Download ACT-IRx24UN-Lx / ACT-IRx24UN-Lx
Transcript
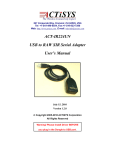
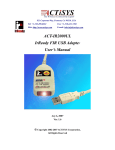
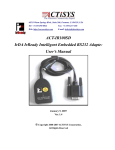
921 Corporate Way, Fremont, CA 94539, USA Tel: +1-510-490-8024, Fax:+1-510-623-7268 Web: http://www.actisys.com, E-mail: [email protected] ACT-IRx24UN-Lx / ACT-IRx24UN-Lx-LE USB to RAW SIR Serial Adapter User’s Manual ACT-IR424UN ACT-IR224UN March 24, 2014 Version 1.3.4 Copyright 2005-2014 ACTiSYS Corporation All Rights Reserved Warning! Please Install Driver BEFORE you plug in the Dongle to USB port. The Wireless Connectivity Expert ACT-IRx24UN-Lx / ACT-IRx24UN-Lx-LE User’s Manual TABLE OF CONTENTS REVISION HISTORY ....................................................................................................... 3 1. OVERVIEW ...................................................................................................................... 4 2. FEATURES ....................................................................................................................... 4 3. PACKAGE CONTENT ...................................................................................................... 4 4. SPECIAL NOTICE & SYSTEM REQUIREMENT ............................................................ 5 4.1 4.2 Special Notice........................................................................................................... 5 System Requirement.................................................................................................. 5 5. FAQ (FREQUENTLY ASKED QUESTIONS)..................................................................... 6 6. GENERAL SETUP PROCEDURE – WINDOWS, MAC, ANDROID & LINUX.................. 7 7. INSTALLATION UNDER WINDOWS .............................................................................. 7 7.1 7.2 7.3 7.4 Definition of “New Chip Inside”................................................................................. 7 General Notes – Windows vs. Chip Inside ................................................................... 8 CD Installation Steps ................................................................................................. 8 Driver Installation ..................................................................................................... 8 8. INSTALLATION UNDER MAC OS................................................................................. 13 9. INSTALLATION CHECK ............................................................................................... 15 9.1 9.2 9.3 9.4 Check “Add or Remove Programs” or “Programs and Features” in Windows ................ 15 Device Manager Check in Windows.......................................................................... 15 Terminal Check in Mac Machine .............................................................................. 16 Android And Linux Based Equipments...................................................................... 17 10. UN-INSTALL THE DRIVER ........................................................................................... 18 10.1 10.2 10.3 Driver Un-installation For Windows 98/ME/2000/XP ................................................. 18 Driver Un-installation For Windows Vista /Win 7/8 (32 & 64 bits) ............................... 20 Uninstall The Driver From Mac OS .......................................................................... 23 11. OPERATION OF IR DONGLE ........................................................................................ 24 12. LED BEHAVIOR ............................................................................................................. 24 13. IR DONGLE DIMENSIONS ............................................................................................ 24 14. CHARACTERISTICS AND SPECIFICATION ................................................................ 24 15. APPENDIX : TURN UAC ON/OFF IN WINDOWS VISTA /WIN 7/8................................ 25 15.1 15.2 Check current UAC (User Account Control) Status..................................................... 25 Turn On / Off UAC ................................................................................................. 25 16. WARRANTY INFORMATION ........................................................................................ 27 17. CONTACT INFORMATION ........................................................................................... 28 Copyright 2005-2014 ACTiSYS Corp Confidential Information Page 2 of 28 Mar. 24, 2014 Version 1.3.4 ACT-IRx24UN-Lx / ACT-IRx24UN-Lx-LE User’s Manual The Wireless Connectivity Expert REVISION HISTORY Revision History Revision Date Comment 1.0 10/30/2006 Initial release 1.0.1 01/03/2007 Extracted Chapt. of detailed description for models & IR pulse format 1.1 01/25/2007 1.1.1 04/14/2007 Removed IrReady label from dongle case; added CRoHS logo 1.1.2 04/25/2007 Revised Un-installation Chapters for utility & driver; added FAQ Modification in Installation Package for one time removal of both utility & driver at a click 1.1.3 05/16/2007 Not released officially. Only for Internal use Added new configuration models and re-edited the chapter Expanded function models to include competitors’ compatible models 1.1.4.1 05/30/2007 1.1.5 08/28/2007 1.1.6 09/27/2007 Modification In Utility GUI (COM Port Listing, Check For IR224UN During Launching Etc) Removed Installation Package For Utility Program. Modified Chapter Of Installation & deleted section of Configuration insatallation & Chapter of Configuration un-installation Modified Chapter 14 for USB spec 2.0 Rewrite Chapter of General setup procedure. Added section of “Using configuration utility to check” Included Driver installation/un-installation procedure under Windows Vista OS. Included “UAC” Security features of Windows Vista OS in FAQ section & Appendix. Omitted IR mate 210 function Firmware upgraded from version 1.2 to 1.3 Modified in Configuration Utility (based on firmware change) FAQ updated in User Manual 1.1.7 10/17/2007 Added Chapter 4 Special Notice & System Requirement 1.1.8 10/28/2008 System reqirement included Win 98, ME, Win CE, Linux, & Mac 1.1.9 7/22/2009 1.2.0 7/15/2010 Added installation chapter, installation check section and uninstallation section for Mac. Added Factory Default Setting section. Modification in Configuration Utility. Update all-in-1 driver installer v1.2.10 (4/08/2010) for Windows series which Win 7 included. 1.2.0.1 8/17/2010 Updated for IR224UN-Lx 1.2.0.2 6/20/2011 Included Android. 1.3.0 8/15/2012 Updated driver installer to v1.5.0 (2011-10-21) for Win, and v1.4.0 for Mac; rewrte all for Mac. 1.3.1 9/17/2012 Combined with all IR424UN sub-models IR424UN-Lx/Lx-LE 1.3.2 12/11/2012 Updated to include Windows 8 1.3.3 1/31/2013 Updated installation procedure for New/Old Chip Inside, for Windows 8, etc. 1.3.4 3/24/2014 Extended Mac OS support up to 10.9 1.1.4 05/22/2007 Combined Manual for IR224UN-Lx & IR224UN-Lx-LE ACTiSYS reserves the right to make changes without further notice to any products herein to improve reliability, function or design. ACTiSYS does not assume any liability arising out of the application or use of any product or circuit described herein. All trademarks, logos, organization & company names and product model names are the properties of their respective owners. Copyright 2005-2014 ACTiSYS Corp Confidential Information Page 3 of 28 Mar. 24, 2014 Version 1.3.4 The Wireless Connectivity Expert ACT-IRx24UN-Lx / ACT-IRx24UN-Lx-LE User’s Manual 1. OVERVIEW ACT-IR224UN-Lx or ACT-IR224UN-Lx-LE is an USB-to-Raw-IR adapter. It generates a virtual COM port to transmit data with other RAW IR devices. The Only Difference between ACT-IR224UN-Lx series and ACT-IR224UN-Lx-LE series is their LED behavior. Please refer to Chapter 12. LED Behavior for detailed comparison. ACT-IR424UN-Lx & ACT-IR424UN-Lx-LE are the thumb sized models of above. All play the same function except the size is different. ACT-IR424UN series is smaller. In brief, hereafter ACT-x24UN-Lx/IRx24UN-Lx-LE represents either model series: IR224UN or IR424UN series. 2. FEATURES a. ACT-IRx24UN-Lx series includes all customized sub-models, i.e., ACT-IRx24UN-Li, ACT-IRx24UN-L+, & ACT-IRx24UN-LNnn, where nn is the specified Baud Rate: LN96 for 9.6k bps, LN19 for 19.2k bps, LN38 for 38.4k bps, LN57 for 57.6k bps, LN115 for 115.2k bps. The same phylosophy applies to the model names of ACT-IRx24UN-Lx-LE series. i.e., it includes ACT-IRx24UN-LN96-LE, ACT-IRx24UN-LN19-LE, ACT-IRx24UN-LN38-LE etc., etc. b. Supports 8 baud rates: 1.2k, 2.4k, 4.8k, 9.6k, 19.2k, 38.4k, 57.6k and 115.2k bps, depending on what sub-model you sepecified. c. 1.63 μs IR pulse. d. Supports No IrDA® protocols, only Raw IR. e. Compatible with and replaces RS232 Raw IR adapters: ACT-IR220L+, ACT-IR220L, ACT-IR220Li and ACT-IR220LN. f. Supports Virtual COM port. Nothing or minimum changes in user’s sofware which are already working with RS232 adapters originally. g. Less Latency time, average is 1.5 ms. The latency of a real COM port is about 0.5ms. h. Fully compliant with USB 2.0 (Full speed, 12 Mbps). i. 256 bytes outbound buffer and 256 bytes inbound buffer. j. Supports Windows 98/ME/2000, Win XP SP2/Vista/Win 7/8 /Win Server 2003/Win Server 2008 (32 & 64 bits), Mac OS X 10.1 to 10.9 (includes 64-bit) Also supports Mac OS X Lion 10.7, Linux, Android & Windows-CE (ARM & x86). 3. PACKAGE CONTENT IR Adapter (ACT-IRx24UN-Lx / ACT-IRx24UN-Lx-LE) x1; separated USB cable for ACT-IR424UN. Installation CD x1, which includes: a. Device driver installer c. b. User’s Manual Quick Start Guide Copyright 2005-2014 ACTiSYS Corp Confidential Information Page 4 of 28 Mar. 24, 2014 Version 1.3.4 The Wireless Connectivity Expert ACT-IRx24UN-Lx / ACT-IRx24UN-Lx-LE User’s Manual 4. SPECIAL NOTICE & SYSTEM REQUIREMENT 4.1 Special Notice 4.1.1. Timing of COM Port Closing ACT-IRx24UN-Lx / ACT-IRx24UN-Lx-LE uses DTR and RTS signals to configure IR communication speed and has 256 bytes inbound buffer & 256 bytes outbound buffer. Normally this Raw IR transmitting dongle has no flow control protocol. So, if the sending side has completed its sending but some data in dongle buffer still pending transmission before you close the COM port, DTR and RTS signal will get change consequently. This will also cause the baud rate change. In such a case the receiver will get junk data. To prevent this, we recommend giving some delay time before closing the port, which ensures all pending data being sent out completely. 4.1.2. Improve the Throughput We recommend sending bulk of data rather than byte-by-byte data to achieve good throughput. E.g., send the entire data as a whole, instead of calling the write API one byte at a time. If your data size is too big, then you can send them in multiple blocks. 4.2 System Requirement 1. Windows 98/ME/2000 SP4, Win XP SP2/Vista (32 & 64 bit), Windows 7/8 (32 & 64 bit), Windows Server 2003/2008 (32 & 64 bit), Win CE, Mac, Android or Linux.. 2. At least 256MB RAM (512MB is recommended). 3. Processor Speed 1.8 GHz. 4. USB 1.1 port (or above). Copyright 2005-2014 ACTiSYS Corp Confidential Information Page 5 of 28 Mar. 24, 2014 Version 1.3.4 The Wireless Connectivity Expert ACT-IRx24UN-Lx / ACT-IRx24UN-Lx-LE User’s Manual 5. FAQ (Frequently Asked Questions) Q1: When we use this dongle, occasionally at the end of communication, a few bytes show as junk in receiver side. Why? And how to solve? A1: Please refer to 4.1.1 “Timing of COM Port Closing” in section 4.1 Special Notice. Q2: How to improve the channel utilization or throughput? A2: Please refer to 4.1.2 “Improve the Throughput” in section 4.1 Special Notice. Q3: While un-installing the Driver, Windows prompts to Restart. Do I need to restart the PC? A3: Yes! We highly recommend restarting the PC so that you can complete the un-installation successfully. Q4: In some Windows XP, while Un-installing the driver (from “Add or Remove Programs”), it is not restarting automatically when I select “Yes” to restart. Why? A4: We recommend Method 1 in Chapter 10 to un-install the driver. If system still doesn’t restart automatically, it is highly recommended to restart manually. Q5: In Windows Vista, I am getting an “elevation prompt” of the administrator permission each time I perform any new driver installation/un-installation or running any new application. Why? A5: Windows Vista/Win 7/8 have added a new Security Feature called as “UAC (User Account Control)”. So, in such OS, if UAC has been turned on (refer to Appendix) then you will get an “elevation prompt” of the administrator permission each time you perform any new driver installation/un-installation like follows. In that case, Press Allow button and continue your driver installation/un-installation. In general, with “Administrator Approval Mode”, Windows Vista/Win 7/8 will run most applications with standard user permissions even if the user is an administrator. If a user wishes to run a program that requires administrator permissions, they must give consent through a User Account Control prompt. Copyright 2005-2014 ACTiSYS Corp Confidential Information Page 6 of 28 Mar. 24, 2014 Version 1.3.4 The Wireless Connectivity Expert ACT-IRx24UN-Lx / ACT-IRx24UN-Lx-LE User’s Manual 6. GENERAL SETUP PROCEDURE – Windows, Mac, Android & Linux a) Make sure USB dongle is NOT plugged into PC until you have installed the driver. b) From “Add or Remove Program” in Control Panel of Win 98/ME/2K/XP, or from “Programs and Features” in Control Panel of Windows Vista /Win 7/8, check if “PL-2303 USB-to-Serial” or “PL-2303 Vista Driver Installer” exists. If exists, please remove it first. c) Insert the installation CD and it will install driver for Windows 98/ME/2K/XP/Vista/Win 7/8 automatically. d) Manually SETUP under WinCE, Mac, Android or Linux OS: Run SETUP yourself under WinCE, Mac, Android or Linux since it will not autorun for you. Please direct browse the installation CD to find the path: D:\Driver (assume D:\ is your CD driver). Then select the right folder under it , say “Linux_RedHat” for example and extract the packaged file for use. Note: Google Android OS is also based on Linux kernel actually. Linux driver is for RedHat 7.3/8.0/9.0 Only. No need to install drivers for the followings: Linux Kernel 2.4.10 and above already includes built-in drivers for PL-2303H; Linux Kernel 2.4.31 and above already includes built-in drivers for PL-2303H, PL-2303HXD and PL-2303XA/HXA. e) Sometimes you may find it not AUTORUN in Windows, especially in Vista/Win 7/8. Make sure the “AUTORUN” option under “Control Panel=> AUTOPLAY” has been selected in Vista/Win 7/8. Otherwise please browse the CD and run ACT-IR224UN-DriverInstaller_v#.#.#-YYYYMMDD.exe manually. f) Plug the IR adapter into USB port. It will lead you to a “Found New Hardware” procedure to complete the installation. 7. INSTALLATION UNDER WINDOWS 7.1 Definition of “New Chip Inside” For those dongles which their SN (Serial Number on the SN label, at the back side of the dongle) has Prefix “TA”, say, S/N: TA000168, these dongles have “New Chip Inside”. The new chip inside is PL2303TA. Else, say, S/N: LI001357, or S/N: UN002468, etc., these are with Old Chip inside: PL2303HXA. Copyright 2005-2014 ACTiSYS Corp Confidential Information Page 7 of 28 Mar. 24, 2014 Version 1.3.4 The Wireless Connectivity Expert ACT-IRx24UN-Lx / ACT-IRx24UN-Lx-LE User’s Manual 7.2 General Notes – Windows vs. Chip Inside Windows 8 User, New Chip Inside: Please skip below CD installation steps. Just plug the dongle and OS will auto find the hardware for you. Just in case not succesful, please run the latest version of Driver Installer, v1.7.0. Windows 8 User, Old Chip Inside: Please Disable “Auto Update” option on your Windows Update. DO NOT let system go updating to its native driver for you from Windows Update! Because the native driver of Windows 8 does Not support Old Chip! Do also Not run Driver Installer v1.7.0, because it does Not Support Old Chip, either! Please run Driver Installer v1.5.0. instead. Windows Vista / 7, either New Chip or Old Chip Inside: Please follow Case1. Windows XP and under, either New Chip or Old Chip inside: Please directly run Driver Installer v1.7.0, from installation CD. 7.3 CD Installation Steps 1. Insert the installation CD. In most cases this should start the installation automatically. And the first step it will copy the following files to the path: “C:\Program Files\ACTiSYS\ACT-IRx24UN\” o ACT-IRx24UN-Lx / ACT-IRx24UN-Lx-LE Quick Guide & User’s Manual. o ACT-IRx24UN-Lx / ACT-IRx24UN-Lx-LE DriverInstaller is copied to the subdirectory named “Driver”. 2. If the installation Does start automatically, go to the next section: Driver Installation. 3. Else, explore the CD. 4. Double click “Autorun.bat”, or “Autorun.exe” for Windows. 7.4 Driver Installation 7.4.1 Driver Installation – Windows 8 (32 & 64 bit) Please refer to section 7.1 Definition of New Chip Inside. Check your chip inside first. If your chip inside is New, follow above section Case1. Else, follow above section Case2, for Old Chip inside. Copyright 2005-2014 ACTiSYS Corp Confidential Information Page 8 of 28 Mar. 24, 2014 Version 1.3.4 The Wireless Connectivity Expert ACT-IRx24UN-Lx / ACT-IRx24UN-Lx-LE User’s Manual 7.4.2 Windows Vista /Win 7 (32 & 64 bit) 1. When start the driver installation, you may get “elevation prompt” of “(UAC)” if UAC has been turned ON in your Windows Vista OS (see FAQ for details). Else a welcome screen for PL-2303 Driver installer will show up. Click “Next” to continue. 2. You will see the Vista Driver Installer under processing: Copyright 2005-2014 ACTiSYS Corp Confidential Information Page 9 of 28 Mar. 24, 2014 Version 1.3.4 The Wireless Connectivity Expert ACT-IRx24UN-Lx / ACT-IRx24UN-Lx-LE User’s Manual 3. When this Installation completes, click “Finish” to close the Wizard window. 4. Now plug IR adapter to USB port. System will pop up a “Found New Hardware “ bubble window at the right corner of Tool Bar and display the message: ”Prolific USB-to-Serial Comm Port “ the first time you plug in. 5. This completes the driver installation. Now confirm this installation per Chapter of “Installation Check”. Copyright 2005-2014 ACTiSYS Corp Confidential Information Page 10 of 28 Mar. 24, 2014 Version 1.3.4 The Wireless Connectivity Expert ACT-IRx24UN-Lx / ACT-IRx24UN-Lx-LE User’s Manual 7.4.3 Driver installation - Windows 98/ME/2000/XP 1. When start the driver installation, a welcome screen for PL-2303 Driver installer will show up. Click “Next” to continue. 2. It will go very quick to complete, click “Finish” to close the Wizard window. 3. Now plug IR adapter to USB port. System will pop up a “Found New Hardware“ bubble window at the right corner of Tool Bar and display the message: ”Prolific USB-to-Serial Comm Port“ at the first time you plug in. Copyright 2005-2014 ACTiSYS Corp Confidential Information Page 11 of 28 Mar. 24, 2014 Version 1.3.4 The Wireless Connectivity Expert ACT-IRx24UN-Lx / ACT-IRx24UN-Lx-LE User’s Manual 4. This completes the driver installation. Now you can confirm the installation per chapter 9 “Installation Check”. Copyright 2005-2014 ACTiSYS Corp Confidential Information Page 12 of 28 Mar. 24, 2014 Version 1.3.4 The Wireless Connectivity Expert ACT-IRx24UN-Lx / ACT-IRx24UN-Lx-LE User’s Manual 8. INSTALLATION UNDER Mac OS 1. Insert the CD into your Mac Machine. The PL-2303 Mac OS X driver package contains the DMG compressed image file. Click on the DMG file to extract the driver installer package. 2. Double click the driver installation file “PL2303.1.4.0” to start the installation. 3. You will see the Welcome Window as below: Click “Continue”. Copyright 2005-2014 ACTiSYS Corp Confidential Information Page 13 of 28 Mar. 24, 2014 Version 1.3.4 The Wireless Connectivity Expert ACT-IRx24UN-Lx / ACT-IRx24UN-Lx-LE User’s Manual 4. At the end of the installation, you will need to restart your computer. Close all programs and click [Restart] to complete installation and reboot the system. 5. After rebooting the system,you can now plug ACT-IRx24UN to the USB port.You can first run the System Profiler program under the Applications-Utilities folder. Click USB hardware inside System Profiler and look for “USB-Serial Controller” or “USB-Serial Controller D”. This means that the hardware device is detected by your Mac computer. Copyright 2005-2014 ACTiSYS Corp Confidential Information Page 14 of 28 Mar. 24, 2014 Version 1.3.4 The Wireless Connectivity Expert 9. ACT-IRx24UN-Lx / ACT-IRx24UN-Lx-LE User’s Manual INSTALLATION CHECK 9.1 Check “Add or Remove Programs” or “Programs and Features” in Windows 9.1.1 Check Programs in Windows 98/ME/2000/XP You can open “Add or Remove Programs” window from “Control Panel” in Windows. Check if “PL-2303 USB-to-Serial” is listed as shown below: 9.1.2 Check Programs in Windows Vista / Win 7/8 In Windows Vista /Win 7/8, you can open “Programs and Features” window from “Control Panel” and see “PL-2303 USB-to-Serial” as below. 9.2 Device Manager Check in Windows 1. You should have plugged IR Dongle to USB Port. 2. To confirm if the installation is successful, you can also open “Device Manager”. 3. You will see the device described as “Prolific USB-to-Serial Comm Port (COMx)” installed under Ports (COM & LPT), where COMx is the COM port number, COM3 for this example. This is the place you can check which vitual COM port this device has been connected. See below. Copyright 2005-2014 ACTiSYS Corp Confidential Information Page 15 of 28 Mar. 24, 2014 Version 1.3.4 The Wireless Connectivity Expert ACT-IRx24UN-Lx / ACT-IRx24UN-Lx-LE User’s Manual 9.3 Terminal Check in Mac Machine 1. You can then proceed to check if ACT-IRx24UN is setup properly. You can run the Terminal program under Applications-Utilities folder and type the following commands: cd /dev ls tty.usbserial* You should see the “tty.usbserial” device which means the USB serial device is already setup properly. If you try to plug another ACT-IRx24UN device, you should also see several “tty.usbserialx” listed where “x” is the assigned device number similar to Windows COM port assignment. 2. NOTE: Mac OS may also pop-up a new network interface when it detects a new USB-Serial Controller device. See chapter of “Using ACT-IRx24UN UNDER MAC OS X” for more explanation. Copyright 2005-2014 ACTiSYS Corp Confidential Information Page 16 of 28 Mar. 24, 2014 Version 1.3.4 The Wireless Connectivity Expert 9.4 ACT-IRx24UN-Lx / ACT-IRx24UN-Lx-LE User’s Manual Android And Linux Based Equipments 1. Google Android OS is actually also based on Linux kernel. 2. After you installed the driver or the OS kernal itself has build-in driver, plug in IR dongle to USB port. You will then get a “ttyusb0” device Copyright 2005-2014 ACTiSYS Corp Confidential Information Page 17 of 28 Mar. 24, 2014 Version 1.3.4 The Wireless Connectivity Expert ACT-IRx24UN-Lx / ACT-IRx24UN-Lx-LE User’s Manual 10. UN-INSTALL THE DRIVER Note: This un-installation will only remove the Dongle Driver alone. As to all the other files copied to the folder under C:\Program Files\ACTiSYS\ACT-IRx24UN\, you have to delete them manually when needed. 10.1 Driver Un-installation For Windows 98/ME/2000/XP 10.1.1 Method 1 - Add or Remove Programs 1. Double click “Add or Remove Program” under “Control Panel”. 2. Select “PL-2303 USB-to-Serial” and click “Remove” to remove the drivers. It will pop up a Welcome window as below. Select “Remove”, then click “Next>”. 3. It will ask you to confirm as below window. Click “Yes” to continue. Copyright 2005-2014 ACTiSYS Corp Confidential Information Page 18 of 28 Mar. 24, 2014 Version 1.3.4 The Wireless Connectivity Expert ACT-IRx24UN-Lx / ACT-IRx24UN-Lx-LE User’s Manual 4. After seeing “Uninstall Complete” window, click “Finish” to close the wizard. 10.1.2 Method 2 - Driver Installer 1. From C:\Program Files\actisys\ACT-IRx24UN\Driver, run “ACT-IR224UN-DriverInstaller_v#.#.#-YYYYMMDD.exe”. 2. It will lead you to the same procedure as step 2 to 4 of Method 1. Note: Instead of running above file, if you insert Installation CD the second time, the CD will auto run again and system will then detect the driver installed already and ask you to confirm the same removal procedure. Copyright 2005-2014 ACTiSYS Corp Confidential Information Page 19 of 28 Mar. 24, 2014 Version 1.3.4 The Wireless Connectivity Expert ACT-IRx24UN-Lx / ACT-IRx24UN-Lx-LE User’s Manual 10.2 Driver Un-installation For Windows Vista /Win 7/8 (32 & 64 bits) 10.2.1 Method 1 – Programs and Features 1. Double click “Programs and Features” under “Control Panel”. 2. Right click on “PL-2303 USB-to-Serial” and then click on Uninstall to remove the driver. You may get “elevation prompt” of “(UAC)” if UAC has been turned ON in your Windows Vista/Win 7/8 OS (see FAQ for details). Else a Welcome window will pop up as follows. Select “Remove” and click “Next>”. 3. Click Yes button to continue. Copyright 2005-2014 ACTiSYS Corp Confidential Information Page 20 of 28 Mar. 24, 2014 Version 1.3.4 The Wireless Connectivity Expert ACT-IRx24UN-Lx / ACT-IRx24UN-Lx-LE User’s Manual 4. Then you will get Setup Status window as follows. 5. Click Finish button to complete the Un-installation as below. Copyright 2005-2014 ACTiSYS Corp Confidential Information Page 21 of 28 Mar. 24, 2014 Version 1.3.4 The Wireless Connectivity Expert ACT-IRx24UN-Lx / ACT-IRx24UN-Lx-LE User’s Manual 10.2.2 Method 2 - Driver Installer 1. From C:\Program Files\ACTiSYS\ACT-IRx24UN\Driver, run “ACT-IR224UN-DriverInstaller_v#.#.#-YYYYMMDD.exe”. You may get “elevation prompt” of “(UAC)” if UAC has been turned ON in your Windows Vista/Win 7/8 OS (see FAQ for details). Else it will lead you to the same procedure as Method 1. 2. Note: Instead of running above file, if you insert Installation CD the second time, the CD will auto run again and system will then detect the driver already installed and ask you to confirm the same removal procedure. Copyright 2005-2014 ACTiSYS Corp Confidential Information Page 22 of 28 Mar. 24, 2014 Version 1.3.4 The Wireless Connectivity Expert ACT-IRx24UN-Lx / ACT-IRx24UN-Lx-LE User’s Manual 10.3 Uninstall The Driver From Mac OS To remove and uninstall ACT-IRx24UN drivers from Mac OS X operating system, you must be logged on as root. You can use the “sudo” command option to substitute user privileges. 1. Run a Terminal session (Applications-Utilities-Terminal) and enter the following commands at the command prompt: cd /System/Library/Extensions sudo kextunload ProlificUSBSerial.kext (enter system password) rm -r ProlificUSBSerialDriver.kext You can also go to the System-Library-Extensions file folder to delete the “ProlificUSBSerialDriver.kext” file. 2. To remove the port from the system, go to System Preferences and select Network. Select the “USB-Serial Controller” device shown from the Show menu and click on the “-” remove button to uninstall the port. 3. Restart the computer again before reinstalling the driver. Copyright 2005-2014 ACTiSYS Corp Confidential Information Page 23 of 28 Mar. 24, 2014 Version 1.3.4 ACT-IRx24UN-Lx / ACT-IRx24UN-Lx-LE User’s Manual The Wireless Connectivity Expert 11. OPERATION OF IR DONGLE Establish IR Connection with another PC after confirming the detection of IR dongle as indicated above. Place any other Raw IR device (e.g., ACT-IR220L+). Launch your Communications application like “HyperTerminal” or any other application in the Windows. 12. LED BEHAVIOR Behavior Status Power on Standby and receiving Transmitting 13. ACT-IRx24UN-Lx ACT-IRx24UN-Lx-LE LED on for one second LED off for one second LED off LED on Blinks rapidly but weak IR DONGLE DIMENSIONS USB Cable Length: 120 cm ACT-IR224UN ACT-IR424UN 14. CHARACTERISTICS AND SPECIFICATION Parameter MIN. TYPICAL MAX. Units DC supply voltage 5.0 Supply voltage, VSS Operating temperature range, TA DC current (Ready mode) DC current (Active mode) Infrared Transmitting range USB signal threshold level Copyright 2005-2014 ACTiSYS Corp Confidential Information V 60 V ℃ 20 100 200 +5.5 mA mA cm V 0 0 1 +4.8 Page 24 of 28 5.2 15 60 158 +5V Mar. 24, 2014 Version 1.3.4 The Wireless Connectivity Expert 15. ACT-IRx24UN-Lx / ACT-IRx24UN-Lx-LE User’s Manual APPENDIX : TURN UAC On/Off in WINDOWS VISTA /WIN 7/8 15.1 Check current UAC (User Account Control) Status 1. Go to Control Panel => Security Center 2. You can see current status of UAC (On or Off) like below: 15.2 Turn On / Off UAC 1. Go to Control Panel => User Accounts, you can see below window. Click “Turn User Account Copyright 2005-2014 ACTiSYS Corp Confidential Information Page 25 of 28 Mar. 24, 2014 Version 1.3.4 The Wireless Connectivity Expert ACT-IRx24UN-Lx / ACT-IRx24UN-Lx-LE User’s Manual Control on or off” button. 2. You can turn either on (checked) or off (unchecked) UAC by clicking the following check box as below. Copyright 2005-2014 ACTiSYS Corp Confidential Information Page 26 of 28 Mar. 24, 2014 Version 1.3.4 The Wireless Connectivity Expert 16. ACT-IRx24UN-Lx / ACT-IRx24UN-Lx-LE User’s Manual WARRANTY INFORMATION ACTiSYS Corporation warrants the first end-user purchaser, for a period of 1 year from the date of purchase, that this wireless interface (The Product) will be free from defective workmanship and materials, and agrees that it will, at its option, either repair the defect or replace the defective Product or part thereof at no charge to the purchaser for parts or for labor. This warranty does not apply to any appearance items of the Product, any consumable items such as paper, ink ribbon, or batteries supplied with the Product, or to any equipment or any hardware, software, firmware, or peripheral other than the Product. This warranty does not apply to any Product the exterior of which has been damaged or defected, which has been subjected to misuse, abnormal service or handling, or which has been altered or modified in design, construction or interfacing. Tampering with Label Voids Warranty. In order to enforce the rights under this limited warranty, the purchaser should mail, ship or carry the Product, together with proof of purchase, to ACTiSYS. The limited warranty described above is in addition to whatever implied warranties may be granted to purchasers by law. To the extent permitted by applicable law, ALL IMPLIED WARRANTIES INCLUDE THE WARRANTIES OF MERCHANT ABILITY AND FITNESS FOR USER ARE LIMITED TO A PERIOD OF 1 YEAR FROM THE DATE OF PURCHASE. Some states do not allow limitations on how long an implied warranty lasts, so the above limitation may not apply to you. Neither the sales personnel of the seller nor any other person is authorized to make any warranties other than those described above, nor to extend the duration of any warranties beyond the time period described above on behalf of ACTiSYS. Corporation. The warranties described above shall be the sole and exclusive remedy available to the purchaser. Correction of defects, in the manner and for the period of time described above, shall constitute full satisfaction of all claims, whether based on contract, negligence, strict liability or otherwise. In no event shall ACTiSYS Corporation be liable or in any way responsible, for any damages or defects in the Product which were caused by repair or attempted repairs performed by anyone other than ACTiSYS technician. Nor shall ACTiSYS Corporation be liable or in any way responsible for any incidental or consequential economic or property damage. Some states do not allow the exclusion of incidental or consequential damages, so the above exclusion may not apply to you. Copyright 2005-2014 ACTiSYS Corp Confidential Information Page 27 of 28 Mar. 24, 2014 Version 1.3.4 The Wireless Connectivity Expert 17. ACT-IRx24UN-Lx / ACT-IRx24UN-Lx-LE User’s Manual CONTACT INFORMATION ACTiSYS Corporation 921 Corporate Way Fremont, CA 94539, USA TEL:+1-510-490-8024, FAX:+1-510-623-7268 E-Mail: [email protected] Web: http://www.actisys.com Copyright 2005-2014 ACTiSYS Corp Confidential Information Page 28 of 28 Mar. 24, 2014 Version 1.3.4


