
1
Hercules ePlug 200 V2 Hercules ePlug 200 HD CONTENTS Clicking on a title in this table of contents will display the corresponding section 1. 2. YOUR HERCULES EPLUG 200 V2/HD ADAPTER............................................................................. 3 1.1. Recommendations ........................................................................................................................ 4 1.2. Specifications ................................................................................................................................ 4 1.3. Minimum system requirements ..................................................................................................... 5 1.4. Box contents.................................................................................................................................. 5 1.5. LEDs overview .............................................................................................................................. 5 1.6. Connectivity overview ................................................................................................................... 6 INSTALLING YOUR HERCULES EPLUG 200 V2/HD ........................................................................ 7 2.1. 2.2. How to position your Hercules ePlug 200 V2/HD ......................................................................... 7 HomePlug: the partner to WiFi in your home ............................................................................... 8 2.2.1. Connecting an Internet modem router to an HD TV set, a TV set-top box and a game console in a HomePlug network ........................................................................................... 8 2.2.2. Connecting two computers in a HomePlug network ............................................................. 9 2.2.3. Connecting a computer to a modem, a modem router, an Internet "box" or a game console in a HomePlug network ........................................................................................... 9 3. 2.3. You haven't yet created a HomePlug network: initial installation of Hercules ePlug 200 V2/HD Duo ................................................................................................. 10 2.4. You have already created a HomePlug network: adding a new adapter to your network (Hercules ePlug 200 HD Solo) ...................................................................................... 13 2.5. How to change the network password ........................................................................................ 17 MANAGING YOUR NETWORK WITH HERCULES EPLUG STATION ............................................ 18 3.1. Downloading Hercules ePlug Station ......................................................................................... 18 3.2. Installing Hercules ePlug Station ................................................................................................ 18 3.3. Managing your PLC network....................................................................................................... 25 3.4. Adding one or more adapters to your Hercules ePlug Station monitoring list............................ 26 3.5. Scanning the network.................................................................................................................. 27 3.6. Changing an adapter's location .................................................................................................. 27 3.7. Changing the password for your PLC network ........................................................................... 28 3.8. Updating the firmware ................................................................................................................. 29 3.9. Restoring the factory default settings of the ePlug adapter connected to the PC...................... 29 Hercules ePlug 200 V2 4. Hercules ePlug 200 HD YOUR HOMEPLUG NETWORK IN PRACTICE ................................................................................ 30 4.1. A few prerequisites ..................................................................................................................... 30 4.2. Identifying your HomePlug network type: Infrastructure or Ad hoc............................................ 30 4.3. Computers running Windows 7: Sharing folders, a printer or an ADSL connection .................. 31 4.3.1. Windows 7: Sharing an ADSL connection in an Infrastructure type network..................... 31 4.3.2. Windows 7: Sharing an ADSL connection in an Ad hoc type network ............................... 34 4.3.3. Enabling sharing ................................................................................................................. 36 4.3.4. Windows 7: Sharing public or personal folders .................................................................. 38 4.3.5. Computers running Windows 7: Accessing shared folders .............................................................. 40 4.3.6. Windows 7: Sharing a printer .................................................................................................. 40 4.3.7. Computers running Windows 7: Accessing the shared printer .......................................................... 42 4.4. Computers running Windows Vista: Sharing folders, a printer or an ADSL connection ............ 43 4.4.1. Windows Vista: Sharing an ADSL connection in an Infrastructure type network............... 43 4.4.2. Windows Vista: Sharing an ADSL connection in an Ad hoc type network......................... 46 4.4.3. Enabling sharing ................................................................................................................. 48 4.4.4. Windows Vista: Sharing public or personal folders ............................................................ 51 4.4.5. Computers running Windows Vista: Accessing shared folders.......................................................... 53 4.4.6. Windows Vista: Sharing a printer ................................................................................................ 53 4.4.7. Computers running Windows Vista : Accessing the shared printer .................................................... 56 4.5. Computers running Windows XP: Sharing folders, a printer or an ADSL connection ............... 57 4.5.1. Windows XP: Using the Network Setup Wizard in an Infrastructure network .................... 58 4.5.2. Windows XP: Using the Network Setup Wizard in an Ad hoc network .............................. 61 4.5.3. Windows XP: Sharing folders .............................................................................................. 66 4.5.4. Computers running Windows XP: Accessing shared folders ...................................................... 67 4.5.5. Windows XP: Sharing a printer ........................................................................................... 67 4.5.6. Windows XP: Modifying a workgroup name (advanced users).......................................... 69 4.6. Computers running a different operating system or adding any other type of network device.. 69 5. TECHNICAL SUPPORT ..................................................................................................................... 70 6. WARRANTY........................................................................................................................................ 70 7. ENVIRONMENTAL PROTECTION RECOMMENDATION................................................................ 71 Hercules ePlug 200 V2 Hercules ePlug 200 HD 1. YOUR HERCULES ePLUG 200 V2/HD ADAPTER PLC (Power Line Communication), also known as HomePlug, is a technology which uses your home's existing electrical wiring to efficiently transfer digital data (audio, video, Internet, other types of files) within a secure personal network. HomePlug is an ideal alternative for those who wish to easily create a network, without the constraints of cables, and are unable to enjoy all of the potential of WiFi due to the configuration of their home (as a result of the presence of thick walls or other obstacles which impede wireless data transmission). The Hercules ePlug 200 V2 and HD devices are PLC adapters that you can connect to any electrical outlet in your home (from the ground floor to upstairs), thereby transforming your outlets into as many possible network connection points. Moreover, you can freely unplug Hercules ePlug 200 adapters and plug them into different outlets in your home, according to your needs (changing the location of a computer, or of your modem router...), without having to repeat the installation or re-create your network. As a network is composed of at least two devices connected to one another, all you need to do is connect two Hercules ePlug 200 V2/HD adapters to two electrical outlets in your home (in the same room or in different rooms). For example, to access the Internet, you can connect your modem or your Internet “box” to a Hercules ePlug adapter plugged into the nearest electrical outlet, and connect your computer to another Hercules ePlug adapter plugged into another electrical outlet. Finally, your network is already preconfigured to provide you with maximum security. All products in the Hercules ePlug 200 range are compatible with the HomePlug AV standard (including devices functioning at 200 Mbits/s), allowing you to enjoy high-definition video or stream multimedia files with ease. These adapters may be combined according to your needs or according to your devices. The ePlug 200 HD’s three Ethernet ports enable you to simultaneously connect a TV set-top box, a TV set and a game console (in your living room, for instance) or three computers (in an office, for instance) to one single device. You can also connect a set-top box, a modem router, a computer, a game console or a printer to an ePlug 200 V2 adapter located in another room. You will find some possible configurations set out in the installation section of this manual. Finally, with the goal of helping to protect the environment, Hercules offers energy-saving adapters, which conform to the European ERP (Energy Related Products) directive, guaranteeing electrical consumption of less than 1 watt when the device is in standby mode. The HomePlug AV standard is not compatible with the Homeplug 1.0 standard corresponding to the Hercules ePlug 85 range (and other adapters conforming to this standard). Nevertheless, you are perfectly able to create a network composed of Hercules ePlug 85 adapters in your home coexisting alongside another network composed of Hercules ePlug 200 adapters. Even though this type of device presents no danger in terms of your home's electrical wiring, you should take care to respect certain recommendations, set out below. User Manual – 3/72 Hercules ePlug 200 V2 Hercules ePlug 200 HD 1.1. Recommendations - Only connect the Hercules ePlug 200 V2/HD adapter to an electrical network which conforms to the security standards and specifications detailed on the device's electrical rating plate. If you are not sure about your electrical network, contact an electrician or your power supplier. - Never open up the Hercules ePlug 200 V2/HD adapter, as doing so risks damaging its internal components. - Do not attempt to insert any objects into the vents and openings of the Hercules ePlug 200 V2/HD adapter. - Do not obstruct the vents and openings of the Hercules ePlug 200 V2/HD adapter. - If you need to carry out any maintenance on your Hercules ePlug 200 V2/HD adapter, be sure to first unplug the adapter and entrust the job to a qualified professional in order to avoid the risk of electrocution. - In order to avoid the risk of fire or electrical discharge, keep your adapter away from: - rain or humidity, as well as all fluids (water, chemical products and any other liquids), - sources of heat such as heaters, stoves and any other heat-producing devices (including amplifiers), - direct sunlight. - Only plug in the Hercules ePlug 200 V2/HD adapter in a sufficiently ventilated room. - Only connect the Hercules ePlug 200 V2/HD adapter using the included Ethernet cable. - Unplug the Hercules ePlug 200 adapter from its electrical outlet if you do not plan on using it again for an extended period of time. - Unplug the Hercules ePlug 200 V2/HD adapter from its electrical outlet before cleaning. Use a soft cloth for cleaning and avoid using aerosol cleaners, water, solvent-based chemical products, benzene, alcohol or other cleaning products. - Always keep children away from electrical outlets. 1.2. Specifications Atheros 6400 chipset Compatible with the IEE 802.3, IEE 802.3u, IEE 802.3x and Auto MDI/X specifications Compatible with the Homeplug AV standard Coexists with HomePlug 1.0 modules Encryption via the AES 128-bit security protocol 200 Mbits/s theoretical transfer rate Asynchronous transmission mode Modulation: OFDM, 1024/256/64 QAM, QPSK, BPSK 200m range over the electrical network Ethernet RJ45 port Average power consumption: ePlug 200 V2: : 2,4W when in use, 0,95W when no data is circulating (these values may vary depending on your home's electrical system) ePlug 200 HD: 2,4W when in use, 0,95W when no data is circulating (these values may vary depending on your home's electrical system) Internal power supply: 100~ 240V AC, 50/60Hz Connect button, allowing you to add a Hercules ePlug 200 adapter to an existing network Factory reset button LEDs on front face 4/72 – User Manual Hercules ePlug 200 V2 Hercules ePlug 200 HD 1.3. Minimum system requirements To connect a device to your Hercules ePlug 200 V2/HD adapter: An Ethernet type network interface must be available on each device to be connected (computer, game console, modem, router, TV decoder, etc.) To access the Internet with the Hercules ePlug 200 V2/HD adapter: Active Internet line Internet Explorer 6.0, Netscape Navigator 4.7 or Mozilla Firefox 1.0 or higher ADSL Ethernet modem, cable modem, Internet “Box” (Livebox®, Freebox®, Neufbox®…) 1.4. Box contents Please verify that the following elements are present in the box: Depending on the pack: - Hercules ePlug 200 HD Solo: 1 ePlug 200 HD adapter - Hercules ePlug 200 HD Duo: 1 ePlug 200 HD adapter and 1 ePlug 200 V2 adapter Quick Start Guide in English Ethernet cable (1 per adapter) The "Hercules ePlug Station" network configuration and supervision software is available for download at http://www.hercules.com. 1.5. LEDs overview Hercules ePlug 200 V2 : HomePlug connection status LED: Hercules ePlug 200 HD - Green: very good connection (transfer rates greater than 60 Mbits/s) - Orange: fairly good connection (transfer rates between 60 and 40 Mbits/s) - Red: mediocre connection (transfer rates less than 40 Mbits/s) : Power LED: flashes during traffic : Ethernet connection LED: - lit up when the Ethernet cable is connected - flashes during data transfer User Manual – 5/72 Hercules ePlug 200 V2 Hercules ePlug 200 HD 1.6. Connectivity overview Hercules ePlug 200 V2 Power plug to plug the Hercules ePlug 200 V2 adapter into an electrical outlet Ethernet port allowing you to connect a device to the Hercules ePlug 200 V2 adapter (desktop computer, laptop or netbook computer, modem/router, Internet “box”) Pairing button with two functions, allowing you to: - enable pairing, in order to connect other ePlug 200 adapters to the network (by way of a short press, from 2 to 4 seconds): the power LED flashes - randomly generate a new network password (by way of a long press, of more than 15 seconds): the adapter restarts Reset button, allowing you to restore factory default settings (by way of a short press from 3 to 5 seconds, using a pointed object): the adapter restarts Hercules ePlug 200 HD Additional electrical outlet to plug in another electrical device 3 Ethernet ports enabling you to connect up to 3 different devices (e.g. game console, TV set-top box or TV set) Pairing button with two functions, allowing you to: - enable pairing, in order to connect other ePlug 200 adapters to the network (by way of a short press, from 2 to 4 seconds): the power LED flashes - randomly generate a new network password (by way of a long press, of more than 15 seconds): the adapter restarts Reset button, allowing you to restore factory default settings (by way of a short press from 3 to 5 seconds, using a pointed object): the adapter restarts Power plug to plug the Hercules ePlug 200 HD adapter into an electrical outlet In order for the Hercules ePlug 200 adapter to switch to standby mode, the network card on your computer or other network device must be inactive (i.e. no data is being transferred). To be sure that the network card remains inactive, you can unplug the computer from its electrical outlet, particularly if you don't intend to use it again for some time, or, if the computer is plugged into a power strip with an On/Off button, you can press the Off button on the power strip. 6/72 – User Manual Hercules ePlug 200 V2 Hercules ePlug 200 HD 2. INSTALLING YOUR HERCULES ePLUG 200 V2/HD The Hercules ePlug 200 V2/HD adapter has been designed to be simple to use and install. If you have already purchased and installed HomePlug (or PLC) adapters, Hercules provides a Quick Start Guide which guides you through several steps to take to add your Hercules ePlug 200 adapters to your existing HomePlug network. If you are new to the world of HomePlug technology, we invite you to follow the pieces of advice set out in chapters 2.1 and 2.2 in order to get started. Otherwise, you can proceed directly to chapter 2.3. You haven't yet created a HomePlug network: initial installation of Hercules ePlug 200 V2/HD Duo which sets out, step by step, the installation procedure for your Hercules ePlug 200. Finally, if you have already created a HomePlug network and wish to add a new adapter, please refer to chapter 2.4. You have already created a HomePlug network: adding a new adapter to your network (Hercules ePlug 200 V2/HD Solo or Duo). 2.1. How to position your Hercules ePlug 200 V2/HD To help you connect your Hercules ePlug 200 V2/HD, start by selecting an electrical outlet near to the equipment you wish to connect and follow the pieces of advice set out below. To optimize the transfer of data on your electrical network, be sure to follow these recommendations: You should preferably plug the adapters and devices (computer, Internet "box"...) into separate wall outlets: one for the adapter and one for the device to be connected to the HomePlug network. If you plug both an adapter and a device into the same powerstrip, the performance (bitrate) of your network may be affected. User Manual – 7/72 Hercules ePlug 200 V2 Hercules ePlug 200 HD 2.2. HomePlug: the partner to WiFi in your home If you have a modem router or an Internet "box", your various pieces of network equipment, whether connected by Wi-Fi or HomePlug, can communicate with one another. All data is transferred to a central point, in this case your modem router or Internet "box", and may circulate either on the electrical network via your HomePlug adapters, or by way of radio waves via Wi-Fi. It is therefore perfectly possible for a computer or any other piece of network equipment connected via Wi-Fi to communicate with another piece of equipment connected via the HomePlug network to the modem router. In chapters 2.2.1 to 2.2.3, you will find different examples of purely HomePlug networks. However, there is nothing stopping you from adding Wi-Fi devices as well: for example, an Internet "box" connected to the HomePlug network on the one hand, and a Wi-Fi laptop computer connected to this same "box" via Wi-Fi, on the other hand. 2.2.1. Connecting an Internet modem router to an HD TV set, a TV set-top box and a game console in a HomePlug network 8/72 – User Manual Hercules ePlug 200 V2 Hercules ePlug 200 HD 2.2.2. Connecting two computers in a HomePlug network 2.2.3. Connecting a computer to a modem, a modem router, an Internet "box" or a game console in a HomePlug network User Manual – 9/72 Hercules ePlug 200 V2 Hercules ePlug 200 HD 2.3. You haven't yet created a HomePlug network: initial installation of Hercules ePlug 200 V2/HD Duo The HomePlug AV standard of Hercules ePlug 200 adapters is not compatible with the Homeplug 1.0 standard of Hercules ePlug 85 adapters and HomePlug 14 Mbits/s adapters, but these two standards can coexist side-by-side. In effect, if you have already installed a HomePlug network in the HomePlug 1.0 standard (for example, with Hercules ePlug 85 adapters), you cannot add Hercules ePlug 200 adapters to that network. However, you are perfectly able to install a second network in your home composed of Hercules ePlug 200 adapters and HomePlug AV compatible devices. To install a HomePlug network: 1. Connect the Ethernet cable to the first adapter’s Ethernet connector. 2. Connect the adapter to a power outlet located near the device that you want to connect to the network. Then, connect the other end of the Ethernet cable to the computer, modem, console or any other network device (e.g. a modem/router). 10/72 – User Manual Hercules ePlug 200 V2 Hercules ePlug 200 HD 3. Connect the Ethernet cable(s) to the second adapter’s Ethernet connector(s). Hercules ePlug 200 HD: you can connect up to 3 devices (e.g. an HD TV set, a game console and a set-top box, or 3 computers). 4. Connect the adapter to a power outlet. Then, connect the other end of the Ethernet cable(s) to your network device. Hercules ePlug 200 HD: if required, you can connect another device to the additional connector (e.g. a power strip, modem or printer). To optimize data transfers over the PLC network, avoid connecting your adapter directly to a power strip. Once your adapters are connected, the indicator (i.e. the connection status indicator) lights up to confirm that the network is operating correctly. Signal quality is also defined by a colour code, described in Chapter 1.5., LEDs overview. User Manual – 11/72 Hercules ePlug 200 V2 Hercules ePlug 200 HD Your computer can now access the Internet through your modem router, as both devices are connected over the HomePlug network and share the same network password. 12/72 – User Manual Hercules ePlug 200 V2 Hercules ePlug 200 HD 2.4. You have already created a HomePlug network: adding a new adapter to your network (Hercules ePlug 200 HD Solo) Let's take an example of a home in which you have already installed a HomePlug network composed of HomePlug adapters in the AV standard (Hercules ePlug 200 range, for example). You now wish to install one or more new Hercules ePlug 200 HD adapters in order to expand your network and be able to connect new devices (printer, modem, router, game console...). 1. Ethernet connection and electrical connection of your new Hercules ePlug 200 adapter 1. Connect the Ethernet cable(s) to the second adapter’s Ethernet connector(s). Hercules ePlug 200 HD: you can connect up to 3 devices (e.g. an HD TV set, a game console and a set-top box, or 3 computers). User Manual – 13/72 Hercules ePlug 200 V2 Hercules ePlug 200 HD 2. Connect the adapter to a power outlet. Then, connect the other end of the Ethernet cable(s) to your network device. Hercules ePlug 200 HD: if required, you can connect another device to the additional connector (e.g. a power strip, modem or printer). To optimize data transfers over the PLC network, avoid connecting your adapter directly into a power strip. Once your adapters are connected, the indicator (i.e. the connection status indicator) lights up to confirm that the network is operating correctly. Signal quality is also defined by a colour code, described in Chapter 1.5., LEDs overview. 3. Press and hold the pairing button on one of the connected adapters for 2–4 seconds. You now have 2 minutes to pair the new adapter. 4. Press and hold the pairing button on the Hercules ePlug 200 HD adapter for 2–4 seconds. The indicator should light up when the adapter connects to the network. 14/72 – User Manual Hercules ePlug 200 V2 Hercules ePlug 200 HD 5. Repeat the steps above to add another Hercules ePlug 200 HD adapter. 2. Connection to the network The network password is applied to the Hercules ePlug 200 HD adapter, which can now communicate with all the adapters of the existing network. If the connection of your adapter to the network has failed, there are several possible causes. Cause 1: You may not have carried out the connection procedure properly: - Press for between 2 to 4 seconds on the Connect button (also referred to as the security button by some manufacturers) on the adapter which is already part of your existing network. - Make the connection by pressing for between 2 to 4 seconds on the Connect button on your Hercules ePlug 200 HD adapter. You have 2 minutes to carry this out. Cause 2: Your adapter may not be properly plugged into an electrical outlet, or this outlet is not powered: - Verify that the adapter's power LED is lit up. Cause 3: There may be a strong disturbance in your electrical network caused by other devices near to your adapter: - Avoid plugging your adapter directly into a power strip. - Unplug the devices plugged in near to the adapter. - Try plugging the adapter into another outlet. User Manual – 15/72 Hercules ePlug 200 V2 16/72 – User Manual Hercules ePlug 200 HD Hercules ePlug 200 V2 Hercules ePlug 200 HD 2.5. How to change the network password When you install a HomePlug network, a random password is automatically generated. You can easily generate a new random password by using the Connect button's restart function. If you change the network password on an adapter, that adapter will no longer be part of the network. - Press for more than 15 seconds on the Connect button on the adapter whose password you want to change. - Wait until the adapter restarts. - Connect the other adapters by pressing for between 2 to 4 seconds on the Connect button on the adapter which is already part of the network you wish to create, and then pressing the Connect button on the adapter you wish to integrate into that network. - Repeat this procedure for all adapters you wish to integrate into the network. User Manual – 17/72 Hercules ePlug 200 V2 Hercules ePlug 200 HD 3. MANAGING YOUR NETWORK WITH HERCULES ePLUG STATION The Hercules ePlug Station software has been designed to let you manage your PLC network. Once you have provided the requested items of information, you will be able to view a depiction of all devices connected to your PLC network, allowing you to verify their functioning and bitrate, room by room. 3.1. Downloading Hercules ePlug Station Hercules ePlug Station is available for download from the http://www.hercules.com website, in the Downloads part of the PLC products section. On the Hercules website, select the version corresponding to your product, follow the procedure and save the installer file to your hard disk drive. 3.2. Installing Hercules ePlug Station - Double-click the ePlugStation_Setup.exe file (in the location where you have saved it on your computer) to launch the installation. To use Hercules ePlug Station, your computer must meet the following minimum system requirements: - Intel Pentium III, AMD Athlon/AMD-K6 - 64MB RAM - 10/100 RJ-45 Ethernet network card - CD-ROM drive - 50MB free hard disk space - Operating system: Microsoft Windows XP (SP2-SP3), Vista, 7 - If a Windows security warning is displayed, click Run. - Select the location for extraction of the files, then click Next. Once extraction is complete, a Hercules ePlug Station window opens. 18/72 – User Manual Hercules ePlug 200 V2 Hercules ePlug 200 HD - Click the Install Hercules ePlug Station button. The welcome screen for the ePlug Station InstallShield Wizard is displayed. - Click Next. - Select I accept the terms of the License Agreement, then click Next. User Manual – 19/72 Hercules ePlug 200 V2 - Select the installation location for ePlug Station, then click Next. - Click Install to confirm your choice and launch the installation. ePlug Station is installed in the selected location. 20/72 – User Manual Hercules ePlug 200 HD Hercules ePlug 200 V2 Hercules ePlug 200 HD - Click Finish to exit the Wizard. A shortcut icon to ePlug Station is now available on your desktop, and step 1 of the Hercules ePlug Installation Assistant is launched. The objective is now to help ePlug Station to identify the adapters in your network (via each adapter’s individual MAC address) and assign them a location in your home. User Manual – 21/72 Hercules ePlug 200 V2 Hercules ePlug 200 HD - Given that you have not yet configured the settings for managing your network, click Launch the Assistant. Afterwards, you will be able to directly access Hercules ePlug Station. - In step 2, verify that the PLC adapter is connected to your computer or your modem/router. - Click Next. - In step 3, select (in the drop-down list) the room in which the PLC adapter connected to your computer is set up. 22/72 – User Manual Hercules ePlug 200 V2 Hercules ePlug 200 HD - Click Next. - In step 4, enter the MAC address of the second PLC adapter in your network, and select the room in which it is set up. You may have to unplug the adapter to make a note of its MAC address. When you have plugged the adapter back in, the adapter will still be part of the network; you won't have to pair it again. - Click Add and repeat this procedure for all other adapters that you own. A table summarizes all of the devices that are set up, along with their location and their MAC address. - Click Next. User Manual – 23/72 Hercules ePlug 200 V2 Hercules ePlug 200 HD - In step 5, plug in and connect your new adapter according to the instructions displayed onscreen. - Click Next. - In step 6, verify that your adapters are connected to the same network (the this is not the case, follow the instructions displayed onscreen. - Click Next. 24/72 – User Manual LED should light up). If Hercules ePlug 200 V2 Hercules ePlug 200 HD - In step 7, click Launch ePlug Station. 3.3. Managing your PLC network The General tab displays the general configuration of your PLC network, with information regarding the room in which the adapter is located, the adapter's MAC address, the network status and bitrate. The You are connected to information corresponds to the adapter to which the computer running ePlug Station is connected. The network status indicator varies according to the network quality: green (very good connection quality), orange (medium connection quality), red (poor connection quality). User Manual – 25/72 Hercules ePlug 200 V2 Hercules ePlug 200 HD 3.4. Adding one or more adapters to your Hercules ePlug Station monitoring list You may wish to add a third and fourth adapter to extend your PLC network to other rooms in your home. In order for them to appear in Hercules ePlug Station, you must enter their information (room, MAC address). - In the General tab, click Add a device. - Unplug the PLC adapter that you wish to add to the monitoring list, and make a note of its MAC address. Next, enter the MAC address in the corresponding field and select (in the drop-down list) the room in which the PLC adapter in question is set up. - Click Add and repeat this procedure for all of the other adapters that you wish to add. - Click when you're done. - Plug the adapter into an electrical outlet in the room you have indicated. - Click . - Connect the adapter according to the instructions displayed onscreen. - Click . - Click Close. The new adapter appears in the general configuration display for your PLC network. 26/72 – User Manual Hercules ePlug 200 V2 Hercules ePlug 200 HD 3.5. Scanning the network An automatic scan of the network is carried out each time you launch Hercules ePlug Station, or when you access the General tab. You can carry out a manual scan from the General tab by clicking the Scan the network button. To disable automatic scanning of the network, go to the Info tab and deselect the Automatically scan the network box. From then on, only a manual scan will allow you to refresh the general configuration of your PLC network. 3.6. Changing an adapter's location If you have unplugged an adapter to plug it in in another room in your home, you can change the location information in ePlug Station to update the general configuration of your network. - In the General tab, click the icon in the upper right corner of the depiction of the room. - Verify that the MAC address is correct, then select the new room from the drop-down list. - Click . User Manual – 27/72 Hercules ePlug 200 V2 Hercules ePlug 200 HD 3.7. Changing the password for your PLC network In order to communicate with each other, the adapters in your PLC network must all have the same password. - In the Advanced settings tab, enter the new network password in the corresponding field. - Tick the Apply the password to all devices on the network box. If you tick the Apply the password to the device connected to the PC only box, the adapter connected to the PC will no longer be part of the network. - Click Change the network name. - In the warning window, click . - Make a note of the network name, then click Close. 28/72 – User Manual Hercules ePlug 200 V2 Hercules ePlug 200 HD 3.8. Updating the firmware To benefit from the latest firmware version, you can visit the Hercules website (http://ts.hercules.com) and verify whether new firmware is available for your ePlug adapters. Follow the instructions and save the file to your hard disk drive. - In the Tools tab, click the computer. button and select the location of the firmware update file on your - Click Update the firmware. 3.9. Restoring the factory default settings of the ePlug adapter connected to the PC If you encounter a connection problem, you can restore the factory default settings via ePlug Station. This procedure will restore the factory default settings of the adapter connected to the PC only. If you have previously modified the network password, this adapter will no longer be part of the network. Restoring the factory default settings via ePlug Station is the equivalent of pressing the reset button on your Hercules ePlug 200 V2 adapter for 3 to 5 seconds, or pressing the pairing button on your Hercules ePlug 200 HD adapter for 15 seconds or more. User Manual – 29/72 Hercules ePlug 200 V2 Hercules ePlug 200 HD 4. YOUR HOMEPLUG NETWORK IN PRACTICE Now that your HomePlug network is installed, it's time to move on to some practical examples. In the following chapters, we will show you how to share files, a printer, or let your friends share your ADSL connection for online gaming. 4.1. A few prerequisites - The procedures described in this chapter differ according to the operating system used. Be sure to refer to the sections corresponding to your system. - You have created a HomePlug network composed of one or more devices (computer(s), modem, router, Internet "box", printer...). - The Internet connection sharing procedures apply to computers or devices connected to your modem router via a HomePlug network composed of Hercules ePlug adapters. - To share an Internet connection, your router and your modem (ADSL Ethernet, cable or Internet "box") must be connected to a Hercules ePlug adapter which is itself plugged into an electrical outlet, everything must be powered on, and your Internet line must be active. 4.2. Identifying your HomePlug network type: Infrastructure or Ad hoc The HomePlug network type will depend on the type of hardware you have. You are connecting… Your mode is… One or more computers to an ADSL modem router (or an ADSL Ethernet modem connected to a router) Infrastructure, whereby the adapters are connected to your router. Infrastructure mode is suited to exchanging data, network gaming, and also sharing an Internet connection and/or a printer between several computers. To find out how to install and configure your modem router or your router, please refer to the manufacturer's documentation. One of your computers by cable directly to an ADSL USB or Ethernet modem Ad hoc (also known as Peer to Peer or computer to computer), whereby the computers are directly connected to one another, by cable or via HomePlug, without a router. Ad hoc mode is suited to exchanging data or network gaming between two computers. 30/72 – User Manual Hercules ePlug 200 V2 Hercules ePlug 200 HD 4.3. Computers running Windows 7: Sharing folders, a printer or an ADSL connection To create a network of computers, share data, a printer or an ADSL connection between computers running Windows 7, it is not imperative that the computers belong to the same homegroup. However, if you wish to share between Windows 7 and an earlier operating system, make sure to define the same homegroup on all computers. For information on how to create a homegroup, please refer to the manual of your Hercules product. Before proceeding as described below, please make sure that you have administrator rights. For more information on how to obtain administrator rights, please refer to the Windows 7 online help. The access paths described hereafter may vary slightly if you have modified the default display in Windows 7 (that is to say, the Start menu properties and the Control Panel display). You have connected your computer to a private network (as opposed to a public network). Therefore, the discovery options (namely, the ability to view outside devices and computers and to be seen from other networks) are enabled, and you may or not already have chosen to activate or deactivate sharing options (for more information on how to activate sharing options, please refer to section 4.3.3). 4.3.1. Windows 7: Sharing an ADSL connection in an Infrastructure type network Reminder: If you have an Internet "box", a modem router or a router connected to a modem, and one or more computers, your network will be in Infrastructure mode by default. In this mode, the computers are connected to your access point, namely your "box", your modem router or your router connected to a modem, via the HomePlug network. The Infrastructure mode is ideal for exchanging data, network gaming, and also for sharing an Internet connection and/or a printer between several computers. User Manual – 31/72 Hercules ePlug 200 V2 Hercules ePlug 200 HD Proceed as follows for each computer that will use the shared Internet connection: 1. Access the Network and Sharing Center. To do so, select the Start menu, then select Control Panel. 2. Click Network and Internet, then Network and Sharing Center. 3. In the Network and Sharing Center window, click the Local Area Connection link. 4. In the Local Area Connection Status window, click Properties. 32/72 – User Manual Hercules ePlug 200 V2 Hercules ePlug 200 HD 5. In the Local Area Connection Properties tab, select Internet Protocol Version 4 (TCP/IPv4). 6. Click Properties. 7. In the Internet Protocol version 4 (TCP/IPv4) window, select Obtain an IP address automatically and Obtain DNS server address automatically. 8. Click OK to validate. 9. Do the same for Internet Protocol version 6 (TCP/IPv6). To access the Internet, simply launch your Internet browser. User Manual – 33/72 Hercules ePlug 200 V2 Hercules ePlug 200 HD 4.3.2. Windows 7: Sharing an ADSL connection in an Ad hoc type network Let's take the example of a Hercules HomePlug network composed, on one end, of an ADSL USB or Ethernet modem directly connected by a cable to one of your computers (which we will refer to as Connection point A), and, on the other end, of a computer (which we will refer to as Connection point B) on which you want to access the Internet. Connection point A Connection point B You are in Ad hoc mode. In this mode, the computers are directly connected to one another, without an access point (or router), via the HomePlug network. In order for Connection point B to be able to access the ADSL connection at Connection point A: - Connection point B must be part of the same HomePlug network as Connection point A. - The computer connected to the modem must be powered on. - The Internet line must be active. 34/72 – User Manual Hercules ePlug 200 V2 Hercules ePlug 200 HD 1. Access the Network and Sharing Center. To do so, select the Start menu, then select Control Panel. 2. Click Network and Internet, then Network and Sharing Center. 3. In the Network and Sharing Center window, click the Local Area Connection link. 4. In the Sharing tab, tick the Allow other users to connect through this computer's Internet connection and Establish a dial-up connection whenever a computer on my network attempts to access the Internet boxes. Note: The Establish a dial-up connection whenever a computer on my network attempts to access the Internet option allows you to enable the Internet connection on the computer connected to the modem, in the event that there is no connection when another computer tries to connect to the Internet. User Manual – 35/72 Hercules ePlug 200 V2 Hercules ePlug 200 HD You can now access the Internet via all of the computers on your network. 4.3.3. Enabling sharing Before setting up sharing for your folders, your printer or your Internet connection, you must enable sharing in the Network and Sharing Center. Note: To open the Network and Sharing Center, click the network icon in the Windows taskbar, then the Open Network and Sharing Center link. Enabling file and printer sharing Note: to activate printer sharing, you must first install a printer. - Click the Change advanced sharing settings link. 36/72 – User Manual Hercules ePlug 200 V2 Hercules ePlug 200 HD - In the File and printer sharing pane, select Turn on file and printer sharing. Enabling public folder sharing Note: A public folder is a folder that can be shared by other users of the same computer or of the same network. - In the Public folder sharing pane, select Turn on sharing so anyone with network access can read and write files in the Public folders (there will be no limitations on the contents of these folders in terms of viewing, making changes and additions or other actions). User Manual – 37/72 Hercules ePlug 200 V2 Hercules ePlug 200 HD - Now, click Save changes before enabling multimedia file sharing. Enabling multimedia file sharing Note: This option allows you to enable sharing of your music, videos and images. - In the Network and Sharing Center, click the Choose homegroup and sharing options item. - In the Share libraries and printers, tick the Pictures, Music and Videos checkboxes. - Click the Save changes button. 4.3.4. Windows 7: Sharing public or personal folders Reminder: In Windows 7, there are two types of folders: personal or local folders and public folders. A personal folder is a folder belonging to a specific user created on the computer, whereas a public folder is a folder that can be shared by any other user of the same computer or the same network. In essence, a public folder is shared, and therefore available to everyone for viewing (the minimum authorization level). For sharing personal folders (your folder of your own images, for example), you must select the users who will be able to access their contents and set the authorization level, as indicated in the following procedure. 1. Select the folder that you wish to share, without opening it (in this case, your My Pictures folders). 2. Right-click the folder. Select Share with. 38/72 – User Manual Hercules ePlug 200 V2 Hercules ePlug 200 HD Note: You can select one of the following sharing options: Homegroup (Read), Homegroup (Read/Write) or Specific people. The homegroup comprises the computers that are part of the Home network. 3. If you enable sharing with specific people, select the users who will be able to access the folder. 4. In the File Sharing window, select the user(s) who will be able to access this folder, then click Add. User Manual – 39/72 Hercules ePlug 200 V2 Hercules ePlug 200 HD Note: You can provide access to all users with no restrictions (Everyone option) or select specific users previously created on your PC. You can also create new users by clicking Create a new user… in the dropdown list. 5. Select the Permission Level you wish to assign by clicking on the line for that user: Reader (authorization to view only), Contributor (authorization to view, add and delete) or Co-owner (authorization to view, modify, add and delete). 6. - Click the Share button. Be sure to note the path indicated, which will allow for access to the shared folder on the network from another computer. 4.3.5. Computers running Windows 7: Accessing shared folders 1. In the file explorer, accessible Start/Computer, double-click Network. via You access the list of the computers on the same network. Use the path indicated by Windows when setting up sharing. 2. Double-click the computer sharing the folders you wish to access. 3. If a password has been defined, enter your user name and your password. All shared folders appear. Depending on your authorization level, you can display, modify, add and/or delete shared folders and files. 4.3.6. Windows 7: Sharing a printer You can put a printer on the network and thereby share it with all computers in your home connected in a network via Hercules ePlug adapters. To access a printer on the network, you must first define the printer’s sharing options in the Network and Sharing Center (please refer to chapter 4.3.3. Enabling sharing). The printer must then be set up for sharing on the computer to which is connected and on which it is installed. On the computer connected to the printer: 1. Click Start/Devices and Printers. The list of installed printers is displayed. 40/72 – User Manual Hercules ePlug 200 V2 Hercules ePlug 200 HD 2. Right-click the printer and select Printer properties. 3. In the [Printer_ Name] Properties window, select the Sharing tab. 4. Tick the Share this printer box. 5. Select the name of the printer which will be displayed on the network under Share name. 6. Click Apply, then click OK. User Manual – 41/72 Hercules ePlug 200 V2 Hercules ePlug 200 HD 4.3.7. Computers running Windows 7: Accessing the shared printer On the computers that will use the shared printer: 1. Click Start/Devices and Printers. 2. Click the Add a printer button. The Add Printer wizard appears. 3. Click Add a network, wireless or Bluetooth printer. 4. Windows then searches for the shared printers on your network. Select the shared printer. 5. Click Next. 6. If necessary, accept installation of the printer’s drivers when prompted to do so by Windows. 7. Validate your printer’s name, then click Next. 8. Tick the Set as the default printer box, if you wish. 9. Click Finish to close the wizard. 42/72 – User Manual Hercules ePlug 200 V2 Hercules ePlug 200 HD 4.4. Computers running Windows Vista: Sharing folders, a printer or an ADSL connection To create a network of computers, share data, a printer or an ADSL connection between computers running Windows Vista, it is not imperative that the computers belong to the same workgroup. However, if you wish to share between Windows Vista and an earlier operating system, make sure to define the same workgroup on all computers. For information on how to create a workgroup, please refer to the manual of your Hercules product. The access paths described hereafter may vary slightly if you have modified the default display in Windows Vista (that is to say, the Start menu properties and the Control Panel display). You have connected your computer to a private network (as opposed to a public network). Therefore, the discovery options (namely, the ability to view outside devices and computers and to be seen by other networks) are enabled, but sharing options are not. You must therefore enable them manually before you can share your folders, your Internet connection or your printer. 4.4.1. Windows Vista: Sharing an ADSL connection in an Infrastructure type network Reminder: If you have an Internet "box", a modem router or a router connected to a modem, and one or more computers, your network will be in Infrastructure mode by default. In this mode, the computers are connected to your access point, namely your "box", your modem router or your router connected to a modem, via the HomePlug network. Infrastructure mode is ideal for exchanging data, network gaming and also for sharing an Internet connection and/or a printer between several computers. User Manual – 43/72 Hercules ePlug 200 V2 Hercules ePlug 200 HD Proceed as follows for each computer that will use the shared Internet connection: 1. Access the Network and Sharing Center. To do so, click the network icon on the Windows taskbar, then click the Network and Sharing Center link. 2. Click the View status link. 3. In the Network Status window, click Properties. 4. In the Windows Vista confirmation window, click Continue. 44/72 – User Manual Hercules ePlug 200 V2 Hercules ePlug 200 HD 5. In the Network Properties window, select Internet Protocol Version 4 (TCP/IPv4). 6. Click Properties. 7. In the Internet Protocol Version 4 (TCP/IPv4) Properties window, select Obtain an IP address automatically and Obtain DNS server address automatically. 8. Click OK to validate. 9. Do the same for Internet Protocol Version 6 (TCP/IPv6). To access the Internet, simply launch your Internet browser. User Manual – 45/72 Hercules ePlug 200 V2 Hercules ePlug 200 HD 4.4.2. Windows Vista: Sharing an ADSL connection in an Ad hoc type network Let's take the example of a Hercules HomePlug network composed, on one end, of an ADSL USB or Ethernet modem directly connected by a cable to one of your computers (which we will refer to as Connection point A), and, on the other end, of a computer (which we will refer to as Connection point B) on which you want to access the Internet. Connection point A Connection point B You are in Ad hoc mode. In this mode, the computers are directly connected to one another, without an access point (or router), via the HomePlug network. In order for Connection point B to be able to access the ADSL connection at Connection point A: - Connection point B must be part of the same HomePlug network as Connection point A. - The computer connected to the modem must be powered on. - The Internet line must be active. 1. Access the Network and Sharing Center by clicking the network icon on the Windows taskbar, then click the Network and Sharing Center link. Before setting up sharing for your folders, your printer or your Internet connection, you must enable sharing in the Network and Sharing Center. 46/72 – User Manual Hercules ePlug 200 V2 Hercules ePlug 200 HD 2. Click Manage network connections. 3. Right-click Internet, and select the Properties option. User Manual – 47/72 Hercules ePlug 200 V2 Hercules ePlug 200 HD 4. In the Sharing tab, tick the Allow other users to connect through this computer's Internet connection and Establish a dial-up connection whenever a computer on my network attempts to access the Internet boxes. Note: The Establish a dial-up connection whenever a computer on my network attempts to access the Internet option allows you to enable the Internet connection on the computer connected to the modem, in the event that there is no connection when another computer tries to connect to the Internet. You can now access the Internet via all of the computers on your network. 4.4.3. Enabling sharing Before setting up sharing for your folders, your printer or your Internet connection, you must enable sharing in the Network and Sharing Center. Note: To open the Network and Sharing Center, click the network icon in the Windows taskbar, then the Network and Sharing Center link. 48/72 – User Manual Hercules ePlug 200 V2 Hercules ePlug 200 HD Enabling file sharing - In the Sharing and Discovery zone, click the Off link or the button located opposite File sharing. - Select the Turn on file sharing radio button. - Click Apply. In the Windows Vista confirmation window, click Continue. Enabling public folder sharing Note: A public folder is a folder which can be shared by other users of the same computer or of the same network. - In the Sharing and Discovery zone, click the Off link or the sharing. button located opposite Public folder - Select the Turn on sharing so anyone with network access can open files radio button (they will only be able to consult files) or select Turn on sharing so anyone with network access can open, change, and User Manual – 49/72 Hercules ePlug 200 V2 Hercules ePlug 200 HD create files (there will be no limitations on the contents of these folders in terms of viewing, making changes and additions or other actions). - Click Apply. In the Windows Vista confirmation window, click Continue. Enabling printer sharing Note: To enable printer sharing, you must first have installed a printer. - In the Sharing and Discovery zone, click the Off link or the button located opposite Printer sharing. - Select the Turn on printer sharing radio button. - Click Apply. In the Windows Vista confirmation window, click Continue. Enabling media file sharing Note: This option allows you to enable sharing of your music, videos and images. - In the Sharing and Discovery zone, click the Off link or the button located opposite Media sharing. - Click Change… - In the Media Sharing window that appears, tick the Share my media box. 50/72 – User Manual Hercules ePlug 200 V2 Hercules ePlug 200 HD - Click Apply. In the Windows Vista confirmation window, click Continue. - In the following window, you can define the different settings, such as: authorize or refuse groups of users, set parental controls, select media types to be shared, and so on. - When you’re done, click Apply, then OK. 4.4.4. Windows Vista: Sharing public or personal folders Reminder: In Windows Vista, there are two types of folders: personal or local folders and public folders. A personal folder is a folder belonging to a specific user created on the computer, whereas a public folder is a folder that can be shared by any other user of the same computer or the same network. In essence, a public folder is shared, and therefore available to everyone for viewing (the minimum authorization level). For sharing personal folders (your folder of your own images, for example), you must select the users who will be able to access their contents and set the authorization level, as indicated in the following procedure. User Manual – 51/72 Hercules ePlug 200 V2 Hercules ePlug 200 HD 1. Select the folder that you wish to share, without opening it. Here, your Pictures folder. 2. Right-click the folder. Select Share. 3. In the File Sharing window, select the user(s) who will be able to access this folder, then click Add. 52/72 – User Manual Hercules ePlug 200 V2 Hercules ePlug 200 HD Note: You can provide access to all users with no restrictions (Everyone option) or select specific users previously created on your PC. You can also create new users by clicking Create a new user… in the dropdown list. 4. Select the Permission Level you wish to assign by clicking on the line for that user: Reader (authorization to view only), Contributor (authorization to view, add and delete) or Co-owner (authorization to view, modify, add and delete). 5. Click Share. Be sure to note the path indicated, which will allow for access to the shared folder on the network from another computer. For example: \\PC\Users\My documents\Shared Pictures Folders. 6. Click Done. The folder is now shared. You can now display all shared folders and files on the computer or the shared files on the network by clicking the links in the Network and Sharing Center. 4.4.5. Computers running Windows Vista: Accessing shared folders 1. In the file explorer, accessible Start/Computer, double-click Network. via You access the list of the computers on the same network. Use the path indicated by Windows when setting up sharing (for example : \\PC\Users\My documents\Shared Pictures Folders). 2. Double-click the computer sharing the folders you wish to access. 3. If a password has been defined, enter your user name and your password. All shared folders appear. Depending on your authorization level, you can display, modify, add and/or delete shared folders and files. 4.4.6. Windows Vista: Sharing a printer You can put a printer on the network and thereby share it with all computers in your home connected in a network via Hercules ePlug adapters. To access a printer on the network, sharing for the printer must first be set up in the Network and Sharing Center (please refer to chapter 4.3.3. Enabling sharing). The printer must then be set up for sharing on the computer to which is connected and on which it is installed. User Manual – 53/72 Hercules ePlug 200 V2 Hercules ePlug 200 HD On the computer connected to the printer: 1. Click Start/Control Panel. 2. Under the Hardware and Sound heading, click the Printer link. The list of installed printers is displayed. 3. Right-click the printer and select the Sharing… option. 54/72 – User Manual Hercules ePlug 200 V2 Hercules ePlug 200 HD 4. In the Printer Properties window, click the Change sharing options button. 5. In the Windows Vista confirmation window, click Continue. 6. Tick the Share this printer box. 7. Select the name of the printer which will be displayed on the network under Share name. 8. Click Apply, then OK. User Manual – 55/72 Hercules ePlug 200 V2 Hercules ePlug 200 HD 4.4.7. Computers running Windows Vista : Accessing the shared printer On the computers that will use the shared printer: 1. Click Start/Control Panel. 2. Under the Hardware and Sound heading, click the Printer link. 3. Click the Add a printer button. The Add a printer assistant appears. 4. Click Add a network, wireless or Bluetooth printer. 56/72 – User Manual Hercules ePlug 200 V2 Hercules ePlug 200 HD 5. Windows searches for the shared printers on your network. Select the shared printer. 6. Click Next. 7. If necessary, accept installation of the printer’s drivers when prompted to do so by Windows. 8. Validate the name of your printer, then click Next. 9. Click Finish to close the assistant. 4.5. Computers running Windows XP: Sharing folders, a printer or an ADSL connection A simple solution for sharing folders, a printer or an ADSL connection in Windows XP is to use the Network Setup Wizard. This Wizard will help you create a real home network. Note: the access paths mentioned below may vary slightly if you have modified the default display configuration in Windows XP (meaning the Start menu properties and Control Panel display). User Manual – 57/72 Hercules ePlug 200 V2 Hercules ePlug 200 HD 4.5.1. Windows XP: Using the Network Setup Wizard in an Infrastructure network Proceed as follows for each computer: 1. Click Start/All Programs/Accessories/ Communications/ Network Setup Wizard. The Network Setup Wizard is launched. 2. Click Next twice. The window opposite may appear if The Wizard found disconnected network hardware. 3. If your Ethernet network connection is not displayed in the list, tick the Ignore disconnected network hardware box, then click Next. Otherwise, exit the Wizard by clicking Cancel and establish the connection from your network device to your router (for more information, please refer to your router's manual). The window opposite may appear if The Wizard found a shared Internet connection on the computer. 4. Select No, let me choose another way to connect to the Internet, then click Next. 58/72 – User Manual Hercules ePlug 200 V2 Hercules ePlug 200 HD 5. In the Select a connection method window, select the Other option. 6. In the following window, select This computer connects to the Internet directly or through a network hub, then click Next. 7. If the window opposite appears, select the connection to your local area network (your Ethernet network card), then click Next. 8. When this warning screen appears, ignore it by clicking Next. If you are using a Hercules modem router, your computers are already protected by the integrated firewall. User Manual – 59/72 Hercules ePlug 200 V2 Hercules ePlug 200 HD 9. If your computer has at least three connections (or network devices, whether Ethernet, FireWire or Wi-Fi), the window opposite appears. In this case, let the Wizard determine the appropriate connections. 10. Click Next. 11. Enter the computer name and a description, if required. Give the computer a name that is unique and sufficiently distinctive, making it easy to recognize on your network (my-computer, HomePlugcomputer or julie, for example). 12. Click Next. 13. Enter the workgroup name (HOME, OFFICE or HERCULES, for example) and a description, if required. The workgroup name must be identical (be sure to respect the case of letters) for all computers you wish to link together in a network. 14. Click Next. 15. Verify the configuration settings you have entered in the window that appears, then click Next. The Wizard configures the computer for the home network. This may take a few minutes. 60/72 – User Manual Hercules ePlug 200 V2 Hercules ePlug 200 HD 16. Before completing the procedure, you may select the Create a Network Setup Disk option. This consists of copying this Wizard onto a storage medium (your choice of floppy disk or USB key) so that it can be launched on computers equipped with operating systems other than Windows XP. This operation is carried out automatically, once you have selected a medium for saving the Wizard. 17. Click Finish to exit the Wizard. Once the procedure is finished, Windows XP may prompt you to restart your computer. The procedures described in this chapter are specific to Windows XP. For all other questions related to sharing folders, a printer or an Internet connection, or on using Windows, please refer to the Windows online help utility. 4.5.2. Windows XP: Using the Network Setup Wizard in an Ad hoc network Proceed as follows for each computer: 1. Click Start/All Programs/Accessories/ Communications/ Network Setup Wizard. The Network Setup Wizard is launched. 2. Click Next twice. User Manual – 61/72 Hercules ePlug 200 V2 Hercules ePlug 200 HD The window opposite may appear if The Wizard found disconnected network hardware. 3. If your Ethernet network connection is not displayed in the list, tick the Ignore disconnected network hardware box, then click Next. Otherwise, exit the Wizard by clicking Cancel and establish the connection from your network device to your router (for more information, please refer to your router's manual). The window opposite may appear if The Wizard found a shared Internet connection on the computer. 4. Select No, let me choose another way to connect to the Internet, then click Next. On the computer equipped with the ADSL modem: 5. In the Select a connection method window, select the This computer connects directly to the Internet. The other computers on my network connect to the Internet through this computer option. 6. Click Next, then select the Internet connection corresponding to your modem. Click Next again. 62/72 – User Manual Hercules ePlug 200 V2 Hercules ePlug 200 HD 7. If your computer has at least three connections (or network devices, whether Ethernet, FireWire or Wi-Fi), the window opposite appears. In this case, select the Let me choose the connections to my network option, then click Next. 8. Among the connections displayed, leave the box corresponding to the connection to your local area network ticked and deselect the others, then click Next. On the computers that will use the shared Internet connection: 5. In the Select a connection method window, select the This computer connects to the Internet through another computer on my network or through a residential gateway option. 6. Click Next. User Manual – 63/72 Hercules ePlug 200 V2 Hercules ePlug 200 HD 7. If your computer has at least three connections (or network devices, whether Ethernet, FireWire or Wi-Fi), the window opposite appears. In this case, select the Determine the appropriate connections for me option. 8. Click Next. Proceed as follows for each computer: 9. Enter the computer name and a description, if required. Give the computer a name that is unique and sufficiently distinctive, making it easy to recognize on the network (my-computer, HomePlugcomputer or julie, for example). 10. Click Next. 11. Enter the workgroup name (HOME, OFFICE or HERCULES, for example) and a description, if required. The workgroup name must be identical (be sure to respect the case of letters) for all computers you wish to link together in a network. 12. Click Next. 13. Verify the configuration settings you have entered in the window that appears, then click Next. The Wizard configures the computer. This may take a few minutes. 64/72 – User Manual Hercules ePlug 200 V2 Hercules ePlug 200 HD If your network is only composed of computers running Windows XP: 14. Select the Just finish the wizard option. If your network is composed of computers running computers running Windows XP and/or Windows 98 SE, Me, 2000): 15. You can select the Create a Network Setup Disk option. This consists of copying this Wizard onto a storage medium (your choice of floppy disk or USB key) so that it can be launched on computers equipped with operating systems other than Windows XP. This operation is carried out automatically, once you have selected a medium for saving the Wizard. 16. Click Finish to exit the Wizard. Once the procedure is finished, Windows XP may prompt you to restart your computer. You can now access the Internet simply by launching your browser (Internet Explorer or Netscape Navigator). Sharing folders or a printer, however, requires a few additional operations, but by following the step-by-step instructions in the next chapters, the subtleties involved will no longer remain a mystery to you. With some Internet service providers, it may happen that your shared connection is not established automatically when you launch your Internet browser. If this occurs, you must first establish an Internet connection on the computer equipped with the modem. User Manual – 65/72 Hercules ePlug 200 V2 Hercules ePlug 200 HD 4.5.3. Windows XP: Sharing folders After having configured all of your computers using the Network Setup Wizard, you can now share data located on different disk drives, as long as the user has authorized access. 1. Select the folder you wish to share, without opening it. 2. Right-click the folder. Select Sharing and Security.... 3. In the Network sharing and security section of the Sharing tab, tick the Share this folder on the network box. 4. On the Share name line, enter the folder name as it will be displayed on the network (12 characters maximum to ensure compatibility with other operating systems). You can also tick the Allow network users to change my files box. In this case, the user will be able to read files and save any changes. If this box is not ticked, the shared files can only be read, and not changed. The [Shared folder name] Properties window is divided into two sections. Local sharing and security only allows for the sharing of files among several users on the same PC. The files are then placed in a Shared Documents folder. Network sharing and security, however, allows for the sharing of files among more than one computer. 5. Click Apply to validate your choices, then click OK to close the window. An icon representing a hand beneath the folder indicates that the folder is now shared. You can only share the contents of a folder, and not an individual file. We therefore recommend that you create a folder specifically for this purpose where you will put files to be shared. 66/72 – User Manual Hercules ePlug 200 V2 Hercules ePlug 200 HD 4.5.4. Computers running Windows XP: Accessing shared folders To easily access folders set up for sharing by several computers, it is preferable that the computers belong to the same workgroup. In Windows XP, the workgroup name has been defined using the Network Setup Wizard. 1. Click Start/My Computer. 2. Click My Network Places, then click View workgroup computers. You directly access the list of computers in your workgroup. 3. Double-click the computer that is sharing the folders you wish to access. All shared folders appear. 4.5.5. Windows XP: Sharing a printer It is possible to put a printer on the network and share it with all computers in the house equipped with a Hercules ePlug adapter. To access a printer on the network, the printer must be set up for sharing on the computer where it is connected and installed. On the computer connected to the printer: 1. Click Start/Control Panel/Printers and Other Hardware/ Printers and Faxes. 2. Right-click the printer and select Sharing. 3. In the Sharing tab, select the Share this printer radio button and enter a name for your printer. Give the printer a name that is unique and sufficiently distinctive, making it easy to recognize (my-printer or home laser printer, for example). If one of your computers is running Windows 98 SE, we recommend that the sharing name not exceed 12 characters (without spaces) in order to ensure its compatibility with this operating system. 4. Click Apply, then OK. User Manual – 67/72 Hercules ePlug 200 V2 Hercules ePlug 200 HD On the computers that will use the shared printer: 1. Click Start/Control Panel/Printers and Other Hardware/ Printers and Faxes. In the Printer Tasks section, select Add a printer. 2. The Add Printer Wizard is launched. Click Next. 3. Select the A network printer, or a printer attached to another computer option, then click Next. 4. In the window that appears, click Next to launch the search for shared printers. 5. In the list displayed, double-click the computer connected to the printer. 6. Select the shared printer, then click Next. 7. If you wish, set the shared printer as the default printer, then click Next. 8. Click Finish to exit the Wizard. You can now use the network printer thanks to your HomePlug connection. For more information on sharing a printer, please refer to your printer’s manual. 68/72 – User Manual Hercules ePlug 200 V2 Hercules ePlug 200 HD 4.5.6. Windows XP: Modifying a workgroup name (advanced users) It may happen that you need to change the name of your workgroup (advanced users only). To do so, proceed as follows: 1. Click Start/Control Maintenance/System. Panel/Performance and 2. In the System Properties window, select the Computer Name tab. 3. Click the Change… button. 4. In the Computer Name zone, enter a name sufficiently distinctive that it can easily be recognized in the list of computers for the workgroup (my-computer, HomePlugcomputer or julie, for example). 5. In the Workgroup zone, enter a name for the group (HOME, OFFICE or HERCULES, for example). The workgroup name must be identical (be sure to respect the case of letters) for all computers you wish to link together in a network. 6. A Windows message indicates that the task has been carried out successfully and that you must restart the computer. 7. Repeat this procedure for each computer. 4.6. Computers running a different operating system or adding any other type of network device Your HomePlug network is not limited to computers running Windows. It also functions with computers running other operating systems, such as Mac OS or Linux. To find out how to share your Internet connection, folders, printers and more in Mac OS or Linux, please refer to the manufacturer's documentation. Apart from desktop and laptop computers, you can add a wide range of network devices to your HomePlug network: game console, printer, TV decoder, modem router, Internet "box", access point and more... so long as the device has an Ethernet port. To find out how to set up these devices, please refer to the manufacturer's documentation. User Manual – 69/72 Hercules ePlug 200 V2 Hercules ePlug 200 HD 5. TECHNICAL SUPPORT If you encounter a problem with your product, please go to http://ts.hercules.com and select your language. From there you will be able to access various utilities (Frequently Asked Questions (FAQ), the latest versions of drivers and software) that may help to resolve your problem. If the problem persists, you can contact the Hercules products technical support service (“Technical Support”): By email: In order to take advantage of technical support by email, you must first register online. The information you provide will help the agents to resolve your problem more quickly. Click Registration on the left-hand side of the Technical Support page and follow the on-screen instructions. If you have already registered, fill in the Username and Password fields and then click Login. By telephone (if you do not have Internet access): United Kingdom 08450800942 Charged at local rate Monday to Saturday from 8 a.m. to 7 p.m. Monday to Friday from 9 a.m. to 8 p.m. Saturday from 8 a.m. to 2 p.m. (Eastern Standard Time) Monday to Friday from 6 a.m. to 5 p.m. Saturday from 5 a.m. to 11 a.m. (Pacific Standard Time) Monday to Friday from 9 a.m. to 8 p.m. Saturday from 8 a.m. to 2 p.m. (Eastern Standard Time) Monday to Friday from 6 a.m. to 5 p.m. Saturday from 5 a.m. to 11 a.m. (Pacific Standard Time) United States 1-866-889-5036 Free Canada 1-866-889-2181 Free Denmark 80887690 Free Monday to Saturday from 9 a.m. to 8 p.m. (English) Sweden 0200884567 Free Monday to Saturday from 9 a.m. to 8 p.m. (English) Finland 0800 913060 Free Monday to Saturday from 10 a.m. to 9 p.m. (English) Hours of operation and telephone numbers are subject to change. Please visit http://ts.hercules.com for the most up-to-date Technical Support contact information. 6. WARRANTY Worldwide, Guillemot Corporation S.A. (“Guillemot”) warrants to the consumer that this Hercules product will be free from material defects and manufacturing flaws for a period of two (2) years from the original date of purchase. Should the product appear to be defective during the warranty period, immediately contact Technical Support, who will indicate the procedure to follow. If the defect is confirmed, the product must be returned to its place of purchase (or any other location indicated by Technical Support). Within the context of this warranty, the consumer’s defective product will, at Technical Support’s option, be either repaired or replaced. Where authorized by applicable law, the full liability of Guillemot and its subsidiaries (including for indirect damages) is limited to the repair or replacement of the Hercules product. The consumer’s legal rights with respect to legislation applicable to the sale of consumer goods are not affected by this warranty. This warranty shall not apply: (1) if the product has been modified, opened, altered, or has suffered damage as a result of inappropriate or abusive use, negligence, an accident, normal wear, or any other cause not related to a material defect or manufacturing flaw; (2) in the event of failure to comply with the instructions provided by Technical Support; (3) to software not published by Guillemot, said software being subject to a specific warranty provided by its publisher. 70/72 – User Manual Hercules ePlug 200 V2 Hercules ePlug 200 HD 7. ENVIRONMENTAL PROTECTION RECOMMENDATION At the end of its working life, this product should not be disposed of with standard household waste, but rather dropped off at a collection point for the disposal of Waste Electrical and Electronic Equipment (WEEE) for recycling. This is confirmed by the symbol found on the product, user manual or packaging. Depending on their characteristics, the materials may be recycled. Through recycling and other forms of processing Waste Electrical and Electronic Equipment, you can make a significant contribution towards helping to protect the environment. Please contact your local authorities for information on the collection point nearest you. Trademarks Hercules® is a registered trademark of Guillemot Corporation S.A. Intel® and Pentium® are registered trademarks of Intel Corporation. Hercules ePlugTM 200 is a trademark of Guillemot Corporation S.A. Microsoft® Windows® 2000, XP, Vista and 7 are either trademarks or registered trademarks of Microsoft Corporation in the United States and/or other countries. Mac OS® is a registered trademark of Apple Computer, Inc. in the United States and/or other countries. Linux® is a registered trademark of Linus Torvalds. Atheros® is a registered trademark of Atheros Communications, Inc. All other trademarks and brand names are hereby acknowledged and are property of their respective owners. Illustrations not binding. Declaration of conformity with EU directives This device can be used in: AT, BE, FR, DE, IE, IT, LU, NL, PL, ES, SE, GB, FI, CH. Hereby, GUILLEMOT CORPORATION, Carentoir France, declares that the ePlug200 V2 and ePlug200 HD devices are in compliance with the essential requirements and other relevant provisions of Directive 1999/5/EC. The Declaration of Conformity can be consulted at this website address: http://ts.hercules.com/download/PLC/DoC/ePlug200V2/DoC-eng_ePlug-200V2.pdf http://ts.hercules.com/download/PLC/DoC/ePlug200HD/DoC-eng_ePlug-200HD.pdf Hercules is a division of Guillemot Corporation. Federal Communication Commission Interference Statement This equipment has been tested and found to comply with the limits for a Class B digital device, pursuant to Part 15 of the FCC Rules. These limits are designed to provide reasonable protection against harmful interference in a residential installation. This equipment generates, uses and can radiate radio frequency energy and, if not installed and used in accordance with the instructions, may cause harmful interference to radio communications. However, there is no guarantee that interference will not occur in a particular installation. If this equipment does cause harmful interference to radio or television reception, which can be determined by turning the equipment off and on, the user is encouraged to try to correct the interference by one of the following measures: • Reorient or relocate the receiving antenna. • Increase the separation between the equipment and receiver. • Connect the equipment into an outlet on a circuit different from that to which the receiver is connected. • Consult the dealer or an experienced radio/TV technician for help. This device complies with Part 15 of the FCC Rules. Operation is subject to the following two conditions: (1) This device may not cause harmful interference, and (2) this device must accept any interference received, including interference that may cause undesired operation. This device and its antenna(s) must not be co-located or operating in conjunction with any other antenna or transmitter. FCC Caution: Any changes or modifications not expressly approved by the party responsible for compliance could void the user's authority to operate this equipment. IMPORTANT NOTE: FCC Radiation Exposure Statement: This equipment complies with FCC radiation exposure limits set forth for an uncontrolled environment. This equipment should be installed and operated with minimum distance 20cm between the radiator & your body. User Manual – 71/72 Hercules ePlug 200 V2 Hercules ePlug 200 HD Copyright © Guillemot Corporation S.A. 2011. All rights reserved. This publication may not be reproduced in whole or in part, summarized, transmitted, transcribed, stored in a retrieval system, or translated into any language or computer language, in any form or by any means, electronic, mechanical, magnetic, photocopying, recording, manual or otherwise, without the prior written permission of Guillemot Corporation S.A. Disclaimer Guillemot Corporation S.A. reserves the right to make changes to specifications at any time and without notice. The information provided by this document is believed to be accurate and reliable. However, no responsibility is assumed by Guillemot Corporation S.A. either for its use or for the infringement of patents or other rights of third parties resulting from its use. This product may exist in a light or special version for PC integration or other purposes. Certain functions detailed in this manual may not be available in these versions. Wherever possible, a README.TXT will be included on the installation CDROM detailing the differences between the supplied product and the product described in the present documentation. End-user software license Agreement IMPORTANT: please read the Agreement carefully prior to opening and installing the Software. By opening the Software package, you agree to be bound by the terms of this Agreement. The Software enclosed in this package is licensed, not sold, and is only available under the terms of the present license Agreement. If you do not agree with the terms hereafter, you must promptly return the Software within 15 days, together with the entire contents of the box, to the place of purchase. The Guillemot Corporation S.A. Software (hereafter named the “Software”) is copyrighted by Guillemot Corporation S.A. All rights are reserved. The term “Software” refers to all documentation and related material, including drivers, executable programs, libraries and data files. The purchaser is granted a license to use the Software only. The licensee also agrees to be bound by the terms and conditions of the present Agreement concerning copyright and all other proprietary rights for any third party Software, documentation and related material included in the Software package. Guillemot Corporation S.A. reserves the right to terminate this license in the event of failure to comply with any of the terms or conditions laid out in the present Agreement. On termination, all copies of the Software shall immediately be returned to Guillemot Corporation S.A.; the purchaser remaining liable for any and all resulting damages. License: 1. The license is granted to the original purchaser only. Guillemot Corporation S.A. retains all title to and ownership of the Software and reserves all rights not expressly granted. The licensee is not permitted to sub-license or lease any of the rights that are hereby granted. Transfer of the license is permitted, provided that the transferor does not retain any part or copy of the Software and the transferee accepts to be bound by the terms and conditions of the present Agreement. 2. The licensee may only use the Software on a single computer at any time. The machine-readable portion of the Software may be transferred to another computer provided it is previously erased from the first machine and there is no possibility that the Software can be used on more than one machine at any one time. 3. The licensee acknowledges the copyright protection belonging to Guillemot Corporation S.A. The copyright notice must not be removed from the Software, nor from any copy thereof, nor from any documentation, written or electronic, accompanying the Software. 4. The licensee is granted the right to make one back-up copy of the machine-readable portion of the Software on the condition that all copyright and proprietary notices are also reproduced. 5. Except where the present Agreement expressly permits, the licensee is strictly prohibited from engaging in, nor may he permit third parties to engage in, the following: providing or disclosing the Software to third parties; providing use of the Software in a network, multiple PCs, multi-user or time-sharing arrangement where the users are not individual licensees; making alterations or copies of any kind of the Software; making any attempt to disassemble, de-compile or reverse engineer the Software in any way or form, or engaging in any activity aimed at obtaining underlying information not visible to the user during normal use of the Software; making copies or translations of the User Manual. 72/72 – User Manual


![[English] 10 MB](http://vs1.manualzilla.com/store/data/005968191_1-682eb674772da7f194b98630edc12795-150x150.png)


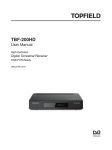
![[English] 1 MB](http://vs1.manualzilla.com/store/data/005724727_1-d0907da86b06d0402fef0dce028404c5-150x150.png)