Download UV-H Manual - Ozone Solutions
Transcript
UV-H
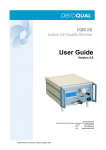
UV Ozone Photometer
User Guide
Aeroqual Limited
109 Valley Road, Mt Eden, Auckland 1024, New Zealand
phone
+64 9 623 3013
fax
+64 9 623 3012
web
www.aeroqual.com
UV-H Version 1.0 May 2011
Table of Contents
Table of Contents ................................................................................................ 2
Foreword ............................................................................................................. 3
Warranty ............................................................................................................. 3
For Your Safety ................................................................................................... 4
Technical Support ............................................................................................... 4
1.0 UV-H Photometer and System Components ................................................. 5
1.1 UV-H .......................................................................................................... 5
1.2 System Components ................................................................................. 5
2.0
Description ............................................................................................ 5
3.0 Operating Instructions ................................................................................... 6
3.1 Getting Started .......................................................................................... 6
3.2 Operating the UV-H Photometer ................................................................ 6
Display ......................................................................................................... 6
Front Panel Push Buttons ............................................................................ 6
SD Card log ................................................................................................. 7
Optional Relay Board ................................................................................... 7
Connecting a computer ................................................................................ 7
Maintenance ................................................................................................ 7
4.0 Troubleshooting ............................................................................................ 8
4.1
Troubleshooting Guide.......................................................................... 8
4.2
Diagnostics ........................................................................................... 9
5.0 Calibration ................................................................................................... 10
5.1
Zero calibration ................................................................................... 10
5.2
Span calibration .................................................................................. 10
Span calibration procedure ........................................................................ 10
Appendix A
UV-Photometer V1.0 Software Instructions............................. 11
Description..................................................................................................... 11
Setting up ...................................................................................................... 11
Passwords ..................................................................................................... 11
Appendix B
Specifications ........................................................................... 15
Enclosure....................................................................................................... 15
Specifications ................................................................................................ 17
UV-H Version 1.0 May 2011
2
Foreword
Copyright Aeroqual Limited. All rights reserved. Reproduction, transfer, distribution or storage of part or all of the
contents of this document in any form without the prior written permission of Aeroqual Limited is prohibited.
“Aeroqual” and “Aeroqual Limited – Making the Invisible Visible” are registered trademarks of Aeroqual Limited. Other
product and company names mentioned herein may also be trademarks or trade names.
Aeroqual operates a policy of continuous development. Aeroqual reserves the right to make changes and improvements
to any of the products described in this document without prior notice.
Under no circumstances shall Aeroqual be responsible for any loss of data or income or any special, incidental,
consequential or indirect damages howsoever caused.
The contents of this document are provided "as is". Except as required by applicable law, no warranties of any kind,
either express or implied, including, but not limited to, the implied warranties of merchantability and fitness for a particular
purpose, are made in relation to the accuracy, reliability or contents of this document.
Aeroqual reserves the right to revise this document or withdraw it at any time without prior notice. The availability of
particular products may vary by region. Please check with the Aeroqual dealer nearest to you.
© Aeroqual Limited 2011. All rights reserved.
Warranty
Aeroqual warrants this product to be free from defects in materials and workmanship for a period of 1 (one) year from the
date of shipment from the factory. Consumable items such as pumps, filters and gas scrubber media are excluded from
this warranty. This warranty is expressly limited to the original owner who purchases the equipment directly from
Aeroqual or from an authorized Aeroqual dealer. Should your Aeroqual product need warranty service, you should
return it to the dealer from whom it was purchased or contact Aeroqual.
What we will do
If, during the warranty period, this product fails to operate under normal use and service, due to improper materials or
workmanship, Aeroqual subsidiaries, authorized distributors or authorized service partners will, at their option, either
repair or replace the product in accordance with the terms and conditions stipulated herein.
Conditions
1.
The warranty is valid only if the original receipt issued to the original purchaser by the dealer, specifying the date of purchase, is
presented with the product to be repaired or replaced. Aeroqual reserves the right to refuse warranty service if this information has
been removed or changed after the original purchase of the product from the dealer.
2.
If Aeroqual repairs or replaces the product, the repaired or replaced product shall be warranted for the remaining time of the
original warranty period or for ninety (90) days from the date of repair, whichever is longer. Repair or replacement may be via
functionally equivalent reconditioned units. Replaced faulty parts or components will become the property of Aeroqual.
3.
This warranty does not cover any failure of the product due to normal wear and tear, damage, misuse, including but not limited to
use in any other than the normal and customary manner, in accordance with Aeroqual’s user guide for use, faulty installation,
calibration and maintenance of the product, accident, modification or adjustment, events beyond human control, improper
ventilation and damage resulting from liquid or corrosion.
4.
This warranty does not cover product failures due to repairs, modifications or improper service performed by a non-Aeroqual
authorized service workshop or opening of the product by non-Aeroqual authorized persons.
5.
The warranty does not cover product failures which have been caused by use of non-Aeroqual original accessories.
6.
This warranty becomes void if a non-Aeroqual approved power supply is used.
7.
Tampering with any part of the product will void the warranty.
8.
Damage to the sensors can occur through exposure to certain sensor poisons such as silicones, tetraethyl lead, paints and
adhesives. Use of Aeroqual sensors in these environments containing these materials may (at the discretion of Aeroqual) void the
warranty on the sensor head. Exposure to gas concentrations outside of the design range of a specific Aeroqual sensor head can
adversely affect the calibration of that sensor head and will also void this warranty as it applies to the replacement of sensor
heads.
9.
Aeroqual makes no other express warranties, whether written or oral, other than contained within this printed limited warranty. To
the fullest extent allowable by law all warranties implied by law, including without limitation the implied warranties of merchantability
and fitness for a particular purpose, are expressly excluded, and in no event shall Aeroqual be liable for incidental or consequential
damages of any nature whatsoever, however they arise, from the purchase or use of the product, and including but not limited to
lost profits or business loss.
10.
Some countries restrict or do not allow the exclusion or limitation of incidental or consequential damage, or limitation of the
duration of implied warranties, so the preceding limitations or exclusions may not apply to you. This warranty gives you specific
legal rights, and you may also have other rights, which may vary from country to country.
UV-H Version 1.0 May 2011
3
Thank you for purchasing this Aeroqual product. To get maximum
use of the features of your new product we recommend that you
follow a few simple steps:
· Read the guidelines for safe and efficient use.
· Read all the terms and conditions of your Aeroqual Warranty.
For Your Safety
Read these simple guidelines. Ignoring these guidelines may be hazardous.
§
USE SENSIBLY
Use only as per this user guide.
§
USE AEROQUAL APPROVED SERVICE
Only approved service personnel must work on this product.
§
ACCESSORIES
Use only approved accessories. Do not connect incompatible products.
§
CONNECTING TO OTHER DEVICES
When connecting to any other device, read the appropriate user guide for detailed safety
instructions. Do not connect incompatible products.
§
HAZARDOUS ENVIRONMENTS
Do not use the UV-H Photometer in or near volatile fuel or chemicals.
§
HEALTH AND SAFETY IN THE WORKPLACE
Aeroqual UV-H Photometers and Sensor Heads are used to monitor ambient gas concentrations.
Aeroqual does not guarantee user safety. In hazardous environments, an appropriate Health and
Safety plan should be in place.
WARNING Do not switch the UV-H Photometer on before reading the User
Guide.
Technical Support
Technical information, service and spare parts are available through your distributor. In addition, world wide
technical support is available from Aeroqual Ltd.
Please contact:
Aeroqual Limited
109 Valley Road, Mt Eden, Auckland 1024, New Zealand
Phone: +64 9 623 3013
Fax: +64 9 623 3012
Email: [email protected]
UV-H Version 1.0 May 2011
4
1.0 UV-H Photometer and System Components
1.1 UV-H
The Aeroqual UV-H Ozone Photometer is a non-dispersive ultraviolet (UV) photometer which alternatiely
switches a selective MnO2 ozone scrubber in and out of the measuring stream and computes the ratio of
transmitted light to give a reliable measure of ozone concentration. A mercury vapor lamp with a line at 254
nm is used as the light source. A solar blind photodiode is used as the detector. The relationship between
transmitted light and ozone concentration is defined by the well known Beers/Lambert Law. The optical
o
bench is maintained at a temperature of 55 C to avoid condensation.
Data is logged to a removable Secure Digital (SD) card or logged directly to a PC using the supplied
software. Optional analog and relay control outputs are available for control applications.
1.2 System Components
·
·
·
·
·
UV-H Ozone Photometer
24VDC Regulated Power Supply
Computer CD containing software for data logging and configuring the UV-H
Data Card (2GB)
Serial Cable
2.0
Description
SD data card
Front View
RS 232 serial port
Display
Power on/off
Adjustment button
Selection button
Rear View
Sample inlet & exhaust
Relay & Analog Output
connector (optional)
24VDC Input
UV-H Version 1.0 May 2011
5
3.0 Operating Instructions
3.1 Getting Started
1.
2.
3.
4.
5.
Unpack unit
Install SD card into slot on front panel
Plug 24VDC power supply pack into rear socket on UV-H and connect to mains power.
Connect inlet and exhaust tubing (1/4 “ OD)
****SAFETY: vent the exhaust safely to avoid personal exposure to elevated ozone levels.*****
Turn on the power switch on front panel. The instrument will showing “warming up: for 2 minutes and
then start reading.
Note: The UV-H Photometer should be allowed to run for 60 minutes to acheive ultimate accuracy.
3.2 Operating the UV-H Photometer
Display
When first powering on the Photometer the display will show “Warming up...” for 2 minutes.
After warm up the displays shows:
instant O3 ppm
average O3 ppm
ID
date / time
Front Panel Push Buttons
There are two buttons on the front panel “selection” and “adjustment”. Pushing the “selection”
button for 2 seconds enters configuration mode. Repeat pushes enable the user to scroll through
a list of parameters whose values can be changed. The “adjustment” button enables the value to
be selected for each parameters. Holding down the ‘adjustment” button will scroll through the
values.
Parameter
ID
display units
logging rate
averaging time
relay output mode
(only functional with optional relay output board)
relay setpoint
Values
1 to 99
ppm or mg/m3
1 to 60 minutes
5, 10, 15 or 60 minutes
alarm above (NO closed, NC open, above setpoint)
alarm below (NO closed, NC open, below setpoint)
control mode (5% band)
0.00 to 200.00 ppm
(only functional with optional relay output board)
exit
UV-H Version 1.0 May 2011
6
SD Card log
The information logged on the SD card is:
Date, Time, O3 ppm, Ave O3 ppm.
The data files are stored as a daily file in a tab delimited file with the filename YYYYMMDD.aql.
Note: the ozone SD card data is always logged in ppm even if the display units are mg/m3.
There is also an EVENTLOG.aql file on the SD card which logs a variety of events for diagnostic
analysis.
Optional Relay Board
If the optional relay board has been fitted the user can use the UV-H for control or alarm
purposes and also obtain a 0-5V (0-200 ppm) analogue output. These outputs are available on
conector located at the rear of the UV-H Photometer. Please note the specifications for these
outputs are given in Appendix B.
Connecting a computer
The connection of a computer to the UV-H via the RS232 serial data port, the installation of the software
and its use are described in Appendix A.
Maintenance
The UV-H is designed to operate without maintenance for extended periods. The following table outlines a
periodic maintenance schedule for the UV-H. This schedule is based on experience under normal operating
conditions and may need to be modified to suit specific operating conditions.
Interval
Item
Procedure
3 months
Inlet filter
check/replace
6 months
pump flow
check
12 months
span calibration
perform against a calibrated ozone source
12 months
zero scrubber
replace filters
12-18 months
check lamp
check lamp output in diagnostics screen and
replace if below 1 V output.
UV-H Version 1.0 May 2011
7
4.0 Troubleshooting
4.1
Troubleshooting Guide
Symptom
Possible Cause
Fault isolation/Solution
Gas sensor readings incorrect
Insufficient warm up
Allow the UV-H Photometer to fully warm up
after power down. This may require 60 minutes
or more.
Incorrect zero calibration
Repeat zero calibration with clean air.
Incorrect span calibration
Perform span check.
Sensor module leaking
Check for leaks
Sensor pump failed
Measure flow. If pump has failed replace.
Inlet filter dirty
Replace
Leaks
Leaks dilute the sample stream and can cause
low span readings and incorrect zero readings.
Perform a leak test.
Inlet filter dirty
Replace
Lamp faulty
Replace
Pump faulty
Check flow. Replace
No communication over RS232
RS232 cable disconnected
Reconnect cable
PC Data logging stopped
UV-H power blackout interrupted
data logging.
Close and restart UV-H software.
USB to serial hub not working
Check USB connectors. Check the Moxa serial
hub is present on the device hardware menu in
the PC. If not reload driver software and reinstall.
Card not correctly installed in slot.
Turn off UV-H and install card in slot correctly.
Data logging interval set too large.
Set logging interval in configuration to a lower
interval.
Data card module fault
Send control module to factory for replacement
module.
Gas Sensor readings noisy or
unstable
No data on SD card
UV-H Version 1.0 May 2011
8
4.2
Diagnostics
The UV-H has a number of sources for diagnostic information if a problem arises. These are described
below:
Event log
A large number of UV-H Photometer events are logged on the event log file which is
located on the SD data card.
Event Code Examples
O3
Meaning
Lamp failure on 12 Nov 2008 at 23:45
:S.F. 2008/11/12 23:45
Power on: 2008/11/12 10:12
Config at 2008/11/12 13:12
D:1, Ave Time: 15, Log Rate:1, Status: 0x01,
Setpoint=1.50
Power turned on at 10:12 am on 12
November 2008
Configuration saved at 1:12 pm on 12
November 2008
Messages
This is located on the PC software tool bar. If the UV-H is connected to the computer then event messages
will be written to the Messages window in real-time.
Diagnostics
This is located in the PC software. If the UV-H is connected to the computer then the sensor module can be
interrogated to determine if there is a problem not picked up by normal fault detection as well as fine tune
the sensor performance. Only qualified personnel should use this menu as incorrect use may result in
sensor malfunction. Please consult Aeroqual Technical Support to understand how to use this feature.
UV-H Version 1.0 May 2011
9
5.0 Calibration
The UV-H can be calibrated by applying a certified concentration of ozone gas to the UV-H inlet. Span
adjustments on the UV-H are performed by adjusting GAIN value via the PC software under the
Calibration menu. Always use PTFE or fluorcarbon tubing for all sample lines. Always allow the instrument
to warm up for at least 2 hours before calibration.
5.1
Zero calibration
The UV-H can be re-zeroed via the PC software using a zero air source.
1. Connect a PC to the UV-H and run the UV-H photometer software.
2. Connect a source of zero air to the UV-H through the sample port using ¼ inch Teflon tubing. Use
a T fitting to ensure the UV-H is sampling the gas flow at atmospheric pressure. The zero air
should be at least 1.0 LPM (check there is excess flow at the exhaust of the T fitting).
3. Allow the UV-H to sample until stable readings are obtained (about 10 minutes).
4. Start zero calibration by clicking “Calibration – Zero calibration”
5.2
Span calibration
The UV-H can be manually span calibrated by modifying the gain factor for the sensor. Introduce a known
concentration of ozone gas into the UV-H Photometer and adjust the gain factor to set the correct
concentration reading. Note: a sensor zero point calibration should always be performed before
undertaking a span calibration.
Span calibration procedure
1.
2.
3.
4.
Perform zero calibration.
Connect a calibrated source of ozone gas to the UV-H through the inlet port . Use a T fitting to
ensure the UV-H is sampling the gas flow at atmospheric pressure. The span gas flow should be at
least 1.5 LPM (check there is excess flow at the exhaust of the T fitting).
Allow the UV-H to sample the gas until a stable reading is obtained (about 10 minutes).
Adjust the UV-H sensor gain factor to set the correct concentration reading
Calibration -->Calibrate Gain-->enter password “password”--> select gas--->enter new gain factor
new Gain factor = old Gain factor x
Span gas concentration / UV-H gas reading
Note: the GAIN change is logged in the EVENTLOG file on the SD card.
UV-H Version 1.0 May 2011
10
Appendix A
UV-Photometer V1.0 Software Instructions
Description
The UV-H Software is designed to be a simple interface for communicating with the UV-H photometer via a
PC. It can be used to configure the UV-H, initiate the zero calibration routine, modify gain factors, poll data
and display the data in either table or graphical format. The software runs in Java VM1.5 (supplied with
software) and the database is an open source HSQLDB Java database. Data can be easily exported to a
spreadsheet for manipulation. The software also incorporates a GSM modem connection which can be
used to connect to a UV-H unit remotely.
Computer Requirements
·
CD-ROM Drive
·
RS232 port
·
Windows OS version 2000 or later
·
100 Mb of spare hard drive space
·
recommended 256 Mb RAM
·
recommended 1 GHz processor speed
Setting up
1.
Install UV-H CD into drive and extract the “Aeroqual UV Photometer v1.0.zip
2.
Launch software
Ø Click Setup---> COM Port.
Ø Select correct COM port settings Port, 38400, 8, 1, N, N
Ø Click OK
Passwords
The factory set passwords for the UV-H are:
System password:
Diagnostic password:
password
george
Software main window
UV-H Version 1.0 May 2011
11
Configuration dialog
Real Time Table view window
UV-H Version 1.0 May 2011
12
Logged Data Table view window
Sensor setting and Diagnostics view window
UV-H Version 1.0 May 2011
13
Gain Calibration dialog
UV-H Version 1.0 May 2011
14
Appendix B
Specifications
Enclosure
(Note: the layout of the back panel can vary slightly depending on the product configuration)
External View
20
20
236
237
17
Handles
360 278
Top
45 67
55
Side (tilted)
133 132
Front
15
Side
12 VDC IN
Rear
30
Description
Cast aluminum and pressed steel powder coated enclosure.
Dimensions
The padded feet add 15mm to the depth and together with the two carry handles give the product an overall size of:
422 mm W x 148 mm H x 422 mm D
UV-H Version 1.0 May 2011
15
Front View
SD data card
RS 232 serial port
Display
Power on/off
Adjustment button
Selection Button
Rear View
Gas Inlet & Exhaust
Optional relay & analogue
output connector
24VDC Input
422
17
360
237
45
133
15
UV-H Version 1.0 May 2011
16
Specifications
Calibrated Range
0-200 ppm or 0-400 mg/m3 Ozone
Precision
<±5% of reading above 0.2 ppm
±0.01 ppm below 0.2 ppm
Resolution
0.01 ppm
T90
< 60s
Sampling method
Sample flow rate
Brushless DC diaphragm pump
0.4 ±0.05 LPM
Inlet filter
5 µm pore size, 37 mm PTFE filter
Pneumatic connections
Kynar ¼” compression fittings
Wetted Materials
Kynar, Teflon PFA, quartz, aluminium, viton
Environmental operating conditions
Temperature
RH
0-40°C
0-95% RH (non-condensating)
Display
4-line digital display
Digital interface
RS232
ID
1 (default) user configurable from 1 to 99
Data logging
2 Gb SD card
Enclosure
Metal Instrument Case
378 x 236 x 132 mm
Power supply
Switch mode power supply 24 VDC
Input 90-260V AC; 47-63Hz
Software
PC data logging software
Options
RS232 to USB convertor (R53)
Spare inlet filters (25 pack) (R12)
10m x 6.25 mm OD PFA tubing (R66)
Relay and analog output board with 0-5V 12 bit (0-200ppm)
and setpoint controlled 30V DC 2A relay
UV-H Version 1.0 May 2011
17


