1
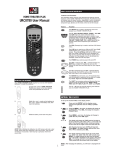
OFA 10L with Learning Owners Manual.fm Page 0 Thursday, January 27, 2005 1:34 PM
10-Device Universal Remote with Learning
Control Remoto Universal de 10 Dispositivos
con Aprendizaje
User’s Guide
Guía del Usuario
OFA 10L with Learning Owners Manual.fm Page 1 Thursday, January 27, 2005 1:34 PM
OWNER’S MANUAL
TABLE OF CONTENTS
Introduction . . . . . . . . . . . . . . . . . . . . . . . . . . . . . . . .2
Features and Functions . . . . . . . . . . . . . . . . . . . . . . .2
Key Charts . . . . . . . . . . . . . . . . . . . . . . . . . . . . . . .3
Device Table . . . . . . . . . . . . . . . . . . . . . . . . . . . . . .5
Installing Batteries . . . . . . . . . . . . . . . . . . . . . . . . . . .6
Setting Up Your Components . . . . . . . . . . . . . . . . . . .7
Programming Combo Device Control . . . . . . . . . . . . .8
Searching for Your Code. . . . . . . . . . . . . . . . . . . . . . .9
Checking the Codes . . . . . . . . . . . . . . . . . . . . . . . . . .9
Using Macros. . . . . . . . . . . . . . . . . . . . . . . . . . . . . . .10
Programming a Favorite Channel . . . . . . . . . . . .10
Programming a Master Power Macro . . . . . . . . .10
To Program the Master Power Macro. . . . . . .10
To Operate Master Power Macro . . . . . . . . . .11
Programming a Macro on a Device Key . . . . . . .11
To Program the Device Key Macro . . . . . . . . .11
To Operate the Device Key Macro. . . . . . . . . .11
Clearing a Macro . . . . . . . . . . . . . . . . . . . . . . . . .11
Using Channel Scan . . . . . . . . . . . . . . . . . . . . . . . . .12
Programming Favorite Channel Scan. . . . . . . . . . . .12
Using Learning . . . . . . . . . . . . . . . . . . . . . . . . . . . . .12
Learning Precautions. . . . . . . . . . . . . . . . . . . . . .12
Programming a Learning Key . . . . . . . . . . . . . . .13
Deleting Functions from the Learning Keys . . . .13
Re-assigning Device Keys. . . . . . . . . . . . . . . . . . . . .14
Using Keymover. . . . . . . . . . . . . . . . . . . . . . . . . . . . .14
Programming Keymover . . . . . . . . . . . . . . . . . . .15
Restoring Keymoved Keys to Default Settings. . .15
Restoring a Single Keymoved Key . . . . . . . . .15
Restoring All Keymoved Keys in a Single Mode .
15
Changing Volume Lock . . . . . . . . . . . . . . . . . . . . . . .15
Locking Volume Control to One Mode (Global
Volume Lock) . . . . . . . . . . . . . . . . . . . . . . . . . . . .15
Unlocking Volume Control for a Single Device
(Individual Volume Unlock) . . . . . . . . . . . . . . . . .16
Unlocking All Volume Control (Restoring Default
Setting). . . . . . . . . . . . . . . . . . . . . . . . . . . . . . . . .16
Restoring Factory Default Settings . . . . . . . . . . . . .16
About Upgrading . . . . . . . . . . . . . . . . . . . . . . . . . . . .16
Upgrade Exclusions . . . . . . . . . . . . . . . . . . . . . . .17
Troubleshooting. . . . . . . . . . . . . . . . . . . . . . . . . . . . .17
FCC Compliance . . . . . . . . . . . . . . . . . . . . . . . . . . . .18
Limited Warranty. . . . . . . . . . . . . . . . . . . . . . . . . . . .19
Manufacturer’s Codes (Códigos del Fabricante) . . .43
Setup Codes for Audio Amplifiers (Códigos de
Configuración para Amplificadores de Audio) . .43
Setup Codes for Cable Converters (Códigos de
Configuración para Cajas/Convertidores de Cable)
43
Setup Codes for Cable/PVR/DVR Combos (Códigos
de Configuración para Aparatos Combinados
Cajas/Convertidores de Cable/PVR/DVR). . . . . . 45
Setup Codes for CD Players (Códigos de
Configuración para Reproductores de CDs) . . . 45
Setup Codes for CD-Rs (Códigos de Configuración
para Reproductores de CD-Rs) . . . . . . . . . . . . . 46
Setup Codes for Home Automation (Códigos de
Configuración para la Automatización del Hogar)
46
Setup Codes for Miscellaneous Audio (Códigos de
Configuración para Componentes Variados de
Audio) . . . . . . . . . . . . . . . . . . . . . . . . . . . . . . . . . 47
Setup Codes for Video Accessories (Códigos de
Configuración para Accesorios de Vídeo) . . . . . 47
Setup Codes for HDTV Decoders (Códigos de
Configuración para Decodificadores de Alta
Definición (HDTV)). . . . . . . . . . . . . . . . . . . . . . . . 48
Setup Codes for Audio Amp/Tuners (Códigos de
Configuración para Amplificadores de Audio/
Sintonizadores). . . . . . . . . . . . . . . . . . . . . . . . . . 48
Setup Codes for Satellite Receivers (Códigos de
Configuración para Receptores de Satélite) . . . 50
Setup Codes for DBS/PVR/DVR Combos (Códigos
de Configuración para Aparatos Combinados DBS/
PVR/DVR). . . . . . . . . . . . . . . . . . . . . . . . . . . . . . . 50
Setup Codes for TVs (Códigos de Configuración
para Televisores) . . . . . . . . . . . . . . . . . . . . . . . . 51
Setup Codes for TV/VCR Player Combos (Códigos
de Configuración para Aparatos Combinados TV/
VCR) . . . . . . . . . . . . . . . . . . . . . . . . . . . . . . . . . . 55
Setup Codes for TV/DVD Player Combos (Códigos
de Configuración para Aparatos Combinados TV/
DVD) . . . . . . . . . . . . . . . . . . . . . . . . . . . . . . . . . . 55
Setup Codes for TV/VCR/DVD Player Combos
(Códigos de Configuración para Aparatos
Combinados TV/VCR/DVD). . . . . . . . . . . . . . . . . . 55
Setup Codes for VCRs (Códigos de Configuración
para Videograbadoras). . . . . . . . . . . . . . . . . . . . 56
Setup Codes for DVD/PVR/DVR Combos (Códigos
de Configuración para Aparatos Combinados DVD/
PVR/DVR). . . . . . . . . . . . . . . . . . . . . . . . . . . . . . . 58
Setup Codes for DVD/VCR Combos (Códigos de
Configuración para Aparatos Combinados DVD/
Videograbadora). . . . . . . . . . . . . . . . . . . . . . . . . 58
Setup Codes for PVR/DVRs (Códigos de
Configuración para PVR/DVRs, Grabadores
Personales en Disco Duro). . . . . . . . . . . . . . . . . 58
Setup Codes for DVD Players (Códigos de
Configuración para Reproductores DVD). . . . . . 59
Setup Codes for Home-Theatre-in-a-Box (HTiB)
(Códigos de Configuración para Dispositivo
Sistema de Teatro en Casa) . . . . . . . . . . . . . . . . 61
Table of Contents
1
OFA 10L with Learning Owners Manual.fm Page 2 Thursday, January 27, 2005 1:34 PM
ONE FOR ALL 10L UNIVERSAL REMOTE CONTROL WITH LEARNING
Setup Codes for DVD-RW Players (Códigos de
Configuración para Reproductores DVD-RW) . . 62
Setup Codes for DVD-R Players (Códigos de
Configuración para Reproductores DVD-R) . . . . 62
Setup Codes for Media Center PCs (Códigos de
Configuración para Computadoras Centro de
Entretenimiento Multimedia) . . . . . . . . . . . . . . . 62
INTRODUCTION
The One For All 10L Universal Remote
Control with Learning (URC-10820 B00) is
pre-programmed with the latest library of
codes, and it is designed to operate up to ten
home entertainment devices, including TV,
video, DVD, Cable, Satellite and audio
components. The remote control requires
four (4) new AAA alkaline batteries (not
included) and easy programming to control
your devices. For best results, please read
and perform all instructions listed here.
Also, keep these instructions for future
reference.
2
Introduction
FEATURES AND FUNCTIONS
Use the Key Charts (on the next page) to
learn how to use the universal features and
functions of the One For All 10L Universal
Remote Control with Learning (URC-10820
B00).
OFA 10L with Learning Owners Manual.fm Page 3 Thursday, January 27, 2005 1:34 PM
OWNER’S MANUAL
KEY CHARTS
The LED (red light),
which is located
underneath the
POWER Key, blinks to
show that the remote
control is working
and is sending
signals.
Press TV, CBL, SAT,
VCR, DVD, CD, PVR,
AUD, AUX1 or AUX2
once to select a
desired home
entertainment device
to control.
Press POWER once to
turn on or off the
selected device. For
master power control,
see “Programming a
Master Power Macro”
on page 10.
Press MENU once to
display your selected
device’s main menu.
Use GUIDE to display
your selected device’s
program guide or
setup menu.
Use EXIT to exit from
your selected device’s
guide or menu.
Use INFO to display
the current channel
and program
information.
Use the Cursor Keys
to move the cursor in
the program guide
and menu screens.
Use OK to choose
options from your
selected device’s
menu or guide.
In the RCVR/AMP
mode, use OK to set
the surround
sound.Use
(or
) to adjust
the volume higher (or
lower).Use
(or ) to adjust the
balance left (or right).
Use VOL + (or VOL -)
to raise (or lower) the
sound volume.
Press MUTE once to
turn the sound off or
on.
In TV, VCR, DVD, CBL,
or SAT modes, use FAV
to scan favorite
channels and/or all
channels. (See “Using
Channel Scan” on
page 12 and
“Programming
Favorite Channel
Scan” on page 12.)
Features and Functions
3
OFA 10L with Learning Owners Manual.fm Page 4 Thursday, January 27, 2005 1:34 PM
ONE FOR ALL 10L UNIVERSAL REMOTE CONTROL WITH LEARNING
Use CH + (or CH -) to
select the next higher
(or lower) channel.
Press PREV once to
recall the last-viewed
channel and to page
back one screen on
the main menu.
In the AUD, DVD and
CD modes, use DISC
to change disk (if
available on your
device).
Use the keypad (1 ~ 9
and 0) to directly
select channels (e.g.,
009 or 031).
In the AUD mode, use
the keypad (1 ~ 9
and 0) to select audio
sources 1 through 10.
4
Use the Transport
Keys to control your
PVR/DVR, VCR,
DVD, or CD player, or
VOD (Video On
Demand) if available
on your cable or
satellite service.
Press REC to record a
DVD or VCR
program.
After programming,
press M1 ~ M3 once
to run a desired
macro (see “Using
Macros” on page 10).
Use the L1 ~ L3 keys
to learn new
functions. See “Using
Learning” on page 12
for the learning
feature.
Press ENTER once
after entering the
channel numbers on
some TVs.
Use PIP to switch the
Picture-In-Picture
feature on or off (if
available on your
TV).
In the CD mode, use
ENTER to add 10 to
the digit entry (e.g.,
ENTER and 7 is 17).
Use MOVE to move the
window picture to
different positions in
the main picture.
Use INPUT to switch
the TV's input to view
TV or video
programs.
Use SWAP to switch
images and sound
between the main
and window pictures.
Features and Functions
OFA 10L with Learning Owners Manual.fm Page 5 Thursday, January 27, 2005 1:34 PM
OWNER’S MANUAL
Press SLEEP to
activate your device's
sleep timer (not
available for all
devices).
Use CC to turn on
closed caption or
subtitles. If you have a
PVR/DVR device, use
SHOWS to access your
list of recorded
shows.
Use FORMAT to
change the Aspect
Ratio of your display
(16:9). If you have a
PVR/DVR device, use
LIVE to return to live
programming.
Use +100 if your
device requires this
key to access
channels greater than
100 (same as your
original device). Use
the (-) function to
access your High
Definition Channels
(e.g., if your HD
channel is 2.5, press 2
(-) 5).
Use SET for all
programming
sequences.
DEVICE TABLE
NOTE: Please refer to the table to the right
when performing the instructions in “Setting
Up Your Components” on page 7.
After programming, the One For All 10L
Universal Remote Control with Learning
(URC-10820 B00) will be able to control the
following types of devices:
DEVICE KEY CONTROLS THESE
DEVICES
TV (including HDTV,
Plasma and LCD), TV/
DVD Combo, TV/VCR
Combo
Satellite, Satellite/PVR/
DVR, Video Accessories
(Including Media Center
PCs)
Cable, Cable/PVR/DVR,
Video Accessories
(Including Media Center
PCs)
VCR, DVD, DVD/R,
HTIB, DVD/VCR
DVD, VCR, DVD/R,
HTIB, DVD/VCR
CD, Home Automation,
CD/R (Recorders)
PVR/DVR Only Devices
Tuner, Amp, Misc. Audio,
HTIB (Home Theater In
A Box)
Tuner, Amp, Misc. Audio,
HTIB (Home Theater In
A Box)
Media Center PCs,
Satellite, Satellite/PVR/
DVR, Cable, Cable/PVR/
DVR, Video Accessories
Features and Functions
5
OFA 10L with Learning Owners Manual.fm Page 6 Thursday, January 27, 2005 1:34 PM
ONE FOR ALL 10L UNIVERSAL REMOTE CONTROL WITH LEARNING
INSTALLING BATTERIES
1.
6
2.
Obtain four (4) new AAA alkaline
batteries. Match the + and – marks on
the batteries to the + and – marks in
the battery case, then insert the new
batteries.
3.
Slide the battery cover back into place.
The tab should click when the cover is
locked.
On the remote control's back, push
down on the top of the battery cover
(where indicated by the arrows). Then
slide the battery cover out.
Installing Batteries
OFA 10L with Learning Owners Manual.fm Page 7 Thursday, January 27, 2005 1:34 PM
OWNER’S MANUAL
4.
Test the remote control by first
pressing POWER and then any mode
key (e.g., TV). If the batteries are
inserted correctly, the LED (red light)
will blink once.
NOTE: When batteries are low, the remote
control will blink 5 times after each key press.
The remote will stop operating when the
batteries need replacement. The permanent
memory retention ensures that your codes
are stored permanently even during battery
replacement.
(Home theater in a box), or a tuner. Use the
AUX2 key to program control of a Media
Center PC (with IR receiver). Alternately, use
the AUX1 or AUX2 key to program control of a
second device type (e.g., a second VCR; see
“Re-assigning Device Keys” on page 14).
3.
Press and hold SET until the LED (red
light) blinks twice, then release SET.
4.
Use the “Manufacturer’s Codes
(Códigos del Fabricante)” (starting on
page 43) to locate the type of device
and brand name and then enter the
first four-digit code for your device. If
performed correctly, the LED will
blink twice.
SETTING UP YOUR
COMPONENTS
The One For All 10L Universal Remote
Control with Learning (URC-10820 B00) is
preprogrammed at the factory to operate a
Sony TV, DVD and VCR, an RCA DirecTV
Satellite box, a Motorola Cable Box, a Sony
Tivo PVR, a Pioneer Receiver and CD, a
Sony Receiver (in the AUX1 Mode), and a
Microsoft Media Center PC (in the AUX2
Mode). To control devices other than the
default brands, perform the following steps;
otherwise skip this section.
NOTE: For Combo Device control, see the next
section.
1.
Turn on a device (e.g., TV, VCR or DVD
player) and, if applicable, insert media
(e.g., cassette or disc).
NOTE: Please read steps 2 through 4
completely before proceeding. Highlight or
write down the codes and device you wish to
program before starting step 2.
2.
On the remote control, press a device
key once (i.e., TV, CBL, SAT, VCR, DVD,
CD, PVR, AUD, AUX1 or AUX2).
NOTE: Use the AUX1 key to program control of
an audio device such as an AMP, HTIB
NOTE: If the LED did not blink twice, repeat
steps 2 through 4 and enter the same code
again.
5.
Aim the remote control at the device
and press POWER once. The device
should turn off. If it does not, repeat
steps 2 through 5, trying each code for
your brand until you find one that
works. If it still doesn’t work, try
“Searching for Your Code” on page 9.
NOTE: If the device does not have a POWER
key, press the
6.
(PLAY) key.
Repeat steps 1 through 5 for each
device you want to control. For future
reference, write down each working
device code in the following boxes:
TV Code:
Brand Name:_____________________
VCR Code:
Brand Name:_____________________
Setting Up Your Components
7
OFA 10L with Learning Owners Manual.fm Page 8 Thursday, January 27, 2005 1:34 PM
ONE FOR ALL 10L UNIVERSAL REMOTE CONTROL WITH LEARNING
CD Code:
Brand Name:_____________________
AUD Code:
Brand Name:_____________________
CBL Code:
Brand Name:_____________________
SAT Code:
Brand Name:_____________________
DVD Code:
Brand Name:_____________________
PVR Code:
Brand Name:_____________________
AUX1 Code:
Aux.1 Device Type:_________________
Brand Name:_____________________
PROGRAMMING COMBO
DEVICE CONTROL
You can set the One For All 10L Universal
Remote Control with Learning (URC-10820
B00) to control your combo devices such as
TV/VCR, TV/DVD, Satellite/PVR/DVR,
Home-Theater-In-A-Box, and many others
with a single code. For a complete list of
combo devices, refer to the “Device Table”
on page 5.
NOTE: Some combo device types have codes
that you can program on separate device keys.
For example, you can program DVD Player/
VCR Combo codes under the VCR or DVD
mode keys. See “Setup Codes for DVD/VCR
Combos (Códigos de Configuración para
Aparatos Combinados DVD/
Videograbadora)” on page 58; note that there
are two sections under this device type.
Perform the following instructions to
control a TV/DVD Combo:
1.
NOTE: Please read steps 2 through 4
completely before proceeding. Highlight or
write down the codes and device you wish to
program before starting step 2.
2.
On the remote control, press TV.
3.
Press and hold SET until the LED (red
light) blinks twice, and then release
SET.
4.
Use the Setup Codes under the TV/
DVD Combos heading (use codes listed
as “TV Codes”) on page 55. Locate the
brand name and then enter the first
four-digit code for your device. If
performed correctly, the LED will blink
twice.
AUX2 Code:
Aux.2 Device Type:_________________
Brand Name:_____________________
8
Programming Combo Device Control
Turn on the TV/DVD Combo and insert
a video cassette.
OFA 10L with Learning Owners Manual.fm Page 9 Thursday, January 27, 2005 1:34 PM
OWNER’S MANUAL
NOTE: If the LED did not blink twice, repeat
steps 2 through 4 and enter the same code
again.
5.
Aim the remote control at the device
and press POWER once. It should turn
off. If the device does not respond,
repeat steps 2 through 4, trying each
code for your brand until you find one
that works. If it still does not work, try
“Searching for Your Code”, below.
SEARCHING FOR YOUR
CODE
If your device does not respond to the
remote control after trying all codes listed
for your brand, or if your brand is not listed
at all, try searching for your code. For
example, to search for a code for your TV:
1.
Turn on your TV and on the remote
control, press TV once.
2.
Press and hold SET until the LED (red
light) blinks twice, then release SET.
3.
Enter 9 9 1. The LED will blink twice.
4.
Select a test function from the list
below or use the default test function
(POWER) and skip step 4.
NOTE: The keys that can be used for the test
function are 0, 1, 2, 3, POWER, VOL +, Play,
Stop and Mute.
5.
Press CH+ to begin searching for your
code. Stop the search when the device
turns off or performs the function
selected in step 4 (if other than
POWER).
NOTE: In the search mode, the remote control
will send IR codes from its library to the
selected device, starting with the most
popular code first. Every press of CH+ will
send a new code. If you go past the code that
performed the Test Function, you can go back
by pressing CH-.
6.
To lock in the code, press and release
the SET key. The LED blinks twice.
7.
To search for the codes of your other
devices, repeat steps 1 through 6, but
substitute the appropriate device key
for the device you are searching for in
step 1.
CHECKING THE CODES
If you have set up the remote control using
the Searching For Your Code procedure, you
may need to find out which four-digit code
is operating your equipment. For example,
to find out which code is operating your TV:
1.
On the remote control, press TV once.
2.
Press and hold SET until the LED (red
light) blinks twice, then release SET.
3.
Enter 9 9 0. The LED will blink twice.
4.
To view the code for the first digit,
press 1 once. Wait 3 seconds, count the
LED blinks (e.g., three blinks = 3) and
write down the number in the leftmost
box in the TV code boxes on page 7.
NOTE: If a code digit is 0, the LED will not
blink.
5.
Repeat step 4 three more times for
remaining digits. Use 2 for the second
digit, 3 for the third digit, and 4 for the
fourth digit. Write down the code
digits in the remaining TV code boxes
on page 7.
6.
To check for codes of other devices,
repeat steps 1 through 5, but substitute
the appropriate device key for each
device you are checking. Write down
the device’s code digits in the
appropriate code boxes on page 7.
Searching for Your Code
9
OFA 10L with Learning Owners Manual.fm Page 10 Thursday, January 27, 2005 1:34 PM
ONE FOR ALL 10L UNIVERSAL REMOTE CONTROL WITH LEARNING
USING MACROS
the channel, also press ENTER after the
channel number (e.g., 0 5 2 ENTER).
You can program the M1 ~ M3 keys on your
One For All 10L Universal Remote Control
with Learning (URC-10820 B00) to perform
repetitive, time-consuming operations for
easy, convenient access through the press of
a single key.
NOTE: You can program up to 20 functions on
the macro keys.
Macro keys are ideal for home theater
operations, setting a favorite channel, guide
steps, or other multiple functions you would
like to control with one key press. Moreover,
each macro key can hold up to a total of 20
key presses.
NOTE: Programming a new macro over an
existing one will erase the original macro.
PROGRAMMING A FAVORITE CHANNEL
With so many channels available through
your cable or satellite system provider, you
can program a macro that directly selects a
favorite channel with one key press.
For example, let's assume your favorite cable
programs are on channel 52. Use the
following instructions to program a macro
key for direct access of this channel:
6.
Now when you press M1, you will instantly
see cable channel 52 on your TV set.
PROGRAMMING A MASTER POWER MACRO
In its default state, the POWER key on the
One For All 10L Universal Remote Control
with Learning (URC-10820 B00) will
individually power your home
entertainment devices on or off. However,
you can also program a Master Power Macro
onto the POWER key that will sequentially
turn on or off all the devices with a single
key press.
To Program the Master Power Macro
1. Press and hold SET until the LED (red
light) blinks twice, then release SET.
2.
Enter 9 9 5. The LED will blink twice.
3.
Press the POWER key once.
4.
For the first device you want in the
power-on sequence, press its device
key (e.g., TV) once.
5.
For the second device you want in the
power-on sequence, press its device
key (e.g., CBL) once.
6.
For the Third device you want in the
power-on sequence, press its device
key (e.g., AUD) once.
7.
Repeat step 6 up to seven more times to
add the other desired devices to the
power-on sequence (e.g., SAT, VCR,
DVD, CD, PVR, AUX1 and AUX2).
8.
To save the settings and exit the
program, press and hold SET until the
LED blinks twice, then release SET.
NOTE: This example assumes the TV is tuned
to the correct Input to view your cable box.
1.
Press and hold SET until the LED (red
light) blinks twice, then release SET.
2.
Enter 9 9 5. The LED will blink twice.
3.
Select an open macro key (e.g., M1)
and press it once.
4.
Press CBL once.
5.
Enter the channel number: 5 2.
NOTE: If you have access to over 100 channels,
enter 0 5 2. Moreover, if the original remote
control requires you to press ENTER to change
10 Using Macros
Press and hold SET until the LED blinks
twice, then release SET.
OFA 10L with Learning Owners Manual.fm Page 11 Thursday, January 27, 2005 1:34 PM
OWNER’S MANUAL
To Operate Master Power Macro
1. After programming, point the remote
control at the devices and press POWER
for at least 2 seconds to sequentially
turn on (or off) your devices.
1.
Press and hold SET until the LED (red
light) blinks twice, then release SET.
2.
Enter 9 9 5. The LED will blink twice.
3.
Press the DVD key once.
NOTE: When you press POWER for less than 2
seconds, a power command will only be sent
to the currently-selected device. This allows
you to still individually power devices on or
off.
4.
Press the AUD key (to select the
receiver).
5.
Press digit 3 (for the input), and press
DVD (to return control to the DVD key).
6.
To save the settings and exit the
program, press and hold SET until the
LED blinks twice, then release SET.
2.
Devices will turn on (or off) according
to your programmed sequence.
NOTE: The currently-selected device will
always turn on or off first, followed by the
remaining programmed sequence. After the
master power sequence has been completed,
the remote control will be set to control the
first powered-on device.
NOTE: If one or more devices does not have a
POWER key, the power off/on sequence may
be slightly delayed when the remote control
signals the device(s).This action is normal.
PROGRAMMING A MACRO ON A DEVICE KEY
In its default state, when you press a device
key (e.g., TV) on the One For All 10L
Universal Remote Control with Learning
(URC-10820 B00), the remote will switch to
that selected device. However, you can also
program a Macro onto the Device keys to
allow for additional functionality. For
example, if your devices are connected to a
receiver unit, you can program a Device
macro to switch the receiver's input to the
selected device.
To Program the Device Key Macro
For example, let's assume that your DVD in
connected to Input 3 of your receiver. You
can program a macro that will switch the
receiver's input to input 3 when you press
and hold the DVD key.
NOTE: You can program up to 20 functions on
the Device Key Macro. You can program a
device Key Macro onto any device key.
To Operate the Device Key Macro
1. After programming, point the remote
control at the receiver and press the
DVD key for at least 2 seconds. This will
switch the Receiver's input to input 3,
to allow you to view the DVD.
NOTE: When you press the device key (e.g.,
DVD) for less than 2 seconds, the remote will
only select the DVD mode but will not change
the Input on the receiver. This allows you to
still change modes while using the remote.
NOTE: After executing the Device Key Macro,
the remote will return to the DVD mode, to
allow the control of the DVD device.
CLEARING A MACRO
1.
Press and hold SET until the LED (red
light) blinks twice, then release SET.
2.
Enter 9 9 5. The LED will blink twice.
3.
Select a macro key (e.g., M1, M2, M3
POWER or any device key) you want to
clear and press it once.
Using Macros 11
OFA 10L with Learning Owners Manual.fm Page 12 Thursday, January 27, 2005 1:34 PM
ONE FOR ALL 10L UNIVERSAL REMOTE CONTROL WITH LEARNING
4.
Press and hold SET until the LED blinks
twice, then release SET. The macro is
now deleted but the keys (in the case of
POWER and device keys), will retain
their original function.
NOTE: Only channels of one mode can be
stored for Favorite Channel Scan.
1.
On the remote control, press TV, VCR,
DVD, CBL or SAT once.
2.
Press and hold SET until the LED (red
light) blinks twice, then release SET.
3.
Enter 9 9 6. The LED will blink twice.
4.
Use the keypad to enter a favorite
channel number (e.g., 031). Then press
SET once.
USING CHANNEL SCAN
In the TV, VCR, DVD, CBL and SAT modes, use
the FAV key to start a 3-second scan of all
favorite channels (if programmed,
“Programming Favorite Channel Scan” on
page 12) and/or all channels for the selected
mode.
1.
Press TV, VCR, DVD, CBL or SAT once.
NOTE: If the original remote control required
pressing an ENTER key to change the channel,
also press the ENTER key after the channel
number (e.g., 0 3 1 ENTER).
2.
Press FAV once.
5.
•
•
3.
If desired, repeat step 4 (in this
section) for each favorite channel to be
stored, up to a total of 10 channels.
If Favorite Channel Scan has been
set up, scanning of favorite
channels will start and cycle
through stored channels, then
proceed to the next channel up
and cycle through all channels on
the selected device.
NOTE: If you try entering more than 10
channels, the remote control will
automatically exit programming.
If Favorite Channel Scan has not
been set up, scanning will start
with the current channel, then
proceed to the next channel up
and cycle through all channels on
the selected device.
USING LEARNING
To stop scanning channels at any time,
press any key once.
PROGRAMMING FAVORITE
CHANNEL SCAN
In the TV, VCR, DVD, CBL and SAT modes, you
can store a list of up to 10 favorite channels,
in any order, that will be immediately
scanned when you press FAV (see “Using
Channel Scan” on page 12).
12 Using Channel Scan
6.
To exit programming, press and hold
SET for 3 seconds. The LED will blink
twice.
The One For All 10L Universal Remote
Control with Learning (URC-10820 B00)
includes a Learning feature so you can add
functions that are unique to your home
entertainment devices (e.g., DVD EJECT) on
the L1 ~ L3 keys. However, there are some
considerations.
LEARNING PRECAUTIONS
•
Your original remote controls must be
in working order for learning to work
properly.
OFA 10L with Learning Owners Manual.fm Page 13 Thursday, January 27, 2005 1:34 PM
OWNER’S MANUAL
•
Learned keys are mode specific, so
each one can store a unique function
for each mode.
•
Learned keys can be used in macros
(see “Using Macros” on page 10).
•
Do not use the following keys for
learning: Device Keys, SETUP, FAV, or
Record (•) Key.
•
Learning capacity is approximately 50
to 70 keys, depending on the code
being learned.
•
If both learned and keymoved
functions are assigned to the same key,
the last programmed function is
stored.
•
A learned function cannot be used as a
source for Keymover (see “Using
Keymover” on page 14).
•
•
Certain device codes are not learnable
including multi-frequency types, some
high frequency ones, and other
unusual formats.
For optimum learning, avoid high
levels of ambient light such as natural
sunlight or energy-efficient fluorescent
lights.
NOTE: Please have your original remote
controls handy before programming learning.
Be sure to press each teaching key within 5
seconds of the previous entry. Otherwise, the
One For All 10L Universal Remote Control
with Learning (URC-10820 B00) exits the
learning mode.
4.
Press the desired key once (e.g., L1) to
store a feature to be learned. The LED
will turn on and remain on for 5
seconds. If the LED does not turn on,
go back to step 1 and start again.
5.
Place your original remote control
(e.g., TV remote control) head-to-head
(about 2" apart) from the One For All
10L Universal Remote Control with
Learning (URC-10820 B00).
6.
On your original remote control, press
and hold the key (i.e., feature) to be
learned until the LED on the One For
All 10L Universal Remote Control with
Learning (URC-10820 B00) turns off
and then blinks twice. If the LED does
not blink twice, repeat steps 3 through
6.
7.
To learn functions onto other learning
keys (e.g., L2 and L3), repeat steps 3
through 6.
8.
To lock in new feature(s) on the One
For All 10L Universal Remote Control
with Learning (URC-10820 B00), press
and hold SET until the LED blinks
twice, then release SET.
9.
To test a learned feature, press a device
key (e.g., TV) once where the learning
mode was assigned. Then press the
learning key (e.g., L1) where the
learned feature is stored.
DELETING FUNCTIONS FROM THE LEARNING
KEYS
1.
Press and hold SET until the LED (red
light) blinks twice, then release SET.
2.
Enter 9 7 6. The LED will blink twice.
3.
Press the device key once where the
learned feature is stored (e.g., TV).
PROGRAMMING A LEARNING KEY
1.
Press and hold SET until the LED (red
light) blinks twice, then release SET.
2.
Enter 9 7 5. The LED will blink twice.
3.
Press a device key once (e.g., TV) to
assign a mode for learning.
Using Learning 13
OFA 10L with Learning Owners Manual.fm Page 14 Thursday, January 27, 2005 1:34 PM
ONE FOR ALL 10L UNIVERSAL REMOTE CONTROL WITH LEARNING
4.
Press the learning key (e.g., L1) to be
deleted twice. The LED will blink twice
after the second press.
5.
To clear additional functions stored on
other learning keys, repeat steps 1
through 4 (in this section).
RE-ASSIGNING DEVICE
KEYS
You can set the One For All 10L Universal
Remote Control with Learning (URC-10820
B00) to control a second TV, VCR, DVD
player, or other device. For example, to
control a TV, a cable box, and two DVDs, you
will need to re-assign the unused AUX1 key
to operate the second DVD as follows:
1.
On the remote control, press and hold
SET until the LED (red light) blinks
twice, then release SET.
2.
Enter 9 9 2. The LED will blink twice.
3.
Press DVD once, then press AUX1 once.
4.
The AUX1 key is now ready to be
programmed for your second DVD. See
“Setting Up Your Components” on
page 7.
To re-assign other device keys to the AUX1
key, repeat steps 1 through 4 by substituting
the sequence from the following chart:
To Re-Assign
Device
AUX1 as 2nd
TV key:
AUX1 as 2nd
VCR key:
AUX1 as 2nd
CBL key:
AUX1 as 2nd
SAT key:
AUX1 as 2nd
CD key:
AUX1 as 2nd
PVR key:
AUX1 as 2nd
AUD key:
AUX1 as 2nd
AUX2 key:
Perform Sequence
SET - 9 - 9 - 2 - TV AUX1
SET - 9 - 9 - 2 VCR - AUX1
SET - 9 - 9 - 2 CBL - AUX1
SET - 9 - 9 - 2 SAT - AUX1
SET - 9 - 9 - 2 - CD AUX1
SET - 9 - 9 - 2 - PVR AUX1
SET - 9 - 9 - 2 - AUD AUX1
SET - 9 - 9 - 2 - AUX2
- AUX1
You can also re-assign another unused
device key by substituting an open key for
the AUX1 key in the above chart and
performing the sequence. For example, to
re-assign an unused CBL key as a 2nd CD
key, perform SET - 9 - 9 - 2 - CD CBL. When a re-assignment is done, the LED
(red light) will blink twice to confirm your
choice. At that time, you will need to
program the remote control for the new
device (see “Setting Up Your Components”
on page 7).
USING KEYMOVER
The One For All 10L Universal Remote
Control with Learning (URC-10820 B00)
includes a Keymover feature that allows you
to map (or copy) keys from one mode (i.e.,
source mode) to another mode (i.e.,
destination mode).
14 Re-assigning Device Keys
OFA 10L with Learning Owners Manual.fm Page 15 Thursday, January 27, 2005 1:34 PM
OWNER’S MANUAL
NOTE: The following keys cannot be used as a
source or destination: TV, CBL, SAT, VCR, DVD,
CD, PVR, AUD, AUX1, AUX2, FAV, and SET.
PROGRAMMING KEYMOVER
For example, if your VCR does not have
volume control, you can map those keys
(i.e., VOL +, VOL -, and MUTE) from the TV
mode to the VCR mode as follows:
1.
Press and hold SET until the LED (red
light) blinks twice, then release SET.
2.
Enter 9 9 4. The LED will blink twice.
3.
For the source mode, press TV once.
4.
For the source key, press VOL + once.
5.
For the destination mode, press VCR
once.
6.
For the destination key, press VOL +
once.
7.
The LED will blink twice, indicating
the keymoved sequence is correct.
8.
Repeat steps 1 through 7 twice more to
map remaining volume control keys,
substituting VOL - and MUTE as source
and destination keys in steps 4 and 6.
Upon completion of the above procedure,
you can now use your One For All 10L
Universal Remote Control with Learning
(URC-10820 B00) to control the TV’s
volume and MUTE in the VCR mode, as well
as in the TV mode.
4.
Restoring All Keymoved Keys in a Single
Mode
1. Press and hold SET until the LED (red
light) blinks twice, then release SET.
2.
Enter 9 9 4. The LED will blink twice.
3.
Press the destination mode twice
(where keymoved keys are stored). The
LED will blink twice.
CHANGING VOLUME LOCK
The One For All 10L Universal Remote
Control with Learning (URC-10820 B00) is
set at the factory for independent volume
control of each selected device.
However, you may change the Volume Lock
setting to Global Volume Lock so that a
device’s volume will be locked to one mode
(e.g., to control TV volume in all other
modes). After that, if desired, you can
perform Individual Volume Unlock on a
selected device to set its volume control for
independent operation.
LOCKING VOLUME CONTROL TO ONE MODE
(GLOBAL VOLUME LOCK)
1.
Press and hold SET until the LED (red
light) blinks twice, then release SET.
2.
Enter 9 9 3 and then press any mode
key once (e.g., TV). The LED will blink
twice.
3.
Now, when you press VOL +, VOL -, or
MUTE, the volume of the selected
device (e.g., TV) will be controlled
regardless of the mode you have
selected.
RESTORING KEYMOVED KEYS TO DEFAULT
SETTINGS
Restoring a Single Keymoved Key
1. Press a device key that has a keymoved
key.
2.
Press and hold SET until the LED (red
light) blinks twice, then release SET.
3.
Enter 9 9 4. The LED will blink twice.
Press the destination key twice (where
the keymoved key is stored). The LED
will blink twice.
Changing Volume Lock 15
OFA 10L with Learning Owners Manual.fm Page 16 Thursday, January 27, 2005 1:34 PM
ONE FOR ALL 10L UNIVERSAL REMOTE CONTROL WITH LEARNING
UNLOCKING VOLUME CONTROL FOR A
SINGLE DEVICE (INDIVIDUAL VOLUME
UNLOCK)
RESTORING FACTORY
DEFAULT SETTINGS
1.
After performing Global Volume Lock
(see left), press a desired mode key
where you want volume to be unlocked
(e.g., AUD) and controlled within its
own mode.
2.
Press and hold SET until the LED (red
light) blinks twice, then release SET.
The One For All 10L Universal Remote
Control with Learning (URC-10820 B00)
includes a Setup Code Reset program. You
can use it to restore all your programmed
codes to factory settings and delete all
custom programming.
3.
Enter 9 9 3 and then press VOL - once.
The LED will blink four times.
4.
If desired, repeat steps 1 through 3 (of
this section) for each device that you
want volume to be unlocked.
5.
Now, after you select a device that has
volume unlocked (e.g., AUD), pressing
VOL +, VOL -, or MUTE, will control the
device’s volume only in its own mode.
UNLOCKING ALL VOLUME CONTROL
(RESTORING DEFAULT SETTING)
NOTE: Performing these instructions will
restore independent volume control for all
programmed devices (e.g., TV volume control
in TV mode, VCR volume in VCR mode, etc.).
1.
On the remote control, press and hold
SET until the LED (red light) blinks
twice, then release SET.
2.
Enter 9 9 3 and then press VOL + once.
The LED will blink four times.
3.
Volume will again be independently
controlled according to its default
states for all programmed devices.
16 Restoring Factory Default Settings
IMPORTANT: Executing this program erases
all code settings and all custom settings
including, Macros, Learned Keys,
Reassigned Device Keys, Keymoved Keys,
Favorite Channels, and all device settings.
1.
On the remote control, press and hold
SET until the LED (red light) blinks
twice, then release SET.
2.
Enter 9 8 0. The LED will blink four
times.
3.
Your remote is now ready for
programming.
ABOUT UPGRADING
The One For All 10L Universal Remote
Control with Learning (URC-10820 B00) has
the largest infrared code library available.
However, if you purchase a brand new home
entertainment or home automation device,
it may not respond to the codes stored in the
remote control's memory.
If this happens, please contact our Customer
Support department (see “Troubleshooting”
on page 17) to upgrade the remote control.
The Customer Support representative will
search our entire database for a code that
matches your device and instruct you how to
enter it into your One For All 10L Universal
Remote Control with Learning (URC-10820
B00).
OFA 10L with Learning Owners Manual.fm Page 17 Thursday, January 27, 2005 1:34 PM
OWNER’S MANUAL
If the code for your home entertainment or
home automation device is not in our
database, we will need to “capture” the code
for that device from its original remote
control. A new code would then be created
and entered into your One For All 10L
Universal Remote Control with Learning
(URC-10820 B00). If necessary, the
Customer Support representative can
instruct you how to begin the capture
procedure.
TROUBLESHOOTING
PROBLEM:
LED (red light) does not
blink when you press a
key.
SOLUTION:
Replace batteries with four
new AAA alkaline
batteries.
PROBLEM:
LED (red light) blinks five
times after you press a key.
NOTE: One For All reserves the right to
replace a returned remote control with a new
one of equal or superior functionality.
SOLUTION:
Replace batteries with four
new AAA alkaline
batteries.
UPGRADE EXCLUSIONS
PROBLEM:
LED blinks when you
press a key, but home
entertainment device does
not respond.
SOLUTION:
Make sure the remote
control is aimed at your
home entertainment
device and is not farther
than 15 feet away.
PROBLEM:
The unit does not control
home entertainment
devices or commands are
not working properly.
SOLUTION:
Try all listed codes for the
device brands being set
up. Make sure they can be
operated with an infrared
remote control.
PROBLEM:
TV/VCR Combo does not
respond properly.
SOLUTION:
Use the VCR codes for your
brand. Some combo units
may require both a TV code
and a VCR code for full
operation.
•
Home entertainment or home
automation devices controlled by radio
frequency (RF/UHF), wired, or
ultrasonic remote controls. Only
devices controlled by infrared remote
controls are covered.
•
Home entertainment or home
automation devices not controlled by
remote controls.
•
Broken or defective product.
•
Products that operate over 100 kHz.
•
Infrared keyboards and infrared
pointing devices (such as mouse
substitutes).
•
All products for sale and/or use
outside the continental United States,
Hawaii, Alaska, or Canada.
Troubleshooting 17
OFA 10L with Learning Owners Manual.fm Page 18 Thursday, January 27, 2005 1:34 PM
ONE FOR ALL 10L UNIVERSAL REMOTE CONTROL WITH LEARNING
PROBLEM:
Changing channels does
not work properly.
SOLUTION:
If the original remote
control required pressing
ENTER to change channels,
then press ENTER on the
remote control after
entering the channel
number.
PROBLEM:
SOLUTION:
PROBLEM:
SOLUTION:
PROBLEM:
During learning, LED
emits a long blink after
pressing and holding key
to be learned.
Memory is full or a bad
capture has occurred.
Avoid high-ambient light
sources, such as direct
daylight and fluorescent
bulbs. Try readjusting
positions of remote
controls before performing
the procedure again.
Tried Searching For Your
Code method and still
could not find a working
code.
Clear the device key as
follows: Press and hold SET
until the LED (red light)
blinks twice, then
release.Next enter 9 9 2.
Then press the device key
to be cleared twice.Now
repeat the Searching for
Your Code method on page
9.
CH+ and CH- do not work
for your RCA TV.
18 FCC Compliance
SOLUTION:
Due to RCA design (19831987), only the original
remote control will operate
these functions.
PROBLEM:
No remote control of
volume.
SOLUTION:
See “Changing Volume
Lock” on page 15 to lock/
unlock volume.
PROBLEM:
If the above does not work.
SOLUTION:
Please contact us in any of
the following ways:
• Please visit:
www.oneforall.com
• If the above website is
not able to provide you
with the information
you need, please email
us at
[email protected]
and refer to
“Troubleshooting”
• Customer Support:
(330) 405-8516
Mon- Fri from 9AM to
5PM ET
FCC COMPLIANCE
This equipment has been tested and found
to comply with the limits for a class B digital
device, pursuant to part 15 of the FCC Rules.
These limits are designed to provide a
reasonable protection against harmful
interference in a residential installation.
This equipment generates, uses, and can
radiated radio frequency energy and if not
installed and used in accordance with the
instructions, may cause harmful
interference to radio communications.
OFA 10L with Learning Owners Manual.fm Page 19 Thursday, January 27, 2005 1:34 PM
OWNER’S MANUAL
However, there is no guarantee that
interference will not occur in a particular
installation. If this equipment does cause
harmful interference to radio or television
reception, which can be determined by
turning the equipment off and on, the user
is encouraged to try to correct the
interference by one or more of the following
measures:
•
Reorient or relocate the receiving
antenna.
•
Increase the separation between the
equipment and receiver.
•
Connect the equipment into an outlet
or a circuit different from that to which
the receiver is connected.
•
Consult the dealer or an experienced
radio/TV technician for help.
LIMITED WARRANTY
One For All® warrants, to the original
purchaser only, that this product will be free
from defects in materials and
workmanship, under normal use, for ninety
(90) days from the date of original
purchase.
This limited warranty is valid only on ONE
FOR ALL product purchased and used in
the United States of America or Canada, and
does not apply to products used for
industrial or commercial purpose.
The limited warranty does not cover
damage or failure caused by products or
services not supplied by ONE FOR ALL, or
which result from accident, misuse, abuse,
neglect, mishandling, misapplication, faulty
installation, set-up adjustment, improper
maintenance, alteration, maladjustment of
consumer controls, modifications,
commercial use, or that is attributable to
acts of God.
There are no express warranties except as
listed above. ONE FOR ALL SHALL NOT BE
LIABLE FOR INCIDENTAL OR
CONSEQUENTIAL DAMAGES RESULTING
FROM THE USE OF THIS PRODUCT OR
ARISING OUT OF ANY BREACH OF
WARRANTY. ALL EXPRESS AND IMPLIED
WARRANTIES, INCLUDING THE
WARRANTIES OF MERCHANTABILITY
AND FITNESS FOR A PARTICULAR
PURPOSE, ARE LIMITED TO THE
WARRANTY PERIOD SET FORTH ABOVE.
Some states do not allow the exclusion or
limitation of incidental or consequential
damages, or limitations on how long an
implied warranty lasts, so the above
exclusions or limitations may not apply to
you. This warranty gives you specific legal
rights and you may also have other rights
which vary from state to state.
To obtain warranty service for a defective
product during the warranty period, please
return the product, preferably in the
original carton, along with your purchase
receipt, to the store of original purchase. A
note detailing the complaint would be
helpful. The store, at its option, will replace
or repair this product if found to be
defective.
One For All: (330) 405-8655
ADDITIONAL INFORMATION
As you update your home entertainment
system, One For All® has a universal remote
control that will fit your needs. Please visit
our Website at WWW.Oneforall.com to see
our full product lineup.
ONE FOR ALL® is the registered trademark
of Universal Electronics Inc. Computime
Limited Warranty 19
OFA 10L with Learning Owners Manual.fm Page 20 Thursday, January 27, 2005 1:34 PM
ONE FOR ALL 10L UNIVERSAL REMOTE CONTROL WITH LEARNING
International Ltd. is the Licensee of the ONE
FOR ALL® brand for USA and Canada.
Copyright 2005 by Universal Electronics Inc.
No part of this publication may be
reproduced, transmitted, transcribed,
stored in any retrieval system, or translated
to any language, in any form or by any
means, electronic, mechanical, magnetic,
optical, manual, or otherwise, without the
prior written permission of Universal
Electronics Inc.
URC-10820
20 Additional Information
01/05