1
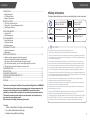
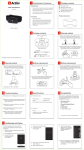
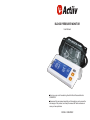
BLOOD PRESSURE MONITOR
User Manual
Thank you very much for selecting the Actiiv Blood Pressure Monitor
ACMMD002.
Please read the user manual carefully and thoroughly so as to ensure the
safe usage of this product, and keep the manual for further reference in
case you have problems.
MODEL: ACMMD002
CATALOGUE
INTRODUCTION
INTRODUCTION................................................................................................................ 1
Safety Information
LCD Display Signal
Monitor Components
BEFORE YOU START....................................................................................................... 4
The Choice of Power Source
Setting Date, Time and Measurement Unit
Install App and Pair-Up
START MEASUREMENT...................................................................................................
Apply the Cuff
Start Measurement
DATA MANAGEMENT.......................................................................................................
Recall the Records
Delete the Records
Data Transmission
INFORMATION FOR USER...............................................................................................
Tips for measurement
Maintenance
ABOUT BLOOD PRESSURE ............................................................................................
What are systolic pressure and diastolic pressure?
What is the standard blood pressure classification?
Why does my blood pressure fluctuate throughout the day?
Why is the blood pressure I get from the hospital different from home?
Will I get the same result if I measure on the right wrist?
TROUBLESHOOTING.......................................................................................................
SPECIFICATIONS..............................................................................................................
AUTHORIZED COMPONENTS.........................................................................................
COMPLIED EUROPEAN STANDARDS LIST.....................................................................
EMC GUIDANCE...............................................................................................................
APPENDIX.........................................................................................................................
8
10
12
14
16
17
18
18
19
23
Thank you for selecting the Actiiv Blood Pressure Monitor (Digital Sleeve ACMMD002).
The monitor features blood pressure measurement, pulse rate measurement and the
storage of results. Readings taken by the ACMMD002 are equivalent to those
obtained by a trained observer using the cuff and stethoscope auscultation method.
This manual contains important safety and care information, and provides step by
step instruction for using this product.
Read the manual thoroughly before using this product.
Features:
128mm x 50mm Blue LCD display with white backlight
Up to 60 records stored for each user
Measure-during-inflating technology
Safety information
The below signs might appear in the user manual, labeling or other component.
Symbol for “THE OPERATION
GUIDE MUST BE READ”
Symbol for “TYPE BF
APPLIED PARTS”
For indoor use only
Symbol for “DIRECT
CURRENT”
The Bluetooth Combination
Mark
F1
T1A/250V Φ3.6*10CCC
CAUTION
Please read this user manual carefully and thoroughly before use.
This device is intended for adult use in the home/domestic environment only.
This device is intended for non-invasive measuring and monitoring of arterial blood pressure. It is
not intended for use on extremities other than the upper arm or for functions other than obtaining
a blood pressure measurement.
Do not confuse self-monitoring with self-diagnosis. This unit allows you to monitor your blood
pressure. Please start or end medical treatment based solely on a physician’s treatment advice.
If you are taking medication, consult your physician to determine the most appropriate time for
your measurement. Never change a prescribed medication without your physician’s consent.
This unit is not suitable for continuous monitoring during medical emergencies or operations.
If the pressure of the cuff exceeds 40 kPa (300 mmHg), the unit will automatically deflate. Should
the cuff not deflate when its pressure exceeds 40 kPa (300 mmHg), detach the cuff from the upper
arm and press the homologous button to stop inflation.
Do not use the monitor in strong electromagnetic field conditions (e.g. mobile) that radiate
interference signals or electrical fast transient / burst signals.
The device is not AP/APG equipment. It is not suitable for use in the presence of a flammable
anesthetic mixture with air (or oxygen, nitrous oxide).
Please keep the unit out of reach of infants or children, since inhalation or swallowing of small
parts is dangerous or even fatal.
Please use ACCESSORIES and detachable parts specified / authorised by MANUFACTURER.
Otherwise, it may cause damage to the unit or danger to the user / patient.
The materials of the cuff have been tested and found to comply with requirements of ISO 10993-5:
2009 and ISO 10993-10:2010. It will not cause any potential alergic reaction or contact injury.
Please make sure the unit functions safely and it is in proper working condition before use.
1
INTRODUCTION
INTRODUCTION
LCD Display Signal
Monitor Components
CUFF
AIR HOSE
AIR CONNECTOR PLUG
SYMBOL
2
DESCRIPTION
EXPLANATION
Systolic Blood Pressure
High blood pressure
Diastolic Blood Pressure
Low blood pressure
Pulse per minute
Beats per minute, BPM
User 1
Start measurement for user 1 and transmit the
measuring result
User 2
Start measurement for user 2 and transmit the
measuring result
Heartbeat
Heartbeat detection during the measurement
Data Pending to Transmit
Measurement data stored in the equipment
Data Transmitting
Data is transmitting
Average Value
Average value of last three measurements
Shaking reminder
Shaking will result in inaccurate measurements
Low Battery
Low battery. Please replace the batteries
Unit
Measurement unit of blood pressure
(1kPa=7.5mmHg)
(1mmHg=0.133kPa)
Current Time
Month/Day (Hour:Minute)
Deflating
Exhaust the air in the cuff
Data Enquiry Mode
Recall the records
Arrhythmia
Irregular Heartbeat
INQUIRY BUTTON
USER 1
USER 2
LCD DISPLAY
BATTERY COMPARTMENT
List
1.Blood Pressure Monitor
(ACMMD002)
2.Cuff (Type BF applied part) (AC2232-03)
(Please use Actiiv authorized cuff.)
3. 4*AAA alkaline batteries
4.User manual
3
BEFORE YOU START
BEFORE YOU START
The Choice of Power Supply
1.Battery powered mode:
6VDC 4*AAA alkaline batteries
CAUTION
In order to achieve the best performance and protect your monitor,
please use the authorized / specified battery
Setting Date, Time and Measurement Unit
Please proceed to time setting before your initial use so as to ensure
each record is labeled with a time stamp.
NOTE: The monitor will shut off in 60 seconds after last
operation when in Setting Interface.
1.When the monitor is OFF, press
and hold “User 1” button to enter
Time Setting Mode.
Installing and Replacing the Batteries
1. Open the battery door.
2. Insert the batteries according to the polarity
indications.
3. Close the battery door.
Battery Life: Approx. 44 days
(Battery capacity: 600 mAH. If measured three times per day, each measurement takes 35s,
measuring result display takes 20s and data transmission takes 10s. The current for measurement is
400 mA and that for records display and data transmission is 50 mA and 50 mA separately, while the
current when shutdown is 35 uA)
2.As pictured on the right, the
blinking numeral represents the
[HOUR]. Press “Query” button to
change the numeral. Each press
will increase the numeral by one
in a cycling manner.
HOUR
3.Press “User 1” button to confirm
the [HOUR]. Then the monitor
diverts to [MINUTE] setting .
Replace the batteries under following circumstances:
displays on the LCD.
MINUTE
The LCD display dims.
When powering on the monitor, the LCD doesn’t light up.
CAUTION
Remove batteries if the device is not likely to be used for some time.
Worn batteries are harmful to the environment. Do not dispose with daily garbage.
Dispose old batteries following your local recycling guidelines.
4
5
BEFORE YOU START
BEFORE YOU START
4.Repeat step 2 and 3 to confirm the [MINUTE]. Then the monitor
diverts to [MONTH] and [DAY] setting.
MONTH
DAY
5.Repeat step 2 and 3 to confirm [MONTH] and [DAY]. Then the
monitor diverts to [YEAR] setting.
YEAR
Install App and Pair-Up
With the advanced Bluetooth 4.0 technology applied to this blood pressure
monitor, mobile phones which are equipped with Bluetooth functionality are
able to receive your personal health data. Just simply install the specially
designed app and pair up your blood pressure monitor with your mobile
phone by following the instructions below
1.The App is now available in the App Store and Google Play.
App name is "LIFESENSE INTERNATIONAL"
You may search for the app, then download and install the app on
your iPhone or Android Phone. Simple and convenient!
2.Turn on Bluetooth and the App. Make sure both are ON when
pair-up is proceeding.
3.When the monitor is off, press and hold “User 2” button to start
pair-up. Symbol
and symbol
will be shown on the LCD
alternatively, indicating pair-up is proceeding.
6.Repeat step 2 and 3 to confirm [YEAR]. Then the monitor diverts to
[UNIT] setting.
If SUCCESSFUL, symbol
be shown on the LCD.
7.After confirming the measurement unit, the LCD will display
“dOnE” and the monitor will shut off .
If FAILED, symbol
on the LCD.
will
will shown
Bluetooth Module No.: AW8001
RF Frequency Range: 2402 MHz to 2480 MHz
Output Power Range: 4 dBm
Supply Voltage: 3-3.6 V
6
7
Start Measurement
Apply the Cuff
1.Insert the plug of cuff’s air pipe into
the interface located on the right side
of the monitor.
Start Measurement
Start the Measurement
After correctly positioning the cuff, when the monitor is off,
press “User 1” (or “User 2”) button to turn on the monitor,
and it will complete the measurement process.
1.LCD display
2.Adjust to zero.
3.Inflating and measuring.
4.Display and save the results, and the
data will be transmitted.
2.As pictured on the right, wear the
cuff on your upper arm.
3.Tighten the cuff up. Make sure the
cuff is fixed 2 to 3 centimeters
above your elbow.
You should still be able to insert
one finger when the cuff is
tightened around your upper arm.
4.Correct Posture:
Take measurement on a bare arm only (no
clothing between the arm and monitor).
Sit comfortably and relaxed on a chair.
The centre of the cuff should remain at the
same level as your heart.
Your legs should be relaxed with feet
falling outwards. Palms up.
8
5. Press “User 1” (“User 2”) button to turn off the monitor. Otherwise, the monitor
will shut off within 1 minute after last operation.
Tips:
A.When you have finished taking a measurement, press another user button to
begin measuring again.
B.Each user can record a maximum of 60 records.
9
Data Management
Recall the Records
1.When the monitor is OFF, press “Query”
button to retrieve the memory. The monitor
will display the average value of last three
measurements.
2.Press “Query” button again to rotate the
records. Up to 60 records will be stored
under each user ID.
The order of the record, date and time
will be displayed alternatively.
3.Press another user button to switch
to display another user’s
measurement data.
4.When User 2 has no record, the
LCD will display just like the picture
on the right.
5.Press the corresponding User ID button to turn off the monitor. Otherwise, the
monitor will shut off within 1 minute after last operation.
CAUTION
The most recent record (1) is shown first. Each new measurement
is assigned to the first (1) record. All other records are pushed back
one digit (e.g., 2 becomes 3, and so on), and the last record (60) is
dropped from the list.
10
Data Management
Delete the Records
1.When under data enquiry mode, press
and hold “Query” button for 3 seconds to
clear memory. The LCD will display the
blinking “dEL ALL”.
2.Press “Query” button to confirm deletion
from memory. The LCD will display “dEL
dOnE” indicates that the deletion is
complete, and then turn off.
Data Transmission
1.With the device successfully paired-up with your iPhone, the measurement data
will be automatically transmitted to your mobile via Bluetooth.
2.The symbol
will disappear after successful data transmission, and you may
check your personal health data stored in your mobile device.
3.If the data transmission fails, the symbol
will remain. The pending
measurement data will be transmitted to your iPhone when next measurement is
complete.
CAUTION
Interference may occur in the vicinity of equipment marked with the following
symbol
and the monitor may interfere with electrical equipment.
To enable the data transmission function, this product should be paired to a
Bluetooth end at 2.4 GHz.
How to mitigate possible interference?
1.The range between the monitor and the Bluetooth end should be reasonably close,
from 1 metre to 10 metres. Please ensure no obstacles between the monitor and the
Bluetooth end so as to obtain quality connection.
2.To avoid interference, other electronic devices (particularly those with Bluetooth
transmission / Transmitter) should be kept at least 1 metre away from the monitor.
11
INFORMATION FOR USER
INFORMATION FOR USER
Tips for Measurement
Measurements could be inaccurate if taken in the following
circumstances:
Within 1 hour
after eating or drinking
Within 20 minutes
after taking a bath
Maintenance
To obtain the best performance, please follow below instructions.
Keep your device in a cool dry place,
avoid direct sunlight and high temperatures
Avoid immersing your device in liquid
Avoid dropping or direct impact to
your device
Avoid dusty environments and
unstable surrounding temperatures
Use a slightly damp cloth to remove dirt
Do not wash the cuff.
Immediate measurement
after tea, coffee, smoking
When talking or moving your fingers
Cleaning: Before Use - Remove the unit from the storage bag. Use a soft cloth to
remove the dirt on the monitor and apply some alcohol to
disinfect the cuff before tying the cuff.
After Use - Use a soft cloth to wipe the unit and apply some alcohol to
disinfect the cuff before putting the whole unit back in the bag.
Please always disinfect the cuff before applying to another patient.
In a very cold environemnt
12
When you want to discharge urine
Disposal: Degraded sensors may result in inaccurate measurement while loosened
electrodes may cause the monitor’s failure to power on. The expected life of the monitor
is two years. Please dispose of accessories, detachable parts, and the ME equipement
according to the local guidelines.
13
ABOUT BLOOD PRESSURE
ABOUT BLOOD PRESSURE
What are systolic pressure and diastolic pressure?
When ventricles contract and pump blood out
Systolic
of the heart, the blood pressure reaches its
blood discharging
maximum value in the cycle, which is called
artery
systolic pressure. When the ventricles relax,
the blood pressure reaches its minimum
press
value in the cycle, which is called diastolic
pressure.
Diastolic
blood entering
vein
relax
What is the standard blood pressure classification?
The blood pressure classification published
by the World Health Organization (WHO)
and the International Society of Hypertension (ISH)
in1999 is as follows:
Only a physician can tell your normal BP range. Please
contact a physician if your measuring result falls out of the
range. Kindly note that only a physician can tell whether
your blood pressure value has reached a dangerous point.
Level
Optimal
Normal
High-normal
SYS
<120
120-129
130-139
DIA
<80
80-84
85-89
Mild
Moderate
Severe
140-159
160-179
≥180
90-99
100-109
≥110
Irregular Heartbeat Detector
This Blood Pressure Monitor is equipped with an intelligent Irregular Heartbeat (IHB)
Detector function. During each measurement, this equipment records the
heartbeat intervals and works out the standard deviation. If the calculated value is
larger than or equal to 15, this equipment will light up the IHB symbol on the screen
when displaying the measuring result.
CAUTION
The appearance of the IHB icon indicates that a pulse irregularity consistent with
an irregular heartbeat was detected during measurement. Usually this is NOT a
cause for concern. However, if the symbol appears often, we recommend you
seek medical advice. Please note that the device does not replace a cardiac
examination, but serves to detect pulse irregularities at an early stage.
14
1. Individual blood pressure varies every day.
It is also affected by the way you tie your
cuff and your measurement position,
so please take the measurement in
the same conditions.
2. Blood pressure variation is greater
if the person takes medication.
3. Make sure you wait at least
3 minutes before taking another
measurement.
Why is the blood pressure
I get from the hospital
different from home?
CAUTION
Blood
Pressure (mm Hg)
Why does my blood pressure vary, even in one day?
Blood pressure can vary even
during a 24 hour period due to
influences like the weather,
emotions, exercise etc. You may
experience different environmental
and emotional conditions at a
hospital compared to at home
which can affect your blood
pressure measurements.
Pay attention to the following
when measuring your blood
pressure at home:
If the cuff is tied properly.
If the cuff is too tight or too loose.
If the cuff is tied on the upper arm.
If you feel anxious or under pressure,
take a few deep breaths before
beginning.
If your measurement is inaccurate,
wait 4 to 5 minutes before retesting.
Will I get the same result if I
measure on the right arm?
It is ok to use the device on both arms,
but the results may differ depending on
the person. It is recommended that you
measure on the same wrist every time
to maintain an accurate record of
measurements.
15
TROUBLESHOOTING
SPECIFICATIONS
This section includes a list of error messages and frequently asked
questions for problems you may encounter with your blood pressure
monitor. If the product is not operating as you think it should, check
here before arranging for servicing.
PROBLEM SYMPTOM
No power
Low
batteries
Error
message
Display
will not light up.
Batteries are inserted
incorrectly.
Insert the batteries
correctly
AC adaptor is inserted
incorrectly.
Insert the AC adaptor
tightly
E 1 shows
Communication error
E 3 shows
The cuff is not secure.
E10 or E11
shows
E21 shows
EExx,shows on
the display.
REMEDY
Batteries are exhausted. Replace with new batteries
Display is dim or
Batteries are low.
shows
E20 shows
16
CHECK THIS
A calibration error
occurred.
Battery Powered Mode:
6V (4 x AAA-size alkaline-battery)
Display mode
Blue LCD with White Backlight
V.A. = 128mm(L) x 50mm(W)
Measurement mode
Measurement range
Accuracy
Replace with new batteries
Check if the APP is on,
operate and send the data
again.
Readjust the cuff and
relax for a moment
and then measure again.
Movement can affect the
measurement. Relax for a
The monitor detected
moment and then
motion while measuring.
measure again.
The measurement
process does not detect
the pulse signal.
The treatment of the
measurement failed.
Power supply
Loosen the clothing on the
arm and then measure
again
Relax for a moment and
then measure again.
Retake the measurement.
If the problem persists,
contact the retailer or our
customer service
department for further
assistance.Refer to the
warranty for contact
information and return
instructions.
Working condition
Storage & transportation
condition
Measurement perimeter
of the upper arm
Weight
External dimensions
Attachment
Oscillographic testing mode
Pressure: 0-40kpa (0~300mmHg)
pulse value: (40-199) beats/minute
Pressure:
5℃-40℃ within ±0.4 kPa (3 mm Hg)
0℃-45℃ (out of 5℃-40℃) within ±0.7 kPa
(5 mm Hg); Pulse Value: ±5%
Temperature:5℃-40℃
Relative Humidity ≤85%RH
Atmospheric Pressure: 86-106 kPa
Temperature:-20℃-60℃
Relative Humidity 10%-93%RH
Atmospheric Pressure: 50-106 kPa
About 22cm-32cm
Approx.300g (Excluding the dry cells)
Approx.180*100*39mm
4*AAA alkaline batteries,user manual
Mode of operation
Continuous operation
Degree of protection
Type BF applied part
Device Classification
Battery Powered Mode: Internally Powered ME Equipment
AC Adaptor Powered Mode: Class II ME Equipment
IP Classification
Software Version
IP22
V01
WARNING: No modification of this equipment is allowed.
17
AUTHORIZED COMPONENT
Contact Information
For more information about our products, please visit www.actiivfitness.com
Complied European Standards List
Risk Management
EN/ISO 14971:2007
Labeling
EN 980:2008
User Manual
EN 1041:2008
Generl Requirements EN 60601-1:2006/AC:2010
EN 62304:2006/AC:2008
for Safety
EN 60601-1-6:2010
EN 60601-1-11:2010
Non-invasive
EN 1060-1:1995+A2:2009
Sphygmomanometers
EN 1060-3:1997+A2:2009
General
Requirements
EN 1060-4:2004
Electromagnetic
Compatibility
EN 60601-1-2:2007/AC:2010
EMC GUIDANCE
EMC guidance
Table 1 – Guidance and MANUFACTURER’ S declaration – ELECTROMAGNETIC EMISSIONS –
for all ME EQUIPMENT and ME SYSTEMS
Guidance and manufacturer’s declaration – electromagnetic emissions
The device is intended for use in the electromagnetic environment specified below.
The customer or the user of the device should assure that it is used in such an
environment.
Emissions test
RF emissions
CISPR 11
RF emissions
CISPR 11
Harmonic emissions
Group 2
Electromagnetic environment – guidance
The device must emit electromagnetic
energy in order to perform its intended
function. Nearby electronic equipment may be affected.
Class B
IEC 61000-3-2
Not applicable
Voltage fluctuations/
flicker emissions
Not applicable
IEC 61000-3-3
18
Compliance
19
EMC GUIDANCE
Table 2 – Guidance and MANUFACTURER’ S declaration – electromagnetic IMMUNITY –
for all ME EQUIPMENT and ME SYSTEMS
20
EMC GUIDANCE
Table 4 – Guidance and MANUFACTURER’ S declaration – electromagnetic IMMUNITY –
for ME EQUIPMENT and ME SYSTEMS that are not LIFE -SUPPORTING
21
EMC GUIDANCE
APPENDIX
Installing App and Pairing
The following steps are for use with iPhone.
Table 6 – Recommended separation distances between portable and mobile
RF communications equipment and the ME EQUIPMENT or ME SYSTEM –
for ME EQUIPMENT and ME SYSTEMS that are not LIFE -SUPPORTING
The App is also available for Android
through Google Play.
1.
Search for the App in the App Store.
The App name is “Lifesense
International”. Download and install the
App onto your phone.
2.
Ensure Bluetooth is turned “ON”
on your phone
3.
Run the App,
the following screen
should appear
4.
Create a new account
or sign in
5.
The following screen will
appear after you
have signed in.
10. Please ensure you pressand hold the
“Start” button on the blood pressure
monitor to initiate Pairing Mode.
11. Once connected, the device will show
[ ]. It is now ready to use.
12. Your readings will be
recorded on the App, you
can find the readings by
selecting Blood Pressure
in the App as per the image
shown here
13. The following screen
will appear
14. To see records, press the “list” button
at the top of the screen ( )
15. The following screen
will appear
22
6.
Press “Edit” at the bottom right corner,
untick “Weight”, press the back button
and “Yes” to save Data. (this will
remove the weight measurement) and
return to the Start menu.
7.
Press the “Settings” button
in the top right corner ( )
8.
Press the “Add” button to
add a device ( )
9.
Press the Bluetooth logo
16. To delete any unwanted
readings, slide to the left
on the reading and the
delete button will appear
23