1
IM5 Smartphone
IM5 Smartphone
User Guide
IM5 Smartphone
Life less complicated
Congratulations on your purchase. We live in an unnecessarily complex world.
Life is as challenging as you make it – so why not make it easier? The KODAK IM5
intuitively eases life’s complications.
Contents
Phone Overview.............................................................................................................................3
Insert your SIM card(s)................................................................................................................4
Insert your SD card.......................................................................................................................4
Charge the battery........................................................................................................................5
Power on and Power off...............................................................................................................6
Using the touchscreen.................................................................................................................7
Phone keys......................................................................................................................................8
Lock screen.....................................................................................................................................8
Simple interface and settings.....................................................................................................9
Notifications and Status bar.......................................................................................................9
Add someone to your Contacts...............................................................................................10
Sending a text message.............................................................................................................10
Making a call................................................................................................................................. 11
Receiving a call.............................................................................................................................. 11
Accessing the internet............................................................................................................... 12
Sending an email......................................................................................................................... 12
App store....................................................................................................................................... 13
App drawer................................................................................................................................... 13
Play store....................................................................................................................................... 13
Google app folder ....................................................................................................................... 13
Calendar........................................................................................................................................14
Flashlight.......................................................................................................................................14
Magnifier.......................................................................................................................................14
Taking a picture............................................................................................................................ 15
Gallery............................................................................................................................................ 15
Editing and sharing images....................................................................................................... 16
Remote assist............................................................................................................................... 17
Android user guide..................................................................................................................... 19
2
IM5 Smartphone
Phone Overview
1
Power Key
2 Headset Jack
3a SIM card slot 1
3b SIM card slot 2
4 Notification light
5 Auto light/proximity sensor
6a Front camera
6b Front flash
7Earpiece
8 Menu key
9 Home key
10 Back key
11Microphone
12 USB/Charger port
13 SD card slot
14 Volume key
15 Rear-facing camera
16Flash
17Loudspeaker
2
1
5
6a
7
6b
3a
15
13
16
13 MP
4
14
3b
17
8
10
9
11
Back to contents
12
3
IM5 Smartphone
Insert your SIM card(s)
Insert your SD card
1. Use the SIM/SD card eject tool to
flick open the SD card cover on the
right side of the device.
t2
slo
SIM
SIM
slo
t1
1. Insert the SIM/SD card eject tool
into the small hole next to SIM slot
1 on the left side of the device. The
tray will pop out. Repeat with SIM
slot 2 if required.
2. Insert the SD card as shown.
2. Insert the SIM card(s) as shown.
SIM 1
Back to contents
SIM 2
4
IM5 Smartphone
Charge the battery
Fully charge the battery before using
your device for the first time.
1. Connect the USB cable that came
with your mobile phone to the
charger.
Note: Use only the cable and charger
supplied with the phone. Unapproved
equipment may cause damage to the
device or cause batteries to explode.
2. Connect the USB cable to the USB
port of the phone.
Important Information about the Battery
If the battery has not been used for a long period of time, you may not be able to
power on your mobile phone immediately after you begin charging the battery.
Allow the battery to charge for a few minutes with the phone powered off before
attempting to power on the phone. The on-screen charge animation may not be
displayed during this period.
Using data services increases demand on the battery and will reduce the length of
time it can hold a charge.
The time required to charge the battery depends on the environmental temperature
and the age of the battery.
When the battery power level is low, the phone plays an alert and displays a
prompt. When the battery power is almost exhausted, your phone will power off
automatically.
Be careful not to use excessive force
when plugging the USB cable.
Be aware of the correct orientation of
the plug. Damage can be caused by
attempting to insert the connector the
wrong way, which is not covered under
warranty.
Back to contents
5
IM5 Smartphone
Power on and Power off
Powering On your Mobile Phone
Powering Off your Mobile Phone
Press the Power button.
1. Press and hold the Power button to
open the Phone options menu.
The first time you power on your phone,
you will see a Welcome screen. Select
your preferred language and touch the
Start icon to continue with the set up
process.
2. Touch Power off.
3. Touch OK.
Note: If personal identification number
(PIN) protection is enabled on your
SIM Card, you will be asked to enter
your PIN before the Welcome screen. A
Wi-Fi or Data connection is needed to
complete the set up process.
You will now be prompted to sign in with
your existing Google account, or set up
a new account and complete the set up
process.
Note: You can skip the account set up
process to complete at another time. A
Google account is required to use some
of the Google services on offer through
your device.
Back to contents
6
IM5 Smartphone
Using the Touchscreen
Touch
Touch using your fingertip to select an
item, confirm a selection, or start an
application.
Touch and Hold
Touch an item with your fingertip and
continue to press down until your
mobile phone responds. For example,
to open the options menu for the
active screen, touch the screen and
hold down until the menu appears.
Swipe
Move your finger across the screen
either vertically or horizontally. For
example, swipe left or right to switch
between pictures.
Drag
Touch and hold the desired item with
your finger. Drag the item to any part
of the screen. You can drag an icon to
move or delete it.
Rotating your Mobile Phone Display
The orientation of most screens will rotate with the phone as you turn it from upright to sideways and back again. See “Auto-rotate screen” on page 64.
Back to contents
7
IM5 Smartphone
Phone keys
Lock screen
1. To return to the Home screen from
within an app, press the Home key.
1. Slide the Lock symbol to the right to
unlock the phone.
2. Within an app, press the Back key to
return to the previous screen.
2. Slide the Gallery icon to the left to
view your photos.
3. From within some apps you can
press the Menu key to access app
options.
3. Your lock screen background will
be set by default to pan across fullscreen photos from among the last
20 images saved in your Camera roll
Back to contents
8
IM5 Smartphone
Simple interface and settings
1. Your KODAK device has a clear and
intuitive user interface for easy access
to all the most used apps.
2. Touch each tile to launch an
application.
3. To access settings, select the settings
icon. From here you can alter various
phone settings, including display
brightness and audio profiles.
Notifications and Status bar
1. The status bar shows when you have
a message or a missed call, as well
as the status of your battery, phone
signal and Wi-Fi.
2. Drag the status bar downwards to
view updates and notifications. Press
the Quick Settings button in the top
right corner of the screen for options
to enable Bluetooth, Wi-Fi and flight
mode.
3. The light in the top left corner of your
phone will flash green when you have
a new notification.
Back to contents
9
IM5 Smartphone
Add someone to your Contacts
1. From the Home screen, press the
Contacts icon.
Sending a text message
1. From the Home screen, press the
Text icon. Then press the New Text
Message icon to start composing a
message.
2. In the contact list, select ‘Add
Contact’.
3. Enter the information required.
When you have finished, press Save.
Select ‘Add as Favorite’ to show this
contact in your favorite list.
2. Touch the ‘Type name or number’
box to display the on-screen
keyboard. Enter the number of the
person you wish to text, or their
name if you have already saved them
as a contact. Enter your message
where is says ‘Type text message’.
3. When the message is complete,
press the Arrow symbol
to send it.
Back to contents
10
IM5 Smartphone
Making a call
1. From the Home screen, press the
Phone icon. Then press the Keypad
icon to display a numbered keypad.
Receiving a call
1. To receive a call, swipe the phone
icon right towards the green ‘Answer
call’ symbol.
2. To reject a call swipe the phone icon
left towards the red ‘End call’ symbol.
To send a predefined text, swipe the
phone icon towards the text symbol.
2. Enter the telephone number you
wish to dial, or their name if you have
already saved them as a contact.
Press the blue Call button to start the
call.
3. Within a call press the Speakerphone
icon to put the call on loud speaker.
Press the Keypad button to access
the keypad.
3. To end the call, press the red End Call
button.
Back to contents
11
IM5 Smartphone
Accessing the internet
1. Select the Settings icon. Select Wi-Fi,
and turn it on to see a list of available
networks. Select the network you
wish to join. If required, enter the WiFi password when prompted, then
press Connect.
2. On the Home screen press the
Internet icon. Touch the ‘Search or
type URL’ bar at the top of the screen
to display the keyboard.
3. Enter the search term or the address
of the website you are looking for,
and then press the Enter or Go key
on the keyboard to start browsing.
Back to contents
Sending an email
1. Press the Gmail icon, select your
account, and press Always. You willl
be asked to set up a Google account
if you have not already done so.
1. On the Inbox screen, select the
Compose icon. Touch the To field
to display the keyboard, and enter
the email address(es) of the person
(or people) you wish to receive
the message. Enter the subject of
the email in the Subject line, then
compose your message.
2. Press the Arrow symbol
the message.
to send
12
IM5 Smartphone
App store
1. Select the Apps icon from the home
screen to enter the app store for your
KODAK Smartphone.
2. From here, you can download and
install new apps to your device from
a secure and curated catalogue of
hundreds of high quality apps.
App drawer
1. To access other apps, already
installed on your device, press the
App Drawer icon on the Home
screen.
Back to contents
Play store
1. To access the Google Play store,
select the Play store icon.
2. This is an alternative store for
downloading Android apps.
Google app folder
1. Select the Google app folder to
access a range of applications,
including Google Maps, YouTube and
Google Drive.
13
IM5 Smartphone
Calendar
Magnifier
1. Press the Calendar icon to open the
calendar.
1. Your KODAK Smartphone also
includes a magnifying application.
2. Select a time to add a new event.
2. Select the Magnifier icon, and point
the camera at the document or item
you wish to view. You can zoom in or
out by sliding the bar at the bottom
of the screen. Turn on the light by
pressing the Light button.
3. Fill in the event details and select
Done. The event will now show in
your calendar.
Flashlight
1. Select the Light button to turn
on the IM5 flashlight. Tap it
again to turn it off.
Back to contents
14
IM5 Smartphone
Taking a picture
1. The KODAK IM5 is designed around
an excellent and easy-to-use camera
experience. Select the Camera icon
to start taking pictures.
2. Press the central Capture button
to take the picture. Once you have
taken the picture, you can choose the to discard it or to keep it.
Gallery
1. From the Home screen touch the
Camera icon. Once camera is
opened, swipe up from the bottom
of display to access the tiled photo
gallery. Here you can scroll through
all the images you have taken.
2. Select an image to share, edit, or
print it.
3. Your captured photos will appear at
the bottom of the screen.
Back to contents
15
IM5 Smartphone
Editing and sharing images
1. You can edit photos easily from the
Gallery or Camera app. Select an
image by pressing on it.
1.
2.
3.
2. To edit the image, press the Edit icon
(a pencil symbol). You will be given
a number of options for editing the
picture.
3. Or, to share a picture, press the Share
icon from the image to send it to a
contact through email, text message,
or social media.
Back to contents
16
IM5 Smartphone
Remote assist
1. Remote assist is an application
on your phone that allows you to
request help with some of your
phone’s functions from friends or
relatives. Open the app drawer and
select the Remote icon. Press the
‘Allow remote access’ button to turn
the function on.
1.
2.
3.
2. To add someone you know as a
remote helper, select ‘Add new’
from the connections box. Enter the
person’s email address, or choose
someone from Contacts and press
the + icon.
3. Once you have selected your chosen
helper, the screen will show you a list
of features they can help with. Turn
them On and Off as you wish. Then
press Send.
Back to contents
17
IM5 Smartphone
Remote assist
4. Your phone will now send an
invitation to the selected helper. The
Remote Configurations screen will
show a list of your helpers and their
status.
4.
5.
6.
5. When the helper accepts your invite,
a notification will be sent to you and
their status will show as green.
6. The helper can now access features
of your phone through a web
interface. When your helper makes a
change you will receive a notification
and can choose to accept or reject a
change. Select Access to show the
list of changes made by the helper.
Back to contents
18
IM5 Smartphone
IM5 Smartphone
Android User Guide
IM5 Smartphone
All Rights Reserved
Safety Precautions
©2015. All rights are reserved. No part of this document can be reproduced without
permission. All trademarks and brand names mentioned in this publication are
property of their respective owners.
Please read the safety precautions carefully to ensure the correct use of your mobile
phone.
While all the efforts have been made to ensure the accuracy of contents in this
manual, we presume no responsibility for errors or omissions or statements of any
kind, whether such errors are omissions or statements resulting from negligence,
accidents, or any other cause. We operate a policy of continuous development and
reserve the right to make changes, modifications and improvements to the device,
device features/ specifications or any of its parts without prior notice.
Your device may have preinstalled bookmarks and links for third party internet
sites and may allow you to access third party sites. These are no affiliated with us,
and we do not endorse or assume liability for them. If you access such sites, take
precautions for security or content.
The limited warranty does not cover user manuals or any third party software,
settings, content, data or links, whether included/downloaded in the product,
whether included during installment, assembly, shipping or any other time in the
delivery chain or otherwise and in any way acquired by you. To the extent permitted
by applicable law(s), we do not warrant that any our software will meet your
requirements, will work in combination with any hardware or software applications
provided by a third party, that the operations of the software will be uninterrupted
or error free or that any defects in the software are correctable or will be corrected.
User’s Manual is provided just to guide the user about the functionality of the
device. This does not seem to be any certificate of technology. Some functions
may vary due to modifications and up-gradations of software or due to printing
mistake.
Avoid using your mobile phone in a damp environment, such as the bathroom.
Prevent your mobile phone from being intentionally soaked or washed in liquid.
Do not switch on your mobile phone when it is prohibited to use phones or when
the phone may cause interference or danger.
Do not use your mobile phone while driving.
Follow any rules or regulations in hospitals and health care facilities. Switch off your
mobile phone near medical apparatus.
Switch off your mobile phone in aircraft. The phone may cause interference to
control equipment of the aircraft.
Switch off your mobile phone near high-precision electronic devices. The phone
may affect the performance of these devices.
Do not attempt to disassemble your mobile phone or its accessories. Only qualified
personnel are allowed to service or repair the phone.
Do not place your mobile phone or its accessories in containers with a strong
electromagnetic field.
Do not place magnetic storage media near your mobile phone. Radiation from the
phone may erase the information stored on them.
20
IM5 Smartphone
(Safety Precautions Continued)
Notice
Do not put your mobile phone in a high-temperature place or use it in a place with
flammable gas such as a gas station.
Some features of the product and its accessories described herein rely on the
software installed, capacities and settings of local network, and may not be
activated or may be limited by local network operators or network service providers.
Thus the descriptions herein may not exactly match the product or its accessories
you purchase.
Keep your mobile phone and its accessories away from young children. Do not
allow children to use your mobile phone without guidance.
Use only approved batteries and chargers to avoid the risk of explosions.
Observe any laws or regulations on the use of wireless devices. Respect others’
privacy and legal rights when using your wireless device.
Do not use the mobile phone in airplanes, hospital, gas stations, or professional
garages.
For medical implants patient (heart, insuline, etc), keep the mobile phone 15cm
away from the implant and, while calling, keep the phone on the opposite side of
the implant.
The manufacturer reserves the right to change or modify any information or
specifications contained in this manual without prior notice or obligation.
The manufacturer is not responsible for the legitimacy and quality of any products
that you upload or download through this mobile phone, including but not limited
to the text, pictures, music, movies, and non-built-in software with copyright
protection. Any consequences arising from the installation or usage of the
preceding products on this mobile phone shall be borne by yourself.
If your phone or any of its accessories do not function normally, then please visit
your nearest authorized service facility. The qualified personnel will assist you,
and if necessary, will arrange for the service.
Strictly follow the relevant instructions of this manual while using the USB cable.
Otherwise your mobile phone or PC may be damaged.
21
IM5 Smartphone
Contents
Understanding your Device
General info...................................................................................................................... 24
Getting to know the home screen...............................................................................25
Locking and unlocking the screen.............................................................................. 26
Display
Display layout...................................................................................................................27
Notification panel........................................................................................................... 29
Shortcut icons................................................................................................................... 31
Wallpapers........................................................................................................................32
Folders................................................................................................................................32
Using the Airplane mode...............................................................................................33
Transfering media to and from your mobile phone.................................................33
Phone
Making a call.................................................................................................................... 34
Answering and rejecting a call.................................................................................... 36
Other operations during a call.................................................................................... 36
Using call log.....................................................................................................................37
Contacts
Contacts............................................................................................................................ 38
Communicating with your contacts.......................................................................... 39
Using the onscreen keyboard...................................................................................... 39
Messaging
SMS and MMS................................................................................................................40
Email.................................................................................................................................. 42
Wi-FI......................................................................................................................................... 44
Browser................................................................................................................................... 45
Bluetooth................................................................................................................................ 46
Entertainment
Taking photos and recoding videos............................................................................ 49
Enjoying music................................................................................................................. 51
Listening to FM radio......................................................................................................53
Google Services.................................................................................................................. 54
Using Maps........................................................................................................................... 56
Using YouTube.....................................................................................................................57
Using Play Store................................................................................................................. 58
22
IM5 Smartphone
Synchronizing Information
Managing your accounts.............................................................................................. 59
Customizing your account synchronization............................................................ 60
Using other Applications
Using the calendar.......................................................................................................... 61
Using the alarm............................................................................................................... 62
Calculator......................................................................................................................... 62
Using the file manager.................................................................................................. 63
Managing your Mobile Phone
Setting the date and time............................................................................................. 64
Setting the display.......................................................................................................... 64
Setting phone ringtone.................................................................................................. 65
Setting phone services.................................................................................................. 65
Setting dual SIM functionality..................................................................................... 66
Protecting your mobile phone..................................................................................... 66
Managing applications...................................................................................................67
Ways to free up your mobile phone memory...........................................................67
Resetting your mobile phone........................................................................................67
Specifications...................................................................................................................... 68
Environmental Concern................................................................................................. 69
KODAK Phone Information......................................................................................... 70
23
IM5 Smartphone
Understanding your Device
General Info
The KODAK IM5 Smartphone is a multi SIM phone with many great features such
as Android version 4.4.2, Wi-Fi and an 13 MP Digital Camera. The two SIM slots
provide the flexibility to manage both personal and professional SIM requirements
with ease.
Powered by Android and featuring the Google suite of applications you’ll be able to
enjoy web browsing, messaging, music and more with the high capacity battery and
expandable memory up to 32GB.
Back to contents
24
IM5 Smartphone
Getting to know the Home Screen
After you sign in, or when you power on the phone, the Home screen opens.
The Home screen is your starting point to access all the features on your phone.
It displays application icons, widgets, shortcuts, and other features. You can
customize the Home screen with different wallpaper and display the items you
want.
The home screen has the Launcher icon
touch this to view and launch installed
applications (apps).
Back to contents
25
IM5 Smartphone
Locking and Unlocking the Screen
Locking the Screen
Unlocking the Screen
When your mobile phone is on, press
the Power button to lock the screen.
When the screen is locked, you can still
receive messages and calls.
Press the Power key to wake up the screen. Then drag the lock icon to the unlock
icon to unlock the screen.
If you leave your mobile phone
undisturbed for a while, the screen will
lock automatically.
Note: If you have set up a screen lock, you will be prompted to unlock the
screen. For details, refer to “Protecting Your Mobile Phone with a Screen
Lock” on page 66.
Back to contents
26
IM5 Smartphone
Display Layout
Notifications and Status Information
The Status bar appears at the top of every screen. It displays notifications icons,
such as missed call or received messages (on the left) and phone status icons, such
as battery status (on the right), along with the current time.
Notification icons
Back to contents
Status icons
27
IM5 Smartphone
Status Icons
Notification Icons
Connected to GPRS mobile network
New email message
Connected to EDGE mobile network
New text or multimedia message
Connected to 3G mobile network
Alarm is set
Connected to HSDPA mobile network
Upcoming event
Connected to HSPA+ mobile network
Data is syncing
Mobile network signal strength
Problem with sign-in or sync
Searching for a network signal
Incoming call
No signal
Missed call
Connected to a Wi-Fi network
Speakerphone is activated
Bluetooth is on
Phone microphone is muted
Connected to a Bluetooth device
Downloading data
Vibrate mode
Phone is connected via USB cable
Ringer is silenced
Battery is very low
Battery is low
Battery is partially drained
Battery is full
Battery is charging
Roaming
Airplane mode
Receiving location data from GPS
Back to contents
28
IM5 Smartphone
Notification Panel
Your mobile phone will notify you when you receive a new message or there is an
incoming event. The notification panel also informs you about alarms and settings
— for example, when an alarm is activated.
Open the notification panel to see who the wireless network operator is or to view
a message, reminder, or event notification.
Opening the Notification Panel
1. When a new notification icon appears on the notification bar, touch the
notification bar, and then drag down to open the notification panel.
2. Touch a notification to open the related application.
Back to contents
29
IM5 Smartphone
Closing the Notification Panel
To directly close a notification (without viewing), simply touch and hold the
notification and drag it to the left/right of the screen.
To close the notification panel, slide the bottom of the panel upwards to close the
notifications panel.
Back to contents
30
IM5 Smartphone
Shortcut Icons
Adding a New Screen Item
Moving a Screen Item
Removing a Screen Item
Widgets
1. From the Home screen, touch
launcher icon to display all the
applications.
1. Touch and hold an application icon
on the Home screen until the icon
enlarges.
1. Touch and hold an application icon
on the Home screen until the icon
enlarges.
A widget lets you preview or use an
application. You can place widgets on
your Home screen as icons or preview
windows.
2. Without lifting your finger, drag the
icon to the desired position on the
screen, and then release it.
2. Without lifting your finger, drag the
item to Remove.
Note: There must be enough space
for the icon to fit on the current Home
screen panel.
2. Touch and hold an application icon
until the icon vibrates.
3. When the item turns red, release
your finger to remove it from the
Home screen.
Several widgets are installed on your
phone by default. More widgets can be
downloaded from Google Play Store. To
add a widget to one of the screens:
1. From the Home screen, touch the
Menu key. Then touch WIDGETS to
display the available widgets.
2. To add an item, drag your desired
widget to a specific Home screen.
3. Without lifting your finger, drag the
icon to the desired position on the
home screen, and then release it.
Back to contents
31
IM5 Smartphone
Wallpapers
Folders
Changing the Wallpaper
Creating a Folder
1. From the Home screen, touch the
Menu key or touch and hold the
Home screen.
Drag the application icon or shortcut
1. Touch a folder to open it.
and drop it on top of similar applications.
2. On the title bar of the folder, enter
the new folder name.
Renaming a Folder
2. Touch WALLPAPERS.
3. When complete, touch the Back key.
3. Scroll through the available options
to set a wallpaper of your choice.
Back to contents
32
IM5 Smartphone
Using the Airplane Mode
Transferring Media to and from Your Mobile Phone
Some locations may require you to turn
off your phone’s wireless connections.
Rather than powering off your phone,
you can set it to Airplane mode.
Transfer all your favorite music and pictures between your mobile phone and PC in
Media Device MTP mode.
1. Connect your mobile phone to your PC with the USB cable and MTP mode will
be activated.
1. Press and hold the Power button.
2. Touch Airplane mode in the options
menu.
Or using the Settings application, access
the More…to enable the Airplane mode.
Back to contents
2. Your phone should be displayed as a removable device displaying Phone storage
and if a memory card is inserted, SD card will also be visible.
Note:If using a MAC you will need to download drivers from:
http://www.android.com/filetransfer/
33
IM5 Smartphone
Phone
Making a Call
There are several ways to place a phone call. You can dial a number, select a
number in your contacts list, on a Web page, or from a document that contains a
phone number. When you are on a call, you can either answer incoming calls or
send them to your voicemail box. You can also set up conference calls with several
participants.
To make a call, you can use the Phone application, or select a number from Contacts
or Call Log.
Note:When you are in a call using one SIM card, you will not be able to receive
other calls using the other SIM card for the duration of that call. Contact your
network operator to learn whether it supports conference calls and how many
participants you can add.
Back to contents
When you are on a call, you can touch the Home key to return to the Home screen
and use other functions. To return to the calling screen, drag the notification bar
down and touch Current call.
Note:Be careful not to block the microphone with your fingers.
34
IM5 Smartphone
Making a Call with the Dialer
Making a Call from Contacts
1. Touch
1. Touch
on the Home screen display to display the dialer.
If you are already working with Contacts or Call Log, touch the Phone tab.
Or you can touch
and then Phone
2. Touch the appropriate numeric keys to enter the phone number.
Tip: Your mobile phone supports the SmartDial function, that is, when you touch
numbers on the dialer, the phone automatically searches among your contacts
and lists the matching results based on the accuracy. Close the keypad to view
more possible matches.
3. After entering the number, or selecting the contact, touch
If you have inserted two SIM cards, touch the desired network to dial the
phone number.
and then Contacts
to display the contact list.
If you are already within the Dialer, touch the Menu key or
select People.
and
2. In the list, touch the contact you want to call.
3. Touch
If you have inserted two SIM cards, touch the desired network to
dial the phone number.
Making a Call from Call log
1. Touch
> Phone
all call history.
2. Touch
> Call Log tab (lower left corner of screen) to display
of the contact you want to call.
Note:You can also specify the desired network that you want to use for data
connection. See “Set up the Default Network” on page 65.
Back to contents
35
IM5 Smartphone
Answering and Rejecting a Call
Other Operations During a Call
Answering or Rejecting an Incoming Call
Making a Conference Call
When you receive a phone call, the incoming call screen opens with the caller ID
and any additional information about the caller that you have entered in Contacts.
If you receive a new call while you are already on a call, you can connect the second
call to the call you are on. This feature is known as conference calling. You can also
set up a conference call with multiple callers.
To answer a call, touch
and drag it to the right
To reject the call, touch
and drag it to the left
.
Note:When you touch
it automatically changes to
Note: Contact your network operator to learn whether it supports conference calls
and how many participants you can add.
1. To initiate a conference call, dial the number of the first person to be on the call.
While you are on that call, touch .
Ending a Call
2. Enter the phone number of the person you want to join the conversation
During a call, touch
to hang up.
and touch
, or select someone from your Call Log or Contacts. The first call
is automatically placed on hold.
3. Once the additional call has been connected, touch
conference call.
4. To add more people, touch
to begin the
and repeat steps 2 and 3.
5. To end the conference call and disconnect everyone, touch .
Back to contents
36
IM5 Smartphone
Switching Between Calls
Using Call log
If you receive a new call while you are already on a call, you can switch between the
two calls.
The Call log contains a list of calls that you have dialed, received, or missed. You can
use the call log to quickly find a recently called number or add an incoming number
to your contact list.
1. While you are on two calls, touch .
2. The current call is placed on hold and you are connected to the other call.
Saving an entry to Contacts
1. Touch
on the Home screen, then touch Call Log tab.
2. Touch the entry you want to add.
3. Touch .
4. Either add to existing contact or touch Create new contact.
Removing an entry from the list
1. Touch
on the Home screen, then touch Call Log tab.
2. Select the entry that you want to delete.
3. Touch the
icon to delete.
Clearing the call log
1. Touch
on the Home screen, then touch Call Log tab.
2. Touch the Menu key and then touch Delete, touch respective.call log(s), and
then touch OK.
Back to contents
37
IM5 Smartphone
Contacts
The Contacts application enables you to save and manage information such
as phone numbers and addresses of your contacts. After you save the contact
information on your mobile phone, it gives you easy access to people with whom
you want to communicate.
Opening the Contacts Application
If you have a new mobile phone and have not yet added any contacts, Contacts
displays a message with hints on how to start adding contacts to your mobile
phone.
To open the application, do one of the following:
• Touch
and then Contacts
to display the contact list.
• Touch
on the Home screen, then touch People tab.
All of your contacts are displayed alphabetically in a scrolling list.
Copying Contacts
Adding a Contact
1. In the contacts list, touch
to add a new contact.
2. Select the location you want to save the contact to.
3. Enter the contact’s name, and then add any detailed information such as phone
number or address.
4. When you are finished, touch Done to save the contact information.
Adding a Contact to Your Favorites
1. Touch the contact you want to add to Favorites.
2. Touch
beside the name and the icon turns white
Searching for a Contact
1. In the contacts list, touch
to search for a contact.
2. Enter the name of the contact for which you are searching. As you type, contacts
with matching names appear below the search box.
Editing a Contact
You can copy contacts to and from the device, memory card, or USB storage.
1.
2.
3.
4.
In the contacts list, touch the Menu key, and then touch Import/export.
Select the source location of the contacts that you want to copy and touch Next.
Select the destination location to copy the contacts to and touch Next.
Select the contacts to copy and touch OK.
Back to contents
You can always make changes to the information you have stored for a contact.
1. In the contacts list, touch the contact whose details you want to edit.
2. Touch the Menu key, and then touch Edit.
3. Make the desired changes to the contact information, and then touch Done. To
cancel all changes you have made to the contact information, touch the Back key.
38
IM5 Smartphone
Communicating with Your Contacts
Using the Onscreen Keyboard
From the Contacts or Favorites tab, you can quickly call or send a text (SMS) or
multimedia message (MMS) to a contact’s default phone number. You can also
open details to view a list of all the ways you can communicate with that contact.
This section describes how to communicate with a contact when you view your
contacts list.
Displaying the Keyboard Panel
Communicating with a Contact
1. In the contacts list, touch the contact that you want to communicate with.
2. In the contact’s details, you can do one of the following:
• Touch the phone number to make a call.
• Touch
to send message.
• Touch
to make a video call.
To enter text, use the onscreen keyboard. Some applications open the keyboard
automatically. In others, touch a text field to open the keyboard.
To open the keyboard, touch the space where you want to write the text. Touch the
Back key to hide the keyboard.
Using the Landscape Keyboard
If you find the keyboard inconvenient or difficult to use, turn your mobile phone
sideways. The screen will display the keyboard in landscape orientation, providing
you with a wider keyboard layout.
Customizing Keyboard Settings
1. Touch
Deleting a Contact
1. In the contacts list, touch the contact that you want to delete.
2. Touch the Menu key, and then touch Delete.
3. Touch OK to confirm that you want to delete the contact.
Back to contents
> Settings
> Language & input.
2. On KEYBOARD & INPUT METHODS option, touch
Android keyboard settings.
to customize the
39
IM5 Smartphone
Messaging
The Messaging application allows you to exchange text messages (SMS) and
multimedia messages (MMS) with anyone using an SMS or MMS-capable phone.
With the Email application you can read and send emails.
SMS and MMS
Opening Messaging
To open the application, do one of the following:
• Touch
on the Home screen.
• Touch
> Messaging
Creating and Sending a Text Message
The Messaging window opens, where you can create a new message or open an
ongoing message thread.
1. Touch
to start a new text or multimedia message or touch an existing
message thread to open it.
2. Enter a phone number in the Type name or number field, or touch
to select
a contact from Contacts. As you enter the phone number, matching contacts
appear. You can touch a suggested recipient or continue entering the phone
number.
3. Touch the composition text box to start entering your message.If you touch the
Back key while composing a message, it is saved as a draft in your message list.
Touch the message to resume composing it.
4. Once you are done, touch
If you have inserted two SIM cards, touch the
desired network to send your message.
Note: Responses appear in the window. As you view and send additional
messages, a message thread is created.
Back to contents
40
IM5 Smartphone
Creating and Sending a Multimedia Message
Opening and Viewing a Multimedia Message
1. On the messaging screen, touch
1. In the message list, touch the message thread to open it.
2. Touch the multimedia message to view the message.
3. Flick up or down to view the previous or next slide.
2. Enter a phone number in the Type name or number field, or touch
select a contact from Contacts.
to
3. Touch the composition text box to start entering your message.
Replying to a Message
4. Touch the Menu key to display the options panel, and then touch Add subject
to add the message subject.
1. In the message list, touch a text or multimedia message thread to open it.
5. Enter a subject.
6. Your mobile phone is now in multimedia message mode.
7. Touch
2. Touch the text box to compose your message.
3. Touch
If you have inserted two SIM cards, touch the desired network to
send your message.
and select the kind of media file to attach to the message.
8. Once you are done, touch
If you have inserted two SIM cards, touch the
desired network to send your message.
Back to contents
Customizing the Message Settings
In the message list, touch the Menu key, and then touch Settings to customize the
message settings.
41
IM5 Smartphone
Email
Your mobile phone puts email at your fingertips, too. Using your Email application,
you can configure it for most popular email services. These types of email accounts
are known as POP3, IMAP, or Exchange.
5. Set the Inbox checking frequency settings and touch Next.
6. Enter Give this account a name and Your Name.
Opening Email
To open the application, touch
Note: Your account settings may vary, depending on the kind of email service for
the account. For setup parameter details, please check with your service provider.
> Email
Note: Give this account a name is the name shown on the Email screen.
7. Touch Next.
Adding an Email Account
When using the Email application for the first time, you must configure your email
account. The Email setup wizard helps you set up your account for many popular
email systems, so you can read and work with the same email that you do on a
computer in a web browser, or with another email application.
1. Launch Email application. See “Opening Email”.
2. Enter your Email address and Password.
3. Touch Next. The device will automatically retrieve the email settings.
To manually set up email, touch Manual setup.
Note: If you select Manual setup, contact your email service provider for the
parameters required for your account if you don’t know what they are.
After the initial setup, your email application opens to display the contents of your
Inbox.
Adding Other Email Accounts
1. After creating your initial email account, touch the Menu key, and then touch
Settings.
2. Touch ADD ACCOUNT to create another email account.
3. Repeat steps 2~6 on “Adding an Email Account”.
Tip: When adding a subsequent email account, you can also select Send email
from this account by default option to use the new account to send all outgoing
messages.
4. Select an email connection protocol which best suits your needs. Follow the
on-screen instructions and enter all the server information, Domain, Username,
Password, and other related information. Touch Next to continue.
Back to contents
42
IM5 Smartphone
Viewing an Email Message
Deleting an Email Account
1. On the Inbox screen, touch an email to open it.
2. To access a folder(s) on an email account that has been set up through
Exchange, touch the account selection box at the top left of the screen, the
folder(s) for the selected account will be displayed under ALL FOLDERS.
1. Touch the Home key to take you back to the Home screen. Touch the Menu key
and select SETTINGS.
2. Scroll down to ACCOUNTS and select Corporate.
3. Touch the email account you want to delete.
4. Touch the Menu key or Options and select Remove account.
Creating and Sending an Email Message
1. On the Inbox screen, touch
to compose.
Changing Email Account Settings
Note: To switch to another email account, touch the account selection box at the
top left of the screen, then touch the account that you want to view.
You can change a number of settings for an account, including how often you check
for emails, how you are notified of a new mail, and details about the servers the
account uses to send and receive mails.
2. In the To field, enter the recipient’s email address.
3. Enter the subject and compose your email.
4. To send an attachment with the message, touch the Menu key, and then touch
Attach file. Select the type of file then select the file you want to attach.
1. On the Inbox screen, touch the Menu key, and then touch Settings to customize
the message settings.
2. Touch General settings or an email account.
3. Touch an option and change the necessary settings.
5. When you are finished, touch
6. If you touch the Back key while composing a message, it saves the current
message as a draft.
Note:Your account’s incoming and outgoing settings depend on the kind of email
service for your account: POP3, IMAP, or Exchange. You can enter the necessary
details manually, although you will typically need to contact your email service
provider to determine the right settings for the account.
Replying to an Email Message
1. Touch the email message you want to view and reply to.
2. Touch
or touch
Back to contents
> Reply all to reply to the email message.
43
IM5 Smartphone
Wi-Fi
Wi-Fi gives you wireless access to broadband Internet access. To use Wi-Fi on
your mobile phone, you need to have access to wireless access points (hotspots).
Obstacles that block the Wi-Fi signal will reduce its strength.
Turning On Wi-Fi
1. Touch
> Settings
2. Drag
Back to contents
to the right to enable Wi-Fi
44
IM5 Smartphone
Connecting to a Wireless Network
1. A list of detected Wi-Fi networks will be displayed. Touch a W-Fi network to
connect to it.
2. If you select an open network, you will be automatically connected to the
network. If you select a network that is secured and connect to it for the first
time, enter the password, and then touch Connect.
Note:If you connect to a secured wireless network that you have already used, you
will not be prompted to enter the password again unless you reset your mobile
phone to its default settings.
Tip: On the Wi-Fi settings screen, touch
to add a new Wi-Fi network.
Browser
Google Chrome is the default browser on your mobile phone. Chrome is a simple,
streamlined browser allowing you to navigate with ease, open and switch between
an unlimited number of tabs.
When you access the Chrome application for the first time there is an option to
“Take a tour” to find new ways of enhancing your browsing experience.
Back to contents
45
IM5 Smartphone
Bluetooth
Your mobile phone has Bluetooth, which allows you to create a wireless connection
with other Bluetooth devices so you can share files with your friends, talk handsfree with a Bluetooth headset, or even transfer photos on your phone to your PC.
If you are using Bluetooth, remember to stay within 10 meters (33 feet) of other
Bluetooth devices. Be aware that obstacles like walls or other electronic equipment
may interfere with your Bluetooth connection.
Turning On Bluetooth
1. Touch
> Settings
2. Drag
to the right to enable Bluetooth
When Bluetooth is turned on, the Bluetooth icon appears in the notification bar.
Back to contents
46
IM5 Smartphone
Note:When the Bluetooth is turned on, your phone detects other Bluetooth
devices, but your phone is not visible to others.
3. To make your phone visible to others, touch your phone model name to make this
device visible to other Bluetooth devices.
Pairing and Connecting a Bluetooth Device
Your mobile Bluetooth lets you do the following:
•
•
•
•
Hands Free Profile (HFP): allows you to use a hands-free Bluetooth device.
Headset Profile (HSP): allows you to use a mono Bluetooth headset.
Object Push Profile (OPP): allows you to transfer files through Bluetooth.
Advanced Audio Distribution Profile (A2DP): allows you to use a stereo
Bluetooth headset.
• A/V Remote Control Profile (AVRCP): allows you to control what plays
through the Bluetooth headset remotely.
Before you use Bluetooth, you need to pair your mobile phone with another
Bluetooth device as follows:
Note:If pairing with a car kit please enable Remote SIM mode before you start
the pairing process. In the Bluetooth menu, touch Menu key or Options and select
Advanced settings. The box needs to be checked to enable Remote SIM mode.
Once a partnership has been created, connecting to that Bluetooth device again
will no longer require entering the password.
Sending Files via Bluetooth
With Bluetooth, you can share pictures, videos, or music files with your family and
friends.
To send files via Bluetooth, do as follows:
1. Touch
> File Manager
to open the file manager
2. Touch and hold the file to be sent.
3. Touch
> Bluetooth, and then select a paired device.
1. Ensure that the Bluetooth function on your mobile phone is enabled.
2. Your mobile phone will then search for Bluetooth devices in range (or touch
SEARCH FOR DEVICES).
3. Touch the device you want to pair with your mobile phone.
4. Enter the pairing password to complete the connection.
47
IM5 Smartphone
Disconnecting or Unpairing a Bluetooth Device
1. Touch
> Settings
2. Drag
to the right to enable Bluetooth
3. On the connected device option, touch
device.
Back to contents
and then Unpair to disconnect the
48
IM5 Smartphone
Entertainment
In addition to being a communication device and personal assistant, your mobile
phone also provides you with a multitude of entertainment possibilities. You can
take photos, create videos and audio clips, and download and listen to music.
Taking Photos and Recording Videos
The camera is a combination of camera and camcorder that you can use to shoot
and share pictures and videos.
Opening Your Camera
Touch
> Camera
Viewing Your Photos
1. After taking a photo, a thumbnail of the photo you have just taken is shown in
the corner of the Capture screen. Touch the thumbnail to view it.
2. Touch the onscreen button to do any of the following:
• To share the photo, touch
, then touch an application for sharing.
• To delete the photo, touch
> OK.
• To view other photos and videos in Photos, touch
to open the camera.
3. If you want to view more photos, touch the screen, and then flick right or left.
Touch the Back key or the Home key to close the camera.
Shooting a Video
Taking a Photo
1. Touch
> Camera
.
Note: To switch between front and rear camera, touch
2. Compose your photo within the photo capture screen.
• Pinch to zoom in/out on the subject.
• Touch
to change the camera settings. The preview changes as you
change the settings.
3. Touch
to take your photo.
Back to contents
1. Touch
> Camera
2. Touch
when you want to start recording.
3. In recording mode will show
and timer will be displayed in top right corner.
• Pinch to zoom in/out on the subject.
• Touch
beside the timer to pause recording, timer will start flashing now.
• Touch the
4. Touch
next to flashing timer to resume.
to stop shooting.
49
IM5 Smartphone
Viewing Your Videos
Cropping a Picture
After recording a video, a thumbnail of the video you have just recorded is shown in
the bottom right corner of the Capture screen. Touch the thumbnail to view it.
1. When viewing a picture, touch the
, and then touch Crop.
2. Use the cropping tool to select the portion of the picture to crop.
Using the Gallery
Your Photos application can automatically search for pictures and videos saved
to Phone or SD storage. Select the album/folder and play as a slideshow or select
items to share with other applications.
Opening the Gallery
• Drag from the inside of the cropping tool to move it.
• Drag an edge of the cropping tool to resize the image.
• Drag a corner of the cropping tool to resize the image without changing the
length to width ratio.
3. Touch
changes.
to save the cropped picture. Touch the Back key to discard the
Touch
> Photos
to open the application. The Gallery application
categorizes your pictures and videos by storage location and stores these files in
folders. Touch a folder to view the pictures or videos inside.
Viewing a Picture
1. In the Photos, touch the folder that contains the pictures you want to view.
2. Touch the picture to view it in full-screen mode. When viewing a picture in fullscreen mode, flick the picture left or right to view the previous or next picture.
3. To zoom in on the image, move your two fingers apart from each other at the
location of the screen where you want to zoom in. In zoom mode, swipe your
finger up or down and left or right.
Tip: The picture viewer supports the automatic rotation function. When you
rotate your mobile phone, the picture adjusts itself to the rotation.
Back to contents
50
IM5 Smartphone
Enjoying Music
You can transfer music files from your PC to your microSD card so you can listen to
music on your mobile phone.
Copying Music to the microSD Card
1. Connect the phone to your computer with a USB cable and mount the microSD
card.
2. On the PC, navigate to the USB drive and open it.
3. Create a folder in the root directory of the microSD card (for example, Music).
4. Copy the music from your computer to the folder you have created.
5. After copying music, unmount or eject the drive as required by your PC’s
operating system to safely remove the mobile phone.
6. Disconnect the mobile phone from the PC.
Opening the Media Library
Touch
> Play Music
to display the media library. The Music application
organizes your music files by storage location.
Back to contents
51
IM5 Smartphone
Playing Music
Touch the song you want to play.
Tip: When you are listening to music, touch the Back key to use another
application. Your music continues to play. To return to the music controls, open
the notification panel and then touch the song.
Adding Music to a Playlist
1. Touch the song, and then touch
> Add to playlist.
2. Select a playlist or touch New playlist to add the song to an existing playlist.
Playing a Playlist
1. Touch
icon on the music screen.
2. Touch Playlists.
3. Touch
to play.
Back to contents
52
IM5 Smartphone
Listening to FM Radio
FM Radio lets you listen to FM radio stations on your mobile phone. Connect your
headset first to the audio jack of your phone before opening the application.
Recording the FM Radio
To record the radio, touch
Opening the FM Radio
1. Touch
> FM Radio
> Record FM and do the following:
• To start recording, touch .
to open the application.
2. The FM Radio automatically scans for available FM channels, saves them as
presets and plays the first FM channel found.
• To stop recording, touch
and then enter the file name and touch Save.
• To listen to the recorded file, touch
Tuning the FM Radio
Do any of the following:
• To select the radio station to listen to, touch
• To manually tune to a frequency, touch
or
or
• To add the current radio station to the Favorite list, touch
• To view the Favorite List, touch
• To turn on the speaker, touch
and select Speaker.
• To scan for all available channels, touch
• To turn off the radio, touch
Back to contents
> Search.
to exit out of application.
53
IM5 Smartphone
Google Services
You must sign in to a Google account to use Gmail, Google Calendar, and other
Google applications. To download applications from Play Store, you will also be
prompted to sign in to your Google account.
The mobile phone will connect to the Google server to check whether the username
is available. If the username you entered is already in use, you will be prompted to
choose another one.
Note:If your phone does not have a SIM card installed, you cannot connect to
mobile networks for voice and data services, but you can connect to a Wi-Fi
network to sign in to your Google Account and to use all the features of your
phone, except making a phone call.
7. Enter and confirm your Google account password.
8. Set the recovery information (i.e. alternative email account and security
question) and touch .
If you start an Android phone the first time without a SIM card, you will be asked
9. Read the agreement and touch
to complete the account setup.
to touch Connect to Wi-Fi to connect to a Wi-Fi network (instead of to a mobile
network) to set up your phone. If you already have a Google account, touch Sign in
10.Enter the authenticating code and touch .
and enter your username and password.
Creating a Google Account
If you do not have a Google account, you can create one:
1. Touch
11. Enter your credit card information to enable purchases from Google Play Store,
and then touch Save. Or, touch Skip to skip this step.
Using Gmail
> Settings
2. In ACCOUNTS, touch Add account.
3. Touch Google to create a Google account.
Gmail is Google’s web-based email service. When you first set up your phone, you
may have configured it to use an existing Gmail account or create a new account.
The first time you open the Gmail application on your phone, your Inbox will contain
the messages from your Gmail account on the web.
4. Touch New to create a new account.
5. Enter your name and touch
6. Enter the username and touch
Back to contents
54
IM5 Smartphone
Opening Gmail
Replying To or Forwarding an Email
Touch
> Gmail
The Inbox mail list appears. Any emails you decide to keep
on your mobile phone will go to your Inbox folder.
1. On the Inbox screen, touch the email that you want to reply to or forward.
2. Touch Reply
Switching Between Accounts
To switch to another email account, touch the account selection box at the top left
of the screen, then touch the account that you want to view.
Creating and Sending an Email
,Reply all
> Reply all, or Forward
> Forward.
3. Do one of the following:
• If you select Reply or Reply all, enter your message.
• If you select Forward, specify the message recipients and add any additional
text you want to include with the forwarded message.
4. Touch
1. On the Inbox screen, touch .
2. Enter the message recipient’s email address in the To field.
• If you are sending the email to several recipients, separate the email
addresses with commas.
• If you want to send a copy (Cc) or a blind copy (Bcc) of the email to other
recipients, touch the Menu key, and then touch Add Cc/Bcc.
3. Enter the email subject and compose your message. If you want to add a picture
attachment, touch the Menu key, and then touch Attach file to select the
picture you want to attach.
Searching for an Email
1. On the Inbox screen, touch .
2. Enter the search keywords in the box, and then touch
Customizing Your Gmail Settings
On the Inbox screen, touch the Menu key, and then touch Label settings to
customize the message settings.
4. After composing your email, touch
Back to contents
55
IM5 Smartphone
Using Maps
Maps lets you find your current location, view real-time traffic conditions
(depending on availability in your location), and get detailed directions to various
destinations on a satellite,traffic, or other kind of map.
Searching for Places of Interest
Enabling Location
2. Enter the place you want to search for in the search box, and then touch .
Before you open Maps to find your location or search for places of interest, you
must enable “location source”.
1. Touch
> Settings
3. Touch Mode to choose the relevant option.
Note: To use the navigation feature the Mode function will have to be set to High
Accuracy or Device only.
3. Your search results will then be displayed. Touch the marker
the location name.
and it displays
Getting Directions
1. While viewing a map, touch .
2. Enter the starting point in the first text box, and then enter your destination in
the second text box.
Opening Maps
> Maps
Note: You can also select one option from the suggestions list.
4. Touch the onscreen buttons to view the location on the map, get directions, and
more.
2. Touch Location.
Touch
1. While viewing a map, touch .
to open the application.
Note: You can also touch the corresponding and select an option.
3. Touch the icon for car, public transit, or walking directions.
4. Directions list will be displayed.
Back to contents
56
IM5 Smartphone
Using YouTube
YouTube is Google’s free online video streaming service for viewing, searching for,
and uploading videos.
Sharing a Video
1. While viewing a video, touch .
Opening YouTube
2. Touch an application for sharing the video link from the available options.
Touch
> YouTube
The videos are grouped into categories, such as
Recommended, Trending, Live, and more.
Searching for a Video
1. On the YouTube screen, touch .
2. Enter a search keyword, and then touch .
3. Scroll through the results and touch a video to watch it.
TIP: You also have the option to view results of recently posted videos. Touch All
time, and then select one of the available options.
Back to contents
57
IM5 Smartphone
Using Play Store
Play Store provides direct access to applications and games, which you can
download and install on your phone.
1. Touch
> Play Store
2. Touch a category, and then touch the item you want to download.
Opening Market
1. Touch
> Play Store
2. When you open Play Store for the first time, the Terms of Service window will
appear. Touch Accept to continue.
Searching for Applications
There are a few different ways to find applications on the Play Store home screen,
including:
• List of applications by category: Touch the desired category and scroll down to view more.
, and then touch My Apps.
Installing an Application
Note:If you want to install a non-Market application, touch Settings
>
Security, and then select the Unknown sources check box to allow installation of
the non-Market application.
Back to contents
4. To install the item, touch INSTALL, then the screen changes to show requested
permissions, then touch ACCEPT.
Note:To check the progress of a download, open the notification panel. The
installation duration will depend on the size of the application and your data
connection speed.
Uninstalling an Application
1. On the Play Store screen, touch
• Search function: Touch .
To view the installed applications, touch the
3. On the item details screen, read more about the application, including overall
rating, and user comments. If you scroll down to the Developer Info section, you
can see other applications from the same developer, or link to the developer’s
website.
> My Apps.
2. Touch the application you want to uninstall, and then touch UNINSTALL.
3. When prompted, touch OK to remove the application from your mobile phone.
Note:Applications can also be managed by touching Settings
> Apps.
58
IM5 Smartphone
Synchronizing Information
Some applications (for example, Gmail) on your mobile phone give you access to
the same personal information that you can add, view, and edit on your computer. If
you add, change, or delete your information in any of these applications on the web,
the updated information also appears on your mobile phone.
This is made possible through over-the-air data synchronization. The process
occurs in the background and does not interfere with the use of your mobile phone.
When your phone is synchronizing, a data synchronization icon will be shown in the
notification bar.
Managing Your Accounts
You can synchronize contacts, email, and other information on your mobile phone
with multiple Google accounts or other kinds of accounts, depending on the
applications installed on your mobile phone.
For example, you can start by adding your personal Google account, so your
personal email, contacts, and calendar are always available. You could then add a
work account, so your work-related emails, contacts and calendar entries are also
handy.
Back to contents
Adding an Account
1. Touch
> Settings
2. In ACCOUNTS, touch Add Account. The screen displays your current
synchronization settings and a list of your current accounts.
Note: In some cases, you may need to obtain account details from network
administrator support. For example, you may need to know the account’s domain
or server address.
3. Touch the account type to add.
4. Follow the onscreen steps to enter the required and optional information about
the account. Most accounts require a username and password, but the details
depend on the kind of account and the configuration of the service to which you
are connecting.
5. Configure the account. Depending on the kind of account, you may be asked to
configure what kind of data you want to sync to the mobile phone, to name the
account, and for other details. When you are finished, the account is added to
the list in the ACCOUNTS settings screen.
59
IM5 Smartphone
Removing an Account
Customizing Your Account Synchronization
You can remove an account and all information associated with it from your mobile
phone, including email, contacts, settings, and so on. You cannot, however, remove
some accounts, such as the first account you signed into on the mobile phone. If
you attempt to remove certain accounts, be aware that all personal information
associated with it will be deleted.
You can configure background data use and synchronization options for all
the applications on your phone. You can also configure what kind of data you
synchronize for each account. Some applications, such as Contacts and Gmail, can
synchronize data from multiple applications. Others, such as Calendar, synchronize
data only from the first
1.
2.
3.
4.
On the ACCOUNTS settings screen, touch the account type.
Touch the account to delete.
Touch the Menu key, and then touch Remove account.
Touch Remove account to confirm that you want to remove the account.
Google account you signed into on your phone, or from an account associated
specifically with that application. For some accounts, synchronizing is twodirectional; changes that you make to the information on your mobile phone are
made to the copy of that information on the web. Some accounts support only oneway synchronization; the information on your mobile phone is read-only.
Changing an Account’s Synchronization Settings
1. On the ACCOUNTS settings screen, touch the account type, touch the
account whose synchronization settings you want to change. The data and
synchronization screen opens, displaying a list of the kinds of information the
account can synchronize.
2. Selected items are configured to synchronize to your mobile phone.
3. Select or clear the check box of information you want to synchronize to the
mobile phone.
Back to contents
60
IM5 Smartphone
Using Other Applications
Using the Calendar
Setting an Event Reminder
Use Calendar to create and manage events, meetings, and appointments.
Depending on your synchronization settings, the calendar on your phone stays in
synchronization with your calendar on the web.
1. On any calendar view, touch an event to view its details or event summary.
2. Touch Add reminder to add a reminder. Or touch the “X” icon to delete it.
3. Touch the reminder time, and then touch the length of time before the event
when you want to be reminded. When the time comes, you will receive a
notification about the event.
Opening the Calendar
Touch
> Calendar
to open the application. Touch the Menu key to display
various view and settings options.
Creating an Event
1. On any calendar view, touch Menu key and select the New event option.
2. Enter the event name on the keyboard.
3. Enter the location of the event and the description.
• If there is a time frame for the event, touch the time FROM and TO, so you
can set the duration of the event.
• If it is a special occasion such as a birthday or a day-long event, touch the
ALL DAY check box.
4. Enter email addresses to invite Guests and Description.
5. Set the time of your event reminder in REMINDERS, and then specify in
REPETITION whether the event recurs and its frequency of recurrence.
6. After all settings are complete, touch DONE.
Back to contents
Customizing the Calendar Settings
On any calendar view, touch the Menu key, and then touch Settings > General
settings. Choose from:
• Hide declined events: Select to hide events for which you have declined
invitations.
• Show week number: Select to show the number of week.
• Week starts on: Specify the first day of the week.
• Use home time zone: Display calendars and event times in your home time
zone when travelling.
• Home time zone: Specify the time zone of the current location.
• Notifications: Select to send you an event notification.
• Choose ringtone: Touch to select the ringtone to sound when you receive an
event reminder.
• Vibrate: Touch to select the vibrate mode when you receive an event
notification.
• Pop-up notification: Select to set an event reminder.
• Default reminder time: Touch to select the default time before an event for
event reminders to occur.
• Quick responses: Touch to edit the default responses when emailing event
information to the respective guests.
61
IM5 Smartphone
Using the Alarm
Calculator
You can set a new alarm or modify an existing alarm.
Use the calculator to solve simple arithmetic problems or use its advanced
operations to solve more complex equations.
Opening the Alarm
Touch
> Clock
touch
to set alarm to use your mobile phone alarm.
Here you will see a list of current alarm details.
Adding an Alarm
Opening the Calculator
Touch
> Calculator
to open the application.
Switching to the Advanced panel:
On the Calculator screen, touch the Menu key, and then touch Advanced panel.
1. On the alarm list screen, touch
to add an alarm.
2. To set the alarm, do the following:
• Set the hour and minutes by navigating around the dial and touch Done.
• To set repeat mode, touch REPEAT. Touch one or more options, then
touch Done.
• To set the ringtone, touch WAKE UP. Touch an option, then touch OK.
• To vibrate when the alarm sounds, check Vibrate.
• To add an alarm label, touch Label.
3. After all settings are complete, touch the blank area of the alarm to save it.
Back to contents
62
IM5 Smartphone
Using the File Manager
Delete File(s)
File Manager lets you organize, edit, and delete files and folders.
1. On the File Manager screen, long press the file or folder you want to delete.
Opening the File Manager
Note: To select another file(s), touch the respective file(s). To select all files,
touch Select All.
Touch
File Manager
to open the application.
Creating a Folder
2. Touch .
3. Touch OK to confirm the deletion.
1. On the File Manager screen, touch .
2. Enter the name of the new folder in the text box.
3. Touch OK.
Moving or Copying File(s)
1. On the File Manager screen, long press the file or folder you want to move or
copy.
Note: To select another file(s), touch the respective file(s). To select all files,
touch Select All.
2. Touch
to copy or touch
to move the file.
3. Select the destination folder.
4. Touch
to paste the file.
Back to contents
63
IM5 Smartphone
Managing Your Mobile Phone
Setting the Display
To configure your mobile phone, touch
Adjusting the Screen Brightness
> Settings
Setting the Date and Time
When you first start the phone, you are asked if you want the time and date to
update automatically using the time provided by the network.
Note:When the time provided by the network is automatically used, you cannot
set the date, time, and time zone.
1.
2.
3.
4.
5.
6.
7.
8.
On the Settings screen, touch Date & time.
Touch Automatic date & time and set its setting to Off.
Clear the Automatic time zone check box.
Touch Set date. On the set date screen, touch the desired field, and then scroll
up or down to set the date. Touch Done when the configuration is complete.
Touch Select time zone, and then select the desired time zone from the list.
Scroll the list to view more time zones.
Touch Set time. On the set time screen, touch the desired field, and then scroll
up or down to set the time. Touch Done when the configuration is complete.
Select or clear the Use 24-hour format check box to switch between 24-hour
format and 12-hour format.
Touch Choose date format to select how you want the date to display on your
mobile phone.
Back to contents
1. On the Settings screen, touch Display > Brightness.
2. Drag the slider left to make the screen darker, or right to make it brighter.
3. Once you lift your finger off the slider, this will save your setting automatically.
Note: Tap AUTO to enable the device to automatically adjust the brightness of the
screen depending on the surrounding light.
Auto-rotate screen
Check this box to enable the display to rotate when you turn the phone between
landscape and portrait.
Adjusting the Time Before the Screen Turns Off
If your mobile phone is idle for several minutes, it will turn off the screen to save
battery power. To set a longer or shorter idle time, do the following:
1. On the Settings screen, touch Display > Sleep.
2. Select the duration you want the screen to be illuminated.
64
IM5 Smartphone
Setting Phone Ringtone
Setting Phone Services
Turning On Silent Mode
Set up the Default Network
On the Settings screen, touch Audio profiles > Silent to enable the silent mode.
Then all sounds except media and alarms are silenced.
1. On the Settings screen, touch SIM management.
2. In DEFAULT SIM, touch Voice call, Video call, Messaging, or Data connection
and then select the network that you want to use for data connection.
Adjusting the Ringtone Volume
You can adjust the ringer volume when you are on the Home screen or any
application screens (except during a call or when playing music or videos). Press
the Volume keys to adjust the ringer volume to your desired level. You can also
adjust the ringer volume on the settings screen.
1. On the Settings screen, touch Audio profiles > General >
and touch
Volumes.
2. Drag the slider left to make the volume softer, or right to make it louder.
3. Touch OK to save the adjustment.
Changing the Phone Ringtone
1. On the Settings screen, touch Audio profiles > General >
and touch Voice
call ringtone.
2. Touch the ringtone you want to use, and then touch OK. The ringtone plays
when selected.
Note:Check the availability of service and plan rates of data connections with your
network service provider.
Customize the Network Settings
1. On the Settings screen, touch SIM management.
2. In SIM INFORMATION, select the network that you want to customize. The
following network settings are available:
• Edit SIM name: Select to change the network name.
• Enter phone number: Select to set the phone number.
• Set background color: Select to customize the network icon shown on the
status bar.
• Display numbers: Select to hide the number or to display the first/last 4
digits.
Setting Your Phone to Vibrate for Incoming Calls
1. On the Settings screen, touch Audio profiles > General > .
2. Select the Vibrate check box to enable your phone to vibrate for incoming calls.
Back to contents
65
IM5 Smartphone
Setting Dual SIM functionality
Protecting Your Mobile Phone
In the SIM management menu within WIRELESS & NETWORKS, you can view SIM
information and configure which SIM is used for Voice, Video calls, Messaging and
Data Connection. By default the setting for Calls and Messaging is set to Always
ask. Data connection will default to use the SIM placed in the SIM slot 1 If you
change the Data connection from the defaulted SIM slot a warning pop up message
will be displayed that the selected SIM does not support 3G service, which may
make data loading slower, so 3G service may need to be changed.
Enable Your SIM Card PIN
Setting 3G Service
To change the SIM card PIN at any time, touch Change SIM PIN.
On your Dual SIM phone both SIM card slots support 3G services, however only
one can be 3G enabled at a time, with the default set to SIM slot 1
In WIRELESS & NETWORKS, select More... > Mobile networks > 3G service >
Enable 3G and select the SIM to be used for 3G services.
Turning on Data Roaming
In WIRELESS & NETWORKS, select SIM management > GENERAL SETTINGS >
Roaming > Data roaming, check to enable Data roaming.
Note:Accessing data services while roaming may incur considerable additional
charges. Ask your network service provider about data roaming fees.
Disable Data Service
In WIRELESS & NETWORKS, select More... > Mobile networks > Data connection
and select off.
Back to contents
1. On the Settings screen, touch Security > Set up SIM card lock.
2. If you have inserted two SIM cards, touch the desired SIM card network that you
want to set the PIN code.
3. Check the Lock SIM card check box.
4. Enter the SIM card PIN, and then touch OK.
Note:You can dial emergency numbers any time from your mobile phone.
Protecting Your Mobile Phone with a Screen Lock
To keep your data more secure, lock the screen and/or require a screen unlock
pattern every time your mobile phone is turned on or wakes up from sleep mode.
1. On the Settings screen, touch Security > Screen lock.
2. Select the one of the available options.
• None: The device is not protected.
• Slide: Slide to lock icon to unlock the phone.
• Face Unlock: Use face detection to unlock the phone.
• Voice Unlock: Use a voice command to unlock the phone.
• Pattern: Trace the correct unlock pattern on the screen to unlock the phone.
• PIN: Enter a PIN number to unlock the phone.
• Password: Enter a password to unlock the phone.
3. Follow instructions for the chosen method to complete the settings.
66
IM5 Smartphone
Managing Applications
Resetting Your Mobile Phone
Viewing an Installed Application
Backing Up My Settings
1. On the Settings screen, touch Apps.
2. In the applications list, do any of the following:
• Touch the Menu key, and then touch Sort by size. Then touch an application
to view its details.
• Select Downloaded, Phone storage, Running, or All tab at the top of the
screen. Then touch an application to view its details.
• Touch an application to view its details directly.
You can back up your mobile phone’s settings to Google servers, with your Google
account. If you replace your mobile phone, the settings you have backed up are
stored on the new mobile phone the first time you sign in with your Google account.
Removing an Installed Application
1. On the Settings screen, touch Apps.
2. Touch an application, and then touch Uninstall to remove the application from
your mobile phone.
Note:Pre-installed applications can not be deleted.
Ways to Free Up Your Mobile Phone Memory
1. On the Settings screen, touch Backup & reset.
2. Select the Back up my data box.
Restoring Factory Data
If you reset your phone to the settings that were configured at the factory, all of
your personal data from internal phone storage, including information about your
Google Account, any other accounts, your system and application settings, and any
downloaded applications will be erased. Resetting the phone does not erase any
system software updates you’ve downloaded or any files on your microSD card,
such as music or photos.
1. On the Settings screen, touch Backup & reset > Factory data reset.
2. When prompted, touch Reset phone, and then touch Erase everything. The
mobile phone resets the settings to the original factory settings, and then
restarts.
• Move files and email attachments to the microSD card.
• Uninstall the downloaded programs that you no longer use.
• Reset your mobile phone.
Note: Please back up all your important data before performing a Factory reset.
Back to contents
67
IM5 Smartphone
Specifications
Platform
MTK 6592
SIM card
Dual SIM, Dual online, One talk
eMMC
8GB+8Gb
Screen
5 inch (TFT)
Sensor Pixel
QUXGA(13.0Mega)
Band
GSM: 850/900/1800/1900 MHz
WCDMA: BAND1(2100)\BAND2(1900)
\BAND5(850)
Battery
2150 mAh
Standby Time
430 hours*
Maximum Talk Time
360 Minutes*
*The standby time and maximum talk time depend upon the network signals and settings.
Back to contents
68
IM5 Smartphone
Environmental Concern
Help us save Our Environment…GO GREEN..!!
All our endeavors are directed towards providing environment friendly products to you. The
materials used in our devices are recyclable and can be reused to make new products. We strive to
make products that are safe for our consumers as well as the environment. Come join hands with
us and make world a better place to live.
Preserve natural resources for future generations by recycling your phone. The phone contains
some metals, when recycled properly; these can be put back into circulation, decreasing the need
for new metal mining. Recycling reduces the need for raw materials, saves energy, helps mitigate
Global Warming and reduces pollution, reduces waste products in landfills; therefore preserving
natural resources for the future and saving the planet.
Follow some simple steps and contribute towards saving the planet.
DO’s
Recycle your handset and its accessories. To Protect natural resources and to promote re-use of the
material, kindly separate batteries from other type of waste.
Affect nearly every system in the human body and result in birth defects, brain, heart, liver, kidney
and skeletal system damage. They will also significantly affect the nervous and reproductive
systems of the human body;
When burned, create cancer-producing dioxins which are released into the air we breathe; If
thrown in landfills, may leach into groundwater affecting your local community;
In warm climates, the oxidation of mercury in the environment can be accelerated, leading to the
creation of oxidized Hg atoms that are known to be associated with ozone depletion; and Improper
recycling additionally results in data security issues, as private electronic information remains on
hard drive, if not properly removed before disposal.
Constitution of Hazardous Elements in your Device:
Your device does not contain the following hazardous elements in a proportion higher than the
limits provided hereunder: maximum concentration value of 0.1% by weight in homogenous
materials for lead, mercury, hexavalent chromium, polybrominated biphenyls and polybrominated
diphenyl ethers; and maximum concentration value of 0.01% by weight in homogenous materials
for cadmium.
DONT’s
Do not dispose off your mobile and its battery in fire.
Do not dispose your mobile with the regular waste.
Do not over charge your handset. Remove the charger when battery is full.
Don’t trash your phone, instead RECYCLE it
Hazards of Improper handling, accidental breakage, damage and /or
improper recycling of hazardous elements
If this product is improperly handled, broken or damaged or carelessly recycled or disposed off in
the fire, can result in environmental and data security concerns, including the following:
Back to contents
69
IM5 Smartphone
KODAK Phone Information
KODAK Phone user guide
Eu compliance statement
To review the user guide before using your KODAK Phone, go to www.
kodakphones.com/support
Bullitt Mobile hereby declares that this wireless device is in compliance with the
essential requirements and other relevant provisions of the R&TTE directive. Use
restriction: This device is restricted to indoor use when operating in the 5150 to
5350 Mhz frequency range.
Regulatory information
Regulatory information, certification and compliance marks specific to KODAK
Phones are available in the user guide.
EMC compliance statement
This product has demonstrated EMC compliance under conditions that included
the use of compliant peripheral devices and shielded cables between system
components.
It is important that you use compliant peripheral devices and shielded cables
between system components to reduce the possibility of causing interference to
radios, televisions and other electronic devices.
FCC compliance statement
Avoid Hearing Damage
To prevent possible hearing damage, do not listen at high volume levels for long
periods. This device has been tested to comply with the Sound Pressure Level
requirement laid down in the applicable EN 50332-1 standards. Permanent hearing
loss may occur if earphones or headphones are used at high volume for prolonged
periods of time. Prevention of Hearing Loss Warning statement requirement under
EN 60950-1:A12.
Battery caution
Caution! Risk of explosion if battery is replaced by an incorrect type.
Dispose of used batteries according to the instructions. Operating temperature of
device: 0-35°C.
This device complies with part 15 of the FCC rules. Operation is subject to the
following two conditions: [1] this device may not cause harmful interference, and
[2] this device must accept any interference received, including interference that
may cause undesired operation.
Made for and Distributed by Bullitt Mobile Ltd under license from Eastman Kodak
Company. The Kodak trademark and trade dress are used under license from Eastman
Kodak Company. Made in China. ©2015 Bullitt Mobile Ltd www.kodakphones.com
Back to contents
70


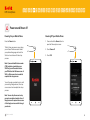
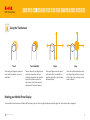
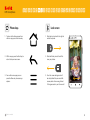


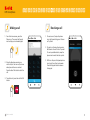
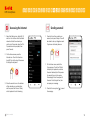
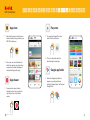


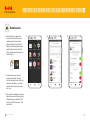


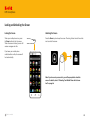
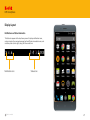


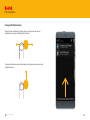
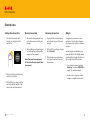
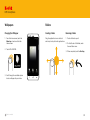
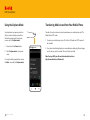

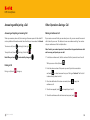

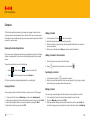

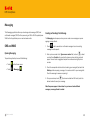

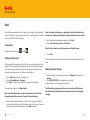

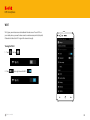


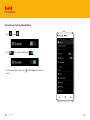
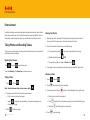
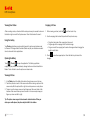


![AGIVEN PROGRAM ]](http://vs1.manualzilla.com/store/data/005708142_1-ae1c6d6b32e7a9016e2dede042b38772-150x150.png)