1
FileMate Clear X2/X4
User Manual
Table of contents
1 Getting started
Charging the battery 4
Set up your Clear 5
Favorites Tray 6
Browse & organize your Home screens 8
Touch & type 10
Type text by speaking 11
What’s New in Android 11
2 Exploring your Clear
Swipe up for Google Now 14
Swipe down for notifications & settings 15
Relax with Google Play 18
Use & customize the lock screen 20
Try Face Unlock 21
Share content with Android Beam 21
Change the wallpaper 22
Take a screenshot 23
Connect to keyboards, mice, & other devices 23
3 Use the keyboard
Enter & edit text 25
Try Gesture Typing 27
Use keyboard dictionaries 28
4 Try some apps
Use All Apps 29
Start Gm ail 30
Find People 3 1
M anage yo ur Calendar 32
Open & use Clock 33
M anage dow nlo ads 34
2
5 Google Now & Search
Abo ut Goo gle Now 35
Use Google Now 38
Turn Google Now on or off 40
Co ntro l lo cation access, repo rting, & histo ry 40
Use your voice on Android 42
Voice Actions commands 44
Google Now Card list 44
Abo ut Gm ail Cards 47
Abo ut the Activity summ ary card 47
6 Settings
Settings 48
7 Accessibility
Accessibility 51
8 Warranty
Warranty 5 2
9 Troubleshooting
Tro ubleshooting 55
3
1
Getting started
Charging the battery
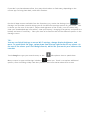
The battery may not be fully charged at first. It’s a good idea to fully charge it as soon as you get a
chance, and for at least 6 to 8 hours prior to use. The best way to charge your Clear tablet is by
connecting it to its wall charger ensuring that the charging pin of the wall charger is carefully
inserted it into the charging port. Do not force the charging tip into the power port or wiggle it
around. Failure to follow these guidelines will result in damaging your power port and may be
considered incidental, accidental, or physical damage to your tablet which would not be covered
under Wintec Industries’ limited 1 year warranty. Here are some basic guidelines:
Use only the charging unit and micro USB cable that come s with your FileMate Clear.
Using a different charging unit or cable may damage your tablet. If you need a replacement
wall charger, please contact Wintec Industries’ customer support team at 1 -866-989-4683.
The best power source is the charging unit that comes with your tablet. Other sources, such
as a laptop, may not work as well or may damage your Clear. Using non-approved or generic
chargers may damage the power port which is not covered under the 1 year limited warranty
with Wintec Industries.
The tablet charges faster when you’re not using it. So, please power your Clear off and let it
charge.
Have a charging routine is best. Decide where and when you plan to charge your Clear.
It is not recommended to use and charge your Clear at the same time. There is a possibility
of bending or flexing the charging port causing physical distress or damage.
4
It is not recommended to charge or use your FileMate Clear while driving. The voltage output
from your vehicle is different and may damage your FileMate Clear.
The input voltage range between the wall outlet and this charging unit is AC 100V–240V, and
the charging unit’s output volt-age is DC 5V, 2A.
The Clear’s battery can’t be removed. Don’t attempt to o pen the Clear .
Opening yo ur Clear will v io late yo ur lim ited 1 year warranty with Wintec Industries.
Set up your Clear
To turn on your Clear, press the Power button on the top right hand side for a few seconds, and
then release it.
The first time you turn on the tablet, you’ll see a Welcome screen.
• To choose a different language, touch the menu
• To continue, touch S t a r t and follow the instructions. If you do not completely finish the setup
information per screen, the Clear will not allow you to adv ance.
IMPORTANT: You must have a Wi-Fi connection to complete the setup process.
When prompted, you can sign in with your Google Account or create one at that time. You can also
choose to skip this step and create one later. An email address that you use for any of the following
is acceptable as a Goo gle Account:
• Gmail
• Goo gle Apps
• YouTube
• Any other Google product
When you sign in with a Google Account, all the email, contacts, calendar events, and other data
associated with that account are automatically synced with your tablet. If you have multiple Google
Accounts, you can add the others later.
5
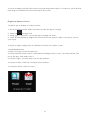
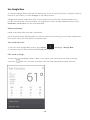
Favorites Tray
Every Home screen shows the Favorites tray: another quick way to get to your books, magazines,
apps, movies, and music:
Open folder for
popular apps
View all
your apps
Shop on
Google Play
At the bottom of the Clear’s screen, no matter what you’re doing, you’ll always find these three
navigation buttons:
Back
Opens the previous screen you were working in, even if it was in a different app. Once you back up
to the Home screen, you can’t go back any further in your history.
Home
By tapping on the Home icon, it opens the Home screen. If you’re viewing a left or right Home
screen, it opens the central Home screen. To open Google Now, swipe up. Google Now gives just
what you need to know, right when you need it.
Recent apps
Opens a list of thumbnail images of apps you’ve worked with recently. To open an app, touch it. To
re-move a thumbnail from the list, swipe it left or right
6
If you don’t use these buttons often, they may shrink to dots or fade away, depending on the
current app. To bring them back, touch their location.
On the All Apps screen available from the Favorites tray, notice the Settings icon.
The
Settings icon provides you with brings you all the different settings options for your Clear. This
is where you can turn on the Wi -Fi, adjust the brightness of the sc reen, turn off screen lock,
view your downloaded app information, view your battery’s charging information, and perform a
backup and reset if necessary. Take your time to be familiar with all the different options in the
Settings screen.
TIP:
You can use Quick Settings to access Wi-Fi settings, change display brightness, and
more. To open Quick Set-tings, swipe down from the top right corner of any screen. At
the top of the screen you’ll find Google Search, which lets you search your tablet or the
Internet .
Touch G o o g l e to type your search terms, or the
Microphone icon to speak them.
Many screens in apps and Settings include a
Menu icon. Touch it to explore additional
options, often including a Help item that provides more information about that screen.
7
Browse & organize your Home screens
Browse Home screens
To move between Home screens, swipe left or right. There may not be anything there now, but
you can customize your home screens to have what you want ranging from any of the widgets
that can be found in the widget section in the Apps folder. Keep in mind that widgets are
shortcuts to applications. Here is an example of the My Library widget displays music, movies,
magazines, and books.
Touch any title to
open it.
When you’re ready to shop for more, try th e suggestions in one of the Play Recommendations
widgets:
Touch to
avoid future
suggestions
like this
Touch to see a
different suggestion
Touch to
learn more
8
To resize a widget, touch & hold, then let go and drag the blue dots. To remove it, touch & hold,
then drag it to the Remove icon at the top of the screen.
Organize Home screens
To add an app or widget to a Home screen:
1. Go to the Home screen where you want to place the app or w i d g e t .
2. Touch the
All Apps icon.
3. Swipe right, if necessary, to fi nd the app or widget you want.
4. Touch & hold the app or widget until the Home screen appears, slide it into place, and lift
your finger.
To move an app or widget icon to a different location on a Home screen:
1. Touch & hold the icon.
2. Slide your finger to the new position.
To move between Home screens, slide toward the edge of the s c r e e n . To bump another icon
out of the way, slide slowly into it.
3. Lift your finger. The icon drops into its new position.
To create a folder, slide one icon quickly over another.
To rename a folder, touch its name.
9
Touch & type
To select or activate something, touch it. To type something, such as a name, password, or
search terms, just touch where you want to type. A keyboard pops up that lets y o u t y p e i n t o t h e f i e l d .
Other common gestures include:
• Touch & hold. Touch & hold an item on the screen by touching it and not lifting your finger
until it responds.
• D r a g . Touch & hold an item for a moment and then, without lift ing your finger, move your
finger on the screen until you reach the target position. For example, you can move apps around
on the Home screen.
• S w i p e o r s l i d e . Quickly move your finger across the surface of the screen, without pausing
when you first touch (so you don’t drag something instead). For example, you can slide a Home
screen left or right to view the other Home screens.
• D o u b l e - t a p . Tap quickly twice on a webpage, map, or other screen to zoom. For example,
double-tap a picture in Chrome to zoom in, and double-tap again to zoom out.
• P i n c h . In some apps (such as Maps, Chrome, and Gallery), you can zoom in and out by placing
two fingers on the screen at once and pinching them together (to zoom out) or spreading them
apart (to zoom in).
• Rotate the screen. The orientation of most screens rotates with your device as you turn it. To
lock or unlock the screen’s vertical orientation, swipe down from the top right of any screen and
touch the Rotation icon in Quick Settings
To change your tablet’s notifi cation sounds, volumes, and more, go to
Settings > Device > Soun d.
To change your tablet’s brightnes s, font sizes, and more, go to
Settings > Device > Display .
10
Type text by speaking
You can speak to enter text in most places that you can enter text with the onscreen keyboard.
1. Touch a text field, or a location in text you’ve already ent ered in a text field.
2. Touch the Microphone key on the onscreen keyboard.
3. When you see the microphone image, speak what you want to t y p e .
Say “comma,” “period,” “question mark,” “exclamation mark,” or “exclamation point” to enter
punctuation.
When you pause, what you spoke is transcribed by the speech -reco g n i t i o n s e r v i c e a n d
e n t e r e d i n t h e t e x t f i e l d , u n d e r l i n e d . Y o u c a n touch the Delete key to erase the
underlined text. If you start typing or enter more text by speaking, the underline disappear s. To
improve processing of your voice input, Google may record a f e w s e c o n d s o f a m b i e n t
b a c k g r o u n d n o i s e i n t e m p o r a r y m e m o r y at any time. This recording remains on the device
only fleetingly and is not sent to Google.
To change your tablet’s speech set tings, go to
input
Settings > Personal > Language &
What’s New in Android
If you are new to Android, or perhaps new to the version that is on your Clear, you may want to
check out some of the new features in Android 4.2 (Jelly Bean). For a list of all changes since
Android 4.0, please click below:
http://www.android.com/about/jelly -bean/
•Gesture Typing (Android 4.2)
Instead of typing each letter, use Gesture Typing to input a word without lifting your finger. You
don’t need to worry about spaces because they’re added automatically for you.
TIP: Glide your finger over the letters you want to type, and lift it after each word.
•PhotoSphere mode (Android 4.2)
Use Photo Sphere mode in the Camera app to capture 360 de gree photos.
TIP: Touch the Camera icon to open the app, then touch the mode options to select
Photo Sphere mode.
11
• Google Play widgets
New widgets on your Home screens display recently used apps, music, movies, books, or games
you already have including preloaded content that comes with your device. Other widgets offer
suggestions for browsing Google Play.
TIP: Touch a widget to access its content on Google Play. Touch &hold a widget to
resize it or remove it .
•Q u i c k S e t t i n g s (Android 4.2)
Use Quick Settings to easily ac cess Wi-Fi settings, manage dis play brightness, open the main
Settings menu, and more.
TIP: Swipe down from the top right corner of any screen to open Quick Settings, and
then touch one of the boxes to op en a specific s e t t i n g .
•E x p a n d a b l e n o t i f i c a t i o n s
Expandable notifications were introduced in Android 4.1, including the option t o perform
actions from the notification itself. In Android 4.2, you can expand notifi cations more easily
with a swipe of your finger.
TIP: Swipe down the notification shade from the top of the screen, then glide your
finger down the notifications to expand them. Touch an icon inside a notification to
handle a task directly.
•R e a r r a n g e H o m e s c r e e n s
Slide an icon slowly to move other icons or widgets gently aside.
Touch & hold an icon and slide slowly to the location of your choice and then s lide an icon
quickly over another to create a folder.
•S c r e e n m a g n i f i c a t i o n
Users with visual impairments can enter full-screen magnification by triple-tapping
the screen.
Go to S e t t i n g s
screen magnification.
> S y s t e m > A c c e s s i b i l i t y > M a g n i f i c a t i o n g e s tures to turn on
12
•Google Now
Google Now shows you information at just the right time, such as today’s weather before you
start your day, how much traffic to expect before you leave for work, and even your favorite
team’s score while they’re playing.
Swipe up from the bottom center of any screen, or touch the Google Search bar on any Home
screen.
•Say “Google” to search
When the Google Now screen is open, you can say “Google” to activate a voice search.
Open Google Now, and then say “ Google” and what it is you want to search.
13
2
Exploring your Clear
Swipe up for Google Now
Google Now is about getting you just the right information, at just the right time. It tells you
today’s weather before you start your day, how much traffic to expect before you leave for
work, and even your favorite team’s score while they’re playing. All of this happens
automatically. Google Now brings you the information you want to see, when you want to see it.
No s e a r c h i n g r e q u i r e d .
Swipe your finger up from the bottom of any screen , or touch the Google Search bar at the top
of the Home screen. When you want to see more cards, touch
Show more cards at the bottom of the screen. When you don’t need them anymore, swipe them
out of the way.
You’re in control
When you decide to use Google Now, you’re turning on location reporting and location history.
Google Now also uses location information provided by Google’s location service.
If location services are turned on, Google Now uses data that you may have stored in other
Google products. For example, if you have searches stored in your Web History, Google Now can
show cards based on sports scores, f l i g h t s t a t u s , a n d s o o n .
14
Similarly, Google Now can use data that you may have stored in t h i r d - p a r t y p r o d u c t s t h a t
y o u a l l o w G o o g l e t o a c c e s s . F o r e x a m p l e , your tablet’s synced calendar may include
entries from non-Google calendar products. If you have a synced calendar entry for a dentist
appointment that includes the dentist’s address, Google Now can check traffic and suggest when
to leave.
You’re in control. You can choose exactly which cards you’d like to see, adjust the details of
what they display, and adjust your p r i v a c y s e t t i n g s . For more information about Google Now
and your location i n f o r m a t i o n , c o n t a c t G o o g l e S u p p o r t . w w w . g o o g l e . c o m / s u p p o r t
Swipe down for notifications & settings
Notifications alert you to the arrival of new messages, calendar events, and alarms, as well as
ongoing events, such as video downloads.
When a notification arrives, its icon appears at the top of the s c r e e n . I c o n s f o r p e n d i n g
n o t i f i c a t i o n s a p p e a r o n t h e l e f t a n d system icons showing things like WiFi signal or battery
strength on the right:
Bluetooth, WiFi & Battery and Status
Pending
notifications
To open the notification shade, swipe down from the top left corner of any screen.
Certain notifications can be expanded to show more information, such as email previews or
calendar events. The one at the top is always expanded when possible.
To open the related app, touch the notifi cation icon on the left. Some notifications also allow
you to take specific actions by t o u c h i n g i c o n s w i t h i n t h e n o t i f i c a t i o n . F o r e x a m p l e ,
C a l e n d a r n o tifications allow you to Snooze (remind you later) or send email to other guests.
When you’re finished with a notifi cation, just swipe it away. To dis miss all notifications, touch
the dismiss icon at the top right of the notification shade. You can perform these actions from
the notification shade
15
Dismiss All
Touch to
respond to
other guests
Swipe down
using one
finger to
expand
certain
notifications
16
Quick Settings
Use Quick Settings to easily ac cess Wi-Fi settings, manage dis play brightness, open the main
Settings menu, and more. To open Quick Settings, swipe down from the top right corner of any
screen:
Touch to
open all
settings
Touch a
square to
open a
specific
setting
17
Relax with Google Play
Google Play brings together all your favorite content in one place – movies, TV shows, books,
music, magazines, apps, and more –so you can reach it from any of your devices.
Use Google Play widgets
These widgets are available on your Home screens:
•M y L i b r a r y . Displays your most recently used music, books, and so on. Touch any of the
images to see your content.
•Recommended on Play. S u g g e s t s m u s i c , m o v i e s , a n d o t h e r content that may interest you.
Touch the suggestion to learn more about it.
•R e c o m m e n d e d a p p s . Recommends apps that you can add to your Home screen. Touch the
recommendation to learn more a b o u t i t
Touch to
avoid future
suggestions
like this
Touch to
see a
different
suggestion
Touch to
learn more
To resize a widget, touch & hold, then let go and drag the blue dots. To remove it, touch & hold,
then drag it to the Remove icon at the top of the screen. To add another Google Play widget,
touch the All Apps icon, t h e n W i d g e t s , and swipe from right to left until you see the one you
want. Then touch & hold, and let go in the Home screen location you want.
18
Shop on Google Play
To open the Google Play Store app, touch the Play Store icon in your Favorites tray on every
Home s c r e e n . Most things you purchase on Google Play are available from your computer as
well as from any of your A n d r o i d m o b i l e d e v i c e s . ( A n d r o i d a p p s a r e o n e e x c e p tion – they
run only on Android devices.)
Sign in to play.google.com to get access to all of your entertainment. The Google Play Store has
millions of applications, music and movies choices available.
Find your content
If you purchased on Google Play in the past, you’ll automatically have access to those previous
applications and content.
TIP: Ensure that you’re signed in using the same account that you used to purchase it.
You can get to your content using any of the Google Play icons in your Favorites tray, including
Books, Magazines, Movies, and M u s i c . Or, touch the Play Store icon to open Google Play. In the
top right corner, to the left of the Menu and Search icons, you’ll fi nd the My Library icon
corresponding to the section of Google Play you’re currently viewing. For example, while
browsing the Movies& TV section, you’ll see the Google Play Movies app icon, which will take
you to My Movies & TV:
Touch icon in this location to see your
content of that type
You can quickly access your content this way, from the Google Play Store app, even if you
originally purchased it on Google Play using a different phone or tablet. If you get a new device,
all your media will automatically be waiting for you here when you turn on and sign in.
Google Play settings
To adjust your Google Play settings, switch accounts, or get help, choose the option you want
from the M e n u in the top right corner. The Google Play Settings screen lets you control when
19
you’re notified about updates to apps and games, clear your search history, and enable user
controls.
TIP: To filter Android apps based on maturity level or require a PIN before completing
any purchase, touch C o n t e n t f i l t e r i n g or Set or change PIN.
Google Play support
For more detailed information about Google Play, including phone a n d e m a i l s u p p o r t
options, visit
www.google.com/support
Use & customize the lock screen
You can add widgets to the top of the lock screen and swipe be tween them. Lock screen widgets
let you scan recent Gmail mes s a g e s , C a l e n d a r e n t r i e s , a n d o t h e r a p p c o n t e n t w i t h o u t
u n l o c k i n g your screen.
If your tablet is set up for more than one user, you may need to touch your image at the bottom
of the screen to see your own l o c k s c r e e n . To open Google Now from the loc k screen, swipe up
from the bottom of the lock screen. Enter your PIN, pattern, or password if p r o m p t e d . To set
or change the type of lock, go to S e t t i n g s
> Personal > Security > Screen lock .
Add a widget to the lock screen
1. If the lock screen has no widgets yet, you’ll see a large Plus icon. If you don’t see it, swipe any
existing widgets from left to r i g h t u n t i l i t a p p e a r s .
2. Touch the Plus icon. If prompted, enter your PIN, pattern, or password. A list of the available
widgets appears. Apps that support lock screen widgets can add their own widgets to this list.
3. Touch the widget you want to add. You can add up to five widgets to your lock screen. To
move between them, swipe across the top of the screen in portrait mode, or across the left side
of the screen in landscape mode.
Reorder lock screen wi dgets
1. Touch & hold a widget.
2. Drag the widget and release it in the location of your choice.
Remove a lock screen widget
Touch & hold the widget, then drag it onto the Remove icon.
20
Try Face Unlock
You can set an automatic screen lock for your ta blet. If a lock is set, the screen locks when your
Clear’s display goes to sleep or if you press the Power button. You can set locks of different
strengths using lock settings:
1. Go to Settings
> Personal > Security > Screen lock .
2. Touch the type of lock you’d like to use. Face Unlock is one of the options available. After
you’ve set it up, you can unlock your tablet simply by looking at it. Although Face Unlock is not
very secure, it can be convenient and fun to use.
T I P : After you set up Face Unlock, look under S e t t i n g s > P e r s o n a l > S e c u r i t y for two
additional settings:
Face Matching and Liveness can make Face Unlock more reliable and secure.
TIP: Wintec Industries does not store your security lock information. If you lock
yourself out of your tablet, you will have to perform an external hard reset. All of your
personal settings and information will be removed from the tablet. A secured and
locked tablet is not a warranty issue.
Share content with Android Beam
You can beam a web page, a video or other content from your s c r e e n t o a n o t h e r d e v i c e b y
b r i n g i n g t h e d e v i c e s t o g e t h e r ( t y p i cally back to back).
TIP: Before you begin:Make sure both devices are unlocked, support Near Field
Communication (NFC), and have both NFC and Android B e a m t u r n e d o n .
1. Open a screen that contains something you’d like to share, such as a webpage, YouTube
video, or place page in Maps.
2. Move the back of your tablet toward the back of the other d e v i c e . When the devices
connect, you hear a sound, the image on your screen reduces in size, and you see the message
Touch to beam.
3. Touch your screen anywhere. Your friend’s device displays the transferred content. Or, if the
necessary app isn’t installed, Google Play opens to a screen where your friend can download the
app.
21
To turn on NFC, go to S e t t i n g s
> W i r e l e s s & n e t w o r k s > More > NFC.
To turn on Android Beam, go to S e t t i n g s
Android Beam.
> W i r e l e s s & networks > More >
Change the wallpaper
To change the wallpaper that’s displayed on your Home screens:
1. Touch & hold anywhere on a Home screen that’s not occupied. A list of options appears.
2. Touch a wallpaper source:
G a l l e r y . Choose from pictures that you’ve synced with your t a b l e t .
Live Wallpapers. Choose from a scrolling list of animated wallpapers.
W a l l p a p e r s . Choose from thumbnails of default images, or touch a thumbnail for a larger
version. You can download additional wallpapers on Google Play.
3. To set a wallpaper, touch Set wallpaper or, for Gallery images, drag the blue dots to
determine the cropping, and touch OK .
To change your tablet’s wallpaper, go to S e t t i n g s
> D e vice > Display > Wallpaper .
IMPORTANT: Using Live wallpapers or downloading wallpapers may cause instability, freezing, or
crashing on your Clear. Users are responsible for the settings they enact or for the applications that
they download. If you notice glitches, freezing, or instability, please uninstall your wallpaper.
22
Take a screenshot
You can easily take a screenshot on your tablet that you can save in your Gallery or share with
others:
1. Make sure the image you want to capture is displayed on the s c r e e n .
2. Press the Power and Volume down buttons simultaneously. The screenshot is automatically
saved in your Gallery.
T I P : To easily share your screenshot via Gmail, Google+ , and more, swipe down the
notification shade and touch the Share icon next to the preview of your screenshot.
Connect to keyboards, mice, & other devices
You can connect a keyboard, mouse, or even a joystick or other input device to your tablet via
USB or Bluetooth and use it just as you would with a PC. You may need an adapter to connect
the keyboard or other device to your tablet’s USB port. To connect more than one USB device at
a time, use a powered USB hub to reduce the drain on your tablet’s battery.
IMPORTANT: Using external devices such as keyboards via USB will cause a significant
additional drain on your battery, as will continuous use of a mouse via Bluetooth.
To pair and connect a Bluetooth input device:
1. Make sure your Bluetooth input de vice is in pairing mode.
2. Touch Settings
> Wireless & Networks > Bluetooth .
3. Make sure Bluetooth is turned on.
4. Touch the name of your device near the top of the screen, so that the text below says “Visible
to all nearby Bluetooth devices”.
5. Touch Search for devices.
6. When the name or ID of your Bluetooth device appears, touch it and follow the instructions.
Keyboards
In addition to entering text, you can use your keyboard to navigate features:
• Use the arrow keys to select items on screen.
• Pressing Return when an item is selected is equivalent to touching that item.
• Pressing Escape is equivalent to touching b ack.
•Press Tab or Shift-Tab to move from field to field in a form or o t h e r s c r e e n w i t h m u l t i p l e
text fields.
23
Mice
When you connect a mouse and move the mouse, a n a r r o w - s h a p e d c u r s o r a p p e a r s , j u s t a s
on a computer:
• Use the mouse to move the cursor.
• Clicking, pressing, and dragging with the mouse button is equivalent to touching, touching &
holding, and dragging with your finger.
• Only one mouse button is supported.
• If your mouse has a trackball or scroll wheel, you can use it to scroll both vertically and
horizontally.
Other input devices
You can connect joysticks, gamepads, and other input devices to your Clear. If they work
without special drivers or adapters on your PC, they will likely work with your Clear. However,
games and other apps must be designed to support any special features of an input device, such
as dedicated buttons or other controls, or they may not functi on properly or may be
incompatible.
24
3
Use the keyboard
Enter & edit text
You can enter text using the onscreen keyboard. Some apps open it automatically. In others, you
open it by touching where you want t o t y p e .
Touch & hold to
type this character
Touch a
suggestion
to type it
Touch & hold to see
input and keyboard
settings
Touch & hold to choose
a smiley face
To make the keyboard go away, touch the modified B a c k b u t ton below it.
25
Basic editing
• Move the insertion point. Touch where you want to type. The cursor blinks in the new
position, and a blue tab appears below it. Drag the tab to move the cursor.
• S e l e c t t e x t Touch & hold or double-tap within the text. The nearest word highlights, with a
tab at each end of the selection. Drag the tabs to change the selection. The tab disappears after
a few moments. To make it reappear, touch the text again.
•D e l e t e t e x t . Touch to delete selected text or the characters before the cursor.
•T y p e c a p i t a l l e t t e r s . Touch the Shift key once to switch to capital letters for one letter. Or
touch & hold Shift key while you type. When you release the key, the lowercase letters
reappear.
•Turn caps lock on. Double-tap or touch & hold Shift key, so it changes to . Touch Shift key again
to return to lowercase.
•Cut, copy, paste. Select the text you want to manipulate. Then t o u c h Cut, Copy or Paste b u t t o n
26
Using next-word suggestions
1. Touch the location where you want to input text.
2. Start typing out a word. When the word you want is displayed in a list above the keyboard,
touch it.
3. Continue to touch words unless the one you want doesn’t appear. If so, type it. Your tablet
continues to suggest words as you type.
To change your tablet’s keyboard and input methods, go to S e t t i n g s
Personal > Language & input .
To turn next-word suggestions on or off, go to S e t t i n g s
& input > Keyboard & input methods > Android keyboard.
>
> Personal > Language
Touch the Settings icon, and then check the box next to Next-word suggestions.
Try Gesture Typing
Tip: Gesture typing works best for English. Quality varies for other languages, and some
don’t support it yet .
To input a word using Gesture Typing:
1. Touch the location where you want to type to open the keyboard.
2. Slide your finger slowly across the letters of the word you want to input.
3. Release your finger when the word you want is displayed in the floating preview or in the
middle of the suggestion strip. To select one of the other words in the suggestion strip, touch it.
If the word you want isn’t shown while using Gesture Typing, you can type it out manual ly.
T I P : If the word you want isn’t displayed in the sugg estion strip, you can emphasize
that you mean to include or repeat a particular letter by keeping your finger over it a
little longer.
27
Use Gesture Typing without the space bar
When you use Gesture Typing, there’s no need to use the spaceba r. Just continue to slide your
finger across the letters you want t o i n p u t , a n d t h e n l i f t y o u r f i n g e r t o s t a r t t h e n e x t
word.
To change Gesture Typing settings, go to S e t t i n g s
> Language & input > Keyboard
& input methods > Android keyboard. Then touch S e t t i n g s a n d l o o k u n d e r Gesture Typing.
Use keyboard dictionaries
To manage keyboard dictionaries, go to S e t t i n g s
input.
> Personal >Language &
Personal dictionary
You can add your own words to your personal dictionary so that your tablet remembers them.
To add a word or phrase, including a n o p t i o n a l s h o r t c u t , t o u c h P e r s o n a l D i c t i o n a r y , then
the Add i c o n .
Add-on dictionaries
1. Touch the Settings icon next to A n d r o i d k e y b o a r d .
2. Touch A d d - o n d i c t i o n a r i e s . You’ll see dictionaries for other languages that you can download to your device.
3. Touch the dictionary you want, and then I n s t a l l .
28
4
Try some apps
Use All Apps
To see all your apps, touch the All Apps icon in the Favorites tray on any Home screen.
This is where you can see all your apps, includi ng those down-loaded on Google Play. You can
move app icons to any of your Home screens.
From All Apps, you can:
• Move between screens. S w i p e l e f t o r r i g h t .
•O p e n a n a p p . Touch its icon.
• Place an app icon on a Home screen. Touch & hold the app icon, slide your finger, and lift your
finger to drop the icon in place.
•Browse widgets. Touch the Widgets tab at the top of any All A p p s s c r e e n .
•G e t m o r e a p p s . Touch the Play Store icon in the list of app icons, or t he Shop icon at the
upper right.
29
To remove an app icon from the Home screen, touch & hold it, slide your finger toward the top
of the screen, and drop the app over the
X Remove icon.
1. To view info about an app from an All App screen, touch & hold it, slide your finger
toward the top of the screen, and drop the app over the
Most apps include a
control the app’s settings.
App Info icon.
Menu icon near the top or bottom of the screen that lets you
Start Gmail
Use the Gmail app to read and write email from any mobile device or browser.
To open it, touch the Gmail icon on a Home or All Apps screen.
Gmail isn’t just about email. You can use your Gmail account to sign in to all Google apps and
services, including these and many more:
•
•
•
•
Google Now, for getting just the right information at just the right time
Calendar
People, for keeping track of your contacts
Google Drive, for working with documents, spreadsheets, or drawings
While you’re reading a message:
• Touch the icons and menu along the top of the screen to archive, throw away, label, or
perform other actions on that message.
• Swipe left or right to read the previous or next conversation. To organize your email, check
the box beside a message to select it. Then use the icons and menu along the top of the screen
to manage the selected messages.
To change your settings, add an account, or get help, touch the M e n u i c o n . No matter where
you are within Gmail, you can always get back to the Inbox by touching the
the top of the screen.
30
Gmail icon at
Find People
The People app gives you quick access to everyone you want to reach. To open it,
touch the People icon on a Home or All Apps screen.
When you first turn on your tablet and sign into a Google Account, any existing contacts from
that account are synced with your People app. After that, all your contacts stay in sync
automatically on your tablet, another device, or a web browser.
If you use Exchange, you can also sync that contact information with People.
All your People information is available from Gmail, Goog le Talk, and other apps. As you add
contacts from different sources, they’re synced automatically across all the places you need
them. When you open the People app, you can:
•View all contacts, favorites, or groups. Choose from the top left of the screen.
•R e a d d e t a i l s . Touch a name to see details for a contact or g r o u p .
•V i e w r e c e n t a c t i v i t y . When viewing a contact, swipe to the right to see recent updates.
•E d i t d e t a i l s . While viewing a contact, touch icons at the top of the screen or the M e n u i c o n
to edit or share contact details, delete a contact, etc… You can also touch the star beside the
contact’s name to add that contact to your Favorites list.
•C h a n g e y o u r s e t t i n g s . While viewing the main list screen, touch t h e
Menu icon
t o i m p o r t o r e x p o r t c o n t a c t s , c h o o s e d i s p l a y options for the Groups and All tabs, and add
or edit accounts. No matter where you are within People, you can always get back to the main
lists by touching the People icon at the top of the s c r e e n .
31
Manage your Calendar
Use the Calendar app to view and edit your schedule. To open it, touch the
Calendar icon on a Home or All A p p s s c r e e n .
When you first set up your tablet, you confi gured it to use an existing Google Account (such as
Gmail), or you created a new one. The first time you open the Calendar app on your tablet, it
displays any existing calendar events from that Google Account on the web.
As you edit events from any mobile device or web browser, they’re synced automatically across
all the places you need them.
To change the Calendar view, choose Day, Week, M o n t h , or A g e n da from the top of the screen.
From any of these views, you can:
• Read or edit event details. Touch an event to view its details.
• M a n a g e e v e n t s a n d c a l e n d a r s . Touch icons across the top of the screen or Menu to search
or create events, return to to -day, or adjust settings.
To email everyone who’s invited to an event, you have two options:
• Open the event from the Calendar app at any time and touch E m a i l g u e s t s .
• When a notification of the event arrives just before the meeting s t a r t s , s w i p e d o w n t h e
n o t i f i c a t i o n s h a d e . T h e n s w i p e u s i n g one finger to expand the notification if necessary, and
touch E m a i l g u e s t s .
32
Open & use Clock
To open the Clock, touch the Clock icon from a Hom e o r A l l A p p s s c r e e n .
Set an alarm
1. Touch the Alarm Clock icon in the lower left corner of the s c r e e n .
2. Touch the Add icon to add a new alarm.
3. Select the time you want, and then touch OK. Any existing alarms will show in the main Clock
screen. To turn one On or Off, slide the switch.
You can also add a label to an alarm and change the ringtone. To change these options for a
single alarm, touch the arrow under neath the On/Off switch.
Set a timer
1. Touch the Timer icon in the top left corner of the screen.
2. Enter the time you want, and then touch S t a r t .
When the timer is going, you can add an additional minute, pause the timer, or delete the current timer.
The timer beeps when the time is up. It keeps beeping until you t o u c h S t o p .
Use the stopwatch
1. Touch the Stopwatch icon in the top right corner of the screen.
2. Touch S t a r t to start the stopwatch. If you want to pause the stopwatch, touch S t o p . You can
also add laps while the stopwatch is running by touching the icon to the left of the stopwatch.
To share your results, touch the Share icon to share via Google+, Gmail, and more.
View your Clock
To view the current date and time, touch the Clock icon at the top center of the screen.
33
Manage downloads
To manage most downloads; touch the Downloads icon on the All Apps screen.
Movies and some other content that you downloaded don’t show up in the Down-l o a d s a p p .
Google Play streams your purchases and rentals from Google servers while you’re playing them.
They don’t occupy permanent storage space. However, you can pin (download) books, movies,
and other content in order to access it offline.
In addition to downloading content from Google Play, you can download files from Gmail or
other sources.
Use the Downloads app to view, reopen, or delete what you download ed in this way. From the
Downloads app:
• Touch an item to open it.
• Touch headings for earlier downloads to view them.
• Check items you want to share. Then touch the
Share icon and choose a sharing method
from the list.
• Check items you want to delete. Then touch the
Trash icon.
Downloads
• At the bottom of the screen, touch Sort by size or Sort by date to switch back and forth. When
your tablet is connected to a computer, look in the Download directory to v iew files available in
the Downloads app. You
34
5
Google Now & Search
About Google Now
Google Now gives you just the right information at just the right time. Swipe up from the
bottom of your tablet to get commute traffic before work, popular nearby places, your favorite
team’s current score, and more.
You can turn Google Now on or off at any time. Swipe up the same way and touch
Settings > Google Now. If the keyboard’s c o v e r i n g t h e m e n u , t o u c h t h e m o d i f i e d
Back button to lower it.
Menu >
After you decide to start using Google Now, you don’t need to do a n y t h i n g e l s e . I f y o u l i k e ,
y o u c a n f i n e - t u n e s o m e s e t t i n g s , b u t Google Now doesn’t need any elaborate setup. The
information you need is always at your fingertips.
To know when to display what information, Google Now uses data from your Clear and from
other Google products, p l u s d a t a f r o m t h i r d - p a r t y p r o d u c t s t h a t y o u a l l o w G o o g l e N o w
to access.
For example, Google Now uses the time of day, your current location, and your location hi story
to show you what the traffic on your commute is like when you wake up in the morning. It also
uses information from Google services such as your Web History for sports or flight updates, or
from your synced calendar entries for a p p o i n t m e n t r e m i n d e r s .
35
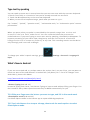
About Google Now cards
A Google Now card is a short snippet of useful information that slides into view right when
you’re most likely to need it. For ex ample, here’s a traffic card:
To see some sample cards from the main Google Now screen, t o u c h
Menu > Sample
c a r d s . When you’re finished and want to get back to the main Google Now screen, touch H i d e
samplecards.
In addition to the cards shown in the list of samples, you may also s e e a P u b l i c A l e r t s c a r d .
Public Alerts provide emergency information f rom sources such as the National Weather Servic e
and State Issued Amber Alerts . Coverage is currently provided by a limited number of key
partners, and only in the United States . Google can’t guarantee that you’ll see every relevant
alert. However, Google Now attempts to show you what’s i m p o r t a n t w h e n y o u n e e d i t , i n
t h e h o p e t h a t s u c h a l e r t s a r e a u s e ful additional source of information. To learn more, visit
s u p p o r t . google.com/publicalerts .
About location access, reporting, & history
Location access settings determine whether your tablet can use your current location. When
location access is turned on, apps can use it to give you more relevant information, such as
nearby r e s t a u r a n t s o r c o m m u t e t r a f f i c .
To turn off location access for all apps, go to S e t t i n g s
access.
36
> Personal> Location
If you prefer, you can turn off location access by Google apps while still permitting its use by
non-Google apps just go to Settings
> Accounts > Google > Location settings.
Location reporting refers your tablet’s ability to report your current location for the purpose of
recording your location history.
Location history refers to your tablet’s ability to store your past l o c a t i o n s , i n c l u d i n g h o m e
a n d w o r k . When you decide to use Google Now, you’ll start reporting your location and turn on
your location history. Google won’t share this information with other users or marketers
without your p e r m i s s i o n . If you opted in to location history in the past, Google Now uses your
previously recorded locations as well as ongoing locations when making suggestions. Turning off
location history pauses the collection of location informati on, but doesn’t delete your history.
To manage or delete your location details, visit http://google.c o m / l o c a t i o n h i s t o r y .
Along with location history, Goo gle Now uses your tablet’s location access service, which must
also be turned on for Google Now to work. To manage this setting, go to
Settings
> Personal >Location access .
About Web History & other data
Google Now uses data from multiple sources to help predict what you need. For example, if you
have a synced calendar entry for a d e n t i s t a p p o i n t m e n t , G o o g l e N o w c a n c h e c k t r a f f i c
a n d s u g g e s t when to leave If you have relevant searches saved in your Web History, such as
for your favorite sports team or for upcom ing flights, Google Now can also show cards for sports
scores, flight status, and more. To manage your Web History, visit g o o g l e . c o m / h i s t o r y . You can
delete or pause your Web History and still use Google Now, but certain kinds of information,
such as flight details, won’t show up.
About Google Search versions
Google Now is part of the Google Search app. To check which version of Google Search you’re
using, follow these steps:
1. From any Home screen, go to
All Apps.
2. Touch & hold the
Google icon, and drag it to the
App Info icon at the top of the
screen. T h e v e r s i o n n u m b e r a p p e a r s u n d e r G o o g l e S e a r c h at the top left.
37
Use Google Now
To view the Google Now cards that are waiting for you at any particular time, swipe up from the
bottom of your tablet, or touch G o o g l e on any Home screen.
Google Now displays cards when they’re most likely to be useful and relevant based on the
current time and your current location. To expand that search and get additional ones, touch
Show more c a r d s below the last card displayed.
Swipe cards away
Swipe cards away when you don’t need them.
You’ll occasionally be asked w hether a card was useful. By answering, you can help Google Now
learn which cards are most useful to you and when.
Turn cards off or on
1. From the main Google Now screen, go to M e n u
> S e t t i n g s > Google Now.
2. Locate the type of card.3. Touch the card’s O n / O f f switch.
Edit card settings
To learn why a card appears when it does, or to adjust your preferences for that card type,
touch the
Info icon. The icon turns blue, and the card expands downward, like this:
38
The italicized text explains why t he card has appeared at the cur rent time or location. In some
cases, you can also adjust preferences related to that card (such as Fahrenheit or Celsius for the
Weather card). Some cards also let you answer questions that help Google Now upgrade i t s
performance.
To hide this information, touch the Info icon again. Some cards rely on details you specify about
your home and work addresses, the sports team or stocks you ’re following, and so on. To edit
such details, go to M e n u
> Settings > My stuff.
Adjust notifications
When cards appear, you’ll receive a notification. You can touch the notification to open the
card, or swipe to dismiss it. F o r h i g h - p r i o r i t y c a r d n o t i f i c a t i o n s , y o u c a n s e t a r i n g t o n e
o r t u r n Vibrate on or off. You can also turn notifications for specif ic types of cards off
completely. To adjust notifications:
• Touch M e n u
> Settings > Notifications
Use the Google Now widget
The Google Now widget displays a summary of your current Google Now cards, either on a Home
screen or on the lock screen. Touch the widget anywhere to see the details in Google Now.
39
To add a Google Now widget:
1. Go to the lock screen: Touch the
+
Add icon and follow the i n s t r u c t i o n s .
2. To the Home screen: Touch the
All Apps icon and swipe left until you find the widget.
Then touch & hold the widget to activate a Home screen, and drag the widget to the location
you want.
Turn Google Now on or off
You can turn Google Now on or off from within the Google Search app:
1. Swipe up from the bottom of any screen, or touch G o o g l e on a H o m e s c r e e n .
2. Touch M e n u
> Settings.
NOTE: You may need to lower the keyboard to see the Menu icon.
Turn on Google Now from the Settings screen:
1. Touch Google Now from the Settings screen.
2. In the screen that appears, touch Yes, I’m in.
Turn off Google Now from the Settings screen:
1. Touch Google Now.
2. Slide the On/Off switch to Off.
3. In the dialog that appears, dec ide whether you also want to turnoff Location History. If so,
check Also turn off Location history. Lastly, Touch turn off.
NOTE: Selecting this option may affect the way other Google products w o r k .
Turning off Google Now stops the display of cards and returns any card settings you may have
changed to their initial state. Turning o f f l o c a t i o n h i s t o r y d o e s n ’ t d e l e t e e x i s t i n g h i s t o r y
or turn off location reporting.
Control location access, reporting, & history
Define home & work
As you use Google Now, you may be asked to confirm your home or work address to get
commute traffic information, travel help, and more. You can change these addresses in several
other ways:
•When a Traffic card appears for home or work, touch the I n f o i c o n .
40
• On the main Google Now screen, go to Menu
edit H o m e or Work
> Settings > Mys t u f f > P l a c e s , then
• Visit m a p s . g o o g l e . c o m from a browser and open M y P l a c e s
• Visit L o c a t i o n h i s t o r y d a s h b o a r d from a browser, click C h a n g e next to Time at Work or
Time at Home, edit the address, and c l i c k Save.
Turn off location reporting & history
To turn off both location reporting and location history for your C l e a r :
1 . G o t o Settings
> Google > Maps & Latitude . This brings you to the L o c a t i o n
s e t t i n g s screen for Google M a p s .
2. To turn off location reporting, touch L o c a t i o n r e p o r t i n g > D o not update your location.
3. To turn off location history, u ncheck E n a b l e l o c a t i o n h i s t o r y .
You can turn off and delete your location history and still use Google Now, but certain kinds of
information, such as commute traffic, may be limited or won’t show up at all.
Delete location history details
Even if you turn off both location reporting and location history, your previously recorded
history is still available to Google ser vices such as Google Now.
To delete location history details, follow these steps from a desk -top computer:
1. Open a web browser and make sure you’re signed in with the account whose location history
you want to manage.
2. Visit http://google.com/locationhistory . A page appears that allows you to view your location
history for any date.
3. To delete all your recorded location history, click D e l e t e a l l history.
Alternatively, from this screen you can delete a portion of your location history starting from a
date you choose in the calendar.
4. Click OK.
Turn off location access for your t ablet
E v e n w h e n l o c a t i o n r e p o r t i n g a n d l o c a t i o n h i s t o r y a r e t u r n e d o f f , Google can
periodically report data for use by various apps from sources such as Wi-Fi, mobile networks,
and GPS to determine your precise location at any given time. To turn off access to precise
location information for your Clear, go to S e t t i n g s
a c c e s s and slide the switch to O f f .
41
> Personal > Location
IMPORTANT: Turning off location access for your tablet also turns it off for Google Now,
other Google apps, and third-p a r t y a p p s . T h a t m e a n s t h a t n o a p p s c a n r e c e i v e
y o u r p r e cise location information and many useful features will be d i s a b l e d . To keep
location access on, you must keep GPS satellites, Wi-Fi &m o b i l e n e t w o r k l o c a t i o n , or
both settings checked. If you prefer, you can turn off location access by Google apps
while still permitting its use by non-Google apps just go to Settings
Accounts > Google > Location settings.
>
Use your voice on Android
You can speak into your Android phone or tablet to search, get directions, send messages, and
perform other common tasks. To initiate an action or a search using your voice, touch the
Microphone icon on the Home screen or in the Google Search app. If your device is
running Android 4.1 or later, you don’t have to touch the microphone, just open the Google
Search app and say “Google.”
IMPORTANT: To detect when you say “Google” to launch Voice Search or Voice Actions,
Google analyzes sound picked up by your tablet’s microphone in intervals of a few
seconds or less. The sound is immediately discarded after analysis and is not stored on
the device or sent to Google.
Turn hotword detection on or off
The ability to trigger a search or action by saying “Google” is called hotword detection. To turn
it off or on, open the Google Search app and touch Menu
Hotword detection.
> Settings > Voice >
Voice Search
After you touch the Microphone i con or say “Google,” Google listens as you speak and initiates
the search or action you describe. If Voice Search doesn’t understand you, i t lists a set of
possible meanings. Just touch the one you want.
If you ask your question to Google, the answer can be spoken to you. The answer can be a fact,
weather condition, stock price, f l i g h t s t a t u s , s p o r t s s c o r e , c u r r e n c y c o n v e r s i o n ,
m a t h e m a t i c a l calculation, and more. Some examples include:
42
• Weather: What’s the weather like tomorrow morning?
• Locations: Where’s the nearest pharmacy?
• Flight status: When does United Airlines flight 900 depart?
• Time: What time is it in Belgium ?
• Events: When is sunset?
• Math: What is the square root of 2209?
• Translation: How do you say cucumber in German?
• S p o r t s : When do the Buffalo Bills play ?
• Finance: How is the Netflix stock doing?
• Trivia: When was the Navy Seals program started ?
• Conversions: How many dollars is 1200 Pesos?
• Images: Show me pictures of the BMW K1300 S Motorcycle
NOTE: Spoken answers are supported for English only at this time. This feature is
turned on by default for Voice Search .
Voice Actions
Note: Voice Actions are supported only in English, French, German, Spanish, and Italian.
You can use Voice Actions to perform common tasks, such as sending an email or opening an
app. After touching the Microphone icon or saying “Google,” speak the Voice Action you want to
use. Or say “help” to see examples of the kinds of things you can tell Google to do for you.
Examples include:
• “Set alarm for 8:30 a.m.”
• “Send email to Marcus Foster. Subject: Coming tonight? Mes sage: Hope to see you later.”
• “Navigate to Mike’s Bikes in Palo Alto.”
43
Voice Actions commands
Voice Actions are only supported in English, French, German, Spanish, and Italian.
To see examples of Voice Actions commands on the Google Now screen, say “Google,” then
“Help.”This table also lists so me key Voice Actions phrases.
Say
“OPEN”
Followed by
Examples
App Name
“OPEN Gmail”
“ CREATE A CALENDAR EVENT ” “Event description” &
“day/ date” & “time”
“MAP of”
“Post to Google”
“What’s this song?”
“create a calendar event:
Dinner in San Francisco, Saturday,
at 7:00pm”
Address, name, business
“Map of Golden Gate Park,
Name, type of business, or
San Francsico”
Other location
What you want posted to
“Post to Google + I’m going out
Google +
of town.”
When you hear a song, ask,
“what’s this song?”
Google Now Card list
Cards are displayed when you’re most likely to need them. Most are based on information
available to your Google account, such as your current location, recent searches, or calendar
entries.
Gmail cards display information based on recent confirmation messages in the Gmail account
you’ve selected for use with Google Now.
Travel cards appear when you’re away from home. The samples that follow show some typical
Google Now cards. New cards are added all the time. For a complete list of cards available with
the most recent Google Now release, go to G o o g l e Now card list.
44
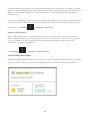
Activity Summary
Shows a rough estimate of how far you have walked
or cycled during the past month.
Birthdays
Displays an interesting fact about your birth date
On your birthday and reminds you of your friends’
birthdays.
Google Now Cards can even let you know of events in your area. Some examples are provided
below.
45
46
About Gmail Cards
Gmail cards are based on confi rmation messages sent to the Gmail account you’ve selected for
use with Google Now. For example, cards appear before restaurant reservations you’ve made
with OpenTable or when you receive email updates for package s in transit. Gmail cards typically
include links to other useful information, such as a link to the email on wh ich the card is based,
or directions to a restaurant or hotel from your current location. You can turn Gmail cards off or
on from the main Google Now screen:
All Gmail cards at once. Go to Menu
On/Off switch for G m a i l c a r d s
Individual Gmail cards. Go to Menu
check or uncheck each card.
> Settings > Google Now and touch the
> Settings > Google Now >G m a i l a n d
IMPORTANT: Gmail cards appear only if your device and Gmail languages are set to
English, and they’re currently not available when you’re using Google Now with a
Google Apps a c c o u n t .
About the Activity summary card
The Activity summary card appears once a month. It provides a very rough approximation of how
far you’ve walked or cycled during that month compared to the previous one. These estimates
are based on occasional samples of the accelerometer in your tablet, which are then compared
to typical movements involved in walking or cycling. This information isn’t available unless
you’ve turned on location reporting and history for at least one of your Android devices. If
you’ve turned these on for more than one device, the Activity sum -mary card reflects the one
you used most often that mo nth.
Search settings
Settings may vary depending on the version of the Google Search app you’re using.
To view Google Search settings (including Google Now) to the bottom of the Google Now screen
and touch M e n u
> Settings.
IMPORTANT: “Google Now is turned off for your domain:” If you see this message,
you’re using Google Apps for Business, and your system administrator has turned off
Google Now for your organization. Before you can turn it on, your administrator needs
to turn it on for the whole domai n. To get more information about the settings
available from this s c r e e n , c h o o s e M e n u
c o r r e s p o n d ing online articles:
> Help. Or open one of these
47
6
Settings
To open Settings, touch its icon in
All Apps. To open Quick Settings, swipe down from the
top right of any screen. To get more information about most Settings screens, touch
Menu > Help.
Quick Settings provide the fastest way to adjust settings that you access frequently, such as WiFi or brightness. You can also reach the main Settings screen from Quick Settings. Most apps
include their own settings, typically available from
Menu > Settings.
These are the main types of settings available.
•
Wireless & Networks: W i - F i , B l u e t o o t h , d a t a u s a g e , A n d r o i d Beam, and related
settings.
•
Device: Sound, battery, sleep, and other display settings
Personal : location access, language, and backup and reset options.
Security : Passwords and certificates, app verification, screen lock and encryption.
Accounts : Sync and other account settings.
System : Date, time, accessibility and device information.
48
IMPORTANT: Wintec Industries is not responsible for the settings that the user installs
or activates. Please remember that this operating system is a Google An droid operating
system owned and managed by Google. Should you have any issues in regards to
Settings, Wintec Industries can certain ly assist you, but ultimately Google is the best
resource for instructions and implementation.
IMPORTANT: Wintec Industries is not responsible for digital content that the user
downloads from the internet or from Google Play. It is the user’s responsibility to
ensure that they are familiar with the FileMate Clear, Android operating system, and
the applications that have chosen. Wintec Industries does not guarantee that your
experience will be error-free. With other several million applications available to
download, it is a best practice to be familiar with what the user is downloading, and
knows how to maintain those applications.
IMPORTANT: Wintec Industries is not responsible for managing or maintain the users
installed application. The user must install, store, and manage their application
correctly, or the FileMate Clear may exhibit freezing, crashing or instability. If the user
has any questions in regards to a specific app, please contact the developer of the
application through the Google Play Store or contact Google Support.
How to move an application to the correct internal memory
Once an application is downloaded from the Google Play Store it is natively installed on the
Clear’s internal memory. There are two internal memory storage partitions.
Tap on Settings
> Tap on Apps > Tap on Storage. On the right, there is a smaller
memory partition and then listed belo w is a larger memory partition. Applications are
automatically installed on the smaller of the two internal memory partitions. The Clear can hold
about 20 downloaded apps on the smaller internal memory prior to the user receiving low
storage warnings. It is not recommended to keep the installed apps on the smaller internal
memory. Failure to move those apps from the smaller internal memory will cause freezing,
crashing, system rebooting, and instability. Please note it is the users’ responsibility to install,
store, and maintain their applications. Below are the steps to move installed apps to the larger
internal memory.
49
Tap on Settings
> Tap on Apps > Tap on SD card.
A populated list of apps will appear with boxes on the right hand side. If the box has a check
mark, the app is already installed on the larger internal memory. If there is no check in the box,
the app may be a candidate to be moved.
PLEASE NOTE: Developers of the applications are responsible for how their applications are
stored. If they designed the application to be natively installed on the smaller internal
memory it cannot be moved to the larger internal memory.
Tapping on app that does not have checkmark in their box, will open to view the details of the
application.
Typically, there are four main boxes.
Force Stop
Uninstall
Move to SD
Clear Data
Tapping on ‘Move to SD’ moves the application from the smaller internal memory to the larger
internal memory.
PLEASE NOTE: Moving an application to the SD does not mean the user is mo ving the
application to an external microSD card or SD card. Applications cannot live outside of the
internal memory unless aided by third party software.
Wintec Industries recommends moving all applications to the larger internal memory for system
stability. Failure to follow this best practice may result in freezing, crashing, constant rebooting,
and instability.
Wintec Industries recommends using the bar graphs as a tool to know how much memory is
being used and in what memory storage partition.
IMPORTANT: The user is responsible for maintaining their applications on the Clear
tablet.
50
7
Accessibility
To use the accessibility options available on your tablet, open
Accessibility .
Settings > System >
Options for people with visual impairment s i n c l u d e :
• TalkBack is a pre-installed screen reader from Google. It uses spoken feedback to describe
events, such as notifications, and the results of your actions, such as opening an app.
• Explore by Touch is a system feature that works with TalkBack, allowing you to touch your
tablet’s screen and hear what’s un der your finger via spoken feedback. This feature is helpful to
people with no vision.
• A c c e s s i b i l i t y s e t t i n g s let you modify your tablet’s display and sound options, such as
increasing the text size, changing the speed at which text is spoken, and more.
NOTE: If you need further assistance with Accessibility, please contact Google directly.
www.google.com/support
51
8
Warranty
Wintec Industries, Inc. ("Wintec") warrants and tests the Product to be free from defects in material and
workmanship and to conform to published specifications. During the warranty period, should the Product fail
under normal use in the recommended environment due to improper workmanship or materials, Wintec
Industries, Inc. will repair the Product or replace it with a comparable one.
This warranty is valid for a specific period from the date of purchase. Proof of date of purchase is required.
Wintec will inspect the Product and make a decision regarding repair or replacement. Wintec reserves the right
to provide a functional equivalent, or refurbished replacement Product.
This warranty does not apply to Product failure due to accident, abuse, mishandling, improper installation, and
alteration, acts of nature, improper usage, or problems with electrical power. In addition, opening or tampering
with the product casing, or any physical damage, abuse or alteration to the product’s surface, including all
warranty or quality stickers, product serial or electronic numbers will also void the product warranty. Wintec is
not responsible for any data recovery in the event of a defective flash memory. The Product must be used with
devices that conform to the recommended industry standards. Wintec will not be liable for damages resulting
from a third party device that causes the Product to fail.
Wintec shall in no event be liable for any consequential, indirect, or incidental damages, lost profits, lost
revenues, lost business investments, lost goodwill, or interference with business relationships as a result of lost
data or images. Wintec is also not responsible for damage or failure to any third party equipment, even if Wintec
Industries, Inc. has been advised of this possibility. This limitation does not apply to the extent that it is illegal or
unenforceable under applicable law.
52
The limited warranty is exclusive, with no other warranties, implied or statutory, including, but not limited to
any implied warranty of merchantability or fitness for a particular purpose. This warranty is not affected in any
part by Wintec Industries, Inc. providing technical support or advice.
For print on insert cards please use above for the respective DRAM and Flash based manufactured consumer
products.
Voiding of Warranty
All warranties are voided if any of the following occur:
•There is evidence of tampering or attempted repair of parts.
•Rework of any parts without written consent from Wintec,
•User abuse (e.g. broken handles or face plates/bezels),
•Accident
•Misuse
•Natural or personal disaster,
•Removal or defacement of the products’ serial number from the products.
•Warranty for memory modules is void if label is removed.
Using or operating product out of manufacture suggested specifications, i.e. Over clocking. Warranty
•
is also voided on products physically damaged through shipping and/or improper packing.
Refurbishing Terms and Conditions
Wintec Industries warrants that refurbished product to be free from defects in workmanship and materials for a
period of three (3) months from the date of return. Refurbished products are covered under an exchange
warranty for manufacturing defects (excluding power surges and/or electrical spikes). If the refurbished product
fails during normal and proper use within the refurbished warranty period Wintec Industries will, at Wintec
Industries’ discretion replace the product with an exchanged product equivalent in performance and reliability.
Refurbished products feature internal components that are not end user replaceable and therefore are
warranted in the same manner as the complete unit.
Software Support
Any software (if applicable) delivered with the refurbished product is provided “as-is”. Wintec Industries does
not guarantee uninterrupted or error-free operation of any software provided with the Product. If you have any
software related technical problems when using your FileMate Product, we suggest you check the Quick Start
Guide or Wintec Industries support web site to carry out preliminary trouble shooting
Refurbished Shipping Terms
The customer is responsible for sending their original or refurbished FileMate product as instructed to offer
product for evaluation as part of the regular RMA process. Wintec Industries will cover the return shipping cost
of sending back replacement or original items to the customer after service inspection and any necessary repairs
or replacements, as applicable, to complete the warranty claim request.
53
Limitations of Liability
If the product fails during normal and proper use within the warranty period, Wintec Industries will, at its
discretion, replace the product with a like or similar item that is functionally equivalent to the originally supplied
product during the warranty period defined for the model, using new or refurbished parts or units. If the
product is replaced under warranty, the owner agrees that by submitting for warranty claim services, they will
commend ownership of the replaced defective item as automatically transferred to Wintec Industries. All
components repaired or replaced by Wintec Industries will be warranted for the remaining period of the
warranty period started from the original date of purchase.
THIS LIMITED WARRANTY IS IN LIEU OF ALL OTHER WARRANTIES, WHETHER EXPRESS, IMPLIED, OR STATUTORY,
AND WINTEC INDUSTRIES SPECIFICALLY DISCLAIMS ANY WARRANTIES OF MERCHANTABILITY, OR FITNESS FOR A
PARTICULAR PURPOSE.
IF THIS PRODUCT FAILS TO WORK AS WARRANTED ABOVE, THE CUSTOMER’S SOLE AND EXCLUSIVE REMEDY
AND WINTEC INDUSTRIES’ SOLE LIABILITY SHALL BE REPAIR OR REPLACEMENT. ALL WINTEC INDUSTRIES’
WARRANTY TERMS AND AGREEMENTS ARE NON-TRANSFERABLE AND ONLY APPLY TO THE ORIGINAL UNIT AND
ORIGINAL PURCHASER. WINTEC INDUSTRIES IS NOT LIABLE FOR A CLAIM MADE BY A THIRD PARTY OR MADE BY
YOU FOR A THIRD PARTY.
Exclusions from this Limited Warranty Service
Wintec Industries does not warrant uninterrupted or error-free operation of this Product. Any technical or other
support provided for the Product under warranty, such as assistance via telephone with “how-to” questions and
support regarding product setup and information will be provided without warranties of any kind.
The Product Warranty only covers failures or malfunctions that occurred within the warranty period with normal
and proper use. The warranty will not apply if:
a. The serial number of the FileMate product, components or accessories has been altered, cancelled, removed,
or otherwise not valid as Wintec Industries.
b. The product has been tampered with, repaired and/or modified by non-authorized personnel.
c. The product warranty seals have been broken or altered.
d. There is damage caused by natural disaster, intentional or unintentional misuse, abuse, neglect, acts of war,
improper maintenance, or use under abnormal conditions.
e. There is damage caused by accidental drops, spills, fire, or power surges.
f. There is damage from improper installation, improper connection, or use of parts and/or components not
manufactured or sold by Wintec Industries.
g. There is damage from use outside of the operation or storage parameters or environment detailed in the
Quick Start Guide or reasonably acceptable for similar product usage models deemed industry standard best
practices.
h. There is damage from third party software or from virus (es) from items downloaded unto the FileMate
product.
Wintec Industries is not responsible for:
Software loss or data loss that may occur during the repair or replacement of the FileMate Product (if
applicable).
Damage to or loss of any program, data, or removable storage media.
54
9
Troubleshooting
There are many different software issues that can be troublesome to an Android device/tablet including your
FileMate Clear. It is important to know where to go for support when trouble happens.
There are two distinct types of issues:
Hardware
Software
Hardware is a typically an issue with the workmanship of the device and is covered under the terms of the
warranty. Here are some examples that include but are not limited to:
Wi-Fi Antenna Radio will turn on, but then will immediately turn off
The tablet will not power on even though it is charging and there is no physical damage to the tablet or
its ports and it has not been dropped.
The camera is not functional
The wall charger or the accessories that were supplied are defective and not due to physical damage
The screen will not turn on or has pixel issues.
The tablet reboots after a factory data reset or is constantly rebooting into a power cycling loop after a
factory data reset with no physical damage.
55
Software is typically an issue that is related to what is installed by the user or an issue that is related to Google’s
operating system and/or Google’s Play Store. Here are some examples that include but are not limited to:
App is not responding, close, report, or wait
Insert SD card first prior to using Camera, even though SD card is mounted
Wi-Fi Authentication error
WiFi out of Range
WiFi Avoided poor internet connection
App is not compatible
Google Play has stopped unexpectedly
App has stopped unexpectedly
Force Close
Cannot move App to the SD card
Cannot download app
Cannot update app
App is not available
Cannot install app to the SD card
SD card has unmounted unexpectedly
In most of the cases above, the first action to do is to uninstall an underperforming app or an app that this not
responding. Please remember that apps are generated by the tablet’s manufacturer. Apps are generated by the
developer of the app. If the user encounters any issue with an application, please contact the developer of the
app first. If the issue is still unresolved, please contact the Google Play Support.
If issues persist, it is recommended to the restore to the tablet’s original factory conditions. Here are the steps.
Tap on Apps folder
Tap on Settings
Tap on Backup and Reset
Tap on Factory Data Reset
Tap on Reset Tablet
It is important to note that a factory data reset does not fix issues with apps that have errors. If there was an
issue with an app, and a factory data reset was performed, and the user downloads the same app, it is highly
possible, that the user will experience the same issue again.
Some app issues can be solved by either uninstalling them, moving them to the correct internal storage, or by
deleting their data and cache.
Here are the steps to perform each of those actions.
56
Uninstalling an App:
Tap on Apps folder
Tap on Settings
Tap on Apps
Tap on Downloaded
Tap on the offending app
Tap on Uninstall
Tap on Ok
Moving an app to the internal SD card:
Tap on Apps folder
Tap on Settings
Tap on Apps
Tap on Downloaded
Tap on Offending app
Tap on Move to SD
Tap on Ok
Deleting the Cache or Data for an App:
Tap on Apps folder
Tap on Settings
Tap on Apps
Tap on All
Tap on offending app
Tap on Delete Cache
Tap on Ok
Tap on Clear Data
Tap on Ok
If any issues related to the Google Android operating system, please contact Google’s technical support team at
1-650-253-0000 Press 5
Google can also be accessed through this link: http://www.google.com/contact/
For Google Play support, please visit them through this link:
https://support.google.com/googleplay/digital-content/?hl=en#
57
There will be following options:
Get Started with Google Play
Using Google Play
Purchases and Downloads
Managing devices
Account and password
Refunds and returns
Troubleshoot issues
Help by product type
IMPORTANT: PLEASE ENSURE THAT YOU SIGNED IN WITH YOUR GOOGLE ACCOUNT SO THEY CAN
BETTER ASSIST YOU.
If you would like to contact a Google customer support representative, please click on the ‘Contact Us’ link in
the upper right corner of this link:
https://support.google.com/googleplay/digital-content/?hl=en#
58