1
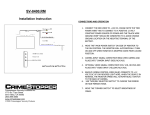
RTDC Environmental Controllers for Tobacco Drying Installation and User Guide P/N: 110388 Warranty & Limitation of Liability 1. ROTEM warrants that the product shall be free of defects in materials or workmanship and will conform to the technical specification for a period of 1 (one) year from the date of initial installation on site (the "warranty period"). 2. ROTEM warrants that during said warranty period, any item/items or part/parts of equipment found defective with respect to materials or workmanship or which do not conform to the technical specification shall be repaired or replaced (at ROTEM's sole discretion), free of charge. 3. During the warranty period, in the event of an alleged defect, authorized resellers in relevant regions should be notified as soon as possible from the date of noticing the said defect, but no longer than thirty (30) days from such a discovery. The report shall include (1) a short description of the defects noticed (2) type of card / component and its matching serial number. 4. ROTEM's sole liability under this warranty is the repair or replacement of the defective item of product. 5. Load cells are not covered by ROTEM’s warranty. Conditions and Limitations 1. ROTEM will not be responsible for any labor costs or expenses associated with replacement of defective items or other parts of the product or repair. 2. This warranty shall not cover: (i) product or part therein which has been modified (without prior written approval of ROTEM), or (ii) product or part therein which has not handled or installed by an authorized reseller of ROTEM or (iii) product or part therein which has either handled or installed not in strict accordance with ROTEM's instructions, (iv) products which were used for function other than agriculture industry. 3. This warranty will not apply in the following cases: (i) if all components of the product are not originally supplied by ROTEM (ii) the defect is the result of an act of nature, lighting strikes, electrical power surge or interruption of electricity (iii) the defect is the result of accident, misuse, abuse, alteration, neglect, improper or unauthorized maintenance or repair. ROTEM warns and alerts all users that the Product is inherently complex and may not be completely free of errors. ROTEM's products are designed and manufactured to provide reliable operation. Strict tests and quality control procedures are applied to every product. However, the possibility that something may fail beyond our control exists. Since these products are designed to operate climate control and other systems in confined livestock environments, where failure may cause severe damage, the user should provide adequate backup and alarm systems. These are to operate critical systems even in case of a ROTEM system failure. Neglecting to provide such a backup will be regarded as the user’s willingness to accept the risk of loss, injury and financial damage. In no event will ROTEM be liable to a user or any third party for any direct, indirect, special, consequential or incidental damages, including but not limited to any damage or injury to business earnings, lost profits or goodwill, personal injury, costs of delay, any failure of delivery, costs of lost or damaged data or documentation, lost or damaged products or goods, lost sales, lost orders, lost income. Except for the above express warranty, ROTEM makes no other warranties, express or implied, relating to the products. ROTEM disclaims and excludes the implied warranties of merchantability and fitness for a particular purpose. No person is authorized to make any other warranty or representation concerning the performance of the products other than as provided by ROTEM. Software Version: Document Version: 1.08 1.1 Table of Contents 1 Front Matter................................................................................................... 5 1.1 1.2 1.3 1.4 2 Precautions ................................................................................................... 6 2.1 2.2 3 Introduction ................................................................................................................... 5 Conventions .................................................................................................................. 5 Contact Information ...................................................................................................... 5 Document Information .................................................................................................. 5 Grounding ..................................................................................................................... 6 Checking the Battery Level .......................................................................................... 6 Introduction to the RTDC Controller ........................................................... 7 3.1 Relays ............................................................................................................................ 7 3.2 RTDC Interface .............................................................................................................. 8 3.2.1 RTDC Control Buttons................................................................................................ 8 3.2.2 Information Screens ................................................................................................... 8 3.3 Menu Structure.............................................................................................................. 9 3.4 Theory of Operation ...................................................................................................... 9 3.4.1 Controlled Components.............................................................................................. 9 3.4.2 Mode of Operation ................................................................................................... 10 3.4.3 Alarms ..................................................................................................................... 10 4 RTDC Functions ......................................................................................... 12 4.1 Initial Setup ................................................................................................................. 12 4.2 Curing Mode Configuration ........................................................................................ 12 4.2.1 Enabling/Disabling the Curve ................................................................................... 13 4.2.2 Temperature and Humidty Control............................................................................ 13 4.2.3 Setting the Inlet Opening .......................................................................................... 14 4.2.4 Setting Burner Differentials....................................................................................... 14 4.3 Cooling Mode Configuration ...................................................................................... 15 4.4 Moisture Mode Configuration ..................................................................................... 15 4.5 Empty Barn Mode........................................................................................................ 15 4.6 Alarm Configuration ................................................................................................... 16 4.6.1 Resetting Alarms...................................................................................................... 16 4.7 Cold Start .................................................................................................................... 16 5 Technical Specifications ............................................................................ 17 6 Wiring Diagrams ......................................................................................... 18 7 Appendix: Feature Parameters .................................................................. 21 1 FRONT MATTER This section includes information on the manual and general information. 1.1 Introduction Rotem manuals provide easy-to-use information regarding the installation, operation, long/short term planning and parts listing (this manual may not deal with all of the above subjects). The table of contents is an outline of the relevant information in this manual. Read this manual before operating your Rotem product. Using this equipment for any other purpose or in a way not within the operating recommendations specified in this manual will void the warranty and may cause personal injury. If you have any questions or comments regarding your product, please contact your local Rotem dealer. 1.2 Conventions NOTE: Notes provide important details regarding specific procedures. CAUTION Cautions alert you to potential damage to the controller if the procedures are not followed carefully. WARNING! Warnings alert you to potentially hazardous situations which, if not avoided could result in death or personal injury. 1.3 Contact Information Rotem Control and Management Email: [email protected] URL: www.rotem.com 1.4 Document Information Revision History Revision Level / Date Section Affected Description 1.0 November 2013 Release document 1.1 / April 2014 Added RTDC-8, new software © 2011 Rotem Corp. All rights reserved. Document Number: 110388 Revision Number: 1.1 No part of this publication may be reproduced, stored in an automated data file or made public in any form or by any means, whether electronic, mechanical, by photocopying, recording or in any other manner without prior written permission of the publisher. Rotem will not accept responsibility for damage resulting from the use of this manual. Rotem also reserves the right to make changes and improvements to its products and/or the associated documentation without prior notice. 5 RTDC | 1.08 2 PRECAUTIONS • • Grounding Checking the Battery Level 2.1 Grounding CAUTION Always connect temperature and sensor shields to earth ground. Avoid mixing high voltage wiring with sensor and low voltage wiring. CAUTION Keep the controller as far as possible from heavy contactor boxes and other sources of electrical interference. CAUTION Do not connect communication wire shields, which go from one house to another at both ends. Connect them at one end only. Connection at both ends can cause ground loop currents to flow, which reduce reliability. 2.2 Checking the Battery Level CAUTION Check the battery once a year. The output must be 2.7 volts (minimum). Authorized personnel only must replace the battery if the output is below the minimum required level or every five years. RTDC | 1.08 6 3 INTRODUCTION TO THE RTDC CONTROLLER Rotem’s RTDC controller enables growers to control the environment of their tobacco drying facilities. In particular, the RTDC provides control over air temperature and humidity. Growers can set the RTDC to monitor and control the temperature and humidity levels throughout the drying cycle, with these parameters changing as required. For example, when the relevant sensors detect that temperature or humidity levels are too low, the RTDC turns on the burner or shuts the air inlet, respectively. • • RTDC wets the leaves as needed to prepare them for shipping. In the event of temperatures going above permitted levels, an alarm is sent. The RTDC supports: • Analog sensors o One humidity sensor o Two temperature sensors • Two digital sensors o Water Meter o Power Fail o Blower Fail o Fire / Smoke Detector • RS-232 communication to a computer • Four relays (RTDC-4) or eight relays (RTDC-8) 3.1 Relays RTDC relays control: • RTDC-4: o Relay 1: Burner o Relay 2: Inlet opening o Relay 3: Inlet closure o Relay 4: Blower \ Alarm \ Water Valve (user defined) • RTDC-8: o Relay 1: Inlet Open o Relay 2: Inlet Close o Relay 3: Burner o Relay 4: Water Valve o Relay 5: Blower o Relay 6: Unused o Relay 7: Unused o Relay 8: Alarm NOTE: 7 Rotem recommends setting the relay switches to Auto. RTDC | 1.08 3.2 RTDC Interface Figure 1: RTDC-4 Front Panel Figure 2: RTDC-8 Front Panel 3.2.1 RTDC Control Buttons At the bottom of the RTDC screen are four buttons: • • • • Prog. Down (arrow) Up (arrow) Select Press these buttons to scroll through screens, view data, enter and edit menus, and so on. • • • • • • To enter edit mode of a parameter, press Prog. To change the parameter, press Up or Down. To exit edit mode, press Prog. To cancel any change that you made while in edit mode, press Select. To go to the System menu, press Prog for three seconds. To turn off the alarm relay and keep it off for 30 minutes, press Select on any screen while an alarm is active. The alarm message remains on screen until the cause of the alarm is resolved. 3.2.2 Information Screens When in the Main Menu, press the arrow keys to view the following information screens. These screens are read only. • Climate conditions: o Current temperature and humidity o Target temperature and humidity RTDC | 1.08 8 NOTE: • • When the unit is in Moisture mode, only the humidity specs appear. When the unit is in Cooling mode, only the temperature specs appear. Inlet information: o Current inlet position o Set inlet position Current control mode: Displays Curing, Cooling, Moisture, or Empty Barn. 3.3 Menu Structure Control Settings Alarm Test System Mode Cure Temperature Increase High Temperature Difference Temperature Sensor 1/2 Curing Curve Cure From Temperature Cure Humidity Increase Low Temperature Difference Humidity Sensor Relay 4 Cure To Temperature Cure Time Per Safety Temperature Alarm Relay 1 - 8 Digital Input 1/2 Cure From Humidity Burner On Difference Safety Alarm Activity Digital Input 1/2 Inlet Open Cure Inlet Position Burner Off Difference Blower Alarm Activity Software Version Inlet Close Cooling Temp Auto Burner Recover Reminder Communiction Version Communication Baud Rade Cool Inlet Position Burner Recover Tries LCD Versiobn Communication Unit ID Moisture Humidity Some menu items depend on the setup or the model: • Control > Cure From/To Temperature, Cure From Humidity: Only appear if Curve is enabled. When Curve is not enabled, Cure Temperature and Cure Humidity appear. • • Settings > Cure Temperature Increase, Cure Humidity Increase, Cure Time Per: Only appear if Curve is enabled. System > Relay 4: Appears in RTDC-4 only. 3.4 Theory of Operation • • Controlled Components Mode of Operation • Alarms 3.4.1 Controlled Components The RTDC controls the following components: • • • • 9 Burner Controller: Each system includes a burner controller which regulates the burner (heater). The RTDC contols the burner controller, defining when the latter turns on and off. Blower: The blower ventilates the barn. Inlet: The inlet opens and closes to user-defined levels to control the temperature and humidity level. Water valves: These components wet the leaves before transport. RTDC | 1.08 3.4.2 Mode of Operation The RTDC operates in one of four modes. Each mode corresponds to a part of the tobacco drying cycle. In addition, the role that the temperature and humidity plays differs in each mode. • Curing: In this mode, the air is kept hot and dry. Target temperature is set to be higher than the outside temperature while the humidity is kept lower. The burner raises the temperature to the target and then maintains it at this level while the inlet controls the humidity level. In this mode, the RTDC regulates the burner controller, blower, and inlet. • Cooling: In this mode, the air temperature cools down to a user-defined temperature. Humidity does not play a role in this mode. The blower operates and the user opens the inlet. In this mode, the RTDC regulates the blower and inlet. Moisture: Before shipping the leaves, leaves are wet to prevent brittleness and breaking apart during transport. In this mode, the humidity is the critical specification. The humidity rises to a defined level and the inlet remains shut. In this mode, the RTDC regulates the inlet. • • NOTE: Empty Barn. During this mode, the device is basically non-operational. Only a limited number of alarms are enabled. The inlet is shut completely. RTDC switches between modes manually; meaing the user changes the mode. 3.4.3 Alarms Depending on the mode, different alarms are active. • • V: Alarm is enabled X: Alarm is disabled Table 1: Mode Alarms Curing Cooling Moisture Empty Barn Shutdown procedure High Temperature V X X X X Low Temperature V X X X X Safety Temperature V V V V V Temp Sens X Failure V V V X X* Hum Sens. Fail V V V X V Power Failure V V V V X Blower Failure V V V X X Smoke Detected V V V V V Fire Detected V V V V V Burner Recover Fail V X X X X Table 2: Alarm Messages Message Trigger Siren Communicator message High Temperature Sensor temperature average is greater than high temperature difference and target temperature in barn. Yes High temperature Low Temperature Sensor temperature average is lower than temperature difference and target temperature in barn. Yes Low temperature RTDC | 1.08 10 Message Trigger Siren Communicator message Safety Temperature Sensor temperature average is greater than the "safety temp alarm" value. Yes Saftey temperature Temp Sens X Failure Temperature sensor is disconnected \ shorted Yes Temp sensor X fail Hum Sens. Fail Humidity sensor is disconnected \ shorted Yes Humiditiy sensor fail Power Failure Digital Input 1/2 as assigned by user in System menu. Yes Power fail Blower Failure Digital Input 1/2 as assigned by user in System menu. Yes Blower in failure Smoke Detected Digital Input 1/2 as assigned by user in System menu. Yes Smoke detected Fire Detected Digital Input 1/2 as assigned by user in System menu. Yes Fire detected Burner Recover Fail Burner recovery attempts greater than the number of attempts specified in "Burner recover tries". No None NOTE: 11 Refer to Table 5, page 22 for details on the alarm settings. RTDC | 1.08 4 RTDC FUNCTIONS This section details how to use the RTDC. • • • • • • • Initial Setup Curing Mode Configuration Cooling Mode Configuration Moisture Mode Configuration Empty Barn Mode Configuration Alarm Configuration Cold Start 4.1 Initial Setup This procedure describes the initial unit configuration. 1. Press Prog for three seconds. 2. Press Down.Communication Speed. Press Prog. 3. If required, set the speed (9600 bps default). Press Prog. NOTE: Rotem recommends a communication speed of 9600 or lower. 4. Press Down. Comm ID appears. 5. Press Prog. 6. Press Up to set the unit ID. CAUTION Each unit MUST have a unique ID. 7. Press Prog. 8. RTDC-4 only: a. Go to Relay 4. b. Define the relay and press Prog. 9. Press Select. 4.2 Curing Mode Configuration The following section describes how to configure the RTDC Curing Mode. Configuring the heat control consists of : • • • Enabling/Disabling the Curve Setting the Temperature and Humidty Control Setting the Inlet Opening • Setting Burner Differentials Before starting, go to the Control Menu and select Cure Mode. RTDC | 1.08 12 4.2.1 Enabling/Disabling the Curve RTDC controls the temperature and humidity in one of two manners: • • Without a curve: In this scenario, the user defines a target temperature and humidity. If either parameter does not meet the specification, RTDC turns on the burner or opens the inlet to adjust the temperature or humidity, respectively. With a curve: In this scenario, the user defines a target temperature and humidity range. When either parameter falls out of this range, the RTDC turns on the burner or opens the inlet and adjusts the parameters gradually, at a user defined rate (cure increase/cure decrease respectively). 1. Press Prog for three seconds; System appears. 2. Press Up or Down until Curve appears. 3. Press Prog. 4. Set the Curve to Yes or NO, as required. 5. Press Prog. 6. Press Select. 4.2.2 Temperature and Humidty Control • • If there is no curve, set temperature and humidty targets. If there is a curve, set temperature and humidty curves. 4.2.2.1 Setting Targets This procedure details how to set the target temperature and humidity. When set: • • NOTE: The burner turns on when the temperature falls below this temperature. The inlet opens to the user defined position. If you want the burner to turn on (or turn off) at a specific temperature below the Target Temperature, refer to Setting Burner Differentials. Curve must be disabled. 1. Press Select 2. Scroll to Control and press Prog. 3. Scroll to Cure Temperature and press Prog. 4. Press Up or Down to set the required temperature. 5. Press Prog. 6. Scroll to Cure Humidity and press Prog. 7. Press Up or Down to set the required humidity level and press Prog. 8. Scroll to Cure Inlet position and press Prog. 9. Press Up or Down to set the inlet opening and press Prog. 10. Press Select. 4.2.2.2 Setting Ranges This procedure details how to set a temperature and humidity curve. Curve must be enabled. 1. Press Select. 2. Scroll to Control and press Prog. 13 RTDC | 1.08 3. Scroll to Cure From Temperature and press Prog. 4. Press Up or Down to set the required temperature and press Prog. 5. Scroll to Cure to Humidity and press Prog 6. Press Up or Down to set the required humidty and press Prog. 7. Press Select. 8. Scroll to Settings and press Prog. 9. Scroll to Cure Temperature Increase and and press Prog. 10. Press Up or Down to set the required temperature increase and and press Prog.. 11. Scroll to Cure Humidity Decrease and and press Prog. 12. Press Up or Down to set the required humidty decrease and and press Prog.. 13. Scroll to Cure Time and press Prog. 14. Press Up or Down to select the required time and press Prog. 15. Press Select. 4.2.3 Setting the Inlet Opening 1. Scroll to Cure Inlet position and press Prog. 2. Press Up or Down to set the inlet opening and press Prog. 3. Press Select. 4. Scroll to System and press Prog. 5. Scroll to Inlet Open and press Prog. 6. Set the inlet opening time and press Prog. 7. Press the down arrow and press Prog. 8. Set the inlet closing time and press Prog. 9. Press Select. 4.2.4 Setting Burner Differentials This procedure details how to set a temperature differential which turns the burner on or off at a temperature lower than the target temperature. For example, if: • • • Target Temperature is set to 98° Burner On Differential is 5° Burner Off Differential is 2° the burner turns on at 93° and turns off at 96°. NOTE: Heat differential affects heating using a Target Temperature or a Temperature Curve. 1. Press Select and Up for three seconds to access Settings. 2. Press Up or Down until you reach Burner On Diff and press Prog. 3. Set the differential and press Prog. 4. Press Up or Down until you reach Burner Off Diff and press Prog. 5. Set the differential and press Prog. 6. Press Up or Down until you reach Auto Burner Recover. o No: Burner remains on regardless of the temperature (press Prog and then Select). o Yes: If the burner turns off, it attempts to reignite (proceed to step 7). 7. Press Prog. 8. Press Up or Down until you reach Burner Recovery Tries and press Prog. 9. Set the number of attempts and press Prog. CAUTION If one parameter is set to 0, the second parameter must at least ±0.4 degrees. RTDC | 1.08 14 10. Press Select. The burner differentials are set. 4.3 Cooling Mode Configuration In Cooling Mode, RTDC reduces the air temperature, while adjusting the inlet opening. 1. Press Select. 2. Scroll to the Control Menu and press Prog. 3. Select Cooling and press Prog. 4. Press Up or Down until you reach Cooling Temp and press Prog. 5. Press the Up or Down until you reach the required temperature and press Prog. 6. Press Down once and press Prog. 7. Press the Up or Down until you reach the required inlet position. 8. Press Prog. 9. Press Select. The Cooling Mode is set. 4.4 Moisture Mode Configuration In Moisture Mode, the RTDC raises the humidity level to the required level. In RTDC-4, Relay 4 must be set to Water Valve. 1. Press Select. 2. Scroll to the Control Menu and press Prog. 3. Scroll to Moisture and press Prog. 4. Press Up or Down until you reach the required humidity. 5. Press Prog. 6. Press Select. The Moisture Mode is set. 4.5 Empty Barn Mode Configuration When the barn is not in use, set the RTDC to Empty Barn. All functions are disabled except for the following alarms: • • • Saftey Temperature Alarm, Fire Smoke Detectors • Power Fail 1. Press Select. 2. Scroll to the Control Menu and press Prog. 3. Scroll to Empty Barn and press Prog. The Empty Barn Mode is set. 15 RTDC | 1.08 4.6 Alarm Configuration This procedure configures the alarms 1. Install digital sensors as shown in Figure 5 (optional). 2. Press Select. 3. Scroll to Alarms. 4. Press Prog. 5. Set each alarm (refer to Appendix: Feature Parameters for details). 4.6.1 Resetting Alarms This procedure details how to reset current alarms. 1. Press Prog and Select for three seconds. 2. Press Prog. 3. Press Up to select Yes. 4. Press Prog. 5. Press Select. RTDC resets the alarms. Because two alarms, Burner Recovery Fail and Safety Temperate, are so important, they each have a unique reset procedure. 4.6.1.1 Burner Recovery Fail Alarm Reset 1. Press Select. 2. Go to Control and press Prog. 3. Scroll to Auto Burner Recovery. 4. Switch from Yes to No and then to Yes. 4.6.1.2 Safety Temperature Alarm Reset 1. Go to Alarms > Safety Alarm Active. 2. Set to No. Devices returns to activity. 3. Set parameter back to "Yes" to re-enable the alarm for next time. 4.7 Cold Start Press Select + Up + Down while powering up the controller causes a Cold Start. All parameters in the controller revert to their defaults and the Inlet Close relay stays on for a minimum of 60 seconds. NOTE: Do not perform a Cold Start unless directed to by a Rotem technician. RTDC | 1.08 16 5 TECHNICAL SPECIFICATIONS Input Power Voltage One Phase 115 VAC 0.1 Amp, 60Hz Relay Loads 4 x 5.0 Amps, 250 Volts Analog Inputs 3 temperature inputs 1 humidity input 12 VDC for humidity 0.1 A Digital Inputs 5 mA @ 5 Volts, Dry Contact 2 inputs Operating Temperature Range: -10° to +50° C (14° to 125° F) Enclosure: Water and Dust Tight Fuses: Main fuse: 0.100 Amps, 250 Volts Relay Fuse: 5 A 17 RTDC | 1.08 6 WIRING DIAGRAMS • Figure 3: RTDC-4 Board Layout • Figure 4: RTDC-8 Board Layout • Figure 5: Opening a Port • Figure 6: Analog Sensor Wiring • Figure 7: Digital Sensor Wiring (example) • Figure 8: RTDC-4 Relay Wiring • Figure 9: RTDC-8 Relay Wiring • Figure 10: Powering the Unit Figure 3: RTDC-4 Board Layout Figure 4: RTDC-8 Board Layout RTDC | 1.08 18 Open the metal plate in a terminal before inserting a cable, as illustrated in Terminal 5. Figure 5: Opening a Port Figure 6: Analog Sensor Wiring Figure 7: Digital Sensor Wiring (example) 19 RTDC | 1.08 Figure 8: RTDC-4 Relay Wiring Figure 9: RTDC-8 Relay Wiring Figure 10: Powering the Unit RTDC | 1.08 20 7 APPENDIX: FEATURE PARAMETERS Table 3: Control Menu Items Parameter Name Default Value Increment Value Min Value Max Value Curve Enabled Control Mode Curing N/A Curing, Cooling, Moisture, Empty Barn Cure From Temp 100.0 0.1 50.0 Cure to Temp Cure to Temp (°) 120.0 0.1 Cure From Temp 180.0 Cure From Humidity (%) 85 1 100 Cure to Humidity Cure to Humidity 15 Cure From Humidity 0 Curve Not Enabled Cure Temperature 100.0 0.1 50.0 180.0 Cure Humidity 85 1 0 100.0 Common Paramenters Cure Inlet Position (%) 25 1 0 100 Cooling Temp 90.0 0.1 50 180 Cool Inlet Position (%) 100 1 0 100 Moisture Humidity (%) 25 1 0 100 Table 4: Setting Menu Items Parameter Name Default Value Increment Value Min Value Max Value Cure Temp Increase 1 1 1 5 Cure Hum idity Increade 5 1 1 10 Cure Time Per (min) 60 N/A 15, 30, 45, 50, 55, 60, 65, 70, 75 Burner On Diff -3.0 0.1 -20.0 0.0 Burner Off Diff 1.0 0.1 0.0 20.0 Auto Burner Diff Yes N/A Yes/No Burner Recovery Times 3 1 3 NOTE: 21 99 Cure Temp Increase, Cure Hum idity Increade, and Cure Time Per (min) only appear when Curve is enabled. RTDC | 1.08 Table 5: Alarms Menu Items Parameter Name Default Value Increment Value Min Value Max Value High Temperature Diff 10.0 1 0.0 99 Low Temperature Diff -10.0 1 -99.0 0.0 Safety Temp Alarm 180 1 60 212 Safety Alarm Active Yes N/A Yes/No Blower Alarm Active Yes N/A Yes/No Reminder 30 1 0 99 Table 6: System Menu Items Parameter Name Default Value Increment Value Min Value Curing Curve Yes N/A Yes/No Relay 4 Alarm N/A None, Blower, Alarm, Water Valve (RTDC-4 only) Digital-IN 1 Water Meter N/A None, Water Meter, Power Fail, Blower Fail, Fire / Smoke Detector Digital-IN 2 Power Fail N/A None, Water Meter, Power Fail, Blower Fail, Fire / Smoke Detector Inlet Open/Close 60 1 1 Comm Baud Rate: 9600 N/A 115000, 19200, 9600, 4800, 2400 Comm Unit ID 0 1 0 RTDC | 1.08 Max Value 9999 120 22