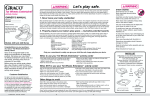
1
Online Shop
English
Training Brush / First Brush / Learn To Brush Set / Massaging Brush
Attention! This is not a toy – always use with adult supervision.
All materials meet the requirements of EN71-3. These products meet the requirements of EN ISO 20126:2012.
Instruction for use:
Clean toothbrush regularly and between each use with warm water.
Inspect toothbrush before and after each use and discard if worn or damaged.
Do not boil, steam or microwave sterilise. Do not put in the dishwasher.
Replace toothbrush regularly (after 1 – 2 months use).
For your child’s safety and health
WARNING!
Toothbrushing should be supervised by an adult.
Do not let your young child walk or crawl around with the toothbrush in his/her hand or mouth.
Oral Care Rabbit
This product meets the requirements of EN71.
Instruction for use:
Wash Oral Care Rabbit before first use.
Clean regularly and between each use with warm water.
Simply put your fi ngers in the rabbits ears and softly rub your baby‘s teeth or gums.
Machine washable up to 40°C, can be tumble dried (low temperature only) and ironed (low temperature only).
Can be sterilisied by steam sterilising, but if you choose to sterilise the material may shrink and/or discolour.
Not usable for cold water sterilisation. Do not dry clean.
Do not bleach.
For your child’s safety and health
WARNING!
Inspect product before and after each use and discard if worn or damaged!
Cotton terry: 80% Cotton, 20% Polyester, Microfi ber: 83%
Polyester, 17% Nylon, Lycra knitted: 84% Nylon, 16% Spandex
Bite & Brush / Starter & Clip
The teethers meet the requirements of EN71. The clip meets the requirements of European Standard EN 12586:2007. The clip should only be attached
to a garment.
TEETHER: Instruction for use:
Sterilise the teether before first use.
Dishwasher safe (in top rack to a max. temperature of 65°C).
Clean regularly with warm, soapy water.
Can be sterilised by boiling, cold water method, steam and microwave steam sterilising.
For your child‘s safety
WARNING!
Inspect before and after each use and discard if worn or damaged!
CLIP: Instruction for use:
The clip fastener is opened by moving the slider towards the leash and closed by clicking the slider towards the rounded end
(Diagram).
The clip should only be attached to garments.
The clip fastener should always be stored and cleaned in the open position to avoid the clip spring losing it`s strength. Do not
store in the closed position.
Regularly clean the clip with warm water and mild cleaning agent. Rinse thoroughly. DO NOT BOIL, steam or microwave
sterilize.
Do not use solvents or abrasive cleaning agents as these could damage the product.
For your child’s safety
WARNING!
Before each use check carefully. Throw away at the first sign of damage or weakness.
Never lengthen the soother holder!
Never attach to cords, ribbons, laces or loose parts of clothing. The child may be strangled.
The use of a clip with a sleeping baby, as well as in bed, crib, cot or perambulator is not recommended.
Ensure both ends of the clip are fastened before leaving your child unattended.
The clip should not be used as a teether or toy.
Cooler, Bite & Play, Mini Cooler & Clip
The teethers meet the requirements of EN 71.
TEETHER: Instruction for use:
Wash before first use and regularly with hot water and mild detergents.
Dishwasher safe (in top rack to a max. temperature of 65° C).
For optimum cooling effect, put the teether in the refrigerator for one hour.
Cool only in a refrigerator. Do not place in the freezer compartment.
For your child‘s safety
WARNING!
Inspect before and after each use and discard if worn or damaged!
Do not boil, steam or microwave sterilise. For disinfection wash with hot water.
The teether is for children between 0-3 years. Older children can bite through the waterfilled section. The waterfilling is harmless and controlled
regularly.
The clip meets the requirements of European Standard EN 12586:2007.
CLIP: Instruction for use:
The clip fastener is opened by moving the slider towards the leash and closed by clicking the slider towards the rounded end
(Diagram).
The clip should only be attached to garments.
The clip fastener should always be stored and cleaned in the open position to avoid the clip spring losing it`s strength. Do not
store in the closed position.
Regularly clean the clip with warm water and mild cleaning agent. Rinse thoroughly. DO NOT BOIL, steam or microwave
sterilize.
Do not use solvents or abrasive cleaning agents as these could damage the product.
For your child‘s safety
WARNING!
Before each use check carefully. Throw away at the first sign of damage or weakness.
Never lengthen the soother holder!
Never attach to cords, ribbons, laces or loose parts of clothing. The child may be strangled.
The use of a clip with a sleeping baby, as well as in bed, crib, cot or perambulator is not recommended.
Ensure both ends of the clip are fastened before leaving your child unattended.
The clip should not be used as a teether or toy.
Bite & Relax Phase 1 / Phase 2
This teether meets the requirements of EN71.
Instructions for use:
Sterilise the mini teether before first use.
Can be sterilised by boiling, cold water method, steam and microwave steam sterilising.
Dishwasher safe (in top rack to a max. temperature of 65°C). Food colourings may discolour components.
Clean regularly with warm, soapy water.
Do not worry if the bite & relax teether becomes lodged in the mouth. It can not be swallowed and is designed to cope with such an event. Remove
as gently as possible.
For your child’s safety
WARNING!
Inspect mini teether before and after each use and discard if worn or damaged!
Steriliser-box
Instructions for use:
Remove tamper-proof closure and any stickers from the box.
Remove plastic inlay from box (fi g. A).
Wash mini teether and box with mild soapy water and then rinse with clear water before use.
When using the self-sterilising method, please ensure the teether, box and microwave
(including the waveguidecover and turntable) are COMPLETELY CLEAN and free from dirt,
food residue, fat or oil splashes. If not, this could lead to the product or box melting and the
microwave sparking or the waveguide cover burning!
Hold box and fill to the mark with 25ml / 0.9 fl oz of water (fi g. B).
Place mini teether in the box.
Close box and heat in the microwave at 750 – 1,000 watts for 3 minutes (fi g. C).
Allow to cool for at least 10 minutes.
Open microwave. CAUTION! The box, water and the mini teether may still be very hot after the
10 minute cooling period!
Open box and drain remaining water. Leave mini teether to dry in slightly open box.
Check the temperature of the mini teether before use!
Improper water level, power level or time setting can damage the microwave, mini teether and box and result in poor disinfection!
For use only with MAM mini teethers!
Keep steriliser-box away from children.
After microwave sterilisation, mini teethers kept in the closed box will remain sterile for a minimum of 48 hours.
Dipper Set / Baby’s Cutlery
These products meet the requirements of European Standard EN 14372.
Instructions for use:
Clean the product prior to first use and again after each use.
Dishwasher-safe to 65°C in top rack or cutlery basket.
Stir food thoroughly for even warming.
DO NOT Boil, Steam or Microwave Sterilise, sterilise by cold water method ONLY (The MAM Microwave Steam Steriliser is perfect for
this as it can also be used for cold water sterilisation).
For your child’s safety and health
Warning!
Always use this product with adult supervision.
Before each use, inspect the product. Throw away at the first sign of damage or weakness. Always check food temperature before
feeding.
Do not expose product to direct sunlight or heat and do not leave in disinfecting solutions longer than recommended as this may
adversely affect the material.
Heat Sensitive Spoons & Cover
The spoons meet the requirements of European Standard EN 14372.
Instructions for use:
Clean the product prior to first use and again after each use with warm soapy water.
Dip the spoon into baby’s food or drink and stir for 15 seconds for even warming. If spoon changes colour, allow food to cool and
rinse spoon under cold water. Repeat until spoon does not change colour. To get the most obvious colour change only dip the tip of the
spoon in.
Dishwasher-safe to 65°C in top rack or cutlery basket.
DO NOT Boil, Steam or Microwave Sterilise, sterilise by cold water method ONLY (The MAM Microwave Steam Steriliser is perfect for
this as it can also be used for cold water sterilisation).
Food colourings may discolour components. This does not adversely affect the material.
For your child’s safety and health
Warning!
Always use this product with adult supervision.
Before each use, inspect the product. Throw away at the first sign of damage or weakness.
Always check food temperature before feeding.
Do not expose product to direct sunlight or heat and do not leave in disinfecting solutions longer than recommended as this may
adversely affect the material.
The heat sensitive spoons are developed to check whether babies food is too hot. Do not use as a cooking spoon. Do not use or store
with hot (over 50° C) food. Only use with baby food. Do not use with fatty foods.
As the spoon cover is a reusable packaging and no childcare product, keep the removable spoon cover out of the reach of children.
Feeding Bowl
The product meets the requirements of European Standard EN 14372
Instructions for use:
Clean the product prior to first use and again after each use.
Dishwasher-safe to 65°C in top rack. · Freezable to –30°C.
Microwavable · Stir food thoroughly for even warming.
Do not use or store with hot (over 40° C) food. DO NOT Boil, Steam or Microwave Sterilise, sterilise by cold water method ONLY (The
MAM Microwave Steam Steriliser is perfect for this as it can also be used for cold water sterilisation)
For your child’s safety and health
Warning!
Always use this product with adult supervision.
Before each use, inspect the product. Throw away at the first sign of damage or weakness.
Always check food temperature before feeding.
Do not expose product to direct sunlight or heat and do not leave in disinfecting solutions longer than recommended as this may
adversely affect the material.
Baby’s Bowl & Plate
The product meets the requirements of European Standard EN 14372.
Instructions for use:
Clean the product prior to first use and again after each use.
Dishwasher-safe to 65°C in top rack.
Freezable to –30°C. Microwavable
Stir food thoroughly for even warming.
Do not use or store with hot (over 40°C) food. DO NOT Boil, Steam or Microwave Sterilise, sterilise by cold water method ONLY (The
MAM Microwave Steam Steriliser is perfect for this as it can also be used for cold water sterilisation).
For your child’s safety and health
Warning!
Always use this product with adult supervision.
Before each use, inspect the product. Throw away at the first sign of damage or weakness.
Always check food temperature before feeding.
Do not expose product to direct sunlight or heat and do not leave in disinfecting solutions longer than recommended as this may
adversely affect the material.
Snack Box
The product meets the requirements of European Standard EN 14372.
Instructions for use:
Clean the product prior to first use and again after each use.
Dishwasher-safe to 65°C in top rack.
Freezable to –30°C.
Stir food thoroughly for even warming.
Do not use or store with hot (over 40° C) food.
DO NOT Boil, Steam or Microwave Sterilise, sterilise by cold water method ONLY (The MAM Microwave Steam Steriliser is perfect for
this as it can also be used for cold water sterilisation)
For your child’s safety and health
Warning!
Always use this product with adult supervision.
Before each use, inspect the product. Throw away at the first sign of damage or weakness.
Always check food temperature before feeding. Do not expose product to direct sunlight or heat and do not leave in disinfecting
solutions longer than recommended as this may adversely affect the material.
Milk Powder Box
Instruction for use:
Clean prior to first use.
For sterilisation, one of the following methods can be used: steam sterilising (electric or microwave according to manufacturers instructions),
boiling in water or liquid sterilising solution.
Dishwasher safe up to 65°C in top-rack.
Always clean, sterilise and store in open position (snap covers and lid).
Not suitable for storing liquids.
During transportation, a non-relevant amount of powder may flow between the compartments.
Usage:
The formula box consists of a bottom section with 3 compartments and a lid with 3 snap covers. The compartments are designed for large
portions of formula (up to 40g /compartment).
Remove lid.
Ensure that all parts are completely dry.
Fill the compartments with powder. One compartment for each portion.
Put the lid on and ensure the snap covers are firmly closed to prevent the powder from leaking out.
To use, fold the snap cover of the desired chamber back and hold it open with your thumb.
Firmly close cover after use.
For your child‘s safety
WARNING!
Keep product out of the reach of children.
Learn To Drink Cup & Sports Cup
The products meet the requirements of European Standard EN 14350.
Instructions for use:
Clean before first and each use.
Before first use place all cup parts separately in boiling water for 5 minutes. This is to ensure hygiene.
Check all components before each use and throw away at the first signs of damage or weakness.
To ensure proper cleaning/sterilizing all cup parts MUST be disassembled before cleaning. Cleaning/sterilizing while assembled can damage the
cup.
All parts are top rack dishwasher safe (up to 65°C).
Food colourings may discolour components. This does not adversely affect the material.
Do not use abrasive cleaning agents. Only soft bristle brushes or soft sponges should be used.
Sterilizing: in boiling water or liquid sterilizing solution, steam sterilizing (electric or microwave according to manufacturers instructions). All parts
must be disassembled before sterilizing. After boiling or sterilizing allow all parts to cool.
Do not leave cup parts in direct sunlight or heat, as this may affect the product function.
Ensure that the holes of the spout are not blocked.
Do not store or use for hot (above 40°C) beverages.
The cup will not remain spill-proof if used for carbonated drinks.
To avoid injury, do not let toddler walk with the cup.
Do not put your baby to bed with cup. Prolonged contact with liquids may cause severe tooth decay.
Use sugar free food or liquids only.
All Cup parts must be disassembled before heating (especially microwave heating) or cooling. Stir thoroughly after heating to evenly distribute
heat. After heating allow Cup to cool.
”click!“
”click!“
Free-flow
without
valve
Spill-free
with valve
”click!“
Free-flow
without
”click!“ valve
Spill-free
with valve
For your child’s safety and health
WARNING!
Always use this product with adult supervision.
Continuous and prolonged sucking of fluids will cause tooth decay.
Always check food temperature before feeding.
Keep all components not in use out of the reach of children.
Never use feeding spouts as a soother.
Starter Cup
The product meets the requirements of European Standard EN 14350.
Instructions for use:
Clean before first and each use.
Before first use place spout and cup separately in boiling water for 5 minutes. This is to ensure hygiene.
Check all components before each use. Throw away at the first signs of damage or weakness.
Before first use, press gently the mouthpiece of the spout to check if the slits properly open.
When first used and sometimes for later usages, the slit in the ventilation (the raised, slit bubble on the underside of the spout base) can stick
together, therefore not allowing air to enter the cup during feeding and as a result, the spout collapsing. Slowly brush over the bubble (ventilation) a
few times with your thumb or fingers to re-open the slit.
To ensure proper cleaning/sterilizing all cup parts MUST be disassembled before cleaning. Cleaning/ sterilizing while assembled can damage the
cup.
All parts are top rack dishwasher safe (up to 65°C). Food colourings may discolour components.
Clean the mouthpiece of the spout with special care to prevent damaging the membrane. Do not use abrasive cleaning agents. Only soft bristle
brushes or soft sponges should be used.
Sterilise using one of the following methods: steam sterilising (electric or microwave according to manufacturers instructions), boiling in water for
at least 5 minutes or liquid sterilising solution. After boiling or sterilising allow all parts to cool.
Do not leave single cup parts in direct sunlight or heat, or leave in sterilising solution for longer than recommended, as this my affect the product
function.
Do not use pin or sharp object to enlarge feeding slits.
To avoid injury, do not let toddler walk with the cup.
Do not put your baby to bed with cup. Prolonged contact with liquids may cause severe tooth decay.
Use sugar free food or liquids only.
The spout and the Cup handles are compatible with all MAM Cups.
All parts must be disassembled before heating (especially microwave heating) or cooling. Stir thoroughly after heating to evenly distribute heat.
After heating allow cup to cool.
Assembling SPOUT: Insert spout into top of cup screw ring until you hear a “click”. Place the handles over the cup neck and screw the spout onto the
cup tightly.
For your child’s safety
WARNING!
Always use this product with adult supervision.
Continuous and prolonged sucking of fluids will cause tooth decay.
Always check food temperature before feeding.
Keep all components not in use out of the reach of children.
Never use feeding spouts as a soother.
Anti-Colic
This product meets the requirements of European Standard EN 14350.
Instructions for use:
Clean before first and each use.
Before first use separate all 6 parts and place them in boiling water for 5 minutes. This is to ensure hygiene.
Check all components before each use and throw away at the first signs of damage or weakness.
To ensure proper cleaning/sterilizing all bottle parts MUST be disassembled.
Cleaning/sterilising while assembled can damage the bottle.
Dishwasher safe on top dishwasher rack (max. 65° C / 149 Fahrenheit) but food colourings may discolour components.
Do not use abrasive cleaning agents. Only soft bristle brushes or soft sponges should be used. Hard scourers may scratch the plastic.
Sterilise using one of the following methods: steam sterilizing (electric or microwave according to manufacturers instructions), boiling in water for
at least 5 minutes or liquid sterilising solution.
Do not leave single bottle parts in direct sunlight or heat, or leave in sterilising solution for longer than recommended, as this may affect the
product function.
The bottle is made of polypropylene which is hygienic, easy to clean and relatively soft. Avoid any heavy pressure on it, as this could affect the
function.
Do not use pin or sharp object to enlarge feeding hole of teat.
Ensure valve is assembled correctly and the base of the bottle is firmly
attached prior to filling bottle with liquid (see figure 1 & 2).
Do not let babies self-feed. Store teats and valves in a dry sealed container.
Always use only MAM teats with the MAM bottles.
Use sugar free food or liquids only.
To avoid injury, do not let baby walk with bottle.
Do not put your baby to bed with bottle. Prolonged contact with liquids may
cause severe tooth decay.
1
2
3
4
Bottle teat fits all MAM wide neck bottles and trainers.
Place silicone valve
into bottom ring.
Press down on
raised perimeter
of silicone valve.
Screw assembled base onto bottom of
bottle in slow steady
manner.
Insert teat into top
of bottle screw ring
until you hear a
”click“.
Heating Instructions:
NEVER pour boiling water into the bottle.
Place in a bottle warmer, under hot running water or in a container of heated water.
NEVER heat or cool a sealed bottle. Remove the protective cap and teat before heating, especially before bottle warmer and microwave heating.
Do not overheat as this may damage the bottle.
Stir thoroughly after heating to evenly distribute heat. Allow the standing time recommended by the microwave manufacturer.
Wrap cloth or towel around bottom of bottle and shake to absorb any excess water after warming in a bottle warmer or boiling water.
After warming the bottle in a bottle warmer or boiling water it is recommended to tighten the bottom of the bottle.
Do not place bottle in heated oven.
For your child’s safety and health
WARNING!
Always use this product with adult supervision.
Never use feeding teats as a soother.
Continuous and prolonged sucking of fluids will cause tooth decay.
Always check food temperature before feeding.
Keep all components not in use out of the reach of children.
Self-sterilising function of Anti-Colic:
The Anti-Colic can be transformed into a self-sterilising bottle by 3 simple steps. Thereby making further sterilization unnecessary. Always clean
bottle parts before using the sterilising function!
1
Step 1: For the self-sterilisation of the Anti-Colic assemble clean bottle parts as follows: base with silicone
valve, teat with screw ring, bottle body and protective cap.
2
Step 2: Fill the base with silicone valve with 20 ml of cool water. The protective cap makes a practical
measuring cup.
3
Step 3:
Place the screw ring with teat in the bottle base.
Place the bottle body on it (Optionally screw in slightly to avoid pouring out hot water by removing the bottle
from microwave).
Place the protective cap on top.
Sterilisation in the microwave:
Set the microwave timer according to the number of bottles sterilised at once. Set microwave from 500 to 1000 Watt.
Number of bottles
sterilized at the
same time
1
2
3
4
5
6
Estimated duration
of sterilizing [min]
3
4
5
6
7
8
Allow bottle to cool down before removing from microwave. Recommended cooling time: 10 minutes at opened microwave door.
Pour out the rest water. Allow bottle parts to dry. Always store bottle assembled.
Additional Instructions:
Follow the user-manual-instructions of your microwave or multifunctional device.
Ensure all parts from the selfsterilising bottle and microwave (including waveguide-cover and turntable) are COMPLETELY clean and free from dirt,
food residue, fat or oil splashes. If not, this could lead to the product melting and the microwave sparking or the waveguide-cover burning!
The self-sterilising bottle should only be placed on solid and fl at surfaces.
Don’t put the self-sterilising bottle at the center of the turntable as this could result in an uneven heat distribution.
Don’t leave your microwave unattended during sterilisation process.
Never place in the microwave without water and stop the microwaving process immediately if whole water is vaporized!
Filling the base with inaccurate water measures can damage the bottle.
Always set the microwave to the correct power and time.
If using a combination microwave oven, ensure that the self-sterilising bottle is not exposed to the heat of the grill because this will damage it.
ATTENTION when dealing with sterilised products since they may still be hot.
Wash hands before using sterilized products.
Always store the bottle dry.
Hold the self-sterilising bottle straight when removing from microwave to void pouring out hot residual water.
Do not wash self-sterilising bottle after sterilizing.
Do not touch the teat after sterilising. Handle teat by using the screw ring.
Feel Good – Premium Glass Bottle
This product meets the requirements of European Standard EN 14350.
Instructions for use:
Check all components before each use and throw away at the first sign of weakness, cracks or glass fragments inside and outside the bottle.
Sudden temperature changes can cause glass bottles to crack or break.
Clean before first and each use.
Before first use place all components separately in boiling water for 5 minutes. This is to ensure hygiene.
Do not leave glass bottles in boiling water unattended as glass can be damaged through uncontrolled impact with the pot or other glass
components. We recommend boiling the glass body separately.
To ensure proper cleaning/sterilising all bottle parts MUST be disassembled.
Cleaning/sterilising while assembled can damage the bottle itself or the plastic components.
Do not use abrasive cleaning agents or any metal utensils for cleaning or stirring contents. This can damage the glass and/or the printing. Only
soft bristle brushes or soft sponges should be used to avoid damaging the glass and/or the printing.
Dishwasher safe on top dishwasher rack (max. 65° C) but food colourings may discolour plastic components.
Sterilise using one of the following methods: steam sterilizing (electric or microwave according to manufacturers instructions), boiling in water for
at least 5 minutes or liquid sterilizing solution.
Clean the bottle thoroughly before sterilising.
Do not place glass bottle on the top rack of the MAM microwave steriliser as the weight of the bottle could deform the rack.
Do not leave single bottle parts in direct sunlight or heat, or leave in sterilising solution for longer than recommended, as this may affect the
product function.
Remove the protective cap and teat before heating, especially before microwave and bottle warmer heating.
The bottle is made of natural glass which is hygienic, easy to clean and relatively fragile. Avoid putting heavy pressure on it, as
the glass bottle could break.
Do not use pin or sharp object to enlarge feeding hole.
Use sugar free food or liquids only.
When first used and sometimes for later usages, the slit in the ventilation (the raised, slit bubble on the underside of the teat
base) can stick together, therefore not allowing air to enter the bottle during feeding and as a result, the teat collapsing. Slowly
brush over the bubble (ventilation) a few times with your thumb or fingers to re-open the slit.
Do not let children feed themselves with a glass bottle. Do not let children walk with a glass bottle.
Do not put your baby to bed with bottle. Prolonged contact with liquids may cause severe tooth decay.
Insert teat into top of bottle screw ring until you hear a “click“.
HEATING INSTRUCTIONS:
NEVER pour boiling water into the bottle.
NEVER heat or cool a sealed bottle.
Stir thoroughly with plastic or soft spoon after heating to evenly distribute heat. Allow the standing time recommended by the microwave
manufacturer and test the temperature before serving.
Beware of very hot glass body after heating.
For your child’s safety and health
WARNING!
Glass bottles may break.
Always use this product with adult supervision.
Never use feeding teats as a soother.
Continuous and prolonged sucking of fluids will cause tooth decay.
Always check food temperature before feeding.
Keep all components not in use out of the reach of children.
The bottle is compatible with MAM teats, sealing discs and breast pump.
Do not use it with handles as it may break if dropped.
Baby Bottle
This product meets the requirements of European Standard EN 14350
Instruction for use:
Clean before first and each use.
Before first use place all components separately in boiling water for 5 minutes. This is to ensure hygiene.
Check all components before each use and throw away at the first signs of damage or weakness.
To ensure proper cleaning/sterilising all bottle parts MUST be disassembled.
Cleaning/sterilising while assembled can damage the bottle.
Dishwasher safe on top dishwasher rack (max. 65° C) but food colourings may discolour components.
Do not use abrasive cleaning agents. Only soft bristle brushes or soft sponges should be used. Hard scourers may scratch the plastic.
Sterilise using one of the following methods: steam sterilizing (electric or microwave according to manufacturers instructions), boiling in water for
at least 5 minutes or liquid sterilising solution.
Do not leave single bottle parts in direct sunlight or heat, or leave in sterilizing solution for longer than recommended, as this may affect the
product function.
The bottle is made of polypropylene which is hygienic, easy to clean and relatively soft. Avoid any heavy pressure on it, as this could affect the
function.
Do not use pin or sharp object to enlarge feeding hole.
Use sugar free food or liquids only.
When first used and sometimes for later usages, the slit in the ventilation (the raised, slit bubble on the underside of the teat
base) can stick together, therefore not allowing air to enter the bottle during feeding and as a result, the teat collapsing. Slowly
brush over the bubble (ventilation) a few times with your thumb or fingers to re-open the slit.
To avoid injury, do not let baby walk with bottle.
Do not put your baby to bed with bottle. Prolonged contact with liquids may cause severe tooth decay.
Insert teat into top of bottle screw ring until you hear a “click“.
Heating Instructions:
NEVER pour boiling water into the bottle.
NEVER heat or cool a sealed bottle. Remove the protective cap and teat before heating, especially before microwave and bottle warmer heating.
Stir thoroughly after heating to evenly distribute heat.
Allow the standing time recommended by the microwave manufacturer. Test the temperature before serving.
For your child’s safety and health
WARNING!
Always use this product with adult supervision.
Continuous and prolonged sucking of fluids will cause tooth decay.
Always check food temperature before feeding.
Keep all components not in use out of the reach of children.
Never use feeding teats as a soother.
Trainer
The product meets the requirements of European Standard EN 14350.
Instructions for use:
Clean before first and each use.
Before first use separate all parts and place them in boiling water for 5 minutes. This is to ensure hygiene.
Inspect carefully all components before each use. Throw away at the first signs of damage or weakness.
Before first use, press gently the mouthpiece of the teat/ spout to check if the slits properly open.
When first used and sometimes for later usages, the slit in the ventilation (the raised, slit bubble on the underside of the teat/spout base) can
stick together, therefore not allowing air to enter the bottle during feeding and as a result, the teat/spout collapsing. Slowly brush over the bubble
(ventilation) a few times with your thumb or fingers to re-open the slit.
To ensure proper cleaning/sterilising all bottle parts MUST be disassembled. Cleaning/sterilising while assembled can damage the bottle.
All parts are top rack dishwasher safe (up to 65°C). Food colourings may discolour components.
Clean the mouthpiece of the spout with special care to prevent damaging the membrane. Do not use abrasive cleaning agents. Only soft bristle
brushes or soft sponges should be used. Hard scourers may scratch the plastic.
Sterilise using one of the following methods: steam sterilizing (electric or microwave according to manufacturers instructions), boiling in water for
at least 5 minutes or liquid sterilising solution. After boiling or sterilising allow all parts to cool.
Do not leave single bottle parts in direct sunlight or heat, or leave in sterilising solution for longer than recommended, as this may affect the
product function.
The trainer is made of polypropylene which is hygienic, easy to clean and relatively soft. Avoid any heavy pressure on it, as this could affect the
function.
Store teats/spouts in a dry, sealed container.
Do not use pin or sharp object to enlarge feeding slits.
To avoid injury, do not let baby walk with Trainer.
Do not put your baby to bed with Trainer. Prolonged contact with liquids may cause severe tooth decay.
Use sugar free food or liquids only.
Teat, spout and handles are compatible with all MAM wide neck bottles and the Trainer.
Assembling TEAT/SPOUT: Insert teat/spout into top of bottle screw ring until you hear a “click”. Place the handles over the bottle neck and screw the
teat/spout onto the bottle tightly.
HEATING INSTRUCTIONS:
NEVER pour boiling water into the Trainer.
NEVER heat or cool a sealed Trainer. Remove the protective cap and spout or teat before heating, especially before microwave and bottle warmer
heating.
Take extra care when microwave heating. Stir thoroughly after heating to evenly distribute heat. Allow the standing time recommended by the
microwave manufacturer and test the temperature before serving.
For your child’s safety and health
WARNING!
Always use this product with adult supervision.
Never use feeding teats as a soother.
Continuous and prolonged sucking of fluids will cause tooth decay.
Always check food temperature before feeding.
Keep all components not in use out of the reach of children.
MAM Teat
This product meets EN 14350. Bottle teat fits all MAM wide neck bottles and trainers.
Instructions for use:
Clean before first and each use.
Before first use and regularly place in boiling water for 5 minutes. This is to ensure hygiene.
Check teat carefully before each use, especially when the child has teeth. Pull the teat in all directions and throw away at the first signs of damage
or weakness.
When first used and sometimes for later usages, the slit in the ventilation (the raised, slit bubble on the underside of the teat base) can stick
together, therefore not allowing air to enter the bottle during feeding and as a result, the teat collapsing. Slowly brush over the bubble (ventilation) a
few times with your thumb or fingers to re-open the slit.
Dishwasher safe in top rack (max. 65° C) but food colourings may discolour components.
Do not use abrasive cleaning agents. Only soft bristle brushes or soft sponges should be used.
Sterilise using one of the following methods: steam sterilizing (electric or microwave according to manufacturers instructions), boiling in water for
at least 5 minutes or liquid sterilising solution.
Do not leave the teat in direct sunlight or heat, or leave in sterilising solution for longer than recommended, as this may affect the product function.
Do not use pin or sharp object to enlarge feeding hole.
Store teats in a dry, sealed container.
Insert teat into top of bottle screw ring until you hear a ”click“.
Use sugar free food or liquids only.
NEVER heat or cool a sealed bottle. Remove the protective cap and teat before heating, especially before microwave heating. Stir thoroughly after
heating to evenly distribute heat. Test before serving.
Bottle teat fits all MAM wide neck bottles and trainers.
For your child‘s safety and health
WARNING!
Always use this product with adult supervision.
Continuous and prolonged sucking of fluids will cause tooth decay.
Always check food temperature before feeding.
Never use feeding teats as a soother.
MAM Spill-Free Teat
This product meets EN 14350. Bottle teat fits all MAM wide neck bottles and trainers.
Instructions for use:
Clean before first and each use.
Before first use and regularly place in boiling water for 5 minutes. This is to ensure hygiene.
Check teat carefully before each use, especially when the child has teeth. Pull the teat in all directions and throw away at the first signs of damage
or weakness.
When first used, the slit at the top of the teat can stick together. Pull gently on both sides of the teat to open it (see diagram).
When first used and sometimes for later usages, the slit in the ventilation (the raised, slit bubble on the underside of the teat base) can stick
together, therefore not allowing air to enter the bottle during feeding and as a result, the teat collapsing. Slowly brush over the bubble (ventilation) a
few times with your thumb or fingers to re-open the slit.
Dishwasher safe in top rack (max. 65° C) but food colourings may discolour components.
Do not use abrasive cleaning agents. Only soft bristle brushes or soft sponges should be used.
Sterilise using one of the following methods: steam sterilizing (electric or microwave according to manufacturers instructions), boiling in water for
at least 5 minutes or liquid sterilizing solution.
Do not leave the teat in direct sunlight or heat, or leave in sterilising solution for longer than recommended, as this may
affect the product function.
Do not use pin or sharp object to enlarge feeding hole.
Store teats in a dry, sealed container.
Insert teat into top of bottle screw ring until you hear a ”click“.
Use sugar free food or liquids only.
NEVER heat or cool a sealed bottle. Remove the protective cap and teat before heating, especially before microwave
heating. Stir thoroughly after heating to evenly distribute heat. Test before serving.
Bottle teat fits all MAM wide neck bottles and trainers.
For your child‘s safety and health
WARNING!
Always use this product with adult supervision.
Continuous and prolonged sucking of fluids will cause tooth decay.
Always check food temperature before feeding.
Never use feeding teats as a soother.
Hold my Bottle / Hold my Cup handles
Instructions for use:
Clean before first and each use.
Dishwasher safe in top rack (max. 65° C).
Before first use place in boiling water for 5 minutes. This is to ensure hygiene.
Always check food temperature before feeding. Stir thoroughly after heating to evenly distribute heat.
Do not let your young child walk or crawl around with the product in his/her hand or mouth.
The handles are made from a special high-grade plastic which is hygienic, easy to clean and resistant. Avoid heavy pressure – this could affect the
efficiency.
Start / Original /Mini Air / Air / Perfect
These products meet the requirements of EN 1400.
Instructions for use :
Before first use boil in water for 5 minutes or sterilise. Allow to stand for a further 5 minutes before giving it to baby.
During sterilisation a small amount of water may enter the teat. This can be expelled by squeezing the teat. This is to ensure hygiene.
Clean before each use.
Do not use aggressive cleaning agents.
Never dip the teat in sweet substances or medication. This can cause tooth decay.
To ensure safety and hygiene replace the soother every 1-2 months.
Do not worry if the soother becomes lodged in the mouth. It can not be swallowed and is designed to cope with such an event. Remove as gently
as possible.
MAM recommends giving up soother usage at 3 years of age.
For your child´s safety
WARNING!
Inspect carefully before each use. Pull the soother in all directions. Throw away at the first signs of damage or weakness.
Only use dedicated soother holders tested to EN 12586. Never attach other ribbons or cords to a soother, your child may be strangled by them.
Do not leave a soother in direct sunlight or near a source of heat or leave in sterilising solution for longer than recommended, as this may weaken
the teat.
Night / Perfect Night
These products meet the requirements of European Standard EN 1400.
Instructions for use:
Before first use boil in water for 5 minutes or sterilise.
Allow to stand for a further 5 minutes before giving it to baby.
During sterilisation a small amount of water may enter the teat. This can be expelled by squeezing the teat. This is to ensure hygiene.
Clean before each use.
Do not use aggressive cleaning agents.
Never dip the teat in sweet substances or medication. This can cause tooth decay.
To ensure safety and hygiene replace the soother every 1–2 months.
Do not worry if the soother becomes lodged in the mouth. It can not be swallowed and is designed to cope with such an event. Remove as gently
as possible.
Keep the soother in daylight – not direct sunlight – during the day so that the knob glows in the dark
MAM recommends giving up soother usage at 3 years of age.
For your child’s safety
WARNING!
Inspect carefully before each use. Pull the soother in all directions. Throw away at the first signs of damage or weakness.
Only use dedicated soother holders tested to EN 12586. Never attach other ribbons or cords to a soother, your child may be strangled by them.
Do not leave a soother in direct sunlight or near a source of heat or leave in sterilising solution for longer than recommended, as this may weaken
the teat
Latex Soothers
Produced from natural rubber latex. Keep away from sun light and heat.
Steriliser-box
Instructions for use:
Remove tamper-proof closure and any stickers from the box.
Wash soother and box with mild soapy water and then rinse with clear water before use. This is to ensure hygiene.
When using the self-sterilising method. Please ensure the soother, box and microwave (including the waveguide-cover and turntable) are
COMPLETELY CLEAN and free from dirt, food residue, fat or oil splashes. If not, this could lead to the product or box melting and the microwave
sparking or the waveguide cover burning!)
First, hold box and fill to the mark with 25ml / 0.9 fl oz of water (Fig. A).
Next, firmly attach the holding clip to the soother (fig. B) and then place the device in the box with the teat facing down (Fig. C).
Close box and heat in the microwave at 750 – 1000 watts.
Set the microwave timer according to the number of boxes and soothers being simultaneously sterilized.
Follow the user manual- instructions of your microwave. Don’t put the sterilizer box at the center of the turntable. Don’t leave your microwave
unattended during sterilization process! Stop the microwaving- process immediately if whole water is vaporized
Allow to cool for at least 5 minutes.
Open microwave. CAUTION! The box, water and soothers may still be very hot after the 5 minute cooling period!
Open box and drain remaining water. Leave soothers to dry in slightly open box.
After microwave sterilisation, soothers kept in the closed box will remain sterile for a minimum of 48 hours.
Check the temperature of the soothers before use!
Improper water level, power level or time setting can damage the microwave,
soothers and box and result in poor disinfection!
Retain holding clip for future use. In case of sterilisation without holding clip
place soother in the box with the teat facing down.
For use only with MAM soothers!
Keep steriliser-box away from children.
750 – 1000 W
Clip, Clip & Cover, Twist Clip
These products meet the requirements of EN 12586: 2007.
Instruction for use:
When used with a MAM or other button soother, press the ring over the button of the soother (Diagram A).
When used with a soother with handle, put the transparent ring over the whole handle of the soother (Diagram B), or attach the ribbon directly to
the soother handle, using the Velcro. (Diagram C).
The Velcro securely holds not only soothers but also teethers, small toys and much more. (Diagram D).
The clip fastener is opened by moving the slider towards the leash and closed by clicking the slider towards the rounded end (Diagram F)
Twist Clip: The clip is opened by turning the wheel left and closed by turning it right (Diagram E).
The clip should only be attached to garments.
The clip fastener should always be stored and cleaned in the open position to avoid the clip spring losing it`s strength. Do not store in the closed
position.
Regularly clean the clip with warm water and mild cleaning agent. Rinse thoroughly. DO NOT BOIL, steam or microwave sterilize.
Do not use solvents or abrasive cleaning agents as these could damage the product.
A
B
C
D
E
F
For your child‘s safety
WARNING!
Before each use check carefully. Throw away at the first sign of damage or weakness.
Never lengthen the soother holder!
Never attach to cords, ribbons, laces or loose parts of clothing. The child may be strangled.
The use of a clip when baby is sleeping or in bed, crib or cot is not recommended.
Ensure both ends of the clip are fastened before leaving your child unattended.
The clip should not be used as a teether or toy.
MAM Pod
No metal parts. Only plastic materials. PVC free. Materials conform to EN 71-3
Instructions for use & warnings:
Clean before each use by rinsing the MAM Pod under warm water using mild soap or hand dishwashing detergent. Do not use the rough side of
sponge.
Rinse thoroughly - dry afterwards.
As the pod is a reusable packaging and no childcare product, keep the pod out of the
reach of children.
Never lengthen the leash as this could present a strangulation danger.
Throw away at first signs of damage.
MAM Thermal Bag
Instructions for use:
Thermal Bag for storage of e.g. pre-boiled hot water or tea.
Temperature sequence of bottle content depends on filling quantity and temperatures of liquid and environment. A temperature of about 95°C will
be recommended for pre-boiled water to be poured into the bottle.
Tip: Rinse bottle with hot water directly before use. Warning: Always check the temperature of the nutrition before feeding. Wipe clean with soapy
water on a damp cloth. Please check the internal lining after each use. Remove any milk spills immediately.
Warning:
Place only closed baby bottles into the bottle holder. The Thermal Bag is not a toy. Product must be stored away from babies and young children’s
reach.
Nipple shields
Instructions for use:
Cleaning and sterilising: Clean nipple shields before first and each use. Before first use place nipple shields in boiling water for 5 minutes. This is to
ensure hygiene. Clean the nipple shields in water or gentle cleaning agents. Boil the nipple shields after each use for 5 minutes or sterilise them in a
vaporiser or steam steriliser. In order to store the sterilized nipple shields hygienically, keep them in the closed sterilised box.
Instructions for use:
Inspect the nipple shields before each use and replace at the first signs of damage. Moisten the reverse of the shield with a small amount of breast
milk for an optimal hold on the breast. Before giving baby the breast, check that the shield fits the nipple and is holding well. Before first use contact
a midwife or health consultant.
Warnings – for your child’s safety!
Do not use the nipple shields as a soother or teat. Do not cut the shape of the nipple shield. Keep out of the reach of children.
Manual Breast Pump
The Anti-Colic bottle meets the requirements of EN 14350.
II a.
IV FUNNEL
II f.
II e.
IV a.
II PUMP &
HANDLE
I SCREW RING
II c.
II b.
I b.
II d.
I a.
III VALVE
V ANTI-COLIC
Bottle
1. Parts of the MAM Breast pump (cf. figure)
I.) Screw ring
II.) Pump and handle*
III.) Silicone valve
I V.) Funnel with cushions
* Pump chamber and handle are one piece and not designed to come apart. They will be referred to in these instructions as “handle”.
Important: Before first use: MAM Breast Pump must be disassembled and cleaned before first use.
Additionally: funnel, screw ring and valve must be sterilised.
2. Disassembly (for cleaning): Diagrams 1–4
IMPORTANT: Clean and store all parts separately. Those parts that can be sterilised (see 4. Sterilising) must also be separated before sterilising.
1.) First remove the funnel. You will find this easier if you twist and gently pull. (Diagram 1)
2.) Hold the handle firmly and separate the handle from the screw ring by pulling away and up.
(Diagram 2)
3.) Unscrew the screw ring (I.) from the Anti-Colic (V.). Caution: If the bottle is filled, keep it in an upright position in order to prevent the milk from
leaking out. (Diagram 3)
4.) Pull off the valve (III.). (Diagram 4)
3. Cleaning
For reasons of hygiene all parts must be thoroughly cleaned before first use and after each use. Please disassemble the pump into its 4 parts before
doing so.
Wash all parts in warm soapy water with a damp cloth or sponge and rinse thoroughly or place the separated parts in the top dishwasher rack.
Please note that the pump handle’s functionality can be affected by regular machine washing. We therefore recommend only cleaning the pump
handle in warm soapy water and then rinsing it with clear water since it does not come into contact with the breast milk.
Do not use any abrasive cleaning agents such as anti-bacterial solutions, scented dishwasher tablets etc.
When hand washing, please ensure that the spring under the handle is not dislodged.
The dial (II e) on the pump chamber has a silicone cover that can come off when hand-washing. This can easily be reinserted after cleaning.
Cleaning the handle: submerge the handle in pure soapy water and pump to pull water into the chamber. Repeat this procedure with clear water.
Remove the handle from the water and pump again until the water has been completely pushed out of the chamber.
Please note: never clean the assembled pump – always separate the 4 parts.
4. Sterilising
Before each sterilisation all parts of the MAM Breast Pump must be cleaned (see 3. Cleaning)
Warning: the pump handle – which does not come into contact with the breast milk – must not be sterilised or
boiled because this can lead to deformation and malfunction.
The funnel, screw ring and valve of the MAM Breast Pump can be sterilised in boiling water, in a steam or
microwave steriliser as well as in cold sterilising liquid.
Please note: never sterilise the assembled pump – always separate the parts.
Important: allow all parts of the Manual Breast Pump to fully cool before usage.
5. Assembly: Diagrams 5–8
For hygienic reasons please wash your hands before assembling the breast pump.
Before assembling the pump, the Anti-Colic must be assembled (see Anti-Colic instructions for use).
The pump is assembled in 4 simple steps:
Put the handle on the screw ring so the tube inside the pump handle fits over the nozzle on the screw ring. Then click the handle onto the screw
ring. You hear a “click” when the handle is put on the screw ring properly. (Diagram 5)
Push the silicone valve onto the bottom of the adapter. (Diagram 6)
Screw the adapter and pump unit onto the Anti-Colic. (Diagram 7)
Set the funnel in place. Push it into the adapter just hard enough that it can still turn. (Diagram 8)
6. Usage: Diagrams 9–11
Wash your hands with soap, your breasts and nipples with a washcloth and clean fresh water
Squeeze a little bit of milk out of each nipple to make sure the milk ducts are not clogged.
Be sure all parts are clean and sterile before use.
Before using, make sure that the pump is properly assembled and fully screwed onto the bottle.
Sit comfortably and lean forward slightly. Set a glass of water within reach.
The funnel neck is angled and can be turned 360°. Before starting to express turn the funnel so that your arm can rest on your side, or you find a
position that is comfortable. Turning the funnel for different expressing positions can also help prevent clogged milk ducts. Integrated in the funnel
mouth are four soft cushions which make the funnel comfortable and gently cling to your breast for effective suction. Please be sure to hold the
pump upright while expressing to prevent the milk from leaking out. (Diagram 9)
Place the funnel firmly on your breast. Make sure no air escapes through the side, otherwise no suction will develop.
While slowly squeezing the pump handle you will feel a sucking on your breast. Squeeze the handle only so far that it is still comfortable.
Should the seal be broken whilst expressing i.e. the funnel come off your breast, lean slightly forward and the expressed milk will run down
the funnel neck into the bottle. Milk that runs onto your breast in such a situation should be dried off, before repositioning the funnel to continue
expression.
Turn the dial (IIe.) to your preferred expression strength. From left to right along the curve above the dial, the suction strength increases. To
stimulate let-down you may find it useful to use a stronger suction strength, which can then be reduced when your milk has let down. You can of
course also adjust the rhythm of expression with your pumping hand. We recommend a faster pump rhythm to stimulate the milk flow. Once the milk
starts flowing, you can switch to a slower rhythm. (Diagram 10)
The single position to the far right holds the suction, i.e. your breast in the ‘milk release’ position for a few seconds or until you release the handle.
(Diagram 11)
This position can be used to keep milk running from your breast for longer with just one pump action or as a way of stimulating let-down. This may
or may not be comfortable for you. Be careful when using this function. If it is uncomfortable for too long it could lead to bruised milk ducts.
If you are having problems expressing or stimulating concentrate more on relaxing and thinking of your baby, or seek professional advice.
7. Milk Storage
The Anti-Colic with the expressed milk can be sealed either with the bottle screw ring, teat and protective cap or with the
bottle screw ring and sealing disc. (Diagram 12)
Breast milk can be stored in the bottle in the fridge for up to 24 hours. Milk can be stored in the freezer for 3 months: it is best
to use special sterilized sealable containers or sterile milk storage bags, like for example MAM Storage Solution.
Please note: The Anti-Colic is not suitable for storing expressed milk in the freezer or freezer compartment.
If you have a 3 star freezer in your refrigerator, do not store milk longer than 4 weeks.
It is recommended that breast milk is frozen in small portions of 50–120ml / 1,5 – 4 UK floz.
Mark the container with the date and time. Use milk that has been stored the longest, first.
When transporting breast milk, it is important that the cooling chain is not broken.
8. Milk Warning
Defrost frozen milk in the fridge over-night or carefully in a water bath.
Do not put the milk in the microwave to heat, otherwise micronutrients and important immunological properties will be lost.
To warm the milk place in a bath of hot water or a bottle warmer. To warm to body temperature, running water can also be used. Start with cold
running water and gradually increase the temperature until the milk is warm.
Remove the sealing disc of the Anti Colic before placing the bottle in the water bath or bottle warmer for warming. Also make sure to remove teat
and protective cap before heating.
Breast milk should never be refrozen. Pour warmed unused milk away.
Never mix newly expressed breast milk with frozen milk.
Always check the temperature of the milk before feeding.
Storage Solution
Instructions for use:
Check all components before each use. Throw away at the first signs of damage or weakness.
Product is suitable for food contact.
It is recommended to use a pencil for the washable labeling area. Do not use permanent markers.
CLEANING & STERILISATION:
Before first use separate all parts and place them in boiling water for 5 minutes. This is to ensure hygiene.
Dishwasher safe on top dishwasher rack (max. 65° C / 149 Fahrenheit) but food colourings may discolour components.
Do not use abrasive cleaning agents. Only soft bristle brushes or soft sponges should be used. Rough/hard scourers can scratch the plastic.
For sterilisation, one of the following methods can be used: steam sterilizing (electric or microwave according to manufacturers instructions),
boiling in water or liquid sterilising solution.
Stackable when dry after cleaning/sterilisation.
USAGE WITH BREAST MILK:
Do not defrost breast milk in the microwave, as this will reduce its nutritional value.
It is recommended that breast milk is frozen in small portions of 1,5 – 4 UK floz.
Defrost frozen milk over night in the fridge or at room temperature.
To warm the milk place in a bath of hot water or a bottle warmer. To warm to body temperature, running water can also be used. Start with cold
running water and gradually increase the temperature until the milk is warm.
Under no circumstances should breast milk be re-frozen. Pour warmed unused milk away.
Never mix newly expressed breast milk with frozen milk.
When transporting breast milk, it is important that the cooling chain is not broken.
WARMING BABY FOOD (DO NOT OVERHEAT):
To warm baby food, it is recommended that it is placed in a bath of hot water or a bottle warmer.
To evenly distribute heat stir the baby food thoroughly after heating and allow time to cool.
USAGE IN COMBINATION WITH THE MAM MANUAL BREAST PUMP & STORAGE:
1) Remove the Anti-Colic base ventilation and screw the Storage Solution on in its place. This unit can now be screwed onto the pump. All sizes of
Anti- Colic bottle can be used in this way. (Diag.1)
2) Bring the pump to the breast and express. Please refer to the MAM Manual Breast Pump instructions for use. (Diag.2)
3) Unscrew the Storage Solution and close securely with the lid. (Diag.3)
1
2
3
4) To label with expression date and time, use the purpose designed two part area on the Storage Solution. A pencil is best used.
5) Store for the recommended time periods.
Room Temperature 4 hours
Fridge (4°C) 3 days / 72 hours
Freezer (-20°) 3 months
6) Use the longest stored breast milk first.
For your child’s safety and health
WARNING!
Always use this product with adult supervision.
Keep all components not in use out of the reach of children.
MAM Soft Brush
Instruction for use:
The bottle brush is made from high quality materials: bristles and teat brush: TPE; handle: PP
Clean before first use and at regular intervals thereafter.
Inspect the bottle brush before each use.
Discontinue use at the first signs of damage or weakness.
Defect brushes can damage bottle and teat.
To ensure hygiene rinse the bottle brush thoroughly after use and let it dry in a well-aired place.
For disinfection wash with detergent and warm water.
The bottle brush can be placed in a dishwasher (cutlery or top rack) at low temperatures (~ 60°C).
Do not rest the bottle brush directly on the soft bristles in the dishwasher. Place the bottle brush in the cutlery or top rack, bristles up for
dishwashing.
Do not use aggressive cleaning agents.
Food colourings may discolour the bottle brush.
Do not boil, steam or microwave sterilise.
Otherwise deformation of bristles can occur.
Suitable for cleaning all bottles and teats.
The Soft Brush is also especially suitable for cleaning MAM Cups.
Warning: The Soft Brush is not a toy. Please keep out of the reach of babies and children.
Microwave Steam Steriliser
Microwave Steam Steriliser Usage:
1) Carefully wash all items (soothers, bottles etc.) and components in mild soapy water and then rinse with clean water.
2) Open the latch on the microwave steam steriliser. Remove the lid. Take the upper and lower baskets out as necessary.
1 lid
2 upper basket
3 lower basket
4 base
3) Fill exactly 200ml / 7 UK floz into the base of the microwave steam steriliser. The use of a measuring cup is recommended. Please pay attention to
the measure marking inside the base! Ensure an exact measure of water.
4) For sterilisation disassemble the products to their individual components. MAM Anti-Colic bottles must be completely disassembled; the base
ventilation must be taken out of the screw base for sterilisation. Sterilising assembled components can damage the bottle.
5) Place the bottles and components in the microwave steam steriliser. In the MAM Microwave Steam Steriliser the products can be flexibly arranged
on 2 levels and the
steriliser holds up to:
6 MAM Anti-Colic 5,5 oz bottles or
4 MAM Anti-Colic 9 oz bottles or
5 MAM Baby Bottles 11 oz or
6 MAM Baby Bottles 9,5 oz
incl. additional products like soothers.
6) With the products inside, replace the lid and close the latch. The lid must „click“ into place.
7) Place the appliance in the microwave. Should the appliance not fi t into the microwave, please check that the lid has „clicked“ into place correctly.
8) The appliance is suitable for microwaves with wattage 500 to 1850. The sterilisation times correspond to the microwave’s wattage; adhere to the
given times:
Wattage
Time*
Cooling time
650 W – 1000 W
11 min
3 min
1050 W – 1800 W
6 min
3 min
1850 W:
5 min
3 min
*max. power
9) Allow microwave steam steriliser to cool down before removing from microwave. Recommended cooling time: 3 minutes at opened microwave
door. Hold the steriliser straight when removing.
10) CAUTION when opening the steriliser after use. Hot water vapour can escape and the remaining water may be very hot - SCALDING HAZARD.
11) Residual water in the products can be removed with the draining function in the lid. On the inside of the lid there are drainage grooves. Products
can be placed in the inside of the upturned lid individually or with the baskets.
12) Use the tongs to remove and assemble the components.
13) Pour any water from inside the steriliser away and dry with a soft cloth.
14) After the sterilisation process, products stay sterile for up to 24 hours in closed
appliance.
Cold Water Sterilisation Usage:
1) Carefully wash the bottles and components in mild soapy water and then rinse with clear water.
2) Various commercially available anti-bacterial solutions or tablets can be used for cold water sterilisation.
3) Always follow the manufacturer’s instructions.
4) Fill the base of the microwave steam steriliser with water. The measure of water and duration of sterilisation depends on the instructions from the
manufacturer of the solution or tablets and the number of products to be sterilised. All components must be fully immersed for sterilisation.
5) Air bubbles in bottles compromise sterilisation.
6) Sterilisation solution must be regularly renewed according to the manufacturer’s instructions.
7) Pour away any surplus sterilisation solution
General Information:
The microwave steam steriliser should only be placed on solid, flat, dry and nonflammable surfaces.
The microwave steam steriliser is aligned to commercially available microwave appliances. There must be enough space between the microwave
and steriliser. The steriliser must not touch the microwave walls. Do not force the steriliser into the microwave. Sterilising in too small a microwave
can damage the steriliser and the microwave.
Do not sterilise metal or electronic parts. Watch out for non-sterilisable elements of composite products.
Filling the steriliser with inaccurate water measures can damage the steriliser and the microwave. Too little water and the parts will not be properly
sterilised. Too much water extends the sterilisation time. Never place in the microwave without water.
Do not use bleach.
If using a combination microwave oven, ensure that the microwave steam steriliser is not exposed to the heat of the grill because this could
damage it.
Attention when dealing with sterilised products since they may still be hot.
Wash hands before using sterilised products.
Please do not use abrasive cleaning agents. Please only use soft brushes or sponges. Hard objects can scratch the surface.
Microwave steam steriliser can be washed in the dishwasher.
Only store the appliance dry.
To avoid lime scale pour any surplus water away and dry the appliance with a soft cloth. Slight lime scale can be wiped away with a damp cloth.
More stubborn lime scale can be removed with diluted household vinegar.
To avoid stubborn lime scale and safeguard the steriliser’s proper function it is recommended the steriliser be regularly descaled, especially in
regions with hard water.
For your child’s safety and health
WARNING!
Keep all components out of the reach of babies and children.
Never place the appliance within the reach of children.
Breast Pads
Warning: Keep out of the reach of children.
Sealing Discs
The sealing discs are compatible with all MAM bottles and trainers which meet the requirements of EN 14350.
Instructions for use:
Clean before first and each use.
Before first use place the sealing disc in boiling water for 5 minutes. This is to ensure hygiene.
Check sealing disc before each use and throw away at the first signs of damage or weakness.
Dishwasher safe in top rack (max. 65° C) but food colourings may discolour sealing discs.
Do not use abrasive cleaning agents as these could damage the product.
Sterilise using one of the following methods: steam sterilising (electric or microwave according to manufacturers instructions), boiling in water or
liquid sterilising solution.
Do not leave sealing discs in direct sunlight or heat, or leave in sterilising solution for longer than recommended.
Store sealing discs in a dry, sealed container.
Important: For storing in the freezer all MAM bottles are suitable, except the MAM Anti-Colic. The MAM Anti-Colic should only be stored in the
fridge.
click!
click!
Assembling: Pull sealing disc through the screw ring and ‘click’ into position.
s
s
s
s
s
s
For your child‘s safety and health
WARNING!
Keep these components out of the reach of children.
Anti-Colic Valves
The Anti-Colic valves are compatible with all MAM Anti-Colic bottles which meet the requirements of EN 14350.
Instruction for use:
Clean before first and every use.
Before first use place the valve in boiling water for 5 minutes. This is to ensure hygiene.
Check valve before each use and throw away at the first signs of damage or weakness.
Dishwasher safe in top rack (max. 65° C) but food colourings may discolour valves.
Do not use abrasive cleaning agents as these could damage the product.
Sterilise using one of the following methods: steam sterilising (electric or microwave according to manufacturers instructions), boiling in water or
liquid sterilising solution.
Do not leave valves in direct sunlight or heat, or leave in sterilising solution for longer than recommended.
Store valves in a dry, sealed container
Assembly:
Push silicone valve into base ring. Press down on raised perimeter of silicone valve.
For your child‘s safety
WARNING!
Keep these components out of the reach of children.
Valve Set
This product meets the requirements of Standard EN 14350
Instructions for use:
To assemble pull the spout into the screw ring till it engages, then push the valve tightly into the designated holder on the underside of the spout.
Screw spout onto cup tightly.
Clean before first and each use.
Valve is dishwasher safe (up to 65°C). Food colourings may discolour components.
Do not store or use for hot (above 40°C) beverages.
The cup will not remain spill-proof if used for carbonated drinks.
Do not put your baby to bed with cup. Prolonged contact with liquids may cause severe tooth decay.
Pay special attention to the area around the silicone valve and its plastic holder. Do not clean the silicone valve with rough/hard scourers.
Valve is not compatible with other drinking containers.
All Cup parts must be disassembled before heating (especially microwave heating) or cooling.
For your child’s safety and health
WARNING!
Always check food temperature before feeding.
Always use this product with adult supervision.
Continuous and prolonged sucking of fluids will cause tooth decay.
Keep all components not in use out of the reach of children.
Extra Soft Cup Spout
The product meets the requirements of European Standard EN 14350.
Instructions for use:
Clean before first and each use.
Before first use place in boiling water for 5 minutes. This is to ensure hygiene.
Inspect carefully before each use and throw away at the first signs of damage or weakness.
Before first use, press gently the mouthpiece of the spout to check if the slits properly open.
When first used and sometimes for later usages, the slit in the ventilation (the raised, slit bubble on the underside of the spout base) can stick
together, therefore not allowing air to enter the cup during feeding and as a result, the spout collapsing. Slowly brush over the bubble (ventilation) a
few times with your thumb or fingers to re-open the slit.
To ensure proper cleaning/sterilising all cup parts MUST be disassembled before cleaning. Cleaning/sterilising while assembled can damage the
product.
Spout is top rack dishwasher safe (up to 65°C). Food colourings may discolour components.
Clean the mouthpiece of the spout with special care to prevent damaging the membrane. Do not use abrasive cleaning agents. Only soft bristle
brushes or soft sponges should be used.
Sterilise using one of the following methods: steam sterilising (electric or microwave according to manufacturers instructions), boiling in water for
at least 5 minutes or liquid sterilising solution. After boiling or sterilising allow spout to cool.
Do not leave spout in direct sunlight or heat, or leave in sterilising solution for longer than recommended, as this my affect the product function.
Do not use pin or sharp object to enlarge feeding slits.
To avoid injury, do not let toddler walk with the cup.
Do not put your baby to bed with cup. Prolonged contact with liquids may cause severe tooth decay.
Use sugar free food or liquids only.
The spout is compatible with all MAM Cups.
All parts must be disassembled before heating (especially microwave heating) or cooling. Stir thoroughly after heating to evenly distribute heat.
After heating allow cup to cool.
Assembling SPOUT: Insert spout into top of cup screw ring until you hear a “click”.
For your child‘s safety and health
WARNING!
Always use this product with adult supervision.
Continuous and prolonged sucking of fluids will cause tooth decay.
Always check food temperature before feeding.
Keep all components not in use out of the reach of children.
Never use feeding spouts as a soother.
Soft Spout & Valve
The product meets the requirements of European Standard EN 14350.
Instructions for use:
Clean before first and each use.
Before first use place all cup parts separately in boiling water for 5 minutes. This is to ensure hygiene.
Check all components before each use and throw away at the first signs of damage or weakness.
Spout and valve are top rack dishwasher safe (up to 65°C).
Food colourings may discolour components. This does not adversely affect the material.
Do not use abrasive cleaning agents. Only soft bristle brushes or soft sponges should be used.
Sterilizing: boiling in water or liquid sterilizing solution, steam sterilizing (electric or microwave according to manufacturers instructions). All parts
must be disassembled before sterilizing. After boiling or sterilizing allow all parts to cool.
Do not leave cup parts in direct sunlight or heat, as this may affect the product function.
Ensure that the holes of the spout are not blocked.
Do not store or use for hot (above 40°C) beverages.
The cup will not remain spill-proof if used for carbonated drinks.
To avoid injury, do not let toddler walk with the cup.
Do not put your baby to bed with cup. Prolonged contact with liquids may cause severe tooth decay.
Use sugar free food or liquids only.
The spout is compatible with all MAM Cups.
All parts must be disassembled before heating (especially microwave heating) or cooling. Stir thoroughly after heating to evenly distribute heat.
After heating allow cup to cool.
For your child‘s safety and health
WARNING!
Always use this product with adult supervision.
Continuous and prolonged sucking of fluids will cause tooth decay.
Always check food temperature before feeding.
Keep all components not in use out of the reach of children.
Never use feeding spouts as a soother.
”click!“
Free-flow
”click!“ without
valve
Spill-free
with valve
Hard Spout & Valve
The product meets the requirements of European Standard EN 14350.
Instructions for use:
Clean before first and each use.
Before first use place all cup parts separately in boiling water for 5 minutes. This is to ensure hygiene.
Check all components before each use and throw away at the first signs of damage or weakness.
Spout and valve are top rack dishwasher safe (up to 65°C).
Food colourings may discolour components. This does not adversely affect the material.
Do not use abrasive cleaning agents. Only soft bristle brushes or soft sponges should be used.
Sterilizing: boiling in water or liquid sterilizing solution, steam sterilizing (electric or microwave according to manufacturers instructions). All parts
must be disassembled before sterilizing. After boiling or sterilizing allow all parts to cool.
Do not leave cup parts in direct sunlight or heat, as this may affect the product function.
Ensure that the holes of the spout are not blocked.
Do not store or use for hot (above 40°C) beverages.
The cup will not remain spill-proof if used for carbonated drinks.
To avoid injury, do not let toddler walk with the cup.
Do not put your baby to bed with cup. Prolonged contact with liquids may cause severe tooth decay.
Use sugar free food or liquids only.
The spout is compatible with all MAM Cups.
All parts must be disassembled before heating (especially microwave heating) or cooling. Stir thoroughly after heating to evenly distribute heat.
After heating allow cup to cool.
For your child‘s safety and health
WARNING!
Always use this product with adult supervision.
Continuous and prolonged sucking of fluids will cause tooth decay.
Always check food temperature before feeding.
Keep all components not in use out of the reach of children.
Never use feeding spouts as a soother.
”click!“
Free-flow
”click!“ without
valve
Spill-free
with valve
Extra Soft Bottle Spout
This product meets EN 14350
Instructions for use:
Clean before first and each use.
Before first use place in boiling water for 5 minutes. This is to ensure hygiene.
Inspect carefully before each use and throw away at the first signs of damage or weakness.
Before first use, press gently the mouthpiece of the spout to check if the slits properly open.
When first used and sometimes for later usages, the slit in the ventilation (the raised, slit bubble on the underside of the spout base) can stick
together, therefore not allowing air to enter the bottle during feeding and as a result, the spout collapsing. Slowly brush over the bubble (ventilation)
a few times with your thumb or fingers to re-open the slit.
To ensure proper cleaning/sterilising all bottle parts MUST be disassembled. Cleaning/sterilising while assembled can damage the product.
Spout is top rack dishwasher safe (up to 65°C). Food colourings may discolour components.
Clean the mouthpiece of the spout with special care to prevent damaging the membrane. Do not use abrasive cleaning agents. Only soft bristle
brushes or soft sponges should be used.
Sterilise using one of the following methods: steam sterilising (electric or microwave according to manufacturers instructions), boiling in water for
at least 5 minutes or liquid sterilising solution. After boiling or sterilising allow the spout to cool.
Do not leave spout in direct sunlight or heat, or leave in sterilising solution for longer than recommended, as this may affect the product function.
Do not use pin or sharp object to enlarge feeding slits.
To avoid injury, do not let baby walk with bottle or trainer.
Do not put your baby to bed with bottle or trainer. Prolonged contact with liquids may cause severe tooth decay.
Use sugar free food or liquids only.
The spout is compatible with all MAM wide neck bottles and the Trainer.
All parts must be disassembled before heating (especially microwave heating) or cooling. Stir thoroughly after heating to evenly distribute heat.
After heating allow bottle to cool.
Assembling SPOUT: Insert spout into top of bottle screw ring until you hear a “click”.
For your child‘s safety and health
WARNING!
Always use this product with adult supervision.
Continuous and prolonged sucking of fluids will cause tooth decay.
Always check food temperature before feeding.
Keep all components not in use out of the reach of children.
Never use feeding spouts as a soother.
Bottle and Baby Food Warmer
Please take time to read these instructions through carefully before using the Bottle and Baby Food Warmer for the first time. Please keep the
instructions safe for future reference.
General information on how the MAM Bottle and Baby Food Warmer works
The Bottle and Baby Food Warmer warms baby bottles and jars of baby food automatically with the aid of heated water. The water is heated by
means of a hotplate located in the base of the Food Warmer and, as such, warms baby bottles and jars of baby food by dissipating heat. To keep
a bottle or jar warm after the warming process, turn the dial down to lower setting (2 to 3). The indicator lamp will come on and off to indicate the
water surrounding the bottle or jar will be kept at a constant temperature. After use, always switch off the Food warmer by turning the dial to stop
in an anti-clockwise direction. Always disconnect the mains plug and empty out the water. Caution: The water inside the Bottle and Baby Food
Warmer can get extremely hot! The warming ensues efficiently and gently so as to avoid losing any nutrients. As to how long it takes for the food to
reach the right temperature always depends on the size of the vessel, the quantity and type of food and its temperature prior to warming – e.g. food
taken from the refrigerator (approx. 5–8°C) takes longer to warm up than food stored at room temperature (approx. 19–20°C). The table on page 33
provides you with approx. values for warming food in the Bottle and Baby Food Warmer. Always use a clean spoon to stir the content of the bottle
or the jar of baby food so that the heat spreads evenly more quickly. During warming, please be sure to check the temperature of the food. Sprinkle
2 - 3 drops of the content onto the back of your hand (Tip: try it on the groove on the back of your hand that forms when spreading your thumb and
first finger apart) or on the pulse of your wrist. After the time mentioned in the table is elapsed please check if the bottle or jar content has the right
temperature and either take them out (careful, the bottle or jar can be very hot) or to keep them warm t urn the dial down to 2 to 3.
Tip: The Food Warmer works faster if you add preheated water in the bottle warmer.
Please note!
For reasons of hygiene, your baby should have his or her own spoon from the outset, which is not used by anyone else at the same time. When
testing food yourself, e.g. when checking for the right temperature, please use a different spoon and do not put this back into the baby food.
Safety instructions
1. Children shall not play with the appliance.
2. This appliance cannot be used by children, because children don’t understand the hazard involved. Cleaning and user maintenance shall not be
made by children. Keep the appliance and cord out of reach of children.
3. Appliance can be used by persons with reduced physical, sensory or mental capabilities or lack of experience and knowledge, if they have been
given supervision or instruction concerning the use of the appliance in a safe way and understand the hazards involved.
4. This appliance is intended to be used in household only.
5. The food should not be heated for too long.
6. Before feeding, check if the contents of the bottle or the jar of baby food are at the right temperature. In doing so, stir the contents of the bottle or
the jar of baby food so that the heat achieved spreads evenly more quickly. Place 2-3 drops of the liquid or food onto the back of the hand or onto the
pulse.
7. For detailed cleaning, refer to section “5. Cleaning and Maintaining the appliance”.
8. Do not misuse this bottle warmer for other than its intended use to avoid potential injury.
9. Caution: The heating element surface is hot during operation and also subject to residual heat after use.
10. If the mains supply cord is damaged it must be replaced by manufacturer, its service or similarly qualified persons in order to avoid a hazard.
11. This appliance must not be immersed.
12. The appliance has to be descaled at regular intervals.
13. Prior to using the appliance for the first time, be sure to remove all the packaging material and any components not used, so that your child
cannot injure him or herself or swallow anything.
14. Only connect appliance to voltages in accordance with the rating plate on the base of the appliance.
15. Do not use the appliance within the reach of children. Secure the power cord and make sure that it cannot be pulled on inadvertently, causing the
appliance to fall down onto the floor.
16. To operate the appliance, it must be placed on a dry and level s urface.
17. Always fill a sufficient amount of water for warming. When doing this, place the bottle or jar along with the baby food jar / baby bottle basket into
the appliance first prior to filling the appliance with water. To ensure optimum warming, make sure that the interior compartment is completely filled
with water.
18. Never fill the appliance with water up to the top edge.
19. Caution: During operation, the water inside the appliance becomes very hot.
20. Never operate the Baby Food Warmer without water or transport it during operation.
21. When the appliance is not in use, always disconnect the mains plug and empty out the water. Caution: The water inside the Baby Food Warmer
can get extremely hot.
22. Check the Baby Food Warmer each time before use and only use it if the appliance and power cord are intact. At the first sign of any damage, the
component in question must be either disposed of or repaired.
23. The appliance may only be opened by an authorised service centre. Otherwise the warranty is invalidated. Repairs may only be performed by
specialized personnel. Improper repairs can present considerable safety hazards for users. This also applies to the replacement of the power cord.
24. Always keep the instruction manual in a safe place.
2. Warming baby bottles
Place the bottle to be warmed along with the baby bottle basket into the Bottle and Baby Food Warmer. Next, pourwater into the interior
compartment until it is completely filled up and/or up to the filling level of the bottle. Make sure that no water runs into the bottle or over the edge
of the Bottle and Baby Food Warmer. Depending on the initial temperature of the food, for small (approx. 160 ml) and large (approx. 260 ml) baby
bottles, we recommend turning the dial to a setting 4 or 5. The indicator lamp will light up. To help the heat to spread evenly more quickly, stir the
content of the bottle repeatedly. The time it takes to warm up the content can vary depending on the bottle size, quantity and initial temperature.
In this regard, please consult our table on page 33. After the time mentioned in the table is elapsed please check if the bottle content has the right
temperature. As described on page 8, sprinkle 2 - 3 drops of the content onto the back of your hand or on the pulse. To keep the bottle warm,
turn the dial down to setting 2 to 3. The indicator lamp will come on and off to indicate the water surrounding the bottle will be kept at a constant
temperature. Further information on keeping baby food warm can be found on page 10, further down. After use, be sure to switch off the Bottle and
Baby Food Warmer by turning the dial to stop in an anti-clockwise direction. Always disconnect the mains
plug and empty out the water. Caution: the bottle and the water inside the baby food warmer can get ex tremely hot.
For your child’s health – warning notice:
Before feeding your child, please check that the contents have the right temperature. Please start by using a spoon to stir the contents of the jar so
that the heat spreads evenly more quickly. Then sprinkle 2 - 3 drops of the contents onto the back of your hand (Tip: try it on the groove on the back
of your hand that forms when spreading your thumb and first finger apart) or on the pulse of your wrist. Do not overheat the contents of the bottle
and do not reheat. Dispose of any leftovers after feeding.
3. Warming jars of baby food
Please remove the label from the jar of baby food. It may otherwise become detached during warming and get stuck inside the interior
compartment. Remove the lid from the jar of baby food. Place the jar along with the baby food jar basket into the Bottle and Baby Food Warmer. Pour
water into the interior compartment until it is completely filled up.
Make sure that no water runs into the jar or over the edge of the Bottle and Baby Food Warmer. For all sizes of jars, we recommend turning the dial
to setting 5. To help the heat spread evenly more quickly, stir the content of the jar repeatedly. The time it takes to warm up the content can vary
depending on the type of food, quantity and initial temperature. In this regard, please consult our table on page 33. After the time mentioned in the
table is elapsed please check if the content of the jar has the right temperature. As described on page 8, sprinkle 2 - 3 drops of the content onto the
back of your hand or on the pulse. To keep the jar warm, turn the dial down to setting 2 to 3. The indicator lamp will come on and off to indicate the
water surrounding the jar will be kept at a constant temperature. Further information on keeping baby food warm can be found on page 10, further
down. After use, be sure to switch off the Bottle and Baby Food
Warmer by turning the dial to stop in an anti-clockwise direction. Always disconnect the mains plug and empty out the water. Caution: the body of
the jar and the water inside the baby food warmer c an get extremely hot.
For your child’s health – warning notice:
Before feeding your child, please check that the contents have the right temperature. Please start by using a spoon to stir the contents of the jar so
that the heat spreads evenly more quickly. Then sprinkle 2 to 3 drops of the contents onto the back of your hand (tip: try it on the groove on the back
of your hand that forms when spreading your thumb and first finger apart) or on the pulse of your wrist. Do not overheat the baby food and do not
reheat. Dispose of any leftovers after feeding.
4. Warming and keeping baby food warm
We recommend warming only freshly prepared baby food immediately before feeding. Keeping the food warm for too long can result in the loss
of important nutrients and also to the formation of germs due to the heat. Always make sure that bottles and bottle teats are perfectly clean and
germ-free. Clean bottles and teats immediately after feeding, and subsequently sterilise these, e.g. in boiling water, or using the MAM Steriliser. You
can wash bottles and teats in the dishwasher, but they must still be sterilised. The MAM Steriliser provides a safe and reliable means of sterilisation,
simply using water vapour and entirely without chemical additives. It can hold up to 7 wide-neck bottles or 9 standard baby bottles. After sterilising,
it switches off automatically, thus saving valuable energy and time in the dynamic everyday life of baby care. Bottles and teats can be kept inside the
MAM Steriliser unti l your baby’s next feed is due.
Breast milk:
Feed warmed breast milk immediately; only keep warm for max. 5 – 10 minutes. Do not reheat any leftovers, but dispose of these immediately.
Breast milk may be warmed up approx. 15 minutes before feeding.
Formula milk:
Always prepare fresh formula milk and feed the bottle within an hour. Never keep the bottle warm for a longer period of time than this, as this can
lead to the formation of germs. Do not keep any left-over milk in the bottle until the next feed. Never reheat any left-over milk, but dispose of this
immediately.
Solid food / jars of baby food:
The recommended duration for keeping baby food warm (irrespective of whether from a jar, freshly prepared or mixed) depends on the particular
ingredients and composition. If it contains protein (e.g. eggs, poultry, veal, beef), it can be kept warm for a maximum of 45 minutes. Please consult
the manufacturer’s directions. Vegetables and fruit without added protein can be kept warm for approx. 4 hours. Once a jar of baby food has been
opened, there is a risk of bacteria getting into the food and growing. Consequently, once a jar of baby food has been warmed up and used for
feeding from directly with a spoon, it should never be kept, but always disposed of immediately. A jar that has been opened and from which part
of the contents has been removed and used for feeding can, however, be resealed and, depending on the product, kept in the refrigerator for 1 to 3
days. Please consult the manufacturer’s directions for further information.
5. Cleaning and maintaining the appliance
Always unplug the appliance from the mains before cleaning it. Do not clean the appliance when it is hot. Do not use strong or abrasive cleaning
or scouring agents, as these could attack the appliance’s surface. After every use, unplug the appliance and wipe it with a damp cloth to avoid any
build up of lime scale. Descale the appliance at regular intervals. Always unplug the appliance from the mains before descaling it. Ideally, use boiled
water for this purpose. If the appliance ever needs repairing, under no circumstances, try to open it. Instead, contact the address indicated in these
instructions. The appliance must not be immerse. Never place it in a dishwasher in order to clean it.
6. Technical data
Voltage: ~220 - 240 V • 50/60 Hz / power consumption: 100 Watt
7. Warranty
This appliance is covered by a statutory 2-year warranty period from the date of purchase upon presentation of proof of purchase. This does not
include damage that is attributable to natural wear and tear, improper use and insufficient or incorrect maintenance. If handled carefully and in
accordance with the instruction manual, the manufacturer provides a 2-year warranty from the date of purchase. The power cord and plug are
excluded from the warranty in cases of normal wear and tear. When sending in the appliance, always be sure to enclose the proof of purchase.
8. Repair notes
If the appliance ever needs repairing, under no circumstances, try to open it. The appliance cannot be opened. In the event of a malfunction or if the
power cord develops a fault, please send the appliance directly to the MAM Customer Service department. Important: Improper repairs can present
considerable safety hazards for the user.
9. Disposal information for users from private households
Important: Please do not dispose of this appliance in the normal household waste! In accordance with a new EU directive, which prescribes the
proper collection, treatment and recycling of used electrical and electronic appliances, old electrical and electronic appliances have to be disposed
of separately. Following the introduction of the directive in the EU member states, private households can now take their used electrical and
electronic appliances free of charge to official collection centres*.
*) Further details are available from your district council.
By disposing of your old appliances in the correct way, you are helping to ensure that old appliances are collected, treated and used in an
appropriate manner. This prevents possible harmful impacts to the environment and to health arising from improper disposal.
In other countries inside and outside the EU
Please enquire with your district council as to the proper procedure for disposing of this appliance. The materials can be recycled in accordance
with their labelling. By recycling this appliance, recycling materials and other forms of recycling for old appliances, you are making an important
contribution to the protection of our environment. Please enquire with your district council about the relevant disposal centre.
GGH1A9ZA001.AAA