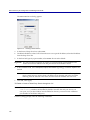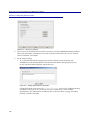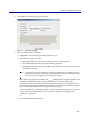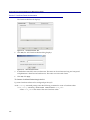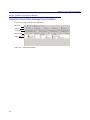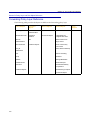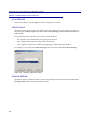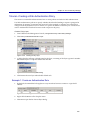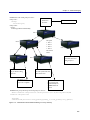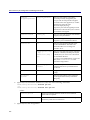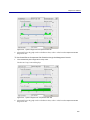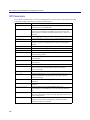
1
Blue Coat® Systems
ProxySG™
Configuration and Management Guide
Blue Coat ProxySG Configuration and Management Guide
Contact Information
Blue Coat Systems Inc.
650 Almanor Avenue
Sunnyvale, California 94085
North America (USA) Toll Free: 1.866.362.2628 (866.36.BCOAT)
North America Direct (USA): 1.408.220.2270
Asia Pacific Rim (Japan): 81.3.5425.8492
Europe, Middle East, and Africa (United Kingdom): +44 (0) 1276 854 101
[email protected]
[email protected]
www.bluecoat.com
Copyright© 1999-2005 Blue Coat Systems, Inc. All rights reserved worldwide. No part of this
document may be reproduced by any means nor modified, decompiled, disassembled, published or
distributed, in whole or in part, or translated to any electronic medium or other means without the
written consent of Blue Coat Systems, Inc. The Software may not be modified, reproduced (except to
the extent specifically allowed by local law), removed from the product on which it was installed,
reverse engineered, decompiled, disassembled, or have its source code extracted. In addition to the
above restrictions, the Software, or any part thereof, may not be (i) published, distributed, rented,
leased, sold, sublicensed, assigned or otherwise transferred, (ii) used for competitive analysis or used
to create derivative works thereof,(iii) used for application development, or translated (iv) used to
publish or distribute the results of any benchmark tests run on the Software without the express
written permission of Blue Coat Systems, Inc., or (v) removed or obscured of any Blue Coat Systems,
Inc. or licensor copyrights, trademarks or other proprietary notices or legends from any portion of the
Software or any associated documentation. All right, title and interest in and to the Software and
documentation are and shall remain the exclusive property of Blue Coat Systems, Inc. and its
licensors. Blue Coat Systems, Inc. specifications and documentation are subject to change without
notice. Information contained in this document is believed to be accurate and reliable, however, Blue
Coat Systems, Inc. assumes no responsibility for its use. ProxySG™, ProxyAV™, CacheOS™, SGOS™,
are trademarks of Blue Coat Systems, Inc. and CacheFlow®, Blue Coat®, Accelerating The Internet®,
WinProxy®, AccessNow®, Ositis®, Powering Internet Management®, and The Ultimate Internet
Sharing Solution® are registered trademarks of Blue Coat Systems, Inc. All other trademarks
contained in this document and in the Software are the property of their respective owners.
BLUE COAT SYSTEMS, INC. DISCLAIMS ALL WARRANTIES, CONDITIONS OR OTHER TERMS,
EXPRESS OR IMPLIED, STATUTORY OR OTHERWISE, ON SOFTWARE AND DOCUMENTATION
FURNISHED HEREUNDER INCLUDING WITHOUT LIMITATION THE WARRANTIES OF
DESIGN, MERCHANTABILITY OR FITNESS FOR A PARTICULAR PURPOSE AND
NONINFRINGEMENT. IN NO EVENT SHALL BLUE COAT SYSTEMS, INC., ITS SUPPLIERS OR
ITS LICENSORS BE LIABLE FOR ANY DAMAGES, WHETHER ARISING IN TORT, CONTRACT OR
ANY OTHER LEGAL THEORY EVEN IF BLUE COAT SYSTEMS, INC. HAS BEEN ADVISED OF
THE POSSIBILITY OF SUCH DAMAGES. The Software and all related technical information,
documents and materials are subject to export controls under the U.S. Export Administration
Regulations and the export regulations of other countries.
Document Number: 231-02679
Document Revision: Halfdome 004—02/24/2005
ii
Third Party Copyright Notices
Blue Coat Systems, Inc. Security Gateway Operating System (SGOS) version 4 utilizes third party software from various sources. Portions of this
software are copyrighted by their respective owners as indicated in the copyright notices below.
The following lists the copyright notices for:
BPF
Copyright (c) 1988, 1989, 1990, 1991, 1992, 1993, 1994, 1995, 1996
The Regents of the University of California. All rights reserved.
Redistribution and use in source and binary forms, with or without modification, are permitted provided that: (1) source code distributions retain
the above copyright notice and this paragraph in its entirety, (2) distributions including binary code include the above copyright notice and this
paragraph in its entirety in the documentation or other materials provided with the distribution, and (3) all advertising materials mentioning
features or use of this software display the following acknowledgement:
This product includes software developed by the University of California, Lawrence Berkeley Laboratory and its contributors.
Neither the name of the University nor the names of its contributors may be used to endorse or promote products derived from this software
without specific prior written permission. THIS SOFTWARE IS PROVIDED ``AS IS'' AND WITHOUT ANY EXPRESS OR IMPLIED
WARRANTIES, INCLUDING, WITHOUT LIMITATION, THE IMPLIED WARRANTIES OF MERCHANTABILITY AND FITNESS FOR A
PARTICULAR PURPOSE.
DES
Software DES functions written 12 Dec 1986 by Phil Karn, KA9Q; large sections adapted from the 1977 public-domain program by Jim Gillogly.
EXPAT
Copyright (c) 1998, 1999, 2000 Thai Open Source Software Center Ltd.
Permission is hereby granted, free of charge, to any person obtaining a copy of this software and associated documentation files (the "Software"),
to deal in the Software without restriction, including without limitation the rights to use, copy, modify, merge, publish, distribute, sublicense,
and/or sell copies of the Software, and to permit persons to whom the Software is furnished to do so, subject to the following conditions:
The above copyright notice and this permission notice shall be included in all copies or substantial portions of the Software.
THE SOFTWARE IS PROVIDED "AS IS", WITHOUT WARRANTY OF ANY KIND, EXPRESS OR IMPLIED, INCLUDING BUT NOT LIMITED TO
THE WARRANTIES OF MERCHANTABILITY, FITNESS FOR A PARTICULAR PURPOSE AND NONINFRINGEMENT. IN NO EVENT SHALL
THE AUTHORS OR COPYRIGHT HOLDERS BE LIABLE FOR ANY CLAIM, DAMAGES OR OTHER LIABILITY, WHETHER IN AN ACTION
OF CONTRACT, TORT OR OTHERWISE, ARISING FROM, OUT OF OR IN CONNECTION WITH THE SOFTWARE OR THE USE OR OTHER
DEALINGS IN THE SOFTWARE.
Finjan Software
Copyright (c) 2003 Finjan Software, Inc. All rights reserved.
Flowerfire
Copyright (c) 1996-2002 Greg Ferrar
ISODE
ISODE 8.0 NOTICE
Acquisition, use, and distribution of this module and related materials are subject to the restrictions of a license agreement. Consult the Preface in
the User's Manual for the full terms of this agreement.
4BSD/ISODE SMP NOTICE
Acquisition, use, and distribution of this module and related materials are subject to the restrictions given in the file SMP-READ-ME.
UNIX is a registered trademark in the US and other countries, licensed exclusively through X/Open Company Ltd.
MD5
RSA Data Security, Inc. MD5 Message-Digest Algorithm
Copyright (c) 1991-2, RSA Data Security, Inc. Created 1991. All rights reserved.
License to copy and use this software is granted provided that it is identified as the "RSA Data Security, Inc. MD5 Message-Digest Algorithm" in all
material mentioning or referencing this software or this function.
License is also granted to make and use derivative works provided that such works are identified as "derived from the RSA Data Security, Inc.
MD5 Message-Digest Algorithm" in all material mentioning or referencing the derived work.
RSA Data Security, Inc. makes no representations concerning either the merchantability of this software or the suitability of this software for any
particular purpose. It is provided "as is" without express or implied warranty of any kind.
THE BEER-WARE LICENSE" (Revision 42):
<[email protected] <mailto:[email protected]>> wrote this file. As long as you retain this notice you can do whatever you want with this stuff.
If we meet some day, and you think this stuff is worth it, you can buy me a beer in return. Poul-Henning Kamp
Microsoft Windows Media Streaming
Copyright (c) 2003 Microsoft Corporation. All rights reserved.
OpenLDAP
iii
Blue Coat Configuration and Management Guide
Copyright (c) 1999-2001 The OpenLDAP Foundation, Redwood City, California, USA. All Rights Reserved. Permission to copy and distribute
verbatim copies of this document is granted.
http://www.openldap.org/software/release/license.html
The OpenLDAP Public License Version 2.7, 7 September 2001
Redistribution and use of this software and associated documentation ("Software"), with or without modification, are permitted provided that the
following conditions are met:
1. Redistributions of source code must retain copyright statements and notices,
2. Redistributions in binary form must reproduce applicable copyright statements and notices, this list of conditions, and the following disclaimer
in the documentation and/or other materials provided with the distribution, and
3. Redistributions must contain a verbatim copy of this document.
The OpenLDAP Foundation may revise this license from time to time. Each revision is distinguished by a version number. You may use this
Software under terms of this license revision or under the terms of any subsequent revision of the license.
THIS SOFTWARE IS PROVIDED BY THE OPENLDAP FOUNDATION AND ITS CONTRIBUTORS ``AS IS'' AND ANY EXPRESSED OR
IMPLIED WARRANTIES, INCLUDING, BUT NOT LIMITED TO, THE IMPLIED WARRANTIES OF MERCHANTABILITY AND FITNESS FOR
A PARTICULAR PURPOSE ARE DISCLAIMED. IN NO EVENT SHALL THE OPENLDAP FOUNDATION, ITS CONTRIBUTORS, OR THE
AUTHOR(S) OR OWNER(S) OF THE SOFTWARE BE LIABLE FOR ANY DIRECT, INDIRECT, INCIDENTAL, SPECIAL, EXEMPLARY, OR
CONSEQUENTIAL DAMAGES (INCLUDING, BUT NOT LIMITED TO, PROCUREMENT OF SUBSTITUTE GOODS OR SERVICES; LOSS OF
USE, DATA, OR PROFITS; OR BUSINESS INTERRUPTION) HOWEVER CAUSED AND ON ANY THEORY OF LIABILITY, WHETHER IN
CONTRACT, STRICT LIABILITY, OR TORT (INCLUDING NEGLIGENCE OR OTHERWISE) ARISING IN ANY WAY OUT OF THE USE OF
THIS SOFTWARE, EVEN IF ADVISED OF THE POSSIBILITY OF SUCH DAMAGE.
The names of the authors and copyright holders must not be used in advertising or otherwise to promote the sale, use or other dealing in this
Software without specific, written prior permission. Title to copyright in this Software shall at all times remain with copyright holders.
OpenLDAP is a registered trademark of the OpenLDAP Foundation.
OpenSSH
Copyright (c) 1995 Tatu Ylonen <[email protected]>, Espoo, Finland. All rights reserved
This file is part of the OpenSSH software.
The licences which components of this software fall under are as follows. First, we will summarize and say that all components are under a BSD
licence, or a licence more free than that.
OpenSSH contains no GPL code.
1) As far as I am concerned, the code I have written for this software can be used freely for any purpose. Any derived versions of this software
must be clearly marked as such, and if the derived work is incompatible with the protocol description in the RFC file, it must be called by a name
other than "ssh" or "Secure Shell".
[Tatu continues]
However, I am not implying to give any licenses to any patents or copyrights held by third parties, and the software includes parts that are not
under my direct control. As far as I know, all included source code is used in accordance with the relevant license agreements and can be used
freely for any purpose (the GNU license being the most restrictive); see below for details.
[However, none of that term is relevant at this point in time. All of these restrictively licenced software components which he talks about have
been removed from OpenSSH, i.e.,
- RSA is no longer included, found in the OpenSSL library
- IDEA is no longer included, its use is deprecated
- DES is now external, in the OpenSSL library
- GMP is no longer used, and instead we call BN code from OpenSSL
- Zlib is now external, in a library
- The make-ssh-known-hosts script is no longer included
- TSS has been removed
- MD5 is now external, in the OpenSSL library
- RC4 support has been replaced with ARC4 support from OpenSSL
- Blowfish is now external, in the OpenSSL library
[The licence continues]
Note that any information and cryptographic algorithms used in this software are publicly available on the Internet and at any major bookstore,
scientific library, and patent office worldwide. More information can be found e.g. at "http://www.cs.hut.fi/crypto".
The legal status of this program is some combination of all these permissions and restrictions. Use only at your own responsibility. You will be
responsible for any legal consequences yourself; I am not making any claims whether possessing or using this is legal or not in your country, and
I am not taking any responsibility on your behalf.
NO WARRANTY
BECAUSE THE PROGRAM IS LICENSED FREE OF CHARGE, THERE IS NO WARRANTY FOR THE PROGRAM, TO THE EXTENT
PERMITTED BY APPLICABLE LAW. EXCEPT WHEN OTHERWISE STATED IN WRITING THE COPYRIGHT HOLDERS AND/OR OTHER
PARTIES PROVIDE THE PROGRAM "AS IS" WITHOUT WARRANTY OF ANY KIND, EITHER EXPRESSED OR IMPLIED, INCLUDING, BUT
NOT LIMITED TO, THE IMPLIED WARRANTIES OF MERCHANTABILITY AND FITNESS FOR A PARTICULAR PURPOSE. THE ENTIRE
RISK AS TO THE QUALITY AND PERFORMANCE OF THE PROGRAM IS WITH YOU. SHOULD THE PROGRAM PROVE DEFECTIVE, YOU
ASSUME THE COST OF ALL NECESSARY SERVICING, REPAIR OR CORRECTION. IN NO EVENT UNLESS REQUIRED BY APPLICABLE
iv
Copyrights
LAW OR AGREED TO IN WRITING WILL ANY COPYRIGHT HOLDER, OR ANY OTHER PARTY WHO MAY MODIFY AND/OR
REDISTRIBUTE THE PROGRAM AS PERMITTED ABOVE, BE LIABLE TO YOU FOR DAMAGES, INCLUDING ANY GENERAL, SPECIAL,
INCIDENTAL OR CONSEQUENTIAL DAMAGES ARISING OUT OF THE USE OR INABILITY TO USE THE PROGRAM (INCLUDING BUT
NOT LIMITED TO LOSS OF DATA OR DATA BEING RENDERED INACCURATE OR LOSSES SUSTAINED BY YOU OR THIRD PARTIES OR A
FAILURE OF THE PROGRAM TO OPERATE WITH ANY OTHER PROGRAMS), EVEN IF SUCH HOLDER OR OTHER PARTY HAS BEEN
ADVISED OF THE POSSIBILITY OF SUCH DAMAGES.
2) The 32-bit CRC compensation attack detector in deattack.c was contributed by CORE SDI S.A. under a BSD-style license.
Cryptographic attack detector for ssh - source code
Copyright (c) 1998 CORE SDI S.A., Buenos Aires, Argentina. All rights reserved. Redistribution and use in source and binary forms, with or
without modification, are permitted provided that this copyright notice is retained. THIS SOFTWARE IS PROVIDED ``AS IS'' AND ANY
EXPRESS OR IMPLIED WARRANTIES ARE DISCLAIMED. IN NO EVENT SHALL CORE SDI S.A. BE LIABLE FOR ANY DIRECT, INDIRECT,
INCIDENTAL, SPECIAL, EXEMPLARY OR CONSEQUENTIAL DAMAGES RESULTING FROM THE USE OR MISUSE OF THIS SOFTWARE.
Ariel Futoransky <[email protected]> <http://www.core-sdi.com>
3) ssh-keygen was contributed by David Mazieres under a BSD-style license.
Copyright 1995, 1996 by David Mazieres <[email protected]>. Modification and redistribution in source and binary forms is permitted provided
that due credit is given to the author and the OpenBSD project by leaving this copyright notice intact.
4) The Rijndael implementation by Vincent Rijmen, Antoon Bosselaers and Paulo Barreto is in the public domain and distributed with the
following license:
@version 3.0 (December 2000)
Optimised ANSI C code for the Rijndael cipher (now AES)
@author Vincent Rijmen <[email protected]>
@author Antoon Bosselaers <[email protected]>
@author Paulo Barreto <[email protected]>
This code is hereby placed in the public domain.
THIS SOFTWARE IS PROVIDED BY THE AUTHORS ''AS IS'' AND ANY EXPRESS OR IMPLIED WARRANTIES, INCLUDING, BUT NOT
LIMITED TO, THE IMPLIED WARRANTIES OF MERCHANTABILITY AND FITNESS FOR A PARTICULAR PURPOSE ARE DISCLAIMED. IN
NO EVENT SHALL THE AUTHORS OR CONTRIBUTORS BE LIABLE FOR ANY DIRECT, INDIRECT, INCIDENTAL, SPECIAL, EXEMPLARY,
OR CONSEQUENTIAL DAMAGES (INCLUDING, BUT NOT LIMITED TO, PROCUREMENT OF SUBSTITUTE GOODS OR SERVICES; LOSS
OF USE, DATA, OR PROFITS; OR BUSINESS INTERRUPTION) HOWEVER CAUSED AND ON ANY THEORY OF LIABILITY, WHETHER IN
CONTRACT, STRICT LIABILITY, OR TORT (INCLUDING NEGLIGENCE OR OTHERWISE) ARISING IN ANY WAY OUT OF THE USE OF THIS
SOFTWARE, EVEN IF ADVISED OF THE POSSIBILITY OF SUCH DAMAGE.
5) One component of the ssh source code is under a 3-clause BSD license, held by the University of California, since we pulled these parts from
original Berkeley code.
Copyright (c) 1983, 1990, 1992, 1993, 1995
The Regents of the University of California. All rights reserved.
Redistribution and use in source and binary forms, with or without modification, are permitted provided that the following conditions are met:
1. Redistributions of source code must retain the above copyright notice, this list of conditions and the following disclaimer.
2. Redistributions in binary form must reproduce the above copyright notice, this list of conditions and the following disclaimer in the
documentation and/or other materials provided with the distribution.
3. Neither the name of the University nor the names of its contributors may be used to endorse or promote products derived from this software
without specific prior written permission.
THIS SOFTWARE IS PROVIDED BY THE REGENTS AND CONTRIBUTORS ``AS IS'' AND ANY EXPRESS OR IMPLIED WARRANTIES,
INCLUDING, BUT NOT LIMITED TO, THE IMPLIED WARRANTIES OF MERCHANTABILITY AND FITNESS FOR A PARTICULAR PURPOSE
ARE DISCLAIMED. IN NO EVENT SHALL THE REGENTS OR CONTRIBUTORS BE LIABLE FOR ANY DIRECT, INDIRECT, INCIDENTAL,
SPECIAL, EXEMPLARY, OR CONSEQUENTIAL DAMAGES (INCLUDING, BUT NOT LIMITED TO, PROCUREMENT OF SUBSTITUTE
GOODS OR SERVICES; LOSS OF USE, DATA, OR PROFITS; OR BUSINESS INTERRUPTION) HOWEVER CAUSED AND ON ANY THEORY OF
LIABILITY, WHETHER IN CONTRACT, STRICT LIABILITY, OR TORT (INCLUDING NEGLIGENCE OR OTHERWISE) ARISING IN ANY WAY
OUT OF THE USE OF THIS SOFTWARE, EVEN IF ADVISED OF THE POSSIBILITY OF SUCH DAMAGE.
6) Remaining components of the software are provided under a standard 2-term BSD licence with the following names as copyright holders:
Markus Friedl
Theo de Raadt
Niels Provos
Dug Song
Aaron Campbell
Damien Miller
Kevin Steves
Daniel Kouril
Wesley Griffin
Per Allansson
Nils Nordman
v
Blue Coat Configuration and Management Guide
Simon Wilkinson
Redistribution and use in source and binary forms, with or without modification, are permitted provided that the following conditions are met:
1. Redistributions of source code must retain the above copyright notice, this list of conditions and the following disclaimer.
2. Redistributions in binary form must reproduce the above copyright notice, this list of conditions and the following disclaimer in the
documentation and/or other materials provided with the distribution.
THIS SOFTWARE IS PROVIDED BY THE AUTHOR ``AS IS'' AND ANY EXPRESS OR IMPLIED WARRANTIES, INCLUDING, BUT NOT
LIMITED TO, THE IMPLIED WARRANTIES OF MERCHANTABILITY AND FITNESS FOR A PARTICULAR PURPOSE ARE DISCLAIMED. IN
NO EVENT SHALL THE AUTHOR BE LIABLE FOR ANY DIRECT, INDIRECT, INCIDENTAL, SPECIAL, EXEMPLARY, OR CONSEQUENTIAL
DAMAGES (INCLUDING, BUT NOT LIMITED TO, PROCUREMENT OF SUBSTITUTE GOODS OR SERVICES; LOSS OF USE, DATA, OR
PROFITS; OR BUSINESS INTERRUPTION) HOWEVER CAUSED AND ON ANY THEORY OF LIABILITY, WHETHER IN CONTRACT, STRICT
LIABILITY, OR TORT (INCLUDING NEGLIGENCE OR OTHERWISE) ARISING IN ANY WAY OUT OF THE USE OF THIS SOFTWARE, EVEN
IF ADVISED OF THE POSSIBILITY OF SUCH DAMAGE.
OpenSSL
Copyright (c) 1995-1998 Eric Young ([email protected]). All rights reserved.
http://www.openssl.org/about/
http://www.openssl.org/about/
OpenSSL is based on the excellent SSLeay library developed by Eric A. Young <mailto:[email protected]> and Tim J. Hudson
<mailto:[email protected]>.
The OpenSSL toolkit is licensed under a Apache-style license which basically means that you are free to get and use it for commercial and
non-commercial purposes.
This package is an SSL implementation written by Eric Young ([email protected]). The implementation was written so as to conform with
Netscapes SSL.
This library is free for commercial and non-commercial use as long as the following conditions are adhered to. The following conditions apply to
all code found in this distribution, be it the RC4, RSA, lhash, DES, etc., code; not just the SSL code. The SSL documentation included with this
distribution is covered by the same copyright terms except that the holder is Tim Hudson ([email protected]).
Copyright remains Eric Young's, and as such any Copyright notices in the code are not to be removed. If this package is used in a product, Eric
Young should be given attribution as the author of the parts of the library used. This can be in the form of a textual message at program startup or
in documentation (online or textual) provided with the package.
Redistribution and use in source and binary forms, with or without modification, are permitted provided that the following conditions are met:
1. Redistributions of source code must retain the copyright notice, this list of conditions and the following disclaimer.
2. Redistributions in binary form must reproduce the above copyright notice, this list of conditions and the following disclaimer in the
documentation and/or other materials provided with the distribution.
3. All advertising materials mentioning features or use of this software must display the following acknowledgement: "This product includes
cryptographic software written by Eric Young ([email protected])" The word 'cryptographic' can be left out if the routines from the library being
used are not cryptographic related :-).
4. If you include any Windows specific code (or a derivative thereof) from the apps directory (application code) you must include an
acknowledgement: "This product includes software written by Tim Hudson ([email protected])"
THIS SOFTWARE IS PROVIDED BY ERIC YOUNG ``AS IS'' AND ANY EXPRESS OR IMPLIED WARRANTIES, INCLUDING, BUT NOT
LIMITED TO, THE IMPLIED WARRANTIES OF MERCHANTABILITY AND FITNESS FOR A PARTICULAR PURPOSE ARE DISCLAIMED. IN
NO EVENT SHALL THE AUTHOR OR CONTRIBUTORS BE LIABLE FOR ANY DIRECT, INDIRECT, INCIDENTAL, SPECIAL, EXEMPLARY,
OR CONSEQUENTIAL DAMAGES (INCLUDING, BUT NOT LIMITED TO, PROCUREMENT OF SUBSTITUTE GOODS OR SERVICES; LOSS
OF USE, DATA, OR PROFITS; OR BUSINESS INTERRUPTION) HOWEVER CAUSED AND ON ANY THEORY OF LIABILITY, WHETHER IN
CONTRACT, STRICT LIABILITY, OR TORT (INCLUDING NEGLIGENCE OR OTHERWISE) ARISING IN ANY WAY OUT OF THE USE OF
THIS SOFTWARE, EVEN IF ADVISED OF THE POSSIBILITY OF SUCH DAMAGE.
The license and distribution terms for any publicly available version or derivative of this code cannot be changed. i.e. this code cannot simply be
copied and put under another distribution license [including the GNU Public License.]
Copyright (c) 1998-2002 The OpenSSL Project. All rights reserved.
Redistribution and use in source and binary forms, with or without modification, are permitted provided that the following conditions are met:
1. Redistributions of source code must retain the above copyright notice, this list of conditions and the following disclaimer.
2. Redistributions in binary form must reproduce the above copyright notice, this list of conditions and the following disclaimer in the
documentation and/or other materials provided with the distribution.
3. All advertising materials mentioning features or use of this software must display the following acknowledgment:
"This product includes software developed by the OpenSSL Project for use in the OpenSSL Toolkit. (http://www.openssl.org/)"
4. The names "OpenSSL Toolkit" and "OpenSSL Project" must not be used to endorse or promote products derived from this software without
prior written permission. For written permission, please contact [email protected].
5. Products derived from this software may not be called "OpenSSL" nor may "OpenSSL" appear in their names without prior written permission
of the OpenSSL Project.
6. Redistributions of any form whatsoever must retain the following acknowledgment: "This product includes software developed by the
OpenSSL Project for use in the OpenSSL Toolkit (http://www.openssl.org/)"
THIS SOFTWARE IS PROVIDED BY THE OpenSSL PROJECT ``AS IS'' AND ANY EXPRESSED OR IMPLIED WARRANTIES, INCLUDING, BUT
NOT LIMITED TO, THE IMPLIED WARRANTIES OF MERCHANTABILITY AND FITNESS FOR A PARTICULAR PURPOSE ARE
DISCLAIMED. IN NO EVENT SHALL THE OpenSSL PROJECT OR ITS CONTRIBUTORS BE LIABLE FOR ANY DIRECT, INDIRECT,
INCIDENTAL, SPECIAL, EXEMPLARY, OR CONSEQUENTIAL DAMAGES (INCLUDING, BUT NOT LIMITED TO, PROCUREMENT OF
vi
Copyrights
SUBSTITUTE GOODS OR SERVICES; LOSS OF USE, DATA, OR PROFITS; OR BUSINESS INTERRUPTION) HOWEVER CAUSED AND ON
ANY THEORY OF LIABILITY, WHETHER IN CONTRACT, STRICT LIABILITY, OR TORT (INCLUDING NEGLIGENCE OR OTHERWISE)
ARISING IN ANY WAY OUT OF THE USE OF THIS SOFTWARE, EVEN IF ADVISED OF THE POSSIBILITY OF SUCH DAMAGE.
This product includes cryptographic software written by Eric Young ([email protected]). This product includes software written by Tim Hudson
([email protected]).
PCRE
Copyright (c) 1997-2001 University of Cambridge
University of Cambridge Computing Service, Cambridge, England. Phone: +44 1223 334714.
Written by: Philip Hazel <[email protected]>
Permission is granted to anyone to use this software for any purpose on any computer system, and to redistribute it freely, subject to the following
restrictions:
1. This software is distributed in the hope that it will be useful, but WITHOUT ANY WARRANTY; without even the implied warranty of
MERCHANTABILITY or FITNESS FOR A PARTICULAR PURPOSE.
2. Regular expression support is provided by the PCRE library package, which is open source software, written by Philip Hazel, and copyright by
the University of Cambridge, England.
ftp://ftp.csx.cam.ac.uk/pub/software/programming/pcre/
PHAOS SSLava and SSLavaThin
Copyright (c) 1996-2003 Phaos Technology Corporation. All Rights Reserved.
The software contains commercially valuable proprietary products of Phaos which have been secretly developed by Phaos, the design and
development of which have involved expenditure of substantial amounts of money and the use of skilled development experts over substantial
periods of time. The software and any portions or copies thereof shall at all times remain the property of Phaos.
PHAOS MAKES NO WARRANTIES, EXPRESS OR IMPLIED, INCLUDING WITHOUT LIMITATION THE IMPLIED WARRANTY OF
MERCHANTABILITY OR FITNESS FOR A PARTICULAR PURPOSE, REGARDING THE SOFTWARE, OR ITS USE AND OPERATION ALONE
OR IN COMBINATION WITH ANY OTHER SOFTWARE.
PHAOS SHALL NOT BE LIABLE TO THE OTHER OR ANY OTHER PERSON CLAIMING DAMAGES AS A RESULT OF THE USE OF ANY
PRODUCT OR SOFTWARE FOR ANY DAMAGES WHATSOEVER. IN NO EVENT WILL PHAOS BE LIABLE FOR SPECIAL, INCIDENTAL OR
CONSEQUENTIAL DAMAGES, EVEN IF ADVISED OF THE POSSIBLITY OF SUCH DAMAGES.
RealSystem
The RealNetworks® RealProxy™ Server is included under license from RealNetworks, Inc. Copyright 1996-1999, RealNetworks, Inc. All rights
reserved.
SNMP
Copyright (C) 1992-2001 by SNMP Research, Incorporated.
This software is furnished under a license and may be used and copied only in accordance with the terms of such license and with the inclusion of
the above copyright notice. This software or any other copies thereof may not be provided or otherwise made available to any other person. No
title to and ownership of the software is hereby transferred. The information in this software is subject to change without notice and should not be
construed as a commitment by SNMP Research, Incorporated.
Restricted Rights Legend:
Use, duplication, or disclosure by the Government is subject to restrictions as set forth in subparagraph (c)(1)(ii) of the Rights in Technical Data
and Computer Software clause at DFARS 252.227-7013; subparagraphs (c)(4) and (d) of the Commercial Computer Software-Restricted Rights
Clause, FAR 52.227-19; and in similar clauses in the NASA FAR Supplement and other corresponding governmental regulations.
PROPRIETARY NOTICE
This software is an unpublished work subject to a confidentiality agreement and is protected by copyright and trade secret law. Unauthorized
copying, redistribution or other use of this work is prohibited. The above notice of copyright on this source code product does not indicate any
actual or intended publication of such source code.
STLport
Copyright (c) 1999, 2000 Boris Fomitchev
This material is provided "as is", with absolutely no warranty expressed or implied. Any use is at your own risk.
Permission to use or copy this software for any purpose is hereby granted without fee, provided the above notices are retained on all copies.
Permission to modify the code and to distribute modified code is granted, provided the above notices are retained, and a notice that the code was
modified is included with the above copyright notice.
The code has been modified.
Copyright (c) 1994 Hewlett-Packard Company
Copyright (c) 1996-1999 Silicon Graphics Computer Systems, Inc.
Copyright (c) 1997 Moscow Center for SPARC Technology
Permission to use, copy, modify, distribute and sell this software and its documentation for any purpose is hereby granted without fee, provided
that the above copyright notice appear in all copies and that both that copyright notice and this permission notice appear in supporting
documentation. Hewlett-Packard Company makes no representations about the suitability of this software for any purpose. It is provided "as is"
without express or implied warranty.
Permission to use, copy, modify, distribute and sell this software and its documentation for any purpose is hereby granted without fee, provided
that the above copyright notice appear in all copies and that both that copyright notice and this permission notice appear in supporting
documentation. Silicon Graphics makes no representations about the suitability of this software for any purpose. It is provided "as is" without
express or implied warranty.
vii
Blue Coat Configuration and Management Guide
Permission to use, copy, modify, distribute and sell this software and its documentation for any purpose is hereby granted without fee, provided
that the above copyright notice appear in all copies and that both that copyright notice and this permission notice appear in supporting
documentation. Moscow Center for SPARC Technology makes no representations about the suitability of this software for any purpose. It is
provided "as is" without express or implied warranty.
SmartFilter
Copyright (c) 2003 Secure Computing Corporation. All rights reserved.
SurfControl
Copyright (c) 2003 SurfControl, Inc. All rights reserved.
Symantec AntiVirus Scan Engine
Copyright (c) 2003 Symantec Corporation. All rights reserved.
TCPIP
Some of the files in this project were derived from the 4.X BSD (Berkeley Software Distribution) source.
Their copyright header follows:
Copyright (c) 1982, 1986, 1988, 1990, 1993, 1994, 1995
The Regents of the University of California. All rights reserved.
Redistribution and use in source and binary forms, with or without modification, are permitted provided that the following conditions are met:
1. Redistributions of source code must retain the above copyright notice, this list of conditions and the following disclaimer.
2. Redistributions in binary form must reproduce the above copyright notice, this list of conditions and the following disclaimer in the
documentation and/or other materials provided with the distribution.
3. All advertising materials mentioning features or use of this software must display the following acknowledgement:
This product includes software developed by the University of California, Berkeley and its contributors.
4. Neither the name of the University nor the names of its contributors may be used to endorse or promote products derived from this software
without specific prior written permission.
THIS SOFTWARE IS PROVIDED BY THE REGENTS AND CONTRIBUTORS ``AS IS'' AND ANY EXPRESS OR IMPLIED WARRANTIES,
INCLUDING, BUT NOT LIMITED TO, THE IMPLIED WARRANTIES OF MERCHANTABILITY AND FITNESS FOR A PARTICULAR PURPOSE
ARE DISCLAIMED. IN NO EVENT SHALL THE REGENTS OR CONTRIBUTORS BE LIABLE FOR ANY DIRECT, INDIRECT, INCIDENTAL,
SPECIAL, EXEMPLARY, OR CONSEQUENTIAL DAMAGES (INCLUDING, BUT NOT LIMITED TO, PROCUREMENT OF SUBSTITUTE
GOODS OR SERVICES; LOSS OF USE, DATA, OR PROFITS; OR BUSINESS INTERRUPTION) HOWEVER CAUSED AND ON ANY THEORY
OF LIABILITY, WHETHER IN CONTRACT, STRICT LIABILITY, OR TORT (INCLUDING NEGLIGENCE OR OTHERWISE) ARISING IN ANY
WAY OUT OF THE USE OF THIS SOFTWARE, EVEN IF ADVISED OF THE POSSIBILITY OF SUCH DAMAGE.
Trend Micro
Copyright (c) 1989-2003 Trend Micro, Inc. All rights reserved.
zlib
Copyright (c) 2003 by the Open Source Initiative
This software is provided 'as-is', without any express or implied warranty. In no event will the authors be held liable for any damages arising
from the use of this software.
viii
Contents
Contact Information
Third Party Copyright Notices
Chapter 1: Introducing the ProxySG
Web Security Solution ......................................................................................................................................21
New Features in this Release ...........................................................................................................................26
Security Services ................................................................................................................................................30
Protocols Supported..........................................................................................................................................30
Supported Browsers..........................................................................................................................................31
Upgrading and Upgrade Enhancements .......................................................................................................31
About the Document Organization ................................................................................................................31
Related Blue Coat Documentation..................................................................................................................33
Document Conventions....................................................................................................................................33
Chapter 2: Licensing
About Licensing.................................................................................................................................................35
Licensable Components....................................................................................................................................35
About the Trial Period ......................................................................................................................................37
About License Expiration.................................................................................................................................37
Obtaining a WebPower Account.....................................................................................................................38
Registering the Hardware ................................................................................................................................38
Installing a License Key File ............................................................................................................................40
Viewing License Information ..........................................................................................................................43
Updating a License............................................................................................................................................44
Automatically Updating a License .................................................................................................................45
Chapter 3: Accessing the ProxySG
Before You Begin: Understanding Modes .....................................................................................................47
Accessing the ProxySG .....................................................................................................................................48
Management Console Home Page..................................................................................................................49
Changing the Logon Parameters.....................................................................................................................50
Configuring the SSH Console..........................................................................................................................55
Chapter 4: Configuring the System
Global Configurations ......................................................................................................................................61
Archive Configuration......................................................................................................................................66
Adapters .............................................................................................................................................................71
Software and Hardware Bridges.....................................................................................................................75
Gateways ............................................................................................................................................................81
Defining Static Routes ......................................................................................................................................83
Using RIP ............................................................................................................................................................87
ix
Blue Coat ProxySG Configuration and Management Guide
DNS .................................................................................................................................................................... 90
Attack Detection................................................................................................................................................ 95
Using a Bypass List ......................................................................................................................................... 100
Installing WCCP Settings............................................................................................................................... 108
Virtual IP Addresses....................................................................................................................................... 112
Configuring Failover ...................................................................................................................................... 113
TCP-IP Configuration..................................................................................................................................... 117
Chapter 5: Managing Port Services
Section A: Managing Multiple Management Consoles
HTTPS Console (Secure Console)................................................................................................................. 122
HTTP Console.................................................................................................................................................. 125
SSH Console..................................................................................................................................................... 126
Telnet Console ................................................................................................................................................. 127
Section B: Creating and Editing Services
About Service Attributes................................................................................................................................ 130
DNS-Proxy ....................................................................................................................................................... 131
Endpoint Mapper Proxy ................................................................................................................................ 133
FTP .................................................................................................................................................................... 135
HTTP ................................................................................................................................................................. 136
HTTPS............................................................................................................................................................... 138
Instant Messaging Protocols.......................................................................................................................... 140
Streaming Protocols ........................................................................................................................................ 141
SOCKS .............................................................................................................................................................. 142
TCP Tunneling................................................................................................................................................. 143
Telnet Shell Proxy Service.............................................................................................................................. 145
Chapter 6: Configuring Proxies
About Explicit and Transparent Proxy ........................................................................................................ 149
Section A: Configuring Explicit Proxies
Creating an Explicit Proxy Server................................................................................................................. 151
Configuring the FTP Proxy............................................................................................................................ 152
Configuring FTP Connection Welcome Banners........................................................................................ 158
HTTP Proxy ..................................................................................................................................................... 159
HTTP Terms..................................................................................................................................................... 161
Configuring Refresh Bandwidth for the HTTP Proxy............................................................................... 162
Setting Default HTTP Proxy Policy .............................................................................................................. 164
Choosing the HTTP Proxy Profile ................................................................................................................ 168
Additional Configuration Affecting Bandwidth Gain .............................................................................. 175
Viewing HTTP Settings through the CLI .................................................................................................... 177
HTTP Compression ........................................................................................................................................ 178
Troubleshooting HTTP Proxy Issues ........................................................................................................... 185
Configuring a SOCKS Proxy ......................................................................................................................... 188
Shell Proxies..................................................................................................................................................... 193
x
Contents
Section B: Transparent Proxies
Configuring the Transparent Proxy Hardware .......................................................................................... 199
IP Forwarding.................................................................................................................................................. 201
Creating a Transparent Proxy Service ......................................................................................................... 201
Chapter 7: Using Secure Services
HTTPS Termination Overview ..................................................................................................................... 203
Configuring HTTPS Termination ................................................................................................................. 207
Managing the SSL Client................................................................................................................................ 231
Configuring HTTP or HTTPS Origination to the Origin Content Server............................................... 236
Configuring DNS Resolution to the Origin Content Server ..................................................................... 239
Chapter 8: Security and Authentication
Section A: Controlling Access to the ProxySG
Limiting Access to the ProxySG Appliance ................................................................................................ 243
About Password Security............................................................................................................................... 244
Limiting User Access to the ProxySG—Overview..................................................................................... 245
Moderate Security: Restricting Management Console Access Through the Console Access Control List
(ACL) ........................................................................................................................................................ 247
Maximum Security: Administrative Authentication and Authorization Policy ................................... 249
Section B: Controlling Access to the Internet and Intranet
Using Authentication and Proxies................................................................................................................ 255
Using SSL with Authentication and Authorization Services ................................................................... 260
Creating a Proxy Layer to Manage Proxy Operations............................................................................... 261
Chapter 9: Using Authentication Services
Understanding Realms................................................................................................................................... 271
SSL Between the ProxySG and the Authentication Server ....................................................................... 271
Section A: NTLM Realm Authentication and Authorization
How Blue Coat Works with NTLM.............................................................................................................. 273
Creating an NTLM Realm ............................................................................................................................. 273
NTLM Servers.................................................................................................................................................. 274
Defining NTLM Realm General Properties................................................................................................. 276
Creating the CPL ............................................................................................................................................. 278
Tips and Boundary Conditions..................................................................................................................... 278
Section B: LDAP Realm Authentication and Authorization
Overview .......................................................................................................................................................... 279
Creating an LDAP Realm .............................................................................................................................. 280
LDAP Servers .................................................................................................................................................. 281
Defining LDAP Base Distinguished Names ............................................................................................... 285
LDAP Search & Groups Tab (Authorization and Group Information) .................................................. 288
Customizing LDAP Objectclass Attribute Values...................................................................................... 291
Defining LDAP General Realm Properties.................................................................................................. 292
Creating the CPL ............................................................................................................................................. 294
xi
Blue Coat ProxySG Configuration and Management Guide
Section C: RADIUS Realm Authentication and Authorization
Creating a RADIUS Realm............................................................................................................................. 295
Defining RADIUS Realm Properties ............................................................................................................ 296
Defining RADIUS Realm General Properties ............................................................................................. 298
Creating the CPL ............................................................................................................................................. 301
Section D: Local Realm Authentication and Authorization
Creating a Local Realm .................................................................................................................................. 302
Changing Local Realm Properties ................................................................................................................ 303
Defining the Local User List .......................................................................................................................... 305
Creating the CPL ............................................................................................................................................. 312
Section E: Certificate Realm Authentication
How Certificate Realm Works ...................................................................................................................... 313
Creating a Certificate Realm.......................................................................................................................... 313
Defining a Certificate Realm ......................................................................................................................... 315
Defining Certificate Realm General Properties .......................................................................................... 316
Revoking User Certificates ............................................................................................................................ 318
Creating the Certificate Authorization Policy ............................................................................................ 318
Tips.................................................................................................................................................................... 319
Section F: Netegrity SiteMinder
Understanding SiteMinder Interaction with Blue Coat ............................................................................ 321
Participating in a Single Sign-On (SSO) Scheme ........................................................................................ 323
Creating a SiteMinder Realm ....................................................................................................................... 324
SiteMinder Servers.......................................................................................................................................... 327
Defining SiteMinder Server General Properties......................................................................................... 330
Creating the CPL ............................................................................................................................................. 335
Section G: Oblix COREid
Understanding COREid Interaction with Blue Coat ................................................................................. 336
Configuring the COREid Access System..................................................................................................... 336
Additional COREid Configuration Notes ................................................................................................... 337
Configuring the ProxySG Realm .................................................................................................................. 337
Participating in a Single Sign-On (SSO) Scheme ........................................................................................ 338
Creating a COREid Realm ............................................................................................................................. 339
Agents ............................................................................................................................................................... 340
COREid Access Server.................................................................................................................................... 342
COREid General .............................................................................................................................................. 344
Creating the CPL ............................................................................................................................................. 346
Section H: Policy Substitution Realm
How Policy Substitution Realms Work ....................................................................................................... 347
Creating a Policy Substitution Realm .......................................................................................................... 349
Defining a Policy Substitution Realm .......................................................................................................... 350
Defining Policy Substitution Realm General Properties ........................................................................... 352
Tips and Boundary Conditions..................................................................................................................... 354
Creating the Policy Substitution Policy ....................................................................................................... 355
xii
Contents
Section I: Sequence Realm Authentication
Adding Realms to a Sequence Realm........................................................................................................... 356
Creating a Sequence Realm ........................................................................................................................... 356
Adding Realms to a Sequence Realm........................................................................................................... 357
Defining Sequence Realm General Properties ........................................................................................... 359
Section J: Forms-Based Authentication
Understanding Authentication Forms......................................................................................................... 361
Creating and Editing an Authentication Form ........................................................................................... 363
Setting Storage Options.................................................................................................................................. 369
Using CPL with Forms-Based Authentication............................................................................................ 370
Tips and Boundary Conditions..................................................................................................................... 371
Section K: Managing the Credential Cache
Boundary Conditions ..................................................................................................................................... 374
Chapter 10: Bandwidth Management
Licensing........................................................................................................................................................... 375
Bandwidth Management Terms ................................................................................................................... 375
Bandwidth Management Overview............................................................................................................. 376
Configuring Bandwidth Allocation.............................................................................................................. 381
Using Policy to Manage Bandwidth............................................................................................................. 387
Chapter 11: External Services
Section A: ICAP
Supported ICAP Servers ................................................................................................................................ 400
ICAP v1.0 Features.......................................................................................................................................... 400
About Content Scanning ................................................................................................................................ 401
Installing the ICAP Server ............................................................................................................................. 403
Creating an ICAP Service .............................................................................................................................. 403
Deleting an ICAP Service............................................................................................................................... 407
Customizing ICAP Patience Text ................................................................................................................. 408
Creating ICAP Policy...................................................................................................................................... 413
Managing Virus Scanning.............................................................................................................................. 418
Access Logging................................................................................................................................................ 419
References......................................................................................................................................................... 420
Section B: Websense
Creating a Websense Service......................................................................................................................... 421
Deleting a Websense Service ......................................................................................................................... 423
Section C: Service Groups
Creating a Service Group............................................................................................................................... 425
Deleting a Service Group or Group Entry................................................................................................... 427
About Weighted Load Balancing.................................................................................................................. 427
Section D: Displaying External Service and Group Information
xiii
Blue Coat ProxySG Configuration and Management Guide
Chapter 12: Health Checks
About General Health Checks....................................................................................................................... 431
Configuring Service-Specific Health Checks .............................................................................................. 432
About Global Forwarding and SOCKS Gateway Health Checks ............................................................ 435
Configuring Global Health Checks .............................................................................................................. 435
Pausing or Resuming Global Health Checking .......................................................................................... 437
Chapter 13: Managing Policy Files
About Policy Files ........................................................................................................................................... 439
Creating and Editing Policy Files ................................................................................................................. 442
Managing the Central Policy File ................................................................................................................. 447
Viewing Policy Files ....................................................................................................................................... 449
Chapter 14: The Visual Policy Manager
Section A: About the Visual Policy Manager
System Requirements ..................................................................................................................................... 455
Launching the Visual Policy Manager ......................................................................................................... 456
About the Visual Policy Manager User Interface ....................................................................................... 457
About VPM Components............................................................................................................................... 460
The Set Object Dialog ..................................................................................................................................... 463
The Add/Edit Object Dialog ......................................................................................................................... 465
Online Help...................................................................................................................................................... 465
Section B: Policy Layer and Rule Object Reference
About the Reference Tables ........................................................................................................................... 467
Administration Authentication Policy Layer Reference ........................................................................... 467
Administration Access Policy Layer Reference.......................................................................................... 467
DNS Access Policy Layer Reference............................................................................................................. 468
SOCKS Authentication Policy Layer Reference ......................................................................................... 468
Web Authentication Policy Layer Reference .............................................................................................. 469
Web Access Policy Layer Reference ............................................................................................................. 469
Web Content Policy Layer Reference........................................................................................................... 472
Forwarding Policy Layer Reference ............................................................................................................. 473
Section C: Detailed Object Column Reference
Source Column Object Reference.................................................................................................................. 475
Destination Column Object Reference ......................................................................................................... 487
Service Column Object Reference................................................................................................................. 493
Time Column Object Reference .................................................................................................................... 498
Action Column Object Reference.................................................................................................................. 501
Track Object Column Reference ................................................................................................................... 527
Comment Object Reference ........................................................................................................................... 530
Using Combined Objects ............................................................................................................................... 530
Centralized Object Viewing and Managing................................................................................................ 534
Creating Categories ........................................................................................................................................ 536
Restricting DNS Lookups .............................................................................................................................. 537
Restricting Reverse DNS Lookups ............................................................................................................... 538
xiv
Contents
Setting the Group Log Order......................................................................................................................... 538
Section D: Managing Policy Layers and Files
How Policy Layers, Rules, and Files Interact.............................................................................................. 541
Installing Policies ............................................................................................................................................ 543
Managing Policy Files .................................................................................................................................... 544
Installing VPM-Created Policy Files ............................................................................................................ 545
Viewing the Policy/Created CPL ................................................................................................................. 547
Section E: Tutorials
Tutorial—Creating a Web Authentication Policy ...................................................................................... 549
Tutorial—Creating a Web Access Policy ..................................................................................................... 554
Chapter 15: Advanced Policy
Section A: Blocking Pop Up Windows
About Pop Up Blocking ................................................................................................................................. 562
Limitations ....................................................................................................................................................... 562
Recommendations........................................................................................................................................... 562
Section B: Stripping or Replacing Active Content
About Active Content..................................................................................................................................... 564
About Active Content Types ......................................................................................................................... 564
Section C: Modifying Headers
Section D: Defining Exceptions
Built-in Exceptions .......................................................................................................................................... 568
................................................................................................................................ User-Defined Exceptions572
About Exception Definitions ......................................................................................................................... 572
About the Exceptions Hierarchy................................................................................................................... 573
About the Exceptions Installable List........................................................................................................... 574
Creating or Editing Exceptions ..................................................................................................................... 576
Viewing Exceptions ........................................................................................................................................ 579
Section E: Managing Peer-to-Peer Services
About Peer-to-Peer Communications .......................................................................................................... 580
The Blue Coat Solution................................................................................................................................... 580
Policy Control .................................................................................................................................................. 581
Proxy Authentication ..................................................................................................................................... 582
Access Logging................................................................................................................................................ 582
Chapter 16: Streaming Media
Section A: About Streaming Media
Streaming Media Overview........................................................................................................................... 584
Streaming Media Protocols............................................................................................................................ 585
Streaming Media Player Support ................................................................................................................. 587
Streaming Media Authentication ................................................................................................................. 588
Streaming Media Caching Behavior............................................................................................................. 590
xv
Blue Coat ProxySG Configuration and Management Guide
Section B: Configuring Streaming Media
Limiting Bandwidth ....................................................................................................................................... 593
Configuring the Refresh Rate ........................................................................................................................ 597
Configuring HTTP Handoff .......................................................................................................................... 598
Forwarding Client Logs to the Media Server.............................................................................................. 599
Configuring Media Server Authentication Type (Windows Media) ...................................................... 600
About Multicast Streaming............................................................................................................................ 600
Managing Multicast Streaming for Windows Media ................................................................................ 602
Managing Multicast Streaming for Real Media.......................................................................................... 605
Managing Simulated Live Content (Windows Media) ............................................................................. 606
ASX Rewriting (Windows Media)................................................................................................................ 608
About Fast Streaming (Windows Media).................................................................................................... 612
Section C: Windows Media Player
Configuring Windows Media Player ........................................................................................................... 613
Limitations ....................................................................................................................................................... 614
Windows Media Access Log Formats.......................................................................................................... 615
Section D: RealPlayer
Configuring RealPlayer.................................................................................................................................. 616
Real Media Access Log Formats ................................................................................................................... 618
Limitations and Known Issues...................................................................................................................... 618
Section E: QuickTime Player
Configuring QuickTime Player..................................................................................................................... 619
QuickTime Access Log Formats ................................................................................................................... 619
Limitations ....................................................................................................................................................... 619
Access Log Format .......................................................................................................................................... 620
Chapter 17: Instant Messaging
About Securing Instant Messaging............................................................................................................... 621
Recommended Deployments ........................................................................................................................ 621
About the Instant Messaging Protocol Services ......................................................................................... 621
About HTTP Proxy Support.......................................................................................................................... 622
About Instant Messaging Reflection ............................................................................................................ 622
IM Reflection Diagrams ................................................................................................................................. 622
About Instant Messaging Proxy Authentication ........................................................................................ 626
Securing AOL Encryption Capability .......................................................................................................... 626
Instant Message Proxies ................................................................................................................................. 627
Configuring Instant Messenger Clients ....................................................................................................... 630
VPM Examples ................................................................................................................................................ 633
Statistics ............................................................................................................................................................ 634
Related Material .............................................................................................................................................. 634
Chapter 18: Content Filtering
Overview .......................................................................................................................................................... 635
Selecting Category Providers ........................................................................................................................ 636
Configuring a Local Database ....................................................................................................................... 640
xvi
Contents
Configuring Blue Coat Web Filter ............................................................................................................... 645
Configuring InterSafe ..................................................................................................................................... 653
Configuring Optenet ...................................................................................................................................... 658
Configuring Proventia Web Filter ................................................................................................................ 663
Configuring SmartFilter ................................................................................................................................. 667
Configuring SurfControl................................................................................................................................ 677
Configuring Websense ................................................................................................................................... 681
Configuring Webwasher URL Filter ............................................................................................................ 688
How to Apply Policy to Categorized URLs ................................................................................................ 692
Using Content-Filtering Vendors with ProxySG Policies ......................................................................... 695
Tips.................................................................................................................................................................... 698
Chapter 19: Configuring the Upstream Networking Environment
Forwarding Configuration ............................................................................................................................ 701
SOCKS Gateway Configuration.................................................................................................................... 722
Internet Caching Protocol (ICP) Configuration.......................................................................................... 730
Using Policy to Manage Forwarding ........................................................................................................... 736
Chapter 20: Access Logging
Overview .......................................................................................................................................................... 743
Enabling or Disabling Access Logging ........................................................................................................ 746
Customizing the Log Procedures ................................................................................................................. 746
Editing Upload Clients................................................................................................................................... 765
Testing Access Log Uploading...................................................................................................................... 780
Viewing Access-Log Statistics ....................................................................................................................... 781
Using Access Logging with Policy Rules .................................................................................................... 781
Chapter 21: Maintaining the ProxySG
Restarting the ProxySG .................................................................................................................................. 785
Restoring System Defaults............................................................................................................................. 787
Purging the DNS Cache ................................................................................................................................. 790
Clearing the System Cache ............................................................................................................................ 790
Upgrading the ProxySG ................................................................................................................................. 791
Managing ProxySG Systems ......................................................................................................................... 794
Event Logging and Notification.................................................................................................................... 797
Configuring SNMP ......................................................................................................................................... 804
Disk Reinitialization ....................................................................................................................................... 807
Deleting Objects from the ProxySG.............................................................................................................. 808
Chapter 22: Statistics
Selecting the Graph Scale............................................................................................................................... 811
General Statistics ............................................................................................................................................. 811
System Usage Statistics .................................................................................................................................. 816
HTTP/FTP History Statistics ........................................................................................................................ 821
IM History Statistics ....................................................................................................................................... 826
P2P History Statistics...................................................................................................................................... 829
xvii
Blue Coat ProxySG Configuration and Management Guide
Streaming History Statistics .......................................................................................................................... 832
SOCKS History Statistics................................................................................................................................ 837
Shell History Statistics .................................................................................................................................... 840
Resources Statistics ......................................................................................................................................... 840
Efficiency Statistics.......................................................................................................................................... 843
Contents Statistics ........................................................................................................................................... 847
Event Logging.................................................................................................................................................. 848
Bandwidth Management Statistics ............................................................................................................... 849
Access-Log Statistics ....................................................................................................................................... 853
Failover Statistics............................................................................................................................................. 857
Advanced Statistics......................................................................................................................................... 858
Appendix A: Using the Authentication/Authorization Agent
Installing the BCAAA Service on a Windows or Windows NT System................................................. 862
Installing the BCAAA Service on a Solaris System.................................................................................... 869
Troubleshooting Authentication Agent Problems ..................................................................................... 869
Common BCAAA Event Messages .............................................................................................................. 870
Appendix B: Access Log Formats
Custom or W3C ELFF Format....................................................................................................................... 877
SQUID-Compatible Format ........................................................................................................................... 880
NCSA Common Access Log Format ............................................................................................................ 881
Fields Available for Creating Access Log Formats .................................................................................... 882
Appendix C: Using WCCP
Overview .......................................................................................................................................................... 911
Quick Start........................................................................................................................................................ 913
Configuring a WCCP Version 2 Service on the Router ............................................................................. 914
Creating a ProxySG WCCP Configuration File .......................................................................................... 921
Examples .......................................................................................................................................................... 928
Troubleshooting: Home Router .................................................................................................................... 932
Tips.................................................................................................................................................................... 935
Appendix D: RIP Commands
net ...................................................................................................................................................................... 937
host .................................................................................................................................................................... 937
RIP Parameters ................................................................................................................................................ 938
ProxySG-Specific RIP Parameters................................................................................................................. 939
Using Passwords with RIP ............................................................................................................................ 939
Appendix E: Diagnostics
Diagnostic Reporting (Service Information) ............................................................................................... 942
Packet Capturing (the PCAP Utility) ........................................................................................................... 951
Core Image Restart Options .......................................................................................................................... 957
xviii
Contents
Diagnostic Reporting (Heartbeats) ............................................................................................................... 958
Diagnostic Reporting (CPU Monitoring)..................................................................................................... 959
Appendix F: Using Blue Coat Director to Manage Multiple Appliances
How Director Works with ProxySG ............................................................................................................ 963
Backing Up a ProxySG’s SSL Settings.......................................................................................................... 967
Creating Profiles.............................................................................................................................................. 967
Creating Overlays ........................................................................................................................................... 968
Director Documentation ................................................................................................................................ 968
Index
xix
Blue Coat ProxySG Configuration and Management Guide
xx
Chapter 1:
Introducing the ProxySG
Blue Coat© Systems ProxySG™ Appliance represents the latest in perimeter defense for securing and
controlling Web-based content and applications. The Blue Coat ProxySG is designed to integrate
protection and control functions for Internet and intranet traffic without sacrificing performance and
employee productivity.
The ProxySG series of proxy appliances is designed specifically to manage and control user
communication over the Internet. Acting on behalf of the user and the application, the ProxySG does
not replace existing perimeter security devices; rather, it complements them by giving organizations
the ability to control communications in a number of ways that firewalls and other externally focused
devices cannot.
Web Security Solution
The Blue Coat ProxySG provides a point of integration, control, and acceleration for enterprise Web
security applications, including:
•
Layered security approach with content-level protection to combat Web-based threats using port
80.
•
Abundant policy controls wrapped in performance-based hardware and a custom operating
system to give organizations visibility and control over employee Web communications.
•
A preventative spyware defense that combines multiple techniques in a high-performance
solution acceptable for web-based business communications.
•
Integrated reverse proxy caching and SSL support to offload content delivery and encryption
tasks from Web servers, reducing server bottlenecks and enhancing Web site performance and
scalability.
•
Control over which users are allowed to use Instant Messaging, and which IM protocols are
allowed, what features are to be enabled, to whom users may IM or chat with (inside the company
or outside the company), what time of the day they can IM, and how logging is managed.
•
Immediate and dynamic Peer-to-Peer (P2P) control, allowing an administrator to identify, log, and
block P2P traffic.
•
Integrated caching, content positioning, bandwidth savings, and bandwidth management to
provide superior performance for controlling Web content.
•
Control over Windows Media, RealTime, and QuickTime video and audio streams as the file is
being downloaded over the Internet.
•
Prevention of the spread of viruses and other malicious code by using the Blue Coat ProxyAV™
Appliance in conjunction with the Blue Coat ProxySG. The ProxySG with ProxyAV integration is a
high-performance Web anti-virus (AV) solution.
21
Blue Coat ProxySG Configuration and Management Guide
•
Control over the type of content retrieved by the ProxySG. You can also filter requests made by
clients. If you use Blue Coat Web Filter (BCWF), a highly effective content filtering service that
quickly learns and adapts to the working set of its users, you can also use a network service that
dynamically examines and categorizes Web pages as they are requested.
Ease of Deployment
The ProxySG is specifically designed to increase security and reduce costs associated with central,
regional, and branch office Web protection. For example, the SG200 and SG400 platforms easily drop in
to remote environments where technical support staff is not always available, and features simple
installation and remote management.
Other platforms also feature a simple-to-manage system that installs in minutes with little ongoing
maintenance. In addition, they also provide configuration restoration that allows system
configuration to be archived, including all system settings, filtering and policies; removable,
hot-swappable disk drives for true fault tolerance, and are field serviceable and upgradeable.
Policy and Management Architecture
Networking environments have become increasingly complex, with a variety of security and access
management issues. Enterprises face challenges in configuring products and ensuring the result
supports enterprise policies. Policies enhance ProxySG features, such as authentication and virus
scanning, allowing you to manage Web access specific to the enterprise’s needs.
Blue Coat policies provide:
•
Fine-grained control over various aspects of ProxySG behavior.
•
Multiple policy decisions for each request.
•
Multiple actions triggered by a particular condition.
•
Bandwidth limits.
•
Authentication awareness, including user and group configuration.
•
Flexibility of user-defined conditions and actions.
•
Convenience of predefined common actions and transformations.
•
Support for multiple authentication realms.
•
Configurable policy event logging.
•
Built-in debugging.
The ProxySG uses policies and system configuration together to provide the best possible security for
your network environment.
Blue Coat's unique architecture allows for scalable decision making. Effectively turning on multiple
combinations of granular policy requires a unique level of performance.
Blue Coat's flexible logging features, coupled with integrated authentication and identification
capabilities, give organizations the power to monitor Web access for every user in the network at any
time, regardless of where they are. Internet access traffic flowing through the ProxySG gives
administrators and managers the ability to audit Web traffic as needed.
22
Chapter 1: Introducing the ProxySG
Content Filtering
As the number of users and the total amount of traffic grows, policy enforcement demands higher
performance to provide adequate end-user quality of experience. To satisfy the management level and
scalability that enterprise traffic demands, ProxySG Appliances have emerged as a new layer of
infrastructure that provide the performance and manageability required for enterprise-wide
policy-based content filtering.
SGOS 4.1offers a dynamic categorization service if you use the Blue Coat Web Filter (BCWF). The
BCWF categorization service is an Internet service, available from designated service points with
high-bandwidth connections and dedicated hardware. It analyzes data externally so that content
(offensive, distasteful, or perhaps even potentially a legal liability) never enters the network.
Figure 1-1: Content Filtering
The ProxySG enforces Internet access policies based on:
•
Content categories (gambling, sex, etc.)— Besides BCWF, which includes a database and a
dynamic categorization service, databases from leading third-party filtering vendors are offered.
•
Content type and protocols (HTTP, FTP, streaming, MIME type, etc.)—Adds the ability to block
certain types of content transported on certain types of protocols.
•
Identity (user, group, network)—Customize policy based on who the users are regardless of
location.
•
Network conditions—Customize based on real-time conditions.
Content and Virus Scanning
When integrated with a supported Internet Content Adaptation Protocol (ICAP) server such as the
Blue Coat ProxyAV appliance, Blue Coat provides content scanning and filtering. ICAP is an evolving
protocol that allows an enterprise to dynamically scan and change Web content. Content scanning
includes actions like sending a given request for content to an ICAP server for virus scanning or
malicious mobile code detection.
To eliminate threats to the network and to maintain caching performance, the ProxySG sends objects
to the integrated ICAP server for evaluation and saves the scanned objects in its object store. With
subsequent content requests, the ProxySG serves the scanned object rather than rescanning the same
object for each request.
23
Blue Coat ProxySG Configuration and Management Guide
Figure 1-2: Content and Virus Scanning
The ProxySG blocks viruses from Web content behind and in front of the firewall. Blue Coat
architecture is optimized to handle Web requests and responses that require scanning for potentially
malicious mobile code and viruses. The ProxySG uses ICAP to vector responses to supported virus
scanning servers to deliver unmatched flexibility and performance in scanning Web content.
Spyware
Spyware leverages multiple vectors, making silver bullet defenses using coarse-grained controls
useless and unproductive and impeding critical Web-based business communications. No single
technique can filter out spyware and adware to defend against the threat.
Blue Coat combines multiple techniques in a high-performance solution acceptable for Web-based
business communications. Latency is minimal and the protection layers are comprehensive to stop,
block, and scan spyware. With Blue Coat, you can:
•
stop spyware installations;
•
block spyware Web sites;
•
scan for spyware signatures;
•
detect desktop spyware and target for cleanup.
Figure 1-3: Preventing Spyware
For information on using the ProxySG and ProxyAV together, refer to the Blue Coat ProxyAV
Configuration and Management Guide.
24
Chapter 1: Introducing the ProxySG
Instant Messaging
Instant Message (IM) usage in an enterprise environment creates security concerns because, regardless
of how network security is configured, IM connections can be made from any established protocol,
such as HTTP or SOCKS, on any open port. Because it is common for coworkers to use IM to
communicate, especially in remote offices, classified company information can be exposed outside the
network. Viruses and other malicious code can also be introduced to the network from file sharing
through IM clients.
The ProxySG serves as an IM proxy, both in transparent and explicit modes. You can control IM
actions by allowing or denying IM communications and file sharing based on users (both employee
identities and IM handles), groups, file types and names, and other triggers. You can also log and
archive all IM chats.
Using policy, administrators can quickly deploy sophisticated IM usage policies that integrate with
existing authentication directories through LDAP, NTLM and Radius.
Figure 1-4: Controlling Instant Messaging
Peer-to-Peer
The very nature of the Peer-to-Peer (P2P) client architecture is to evade firewalls and general network
security. Additionally, blocking a P2P client at the firewall has proved to be extremely difficult
because:
•
port blocking, as a means to controlling P2P, is very limited.
•
P2P packets cannot be classified simply by looking at packet headers such as an IP address and
port number.
Blue Coat ProxySG Appliances provide a powerful platform for immediate and dynamic P2P control.
Integrated Reverse Proxy
ProxySG Appliances are easily configured for reverse proxy mode, providing optimized Web server
acceleration and featuring a high RAM-to-disk ratio and a built-in Secure Sockets Layer (SSL)
encryption/decryption processor. This processor can manage 10 to 40 times more secure sessions than
a standard Web server, allowing the appliances to accelerate the delivery of both public (HTTP) and
private (HTTPS) content. The product is packaged in a compact 1U form factor (ProxySG 400 and
ProxySG 800 models) a major advantage in space-constrained data centers, or a 4U form factor
(ProxySG 8000) that allows for modular expansion of network interface cards, SSL cards, processors,
and RAM.
25
Blue Coat ProxySG Configuration and Management Guide
The ProxySG system software is easily tuned for the workload of high traffic Web sites. This
environment is characterized by a finite amount of site content accessed by many remote users, often
resulting in flash crowds. The ProxySG Appliances allow efficient scaling of Web farms to address
flash or peak periods of traffic, and includes advanced features such as protection against
Denial-of-Service attacks and dynamic content acceleration.
Bandwidth Management
Bandwidth management allows you to classify, control, and, if required, limit the amount of
bandwidth used by different classes of network traffic flowing into or out of the ProxySG. Network
resource sharing (or link sharing) is accomplished using a bandwidth-management hierarchy where
multiple traffic classes share available bandwidth in a controlled manner.
You can also create policies to constrain who can use certain media types, and how much of it. For
example, you can allow your executives to view high-bandwidth streaming media, but only allow the
accounting group to view streams up to 56k on corporate sites.
With Blue Coat, you can limit access based on user, group, network address, and the time of day. You
can also prevent all access to the Internet except for a group of users who need access to do their jobs,
effectively freeing bandwidth for mission-critical needs.
New Features in this Release
Blue Coat has long been the leader in proxy appliances. For SGOS 4.1.x, Blue Coat built upon this
leadership by adding:
•
New Authentication Realms
•
Enhancements to Access Logging
•
Bandwidth Management
•
CPU Monitoring
•
HTTP Object Compression
•
SOCKS Compression and Endpoint Mapper proxy
•
Content Filtering vendors
•
Enhancements to the Blue Coat Patience Page
•
New policy to support new SGOS 4.x features
For information on each of these features, continue with the following sections.
26
Chapter 1: Introducing the ProxySG
New Authentication Realms
In 4.x, two new authentication realms are available, bringing the total to eleven:
•
Oblix COREid: With Oblix COREid (formerly NetPoint), the ProxySG acts as a custom
AccessGate. The ProxySG supports authentication with Oblix COREid v6.5 and v7.0.
•
Policy Substitution: A Policy Substitution realm provides a mechanism for identifying and
authorizing users based on information in the request to the ProxySG. The realm uses information
in the request and about the client to identify the user. The realm is configured to construct user
identity information by using policy substitutions.
For more information on these realms, refer to "Section G: Oblix COREid" on 336 and "Section H:
Policy Substitution Realm" on 347".
Access Logging
Access Logging has added several new features in SGOS 4.1.x:
•
A switch to enable or disable access logging on a global basis, both through the Management
Console (Access Logging>General>Global Settings) and the CLI.
•
A P2P format and log to support the new P2P functionality.
•
Signed access logs that certify that a specific ProxySG generated and uploaded a specific log file.
•
New substitutions to support SGOS 4.x functionality. (For more information on new substitutions,
refer to the Blue Coat SGOS 4.x Upgrade Guide.)
For information on access logging, see Chapter 20: “Access Logging” on page 743.
Bandwidth Management
Bandwidth Management is used to classify, control, and if required, limit the amount of bandwidth
used by a class (a unit of bandwidth allocation) of network traffic flowing in or flowing out of the
proxy. Network resource sharing (or link sharing) is accomplished in a hierarchical method where
multiple traffic classes share the available bandwidth in a controlled manner. The hierarchy specifies
how excess bandwidth is shared between the classes.
Note:
Bandwidth Management is a licensable feature. It is enabled by default if you have a valid
license.
For more information on Bandwidth Gain Management, see Chapter 10: “Bandwidth Management”
on page 375.
CPU Monitoring
You can enable CPU monitoring to see the percentage of CPU being used by specific functional
groups. CPU monitoring is disabled by default.
You can also view CPU monitoring statistics through Statistics>Advanced>Diagnostics.
For more information, see "Diagnostic Reporting (CPU Monitoring)" on page 959.
27
Blue Coat ProxySG Configuration and Management Guide
Content Filtering
Blue Coat Web Filter (BCWF), formerly Cerberian, is a highly effective content filtering service that
quickly learns and adapts to the working set of its users.
You can evaluate BCWF free during the SG trial period (60 days). The auto-evaluation is available to
new users of ProxySG as well as those upgrading from SGOS v3.x to SGOS v4.x.
SGOS 4.1 introduces integration with a dynamic categorization service. The BCWF categorization
service is an Internet service, available from designated service points with high-bandwidth
connections and dedicated hardware.
No username or password is required to use BCWF during the trial period (60 days). If you want to
download the database on demand or on a schedule, or if you want to try out dynamic categorization,
you’ll need to configure the BCWF service.
For more information on BCWF, see"Configuring Blue Coat Web Filter" on page 645.
Also new in this release are three new third-party content filtering vendors—InterSafe, Optenet, and
Webwasher. For more information, see "Configuring InterSafe" on page 653, "Configuring Optenet" on
page 658, or "Configuring Webwasher URL Filter" on page 688.
HTTP Object Compression
With compression, the HTTP proxy forwards the supported compression algorithm (either deflate or
gzip) from the client’s request (Accept-Encoding: request header) to the server as is, and attempts to
send compressed content to client whenever possible. This allows the ProxySG to send the response as
is when the server sends compressed data, including non-cacheable responses. Any unsolicited
encoded response is treated as an error.
Note:
HTTP object compression is a licensable feature. It is disabled by default, even if you have
a valid license.
Whether and where you use compression depends upon three resources: server-side bandwidth,
client-side bandwidth, and ProxySG CPU. If server-side bandwidth is more expensive in your
environment than CPU, always request compressed content from the OCS. However, if CPU is
comparatively expensive, configure the ProxySG to ask the OCS for the same compressions that the
client asked for and to forward whatever the server returns.
For more information on compression, see "HTTP Compression" on page 178.
SOCKS Compression and Endpoint Mapper Proxy
Compression over SOCKS is supported for TCP/IP tunnels, which can compress the data transferred
between the branch (downstream proxy) and main office (upstream proxy), reducing bandwidth
consumption and improving latency. For information on enabling SOCKS compression,
see"Understanding SOCKS Compression" on page 188.
For SOCKS compression to be successful, you must create an Endpoint Mapper proxy at the remote
office (the downstream proxy) that intercepts Microsoft RPC traffic and creates dynamic TCP tunnels.
Traffic to port 135 is transparently redirected to this service using bridging or L4 switch or WCCP. For
information on creating and enabling an Endpoint Mapper proxy service, see "Endpoint Mapper
Proxy" on page 133.
28
Chapter 1: Introducing the ProxySG
When configuration is complete, you can set policy to forward TCP traffic through a SOCKS gateway.
You can do this through the <proxy> layer using either the VPM or CPL. For more information, see
"Using Policy to Control the SOCKS Proxy" on page 192.
Patience Page
The ProxySG allows you to customize the patience pages that are displayed when HTTP clients
experience delays as Web content is scanned.
In SGOS 4.1.x, patience page behavior has been modified to
•
Refresh every five seconds, using Javascript.
•
Update the status bar every second with patience page information.
•
Manage a popup blocker. If a popup blocker is active, the patience page initiates the download of
the scanned object when the root window gets the final patience page. The final patience page also
updates the status bar to indicate that the scan is complete.
For information on using patience pages, see Chapter 11: “External Services” on page 399.
Policy
A number of properties (actions) and conditions (source) have been added to support the new features
in SGOS 4.1.x. (For a complete list of new CPL and VPM objects, refer to the Blue Coat SGOS 4.x
Upgrade Guide.)
VPM Object Naming
Objects that can be named by the user no longer start with "_" (underscore character). The underscore
character is now used internally to prevent name collisions between objects that can be named by the
user and internally generated names.
Exception Pages
A number of built-in exception pages have been added to SGOS 4.1.x to send information back to the
user under operational contexts that are known to occur. New exception pages include:
•
•
HTML Notification
❐
notify
❐
notify_missing_cookie
HTTP Compression
❐
transformation_error
❐
unensupported_encoding
Documentation References
•
Chapter 14: “The Visual Policy Manager” on page 453
•
Chapter 13: “Managing Policy Files” on page 439
•
Blue Coat SGOS 4.x Upgrade Guide
29
Blue Coat ProxySG Configuration and Management Guide
•
Blue Coat ProxySG Content Policy Language Guide
Security Services
The Blue Coat ProxySG allows you to control content, instant messaging, and file sharing. In SGOS
4.x, Blue Coat has also added increased support for:
•
P2P
•
SSL Key Management
For information on each of these features, continue with the following sections.
P2P
The ProxySG recognizes P2P activity relating to P2P file sharing applications. By constructing policy,
you can control, block, and log P2P activity and limit the bandwidth consumed by P2P traffic.
For more information, see Chapter 15:"Section E: Managing Peer-to-Peer Services" on 580.
SSL Key Management
In this release, SSL key management has been extended to interact more efficiently with Blue Coat
Director.
Director allows you to configure a ProxySG and then push that configuration out to as many ProxySG
Appliances as you need. Director also allows you to delegate network and content control to multiple
administrators.
For information on using SSL key management with Director, refer to the Blue Coat Director
Configuration and Management Guide.
Protocols Supported
Blue Coat ProxySGs are multi-protocol. For administrative purposes, you can connect to the Blue Coat
ProxySG Appliances through the:
•
HTTPS-Console: This is the default protocol used by the Management Console. It is configured
and enabled by default.
•
SSH-Console: This is the default protocol for connecting to the ProxySG through the CLI. It is
configured and enabled by default.
If you prefer and are in a secure environment, you can use the HTTP-Console or Telnet-Console for
administrative access to the system.
Note:
30
HTTP-Console and Telnet-Console are security risks. They should not be used for
administrative access in insecure situations.
Chapter 1: Introducing the ProxySG
Supported Browsers
The ProxySG Management Console supports Microsoft® Internet Explorer 6, Netscape®
Communicator 7.2, and Firefox 1.0.
The Management Console uses the Java Runtime Environment. Because of security concerns, you
should use JRE 1.5.0 (also called J2SE 5.0) if you plan to access external Internet sites.
Upgrading and Upgrade Enhancements
For information on doing upgrades or downgrades, or for restoring default system settings, refer to
the Blue Coat SGOS 4.x Upgrade Guide.
About the Document Organization
This document is organized for easy reference, and is divided into the following sections and chapters:
Table 1.1: Document Organization
Chapter Title
Description
Chapter 1 – Introducing the ProxySG
This chapter discusses the ProxySG Security Solution and
new features and enhancements in SGOS 3.x. It also covers
document conventions.
Chapter 2 – Licensing
Several features must be licensed to be used beyond the
evaluation trial date. This chapter describes which features
require licenses and how to download licenses.
Chapter 3 – Accessing the ProxySG
This chapter explains how to log in to the ProxySG CLI and
Web-based Management Console; how to change the
administrator username, password, privileged-mode
password; and how to make a secure connection using SSH
and HTTPS.
Chapter 4 – Configuring the System
Instructions on setting the ProxySG name and system time,
configuring the network adapter, load balancing, and FTP
port services, and specifying DNS servers. This chapter also
describes how to track client IP addresses using server-side
transparency or virtual IP addresses.
Chapter 5 – Managing Port Services
This chapter describes port services configurable on the
ProxySG, including several kinds of Management Consoles,
such as HTTPS, HTTP, SSH, and Telnet Consoles, and
application proxies such as Instant Messenger (IM), SOCKS,
FTP, MMS, and RTSP, HTTP and HTTPS.
Chapter 6 – Configuring Proxies
Explicit and Transparent proxies are discussed in this
chapter, as well as the recommended types of proxy.
Chapter 7 – Using Secure Services
HTTPS termination, including SSL, Certificates, keyrings,
and keypairs are discussed in this chapter.
31
Blue Coat ProxySG Configuration and Management Guide
Table 1.1: Document Organization (Continued)
32
Chapter Title
Description
Chapter 8 – Security and Authentication
Enabling and maintaining security on the ProxySG is
discussed in this chapter.
Chapter 9 – Using Authentication Services
Blue Coat supports six kinds of authentication, discussed
here: LDAP, NTLM, RADIUS, Local (formerly UNIX),
Certificate (which allows you to authenticate using
certificates), and Sequence (which allows you to
authenticate using multiple authentication servers).
Chapter 10 – Bandwidth Management
Managing the amount of bandwidth used by different
classes of network traffic is discussed in this chapter.
Chapter 11 – External Services
ICAP and Websense off-box are described in this chapter.
Chapter 12 – Health Checks
The health of services, such as SOCKS, ICAP, and
forwarding services, is discussed in this chapter.
Chapter 13 – Managing Policy Files
Four policy files are used to manage policy: Central, Local,
Visual Policy Manager, and Forwarding. This chapter
discusses how to manage them.
Chapter 14 – The Visual Policy Manager
This chapter contains a reference guide and several tutorials
for using the Visual Policy Manager.
Chapter 15 – Advanced Policy
This chapter discusses using features such as pop-up ad
blocking, managing active content, and creating exceptions.
Chapter 16 – Streaming Media
This chapter discusses streaming, including the new RTSP
proxy.
Chapter 17 – Instant Messaging
How to configure and use the ProxySG’s instant messaging
capabilities is discussed in this chapter.
Chapter 18 – Content Filtering
This chapter discusses how to configure and use the
ProxySG’s content filtering capabilities, as well as
configuring and using content filtering vendors to work
with the ProxySG.
Chapter 19– Configuring the Upstream
Networking Environment
This chapter discusses how to control upstream interaction
with the ProxySG.
Chapter 20 – Access Logging
Log formats, upload clients, upload schedules, and
protocols are discussed in this chapter.
Chapter 21 – Maintaining the ProxySG
This chapter discusses upgrading the system and
configuring event logs, SMNP, STMP, heartbeats, and core
images.
Chapter 22 – Statistics
This chapter discusses viewing various kinds of
statistics—system usage, efficiency, resources, and logs of all
kinds.
Chapter 1: Introducing the ProxySG
Table 1.1: Document Organization (Continued)
Chapter Title
Description
Appendix A – Using the Authentication/
Authorization Agent
The ProxySG BCAAA agent is discussed in this appendix.
Appendix B – Access Log Formats
ELFF, SQUID, NCSA/Common, and custom logs are
discussed in this appendix.
Appendix C – Using WCCP
Configuring and using a WCCP router with the ProxySG is
discussed in this appendix.
Appendix D – RIP Commands
Commands supported for the Routing Information Protocol
(RIP) configuration text file are discussed in the appendix.
Appendix E – Diagnostics
Determining and resolving ProxySG problems are discussed
in this appendix.
Appendix F – Using Blue Coat Director to
Manage Multiple ProxySG Appliances
Discusses how Blue Coat Director works with multiple
ProxySG Appliances.
Related Blue Coat Documentation
•
Blue Coat 6000 and 7000 Installation Guide
•
Blue Coat 200 Series Installation Guide
•
Blue Coat 400 Series Installation Guide
•
Blue Coat ProxySG 800 Series Installation Guide
•
Blue Coat ProxySG 8000 Series Installation Guide
•
Blue Coat ProxySG Content Policy Language Guide
•
Blue Coat ProxySG Command Line Reference
Document Conventions
The following section lists the typographical and Command Line Interface (CLI) syntax conventions
used in this manual.
Table 1.2: Typographic Conventions
Conventions
Definition
Italics
The first use of a new or Blue Coat-proprietary term.
Courier font
Command line text that appears on your administrator
workstation.
Courier Italics
A command line variable that is to be substituted with a literal
name or value pertaining to the appropriate facet of your network
system.
Courier Boldface
A ProxySG literal to be entered as shown.
33
Blue Coat ProxySG Configuration and Management Guide
Table 1.2: Typographic Conventions
34
{ }
One of the parameters enclosed within the braces must be
supplied
[ ]
An optional parameter or parameters.
|
Either the parameter before or after the pipe character can or must
be selected, but not both.
Chapter 2:
Licensing
This chapter describes the ProxySG licensing behavior.
About Licensing
SGOS 4.x features a global licensing system for the ProxySG. License key files are issued on a
per-appliance basis. One license key file includes all of the component licenses for whichever ProxySG
features you have elected to use.
Note:
When your ProxySG order was completed, you received an e-mail that contains serial
numbers for licensable components. Those numbers are required for the procedures in
this chapter.
Licensable Components
There are two types of licensable components: required and optional. The SGOS X base is required
component of the license key file. Optional components license additional feature, and are added to
the license key file. The following table lists the ProxySG licensable components.
35
Blue Coat ProxySG Configuration and Management Guide
Table 2.1: Licensable Components
Component
Type
Description
SGOS 4 Base
Required
The ProxySG operating system, plus base features: HTTP, FTP, TCP-Tunnel,
SOCKS, and DNS proxy. The following additional features are also included
in the base license:
• 3rd Party Onbox Content Filtering: Allows use with third-party vendor
databases, such as SmartFilter, Websense, and SurfControl.
• Websense Offbox Content Filtering: For Websense off-box support only.
• ICAP Services: External virus and content scanning with ICAP servers.
• Bandwidth Management: Allows you to classify, control, and, if required,
limit the amount of bandwidth used by different classes of network traffic
flowing into or out of the ProxySG.
• Windows Media Standard: MMS proxy; no caching or splitting; content
pass-through. Full policy control over MMS.
• Real Media Standard: RTSP proxy; no caching or splitting; content
pass-through. Full policy control over RTSP.
• Apple QuickTime Basic: RTSP proxy; no caching or splitting; content
pass-through. Full policy control over RTSP.
• Netegrity SiteMinder: Allows realm initialization and user authentication
to SiteMinder servers.
• Oblix COREid: Allows realm initialization and user authentication to
COREid servers
• Peer-to-Peer: Allows you to recognize and manage peer-to-peer P2P
activity relating to P2P file sharing applications.
Compression
Optional
Allows reduction to file sizes without losing any data.
SSL
Optional
SSL Termination; includes an SSL termination card to be installed on the
appliance.
IM
Optional
• AOL Instant Messaging: AIM proxy with policy support for AOL Instant
Messenger.
• MSN Instant Messaging: MSN proxy with policy support for MSN Instant
Messenger.
• Yahoo Instant Messaging: Yahoo proxy with policy support for Yahoo
Instant Messenger.
Windows Media
Premium
Optional
• MMS proxy; content caching and splitting.
• Full policy control over MMS.
• When the maximum concurrent streams is reached, all further streams are
denied and the client receives a message.
Real Media
Premium
Optional
• RTSP proxy; content caching and splitting.
• Full policy control over RTSP.
• When the maximum concurrent streams is reached, all further streams are
denied and the client receives a message.
36
Chapter 2: Licensing
About the Trial Period
Blue Coat provides a trial period. The initial system boot-up triggers the 60-day trial period, during
which you can evaluate the ProxySG functionality. For the first 60 days, all licensable components are
active and available to use. Furthermore, when a license is installed during the trial period (or while
using a demo license), components that are not part of that license remain available and active during
the trial period.
Note:
The ProxySG Licensing feature has slight changes from SGOS 3.x. The Blue Coat SGOS 4.x
Upgrade Guide (in Chapter 2) describes licensing behavior concerning an upgrade to
SGOS 4.x from SGOS 3.x.
Each time you navigate to the Management Console home page or click the Maintenance>Licensing tab,
a pop-up dialog appears warning you that the trial period expires in so many days (a text message is
displayed on a Telnet, SSH, or serial console). If you require more time to explore the ProxySG
features, a demo license is available; refer to your reseller or contact Blue Coat Sales.
The trial period streaming and IM licenses are no-count licenses—unlimited streams and IM clients
are accessible.
Upon installing licenses after or during the trial period, the Base SGOS, Instant Messaging (IM),
Windows Media basic, and Real Media premium licenses are also unlimited, but Windows Media
premium and IM licenses impose user limits established by each license type.
Note:
If you invoke the restore-defaults command after you have installed licenses, and the
serial number of your system is configurable (older boxes only), the licenses fail to install
and you return to the trial period (if any time is left).
About License Expiration
At the end of the trial or demo period or, subsequently, when any normally licensed component
expires, components that have not been licensed do not process requests. A license expiration
notification message is logged in the Event Log (see "Viewing the Event Log" on page 848 for
information).
If a license expires, users might not receive notification, depending upon the application they are
using. Notifications do occur for the following:
•
HTTP (Web browsers)—An HTML page is displayed stating the ProxySG license has expired.
•
Streaming media clients—If the Windows Media Player, RealPlayer, or QuickTime player version
supports it, a message is displayed stating the ProxySG license has expired.
•
Instant Messaging clients—Users do not receive a message that the ProxySG license has expired.
Any IM activity is denied, and to the user it appears that the logon connection has failed.
•
FTP clients—If the FTP clients supports it, a message is displayed stating the ProxySG license has
expired.
You can still perform ProxySG configuration tasks through the Management Console, CLI, SSH
console, serial console, or Telnet connection. Although the component becomes disabled, feature
configurations are not altered. Also, policy restrictions remain independent of component availability.
37
Blue Coat ProxySG Configuration and Management Guide
Obtaining a WebPower Account
Before you can generate the license key file, you must have a Blue Coat WebPower user account and
register the ProxySG.
If you do not have a WebPower account or forgot your account information, perform the following
procedure.
To obtain a WebPower account:
1.
Select Maintenance>Licensing>Install.
2.
In the License Administration field, click Register/Manage. The License Configuration and
Management Web page appears (ignore the dialog at this time).
3.
Perform one of the following:
❐
To obtain a new account, click the link for Need a WebPower User ID. Enter the information as
prompted.
❐
To obtain your current information for an existing information, click the link for Forgot your
password.
Registering the Hardware
This section describes how to enter the appliance serial number and register the appliance with Blue
Coat.
System Serial Number Prerequisite
Each ProxySG serial number is the appliance identifier used to assign a license key file. The ProxySG
contains an EEPROM with the serial number encoded. The ProxySG recognizes the serial number
upon system boot-up.
The serial number is visible by navigating to Configuration>General>Identification.
The License Warning Dialog
When you first access the ProxySG Management Console, or when you select
Maintenance>Licensing>Install, a License Warning dialog appears.
38
Chapter 2: Licensing
Figure 2-1: License Warning dialog: Hardware not registered.
You cannot install a license key until the hardware has been registered. The License Warning field
indicates this status.
If you know the hardware has been manually registered, select Hardware has been manually registered
and click Close. The system searches for the last instance and value of hardware registration. Proceed
to "Installing a License Key File" on page 40.
Registering the ProxySG
This section describes how to register the ProxySG.
To register the hardware:
1.
If the License Warning dialog is not displayed, select Maintenance>Licensing. The License Warning
dialog appears.
2.
Select Register hardware with Blue Coat automatically.
3.
Enter your WebPower username and password.
4.
Click Proceed. The Registration Status field displays relative information.
The ProxySG connects to the Blue Coat License Self-Service page. The next step is to obtain and
install the license key file that allows access to the ProxySG features you require.
39
Blue Coat ProxySG Configuration and Management Guide
Installing a License Key File
This section describes how to register the ProxySG with Blue Coat and install the license key file.
Creating a License Key File
The License Self-Service Web page allows you to create a license key file that allows the use of the base
and additional features for this ProxySG.
Figure 2-2: The License Self-Service Web page.
Upon purchasing the ProxySG from Blue Coat or a reseller, you received an e-mail that contains
license serial numbers. These serial numbers are required to create the license key file.
To create a license key file:
1.
In the first field under Add a new software solution to this appliance, enter the serial number for the
SGOS 4.x base license.
2.
In the subsequent fields, enter the serial numbers for any optional licenses you obtained (for
example, Compression and IM).
Figure 2-3: Enter license serial numbers.
3.
40
Click Apply.
Chapter 2: Licensing
A license key file, which contains either just the base license or the base combined with optional
licenses, is generated and is ready to be downloaded and installed.
Downloading the License Key File
Downloading the license key file is accomplished by using the automatic installation feature or by
receiving the key through e-mail and manually installing it from a Web server or a local file.
Automatic License Installation
If the ProxySG has Internet access, you can use the automatic license installation feature to retrieve
and install the license from Blue Coat.
To automatically obtain and install the license from the Management Console:
1.
Select Maintenance>Licensing>Install.
2.
In the License Key Automatic Installation field, click Retrieve. The Request License Key dialog appears.
Figure 2-1: Requesting a License
3.
Enter your Blue Coat WebPower user ID and password.
4.
Click Send Request.
The ProxySG fetches the license associated with the serial number that is displayed.
5.
The Installation Status field displays relevant information. When installation is complete, click
Results; examine the results and click OK; click Close. The ProxySG is now licensed.
Manual License Installation
If the ProxySG does not have Internet access, Blue Coat can send you the license in an e-mail. The file
can then be installed from a Web server or a local directory.
41
Blue Coat ProxySG Configuration and Management Guide
To Manually Obtain and Install the License:
1.
Select Maintenance>Licensing>Install.
2.
Click Register/Manage. A new window opens to the Blue Coat ProxySG Registration page. This
Web page provides instructions for requesting that the license (associated to the ProxySG by the
serial number) be sent through e-mail.
3.
When the e-mail arrives, save the attached license file on a Web server or to a local file.
4.
In the License Key Manual Installation field, select one of the following from the drop-down list and
click Install:
Note:
❐
A message is written to the event log when you install a list through the ProxySG.
Remote URL—If the file resides on a Web server. The Install License Key dialog displays.
Figure 2-2: Installing a License from a Web Server
Enter the URL path and click Install. The Installation Status field displays relevant information.
When installation is complete, click Results; examine the results, close the window, and click
OK. Click Apply.
❐
42
Local File—If the file resides in a local directory. The Upload and Install File window opens.
Chapter 2: Licensing
Figure 2-3: Uploading a License from a Local File
Enter a path to the license file or click Browse and navigate to the file. Click Install. A results
window opens. Examine the license installation results; close the window. Click Close. Click Apply.
The ProxySG license is now installed. All features that you subscribed to are fully operational.
Viewing License Information
You can review the validity and expiration date of any licensed feature.
To View the License Information through the Management Console:
Select Maintenance>Licensing>View.
43
Blue Coat ProxySG Configuration and Management Guide
Figure 2-4: Viewing License Information
Each licensable component is listed, along with its validity and its expiration date.
Note:
To view the most current information, click Refresh Data.
You can also highlight a license component and click View Details. A dialog appears displaying more
detailed information about that component. For example, a streaming component displays the
maximum number of streams allowed.
Updating a License
After the initial license installation, you might decide to use another feature that requires a license. For
example, you currently support Windows Media, but want to add Real Media support. The license
must be updated to allow this support.
To Update a License through the Management Console:
1.
Select Maintenance>Licensing>Install.
2.
Click Register/Manage.
3.
Follow the instructions on the Blue Coat License Self-Service Web page.
4.
If using the automatic license installation feature, click Update; otherwise, manually install the
license as described in "Manual License Installation" on page 41.
To Update a License through the CLI:
At the enable prompt, enter the following command:
SGOS# licensing update-key
44
Chapter 2: Licensing
Automatically Updating a License
The license automatic update feature allows the ProxySG to contact the Blue Coat licensing Web page
31 days before the license is to expire. If a new license has been purchased and authorized, the license
is automatically downloaded. The ProxySG continues to contact the Web site up to 30 days after the
license is set to expire. Outside the above license expiration window, the ProxySG performs this
connection once every 30 days to check for new license authorizations. This feature is enabled by
default.
To Configure the License Auto-Update Feature through the Management Console:
1.
Select Maintenance>Licensing>Install.
2.
Select Use Auto-Update.
3.
Click Apply.
To Configure the License Auto-Update Feature through the CLI:
At the (config) prompt, enter the following command:
SGOS# (config) license-key path url
SGOS# (config) license-key auto-update {enable | disable}
Note:
If the automatic license update fails and you receive a Load from Blue Coat error,
you must log on to your License Management account:
https://services.bluecoat.com/eservice_enu/licensing/mgr.cgi. Click Update
License Key.
45
Blue Coat ProxySG Configuration and Management Guide
46
Chapter 3:
Accessing the ProxySG
The Blue Coat Systems ProxySG uses the Secure Shell (SSH) and HTTPS protocols to securely access
the ProxySG CLI and Management Console. Both SSHv1 and SSHv2 are enabled by default, and host
keys have already been created on the ProxySG.
All data transmitted between the client and the ProxySG using SSH/HTTPS is encrypted.
During initial configuration, you assigned the ProxySG a username and password and a
privileged-mode (enabled/configuration) password. These passwords are always stored and
displayed hashed.
This chapter discusses:
•
"Before You Begin: Understanding Modes"
•
"Accessing the ProxySG"
•
"Management Console Home Page"
•
"Changing the Logon Parameters"
•
"Configuring the SSH Console"
Important: This chapter assumes that you have completed the first-time setup of the ProxySG
using either the front panel or serial console, and that the appliance is running on the
network. These steps must be completed before accessing the appliance.
You can manage the ProxySG by logging on to and using one of the following:
•
An SSH session to access the CLI.
•
The Management Console graphical interface.
You can also use a serial console to access the CLI.
Note:
To use a Telnet session, you must use a serial console connection until you have
configured Telnet for use. (For security reasons Blue Coat does not recommend using
Telnet).
Before You Begin: Understanding Modes
SGOS 4.x supports different levels of command security:
•
Standard, or unprivileged, mode is read-only. You can see but not change system settings and
configurations. This is the level you enter when you first access the CLI.
•
Enabled, or privileged, mode is read-write. You can make immediate but not permanent changes
to the ProxySG, such as restarting the box. This is the level you enter when you first access the
Management Console.
47
Blue Coat ProxySG Configuration and Management Guide
•
Configuration is a mode within the enabled mode. From this level, you can perform permanent
changes to the ProxySG configuration.
If you use the Management Console, you are in configuration mode when you are completely logged
on to the system.
If you use the CLI, you must enter each level separately:
Username: admin
Password:
SGOS> enable
Enable Password:
SGOS# configure terminal
Enter configuration commands, one per line. End with CTRL-Z.
SGOS#(config)
For detailed information about the CLI and the CLI commands, refer to the Blue Coat ProxySG
Command Line Reference.
Note:
Although most administrator tasks can be performed using either the Management
Console or the CLI, there is the occasional task that can only be done using one of the two:
these are specified in the manual.
Accessing the ProxySG
You can access the ProxySG through either the CLI or the Management Console. By default, SSHv2
(CLI) and HTTPS (Management Console) are used to connect to the appliance.
The SSH and HTTPS ports are configured and enabled. For SSH, you can use either version 1 or
version 2 (with password or RSA client key authentication).
Accessing the CLI
If you use the CLI, you can use SSHv2 to access the ProxySG, but you cannot use SSHv1 or Telnet
without additional configuration.
Note:
Enabling the Telnet-Console introduces a security risk, so it is not recommended.
To use SSHv1, you must first create an SSHv1 host key. For more information on creating SSH host
keys, see "Configuring the SSH Console" on page 55.
To log on to the CLI, you must have:
•
the account name that has been established on the ProxySG
•
the IP address of the ProxySG
•
the port number (8082 is the default port number)
You must log on from your SSH client.
48
Chapter 3: Accessing the ProxySG
Accessing the Management Console
The Management Console is a graphical Web interface that allows you to manage, configure, monitor,
and upgrade the ProxySG from any location.
In the Web browser, enter HTTPS, the ProxySG IP address, and port 8082 (the default management
port). For example, if the IP address configured during first-time installation is 10.25.36.47, enter the
URL https://10.25.36.47:8082 in the Web browser.
The Management Console consists of a set of Web pages and Java applets stored on the ProxySG. The
appliance acts as a Web server on the management port to serve these pages and applets. From the
ProxySG home page on the appliance, you can access the management applets, statistics applets, and
documentation. The Management Console is supported with a complete online help facility to assist
you in defining the various configuration options.
Note:
If, when you access the Management Console home page, you get a “host mismatch” or
an “invalid certificate” message, you need to recreate the security certificate used by the
HTTPS-Console. For information on changing the security certificate, see "HTTPS Console
(Secure Console)" on page 122.
Management Console Home Page
When you access the Management Console home page (see "Accessing the Management Console" on
page 49), you are prompted to log on to the box.
Logging On
Each time you access the Management Console, you must log on.
Figure 3-1: Logon Dialog
•
The Site is the IP address of the ProxySG to which you are logging on.
•
The Realm is a configurable name that can be anything you choose. The ProxySG IP address is the
default. For more information on configuring the realm name, see "Changing the ProxySG Realm
Name" on page 53.
•
The User Name is the name of the account you are using on this ProxySG. The name must already
exist. It cannot be created here.
•
The Password is the password for the account you are using. It cannot be changed here.
49
Blue Coat ProxySG Configuration and Management Guide
You can change the username and password for the console through the Management Console or the
CLI. See "Changing the Logon Parameters" on page 50.
Note:
All successful and failed logon attempts are logged to the ProxySG event log.
Logging Out
Once you have logged on, you do not have to log on again unless you exit the current session or the
session times out. The session timeout period, with a default of 900 seconds (15 minutes), is
configurable.
Thirty seconds before the session times out, a warning dialog displays. Click the Keep Working button
or the X in the upper-right-corner of the dialog box to keep the session alive.
Note:
The Keep Working button saves your changes to the current applet. You cannot work in
other applets without logging back on to the ProxySG.
Figure 3-2: Automatic Logout Warning
If you do not click Keep Working or the X in the upper-right-hand corner within the thirty-second
period, you are logged out. You must log back on to access the Management Console.
Figure 3-3: Logout Dialog
Click the hyperlink to log back on to the ProxySG.
Note:
If no applet is running when the session times out (you are on the Management Console
home page), you are logged out without seeing the logout warning dialog. You might not
be aware that you are logged out until you try to access an applet. You must enter the
logon information again.
Changing the Logon Parameters
You can change the console username and password, the console realm name (which displays when
you log on to the ProxySG), and the auto-logout timeout (in seconds; the default is 900 seconds.)
50
Chapter 3: Accessing the ProxySG
The Management Console requires a valid administrator username and password to have full
read-write access; you do not need to enter a privileged-mode password as you do when using the
CLI. A privileged-mode password, however, must already be set.
Note:
To prevent unauthorized access to the ProxySG, only give the console username and
password to those who administer the ProxySG.
Changing the Username and Password through the Management Console
You can change either the username or the password without changing both.
Changing the Username through the Management Console
The console account username was assigned during initial setup of the system. You can change the
username at any time.
To Change the Username through the Management Console:
1.
Select Configuration>Authentication>Console Access>Console Account.
The Console Account tab displays.
Figure 3-4: Console Account Tab
Note:
2.
Changing the Console Account username or password causes the Management Console
to refresh and log back on using the new information. Note that each parameter must be
changed and individually refreshed. You cannot change both parameters at the same time.
Enter the username of the administrator or administrator group who is authorized to view and
revise console properties.
Only one console account exists on the ProxySG. If you change the console account username, that
username overwrites the existing console account username.
The console account username can be changed to anything that is not null and contains no more
than 64 characters.
3.
Click Apply.
51
Blue Coat ProxySG Configuration and Management Guide
After clicking Apply, an Unable to Update configuration error is displayed. The username change was
successfully applied, but the configuration could not be fetched from the ProxySG, as the
username offered in the fetch request is still the old username.
4.
Refresh the screen. You are then challenged for the new username.
To Change the Password through the Management Console:
The console password and privileged-mode password were defined during initial configuration of the
system. The console password can be changed at any time through the Management Console. The
privileged-mode, or enabled-mode, password can only be changed through the CLI or the serial
console.
1.
Select Configuration>Authentication>Console Access>Console Account.
The Console Account tab displays.
2.
Click Change Password.
Figure 3-5: Setting or Changing a Password
3.
Enter and re-enter the console password that is used to view and edit configuration information.
The password must be from 1 to 64 characters long. As you enter the new password, it is obscured
with asterisks. Click OK.
Note:
This does not change the enabled-mode password. You can only change the
enabled-mode password through the CLI.
4.
Refresh the screen, which forces the ProxySG to re-evaluate current settings. When challenged,
enter the new password.
5.
(Optional) Restrict access by creating an access control list or by creating a policy file containing
<Admin> layer rules. For more information, see "Moderate Security: Restricting Management
Console Access Through the Console Access Control List (ACL)" on page 247.
Changing the Username and Password through the CLI
To Change the Console Account Username or Password, Privileged-Mode Password, and the
Front-Panel PIN through the CLI:
1.
Open a terminal session with the ProxySG and enter the current username and password as
prompted.
2.
At the command prompt, enter the following command:
SGOS> enable
52
Chapter 3: Accessing the ProxySG
3.
Enter the privileged-mode password when prompted.
4.
At the command prompt, enter the following commands (note that usernames and passwords can
each be from 1 to 64 characters in length, but that passwords need to be in quotes):
SGOS#configure terminal
SGOS#(config) security username username
This command specifies the administrator username.
SGOS#(config) security password “password”
-orSGOS#(config) security hashed-password hashed_password
These commands specify the administrator console password.
SGOS#(config) security enable-password “password”
-orSGOS#(config) security hashed-enable-password hashed_password
These commands specify the administrator privileged-mode password. The ProxySG
hashes the password if you enter it in clear text.
5.
(Optional, for maximum security. Note that these commands are not available if the ProxySG does
not have a front panel.) At the command prompt, change the ProxySG front panel PIN:
SGOS#(config) security front-panel-pin pin
-orSGOS#(config) security hashed-front-panel-pin hashed-pin
6.
(Optional) Restrict access by creating an access control list or by creating a policy file containing
<Admin> layer rules. For more information, see Section A: “Controlling Access to the ProxySG” on
page 243.
Changing the ProxySG Realm Name
The realm name displays when you log on to the ProxySG Management Console. The default realm
name is the connection used to access the ProxySG, usually the IP address of the system.
To Change the Realm Name through the Management Console:
1.
Select Configuration>Authentication>Console Access>Console Account.
The Console Account tab displays.
2.
Enter a new realm name.
The new realm name displays the next time you log on to the ProxySG Management Console.
3.
Click Apply.
To Change the Realm Name through the CLI:
1.
At the (config) prompt, enter the following command to change the name from the default.
SGOS#(config) security management display-realm name
The new realm name displays the next time you log on to the ProxySG Management
Console.
2.
(Optional) View the results. As the show security command displays lengthy output, only the
relevant section is displayed in the following example:
53
Blue Coat ProxySG Configuration and Management Guide
SGOS#(config) show security
Account:
Username:
"admin"
Hashed Password: $1$aWMpN$/dsvVrZK6R68KH8r2SQxt/
Hashed Enable Password: $1$P4lpm$ZqFXg4J4A/T.ORgUbr0B/1
Hashed Front Panel PIN: "$1$GGSf2$lEhLm9oITgny9PDF2kVFp."
Management console display realm name: ""
Management console auto-logout timeout: Never
You can negate the security management display-realm values by entering no before the
command; for example, security management no display-realm.
Changing the ProxySG Timeout
The timeout is the length of time a session persists before you are logged out. The default timeout is
900 seconds (15 minutes).
To Change the Timeout through the Management Console:
1.
Select Configuration>Authentication>Console Access>Console Account.
The Console Account tab displays.
2.
Either deselect Enforce auto-logout (which eliminates auto-logout entirely) or change the
auto-logout timeout from its default of 900 seconds (15 minutes) to another time (in seconds). This
is the allowable time on the ProxySG before the current session times out. Acceptable values are
between 300 and 86400 seconds (5 minutes to 24 hours).
If you change the timeout value, the change takes effect on the next refresh of any applet on the
Management Console.
3.
Click Apply.
To Change the Timeout through the CLI:
1.
To change the timeout from its default of 900 seconds (15 minutes), enter:
SGOS#(config) security management auto-logout-timeout seconds
The change takes effect on the next refresh of any applet in the Management Console. Acceptable
values are between 300 and 86400 seconds (5 minutes to 24 hours).
2.
(Optional) View the results. As the show security command displays lengthy output, only the
relevant section is displayed in the following example:
SGOS#(config) show security”
Account:
Username:
“admin”
Hashed Password: $1$a2zTlEE$1b88R3SXUTXS.zO7lh8db0
Hashed Enable Password: $1$xQnqGerX$LU65b20trsIAF6yJox26L.
Hashed Front Panel PIN: "$1$ThSEiB1v$seyBhSxtTXEtUGDZ5NOB1/"
Management console display realm name: "Aurora"
Management console auto-logout timeout: Never
You can negate the security management auto-logout-timeout values by entering no
before the command; for example, security management no auto-logout-timeout.
54
Chapter 3: Accessing the ProxySG
Configuring the SSH Console
By default, the ProxySG uses Secure Shell (SSH) and password authentication so administrators can
access the ProxySG CLI or Management Console securely. SSH is a protocol for secure remote logon
over an insecure network. No action is required unless you want to change the existing SSH host key,
disable a version of SSH, or import RSA host keys. Only one SSH service is allowed on the ProxySG.
To disable the SSH port, see "Managing the SSH Host Connection" below.
Managing the SSH Host Connection
You can manage the SSH host connection through either the Management Console or the CLI.
To Manage the SSH Connection through the Management Console:
Note:
1.
Only one SSH Console can be enabled at a time. By default, both SSHv1 and SSHv2 are
enabled and assigned to port 22. You do not need to create a new host key unless you
want to change the existing configuration.
Select Configuration>Services>SSH Console>SSH Host.
The SSH Host tab displays.
Figure 3-6: SSH Host Tab
2.
To delete either SSHv1 or SSHv2 support on the ProxySG, click the appropriate Delete button.
The change is made on the ProxySG instantly.
Important:
Do not delete both versions. This disables the SSH Console. Even if you add SSHv1
or SSHv2 client keys back, you will have to enable the service through
Configuration>Services>Service Ports.
The SSH host tab redisplays with the appropriate host key deleted.
3.
To add SSHv1 or v2 support, select the Create checkbox for the version you want. Remember that
if both versions are deleted, you must re-enable the SSH service on port 22.
4.
The SSH host key displays in the appropriate pane.
55
Blue Coat ProxySG Configuration and Management Guide
To Manage SSH Host Keys through the CLI:
Note:
Only one SSH Console can be enabled at a time. By default, both SSHv1 and SSHv2 are
enabled and set up on port 22. You do not need to create a new host key unless you want
to change the existing configuration. In fact, you cannot create a new host key unless you
delete one of the existing client keys.
You must set up RSA client keys to connect to the ProxySG using RSA. To set up RSA client keys, see
"Managing the SSH Client" below.
1.
From the (config) prompt of the ProxySG, enter the following commands to create a host key.
SGOS#(config) services
SGOS#(config services) ssh-console
SGOS#(config services ssh-console) create host-keypair [sshv1 | sshv2]
The client key, either SSHv1 or SSHv2 or both, is created, depending on which client key
was previously deleted.
2.
(Optional) View the results.
SGOS#(config services ssh-console) view host-public-key [sshv1 | sshv2]
1024 35
190118975106704546356706163851813093052627858203406609264841510464285480824
068799445880489701889675368436600545643174140823440610328520806007156774811
989754027101280816905716431491183274963949027032871437205903863441301419664
1366408168414061584835486361481236628643756053169543839452802141370496747163
3977037
ssh-rsa
AAAAB3NzaC1yc2EAAAABIwAAAIEA2rSeDb3vhr78AFmd7TbdtziYfUQybaDxdMBbSLuyJVgwVbq+
tIvS4L6kDsTuFYGVR8Cg74Xqsj2kO6iwo71YGwdUnDXEzIFBwl0nvS4LkV2UINUwbuP0R0hD4Dt
jVTKsURrOHbTxcXkFipplDwFPDiCKOIqLm4ypcaC/Pj+Juq0=
3.
To disable SSH, enter:
SGOS#(config services ssh-console) delete host-keypair [sshv1 | sshv2]
Deleting both of the client keys disables the SSH service on port 22, which then must be
re-enabled before you can use SSH Console services again, even if you re-create the host
keys.
Managing the SSH Client
You can have multiple RSA client keys on the ProxySG to allow for actions such as logging on to the
ProxySG from different locations. You cannot create an RSA client key through the appliance, only
through an SSH client. Many SSH clients are commercially available for UNIX and Windows.
Once you have created an RSA client key following the instructions of your SSH client, you can
import the key onto the ProxySG using either the Management Console or the CLI.
Understanding OpenSSH.pub Format
Blue Coat supports the OpenSSH.pub format. Keys created in other formats will not work.
An OpenSSH.pub public key is similar to the following:
56
Chapter 3: Accessing the ProxySG
ssh-rsa
AAAAB3NzaC1yc2EAAAABIwAAAIEAwFI78MKyvL8DrFgcVxpNRHMFKJrBMeBn2PKcv5oAJ2qz+uZ7
hiv7Zn43A6hXwY+DekhtNLOk3HCWmgsrDBE/NOOEnDpLQjBC6t/T3cSQKZjh3NmBbpE4U49rPdu
iiufvWkuoEiHUb5ylzRGdXRSNJHxxmg5LiGEiKaoELJfsDMc= user@machine
One of the public key format examples (this one created by the SSH client) is similar to the following:
---- BEGIN SSH2 PUBLIC KEY ---Comment: “[1024-bit rsa, user.name@machine, Wed Feb 19 2003 19:2\8:09]”
AAAAB3NzaC1yc2EAAAADAQABAAAAgQCw52JeWr6Fv4kLkzbPZePvapCpaTadPYQwqsGnCIYdf1W
e7/8336EmzV918G1jb/VT1SI1tM1Ku1BTal7uWAi+aUBGKLlYuyhCTo03IZFMnsQC7QYzY1y3ju
fUP3H0be52fg7n7p7gNZR11yzWhVei1vIKiyVKpjqiq6hxCbMb2Q==
---- END SSH2 PUBLIC KEY ----
The OpenSSH.pub format appends a space and a user ID to the end of the client key.
The user ID for the key must be unique. Because the ProxySG manages the keys through the user, no
two can be the same.
Other caveats:
•
1024 bits is the maximum supported key size.
•
An ssh-rsa prefix must be present.
•
Trailing newline characters must be removed from the key before it is imported.
To Import RSA Client Keys through the Management Console:
1.
From your SSH client, create a client key and copy it to the clipboard.
Note:
2.
The above step must be done with your SSH client. The ProxySG cannot create client keys.
Select Configuration>Services>SSH Console>SSH Client.
The SSH Client tab displays.
Figure 3-7: SSH Client Tab
3.
Click Import to import a new host key.
The Import Client Key dialog displays.
57
Blue Coat ProxySG Configuration and Management Guide
Figure 3-8: Import Client Key Dialog
4.
Specify whether the client key is associated with an existing user or a new user, and enter the
name.
5.
Paste the RSA key that you previously created with an SSH client into the Client key field. Ensure
that a key ID is included at the end. Otherwise, the import fails.
6.
Click OK.
The SSH Client tab reappears, with the fingerprint of the imported key displayed.
Figure 3-9: SSH Client with Imported Client Key
To Import a Client Key through the CLI:
58
1.
From your SSH client, create a client key and copy it to the clipboard.
2.
From the (config) prompt, enter the following commands to import a client key.
Chapter 3: Accessing the ProxySG
SGOS#(config) services
SGOS#(config services) ssh-console
SGOS#(config ssh-console) import client-key user_name
Paste client key here, end with “...” (three periods)
ssh-rsaAAAAB3NzaC1yc2EAAAABIwAAAIEAtAy+axsx0iwroFN7B9qSJYjfVbsxPfyC0aoZpSMBd
g97/oiFozDXPhrRmPI3c42EiVdJtVo65r0Aerpu4ybCYVeq6MjRwdsszaezY+VdqtfyYVptC6V1
7Pmj2erw4+A9AggKHTp56BBCm3mEPQDdVW7J6QBrJ+U1ClFS/sMcbV8=laptop@GLYPH
...
ok
3.
(Optional) View the results.
SGOS#(config services ssh-console) view client-key username
user_ID@PC 45:5C:3F:5F:EA:65:6E:CF:EE:4A:05:58:9A:C5:FB:4F
user_ID@LAPTOP 61:ED:79:23:F5:2A:1A:6D:84:81:A0:5B:25:36:C7:5F
Note:
If you have upgraded from an older version ProxySG, and you want to view a
previously imported client key, you might not need to enter a username.
59
Blue Coat ProxySG Configuration and Management Guide
60
Chapter 4:
Configuring the System
This chapter describes how to configure various ProxySG system configurations, such as setting the
time, configuring adapters, and creating software bridges.
This chapter contains the following topics:
•
"Global Configurations"
•
"Archive Configuration"
•
"Adapters"
•
"Software and Hardware Bridges"
•
"Gateways"
•
"Defining Static Routes"
•
"Using RIP"
•
"DNS"
•
"Attack Detection"
•
"Installing WCCP Settings"
•
"Virtual IP Addresses"
•
"Configuring Failover"
•
"TCP-IP Configuration"
During initial configuration, Interface 0 was configured by default. The NTP server was defined to
keep the system time correct. You also optionally configured a bridge, a gateway, and a DNS server.
These configurations require no further modification. These procedures are provided if you need to
configure other adapters in the system or if the need to change a configuration occurs.
Global Configurations
The ProxySG global configurations include: defining the ProxySG name and serial number, setting the
time, and configuring NTP for your environment.
Configuring the ProxySG Name
You can assign any name to a ProxySG. A descriptive name helps identify the system.
To Set the ProxySG Name through the Management Console:
1.
Select Configuration>General>Identification.
The Identification tab displays.
61
Blue Coat ProxySG Configuration and Management Guide
Figure 4-1: General Identification Tab
2.
In the Unique name for this ProxySG Appliance field, enter a ProxySG name.
3.
Click Apply.
To Set the ProxySG Name through the CLI:
At the (config) command prompt, enter the following command:
SGOS#(config) hostname name
Configuring the Serial Number
The ProxySG serial number assists Blue Coat Systems Customer Support when analyzing
configuration information, including heartbeat reports. This number is found on the ProxySG. Once
the serial number is entered, the ProxySG does not verify the validity of the number, only that it is
numeric.
Note:
If the EPROM contains the ProxySG serial number, you cannot manually enter a serial
number.
To Enter the Serial Number through the Management Console:
1.
Select Configuration>General>Identification.
The Identification tab displays.
2.
In the Serial Number field, enter the serial number.
3.
Click Apply.
To Enter the Serial Number through the CLI:
At the (config) command prompt, enter the following command:
SGOS#(config) serial-number serial_number
62
Chapter 4: Configuring the System
Displayed Information
The serial number is visible on the Management Console home page. and is displayed using the show
serial-number command. If the serial number was entered through the Management Console or the
CLI, it is appended with (configured) to indicate a manual entry.
Configuring the System Time
To manage objects, the ProxySG must know the current Universal Time Coordinates (UTC) time,
which is the international time standard and is based on a 24-hour clock.
By default, the ProxySG attempts to connect to an NTP server to acquire the UTC time. The appliance
ships with a list of NTP servers available on the Internet, and attempts to connect to them in the order
they appear in the NTP server list on the NTP tab. If the appliance cannot access any of the listed NTP
servers, you must manually set the UTC time.
To Set UTC Time through the Management Console:
1.
Select Configuration>General>Clock>Clock.
The Clock tab displays.
Figure 4-2: General Clock Tab
2.
Verify that Enable NTP is selected.
3.
To set your local time, select a time zone from the Timezone drop-down list.
Once the local time zone is selected, event logs record the local time instead of GMT.
4.
Click Acquire UTC time.
5.
Click Apply.
63
Blue Coat ProxySG Configuration and Management Guide
To Set UTC Time through the CLI:
At the enable prompt, enter the following command:
SGOS# acquire-utc
If NTP is disabled, an error is displayed.
To Manually Set UTC Time through the Management Console:
1.
Select Configuration>General>Clock>Clock.
The Clock tab displays.
2.
De-select Enable NTP.
The UTC time and date fields become editable when NTP is disabled.
3.
To set your local time, select a time zone from the Timezone drop-down list.
Once the local time zone is selected, event and access logs record the local time instead of GMT.
4.
Click Pause in the upper-right-hand corner to stop the system clock.
5.
Enter the current UTC time and date in the UTC time and date fields.
6.
Click Resume to start the system clock.
7.
Click Apply.
To Manually Set UTC Time through the CLI:
1.
At the (config) command prompt, enter the following commands
SGOS#(config)
SGOS#(config)
SGOS#(config)
SGOS#(config)
SGOS#(config)
SGOS#(config)
2.
clock
clock
clock
clock
clock
clock
day 1-31
hour 0-23
minute 0-59
month 1-12
second 0-59
year year
(Optional) View the results.
SGOS#(config) show clock
2003-08-28 22:50:56+00:00UTC
2003-08-28 22:50:56+00:00UTC
Network Time Protocol
The Network Time Protocol (NTP) is used to synchronize the time of a computer client or server to
another server or reference time source, such as a radio or satellite receiver or modem. There are more
than 230 primary time servers, synchronized by radio, satellite and modem.
The ProxySG ships a list of NTP servers available on the Internet, and attempts to connect to them in
the order they appear in the NTP server list on the NTP tab. You can add others, delete NTP servers,
and reorder the NTP server list to give a specific NTP server priority over others.
The ProxySG uses NTP and the Universal Time Coordinates (UTC) to keep the system time accurate.
You can add and reorder the list of NTP servers the ProxySG uses for acquiring the time through the
Management Console. The reorder feature is not available through the CLI.
64
Chapter 4: Configuring the System
To Add an NTP Server through the Management Console:
1.
Select Configuration>General>Clock>NTP.
The NTP tab displays.
Figure 4-3: General Clock NTP Tab
2.
Click New to add a new server to the list.
3.
Enter either the domain name or IP address of the NTP server and click OK.
4.
Click Apply.
To Add an NTP Server through the CLI:
1.
At the (config) command prompt, enter:
SGOS#(config) ntp server domain_name
SGOS#(config) ntp interval minutes
SGOS#(config) ntp enable
2.
(Optional) View the results.
SGOS#(config) show ntp
NTP is enabled
NTP servers:
ntp.bluecoat.com
ntp2.bluecoat.com
Query NTP server every 60 minutes
3.
To remove a server from the NTP server list:
SGOS#(config) ntp no server domain_name
To Change the Access Order through the Management Console:
NTP servers are accessed in the order displayed. You can organize the list of servers so the preferred
server appears at the top of the list. This feature is not available through the CLI.
1.
Select Configuration>General>Clock>NTP.
The NTP tab displays.
65
Blue Coat ProxySG Configuration and Management Guide
2.
Select an NTP server to promote or demote.
3.
Click Promote entry or Demote entry as appropriate.
4.
Click Apply.
Configuring HTTP Timeout
You can configure various network receive timeout settings for HTTP transactions. You can also
configure the maximum time that the HTTP proxy waits before reusing a client-side or server-side
persistent connection. You must use the CLI to configure these settings.
To Configure the HTTP Receive Timeout Setting through the CLI:
At the (config) command prompt, enter the following command:
SGOS#(config) http receive-timeout {client | refresh | server} #_seconds
where:
client
#_seconds
Sets the receive timeout for client to #_seconds. The
default is 120 seconds.
refresh
#_seconds
Sets receive timeout for refresh to #_seconds. The default
is 90 seconds.
server
#_seconds
Sets receive timeout for server to #_seconds. The default
is 180 seconds.
To Configure the HTTP Persistent Timeout Setting through the CLI:
At the (config) command prompt, enter the following command:
SGOS#(config) http persistent-timeout {client | server} #_seconds
where:
client
#_seconds
The maximum amount of time the HTTP proxy waits
before closing the persistent client connection if another
request is not made. The default is 360 seconds.
server
#_seconds
The maximum amount of time the HTTP proxy waits
before closing the persistent server connection if that
connection is not re-used for any subsequent request
from the proxy. The default is 900 seconds.
Archive Configuration
Blue Coat allows you to both use an existing configuration (modified to include only general
parameters, not system-specific settings) to quickly set up a newly-manufactured ProxySG and to
save the running configuration off-box for archival purposes.
To share configurations among systems, continue with the next section; to archive a configuration for
later use, skip to "Archiving a Configuration" on page 69.
66
Chapter 4: Configuring the System
Sharing Configurations
You can share configuration between two ProxySG Appliances. You can take a post-setup configuration
file (one that does not include those configuration elements that are established in the setup console)
from an already-configured ProxySG and push it to a newly-manufactured system.
Note:
Blue Coat Director allows you to push configuration from one ProxySG to multiple
ProxySG Appliances at the same time. For more information on using Director, see
Appendix F: “Using Blue Coat Director to Manage Multiple Appliances” on page 963.
The new configuration is applied to the existing configuration, changing any existing values. This
means, for instance, that if the new configuration creates a realm called RealmA and the existing
configuration has a realm called RealmB, the combined configuration includes two realms, RealmA and
RealmB.
You can use either the Management Console or the CLI to create a post-setup configuration file on one
ProxySG and push it to another.
Note:
You cannot push configuration settings to a newly manufactured system until you have
completed initial setup of the system.
To Create and Push a Configuration to a Newly Manufactured ProxySG through the Management
Console:
From the already configured ProxySG:
1.
Select Configuration>General>Archive.
The Archive Configuration tab displays.
Figure 4-4: Archive Configuration Tab
2.
In the View Current Configuration panel, select the configuration from the drop-down list that you
want to use for the newly-manufactured machine:
67
Blue Coat ProxySG Configuration and Management Guide
❐
Configuration - post setup: This displays the configuration on the current system, minus any
configurations created through the setup console, such as the hostname and IP address. It also
includes the installable lists.
❐
Configuration - brief: This displays the configuration on the current system, but does not include
the installable lists.
❐
Configuration - expanded: This is the most complete snapshot of the system configuration, but it
contains system-specific settings that should not be pushed to a new system.
❐
Results of Configuration Load: This displays the results of the last configuration pushed to the
system.
3.
View the configuration you selected by clicking View. You can also view the file by selecting Text
Editor in the Install Configuration panel and clicking Install.
4.
Save the configuration. You can save the file two ways:
❐
Save it as a text file on your local system. This is advised if you want to re-use the file.
❐
Copy the contents of the configuration. (You will paste the file into the Text Editor on the
newly-manufactured system.)
From the newly-manufactured ProxySG:
1.
Launch the Management Console in a new browser window.
2.
Select Configuration>General>Archive.
3.
The Archive Configuration tab displays.
4.
In the Install Configuration panel, select either Local File or Text Editor from the drop-down list
(depending on whether you saved the file to your system or just copied it to the clipboard) and
click Install.
❐
If you saved the file to your system, browse to the location of the Local File, highlight the file,
and click Install. The configuration is installed, and the results screen displays.
❐
If you copied the contents of the file, paste it into the Text Editor and click Install. The
configuration is installed, and the results screen displays.
Note:
5.
A message is written to the event log when you install a list through the ProxySG.
Click Close.
To Create and Push a Configuration to a Newly Manufactured ProxySG through the CLI:
From the already configured ProxySG:
1.
From the enable prompt (#), determine which configuration you want to use for the new system.
The syntax is:
show configuration post-setup | brief | expanded
where:
Configuration - post setup
68
This displays the configuration on the current system, minus any
configurations created through the setup console, such as the
hostname and IP address. It also includes the installable lists.
Chapter 4: Configuring the System
Configuration - brief:
This displays the configuration on the current system, but does not
include the installable lists.
Configuration - expanded
This is the most complete snapshot of the system configuration, but it
contains system-specific settings that should not be pushed to a new
system.
SGOS# show configuration post-setup
The selected configuration displays on the screen.
2.
Save the configuration. You can save the file two ways:
❐
Copy the contents of the configuration to the clipboard. (You will paste the file into the
terminal on the newly-manufactured system.)
❐
Save it as a text file on a download FTP server accessible to the ProxySG. This is advised if you
want to re-use the file.
From the newly-manufactured ProxySG, do one of the following:
•
If you saved the configuration to the clipboard, go to the (config) prompt and paste the
configuration into the terminal.
•
If you saved the configuration on the FTP server:
At the enable command prompt, enter the following command:
SGOS# configure network “url”
where url must be in quotes and is fully-qualified (including the protocol, server name or
IP address, path, and filename of the configuration file). The configuration file is
downloaded from the server, and the ProxySG settings are updated.
Note:
If you rename the archived configuration file so that it does not contain any
spaces, the quotes surrounding the URL are unnecessary.
The username and password used to connect to the FTP server can be embedded into the
URL. The format of the URL is:
ftp://username:password@ftp-server
where ftp-server is either the IP address or the DNS resolvable hostname of the FTP
server.
If you do not specify a username and password, the ProxySG assumes that an anonymous
FTP is desired and thus sends the following as the credentials to connect to the FTP server:
username: anonymous
password: proxy@
Archiving a Configuration
In the rare case of a complete system failure, restoring a ProxySG to its previous state is simplified by
loading an archived system configuration from an FTP or TFTP server. The archive, taken from the
running configuration, contains all system settings differing from system defaults, along with any
installable lists configured on the ProxySG.
Archive and restore operations must be done through the CLI.
69
Blue Coat ProxySG Configuration and Management Guide
Note:
You can archive a system configuration to an FTP or TFTP server that allows either
anonymous logon or requires a specific username and password. Likewise, to restore a
system configuration, the server storing the archive can be configured either to allow
anonymous logon or to require a username and password.
Preparing to Archive a System Configuration
1.
Obtain write permission to a directory on an FTP server. This is where the archive will be stored.
The system configuration must be stored using FTP.
2.
At the (config) command prompt, enter the following commands:
SGOS#(config) archive-configuration protocol {ftp | tftp}
SGOS#(config) archive-configuration host host_name
where host_name is the IP address of the server.
Note:
TFTP does not require a password, path, or username.
SGOS#(config) archive-configuration password password
-orSGOS#(config) archive-configuration encrypted-password encrypted-password
where password is the password (or encrypted password) used to access the server.
SGOS#(config) archive-configuration path path
where path is the directory on the server where the archive is to be stored, relative to the
preset FTP directory.
SGOS#(config) archive-configuration filename-prefix filename
where filename can contain % strings that represent the information in the upload
filename. If you do not use the filename command, the ProxySG creates a name with a
timestamp and the filename SG_last-ip-octet_timestamp. For % string substitutions,
see "Fields Available for Creating Access Log Formats" on page 882.
SGOS#(config) archive-configuration username username
where user_name is the username used to access the server.
Example Session
SGOS#(config)
ok
SGOS#(config)
ok
SGOS#(config)
ok
SGOS#(config)
ok
SGOS#(config)
ok
Note:
70
archive-configuration host 10.25.36.47
archive-configuration password access
archive-configuration username admin1
archive-configuration path ftp://archive.server/stored
archive-configuration protocol ftp
To clear the host, password, or path, type the above commands using empty
double-quotes instead of the variable. For example, to clear the path, enter
archive-configuration path “”.
Chapter 4: Configuring the System
To Archive a System Configuration through the CLI:
At the enable command prompt, enter the following command:
SGOS# upload configuration
To Restore a System Configuration through the CLI:
At the enable command prompt, enter the following command:
SGOS# configure network “url”
where url must be in quotes and is fully-qualified (including the protocol, server name or
IP address, path, and filename of the configuration file). The configuration file is
downloaded from the server, and the ProxySG settings are updated.
Note:
If you rename the archived configuration file so that it does not contain any
spaces, the quotes surrounding the URL are unnecessary.
The username and password used to connect to the FTP server can be embedded into the URL. The
format of the URL is:
ftp://username:password@ftp-server
where ftp-server is either the IP address or the DNS resolvable hostname of the FTP
server.
If you do not specify a username and password, the ProxySG assumes that an anonymous FTP is
desired and thus sends the following as the credentials to connect to the FTP server:
username: anonymous
password: proxy@
Adapters
This section describes ProxySG network adapters and the adapter interfaces.
Note:
In Blue Coat documentation, the convention for adapters and their interfaces (the
connections on the adapter) is Adapter 0, Interface 0, or 0:0.
About Adapters
ProxySG Appliances ship with one or more network adapters installed on the system, each with one
or more interfaces. You can change interface parameters or configure additional adapters in the
appliance. You can also accept or reject inbound connections, change link settings in the event the
system did not correctly determine them, and configure the browser for proxy settings.
Network Interface States
As you select adapters from the picklist, the Adapter panel (Configuration>Network>Adapters) displays the
state of the configured adapter and its interfaces. When you initially set up the ProxySG, you
optionally configured Adapter 0, Interface 0. If your system has only one adapter, you can skip this
section. If your system shipped with other adapters, you can configure them through these
procedures.
71
Blue Coat ProxySG Configuration and Management Guide
Configuring an Adapter
The following procedure describes how to configure an adapter. Repeat the process if the system has
additional adapters.
To Configure a Network Adapter through the Management Console:
1.
Select Configuration>Network>Adapters>Adapters.
The Adapters tab displays.
Note:
Different ProxySG models have different adapter configurations, and the appearance of
the Adapters tab varies accordingly.
Figure 4-5: Network Adapters Tab
2.
Select an adapter from the Adapter drop-down list.
Notice that in the Interfaces field, a message displays stating whether the interface belongs to a
bridge. For more information about network bridging, see "Software and Hardware Bridges" on
page 75.
3.
(Optional) If you have a dual interface adapter, select an interface from the drop-down list.
4.
Enter the IP address and subnet mask for the interface into the IP address for interface x and Subnet
mask for interface x fields (where interface x refers to the interface selected in the Interfaces
drop-down list.)
5.
(Optional) To configure link settings, restrict inbound connections, or set up browser proxy
behavior for the adapter, select the adapter (under Interfaces) and click Settings. Enter any changes
and click OK to close the Settings dialog.
Note:
6.
Click Apply.
REVIEWERS:
72
The default is to permit all inbound connections. Link settings are automatically
determined and should not need to be modified. The browser default is to use the proxy’s
default PAC file. (See "About the Settings Button" below for more information on link
settings and inbound connections.)
Either the command is wrong (bug-worthy) or the documentation is wrong.
Chapter 4: Configuring the System
To Configure a Network Adapter through the CLI:
At the (config) command prompt, enter the following commands:
SGOS#(config) interface fast-ethernet interface_number
where interface_number is 0, 1, or n, up to one number less than the number of adapters
in the system.
SGOS#(config interface interface_#) ip-address ip_address
SGOS#(config interface interface_#) subnet-mask subnet
SGOS#(config interface interface_#) exit
About the Settings Button
The Settings button in the Interfaces field allows you to restrict inbound connections on the selected
adapter, and to choose manual or automatic configuration of the adapter link settings.
The default for Inbound connections is to permit all incoming connections. The link settings are
automatically determined and should not normally require modification.
Note:
Rejecting inbound connections improperly, or manually configuring link settings
improperly, can cause the ProxySG to malfunction. Make sure that you know the correct
settings before attempting either of these. If the ProxySG fails to operate properly after
changing these settings, contact Blue Coat Support.
Rejecting Inbound Connections
The default setting allows inbound connections on all network adapters.
To Reject Inbound Connections through the Management Console:
1.
Select Configuration>Network>Adapters>Adapters.
The Adapters tab displays.
2.
Select an adapter from the Adapter drop-down list.
73
Blue Coat ProxySG Configuration and Management Guide
Figure 4-6: Settings for Individual Network Adapters
3.
Click Settings.
4.
To allow inbound connections, select the Accept inbound connections radio button. To reject
inbound connections, select Reject inbound connections.
5.
Click OK to close the Settings dialog.
6.
Click Apply.
To Reject Inbound Connections through the CLI:
At the (config) command prompt, switch to the interface submode to enter the following
commands:
SGOS#(config) interface interface_#
SGOS#(config interface interface_#) no accept inbound
SGOS#(config interface interface_#) exit
Manually Configuring Link Settings
By default, the ProxySG automatically determines the link settings for all network adapters. If the
device incorrectly identifies the network adapter, you can manually configure the link settings.
To Manually Configure Link Settings through the Management Console:
1.
Select Configuration>Network>Adapters>Adapters.
The Adapters tab displays.
74
2.
Select an adapter from the Adapters drop-down list.
3.
Click Settings.
4.
Select Manually configure link settings.
5.
Select Half or Full duplex.
6.
Select the correct network speed.
Chapter 4: Configuring the System
7.
Click OK to close the Advanced Settings dialog.
8.
Click Apply.
To Manually Configure Link Settings through the CLI:
At the (config) command prompt, enter the following commands:
SGOS#(config) interface fast-ethernet interface_#
SGOS#(config interface interface_#) full-duplex | half-duplex
SGOS#(config interface interface_#) speed 10 | 100 | 1gb
SGOS#(config interface interface_#) exit
Setting Up Proxies
To set up proxies, see "Configuring Proxies" on page 149.
Detecting Network Adapter Faults
The ProxySG can detect whether the network adapters in an appliance are functioning properly. If the
appliance finds that an adapter is faulty, it stops using it. When the fault is remedied, the ProxySG
detects the functioning adapter and uses it normally.
To determine whether an adapter is functioning properly:
1.
Check whether the link is active (that is, a cable is connected and both sides are up).
2.
Check the ratio of error packets to good packets: both sent and received.
3.
Check if packets have been sent without any packets received.
If an adapter fault is detected, and the adapter has an IP address assigned to it, the ProxySG logs a
severe event. When an adapter does not have an IP address, the appliance does not log an entry.
Software and Hardware Bridges
This section describes the ProxySG hardware and software bridging capabilities.
About Bridging
Network bridging through the ProxySG provides transparent proxy pass-through and failover
support. This functionality allows ProxySG Appliances to be deployed in environments where L4
switches and WCCP-capable routers are not feasible options.
The ProxySG provides bridging functionality by two methods:
•
Software—A software, or dynamic, bridge is constructed using a set of installed interfaces. Within
each logical bridge, interfaces can be assigned or removed.
•
Hardware—A hardware, or pass-through, bridge uses a 10/100 dual interface Ethernet adapter.
This type of bridge provides pass-through support.
75
Blue Coat ProxySG Configuration and Management Guide
About the Pass-Through Adapter
A pass-through adapter is a 10/100 dual interface Ethernet adapter designed by Blue Coat to provide
an efficient fault-tolerant bridging solution. If this adapter is installed on a ProxySG, SGOS detects the
adapter upon system bootup and automatically creates a bridge—the two Ethernet interfaces serve as
the bridge ports. If the ProxySG is powered down or loses power for any reason, the bridge fails open;
that is, Web traffic passes from one Ethernet interface to the other. Therefore, Web traffic is
uninterrupted, but does not route through the appliance.
Important: This scenario creates a security vulnerability.
Once power is restored to the ProxySG, the bridge opens and Web traffic is routed to the appliance
and thus is subject to that appliance’s configured features, defined policies, and content scanning
redirection instructions.
Note:
Bridging supports only failover; it does not support load balancing.
The following figure provides an example of how the ProxySG indicates that an installed adapter is a
pass-through adapter.
Figure 4-7: Pass-through Adapter
Note:
The adapter state is displayed on Configuration>Network>Adapters>Adapters.
ProxySG Prerequisites
Before configuring a software bridge, the following conditions must be satisfied:
•
Adapters—The adapters must of the same type. Although the software does not restrict you from
configuring bridges with adapters of different types (10/100 or GIGE, for example), the resultant
behavior is unpredictable.
•
IP addresses—If the bridge already has an IP address configured, IP addresses must be removed
from any of adapter interfaces to be added. If the bridge does not have an IP address configured,
the bridge can inherit the IP address from the first interface to be added.
Setting Bandwidth Management for Bridging
After you have created and configured a bandwidth management class for bridging (see Chapter 10:
“Bandwidth Management” on page 375), you can manage the bandwidth used by all bridges.
76
Chapter 4: Configuring the System
Note:
Before you can manage the bandwidth for bridging, you must first enable
bandwidth management and create a bandwidth-management class configured
for bridging. Bandwidth management is enabled by default if you have a valid
license for this feature. See Chapter 10: “Bandwidth Management” on page 375
for information about enabling bandwidth management and creating and
configuring the bandwidth class.
To Configure Bandwidth Management for Bridging through the Management Console:
1.
Select Configuration>Network>Adapters>Bridges.
The Bridges tab displays.
Figure 4-8: Bridges Tab
2.
In the Bridging Bandwidth Class drop-down menu, select a bandwidth management class to manage
the bandwidth for bridging, or select <none> to disable bandwidth management for bridging.
3.
Click Apply.
To Configure Bandwidth Management for Bridging through the CLI:
1.
At the (config) command prompt, enter the following commands:
SGOS#(config) bridge
SGOS#(config bridge) bandwidth-class bw_class_name
where bw_class_name designates the name of the bandwidth class that you have created
and configured to manage the bandwidth for software bridging.
2.
(Optional) To disable bandwidth management for software bridging, enter the following
command:
SGOS#(config bridge) no bandwidth-class
77
Blue Coat ProxySG Configuration and Management Guide
Configuring a Software Bridge
This section describes how to use the Management Console or the CLI to link adapters and interfaces
to create a network bridge.
To Create and Configure a Software Bridge through the Management Console:
1.
Select Configuration>Network>Adapters>Bridges.
The Bridges tab displays.
2.
In the Software Bridges area, click Create.
3.
In the New Bridge Name field of the dialog that appears, enter a name for the bridge, up to 16
characters; click OK.
4.
In the Bridge IP Address field, enter the IP address of the interface you previously configured (see
"Configuring an Adapter" on page 72).
5.
In the Bridge Subnet Mask field, enter the subnet mask of the interface.
6.
To add a port to the bridge:
a.
In the Ports field, click New; the Create port for bridge dialog appears.
b.
From the drop-down lists, select a port number and adapter interface number; click OK.
c.
By default, link settings are automatically sensed. To change the Duplex and Speed
options, click Link Settings, select Manually configure link settings, and change as required.
d. Click OK.
7.
Further customize the bridge:
a.
In the Software Bridges field, click Settings; the Settings for bridge dialog appears.
b.
In the Security field, the default is to accept inbound connections on this interface. To
disallow inbound connections, select Reject inbound connections.
c.
The default browser instruction is to use the browser’s default PAC file. To instruct the
browser to use a proxy or other PAC file type, make a selection from the list in the Browser
Configuration field.
d. Click OK.
8.
Click Apply.
The Bridge Settings options allow you to clear bridge forwarding table and clear bridge statistics.
To Create or Edit a Software Bridge through the CLI:
1.
To create a new software bridge, enter the following commands at the (config) command
prompt:
SGOS#(config) bridge
SGOS#(config bridge) create bridge_name
where bridge_name designates the name of the new bridge. The limit is 16 characters.
2.
To edit the configuration of an existing software bridge, enter the following commands:
SGOS#(config bridge) edit bridge_name
where bridge_name designates the name of the bridge that you want to configure. The
prompt changes to a submode for that bridge.
78
Chapter 4: Configuring the System
SGOS#(config bridge bridge_name) ip-address ip_address
where ip_address designates the IP address of the adapter interface you previously
configured (see "Configuring an Adapter" on page 72).
SGOS#(config bridge bridge_name) subnet-mask subnet_mask
where subnet_mask designates the subnet mask of the interface you previously
configured.
3.
To configure a port on a bridge, enter the following commands (repeat to add more ports):
SGOS#(config bridge bridge_name) port port_number
where port_number identifies a port on the interface. This changes the prompt to a
submode for that port number on that bridge.
•
To attach port to an interface or change the Duplex and Speed options, enter the following
commands:
SGOS#(config bridge bridge_name port port_number) attach-interface
interface_number
SGOS#(config bridge bridge_name port port_number) {full-duplex |
half-duplex}
SGOS#(config bridge bridge_name port port_number) speed {10 | 100 |
1gb}
where:
attach-interface
interface_number
full-duplex
Configures this port for full duplex.
half-duplex
speed
Attaches an interface for this port.
Configures this port for half duplex.
10 | 100 | 1gb
Configures speed for this port.
SGOS#(config bridge bridge_name port port_number) exit
SGOS#(config bridge bridge_name)
•
By default, link settings are automatically sensed. To perform an auto-sense, enter the
following command:
SGOS#(config bridge bridge_name port port_number) link-autosense
•
Return to the bridge_name submode:
SGOS#(config bridge bridge_name port port_number) exit
SGOS#(config bridge bridge_name)
4.
To specify the maximum transmission unit (MTU), enter the following command:
SGOS#(config bridge bridge_name) mtu-size size
where size is a value from 72 to 1500.
5.
The default is to accept inbound connections on this interface. To disallow inbound connections,
enter the following command:
SGOS#(config bridge bridge_name) no accept-inbound
6.
The default browser instruction is to use the browser’s default PAC file. To instruct to use a proxy
or other PAC file type, enter the following command:
SGOS#(config bridge bridge_name) instructions {proxy | default-pac |
central-pac url | accelerated-pac}
79
Blue Coat ProxySG Configuration and Management Guide
where:
proxy
Use a proxy.
default-pac
Use the Blue Coat default PAC file.
central-pac
url
accelerated-pac
Use the PAC file specified at the given URL.
Use the proxy’s accelerated PAC file.
Configuring Failover
You can configure failover for software bridges, but not for hardware bridges. Failover is
accomplished by creating virtual IP addresses on each proxy, creating a failover group, and attaching
the bridge configuration. One of the proxies must be designated with a higher priority (a master
proxy).
Example
The following example creates a bridging configuration with one bridge on standby.
Note:
•
This deployment requires a hub on both sides of the bridge or a switch capable of port
mirroring.
ProxySG A—software bridge IP address: 10.0.0.2. Create a virtual IP address and a failover
group, and designate this group the master.
ProxySG_A#(config) virtual-ip address 10.0.0.4
ProxySG_A#(config) failover
ProxySG_A#(config failover) create 10.0.0.4
ProxySG_A#(config failover) edit 10.0.0.4
ProxySG_A#(config failover 10.0.0.3) master
ProxySG_A#(config failover 10.0.0.3) priority 100
ProxySG_A#(config failover 10.0.0.3) interval 1
•
ProxySG B—software bridge IP address: 10.0.0.3. Create a virtual IP address and a failover
group.
ProxySG_B#(config) virtual-ip address 10.0.0.4
ProxySG_B#(config) failover
ProxySG_B#(config failover) create 10.0.0.4
ProxySG_B#(config failover) edit 10.0.0.4
ProxySG_B#(config failover 10.0.0.3) priority 100
ProxySG_B#(config failover 10.0.0.3) interval 1
•
In the bridge configuration on each ProxySG, attach the bridge configuration to the failover group:
ProxySG_A#(config bridge bridge_name) failover 10.0.0.4
ProxySG_B#(config bridge bridge_name) failover 10.0.0.4
Static Forwarding Table Entries
Certain firewall configurations require the use of static forwarding table entries. Failover
configurations use virtual IP (VIP) addresses and virtual MAC (VMAC) addresses. When a client
sends an ARP request to the firewall VIP, the firewall replies with a VMAC (which can be an Ethernet
multicast address); however, when the firewall sends a packet, it uses a physical MAC address, not
the VMAC.
80
Chapter 4: Configuring the System
The solution is to create a static forwarding table entry that defines the next hop gateway that is on the
correct side of the bridge.
To Create a Static Forwarding Table Entry through the CLI:
1.
At the (config) prompt, enter the following commands:
SGOS#
SGOS#
SGOS#
SGOS#
2.
(config) bridge
(config bridge) bridge_name
(config bridge bridge_name) port port_number
(config bridge_name port port_number) static-fwtable-entry mac_address
Add up to 256 entries per bridge.
To Clear a Static Forwarding Table Entry through the CLI:
At the (config) prompt, enter the following commands:
SGOS# (config) bridge
SGOS# (config bridge) bridge_name
SGOS# (config bridge bridge_name) clear-fwtable
Gateways
A key feature of the ProxySG is the ability to distribute traffic originating at the appliance through
multiple gateways. You can also fine tune how the traffic is distributed to different gateways. This
feature works with any routing protocol (such as static routes or RIP).
Note:
Load balancing through multiple gateways is independent from the per-interface load
balancing the ProxySG automatically does when more than one network interface is
installed.
About Gateways
During the initial setup of the ProxySG, you optionally defined a gateway (a device that serves as
entrance and exit into a communications network) for the ProxySG.
By using multiple gateways, an administrator can assign a number of available gateways into a
preference group and configure the load distribution to the gateways within the group. Multiple
preference groups are supported.
The gateway specified applies to all network adapters in the system.
ProxySG Specifics
Which gateway the ProxySG chooses to use at a given time is determined by how the administrator
configures the assignment of preference groups to default gateways. You can define multiple
gateways within the same preference group. A ProxySG can have from 1 to 10 preference groups. If
you have only one gateway, it automatically has a weight of 100.
81
Blue Coat ProxySG Configuration and Management Guide
Initially, all gateways in the lowest preference group are considered to be the active gateways. If a
gateway becomes unreachable, it is dropped from the active gateway list, but the remaining gateways
within the group continue to be used until they all become unreachable, or until an unreachable
gateway in a lower preference group becomes reachable again. If all gateways in the lowest preference
group become unreachable, the gateways in the next lowest preference group become the active
gateways.
In addition to a preference group, each gateway within a group can be assigned a relative weight
value from 1 to 100. The weight value determines how much bandwidth a gateway is given relative to
the other gateways in the same group. For example, in a group with two gateways, assigning both
gateways the same weight value, whether 1 or 100, results in the same traffic distribution pattern. In a
group with two gateways, assigning one gateway a value of 10 and the other gateway a value of 20
results in the ProxySG sending approximately twice the traffic to the gateway with a weight value of
20.
Switching to a Secondary Gateway
When a gateway goes down, the ProxySG takes from 120 to 180 seconds to determine that the
gateway is unreachable. At that point, the ProxySG switches to a secondary gateway if one is
configured.
The ProxySG continues to check failed gateways once a minute using Address Resolution Protocol
(ARP). The gateways are declared unreacheable after three attempts. When a preferred gateway
comes back on line, however, it might take up to 180 seconds for the ProxySG to confirm the preferred
gateway is reachable and to switch back to that gateway.
These times are not user-configurable.
To Configure Multiple Gateway Load Balancing through the Management Console:
1.
Select Configuration>Network>Routing>Gateways.
The Gateways tab displays.
Figure 4-9: Network Routing Gateways Tab and Add List Item Dialog
2.
82
Click New.
Chapter 4: Configuring the System
3.
Enter the IP address, group, and weight for the gateway into the Add list item dialog that appears.
4.
Click OK.
5.
Repeat steps 2 to 4 until IP addresses, groups, and weights have been defined for all of your
gateways.
6.
Click Apply.
To Configure Multiple Gateway Load Balancing through the CLI:
1.
At the (config) command prompt, enter the following command:
SGOS#(config) ip-default-gateway ip_address preference_group weight
The first value is the IP address of the gateway, the second value is the preference group,
and the third value is the relative weighting for this gateway. For example, to use the
gateway 10.25.36.1, the preference group 1, and the relative weighting 100, enter:
ip-default-gateway 10.25.36.1 1 100
2.
Repeat until all IP addresses, groups, and weights of your IP gateways have been defined.
3.
(Optional) View the results.
SGOS#(config) show ip-default-gateway
Default IP gateways
Gateway
Weight
Group
10.25.36.1
100
1
Defining Static Routes
The ProxySG can be configured to use static routes, a manually-configured route that specifies the
transmission path a packet must follow, based on the packet’s destination address. A static route
specifies a transmission path to another network.
Note:
You are limited to 10,000 entries in the static routes table.
You can install the routing table several ways.
•
Using the ProxySG Text Editor, which allows you to enter settings (or copy and paste the contents
of an already-created file) directly onto the appliance.
•
Creating a local file on your local system; the ProxySG can browse to the file and install it.
•
Using a remote URL, where you place an already-created file on an FTP or HTTP server to be
downloaded to the ProxySG.
•
Using the CLI inline static-route-table command, which allows you to paste a static route
table into the ProxySG.
•
Using the CLI static-routes command, which requires that you place an already-created file on
an FTP or HTTP server and enter the URL into the ProxySG.
The routing table is a text file containing a list of IP addresses, subnet masks, and gateways. The
following is a sample router table:
83
Blue Coat ProxySG Configuration and Management Guide
10.25.36.0
10.25.37.0
10.25.38.0
255.255.255.0
255.255.255.0
255.255.255.0
10.25.46.57
10.25.46.58
10.25.46.59
When a routing table is loaded, all requested URLs are compared to the list and routed based on the
best match.
To Install a Routing Table through the Management Console:
1.
Select Configuration>Network>Routing>Routing.
The Routing tab displays.
Figure 4-10: Network Routing Tab
2.
From the drop-down list, select the method used to install the routing table; click Install.
❐
Remote URL:
Enter the fully-qualified URL, including the filename, where the routing table is located. To
view the file before installing it, click View. Click Install. To view the installation results, click
Results; close the window when you are finished. Click OK.
Figure 4-11: Specifying the Remote Location of a Routing Table
❐
84
Local File:
Chapter 4: Configuring the System
Click Browse to bring up the Local File Browse window. Browse for the file on the local system.
Open it and click Install. When the installation is complete, a results window opens. View the
results and close the window.
Figure 4-12: Specifying the Local Location of a Routing Table
❐
Text Editor:
The current configuration is displayed in installable list format. You can customize it or delete
it and create your own. Click Install. When the installation is complete, a results window
opens. View the results, close this window, and click Close.
85
Blue Coat ProxySG Configuration and Management Guide
Figure 4-13: Creating a Static Routing Table on the ProxySG
3.
Click Apply.
Installing a Routing Table Through the CLI
To install a routing table through the CLI, you can use the inline command to install the table
directly, or enter a path to a remote URL that has an already-created text file ready to download.
When entering input for the inline command, you can correct mistakes on the current line using the
<Backspace> key. If you detect a mistake in a line that has already been terminated using the <Enter>
key, you can abort the inline command by typing <Ctrl-c>. If the mistake is detected after you
terminate input to the inline command, type the same inline command again, but with the correct
configuration information. The corrected information replaces the information from the last inline
command.
The end-of-input marker is an arbitrary string chosen by the you to mark the end of input for the
current inline command. The string can be composed of standard characters and numbers, but
cannot contain any spaces, punctuation marks, or other symbols.
Take care to choose a unique end-of-input string that does not match any string of characters in the
configuration information.
86
Chapter 4: Configuring the System
To Install a Routing Table through the CLI:
Do one of the following:
•
To paste a static route table directly into the CLI, enter the following command at the (config)
command prompt, then paste the table on the line after the first end-of-file marker:
SGOS#(config) inline static-route-table end-of-file_marker
paste static routing table
eof
ok
•
To enter the static route table manually, enter the following command, then enter each IP
address/subnet on the second line, following the first end-of-file marker:
SGOS#(config) inline static-route-table end-of-file_marker
10.25.36.0
255.255.255.0
10.25.46.57
10.25.37.0
255.255.255.0
10.25.46.58
10.25.38.0
255.255.255.0
10.25.46.59
eof
ok
•
To enter a path to a remote URL where you have placed an already-created static route table, enter
the following commands at the (config) command prompt:
SGOS#(config) static-routes path url
SGOS#(config) load static-route-table
Using RIP
The Routing Information Protocol (RIP) is designed to select the fastest route to a destination. RIP
support is built into the ProxySG, and is configured by created and installing an RIP configuration text
file onto the ProxySG. (No RIP configuration file is shipped with the appliance.) For commands that
can be entered into the RIP configuration file, see Appendix D: "RIP Commands" on page 937.
Once you have created an RIP configuration file, you can install it several ways:
•
Using the ProxySG Text Editor, which allows you to enter settings (or copy and paste the contents
of an already-created file) directly onto the appliance.
•
Creating a local file on your local system; the ProxySG can browse to the file and install it.
•
Using a remote URL, where you place an already-created file on an FTP or HTTP server to be
downloaded to the ProxySG.
•
Using the CLI inline rip-settings command, which allows you to paste the RIP settings into
the CLI.
•
Using the CLI rip commands, which require that you place an already-created file on an FTP or
HTTP server and enter the URL into the CLI. You can also enable or disable RIP with these
commands.
To Install an RIP Configuration File through the Management Console:
Note:
When entering RIP settings that will change current settings (for instance, when switching
from ripv1 to ripv2), disable RIP before you change the settings; re-enable RIP when you
have finished.
87
Blue Coat ProxySG Configuration and Management Guide
1.
Select Configuration>Network>Routing>RIP.
The RIP tab displays.
Figure 4-14: Network Routing RIP Tab
2.
To display the current RIP settings, routes, or source, click one or all of the View RIP buttons.
3.
In the Install RIP Setting from the drop-down list, select the method used to install the routing table;
click Install.
❐
Remote URL:
Enter the fully-qualified URL, including the filename, where the routing table is located. To
view the file before installing it, click View. Click Install. To view the installation results, click
Results; close the window when you are finished. Click OK.
Figure 4-15: Specifying the Remote Location of a RIP Configuration File
❐
Local File:
Click Browse to display the Local File Browse window. Browse for the file on the local system.
Open it and click Install. When the installation is complete, a results window opens. View the
results and close the window.
88
Chapter 4: Configuring the System
Figure 4-16: Specifying the Local Location of a RIP File
❐
Text Editor:
The current configuration is displayed in installable list format. You can customize it or delete
it and create your own. Click Install. When the installation is complete, a results window
opens. View the results, close the window, and click OK.
Figure 4-17: Creating an RIP file on the ProxySG
4.
Click Apply.
5.
Select Enable RIP.
6.
Click Apply.
89
Blue Coat ProxySG Configuration and Management Guide
Configuring RIP through the CLI
Note:
When entering RIP settings that will change current settings (for instance, when
switching from ripv1 to ripv2), disable RIP before you change the settings; re-enable RIP
when you have finished.
To Disable/Enable RIP through the CLI:
Enter the following command at the (config) command prompt:
SGOS#(config) rip {disable | enable}
To Install an RIP Configuration through the CLI:
Do one of the following:
•
To enter a path to a remote URL where you have placed an already-created RIP configuration file,
enter the following commands at the (config) command prompt:
SGOS#(config) rip path url
SGOS#(config) load rip-settings
•
To paste an RIP configuration directly into the CLI, enter the following command at the (config)
command prompt:
SGOS#(config) inline rip-settings end-of-file_marker
At this point you can paste RIP settings into the inline command, or you can enter
values for specific settings. When you finish, enter your end-of-file_marker command.
Example
SGOS#(config) inline rip-settings eofm
ripv2
ripv1_out
no_rdisc eofm
ok
DNS
During first-time installation of the ProxySG, you configured the IP address of a single primary
Domain Name Service (DNS) server. Using the Configuration>Network>DNS tab, you can change this
primary DNS server at any time, and you can also define additional primary DNS servers and one or
more alternate DNS servers.
ProxySG Specifics
If you have defined more than one DNS server, the ProxySG uses the following logic to determine
which servers will be used to resolve a DNS host name and when to return an error to the client:
90
•
The ProxySG first sends requests to DNS servers in the primary DNS server list.
•
Servers are always contacted in the order in which they appear in a list.
•
The next server in a list is only contacted if the ProxySG does not receive a response from the
current server.
Chapter 4: Configuring the System
•
If none of the servers in a list returns a response, the ProxySG returns an error to the client.
•
The ProxySG only sends requests to servers in the alternate DNS server list if a server in the
primary list indicates that a DNS host name cannot be resolved.
If a DNS server returns any other error (other than an indication that a DNS host name could not
be resolved), the ProxySG returns the error to the client.
If a server in both the primary and alternate DNS server lists are unable to resolve a DNS host
name, an error is returned to the client.
The ProxySG always attempts to contact the first server in the primary DNS server. If a response is
received from this server, no attempts are made to contact any other DNS servers in the primary list.
If the response from the first primary DNS server indicates a name error, the ProxySG sends a DNS
request to the first alternate DNS server, if one is defined. If no alternate DNS servers have been
defined, an error is returned to the client indicating a name error. If the first alternate DNS server is
unable to resolve the IP address, a name error is returned to the client, and no attempt is made to
contact any other DNS servers in either the primary or alternate DNS server lists.
If a response is not received from any DNS server in a particular DNS server list, the ProxySG sends a
DNS request to the next server in the list. The ProxySG returns a name error to the client if none of the
servers in a DNS server list responds to the DNS request.
Note:
The alternate DNS server is not used as a failover DNS server. It is only used when DNS
resolution of primary DNS server returns name error. If a timeout occurs when looking up
the primary DNS server, no alternate DNS server is contacted.
If the ProxySG receives a negative DNS response (a response with an error code set to Name Error), it
caches that negative response. You can configure the ProxySGs negative response time-to-live value.
(A value of zero disables negative caching.) If the ProxySG is not configured (the default), the ProxySG
caches the negative response and uses the TTL value from the DNS response to determine how long it
should be cached.
Configuring Split DNS Support
Customers with split DNS server configuration (for example, environments that maintain private
internal DNS servers and external DNS servers) might choose to populate an Alternate DNS server list
as well as the Primary DNS server list. In the ProxySG, the internal DNS servers are placed in the
Primary list, while external DNS servers (with the Internet information) populate the Alternate list.
Complete the following procedures to configure Primary and Alternate DNS servers.
To Add a Primary DNS Server through the Management Console:
1.
Select Configuration>Network>DNS>DNS.
The DNS tab displays.
91
Blue Coat ProxySG Configuration and Management Guide
Figure 4-18: Network DNS Tab and Add List Item Dialog
2.
Click New.
3.
Enter the IP address of the DNS server in the dialog that appears and click OK.
4.
Click Apply.
To Add a Primary DNS Server through the CLI:
At the (config) command prompt, enter the following command:
SGOS#(config) dns server ip_address
To Add an Alternate DNS Server through the Management Console:
1.
Select Configuration>Network>DNS>DNS.
The DNS tab displays.
2.
Select Alternate DNS in the drop-down list.
3.
Click New.
4.
Enter the IP address of the DNS server in the dialog that appears and click OK.
5.
Click Apply.
To Add an Alternate DNS Server through the CLI:
1.
At the (config) command prompt, enter the following command:
SGOS#(config) dns alternate ip_address
2.
Repeat until alternate DNS servers have been defined.
Changing the Order of DNS Servers
The ProxySG uses DNS servers in the order displayed. You can organize the list of servers so that the
preferred servers appear at the top of the list. This functionality is not available through the CLI.
92
Chapter 4: Configuring the System
To Change the Order of DNS Servers through the Management Console:
1.
Select Configuration>Network>DNS>Imputing.
The Imputing tab displays.
Figure 4-19: Network DNS Imputing Tab
2.
Select the DNS server to promote or demote.
3.
Click Promote entry or Demote entry as appropriate.
4.
Click Apply.
Unresolved Host Names (Name Imputing)
Name imputing allows the ProxySG to resolve host names based on a partial name specification.
When the ProxySG submits a host name to the DNS server, the DNS server resolves the name to an IP
address. The ProxySG queries the original host name before checking imputing entries unless there is
no period in the host name, in which case imputing is applied first. The ProxySG tries each entry in the
name-imputing list until the name is resolved or it comes to the end of the list. If by the end of the list
the name is not resolved, the ProxySG returns a DNS failure.
For example, if the name-imputing list contains the entries company.com and com, and a user submits
the URL http://www.eedept, the ProxySG resolves the host names in the following order.
http://www.eedept
http://www.eedept.company.com
http://www.eedept.com
To Add Names to the Imputing List through the Management Console:
1.
Select Configuration>Network>DNS>Imputing.
The Imputing tab displays.
2.
Click New to add a new name to the imputing list.
3.
Enter the name in the dialog that appears and click OK.
4.
Click Apply.
93
Blue Coat ProxySG Configuration and Management Guide
To Add Names to the Imputing List through the CLI:
1.
At the (config) command prompt, enter the following command:
SGOS#(config) dns imputing suffix
For example, to use company.com as the imputing suffix, enter dns-imputing
company.com.
2.
Repeat until all imputing suffixes have been entered.
Changing the Order of DNS Name Imputing Suffixes
The ProxySG uses imputing suffixes in the order displayed. You can organize the list of suffixes so the
preferred suffix appears at the top of the list. This functionality is only available through the
Management Console. You cannot configure it through the CLI.
To Change the Order DNS Name Imputing Suffixes through the Management Console:
1.
Select Configuration>Network>DNS>Imputing.
The Imputing tab displays.
2.
Select the imputing suffix to promote or demote.
3.
Click Promote entry or Demote entry as appropriate.
4.
Click Apply.
Caching Negative Responses
By default, the ProxySG caches negative DNS responses sent by a DNS server. You can configure the
ProxySG to set the time-to-live (TTL) value for a negative DNS response to be cached. You can also
disable negative DNS response caching.
Note:
The ProxySG generates more DNS requests when negative caching is disabled.
Both type A and type PTR DNS responses are affected by negative caching.
This functionality is only available through the CLI. You cannot configure DNS negative caching
through the Management Console.
To Configure Negative Caching TTL Values:
From the (config) prompt:
SGOS#(config) dns negative-cache-ttl-override seconds
where seconds is any integer between 0 and 600.
Setting the TTL value to 0 seconds disables negative DNS caching; setting the TTL setting to a
non-zero value overrides the TTL value from the DNS response.
To Restore Negative Caching Defaults:
From the (config) prompt):
SGOS#(config) dns no negative-cache-ttl-override
94
Chapter 4: Configuring the System
Attack Detection
The ProxySG can reduce the effects of distributed denial of service (DDoS) attacks and port scanning,
two of the most common virus infections.
A DDoS attack occurs when a pool of machines that have been infected with a DDoS-type of virus
attack a specific Web site. As the attack progresses, the target host shows decreased responsiveness
and often stops responding. Legitimate HTTP traffic is unable to proceed because the ProxySG is still
waiting for a response from the target host.
Port scanning involves viruses attempting to self-propagate to other machines by arbitrarily trying to
connect to other hosts on the Internet. If the randomly selected host is unavailable or behind a firewall
or does not exist, the ProxySG continues to wait for a response, thus denying legitimate HTTP traffic.
The ProxySG prevents attacks by limiting the number of simultaneous TCP connections from each
client IP address and either does not respond to connection attempts from a client already at this limit
or resets the connection. It also limits connections to servers known to be overloaded.
You can configure attack detection for both clients and servers or server groups, such as
http://www.bluecoat.com. The client attack-detection configuration is used to control the behavior of
virus-infected machines behind the ProxySG. The server attack-detection configuration is used when
an administrator knows ahead of time that a virus is set to attack a specific host.
This feature is only available through the CLI. You cannot use the Management Console to enable
attack detection.
For information on configuring a client, continue with the next section. To configure a server for attack
detection, continue with "Configuring Attack-Detection Mode for a Server or Server Group" on
page 99.
Configuring Attack-Detection Mode for the Client
To Enter Attack-Detection Mode for the Client:
From the (config) prompt, enter the following commands:
SGOS#(config) attack-detection
SGOS#(config attack-detection) client
The prompt changes to:
SGOS#(config client)
To Change Global Settings:
The following defaults are global settings, used if a client does not have specific limits set. They do not
need to be changed for each IP address/subnet if they already suit your environment:
•
client limits enabled: true
•
client interval: 20 minutes
•
block-action: drop (for each client)
•
connection-limit: 100 (for each client)
•
failure-limit: 50 (for each client)
•
unblock-time: unlimited
95
Blue Coat ProxySG Configuration and Management Guide
•
warning-limit: 10 (for each client)
To Change the Global Defaults:
Remember that enable/disable limits and interval affect all clients. The values cannot be changed for
individual clients. Other limits can be modified on a per-client basis.
Note:
If you edit an existing client’s limits to a smaller value, the new value only applies to new
connections to that client. For example, if the old value was 10 simultaneous connections
and the new value is 5, existing connections above 5 are not dropped.
SGOS#(config
SGOS#(config
SGOS#(config
SGOS#(config
SGOS#(config
SGOS#(config
SGOS#(config
SGOS#(config
client)
client)
client)
client)
client)
client)
client)
client)
enable-limits | disable-limits
interval minutes
block ip_address [minutes] | unblock ip_address
default block-action drop | send-tcp-rst
default connection-limit integer_between_1_and_65535
default failure-limit integer_between_1_and_500
default unblock-time minutes_between_10_and_1440
default warning-limit integer_between_1_and_100
where:
enable-limits |
disable-limits
96
Toggles between enabled and disabled. The default is
disabled. This is a global setting and cannot be modified
for individual clients.
interval
integer
Indicates the amount of time, in multiples of 10 minutes,
that client activity is monitored. The default is 20. This is a
global setting and cannot be modified for individual
clients.
block | unblock
ip_address
[minutes]
Blocks a specific IP address for the number of minutes
listed. If the optional minutes argument is omitted, the
client is blocked until explicitly unblocked. Unblock
releases a specific IP address.
default
block-action
drop |
send-tcp-rst
Indicates the behavior when clients are at the maximum
number of connections or exceed the warning limit: drop
the connections that are over the limit or send TCP RST
for connections over the limit. The default is drop. This
limit can be modified on a per-client basis.
default
connection-limit
integer
Indicates the number of simultaneous connections
between 1 and 65535. The default is 100. This limit can be
modified on a per-client basis.
default
failure-limit
integer
Indicates the maximum number of failed requests a client
is allowed before the proxy starts issuing warnings.
Default is 50. This limit can be modified on a per-client
basis.
default
unblock-time
minutes
Indicates the amount of time a client is blocked at the
network level when the client-warning-limit is exceeded.
Time must be a multiple of 10 minutes, up to a maximum
of 1440. The default is unlimited. This limit can be
modified on a per-client basis.
Chapter 4: Configuring the System
default
warning-limit
integer
Indicates the number of warnings sent to the client before
the client is blocked at the network level and the
administrator is notified. The default is 10; the maximum
is 100. This limit can be modified on a per-client basis.
To Create and Edit a Client IP Address through the CLI:
1.
Make sure you are in the attack-detection client submode.
SGOS#(config) attack-detection
SGOS#(config attack-detection) client
SGOS#(config client)
2.
Create a client.
SGOS#(config client) create client ip_address or ip_and_length
3.
Move to edit client submode.
SGOS#(config client) edit client_ip_address
The prompt changes to:
SGOS#(config client ip_address)
4.
Change the client limits as necessary.
SGOS#(config
SGOS#(config
SGOS#(config
SGOS#(config
SGOS#(config
client
client
client
client
client
ip_address)
ip_address)
ip_address)
ip_address)
ip_address)
block-action drop | send-tcp-rst
connection-limit integer_between_1_and_65535
failure-limit integer_between_1_and_65535
unblock-time minutes
warning-limit integer_between_1_and_65535
where:
block-action
drop |
send-tcp-rst
Indicates the behavior when the client is at the maximum
number of connections: drop the connections that are over
the limit or send TCP RST for the connection over the
limit. The default is drop.
connection-limit
integer
Indicates the number of simultaneous connections
between 1 and 65535. The default is 100.
failure-limit
integer
Indicates the behavior when the specified client is at the
maximum number of connections: drop the connections
that are over the limit or send TCP RST for the connection
over the limit. The default is 50.
unblock-time
minutes
Indicates the amount of time a client is locked out at the
network level when the client-warning-limit is exceeded.
Time must be a multiple of 10 minutes, up to a maximum
of 1440. The default is unlimited.
warning-limit
integer
Indicates the number of warnings sent to the client before
the client is locked out at the network level and the
administrator is notified. The default is 10; the maximum
is 100.
97
Blue Coat ProxySG Configuration and Management Guide
To View the Specified Client Configuration:
Enter the following command from the edit client submode:
SGOS#(config client ip_address)
Client limits for 10.25.36.47:
Client connection limit:
Client failure limit:
Client warning limit:
Blocked client action:
Client connection unblock time:
view
700
50
10
Drop
unlimited
To View the Configuration for all Clients:
1.
Exit from the edit client submode:
SGOS#(config client ip_address) exit
2.
Use the following syntax to view the client configuration:
view <cr> | blocked | connections | statistics
To View All Settings:
SGOS#(config client) view
Client limits enabled:
Client interval:
true
20 minutes
Default client limits:
Client connection limit:
100
Client failure limit:
50
Client warning limit:
10
Blocked client action:
Drop
Client connection unblock time:
unlimited
Client limits for 10.25.36.47:
Client connection limit:
Client failure limit:
Client warning limit:
Blocked client action:
Client connection unblock time:
700
50
10
Drop
unlimited
To View the Number of Simultaneous Connections to the ProxySG:
SGOS#(config client) view connections
Client IP
Connection Count
127.0.0.1
1
10.9.16.112
1
10.2.11.133
1
To View the Number of Blocked Clients:
SGOS#(config client) view blocked
Client
Unblock time
10.11.12.13
2004-07-09 22:03:06+00:00UTC
Never
10.9.44.73
98
Chapter 4: Configuring the System
To View Client Statistics:
SGOS#(config client) view statistics
Client IP
Failure Count
10.9.44.72
1
Warning Count
0
To Disable Attack-Detection Mode for all Clients:
SGOS#(config client) disable-limits
Configuring Attack-Detection Mode for a Server or Server Group
You can create, edit, or delete a server. A server must be created before it can be edited. You can treat
the server as an individual host or you can add other servers, creating a server group. All servers in
the group have the same attack-detection parameters, meaning that if any server in the group gets the
maximum number of simultaneous requests, all servers in the group are blocked.
To Create a Server or Server Group:
1.
At the (config) prompt, enter the following commands:
SGOS#(config) attack-detection
SGOS#(config attack-detection) server
The prompt changes to:
SGOS#(config server)
2.
Create the first host in a server group, using the fully qualified domain name:
SGOS#(config server) create hostname
To Edit a Server or Server Group:
1.
At the (config server) prompt, enter the following commands:
SGOS#(config server) edit hostname
The prompt changes to (config server hostname).
SGOS#(config server hostname) {add | remove} hostname
SGOS#(config server hostname) request-limit integer_from_1_to_65535
where:
hostname
The name of a previously created server or server group. When
adding a hostname to the group, the hostname does not have to
be created. The host that was added when creating the group
cannot be removed.
add | remove
hostname
Adds or removes a server from this server group.
request-limit
integer
Indicates the number of simultaneous requests allowed from this
server or server group. The default is 1000.
To View the Server or Server Group Configuration:
SGOS#(config server hostname) view
Server limits for hostname:
Request limit:
1500
99
Blue Coat ProxySG Configuration and Management Guide
Using a Bypass List
A bypass list prevents the ProxySG from transparently accelerating requests to servers that perform IP
authentication with clients. The bypass list contains IP addresses, subnet masks, and gateways. When
a request matches an IP address and subnet mask specification in the bypass list, the request is sent to
the designated gateway. A bypass list is only used for transparent caching.
There are three types of bypass lists: local list, central list, and policy-based list. Each of these bypass
lists are discussed below.
The first two lists are not the same as the Local Policy file and the Central Policy file. The policy-based
bypass list is a list maintained in the Forward Policy file or Local Policy file.
The local and central bypass lists can be managed two ways: either through the Management Console
or through the CLI. For installation procedures for the two lists, see "Creating and Installing Local or
Central Bypass Lists" on page 104.
Using the Local Bypass List
The local bypass list is one you create and maintain on your network. You can use a local bypass list
alone, or in conjunction with a central list. You can also use a dynamic local bypass list to increase
ProxySG efficiency. For more information on dynamic bypass lists, see "Using Dynamic Bypass" on
page 101.
The gateways specified in the bypass list must be on the same subnet as the ProxySG. The local bypass
list limit is 10,000 entries.
The local bypass list contains a list of IP addresses, subnet masks, and gateways. It can also define the
default bypass gateway to be used by both the local bypass list and central bypass list. The gateways
specified in the bypass list must be on the same subnet as the ProxySG. When you download a bypass
list, the list is stored in the appliance until it is replaced by downloading a new list.
The following is a sample of a local bypass list:
;define the default gateway for the local and central bypass list
BYPASS_GATEWAY 10.25.46.57
;define addresses to bypass
;IP address
subnet
gateway (or use default gateway)
10.25.36.47
255.255.255.255
10.25.36.48
255.255.255.255
10.25.0.0
255.255.255.0
10.25.46.58
Note:
The BYPASS_GATEWAY and default gateway must be on a different subnet from the IP
addresses.
If you do not specify the BYPASS_GATEWAY, and you do not designate the gateway in the address
specification, the ProxySG forwards the request to the default gateway defined in the network
configuration.
For installation procedures for the local bypass list, see "Creating and Installing Local or Central
Bypass Lists" on page 104.
100
Chapter 4: Configuring the System
Using Dynamic Bypass
Dynamic bypass provides a maintenance-free method for improving performance of the ProxySG by
automatically compiling a list of requested URLs that return various kinds of errors.
With dynamic bypass, the ProxySG adds dynamic bypass entries containing the server IP address of
sites that have returned an error to the appliance’s local bypass list. For a configured period of time,
further requests for the error-causing URLs are sent immediately to the origin content server (OCS),
saving the ProxySG processing time. The amount of time a dynamic bypass entry stays in the list and
the types of errors that cause the ProxySG to add a site to the list, as well as several other settings, are
configurable from the CLI.
Once the dynamic bypass timeout for a URL has ended, the ProxySG removes the URL from the
bypass list. On the next client request for the URL, the ProxySG attempts to contact the OCS. If the
OCS still returns an error, the URL is once again added to the local bypass list for the configured
dynamic bypass timeout. If the URL does not return an error, the request is handled in the normal
manner.
Dynamic bypass increases ProxySG efficiency because redundant attempts to contact the OCS are
minimized.
Limitations
•
Dynamic bypass applies to transparent proxy connections only.
•
Dynamic bypass entries are lost when the ProxySG is restarted or the static bypass file is
reinstalled.
•
No filtering checks are performed on client requests that match entries in the dynamic bypass list.
•
Requests to sites that are put into the dynamic bypass list bypass future policy evaluation. If a site
that requires forwarding policy to reach its destination is populated into the bypass list, the site
might be inaccessible.
Sites requiring that client accesses always be subjected to ProxySG filtering considerations must either
use the appliance in explicit proxy mode or leave dynamic bypass functionality disabled.
Configuring Dynamic Bypass
Dynamic bypass is disabled by default. Enabling and fine-tuning dynamic bypass is a two-step
process:
•
Edit or create a local bypass list, adding the desired dynamic bypass timeout and threshold
parameters.
•
Use the CLI to enable dynamic bypass and set the types of errors that cause dynamic bypass to
add an entry to the bypass list.
Adding Dynamic Bypass Parameters to the Local Bypass List
The first step, which is optional, in configuring dynamic bypass is to edit the local bypass list to set the
SERVER_BYPASS_THRESHOLD, MAX_DYNAMIC_BYPASS_ENTRY, and/or DYNAMIC_TIMEOUT values. This
step is optional because the ProxySG uses default configurations if you do not specify them in the local
bypass list. Use the default values unless you have specific reasons for changing them. Contact Blue
Coat Technical Support for detailed advice on customizing these settings.
101
Blue Coat ProxySG Configuration and Management Guide
The SERVER_BYPASS_THRESHOLD value defines the maximum number of entries in the dynamically
generated portion of the local bypass list before the ProxySG consolidates client–server pair entries
into a single server entry. The range is 1 to 256. The default is 16. When a consolidation occurs, the
lifetime of the consolidated entry is set to the value of DYNAMIC_TIMEOUT.
The MAX_DYNAMIC_BYPASS_ENTRY defines the maximum number of total dynamic bypass entries. The
range is 1 to 50,000. The default value is 16,000. When the number of entries exceeds the
MAX_DYNAMIC_BYPASS_ENTRY value, the oldest entries are removed to make way for new entries.
The DYNAMIC_TIMEOUT value defines the number of minutes a dynamic bypass entry can remain
unreferenced before it is deleted from the bypass list. The range is 1 to 6000. The default value is 60.
Enabling Dynamic Bypass and Specifying Triggers
Enabling dynamic bypass and specifying the types of errors that causes a URL to be added to the local
bypass list are done with the CLI.
To Enable Dynamic Bypass and Trigger Events through the CLI:
At the (config) command prompt, enter the following commands:
SGOS#(config) dynamic-bypass enable
SGOS#(config) dynamic-bypass trigger trigger_event
where trigger_event can be any item in listed in Table 4.1 on page 102.
Enabling dynamic bypass causes the following warning to appear:
WARNING:
Requests to sites that are put into the dynamic bypass list will bypass
future policy evaluation. This could result in subversion of on-box policy.
The use of dynamic bypass is cautioned.
Table 4.1: Values for the Dynamic-Bypass Trigger Event
102
Event
Description
all
Enables all dynamic bypass triggers.
non-http
Enables dynamic bypass for non-HTTP responses.
connect-error
Enables dynamic bypass for any connection failure to the origin content server, including
timeouts.
receive-error
Enables dynamic bypass for when a TCP connection to an origin content server succeeds,
but the cache does not receive an HTTP response.
400
Enables dynamic bypass for HTTP 400 responses.
401
Enables dynamic bypass for HTTP 401 responses.
403
Enables dynamic bypass for HTTP 403 responses.
405
Enables dynamic bypass for HTTP 405 responses.
406
Enables dynamic bypass for HTTP 406 responses.
500
Enables dynamic bypass for HTTP 500 responses.
Chapter 4: Configuring the System
502
Enables dynamic bypass for HTTP 502 responses.
503
Enables dynamic bypass for HTTP 503 responses.
504
Enables dynamic bypass for HTTP 504 responses.
Example
For instance, the following command will enable connection error events:
SGOS#(config) dynamic-bypass trigger connect-error
Bypassing Connection and Receiving Errors
In addition to HTTP code triggers, you can configure the ProxySG to trigger dynamic bypass for
connection and receiving errors.
If connect-error is enabled, any connection failure to the origin content server (OCS), including
timeouts, inserts the OCS destination IP address into the dynamic bypass list. In this instance, the
ProxySG bypasses any connection attempts from the client to this IP address. By default, the timeout
duration is 20 seconds, and the retry count is 3. These parameters are not configurable. Both the
timeout duration and the retry attempt, whichever occurs first, triggers connect-error.
If receive-error is enabled, when the cache does not receive an HTTP response on a successful TCP
connection to the OCS, the OCS destination IP address is inserted into the dynamic bypass list. In this
instance, the appliance bypasses any attempts from the client to this IP address. Server timeouts can
also trigger receive-error. The default timeout value is 180 seconds, which can be changed (see
"Configuring HTTP Timeout" on page 66).
Disabling Dynamic Bypass Triggers
Disabling one or more specific dynamic bypass triggers is an easy way to customize which errors
cause a dynamic bypass entry to be created. For example, if you want all error events except 401
responses to create a dynamic bypass entry, you can enable all triggers and then disable only the
401-event trigger.
To Disable One or More Dynamic Bypass Triggers through the CLI:
At the (config) command prompt, enter the following command:
SGOS#(config) dynamic-bypass no trigger event
where event can be any item listed above in Table 4.1.
To Clear the Dynamic Bypass List through the CLI:
At the (config) command prompt, enter the following command:
SGOS#(config) dynamic-bypass clear
To Disable Dynamic Bypass through the CLI:
At the (config) command prompt, enter the following command:
SGOS#(config) dynamic-bypass disable
103
Blue Coat ProxySG Configuration and Management Guide
Viewing the Dynamic Bypass List
You can view the dynamic bypass list several ways:
To Display the Dynamic Bypass List through the CLI:
At the (config) command prompt, enter the following command:
SGOS#(config) show bypass-list
To Display the Dynamic Bypass List through the Management Console:
In a Web browser, enter the following URL:
https://ip_address_of_ProxySG:8082/TCP/IP-bypass
To View the Current Dynamic Bypass Configuration through the CLI:
At the (config) command prompt, enter the following command:
SGOS#(config) show dynamic-bypass
To Disable Dynamic Bypass through the CLI:
At the (config) command prompt, enter the following command:
SGOS#(config) dynamic-bypass disable
Using the Central Bypass List
The central bypass list is a shared list of addresses that is used by multiple ProxySG Appliances. The
central list contains addresses to bypass, but does not specify gateways (because the ProxySG
Appliances are located on different subnets, using different gateways). The gateway used for matches
in the central bypass list is defined using the BYPASS_GATEWAY command in the local bypass list. If
there is no BYPASS_GATEWAY option, the ProxySG uses the default gateway defined by the network
configuration.
You can create your own central bypass list to manage multiple ProxySG Appliances, or you can use
the central bypass list maintained by Blue Coat Technical Support at:
https://download.bluecoat.com/release/SG4/files/CentralBypassList.txt
Note:
The central bypass list is limited to 10,000 entries.
The central bypass list maintained by Blue Coat contains addresses Blue Coat has identified as using
client authentication. You can determine whether to download the list automatically when it changes
or to just be sent an e-mail notifying you of the update. By default, neither is enabled.
For installation procedures for the central bypass list, continue with the next section.
Creating and Installing Local or Central Bypass Lists
You can install the local and central bypass lists several ways:
•
104
Use the ProxySG Text Editor, which allows you to enter the lists (or copy and paste the contents of
an already-created file) directly onto the ProxySG through the Management Console (see the
instructions below).
Chapter 4: Configuring the System
•
Create a local file on your local system; use the Management Console to browse to the file and
install it (see the instructions below).
•
Use a remote URL, where you place an already-created file on an FTP or HTTP server to be
downloaded to the ProxySG. This can be done through either the Management Console or the CLI
(see the instructions below).
•
Use the CLI inline bypass-list central | local command, which allows you to paste the
configurations onto the ProxySG (see the instructions below). For more information on using the
CLI inline command, see "Using the Local Bypass List" on page 100 or "Using the Central Bypass
List" on page 104.
To Install Bypass Lists through the Management Console:
1.
Select Configuration>Network>Advanced>Bypass List.
The Bypass List tab displays.
Figure 4-20: Bypass List Tab
2.
To view the current bypass list or the source for the current bypass list before installing it, click
Bypass List or Source.
3.
(Optional) If installing the central bypass list, you can select whether to download the list
automatically when it changes, or be sent an e-mail notifying you of the update. By default,
neither is enabled.
4.
Select a method to install the file for either the local or central bypass list; click Install.
❐
Remote URL:
Enter the fully-qualified URL, including the filename, where the routing table is located. To
view the file before installing it, click View. Click Install. View the installation status that
displays; click OK.
105
Blue Coat ProxySG Configuration and Management Guide
Figure 4-21: Specifying the Remote Location of a Local Bypass List Configuration File
106
Chapter 4: Configuring the System
❐
Local File:
Click Browse to bring up the Local File Browse window. Browse for the file on your local
system. Open it and click Install. When the installation is complete, a results window opens.
View the results, close the window, and click Close.
Figure 4-22: Specifying the Local Location of a Local Bypass List
❐
Text Editor:
The current configuration is displayed in installable list format. You can customize it or delete
it and create your own. Click Install. When the installation is complete, a results window
opens. View the results, close the window, and click Close.
Figure 4-23: Creating a Local Bypass List on the ProxySG
107
Blue Coat ProxySG Configuration and Management Guide
5.
Click Apply.
To Install an Already-Existing Bypass List through the CLI:
At the (config) command prompt, enter the following commands:
SGOS#(config) bypass-list {local-path | central-path} url
SGOS#(config) load bypass-list {local | central}
To Install a Bypass List through the CLI inline Command:
At the (config) command prompt, enter the following commands:
SGOS#(config) inline bypass-list {local | central} end-of-file_marker
At this point you can paste in local or central configuration files, or you can enter values
for specific settings, such as server_bypass_threshold, max_dynamic_bypass_entry
or dynamic_timeout. When you finish, enter your end-of-file string.
Example
SGOS#(config) inline bypass-list local eof
max_dynamic_bypass_entry 20000
server_bypass_threshold 30
dynamic_timeout 100 eof
ok
Policy-Based Bypass Lists
ProxySG policies support the ability to define bypass lists. This section describes a property used to
define a policy-based bypass list that can go into the Local Policy or Forward Policy file. For more
information on defining policies, refer to the Blue Coat ProxySG Content Policy Language Guide.
While static and dynamic bypass lists allow traffic to bypass the ProxySG based on a destination IP
address, the bypass_cache property is intended to allow a bypass based on the properties of the
client. This property uses the following syntax:
bypass_cache(yes | no)
If set to yes, the ProxySG is not queried and the response is not stored. Set to no to specify the default
behavior, which is to follow standard caching behavior. This property is available only in the <proxy>
layer.
This property has no effect on streaming objects, but does affect the following types of transactions:
HTTP, HTTPS, FTP over HTTP, and transparent FTP.
Example
; Bypass the cache for requests from this client IP.
client_address=10.25.198.0 bypass_cache(yes)
Installing WCCP Settings
The ProxySG can be configured to participate in a WCCP (Web Cache Control Protocol) scheme,
where a WCCP-capable router collaborates with a set of WCCP-configured ProxySG Appliances to
service requests.
108
Chapter 4: Configuring the System
Before you can install the WCCP configurations, you must create a WCCP configuration file for the
ProxySG. The ProxySG does not ship with a default WCCP configuration file.
You can install the WCCP settings several ways:
•
Using the ProxySG Text Editor, which allows you to enter settings (or copy and paste the contents
of an already-created file) directly onto the appliance.
•
Creating a local file on your local system; the ProxySG can browse to the file and install it.
•
Using a remote URL, where you place an already-created file on an FTP or HTTP server to be
downloaded to the ProxySG.
•
Using the CLI inline wccp-settings command, which allows you to paste the WCCP settings
into the CLI.
•
Using the CLI wccp command, which requires that you place an already-created file on an FTP or
HTTP server and enter the URL into the CLI.
For more information about WCCP, see Appendix C: "Using WCCP" on page 911.
To Install WCCP Settings through the Management Console:
1.
Select Configuration>Network>Advanced>WCCP.
The WCCP tab displays.
Figure 4-24: Network Advanced WCCP Tab
2.
From the drop-down list, select the method used to install the WCCP settings; click Install.
❐
Remote URL:
Enter the fully-qualified URL, including the filename, where the WCCP file is located. To view
the file before installing it, click View. Click Install. Viewing the installation status that displays;
click OK.
109
Blue Coat ProxySG Configuration and Management Guide
Figure 4-25: Specifying the Remote Location of a WCCP Settings File
❐
Local File:
Click Browse to display the Local File Browse window. Browse for the file on the local system.
Open it and click Install. When the installation is complete, a results window opens. View the
results, close the window, and click Close.
Figure 4-26: Specifying the Local Location of a WCCP Settings File
❐
Text Editor:
The current configuration is displayed in installable list format. You can customize it or delete
it and create your own. Click Install. When the installation is complete, a results window
opens. View the results, close the window, and click Close.
110
Chapter 4: Configuring the System
Figure 4-27: Creating a WCCP Settings File on the ProxySG
3.
Click Apply.
To Install WCCP settings through the CLI:
Do one of the following:
•
To enter WCCP settings directly onto the ProxySG, enter the following commands at the (config)
command prompt:
SGOS#(config) inline wccp-settings end-of-file_marker
wccp enable
wccp version 2
service-group 9
priority 1
protocol 6
service-flags destination-ip-hash
service-flags ports-defined
ports 80 21 1755 554 80 80 80 80
interface 6
home-router 10.16.18.2
forwarding l2
eof
Note:
•
For detailed instructions on configuring an WCCP file, see Appendix C: "Using
WCCP" on page 911.
To enter a path to a remote URL where you have placed an already-created static route table, enter
the following commands at the (config) command prompt:
111
Blue Coat ProxySG Configuration and Management Guide
SGOS#(config) wccp path url
where url is a fully qualified URL, including the filename, where the configuration file is
located.
SGOS#(config) load wccp-settings
SGOS#(config) wccp enable
Virtual IP Addresses
Virtual IP (VIP) addresses are addresses assigned to a system that are recognized by other systems on
the network. Up to 255 VIPs can be configured on each ProxySG. They have several uses:
•
Assign multiple identities to a system on the same or different network, partitioning the box in to
separate logical entities for resource sharing or load sharing.
•
Create an HTTPS Console to allow multiple, simultaneous, secure connections to the system.
•
Direct authentication challenges to different realms.
•
Set up failover among multiple ProxySG s on the same subnet.
For information on creating an HTTPS Console, see "Creating and Editing Services" on page 129; for
information on using VIPs with authentication realms, see Chapter 9: “Using Authentication Services”
on page 271; to use VIPs with failover, see "Configuring Failover" on page 113.
To Create a VIP through the Management Console:
1.
Select Configuration>Network>Advanced>VIPs.
The VIPs tab displays.
Figure 4-28: Network Advanced VIPs Tab
2.
Click New.
The Add VIP dialog displays.
3.
112
Enter the virtual IP address you want to use. It can be any IP address, except a multicast address.
(A multicast address is a group address, not an individual IP address.)
Chapter 4: Configuring the System
Note:
4.
You cannot create a VIP address that is the IP address used by the origin content server.
You must assign a different address on the ProxySG, and use DNS and forwarding to
point to the origin content server's real IP address.
Click OK; click Apply.
The VIP address can now be used.
To Create a VIP through the CLI:
At the (config) command prompt, run the virtual IP address command:
SGOS#(config) virtual address ip_address
ok
To Delete a VIP through the CLI:
Note that VIP addresses are deleted silently. If you are using a VIP for a service, the service will no
longer work once the VIP is deleted.
SGOS#(config) virtual no address ip_address
ok
To Clear All VIP Addresses in the System:
SGOS#(config) virtual clear
ok
To View All the VIPs in the System:
SGOS#(config) show virtual
Virtual IP addresses:
SGOS#(config) accelerated-pac path 10.25.36.47
10.9.36.47
10.25.36.48
10.25.36.47
Configuring Failover
Using IP address failover, you can create a redundant network for any explicit proxy configuration. If
you require transparent proxy configuration, you can create software bridges to use failover. For
information on creating software bridges, see "About Bridging" on page 75.
Note:
If you use the Pass-Through adapter for transparent proxy, you must create a software
bridge rather than configuring failover. For information on using the Pass-Through
adapter, see "About the Pass-Through Adapter" on page 76.
Using a pool of IP addresses to provide redundancy and load balancing, Blue Coat migrates these IP
addresses among a group of machines.
113
Blue Coat ProxySG Configuration and Management Guide
About Failover
Failover allows a second machine to take over if a first machine fails, providing redundancy to the
network through a master/slave relationship. In normal operations, the master (the machine whose IP
address matches the group name) owns the address. The master sends keepalive messages
(advertisements) to the slaves. If the slaves do not receive advertisements at the specified interval, the
slave with the highest configured priority takes over for the master. When the master comes back
online, the master takes over from the slave again.
The Blue Coat failover implementation resembles the Virtual Router Redundancy Protocol (VRRP)
with the following exceptions:
•
A configurable IP multicast address is the destination of the advertisements.
•
The advertisements’ interval is included in protocol messages and is learned by the slaves.
•
A virtual router identifier (VRID) is not used.
•
Virtual MAC addresses are not used.
•
MD5 is used for authentication at the application level.
Masters are elected, based on the following factors:
•
If the failover mechanism is configured for a physical IP address, the machine owning the
physical address have the highest priority. This is not configurable.
•
If a machine is configured as a master using a virtual IP address, the master has a priority that is
higher than the slaves.
When a slave takes over because the master fails, an event is logged in the event log. No e-mail
notification is sent.
Configuring Failover
Before you begin, be aware that software bridges must already exist before you can use them to
configure failover. For information on configuring bridges, see "Adapters" on page 71.
You also need to decide which machine is the master and which machines is the slaves, and whether
you want to configure explicit proxy or transparent proxy network.
When configuring the group, the master and all the systems in the group must have exactly the same
failover configuration except for priority, which is used to determine the rank of the slave machines. If
no priority is set, a default priority of 100 is used. If two ProxySG Appliances have equal priority, the
one with the highest physical address ranks higher.
To Configure Failover through the Management Console:
1.
Go to Configuration>Network>Advanced>Failover.
The Failover tab displays.
114
Chapter 4: Configuring the System
Figure 4-29: Network Advanced Failover Tab
2.
Click New.
The Add Failover Group dialog displays.
Figure 4-30: Add Failover Group Dialog
3.
In the Add Failover Group dialog that appears, fill in the fields as appropriate:
❐
Create a group using either a new IP address or an existing IP address. If the group has
already been created, you cannot change the new IP address without deleting the group and
starting over.
❐
The enabled option specifies whether this group is active or inactive. Select enabled to enable
the failover group.
❐
Multicast address refers to a Class D IP address that is used for multicast. It is not a virtual IP
address.
115
Blue Coat ProxySG Configuration and Management Guide
Note:
❐
Class D IP addresses are reserved for multicast. A Class D IP address has a first bit
value of 1, second bit value of 1, third bit value of 1, and fourth bit value of 0. The
other 28 bits identify the group of computers that receive the multicast message.
Relative Priority refers to a range from 1-255 that is assigned to systems in the group. 255 is
reserved for the system whose failover group ID equals the real IP address.
4.
❐
(Optional) Master identifies the system with the highest priority.
❐
(Optional) Advertisement Interval refers to the length of time between advertisements sent by
the group master. The default is 40 seconds. Once the group master has failed, the slave with
the highest priority takes over (after approximately three times the interval value). The
failover time of the group can be controlled by setting this value.
❐
(Optional, but recommended) Group Secret refers to a password shared only with the group.
Click OK; click Apply.
To Configure Failover through the CLI:
1.
At the (config) command prompt, enter the following commands:
SGOS#(config) failover
SGOS#(config failover) create group_address
The IP address does not have to exist.
SGOS#(config
SGOS#(config
SGOS#(config
SGOS#(config
SGOS#(config
SGOS#(config
-orSGOS#(config
SGOS#(config
failover) edit group_address
failover group_address) multicast-address multicast_address
failover group_address) master
failover group_address) priority number
failover group_address) interval seconds
failover group_address) secret secret
failover group_address) encrypted-secret encrypted_secret
failover group_address) enable
where:
116
group_address
Refers to the IP address or VIP address that is monitored by this group.
Once the group has been named, you cannot change the name. To
change the name, you must delete the group and start over.
multicast-address
multicast_address
Refers to a multicast address where the master sends the keepalives
(advertisements) to the slave systems.
master
(Optional) Identifies the system to be used as the master.
no
Negates these settings: multicast-address, priority, interval, secret, and
master.
priority number
(Optional) Refers to the rank of slave systems. The range is from 1 to
254. (The master system, the one whose IP address matches the group
address, gets 255.) Output of show config and show failover
might differ when the master system is also the holder of the physical IP
address.
interval seconds
(Optional) Refers to the time between advertisements from the master
to the multicast address. The default is 40 seconds. Entering no
interval resets the interval to the default time of 40 seconds.
Chapter 4: Configuring the System
2.
secret secret
-orencrypted-secret
encrypted_secret
(Optional but recommended) Refers to a password shared only with the
group. You can create a secret, which then is hashed, or you can provide
an encrypted secret.
enable | disable
Enables or disables failover on the ProxySG.
(Optional) View the results.
SGOS#(config) show failover configuration group_address
Failover Config
Group Address: 10.25.36.47
Multicast Address
: 224.1.2.3
Local Address
: 10.9.17.159
Secret
: none
Advertisement Interval: 40
Priority
: 100
Current State
: DISABLED
Flags
: V M
Three flags exist, set as you configure the group.
V—Specifies the group name is a virtual IP address.
R—Specifies the group name is a physical IP address
M—Specifies this machine can be configured to be the master if it is available
3.
(Optional) You can view Failover Group Statistics
These are all integers/counters that count various events.
SGOS#(config) show failover statistics
Failover Statistics
Advertisements Received
: 0
Advertisements Sent
: 194
States Changes
: 2
Bad Version
: 0
Bad Packet
: 0
Bad Checksum
: 0
Packet Too Short
: 0
Bad Packet Header
: 0
Invalid Group
: 0
Viewing Statistics
To view statistics on failover, see "Failover Statistics" on page 857
TCP-IP Configuration
Use the TCP-IP configuration options to enhance the performance and security of the ProxySG. Except
for IP Forwarding (see "IP Forwarding" on page 201), these commands are only available through the
CLI.
•
RFC-1323: Enabling RFC-1323 support enhances the high-bandwidth and long-delay operation of
the ProxySG over very high-speed paths, ideal for satellite environments.
•
TCP NewReno: Enabling TCP NewReno support improves the fast recovery of the ProxySG.
117
Blue Coat ProxySG Configuration and Management Guide
•
ICMP Broadcast Echo: Disabling the response to these messages can limit security risks and
prevent an attacker from creating a distributed denial of service (DDoS) to legitimate traffic.
•
ICMP Timestamp Echo: Disabling the response to these messages can prevent an attacker from
being able to reverse engineer some details of your network infrastructure.
•
TCP Window Size: configures the amount of unacknowledged TCP data that the ProxySG can
receive before sending an acknowledgement.
•
PMTU Discovery: Enabling PMTU Discovery prevents packets from being unable to reach their
destination because they are too large.
To view the TCP-IP configuration, see "Viewing the TCP-IP Configuration" on page 120.
RFC-1323
The RFC-1323 TCP-IP option enables the ProxySG to use a set of extensions to TCP designed to
provide efficient operation over large bandwidth-delay-product paths and reliable operation over
very high-speed paths, including satellite environments. RFC-1323 support can only be configured
through the CLI, and is enabled by default.
To Enable or Disable RFC-1323 Support through the CLI:
At the (config) command prompt, enter the following command:
SGOS#(config) tcp-ip rfc-1323 {enable | disable}
TCP NewReno
NewReno is a modification of the Reno algorithm. TCP NewReno improves TCP performance during
fast retransmit and fast recovery when multiple packets are dropped from a single window of data.
TCP NewReno support is disabled by default.
To Enable or Disable TCP NewReno Support through the CLI:
At the (config) command prompt, enter the following command:
SGOS#(config) tcp-ip tcp-newreno {enable | disable}
ICMP Broadcast Echo Support
Disabling the ICMP broadcast echo command can prevent the ProxySG from participating in a Smurf
Attack. A Smurf attack is a type of Denial-of-Service (DoS) attack, where the attacker sends an ICMP
echo request packet to an IP broadcast address. This is the same type of packet sent in the ping
command, but the destination IP is broadcast instead of unicast. If all the hosts on the network send
echo reply packets to the ICMP echo request packets that were sent to the broadcast address, the
network is jammed with ICMP echo reply packets, making the network unusable. By disabling ICMP
broadcast echo response, the ProxySG does participate in the Smurf Attack.
This setting is disabled by default.
To Enable or Disable ICMP Broadcast Echo Support through the CLI:
At the (config) command prompt, enter the following command:
SGOS#(config) tcp-ip icmp-bcast-echo {enable | disable}
118
Chapter 4: Configuring the System
For more information on preventing DDoS attacks, see "Attack Detection" on page 95.
ICMP Timestamp Echo Support
By disabling the ICMP timestamp echo commands, you can prevent an attacker from being able to
reverse engineer some details of your network infrastructure.
For example, disabling the ICMP timestamp echo commands prevents an attack that occurs when the
ProxySG responds to an ICMP timestamp request by accurately determining the target's clock state,
allowing an attacker to more effectively attack certain time-based pseudo-random number generators
(PRNGs) and the authentication systems on which they rely.
This setting is disabled by default.
To Enable or Disable ICMP Timestamp Echo Support through the CLI:
At the (config) command prompt, enter the following command:
SGOS#(config) tcp-ip icmp-timestamp-echo {enable | disable}
TCP Window Size
Adjusting the TCP window-size regulates the amount of unacknowledged data that the ProxySG
receives before sending an acknowledgement.
To Configure the TCP Window Size through the CLI:
At the (config) command prompt, enter the following command:
SGOS#(config) tcp-ip window-size window_size
where window_size indicates the number of bytes allowed before acknowledgement (the
value must be between 8192 and 4194304).
PMTU Discovery
PMTU (Path Maximum Transmission Unit) is a mechanism designed to discover the largest packet
size sent that is not fragmented anywhere along the path between two communicating ProxySG
Appliances that are not directly attached to the same link. A ProxySG doing PMTU sets the
Do-Not-Fragment bit in the IP header when transmitting packets. If fragmentation becomes
necessary before the packets arrive at the second ProxySG, a router along the path discards the packets
and returns an ICMP Host Unreachable error message, with the error condition of
Needs-Fragmentation, to the original ProxySG. The first ProxySG then reduces the PMTU size and
re-transmits the transmissions.
The discovery period temporarily ends when the ProxySG’s estimate of the PMTU is low enough that
its packets can be delivered without fragmentation or when the ProxySG stops setting the
Do-Not-Fragment bit. Five minutes later (this value is configurable), rediscovery is used to see if the
transmittable packet size has changed.
Following discovery and rediscovery, the size of the packets that are transferred between the two
communicating nodes dynamically adjust to a size allowable by the path, which might contain
multiple segments of various types of physical networks.
PMTU is disabled by default.
119
Blue Coat ProxySG Configuration and Management Guide
A ProxySG that is not running PMTU might send packets larger than that allowed by the path,
resulting in packet fragmentation at intermediate routers. Packet fragmentation affects performance
and can cause packet discards in routers that are temporarily overtaxed.
To Configure PMTU Discovery through the CLI:
Note:
PMTU discovery can only be configured through the CLI. It is not available through the
Management Console.
At the (config) command prompt, enter the following commands:
SGOS#(config)tcp-ip pmtu-discovery enable | disable
SGOS#(config)tcp-ip pmtu-discovery expire-period seconds
SGOS#(config)tcp-ip pmtu-discovery probe-interval seconds
where
tcp-ip
pmtu-discovery
enable | disable
Allows you to enable PMTU discovery. The
default is disabled.
expire-period
seconds
Determines the time, in seconds, when PMTU
rediscovery takes place after receiving the
ICMP Host Unreachable – Needs
Fragmentation error message. The default
is 600 seconds.
probe-interval seconds
Determines the time, in seconds, when the
next PMTU rediscovery takes place following
a previous consecutive successful expansion
of the PMTU value. The default is 120
seconds.
Viewing the TCP-IP Configuration
To view the TCP-IP configuration:
SGOS#(config) show tcp-ip
RFC-1323 support:
TCP Newreno support:
IP forwarding:
ICMP bcast echo response:
ICMP timestamp echo response:
Path MTU Discovery:
PMTU expiration period:
PMTU probe interval:
TCP window size:
120
enabled
disabled
disabled
disabled
disabled
enabled
600 seconds
120 seconds
65535 bytes
Chapter 5:
Managing Port Services
This chapter describes port services that are configurable on the ProxySG. These services run on the
ProxySG, and include Management Consoles such as HTTPS, HTTP, SSH, and Telnet Consoles, and
application proxies such as Instant Messenger (IM), SOCKS, FTP, MMS, and RTSP, HTTP and HTTPS.
Other proxy services, like ICAP and Websense, are remote to the ProxySG and are discussed in
Chapter 11: “External Services” on page 399.
This chapter discusses
•
"Managing Multiple Management Consoles"
•
"Creating and Editing Services"
This chapter does not discuss configuration of some of the port services that are enabled here. The
following are discussed in Chapter 6: “Configuring Proxies” on page 149:
•
FTP Proxy
•
HTTP Proxy
•
SOCKS Proxy
•
Shell Proxies (Telnet)
121
Blue Coat ProxySG Configuration and Management Guide
Section A: Managing Multiple Management Consoles
Section A: Managing Multiple Management Consoles
The ProxySG ships with a number of already existing consoles designed to manage the system and
communication with the system:
•
HTTP and HTTPS Consoles: These consoles are designed to allow you access to the ProxySG. The
HTTPS Console is created and enabled; the HTTP Console is created by default but not enabled
because it is less secure than HTTPS.
•
SSH Console: This console is created and enabled by default, allowing you to gain access to the
ProxySG through the CLI with your SSH service.
•
Telnet Console: This console is created but is disabled by default because of security concerns. You
must enable the service before you can access the ProxySG through a Telnet client (not
recommended).
HTTPS Console (Secure Console)
The HTTPS Console provides secure access to the Management Console through the HTTPS protocol.
You can create multiple management HTTPS consoles, allowing you to simultaneously access the
Management Console using any IP address belonging to the box as well as any of the ProxySG’s
virtual IP (VIP) addresses. The default is HTTPS over port 8082.
The ProxySG ships with an HTTPS Console already created and enabled. You do not need to create
other HTTPS Consoles unless you need them for other purposes.
An HTTPS Console and an HTTPS service are not the same. The HTTPS Console is meant only for
accessing the ProxySG. An HTTPS service is meant to allow secure access to other systems.
Creating a new HTTPS Console port requires three steps, discussed more fully in the following
sections:
•
Selecting a keyring (a keypair and a certificate that is stored together)
•
Selecting an IP address and port on the system that the service will use, including virtual IP
addresses
•
Putting the keyring and service together into an HTTPS Console
Selecting a Keyring
The ProxySG ships with a default keyring that can be reused with each HTTPS service that you create.
You can also create your own keyrings for other purposes.
To use the default keyring, simply accept the default keyring through the Management Console, or, if
you’re using the CLI, enter default for the keyring ID when using the services https-console
create command.
122
Chapter 5: Managing Port Services
Section A: Managing Multiple Management Consoles
Note:
When using certificates for the HTTPS Console or for HTTPS termination services that are
issued by Certificate Signing Authorities that are not well-known, see "Troubleshooting
Certificate Problems" on page 230.
If you get “host mismatch” errors or if the security certificate is called out as invalid, you
need to create a different certificate and use it for the HTTPS Console.
For information on creating a keypair and a certificate to make a keyring, see "Configuring HTTPS
Termination" on page 207.
Selecting an IP Address
You can use any IP address on the ProxySG for the HTTPS Console service, including virtual IP
addresses. To create a virtual IP address, see "Virtual IP Addresses" on page 112.
Enabling the HTTPS Console Service
The final step in editing or creating an HTTPS Console service is to select a port and enable the
service.
To Create or Edit an HTTPS Console Port Service through the Management Console:
1.
Select Configuration>Services>Service Ports.
The Service Ports tab displays.
Figure 5-1: Service Ports Tab
2.
123
Do one of the following:
❐
To create a new HTTPS Console port service, click New; the Add Service dialog appears. Select
HTTPS-Console from the Protocol drop-down list.
❐
To edit an existing HTTPS Console port service, highlight the HTTPS Console and click Edit;
the Edit Service dialog appears.
Blue Coat ProxySG Configuration and Management Guide
Section A: Managing Multiple Management Consoles
Continue with the next step.
Figure 5-2: HTTPS-Console Add Service Dialog
3.
The default IP address value is <All>. To limit the service to a specific IP address, select the IP
address from the drop-down list. It must already exist.
4.
Identify the port you want to use for this service.
5.
In the Keyring drop-down list, select any already created keyring that is on the system. The system
ships with a default keyring that can be reused for each HTPPS service.
Note:
The configuration-passwords-key keyring that shipped with the ProxySG does
not contain a certificate and cannot be used for HTTPS Consoles.
6.
(Optional) In the SSL Versions drop-down list, select the version that you want to use for this
service. The default is SSL v2/v3 and TLS v1.
7.
Click OK; click Apply.
Note:
For information on creating keyrings and client certification lists, see
"Configuring HTTPS Termination" on page 207.
To Create Another HTTPS Console Port Service through the CLI:
1.
At the (config) command prompt, enter the following commands:
SGOS#(config) services
SGOS#(config services) https-console
SGOS#(config services https-console) create [ip_address:]port [keyring id]
If you do not specify a keyring, the default is used.
SGOS#(config services https-console) attribute cipher-suite ip_address:port
2.
124
(Optional) View the results:
Chapter 5: Managing Port Services
Section A: Managing Multiple Management Consoles
SGOS#(config services https-console) view
Port:
8082
IP: 0.0.0.0
Type: https-console
Keyring: default
Properties: explicit, enabled
Cipher suite:
RC4-MD5:RC4-SHA:DES-CBC3-SHA:DES-CBC3-MD5:RC2-CBC-MD5:RC4-64-MD5:DES-CBC-SHA
:DES-CBC-MD5:EXP1024-RC4-MD5:EXP1024-RC4-SHA:EXP1024-RC2-CBC-MD5:EXP1024-DES
-CBC-SHA:EXP-RC4-MD5:EXP-RC2-CBC-MD5:EXP-DES-CBC-SHA:
+SSLv2:+SSLv3+LOW:+SSLv2+LOW:+EXPOHTTP
Note:
To create client-certification lists and keyrings, see
"Configuring HTTPS Termination" on page 207. To set the cipher-suite to the ciphers you
want to use, see "Changing the Cipher Suites of the SSL Client" on page 233.
HTTP Console
The HTTP Console is meant to allow you to access the ProxySG if you require a less secure
environment. The default HTTP Console is already configured; you must enable it before it can be
used.
You can create and use more than one HTTP Console as long the IP address and the port do not match
the existing HTTP Console settings.
To Create or Edit an HTTP Console Port Service through the Management Console:
1.
Select Configuration>Services>Service Ports.
The Service Ports tab displays.
2.
Do one of the following:
❐
To create a new HTTP-Console port service, click New; the Add Service dialog appears. Select
HTTP-Console from the Protocol drop-down list.
❐
To edit an existing HTTP-Console port service, highlight the HTTP-Console and click Edit; the
Edit Service dialog appears.
Figure 5-3: HTTP-Console Add Service Dialog
In either case, continue with the next step.
125
Blue Coat ProxySG Configuration and Management Guide
Section A: Managing Multiple Management Consoles
3.
The default IP address value is <All>. To limit the service to a specific IP address, select the IP
address from the drop-down list. It must already exist.
4.
Identify the port you want to use for this service.
5.
Click OK; click Apply.
To Create or Edit an HTTP Console Port Service and Enable It through the CLI:
1.
At the (config) command prompt, enter the following commands:
SGOS#(config) services
SGOS#(config services) http-console
SGOS#(config services http-console) create [ip_address:]port
2.
(Optional) View the results:
SGOS#(config services http-console) view
Port:
8085 IP: 0.0.0.0
Type: http-console
Properties: enabled
SSH Console
The SSH Console is created and enabled by default. Only one SSH Console can exist on the ProxySG.
If you inadvertently deleted the SSHv1 and SSHv2 host keys from the system at the same time, you
automatically disabled the SSH Console and will have to enable the SSH Console after you create a
host key.
For information on managing SSH, see "Configuring the SSH Console" on page 55.
To Edit an SSH Console Service through the Management Console:
1.
Select Configuration>Services>Service Ports.
The Service Ports tab displays.
2.
To edit the existing SSH-Console port service, highlight the SSH-Console and click Edit.
The Edit Service dialog appears.
Figure 5-4: SSH-Console Add Service Dialog
3.
126
The default IP address value is all. To limit the service to a specific IP address, select the IP address
from the drop-down list.
Chapter 5: Managing Port Services
Section A: Managing Multiple Management Consoles
4.
In the Port field, specify a port number; select Enable.
5.
Click OK; click Apply.
To Create an SSH Port Service through the CLI:
1.
At the (config) command prompt, enter the following commands:
SGOS#(config) services
SGOS#(config services) ssh-console
SGOS#(config services ssh-console) create [ip_address:]port
SGOS#(config services ssh-console) enable [ip_address:]port
2.
(Optional) View the results:
SGOS#(config services ssh-console) view
Port:
22
IP: 0.0.0.0 Type: ssh-console
Properties: enabled
Telnet Console
The Telnet Console allows you to connect to and manage the ProxySG using the Telnet protocol.
Remember that Telnet is an insecure protocol that should not be used in insecure conditions. By
default, only SSH is created and enabled.
Blue Coat Systems recommends against using Telnet because of the security hole it creates.
Note:
If you do enable the Telnet Console, be aware that you cannot use Telnet everywhere in
the CLI. Some modules, such as SSL, respond with the error message:
Telnet sessions are not allowed access to ssl commands.
To Create or Edit a Telnet Console Port Service through the Management Console:
Before you begin, make sure that no Telnet service exists on the default telnet port (23). If it does exist,
delete it and apply the changes before continuing. If you also want a Telnet service, you can re-create
it later, being sure to use a different port. For information on the Telnet service, see"Telnet Shell Proxy
Service" on page 145.
1.
Select Configuration>Services>Service Ports.
The Service Ports tab displays.
2.
Do one of the following:
❐
To create a new Telnet-Console port service, click New; the Add Service dialog appears. Select
Telnet-Console from the Protocol drop-down list.
❐
To edit an existing Telnet-Console port service, highlight the Telnet-Console and click Edit; the
Edit Service dialog appears.
In either case, continue with the next step.
127
Blue Coat ProxySG Configuration and Management Guide
Section A: Managing Multiple Management Consoles
Figure 5-5: Telnet Console Edit Service Dialog
3.
Select Telnet protocol from the drop-down list.
4.
The default IP address value is all. To limit the service to a specific IP address, select the IP address
from the drop-down list.
5.
In the Port field, specify a port number; 23 is the default.
Note:
If you want to use the Telnet shell proxy and retain the Telnet Console as well, you must
change the port number on one of them. Only one service is permitted on a port. For more
information on the Telnet shell proxy, see "Telnet Shell Proxies" on page 195.
6.
Select Enabled.
7.
Click OK; click Apply.
To Create or Edit a Telnet Port Service through the CLI:
1.
At the (config) command prompt, enter the following commands:
SGOS#(config) services
SGOS#(config services) telnet-console
SGOS#(config services telnet-console) create [ip_address:]port
2.
(Optional) View the results.
SGOS#(config services telnet-console) view
Port:
23
IP: 0.0.0.0
Type: telnet-console
Properties: enabled
128
Chapter 5: Managing Port Services
Section B: Creating and Editing Services
Section B: Creating and Editing Services
Port services define attributes for ports on which the ProxySG listens for Web requests. Each service
applies to all IP addresses, or can be limited to a specific address.
You can create as many services as you require, keeping in mind that every newly created service uses
up resources.
Note:
When multiple non-wildcard services are created on a port, all of them must be of the
same service type. So you can have HTTP listening on a given port on some subset of
adapter interfaces (or VIPs), but you can't have HTTP on one adapter interface and
HTTPS on a different adapter interface with both using the same port.
Also note that wildcard services and non-wildcard services cannot both exist at the same
time on a given port.
The following table lists the available ProxySG services, including their attributes and default status.
The defaults are for a new ProxySG. If you have an upgraded appliance, the settings do not change.
Table 5.1: Proxy Port Services
Proxy Service
Default Port
Status
Configuration Discussed
DNS-Proxy
53 (both transparent and explicit)
Disabled
"DNS-Proxy"
EPMapper
135 (both transparent and explicit)
Disabled
"Endpoint Mapper Proxy"
FTP
21 (transparent and explicit
Disabled
"FTP"
HTTP
80 (transparent and explicit)
8080 (explicit only)
Enabled
"HTTP"
HTTP-Console
8081
Disabled
"HTTP Console"
Disabled
"HTTPS"
HTTPS
HTTPS-Console
8082
Enabled
"HTTPS Console (Secure Console)"
MSN-IM
1863 (transparent and explicit) and
6891 (transparent and explicit)
Disabled
"Instant Messaging Protocols"
Yahoo-IM
5050 (transparent and explicit) and
5101 (transparent and explicit)
Disabled
"Instant Messaging Protocols"
AOL-IM
5190 (transparent and explicit)
Disabled
"Instant Messaging Protocols"
MMS
1755 (transparent and explicit)
Disabled
"Streaming Protocols"
RTSP
554 (transparent and explicit)
Disabled
"Streaming Protocols"
SOCKS
1080
Disabled
"SOCKS"
SSH-Console
22
Enabled
"SSH Console"
Not Created
"TCP Tunneling"
TCP-Tunnel
129
Blue Coat ProxySG Configuration and Management Guide
Section B: Creating and Editing Services
Table 5.1: Proxy Port Services
Proxy Service
Default Port
Status
Configuration Discussed
Telnet-Console
23
Not Created
"Telnet Console"
Telnet shell
proxy
23
Disabled
"Telnet Shell Proxy Service"
Note:
If HTTP is configured to be explicit, Internet Explorer version 6.0 users accessing FTP sites
over HTTP must disable the browser setting Enable folder view for FTP sites. To access this
attribute in Internet Explorer, select Tools>Internet Options, click the Advanced tab, deselect
Enable folder view for FTP sites, and click OK.
About Service Attributes
The service attributes define the parameters the ProxySG uses for a particular service. In addition to
configuring the default port services, you can create additional ports and define their attributes.
Note:
For all service types except HTTPS, a specific listener cannot be posted on a port if the
same port has a wildcard listener of any service type already present.
The following table describes the attributes; however, depending on the protocol, not all attributes are
available.
Table 5.2: Attributes
Attribute
Description
Explicit
Enables or disables explicit attribute for the port. (Explicit allows connections to a
ProxySG IP address.)
Note: If DNS redirection is used to direct traffic to the ProxySG, the explicit flag on
its services must be enabled, as these connections will be routed through DNS to the
ProxySG’s IP address.
Transparent
Enables or disables transparent-proxy attribute for port. (This allows connections to
any IP address other than those belonging to the ProxySG.)
Authenticate-401
All transparent and explicit requests received on the port always use transparent
authentication (cookie or IP, depending on the configuration). This is especially
useful to force transparent proxy authentication in some proxy-chaining scenarios.
Send client IP
Enables or disables sending of client's IP address instead of the ProxySG's IP
address. For more information, see the section on tracking client IP addresses using
server-side transparency.
Note:
130
If you use the CLI to create a service, specify 0.0.0.0 to define that the service listens on all
IP addresses; specify the individual IP address to limit the service to one IP address.
Chapter 5: Managing Port Services
Section B: Creating and Editing Services
DNS-Proxy
When a DNS-Proxy service is enabled, it listens on port 53 for both explicit and transparent DNS
domain query requests. By default, the service is created but not enabled.
The DNS-Proxy does a lookup of the DNS cache to determine if requests can be answered. If yes, the
ProxySG responds. If not, the DNS-Proxy forwards the request to the DNS server list configured on
the ProxySG. (To configure the DNS server list, see Configuration>Network>DNS.)
Note:
The ProxySG is not a DNS server. It does not perform zone transfers, and recursive
queries are forwarded to other name servers.
Through policy, you can configure the list of resolved domain names (the resolving name list) the
DNS-Proxy uses. The domain name in each query received by the ProxySG is compared against the
resolving name list. Upon a match, the ProxySG checks the resolving list. If a domain name match is
found but no IP address was configured for the domain, the ProxySG sends a DNS query response
containing its own IP address. If a domain name match is found with a corresponding IP address, that
IP address is returned in a DNS query response. All unmatched queries are sent to the name servers
configured on the ProxySG.
To Create or Edit a DNS-Proxy Service through the Management Console:
1.
Select Configuration>Services>Service Ports.
The Service Ports tab displays.
2.
Click New or Edit; the Add (or Edit) Service dialog appears.
3.
Select DNS-Proxy from the Protocol drop-down list.
Figure 5-6: DNS-Proxy Add Service Dialog
131
4.
The default IP address value is All. To limit the service to a specific IP address, select the IP address
from the drop-down list.
5.
In the Port field, 53 displays; you can change it to any unused port.
Blue Coat ProxySG Configuration and Management Guide
Section B: Creating and Editing Services
6.
Select Enabled.
7.
In the Attributes field, select Transparent, Explicit, Send-client-IP (spoofing), or all three. Explicit is the
default.
Note:
8.
The send-client-IP attribute allows the ProxySG to pretend to be a client, allowing the
origin content server to see the client’s IP address. If an alternate path exists for traffic
returning from the Internet to the client, the Send-client-IP attribute does not work.
Click OK; click Apply.
To Create or Edit a DNS-Proxy Service through the CLI:
1.
At the (config) command prompt, enter the following commands to set the value returned to the
client before configuring the DNS service:
SGOS#(config) services
SGOS#(config services) dns
SGOS#(config services dns) create ip_address:port
2.
If you do not need to change the defaults, you have completed the procedure. To change the
attributes, enter the following command:
SGOS#(config services dns)attribute {explicit | transparent | send-client-ip}
{enable | disable} [ip_address:] port
where:
attribute
enable
3.
explicit |
transparent
|send-client-ip
enable
[ip_address:]port
Give the DNS proxy explicit and transparent
attributes, and create IP spoofing (where the ProxySG
pretends to be a client so the OCS can see the client’s IP
address).
[ip_address:]port
Enable the new DNS proxy.
Note: The send-client-IP attribute allows the ProxySG
to pretend to be a client, allowing the origin content
server to see the client’s IP address. If an alternate path
exists for traffic returning from the Internet to the
client, the Send-client-IP attribute does not work.
(Optional) View the results:
SGOS#(config services dns)view
Port:
53
IP: 0.0.0.0
Type: dns
Properties: transparent, explicit, enabled
Port:
54
IP: 0.0.0.0
Type: dns
Properties: transparent, enabled
Creating a Resolving Name List
You can create the resolving name list that the DNS proxy uses to resolve domain names. This
procedure can only be done through policy. (For a discussion on using the <DNS-Proxy> layer, refer to
the Blue Coat ProxySG Content Policy Language Guide.)
Each name resolving list entry contains a domain-name matching pattern. The matching rules are:
132
Chapter 5: Managing Port Services
Section B: Creating and Editing Services
•
test.com matches only test.com and nothing else.
•
.test.com matches test.com, www.test.com and so on.
•
“.” matches all domain names.
An optional IP address can be added, which allows the DNS proxy to return any IP address if the DNS
request's name matches the domain name suffix string (domain.name).
To create a resolving name list, create a policy, using the <DNS-Proxy> layer, that contains text similar
to the following:
<DNS-Proxy>
dns.request.name=www.example.com dns.respond.a(vip)
-or<DNS-Proxy>
dns.request.name=.example.com dns.respond.a(vip)
-or<DNS-Proxy>
dns.request.name=www.example.com dns.respond.a(10.1.2.3)
Note: You can also create a resolving name list using VPM. For more information on using
the DNS-Proxy layer in VPM, see "Web Content Policy Layer Reference" on
page 472.
Endpoint Mapper Proxy
The Endpoint Mapper proxy accelerates Microsoft RPC traffic (applications that use dynamic port
numbers) between branch and main offices, automatically creating TCP tunnels to ports where RPC
services are running. The Endpoint Mapper proxy can be used in both explicit and transparent mode.
Endpoint Mapper works by intercepting and tunnelling RPC traffic in the branch office (downstream
proxy). The tunneled data is compressed and forwarded to the main office (upstream proxy). The
upstream proxy, using SOCKS gateways, decompresses the traffic and forwards it to RPC server. (For
information on SOCKS compression, see "Understanding SOCKS Compression" on page 188.)
Note:
Only Microsoft RPC version 5.0 is supported. Traffic for unsupported Microsoft RPC
versions is passed through the ProxySG without processing.
For information on using SOCKS proxy and EPMapper together, see the Blue Coat Edge Deployment
Guide.
By default, the service is created but not enabled.
To Create or Edit Endpoint Mapper Service through the Management Console:
1.
Select Configuration>Services>Service Ports.
The Service Ports tab displays.
2.
133
Click New or highlight the existing Endpoint Mapper proxy service and click Edit; the Add (or
Edit) Service dialog appears.
Blue Coat ProxySG Configuration and Management Guide
Section B: Creating and Editing Services
3.
Select EndpointMapper from the Protocol drop-down list.
Figure 5-7: Endpoint Mapper Edit Service Dialog
4.
The default IP address value is All. It cannot be changed.
5.
In the Port field, 135 displays. Port 135 is the standard port for Microsoft RPC traffic.
6.
Select Enabled.
7.
In the Attributes field, select Send-client-IP, if necessary. Explicit and Transparent attributes are not
user configurable.
Note:
8.
The send-client-IP attribute allows the ProxySG to pretend to be a client, allowing the
origin content server to see the client’s IP address. If an alternate path exists for traffic
returning from the Internet to the client, the Send-client-IP attribute does not work.
Click OK; click Apply.
To Create or Edit an Endpoint Mapper Proxy Service through the CLI:
1.
At the (config) command prompt, enter the following commands to create a new Endpoint
Mapper proxy service. If you want to edit the existing Endpoint Mapper proxy, skip to step 2.:
SGOS#(config) services
SGOS#(config services) epmapper
SGOS#(config services epmapper) create port
2.
134
To enable the Endpoint Mapper proxy service or enable the send-client-ip attribute, enter the
following commands:
Chapter 5: Managing Port Services
Section B: Creating and Editing Services
SGOS#(config services epmapper) enable port
SGOS#(config services epmapper) attribute send-client-ip {enable | disable}
port
where:
attribute
send-client-ip enable port
Enable sending the client's IP address instead of
the ProxySG's IP address.
Note: If an alternate path exists for traffic
returning from the Internet to the client, the
Send-client-IP attribute does not work.
enable
3.
port
Enable the new Endpoint Mapper proxy. Port
135 is the standard port for Microsoft RPC
traffic.
(Optional) View the results:
SGOS#(config services epmapper) view
Port:
135
IP: 0.0.0.0
Type: epmapper
Properties: transparent, explicit, disabled
FTP
To configure the native FTP proxy, see "Configuring the FTP Proxy" on page 152.
To Create or Edit an FTP Port Service through the Management Console:
1.
Select Configuration>Services>Service Ports.
The Service Ports tab displays.
2.
Click New or Edit; the Add (or Edit) Service dialog appears.
3.
Select FTP from the Protocol drop-down list.
Figure 5-8: FTP Edit Service Dialog
135
Blue Coat ProxySG Configuration and Management Guide
Section B: Creating and Editing Services
4.
The default IP address value is all. To limit the service to a specific IP address, select the IP address
from the drop-down list.
5.
In the Port field, specify a port number; select the Enabled checkbox.
6.
In the Attributes field, both Explicit and Transparent are selected. You can de-select one of them if
necessary
7.
Click OK; click Apply.
To Create an FTP service through the CLI:
1.
At the (config) command prompt, enter the following commands:
SGOS#(config) services
SGOS#(config services) ftp
SGOS#(config services ftp) create [ip_address:]port
SGOS#(config services ftp) attribute passive-mode {enable | disable}
-orSGOS#(config services ftp) attribute {explicit | transparent} {enable |
disable} [ip_address:]port
2.
(Optional) View the results.
10.9.17.159 - Blue Coat SG3000#(config services ftp) view
Port:
21
IP: 0.0.0.0
Type: ftp
Properties: transparent, enabled, passive-allowed
HTTP
Two HTTP services exist by default and are enabled, one with explicit and transparent attributes on
port 80 and one with explicit attributes on port 8080. You can change the attributes or create other
HTTP ports if needed.
To Create or Edit an HTTP Port Service through the Management Console:
1.
Select Configuration>Services>Service Ports.
The Service Ports tab displays.
136
2.
Click New or highlight the service and click Edit; the Add (or Edit) Service dialog appears.
3.
Make sure HTTP is selected from the Protocol drop-down list.
Chapter 5: Managing Port Services
Section B: Creating and Editing Services
Figure 5-9: HTTP Edit Service Dialog
4.
The default IP address value is all. To limit the service to a specific IP address, select the IP address
from the drop-down list.
5.
In the Port field, specify a port number; be sure Enabled is selected.
6.
In the Attributes field, select all that apply: Explicit, Transparent, Authenticate-401, or Send-client-IP.
Note:
7.
The send-client-IP attribute allows the ProxySG to pretend to be a client, allowing the
origin content server to see the client’s IP address. If an alternate path exists for traffic
returning from the Internet to the client, the Send-client-IP attribute does not work.
Click OK; click Apply.
To Create an HTTP Service through the CLI:
Two HTTP services exist and are enabled on the ProxySG. If you need to create another at a different
port in addition to the services already existing on the system, complete the following steps:
At the (config) command prompt, enter the following commands:
SGOS#(config) services
SGOS#(config services) http
SGOS#(config services http) create [ip_address:]port
SGOS#(config services http) attribute {authenticate-401 | explicit |
send-client-ip | transparent} {enable | disable} [ip_address:]port
-orSGOS#(config services http) attribute {connect | head} {enable | disable
{drop | error}} [ip_address:]port
Note:
137
The send-client-IP attribute allows the ProxySG to pretend to be a client, allowing the
origin content server to see the client’s IP address. If an alternate path exists for traffic
returning from the Internet to the client, the Send-client-IP attribute does not work.
Blue Coat ProxySG Configuration and Management Guide
Section B: Creating and Editing Services
To view the results:
SGOS#(config services http) view
Port:
8080
IP: 0.0.0.0
Type: http
Properties: explicit, enabled
Port:
80
IP: 0.0.0.0
Type: http
Properties: transparent, explicit, enabled
HTTPS
The HTTPS service is not configured or enabled by default when the ProxySG ships. You can
configure and use multiple HTTPS services.
To Create an HTTPS Port Service through the Management Console:
1.
Select Configuration>Services>Service Ports.
The Service Ports tab displays.
2.
Click New; the Add Service dialog appears.
3.
Select HTTPS from the Protocol drop-down list.
Figure 5-10: HTTPS Add Service Dialog
4.
138
To select or add an IP address, do one of the following:
❐
To select a local address, specify a real IP address from the IP drop-down list. All is not a
selection option.
❐
To add a non-local IP address, first select the Transparent attribute, then enter a non-local IP
address that is not bound to the ProxySG.
Chapter 5: Managing Port Services
Section B: Creating and Editing Services
5.
In the Port field, specify a port number; select Enable.
6.
In the Attributes field, select all that apply: Explicit, Transparent, Send-client-IP, Verify-client, or
Forward-client-cert. The send-client-IP attribute allows the ProxySG to pretend to be a client,
allowing the origin content server to see the client’s IP address.
Note: If the ProxySG HTTPS service is configured to require a client certificate (if the
Verify-client checkbox is selected), information from the client certificate is extracted
and put into a header that is included in the request when it is forwarded to the
OCS.
The name of the header is Client-Cert. The header contains the certificate serial
number, subject, validity dates and issuer (all as name=value) pairs. The actual
certificate itself is not forwarded.
7.
In the Keyring drop-down list, select any already-created keyring that is on the system. The system
ships with a default keyring that can be reused for each HTTPS service. Keep in mind that the
default certificate associated with the default keyring is self-signed and might not be trusted by all
clients.
Note:
The configuration-passwords-key keyring that shipped with the ProxySG does
not contain a certificate and cannot be used for HTTPS services.
8.
In the SSL Versions drop-down list, select the version that you want to use for this service. The
default is SSL v2/v3 and TLS v1.
9.
In the CA-Cert Lists drop-down list, select the list (already created) for the HTTPS service to use.
10. Click OK; click Apply.
Note:
To create client-certification lists and keyrings, see "Configuring HTTPS Termination" on
page 207.
To Create an HTTPS Service through the CLI:
1.
At the (config) command prompt, enter the following commands:
SGOS#(config) services
SGOS#(config services) https
SGOS#(config services https) create ip_address:port keyring
SGOS#(config services https) attribute ccl list_name ip_address:port
-orSGOS#(config services https) attribute cipher-suite ip_address:port
-or-
139
Blue Coat ProxySG Configuration and Management Guide
Section B: Creating and Editing Services
SGOS#(config services https) attribute {forward-client-cert | send-client-ip
| verify-client} {enable | disable} ip_address:port
-orSGOS#(config services https) attribute ssl-protocol-version {sslv2 | sslv3 |
tlsv1 | sslv2v3| sslv2tlsv1 | sslv3tlsv1 | sslv2v3tlsv1} ip_address:port
Note: If the ProxySG HTTPS service is configured to require a client certificate (if you
enter the command SGOS#(config services https) attribute verify-client
enable ip_address:port), information from the client certificate is extracted and
put into a header that is included in the request when it is forwarded to the OCS.
The name of the header is Client-Cert. The header contains the certificate serial
number, subject, validity dates and issuer (all as name=value) pairs. The actual
certificate itself is not forwarded.
2.
(Optional) View the results:
SGOS#(config services https) view
Port:
1000
IP: 10.9.17.159
Type: https
Keyring: default
Properties: explicit, enabled
SSL Protocol version: SSLv2v3TLSv1
CA Certificate List: not configured
Cipher suite:
RC4-MD5:RC4-SHA:DES-CBC3-SHA:DES-CBC3-MD5:RC2-CBC-MD5:RC4-64-MD5:DES-CBC-SHA
:DES-CBC-MD5:EXP1024-RC4-MD5:EXP1024-RC4-SHA:EXP1024-RC2-CBC-MD5:EXP1024-DES
-CBC-SHA:EXP-RC4-MD5:EXP-RC2-CBC-MD5:EXP-DES-CBC-SHA:+SSLv2:+SSLv3+LOW:+SSLv
2+LOW:+EXPO
Instant Messaging Protocols
Supported instant messaging (IM) services are present by default with the transparent and explicit
attributes selected and listening on all IP addresses; none of them are enabled. Note that the explicit
attribute is not user-configurable.
To Create or Enable an AOL, Yahoo, or MSN Port Service through the Management Console:
1.
Select Configuration>Services>Service Ports.
The Service Ports tab displays.
140
2.
Click New or highlight the service you want and select Edit; the Add (or Edit) Service dialog
appears.
3.
Select the IM service you want to create or edit from the Protocol drop-down list.
4.
The default port is determined by the protocol:
❐
AOL— Port 5190
❐
Yahoo—Ports 5050 and 5101
❐
MSN—1863 and 6891
Chapter 5: Managing Port Services
Section B: Creating and Editing Services
5.
Click OK; click Apply.
To Manage an Instant Messaging Service through the CLI:
1.
At the (config) command prompt, enter the following commands:
SGOS#(config) services
SGOS#(config services) aol-im | msn-im | yahoo-im
SGOS#(config services protocol) create port
SGOS#(config services protocol) attribute send-client-ip {enable | disable}
port
Note:
2.
The send-client-IP attribute allows the ProxySG to pretend to be a client, allowing the
origin content server to see the client’s IP address. If an alternate path exists for traffic
returning from the Internet to the client, the Send-client-IP attribute does not work.
(Optional) View the results:
SGOS#(config services aol-im) view
Port:
5190 IP: 0.0.0.0
Type: aol-im
Properties: transparent, explicit, enabled
SGOS#(config services aol-im) exit
SGOS#(config services) yahoo-im
SGOS#(config services yahoo-im) view
Port:
5050 IP: 0.0.0.0
Type: yahoo-im
Properties: transparent, explicit, enabled
Streaming Protocols
MMS and RTSP services are configured on the system, but are disabled by default. To enable the
default MMS and RTSP service, follow the steps below.
To Enable an MMS or RTSP Port Service through the Management Console:
1.
Select Configuration>Services>Service Ports.
The Service Ports tab displays.
2.
Click New to create a new MMS or RTSP port service or highlight the existing service and click
Edit.
The Add (or Edit) Service dialog appears.
141
3.
Select MMS or RTSP from the Protocol drop-down list.
4.
The default IP address value is All. To limit the service to a specific IP address, select the IP address
from the drop-down list.
5.
In the Port field, specify a port number; select Enabled.
6.
In the Attributes field, select the attributes you want the service to have.
7.
Click OK; click Apply.
Blue Coat ProxySG Configuration and Management Guide
Section B: Creating and Editing Services
To Enable an MMS or RTSP Service through the CLI:
1.
At the (config) command prompt, enter the following commands:
SGOS#(config) services
SGOS#(config services) {mms | rtsp}
SGOS#(config services protocol) create [ip_address:]port
SGOS#(config services protocol) attribute {explicit | send-client-ip |
transparent} {enable | disable} [ip_address:]port
Note:
2.
The send-client-IP attribute allows the ProxySG to pretend to be a client, allowing the
origin content server to see the client’s IP address. If an alternate path exists for traffic
returning from the Internet to the client, the Send-client-IP attribute does not work.
(Optional) View the results:
SGOS#(config services mms) view
Port:
1755
IP: 0.0.0.0
Type: mms
Properties: transparent, explicit, enabled
SGOS#(config services mms) exit
SGOS#(config services)rtsp
SGOS#(config services rtsp) view
Port:
554
IP: 0.0.0.0
Type: rtsp
Properties: transparent, explicit, enabled
SOCKS
By default, a SOCKS service is configured with explicit attribute on port 1080, but not enabled. You
can create additional SOCKS services.
To enable a SOCKS port service, complete the steps below. To configure SOCKS gateway forwarding,
see "SOCKS Gateway Configuration" on page 722.
Note:
The version of SOCKS used is controlled through policy. For example, to use only
SOCKSv5:
<proxy> client.protocol=socks
ALLOW socks.version=4 deny
DENY
To Create or Edit a SOCKS Port Service through the Management Console:
1.
Select Configuration>Services>Service Ports.
The Service Ports tab displays.
142
2.
Click New to create a new SOCKS service or select Edit to enable the existing service; the Add (or
Edit) Service dialog appears.
3.
Select SOCKS from the Protocol drop-down list.
Chapter 5: Managing Port Services
Section B: Creating and Editing Services
Figure 5-11: SOCKS Edit Service Dialog
4.
The default IP address value is All. To limit the service to a specific IP address, select the IP address
from the drop-down list.
5.
In the Port field, specify a port number; select Enable.
6.
Click OK; click Apply.
To Create a SOCKS Port Service through the CLI:
1.
At the (config) command prompt, enter the following commands:
SGOS#(config) services
SGOS#(config services) socks
SGOS#(config services socks) create [ip_address:]port
SGOS#(config services socks) enable [ip_address:]port
2.
(Optional) View the results:
SGOS#(config services socks) view
Port:
1080
IP: 10.25.36.48 Type: socks
Properties: explicit, enabled
TCP Tunneling
Tunneling, or port forwarding, is a way to forward TCP traffic. Any application protocol running over
TCP can be tunneled using this service. Client-server applications carry out any authentication
procedures just as they do when TCP tunneling is not involved.
SGOS uses a tcp:// scheme for tcp-tunnel transactions instead of HTTPS because SGOS does not
actually know that it is HTTPS that is being tunneled.
You can use the SOCKS proxy in conjunction with TCP tunnels to compress and accelerate the
tunnelled traffic. For information on using the SOCKS proxy, see "Configuring a SOCKS Proxy" on
page 188.
143
Blue Coat ProxySG Configuration and Management Guide
Section B: Creating and Editing Services
Both explicit and transparent TCP tunneling are supported. Which one you use depends on your
needs.
Explicit TCP tunneling allows connections to one of the ProxySG's IP addresses.
Transparent TCP tunneling allows connections to any IP address other than those belonging to the
ProxySG. TCP tunneling in transparent mode supports categorization as well as blocking of
destination IP address, port, host, and domain.
Note:
The TCP-Tunnel service does not support content filtering with Websense offbox or ICAP.
If you want to create a transparent TCP tunneling protocol, you can do so from either the CLI or the
Management Console. When a TCP-Tunnel service is created, it is by default created as an explicit
service and is also enabled automatically.
To Create a Transparent or Explicit TCP-Tunnel Port Service through the Management Console:
1.
Select Configuration>Services>Service Ports.
The Service Ports tab displays.
2.
Click New; the Add Service dialog appears.
3.
Select TCP-Tunnel from the Protocol drop-down list.
The Add Service dialog displays.
Figure 5-12: TCP-Tunnel Add Service Dialog
144
4.
The default IP address value is All. To limit the service to a specific IP address, select the IP address
from the drop-down list.
5.
In the Port field, specify a port number; select Enabled.
6.
If you are configuring a transparent TCP-Tunnel service, make sure Transparent is selected in the
Attributes field; if you are configuring an explicit TCP-Tunnel service, make sure Explicit is selected.
7.
Click OK; click Apply.
Chapter 5: Managing Port Services
To Create a TCP-Tunnel Transparent or Explicit Port Service through the CLI:
1.
At the (config) prompt, enter the following commands to create a transparent or explicit service:
SGOS#(config) services
SGOS#(config services) tcp-tunnel
SGOS#(config services tcp-tunnel) create [ip_address:]port
where ip_address is the IP address of the ProxySG (use 0.0.0.0 to indicate all available IP
addresses), and port is the number of the port where you want the ProxySG to listen. You
must choose a port that is not configured for any other service.
2.
Enable the service to be transparent or explicit. By default, the port service is explicit.
SGOS#(config services tcp-tunnel) attribute {explicit | transparent} {enable
| disable} [ip_address:]port
3.
(Optional) View the results.
SGOS#(config services tcp-tunnel) view
Port:
7080
IP: 0.0.0.0
Type: tcp-tunnel
Properties: transparent, explicit, enabled
If you created a transparent TCP-Tunnel service, you have completed the procedure. If you created an
explicit TCP-Tunnel service, you must configure a forwarding destination port.
Configuring a Forwarding Destination Port through the CLI:
1.
Create a forwarding destination port, where the ProxySG directs traffic.
SGOS#(config services tcp-tunnel) exit
SGOS#(config services) exit
SGOS#(config) forwarding
SGOS#(config forwarding) create host_alias ip_address tcp=port
2.
(Optional) View the results:
SGOS#(config forwarding) view
Forwarding Groups: (* = host unresolved)
No forwarding groups defined.
Individual Hosts: (* = host unresolved)
Host_Alias 10.25.36.47 tcp=port_number
Telnet Shell Proxy Service
On a new system, Telnet proxy service is configured and disabled on port 23. On an upgrade, Telnet
proxy service is not created.
To Enable or Create a Telnet Proxy Service through the Management Console
Important: If you want to use Telnet to manage the ProxySG, create a Telnet-Console rather than
a Telnet service. The Telnet service allows you to use Telnet for outbound
connections, and the ProxySG functions as Shell proxy in that situation. For more
information on the Telnet-Console, see "Telnet Console" on page 127.
1.
Select Configuration>Services>Service Ports.
2.
Click New if you are creating a new Telnet service; highlight the Telnet service and click Edit if you
are enabling an existing Telnet service;
145
Blue Coat ProxySG Configuration and Management Guide
The Add or Edit Service dialog appears.
Figure 5-13: Creating a Telnet Service
3.
In the Protocol drop-down list, select Telnet.
4.
The default IP address value is all. To limit the service to a specific IP address, select the IP address
from the drop-down list.
5.
In the Port field, specify a port number; select Enable. Port 23 is the default.
Important: You can have only one service on a port, so you must choose a port number for the
Telnet service that is different from the port chosen for the Telnet Console.
6.
In the Attributes field, select Transparent, Explicit, Send-client-IP (spoofing), or all three. Explicit is the
default.
Note:
7.
The send-client-IP attribute allows the ProxySG to pretend to be a client, allowing the
origin content server to see the client’s IP address. If an alternate path exists for traffic
returning from the Internet to the client, the Send-client-IP attribute does not work.
Click OK; Click Apply.
To Enable or Create a Telnet Proxy Service through the CLI
Note:
The explicit attribute is enabled by default and the transparent and
send-client-ip attributes are disabled by default. Note also that only one service can
use a port, so if you have Telnet-Console enabled on Port 23, you must choose a different
port number for the Telnet shell proxy.
From the (config) prompt, enter the following commands:
146
Chapter 5: Managing Port Services
SGOS#(config) services
SGOS#(config services) telnet
SGOS#(config services telnet) create [ip_address:]port
SGOS#(config services telnet) attribute {explicit | transparent |
send-client-ip} enable [ip_address:]port
SGOS#(config services telnet) enable [ip_address:]port
where:
create
[ip_address:]port
Create a Telnet shell proxy service at the (optional)
address and port number.
attribute
explicit |
transparent
|send-client-ip
enable
[ip_address:]port
Give the Telnet shell proxy explicit and transparent
attributes, and create IP spoofing (where the ProxySG
pretends to be a client so the OCS can see the client’s IP
address).
[ip_address:]port
Enable the new Telnet shell proxy.
enable
Note: The send-client-IP attribute allows the ProxySG
to pretend to be a client, allowing the origin content
server to see the client’s IP address.If an alternate path
exists for traffic returning from the Internet to the
client, the Send-client-IP attribute does not work.
To view the results:
SGOS#(config services telnet) view
Port:
23
IP: 0.0.0.0
Type: telnet
Properties: transparent, explicit, disabled
Port:
24
IP: 10.25.36.47 Type: telnet
Properties: explicit, enabled
147
Blue Coat ProxySG Configuration and Management Guide
148
Chapter 6:
Configuring Proxies
A proxy filters traffic, monitors Internet and intranet resource usage, blocks specific Internet and
intranet resources for individuals or groups, and enhances the quality of Internet or intranet user
experiences.
A proxy also serves as an intermediary between a Web client and a Web server and can require
authentication to allow identity-based policy and logging for the client. The rules used to authenticate
a client are based on the policies created and implemented through your existing security framework,
such as LDAP, RADIUS, and NTLM, and are further discussed in "Using Authentication Services" on
page 271.
Explicit/Transparent proxy specifies the mode the client requests get to the proxy.
•
Explicit—The default, requiring software configuration for both browser and service.
•
Transparent—Requires a Layer-4 switch or a WCCP-compliant router. You can also transparently
redirect requests through a ProxySG by setting the workstation’s gateway to the ProxySG IP
address. You can also use the ProxySG software bridge to transparently proxy requests.
Some software configuration on the ProxySG is also required to allow the appliance to know what
traffic to intercept.
You might also configure both proxy types, depending on the services you require.
This chapter contains the following topics:
•
"About Explicit and Transparent Proxy"
•
"Configuring Explicit Proxies"
•
"Configuring the Transparent Proxy Hardware"
About Explicit and Transparent Proxy
Whether you select explicit or transparent proxy deployment is determined by factors such as network
configuration, number of desktops, desired user experience, and desired authentication approach.
Note:
While you must configure proxying to do authentication, verify the proxy is configured
correctly and is functioning before adding authentication to the mix. Many network or
other configuration problems can appear similar to authentication errors.
Explicit Proxy
In an explicit proxy configuration, the client (browser) is explicitly configured to use a proxy server.
The browser is given the IP address and port number of the proxy service (the ProxySG). It is also
possible to configure the browser to download the proxy settings from a Web server. This is called a
Proxy Auto-Configuration (PAC) file. When a user makes a request, the browser connects to the proxy
service and sends the request. Since the browser knows it is talking to a proxy, the browser provides
the proxy server with the destination server.
149
Blue Coat ProxySG Configuration and Management Guide
The proxy service accepts the explicit connection to it, and fetches the request from the browser. The
request identifies the desired origin content server (OCS) and the resource on that server. The proxy
service uses this information to contact the OCS if necessary.
The disadvantage to explicit proxy is that each desktop must be properly configured to use the proxy,
which might not be feasible in a large organization.
Transparent Proxy
When transparent proxy is enabled, the client (browser) does not know the traffic is being processed
by a machine other than the OCS. The browser believes it is talking to the OCS, so the request is
formatted for the OCS and the proxy determines for itself the destination server based on information
in the request, such as the destination IP address in the packet, or the Host: header in the request.
To enable the ProxySG to intercept traffic sent to it, you must create a service and define it as
transparent. The service is configured to intercept traffic for a specified port, or for all IP addresses on
that port. A transparent HTTP proxy, for example, typically intercepts all traffic on port 80 (all IP
addresses).
To make sure that the appropriate traffic is directed to the ProxySG, deploy hardware such as a
Layer-4 switch or a WCCP router, or the ProxySG appliance’s software bridge that can redirect
selected traffic to the appliance. Traffic redirection is managed through polices you create on the
redirection device.
For detailed information on explicit proxies, continue with the next section; for detailed information
on transparent proxies, continue with "Transparent Proxies" on page 199.
150
Chapter 6: Configuring Proxies
Section A: Configuring Explicit Proxies
Section A: Configuring Explicit Proxies
You can configure several different explicit proxy servers and services:
•
Native FTP—See "Configuring the FTP Proxy" on page 152.
•
HTTP Proxy—See "HTTP Proxy" on page 159.
•
SOCKS—See "Configuring a SOCKS Proxy" on page 188.
•
Shell Proxies—See "Customizing Policy Settings for Shell Proxies" on page 193
For information on creating an explicit proxy server, regardless of type, continue with "Creating an
Explicit Proxy Server".
Creating an Explicit Proxy Server
If your network does not use transparent proxy, clients on the network must configure their browsers
to use either an explicit proxy server or a Proxy Auto-Configuration (PAC) file. The ProxySG
generates client instructions that describe how to configure Microsoft Internet Explorer, Netscape
Communicator, and other browsers based on instructions selected by the ProxySG administrator. You
can configure client instructions for each network adapter in the ProxySG with the
Configuration>Network>Adapters>Interface>Settings button.
After selecting client instructions, the ProxySG administrator directs clients to go to the ProxySG
home page and follow the instructions in the Browser Configuration section. The ProxySG detects the
browser installed on the client and displays the appropriate instructions.
Using the ProxySG as an Explicit Proxy
To use the ProxySG as an explicit proxy and use services such as SOCKS or FTP, you must provide
custom instructions to clients instructing them how to configure their browsers to use the ProxySG as
a proxy server.
This is a two-step process, requiring that you add the proxy IP address to the browser and also
instruct the ProxySG which adapter interface uses the proxy IP address.
Before the proxy can be used, you must:
•
Configure the proxy server.
•
Enable the explicit proxy (whether a service or a server).
The browsers described here are Internet Explorer 6.0 and Netscape 6.2. If you have different browsers
or different versions of Internet Explorer or Netscape, refer to the vendor documentation for
information on configuring proxies.
From Internet Explorer
151
1.
Select Tools>Internet Options>Connections>LAN Settings.
2.
Select Use a proxy server.
Blue Coat ProxySG Configuration and Management Guide
Section A: Configuring Explicit Proxies
3.
Enter the IP address and port number for the proxy, or click Advanced to set proxy server IP
addresses and port numbers for services such as HTTP, FTP, and SOCKS. (Configure HTTPS
through the Secure field.)
4.
Click OK to exit the Advanced Settings tab, then continue to click OK until you exit the Tools menu.
From Netscape 6.2
1.
Select Edit>Preferences>Advanced>Proxies.
2.
Select Manual proxy configuration.
3.
Enter proxy server IP addresses and port numbers for services such as HTTP, FTP, SOCKS and
SSL.
4.
Click OK.
Note:
Explicit proxy allows a redundant configuration using IP address failover among a cluster
of machines. For information on creating a redundant configuration for failover, see
"Configuring Failover" on page 113.
Adapter Proxy Settings
Once the explicit proxy is configured on the browser, decide which adapter interfaces listen for which
service. Each adapter interface can listen for only one IP address; you can configure multiple proxies
on one ProxySG using the same IP address.
To Provide Configuration Instructions through the Management Console
1.
Select Configuration>Network>Adapters.
2.
Select an adapter and the correct interface and click Settings.
3.
Select Using a proxy.
4.
Click OK to close the Settings dialog.
5.
Click Apply.
To Provide Configuration Instructions through the CLI
At the (config) command prompt, enter the following commands:
SGOS#(config) interface fast-ethernet interface_#
SGOS#(config interface interface_#) instructions proxy
Configuring the FTP Proxy
In previous SGOS releases, connections to FTP origin content servers were only accomplished over
HTTP. SGOS 4.x supports Native FTP proxy.
Note:
152
As in previous releases, FTP requests sent through the HTTP proxy are still valid.
Chapter 6: Configuring Proxies
Section A: Configuring Explicit Proxies
Configuring an FTP proxy requires ProxySG configuration and specific configuration of the FTP
client. The service must be enabled on the ProxySG before it can be used.
Data connections initiated by an FTP client to an FTP server are known as passive mode data
connections. This type of connection is useful in situations where an FTP server is unable to make a
connection to an FTP client because the client is located behind a firewall or other similar device
where outbound connections from the client are allowed, but inbound connections to the client are
blocked.
This functionality allows administrators to select how the ProxySG responds to a request from an FTP
client for a passive mode data connection (PASV command). This functionality does not affect HTTP
requests for FTP objects (for example, those originating from browsers that are explicitly proxied to a
ProxySG).
If the FTP server responds that it supports PASV, but the ProxySG is unable to connect because of a
firewall blocking the port, the ProxySG only attempts a PORT command. Some FTP clients do not
open a passive mode data connection to an IP address that is different from the IP address used for the
control connection.
Disabling passive mode data connections on the ProxySG servicing requests from this type of FTP
client might provide a more acceptable response to the end user.
When passive mode data connections are disabled, the ProxySG returns a response to the FTP client
indicating that the server does not support passive mode. The FTP client software controls any
messages displayed to the end user as a result of this response from the ProxySG.
Limitations
•
Internet Explorer does not support proxy authentication for Native FTP.
•
The ProxySG FTP proxy does not support exceptions.
FTP Spoofing
Using policy, you can spoof the IP addresses for FTP data connections in both transparent and explicit
deployments, for both active and passive modes; certain deployments are subject to limitations. The
client and server-side policies are:
•
ftp.match_client_data_ip(yes)—Matches the source IP address of the ACTIVE data
connection with the destination IP address of the control connection (client side).
•
ftp.match_server_data_ip(yes)—Matches the source IP address of the PASV data connection
with the source IP address of the ProxySG control connection (server side).
Note:
To always use the ProxySG physical IP address (no spoofing), define policy as
ftp.match_[client | server]_data_ip(no).
The following points describe the various data flow scenarios:
•
153
Outbound client data connection (ProxySG to client)—When the client issues a PORT command,
the ProxySG opens a data connection to the FTP client with the source IP address of whatever
destination IP address the client used when opening the control connection.
Blue Coat ProxySG Configuration and Management Guide
Section A: Configuring Explicit Proxies
•
Inbound client data connection (client to ProxySG)—When the client issues a PASV command, the
ProxySG returns the IP address and port to which client makes a data connection.
❐
Explicit—The ProxySG returns the destination IP address of the control connection; this can
be a physical or virtual ProxySG IP address.
❐
Transparent—The ProxySG returns the IP address of the physical adapter on which the
control connection arrived.
•
Outbound server data connection (ProxySG to FTP server)—When the ProxySG issues a PASV
command upstream, the server returns an IP address and port to connect to. The ProxySG then
opens a data connection to the server with the same source IP address it used to open the control
connection. This address is defined by the reflect_ip property.
•
Inbound server data connection (FTP server to ProxySG)—When the ProxySG issues a PORT
command, the ProxySG provides the IP address and port number to which the server makes a
data connection.
❐
The ProxySG sends the control connection’s source IP address if that IP is a local ProxySG
(virtual or physical) IP address; or
❐
The ProxySG sends the IP address of the physical adapter that was used to make the outgoing
control connection.
FTP Server Limitations
Consider the following limitations when defining FTP spoofing policy:
•
IIS and WS_FTP servers do not support PASV data connections with a source IP address that is
different from the source IP address of the control connection.
•
IIS and WS_FTP servers do not support ACTIVE data connections with a destination IP address
that differs from the source IP address of the control connection.
Configuring the ProxySG for Native FTP Proxy
This section describes how to configure the ProxySG through the Management Console and the CLI.
To Configure Native FTP Proxy through the Management Console
1.
Select Configuration>Services>FTP Proxy.
The FTP Proxy tab displays.
154
Chapter 6: Configuring Proxies
Section A: Configuring Explicit Proxies
Figure 6-1: FTP Proxy Tab
2.
Select the checkbox to Allow caching of FTP objects. The default is enabled.
3.
Determine the amount of time in percentage of how long since the object was last modified. The
default is 10%.
4.
Enter an amount, in hours, that the object remains in the cache before becoming eligible for
deletion. The default is 24 hours.
5.
Select the checkbox to allow use of PASV mode to clients. The default is enabled.
To Configure Native FTP Proxy through the CLI
1.
At the (config) command prompt, enter the following commands:
SGOS#(config) caching
SGOS#(config caching) max-cache-size 18
SGOS#(config caching) ftp
SGOS#(config caching ftp) enable
SGOS#(config caching ftp) type-m-percent 20
SGOS#(config caching ftp) type-n-initial 12
where:
max-cache-size
megabytes
enable |
disable
2.
155
The maximum size, in megabytes, of the largest object that
can stored on the ProxySG. Note that max-cache-size
sets the maximum object size for both HTTP and FTP.
Enables or disables the caching of FTP objects.
type-m-percent
percent
Time to live for objects with a last-modified time.
type-n-initial
hours
Time to live for objects without a last-modified time.
(Optional) View the result.
Blue Coat ProxySG Configuration and Management Guide
Section A: Configuring Explicit Proxies
SGOS#(config caching ftp) view
Caching FTP objects is enabled
FTP objects with last modified date, cached for 20% of last modified time
FTP objects without last modified date, initially cached for 12 hours
3.
(Optional) Change the default login syntax. The default syntax is Raptor. The ProxySG also
supports the Checkpoint authentication syntax. The supported Checkpoint formats are:
❐
remoteuser@proxyuser@host (in USER command) for explicit FTP.
❐
remotepass@proxypass (in PASS command) for explicit FTP.
❐
remoteuser@proxyuser (in USER command) for transparent FTP.
❐
remotepass@proxypass (in PASS command) for transparent FTP.
Enter the following command to change the login syntax:
SGOS# (config) ftp login-syntax {raptor | checkpoint}
Note:
Neither proxy authentication for transparent FTP nor proxy chaining are supported with
the Checkpoint syntax.
Enabling the FTP Service
By default, an FTP service is already created with explicit and transparent attributes, but it is disabled.
You must enable the FTP port before it can be used.
To Create and Enable a Native FTP Port Service through the Management Console
1.
Select Configuration>Services>Service Ports.
The Service Ports tab displays.
2.
Click New; the Add Service dialog appears.
Figure 6-2: FTP Add Service Dialog
156
Chapter 6: Configuring Proxies
Section A: Configuring Explicit Proxies
3.
In the Protocol drop-down list, select FTP.
4.
The default IP address value is All. To limit the service to a specific IP, select the IP from the
drop-down list.
5.
In the Port field, specify a port number; select Enabled.
6.
Choose the attributes you want the FTP proxy to have: Explicit, Transparent, or both.
7.
Click OK; Click Apply.
To Create a Native FTP Port Service through the CLI
1.
At the (config) command prompt, enter the following commands:
SGOS#(config) services
SGOS#(config services) ftp
SGOS#(config services ftp)
SGOS#(config services ftp)
SGOS#(config services ftp)
SGOS#(config services ftp)
2.
create [ip_address:]port
attribute passive-mode {enable | disable}
attribute explicit enable [ip_address:]port
attribute transparent enable [ip_address:]port
(Optional) View the results.
SGOS#(config services ftp) view
Port:
25
IP: 0.0.0.0
Type: ftp
Properties: transparent, explicit, enabled, passive-allowed
Configuring FTP Clients
FTP clients must be configured as follows:
•
Enable firewall.
•
Select USER with no logon.
•
For proxy authentication, select USER remoteID@remoteHost fireID and specify a proxy username
and password.
Example
The following graphic demonstrates configuring a WSFtp client.
157
Blue Coat ProxySG Configuration and Management Guide
Section A: Configuring Explicit Proxies
Figure 6-3: Configuring the WSFtp Client for Native FTP
Configuring FTP Connection Welcome Banners
You can customize banners that usually describe the policies and content of the FTP server displayed
to FTP clients. Without modification, the ProxySG sends a default banner to newly-connected FTP
clients: Welcome to Blue Coat FTP. However, you might not want users to know that a Blue Coat
ProxySG exists on the network. A default banner can be defined in the Management Console or the
CLI, but other banners defined for specific groups can be created in policy layers.
Note:
Configurable banners are only displayable when FTP is explicit through the ProxySG. In
transparent deployments, the banner is sent to the client when proxy authentication is
required; otherwise, the banner is forwarded from the FTP server.
To Define the Default FTP Banner through the Management Console
1.
Select Configuration>Services>FTP Proxy.
2.
In the Welcome Banner field, enter a line of text that is displayed on FTP clients upon connection. If
the message length spans multiple lines, the ProxySG automatically formats the string for
multiline capability.
3.
Click Apply.
Figure 6-4: Configuring an FTP Connection Welcome Banner
158
Chapter 6: Configuring Proxies
Section A: Configuring Explicit Proxies
To Define the Default FTP Banner through the CLI
At the (config) prompt, enter the following command:
#SGOS#(config) ftp
#SGOS#(config) ftp welcome-banner "message"
To Create Policy that Overrides the Default Banner
Add the following property to a policy:
<Proxy>
ftp.welcome_banner "message"
If entering text that spans more than one line, use $(crlf) for line breaks.
HTTP Proxy
By default, an HTTP proxy service, with both explicit and transparent attributes set, is enabled on
port 80. To change the attributes of the proxy service or create new HTTP proxy services, see "HTTP"
on page 136.
The HTTP proxy is the first line of defense for the ProxySG, controlling all traffic that arrives on
port 80 to the ProxySG. To control that traffic and improve performance, you can:
•
Set default caching policies to configure the length of time an object or negative response is
cached, whether objects are always revalidated before being served, whether server certificates
are verified by default, and how headers are parsed. For more information, see "Setting Default
HTTP Proxy Policy" on page 164.
•
Configure the HTTP proxy as a server accelerator. For more information, see "Choosing the HTTP
Proxy Profile" on page 168.
•
Set a limit to the maximum bandwidth the ProxySG is allowed to use for refreshing objects in the
background. For more information, see "Configuring Refresh Bandwidth for the HTTP Proxy" on
page 162.
•
Compress and decompress content. For more information, see "HTTP Compression" on page 178.
Note:
Use of the compression feature is a trade-off among three resources: server-side
bandwidth, client side-bandwidth, and CPU. If server-side bandwidth is expensive
compared to CPU, then you should always request compressed content from the OCS. If
CPU is comparatively expensive, then the ProxySG should ask the server for the
compression formats that the client asked for and forward whatever the server returns.
The HTTP proxy is designed to control Web traffic, providing:
•
Security
•
Authentication
•
Virus Scanning and Patience Pages
•
Performance
❐
159
Default HTTP Proxy Policy
Blue Coat ProxySG Configuration and Management Guide
Section A: Configuring Explicit Proxies
❐
HTTP Proxy Caching Profiles
❐
Byte-Range Support
❐
Refresh Bandwidth
❐
Compression
This chapter deals with HTTP proxy performance. See also:
•
Chapter 8: “Security and Authentication” on page 241 to learn about controlling access to the
ProxySG, Internet, intranet, and making decisions based on user identity.
•
"Forms-Based Authentication" on page 361 for information about using Web forms for
authentication.
•
See "About Content Scanning" on page 401 for information about virus scanning and sending
patience pages to explain the delays that can occur when scanning for viruses before serving data.
HTTP Proxy Performance
Default HTTP Proxy Policy
Using the ProxySG Management Console or CLI, you can configure global defaults that determine
HTTP proxy caching policy, such as the maximum size of cacheable objects, the length of time that
negative responses remain in the cache, whether the ProxySG revalidates each object before serving it,
whether the server certificate is verified by default, and how headers are parsed.
For information about setting default policy for HTTP proxy caching, see "Setting Default HTTP
Proxy Policy" on page 164.
HTTP Proxy Acceleration Profiles
You have a choice of three profiles to use for the ProxySG:
•
Normal (the default setting) acts as a client-accelerator, and is used for enterprise deployments
•
Portal acts as a server accelerator, and is used for web-hosting
•
Bandwidth Gain is used for ISP deployments
For information on HTTP profiles, see "Choosing the HTTP Proxy Profile" on page 168.
Byte-Range Support
If a client makes a request using the Range: HTTP header, the ProxySG can serve the requested
portions of the file from the cache if byte-range support is enabled (the default). If byte range support
is disabled, all such requests will be forwarded to the origin content server and the response will not
be cached. For information on using byte-range support to determine how the ProxySG handles
byte-range requests, see "Additional Configuration Affecting Bandwidth Gain" on page 175.
160
Chapter 6: Configuring Proxies
Section A: Configuring Explicit Proxies
Refresh Bandwidth
Refresh bandwidth refers to server-side bandwidth used for all forms of asynchronous refresh activity.
The default configuration is to allow the ProxySG to manage refresh bandwidth. The ProxySG
manages the bandwidth in order to preserve the maximum freshness of accessed objects. It can
sometimes be the case, however, that the automatic refresh bandwidth amount is too high. It is not
unusual for refresh bandwidth to spike up occasionally, depending on access patterns at the time. If
necessary, you can choose to impose a limit on refresh bandwidth. To limit the refresh bandwidth to a
specified amount, you must disable automatic management of the bandwidth and explicitly set a
bandwidth limit. Note that setting the refresh bandwidth amount too low can lower the estimated
freshness of objects in the cache. If you set the refresh bandwidth amount to zero, the ProxySG does
not do active refresh at all.
For information about configuring refresh bandwidth, see "Configuring Refresh Bandwidth for the
HTTP Proxy" on page 162.
Compression
Compression is disabled by default (even if you have a valid license for this feature). If compression is
enabled, the HTTP proxy forwards the supported compression algorithm (either deflate or gzip) from
the client’s request (Accept-Encoding: request header) to the server as is, and attempts to send
compressed content to client whenever possible. This allows the ProxySG to send the response as is
when server sends compressed data, including non-cacheable responses. Any unsolicited encoded
response is forwarded to the client as is.
For more information on compression, see "HTTP Compression" on page 178.
HTTP Terms
161
•
Asynchronous Adaptive Refresh (AAR)—This allows the ProxySG to keep cached objects as fresh
as possible, thus reducing response times. The AAR algorithm allows HTTP proxy to manage
cached objects based on their rate of change and popularity: an object that changes frequently
and/or is requested frequently will be more eligible for asynchronous refresh compared to an
object with a lower rate of change and/or popularity.
•
Asynchronous Refresh Activity—Refresh activity that does not wait for a request to occur, but that
occurs asynchronously from the request.
•
Bandwidth Gain—A measure of the difference in client-side and server-side internet traffic
expressed in relation to server-side internet traffic. It is managed in two ways: you can enable or
disable bandwidth gain mode or you can select the Bandwidth Gain profile (this also enables
bandwidth gain mode). See "Configuring the HTTP Proxy Profile" on page 173 for information
about configuring bandwidth gain.
•
Byte-Range Support—The ability of the ProxySG to respond to byte-range requests (requests with
a Range: HTTP header).
•
Cache-hit—An object that is in the ProxySG and can be retrieved when an end user requests the
information.
Blue Coat ProxySG Configuration and Management Guide
Section A: Configuring Explicit Proxies
•
Cache-miss—An object that can be stored but has never been requested before; it was not in the
ProxySG to start, so it must be brought in and stored there as a side effect of processing the
end-user's request. If the object is cacheable, it is stored and served the next time it is requested.
•
Compression—An algorithm that reduces a file’s size but does not lose any data. The ability to
compress or decompress objects in the cache is based on policies you create. Compression can
have a huge performance benefit, and it can be customized based on the needs of your
environment: Whether CPU is more expensive (the default assumption), server-side bandwidth is
more expensive, or whether client-side bandwidth is more expensive.
•
Freshness—A percentage that reflects the objects in the ProxySG cache that are expected to be
fresh; that is, the content of those objects is expected to be identical to that on the OCS (origin
content server).
•
Maximum Object Size—The maximum object size stored in the ProxySG. All objects retrieved that
are greater than the maximum size are delivered to the client but are not stored in the ProxySG.
•
Negative Responses—An error response received from the OCS when a page or image is
requested. If the ProxySG is configured to cache such negative responses, it returns that response
in subsequent requests for that page or image for the specified number of minutes. If it is not
configured, which is the default, the ProxySG attempts to retrieve the page or image every time it
is requested.
•
Refresh Bandwidth—The amount of bandwidth used to keep stored objects fresh. By default, the
ProxySG is set to manage refresh bandwidth automatically. You can configure refresh bandwidth
yourself, although Blue Coat does not recommend this.
•
Variants—Objects that are stored in the cache in various forms: the original form, fetched from the
OCS; the transformed (compressed or uncompressed) form (if compression is used). If a required
compression variant is not available, then one might be created upon a cache-hit. (Note:
policy-based content transformations are not stored in the ProxySG.)
Configuring Refresh Bandwidth for the HTTP Proxy
The ProxySG uses as much bandwidth as necessary for refreshing to achieve the desired access
freshness.
The amount of bandwidth used varies depending on client demands. If you determine that the
ProxySG is using too much bandwidth (by reviewing the logged statistics and examining current
bandwidth used shown in the Refresh bandwidth field), you can specify a limit to the amount of
bandwidth the ProxySG uses to try to achieve the desired freshness. Be aware, however, that if you
limit the amount of bandwidth the ProxySG can use, you might prohibit the ProxySG from achieving
the desired freshness. If the refresh bandwidth configuration remains at the recommended
default—Let the ProxySG Appliance manage refresh bandwidth (recommended) in the Management Console
or SGOS#(config caching) refresh automatic in the CLI—then the ProxySG uses whatever
bandwidth is available in its efforts to maintain 99.9% estimated freshness of the next access.
To Set Refresh Bandwidth through the Management Console
1.
Select Configuration>Services>HTTP Proxy>Freshness.
The Freshness tab displays.
162
Chapter 6: Configuring Proxies
Section A: Configuring Explicit Proxies
Figure 6-5: Freshness Tab
The Refresh bandwidth field displays the refresh bandwidth options. The default setting is to allow
the ProxySG to manage refresh bandwidth automatically.
Important:
2.
3.
Blue Coat strongly recommends that you not change the setting from the default.
Do one of the following:
❐
To turn off automatic bandwidth refresh, select Limit refresh bandwidth to (not recommended).
Enter a new value into the kilobits/sec field, if necessary.
❐
To return the ProxySG to automatic bandwidth refresh, select Let the ProxySG Appliance manage
refresh bandwidth (recommended).
Click Apply.
To Set Refresh Bandwidth through the CLI
1.
To disable automatic bandwidth refresh (not recommended), enter the following commands at the
(config) command prompt:
SGOS#(config) caching
SGOS#(config caching) refresh no automatic
2.
(Optional) To adjust the kilobit/sec refresh bandwidth value, enter the following commands:
Note:
Adjusting the refresh bandwidth value has no effect if you do not also turn off the
automatic refresh bandwidth option (you must perform Step 1). You can skip Step 2 if the
refresh bandwidth value is acceptable (200 Kbps is the default).
SGOS#(config) caching
SGOS#(config caching) refresh bandwidth kbps
3.
163
To return the ProxySG to automatic bandwidth refresh (recommended), enter the following
commands:
Blue Coat ProxySG Configuration and Management Guide
Section A: Configuring Explicit Proxies
SGOS#(config) caching
SGOS#(config caching) refresh automatic
4.
(Optional) View the (truncated) results:
SGOS#(config caching) view
Refresh:
Estimated access freshness is 100.0%
Let the ProxySG Appliance manage refresh bandwidth
Current bandwidth used is 0 kilobits/sec
To view all HTTP settings, see "Viewing HTTP Settings through the CLI" on page 177.
Setting Default HTTP Proxy Policy
Using the ProxySG Management Console or CLI, you can configure global defaults that determine
HTTP proxy policy, such as the maximum size of cacheable objects, the length of time that negative
responses remain in the cache, whether the ProxySG revalidates each object before serving it, whether
the server certificate is verified by default, and how headers are parsed.
Other policy can be controlled only by using Blue Coat Content Policy Language (CPL). This section is
about using the Management Console or CLI to set default HTTP proxy policy; see "Creating a Proxy
Layer to Manage Proxy Operations" on page 261 for information about using CPL to configure HTTP
proxy caching.
Note:
Tolerant HTTP request parsing can only be done through the CLI; it is not available
through the Management Console.
To Set HTTP Default Proxy Policy through the Management Console:
1.
Select Configuration>Services>HTTP Proxy>Policies.
The Policies tab displays.
Figure 6-6: Policies Tab
164
Chapter 6: Configuring Proxies
Section A: Configuring Explicit Proxies
2.
Fill in the fields as appropriate:
❐
In the Do not cache objects larger than field, enter the maximum object size to cache. The default
is 1024 MB. This configuration determines the maximum object size to store in the ProxySG.
All objects retrieved that are greater than the maximum size are delivered to the client but are
not stored in the ProxySG.
❐
In the Cache negative responses for field, enter the number of minutes the ProxySG stores
negative responses. The default is 0, meaning that the ProxySG will not cache negative
responses and will always attempt to retrieve the object.
The OCS might send a client error code (4xx HTTP response) or a server error code (5xx HTTP
response) as a response to some requests. If the ProxySG is configured to cache such negative
responses, it returns that response in subsequent requests for that page or image for the
specified number of minutes. If it is not configured, which is the default, the ProxySG
attempts to retrieve the page or image every time it is requested.
If you enter a number of minutes into this field, then your response times will improve, but
you could receive negative responses to requests that might otherwise have been served for
that period of time.
❐
To always verify that each object is fresh upon access, select the Always check with source before
serving object checkbox. Enabling this setting has a significant impact on performance, because
HTTP proxy will revalidate requested cached objects with the OCS before serving them to the
client, resulting in a negative impact on response times and bandwidth gain. Therefore, this
configuration item should not be enabled unless absolutely required.
❐
If you communicate with an OCS through HTTPS and want the OCS's certificate to be verified
by the ProxySG, make sure that the Verify server certificate for secure connections checkbox is
checked.
❐
The default is to parse HTTP meta tag headers in HTML documents if the MIME type of the
object is text/HTML. The function of all meta tags is same as the corresponding HTTP
headers.
To disable meta-tag parsing, remove the check from the checkbox for:
•
Parse “cache-control” meta tag
The following sub-headers are parsed when this checkbox is selected: private,
no-store, no-cache, max-age, s-maxage, must-revalidate, proxy-revalidate.
3.
•
Parse “expires” meta tag
•
Parse “pragma-no-cache” meta tag
Click Apply.
To Set HTTP Proxy Default Policy through the CLI
1.
165
At the (config) command prompt, enter the following commands:
Blue Coat ProxySG Configuration and Management Guide
Section A: Configuring Explicit Proxies
SGOS#(config) caching
SGOS#(config caching)
SGOS#(config caching)
SGOS#(config caching)
-orSGOS#(config caching)
max-cache-size megabytes
negative-response minutes
always-verify-source
no always-verify-source
where:
max-cache-size
megabytes
The maximum size, in megabytes, of the largest object
that can stored on the ProxySG. Note that
max-cache-size sets the maximum object size for
both HTTP and FTP.
negative-response
minutes
The amount of time, in minutes, that the ProxySG
remembers that an object is not stored.
always-verifysource
no
Note:
2.
Ensures that every object is always fresh upon access.
This has a significant impact on performance, because
HTTP proxy will revalidate requested cached objects
with the OCS before serving them to the client,
resulting in a negative impact on response times and
bandwidth gain. Therefore, this configuration item
should not be enabled unless absolutely required.
always-verify
source
The default setting. This tells the ProxySG never to
check objects on the source before serving them to the
client.
If you use HTTPS, you might want to change the verify-server certificate from the default
of enabled to suppress verification of the OCS certificate (step 2).
(Optional) To enable or disable the verify-server certificate setting, enter one of the following
commands:
SGOS#(config caching) exit
SGOS#(config) http ssl-verify-server
-orSGOS#(config) http no ssl-verify-server
3.
(Optional) To enable or disable meta-tag parsing (parsing is enabled by default), enter one of the
following commands:
SGOS#(config services) exit
SGOS#(config) http parse meta-tag {cache-control | expires | pragma-no-cache}
-orSGOS#(config) http no parse meta-tag {cache-control | expires |
pragma-no-cache}
To view all HTTP settings, see "Viewing HTTP Settings through the CLI" on page 177.
166
Chapter 6: Configuring Proxies
Section A: Configuring Explicit Proxies
Tips on Parsing Meta Tags
•
If ICAP response modification is occurring, the response body modified by the ICAP server is not
parsed.
•
Relevant HTTP meta tags must appear within the first 1000 bytes of HTTP object body. If the meta
tag does not appear within the first 1000 bytes, it is ignored.
Tips on Using Meta Tags With Policy
•
The following CPL properties can be used in the <Cache> layer to control meta tag processing for
HTTP proxy, HTTP refresh, and HTTP pipeline transactions:
http.response.parse_meta_tag.Pragma.no-cache(yes|no)
http.response.parse_meta_tag.Cache-Control(yes|no)
http.response.parse_meta_tag.Expires(yes|no)
•
VPM support for this feature is not available.
Tolerant HTTP Request Parsing
By default, the ProxySG blocks malformed HTTP requests, returning a 400 Invalid Request error. The
tolerant HTTP request parsing flag causes certain types of malformed requests to be processed instead
of being rejected.
By default, a header line not beginning with a <Tab> or space character must consist of a header name
(which contains no <Tab> or space characters), followed by a colon, followed by an optional value, or
an error is reported. With tolerant request parsing enabled, a request header name is allowed to
contain <Tab> or space characters, and if the request header line does not contain a colon, then the
entire line is taken as the header name.
A header containing one or more <Tab> or space characters, and nothing else, is considered
ambiguous. Blue Coat doesn't know if this is a blank continuation line or if it is the blank line that
signals the end of the header section. By default, an ambiguous blank line is illegal, and an error is
reported. With tolerant request parsing enabled, an ambiguous blank line is treated as the blank line
that signals the end of the header section.
To Enable the HTTP Tolerant Request Parsing Flag through the CLI
Note:
This feature is only available through the CLI. It cannot be set through the Management
Console.
From the (config) prompt, enter the following command to enable tolerant HTTP request parsing
(the default is disabled):
SGOS#(config) http tolerant-request-parsing
To disable HTTP tolerant request parsing, enter the following command:
SGOS#(config) http no tolerant-request-parsing
To view all HTTP settings, including http tolerant-request-parsing if it is enabled, see "Viewing
HTTP Settings through the CLI" on page 177.
167
Blue Coat ProxySG Configuration and Management Guide
Section A: Configuring Explicit Proxies
Choosing the HTTP Proxy Profile
You can select from among three profiles for the HTTP proxy, depending on your needs, and you can
also create a customized profile from the three available.
The three profiles are:
•
Normal, which acts as a client-accelerator and is used for enterprise deployments
•
Portal, which acts as a server accelerator and is used for web-hosting
•
Bandwidth, which is used for ISP deployments
Table 6.1 shows the configuration for each profile. For a description of each configuration setting, see
Table 6.2 on page 170.
Table 6.1: Normal, Portal and Bandwidth Gain Profiles
Configuration
Normal Profile
Portal Profile
Bandwidth Gain
Pipeline embedded objects in client requests
Enabled
Disabled
Disabled
Pipeline embedded objects in prefetch requests
Enabled
Disabled
Disabled
Pipeline redirects for client requests
Enabled
Disabled
Disabled
Pipeline redirects for prefetch requests
Enabled
Disabled
Disabled
Cache expired objects
Enabled
Disabled
Enabled
Bandwidth Gain Mode
Disabled
Disabled
Enabled
Substitute GET for IMS (if modified since)
Disabled
Enabled
Enabled
Substitute GET for PNC (Pragma no cache)
Disabled
Enabled
Does not change
Substitute GET for HTTP 1.1 conditionals
Disabled
Enabled
Enabled
Substitute GET for IE (Internet Explorer) reload
Disabled
Enabled
Does not change
Never refresh before expiration
Disabled
Enabled
Enabled
Never serve after expiration
Disabled
Enabled
Does not change
When a ProxySG is first manufactured, it is set to a Normal profile. Depending on your needs, you can
use the Bandwidth Gain profile or the Portal profile. You can also combine needed elements of all three
profiles.
Normal Profile
Normal is the default profile and can be used wherever the ProxySG is used as a normal forward
proxy. This profile is typically used in enterprise environments, where the freshness of objects is more
important than controlling the use of server-side bandwidth. The Normal profile is the profile that
most follows the HTTP standards concerning object revalidation and staleness. Additionally,
prefetching (pipelining) of embedded objects and redirects is enabled, which reduces response time
for clients.
168
Chapter 6: Configuring Proxies
Section A: Configuring Explicit Proxies
Portal Profile
When configured as a server accelerator, the ProxySG improves object response time to client requests,
scalability of the OCS site, and overall Web performance at the OCS. A server accelerator services
requests meant for an OCS as if it is the OCS itself.
Because an OCS can actually consist of many servers—a single Web server or an entire server
farm—OCSs are identified by domain name or IP address. To the ProxySG, the domain name or IP
address is treated as the OCS, regardless of how many back-end Web servers might be installed.
Bandwidth Gain Profile
The Bandwidth-Gain profile is useful wherever server-side bandwidth is an important resource. This
profile is typically used in Internet Service Provider (ISP) deployments. In such deployments, the
freshness of the object is not as important as controlling the use of server-side bandwidth. The
Bandwidth-Gain profile enables various HTTP configurations that can increase page response times
and the likelihood that stale objects are served, but that reduces the amount of server-side bandwidth
required.
HTTP Object Types
HTTP proxy categorizes HTTP objects into three types:
•
Type-T: The OCS specifies explicit expiration time.
•
Type-M: Expiration time is not specified; however, the last modified time is specified by the OCS.
•
Type-N: Neither expiration nor last modified time has been specified.
The ProxySG’s asynchronous adaptive refresh (AAR) algorithm is normally applied to all three types
of HTTP objects. To maximize the freshness of the next access to objects in the ProxySG’s cache,
asynchronous revalidations are performed on those objects in accordance with their relative
popularity and the amount of time remaining before their estimated time of expiration. Estimated
expiration times will vary as object content changes are observed during such asynchronous
revalidations. This will happen even for type-T objects, because the expiration times of type-T objects
are not always perfectly managed by webmasters of content servers. However, for situations where
such management can be trusted, certain configuration items exist to reduce speculative revalidation
of type-T objects. In the following section, the terms revalidation and refresh mean the same thing—to
assess the freshness of an object by sending a conditional GET request to the object’s OCS.
169
Blue Coat ProxySG Configuration and Management Guide
Section A: Configuring Explicit Proxies
HTTP Proxy Profile Configuration Components
Table 6.2 gives a definition of the customizable HTTP proxy profile settings. Both the Management
Console field and CLI (config) command text is included.
Table 6.2: Description of Profile Configuration Components in the Management Console and CLI
170
Management Console
Checkbox Field
CLI (config)
Command
Definition
Pipeline embedded
objects in client request
http [no]
pipeline client
requests
This configuration item applies only to HTML
responses. When this setting is enabled, and the object
associated with an embedded object reference in the
HTML is not already cached, HTTP proxy will acquire
the object’s content before the client requests the object.
This improves response time dramatically. If this setting
is disabled, HTTP proxy will not acquire embedded
objects until the client requests them.
Pipeline redirects for
client request
http [no]
pipeline client
redirects
When this setting is enabled, and the response of a
client request is one of the redirection responses (such
as 301, 302, or 307 HTTP response code), then HTTP
proxy pipelines the object specified by the Location
header of that response, provided that the redirection
location is an HTML object. This feature improves
response time for redirected URLs. If this setting is
disabled, HTTP proxy does not pipeline redirect
responses resulting from client requests.
Pipeline embedded
objects in prefetch
request
http [no]
pipeline prefetch
requests
This configuration item applies only to HTML
responses resulting from pipelined objects. When this
setting is enabled, and a pipelined object’s content is
also an HTML object, and that HTML object has
embedded objects, then HTTP proxy pipelines those
embedded objects as well. This nested pipelining
behavior can occur three levels deep at most. If this
setting is disabled, HTTP proxy does not engage in
nested pipelining behavior.
Pipeline redirects for
prefetch request
http [no]
pipeline prefetch
redirects
When this setting is enabled, HTTP proxy pipelines the
object specified by a redirect location returned by a
pipelined response. If this setting is disabled, HTTP
proxy does not try to pipeline redirect locations
resulting from a pipelined response.
Chapter 6: Configuring Proxies
Section A: Configuring Explicit Proxies
Table 6.2: Description of Profile Configuration Components in the Management Console and CLI (Continued)
Management Console
Checkbox Field
CLI (config)
Command
Definition
Substitute Get for IMS
http [no]
substitute
if-modified-since
If the time specified by the If-Modified-Since: header in
the client’s conditional request is greater than the last
modified time of the object in the cache, it is a strong
indication that the copy in the cache is stale. When that
is the case, HTTP proxy will do a conditional GET to the
OCS, based on the last modified time of the cached
object.
To control this aspect of the ProxySG’s treatment of the
If-Modified-Since: header, disable the Substitute Get for
IMS setting. When this setting is disabled, a client time
condition greater than the last modified time of the
object in the cache does not trigger revalidation of the
object.
Note, however, that not all objects necessarily have a
last-modified time specified by the OCS.
Substitute Get for HTTP
1.1 conditionals
http [no]
substitute
conditional
HTTP 1.1 provides additional controls to the client over
the behavior of caches concerning the staleness of the
object. Depending on various Cache-Control:
headers, the ProxySG can be forced to consult the OCS
before serving the object from the cache. For more
information about the behavior of various
Cache-Control: header values, refer to RFC 2616.
If the Substitute Get for HTTP 1.1 Conditionals setting
is enabled, HTTP proxy ignores the following
Cache-Control: conditions from the client request:
• "max-stale" [ "=" delta-seconds ]
• "max-age" "=" delta-seconds
• "min-fresh" "=" delta-seconds
• "must-revalidate"
• "proxy-revalidate"
Substitute Get for PNC
171
http [no]
substitute
pragma-no-cache
Typically, if a client sends an HTTP GET request with a
Pragma: no-cache or Cache-Control: no-cache
header (both are hereby referred to as PNC for
convenience), a cache must consult the OCS before
serving the content. This means that HTTP proxy will
always re-fetch the entire object from the OCS, even if
the cached copy of the object is fresh. Because of this,
PNC requests can degrade proxy performance and
increase server-side bandwidth utilization. However, if
the Substitute Get for PNC setting is enabled, then the
PNC header from the client request is ignored (HTTP
proxy treats the request as if the PNC header is not
present at all).
Blue Coat ProxySG Configuration and Management Guide
Section A: Configuring Explicit Proxies
Table 6.2: Description of Profile Configuration Components in the Management Console and CLI (Continued)
172
Management Console
Checkbox Field
CLI (config)
Command
Definition
Substitute Get for IE
reload
http [no]
substitute
ie-reload
Some versions of Internet Explorer issue the
Accept: */* header instead of the Pragma:
no-cache header when you click Refresh. When an
Accept header has only the */* value, HTTP proxy
treats it as a PNC header if it is a type-N object. You can
control this behavior of HTTP proxy with the Substitute
GET for IE Reload setting. When this setting is enabled,
the HTTP proxy will ignore the PNC interpretation of
the Accept: */* header.
Never refresh before
expiration
http [no]
strict-expiration
refresh
Applies only to cached type-T objects. When this setting
is enabled, the ProxySG will not asynchronously
revalidate such objects before their specified expiration
time. When this setting is disabled, such objects, if they
have sufficient relative popularity, can be
asynchronously revalidated and can, after a sufficient
number of observations of changes, have their estimates
of expiration time adjusted accordingly.
Never serve after
expiration
http [no]
strict-expiration
serve
Applies only to cached type-T objects. If this setting is
enabled, an object will be synchronously revalidated
before being served to a client, if the client accesses the
object after its expiration time. If this setting is disabled,
the object will be served to the client and, depending on
its relative popularity, may be asynchronously
revalidated before it is accessed again.
Cache expired objects
http [no] cache
expired
Applies only to type-T objects. When this setting is
enabled, type-T objects that are already expired at the
time of acquisition will be cached (if all other conditions
make the object cacheable). When this setting is
disabled, already expired type-T objects become
non-cacheable at the time of acquisition.
Chapter 6: Configuring Proxies
Section A: Configuring Explicit Proxies
Table 6.2: Description of Profile Configuration Components in the Management Console and CLI (Continued)
Management Console
Checkbox Field
CLI (config)
Command
Definition
Enable Bandwidth Gain
Mode
bandwidth-gain
{disable |
enable}
This setting controls both HTTP-object acquisition after
client-side abandonment and AAR (asynchronous
adaptive refresh) revalidation frequency.
• HTTP-Object Acquisition
When Bandwidth Gain mode is enabled, if a client
requesting a given object abandons its request, then
HTTP proxy immediately abandons the acquisition
of the object from the OCS, if such an acquisition is
still in progress. When bandwidth gain mode is
disabled, the HTTP proxy continues to acquire the
object from the OCS for possible future requests for
that object.
• AAR Revalidation Frequency
Under enabled bandwidth gain mode, objects that
are asynchronously refreshable are revalidated at
most twice during their estimated time of freshness.
With bandwidth gain mode disabled, they are
revalidated at most three times. Note that not all
asynchronously refreshable objects are guaranteed to
be revalidated.
Configuring the HTTP Proxy Profile
You can configure the profile you want from either the Management Console or the CLI.
To Configure the HTTP Proxy Profile through the Management Console
1.
Select Configuration>Services>HTTP Proxy>Acceleration Profile.
The Acceleration Profile tab displays (Normal is the default profile). Text appears at the bottom of
this tab indicating which profile is selected. If you have a customized profile, this text does not
appear.
173
Blue Coat ProxySG Configuration and Management Guide
Section A: Configuring Explicit Proxies
Figure 6-7: Acceleration Profile Tab
Important:
2.
If you have a customized profile and you click one of the Use Profile buttons, no
record of your customized settings remains. However, once the ProxySG is set to a
specific profile, the profile is maintained in the event the ProxySG is upgraded.
To select a profile, click one of the three profile buttons (Use Normal Profile, Use Bandwidth Gain
Profile, or Use Portal Profile).
The text at the bottom of the Acceleration Profile tab changes to reflect the new profile.
Note:
You can customize the settings, no matter which profile button you select.
3.
(Optional) To customize the profile settings, select or deselect any of the checkboxes (see Table 6.2
on page 170 for information about each setting).
4.
Click Apply.
To Configure the HTTP Proxy Profile through the CLI
1.
At the (config) command prompt, enter the profile you want:
SGOS#(config) profile {normal | portal | bwgain}
2.
(Optional) Use the following commands to customize the profile settings (see Table 6.2 on
page 170 for information about these settings):
SGOS#(config)
SGOS#(config)
SGOS#(config)
SGOS#(config)
SGOS#(config)
SGOS#(config)
SGOS#(config)
SGOS#(config)
174
http
http
http
http
http
http
http
http
[no]
[no]
[no]
[no]
[no]
[no]
[no]
[no]
pipeline client requests
pipeline client redirects
pipeline prefetch requests
pipeline prefetch redirects
substitute if-modified-since
substitute conditional
substitute pragma-no-cache
substitute ie-reload
Chapter 6: Configuring Proxies
Section A: Configuring Explicit Proxies
SGOS#(config)
SGOS#(config)
SGOS#(config)
SGOS#(config)
3.
http [no] strict-expiration refresh
http [no] strict-expiration serve
http [no] cache expired
bandwidth-gain {disable | enable}
(Optional) View the settings. (This example assumes you have selected the Portal profile.)
SGOS#(config) show profile
SG is currently using the Normal Profile
Pipeline client requests:
Enabled
Pipeline client redirects:
Enabled
Pipeline prefetch requests:
Enabled
Pipeline prefetch redirects:
Enabled
Substitute Get "if-modified-since": Disabled
Substitute Get "pragma: no-cache":
Disabled
Substitute HTTP 1.1 Conditional Get: Disabled
Substitute Internet Explorer reload: Disabled
Never refresh before expiration:
Disabled
Never serve after expiration:
Disabled
Cache expired objects:
Enabled
Bandwidth gain mode:
Disabled
You can view all HTTP settings. See "Viewing HTTP Settings through the CLI" on page 177 for more
information.
Additional Configuration Affecting Bandwidth Gain
In addition to the configuration items related to top-level profiles, other configurable items also affect
bandwidth gain. You can set the top-level profile and adjust various related configuration items to fine
tune ProxySG for your needs (see "Configuring the HTTP Proxy Profile" on page 173), and you can
provide additional fine-tuning with the following configuration items:
•
Byte-range support
•
Revalidate pragma-no-cache
Byte-range requests can be made with a pragma-no-cache header. In order to serve these requests
from the cache, you will need to enable the revalidate pragma-no-cache setting (see "Revalidate
Pragma-No-Cache" below).
Byte-Range Support
If a client requests a byte range using the Range: HTTP header, the ProxySG can serve the requested
portions of the file from the cache if byte-range support is enabled (the default). If byte range support
is disabled, all such requests will be forwarded in a non-cacheable way to the origin content server.
Byte-range configuration can significantly affect bandwidth gain where heavy use of range requests is
expected. Download managers (such as NetAnts®) typically use byte-range requests heavily.
175
Blue Coat ProxySG Configuration and Management Guide
Section A: Configuring Explicit Proxies
With byte-range support enabled, if the object is already cached and does not need to be reloaded
from the OCS, the ProxySG serves the byte-range request from the cache only. But if the object is not in
the cache, or if a reload of the object is required, the ProxySG might treat the byte-range request as if
byte-range support is disabled and serve the object from the cache. It is important to note that HTTP
proxy never caches partial objects, even if byte-range support is enabled.
If byte-range support is disabled, HTTP treats all byte-range requests as non-cacheable. Such requests
are never served from the cache, even if the object exists in the cache. The client’s request is sent
unaltered to the OCS and the response is not cached. Thus a byte-range request has no effect on the
cache if byte-range support is disabled.
HTTP proxy categorizes the range requests in following three categories when byte-range support is
enabled:
•
Type-1: 0-N: Range request for first N bytes of the object
•
Type-2: N-M: Range request from N bytes to M bytes of the object
•
Type-3: -N: Range request for last N bytes of the object
If the object does not exist in the cache, and a byte-range request is received with the first range being
type-1 or type-2, and the start byte of the first requested range is within 14336 bytes (hard coded
threshold), then the entire object is retrieved from the OCS and cached in the ProxySG. Even though
HTTP proxy retrieves the entire object from the OCS, it sends an appropriate byte-range response to
the client. If the object does not exist in the cache, and if the first range in the request is not of type-1 or
type-2, or if the start byte of the first requested range is beyond 14336 bytes, then the client’s request is
sent unaltered to the OCS and the response is not cached.
If the object exists in the cache, and if a range request with an effective PNC (the PNC header is not
substituted or revalidated—see "Revalidate Pragma-No-Cache" below) is made, and the first range in
the request is either type-3 or type-1 or 2 with a start byte offset greater than 14336 bytes, then, even if
the object exists in the cache, the transaction is made non-cacheable (the request is sent to the OCS
without any modification and the response is not cached). If an object exists in the cache and a
byte-range request is made without the PNC header, then the byte-range response is satisfied from the
cache.
Most download managers make byte-range requests with a PNC (pragma-no-cache) header. To serve
such requests from the cache, the revalidate pragma-no-cache option should be configured along with
byte-range support (see "Revalidate Pragma-No-Cache" below).
To Configure Byte-Range Support through the CLI
Note:
Enabling or disabling byte-range support can only be configured through the CLI.
To enable or disable byte-range support, enter one of the following commands at the (config)
command prompt:
SGOS#(config) http byte-ranges
-orSGOS#(config) http no byte-ranges
To view all HTTP settings, see "Viewing HTTP Settings through the CLI" on page 177.
176
Chapter 6: Configuring Proxies
Section A: Configuring Explicit Proxies
Revalidate Pragma-No-Cache
The pragma-no-cache (PNC) header in a client’s request can affect the efficiency of the proxy from a
bandwidth gain perspective (this behavior is described in Table 6.2 in the Substitute Get for PNC
configuration description). If you do not want to completely ignore PNC in client requests (which you
can do by using the Substitute Get for PNC configuration), you can lower the impact of the PNC by
enabling the revalidate-pragma-no-cache setting. When the revalidate-pragma-no-cache
setting is enabled, a client’s non-conditional PNC-GET request will result in a conditional GET request
sent to the OCS if the object is already in the cache. This gives the OCS a chance to return the 304 Not
Modified response, thus consuming less server-side bandwidth, because it has not been forced to return
full content even though the contents have not actually changed. By default, the revalidate
pragma-no-cache configuration is disabled and is not affected by changes in the top-level profile. Note
that when the Substitute Get for PNC configuration is enabled (see "Configuring the HTTP Proxy
Profile" for configuration information), the revalidate pragma-no-cache configuration has no effect.
To Configure the Revalidate PNC Setting through the CLI
Note:
The revalidate pragma-no-cache setting can only be configured through the CLI.
To enable or disable the revalidate PNC setting, enter one of the following commands at the (config)
command prompt:
SGOS#(config) http revalidate-pragma-no-cache
-orSGOS#(config) http no revalidate-pragma-no-cache
To view all HTTP settings, see "Viewing HTTP Settings through the CLI" below.
Viewing HTTP Settings through the CLI
You can view the existing HTTP settings by entering the following command:
SGOS#(config) show http
Supported protocol version: HTTP 1.1
Caching options:
Cache authenticated data: enabled
Cache expired objects:
enabled
Cache personal pages:
disabled
Reverse DNS lookup on IP: disabled
Strip From Headers:
disabled
Byte range support:
enabled
Force NTLM on proxy IE:
disabled
Rewrite redirects for XP: disabled
Revalidate "pragma: no-cache":
disabled
WWW redirect if host not found:
enabled
Force explicit expirations:
Never refresh before:
disabled
Never serve after:
disabled
Add headers:
"Front-end-https":
disabled
"Via":
disabled
"X-forwarded-for":
disabled
177
Blue Coat ProxySG Configuration and Management Guide
Section A: Configuring Explicit Proxies
"Client-ip":
disabled
Parsing options:
HTML meta tag "Cache-Control":
enabled
HTML meta tag "Expires":
enabled
HTML meta tag "Pragma: no-cache": enabled
Persistent connections:
Client connections:
enabled
Server connections:
enabled
Pipeline:
Client requests:
enabled
Client redirects:
enabled
Prefetch requests:
enabled
Prefetch redirects:
enabled
Substitute simple Get for:
Get "if-modified-since": disabled
Get "pragma: no-cache":
disabled
HTTP 1.1 Conditional get: disabled
Internet Explorer reload: disabled
Proprietary header extensions:
Blue Coat extensions:
disabled
FTP proxy:
Url path is:
absolute from root
Configuration/access log uploads: will use PASV
Persistent connection timeouts:
Server:
900
Client:
360
Receive timeouts:
Server:
180
Client:
120
Refresh:
90
Https:
ssl-verify-server:
enabled
tolerant-request-parsing: enabled
HTTP Compression
Compression is an algorithm that reduces a file size but does not lose any data. Whether you should
use compression depends upon three resources: server-side bandwidth, client-side bandwidth, and
ProxySG CPU. If server-side bandwidth is more expensive in your environment than CPU, then you
should always request compressed content from the origin content server (OCS). However, if CPU is
comparatively expensive, the ProxySG should instead be configured to ask the OCS for the same
compressions that the client asked for and to forward whatever the server returns.
The default configuration assumes that CPU is costlier than bandwidth. If this is not the case, you can
change the ProxySG behavior.
178
Chapter 6: Configuring Proxies
Section A: Configuring Explicit Proxies
Note:
Decompression, content transformation, and recompression increases response time by a
small amount because of the CPU overhead. (The overhead is negligible in most cases.)
RAM usage also increases if compression is enabled.
Compression might also appear to adversely affect bandwidth gain. Because compression
results in a smaller file being served to the client than was retrieved by the ProxySG from
the origin content server, bandwidth gain statistics reflect such requests/responses as
negative bandwidth gain.
Compression is disabled by default (even if you have a valid license for this feature). If compression is
enabled, the HTTP proxy forwards the supported compression algorithm (gzip and deflate) from the
client’s request (Accept-Encoding: request header) to the server as is, and attempts to send
compressed content to client whenever possible. This allows the ProxySG to send the response as is
when the server sends compressed data, including non-cacheable responses. Any unsolicited encoded
response is forwarded to the client as is.
Note:
Compression is a licensed feature of SGOS. If the ProxySG has no valid license for
compression, it does not compress the content if the server sends uncompressed content.
However, the ProxySG continues to uncompress content if necessary to apply
transformations.
Any unsolicited encoded response is forwarded to the client as is.
For information on licensing, see "Licensing" on page 35.
Compression is controlled by policy only.
You can view compression statistics by going to Statistics>System Usage>Client Comp. Gain and Server
Comp. Gain and Statistics>HTTP/FTP History>Client Comp. Gain and Server Comp. Gain. For information on
these statistics, see "System Usage Statistics" on page 816 and "HTTP/FTP History Statistics" on
page 821.
Compression Behavior
The ProxySG compression behavior is detailed in the tables below.
Note:
A variant is the available form of the object in the cache—compressed or uncompressed.
The Content-Encoding: header Identity refers to the uncompressed form of the content.
Compression increases the overall percentage of cacheable content, increasing the hit rate in terms of
number of objects served from the cache.
179
Blue Coat ProxySG Configuration and Management Guide
Section A: Configuring Explicit Proxies
For cache-hit compression behavior, see Table 6.3 below. For cache-miss compression behavior, see
Table 6.4 on page 180.
Table 6.3: Cache-Hit Compression Behavior
Accept-Encoding:
in client request
Variant Available when
the Request Arrived
Variant Stored as a
Result of the Request
Content-Encoding: in ProxySG
response
Identity
Uncompressed object
None
Identity
Identity
No uncompressed object
Uncompressed
Identity
gzip compressed
gzip, deflate
Uncompressed object
gzip compressed
gzip
gzip, deflate
Uncompressed object
None
gzip
None
deflate
deflate compressed
deflate
gzip compressed
gzip, deflate
Uncompressed object
deflate compressed
deflate
No uncompressed object
gzip compressed
(This is effectively a cache-miss.
The ProxySG does not convert
from gzip to deflate.)
Table 6.4: Cache-Miss Compression Behavior
Accept-Encoding:
in client request
Accept-Encoding:
in ProxySG
request
Content-Encoding:
in server response
Generated variants
Content-Encoding:
in ProxySG
response
Identity
Identity
Identity
uncompressed object
Identity
gzip, deflate
gzip, deflate
Identity
uncompressed object
gzip
gzip-compressed
gzip, deflate
gzip, deflate
gzip
No uncompressed
object
gzip
gzip-compressed
gzip, deflate,
compress
gzip, deflate
gzip
No uncompressed
object
gzip
gzip-compressed
gzip, deflate
gzip, deflate
compress (illegal
response)
compress
compress
Compression Exceptions
•
180
The ProxySG issues a transformation_error exception (HTTP response code 403), when the
server sends an unknown encoding and the ProxySG is configured to do content transformation.
Chapter 6: Configuring Proxies
Section A: Configuring Explicit Proxies
•
The ProxySG issues an unsupported_encoding exception (HTTP response code 415 Unsupported Media Type) when the ProxySG is unable to deliver content due to configured
policy.
The messages in the exception pages can be customized. For information on using exception pages,
see "Section D: Defining Exceptions".
Configuring Compression
Compression behavior can only be configured through policy—VPM or CPL.
Using VPM to Configure Compression Behavior
Two objects can be used to configure compression through VPM:
•
HTTP client compression object: Allows you to determine the behavior when the client wants the
content in a different form than is in the cache.
•
HTTP server compression object: Allows you to enable or disable compression and to set options.
Complete the following steps to manage HTTP server and client compression.
To Add or Edit Client Compression
1.
2.
Create a Web Access Layer:
❐
Select Configuration>Policy>Visual Policy Manager; click the Launch button.
❐
Select Policy>Add Web Access Layer from the menu of the Blue Coat VPM window that appears.
❐
Type a layer name into the dialog that appears and click OK.
Add an Action object:
❐
Right click on the item in the Action column; select Set.
❐
Click New in the Set Action Object dialog that appears; select Set HTTP Client Compression.
The Add Client HTTP Compression Object dialog displays.
181
Blue Coat ProxySG Configuration and Management Guide
Section A: Configuring Explicit Proxies
Figure 6-8: Add Client HTTP Compression Object Dialog
❐
Select the compression options you want to use; click OK.
❐
Click OK again; close the VPM window and click Yes in the dialog to save your changes.
To Add or Edit Server Compression
1.
2.
Create a Web Access Layer:
❐
Select Configuration>Policy>Visual Policy Manager; click the Launch button.
❐
Select Policy>Add Web Access Layer from the menu of the Blue Coat VPM window that appears.
❐
Type a layer name into the dialog that appears and click OK.
Add an Action object:
❐
Right click on the item in the Action column; select Set.
❐
Click New in the Set Action Object dialog that appears; select Set Server HTTP Compression.
The Add Server HTTP Compression Object dialog displays.
Figure 6-9: Add Server HTTP Compression Object Dialog
182
Chapter 6: Configuring Proxies
Section A: Configuring Explicit Proxies
❐
Select the compression options you want to use; click OK.
❐
Click OK again; close the VPM window and click Yes in the dialog to save your changes.
Using Policy to Configure Compression Behavior
Compression and decompression are allowed if you have a valid compression license and
compression is enabled. If you do not have a valid compression license, or if compression is not
enabled, neither compression nor decompression are allowed.
Policy controls the compression or decompression of content on the ProxySG. If compression is turned
off, uncompressed content is served to the client if a compressed variant is not available. If
decompression is turned off, an uncompressed version is fetched from the OCS if the variant doesn’t
exist and the client requested uncompressed content.
Note:
The ProxySG decompresses the content if transformation is to be applied, even if the
compression license is expired or not present.
You can use server-side or client-side controls to manage compression through policy, as described in
the following table.
Table 6.5: Compression Properties
183
Compression Properties
Meaning
http.allow_compression(yes | no)
Allow the ProxySG to decompress content on the
fly if needed.
http.allow_decompression(yes | no)
Allow the ProxySG to decompress content on the
fly if needed.
http.server.accept_encoding(client)
Turn on only client encodings
http.server.accept_encoding(identity)
Turn off all encodings
http.server.accept_encoding(all)
Turn on all supported encodings, including the
client’s encodings.
http.server.accept_encoding(gzip,
deflate)
Send specific encodings (order sensitive)
http.server.accept_encoding(gzip, client)
Send specific encodings (order sensitive)
http.server.accept_encoding.gzip(yes |
no)
Add/remove an encoding
http.server.accept_encoding[gzip,
deflate, identity](yes | no)
Add/remove a list of encodings
http.server.accept_encoding.allow_unknown
(yes | no)
Allow/disallow unknown encodings.
http.client.allow_encoding(identity);
Allow no encodings (send uncompressed).
Blue Coat ProxySG Configuration and Management Guide
Section A: Configuring Explicit Proxies
Table 6.5: Compression Properties (Continued)
Compression Properties
Meaning
http.client.allow_encoding(client);
Allow all client encodings. This is the default
regardless of the state of the compression license.
http.client.allow_encoding(gzip,
deflate);
Allow fixed set of encodings.
http.client.allow_encoding(gzip, client);
Allow fixed set of encodings.
http.client.allow_encoding.gzip(yes |
no);
Add/remove one encoding
http.client.allow_encoding[gzip, deflate,
identity](yes | no);
Add/remove list of encodings
Default Behavior
By default, Blue Coat sends the client’s list of the accept encoding algorithms, except for unknown
encodings. If the compression license is expired or not present, the default overrides any configured
CPL policy.
If Accept-Encoding request header modification is used, it is overridden by the compression
related policy settings shown in Table 6.5. The Accept-Encoding header modification can continue
to be used if no compression policies are applied, or if the compression license is not present or
expired. Otherwise, the compression-related policies override any Accept-Encoding header
modification, even if the Accept-Encoding header modification appears later in the policy file.
Adding encoding settings with client-side controls depend on if the client originally listed that
encoding in its Accept-Encoding header. If so, these encodings are added to the list of candidates to
be delivered to the client. The first cache object with an Accept-Encoding match to the client-side list
is the one that is delivered.
Suggested Settings for Compression
•
If client-side bandwidth is expensive in your environment, use the following policy:
<proxy>
http.client.allow_encoding(client)
http.allow_compression(yes)
•
If server-side bandwidth is expensive in your environment, compared to client-side bandwidth
and CPU:
http.server.accept_encoding(all)
http.server.accept_encoding.allow_unknown(no); default
http.allow_compression(yes)
http.allow_decompression(yes)
•
184
If CPU is expensive in your environment, compared to server-side and client-side bandwidth:
Chapter 6: Configuring Proxies
Section A: Configuring Explicit Proxies
http.server.accept_encoding(client);If no content transformation policy is
configured
http.server.accept_encoding(identity);If some content transformation policy
is configured
http.allow_compression(no); default
http.allow_decompression(no); default
Boundary Conditions
•
Policy-based content transformations are not stored as variant objects. If content transformation is
configured, it will be applied on all cache-hits, and objects might be compressed all the time at the
end of such transformation if they are so configured.
•
The variant that is available in the cache is served, even if the client requests a compression choice
with a higher qvalue. For example, if a client requests Accept-encoding: gzip;q=1,
deflate;q=0.1, and only a deflate-compressed object is available in the cache, the deflate
compressed object is served.
•
The HTTP proxy ignores Cache-Control: no-transform directive of the OCS. If you want to
change this, you can write policy to disallow compression or decompression if Cache-Control:
no-transform response header is present.
•
The ProxySG treats multiple content encoding (gzip, deflate or gzip, gzip) as an unknown
encoding. (These strings indicate the content has been compressed twice.)
•
The gzip and deflate formats are treated as completely separate and are not converted from one to
the other.
•
Blue Coat recommends using gzip encoding (or allowing both gzip and deflate) when using
the HTTP compression feature.
•
If the ProxySG receives unknown content encoding and if content transformation is configured
(such as popup blocking), an error results.
•
Parsing of container HTML pages occurs on the server side, so pipelining (prefetching) does not
work when the server provides compressed content.
•
Compressing a zip file breaks some browser versions, and compressing images doesn’t provide
added performance. For a current list of content types that are not compressed, refer to the
Release Notes.
•
All responses from the server can be compressed, but requests to the server, such as POST
requests, cannot.
•
Only 200 OK responses can be compressed.
Troubleshooting HTTP Proxy Issues
This section covers problems you might encounter using the HTTP proxy.
185
Blue Coat ProxySG Configuration and Management Guide
Section A: Configuring Explicit Proxies
Using Explicit HTTP Proxy with Internet Explorer
Internet Explorer does not allow OCS NTLM authentication through a ProxySG when explicitly
proxied. To correct this, Blue Coat has added a Proxy-Support: Session-based-authentication
header that is sent by default when the ProxySG receives a 401 authentication challenge from
upstream when the client connection is an explicit proxy connection.
For older browsers or if both the ProxySG and the OCS do NTLM authentication, the Proxy-Support
header might not work. In this case, you can disable the header and instead enable NTLM-force,
which converts the 401-type server authentication challenge to a 407-type proxy authentication
challenge, supported by Internet Explorer. The ProxySG also converts the resulting
Proxy-Authentication headers in client requests to standard server authorization headers, which
allows an OCS NTLM authentication challenge to pass through when Internet Explorer is explicitly
proxied through the ProxySG.
Disabling the Proxy-Support Header
You can control the header using header modification policy. Suppression or modification of the
Proxy-Support custom header keeps the ProxySG from sending this default header. Use either the
Visual Policy Manager (VPM) or CPL to disable the header through policy. For complete information
on using VPM, see Chapter 14: “The Visual Policy Manager” on page 453.
Note:
If you want to suppress the Proxy-Support header globally, you can use the http
force-ntlm command to change the option. To suppress the header only in certain
situations, continue with the procedures below.
Suppress Proxy-Support Header through VPM
To suppress the header using VPM, create a new Web Access Layer. Then:
1.
Right click in the Action field to see the drop-down list; select Set.
The Existing Action Object dialog displays.
2.
Click New to see the drop-down list; select Control Response Header.
The Add Control Response Header Object dialog displays.
Figure 6-10: Add Control Response Header Object
186
Chapter 6: Configuring Proxies
Section A: Configuring Explicit Proxies
3.
Fill in the fields as follows:
❐
Name: Enter a meaningful name. This name will display in the Existing Action Objects dialog.
❐
Show: Select Custom from the drop-down list.
❐
Header Name: Enter Proxy-Support.
❐
Make sure the Suppress radio button is selected.
4.
Click OK.
5.
Scroll to the bottom of the Add Control Response Header Object dialog to see the Proxy-Support
header.
6.
Click OK.
Suppress Proxy-Support Header through CPL
Use CPL to define the Proxy-Support custom header object and to specify what action you want to
take. The example below uses Proxy-Support as the action name, but you can choose any name
meaningful to you. The result of this action is to suppress the Proxy-Support header
<proxy>
action.Proxy-Support(yes)
define action Proxy-Support
delete(response.x_header.Proxy-Support)
end action Proxy-Support
Enabling or Disabling NTLM Authentication for Internet Explorer Clients
The following procedure forces Internet Explorer clients explicitly-proxied through a ProxySG to
participate in NTLM authentication. Note that this CLI setting is global, affecting all clients. You can
also use VPM or CPL to provide granular control for NTLM authentication. (See "Force NTLM
Authentication through VPM" on page 188 and "Force NTLM Authentication through CPL" on
page 188.) These commands should only be used if the Proxy-support header is not suitable for the
situation.
Note:
These procedures can only be done through the CLI. The Management Console is not
available.
Do one of the following (note that the default is http no force-ntlm):
•
To force NTLM authentication for Internet Explorer clients, enter the following command at the
(config) command prompt:
SGOS#(config) http force-ntlm
•
To disable NTLM authentication for Internet Explorer clients, enter the following command at the
(config) command prompt:
SGOS#(config) http no force-ntlm
To view all HTTP settings, see "Viewing HTTP Settings through the CLI" on page 177.
187
Blue Coat ProxySG Configuration and Management Guide
Section A: Configuring Explicit Proxies
Force NTLM Authentication through VPM
To use VPM to force NTLM authentication, create a new Web Access Layer. Then:
1.
Right click in the Action field to see the drop-down list; select Set.
The Existing Action Object dialog displays.
2.
Scroll to the Force NTLM for Server Auth static object; select it.
3.
Click OK.
Force NTLM Authentication through CPL
Global configuration of NTLM authentication behavior is set through the CLI command http
force-ntlm (the default is http no force-ntlm). The http.force_ntlm_for_server_auth( ) CPL
property can be used to override the global settings for a particular subset.
To create a rule to force NTLM authentication for explicitly proxied Internet Explorer clients, first
define the action, then define the rule.
This example implements the following policies:
•
All clients from the “ForceNTLM_subnet” have force-ntlm turned on. These clients do not use the
Proxy-Support header.
•
Requests for all other hosts have force-ntlm turned off. These hosts use the Proxy-Support header.
define subnet ForceNTLM_subnet
10.10.0.0/16
end
<Proxy>
client.address=ForceNTLM_subnet http.force_ntlm_for_server_auth(yes)
http.force_ntlm_for_server_auth(no)
end
Configuring a SOCKS Proxy
While SOCKS servers are generally used to provide firewall protection to an enterprise, they also can
be used to provide a generic way to proxy any TCP or UDP protocols. The ProxySG supports both
SOCKSv4/4a and SOCKSv5; however, because of increased username and password authentication
capabilities and compression support, Blue Coat recommends that you use SOCKS v5.
Note:
For Blue Coat compatibility with SOCKS clients, check with customer support.
Understanding SOCKS Compression
Compression over SOCKS is supported for TCP/IP tunnels, which can compress the data transferred
between the branch (downstream proxy) and main office (upstream proxy), reducing bandwidth
consumption and improving latency.
188
Chapter 6: Configuring Proxies
Section A: Configuring Explicit Proxies
TCP tunnels are created by posting a listener on a static port for protocols that have a well-known
port; applications that use dynamic port numbers are handled through the Endpoint Mapper proxy
that automatically creates TCP tunnels to ports where Microsoft RPC services are running. (For
information on using the Endpoint Mapper proxy, see "Endpoint Mapper Proxy" on page 133.)
Except for enabling the SOCKS proxy, no configuration is required on the main office ProxySG to
support SOCKS compression. However, configuration is required on the branch ProxySG to forward
data through the SOCKS gateway. You can use policy or the socks-gateway CLI options to enable
SOCKS compression globally. Using policy, you can enable or disable compression on a
per-connection basis on either the client side or the server side.
If SOCKS compression is enabled and the upstream SOCKS gateway does not support it, the
connection fails.
Note:
Enabling compression on TCP tunnels impacts performance and should be done only
when the ProxySG is sized correctly to handle the incremental CPU load.
In a typical deployment, you will:
•
Create an Endpoint Mapper proxy at the remote office (the downstream proxy) that intercepts
Microsoft RPC traffic and creates dynamic TCP tunnels. Traffic to port 135 is transparently
redirected to this service using bridging or L4 switch or WCCP. For information on creating and
enabling an Endpoint Mapper proxy service, see "Endpoint Mapper Proxy" on page 133.
•
Create any other TCP tunnel proxies you need at the remote office: SMTP, DNS, and the like. For
information on configuring TCP tunnels, see "TCP Tunneling" on page 143.
•
Create a SOCKS gateway at the remote office and enable compression for that gateway. This
SOCKS gateway points to a SOCKS proxy located at the main office location (the upstream proxy,
the core of the network). For information on creating a SOCKS gateway and enabling SOCKS
compression, see "SOCKS Gateway Configuration" on page 722.
•
Set policy to forward TCP traffic through that SOCKS gateway. You can do this through the
<proxy> layer using either the VPM or CPL. For more information, see "Using Policy to Control
the SOCKS Proxy" on page 192.
Note:
In cases where more than two proxies exist in the chain and intermediate proxy nodes are
configured to do compression the traffic is forwarded as is. If the intermediate proxy is
not configured to do compression, traffic is decompressed before being forwarded to the
next proxy.
For more information on deploying SOCKS compression and Endpoint Mapper proxy, refer to the
Blue Coat Edge Deployment Guide.
Creating and Configuring the Service
Complete the following steps to create a SOCKS proxy and to configure SOCKS-proxy connection and
timeout values.
189
Blue Coat ProxySG Configuration and Management Guide
Section A: Configuring Explicit Proxies
To Create a SOCKS Proxy Server through the Management Console
1.
Select Configuration>Services>SOCKS Proxy.
The SOCKS Proxy tab displays.
Figure 6-11: SOCKS Proxy Tab
2.
Fill in the option fields (described below) as needed. The defaults are displayed and should be
sufficient for most purposes.
Max-Connections
connections
Set maximum allowed SOCKS client connections. The default
of 0 indicates an infinite number of connections are allowed.
Connection timeout
seconds
Set maximum time to wait on an outbound CONNECT.
Bind timeout on
accept
seconds
Set maximum time to wait on an inbound BIND.
Minimum idle timeout
seconds
Set minimum SOCKS client idle time threshold.
Maximum idle timeout
seconds
Set maximum SOCKS client idle time threshold.
To Configure the SOCKS Proxy through the CLI
1.
At the (config) command prompt, enter the following commands:
SGOS#(config) socks-proxy accept-timeout seconds | connect-timeout seconds |
max-connections number | max-idle-timeout seconds | min-idle-timeout seconds
2.
(Optional) View the results.
SGOS#(config) show socks-proxy
max-connections: 0
accept-timeout: 120
connect-timeout: 120
min-idle-timeout: 7200
max-idle-timeout: 0
190
Chapter 6: Configuring Proxies
Section A: Configuring Explicit Proxies
Enabling the SOCKS Proxy
Note that a SOCKS port is already configured on port 1080 and enabled.
To Edit an Existing SOCKS Port Service through the Management Console
1.
Select Configuration>Services>Service Ports.
2.
Highlight the SOCKS server.
3.
Click Edit; the Edit Service dialog appears.
Figure 6-12: SOCKS Add Service Dialog
4.
In the Protocol drop-down list, select SOCKS.
5.
The default IP address value is all. To limit the service to a specific IP, select the IP from the
drop-down list.
6.
In the Port field, specify a port number; select Enable.
7.
Click OK; Click Apply.
To Edit an Existing SOCKS Port Service through the CLI
1.
At the (config) command prompt, enter the following commands:
SGOS#(config) services
SGOS#(config services) socks
SGOS#(config services socks) enable [ip_address:]port
2.
(Optional) View the results:
SGOS#(config services socks) view
Port:
1080
IP: 10.9.87.85
Properties: explicit, enabled
191
Type: socks
Blue Coat ProxySG Configuration and Management Guide
Section A: Configuring Explicit Proxies
Using Policy to Control the SOCKS Proxy
Once the basic configuration for the SOCKS proxy has been set through the Management Console or
the CLI , you can use policy to control the SOCKS proxy.
Note:
•
SOCKS compression requires that a SOCKS gateway be set up with SOCKS compression
enabled. You can either use policy to configure a gateway for SOCKS compression, or you
can configure SOCKS compression while you are configuring the SOCKS gateway. To
configure the SOCKS gateway, see "SOCKS Gateway Configuration" on page 722
To use SOCKS version 5, which allows you to use a SOCKS username/password and SOCKS
compression, you must set the version through policy. Note that SOCKS version 4 does not
support compression.
❐
If using VPM, go to the Forwarding layer, select Source>Set Source Object>New>SOCKS Version.
❐
If using CPL. enter the following:
<proxy> client.protocol=socks
ALLOW socks.version=5
DENY
•
To use SOCKS compression, you must request SOCKS compression through policy.
❐
❐
If using VPM:
•
For global outbound connections (the downstream proxy or branch office location): go to
the Forwarding layer, select Source>Set Source Object>New>SOCKS Gateway Compression
Object. (Request compression is enabled by default.)
•
For global inbound connections (the upstream proxy or the main office location): go to the
Web Access Layer, select Action>New>SOCKS Compression Object. (Allow compression is
enabled by default.)
If using CPL:
•
For global outbound connections (the downstream proxy or branch office location):
<forward>
client.protocol=tcp socks_gateway(socks_gateway_alias)
socks_gateway.request_compression(yes|no|default)
where default refers to the current configuration.
To enable SOCKS compression on a per-connection basis, use a policy similar to the
following:
<forward>
client_address=ip_address
socks_gateway.request_compression(yes|no|default)
•
For global inbound connections (the upstream proxy or the main office location):
<proxy>
socks.method=CONNECT socks.allow_compression(yes|no)
Allow compression is enabled by default.
192
Chapter 6: Configuring Proxies
Section A: Configuring Explicit Proxies
Shell Proxies
Shell proxies are those that provide a shell allowing a client to connect to the ProxySG. In this version,
only a Telnet shell proxy is supported.
Using a shell proxy, you can:
•
terminate a Telnet protocol connection either transparently or explicitly.
•
authenticate users either transparently or explicitly.
•
view the access log.
•
enforce policies specified by CPL.
•
communicate though an upstream SOCKS gateway and HTTP proxy using the CONNECT
method.
Within the shell, you can configure the prompt and various banners using CPL $substitutions. You
can also use hard-coded text instead of CPL substitutions (available substitutions are listed in the table
below). The syntax for a CPL substitution is:
$(CPL_property)
Table 6.6: Substitutions Available at New Connection Time
proxy.name or
appliance.name
Configured name of the ProxySG.
proxy.address
IP address of the appliance on which this connection is accepted.
proxy.card
Adapter number of the appliance on which this connection is accepted.
client.protocol
This is "telnet".
client.address
IP address of the client.
proxy.primary_address or
appliance.primary_address
Primary address of the proxy, not where the user is connected.
release.id
SGOS version.
Customizing Policy Settings for Shell Proxies
To manage a shell proxy through policy, you can use the conditions, properties, and actions list below.
For information on using CPL to manage shell proxies, refer to the Blue Coat ProxySG Content Policy
Language Guide.
Conditions:
193
All time and date related triggers
proxy.address=
All exception related triggers
proxy.card=
All server_url triggers
proxy.port=
All url triggers
client.protocol=
Blue Coat ProxySG Configuration and Management Guide
Section A: Configuring Explicit Proxies
All authentication related triggers
user-defined conditions
category=
client.protocol=telnet
client.address=
url.scheme=telnet
Properties:
allow, deny, force_deny
force_exception(exception_id[, details])
action.action_name{yes|no)
forward(alias_list | no)
All trace() properties
forward.fail_open(yes | no)
All access_log() properties
reflect_ip(auto|no|client|vip|ip-address)
All log.xxx() properties
socks_gateway(alias_list | no)
access_server(yes|no)
socks_gateway.fail_open(yes | no)
authenticate.force(yes|no)
telnet.prompt(no | string)
authenticate(realm)
telnet.realm_banner(no | string)
exception(exception_id[,
details])
telnet.welcome_banner(no | string)
The banner strings support $-sign substitutions.
Actions:
rewrite(url.host, host_regex_pattern,
replacement_pattern)
log_message()
rewrite(url, url_regex_pattern,
replacement_pattern)
notify_email(subject, body)
set(url_port, port_number)
notify_snmp(message)
Boundary Conditions for Shell Proxies
194
•
A hardcoded timeout of five minutes is enforced from the acceptance of a new connection until
destination information is provided using the Telnet command.
•
If proxy authentication is enabled, users have three chances to provide correct credentials.
•
Users will not be authenticated until destination information is provided.
•
Users can only enter up to an accumulated 2048 characters while providing the destination
information. (Previous attempts count against the total number of characters.)
•
Connection to an upstream HTTP proxy is not encouraged.
•
If connections from untrustworthy IP address or subnet are not desired, then a
client IP/subnet-based deny policy must be written.
Chapter 6: Configuring Proxies
Section A: Configuring Explicit Proxies
Telnet Shell Proxies
The Telnet shell proxy allows you to manage a Telnet protocol connection to the ProxySG. Using the
Telnet shell proxy, you can do:
•
Explicit termination without proxy authentication, where you explicitly connect, through Telnet,
to the ProxySG hostname or IP address. In this case, the ProxySG provides a shell.
•
Explicit termination with proxy authentication, where after obtaining the destination host and
port information from user, the ProxySG challenges for proxy credentials. Once the correct proxy
credentials are provided and authenticated, the ProxySG makes an upstream connection and goes
into tunnel mode. In this case, the ProxySG provides a shell.
•
Transparent termination without proxy authentication, where the ProxySG intercepts Telnet
traffic through an L4 switch, software bridge, or any other transparent redirection mechanism.
From the destination address of TCP socket, the ProxySG obtains OCS contact information and
makes the appropriate upstream connection, either directly or through any configured proxy. For
more information on configuring a transparent proxy, see "Transparent Proxies" on page 199.
•
Transparent termination with proxy authentication, where, after intercepting the transparent
connection, the ProxySG challenges for proxy credentials. Once the correct proxy credentials are
provided and authenticated, the ProxySG makes an upstream connection and goes into tunnel
mode. For more information on configuring a transparent proxy, see "Transparent Proxies" on
page 199.
Once in the shell, the following commands are available:
•
help: Displays available commands and their effects.
•
telnet <server[:port]>: Makes an outgoing telnet connection to specified server. The colon (:)
between server and port can be replaced with a space, if preferred.
•
exit: Terminates the shell session.
Creating a Telnet Shell Proxy Service
On a new system, Telnet proxy service is configured but disabled on port 23. On an upgrade, a Telnet
proxy service is not created.
To enable or create a Telnet proxy service, use Services>Service Ports on the Management Console, or
config>services>telnet from the CLI. For more information, see "Telnet Shell Proxy Service" on
page 145.
Customizing Welcome and Realm Banners and Prompt Settings
You can configure banners for the Telnet shell and the realm and set the prompt that users see when
entering the shell.
To Customize Telnet Shell Proxy Settings through the Management Console
1.
Select Configuration>Services>Shell Proxies>Telnet Proxy Settings.
The Telnet Proxy Settings Tab displays.
195
Blue Coat ProxySG Configuration and Management Guide
Section A: Configuring Explicit Proxies
Figure 6-13: Telnet Proxy Settings
2.
If you want to set the maximum concurrent connections, check the Limit Max Connections checkbox.
Then enter the number of maximum concurrent connections allowed for this service. Allowed
values are between 1 and 65535.
3.
Set the banner settings:
a.
To set the Welcome banner message (users see this when they enter the shell), click
View/Edit next to the Welcome Banner. The Edit Welcome Banner dialog displays. (If you
do not want this banner displayed, remove the text.)
Figure 6-14: Editing Welcome Banner Properties.
Change the banner as necessary. The $(client.protocol) text is a CPL variable indicating
that Telnet is the protocol. You do not have to use a variable. (For a list of available
$substitutions, see "Substitutions Available at New Connection Time" on page 193.) When
finished, click OK. Click Apply.
196
Chapter 6: Configuring Proxies
Section A: Configuring Explicit Proxies
b.
To set the realms banner message (users see this help message just before they see the
Username prompt for proxy authentication), click View/Edit next to the Realms Banner. The
Edit Realms Banner dialog displays. (If you do not want this banner displayed, remove
the text.)
Figure 6-15: Editing Realm Banner Properties
Change the banner as necessary. The $(realm) text is a CPL variable indicating the name of
the realm. You do not have to use a variable. (For a list of available substitutions, see
"Substitutions Available at New Connection Time" on page 193.) When finished, click OK.
Click Apply.
c.
To set the prompt, click View/Edit next to the Prompt line. The Prompt dialog displays.
Figure 6-16: Editing the Prompt
Change the banner as necessary. The default is $(client-protocol)>, where
$(client-protocol) is Telnet. You do not have to use a variable. (For a list of available
substitutions, see "Substitutions Available at New Connection Time" on page 193.) When
finished, click OK. Click Apply.
To Customize Telnet Shell Proxy Settings through the CLI
You can use CPL substitutions when creating welcome and realm banners and Telnet prompts. For a
list of available CPL substitutions, see "Substitutions Available at New Connection Time" on page 193.
1.
197
From the (config) prompt, enter the following commands:
Blue Coat ProxySG Configuration and Management Guide
Section A: Configuring Explicit Proxies
SGOS#(config) shell max-connections number
SGOS#(config) shell welcome-banner welcome-banner-string (Enclose string in
quotes if string includes spaces)
SGOS#(config) shell realm-banner realm-banner-string (Enclose string in
quotes if string includes spaces)
SGOS#(config) shell prompt prompt-string (Enclose string in quotes if string
includes spaces)
where:
2.
max-connection
s
number
Allowed values are between 1 and 65535.
welcome-banner
string
The text a user sees when the shell is entered. You can hide this
banner by using shell no welcome-banner.
realm-banner
string
The text a user sees when the realm is entered. You can hide this
banner by using shell no welcome-banner.
prompt
string
The prompt a user sees when the shell is entered. You can hide the
prompt by using shell no prompt.
(Optional) To view the shell’s settings:
SGOS#(config) show shell
max-connections:
Unlimited
prompt:
Telnet #
realm-banner:
Enter credentials for realm Test
welcome-banner:
Welcome to Blue Coat Telnet shell proxy
To hide the shell’s settings:
SGOS#(config)
SGOS#(config)
SGOS#(config)
SGOS#(config)
shell
shell
shell
shell
no
no
no
no
welcome-banner
realm-banner
prompt
max-connections
Boundary Conditions for Telnet Shell Proxies
198
•
Telnet credential exchange is in clear text.
•
A Telnet proxy cannot be used to communicate with non-Telnet servers (such as webservers on
port 80) because Telnet proxies negotiate Telnet options with the client before a server connection
can be established.
Chapter 6: Configuring Proxies
Section B: Transparent Proxies
Section B: Transparent Proxies
To use transparent proxy, you must:
•
Configure the network to redirect client requests
•
Create a transparent proxy service
Configuring the Transparent Proxy Hardware
For transparent proxy to work, you must use one of the following:
•
ProxySG Pass-Through card
•
ProxySG software bridge
•
Layer-4 switch
•
WCCP
Configuring the Pass-Through Card for Hardware Bridging
The Blue Coat Pass-Through card is a device that enables a bridge, using its two adapters, so that
packets can be forwarded across it. However, if the system crashes, the Pass-Through card becomes a
network: the two Ethernet cables are connected so that traffic can continue to pass through without
restriction.
Configure a transparent service on the bridge's IP address just like for any other IP address, and it
intercepts traffic as usual.
The differences are:
•
Forwards traffic: it does not intercept without enabling global IP packet forwarding.
•
Proxies for requests on either adapters, so if you have connected one side of the bridge to your
Internet connection, you must be careful.
Configuring the ProxySG for Software Bridging
Blue Coat supports a software or dynamic bridge that is constructed using a set of installed adapters.
Keep in mind the following about software bridges:
•
The adapters must of the same type. Although the software does not restrict you from configuring
bridges with adapters of different types (10/100 or GIGE), the resultant behavior is unpredictable.
•
IP addresses—If any of the adapter interfaces to be added to the bridge already have IP addresses
assigned to them, those IP addresses must be removed.
To set up a software bridge, see "Configuring a Software Bridge" on page 78.
199
Blue Coat ProxySG Configuration and Management Guide
Section B: Transparent Proxies
Configuring a Layer-4 Switch for Transparent Proxy
In Transparent Proxy Acceleration, as traffic is sent to the OCS, any traffic sent on TCP port 80 is
redirected to the ProxySG Appliances by the Layer 4 switch. The benefits to using a Layer 4 switch
include:
•
Built-in failover protection. In a multi-ProxySG setup, if one ProxySG fails, the Layer 4 switch can
route to the next ProxySG.
•
Request partitioning based on IP address instead of on HTTP transparent proxying. (This feature
is not available on all Layer 4 switches.)
•
ProxySG bypass prevention. You can configure a Layer 4 device to always go through the Blue
Coat ProxySG machine even for requests to a specific IP address.
•
ProxySG bypass enabling. You can configure a Layer 4 device to never go through the ProxySG.
The following are very generic directions for configuring transparent proxy using a Layer 4 switch
and ProxySG Appliances. The steps to perform depend on the brand of Layer 4 switch. Refer to the
Layer 4 switch manufacturer’s documentation for details.
To Set up Transparent Proxy Using a Layer-4 Switch and the ProxySG
From the Layer 4 switch:
1.
Configure the Layer 4 switch according to the manufacturer's instructions.
2.
Configure for global transparent cache switching (TCS). With global TCS, incoming traffic from all
devices attached to all ports of the Layer-4 switch is redirected to the ProxySG. Assign an IP
address, default gateway, and subnet mask to the Layer-4 switch.
3.
Configure TCS using a global policy, enabling redirection for all ports.
4.
Identify one or more ProxySG Appliances.
5.
Create a device server group.
6.
Apply the ProxySG name to the device group.
7.
Configure Ethernet interface 2.
8.
Disable the redirection policy for the port to which the ProxySG is connected.
9.
Configure Ethernet interface 4.
10. Disable the redirection policy for the port to which the router is connected.
11. (Optional) Configure the Layer-4 switch for server load balancing.
12. Save the Layer-4 switch configuration.
From the ProxySG, all you need to do is:
200
•
Define the appropriate IP configurations per the instructions in the Installation Guide that
accompanied the ProxySG.
•
Test the new network configuration.
Chapter 6: Configuring Proxies
Configuring WCCP for Transparent Proxy
WCCP is a Cisco®-developed protocol that allows you to establish redirection of the traffic that flows
through routers.
The main benefits of using WCCP are:
•
Scalability—With no reconfiguration overhead, redirected traffic can be automatically distributed
to up to 32 ProxySG Appliances.
•
Redirection safeguards—If no ProxySG Appliances are available, redirection stops and the router
forwards traffic to the original destination address.
For information on using WCCP with a Blue Coat ProxySG, see Appendix C: “Using WCCP” on
page 911.
IP Forwarding
IP Forwarding is a special type of transparent proxy. The ProxySG is configured to act as a gateway.
The gateway is configured so that if a packet is addressed to the gateway’s adapter, but not to its IP
address, the packet is forwarded toward the final destination. (If IP forwarding is turned off, the
packet is rejected as being mis-addressed).
By default, IP forwarding is set to off (disabled) to maintain a secure network.
To Enable IP Forwarding through the Management Console
1.
Select Configuration>Network>Routing>Gateways.
2.
Select the Enable IP forwarding checkbox.
3.
Click Apply.
To Enable IP Forwarding through the CLI
At the (config) command prompt, enter the following command:
SGOS#(config) tcp-ip ip-forwarding enable
Important: When IP forwarding is enabled, be aware that all ProxySG ports are open and all the
traffic coming through them is not subjected to policy, with the exception of the
ports explicitly defined (Configuration> Services>Service Ports).
Creating a Transparent Proxy Service
As noted earlier, Blue Coat recommends that you ignore authentication until the proxy service is
configured and running.
The below example uses HTTP. Note that two HTTP services are already configured and enabled on
SGOS 4.x.
To Create a Transparent HTTP Port Service through the Management Console
1.
Select Configuration>Services>Service Ports.
201
Blue Coat ProxySG Configuration and Management Guide
2.
Click New; the Add Service dialog appears.
Figure 6-17: HTTP Add Service Dialog
3.
In the Protocol drop-down list, select HTTP.
4.
The default IP address value is all. To limit the service to a specific IP, select the IP from the
drop-down list.
5.
In the Port field, specify a port number; select Enable.
6.
In the Attributes field, select Transparent.
7.
Click OK; Click Apply.
To Create a Transparent HTTP Port Service through the CLI
At the (config) command prompt, enter the following commands:
SGOS#(config) services
SGOS#(config services) http
SGOS#(config services http) create [ip_address:]port
SGOS#(config services http) attribute transparent enable [ip_address:]port
SGOS#(config services http) enable [ip_address:]port
Example
SGOS#(config services http)attribute transparent enable 80
To View the Results
SGOS#(config services http) view
Port:
8080
IP: 0.0.0.0
Properties: explicit, enabled
Port:
80
IP: 0.0.0.0
Properties: transparent, enabled
202
Type: http
Type: http
Chapter 7:
Using Secure Services
Secure services allow you to provide the maximum security level for your enterprise. Maximum
security is provided by using:
•
SSH (with RSA authentication) instead of Telnet for basic communication between machines.
•
HTTPS instead of HTTP for secure communication over insecure channels.
•
A method of authenticating (identifying your users) and authorizing (limiting what a user can
do).
Configuring secure services requires creating and using keypairs and certificates to verify trusted
hosts.
This chapter discusses:
•
"HTTPS Termination Overview"
•
"Configuring HTTPS Termination"
•
"Managing the SSL Client"
•
"Enabling an HTTPS Service"
•
"Configuring HTTP or HTTPS Origination to the Origin Content Server"
•
"Configuring DNS Resolution to the Origin Content Server"
HTTPS Termination Overview
Offloading SSL processing from the origin server (referred to as HTTPS termination), allows a large
number of requests to be processed very quickly from the ProxySG.
The HTTPS termination implementation:
•
Combines hardware-based SSL acceleration with full caching functionality.
•
Establishes and services incoming SSL sessions.
•
Provides SSL v2.0, v3.0, and TLSv1 protocol support.
A common scenario in using HTTPS termination is in conjunction with HTTPS origination. HTTPS
termination is used to connect the client to the ProxySG; HTTPS origination is used to connect from
the ProxySG to the Origin Content Server (OCS).
Before discussing the specifics of how a ProxySG accelerates HTTPS requests, it is important to
understand securing data using HTTPS. There are several RFCs and books on the public key
cryptographic system (PKCS). This discussion of the elements of PKCS is relevant to their
implementation in SGOS.
The key concepts to understand are:
•
Public keys and private keys
203
Blue Coat ProxySG Configuration and Management Guide
•
Certificates
•
Keyrings
•
Cipher Suites
•
SSL client
There are many network infrastructure variables that must be considered in your key and certificate
management plan. A good publication that addresses such issues is Understanding Public-Key
Infrastructure; Concepts, Standards, and Deployment Considerations by Carlisle Adams and Steve Lloyd ISBN 1-57870-166-X.
Public Keys and Private Keys
The intended recipient of encrypted data generates a private/public keypair, and publishes the public
key, keeping the private key secret. The sender encrypts the data with the recipient's public key, and
sends the encrypted data to the recipient. The recipient uses the corresponding private key to decrypt
the data.
For two-way encrypted communication, the endpoints can exchange public keys, or one endpoint can
choose a symmetric encryption key, encrypt it with the other endpoint's public key, and send it.
A keyring contains a public/private keypair. It can also contain a certificate signing request or a
signed certificate.
Certificates
Certificates are used to authenticate the identity of a server by associating a public key with a
particular server. A certificate is electronic confirmation of the owner of a public key, and contains
other information, such as its expiration date. Several kinds of certificates are used.
Self-Signed Certificates
A self-signed certificate is a certificate that you create and authorize yourself that has no official
guarantees or authority in the real world. It is mainly used for intranet security.
CA Certificates
The association between a public key and a particular server is performed by a certificate signing
authority (CA), who verifies the identity of a server and then signs the server's public key. The
resulting certificate can then be offered by the server to clients who can recognize the CA's signature
and trust that the server is who it claims to be. Such use of certificates issued by CAs has become the
primary infrastructure for authentication of communications over the Internet.
ProxySG appliances come with many popular CA certificates already installed. You can review these
certificates using the Management Console or the CLI.
CA certificates installed on the ProxySG are used to verify client certificates (when browsers are
configured to offer them during negotiation) and are also required to verify secure servers in
communication with the ProxySG.
204
Chapter 7: Using Secure Services
External Certificates
An external certificate is an X.509 certificate created outside the ProxySG for the purpose of encrypting
data, such as access logs, with a public key on the ProxySG so that it can only be decrypted by
someone off-box who has the corresponding private key. When you import an external certificate to
the ProxySG, you can use it to encrypt your access logs so that only those with the appropriate security
credential can decrypt them. See "Customizing the Log Facility: Configuring the Upload Client" on
page 759 for information about encrypting access logs.
Wildcard Certificates
Wildcard certificates are certificates that contain wildcard characters in the common name field of an
X.509 certificate. Wildcards certificates are typically used in order to share a single certificate among
multiple hosts belonging to the same DNS domain.
Wildcard certificates during HTTPS termination are supported. Keep in mind that Microsoft’s
implementation of wildcard certificates is as described in RFC 2595, allowing an * (asterisk) in the
leftmost-element of the server's common name only. For information on wildcards supported by
Internet Explorer, refer to the Microsoft knowledge base, article: 258858.
Cipher Suites Supported by SGOS
A cipher suite is an object that specifies the algorithms used to secure an SSL connection. When a client
makes an SSL connection to a server, it sends a list of the cipher suites that it supports. The server
compares this list with its own supported cipher suites and chooses the first cipher suite proposed by
the client that they both support. Both the client and server then use this cipher suite to secure the
connection.
All cipher suites supported by the ProxySG use the RSA key exchange algorithm, which uses the
public key encoded in the server's certificate to encrypt a piece of secret data for transfer from the
client to server. This secret is then used at both endpoints to compute encryption keys.
By default, the ProxySG is configured to allow SSLv2 and v3 as well as TLSv1 traffic. The cipher suites
available to use differ depending on whether you configure SSL for version 2, version 3, TLS, or a
combination of these.
Table 7.1: SGOS Cipher Suites Shipped with the ProxySG
SGOS Cipher
#
Cipher Name
Strength
Exportable
Description
1
RC4-MD5
Medium
No
128-bit key size.
2
RC4-SHA
Medium
No
128-bit key size.
3
DES-CBC3-SHA
High
No
168-bit key size.
4
DES-CBC3-MD5
High
No
168-bit key size.
5
RC2-CBC-MD5
Medium
No
128-bit key size.
6
RC4-64-MD5
Low
No
64-bit key size.
7
DES-CBC-SHA
Low
No
56-bit key size.
205
Blue Coat ProxySG Configuration and Management Guide
Table 7.1: SGOS Cipher Suites Shipped with the ProxySG (Continued)
8
DES-CBC-MD5
Low
No
56-bit key size.
9
EXP1024-RC4-MD5
Export
Yes
56-bit key size.
10
EXP1024-RC4-SHA
Export
Yes
56-bit key size.
11
EXP1024-RC2-CBC-MD5
Export
Yes
56-bit key size.
12
EXP1024-DES-CBC-SHA
Export
Yes
56-bit key size.
13
EXP-RC4-MD5
Export
Yes
40-bit key size.
14
EXP-RC2-CBC-MD5
Export
Yes
40-bit key size.
15
EXP-DES-CBC-SHA
Export
Yes
40-bit key size.
Server Gated Cryptography and International Step-Up
Due to US export restrictions, international access to a secure site requires the site negotiate
export-only ciphers. These are relatively weak ciphers ranging from 40-bit to 56-bit key lengths, and
are vulnerable to attack.
Server Gated Cryptography (SGC) is a Microsoft extension to the certificate that allows the client
receiving the certificate to first negotiate export strength ciphers, followed by a re-negotiation with
strong ciphers. Netscape has a similar extension called International Step-up.
The ProxySG supports both SGC and International Step-up in its SSL implementation. There are,
however, known anomalies in Internet Explorer's implementation that can cause SSL negotiation to
fail. Refer to the following two documents for more detail and check for recent updates on the
Microsoft support site.
http://support.microsoft.com/support/kb/articles/Q249/8/63.ASP
http://support.microsoft.com/support/kb/articles/Q244/3/02.ASP
To take advantage of this technology, the ProxySG supports VeriSign's Global ID Certificate product.
The Global ID certificate contains the extra information necessary to implement SGC and
International Step-up.
Note:
When requesting a Global ID certificate, be sure to specify bluecoat as the server.
SSL Client
The SSL client is used to determine the protocol of outgoing HTTPS connections. The protocol must be
specified when a ProxySG obtains content from the origin server using an encrypted connection.
The ProxySG uses one SSL client. The role of the SSL client is to:
206
•
Determine which certificate can be presented to origin servers by associating a keyring with the
SSL client.
•
Identify the protocol version the ProxySG uses in negotiations with origin servers.
•
Identify the cipher suites used.
Chapter 7: Using Secure Services
Configuring HTTPS Termination
To configure HTTPS termination, you must complete the following tasks:
•
(Optional) Create or import a keyring. A default keyring is shipped with the system. You can
create others.
•
(Optional) Create Certificate Signing Requests (CSRs) that can be sent to Certificate Signing
Authorities (CAs).
•
(Optional, if creating a new keyring) Create or import certificates and associate them with the
keyring.
•
(Optional) If connections will be forwarded upstream using HTTPS, configure the SSL client
appropriately. See "Managing the SSL Client" on page 231.
•
(Optional) Set the SSL configuration timeout period.
•
Create the HTTPS Service. The keyring should contain the server certificate to present to clients
connecting to this service.
Do these steps in order.
Note:
These steps must be done with a serial console or SSH connection; you cannot use Telnet.
Before you begin, you should be familiar with the following terms:
CA Certificates
This is a certificate that has been given out by a CA identifying the authority and what
public key to use to verify certificates signed by them. CA certificates are used to verify
certificates presented by clients during HTTPS termination or to verify certificates
presented by servers during HTTPS origination.
You only need this certificate if the ProxySG will be obtaining data through an encrypted
source.
CA-Certificate
Lists
CA-Certificate lists allow you to associate a specific CA certificate (or a list of CA
certificates) with the HTTPS service you create.
Certificates
Regular certificates are presented by the ProxySG as server certificates when doing
HTTPS Termination or as client certificates when doing HTTPS origination.
A certificate can be created (self-signed) or imported from another machine. Certificates
and CA Certificates are imported differently on the ProxySG and have different purposes.
Certificate Signing
Authority (CA)
CAs receive Certificate Signing Requests and create certificates from the information and
the keypair provided. The certificate is then returned to the originator, who can import it
into the ProxySG.
Certificate Signing
Request (CSR)
CSRs are used to send a keypair and critical information to a Certificate Signing
Authority. You can use Blue Coat to create a CSR or you can create a CA Certificate
off-line.
Once the certificate is sent from the CA, you can import into the ProxySG. (For
information on importing CA certificates, see "Importing a CA Certificate" on page 225.)
SSL Client
Only one SSL client can be used on the ProxySG, and only one keyring can be associated
with it. If a keyring is associated with the SSL client and you change the association, the
old association is overwritten by the new.
207
Blue Coat ProxySG Configuration and Management Guide
SSL Server
When the ProxySG is acting as an SSL server (HTTPS termination), SSL sessions are
cached for one hour.
HTTPS Service
A service on which the ProxySG listens for Web requests sent through the HTTPS
protocol.
Keyring
A keyring holds a keypair and a certificate, and can be used when configuring secure
connections on the ProxySG. When a keyring is created, it only contains a keypair. You
can associate a certificate with this keyring. If you have multiple certificates, you can
configure multiple keyrings and associate the certificates and the keyrings.
Creating a Keyring
The ProxySG ships with two keyrings already created:
•
default
•
configuration-passwords-key
The default keyring contains a certificate and an automatically-generated keypair. Because the default
keyring is self-signed, you might want to create other keyrings signed by a well-known Certificate
Signing Authority (CA).
You must associate a keyring with the SSL client if the ProxySG will be obtaining content through
HTTPS from an origin content server (OCS) that requires a client certificate to be presented. If the OCS
requires a client certificate and no keyring is associated with the SSL client, the connections will fail.
For information on associating a keyring with the SSL client, "Managing the SSL Client" on page 231.
The configuration-passwords-key keyring contains a keypair but does not contain a certificate. It is
a keyring created for encrypting passwords in the show config command and should not be used for
other purposes.
To Create a Keyring through the Management Console
1.
Select Configuration>SSL>Keyrings>SSL Keyrings.
The SSL Keyrings tab displays.
Figure 7-1: SSL Keyring Tab
208
Chapter 7: Using Secure Services
2.
Click Create; the Create Keyring dialog appears.
Figure 7-2: Create Keyring Dialog
3.
Fill in the dialog window as follows:
❐
Keyring Name: Give the keyring a meaningful name to you.
❐
Select the show option you need:
•
Show keypair allows the keys, and everything in the keys, to be exported.
•
Do not show keypair prevents the keypair from being exported.
•
Show keypair to director is a keyring viewable only if Director is issuing the command using
a SSH-RSA connection.
Note:
❐
The choice of show/show-director/no-show has implications for whether keyrings
are included in profiles and backups created by Director. For more information, refer
to Blue Coat Director Configuration and Management Guide.
Select the keyring length in the Create a new ______ -bit keyring field. A length of 1024 bits is the
maximum (and default). Longer keypairs provide better security, but with a slight
performance expense on the ProxySG. Be aware that the maximum key length allowed for
international export might be different than the default. For deployments reaching outside of
the U.S., determine the maximum key length allowed for export.
Click OK. The keyring, containing a keypair, is created with the name you chose. It does not
have a certificate associated with it yet. To associate a certificate, see "Managing SSL
Certificates" on page 212
-or-
❐
Select the Import keyring radio button.
209
Blue Coat ProxySG Configuration and Management Guide
The grayed-out Keyring field becomes enabled, allowing you to paste in an already existing
keypair. The certificate associated with this keypair must be imported separately. For
information on importing a certificate, see "Importing an Existing Keypair and Certificate" on
page 216.
If the keypair that is being imported has been encrypted with a password, select Keyring
Password and enter the password into the field.
Click OK.
To Create an SSL Keyring through the CLI
At the (config) command prompt, enter the following commands to create an SSL keyring:
SGOS#(config) ssl
SGOS#(config ssl) create keyring {show | show-director | no-show} keyring_id
[key_length]
where:
show |
• show: Allows the keys, and everything in the keys, to be exported.
show-director • show-director: Prevents the keypair from being exported.
| no-show
• no-show: A keyring viewable only if Director is issuing the command using a
SSH-RSA connection.
Note:
The choice of show/show-director/no-show has implications for
whether keyrings are included in profiles and backups created by
Director. For more information, refer to Blue Coat Director Configuration
and Management Guide.
keyring_id
The name, meaningful to you, of the keyring.
key_length
Longer keypairs provide better security, but with a slight performance expense on
the ProxySG Appliance. The default key length used in SGOS and most U.S.-based
servers is 1024, which is the maximum key length. Be aware that the maximum
key length allowed for international export might be different than the default. For
deployments reaching outside of the U.S., determine the maximum key length
allowed for export.
To Import a Keyring through the CLI
1.
Copy the keyring to the clipboard.
2.
At the (config) command prompt, enter the following commands:
SGOS#(config) ssl
SGOS#(config ssl) inline keyring show | show-director | no-show keyring_id
[<password>|<"">] eof
Paste keypair here
eof
where:
•
210
show: Allows the keys, and everything in the keys, to be exported
Chapter 7: Using Secure Services
•
show-director: Prevents the keypair from being exported.
•
no-show: A keyring viewable only if Director is issuing the command using a SSH-RSA
connection.
•
password: If the optional password is provided on the command line, the CLI does not
prompt for a password when importing an encrypted keyring. If the optional password is
not provided on the command line and if you are trying to import an encrypted keyring,
the CLI asks for the password (interactive). (You can also use ““ to specify an empty
password to make the command non-interactive.)
Note:
•
Director uses non-interactive commands in profiles and overlays to create
keyrings.
eof: End-of-file marker. This can be anything, as long as it doesn’t also appear in the
inline text. (If it appears in the inline text, the inline command completes at that point.)
To View the Results of a New or Imported Keyring through the CLI
Note:
This example shows the default keyring.
SGOS#(config ssl) view keyring
KeyringID: default
Is private key showable? yes
Have CSR? no
Have certificate? yes
Is certificate valid? yes
CA: Blue Coat SG110
Expiration Date: Dec 16 22:37:30 2013 GMT
Fingerprint: AA:E2:34:DB:5D:06:A7:FF:D8:69:BE:0D:12:FC:34:D5
KeyringID: configuration-passwords-key
Is private key showable? yes
Have CSR? no
Have certificate? no
To View a Keypair
Note:
This example shows the default keypair, unencrypted.
SGOS#(config ssl) view keypair [des | des3 | unencrypted] [keyring_id]
[password]
-----BEGIN RSA PRIVATE KEY----MIICWwIBAAKBgQC6t/IhFTYuyczvEN/wT4dcJl3Ar/aEKs/CjL9DPG+ND79sscFe
tfzmLrjBvxJmZYnim6VEMtKb0qH37YQjXwtQFqYAdWe+yKS6kqJ+Rky/mgHX8awL
RvijFlBkLYMG2SOa1YphOTg/v/dPm28TyJ5ZcavM5Atdpa+RRGPPDR1YQwIDAQAB
AoGAE4TVL/Yqsttvq/Ikptd5e/2awWDjsU9UZq8V825m7uUdirxOTZtSs7FgqQhT
YRbuQh0pOqbhc16ihetza8sswGXJe7YYF7d2zQAfwDsvSTcsVu1mXQmdhddItGuv
+nZWVMqP/tQIk/NtRhp6IJ2qg4Mu3yEVfDEeHP1Um2nGPbECQQDltYIaoiLW27sa
+O7Rzl2geVoVvdROjKg0g0gyT65tRCgqyGv6AXI1+gWl1TcP5rhOlB9XX3i0wiUp
HejKsompAkEA0BbQNCRXUXZTPyK6R6JaHE0Ji8SSXtLCUN9RZrChdjGc263D6/IV
211
Blue Coat ProxySG Configuration and Management Guide
/jqpqkLLR2qSibmKDX1ADmYAP9U18ta+CwJAecPBd8TCmwpXIHEch3LRBqPNMQEz
bX/6GfwNZT3/xEQA1szvD9N8a0hhfgqL6Y3v3Rd/lZ0yKv9PG4CTSf9iIQJAL7Jq
+uixkxyaLEibhjvyh7Yoz/64xj9tBviJQg6Ok/b/S2NjGzwcSm/L4Bj7W11URXlf
6YOiISrEN915RjZuzQJAYUlytdCj7pM2nziyO7jrWnY8MmIod3+kHlQajoV/OI6Q
Z5gaJ2nLOwicSlSY4MFewHavvRS18yI9JP2q1+6Y/g==
-----END RSA PRIVATE KEY-----
Notes
•
If you want to view the keypair in an encrypted format, you can optionally specify des or des3
before the keyring_id, along with an optional password. If the optional password is provided on
the command line, the CLI does not prompt for a password. You can also use ““ to specify an
empty password to make the command non-interactive.
•
If the optional password is not provided on the command line, the CLI asks for the password
(interactive). If you specify either des or des3, you will be prompted.
•
To view the keypair in unencrypted format, select either the optional keyring_id or use the
unencrypted command option.
•
You cannot view a keypair over a Telnet connection because of the risk that it could be
intercepted.
Managing SSL Certificates
The ProxySG ships with a certificate associated with a default keyring. The certificate, self-signed and
associated with the default keyring, can be reused in other keyrings meant for internal use.
You can add three kinds of SSL certificates:
•
A self-signed certificate
•
A certificate signed by a CA
•
An external certificate
Note:
You can create a Certificate Signing Request either on the ProxySG or off-box to send to a
Certificate Signing Authority.
To create a self-signed certificate for internal use, continue with the next section. To import an existing
certificate, continue with "Importing an Existing Keypair and Certificate" on page 216; to import an
external certificate, see "Importing an External Certificate" on page 219; to import a CA certificate, see
"Importing a CA Certificate" on page 225.
212
Chapter 7: Using Secure Services
Adding a Self-Signed Certificate
Self-signed certificates are generally meant for intranet use, not internet.
To Create a Self-Signed Certificate through the Management Console
1.
Select Configuration>SSL>Keyrings>SSL Certificates.
The SSL Certificates tab displays.
Figure 7-3: SSL Certificates Tab
2.
Select the keyring for which you want to add a certificate in the keyring drop-down list.
3.
Click Create in the Certificate tab.
The Create Certificate dialog displays.
Figure 7-4: Create Certificate Dialog
4.
Fill in the fields as appropriate:
❐
State/Province—Enter the state or province where the machine is located.
❐
Country Code—Enter the two-character ISO code of the country.
213
Blue Coat ProxySG Configuration and Management Guide
❐
City/Locality—Enter the city.
❐
Organization—Enter the name of the company.
❐
Unit—Enter the name of the group that will be managing the machine.
❐
Common Name—A common name should be the one that contains the URL with client access
to that particular origin server.
❐
Challenge—Enter a 4-16 character alphanumeric challenge.
❐
E-mail Address—The email address you enter must be 40 characters or less. A longer email
address will generate an error.
❐
5.
Company—Enter the name of the company.
The Create tab displays the message: Creating.....
To Create a Self-Signed Certificate through the CLI
You can create a self-signed certificate two ways: interactively or non-interactively.
Note:
Director uses non-interactive commands in profiles and overlays to create self-signed
certificates.
To create a certificate using the:
•
interactive version of the create certificate command: continue with the next section.
•
non-interactive version of the create certificate command: skip to "To Create a Self-Signed
Certificate Non-interactively Using Create Commands" on page 215.
Note:
If you want the certificate to be part of a profile or overlay, the keyring must be configured
as showable.
To Create a Self-Signed Certificate Interactively Using Create Commands
1.
At the (config) command prompt, enter the following commands to interactively create a
self-signed certificate.
SGOS#(config ssl) create certificate keyring_id
Country code []: US
State or province []: CA
Locality or city []: SV
Organization name []: Blue Coat
Organization unit []: Docs
Common name []: www.bluecoat.com
Email address []: [email protected]
Challenge []: test
Company name []: Blue Coat
ok
where:
214
Country code
At the Country code prompt, enter the two-character ISO code of the
country.
State or province
Name of the state or province where the machine is located.
Chapter 7: Using Secure Services
2.
Locality or city
Name of the town where the machine is located.
Organization name
Name of the company.
Organization unit
Name of the group within the company.
Common name
Verify the Common name is the same as the domain name of the Web site
being terminated. If the Common name and site domain name do not
match, a client browser generates a warning whenever the ProxySG
terminates an HTTPS request for that site. The use of wildcards is
supported in the Common name.
Email address
The email address you enter must be 40 characters or less. A longer email
address will generate an error
Challenge
At the Challenge prompt, enter a 4-16 character alphanumeric secret.
Company name
Name of the company.
View the certificate.
SGOS#(config ssl) view certificate keyring_id
-----BEGIN CERTIFICATE----MIIB3zCCAZmgAwIBAgIBADANBgkqhkiG9w0BAQQFADCBhzELMAkGA1UEBhMCVVMxCzAJBgNVBAgT
AkNBMQswCQYDVQQHEwJTVjESMBAGA1UEChMJQmx1ZSBDb2F0MQ0wCwYDVQQLEwREb2NzMRkwFwY
DVQQDExB3d3cuYmx1ZWNvYXQuY29tMSAwHgYJKoZIhvcNAQkBFhF0ZXN0QGJsdWVjb2F0LmNvbT
AeFw0wMzAzMDQyMTA2NThaFw0wMzA0MDMyMTA2NThaMIGHMQswCQYDVQQGEwJVUzELMAkGA1UEC
BMCQ0ExCzAJBgNVBAcTAlNWMRIwEAYDVQQKEwlCbHVlIENvYXQxDTALBgNVBAsTBERvY3MxGTAX
BgNVBAMTEHd3dy5ibHVlY29hdC5jb20xIDAeBgkqhkiG9w0BCQEWEXRlc3RAYmx1ZWNvYXQuY29
tMEwwDQYJKoZIhvcNAQEBBQADOwAwOAIxAK+AGYRMbnjyGr7U0oZUYdslO6y8uQnxq2PV6qCr4Q
BpN1Vqyr1Fi7ZEaw0lyMs5FwIDAQABMA0GCSqGSIb3DQEBBAUAAzEAe8zoYW0igTcGRGG7sBpca
U95J907ZVm8qSU/PQfx1IrDzKdRSQPO9Gs1I8MqXi0D
-----END CERTIFICATE-----
To Create a Self-Signed Certificate Non-interactively Using Create Commands
Note:
If you want the keyring to part of an overlay or profile, the keyring must be configured as
showable.
215
Blue Coat ProxySG Configuration and Management Guide
At the (config) command prompt, use the following syntax to create a self-signed certificate
SGOS#(config ssl)create certificate keyring-id [attribute value] [attribute
value]
where any or all of the following attribute and value pairs are accepted:
Mandatory:
• cn <common name>
• challenge <at least four characters>
Optional:
• c <2 character country code>
• o <organization name>
• ou <organizational unit>
• email <email-id>
• state <state or province>
• city <locality or city>
• company <company name>
Notes:
•
If you do not specify any attributes, the interactive mode is assumed, meaning that the self-signed
certificate cannot be created by Director in profiles or overlays.
•
The name of the attribute is predefined and the value of the attribute is a string. The value can be
quoted if it contains white space or other special characters.
•
You must specify the name and value together; the order of appearance of multiple name value
pairs does not matter. If you omit an attribute, an empty string is assumed for the value of the
attribute.
Example:
SGOS#(config ssl)create certificate keyring-id cn bluecoat challenge test
c US state CA company bluecoat
Importing an Existing Keypair and Certificate
If you have a keypair and certificate from another system, you can import it for use on a different
system. You can also import a certificate chain containing multiple certificates in a single operation.
Use the inline certificate command to import multiple certificates through the CLI.
If you are importing a keyring and one or more certificates onto a ProxySG, first import the keyring,
followed by the related certificates. Note that the certificates contain the public key from the keyring,
and the keyring and certificates are related.
To Import a Keyring through the Management Console
1.
Copy the already-created certificate onto the clipboard.
2.
Select Configuration>SSL>Keyrings>SSL Keyrings.
3.
Click Create.
The Create Keyring dialog appears.
216
Chapter 7: Using Secure Services
Figure 7-5: Import a Keyring
4.
Fill in the dialog window as follows:
❐
Keyring Name: Give the keyring a meaningful name to you.
❐
Select the show option you need:
•
show: Keyrings created with this attribute can be included as part of a profile or overlay
pushed by Director.
•
show-director: Keyrings created with this attribute can be included as part of a profile or
overlay pushed by Director.
•
❐
no-show: Keyrings created with this attribute cannot be part of a profile. The no-show
option is provided as additional security for environments where the keys will never be
used outside of the particular ProxySG.
Select the keyring length in the Create a new ______ -bit keyring field. A length of 1024 bits is the
maximum (and default). Longer keypairs provide better security, but with a slight
performance expense on the ProxySG. Be aware that the maximum key length allowed for
international export might be different than the default. For deployments reaching outside of
the U.S., determine the maximum key length allowed for export.
Click OK. The keyring, containing a keypair, is created with the name you chose. It does not
have a certificate associated with it yet. To associate a certificate, see "Managing SSL
Certificates" on page 212.
-or-
❐
Select the Import keyring radio button.
The grayed-out Keyring field becomes enabled, allowing you to paste in the already existing
keypair. The certificate associated with this keypair must be imported separately.
If the keypair that is being imported has been encrypted with a password, select Keyring
Password and enter the password into the field.
217
Blue Coat ProxySG Configuration and Management Guide
Click OK.
To Import a Certificate and Associate it with a Keyring through the Management Console
1.
Copy the certificate onto the clipboard.
2.
Select Configuration>SSL>Keyrings>SSL Certificates and select the keyring that you just imported
from the Keyring drop-down list.
3.
Click Import in the Certificate field.
4.
Paste the certificate into the Import Certificate dialog that appears. Be sure to include the
----BEGIN CERTIFICATE---- and -----END CERTIFICATE---- statements.
5.
Click OK.
To Import a Keyring through the CLI Using Inline Commands
1.
Copy the keyring to the clipboard.
2.
At the (config) command prompt, enter the following commands:
SGOS#(config) ssl
SGOS#(config ssl) inline {keyring show | show-director | no-show} keyring_id
eof
Paste keyring here
eof
where:
•
Show allows the keys, and everything in the keys, to be exported.
•
no-show prevents the keypair from being exported.
•
show-director is a keyring viewable only if Director is issuing the command using a
SSH-RSA connection.
Note:
•
The choice of show/show-director/no-show has implications for whether keyrings
are included in profiles and backups created by Director. For more information, refer
to the Blue Coat Director Configuration and Management Guide.
eof: End-of-file marker. This can be anything, as long as it doesn’t also appear in the
inline text. (If it appears in the inline text, the inline command completes at that point.
To Import a Certificate and Associate it with a Keyring through the CLI
Note:
The keyring you want to associate with the certificate must already be on this ProxySG.
The key and certificate must be imported onto the ProxySG in PEM (base64 encoded text)
format.
1.
Copy the certificate or certificate chain to the clipboard. Be sure to include the ----BEGIN
CERTIFICATE---- and -----END CERTIFICATE---- statements.
2.
At the (config) command prompt, enter the following commands:
SGOS#(config) ssl
SGOS#(config ssl) inline certificate keyring_id eof
Paste certificate here
218
Chapter 7: Using Secure Services
eof
Deleting an Existing Keyring and Certificate
To Delete a Keyring and the Associated Certificate through the Management Console
1.
Select Configuration>SSL>Keyrings>SSL Keyrings.
2.
Highlight the name of the keyring that you want to delete.
3.
Click Delete.
The Confirm delete dialog appears.
4.
Click OK in the Confirm delete dialog that appears.
To Delete a Keyring and the Associated Certificate through the CLI
From the (config) prompt, enter the following commands:
SGOS#(config) ssl
SGOS#(config ssl) delete keyring keyring_id
Importing an External Certificate
You can import an X.509 certificate into ProxySG to use for encrypting data (see "Customizing the Log
Facility: Configuring the Upload Client" on page 759).
To Import an External Certificate through the Management Console
1.
Copy the certificate onto the clipboard.
2.
Select Configuration>SSL>External Certificates.
The External Certificates tab displays.
Figure 7-6: External Certificates Tab
3.
Click Import.
The Import External Certificate dialog displays.
219
Blue Coat ProxySG Configuration and Management Guide
Figure 7-7: Import External Certificate Dialog
4.
Enter the name of the external certificate into the External Cert Name field and paste the certificate
into the External Certificate field. Be sure to include the ----BEGIN CERTIFICATE---- and -----END
CERTIFICATE---- statements.
5.
Click OK.
6.
Click Apply.
To Import an External Certificate through the CLI Using Inline Commands
1.
Copy the certificate or certificate chain to the clipboard. Be sure to include the ----BEGIN
CERTIFICATE---- and -----END CERTIFICATE---- statements.
2.
From the (config) prompt, enter the following commands to paste the certificate and enter the
eof marker:
SGOS#(config) ssl
SGOS#(config ssl) inline external-certificate keyring_id eof
Paste certificate here
eof
Viewing an External Certificate
To View an External Certificate through the CLI
SGOS#(config) ssl
SGOS#(config ssl)view external-certificate certificate_name
-----BEGIN CERTIFICATE----MIICiTCCAfKgAwIBAgIEN4dnrDANBgkqhkiG9w0BAQUFADB1MQswCQYDVQQGEwJi
ZTERMA8GA1UEChMIQmVsZ2Fjb20xDDAKBgNVBAsTA01UTTEkMCIGA1UEAxMbQmVs
Z2Fjb20gRS1UcnVzdCBQcmltYXJ5IENBMR8wHQYKCZImiZPyLGQBAxQPaW5mb0Bl
LXRydXN0LmJlMB4XDTk4MTEwNDEzMDQzOVoXDTEwMDEyMTEzMDQzOVowdTELMAkG
A1UEBhMCYmUxETAPBgNVBAoTCEJlbGdhY29tMQwwCgYDVQQLEwNNVE0xJDAiBgNV
BAMTG0JlbGdhY29tIEUtVHJ1c3QgUHJpbWFyeSBDQTEfMB0GCgmSJomT8ixkAQMU
D2luZm9AZS10cnVzdC5iZTCBnzANBgkqhkiG9w0BAQEFAAOBjQAwgYkCgYEAqtm5
s9VPak3FQdB7BGFqi3GBB9pk41huJ1XCrc4XsPz6ko0I8Bxy/7LDMf7gaoeXTMxD
V6coeTq1g12kHWrxasU+FCIdWQZv8KYxd9ywSTjmywwP/qpyNIjaKDohWu50Kxuk
21sTFrVzX8OujNLAPj2wy/Dsi4YLwsFEGFpjqNUCAwEAAaMmMCQwDwYDVR0TBAgw
220
Chapter 7: Using Secure Services
BgEB/wIBATARBglghkgBhvhCAQEEBAMCAAcwDQYJKoZIhvcNAQEFBQADgYEAerKx
pbF9M+nC4RvO05OMfwH9Gx1amq6rB1Ev7Ymr3VBCux//SrWknLFhKQpM6oNZSY2v
hmnXgaxHqqRxblnvynxqblSK2qiSyfVms3lf1IsBniFjRjWTpcJfImIDcB1jI+hr
SB0jECfY9t9HorrsgFBKbMRwpnrkdCJ/9oRiMn7=
-----END CERTIFICATE-----
To View the External Certificate Summary through the CLI
SGOS#(config) ssl
SGOS#(config ssl)view summary external-certificate
Certificate ID: test1
Is certificate valid? yes
CA: Blue Coat SG3000
Expiration Date: Sep 24 19:33:30 2014 GMT
Fingerprint: 72:D5:7F:9F:B0:CA:D2:54:24:47:A4:7A:37:48:63:D9
Deleting an External Certificate
To Delete an External Certificate through the Management Console
1.
Select Configuration>SSL>External Certificates.
The External Certificates tab displays.
2.
Highlight the name of the external certificate that you want to delete.
3.
Click Delete.
The Confirm delete dialog appears.
4.
Click OK in the Confirm delete dialog that appears; click Apply.
To Delete an External Certificate through the CLI
From the (config) prompt, enter the following commands:
SGOS#(config) ssl
SGOS#(config ssl) delete external-certificate certificate_name
About Certificate Chains
A certificate chain is one that requires that the certificates form a chain where the next certificate in the
chain validates the previous certificate, going up the chain to the root, which is signed by a
well-known root certificate provider. However, expiration is done at the single certificate level and is
checked independently of the chain verification. Each certificate in the chain must not have expired for
the entire chain to be valid. You can import a certificate chain containing multiple certificates in a
single operation.
The valid certificate chain can be presented to a browser. To get the ProxySG to present a valid
certificate chain, the keyring for the HTTPS service must be updated.
The ProxySG Appliance's CA-certificate list must also be updated if the ProxySG uses HTTPS to
communicate with the origin server and if the ProxySG is configured, through the ssl-verify-server
option, to verify the certificate (chain) presented by HTTPS server. If the ProxySG uses HTTP to
communicate with the origin server, updating the CA-certificate list has no effect.
221
Blue Coat ProxySG Configuration and Management Guide
Creating Certificate Signing Requests
While you must create certificate signing requests (CSR) to get a certificate signed by a Certificate
Authority, CSRs are also used for the configuration of regular certificates, certificates that are sent out
to clients or servers for external validation.
Creating a CSR through the Management Console
1.
Select Configuration>SSL>SSL Keyrings>SSL Certificates.
The SSL Certificates tab displays.
2.
Select, from the drop-down list, the keyring for which you need a signed certificate.
3.
From the Certificate Signing Request tab, click the Create button.
The Create Certificate-signing-request dialog displays.
Figure 7-8: Create Certificate-Signing-Request Dialog
4.
Fill in the fields as appropriate:
❐
State/Province—Enter the state or province where the machine is located.
❐
Country Code—Enter the two-character ISO code of the country.
❐
City/Locality—Enter the city.
❐
Organization—Enter the name of the company.
❐
Unit—Enter the name of the group that will be managing the machine.
❐
Common Name—Enter the URL of the company.
❐
Challenge—Enter a 4-16 character alphanumeric challenge.
❐
E-mail Address—The email address you enter must be 40 characters or less. A longer email
address will generate an error.
❐
222
Company—Enter the name of the company.
5.
The Create tab displays the message: Creating....
6.
Click OK.
Chapter 7: Using Secure Services
Creating a CSR through the CLI
You have a choice of using the interactive or non-interactive create command.
Note:
Director uses non-interactive commands in profiles and overlays to create certificate
signing requests.
For more information on Director, refer to the Blue Coat Director User Guide.)
To create a CSR using the:
•
interactive create signing-request command: continue with the next section.
•
non-interactive create signing-request command: skip to "To Create a Signing Request
Non-interactively Using Create Commands" on page 224.
To Create a CSR Interactively using Create Commands
1.
At the (config) command prompt, enter the following commands to create an SSL CSR:
SGOS#(config) ssl
SGOS#(config ssl) create signing-request keyring_id
Country code []: US
State or province []: CA
Locality or city []: SV
Organization name []: Blue Coat
Organization unit []: Docs
Common name []: www.bluecoat.com
Email address []: [email protected]
Challenge []: test
Company name []: Blue Coat
ok
where:
2.
Country code
At the country code prompt, enter the two-character ISO code of the
country.
State or province
Name of the state or province where the machine is located.
Locality or city
Name of the town where the machine is located.
Organization name
Name of the company.
Organization unit
Name of the group within the company.
Common name
Verify the Common name is the same as the domain name of the Web
site being terminated. If the Common name and site domain name do
not match, a client browser generates a warning whenever the ProxySG
terminates an HTTPS request for that site. The use of wildcards is
supported in the Common name.
Email address
The email address you enter must be 40 characters or less. A longer
email address will generate an error
Challenge
At the challenge prompt, enter a 4-16 character alphanumeric secret.
Company name
Name of the company.
View the results.
223
Blue Coat ProxySG Configuration and Management Guide
SGOS#(config ssl) view signing-request keyring_id
-----BEGIN CERTIFICATE REQUEST----MIIBVDCCAQ4CAQAwgYcxCzAJBgNVBAYTAlVTMQswCQYDVQQIEwJDQTELMAkGA1UEBxMCU1YxEjAQ
BgNVBAoTCUJsdWUgQ29hdDENMAsGA1UECxMERG9jczEZMBcGA1UEAxMQd3d3LmJsdWVjb2F0LmN
vbTEgMB4GCSqGSIb3DQEJARYRdGVzdEBibHVlY29hdC5jb20wTDANBgkqhkiG9w0BAQEFAAM7AD
A4AjEAobHjK0AsnKV0TcsntWCdfTaNyCgwNDXffxT5FwM0xkzQi0pCSku27CJXn7TahrKRAgMBA
AGgMTAUBgkqhkiG9w0BCQcxBxMFdGVzdAAwGQYJKoZIhvcNAQkCMQwWCkJsdWUgQ29hdAAwDQYJ
KoZIhvcNAQEEBQADMQBooZfEnzZT2WMMiu3oT9EP3CdtddOTtdBImWUXPdHJGfm1vEJ7HI0cE0W
71JP6pUY=
-----END CERTIFICATE REQUEST-----
To Create a Signing Request Non-interactively Using Create Commands
At the (config) command prompt, enter the following commands to create a signing request:
SGOS#(config) ssl
SGOS#(config ssl)create signing-request keyring_id [attribute value] [attribute
value]
where the following attribute and value pairs are accepted:
Mandatory:
• cn <common name>
• challenge <at least four characters>
Optional:
• c <2 character country code>
• o <organization name>
• ou <organizational unit>
• email <email-id>
• state <state or province>
• city <locality or city>
• company <company name>
Notes:
•
If you do not specify any attributes, the interactive mode is assumed, meaning that the CSR
cannot be created by Director in profiles or overlays.
•
The name of the attribute is predefined and the value of the attribute is a string. The value can be
quoted if it contains white space or other special characters.
•
You must specify the name and value together; the order of appearance of multiple name value
pairs does not matter. If you omit an attribute, an empty string is assumed for the value of the
attribute.
Example:
#(config ssl)create signing-request keyring_id cn bluecoat challenge test
c US state CA company bluecoat
224
Chapter 7: Using Secure Services
Managing CA Certificates
If you plan to use certificates issued by well-known Certificate Authorities, you can use the ProxySG
to create certificate signing requests (CSRs). These can be sent to the Certificate Authority for signing.
Obtain the keypair and CSR to send to the CA in one of two ways:
•
Use the Blue Coat Certificate Signing Request (CSR)
•
Obtain the keypair and CSR off-box
Once the signed request is returned to you from the CA, you can import the certificate into the
ProxySG. To create a Blue Coat CSR, see "Creating Certificate Signing Requests" on page 222.
Note:
If you have a CA certificate that is not on the ProxySG default CA certificate list, you
might receive the following message when you attempt to connect to a web site:
Network Error (ssl_failed)
A secure SSL session could not be established with the Web Site:.
You must import the CA Certificate before the ProxySG can trust the site.
To import a CA Certificate, continue with "Importing a CA Certificate" below.
Importing a CA Certificate
A CA Certificate is a certificate that verifies the identity of a Certificate Authority. The certificate is
used by the ProxySG to verify server certificates and client certificates.
To Import an Approved CA Certificate through the Management Console
1.
Copy the certificate to the clipboard.
2.
Select Configuration>SSL>CA Certificates>CA Certificates.
The CA Certificates tab displays, with its list of existing CA certificates.
225
Blue Coat ProxySG Configuration and Management Guide
Figure 7-9: CA Certificates
3.
Click Import.
The Import CA Certificate dialog displays.
Figure 7-10: Import CA Certificate Dialog
4.
Paste the signed CA Certificate into the Import CA Certificate field.
5.
Click OK.
6.
When the certificate displays in the Certificate tab, click Apply.
To View a CA Certificate through the Management Console
1.
Select Configuration>SSL>CA Certificates>CA Certificates.
The CA Certificates tab displays.
226
2.
Select the certificate you want to view.
3.
Click View.
Chapter 7: Using Secure Services
The certificate displays.
Figure 7-11: View CA Certificate
4.
Examine the contents and click Close.
To Delete a CA Certificate through the Management Console
1.
Select Configuration>SSL>CA Certificates>CA Certificates.
2.
Select the certificate to delete.
3.
Click Delete.
4.
Click OK.
5.
Click Apply.
To Import a CA Certificate through the CLI Using Inline Commands
1.
Copy the certificate to the clipboard.
2.
At the (config) command prompt, enter the following commands:
SGOS#(config) ssl
SGOS#(config ssl) inline ca-certificate ca_certificate_name eof
Paste certificate here
eof
3.
(Optional) You can view the certificate you just imported, a summary of the just-imported
certificate, or a summary of all CA Certificates.
a.
To view the certificate you just imported:
SGOS#(config ssl) view ca-certificate ca_certificate_name
-----BEGIN CERTIFICATE----MIIEJzCCA5CgAwIBAgIEN35hxjANBgkqhkiG9w0BAQQFADCBgzELMAkGA1UEBhMC
VVMxLTArBgNVBAoTJEZpcnN0IERhdGEgRGlnaXRhbCBDZXJ0aWZpY2F0ZXMgSW5j
LjFFMEMGA1UEAxM8Rmlyc3QgRGF0YSBEaWdpdGFsIENlcnRpZmljYXRlcyBJbmMu
IENlcnRpZmljYXRpb24gQXV0aG9yaXR5MB4XDTk5MDcwMzE4NDczNFoXDTE5MDcw
MzE5MTczNFowgYMxCzAJBgNVBAYTAlVTMS0wKwYDVQQKEyRGaXJzdCBEYXRhIERp
Z2l0YWwgQ2VydGlmaWNhdGVzIEluYy4xRTBDBgNVBAMTPEZpcnN0IERhdGEgRGln
aXRhbCBDZXJ0aWZpY2F0ZXMgSW5jLiBDZXJ0aWZpY2F0aW9uIEF1dGhvcml0eTCB
nTANBgkqhkiG9w0BAQEFAAOBiwAwgYcCgYEA3xwUHgm5v6RAciCZebaEIvTXhZLF
BCToBy4C5BeVBTeVdj38seUPhw5iuSwwlybhCxVnAKYV3uiNy5XsAlhSwEdlM0xW
nwofBMA3UIFXut/68mtn68vQgA/ZV5UQZXsGRVjrrrRe45MVK5m8tikv+0KfRysu
TOs0KDKZDu//b6ECAQOjggGmMIIBojARBglghkgBhvhCAQEEBAMCAAcwgawGA1Ud
227
Blue Coat ProxySG Configuration and Management Guide
HwSBpDCBoTCBnqCBm6CBmKSBlTCBkjELMAkGA1UEBhMCVVMxLTArBgNVBAoTJEZp
cnN0IERhdGEgRGlnaXRhbCBDZXJ0aWZpY2F0ZXMgSW5jLjFFMEMGA1UEAxM8Rmly
c3QgRGF0YSBEaWdpdGFsIENlcnRpZmljYXRlcyBJbmMuIENlcnRpZmljYXRpb24g
QXV0aG9yaXR5MQ0wCwYDVQQDEwRDUkwxMCsGA1UdEAQkMCKADzE5OTkwNzAzMTg0
NzM0WoEPMjAxOTA3MDMxODQ3MzRaMAsGA1UdDwQEAwIBBjAfBgNVHSMEGDAWgBSm
uCDJFkuPT1wMw8PumA0+fu5WVTAdBgNVHQ4EFgQUprggyRZLj09cDMPD7pgNPn7u
VlUwDAYDVR0TBAUwAwEB/zA7BgNVHSUENDAyBggrBgEFBQcDAQYIKwYBBQUHAwIG
CCsGAQUFBwMDBggrBgEFBQcDBAYIKwYBBQUHAwgwGQYJKoZIhvZ9B0EABAwwChsE
VjQuMAMCBJAwDQYJKoZIhvcNAQEEBQADgYEAEObEaCOpbLeXSbFzNp3+v3KiDhLC
KlEGH2mTlDARNYVOqHkG43FVPBxWYx5Ee2qBwjB1bN7z8gzDTsp/ycbAX1/vxAZi
qk/6EN4yzOAu/2rixcdFKXU5+YxZC8ZrmQSYWsy6v7F4ApGqtoeAO1cUWzz8zAPK
hqGZqDpta2V+Ubg=
-----END CERTIFICATE-----
b.
To view a summary of the certificate you just imported.
SGOS#(config ssl) view summary ca-certificate ca_certificate_name
CA Certificate ID: ca_certificate_name
Is certificate valid? yes
CA: First Data Digital Certificates Inc.
Expiration Date: Jul 03 19:17:34 2019 GMT
Fingerprint: 70:B5:7C:48:81:95:3E:80:DC:28:9B:BA:EF:1E:E4:85
c.
To view summaries of all CA Certificates on the ProxySG:
SGOS#(config ssl) view summary ca-certificate
A long list of certificates are displayed, each with the summary information displayed
above.
To Delete a CA Certificate through the CLI
At the (config) command prompt, enter the following commands:
SGOS#(config) ssl
SGOS#(config ssl) delete ca-certificate ca_certificate_name
Creating CA Certificate Lists
A CA certificate list can refer to any subset of the available CA Certificates on the ProxySG. When
configuring an HTTPS service to do HTTPS termination, this list can be specified to restrict the set of
certificate authorities that are trusted to validate client certificates presented to that service.
The default is that no list is configured; all certificates are used in authentication.
To Create a CA-Certificate List through the Management Console
1.
Select Configuration>SSL>CA Certificates>CA Certificate Lists.
The CA Certificate Lists tab displays.
228
Chapter 7: Using Secure Services
Figure 7-12: SSL CA-Certificates Lists Dialog
The current CA-Certificate lists display in the pane.
2.
Click New to create a new list.
The Create CA Certificate List dialog displays.
Figure 7-13: Create CA Certificate List Dialog
3.
Enter a name meaningful to you for the list in the CA-Certificate List Name.
4.
To add CA Certificates to the list, highlight the certificate and click the Add button. You cannot add
a certificate to a certificate list if it is not already present.
5.
To remove CA Certificates from the list, highlight the certificate in the Add list and click the
Remove button.
6.
Click OK when you finish; click Apply.
To Create CA-Certificate Lists through the CLI
1.
At the (config) command prompt, view the CA certificates already existing on the system. You
cannot add a certificate to a certificate list if it is not already present.
229
Blue Coat ProxySG Configuration and Management Guide
SGOS#(config) ssl
SGOS#(config ssl) view summary ca-certificate
All the CA Certificates on the system display.
2.
Enter the followings commands to create a list and add existing certificates to the list you just
generated.
SGOS#(config ssl) create ccl list_name
SGOS#(config ssl) edit ccl list_name
The prompt changes, putting you in ccl submode.
SGOS#(config ssl ccl list_name) add ca_cert_name
3.
Repeat the above command until you have entered all the needed certificates. You can have more
than one CA-Certificate list. Each list can have an unlimited number of certificates.
4.
(Optional) View the list.
SGOS#(config ssl ccl list_name) view
CA Certificate ID: VRSN_Secure_Server_CA
Is certificate valid? yes
CA: RSA Data Security, Inc.
Expiration Date: Jan 07 23:59:59 2010 GMT
Fingerprint: 74:7B:82:03:43:F0:00:9E:6B:B3:EC:47:BF:85:A5:93
CA Certificate ID: DeutscheTelekom
Is certificate valid? yes
CA: Deutsche Telekom AG
Expiration Date: Jul 09 23:59:00 2019 GMT
Fingerprint: 9B:34:0D:1A:31:5B:97:46:26:98:BC:A6:13:6A:71:96
CA Certificate ID: CWHKT_SecureNetA
Is certificate valid? yes
CA: C&W HKT SecureNet CA Class A
Expiration Date: Oct 15 23:59:00 2009
Fingerprint: E2:D5:20:23:EC:EE:B8:72:E1:2B:5D:29:6F:FA:43:DA
Troubleshooting Certificate Problems
•
If the client does not trust the Certificate Signing Authority that has signed the ProxySG
Appliance’s certificate, you will see an error message in the event log similar to the following:
2004-02-13 07:29:28-05:00EST "CFSSL:SSL_accept error:14094416:SSL
routines:SSL3_READ_BYTES:sslv3 alert certificate unknown" 0 310000:1
../cf_ssl.cpp:1398
This commonly occurs when you use the HTTPS-Console service on port 8082, which uses a
self-signed certificate by default. When you access the Management Console over HTTPS, the
browser shows a pop-up that says that the security certificate is not trusted and asks if you want
to proceed. If you select No instead of proceeding, the browser sends an unknown CA alert to the
ProxySG.
You can eliminate the error message one of two ways:
❐
230
If this was caused by the Blue Coat self-signed certificate (the certificate associated with the
default keyring), import the certificate as from a trusted Certificate Signing Authority in
Internet Explorer.
Chapter 7: Using Secure Services
❐
•
Import a certificate on the ProxySG that is signed by a well-known Certificate Signing
Authority and use that for HTTPS Console access and HTTPS termination.
If the ProxySG’s certificate is not accepted because of a “host name mismatch” or it is an “invalid
certificate,” you can correct the problem by creating a new certificate and editing the
HTTPS-Console service to use it. For information on editing the HTTPS-Console service, see
"HTTPS Console (Secure Console)" on page 122.
Managing the SSL Client
Although only one SSL client exists on a ProxySG, the SSL client:
•
Determines which certificates can be presented to origin servers if the secure server requires the
ProxySG to present a certificate.
•
Identifies the protocol the ProxySG uses in negotiations with origin servers.
•
Identifies the cipher suites to be used with the certificate.
You can change the protocol and the cipher suites used.
Creating an SSL Client
Only one SSL client can be created on a ProxySG. Creation of the SSL client means that for every
HTTPS connection to the destination server, the ProxySG picks the parameters needed for negotiating
the SSL connection from the SSL-client configuration. Thus, multiple SSL connections to different
HTTPS destination servers can be supported with a single SSL-client configuration. This is similar to a
browser where one configuration is used to negotiate multiple connections with different hosts.
When the ProxySG is acting as an SSL client (SSL origination), SSL sessions are re-used until the server
forces a fresh handshake or until the same session ID has been used 255 times.
If you just need to change the protocol, the cipher suites, or the keyring associated with the SSL client,
you do not need to recreate the client. Continue with "Associating a Keyring and Protocol with the SSL
Client" on page 231 or "Changing the Cipher Suites of the SSL Client" on page 233.
To Create the SSL Client through the CLI
SGOS#(config ssl) create ssl-client default
defaulting protocol to SSLv2v3TLSv1
defaulting associated keyring-id to default
ok
To Delete the SSL Client through the CLI
SGOS#(config ssl) delete ssl-client default
ok
Associating a Keyring and Protocol with the SSL Client
The SSL client, called default, already exists on the ProxySG. Keyrings that are not used to authenticate
encrypted connections do not need to be associated with the SSL client.
Important: Only one keyring can be associated with the SSL client at a time.
231
Blue Coat ProxySG Configuration and Management Guide
To Associate a Keyring with the SSL Client and Change the Protocol Version through the Management
Console
1.
Select Configuration>SSL>SSL Client.
The SSL Client tab displays.
Figure 7-14: SSL Client
2.
To use the SSL client, verify Use SSL Client is selected.
3.
Only keyrings with certificates can be associated with the SSL client, displayed in the Keyring
drop-down list. Select the keyring you want to use to negotiate with origin content servers
through an encrypted connection.
4.
You can change the SSL Versions default from SSLv2v3TLSv1 to any other protocol listed in the
drop-down list.
5.
Click Apply.
To Associate a Keyring and Protocol with the SSL Client through the CLI
1.
To associate a keyring with the SSL client, enter the following commands at the (config)
command prompt:
SGOS#(config) ssl
SGOS#(config ssl) edit ssl-client default
SGOS#(config ssl ssl-client default) keyring-id keyring_id
SGOS#(config ssl ssl-client default) protocol {sslv2 | sslv3 | tlsv1 |
sslv2v3 | sslv2tlsv1 | sslv3tlsv1 | sslv2v3tlsv1}
Note:
To configure the ProxySG to accept only SSL version 3 traffic, for example, use the
sslv3 parameter. To configure the ProxySG to accept SSL version 2 and version 3
traffic, use the sslv2v3 parameter.
2.
232
View the results. The results also show the current value of the cipher suites, which is discussed in
"Changing the Cipher Suites of the SSL Client" on page 233.
Chapter 7: Using Secure Services
SGOS#(config ssl ssl-client default) view
SSL-Client Name
Keyring Name
Protocol
default
default
SSLv2v3TLSv1
Changing the Cipher Suites of the SSL Client
The cipher suite sets the encryption method used by the ProxySG. As the encryption key strength is
determined by the signed certificate, configuring a higher cipher suite than defined by the certificate
will have no affect. Conversely, the cipher suite configuration must be high enough to accommodate
certification encryption values.
This can only be done through the CLI.
To Change the Cipher Suite of the SSL Client through the CLI
The default is to use all ciphers.
You have a choice of using the interactive or non-interactive create command.
Note:
Director uses non-interactive commands in profiles and overlays to create cipher suites.
For more information on Director, refer to the Blue Coat Director User Guide.)
To change the cipher suites used through the:
•
interactive command: continue with the next procedure.
•
non-interactive command: skip to "To Change the Cipher Suites Non-interactively" on page 234.
To Change the Cipher Suites using the Interactive Cipher-Suites Command:
Note that the Use Column in the set cipher-suite output below indicates that the default is to use
all ciphers.
1.
Choose the cipher suites you want to use at the prompt.
SGOS#(config) ssl
SGOS#(config ssl) edit ssl-client default
SGOS#(config ssl ssl-client default) cipher-suite
SSL-Client Name
-------------default
Cipher#
------1
2
3
4
5
6
7
8
Use
--yes
no
no
no
no
no
no
no
Keyring Name
-----------default
Description
-------------------RC4-MD5
RC4-SHA
DES-CBC3-SHA
DES-CBC3-MD5
RC2-CBC-MD5
RC4-64-MD5
DES-CBC-SHA
DES-CBC-MD5
Protocol
-----------SSLv2v3TLSv1
Strength
-------Medium
Medium
High
High
Medium
Low
Low
Low
233
Blue Coat ProxySG Configuration and Management Guide
9
10
11
12
13
14
15
no
no
no
no
no
no
no
EXP1024-RC4-MD5
EXP1024-RC4-SHA
EXP1024-RC2-CBC-MD5
EXP1024-DES-CBC-SHA
EXP-RC4-MD5
EXP-RC2-CBC-MD5
EXP-DES-CBC-SHA
Export
Export
Export
Export
Export
Export
Export
Select cipher numbers to use, separated by commas: 1,3,4
ok
2.
(Optional) View the results. Note the change in the Use column.
SGOS#(config ssl ssl-client default) view
SSL-Client Name
--------------default
Cipher#
------1
2
3
4
5
6
7
8
9
10
11
12
13
14
15
Use
--yes
no
yes
yes
no
no
no
no
no
no
no
no
no
no
no
Keyring Name
-----------default
Description
-------------------RC4-MD5
RC4-SHA
DES-CBC3-SHA
DES-CBC3-MD5
RC2-CBC-MD5
RC4-64-MD5
DES-CBC-SHA
DES-CBC-MD5
EXP1024-RC4-MD5
EXP1024-RC4-SHA
EXP1024-RC2-CBC-MD5
EXP1024-DES-CBC-SHA
EXP-RC4-MD5
EXP-RC2-CBC-MD5
EXP-DES-CBC-SHA
Protocol
-----------SSLv2v3TLSv1
Strength
-------Medium
Medium
High
High
Medium
Low
Low
Low
Export
Export
Export
Export
Export
Export
Export
To Change the Cipher Suites Non-interactively
Enter the following commands:
SGOS#(config) ssl
SGOS#(config ssl) edit ssl-client default
SGOS#(config ssl ssl-client default) cipher-suite cipher-suite cipher-suite
where [cipher-suite] can be any combination of the following:
1. rc4-md5
2. rc4-sha
3. des-cbc3-sha
4. des-cbc3-md5
5. rc2-cbc-md5
6. rc4-64-md5
7. des-cbc-sha
8. des-cbc-md5
9. exp1024-rc4-md5
10.exp1024-rc4-sha
234
Chapter 7: Using Secure Services
11.exp1024-rc2-cbc-md5
12.exp1024-des-cbc-sha
13.exp-rc4-md5
14.exp-rc2-cbc-md5
15.exp-des-cbc-sha
Notes:
•
If you do not specify any attributes, the interactive mode is assumed, meaning that the cipher
suites cannot be used by Director in profiles or overlays.
•
Multiple cipher suites can be specified on the command line.
Example
SGOS#(config ssl ssl-client default) cipher-suite rc4-md5 des-cbc3-md5
exp1024-rc4-md5 exp-des-cbc-sha
ok
SGOS#(config ssl ssl-client default)view
SSL-Client Name
Keyring Name
Protocol
-----------------------------------default
default
SSLv2v3TLSv1
Cipher#
------1
2
3
4
5
6
7
8
9
10
11
12
13
14
15
Note:
Use
--no
no
no
no
no
no
no
no
no
no
no
no
no
no
yes
Description
-------------------RC4-MD5
RC4-SHA
DES-CBC3-SHA
DES-CBC3-MD5
RC2-CBC-MD5
RC4-64-MD5
DES-CBC-SHA
DES-CBC-MD5
EXP1024-RC4-MD5
EXP1024-RC4-SHA
EXP1024-RC2-CBC-MD5
EXP1024-DES-CBC-SHA
EXP-RC4-MD5
EXP-RC2-CBC-MD5
EXP-DES-CBC-SHA
Strength
-------Medium
Medium
High
High
Medium
Low
Low
Low
Export
Export
Export
Export
Export
Export
Export
You can use two policy conditions to test the negotiated cipher strength of a securely
connected client:
client.connection.negotiated_cipher=cipher_suite_list
client.connection.negotiated_cipher.strength=cipher_strength_list
For more information on using these two conditions, refer to Chapter 3 of the Blue Coat
ProxySG Content Policy Language Guide.
235
Blue Coat ProxySG Configuration and Management Guide
Troubleshooting Server Certificate Verification
Server certificate verification can be disabled for all upstream hosts or specific upstream hosts. The
ProxySG, by default, verifies the SSL certificate presented by the upstream HTTPS server. However, it
fails to negotiate the SSL connection if SSL certificate verification fails. The most common cause of
server certificate verification failure is the absence of a suitable CA certificate on the ProxySG. Ensure
that the SG is configured with the relevant CA certificates to avoid unwanted verification failures. The
default behavior can be changed by using the http ssl-verify-server option.
If a forwarding host of type HTTPS server is being used, you can override the default behavior by
changing the ssl-verify-server option on a per-host basis.
Setting the SSL Negotiation Timeout
The SSL negotiation timeout value dictates the time a ProxySG waits for a new SSL handshake to
complete. This value applies to both HTTPS termination and SSL origination.
You can change the default SSL negotiation timeout value if the default, 300 seconds, is not sufficient
for your environment. Note that this value can only be changed through the CLI; it cannot be set from
the Management Console.
To change the HTTPS termination timeout period, enter the follow commands from the command
prompt:
SGOS#(config) ssl
SGOS#(config ssl) view ssl-nego-timeout
300
SGOS#(config ssl) ssl-nego-timeout seconds
Enabling an HTTPS Service
The final step in creating HTTPS termination is to select a port and enable the HTTPS service on that
port. For general information on enabling services, see Chapter 5: “Managing Port Services” on
page 121. For more information on enabling the HTTPS Service, see "HTTPS" on page 138.
Configuring HTTP or HTTPS Origination to the Origin Content Server
In previous procedures, you configured HTTPS termination to the ProxySG. In two common
termination scenarios, you must also configure HTTPS origination to the Origin Content Server
(OCS).
The first two scenarios are used to provide a secure connection between the proxy and server, if, for
example, the proxy is in a branch office and is not co-located with the server.
Table 7.2: Scenario 1: HTTPS Termination with HTTPS Origination
236
Chapter 7: Using Secure Services
HTTPS Termination
Client
HTTPS
HTTPS Origination
ProxySG
ProxySG
HTTPS
Origin Content Server
Steps
Steps
• Configure a keyring
• (Optional) Add a forwarding host
• Configure the SSL client
• (Optional) Set an HTTPS port
• Configure the HTTPS service
• (Optional) Enable server certificate verification
Table 7.3: Scenario 2: HTTP Termination with HTTPS Origination
HTTP Termination
Client
HTTP
HTTPS Origination
ProxySG
ProxySG
HTTPS
Steps:
Steps
• Client is explicitly proxied
• Server URL rewrite
Origin Content Server
-or• Add a forwarding host (only for SGOS 3.1 or higher)
• Set an HTTPS port
• (Optional) Enable server certificate verification
Using server URL rewrite is the preferred method. For information on rewriting the server URL, refer
to the Blue Coat ProxySG Content Policy Language Guide.
You can only configure HTTPS origination through the CLI. You cannot use the Management Console.
To Configure HTTPS Origination:
At the (config) command prompt, enter the following commands:
SGOS#(config forwarding) create host_alias host_name https[=port_number]
server ssl-verify-server=yes
where:
host_alias
ip_address
Specifies the IP address of the OCS.
host_name
url
Specifies the URL of the OCS, such as www.bluecoat.com.
https
[=port_number]
Specifies the port number on the OCS in which HTTPS is
listening.
server
ssl-verifyserver=
server specifies to use the relative path for URLs in the
HTTP header because the next hop is a Web server, not a
proxy server. Proxy is the default.
yes | no
Specifies whether the upstream server certificate should
be verified. You can only enable this command if the
upstream host is a server, not a proxy.
The next scenario is useful when the ProxySG is deployed as a reverse proxy. This scenario is used
when it’s not necessary for a secure connection between the proxy and server. For information on
using the ProxySG as a reverse proxy, see "Choosing the HTTP Proxy Profile" on page 168.
237
Blue Coat ProxySG Configuration and Management Guide
Table 7.4: Scenario 3: HTTPS Termination with HTTP Origination
HTTPS Termination
Client
HTTPS
HTTP Origination
ProxySG
ProxySG
HTTP
Origin Content Server
Steps
Steps
• Configure a keyring
• Server URL rewrite
• Configure the SSL client
-or-
• Configure the HTTPS service
• Add a forwarding host (only for SGOS 3.1 or higher)
• Set an HTTP port
Using server URL rewrite is the preferred method. For information on rewriting the server URL, refer
to the Blue Coat ProxySG Content Policy Language Guide.
You can only configure HTTP origination through the CLI. You cannot use the Management Console.
To Configure HTTP Origination:
At the (config) command prompt, enter the following commands:
SGOS#(config forwarding) create host_alias host_name http[=port_number]
server
where:
host_alias
ip_address
Specifies the IP address of the OCS.
host_name
url
Specifies the URL of the OCS, such as www.bluecoat.com.
http
[=port_number]
Specifies the port number on the OCS in which HTTP is
listening.
server
server specifies to use the relative path for URLs in the
HTTP header because the next hop is a Web server, not a
proxy server. Proxy is the default.
Creating Policy for HTTP and HTTPS Origination
Forwarding hosts must be already created on the ProxySG before forwarding policy can be created.
To Create a Policy using CPL:
<forward>
url.host=host_name forward(host_alias)
To Create a Policy using VPM:
238
1.
In the VPM module, create a Forwarding layer.
2.
Set the Destination to be the URL of the OCS.
3.
Set the Action to forward to the forwarding host and configure parameters to control forwarding
behavior.
Chapter 7: Using Secure Services
Figure 7-15: Creating a Forwarding Object
Configuring DNS Resolution to the Origin Content Server
In different server accelerator scenarios, you might be required to use DNS resolution to the OCS
instead of HTTPS origination.
As long as the DNS that the ProxySG points to correctly resolves the domain name that the client seeks
to access, no addition configuration is required. Verify that the ProxySG has the certificate of the
Certificate Authority that signs the certificate on the OCS.
239
Blue Coat ProxySG Configuration and Management Guide
240
Chapter 8:
Security and Authentication
Enterprise-wide security begins with security on the ProxySG itself, and continues with controlling
user access to the Intranet and Internet.
Terms:
proxy
Caches content, filters traffic, monitors Internet and intranet resource usage,
blocks specific Internet and intranet resources for individuals or groups, and
enhances the quality of Internet or intranet user experiences.
A proxy can also serve as an intermediary between a Web client and a Web server
and can require authentication to allow identity based policy and logging for the
client.
The rules used to authenticate a client are based on the policies you create on the
ProxySG, which can reference an existing security infrastructure—LDAP,
RADIUS, NTLM, and the like, discussed in more detail in Chapter 9: “Using
Authentication Services” on page 271.
explicit proxy
A configuration in which the browser is explicitly configured to communicate
with the proxy server for access to content.
This is the default for the ProxySG, and requires configuration for both browser
and the interface card.
transparent proxy
A configuration in which traffic is redirected to the ProxySG without the
knowledge of the client browser. No configuration is required on the browser,
but network configuration, such as an L4 switch or a WCCP-compliant router, is
required.
forward proxy
A proxy server deployed close to the clients and used to access many servers. A
forward proxy can be explicit or transparent.
reverse proxy
A proxy that acts as a front-end to a small number of pre-defined servers,
typically to improve performance. Many clients can use it to access the small
number of predefined servers.
SSL
A standard protocol for secure communication over the network. Blue Coat
recommends using this protocol to protect sensitive information.
authentication
The process of identifying a specific user.
authorization
The permissions given to a specific user.
realms
A realm is a named collection of information about users and groups. The name
is referenced in policy to control authentication and authorization of users for
access to Blue Coat Systems ProxySG services. Note that multiple authentication
realms can be used on a single ProxySG. Realm services include NTLM, LDAP,
Local, and RADIUS. For detailed information on realms, see Chapter 9: “Using
Authentication Services” on page 271.
241
Blue Coat ProxySG Configuration and Management Guide
serial console
A device that allows you to connect to the ProxySG when it is otherwise
unreachable, without using the network. It can be used to administer the
ProxySG through the CLI. You must use the CLI to use a serial console.
Anyone with access to the serial console can change the administrative access
controls, so physical security of the serial console is critical.
SSH and HTTPS are the recommended (and default) methods for managing access to the ProxySG.
SSL is the recommended protocol for communication between the ProxySG and a realm's off-box
authentication server.
This chapter contains the following sections:
242
•
"Controlling Access to the ProxySG"
•
"Controlling Access to the Internet and Intranet"
Chapter 8: Security and Authentication
Section A: Controlling Access to the ProxySG
Section A: Controlling Access to the ProxySG
You can control access to the ProxySG several ways: by limiting physical access to the system, by
using passwords, restricting the use of console account, through per-user RSA public key
authentication, and through Blue Coat Content Policy Language (CPL). How secure the system needs
to be depends upon the environment.
This section contains:
•
"Limiting Access to the ProxySG Appliance"
•
"About Password Security"
•
"Limiting User Access to the ProxySG—Overview"
•
"Moderate Security: Restricting Management Console Access Through the Console Access
Control List (ACL)"
•
"Maximum Security: Administrative Authentication and Authorization Policy"
Limiting Access to the ProxySG Appliance
You can limit access to the ProxySG Appliance by:
•
Restricting physical access to the system and by requiring a PIN to access the front panel.
•
Restricting the IP addresses that are permitted to connect to the ProxySG CLI.
•
Requiring a password to secure the Setup Console.
These methods are in addition to the restrictions placed on the console account (a console account user
password) and the Enable password. For information on using the console account, see "Changing the
Username and Password through the Management Console" on page 43.
By using every possible method (physically limiting access, limiting workstation IP addresses, and
using passwords), the ProxySG is very secure.
This section discusses:
•
"Requiring a PIN for the Front Panel"
•
"Limiting Workstation Access"
•
"Securing the Serial Port"
Requiring a PIN for the Front Panel
On systems that have a front panel display, you can create a four-digit PIN to protect the system from
unauthorized use. The PIN is hashed and stored. You can only create a PIN from the command line.
To create a front panel PIN, after initial configuration is complete:
From the (config) prompt:
SGOS#(config) security front-panel-pin PIN
where PIN is a four-digit number.
243
Blue Coat ProxySG Configuration and Management Guide
Section A: Controlling Access to the ProxySG
To clear the front-panel PIN, enter
SGOS#(config) security front-panel-pin 0000
Limiting Workstation Access
During initial configuration, you have the option of preventing workstations with unauthorized IP
addresses from accessing the CLI. If this option is not enabled, all workstations are allowed to access
the CLI. You can also add allowed workstations later to the access control list (ACL). (For more
information on limiting workstation access, see "Moderate Security: Restricting Management Console
Access Through the Console Access Control List (ACL)" on page 247.)
Securing the Serial Port
If you choose to secure the serial sort, you must provide a Setup Console password that will be
required to access the Setup Console in the future.
Once the secure serial port is enabled:
•
The Setup Console password is required to access the Setup Console.
•
An authentication challenge (username and password) is issued to access the CLI through the
serial port.
To recover from a lost Setup Console password, you can:
•
Use the Front Panel display to either disable the secure serial port or enter a new Setup Console
password.
•
Use the CLI restore-defaults factory-defaults command to delete all system settings. For
information on using the restore-defaults factory-defaults command, see
"Factory-Defaults" on page 787.
•
Use the reset button (if the appliance has a reset button) to delete all system settings.
To enable the secure serial port, refer to the Installation Guide for your platform.
About Password Security
In the ProxySG, the console administrator password, the Setup Console password, and Enable
(privileged-mode) password are hashed and stored. It is not possible to reverse the hash to recover the
plaintext passwords.
In addition, the show config and show security CLI commands display these passwords in their
hashed form. The length of the hashed password depends on the hash algorithm used so it is not a
fixed length across the board.
Passwords that the ProxySG uses to authenticate itself to outside services are encrypted using
triple-DES on the appliance, and using RSA public key encryption for output with the show config
CLI command. You can use a third-party encryption application to create encrypted passwords and
copy them into the ProxySG using an encrypted-password command (which is available in several
modes and described in those modes). If you use a third-party encryption application, be sure it
supports RSA encryption, OAEP padding, and Base64 encoded with no new lines.
244
Chapter 8: Security and Authentication
Section A: Controlling Access to the ProxySG
These passwords, set up during configuration of the external service, include:
•
Access log FTP client passwords (primary, alternate)—For configuration information, see "Editing
the FTP Client" on page 766
•
Archive configuration FTP password—For configuration information, see "Archive
Configuration" on page 66
•
RADIUS primary and alternate secret—For configuration information, see "Defining RADIUS
Realm Properties" on page 296
•
LDAP search password—For configuration information, see "LDAP Search & Groups Tab
(Authorization and Group Information)" on page 288
•
Content filter download passwords—For configuration information, see Chapter 18: “Content
Filtering” on page 635
Limiting User Access to the ProxySG—Overview
When deciding how to give other users read-only or read-write access to the ProxySG, sharing the
basic console account settings is only one option. The following summarizes all available options:
Note:
If Telnet Console access is configured, Telnet can be used to manage the ProxySG with
behavior similar to SSH with password authentication.
SSL configuration is not allowed through Telnet, but is permissible through SSH.
Behavior in the following sections that applies to SSH with password authentication
applies to Telnet as well. Use of Telnet is not recommended because it is not a secure
protocol.
245
Blue Coat ProxySG Configuration and Management Guide
Section A: Controlling Access to the ProxySG
•
Console account—minimum security
The console account username and password are evaluated when the ProxySG is accessed from
the Management Console through a browser and from the CLI through SSH with password
authentication. The Enable (privileged-mode) password is evaluated when the console account is
used through SSH with password authentication and when the CLI is accessed through the serial
console and through SSH with RSA authentication. The simplest way to give access to others is
sharing this basic console account information, but it is the least secure and is not recommended.
To give read-only access to the CLI, do not give out the Enable (privileged-mode) password.
•
Console access control list—moderate security
Using the access control list (ACL) allows you to further restrict use of the console account and
SSH with RSA authentication to workstations identified by their IP address and subnet mask.
When the ACL is enforced, the console account can only be used by workstations defined in the
console ACL. Also, SSH with RSA authentication connections are only valid from workstations
specified in the console ACL (provided it is enabled).
After setting the console account username, password, and Enable (privileged-mode) password,
use the CLI or the Management Console to create a console ACL. See "Moderate Security:
Restricting Management Console Access Through the Console Access Control List (ACL)" on
page 247.
•
Per-user RSA public key authentication—moderate security
Each administrator’s public keys are stored on the appliance. When connecting through SSH, the
administrator logs in with no password exchange. Authentication occurs by verifying knowledge
of the corresponding private key. This is secure because the passwords never go over the network.
This is a less flexible option than CPL because you can't control level of access with policy, but it is
a better choice than sharing the console credentials.
•
Blue Coat Content Policy Language (CPL)—maximum security
CPL allows you to control administrative access to the ProxySG through policy. If the credentials
supplied are not the console account username and password, policy is evaluated when the
ProxySG is accessed through SSH with password authentication or the Management Console.
Policy is never evaluated on direct serial console connections or SSH connections using RSA
authentication.
246
❐
Using the CLI or the Management Console GUI, create an authentication realm to be used for
authorizing administrative access. For administrative access, the realm must support BASIC
credentials—for example, LDAP, RADIUS, Local, or NTLM with BASIC credentials enabled.
For more information on realms, see Chapter 9: “Using Authentication Services” on page 271.
❐
Using the Visual Policy Manager, or by adding CPL rules to the Local or Central policy file,
specify policy rules that: (1) require administrators to log in using credentials from the
previously-created administrative realm, and (2) specify the conditions under which
administrators are either denied all access, given read-only access, or given read-write access.
Authorization can be based on IP address, group membership, time of day, and many other
conditions. For more information, see "Defining Policies Using the Visual Policy Manager" on
page 250.
Chapter 8: Security and Authentication
Section A: Controlling Access to the ProxySG
❐
To prevent anyone from using the console credentials to manage the ProxySG, set the console
ACL to deny all access (unless you plan to use SSH with RSA authentication). For more
information, see "Moderate Security: Restricting Management Console Access Through the
Console Access Control List (ACL)" on page 247. You can also restrict access to a single IP
address that can be used as the emergency recovery workstation.
The following chart details the various ways administrators can access the ProxySG console and the
authentication and authorization methods that apply to each.
Table 8.1: ProxySG Console Access Methods/Available Security Measures
Security Measures Available
Serial Console
SSH with
Password
Authentication
Username and password evaluated
(console-level credentials)
3
Console Access List evaluated
3
CPL <Admin> Layer evaluated
SSH with RSA
Authentication
3
3
3(if console
(if console
credentials are
offered)
credentials are
offered)
3(see Note 1
below)
3(see Note 2
below)
Enable password required to enter
privileged mode (see Note 2 below)
3
3
3
CLI line-vty timeout command
applies.
3
3
3
Management Console Login/Logout
Management
Console
3
Note 1: When using SSH (with a password) and credentials other than the console account, the enable
password is actually the same as the login password. The privileged mode password set during
configuration is used only in the serial console, SSH with RSA authentication, or when logging in with
the console account.
Note 2: In this case, user credentials are evaluated against the policy before executing each CLI
command. If you log in using the console account, user credentials are not evaluated against the
policy.
Moderate Security: Restricting Management Console Access Through
the Console Access Control List (ACL)
The ProxySG allows you to limit access to the Management Console and CLI through the console
ACL. An ACL, once set up, is enforced only when console credentials are used to access either the CLI
or the Management Console, or when an SSH with RSA authentication connection is attempted. The
following procedure specifies an ACL that lists the IP addresses permitted access.
247
Blue Coat ProxySG Configuration and Management Guide
Section A: Controlling Access to the ProxySG
To Create an ACL through the Management Console:
1.
Select Configuration>Authentication>Console Access>Console Access.
The Console Access tab displays.
Figure 8-1: Console Access Tab
2.
(Optional) To add a new address to the ACL, click New.
The Add List Item dialog is displayed.
Figure 8-2: Add List Item Dialog
a.
In the IP/Subnet fields, enter a static IP address.
b.
In the Mask fields, enter the subnet mask. To restrict access to an individual workstation,
enter 255.255.255.255.
c.
Click OK to add the workstation to the ACL and return to the Console Access page.
d. Repeat step 2 to add other IP addresses.
248
3.
(Optional) To remove a source address from the ACL, select the address to remove from the
Console Access page and click Delete.
4.
(Optional) To change a source IP address, select the IP address to revise and click Edit. See step 2,
above, for details.
Chapter 8: Security and Authentication
Section A: Controlling Access to the ProxySG
5.
To impose the ACL defined in the list box, select Enforce ACL for built-in administration. To allow
access to the CLI or Management Console using console account credentials from any
workstation, deselect the checkbox. The ACL is ignored.
Important:
6.
Before you enforce the ACL, make sure the IP address for the workstation you are
using is included in the list. If you forget, or you find that you mistyped the IP
address, you must correct the problem using the serial console.
Click Apply.
To Create an ACL through the CLI:
1.
At the (config) command prompt, enter the following command to add workstation IP
addresses to the ACL:
SGOS#(config) security allowed-access add ip_address [subnet_mask]
Note:
If you omit the subnet mask, the default subnet mask of 255.255.255.255 is
assumed.
2.
Repeat step 1 for each workstation that you need to add to the console access list.
3.
At the (config) command prompt, enter the following command to enforce the ACL created in
step 1
SGOS#(config) security enforce-acl enable
Only those workstation IP addresses added to the ACL will be able to use the Management
console account to administer the ProxySG. Make sure the IP address for the workstation you
are using is included in the list.
4.
To disable the ACL and open through the access to the console account user, enter the following
command:
security enforce-acl disable
5.
To remove an IP address and subnet mask from the ACL, enter the following command:
SGOS#(config) security allowed-access remove ip_address [subnet_mask]
Note:
If you omit the subnet mask, the default subnet mask of 255.255.255.255 is
assumed.
Maximum Security: Administrative Authentication and Authorization
Policy
The ProxySG permits you to define a rule-based administrative access policy. This policy is enforced
when accessing:
249
•
the Management Console through http or https
•
the CLI via SSH when using password authentication
•
the CLI via telnet
•
the CLI via the serial port if the secure serial port is enabled
Blue Coat ProxySG Configuration and Management Guide
Section A: Controlling Access to the ProxySG
These policy rules can be specified either by using the VPM or by editing the Local policy file. Using
policy rules, you can deny access, allow access without providing credentials, or require
administrators to identify themselves by entering a username and password. If access is allowed, you
can specify whether read-only or read-write access is given. You can make this policy contingent on IP
address, time of day, group membership (if credentials were required), and many other conditions.
Serial-console access is not controlled by policy rules. For maximum security to the serial console,
physical access must be limited.
SSH with RSA authentication also is not controlled by policy rules. You can configure several settings
that control access: the enable password, the console ACL, and per-user keys configured through the
Configuration>Services>SSH>SSH Client page. (If you use the CLI, SSH commands are under
config>services>ssh-console.)
Defining Administrator Authentication and Authorization Policies
The ProxySG uses CPL to define policies, including administrator, authentication, and authorization
policies. CPL also allows you to give administrator privileges to users in any external authentication
service.
The following summarizes the steps required to define Administrator Authentication and
Authorization policies on the ProxySG:
•
(Optional) If you need to give administrative access to existing users or groups, create and
configure the authentication realm. See Chapter 9: “Using Authentication Services” on page 271
for details on configuring authentication realms.
•
Define the policies in the appropriate policy file where you keep the <Admin> Layer layers and
rules.
•
Load the policy file on the ProxySG.
When you define such policies, make sure you define them in the appropriate policy file(s). For more
information on policy files and how they are used, see Chapter 14: “The Visual Policy Manager” on
page 453.
Defining Policies Using the Visual Policy Manager
To define policies through the Management Console, use the Visual Policy Manager. When you use
the VPM, policies are configured in CPL and saved in the VPM policy file. For examples of
Administrator authentication or authorization policy CPL, continue with the next section. The VPM is
described in detail in Chapter 14: “The Visual Policy Manager” on page 453.
Defining Policies Directly in Policy Files
To define policies manually, type CPL rules directly in one of the two policy files, Central or Local.
Important: Do not manually enter CPL rules directly into the VPM file. The file becomes
corrupted.
250
Chapter 8: Security and Authentication
Section A: Controlling Access to the ProxySG
For specific information on creating policies within the policy files, refer to the Blue Coat ProxySG
Content Policy Language Guide.
Following are the CPL elements that can be used to define administrator policies for the ProxySG.
To Define Administrator Policies by Editing a Policy File:
1.
Open the policy file in a text editor.
2.
Define the policies, using the correct CPL syntax.
3.
Save the file.
4.
Load the policy file (see "Creating and Editing Policy Files" on page 442).
Admin Transactions and <Admin> Layers
Admin transactions execute <Admin> layers. Only a restricted set of conditions, properties, and actions
are permitted in <Admin> layers. Table 8.2 lists the conditions permitted in the <Admin> layer:
Table 8.2: <Admin> Layer Conditions
<Admin> Network Connection Conditions
client_address=ip_address
[.subnetmask]
Tests for a match between ip_address and the IP address of the
client transaction source.
proxy.port=number
Tests for a match between number and the port number for which
the request is destined.
proxy.address=ip_address
Tests for a match between ip_address and the IP address of the
network interface card for which the request is destined.
proxy.card=number
Tests for a match between number and the ordinal number
associated with the network interface card for which the request is
destined.
<Admin> General Conditions
condition=condition.label
Tests if the specified defined condition is true.
release.id=
Tests the ProxySG release id.
<Admin> Date/Time Conditions
date[.utc]=[date | date…date]
251
Tests for a match between date and the date timestamp associated
with the source of the transaction. date specifies a single date of the
form YYYY-MM-DD or an inclusive range, as in
YYYY-MM-DD…YYYY-MM-DD. By default, date is calculated based on
local time. To calculate year based on the Coordinated Universal
Time, include the .utc qualifier
Blue Coat ProxySG Configuration and Management Guide
Section A: Controlling Access to the ProxySG
Table 8.2: <Admin> Layer Conditions (Continued)
year[.utc]=[year | year…year]
Tests for a match between year and the year timestamp associated
with the source of the transaction. year specifies a single Gregorian
calendar year of the form YYYY or an inclusive range of years, as in
YYYY…YYYY. By default, year is calculated based on local time. To
calculate year based on the Coordinated Universal Time, include
the .utc qualifier.
month[.utc]=[month |
month…month]
Tests for a match between month and the month timestamp
associated with the source of the transaction. month specifies a
single Gregorian calendar month of the form MM or an inclusive
range of months, as in MM…MM. By default, month is calculated based
on local time. To calculate month based on the Coordinated
Universal Time, include the .utc qualifier.
weekday[.utc]=[number |
number…number]
Tests for a match between weekday and the weekday timestamp
associated with the source of the transaction. weekday specifies a
single day of the week (where Monday=1, Tuesday=2, and
Sunday=7) or an inclusive range of weekdays, as in
number…number. By default, weekday is calculated based on local
time. To calculate weekday based on the Coordinated Universal
Time, include the .utc qualifier.
day[.utc]=[day | day…day]
Tests for a match between day and the day timestamp associated
with the source of the transaction. day specifies a single Gregorian
calendar day of the month of the form DD or an inclusive range of
days, as in DD…DD. By default, day is calculated based on local time.
To calculate day based on the Coordinated Universal Time, include
the .utc qualifier.
hour[.utc]=[hour | hour…hour]
Tests for a match between hour and the hour timestamp associated
with the source of the transaction. hour specifies a single Gregorian
hour of the form HH (00, 01, and so forth, through 23) or an inclusive
range of hours, as in HH…HH. By default, hour is calculated based
on local time. To calculate hour based on the Coordinated Universal
Time, include the .utc qualifier.
minute[.utc]=[minute |
minute…minute]
Tests for a match between minute and the minute timestamp
associated with the source of the transaction. minute specifies a
single Gregorian minute of the form MM (00, 01, and so forth,
through 59) or an inclusive range of minutes, as in MM…MM. By
default, minute is calculated based on local time. To calculate minute
based on the Coordinated Universal Time, include the .utc qualifier.
time[.utc]=[time | time…time]
Tests for a match between time and the time timestamp associated
with the source of the transaction. time specifies military time of the
form TTTT (0000 through 2359) or an inclusive range of times, as in
TTTT…TTTT. By default, time is calculated based on local time. To
calculate time based on the Coordinated Universal Time, include
the .utc qualifier.
<Admin> Authorization Conditions
252
Chapter 8: Security and Authentication
Section A: Controlling Access to the ProxySG
Table 8.2: <Admin> Layer Conditions (Continued)
attribute.name =value
Tests if the current transaction is authorized in a RADIUS or LDAP
realm, and if the authenticated user has the specified attribute with
the specified value. This trigger is unavailable if the current
transaction is not authenticated
authenticated={yes | no}
Tests if authentication was requested and the credentials could be
verified.
group=group_name
If authenticate=yes, the group condition tests the source of the
transaction for membership in the specified groupname.
has_attribute.name=boolean
Tests if the current transaction is authorized in an LDAP realm and if
the authenticated user has the specified LDAP attribute.
realm=realm_name
If authenticate=yes, the realm condition tests the source of the
transaction for membership in the specified realm name.
user=username
If authenticate=yes, the user condition tests the source of the
transaction for the expected username.
user.domain=
windows_domain_name
(This condition is NTLM-realm specific.) If authenticate=yes,
the user_domain condition tests whether the realm type is NTLM
and whether the domain component of the username is the expected
domain name.
<Admin> Read-only or Read-write Conditions
admin_access=read | write
read tests whether the source of the transaction has read-only
permission for the ProxySG console. write tests whether the source
has read-write permission.
When an Administrator logs into the CLI, the ProxySG executes an
<Admin> transaction that includes the condition
admin_access=read. If the transaction is ultimately allowed (all
conditions have been met), the user will have read-only access to
configuration information through the CLI. Further, when that user
executes the CLI enable command, or logs into the Management
Console, the ProxySG executes an <Admin> transaction with
admin_access=write. If the transaction is allowed, the user will
have read-write access within the CLI or the Management Console.
Table 8.3 lists the properties permitted in the <Admin> layer:
Table 8.3: <Admin> Layer Properties
<Admin> Properties
253
deny
Refuse service to the source of the transaction.
authenticate(realm_name)
Requests authentication of the transaction source for the
specified realm.
Blue Coat ProxySG Configuration and Management Guide
Section A: Controlling Access to the ProxySG
Table 8.3: <Admin> Layer Properties (Continued)
authenticate.force( )
If 'yes' is specified then forces authentication even if the
transaction will be denied. This results in the user
information being available for logging. If no, then early
denial without authentication will be possible.
allow
Permit further service to the source of the transaction.
log.suppress.field-id ( )
Controls suppression of the specified field-id in all facilities
log.suppress.field-id[log_list]( )
Controls suppression of the specified field-id in the specified
facilities.
log.rewrite.field-id( )
Controls rewrites of a specific log field in all facilities.
log.rewrite.field-id[log_list]
( )
Controls rewrites of a specific log field in a specified list of
log facilities.
Table 8.4 lists the actions permitted in the <Admin> layer:
Table 8.4: <Admin> Layer Actions
<Admin> Actions
notify_email( )
Sends an e-mail notification to the list of recipients specified in the
Event Log mail configuration when the transaction terminates.
notify_snmp( )
The SNMP trap is sent when the transaction terminates.
Example Policy Using CPL Syntax
To authenticate users against an LDAP realm, use the following syntax in the Local Policy file:
<admin>
authenticate(LDAP_Realm)
<admin>
group="cn=Administrators,cn=Groups,dc=bluecoat,dc=com" allow
This authenticates users against the specified LDAP realm. If the users are successfully authenticated
and belong to group Administrators, they are allowed to administer the ProxySG.
254
Chapter 8: Security and Authentication
Section B: Controlling Access to the Internet and Intranet
Section B: Controlling Access to the Internet and Intranet
Once the ProxySG is secure, you can limit access to the Internet and intranet. It is possible to control
access to the network without using authentication. You only need to use authentication if you want
to use identity-based access controls.
This section contains:
•
"Using Authentication and Proxies"
•
"Using SSL with Authentication and Authorization Services"
•
"Creating a Proxy Layer to Manage Proxy Operations"
Using Authentication and Proxies
Authentication means that the ProxySG requires proof of user identity in order to make decisions
based on that identity. This proof is obtained by sending the client (a browser, for example) a
challenge—a request to provide credentials. Browsers can respond to different kinds of credential
challenges:
•
Proxy-style challenges—Sent from proxy servers to clients that are explicitly proxied. In HTTP, the
response code is 407.
An authenticating explicit proxy server sends a proxy-style challenge (407/Proxy-Authenticate)
to the browser. The browser knows it is talking to a proxy and that the proxy wants proxy
credentials. The browser responds to a proxy challenge with proxy credentials
(Proxy-Authorization: header). The browser must be configured for explicit proxy in order for it
to respond to a proxy challenge.
•
Origin-style challenges—Sent from origin content servers (OCS), or from proxy servers
impersonating a OCS. In HTTP, the response code is 401 Unauthorized.
In transparent proxy mode, the ProxySG uses the OCS authentication challenge (HTTP 401 and
WWW-Authenticate)—acting as though it is the location from which the user initially requested a
page. A transparent proxy, including a reverse proxy, must not use a proxy challenge, because the
client may not be expecting it.
Once the browser supplies the credentials, the ProxySG authenticates them.
Authentication Modes
You can control the way the ProxySG interacts with the client for authentication by controlling the
authentication mode. The mode specifies the challenge type and the accepted surrogate credential.
Note:
Challenge type is the kind of challenge (for example, proxy or origin-ip-redirect) issued.
Surrogate credentials are credentials accepted in place of the user’s real credentials.
255
Blue Coat ProxySG Configuration and Management Guide
Section B: Controlling Access to the Internet and Intranet
•
Auto: The default; the mode is automatically selected, based on the request. Chooses among
proxy, origin-IP, and origin-IP-redirect, depending on the kind of connection (explicit or
transparent) and the transparent authentication cookie configuration. For streaming transactions,
authenticate.mode(auto) uses origin mode.
•
Proxy: The ProxySG uses an explicit proxy challenge. No surrogate credentials are used. This is
the typical mode for an authenticating explicit proxy. In some situations proxy challenges will not
work; origin challenges are then issued.
•
Proxy-IP: The ProxySG uses an explicit proxy challenge and the client's IP address as a surrogate
credential. Proxy-IP specifies an insecure forward proxy, possibly suitable for LANs of single-user
workstations. In some situations proxy challenges will not work; origin challenges are then
issued.
•
Origin: The ProxySG acts like an OCS and issues OCS challenges. The authenticated connection
serves as the surrogate credential.
•
Origin-IP: The ProxySG acts like an OCS and issues OCS challenges. The client IP address is used
as a surrogate credential. Origin-IP is used to support NTLM authentication to the upstream
device when the client cannot handle cookie credentials. This mode is primarily used for
automatic downgrading, but it can be selected for specific situations.
•
Origin-cookie: The ProxySG acts like an origin server and issues origin server challenges. A
cookie is used as the surrogate credential. Origin-cookie is used in forward proxies to support
pass-through authentication more securely than origin-ip if the client understands cookies.
Only the HTTP and HTTPS protocols support cookies; other protocols are automatically
downgraded to origin-ip.
This mode could also be used in reverse proxy situations if impersonation is not possible and the
origin server requires authentication.
•
Origin-cookie-redirect: The client is redirected to a virtual URL to be authenticated, and cookies
are used as the surrogate credential. Note that the ProxySG does not support origin-redirects with
the CONNECT method.
Note:
256
During cookie-based authentication, the redirect to strip the authentication cookie from
the URL is logged as a 307 (or 302) TCP_DENIED.
•
Origin-IP-redirect: The client is redirected to a virtual URL to be authenticated, and the client IP
address is used as a surrogate credential. Note that the ProxySG does not support origin-redirects
with the CONNECT method.
•
SG2: The mode is selected automatically, based on the request, and uses the SGOS 2.x-defined
rules.
•
Form-IP: A form is presented to collect the user's credentials. The form is presented whenever the
user’s credential cache entry expires.
•
Form-Cookie: A form is presented to collect the user's credentials. The cookies are set on the OCS
domain only, and the user is presented with the form for each new domain. This mode is most
useful in reverse proxy scenarios where there are a limited number of domains.
Chapter 8: Security and Authentication
Section B: Controlling Access to the Internet and Intranet
•
Form-Cookie-Redirect: A form is presented to collect the user's credentials. The user is redirected
to the authentication virtual URL before the form is presented. The authentication cookie is set on
both the virtual URL and the OCS domain. The user is only challenged when the credential cache
entry expires.
•
Form-IP-redirect: This is similar to form-ip except that the user is redirected to the authentication
virtual URL before the form is presented.
Important: Modes that use an IP surrogate credential are insecure: After a user has
authenticated from an IP address, all further requests from that IP address are
treated as from that user. If the client is behind a NAT, or on a multi-user system, this
can present a serious security problem.
The default value is auto.
For more information on using authentication modes, see the Blue Coat ProxySG Content Policy
Language Guide.
Setting the Default Authenticate Mode Property
Setting the authentication.mode property selects a challenge type and surrogate credential
combination. In auto mode, explicit NTLM uses connection surrogate credentials. In sg2 mode,
explicit NTLM uses IP surrogate credentials.
To Configure the NTLM Default authenticate.mode Settings:
At the (config) command prompt, enter the following commands:
SGOS#(config) security default-authenticate-mode {auto | sg2}
Origin-Style Redirection
Some authentication modes redirect the browser to a virtual authentication site before issuing the
origin-style challenge. This gives the user feedback as to which credentials are required, and makes it
possible to (but does not require) send the credentials over a secure connection.
Since browser requests are transparently redirected to the ProxySG, the Appliance intercepts the
request for the virtual authentication site and issues the appropriate credential challenge. Thus, the
challenge appears to come from the virtual site, which is usually named to make it clear to the user
that ProxySG credentials are requested.
If authentication is successful, the ProxySG establishes a surrogate credential and redirects the
browser back to the original request, possibly with an encoded surrogate credential attached. This
allows the ProxySG to see that the request has been authenticated, and so the request proceeds. The
response to that request can also carry a surrogate credential.
To provide maximum flexibility, the virtual site is defined by a URL. Requests to that URL (only) are
intercepted and cause authentication challenges; other URLs on the same host are treated normally.
Thus, the challenge appears to come from a host that in all other respects behaves normally.
257
Blue Coat ProxySG Configuration and Management Guide
Section B: Controlling Access to the Internet and Intranet
Note:
Sharing the virtual URL with other content on a real host requires additional
configuration if the credential exchange is over SSL.
You can configure the virtual site to something that is meaningful for your company. The default,
which requires no configuration, is www.cfauth.com. See "Configuring Transparent Proxy
Authentication" on page 258 to set up a virtual URL for transparent proxy.
Tip: Using CONNECT and Origin-Style Redirection
You cannot use the CONNECT method with origin-style redirection or form redirect modes. You will
receive an error message similar to the following:
Cannot use origin-redirect for CONNECT method (explicit proxy of https URL)
Instead, you can add policy to either bypass authentication on the CONNECT method, or use proxy
authentication. For example:
<proxy>
allow http.method=CONNECT authenticate.mode(proxy) authenticate(ldap)
allow authenticate(cert) authenticate.mode(origin-cookie-redirect)
Selecting an Appropriate Surrogate Credential
IP surrogate credentials are less secure than cookie surrogate credentials and should be avoided if
possible. Note that if multiple clients share an IP address (such as when they are behind a NAT
firewall or on a multi-user system), the IP surrogate mechanism cannot distinguish between those
users
Configuring Transparent Proxy Authentication
The following sections provide general instructions on configuring for transparent proxy
authentication.
In addition to configuring transparent proxy authentication, you must also enable a transparent proxy
port before the transparent proxy is functional. To enable a transparent proxy port, see "Creating and
Editing Services" on page 129.
To Set Transparent Proxy Options through the Management Console:
1.
Select Configuration>Authentication>Transparent Proxy.
The Transparent Proxy tab displays.
258
Chapter 8: Security and Authentication
Section B: Controlling Access to the Internet and Intranet
Figure 8-3: Transparent Proxy Tab
2.
Select the transparent proxy method—cookie-based or IP address-based. The default is Cookie.
If you select Cookie, the Cookie Type radio buttons are available. Click either Session, for
cookies that will be deleted at the end of a session, or Persistent, for cookies that will
remain on a client machine until the cookie TTL (Time To Live) is reached or the
credentials cache is flushed. The default is Session.
If you select Persistent Cookies, enter the Cookie TTL. If you choose IP address-based, enter
the IP address TTL. The default for each is 15 minutes.
Note:
A value of 0 (zero) for the IP address TTL re-prompts the user for credentials once
the specified cache duration for the particular realm has expired.
3.
Select the Virtual URL. The default is www.cfauth.com. Blue Coat recommends you change the
virtual hostname to something meaningful to you, preferably the IP address of the ProxySG,
unless you are doing secure credentials over SSL. Using the IP address of the ProxySG enables
you to be sure that the correct ProxySG is addressed in a cluster configuration.
4.
Click Apply.
To Set Transparent Proxy Options through the CLI:
1.
At the (config) command prompt, enter the following command:
SGOS#(config) security transparent-proxy-auth method {cookie | ip}
a.
f you select cookie-based transparent proxy authentication, enter the following command
to specify persistent cookies or cookies that persist for the current session only:
SGOS#(config) security transparent-proxy-auth cookie {persistent |
session}
259
Blue Coat ProxySG Configuration and Management Guide
Section B: Controlling Access to the Internet and Intranet
b.
If you select persistent cookies, enter the following command to specify the minutes that
the cookie persists:
SGOS#(config) security transparent-proxy-auth time-to-live
persistent-cookie minutes
c.
If you choose IP-based transparent proxy authentication, enter the following command to
specify that the user be re-prompted for credentials after the number of TTL minutes
specified:
SGOS#(config) security transparent-proxy-auth time-to-live ip minute
A value of 0 (zero) for the IP address TTL re-prompts the user for credentials once the
specified cache duration for the particular realm has expired.
2.
(Optional step for single ProxySG scenarios, only needed if specifying a different virtual URL than
supplied by Blue Coat—www.cfauth.com) To specify the virtual URL for cookie-based
authentication, enter the following command:
SGOS#(config) security transparent-proxy-auth cookie virtual-url url
3.
(Optional, if you choose cookie-based) Add the virtual host domain to the DNS service for your
organization so that browsers, when redirected to the virtual URL, can resolve the hostname in
the URL. (If you use the virtual hostname provided by Blue Coat—www.cfauth.com—you do not
need to add the hostname to the DNS service.)
Using SSL with Authentication and Authorization Services
Blue Coat recommends that you use SSL during authentication to secure your user credentials. Blue
Coat now supports SSL between the client and the ProxySG and between the ProxySG to LDAP and
NTLM authentication servers.
SSL Between the Client and the ProxySG
To configure SSL for to use origin-cookie-redirect or origin-ip-redirect challenges, you must:
•
Specify a virtual URL with the HTTPS protocol (for example, https://virtual_address.
•
Create a keyring and certificate on the ProxySG.
•
Create an HTTPS service to run on the port specified in the virtual URL and to use the keyring
you just created.
Note:
You can only use SSL between the client and the ProxySG for origin-style challenges on
transparent connections (SSL for explicit proxy authentication is not supported).
In addition, if you use a forward proxy, the challenge type must use redirection; it cannot be
an origin or origin-ip challenge type.
When redirected to the virtual URL, the user is prompted to accept the certificate offered by the
ProxySG (unless the certificate is signed by a trusted certificate authority). If accepted, the
authentication conversation between the ProxySG and the user will be encrypted using the certificate.
260
Chapter 8: Security and Authentication
Section B: Controlling Access to the Internet and Intranet
Note:
If the hostname does not resolve to the IP address of the ProxySG, then the network
configuration must redirect traffic for that port to the Appliance. Also, if you use the IP
address as the virtual hostname, you might have trouble getting a certificate signed by a
CA-Certificate authority (which may not important).
For information on creating a keyring and a certificate, see "Configuring HTTPS Termination" on
page 207.
You can use SSL between the ProxySG and NTLM and LDAP authentication servers. For more
information, see Chapter 9: “Using Authentication Services” on page 271.
Creating a Proxy Layer to Manage Proxy Operations
Once hardware configuration is complete and the system configured to use transparent or explicit
proxies, use CPL or VPM to provide on-going management of proxy operations.
Using CPL
Below is a table of all commands available for use in proxy layers of a policy. If a condition, property,
or action does not specify otherwise, it can be used only in <Proxy> layers. For information on
creating effective CPL, refer to the Blue Coat ProxySG Content Policy Language Guide.
Table 8.5: <Proxy> Layer Conditions
261
<Proxy> Layer Conditions
Meaning
admin.access=
Tests the administrative access requested by the current transaction. Can
also be used in <Admin> layers.
attribute.name=
Tests if the current transaction is authenticated in a RADIUS or LDAP
realm, and if the authenticated user has the specified attribute with the
specified value. Can also be used in <Admin> layers.
authenticated=
Tests if authentication was requested and the credentials could be verified;
otherwise, false. Can also be used in <Admin> layers.
bitrate=
Tests if a streaming transaction requests bandwidth within the specified
range or an exact match. Can also be used in <Cache> layers.
category=
Tests if the content categories of the requested URL match the specified
category, or if the URL has not been categorized. Can also be used in
<Cache> layers.
client_address=
Tests the IP address of the client. Can also be used in <Admin> layers.
client.connection.
negotiated_cipher=
Test the cipher suite negotiated with a securely connected client. Can also
be used in <Exception> layers.
client.connection.
negotiated_cipher.
strength=
Test the cipher strength negotiated with a securely connected client. Can
also be used in <Exception> layers.
Blue Coat ProxySG Configuration and Management Guide
Section B: Controlling Access to the Internet and Intranet
Table 8.5: <Proxy> Layer Conditions (Continued)
client.host=
Test the hostname of the client (obtained through RDNS). Can also be used
in <Admin>, <Forward>, and <Exception > layers.
client.host.has_name=
Test the status of the RDNS performed to determine 'client.host'. Can also
be used in <Admin>, <Forward>, and <Exception> layers.
client_protocol=
Tests true if the client transport protocol matches the specification. Can also
be used in <Exception> layers.
condition=
Tests if the specified defined condition is true. Can be used in all layers.
console_access=
(This trigger was formerly admin=yes|no.) Tests if the current request is
destined for the admin layer. Can also be used in <Cache> and
<Exception> layers.
content_management=
(This trigger was formerly content_admin=yes|no.) Tests if the current
request is a content-management transaction. Can also be used in
<Exception> and <Forward> layers.
date[.utc]=
Tests true if the current time is within the startdate..enddate range,
inclusive. Can be used in all layers.
day=
Tests if the day of the month is in the specified range or an exact match.
Can be used in all layers.
exception.id=
Indicates that the requested object was not served, providing this specific
exception page.
Can also be used in <Exception> layers.
262
ftp.method=
Tests ftp request methods against any of a well-known set of FTP methods.
Can also be used in <Cache> and <Exception> layers.
group=
Tests if the authenticated condition is set to yes, the client is authenticated,
and the client belongs to the specified group. Can also be used in <Admin>
layers.
has_attribute.name=
Tests if the current transaction is authenticated in an LDAP realm and if the
authenticated user has the specified LDAP attribute. Can also be used in
<Admin> layers.
hour=
Tests if the time of day is in the specified range or an exact match. Can be
used in all layers.
http.method=
Tests HTTP request methods against any of a well known set of HTTP
methods. Can also be used in <Cache> and <Exception> layers.
http.method.regex=
Test the HTTP method using a regular expression. Can also be used in
<Exception> layers.
http.request_line.regex=
Test the HTTP protocol request line. Can also be used in <Exception>
layers.
http.request.version=
Tests the version of HTTP used by the client in making the request to the
ProxySG. Can also be used in <Cache> and <Exception> layers.
Chapter 8: Security and Authentication
Section B: Controlling Access to the Internet and Intranet
Table 8.5: <Proxy> Layer Conditions (Continued)
263
http.response_code=
Tests true if the current transaction is an HTTP transaction and the
response code received from the origin server is as specified. Can also be
used in <Cache> and <Exception> layers.
http.response.version=
Tests the version of HTTP used by the origin server to deliver the response
to the ProxySG. Can also be used in <Cache> and <Exception> layers.
http.transparent_
authentication=
This trigger evaluates to true if HTTP uses transparent proxy
authentication for this request. Can also be used in <Cache> and
<Exception> layers.
im.buddy_id=
Tests the buddy_id associated with the IM transaction. Can also be used in
<Exception> layers.
im.chat_room.conference=
Tests whether the chat room associated with the transaction has the
conference attribute set. Can also be used in <Exception> layers.
im.chat_room.id=
Tests the chat room ID associated with the transaction. Can also be used in
<Exception> layers.
im.chat_room.invite_only
=
Tests whether the chat room associated with the transaction has the
invite_only attribute set. Can also be used in <Exception> layers.
im.chat_room.type=
Tests whether the chat room associated with the transaction is public or
private. Can also be used in <Exception> layers.
im.chat_room.member=
Tests whether the chat room associated with the transaction has a member
matching the specified criterion. Can also be used in <Exception> layers.
im.chat_room.voice_
enabled=
Tests whether the chat room associated with the transaction is voice
enabled. Can also be used in <Exception> layers.
im.client=
Test the type of IM client in use. Can also be used in <Exception>,
<Forward>, and <Cache> layers.
im.file.extension=
Tests the file extension. Can also be used in <Exception> layers.
im.file.name=
Tests the file name (the last component of the path), including the
extension. Can also be used in <Exception> layers.
im.file.path=
Tests the file path against the specified criterion. Can also be used in
<Exception> layers.
im.file.size=
Performs a signed 64-bit range test. Can also be used in <Exception>
layers.
im.message.reflected
Test whether IM reflection occurred. Can also be used in <Exception>
and <Forward> layers.
im.message.route=
Tests how the IM message reaches its recipients. Can also be used in
<Exception> layers.
im.message.size=
Performs a signed 64-bit range test. Can also be used in <Exception>
layers.
Blue Coat ProxySG Configuration and Management Guide
Section B: Controlling Access to the Internet and Intranet
Table 8.5: <Proxy> Layer Conditions (Continued)
264
im.message.text.
substring=
Performs a signed 64-bit range test. Can also be used in <Exception>
layers.
im.message.opcode=
Tests the value of an opcode associated with an im.method of
send_unknown or receive_unknown.
im.message.type=
Tests the message type. Can also be used in <Exception> layers.
im.method=
Tests the method associated with the IM transaction. Can also be used in
<Cache> and <Exception> layers.
im.user_id=
Tests the user_id associated with the IM transaction. Can also be used in
<Exception> layers.
live=
Tests if the streaming content is a live stream. Can also be used in <Cache>
layers.
minute=
Tests if the minute of the hour is in the specified range or an exact match.
Can be used in all layers.
month=
Tests if the month is in the specified range or an exact match. Can be used
in all layers.
proxy.address=
Tests the IP address of the network interface card (NIC) on which the
request arrives. Can also be used in <Admin> layers.
proxy.card=
Tests the ordinal number of the network interface card (NIC) used by a
request. Can also be used in <Admin> layers.
proxy.port=
Tests if the IP port used by a request is within the specified range or an
exact match. Can also be used in <Admin> layers.
raw_url
Test the value of the raw request URL. Can also be used in <Exception>
layers.
raw_url.host
Test the value of the 'host' component of the raw request URL. Can also be
used in <Exception> layers.
raw_url.path
Test the value of the 'path' component of the raw request URL. Can also be
used in <Exception> layers.
raw_url.pathquery
Test the value of the 'path and query' component of the raw request URL.
Can also be used in <Exception> layers.
raw_url.port
Test the value of the 'port' component of the raw request URL. Can also be
used in <Exception> layers.
raw_url.query
Test the value of the 'query' component of the raw request URL. Can also
be used in <Exception> layers.
realm=
Tests if the authenticated condition is set to yes, the client is authenticated,
and the client has logged into the specified realm. an also be used in
<Admin> layers.
release.id=
Tests the ProxySG release ID. Can be used in all layers.
Chapter 8: Security and Authentication
Section B: Controlling Access to the Internet and Intranet
Table 8.5: <Proxy> Layer Conditions (Continued)
265
request.header_address.
header_name=
Tests if the specified request header can be parsed as an IP address. Can
also be used in <Cache> layers.
request.header.header_
name=
Tests the specified request header (header_name) against a regular
expression. Can also be used in <Cache> layers.
request.header.header_
name.count
Test the number of header values in the request for the given header_name.
Can also be used in <Exception> layers.
request.header.header_na
me.length
Test the total length of the header values for the given header_name. Can
also be used in <Exception> layers.
request.header.Referer.u
rl.host.has_name=
Test whether the Referer URL has a resolved DNS hostname. Can also be
used in <Exception> layers.
request.header.Referer.
url.is_absolute
Test whether the Referer URL is expressed in absolute form. Can also be
used in <Exception> layers.
request.raw_headers.coun
t
Test the total number of HTTP request headers. Can also be used in
<Exception> layers.
request.raw_headers.
length
Test the total length of all HTTP request headers. Can also be used in
<Exception> layers.
request.raw_headers.rege
x
Test the value of all HTTP request headers with a regular expression. Can
also be used in <Exception> layers.
request.x_header.header_
name.count
Test the number of header values in the request for the given header_name.
Can also be used in <Exception> layers.
request.x_header.header_
name.length
Test the total length of the header values for the given header_name. Can
also be used in <Exception> layers.
response.header.header_
name=
Tests the specified response header (header_name) against a regular
expression. Can also be used in <Cache> layers.
response.x_header.header
_name=
Tests the specified response header (header_name) against a regular
expression. Can also be used in <Cache> layers.
server_url[.case_
sensitive|.no_lookup]=
Tests if a portion of the requested URL exactly matches the specified
pattern. Can also be used in <Forward> layers.
socks.accelerated=
Controls the SOCKS proxy handoff to other protocol agents.
socks.method=
Tests the protocol method name associated with the transaction. Can also
be used in <Cache> and <Exception> layers.
socks.version=
Switches between SOCKS 4/4a and 5. Can also be used in <Exception>
and <Forward> layers.
streaming.content=
(This trigger has been renamed from streaming.) Can also be used in
<Cache>, <Exception>, and <Forward> layers.
time=
Tests if the time of day is in the specified range or an exact match. Can be
used in all layers.
Blue Coat ProxySG Configuration and Management Guide
Section B: Controlling Access to the Internet and Intranet
Table 8.5: <Proxy> Layer Conditions (Continued)
tunneled=
266
url.domain=
Tests if the requested URL, including the domain-suffix portion, matches
the specified pattern. Can also be used in <Forward> layers.
url.extension=
Tests if the filename extension at the end of the path matches the specified
string. Can also be used in <Forward> layers.
url.host=
Tests if the host component of the requested URL matches the IP address or
domain name. Can also be used in <Forward> layers.
url.host.has_name
Test whether the request URL has a resolved DNS hostname. Can also be used in
<Exception> layers
url.is_absolute
Test whether the request URL is expressed in absolute form. Can also be
used in <Exception> layers
url.host.is_numeric=
This is true if the URL host was specified as an IP address. Can also be used
in <Forward> layers.
url.host.no_name=
This is true if no domain name can be found for the URL host. Can also be
used in <Forward> layers.
url.host.regex=
Tests if the specified regular expression matches a substring of the domain
name component of the request URL. Can also be used in <Forward>
layers.
url.host.suffix=
Can also be used in <Forward> layers.
url.path=
Tests if a prefix of the complete path component of the requested URL, as
well as any query component, matches the specified string. Can also be
used in <Forward> layers.
url.path.regex=
Tests if the regex matches a substring of the path component of the request
URL. Can also be used in <Forward> layers.
url.port=
Tests if the port number of the requested URL is within the specified range
or an exact match. Can also be used in <Forward> layers.
url.query.regex=
Tests if the regex matches a substring of the query string component of the
request URL. Can also be used in <Forward> layers.
url.regex=
Tests if the requested URL matches the specified pattern. Can also be used
in <Forward> layers.
url.scheme=
Tests if the scheme of the requested URL matches the specified string. Can
also be used in <Forward> layers.
user=
Tests the authenticated user name of the transaction. Can also be used in
<Admin> layers.
user.domain=
Tests if the authenticated condition is set to yes, the client is authenticated,
the logged-into realm is an NTLM realm, and the domain component of
the user name is the specified domain. Can also be used in <Admin> layers.
Chapter 8: Security and Authentication
Table 8.5: <Proxy> Layer Conditions (Continued)
weekday=
Tests if the day of the week is in the specified range or an exact match. Can
be used in all layers.
year=
Tests if the year is in the specified range or an exact match. Can be used in
all layers.
Table 8.6: <Proxy> Layer Properties
<Proxy> Layer Properties
Meaning
action.action_label( )
Selectively enables or disables a specified define action block. Can also be
used in <Cache> layers.
allow
Allows the transaction to be served. Can be used in all layers except
<Exception> and <Forward> layers.
always_verify( )
Determines whether each request for the objects at a particular URL must
be verified with the origin server.
authenticate( )
Identifies a realm that must be authenticated against. Can also be used in
<Admin> layers.
authenticate.force( )
Either disables proxy authentication for the current transaction (using the
value no) or requests proxy authentication using the specified
authentication realm. Can also be used in <Admin> layers.
authenticate.form( )
When forms-based authentication is in use, authenticate.form ( ) selects the
form used to challenge the user.
authenticate.mode(auto)
authenticate.mode(sg2)
Setting the authentication.mode property selects a challenge type and
surrogate credential combination. In auto mode, explicit NTLM uses
connection surrogate credentials. In sg2.mode, explicit NTLM uses IP
surrogate credentials.
authenticate.redirect_sto
red_requests
Sets whether requests stored during forms-based authentication can be
redirected if the upstream host issues a redirecting response.
bypass_cache( )
Determines whether the cache will be bypassed for a request.
check_authorization( )
In connection with CAD (Caching Authenticated Data) and CPAD
(Caching Proxy Authenticated Data) support, check_authorization(
) is used when you know that the upstream device will sometimes (not
always or never) require the user to authenticate and be authorized for this
object. Can also be used in <Cache> layers.
delete_on_abandonment( )
If set to yes, then if all clients requesting an object close their connections
prior to the object being delivered, the object fetch from the origin server
will be abandoned. Can also be used in <Cache> layers.
deny
Denies service. Can be used in all layers except <Exception> and
<Forward> layers.
267
Blue Coat ProxySG Configuration and Management Guide
Table 8.6: <Proxy> Layer Properties (Continued)
dynamic_bypass( )
Used to indicate that a particular transparent request should not be
handled by the proxy, but instead be subjected to our dynamic bypass
methodology.
exception( )
Indicates not to serve the requested object, but instead serve this specific
exception page.
Can be used in all layers except <Exception> layers.
268
ftp.server_connection( )
Determines when the control connection to the server is established.
ftp.welcome_banner( )
Sets the welcome banner for a proxied FTP transaction.
http.client.recv.timeout
Sets the socket timeout for receiving bytes from the client.
http.request.version( )
The http.request.version( ) property sets the version of the HTTP
protocol to be used in the request to the origin content server or upstream
proxy. Can also be used in <Cache> layers.
http.response.parse_meta_
tag.
Cache-Control( )
Controls whether the 'Cache-Control' META Tag is parsed in an HTML
response body. Can also be used in <Cache> layers.
http.response.parse_meta_
tag. Expires
Controls whether the 'Expires' META Tag is parsed in an HTML response
body. Can also be used in <Cache> layers.
http.response.parse_meta_
tag. Pragma.no-cache
Controls whether the 'Pragma: no-cache' META Tag is parsed in an HTML
response body. Can also be used in <Cache> layers.
http.response.version( )
The http.response.version( ) property sets the version of the
HTTP protocol to be used in the response to the client's user agent.
http.server.recv.timeout(
)
Sets the socket timeout for receiving bytes from the upstream host. Can
also be used in <Forward> layers.
im.block_encryption
Prevents the encryption of AOL IM messages by modifying messages
during IM login time.
im.reflect
Sets whether IM reflection should be attempted.
im.strip_attachments( )
Determines whether attachments are stripped from IM messages.
im.transport
Sets the type of upstream connection to make for IM traffic.
log.suppress.field-id( )
The log.suppress.field-id( ) controls suppression of the specified
field-id in all facilities (individual logs that contain all properties for that
specific log in one format). Can be used in all layers.
log.suppress.field-id
[log_list]( )
The log.suppress.field-id [log_list]( ) property controls
suppression of the specified field-id in the specified facilities. Can be used
in all layers.
log.rewrite.field-id( )
The log.rewrite.field-id( ) property controls rewrites of a specific
log field in all facilities. Can be used in all layers.
Chapter 8: Security and Authentication
Table 8.6: <Proxy> Layer Properties (Continued)
log.rewrite.field-id
[log_list]( )
The log.rewrite.field-id [log_list]( ) property controls
rewrites of a specific log field in a specified list of log facilities. Can be used
in all layers.
reflect_ip( )
Determines how the client IP address is presented to the origin server for
explicitly proxied requests. Can also be used in <Forward> layers.
request.filter_service( )
Websense is the built in service name for the off-box content filtering
service. Can also be used in <Cache> layers.
request.icap_service( )
Determines whether a request from a client should be processed by an
external ICAP service before going out.
shell.prompt
Sets the prompt for a proxied Shell transaction.
shell.realm_banner
Sets the realm banner for a proxied Shell transaction.
shell.welcome_banner
Sets the welcome banner for a proxied Shell transaction.
socks.accelerate( )
The socks.accelerate property controls the SOCKS proxy handoff to
other protocol agents.
socks.authenticate( )
The same realms can be used for SOCKS proxy authentication as can be
used for regular proxy authentication.
socks.authenticate.
force( )
The socks.authenticate.force( ) property forces the realm to be
authenticated through SOCKS.
Table 8.7: <Proxy> Layer Actions
<Proxy> Layer Actions
Meaning
log_message( )
Writes the specified string to the ProxySG event log. Can be used in all
layers except <Admin>.
notify_email( )
Sends an email notification to the list of recipients specified in the Event
Log mail configuration. Can be used in all layers.
notify_snmp( )
The SNMP trap is sent when the transaction terminates. Can be used in all
layers.
redirect( )
Ends the current HTTP transaction and returns an HTTP redirect response
to the client.
transform
Invokes the active content or URL rewrite transformer.
269
Blue Coat ProxySG Configuration and Management Guide
270
Chapter 9:
Using Authentication Services
Determining and configuring the type of security (such as LDAP, local list, and NTLM) to implement
on your network (authorization) is a critical part of managing enterprise security.
Understanding Realms
The ProxySG provides a flexible authentication architecture that supports multiple services with
multiple backend servers (for example, LDAP directory servers together with NT domains with no
trust relationship) within each authentication scheme with the introduction of the realm.
A realm authenticates and authorizes users for access to ProxySG services using either explicit proxy or
transparent proxy mode, discussed in "Configuring Proxies" on page 149.
Multiple authentication realms can be used on a single ProxySG. Multiple realms are essential if the
enterprise is a managed service provider or the company has merged with or acquired another
company. Even for companies using only one protocol, multiple realms might be necessary, such as
the case of a company using an LDAP server with multiple authentication boundaries. You can use
realm sequencing to search the multiple realms all at once.
A realm configuration includes:
•
Realm name
•
Authentication service—(NTLM, LDAP, RADIUS, Local, Certificate, Sequences, Netegrity
SiteMinder®, Oblix COREid™, Policy Substitution)
•
External server configuration—Backend server configuration information, such as host, port, and
other relevant information based on the selected service.
•
Authentication schema—The definition used to authenticate users.
•
Authorization schema—The definition used to authorize users for membership in defined groups
and check for attributes that trigger evaluation against any defined policy rules.
•
One-time passwords are supported for RADIUS realms only.
SSL Between the ProxySG and the Authentication Server
SSL communication between the ProxySG and LDAP and NTLM authentication servers is supported.
In addition, you can also use SSL between the client and the ProxySG. For more information on using
SSL between the client and the ProxySG, see "SSL Between the Client and the ProxySG" on page 260.
Configuring a realm to use SSL between the ProxySG and the authentication server is performed on a
per-realm basis. Part of the SSL configuration is specifying whether to verify the server's certificate. If
the server certificate is to be verified, then the server's certificate must be signed by a Certificate
Authority that the ProxySG trusts, and the common name in the server certificate must match the
server host as specified in the realm configuration.
271
Blue Coat ProxySG Configuration and Management Guide
The realms use the default SSL client defined on the ProxySG for SSL communications to the
authentication servers.
Note:
If the browser is configured for on-line checking of certificate revocation, the status check
must be configured to bypass authentication.
The chapter contains the following sections:
272
•
"NTLM Realm Authentication and Authorization"
•
"LDAP Realm Authentication and Authorization"
•
"RADIUS Realm Authentication and Authorization"
•
"Local Realm Authentication and Authorization"
•
"Certificate Realm Authentication"
•
"Netegrity SiteMinder"
•
"Oblix COREid"
•
"Policy Substitution Realm"
•
"Sequence Realm Authentication"
•
"Forms-Based Authentication"
•
"Managing the Credential Cache"
Chapter 9: Using Authentication Services
Section A: NTLM Realm Authentication and Authorization
Section A: NTLM Realm Authentication and Authorization
Windows NT LAN Manager (NTLM) is the authentication protocol used on Windows NT networks.
NTLM is a Microsoft-proprietary protocol that authenticates users and computers based on an
authentication challenge and response. When an NTLM realm is used and a resource is requested by
the client from the ProxySG, the appliance contacts the user's or computer's account domain to verify
identity and then requests an access token. The access token is generated by the domain controller and
passed to (and if valid, accepted by) the ProxySG.
Refer to the Microsoft Web site for detailed information about the NTLM protocol and a list of which
versions of the Microsoft operating systems use NTLM.
This section discusses the following topics:
•
"How Blue Coat Works with NTLM"
•
"Creating an NTLM Realm"
•
"NTLM Servers"
•
"Defining NTLM Realm General Properties"
•
"Creating the CPL"
How Blue Coat Works with NTLM
Blue Coat uses a proprietary NTLM agent to better manage NTLM connections.
For NTLM, a single BCAAA (Blue Coat Authentication and Authorization Agent) can support
multiple ProxySG Appliances; however, only one agent is permitted per realm.
Important: You cannot use CAASNT with SGOS 3.2 and higher.
BCAAA must be installed on a domain controller or member server. If the server where the BCAAA is
installed and its domain have a trust relationship with other domains, the user is authenticated
automatically by the other domains.
Creating an NTLM Realm
To create an NTLM realm, you must provide at least the primary host of the NTLM server for that
realm.
To Create an NTLM Realm through the Management Console:
1.
Select Configuration>Authentication>NTLM>NTLM Realms.
The NTLM Realms tab displays.
273
Blue Coat ProxySG Configuration and Management Guide
Section A: NTLM Realm Authentication and Authorization
Figure 9-1: NTLM Realms Tab
2.
Click New; the Add NTLM Realm dialog displays.
Figure 9-2: Add NTLM Realm
3.
In the Realm name field, enter a realm name. The name can be 32 characters long and composed of
alphanumeric characters and underscores. The name must start with a letter.
4.
Identify the primary server host. You must enter a valid host or an error message is generated.
5.
(Optional) The default port is 16101. You can change the port number if the primary server is
listening on a different port.
6.
Click OK; click Apply.
NTLM Servers
Once you have created an NTLM realm, you can use the NTLM Servers page to change the current
default settings.
1.
Select Configuration>Authentication>NTLM>NTLM Servers.
The NTLM Servers page displays.
274
Chapter 9: Using Authentication Services
Section A: NTLM Realm Authentication and Authorization
Figure 9-3: NTLM Servers Tab
2.
From the Realm Name drop-down list, select the NTLM realm for which you want to change server
properties.
3.
You must have defined at least one NTLM realm (using the NTLM Realms page) before attempting
to set NTLM server properties. If the message Realms must be added in the NTLM Realms tab
before editing this tab is displayed in red at the bottom of this page, you do not currently
have any NTLM realms defined
4.
Specify the host and port for the primary NTLM server. The default port is 16101.
5.
(Optional) Specify the host and port for the alternate NTLM server. The default port is 16101.
6.
(Optional) Under SSL Options, click the SSL enable checkbox to enable SSL.
7.
(Optional) By default, if SSL is enabled, the BCAAA certificate is verified. If you do not want to
verify the BCAAA certificate, deselect this checkbox.
8.
In the Timeout Request field, type the number of seconds the ProxySG allows for each request
attempt before timing out. (The default request timeout is 60 seconds.)
9.
Click Apply. Repeat the above steps for additional NTLM realms, up to a total of 40.
To Create and Define an NTLM Realm through the CLI:
1.
At the (config) prompt, enter the following command to create an NTLM realm:
SGOS#(config) security ntlm create-realm realm_name primary_host
[primary_port]
where:
2.
275
realm_name
The name of the NTLM realm.
primary_host
The host for the primary NTLM server.
primary_port
The port for the primary NTLM server. The default port is 16101.
To redefine the NTLM realm configuration for the realm you just created, enter the following
commands:
Blue Coat ProxySG Configuration and Management Guide
Section A: NTLM Realm Authentication and Authorization
SGOS#(config) security ntlm edit-realm realm_name
SGOS#(config ntlm realm_name) primary-server primary_host [primary_port]
and optionally,
SGOS#(config ntlm realm_name) alternate-server alternate_host
[alternate_port]
where:
3.
primary_host
The host for the primary NTLM server.
primary_port
The port for the primary NTLM server. The default port is 16101.
alternate_host
The host for the alternate NTLM server.
alternate_port
The port for the alternate NTLM server. The default port is 16101.
To enable SSL for this realm and to have the BCAAA certificate verified, enter:
SGOS#(config ntlm realm_name) ssl enable
SGOS#(config ntlm realm_name) ssl-verify-server enable
Defining NTLM Realm General Properties
The NTLM General tab allows you to specify the display name, whether to support Basic and NTLM
credentials, the credential cache duration and a virtual URL.
To Configure General Settings through the Management Console:
1.
Select Configuration>Authentication>NTLM>NTLM General.
The NTLM General tab displays.
Figure 9-4: NTLM General Tab
2.
276
From the Realm Name drop-down list, select the NTLM realm for which you want to change
properties.
Chapter 9: Using Authentication Services
Section A: NTLM Realm Authentication and Authorization
Note:
You must have defined at least one NTLM realm (using the NTLM Realms tab) before
attempting to set NTLM general properties. If the message Realms must be added in
the NTLM Realms tab before editing this tab is displayed in red at the bottom of
this page, you do not currently have any NTLM realms defined.
3.
If needed, change the NTLM realm display name. The default value for the display name is the
realm name. The display name cannot be longer than 128 characters and it cannot be null.
4.
You can enable or disable support for Basic credentials in the realm by selecting or deselecting the
Allow Basic credentials checkbox
Note:
At least one Basic or NTLM credential must be supported. Also, if the NTLM realm is part
of a sequence realm and is not the first realm in the sequence with try NTLM authentication
only once enabled that Basic credentials cannot be disabled in the NTLM realm.
5.
You can enable or disable support for NTLM credentials in the realm by selecting or deselecting
the Allow NTLM credentials checkbox. Note that at least one of Basic or NTLM credentials must be
supported.
6.
Specify the length of time, in seconds, that user and administrator credentials received from the
NTLM server are cached. Credentials can be cached for up to 3932100 seconds. The default cache
duration is 900 seconds (15 minutes).
Note:
7.
If you specify 0, traffic is increased to the NTLM server because each authentication
request generates an authentication and authorization request to the server.You can
specify a virtual URL based on the individual realm. For more information on the virtual
URL, see Chapter 8: “Security and Authentication” on page 241.
Click Apply.
To Configure General Settings through the CLI:
At the (config) command prompt, enter the following commands to configure general settings:
SGOS#(config
SGOS#(config
SGOS#(config
SGOS#(config
SGOS#(config
ntlm
ntlm
ntlm
ntlm
ntlm
realm_name)
realm_name)
realm_name)
realm_name)
realm_name)
cache-duration seconds
credentials-basic enable | disable
credentials-ntlm enable | disable
display-name name
virtual-url URL
where:
277
cache-duration
seconds
Specifies the length of time in seconds that user and
administrator credentials received from the NTLM server are
cached. Credentials can be cached for up to 3932100 seconds.
The default value is 900 seconds (15 minutes).
credentialsbasic
enable |
disable
Enables or disables Basic credential support.
credentialsntlm
enable |
disable
Enables or disables NTLM credential support.
display-name
name
The default value for the display name is the realm name. The
display name cannot be longer than 128 characters and it cannot
be null.
Blue Coat ProxySG Configuration and Management Guide
Section A: NTLM Realm Authentication and Authorization
virtual-url
URL
The URL to redirect to when the user needs to be challenged for
credentials. see Chapter 8: “Security and Authentication” on
page 241 for more details.
Creating the CPL
You can create CPL policies now that you have completed NTLM realm configuration. Be aware that
the examples below are just part of a comprehensive authentication policy. By themselves, they are not
adequate for your purposes.
The examples below assume the default policy condition is allow. On new SGOS 4.x systems, the
default policy condition is deny.
Note:
•
Refer to the Blue Coat ProxySG Content Policy Language Guide for details about CPL and
how transactions trigger the evaluation of policy file layers.
Every NTLM-authenticated user is allowed access the ProxySG.
<Proxy>
authenticate(NTLMRealm)
•
Group membership is the determining factor in granting access to the ProxySG.
<Proxy>
authenticate(NTLMRealm)
<Proxy>
group=”Domain\internetusers”
deny
Tips and Boundary Conditions
•
Forms authentication modes cannot be used with an NTLM realm that allows only NTLM
credentials, a Policy Substitution realm, or a Certificate realm. If a form mode is in use and the
authentication realm is any of them, you will receive a configuration error.
•
For Windows Internet Explorer NTLM users who want true single-sign-on (allowing Internet
Explorer to provide your credentials automatically when challenged), you must set the virtual
URL to a hostname that is resolvable to the IP address of the ProxySG by the client machines. Dots
(for example, 10.1.1.1) are not allowed.
To define the information in Internet Explorer, go to Internet Options>Security>Local
intranet>Sites>Advanced...>Web sites. (If you are an XP user, go to Internet
Options>Security>Internet>Custom Level, then check Automatic logon with current username and
password.)
For Windows Internet Explorer 6.x users, add the virtual host address to Internet
Options>Privacy>Web Sites>Managed Web Sites>Always Allow
278
Chapter 9: Using Authentication Services
Section B: LDAP Realm Authentication and Authorization
Section B: LDAP Realm Authentication and Authorization
Many companies and organizations use the Lightweight Directory Access Protocol (LDAP) as the
directory protocol of choice, enabling software to find an individual user without knowing where that
user is located in the network topography.
This section discusses the following topics:
•
"Overview"
•
"Creating an LDAP Realm"
•
"LDAP Servers"
•
"Defining LDAP Base Distinguished Names"
•
"LDAP Search & Groups Tab (Authorization and Group Information)"
•
"Customizing LDAP Objectclass Attribute Values"
•
"Defining Sequence Realm General Properties"
•
"Creating the CPL"
Overview
Blue Coat supports both LDAP v2 and LDAP v3, but recommends LDAP v3 because it uses Transport
Layer ProxySG (TLS) and SSL to provide a secure connection between the ProxySG and the LDAP
server.
An LDAP directory, either version 2 or version 3, consists of a simple tree hierarchy. An LDAP
directory might span multiple LDAP servers. In LDAP v3, servers can return referrals to others
servers back to the client, allowing the client to follow those referrals if desired.
Directory services simplify administration; any additions or changes made once to the information in
the directory are immediately available to all users and directory-enabled applications, devices, and
ProxySG Appliances.
The ProxySG supports the use of external LDAP database servers to authenticate and authorize users
on a per-group or per-attribute basis.
LDAP group-based authentication for the ProxySG can be configured to support any
LDAP-compliant directory including:
•
Microsoft Active Directory Server
•
Novell NDS/eDirectory Server
•
Netscape/Sun iPlanet Directory Server
•
Other
The ProxySG also provides the ability to search for a single user in a single root of an LDAP directory
information tree (DIT), and to search in multiple Base Distinguished Names (DNs).
You can configure a LDAP realm to use SSL when communicating to the LDAP server.
279
Blue Coat ProxySG Configuration and Management Guide
Section B: LDAP Realm Authentication and Authorization
Configuring LDAP involves the following steps:
•
Creating a realm (up to 40) and configuring basic settings.
•
Configuring an LDAP server
•
Defining LDAP Base Distinguished Names
•
Defining Authorization and Group information
•
Configuring general LDAP realm settings
•
Creating policy
Creating an LDAP Realm
To Create an LDAP Realm through the Management Console:
1.
Select Configuration>Authentication>LDAP>LDAP Realms.
The LDAP Realms tab displays.
Figure 9-5: LDAP Realms Tab
2.
280
Click New; the Add LDAP Realm dialog displays.
Chapter 9: Using Authentication Services
Section B: LDAP Realm Authentication and Authorization
Figure 9-6: Add LDAP Realm
3.
In the Real name field, enter a realm name. The name can be 32 characters long and composed of
alphanumeric characters and underscores. The name must start with a letter.
4.
From the Type of LDAP server drop-down list, select the specific LDAP server.
5.
Specify the host and port for the primary LDAP server. The host must be entered. The default port
number is 389.
6.
In the User attribute type field, specify the default user attribute type for the type of LDAP server.
7.
Microsoft Active Directory Server
sAMAccountName=
Novell NDS/eDirectory Server/Other
cn=
Netscape/iPlanet Directory Server
uid=
Click OK; click Apply.
LDAP Servers
Once you have created an LDAP realm, you can use the LDAP Servers page to change the current
default settings.
To Edit LDAP Server Properties through the Management Console:
Note that the default values exist. You do not need to change these values if the default settings are
acceptable.
1.
Select Configuration>Authentication>>LDAP>LDAP Servers.
The LDAP Servers page displays.
281
Blue Coat ProxySG Configuration and Management Guide
Section B: LDAP Realm Authentication and Authorization
Figure 9-7: LDAP Servers Tab
2.
From the Realm Name drop-down list, select the LDAP realm for which you want to change server
properties.
Note:
You must have defined at least one LDAP realm (using the LDAP Realms tab) before
attempting to set LDAP server properties. If the message Realms must be added
in the LDAP Realms tab before editing this tab is displayed in red at the
bottom of this page, you do not currently have any LDAP realms defined.
3.
From the Type of LDAP server drop-down list, select the specific LDAP server.
4.
From the LDAP Protocol Version drop-down list, select v2 for LDAP v2 support. LDAP v3 is the
default.
If you use LDAP v3, you can click the Follow referrals checkbox to allow the client to follow
referrals to other servers. (This feature is not available with LDAP v2.) The default is Disabled.
5.
Specify the host and port for the primary LDAP server. The host must be entered. The default port
number is 389.
6.
(Optional) Specify the host and port for the alternate LDAP server. The default port is 389.
7.
(Optional) Under SSL Options, click Enable SSL to enable SSL. You can only select this option if you
are using LDAP v3.
8.
(Optional) By default, if SSL is enabled, the LDAP server certificate is verified. If you do not want
to verify the server certificate, disable this setting.
9.
(Optional) Change the timeout request for the server from its default of 60 seconds.
10. Click Apply. Repeat the above steps for additional LDAP realms, up to a total of 40.
To Define a Realm and Edit LDAP Server Properties through the CLI:
1.
282
At the (config) command prompt, enter the following command to create an LDAP realm:
Chapter 9: Using Authentication Services
Section B: LDAP Realm Authentication and Authorization
SGOS#(config) security ldap create-realm {ad | iplanet | nds | other}
realm_name [base_dn] primary_host [primary_port]
where:
{ad | iplanet | nds
| other}
The type of LDAP realm to create. ad specifies a Microsoft Active
Directory realm; iplanet specifies a Netscape/Sun iPlanet realm; nds
specifies a Novell NDS/eDirectory realm; other specifies a realm of any
other type.
realm_name
The name of the new LDAP realm.
base_dn
The distinguished name (DN) that will be used as the unique key for the
LDAP group database; the distinguished name of the key entry and all
entries below it in the directory tree. You can specify additional Base DNs
after the realm has been created. For example: ou=insidesales,
o=toolsdivision. A Base DN can be up to 128 characters long. (In
Netscape/iPlanet Directory Server, Base DN is also known as the Root
DN.) See Table 9.1 for sample DN entries.
Note that at least one base DN is required for authentication to succeed,
although you can create a realm without a base DN.
2.
primary_host
The host for the primary LDAP server.
primary_port
The port for the primary LDAP server. The default port is 389.
To redefine the newly-created LDAP realm authentication properties, enter the following
commands:
SGOS#(config) security ldap edit-realm realm_name
SGOS#(config ldap realm_name) primary-server host [port]
and, optionally:
SGOS#(config
SGOS#(config
SGOS#(config
SGOS#(config
SGOS#(config
SGOS#(config
SGOS#(config
SGOS#(config
SGOS#(config
SGOS#(config
ldap
ldap
ldap
ldap
ldap
ldap
ldap
ldap
ldap
ldap
realm_name)
realm_name)
realm_name)
realm_name)
realm_name)
realm_name)
realm_name)
realm_name)
realm_name)
realm_name)
alternate-server host [port]
distinguished-name base-dn clear
distinguished-name base-dn add base_DN
protocol-version {2 | 3}
referrals-follow {enable | disable}
spoof-authentication none | origin | proxy
ssl enable | disable
ssl-verify-server enable | disable
exit
timeout seconds
where
alternate-server
283
host [port]
The host for the secondary LDAP server.
The port can also be added, if you need it
to be other than the default (389).
Blue Coat ProxySG Configuration and Management Guide
Section B: LDAP Realm Authentication and Authorization
distinguished name
base-dn
clear | add base_DN
Clears the existing base_DN or adds the
specified base_DN. The distinguished
name (DN) that will be used as the
unique key for the LDAP group
database; the distinguished name of the
key entry and all entries below it in the
directory tree. You can specify additional
Base DNs after the realm has been
created. For example: ou=insidesales,
o=toolsdivision. A Base DN can be up to
128 characters long. (In Netscape/iPlanet
Directory Server, Base DN is also known
as the Root DN.) See Table 9.1 for sample
DN entries.
Note that at least one base DN is required
for authentication to succeed, although
you can create a realm without a base
DN.
protocol-version
2 | 3
The LDAP version you want to use.
LDAP v3 is the default, allowing you to
use the referrals-follow argument
and to use SSL.
referrals-follow
enable | disable
Allows the client to follow referrals to
other servers. This argument is not
available if you use LDAP v2.
spoof-authentication
none | origin |
proxy
Enables/disables the forwarding of
authenticated credentials to the origin
content server or for proxy
authentication. You can only choose one.
• If set to origin, the spoofed header will
be an Authorization: header.
• If set to proxy, the spoofed header will
be a Proxy-Authorization: header.
• If set to none, no spoofing will be done.
Flush the entries for a realm if the
spoof-authentication value is changed to
ensure that the spoof-authentication
value is immediately applied.
284
ssl
enable | disable
Enables or disables SSL. This argument is
not available if you use LDAP v2.
ssl-verify-server
enable | disable
By default, if SSL is enabled, the LDAP
server certificate is verified. If you do not
want to verify the server certificate,
disable this setting.
Chapter 9: Using Authentication Services
Section B: LDAP Realm Authentication and Authorization
SGOS#(config ldap
realm_name) timeout
3.
seconds
Note that this command is not in the
edit-realm submode. Changes the
timeout request for the server from its
default of 60 seconds.
(Optional) Once in the edit-realm submode, use the ? command to view all of the edit-realm
commands available.
Defining LDAP Base Distinguished Names
The ProxySG allows you to specify multiple Base Distinguished Names (DNs) to search per realm,
along with the ability to specify a specific branch of a Base DN.
A Base DN identifies the entry that is starting point of the search. You must specify at least one
non-null base-DN for LDAP authentication to succeed.
You must enter complete DNs. Table 9.1 lists some examples of distinguished name attributes.
Table 9.1: Distinguished Name Attributes
285
DN Attribute Syntax
Parameter Description
c=country
Country in which the user or group resides. Examples: c=US, c=GB.
cn=common name
Full name of person or object defined by the entry. Examples:
cn=David Smith, cn=Administrators, cn=4th floor printer
mail=email address
User or group email address.
givenName=given name
User's first name.
l=locality
Locality in which the user or group resides. This can be the name of a
city, country, township, or other geographic regions. Examples:
l=Seattle, l=Pacific Northwest, l=King County
o=organization
Organization to which the user or group is a member. Examples:
o=Blue Coat Inc, o=UW
ou=organizational unit
Unit within an organization. Examples: ou=Sales, ou=IT,
ou=Compliance
st=state or province
State or province in which the user or group resides. Examples:
st=Washington, st=Florida
userPassword=password
Password created by a user.
streetAddress=street
address
Street number and address of user or group defined by the entry.
Example: streetAddress= 650 Almanor Avenue Sunnyvale,
California 94085-3515
sn=surname
User's last name.
telephoneNumber=telephone
User or group telephone number.
title=title
User's job title.
Blue Coat ProxySG Configuration and Management Guide
Section B: LDAP Realm Authentication and Authorization
Table 9.1: Distinguished Name Attributes (Continued)
uid=user ID
Name that uniquely identifies the person or object defined by the entry.
Examples: uid=ssmith, uid=kjones
To Define Searchable LDAP Base DNs through the Management Console:
1.
Select Configuration>Authentication>LDAP>LDAP DN.
The LDAP DN tab displays.
Figure 9-8: LDAP DN Tab
2.
From the Realm Name drop-down list, select the LDAP realm for which you want to change DN
properties.
Note:
3.
You must have defined at least one LDAP realm (using the LDAP Realms tab) before
attempting to set LDAP server properties. If the message Realms must be added in
the LDAP Realms tab before editing this tab is displayed in red at the bottom of
this page, you do not currently have any LDAP realms defined.
In the User attribute type field, the ProxySG has entered the default user attribute type for the type
of LDAP server you specified when creating the realm.
Microsoft Active Directory Server
sAMAccountName=
Novell NDS/eDirectory Server/Other
cn=
Netscape/iPlanet Directory Server
uid=
If you entered information correctly when creating the realm, you do not need to change the User
attribute type in this step. If you do need to change or edit the entry, do so directly in the field.
4.
286
Enter as many Base DNs as you need for the realm. Assume, for example, that Sample_Company
has offices in New York and Lisbon, each with its own Base DN.
Chapter 9: Using Authentication Services
Section B: LDAP Realm Authentication and Authorization
Figure 9-9: Simplified Directory Information Trees
To specify entries for the Base DNs field, click New, enter the Base DN, and click OK. Repeat for
multiple Base DNs. To search all of Sample_Company, enter o values:
Figure 9-10: Searching SampleCompany
To search the manufacturing organizations, rather than starting at the top, enter ou and o values:
Figure 9-11: Searching Part of SampleCompany
You can add, edit, and delete Base DNs for a ProxySG to search. You can also select an individual
DN and move it up or down in the list with the Promote and Demote buttons. The ProxySG
searches multiple DNs in the order listed, starting at the top and working down.
5.
Click Apply to save the changes.
To Define One or More Searchable LDAP Base DNs through the CLI:
1.
To define a Base DN, enter the following command:
SGOS#(config ldap realm_name) distinguished-name base-dn add base-dn
where base-dn is a string up to 128 characters long in the format appropriate to the type
of LDAP server represented by the realm name. The base-dn should be the
Fully-Qualified Domain Name (FQDN) of the base of the search.
Repeat this step for each additional Base DN you want added to the list. Entries in the list
start with the first Base DN created; subsequent additions are appended to the list. The
list is searched from the top down.
2.
(Optional) To remove a Base DN:
SGOS#(config ldap realm_name) distinguished-name base-dn remove base_dn
3.
(Optional) To remove all Base DNs and clear the list:
SGOS#(config ldap realm_name) distinguished-name base-dn clear
4.
287
(Optional) To move a Base DN up or down in the list of Base DNs:
Blue Coat ProxySG Configuration and Management Guide
Section B: LDAP Realm Authentication and Authorization
SGOS#(config ldap realm_name) distinguished-name base-dn {promote | demote}
base_dn
where promote moves the specified Base DN up one level in the list and demote moves it
down one level. You need to issue the command for each level you want to move the Base
DN.
LDAP Search & Groups Tab (Authorization and Group Information)
After creating an LDAP realm, providing at least the required fields of the LDAP server for that realm,
and defining base DNs for the realm, you must define authorization properties for each LDAP realm
you created.
Note:
Authorization decisions are completely handled by policy. The groups that the ProxySG
looks up and queries are derived from the groups specified in policy in group= conditions,
attribute= conditions, and has Attribute conditions. If you do not have any of those
conditions, then Blue Coat does not look up any groups or attributes to make policy decisions
based on authorization.
To Define LDAP Realm Authorization Properties through the Management Console:
1.
Select Configuration>Authentication>LDAP>LDAP Search & Groups.
The LDAP Search & Groups tab displays.
Figure 9-12: LDAP Search & Groups Tab
2.
From the Realm Name drop-down list, select the LDAP realm for which you want to specify
authorization information.
Note:
288
You must have defined at least one LDAP realm (using the LDAP Realms tab) before
attempting to set LDAP Search & Group properties. If the message Realms must be
added in the LDAP Realms tab before editing this tab is displayed in red at the
bottom of this page, you do not currently have any LDAP realms defined.
Chapter 9: Using Authentication Services
Section B: LDAP Realm Authentication and Authorization
3.
Specify whether to allow anonymous search or to enforce user authentication before allowing a
search.
Some directories require a valid user to be able to perform an LDAP search; they do not allow
anonymous bind. (Active Directory is one such example.) For these directories, you must specify a
valid fully-qualified distinguished username and the password that permits directory access
privileges. (For example, cn=user1,cn=users,dc=bluecoat,dc=com is a possible fully-qualified
distinguished name.)
To permit users to anonymously bind to the LDAP service, select Anonymous Search Allowed. For
example, with Netscape/iPlanet Directory Server, when anonymous access is allowed, no
username or password is required by the LDAP client to retrieve information.
The LDAP directory attributes available for an anonymous client are typically a subset of those
available when a valid user distinguished name and password have been used as search
credentials.
To enforce user authentication before binding to the LDAP service, deselect Anonymous Search
Allowed, and set the Search User DN and Search User Password. Enter a user distinguished name in
the Search User DN field. This username can identify a single user or a user object that acts as a
proxy for multiple users (a pool of administrators, for example). A search user distinguished
name can be up to 512 characters long.
You can set or change the user password by clicking Change Password. This password can be up to
64 alphanumeric characters long.
You might want to create a separate user (such as Blue Coat, for example) instead of using an
Administrator distinguished name and password.
The Dereference level field has four values—always, finding, never, searching—that allow you to
specify when to search for a specific object rather than search for the object’s alias. The default is
Always.
4.
Group Information
Membership type and Membership attribute: The ProxySG enters the appropriate default:
❐
Microsoft Active Directory:
Membership type: user
Membership attribute type: memberOf
❐
Netscape/Sun iPlanet:
Membership type:group
Membership attribute typeuniqueMember
❐
Novell NDS eDirectory/Other
Membership type:user
Membership attribute type:member
Username type to lookup: Select either FQDN or Relative. Only one can be selected at a time.
289
❐
Relative can only be selected in the membership type is Group.
❐
FQDN indicates that the lookup is done only on the user object. FQDN can be selected when the
membership type is either Group or User.
Blue Coat ProxySG Configuration and Management Guide
Section B: LDAP Realm Authentication and Authorization
5.
Click Apply.
To Define LDAP Realm Authorization Properties through the CLI:
1.
Define the search criteria for the LDAP realm:
SGOS#(config ldap realm_name) search {anonymous {disable | enable} |
dereference {always | finding | never | searching} | password password |
encrypted-password encrypted_password | user-dn user_dn}
where:
anonymous
disable |
enable
If disabled, users will not be permitted to anonymously bind to
the LDAP service.
If enabled, users will be permitted to anonymously bind to the
LDAP service. When anonymous access is allowed, no password
is required by the LDAP client to retrieve information, however,
one can be specified, if extra security is desirable.
The LDAP directory attributes available for an anonymous client
are typically a subset of those available to clients that have been
authenticated through a user distinguished name and password.
dereference
always |
finding |
never |
searching
Sets dereference options.
password |
encrypted_
password
Specifies the user password (or encrypted password) associated
with the user distinguished name. The non-encrypted (or
plain-text) password can be up to 64 alphanumeric characters
long.
always dereference aliases is the default.
finding dereferences aliases only during name resolution.
searching dereferences aliases only after name resolution.
never means that aliases will never be dereferenced.
password |
encryptedpassword
The primary use of the encrypted-password command is to
allow the ProxySG to reload a password that it encrypted. If you
choose to use a third-party encryption application, be sure it
supports RSA encryption, OAEP padding andBase64 encoded
with no newlines.
user_dn
2.
user_dn
Specifies a user distinguished name. This username can identify
a single user or a user object that acts as a proxy for multiple
users (a pool of administrators, for example). Search user
distinguished name can be up to 512 characters long.
To define LDAP realm membership properties:
SGOS#(config ldap realm_name) membership-attribute membership_attribute
where membership_attribute is the name of the attribute that has the group
information. (For Active Directory, the attribute name is memberOf. For iPlanet, the
attribute name is uniquemember. For Novell Directory service, the attribute name is
member.)
SGOS#(config ldap realm_name) membership-type {group | user}
290
Chapter 9: Using Authentication Services
Section B: LDAP Realm Authentication and Authorization
where group specifies that this realm is composed of individual members belonging to a
group defined elsewhere, and user specifies that this realm is composed of individual
disparate members whose only link to each other is membership in this group.
SGOS#(config ldap realm_name) membership-username (full | relative)
where full specifies that the user's FQDN will be used during membership lookups, and
relative specifies that the user's relative username will be used during membership
lookups. Only one can be selected at a time.
Customizing LDAP Objectclass Attribute Values
The objectclass attributes on an LDAP object define the type of object an entry is. For example, a user
entry might have an objectclass attribute value of person while a group entry might have an
objectclass attribute value of group.
The objectclass attribute values defined on a particular entry can differ among LDAP servers. The
objectclass attribute values are attribute values only, they are not DNs of any kind.
Currently, the objectclass attribute values are used by Blue Coat during a VPM browse of an LDAP
server. If an administrator wants to browse the groups in a particular realm, the ProxySG searches the
LDAP server for objects that have objectclass attribute values matching those in the group list and
in the container list. The list of objectclass attribute values in the container list is needed so that
containers that contain groups can be fetched and expanded correctly.
To Customize LDAP Objectclass Attribute Values through the Management Console:
1.
Select Configuration>Authentication>LDAP>LDAP Objectclasses.
The LDAP Objectclasses tab displays.
Figure 9-13: LDAP Objectclasses Tab
291
2.
From the Realm name drop-down list, select the LDAP realm whose objectclasses you want to
modify.
3.
From the Object type drop-down list, select the type of object: container, group, or user.
Blue Coat ProxySG Configuration and Management Guide
Section B: LDAP Realm Authentication and Authorization
4.
To create or edit an object for the specified objectclass, click New or Edit. (The only difference is
whether you are adding or editing an objectclass value.)
The Add/Edit Objectclass Value dialog displays.
Figure 9-14: Add Objectclass Value
5.
Enter or edit the objectclass, and click OK; click Apply. For example, objectclass=organization.
Defining LDAP General Realm Properties
The LDAP General page allows you to indicate whether an LDAP server is configured to expect
case-sensitive usernames and passwords, the length of time that credentials are cached, the display
name, and if you want to use a special virtual host for this realm.
To Configure General LDAP Settings through the Management Console:
1.
Select Configuration>Authentication>LDAP>LDAP General.
The LDAP General tab displays.
Figure 9-15: LDAP General Tab
292
Chapter 9: Using Authentication Services
Section B: LDAP Realm Authentication and Authorization
2.
From the Realm Name drop-down list, select the LDAP realm for which you want to change
properties.
Note:
You must have defined at least one LDAP realm (using the LDAP Realms tab) before
attempting to set LDAP general properties. If the message Realms must be added in
the LDAP Realms tab before editing this tab is displayed in red at the bottom of
this page, you do not currently have any LDAP realms defined.
3.
If needed, give the LDAP realm a display name. The default value for the display name is the
realm name. The display name cannot be longer than 128 characters and it cannot be null.
4.
If the LDAP server is configured to expect case-sensitive usernames and passwords, select Case
sensitive.
5.
Specify the length of time in seconds that user and administrator credentials received from the
LDAP server are cached. Credentials can be cached for up to 3932100 seconds. The default value is
900 seconds (15 minutes).
Note:
6.
If you specify 0, this increases traffic to the LDAP server because each authentication
request generates an authentication and authorization request to the server.
You can specify a virtual URL based on the individual realm. For information on the virtual URL,
see Chapter 8: “Security and Authentication” on page 241.
To Configure General Settings through the CLI:
At the (config) prompt, enter the following command to configure general settings:
SGOS#(config
SGOS#(config
SGOS#(config
SGOS#(config
ldap
ldap
ldap
ldap
realm_name)
realm_name)
realm_name)
realm_name)
cache-duration seconds
case-sensitive {enable | disable}
virtual-url URL
display-name name
where:
cacheduration
seconds
Specifies the length of time in seconds that user and
administrator credentials received from the LDAP server are
cached. Credentials can be cached for up to 3932100 seconds.
The default value is 900 seconds (15 minutes).
If you specify 0, cached user and administrator credentials are
not re-used.
293
case-sensitive
enable |
disable
Enable this setting if the LDAP server is configured to expect
case-sensitive usernames and passwords.
virtual-url
URL
The URL to redirect to when the user needs to be challenged for
credentials. See Chapter 8: “Security and Authentication” on
page 241.
display-name
name
The default value for the display name is the realm name. The
display name cannot be longer than 128 characters and cannot
be null.
Blue Coat ProxySG Configuration and Management Guide
Section B: LDAP Realm Authentication and Authorization
Creating the CPL
Be aware that the examples below are just part of a comprehensive authentication policy. By
themselves, they are not adequate for your purposes.
Note:
Refer to the Blue Coat ProxySG Content Policy Language Guide for details about CPL and how
transactions trigger the evaluation of policy file layers.
Be aware that the default policy condition for these examples is allow. The default policy condition on
new SGOS 4.x systems is deny.
•
Every LDAP-authenticated user is allowed access the ProxySG.
<Proxy>
authenticate(LDAPRealm)
•
Group membership is the determining factor in granting access to the ProxySG.
<Proxy>
authenticate(LDAPRealm)
<Proxy>
group=”cn=proxyusers, ou=groups, o=myco”
deny
•
A subnet definition determines the members of a group, in this case, members of the Human
Resources department.
<Proxy>
authenticate(LDAPRealm)
<Proxy>
Define subnet HRSubnet
192.168.0.0/16
10.0.0.0/24
End subnet HRSubnet
[Rule] client_address=HRSubnet
url.domain=monster.com
url.domain=hotjobs.com
deny
.
.
.
[Rule]
deny
294
Chapter 9: Using Authentication Services
Section C: RADIUS Realm Authentication and Authorization
Section C: RADIUS Realm Authentication and Authorization
RADIUS is often the protocol of choice for ISPs or enterprises with very large numbers of users.
RADIUS was designed to handle these large numbers through centralized user administration that
eases the repetitive tasks of adding and deleting users and their authentication information. RADIUS
also inherently provides some protection against sniffing.
Some RADIUS servers support one-time passwords. One-time passwords are passwords that become
invalid as soon as they are used. The passwords are often generated by a token or program, although
pre-printed lists are also used. Using one-time passwords ensures that the password cannot be used in
a replay attack. Even if someone were able to retrieve another person’s password off the wire, they
would not be able to reuse it. The ProxySG’s one-time password support works with products such as
Secure Computing’s SafeWord. It is important to note that the ProxySG does not currently support
SafeWord’s two-part challenge mechanism.
This section discusses the following topics:
•
"Creating a RADIUS Realm"
•
"Defining RADIUS Realm Properties"
•
"Defining RADIUS Realm General Properties"
•
"Creating the CPL"
Creating a RADIUS Realm
To Create a RADIUS Realm through the Management Console:
1.
Select Configuration>Authentication>RADIUS>RADIUS Realms.
The RADIUS Realms tab displays.
Figure 9-16: RADIUS Realms Tab
2.
295
Click New; the Add RADIUS Realm dialog displays.
Blue Coat ProxySG Configuration and Management Guide
Section C: RADIUS Realm Authentication and Authorization
Figure 9-17: Add RADIUS Realm
3.
In the Realm name field, enter a realm name. The name can be 32 characters long and composed
of alphanumeric characters and underscores. The name must start with a letter.
4.
Specify the host and port for the primary RADIUS server. The default port is 1812.
5.
Specify the RADIUS secret. RADIUS secrets can be up to 64 characters long and are always case
sensitive.
6.
Confirm the secret.
7.
Click OK; click Apply.
Defining RADIUS Realm Properties
Once you have created the RADIUS realm, you can change the primary host, port, and secret of the
RADIUS server for that realm.
To Re-Define RADIUS Server Properties through the Management Console:
Note:
1.
To make these settings through the CLI, see "To Create and Define a RADIUS Realm through
the CLI:" on page 299.
Select Configuration>Authentication>RADIUS>RADIUS Servers.
The RADIUS Servers tab displays.
296
Chapter 9: Using Authentication Services
Section C: RADIUS Realm Authentication and Authorization
Figure 9-18: RADIUS Servers Tab
Note:
You must have defined a RADIUS realm (using the RADIUS Realms tab) before
attempting to set RADIUS server properties. If the message Realms must be added in
the RADIUS Realms tab before editing this tab is displayed in red at the bottom
of this page, you do not currently have a RADIUS realm defined.
2.
Specify the host and port for the primary RADIUS server. The default port is 1812. (To create or
change the RADIUS secret, click Change Secret. RADIUS secrets can be up to 64 characters long
and are always case sensitive.)
3.
Specify the Service type, which can be one of the following:
•
Login
•
Framed
•
Callback Login
•
Callback Framed
•
Outbound
•
Administrative
•
NAS Prompt
•
Authenticate Only
•
Callback NAS Prompt
•
Call Check
•
Callback Administrative
Framed is the default. If the user record contains Check-list ServiceType attributes, then at least
one of the ServiceType values must match the service-type of the RADIUS server as configured on
the ProxySG.
297
Blue Coat ProxySG Configuration and Management Guide
Section C: RADIUS Realm Authentication and Authorization
4.
(Optional) Specify the host and port for the alternate RADIUS server. The default port is 1812. (To
create or change the RADIUS secret, click Change Secret. RADIUS secrets can be up to 64
characters long and are always case sensitive.)
5.
Specify the service type. (See step 3, above, for information on the allowed services types.)
Framed is the default. If the user record contains Check-list ServiceType attributes, then at least
one of the ServiceType values must match the service-type of the RADIUS server as configured on
the ProxySG.
6.
In the Timeout Request field, enter the number of seconds the ProxySG allows for each request
attempt before timing out. The default request timeout is 5 seconds. In the Retry field, enter the
number of attempts permitted. The default number of retries is 5.
7.
If you are using one-time passwords, select the One-time passwords checkbox. (For more
information on using one-time passwords, see page 295.)
8.
Click Apply.
Defining RADIUS Realm General Properties
The RADIUS General tab allows you to specify the display name and a virtual URL.
To Configure General Settings through the Management Console:
1.
Select Configuration>Authentication>RADIUS>RADIUS General.
The RADIUS General tab displays.
Figure 9-19: RADIUS General Tab
Note:
298
You must have defined a RADIUS realm (using the RADIUS Realms tab) before
attempting to set RADIUS server properties. If the message Realms must be added in
the RADIUS Realms tab before editing this tab is displayed in red at the bottom
of this page, you do not currently have a RADIUS realm defined.
Chapter 9: Using Authentication Services
Section C: RADIUS Realm Authentication and Authorization
2.
If needed, change the RADIUS realm display name. The default value for the display name is the
realm name. The display name cannot be longer than 128 characters and it cannot be null.
3.
If the RADIUS server is configured to expect case-sensitive usernames and passwords, make sure
the Case sensitive checkbox is selected.
4.
Specify the length of time, in seconds, that user credentials received from the RADIUS server are
cached. Credentials can be cached for up to 3932100 seconds. The default is 900 seconds (15
minutes).
Note:
If you specify 0, traffic is increased to the RADIUS server because each authentication
request generates an authentication and authorization request.
5.
(Optional) You can specify a virtual URL based on the individual realm. For more information on
the virtual URL, see Chapter 8: “Security and Authentication” on page 241.
6.
Click Apply.
To Create and Define a RADIUS Realm through the CLI:
1.
At the (config) prompt, enter the following command to create a RADIUS realm:
SGOS#(config) security radius create-realm realm_name secret
primary-server_host [primary-server_port]
-orSGOS#(config) security radius create-realm-encrypted realm_name
encrypted_secret primary_host [primary_port]
where:
realm_name
The name of the RADIUS realm.
secret |
encrypted_
secret
The shared secret (or encrypted secret) associated with the primary RADIUS
server. (RADIUS secrets can be up to 64 characters long and are always case
sensitive.)
The primary use of the encrypted-password command is to allow the
ProxySG to reload a password that it encrypted. If you choose to use a
third-party encryption application, be sure it supports RSA encryption,
OAEP padding andBase64 encoded with no new lines.
2.
primary_host
The host for the primary RADIUS server.
primary_port
The port for the primary RADIUS server. The default port is 1812.
To set the newly-created RADIUS realm primary and alternate hosts and passwords, enter the
following commands:
SGOS#(config) security radius edit-realm realm_name
SGOS#(config radius realm_name) primary-server primary_host [primary_port]
SGOS#(config radius realm_name) primary-server service-type type
SGOS#(config radius realm_name) primary-server secret secret
-orSGOS#(config radius realm_name) primary-server encrypted-secret
encrypted_secret
299
Blue Coat ProxySG Configuration and Management Guide
Section C: RADIUS Realm Authentication and Authorization
and optionally:
SGOS#(config radius
[alternate_port]
SGOS#(config radius
-orSGOS#(config radius
encrypted_secret
SGOS#(config radius
realm_name) alternate-server alternate_host
realm_name) alternate-server secret secret
realm_name) alternate-server encrypted-secret
realm_name) alternate-server service-type type
where:
secret|
encrypted_secret
The shared secret (or encrypted secret) associated with the primary or alternate
RADIUS server. (RADIUS secrets can be up to 64 characters long and are
always case sensitive.)
The primary use of the encrypted-password command is to allow the ProxySG
to reload a password that it encrypted. If you choose to use a third-party
encryption application, be sure it supports RSA encryption, OAEP padding
andBase64 encoded with no newlines.
type
type stands for the service type, which can be one of the following:
1. Login
2. Framed
3. Callback Login
4. Callback Framed
5. Outbound
6. Administrative
7. NAS Prompt
8. Authenticate Only
9. Callback NAS Prompt
10.Call Check
11.Callback Administrative
If the user record contains Check-list ServiceType attributes, then at least one of
the ServiceType values must match the service-type of the RADIUS server as
configured on the ProxySG.
3.
primary_server
The host for the primary RADIUS server.
primary_port
The port for the primary RADIUS server. The default port is 1812.
alternate_host
The host for the alternate RADIUS server.
alternate_port
The port for the alternate RADIUS server. The default port is 1812.
To complete configuration of the RADIUS realm, enter the following commands:
SGOS#(config
SGOS#(config
SGOS#(config
SGOS#(config
SGOS#(config
SGOS#(config
SGOS#(config
300
radius
radius
radius
radius
radius
radius
radius
realm_name)
realm_name)
realm_name)
realm_name)
realm_name)
realm_name)
realm_name)
timeout seconds
server-retry count
cache-duration seconds
case-sensitive enable | disable
display-name name
spoof-authentication none | origin | proxy
one-time-passwords enable | disable
Chapter 9: Using Authentication Services
Section C: RADIUS Realm Authentication and Authorization
where:
timeout
seconds
The length of time permitted for RADIUS requests
to be received before timing out. The default is 5
seconds
server-retry
count
The maximum number of attempts to access the
server.
cache-duration
seconds
The length of time that credentials should be cached
for this RADIUS realm. The default is 900 seconds
(15 minutes)
display-name
name
The default value for the display name is the realm
name. The display name cannot be longer than 128
characters and it cannot be null.
spoof-authentication
none | origin
| proxy
Enables/disables the forwarding of authenticated
credentials to the origin content server or for proxy
authentication. You can only choose one.
• If set to origin, the spoofed header will be an
Authorization: header.
• If set to proxy, the spoofed header will be a
Proxy-Authorization: header.
• If set to none, no spoofing will be done.
Flush the entries for a realm if the
spoof-authentication value is changed to ensure that
the spoof-authentication value is immediately
applied.
one-time-passwords
enable |
disable
Allows you to use one-time passwords for
authentication. The default is disabled. For more
information on one-time passwords, see page 295.
Creating the CPL
Be aware that the examples below are just part of a comprehensive authentication policy. By
themselves, they are not adequate for your purposes.
Note:
•
Refer to the Blue Coat ProxySG Content Policy Language Guide for details about CPL and how
transactions trigger the evaluation of policy file layers.
Every RADIUS-authenticated user is allowed access the ProxySG.
<Proxy>
authenticate(RADIUSRealm)
<Proxy>
allow hasAttribute.servicetype=yes
deny
301
Blue Coat ProxySG Configuration and Management Guide
Section D: Local Realm Authentication and Authorization
Section D: Local Realm Authentication and Authorization
Using a Local realm is appropriate when the network topography does not include external
authentication or when you want to add users and administrators to be used by the ProxySG only.
The Local realm (you can create up to 40) uses a Local User List, a collection of users and groups stored
locally on the ProxySG. You can create up to 50 different Local User Lists. Multiple Local realms can
reference the same list at the same time, although each realm can only reference one list at a time. The
default list used by the realm can be changed at any time.
This section discusses the following topics:
•
"Creating a Local Realm"
•
"Changing Local Realm Properties"
•
"Defining the Local User List"
•
"Creating the CPL"
Creating a Local Realm
To Create a Local Realm through the Management Console:
1.
Select Configuration>Authentication>Local >Local Realms.
The Local Realms tab displays.
Figure 9-20: Local Realms Tab
2.
302
Click New; the Add Local Realm dialog displays.
Chapter 9: Using Authentication Services
Section D: Local Realm Authentication and Authorization
Figure 9-21: Add Local Realm
3.
In the Realm name field, enter a realm name. The name can be 32 characters long and composed
of alphanumeric characters and underscores. The name must start with a letter.
4.
Click OK; click Apply.
To Create a Local Realm through the CLI:
Up to 40 Local realms can be configured per ProxySG.
At the (config) command prompt, enter the following command to create a Local realm:
SGOS#(config) security local create-realm realm_name
where realm_name is the name of the new Local realm.
Changing Local Realm Properties
Once you have created a Local realm, you can modify the properties through the Management
Console or the CLI.
To Define or Change Local Realm Properties through the Management Console:
1.
Select Configuration>Authentication>Local >Local Main.
The Local Main tab displays.
303
Blue Coat ProxySG Configuration and Management Guide
Section D: Local Realm Authentication and Authorization
Figure 9-22: Local Main Tab
Note:
2.
You must define a Local realm (using the Local Realms tab) before attempting to set
realm properties. If the message Realms must be added in the Local Realms tab
before editing this tab is displayed in red at the bottom of this page, you do not
have a Local realm defined.
Display name: The default value for the display name is the realm name. The display name cannot
be longer than 128 characters and it cannot be null.
3.
Local User List: Specify the local user list you want to use from the drop-down list.
4.
Specify the length of time, in seconds, that user and administrator credentials received from the
Local password file should be cached. Credentials can be cached for up to 3932100 seconds. The
default is 900 seconds (15 minutes).
5.
You can specify a virtual URL based on the individual realm. For information on using virtual
URLs, see Chapter 8: “Security and Authentication” on page 241.
6.
Click Apply.
To Define or Change Local Realm Properties through the CLI:
1.
From the (config) prompt, enter the following commands to modify realm properties:
SGOS#(config) security local edit-realm realm_name
SGOS#(config local realm_name) cache-duration 600
SGOS#(config local realm_name) display-name name
SGOS#(config local realm_name) local-user-list list_name
SGOS#(config local realm_name) rename new_name
SGOS#(config local realm_name) spoof-authentication disable | enable
SGOS#(config local realm_name) virtual-url url
304
Chapter 9: Using Authentication Services
Section D: Local Realm Authentication and Authorization
where:
cache-duration
seconds
The number of seconds that user and administrator
credentials received from the Local password file should be
cached. The default is 900 seconds (15 minutes).
display-name
name
The display name for a realm, presented to the user as part
of the authentication challenge, is equivalent to the
display-name option in the CPL authenticate action. The
default value for the display name is the realm name. The
display name cannot be longer than 128 characters and it
cannot be null.
local-user-list
list_name
The list you want to associate with this realm. The list must
exist before it is added. The local user list is set to the
default list when the realm is created. For more
information on creating a local list, see "Defining the Local
User List" on page 305.
rename
new_name
Allows you to change the display name of an existing
realm.
spoofauthentication
none | origin
| proxy
Enables/disables the forwarding of authenticated
credentials to the origin content server or for proxy
authentication. You can only choose one.
• If set to origin, the spoofed header will be an
Authorization: header.
• If set to proxy, the spoofed header will be a
Proxy-Authorization: header.
• If set to none, no spoofing will be done.
Flush the entries for a realm if the spoof-authentication
value is changed to ensure that the spoof-authentication
value is immediately applied.
virtual-url
2.
URL
The URL to redirect to when the user needs to be
challenged for credentials. See Chapter 8: “Security and
Authentication” on page 241 for more details.
(Optional) View the configuration:
SGOS#(config local realm_name) view
Realm name:
local1
Display name:
local1
Local user list: list20
Cache duration:
600
Virtual URL:
10.9.87.85
Defining the Local User List
Defining the local user list involves the following steps:
305
•
Create a list or customize the default list for your needs.
•
Upload a user list or add users and groups through the CLI.
•
Associate the list with the realm.
Blue Coat ProxySG Configuration and Management Guide
Section D: Local Realm Authentication and Authorization
Creating a Local User List
The user list local_user_database is created on a new system or after an upgrade. It is empty on a new
system. If a password file existed on the ProxySG before an upgrade, then the list contains all users
and groups from the password file; the initial default user list is local_user_database. If a new user
list is created, the default can be changed to point to it instead by invoking the security
local-user-list default list list name command. You can create up to 50 new lists with 10,000
users each.
Lists can be uploaded or you can directly edit lists through the CLI. If you want to upload a list, it
must be created as a text file using the .htpasswd format of the ProxySG.
Each user entry in the list consists of:
•
username
•
List of groups
•
Hashed password
•
Enabled/disabled boolean searches
A list that has been populated looks like this:
SGOS#(config) security local-user-list edit listname
SGOS#(config local-user-list listname) view
list20
Lockout parameters:
Max failed attempts: 60
Lockout duration:
3600
Reset interval:
7200
Users:
admin1
Hashed Password: $1$TvEzpZE$Z2A/OuJU3w5LnEONDHkmg.
Enabled: true
Groups:
group1
admin2
Hashed Password: $1$sKJvNB3r$xsInBU./2hhBz6xDAHpND.
Enabled: true
Groups:
group1
group2
admin3
Hashed Password: $1$duuCUt30$keSdIkZVS4RyFz47G78X20
Enabled: true
Groups:
group2
Groups:
group1
group2
To create a new empty local user list:
SGOS#(config) security local-user-list create listname
306
Chapter 9: Using Authentication Services
Section D: Local Realm Authentication and Authorization
Username
The username must be case-sensitively unique, and can be no more than 64 characters long. All
characters are valid, except for a colon (:).
A new local user is enabled by default and has an empty password.
List of Groups
You cannot add a user to a group unless the group has previously been created in the list. The group
name must be case-sensitively unique, and can be no more than 64 characters long. All characters are
valid, except for colon (:).
The groups can be created in the list; however, their user permissions are defined through policies
only.
Hashed Password
The hashed password must be a valid UNIX DES or MD5 password whose plain-text equivalent
cannot be more than 64 characters long.
To populate the local user list using an off-box .htpasswd file, continue with the next section. To
populate the local user list using the ProxySG CLI, go to "Defining the Local User List" on page 305.
How to Populate a List using the .htpasswd File
To add users to a text file in .htpasswd format, enter the following UNIX htpasswd command:
prompt> htpasswd [-c] .htpasswd username
The –c option creates a new .htpasswd file and should only be used for the very first .htpasswd
command. You can overwrite any existing .htpasswd file by using the -c option.
After entering this command, you are prompted to enter a password for the user identified by
username. The entered password is hashed and added to the user entry in the text file. If the -m option
is specified, the password is hashed using MD5; otherwise, UNIX DES is used
Important: Because the -c option overwrites the existing file, do not use the option if you are
adding users to an existing .htpasswd file.
Once you have added the users to the .htpasswd file, you can manually edit the file to add user
groups. When the .htpasswd file is complete, it should have the following format:
user:encrypted_password:group1,group2,…
user:encrypted_password:group1,group2,…
Note:
307
You can also modify the users and groups once they are loaded on the ProxySG. To
modify the list once it is on the ProxySG, see
"Populating a Local User List through the ProxySG" on page 308.
Blue Coat ProxySG Configuration and Management Guide
Section D: Local Realm Authentication and Authorization
How to Upload the .htpasswd File
When the .htpasswd file is uploaded, the entries from it either replace all entries in the default local
user list or append to the entries in the default local user list. One default local user list is specified on
the ProxySG.
To set the default local user list use the command security local-user-list default list
listname. The list specified must exist.
To specify that the uploaded .htpasswd file replace all existing user entries in the default list, enter
security local-user-list default append-to-default disable before uploading
the .htpasswd file.
To specify that the .htpasswd file entries should be appended to the default list instead, enter
security local-user-list default append-to-default enable.
Uploading the .htpasswd File:
The .htpasswd file is loaded onto the ProxySG with a Perl script found at:
http://download.bluecoat.com/release/tools/set_auth.zip
Unzip the file, which contains the set_auth.pl script.
Note:
To use the set_auth.pl script, you must have Perl binaries on the system where the script is
running.
To Load the .htpasswd File:
prompt> set_auth.pl username password
path_to_.htpasswd_file_on_local_machine ip_address_of_the_ProxySG
where username and password are valid administrator credentials for the ProxySG.
Populating a Local User List through the ProxySG
You can populate a local user list from scratch or modify a local user list that was populated by
loading an .htpasswd file.
To Create a New, Empty Local User List:
SGOS#(config) security local-user-list create listname
To Modify an Existing Local User List (Can be Empty or Contain Users):
1.
From the (config) prompt, enter:
SGOS#(config) security local-user-list edit listname
SGOS#(config local-user-list listname)
2.
308
To add users and groups to the list, enter the following commands, beginning with groups, since
they must exist before you can add them to a user account.
Chapter 9: Using Authentication Services
Section D: Local Realm Authentication and Authorization
SGOS#(config
ok
SGOS#(config
ok
SGOS#(config
ok
SGOS#(config
3.
local-user-list listname) group create group1
local-user-list listname) group create group2
local-user-list listname) group create group3
local-user-list listname) user create username
Add the user information to the user account.
SGOS#(config local-user-list
SGOS#(config local-user-list
SGOS#(config local-user-list
SGOS#(config local-user-list
-orSGOS#(config local-user-list
hashed-password
listname) user edit username
listname username) group add groupname1
listname username) group add groupname2
listname username) password password
listname username) hashed-password
Note: If you enter a plain-text password, the ProxySG hashes the password. If you enter a
hashed password, the ProxySG does not hash it again.
4.
(Optional) The user account is enabled by default. To disable a user account:
SGOS#(config local-user-list listname username) disable
ok
5.
Repeat the above steps for each user you want added to the list.
To View the Results of an Individual User Account:
Remain in the user account submode and enter the following command:
SGOS#(config local-user-list listname username) view
admin1
Hashed Password: $1$TvEzpZE$Z2A/OuJU3w5LnEONDHkmg.
Enabled: true
Failed Logins: 6
Groups:
group1
Note:
If a user has no failed logins, the statistic does not display.
To View the Users in the Entire List
Exit the user account submode and enter:
SGOS#(config local-user-list listname username) exit
SGOS#(config local-user-list listname) view
list20
Lockout parameters:
Max failed attempts: 60
Lockout duration:
3600
Reset interval:
7200
Users:
309
Blue Coat ProxySG Configuration and Management Guide
Section D: Local Realm Authentication and Authorization
admin1
Hashed Password: $1$TvEzpZE$Z2A/OuJU3w5LnEONDHkmg.
Enabled: true
Groups:
group1
admin2
Hashed Password: $1$sKJvNB3r$xsInBU./2hhBz6xDAHpND.
Enabled: true
Groups:
group1
group2
admin3
Hashed Password: $1$duuCUt30$keSdIkZVS4RyFz47G78X20
Enabled: true
Groups:
group2
Groups:
group1
group2
To View all the Lists on the ProxySG:
SGOS#(config) show security local-user-list
Default List: local_user_database
Append users loaded from file to default list: false
local_user_database
Lockout parameters:
Max failed attempts: 60
Lockout duration:
3600
Reset interval:
7200
Users:
Groups:
test1
Users:
Groups:
To Delete Groups Associated with a User:
SGOS#(config local-user-list listname username) group remove group_name
To Delete Users from a List:
SGOS#(config local-user-list listname) user delete username
This will permanently delete the object. Proceed with deletion?
(y or n) y
ok
To Delete all Users from a List:
SGOS#(config local-user-list listname) user clear
ok
The groups remain but have no users.
310
Chapter 9: Using Authentication Services
Section D: Local Realm Authentication and Authorization
To Delete all Groups from a List:
SGOS#(config local-user-list listname) group clear
ok
The users remain but do not belong to any groups.
Enhancing Security Settings for the Local User List
You can configure a local user database so that each user account is automatically disabled if too many
failed login attempts occur for the account in too short a period, indicating a brute-force password
attack on the ProxySG. The security settings are available through the CLI only.
Available security settings are:
•
Maximum failed attempts: The maximum number of failed password attempts allowed for an
account. When this threshold is reached, the account will be disabled (locked). If this is zero, there
is no limit. The default is 60 attempts.
•
Lockout duration: The time after which a locked account will be re-enabled. If this is zero, the
account will not automatically re-enable, but will instead stay locked until manually enabled. The
default is 3600 seconds (one hour).
•
Reset interval: The time after which a failed password count will be reset after the last failed
password attempt. If this is zero, the failed password count will be reset only when the account is
enabled or when its password is changed. The default is 7200 seconds (two hours).
These values are enabled by default on the system for all user account lists. You can change the
defaults for each list that exists on the system.
To Change the Security Settings for a Specific User Account List
1.
Enter the following commands from the (config) prompt:
SGOS#(config) security local-user-list
SGOS#(config local-user-list listname)
SGOS#(config local-user-list listname)
SGOS#(config local-user-list listname)
2.
edit listname
lockout-duration seconds
max-failed-attempts attempts
reset-interval seconds
(Optional) View the settings:
SGOS#(config local-user-list listname) view
listname
Lockout parameters:
Max failed attempts: 45
Lockout duration:
3600
Reset interval:
0
3.
(Optional) To disable any of these settings:
SGOS#(config local-user-list listname) no [lockout-duration |
max-failed-attempts | reset-interval]
311
Blue Coat ProxySG Configuration and Management Guide
Section D: Local Realm Authentication and Authorization
Creating the CPL
Be aware that the examples below are just part of a comprehensive authentication policy. By
themselves, they are not adequate for your purposes. (The default policy in these examples is deny.)
Note:
•
Refer to the Blue Coat ProxySG Content Policy Language Guide for details about CPL and how
transactions trigger the evaluation of policy file layers.
Every Local-authenticated user is allowed access the ProxySG.
<Proxy>
authenticate(LocalRealm)
•
Group membership is the determining factor in granting access to the ProxySG.
<Proxy>
authenticate(LocalRealm)
<Proxy>
group=”group1” allow
•
A subnet definition determines the members of a group, in this case, members of the Human
Resources department.
<Proxy>
authenticate(LocalRealm)
<Proxy>
Define subnet HRSubnet
192.168.0.0/16
10.0.0.0/24
End subnet HRSubnet
[Rule] client_address=HRSubnet
url.domain=monster.com
url.domain=hotjobs.com
deny
.
.
.
[Rule]
deny
312
Chapter 9: Using Authentication Services
Section E: Certificate Realm Authentication
Section E: Certificate Realm Authentication
Certificate realms are used to authenticate users. If the users are members of an LDAP or Local group,
the Certificate Realm can also forward the user credentials to the specified authorization realm, which
determines the user’s authorization (permissions).
This section discusses the following topics:
•
"How Certificate Realm Works"
•
"Creating a Certificate Realm"
•
"Defining a Certificate Realm"
•
"Defining Certificate Realm General Properties"
•
"Revoking User Certificates"
How Certificate Realm Works
Once an SSL session has been established, the user is asked to select the certificate to send to the
ProxySG. If the certificate was signed by a Certificate Signing Authority that the ProxySG trusts,
including itself, then the user is considered authenticated. The username for the user is the one
extracted from the certificate during authentication.
At this point the user is authenticated. If an authorization realm has been specified, such as LDAP or
Local, the certificate realm then passes the username to the specified authorization realm, which
figures out which groups the user belongs to.
Note:
If you authenticate with a certificate realm, you cannot also challenge for a password.
Certificate realms do not require an authorization realm. If no authorization realm is configured, the
user is not a member of any group. The effect this has on the user depends on the authorization policy.
If the policy does not make any decisions based on groups, then you do not need to specify an
authorization realm. Also, if your policy is such that it works as desired when all certificate
realm-authenticated users are not in any group, you do not have to specify an authorization realm.
To use a Certificate Realm, you must:
•
Configure SSL between the client and ProxySG (for more information, see "SSL Between the
Client and the ProxySG" on page 260)
•
Enable verify-client on the HTTPS service that will be used (for more information, see "HTTPS" on
page 138).
•
Verify that the certificate authority that signed the client's certificates is in the ProxySG trusted list.
Creating a Certificate Realm
To Create a Certificate Realm through the Management Console:
1.
313
Select Configuration>Authentication>Certificate>Certificate Realms.
Blue Coat ProxySG Configuration and Management Guide
Section E: Certificate Realm Authentication
The Certificate Realms tab displays.
Figure 9-23: Certificate Realms Tab
2.
Click New; the Add Certificate Realm dialog displays.
Figure 9-24: Add Certificate Realm
3.
In the Realm name field, enter a realm name. The name can be 32 characters long and composed
of alphanumeric characters and underscores. The name must start with a letter.
4.
Click OK; click Apply.
To Create a Certificate Realm through the CLI:
Up to 40 Certificate realms can be configured per ProxySG.
At the (config) command prompt, enter the following command to create a Certificate realm:
SGOS#(config) security certificate create-realm realm_name
where realm_name is the name of the new Certificate realm.
314
Chapter 9: Using Authentication Services
Section E: Certificate Realm Authentication
Defining a Certificate Realm
To Define Certificate Authentication Properties through the Management Console:
Note:
1.
You can also define certificate authentication properties through the CLI. For information, see
"To Create and Define a Certificate Realm through the CLI" on page 317.
Select Configuration>Authentication>Certificate>Certificate Main.
The Certificate Main tab displays.
Figure 9-25: Certificate Main Tab
2.
From the Realm Name drop-down list, select the Certificate realm for which you want to change
realm properties.
Note:
You must have defined at least one Certificate realm (using the Certificate Realms tab)
before attempting to set Certificate realm properties. If the message Realms must be
added in the Certificate Realms tab before editing this tab is displayed in
red at the bottom of this page, you do not currently have any Certificate realms defined.
3.
(Optional) From the Authorization Realm Name drop-down list, select the LDAP or Local realm you
want to use to authorize users.
4.
From the username attribute field, enter the attribute that specifies the common name in the subject
of the certificate. CN is the default.
5.
(Optional, if you are configuring a Certificate realm with LDAP authorization) Enter the list of
attributes (the container attribute field) that should be used to construct the user's distinguished
name.
For example, $(OU) $(O) substitutes the OU and O fields from the certificate.
6.
(Optional, if you are configuring a Certificate realm with LDAP authorization) Select or deselect
Append Base DN.
315
Blue Coat ProxySG Configuration and Management Guide
Section E: Certificate Realm Authentication
7.
(Optional, if you are configuring a Certificate realm with LDAP authorization) Enter the Base DN
where the search starts. If no BASE DN is specified and Append Base DN is enabled, the first Base
DN defined in the LDAP realm used for authorization is appended.
8.
Cache credentials: Specify the length of time, in seconds, that user and administrator credentials
received from the Local password file should be cached. Credentials can be cached for up to
3932100 seconds. The default is 900 seconds (15 minutes).
Defining Certificate Realm General Properties
The Certificate General tab allows you to specify the display name and a virtual URL.
To Configure Certificate Realm General Settings through the Management Console:
1.
Select Configuration>Authentication>Certificate>Certificate General.
The Certificate General tab displays.
Figure 9-26: Certificate General Tab
2.
From the Realm name drop-down list, select the Certificate realm for which to change properties.
Note:
316
You must have defined at least one Certificate realm (using the Certificate Realms tab)
before attempting to set Certificate general properties. If the message Realms must be
added in the Certificate Realms tab before editing this tab is displayed in
red at the bottom of this page, you do not currently have any Certificate realms defined.
3.
If needed, change the Certificate realm display name. The default value for the display name is
the realm name. The display name cannot be longer than 128 characters and it cannot be null.
4.
You can specify a virtual URL based on the individual realm. For more information on the virtual
URL, see Chapter 8: “Security and Authentication” on page 241.
5.
Click Apply.
Chapter 9: Using Authentication Services
Section E: Certificate Realm Authentication
To Create and Define a Certificate Realm through the CLI
1.
At the (config) prompt:
SGOS#(config) security certificate create-realm realm_name
2.
To define an authorization realm for the Certificate realm configuration for the realm you just
created, enter the following commands:
SGOS#(config) security certificate edit-realm realm_name
SGOS#(config certificate realm_name) authorization {append-base-dn {enable |
disable | dn dn_to_append} | container-attr-list list | realm-name realm |
username-attribute attribute}
where:
3.
append-base-dn
enable |
disable | dn
dn_to_append
Used only if an LDAP authorization realm is present.
container-attrlist
list
Used only if an LDAP authorization realm is present. If the
CLI contains spaces, quotes must be used, as in
“ou=Research and Development, ou=Sales, o=Blue
Coat”.
realm-name
realm_name
The name of the LDAP or Local realm that will be used for
authorization. The realm name must already exist.
usernameattribute
attribute
The attribute that specifies the common name in the subject
of the certificate. CN is the default.
Enter the following commands to modify Certificate realm properties:
SGOS#(config certificate realm_name) cache-duration 600
SGOS#(config certificate new_realm_name) virtual-url cfauth.com
SGOS#(config certificate new_realm_name) display-name display_name
where:
4.
cache-duration
seconds
The number of seconds that user and administrator
credentials received from the Credential realm should be
cached. The default is 900 seconds (15 minutes).
virtual-url
URL
The URL to redirect to when the user needs to be challenged
for credentials. See Chapter 8: “Security and
Authentication” on page 241 for more details.
display-name
display_name
The default value for the display name is the realm name.
The display name cannot be longer than 128 characters and
it cannot be null.
(Optional) View the results:
SGOS#(config certificate certificate-name) view
Realm name:
certificate-name
Display name:
certificate-name
Cache duration:
900
Virtual URL:
cfauth.com
317
Blue Coat ProxySG Configuration and Management Guide
Section E: Certificate Realm Authentication
Authorization realm:
Username attribute:
Container attr. list:
Append DN:
Base DN:
ldap-realm
cn
ou=Sales,ou=Manufacturing
enabled
Revoking User Certificates
Using policy you can revoke certain certificates by writing policy that denies access to users who have
authenticated with a certificate you want to revoke. You must maintain this list on the ProxySG; it is
not updated automatically.
A certificate is identified by its issuer (the Certificate Signing Authority that signed it) and its serial
number, which is unique to that CA.
Using that information, you can use the following strings to create a policy to revoke user certificates:
•
user.x509.serialNumber—This is a string representation of the certificate’s serial number in
HEX. The string is always an even number of characters long, so if the number needs an odd
number of characters to represent in hex, there is a leading zero. Comparisons are case insensitive.
•
user.x509.issuer—This is an RFC2253 LDAP DN. Comparisons are case sensitive.
•
(optional) user.x509.subject: This is an RFC2253 LDAP DN. Comparisons are case sensitive.
Example
If you have only one Certificate Signing Authority signing user certificates, you do not need to test the
issuer. In the <Proxy> layer of the Local Policy file:
<proxy>
deny user.x509.serialnumber=11
deny user.x509.serialNumber=0F
If you have multiple Certificate Signing Authorities, test both the issuer and the serial number. In the
<Proxy> layer of the Local Policy file:
<proxy>
deny
user.x509.issuer="Email=name,CN=name,OU=name,O=company,L=city,ST=state or
province,C=country" user.x509.serialnumber=11\
deny user.x509.issuer="CN=name,OU=name,O=company, L=city,ST=state or
province,C=country" \
deny user.x509.serialnumber=2CB06E9F00000000000B
Creating the Certificate Authorization Policy
When you complete Certificate realm configuration, you can create CPL policies. Be aware that the
examples below are just part of a comprehensive authentication policy. By themselves, they are not
adequate.
Note:
318
Refer to the Blue Coat ProxySG Content Policy Language Guide for details about CPL and how
transactions trigger the evaluation of policy file <Proxy> and other layers.
Chapter 9: Using Authentication Services
Section E: Certificate Realm Authentication
Be aware that the default policy condition for these examples is allow. On new SGOS4.x systems, the
default policy condition is deny.
•
Every Certificate realm authenticated user is allowed access the ProxySG.
<Proxy>
authenticate(CertificateRealm)
•
A subnet definition determines the members of a group, in this case, members of the Human
Resources department. (They are allowed access to the two URLs listed. Everyone else is denied
permission.)
<Proxy>
authenticate(CertificateRealm)
<Proxy>
Define subnet HRSubnet
192.168.0.0/16
10.0.0.0/24
End subnet HRSubnet
[Rule] client_address=HRSubnet
url.domain=monster.com
url.domain=hotjobs.com
deny
.
.
.
[Rule]
deny
Tips
If you use a certificate realm and see an error message similar to the following
Realm configuration error for realm "cert": connection is not SSL .
This means that certificate authentication was requested for a transaction, but the transaction was not
done on an SSL connection, so no certificate was available.
This can happen in three ways:
319
•
The authenticate mode is either origin-IP-redirect/origin-cookie-redirect or
origin-IP/origin-cookie, but the virtual URL does not have an https: scheme. This is likely if
authentication through a certificate realm is selected with no other configuration, since the default
configuration does not use SSL for the virtual URL.
•
In a server accelerator deployment, the authenticate mode is origin and the transaction is on a
non-SSL port.
•
The authenticate mode is origin-IP-redirect/origin-cookie-redirect, the user has
authenticated, the credential cache entry has expired, and the next operation is a POST or PUT
from a browser that does not handle 307 redirects (that is, from a browser other than Internet
Explorer). The workaround is to visit another URL to refresh the credential cache entry and then
try the POST again.
Blue Coat ProxySG Configuration and Management Guide
Section E: Certificate Realm Authentication
•
320
Forms authentication modes cannot be used with a Certificate realm. If a form mode is in use and
the authentication realm is a Certificate realm, a Policy Substitution realm, or an NTLM realm,
you will receive a configuration error.
Chapter 9: Using Authentication Services
Section F: Netegrity SiteMinder
Section F: Netegrity SiteMinder
The ProxySG can be configured to consult a SiteMinder policy server for authentication and session
management decisions. This requires that a SiteMinder realm be configured on the ProxySG and
policy written to use that realm for authentication.
Important: Use of this feature is subject to obtaining the appropriate license. The license check is
on the ProxySG.
Access to the SiteMinder policy server is done through the Blue Coat Authentication and
Authorization Agent (BCAAA), which must be installed on a Windows 2000 system or higher with
access to the SiteMinder policy servers.
Understanding SiteMinder Interaction with Blue Coat
Within the SiteMinder system, BCAAA acts as a custom web agent. It communicates with the
SiteMinder policy server to authenticate the user and to obtain a SiteMinder session token, response
attribute information, and group membership information.
Custom header and cookie response attributes associated with OnAuthAccept and OnAccessAccept
attributes are obtained from the policy server and forwarded to the ProxySG. They can (as an option)
be included in requests forwarded by the ProxySG.
Within the ProxySG system, BCAAA acts as its agent to communicate with the SiteMinder server. The
ProxySG provides the user information to be validated to BCAAA, and receives the session token and
other information from BCAAA.
Each ProxySG SiteMinder realm used causes the creation of a BCAAA process on the Windows host
computer running BCAAA. A single host computer can support multiple ProxySG realms (from the
same or different ProxySG Appliances); the number depends on the capacity of the BCAAA host
computer and the amount of activity in the realms.
Note:
The BCAAA service is not supported on Solaris in this release. However, Blue Coat can
communicate with SiteMinder, regardless of the system it runs on.
Configuration of the ProxySG SiteMinder realm must be coordinated with configuration of the
SiteMinder policy server. Each must be configured to be aware of the other. In addition, certain
SiteMinder responses must be configured so that BCAAA gets the information the ProxySG needs.
Configuring the SiteMinder Policy Server
Note:
Blue Coat assumes you are familiar with configuration of SiteMinder policy servers and web
agents.
Since BCAAA is a web agent in the SiteMinder system, it must be configured on the SiteMinder policy
server. Configuration of BCAAA on the host computer is not required; the agent obtains its
configuration information from the ProxySG.
321
Blue Coat ProxySG Configuration and Management Guide
Section F: Netegrity SiteMinder
A suitable web agent must be created and configured on the SiteMinder server. This must be
configured to support 4.x agents, and a shared secret must be chosen and entered on the server (it
must also be entered in the ProxySG SiteMinder realm configuration).
SiteMinder protects resources identified by URLs. A ProxySG realm is associated with a single
protected resource. This could be an already existing resource on a SiteMinder server, (typical for a
reverse proxy arrangement) or it could be a resource created specifically to protect access to ProxySG
services (typical for a forward proxy).
Important: The request URL is not sent to the SiteMinder policy server as the requested
resource; the requested resource is the entire ProxySG realm. Access control of
individual URLs is done on the ProxySG using CPL or VPM.
The SiteMinder realm that controls the protected resource must be configured with a compatible
authentication scheme. The supported schemes are Basic (in plain text and over SSL), Forms (in plain
text and over SSL), and X.509 certificates. Configure the SiteMinder realm with one of these
authentication schemes.
Note:
Only the following X.509 Certificates are supported: X.509 Client Cert Template, X.509 Client
Cert and Basic Template, and X.509 Client Cert and Form Template.
ProxySG requires information about the authenticated user to be returned as a SiteMinder response.
The responses should be sent by an OnAuthAccept rule used in the policy that controls the protected
resource.
The responses must include the following:
•
A Web-Agent-HTTP-Header-variable named BCSI_USERNAME. It must be a user attribute; the
value of the response must be the simple username of the authenticated user. For example, with
an LDAP directory this might be the value of the cn attribute or the uid attribute.
•
A Web-Agent-HTTP-Header-variable named BCSI_GROUPS. It must be a user attribute and the
value of the response must be SM_USERGROUPS.
Note that if the policy server returns an LDAP FQDN as part of the authentication response, the
ProxySG will use that LDAP FQDN as the FQDN of the user.
Once the SiteMinder agent object, configuration, realm, rules, responses and policy have been
defined, the ProxySG can be configured.
Additional SiteMinder Configuration Notes
Note:
•
322
Additional configuration might be needed on the SiteMinder server depending on specific
features being used.
If using single-signon (SSO) with off-box redirection (such as to a forms login page), the forms
page must be processed by a 5.x or later Web Agent, and that agent must be configured with
fcccompatmode=no. Note that this precludes that agent from doing SSO with 4.x agents.
Chapter 9: Using Authentication Services
Section F: Netegrity SiteMinder
•
For SSO to work with other web agents, the other agents must have the AcceptTPCookie=YES as
part of their configuration. This is described in the SiteMinder documentation.
•
Blue Coat does not extract the issuerDN from X.509 certificates in the same way as the SiteMinder
agent. Thus, a separate certificate mapping might be needed for the SGOS agent and the
SiteMinder agents.
For example, the following was added to the SiteMinder policy server certificate mappings:
CN=Waterloo Authentication and Security Team,OU=Waterloo R&D, O=Blue Coat\,
Inc.,L=Waterloo,ST=ON,C=CA
•
In order to use off-box redirection (such as an SSO realm), all agents involved must have the
setting EncryptAgentName=no in their configurations.
•
The ProxySG Appliance's credential cache only caches the user's authentication information for
the smaller of the time-to-live (TTL) configured on the ProxySG and the session TTL configured
on the SiteMinder policy server.
Configuring the ProxySG Realm
The ProxySG realm must be configured so that it can:
•
Find the Blue Coat agent(s) that will act on its behalf (hostname or IP address, port, SSL options,
and the like).
•
Provide BCAAA with the information necessary to allow it to identify itself as a web agent (agent
name, shared secret).
•
Provide BCAAA with the information that allows it to find the SiteMinder policy server (IP
address, ports, connection information.)
•
Provide BCAAA with the information that it needs to do authentication and collect authorization
information (protected resource name), and general options (server fail-over and off-box
redirection)
For more information on configuring the ProxySG SiteMinder realm, see "Creating a SiteMinder
Realm" on page 324.
Note:
All ProxySG and agent configuration is done on the ProxySG. The ProxySG sends the
necessary information to BCAAA when it establishes communication.
Participating in a Single Sign-On (SSO) Scheme
The ProxySG can participate in SSO with other systems that use the same SiteMinder policy server.
Users must supply their authentication credentials only once to any of the systems participating.
Participating in SSO is not a requirement, the Proxy SG can use the SiteMinder realm as an ordinary
realm.
323
Blue Coat ProxySG Configuration and Management Guide
Section F: Netegrity SiteMinder
When using SSO with SiteMinder, the SSO token is carried in a cookie (SMSESSION). This cookie is
set in the browser by the first system that authenticates the user; other systems obtain authentication
information from the cookie and so do not have to challenge the user for credentials. The ProxySG sets
the SMSESSION cookie if it is the first system to authenticate a user, and authenticates the user based
on the cookie if the cookie is present.
Since the SSO information is carried in a cookie, all the servers participating must be in the same
cookie domain, including the ProxySG. This imposes restrictions on the authenticate.mode() used on
the ProxySG.
•
A reverse proxy can use any origin mode.
•
A forward proxy must use one of the origin-redirect modes (such as
origin-cookie-redirect). Note that, when using origin-*-redirect modes, the virtual
URL's hostname must be in the same cookie domain as the other systems. It cannot be an IP
address and the default www.cfauth.com does not work either.
When using origin-*-redirect, the SSO cookie is automatically set in an appropriate response after
the ProxySG authenticates the user. When using origin mode (in a reverse proxy), setting this cookie
must be explicitly specified by the administrator. The policy substitution variable
$(x-agent-sso-cookie) expands to the appropriate value of the set-cookie: header.
Avoiding ProxySG Challenges
In some SiteMinder deployments all credential challenges are issued by a central authentication
service (typically a web server that challenges through a form). Protected services do not challenge
and process request credentials; instead, they work entirely with the SSO token. If the request does not
include an SSO token, or the SSO token is not acceptable, the request is redirected to the central
service, where authentication occurs. Once authentication is complete, the request is redirected to the
original resource with a response that sets the SSO token.
If the SiteMinder policy server is configured to use a forms-based authentication scheme, the above
happens automatically. However, in this case, the ProxySG realm can be configured to redirect to an
off-box authentication service always. The URL of the service is configured in the scheme definition
on the SiteMinder policy server. The ProxySG realm is then configured with
always-redirect-offbox enabled.
Note that the ProxySG must not attempt to authenticate a request for the off-box authentication URL.
If necessary, authenticate(no) can be used in policy to prevent this.
Creating a SiteMinder Realm
To Create a SiteMinder Realm through the Management Console:
1.
Select Configuration>Authentication>Netegrity SiteMinder>SiteMinder Realms.
The SiteMinder Realms tab displays.
324
Chapter 9: Using Authentication Services
Section F: Netegrity SiteMinder
Figure 9-27: SiteMinder Realms Tab
2.
Click New; the Add SiteMinder Realm dialog displays.
Figure 9-28: Add SiteMinder Realm
3.
In the Realm name field, enter a realm name. The name can be 32 characters long and composed of
alphanumeric characters and underscores. The name must start with a letter. The name should be
meaningful to you, but it does not have to be the name of the SiteMinder policy server.
4.
Click OK.
5.
Click Apply.
To Create a SiteMinder Realm through the CLI:
At the (config) prompt, enter the following command to create a SiteMinder realm:
SGOS#(config) security siteminder create-realm realm_name
where realm_name is the name of the SiteMinder realm.
Agents
You must configure the SiteMinder realm so that it can find the Blue Coat Authentication and
Authorization Agent (BCAAA).
1.
325
Select Configuration>Authentication>Netegrity SiteMinder>Agents.
Blue Coat ProxySG Configuration and Management Guide
Section F: Netegrity SiteMinder
The Agents page displays.
Figure 9-29: SiteMinder Agents Page
2.
Select the realm name to edit from the drop-down list.
Note:
You must have defined at least one SiteMinder realm (using the SiteMinder Realms tab)
before attempting to configure SiteMinder agents. If the message Realms must be
added in the SiteMinder Realms tab before editing this tab is displayed in
red at the bottom of this page, you do not currently have any SiteMinder realms
defined.
3.
In the Primary agent section, enter the hostname or IP address where the agent resides.
4.
Change the port from the default of 16101 if necessary.
5.
Enter the agent name in the Agent name field. The agent name is the name of the agent as
configured on the SiteMinder policy server.
6.
You must create a secret for the Agent that matches the secret created on the SiteMinder policy
server. Click Change Secret. SiteMinder secrets can be up to 64 characters long and are always case
sensitive.
7.
(Optional) Enter an alternate agent host and agent name in the Alternate agent section.
8.
(Optional) Click Enable SSL to enable SSL between the ProxySG and the BCAAA.
9.
(Optional) By default, if SSL is enabled, the SiteMinder BCAAA certificate is verified. If you do
not want to verify the agent certificate, disable this setting.
To Edit a SiteMinder Agent through the CLI:
1.
326
To define the primary and alternate agent configuration for the realm you just created, enter the
following commands at the (config) prompt:
Chapter 9: Using Authentication Services
Section F: Netegrity SiteMinder
SGOS#(config) security siteminder edit-realm realm_name
SGOS#(config siteminder realm_name) primary-agent agent-name agent_name
SGOS#(config siteminder realm_name) primary-agent host host_name_or_IP
SGOS#(config siteminder realm_name) primary-agent port port_number
SGOS#(config siteminder realm_name) primary-agent encrypted-shared-secret
encrypted_shared_secret
-orSGOS#(config siteminder realm_name) primary-agent shared-secret
shared_secret
SGOS#(config siteminder
SGOS#(config siteminder
SGOS#(config siteminder
SGOS#(config siteminder
encrypted_shared_secret
-orSGOS#(config siteminder
shared_secret
realm_name)
realm_name)
realm_name)
realm_name)
alternate-agent
alternate-agent
alternate-agent
alternate-agent
agent-name agent_name
host host_name_or_IP
port port_number
encrypted-shared-secret
realm_name) alternate-agent shared-secret
where:
primary-agent/
alternate agent
These commands allow you to configure either the
primary or alternate agent for the SiteMinder realm.
agent-name
agent_name
The name of the agent.
host
host_name
or IP
address
The host ID or the IP address of the system that
contains the agent.
port
port_number The port where the agent listens.
encrypted-shared-secret
/shared-secret
secret
The shared secret (or encrypted secret) associated
with the primary or alternate agent. (Secrets can be
up to 64 characters long and are always case
sensitive.)
The primary use of the encrypted-password
command is to allow the ProxySG to reload a
password that it encrypted. If you choose to use a
third-party encryption application, be sure it
supports RSA encryption, OAEP padding, and
Base64 encoded with no newlines.
2.
To enable SSL for this realm and to have the BCAAA certificate verified, enter:
SGOS#(config siteminder realm_name) ssl enable
SGOS#(config siteminder realm_name) ssl-verify-agent enable
SiteMinder Servers
Once you create a SiteMinder realm, use the SiteMinder Servers page to create and edit the list of
SiteMinder policy servers consulted by the realm.
1.
Select Configuration>Authentication>Netegrity SiteMinder>SiteMinder Servers.
The SiteMinder Servers page displays.
327
Blue Coat ProxySG Configuration and Management Guide
Section F: Netegrity SiteMinder
Figure 9-30: SiteMinder Servers Tab
2.
From the Realm Name drop-down list, select the SiteMinder realm for which you want to add
servers or change server properties.
Note:
3.
You must have defined at least one SiteMinder realm (using the SiteMinder Realms page)
before attempting to set SiteMinder policy server properties. If the message Realms
must be added in the SiteMinder Realms tab before editing this tab is
displayed in red Click Apply. Repeat the above steps for additional SiteMinder realms,
up to a total of 40.
To create a new SiteMinder policy server, click New.
The Add List dialog displays.
Figure 9-31: SiteMinder Add List Item Dialog
4.
a.
Enter the name of the server in the dialog. This name is used only to identify the server in
the ProxySG Appliance’s configuration; it usually is the real hostname of the SiteMinder
policy server.
b.
Click OK.
To edit an existing SiteMinder policy server, click Edit.
The Edit dialog displays.
328
Chapter 9: Using Authentication Services
Section F: Netegrity SiteMinder
Figure 9-32: SiteMinder Edit Server Dialog
a.
Enter the IP address of the SiteMinder policy server in the IP address field.
b.
Enter the correct port number for the Authentication, Authorization, and Accounting
ports. The ports should be the same as the ports configured on their SiteMinder policy
server. The valid port range is 1-65535.
c.
The maximum number of connections is 32768; the default is 256.
d. The connection increment specifies how many connections to open at a time if more are
needed and the maximum is not exceeded. One is the default.
e.
The timeout value has a default of 60 seconds, which can be changed.
5.
Click OK.
6.
Click Apply.
Editing SiteMinder Policy Servers through the CLI:
To create and edit the SiteMinder policy server for the realm you just created, enter the following
commands:
Note:
The only required option is the IP address. The other options need only be used if you
want to change the defaults.
SGOS#(config) security siteminder edit-realm realm_name
SGOS#(config siteminder realm_name) siteminder-server create server_name
SGOS#(config siteminder realm_name) siteminder-server edit server_name
SGOS#(config siteminder realm_name server_name) ip-address ip_address
SGOS#(config siteminder realm_name server_name) authentication-port
port_number
SGOS#(config siteminder realm_name server_name) authorization-port
port_number
329
Blue Coat ProxySG Configuration and Management Guide
Section F: Netegrity SiteMinder
SGOS#(config
SGOS#(config
SGOS#(config
SGOS#(config
SGOS#(config
siteminder
siteminder
siteminder
siteminder
siteminder
realm_name
realm_name
realm_name
realm_name
realm_name
server_name)
server_name)
server_name)
server_name)
server_name)
accounting-port port_number
connection-increment number
max-connections number
min-connections number
timeout seconds
where:
siteminderserver
create server_name |
edit server_name |
delete
You can create a SiteMinder policy server, edit
it, or delete it.
edit
server_name
ip-address ip_address
The IP address of the SiteMinder policy server.
edit
server_name
authentication-port
port_number
The default is 44442. The ports should be the
same as the ports configured on the SiteMinder
policy server. The valid port range is 1-65535.
edit
server_name
authorization-port
port_number
The default is 44443. The ports should be the
same as the ports configured on the SiteMinder
policy server. The valid port range is 1-65535.
edit
server_name
accounting-port
port_number
The default is 44441. The ports should be the
same as the ports configured on the SiteMinder
policy server. The valid port range is 1-65535.
edit
server_name
connection-increment
number
The default is 1. The connection increment
specifies how many connections to open at a
time if more are needed and the maximum is
not exceeded.
edit
server_name
max-connections number
The default is 256. The maximum number of
connections is 32768.
edit
server_name
min-connections number
The default is 1.
edit
server_name
timeout seconds
The default is 60.
To View the SiteMinder Policy Server Configuration:
SGOS#(config siteminder realm_name server_name)view
Server name:
test
IP address:
10.25.36.47
Min connections:
1
Max connections:
256
Connection inc:
1
Timeout:
60
Authentication Port: 44442
Authorization Port: 44443
Accounting Port:
44441
Defining SiteMinder Server General Properties
The SiteMinder Server General tab allows you to specify the protected resource name, the server mode,
and whether requests should always be redirected off box.
330
Chapter 9: Using Authentication Services
Section F: Netegrity SiteMinder
To Configure General Settings through the Management Console:
1.
Select Configuration>Authentication>Netegrity SiteMinder>SiteMinder Server General.
The SiteMinder Server General tab displays.
Figure 9-33: SiteMinder Server General Tab
2.
From the Realm Name drop-down list, select the SiteMinder realm for which you want to change
properties.
Note:
3.
Enter the protected resource name. The protected resource name is the same as the resource name
on the SiteMinder policy server that has rules and policy defined for it.
4.
In the Server mode drop-down list, select either failover or round-robin. Failover mode falls back to
one of the other servers if the primary one is down. Round-robin modes specifies that all of the
servers should be used together in a round-robin approach. Failover is the default.
Note:
5.
The server mode describes the way the agent (BCAAA) interacts with the SiteMinder
policy server, not the way that ProxySG interacts with BCAAA.
To force authentication challenges to always be redirected to an off-box URL, check the Always
redirect off-box checkbox.
Note:
331
You must have defined at least one SiteMinder realm (using the SiteMinder Realms tab)
before attempting to set SiteMinder general properties. If the message Realms must be
added in the SiteMinder Realms tab before editing this tab is displayed in
red at the bottom of this page, you do not currently have any SiteMinder realms
defined.
All SiteMinder Web agents involved must have the setting EncryptAgentName=no in
their configurations to go off-box for any reason.
Blue Coat ProxySG Configuration and Management Guide
Section F: Netegrity SiteMinder
If using SiteMinder forms for authentication, the ProxySG always redirects the browser to the
forms URL for authentication. You can force this behavior for other SiteMinder schemes by
configuring the always redirect off-box property on the realm.
6.
If your web applications need information from the SiteMinder policy server responses, you can
check the Add Header Responses checkbox. When this is checked, responses from the policy server
obtained during authentication are added to each request forwarded by the ProxySG. Note that
header responses will replace any existing header of the same name; if no such header exists, the
header will be added. Cookie responses will replace a cookie header with the same cookie name;
if no such cookie header exists, one will be added.
7.
To enable validation of the client IP address, select the Validate client IP address checkbox. If the
client IP address in the SSO cookie can be valid yet different from the current request client IP
address, due to downstream proxies or other devices, deselect the Validate client IP address
checkbox for the realm. SiteMinder agents participating in SSO with the ProxySG should also be
modified; the TransientIPCheck variable should be set to yes to enable IP address validation and
no to disable it.
8.
Click Apply.
To Configure General Settings through the CLI:
At the (config) command prompt, enter the following commands to configure general server
settings:
SGOS#(config siteminder realm_name) protected-resource-name
protected_resource_name
SGOS#(config siteminder realm_name) server-mode failover| round-robin
(optional)SGOS#(config siteminder realm_name) always-redirect-offbox enable
| disable
(optional)SGOS#(config siteminder realm_name) add-header-responses enable |
disable
(optional)SGOS#(config siteminder realm_name) validate-client-IP disable |
enable
where:
332
protected-resource-name protected_resourcename
The resource name on the SiteMinder
policy server that has rules and policy
defined for it.
server-mode
Behavior of the server. Failover mode
falls back to one of the other servers if
the primary one is down. Round-robin
modes specifies that all of the servers
should be used together in a
round-robin approach. Failover is the
default.
failover |
round-robin
Chapter 9: Using Authentication Services
Section F: Netegrity SiteMinder
always-redirect-offbox
enable | disable
If using SiteMinder forms for
authentication, the ProxySG always
redirects the browser to the forms URL
for authentication. You can force this
behavior for other SiteMinder schemes
by configuring the always redirect
off-box property on the realm.
All agents involved must have the
setting EncryptAgentName=no in
their configurations to go off-box for
any reason.
add-header-responses
enable | disable
Enable if your web applications need
information from the SiteMinder
policy server responses. Note that
header responses will replace any
existing header of the same name; if no
such header exists, the header will be
added. Cookie responses will replace a
cookie header with the same cookie
name; if no such cookie header exists,
one will be added.
validate-client-IP
enable | disable
Enables validation of the client IP
address. If the client IP address in the
SSO cookie may be valid yet different
from the current request client IP
address, due to downstream proxies or
other devices, disable client IP
validation. The SiteMinder agents
participating in SSO with the ProxySG
should also be modified. The
TransientIPCheck variable should be
set to yes to enable IP validation and
no to disable it.
SiteMinder General
The SiteMinder General tab allows you to set a display name, cache credentials, timeout value, and
create a virtual URL.
To Manage General Settings for the SiteMinder realm
1.
Select Authentication>Netegrity SiteMinder>SiteMinder General.
The SiteMinder General tab displays.
333
Blue Coat ProxySG Configuration and Management Guide
Section F: Netegrity SiteMinder
Figure 9-34: SiteMinder General Page
2.
From the Realm Name drop-down list, select the SiteMinder realm for which you want to change
properties.
Note:
You must have defined at least one SiteMinder realm (using the SiteMinder Realms tab)
before attempting to set SiteMinder general properties. If the message Realms must be
added in the SiteMinder Realms tab before editing this tab is displayed in
red at the bottom of this page, you do not currently have any SiteMinder realms
defined.
3.
If needed, change the SiteMinder realm display name. The default value for the display name is
the realm name. The display name cannot be longer than 128 characters and it cannot be null.
4.
Specify the length of time, in seconds, that user and administrator credentials received from the
SiteMinder policy server are cached. Credentials can be cached for up to 3932100 seconds. The
default cache-duration is 900 seconds (15 minutes).
5.
If you want group comparisons for SiteMinder groups to be case sensitive, select Case sensitive.
6.
The virtual hostname must be in the same cookie domain as the other servers participating in the
SSO. It cannot be an IP address or the default, www.cfauth.com.
7.
Click Apply.
To Set SiteMinder General Settings through the CLI:
At the (config) command prompt, enter the following commands to configure general server
settings:
SGOS#(config
SGOS#(config
SGOS#(config
SGOS#(config
334
siteminder
siteminder
siteminder
siteminder
realm_name)
realm_name)
realm_name)
realm_name)
cache-duration seconds
case-sensitive enable | disable
display-name name
virtual-url URL
Chapter 9: Using Authentication Services
Section F: Netegrity SiteMinder
where:
cache-duration
seconds
Specifies the length of time in seconds that user and administrator
credentials received from the SiteMinder policy server are cached.
Credentials can be cached for up to 3932100 seconds. The default
value is 900 seconds (15 minutes).
case-sensitive
enable |
disable
Specifies whether the SiteMinder policy server is configured to
expect case-sensitive usernames and passwords.
display-name
name
Equivalent to the display-name option in the CPL authenticate
action. The default value for the display name is the realm name.
The display name cannot be longer than 128 characters and it
cannot be null.
virtual-url
URL
The URL to redirect to when the user needs to be challenged for
credentials. If the ProxySG is participating in SSO, the virtual
hostname must be in the same cookie domain as the other servers
participating in the SSO. It cannot be an IP address or the default,
www.cfauth.com.
Creating the CPL
You can create CPL policies now that you have completed SiteMinder realm configuration. Be aware
that the examples below are just part of a comprehensive authentication policy. By themselves, they
are not adequate for your purposes.
The examples below assume the default policy condition is allow. On new SGOS 4.x systems, the
default policy condition is deny.
Note:
•
Refer to the Blue Coat ProxySG Content Policy Language Guide for details about CPL and how
transactions trigger the evaluation of policy file <Proxy> and other layers.
Every SiteMinder-authenticated user is allowed access the ProxySG.
<Proxy>
authenticate(SiteMinderRealm)
•
Group membership is the determining factor in granting access to the ProxySG.
<Proxy>
authenticate(LDAPRealm)
<Proxy>
group=”cn=proxyusers, ou=groups, o=myco”
deny
335
Blue Coat ProxySG Configuration and Management Guide
Section G: Oblix COREid
Section G: Oblix COREid
The ProxySG can be configured to consult an Oblix COREid (formerly known as Oblix NetPoint)
Access Server for authentication and session management decisions. This requires that a COREid
realm be configured on the ProxySG and policy written to use that realm for authentication.
The ProxySG supports authentication with Oblix COREid v6.5 and v7.0.
Important: Use of this feature is subject to obtaining the appropriate license. The license check is
on the ProxySG.
Access to the COREid Access System is done through the Blue Coat Authentication and Authorization
Agent (BCAAA), which must be installed on a Windows 2000 system or higher with access to the
COREid Access Servers.
Understanding COREid Interaction with Blue Coat
Within the COREid Access System, BCAAA acts as a custom AccessGate. It communicates with the
COREid Access Servers to authenticate the user and to obtain a COREid session token, authorization
actions, and group membership information.
HTTP header variables and cookies specified as authorization actions are returned to BCAAA and
forwarded to the ProxySG. They can (as an option) be included in requests forwarded by the ProxySG.
Within the ProxySG system, BCAAA acts as its agent to communicate with the COREid Access
Servers. The ProxySG provides the user information to be validated to BCAAA, and receives the
session token and other information from BCAAA.
Each ProxySG COREid realm used causes the creation of a BCAAA process on the Windows host
computer running BCAAA. When a process is created, a temporary working directory containing the
Oblix COREid files needed for configuration is created for that process. A single host computer can
support multiple ProxySG realms (from the same or different ProxySG Appliances); the number
depends on the capacity of the BCAAA host computer and the amount of activity in the realms.
Configuration of the ProxySG COREid realm must be coordinated with configuration of the Access
System. Each must be aware of the AccessGate. In addition, certain authorization actions must be
configured in the Access System so that BCAAA gets the information the ProxySG needs.
Configuring the COREid Access System
Note:
Blue Coat assumes you are familiar with the configuration of the COREid Access System and
WebGates.
Since BCAAA is an AccessGate in the COREid Access System, it must be configured in the Access
System just like any other AccessGate. BCAAA obtains its configuration from the ProxySG so
configuration of BCAAA on the host computer is not required. If the Cert Transport Security Mode is
used by the Access System, then the certificate files for the BCAAA AccessGate must reside on
BCAAA’s host computer.
336
Chapter 9: Using Authentication Services
Section G: Oblix COREid
COREid protects resources identified by URLs in policy domains. A ProxySG COREid realm is
associated with a single protected resource. This could be an already existing resource in the Access
System, (typical for a reverse proxy arrangement) or it could be a resource created specifically to
protect access to ProxySG services (typical for a forward proxy).
Important: The request URL is not sent to the Access System as the requested resource; the
requested resource is the entire ProxySG realm. Access control of individual URLs is
done on the ProxySG using policy.
The COREid policy domain that controls the protected resource must use one of the challenge
methods supported by the ProxySG.
Supported challenge methods are Basic, X.509 Certificates and Forms. Acquiring the credentials over
SSL is supported as well as challenge redirects to another server.
The ProxySG requires information about the authenticated user to be returned as COREid
authorization actions for the associated protected resource. Since authentication actions are not
returned when a session token is simply validated, the actions must be authorization and not
authentication actions.
The following authorization actions should be set for all three authorization types (Success, Failure,
and Inconclusive):
•
A HeaderVar action with the name BCSI_USERNAME and with the value corresponding to the
simple username of the authenticated user. For example, with an LDAP directory this might be
the value of the cn attribute or the uid attribute.
•
A HeaderVar action with the name BCSI_GROUPS and the value corresponding to the list of
groups to which the authenticated user belongs. For example, with an LDAP directory this might
be the value of the memberOf attribute.
Once the COREid AccessGate, authentication scheme, policy domain, rules, and actions have been
defined, the ProxySG can be configured.
Additional COREid Configuration Notes
The ProxySG Appliance's credential cache only caches the user's authentication information for the
lesser of the two values of the time-to-live (TTL) configured on the ProxySG and the session TTL
configured in the Access System for the AccessGate.
Configuring the ProxySG Realm
The ProxySG realm must be configured so that it can:
337
•
Communicate with the Blue Coat agent(s) that will act on its behalf (hostname or IP address, port,
SSL options, and the like).
•
Provide BCAAA with the information necessary to allow it to identify itself as an AccessGate
(AccessGate id, shared secret).
•
Provide BCAAA with the information that allows it to contact the primary COREid Access Server
(IP address, port, connection information).
Blue Coat ProxySG Configuration and Management Guide
Section G: Oblix COREid
•
Provide BCAAA with the information that it needs to do authentication and collect authorization
information (protected resource name), and general options (off-box redirection).
For more information on configuring the ProxySG COREid realm, see "Creating a COREid Realm" on
page 339.
Note:
All ProxySG and agent configuration is done on the ProxySG. The ProxySG sends the
necessary information to BCAAA when it establishes communication.
Participating in a Single Sign-On (SSO) Scheme
The ProxySG can participate in SSO using the encrypted ObSSOCookie cookie. This cookie is set in the
browser by the first system in the domain that authenticates the user; other systems in the domain
obtain authentication information from the cookie and so do not have to challenge the user for
credentials. The ProxySG sets the ObSSOCookie cookie if it is the first system to authenticate a user,
and authenticates the user based on the cookie if the cookie is present.
Since the SSO information is carried in a cookie, the ProxySG must be in the same cookie domain as
the servers participating in SSO. This imposes restrictions on the authenticate.mode() used on the
ProxySG.
•
A reverse proxy can use any origin mode.
•
A forward proxy must use one of the origin-redirect modes (such as
origin-cookie-redirect). Note that, when using origin-*-redirect modes, the virtual
URL's hostname must be in the same cookie domain as the other systems. It cannot be an IP
address; the default www.cfauth.com does not work either.
When using origin-*-redirect, the SSO cookie is automatically set in an appropriate response after
the ProxySG authenticates the user. When using origin mode (in a reverse proxy), setting this cookie
must be explicitly specified by the administrator using the policy substitution variable
$(x-agent-sso-cookie). The variable $(x-agent-sso-cookie) expands to the appropriate value
of the set-cookie: header.
Avoiding ProxySG Challenges
In some COREid deployments all credential challenges are issued by a central authentication service.
Protected services do not challenge and process request credentials; instead, they work entirely with
the SSO token. If the request does not include an SSO token, or if the SSO token is not acceptable, the
request is redirected to the central service, where authentication occurs. Once authentication is
complete, the request is redirected to the original resource with a response that sets the SSO token.
338
Chapter 9: Using Authentication Services
Section G: Oblix COREid
If the COREid authentication scheme is configured to use a forms-based authentication, the ProxySG
will redirect authentication requests to the form URL automatically. If the authentication scheme is not
using forms authentication but has specified a challenge redirect URL, the ProxySG will only redirect
the request to the central service if always-redirect-offbox is enabled for the realm on the
ProxySG. If the always-redirect-offbox option is enabled, the authentication scheme must use
forms authentication or have a challenge redirect URL specified.
Note:
The ProxySG must not attempt to authenticate a request for the off-box authentication URL.
If necessary, authenticate(no) can be used in policy to prevent this.
Creating a COREid Realm
To Create a COREid Realm through the Management Console:
1.
Select Configuration>Authentication>Oblix COREid>COREid Realms.
The COREid Realms tab displays.
Figure 9-35: Creating a COREid Realm
2.
Click New; the Add COREid Realm dialog displays.
Figure 9-36: Adding the COREid Realm Name
339
Blue Coat ProxySG Configuration and Management Guide
Section G: Oblix COREid
3.
In the Realm name field, enter a realm name. The name can be 32 characters long and composed of
alphanumeric characters and underscores. The name must start with a letter. The name should be
meaningful to you, but it does not have to be the name of the COREid AccessGate.
4.
Click OK.
5.
Click Apply.
To Create a COREid Realm through the CLI:
At the (config) prompt, enter the following command to create a COREid realm:
SGOS#(config) security coreid create-realm realm_name
where realm_name is the name of the COREid realm.
Agents
You must configure the COREid realm so that it can find the Blue Coat Authentication and
Authorization Agent (BCAAA).
1.
Select Configuration>Authentication>Oblix COREid>Agents.
The Agents page displays.
Figure 9-37: Configuring COREid Agents
2.
Select the realm name to edit from the drop-down list.
Note:
340
You must have defined at least one COREid realm (using the COREid Realms tab) before
attempting to configure COREid agents. If the message Realms must be added in the COREid
Realms tab before editing this tab is displayed in red at the bottom of this page, you do not
currently have any COREid realms defined.
3.
In the Primary agent section, enter the hostname or IP address where the agent resides.
4.
Change the port from the default of 16101 if necessary.
Chapter 9: Using Authentication Services
Section G: Oblix COREid
5.
Enter the AccessGate id in the AccessGate id field. The AccessGate id is the id of the AccessGate as
configured in the Access System.
6.
If an AccessGate password has been configured in the Access System, you must specify the
password on the ProxySG. Click Change Secret and enter the password. The passwords can be up
to 64 characters long and are always case sensitive.
7.
(Optional) Enter an alternate agent host and AccessGate id in the Alternate agent section.
8.
(Optional) Click Enable SSL to enable SSL between the ProxySG and the BCAAA agent.
9.
(Optional) By default, if SSL is enabled, the COREid BCAAA certificate is verified. If you do not
want to verify the agent certificate, disable this setting.
To Edit a COREid Agent through the CLI:
1.
To define the primary and alternate agent configuration for the realm you just created, enter the
following commands at the (config) prompt:
SGOS#(config) security coreid edit-realm realm_name
SGOS#(config coreid realm_name) primary-agent accessgate-id id
SGOS#(config coreid realm_name) primary-agent host host
SGOS#(config coreid realm_name) primary-agent port port
SGOS#(config coreid realm_name) primary-agent encrypted-secret
encrypted_shared_secret
-orSGOS#(config coreid realm_name) primary-agent secret shared_secret
SGOS#(config coreid realm_name) alternate-agent accessgate-id id
SGOS#(config coreid realm_name) alternate-agent host host
SGOS#(config coreid realm_name) alternate-agent port port
SGOS#(config coreid realm_name) alternate-agent encrypted-secret
encrypted_shared_secret
-orSGOS#(config coreid realm_name) alternate-agent secret shared_secret
where
primary-agent/
alternate agent
341
These commands allow you to configure either the
primary or alternate agent for the COREid realm.
accessgate-id
id
The id of the AccessGate.
host
host
The hostname or the IP address of the system that
contains the agent.
port
port
The port where the agent listens.
encrypted-secret/
secret
shared_secret
The password (or encrypted password) associated
with the primary or alternate AccessGate. (Passwords
can be up to 64 characters long and are always case
sensitive.) The primary use of the encrypted-secret
command is to allow the ProxySG to reload a password
that it encrypted. If you choose to use a third-party
encryption application, be sure it supports RSA
encryption, OAEP padding, and is Base64 encoded
with no newlines.
Blue Coat ProxySG Configuration and Management Guide
Section G: Oblix COREid
2.
To enable SSL between the ProxySG and the BCAAA agent and to have the BCAAA certificate
verified, enter:
SGOS#(config coreid realm_name) ssl enable
SGOS#(config coreid realm_name) ssl-verify-agent enable
COREid Access Server
Once you create a COREid realm, use the COREid Access Server page to specify the primary Access
Server information.
1.
Select Configuration>Authentication>Oblix COREid>COREid Access Server.
The COREid Access Server page displays.
Figure 9-38: Configuring the COREid Access Server
2.
Select the realm name to edit from the drop-down list.
Note:
342
You must have defined at least one COREid realm (using the COREid Realms tab)
before attempting to configure COREid agents. If the message Realms must be added in
the COREid Realms tab before editing this tab is displayed in red at the bottom of this page,
you do not currently have any COREid realms defined.
3.
Enter the protected resource name. The protected resource name is the same as the resource name
defined in the Access System policy domain.
4.
Select the Security Transport Mode for the AccessGate to use when communicating with the
Access System.
5.
If Simple or Cert mode is used, specify the Transport Pass Phrase configured in the Access System.
Click Change Transport Pass Phrase to set the pass phrase.
6.
If Cert mode is used, specify the location on the BCAAA host machine where the key, server and
CA chain certificates reside. The certificate files must be named aaa_key.pem, aaa_cert.pem and
aaa_chain.pem respectively.
Chapter 9: Using Authentication Services
Section G: Oblix COREid
7.
To force authentication challenges to always be redirected to an off-box URL, check the Always
redirect off-box checkbox.
8.
To enable validation of the client IP address in SSO cookies, select the Validate client IP address
checkbox. If the client IP address in the SSO cookie can be valid yet different from the current
request client IP address due to downstream proxies or other devices, then deselect the Validate
client IP address checkbox in the realm. The WebGates participating in SSO with the ProxySG
should also be modified. The WebGateStatic.lst file should be modified to either set the
ipvalidation parameter to false or to add the downstream proxy/device to the
IPValidationExceptions lists.
9.
If your web applications need information from the Authorization Actions, you can check the Add
Header Responses checkbox. When this is checked, authorization actions from the policy domain
obtained during authentication are added to each request forwarded by the ProxySG. Note that
header responses will replace any existing header of the same name; if no such header exists, the
header will be added. Cookie responses will replace a cookie header with the same cookie name,
if no such cookie header exists, one will be added.
10. Specify the id of the AccessGate’s primary Access Server.
11. Specify the hostname of the AccessGate’s primary Access Server.
12. Specify the port of the AccessGate’s primary Access Server.
13. Click Apply
Editing COREid Access Server through the CLI:
To create and edit the COREid Access Server configuration for the realm you just created, enter the
following commands:
SGOS#(config) security coreid edit-realm realm_name
SGOS#(config coreid realm_name) protected-resource-name resource name
SGOS#(config coreid realm_name) security-mode cert | open | simple
SGOS#(config coreid realm_name) transport-pass-phrase pass_phrase
-orSGOS#(config coreid realm_name) encrypted-transport-pass-phrase
encrypted_pass_phrase
SGOS#(config coreid realm_name) certificate-path certificate path
SGOS#(config coreid realm_name) always-redirect-offbox disable | enable
SGOS#(config coreid realm_name) validate-client-IP disable | enable
SGOS#(config coreid realm_name) add-header-responses disable | enable
SGOS#(config coreid realm_name) access-server-id id
SGOS#(config coreid realm_name) access-server-hostname hostname
SGOS#(config coreid realm_name) access-server-port port
where:
343
protected-resource-name protected_resource_
name
The resource name defined in the
Access System policy domain.
security-mode
The Security Transport Mode for the
AccessGate to use when
communicating with the Access
System
cert | open | simple
Blue Coat ProxySG Configuration and Management Guide
Section G: Oblix COREid
transport-pass-phrase
pass_phrase
-or-
-or-
encrypted-transportpass-phrase
encrypted_pass_phrase
certificate-path
certificate_path
If Cert mode is used, the location on
the BCAAA host machine where the
key, server and CA chain certificates
reside. The certificate files must be
named aaa_key.pem, aaa_cert.pem
and aaa_chain.pem respectively.
always-redirect-offbox
disable | enable
Forces authentication challenges to
always be redirected to an off-box
URL.
validate-client-IP
disable | enable
Enables validation of the client IP
address in SSO cookies. If the client IP
address in the SSO cookie can be valid
yet different from the current request
client IP address due to downstream
proxies or other devices, then disable
client IP address validation. The
WebGates participating in SSO with
the ProxySG should also be modified.
The WebGateStatic.lst file should be
modified to either set the ipvalidation
parameter to false or to add the
downstream proxy/device to the
IPValidationExceptions lists.
add-header-responses
disable | enable
When enabled, authorization actions
from the policy domain obtained
during authentication are added to
each request forwarded by the
ProxySG. Note that header responses
will replace any existing header of the
same name; if no such header exists,
the header will be added. Cookie
responses will replace a cookie header
with the same cookie name; if no such
cookie header exists, one will be
added.
access-server-id
id
The ID of the primary Access Server.
access-server-hostname
hostname
The hostname of the primary Access
Server.
access-server-port
port
The port of the primary Access Server.
If Simple or Cert mode is used, the
Transport passphrase (or encrypted
passphrase) configured in the Access
System.
COREid General
The COREid General tab allows you to set a display name, cache credentials timeout, request timeout
value, and case-sensitivity and create a virtual URL.
344
Chapter 9: Using Authentication Services
Section G: Oblix COREid
To Manage General Settings for the COREid Realm through the Management Console:
1.
Select Authentication>Oblix COREid>COREid General.
The COREid General tab displays.
Figure 9-39: Configuring COREid General Properties
2.
From the Realm Name drop-down list, select the COREid realm for which you want to change
properties.
Note:
345
You must have defined at least one COREid realm (using the COREid Realms tab)
before attempting to configure COREid agents. If the message Realms must be added in
the COREid Realms tab before editing this tab is displayed in red at the bottom of this page,
you do not currently have any COREid realms defined.
3.
If needed, change the COREid realm display name. The default value for the display name is the
realm name. The display name cannot be longer than 128 characters and it cannot be null.
4.
Specify the length of time, in seconds, to elapse before timeout if a response from BCAAA is not
received.
5.
Specify the length of time, in seconds, that user and administrator credentials are cached.
Credentials can be cached for up to 3932100 seconds. The default cache-duration is 900 seconds
(15 minutes).
6.
If you want username and group comparisons on the ProxySG to be case sensitive, select Case
sensitive.
7.
Specify the virtual URL to redirect the user to when they need to be challenged by the ProxySG. If
the ProxySG is participating in SSO, the virtual hostname must be in the same cookie domain as
the other servers participating in the SSO. It cannot be an IP address or the default,
www.cfauth.com.
8.
Click Apply.
Blue Coat ProxySG Configuration and Management Guide
Section G: Oblix COREid
To Set COREid General Settings through the CLI:
At the (config) command prompt, enter the following commands to configure general settings:
SGOS#(config
SGOS#(config
SGOS#(config
SGOS#(config
SGOS#(config
coreid
coreid
coreid
coreid
coreid
realm_name)
realm_name)
realm_name)
realm_name)
realm_name)
display-name name
timeout seconds
cache-duration seconds
case-sensitive disable | enable
virtual-url URL
where:
display-name
name
Equivalent to the display-name option in the CPL authenticate
action. The default value for the display name is the realm name.
The display name cannot be longer than 128 characters and it
cannot be null.
timeout
seconds
Specifies the length of time, in seconds, to elapse before timeout if
a response from BCAAA is not received.
cache-duration
seconds
Specifies the length of time in seconds that user and administrator
credentials received are cached. Credentials can be cached for up
to 3932100 seconds. The default value is 900 seconds (15 minutes).
case-sensitive
disable |
enable
Specifies whether the username and group comparisons on the
ProxySG should be case-sensitive.
virtual-url
URL
The URL to redirect to when the user needs to be challenged for
credentials. If the ProxySG is participating in SSO, the virtual
hostname must be in the same cookie domain as the other servers
participating in the SSO. It cannot be an IP address or the default,
www.cfauth.com.
Creating the CPL
You can create CPL policies now that you have completed COREid realm configuration. Be aware that
the examples below are just part of a comprehensive authentication policy. By themselves, they are not
adequate for your purposes.
The examples below assume the default policy condition is allow. On new SGOS 4.x systems, the
default policy condition is deny.
Note:
•
Refer to the Blue Coat ProxySG Content Policy Language Guide for details about CPL and how
transactions trigger the evaluation of policy file <Proxy> and other layers.
Every COREid-authenticated user is allowed access the ProxySG.
<Proxy>
authenticate(COREidRealm)
•
Group membership is the determining factor in granting access to the ProxySG.
<Proxy>
authenticate(COREidRealm)
<Proxy>
group=”cn=proxyusers, ou=groups, o=myco”
deny
346
Chapter 9: Using Authentication Services
Section H: Policy Substitution Realm
Section H: Policy Substitution Realm
A Policy Substitution realm provides a mechanism for identifying and authorizing users based on
information in the request to the ProxySG. The realm uses information in the request and about the
client to identify the user. The realm is configured to construct user identity information by using
policy substitutions.
If authorization data (such as group membership) is needed, the realm can be configured with the
name of an associated authorization realm (such as LDAP or local). If an authorization realm is
configured, the fully-qualified username is sent to the authorization realm’s authority to collect
authorization data.
You can use policy substitutions realms in many situations. For example, a Policy Substitution realm
can be configured to identify the user:
•
based on the results of a NetBIOS over TCP/IP query to the client computer.
•
based on the results of a reverse DNS lookup of the client computer's IP address.
•
based on the contents of a header in the request. This might be used when a downstream device
is authenticating the user.
The Policy Substitution realm is used typically for best-effort user discovery, mainly for logging and
subsequent reporting purposes, without the need to authenticate the user. Be aware that if you use
Policy Substitution realms to provide granular policy on a user, it might not be very secure because
the information used to identify the user can be forged.
This section discusses the following topics:
•
"How Policy Substitution Realms Work"
•
"Creating a Policy Substitution Realm"
•
"Defining a Policy Substitution Realm"
•
"Defining Policy Substitution Realm General Properties"
How Policy Substitution Realms Work
The realm is configured the same way as other realms, except that the realm uses policy substitutions
to construct the username and full username from information available in and about the request.
Any policy substitution whose value is available at client logon can be used to provide information for
the name.
The Policy Substitution realm, in addition to allowing you to create and manipulate realm properties,
such as the name of the realm and the number of seconds that credential cache entries from this realm
are valid, also contains two other attributes:
•
347
A user field: A string containing policy substitutions that describes how to construct the simple
username.
Blue Coat ProxySG Configuration and Management Guide
Section H: Policy Substitution Realm
•
A full username field: A string containing policy substitutions that describes how to construct the
full username, which is used for authorization realm lookups. This can either be an LDAP FQDN
when the authorization realm is an LDAP realm, or a simple name when local realms are being
used for authorization.
Note:
Policy Substitution realms never challenge for credentials. If the username and full
username cannot be determined from the configured substitutions, authentication in
the Policy Substitution realm fails.
Remember that Policy Substitution realms do not require an authorization realm. If no authorization
realm is configured, the user is not a member of any group. The effect this has on the user depends on
the authorization policy. If the policy does not make any decisions based on groups, you do not need
to specify an authorization realm. Also, if your policy is such that it works as desired when all Policy
Substitution realm users are not in any group, you do not have to specify an authorization realm.
Once the Policy Substitution realm is configured, you must create policy to authenticate the user.
Note:
If all the policy substitutions fail, authentication fails. If any policy substitution works,
authentication succeeds in the realm.
Example
The following is an example of how to use substitutions with Policy Substitution realms.
Assumptions:
•
The user susie.smith is logged in to a Windows client computer at IP address 10.25.36.47.
•
The Windows messenger service is enabled on the client computer.
•
The client computer is in the domain AUTHTEAM.
•
The customer has an LDAP directory in which group information is stored. The DN for a user's
group information is
cn=username,cn=users,dc=computer_domain,dc=company,dc=com
where username is the name of the user, and computer_domain is the domain to which
the user's computer belongs.
•
A login script that runs on the client computer updates a DNS server so that a reverse DNS
lookup for 10.25.36.47 results in "susie.smith.authteam.location.company.com."
Results:
Under these circumstances, the following username and full username attributes might be used:
•
Username: $(netbios.messenger-username)@$(client.address)
This results in “[email protected]”
•
348
Full username: cn=$(netbios.messenger-username),cn=users,
dc=$(netbios.computer-domain),dc=company,dc=com
Chapter 9: Using Authentication Services
Section H: Policy Substitution Realm
This results in “cn=SUSIE.SMITH,cn=users, dc=AUTHTEAM,dc=company,dc=com”
•
Username: $(netbios.computer-domain)\$(netbios.messenger-username)
This results in “AUTHTEAM\SUSIE.SMITH”).
•
Username: $(client.host:label(6)).$(client.host:label(5))
This results in “SUSIE.SMITH”.
Creating a Policy Substitution Realm
To Create a Policy Substitution Realm through the Management Console:
1.
Select Configuration>Authentication>Policy Substitution>Policy Substitution Realms.
The Policy Substitution Realms tab displays.
Figure 9-40: Policy Substitution Realms Tab
2.
Click New; the Add Policy Substitution Realm dialog displays.
Figure 9-41: Add Policy Substitution Realm Dialog
349
3.
In the Realm name field, enter a realm name. The name can be up to 32 characters long and
composed of alphanumeric characters and underscores. The name must start with a letter.
4.
Click OK; click Apply.
Blue Coat ProxySG Configuration and Management Guide
Section H: Policy Substitution Realm
To Create a Policy Substitution Realm through the CLI:
Up to 40 Policy Substitution realms can be configured per ProxySG.
At the (config) command prompt, enter the following command to create a Policy Substitution
realm:
SGOS#(config) security policy-substitution create-realm realm_name
where realm_name is the name of the new Policy Substitution realm.
Defining a Policy Substitution Realm
You can define a Policy Substitution realm through either the Management Console or the CLI.
To Define Policy Substitution User Information through the Management Console:
1.
Select Configuration>Authentication>Policy Substitution>User Information.
The Policy Substitution User Information tab displays.
Figure 9-42: Policy Substitution User Information Tab
2.
From the Realm Name drop-down list, select the Policy Substitution realm for which you want to
change realm properties.
Note:
350
You must have defined at least one Policy Substitution realm (using the Policy
Substitution Realms tab) before attempting to set Policy Substitution realm properties.
If the message Realms must be added in the Policy Substitutions Realms tab
before editing this tab is displayed in red at the bottom of this page, you do not
currently have any Policy Substitution realms defined.
Chapter 9: Using Authentication Services
Section H: Policy Substitution Realm
3.
(Optional) From the Authorization Realm Name drop-down list, select the realm you want to use to
authorize users.
Note:
Remember that Policy Substitution realms do not require an authorization realm. If the
policy does not make any decisions based on groups, you do not need to specify an
authorization realm.
4.
To construct usernames and full usernames, remember that the Username and Full username
attributes are character strings that contain policy substitutions. When authentication is required
for the transaction, these character strings are processed by the policy substitution mechanism,
using the current transaction as input. The resulting string becomes the user's identity for the
current transaction. For an overview of usernames and full usernames, see "How Policy
Substitution Realms Work" on page 347.
5.
Click Apply.
To Define Policy Substitution User Information through the CLI:
1.
From the (config) command prompt, enter the following commands:
SGOS#(config) security policy-substitution create-realm realm_name
SGOS#(config) security policy-substitution edit-realm realm_name
(Optional)SGOS#(config policy-substitution realm_name)
authorization-realm-name realm_name
SGOS#(config policy-substitution realm_name) username policy
SGOS#(config policy-substitution realm_name) full-username policy
where
351
edit-realm
realm_name
The name of the realm you want to edit. This
command puts you in the edit submode.
authorization-realm-name
realm_name
This option is only required if you are
associating an authorization realm with the
Policy Substitution realm.
Blue Coat ProxySG Configuration and Management Guide
Section H: Policy Substitution Realm
username
construction
_rule
The username as created through policy
substitutions. The construction rule is made up
any of the substitutions whose values are
available at client logon, listed in Appendix D,
“CPL Substitutions,” in the Blue Coat ProxySG
Content Policy Language Guide.
Note: The username and full username
attributes are character strings that
contain policy substitutions. When
authentication is required for the
transaction, these character strings are
processed by the policy substitution
mechanism, using the current
transaction as input. The resulting string
is stored in the user object in the
transaction, and becomes the user’s
identity.
To create usernames for various uses in Policy
Substitution realms, see the Blue Coat ProxySG
Content Policy Language Guide.
full-username
construction
_rule
The username as created through policy
substitutions. Note that the full username is
only required if you are using an authorization
realm. The construction rule is made up any of
the policy substitutions whose values are
available at client logon listed in Appendix D,
“CPL Substitutions,” in the Blue Coat ProxySG
Content Policy Language Guide.
Note: The username and full username
attributes are character strings that
contain policy substitutions. When
authentication is required for the
transaction, these character strings are
processed by the policy substitution
mechanism, using the current
transaction as input. The resulting string
is stored in the user object in the
transaction, and becomes the user’s
identity.
To create full usernames for the various uses of
Policy Substitution realms, see the Blue Coat
ProxySG Content Policy Language Guide.
Defining Policy Substitution Realm General Properties
The Policy Substitution General tab allows you to specify the display name and a virtual URL.
352
Chapter 9: Using Authentication Services
Section H: Policy Substitution Realm
To Configure Policy Substitution Realm General Settings through the Management Console:
1.
Select Configuration>Authentication>Policy Substitution>General.
The Policy Substitution General tab displays.
Figure 9-43: Policy Substitution General Tab
2.
From the Realm name drop-down list, select the Policy Substitution realm for which to change
properties.
Note:
You must have defined at least one Policy Substitution realm (using the Policy
Substitution Realms tab) before attempting to set Policy Substitution general properties.
If the message Realms must be added in the Policy Substitution Realms tab
before editing this tab is displayed in red at the bottom of this page, you do not
currently have any Policy Substitution realms defined.
3.
Specify the length of time, in seconds, that user and administrator credentials are cached.
Credentials can be cached for up to 3932100 seconds. The default cache-duration is 900 seconds
(15 minutes).
4.
You can specify a virtual URL. For more information on the virtual URL, see Chapter 8: “Security
and Authentication” on page 241.
5.
Click Apply.
To Configure Policy Substitution Realm General Settings through the CLI:
1.
Enter the following commands to modify Policy Substitution realm properties:
SGOS#(config) security policy-substitution edit-realm realm_name
SGOS#(config policy-substitution realm_name) cache-duration seconds
SGOS#(config policy-substitution realm_name) virtual-url URL
353
Blue Coat ProxySG Configuration and Management Guide
Section H: Policy Substitution Realm
where:
2.
cache-duration
seconds
The number of seconds that user and administrator
credentials received from the Policy Substitution realm
should be cached. The default is 900 seconds (15 minutes).
virtual-url
URL
The authentication virtual URL for this Policy Substitution
realm.
(Optional) View the results:
SGOS#(config Policy Substitution realm_name) view
Realm name: PS_1
Username:
$(netbios.messenger-user-name)
Full username:
cn=$(netbios.messenger-user-name),cn=users,
dc=$(netbios.computer-domain)
Authorization realm:
LDAP_1
Cache duration:
600
Virtual URL:
Tips and Boundary Conditions
•
Following is an example of how to configure three different types of Policy Substitution realms.
For a list of available substitutions, see "Fields Available for Creating Access Log Formats" on
page 882.
❐
Identity to be determined by sending a NetBIOS over TCP/IP query to the client computer,
and using LDAP authorization
SGOS#(config) security policy-substitution create-realm netbios
SGOS#(config) security policy-substitution edit-realm netbios
SGOS#(config policy-substitution netbios) username \
$(netbios.messenger-username)
SGOS#(config policy-substitution netbios) full-username \
cn=$(netbios.messenger-username),cn=users,dc=company,dc=com
SGOS#(config policy-substitution netbios) authorization-realm-name ldap
❐
Identity to be determined by reverse DNS, using local authorization. Blue Coat assumes login
scripts on the client computer update the DNS record for the client.
SGOS#(config) security policy-substitution create-realm RDNS
SGOS#(config) security policy-substitution edit-realm RDNS
SGOS#(config policy-substitution RDNS) username \
$(client.host:label(5)).$(client.host:label(6))
#SGOS#(config policy-substitution RDNS) full-username \
$(client.host:label(5)).$(client.host:label(6))
SGOS#(config policy-substitution RDNS) authorization-realm-name local
354
Chapter 9: Using Authentication Services
Section H: Policy Substitution Realm
❐
Identity to be determined by a header in the request, using LDAP authorization.
SGOS#(config) security policy-substitution create-realm header
SGOS#(config) security policy-substitution edit-realm header
SGOS#(config policy-substitution header) username \
$(request.x_header.username)
SGOS#(config policy-substitution header) full-username \
cn=$(request.x_header.username),cn=users,dc=company,dc=com
SGOS#(config policy-substitution header) username \
authorization-realm-name ldap
Creating the Policy Substitution Policy
When you complete Policy Substitution realm configuration, you must create CPL policies for the
policy-substitution realm to be used. Be aware that the example below is just part of a comprehensive
authentication policy. By themselves, they are not adequate.
Note:
Refer to the Blue Coat ProxySG Content Policy Language Guide for details about CPL and how
transactions trigger the evaluation of policy file <Proxy> and other layers.
Be aware that the default policy condition for this example is allow. On new SGOS 4.x systems, the
default policy condition is deny.
Note:
•
The Policy Substitution realm cannot be used in an <Admin> layer.
Every Policy Substitution realm authenticated user is allowed to access the ProxySG.
<Proxy>
authenticate(PolicySubstitutionRealm)
355
Blue Coat ProxySG Configuration and Management Guide
Section I: Sequence Realm Authentication
Section I: Sequence Realm Authentication
Once a realm is configured, you can associate it with other realms to allow Blue Coat to search for the
proper authentication credentials for a specific user. That is, if the credentials are not acceptable to the
first realm, they are sent to the second, and so on until a match is found or all the realms are
exhausted. This is called sequencing.
This section discusses the following topics:
•
"Adding Realms to a Sequence Realm"
•
"Creating a Sequence Realm"
Adding Realms to a Sequence Realm
Keep in mind the following rules for using realm sequences:
•
Ensure the realms to be added to the sequence are customized to your needs. Check each realm to
be sure that the current values are correct. For NTLM, verify that the Allow Basic Credentials
checkbox is set correctly.
•
All realms in the realm sequence must exist and cannot be deleted or renamed while the realm
sequence references them.
•
Only one NTLM realm is allowed in a realm sequence.
•
If an NTLM realm is in a realm sequence, it must be either the first or last realm in the list.
•
If an NTLM realm is in a realm sequence and the NTLM realm does not support Basic credentials,
the realm must be the first realm in the sequence and try NTLM authentication once must be
enabled.
•
Multiple BASIC realms are allowed.
•
Connection-based realms, such as Certificate, are not allowed in the realm sequence.
•
A realm can only exist once in a particular realm sequence.
•
A realm sequence cannot have another realm sequence as a member.
•
If a realm is down, an exception page is returned. Authentication is not tried against the other
later realms in the sequence.
Creating a Sequence Realm
To Create a Sequence Realm through the Management Console:
1.
Select Configuration>Authentication>Sequences>Sequence Realms.
The Sequence Realms tab displays.
356
Chapter 9: Using Authentication Services
Section I: Sequence Realm Authentication
Figure 9-44: Sequence Realms Tab
2.
Click New; the Add Sequence Realm dialog displays.
Figure 9-45: Add Sequence Realm
3.
In the Realm name, enter a realm name. The name can be 32 characters long and composed of
alphanumeric characters and underscores. The name must start with a letter.
4.
Click OK.
5.
Click Apply.
To Create a Sequence Realm through the CLI:
Up to 40 Sequence realms can be configured per ProxySG.
At the (config) command prompt, enter the following command to create a Sequence realm:
SGOS#(config) security sequence create-realm realm_name
where realm_name is the name of the new Sequence realm.
Adding Realms to a Sequence Realm
To Add Realms to a Sequence Realm through the Management Console:
1.
357
Select Configuration>Authentication>Sequences>Sequence Main.
Blue Coat ProxySG Configuration and Management Guide
Section I: Sequence Realm Authentication
The Sequences tab displays with the Sequence realm that you want to add realms to.
Note:
You must have defined at least one sequence realm (using the Sequence Realms tab)
before attempting to set Sequence general properties. If the message Realms must be
added in the Sequence Realms tab before editing this tab is displayed in red
at the bottom of this page, you do not currently have any Sequence realms defined.
Figure 9-46: Sequence Main Tab
2.
Click New to add an existing realm to the realm sequence from the drop-down list. Remember that
each realm can be used only once in a realm sequence.
Figure 9-47: Add Member Realm
3.
From the drop-down list, select the Sequence realm you wanted added to the realm sequence.
4.
Click OK.
You are returned to the main Sequences menu.
358
5.
Click Apply.
6.
Repeat from step 2 until you have added all necessary realms.
7.
To change the order that the realms are checked, use the promote/demote buttons. Note that when
you add an NTLM realm, it is placed first in the list and you can allow the realm sequence to try
NTLM authentication only once. If you demote the NTLM entry, it becomes last in the sequence and
the default of checking NTLM multiple times is enabled.
8.
Click Apply.
Chapter 9: Using Authentication Services
Section I: Sequence Realm Authentication
To Add Authentication Realms to a Sequence Realm through the CLI:
1.
From the (config) prompt, add existing realms to the new specified sequence realm name:
SGOS#(config) security sequence edit-realm realm_sequence_name
SGOS#(config sequence realm_sequence_name) realm add realm_name
2.
Repeat the realm add realm_name command until all necessary realms have been added.
3.
(Optional) Give the new sequence realm a display name. The default value for the display name is
the realm name. The display name cannot be longer than 128 characters and it cannot be null.
SGOS#(config sequence realm_sequence_name) display-name display_name
Defining Sequence Realm General Properties
The Sequence General tab allows you to specify the display name and a virtual URL.
1.
Select Configuration>Authentication>Sequences>Sequence General.
The Sequence General tab displays.
Figure 9-48: Sequence General Tab
2.
From the Realm name drop-down list, select the Sequence realm for which you want to change
properties.
Note:
359
You must have defined at least one sequence realm (using the Sequence Realms tab)
before attempting to set Sequence general properties. If the message Realms must be
added in the Sequence Realms tab before editing this tab is displayed in red
at the bottom of this page, you do not currently have any Sequence realms defined
3.
If needed, change the Sequence realm display name. The default value for the display name is the
realm name. The display name cannot be longer than 128 characters and it cannot be null.
4.
You can specify a virtual URL based on the individual realm sequence. For more information on
the virtual URL, see Chapter 8: “Security and Authentication” on page 241.
Blue Coat ProxySG Configuration and Management Guide
Section I: Sequence Realm Authentication
5.
Click Apply.
To Manage Authentication Realms in a Sequence Realm through the CLI:
1.
When you add an NTLM realm it is placed first in the list, and you have the option of allowing the
realm sequence to try NTLM authentication only once. If you demote the NTLM entry, it becomes last
in the sequence and the default of checking NTLM multiple times is enabled.
SGOS#(config sequence realm_sequence_name) ntlm-only-once-enable
% An NTLM realm must be the first member of the realm sequence before
specifying to try NTLM authentication only once
SGOS#(config sequence realm_sequence_name) realm promote ntlm1
SGOS#(config sequence realm_sequence_name) ntlm-only-once-enable
2.
(Optional) You can specify a virtual URL based on the individual realm sequence. For information
on the virtual URL, see "Security and Authentication" on page 241.
SGOS#(config sequence realm_sequence_name) virtual-url 10.25.36.47
ok
3.
View the configuration.
a.
To view the configuration of the current realm sequence, remain in the submode and
enter:
SGOS#(config sequence realm_sequence_name) view
Realm name:
seq1
Display name:seq1
Virtual URL:
10.25.36.47
Try NTLM only once:
yes
Member realms:
ntlm1
radius1
test
ldap1
b.
To view the configurations of all realm-sequence-names, exit the edit-realm submode,
and enter:
SGOS#(config sequence realm_sequence_name) exit
SGOS#(config) security sequence view
Realm name:
seq1
Display name:seq1
Virtual URL:
10.25.36.47
Try NTLM only once:
yes
Member realms:
ntlm1
radius1
test
ldap1
Realm name:
seq2
Virtual URL:
Try NTLM only once:
no
Member realms:
ldap1
ldap2
360
Chapter 9: Using Authentication Services
Section J: Forms-Based Authentication
Section J: Forms-Based Authentication
You can use forms-based authentication exceptions to control what your users see during
authentication. You can:
•
Specify the realm the user is to authenticate against.
•
Specify that the credentials requested are for the ProxySG. This avoids confusion with other
authentication challenges.
•
Make the form comply with company standards and provide other information, such as a help
link.
The authentication form (an HTML document) is served when the user makes a request and requires
forms-based authentication. If the user successfully authenticates to the ProxySG, the ProxySG
redirects the user back to the original request.
If the user does not successfully authenticate against the ProxySG and the error is user-correctable, the
user will be presented with the authentication form again.
Note:
You can configure and install the authentication form and several properties through the
Management Console and the CLI, but you must use policy to dictate the authentication
form’s use.
With forms-based authenticating, you can set limits on the maximum request size to store and define
the request object expiry time. You can also specify whether to verify the client’s IP address against the
original request and whether to allow redirects to the original request.
To create and put into use forms-based authentication, you must complete the following steps:
•
Create a new form or edit the existing authentication form exception
•
Set storage options
•
Set CPL policies
Understanding Authentication Forms
You can customize the default authentication form exception or you can use it as a template to create
other authentication forms. (You can create as many authentication form exceptions as needed. The
form must be a valid HTML document that contains valid form syntax.)
The default authentication form contains the following:
•
Title and sentence instructing the user to enter ProxySG credentials for the appropriate realm.
•
Domain: Text input with maximum length of 64 characters The name of the input must be
PROXY_SG_DOMAIN, and you can specify a default value of $(x-cs-auth-domain) so that the
user's domain is prepopulated on subsequent attempts (after a failure).
The input field is optional, used only if the authentication realm is an NTLM realm. If it is used,
the value is prepended to the username value with a backslash.
361
Blue Coat ProxySG Configuration and Management Guide
Section J: Forms-Based Authentication
•
Username: Text input with maximum length of 64 characters. The name of the input must be
PROXY_SG_USERNAME, and you can specify a default value of $(cs-username) so the
username is prepopulated on subsequent attempts (after a failure).
•
Password: The password should be of type PASSWORD with a maximum length of 64 characters.
The name of the input must be PROXY_SG_PASSWORD.
•
Request ID: If the request contains a body, then the request is stored on the ProxySG until the user
is successfully authenticated.
The request ID should be of type HIDDEN. The input name must be PROXY_SG_REQUEST_ID,
and the value must be $(x-cs-auth-request-id). The information to identify the stored
request is saved in the request id variable.
•
Submit button. The submit button is required to submit the form to the ProxySG.
•
Clear form button.The clear button is optional and resets all form values to their original values.
•
Form action URI: The value is the authentication virtual URL plus the query string containing the
base64 encoded original URL $(x-cs-auth-form-action-url).
•
Form METHOD of POST. The form method must be POST. The ProxySG will not process forms
submitted with GET.
The ProxySG only parses the following input fields during form submission:
•
PROXY_SG_USERNAME (required)
•
PROXY_SG_PASSWORD (required)
•
PROXY_SG_REQUEST_ID (required)
•
PROXY_SG_DOMAIN. (optional) If specified, its value will be prepended to the username and separated
with a backslash.
The default authentication form looks similar to the following:
<HTML>
<HEAD>
<TITLE>Enter Proxy Credentials for Realm $(cs-realm)</TITLE>
</HEAD>
<BODY>
<H1>Enter Proxy Credentials for Realm $(cs-realm)</H1>
<P>Reason for challenge: $(exception.last_error)
<P>
<FORM METHOD="POST" ACTION=$(x-cs-auth-form-action-url)>
$(x-cs-auth-form-domain-field)
<P>Username: <INPUT NAME="PROXY_SG_USERNAME" MAXLENGTH="64"
VALUE=$(cs-username)></P>
<P>Password: <INPUT TYPE=PASSWORD NAME="PROXY_SG_PASSWORD"
MAXLENGTH="64"></P>
<INPUT TYPE=HIDDEN NAME="PROXY_SG_REQUEST_ID" VALUE=$(x-cs-auth-request-id)>
<P><INPUT TYPE=SUBMIT VALUE="Submit"> <INPUT TYPE=RESET></P>
</FORM>
<P>$(exception.contact)
</BODY>
</HTML>
362
Chapter 9: Using Authentication Services
Section J: Forms-Based Authentication
If the realm is an NTLM realm, the $(x-cs-auth-form-domain-field) substitution expands to:
<P>Domain: <INPUT NAME=PROXY_SG_DOMAIN MAXLENGTH=64
VALUE=$(x-cs-auth-domain)>
If you specify $(x-cs-auth-form-domain-field), you do not need to explicitly add the domain
input field.
User/Realm CPL Substitutions for Authentication Forms
CPL user/realm substitutions that are common in authentication form exceptions are listed below.
The syntax for a CPL substitution is:
$(CPL_substitution)
group
user-name
x-cs-auth-request-id
groups
user.x509.issuer
x-cs-auth-domain
realm
user.x509.serialNumber
x-cs-auth-form-domain-field
user
user.x509.subject
x-cs-auth-form-action-url
cs-realm
x-cs-auth-request-id
Note:
Any substitutions that are valid in CPL and in other exceptions are valid in authentication
form exceptions.
For a discussion of using CPL and a complete list of CPL substitutions, as well as a description of each
substitution, refer to the Blue Coat ProxySG Content Policy Language Guide.
Tip
There is no realm restriction on the number of authentication form exceptions you can create. You can
have as many forms as you want, although you might want to make them as generic as possible to cut
down on maintenance.
Creating and Editing an Authentication Form
You can create a new authentication form or you can edit the existing one. If you create a new form,
the new form uses the default authentication form as a template. If you edit the default form, all forms
created after that contain the modification.
Creating or Editing an Authentication Form through the Management Console
1.
Select Configuration>Authentication>Forms.
The Authentication Forms page displays.
363
Blue Coat ProxySG Configuration and Management Guide
Section J: Forms-Based Authentication
Figure 9-49: Authentication Forms
Click Edit to edit the default authentication form; click New to create a new authentication form
based on the existing default settings.
2.
If you click New, the Add Authentication Form dialog displays.
Figure 9-50: Authentication Form Dialog
3.
Enter the form name. Click OK.
4.
If you highlight the form you want to edit and click Edit, the Edit Authentication authentication form
name dialog displays.
Figure 9-51: Edit Authentication Form Dialog
5.
364
From the drop-down list, select the method to use to install the authentication form; click Install.
Chapter 9: Using Authentication Services
Section J: Forms-Based Authentication
❐
Remote URL:
Enter the fully-qualified URL, including the filename, where the authentication form is
located. To view the file before installing it, click View. Click Install. To view the results, click
Results; to close the dialog when through, click OK.
Figure 9-52: Specifying the Remote Location of an Authentication Form
365
Blue Coat ProxySG Configuration and Management Guide
Section J: Forms-Based Authentication
❐
Local File:
Click Browse to bring up the Local File Browse window. Browse for the file on the local
system. Open it and click Install. When the installation is complete, a results window opens.
View the results; to close the window, click Close.
Figure 9-53: Specifying the Local Location of an Authentication Form
366
Chapter 9: Using Authentication Services
Section J: Forms-Based Authentication
❐
Text Editor:
The current authentication form is displayed in the text editor. You can edit the form in place.
Click Install to install the form. When the installation is complete, a results window opens.
View the results; to close the window, click Close.
Figure 9-54: Using the ProxySG Text Editor
To Create an Authentication Form through the CLI
Remember that if you create a new form, the new form uses the default authentication form as a
template. If you edit the default form, all forms created after that will also have the modification.
To create a new form, enter the following command from the (config) prompt:
SGOS#(config) security authentication-form create form_name
ok
To view the authentication forms on the system, enter the following command:
SGOS#(config) show security authentication-form
Authentication forms:
authentication_form
authentication_test
367
Blue Coat ProxySG Configuration and Management Guide
Section J: Forms-Based Authentication
To Edit an Authentication Form through the CLI
You cannot edit an authentication form in place through the CLI. You can replace a form though using
either remote download or through the ProxySG Appliance’s inline commands.
To Edit an Authentication Form using Inline Commands:
SGOS#(config) security authentication-form inline form_name
end-of-file_marker
-orSGOS# inline authentication-form form_name end-of-file_marker
Remember that any form you modify must contain the username, password and request ID. A form
that is missing these values will result in the user receiving an error page when the authentication
form is submitted. For more information on required fields in a new authentication form, see
"Understanding Authentication Forms" on page 361.
Note:
You can also import the entire set of forms through the inline authentication-forms
command.
Notes on using inline commands:
•
If you make a mistake on the current line of the script you are typing, you can backspace to correct
the problem.
•
If you notice a mistake on a previous line, you must quit the script (by using Ctrl<c>) and start
over.
•
The inline script overwrites the existing template.
To Create and Download an Authentication Form using a Text Editor:
1.
Create the authentication form as a text file.
2.
Place the form on a server that is accessible to the ProxySG.
3.
Enter the following commands to give the ProxySG the file’s location and to download the file:
SGOS#(config) security authentication-form path [form_name] path
SGOS#(config) security authentication-form load form_name
-orSGOS#load authentication-form form_name
Note:
You can also download the entire set of forms through the security
authentication-form path and load authentication-forms commands.
To Delete an Authentication Form
From the (config) prompt, enter the following commands:
SGOS#(config)
368
security authentication-form delete form_name
Chapter 9: Using Authentication Services
Section J: Forms-Based Authentication
Setting Storage Options
When a request requiring the user to be challenged with a form contains a body, the request is stored
on the ProxySG while the user is being authenticated. Storage options include
•
the maximum request size
•
the expiration of the request
•
whether to verify the IP address of the client requesting against the original request
•
whether to allow redirects from the origin server
The storage options are global, applying to all form exceptions you use.
The global allow redirects configuration option can be overridden on a finer granularity in policy
using the authenticate.redirect_stored_requests(yes|no) action.
To Set Storage Options through the Management Console
1.
Select Configuration>Authentication>Request Storage.
The Request Storage tab displays.
Figure 9-55: Request Storage Tab
369
2.
In the Maximum request size to store (Megabytes) field, enter the maximum POST request size
allowed during authentication. The default is 50 megabytes.
3.
In the Request object expiry time (seconds) field, enter the amount of time before the stored request
expires. The default is 300 seconds (five minutes). The expiry time should be long enough for the
user to fill out and submit the authentication form.
4.
If you don’t want the ProxySG to Verify the IP address against the original request, doubleclick the
checkbox to deselect the option. The default is to verify the IP address.
Blue Coat ProxySG Configuration and Management Guide
Section J: Forms-Based Authentication
5.
If you want to Allow redirects from the origin servers, click the checkbox. The default is to not allow
redirects from origin servers.
Note:
6.
During authentication, the user's POST is redirected to a GET request. The client will
therefore automatically follow redirects from the origin server. Since the ProxySG is
converting the GET to a POST and adding the post data to the request before contacting
the origin server, the administrator needs to explicitly specify that redirects to these
POSTs requests can be automatically followed.
Click Apply.
To Set Storage Options through the CLI
From the (config) prompt, enter the following commands to select storage options:
SGOS#(config)
SGOS#(config)
SGOS#(config)
SGOS#(config)
security
security
security
security
request-storage
request-storage
request-storage
request-storage
max-size megabytes
expiry-time seconds
verify-ip enable | disable
allow-redirects enable | disable
where
max-size
megabytes
Sets the maximum POST request size during
authentication. The default is 50 megabytes.
expiry-time
seconds
Sets the amount of time before the stored request
expires. The default is 300 seconds (five minutes)
verify-ip
enable | disable
Enables or disables the verify-ip option. The default
is to enable the ProxySG to verify the IP address
against the original request.
allow-redirect
s
enable |disable
Specifies whether to allow redirects. The default is
disable.
Using CPL with Forms-Based Authentication
To use forms-based authentication, you must create policies that enable it and also control which form
will be used in which situations. A form must exist before it can be referenced in policy.
•
Which form to use during authentication is specified in policy using the CPL condition
authenticate.form(form_name).
Note:
•
370
The authenticate.form(form.name) condition can be used with the form
authentication modes only. If no form is specified the form defaults to
authentication_form.
Using the authentication.mode( ) property selects a combination of challenge type and
surrogate credentials. The authentication.mode( ) property offers several options specifically
for forms-based authentication:
Chapter 9: Using Authentication Services
Section J: Forms-Based Authentication
❐
Form-IP—The user’s IP address is used as a surrogate credential. The form is presented
whenever the user’s credential cache entry expires.
❐
Form-Cookie—Cookies are used as surrogate credentials. The cookies are set on the OCS
domain only, and the user is presented with the form for each new domain. This mode is most
useful in reverse proxy scenarios where there are a limited number of domains.
❐
Form-Cookie-Redirect—The user is redirected to the authentication virtual URL before the
form is presented. The authentication cookie is set on both the virtual URL and the OCS
domain. The user is only challenged when the credential cache entry expires.
❐
Form-IP-redirect —This is similar to form-ip except that the user is redirected to the
authentication virtual URL before the form is presented.
•
If you authenticate users who have third-party cookies explicitly disabled, you can use the
authenticate.use_url_cookie( ) property.
•
Since the authentication.mode( ) property will be defined as a form mode (above) in policy, you
don’t need to adjust the default authenticate mode through the CLI.
•
Using the authenticate.redirect_stored_requests(yes|no) action allows granularity in
policy over the global allow redirect config option.
For information on using these CPL conditions and properties, refer to the Blue Coat ProxySG Content
Policy Language Guide.
Tips and Boundary Conditions
•
If the user is supposed to be challenged with a form on a request for an image or video, the
ProxySG returns a 403 error page instead of the form. If the reason for the challenge is that the
user's credentials have expired and the object is from the same domain as the container page, then
reloading the container page should result in the user receiving the authentication form and being
able to authenticate. However, if the client browser loads the container page using an existing
authenticated connection, the user might still not receive the authentication form.
Closing and reopening the browser should fix the issue. Requesting a different site might also
cause the browser to open a new connection and the user will be returned the authentication
form.
If the container page and embedded objects have a different domain though and the
authentication mode is “form-cookie”, reloading or closing and reopening the browser might not
fix the issue as the user is never returned a cookie for the domain the object belongs to. In these
scenarios, it is recommended that policy be written to either bypass authentication for that
domain or to use a different authentication mode such as “form-cookie-redirect” for that domain.
371
•
Forms-based authentication works with HTTP browsers only.
•
Since forms only support BASIC authentication, authentication-form exceptions cannot be used
with a Certificate realm, a Policy Substitution realm, or with an NTLM realm that allows only
NTLM credentials. If a form is in use and the authentication realm is a NTLM credentials, a Policy
Substitution realm, or a Certificate realm, the user receives a configuration error.
•
User credentials are sent in plain text. However, they can be sent securely using SSL if the virtual
URL is HTTPS.
Blue Coat ProxySG Configuration and Management Guide
Section J: Forms-Based Authentication
•
372
Since not all user requests support forms (such as WebDAV and streaming), you should create
policy to bypass authentication or use a different authentication mode with the same realm for
those requests.
Chapter 9: Using Authentication Services
Section K: Managing the Credential Cache
When you have configured all your realms, you can view your realms and manage the credentials
cache for a specific realm.
To Manage the Credential Cache through the Management Console:
1.
Select to Configuration>Authentication>Realms.
The Realms page displays, with all realms that you have created.
Figure 9-56: Viewing All Realms on the ProxySG
2.
To manage the credential cache:
❐
To purge the credentials cache when you make policy changes, select Flush When Policy File
Changes (this option is selected by default).
❐
To flush the entire credentials cache immediately, click Flush and confirm.
❐
To flush only the entries for a particular realm in the credentials cache, select the realm from
the drop-down list, click Flush Realm confirm.
All of these actions force users to be re-authenticated.
3.
Click Apply.
To Manage the Credential Cache through the CLI:
From the (config) command prompt, enter the following command:
SGOS#(config) security flush-credentials <cr> [on-policy-change {enable |
disable} | realm realm]
where:
<cr>
Press Enter to flush the credential cache now.
on-policy-change
enable | disable
Flush the cache only if the policy changes.
realm
realm
Flush the credential cache for the specified realm.
373
Blue Coat ProxySG Configuration and Management Guide
Section K: Managing the Credential Cache
Boundary Conditions
•
For all realms except NTLM, SiteMinder, and COREid, the maximum number of entries stored in
the credential cache is 80,000.
For NTLM, SiteMinder, and COREid authentication, the maximum number of entries stored in
the credential cache is dependent on the system. You can have at least 2500 entries but potentially
more depending on the system resources.
•
374
XFTP users are not prompted for proxy authentication if the credentials are in the cache and the
credentials have not expired.
Chapter 10: Bandwidth Management
Bandwidth management (BWM) allows you to classify, control, and, if required, limit the amount of
bandwidth used by different classes of network traffic flowing into or out of the ProxySG. Network
resource sharing (or link sharing) is done using a bandwidth-management hierarchy where multiple
traffic classes share available bandwidth in a controlled manner.
Note:
The ProxySG does not try to reserve any bandwidth on the network links that it is attached to
or otherwise guarantee that the available bandwidth on the network can sustain any of the
bandwidth limits which have been configured on it. The ProxySG can only shape the various
traffic flows passing through it, and prioritize some flows over others according to its
configuration.
By managing the bandwidth of specified classes of network traffic, you can do the following:
•
Guarantee that certain traffic classes receive a specified minimum amount of available bandwidth.
•
Limit certain traffic classes to a specified maximum amount of bandwidth.
•
Prioritize certain traffic classes to determine which classes have priority over available bandwidth.
Licensing
Bandwidth-management is enabled by default if you have a valid license for this feature. For
information about obtaining a bandwidth-management license, refer to Chapter 2: “Licensing” on
page 35.
Bandwidth Management Terms
Some of the terms used in this document are described below.
•
Bandwidth Class: A defined unit of bandwidth allocation. An administrator uses bandwidth
classes to allocate bandwidth to a particular type of traffic flowing through the ProxySG.
•
Bandwidth Class Hierarchy: Bandwidth classes can be grouped together in a class hierarchy,
which is a tree structure that specifies the relationship among different classes. You create a
hierarchy by creating at least one parent class and assigning other classes to be its children.
•
Bandwidth Policy: The set of rules that you define in the policy layer to identify and classify the
traffic in the ProxySG, using the bandwidth classes that you create. You must use policy (through
either VPM or CPL) in order to manage bandwidth.
•
Child Class: The child of a parent class is dependent upon that parent class for available
bandwidth (they share the bandwidth in proportion to their minimum/maximum bandwidth
values and priority levels). A child class with siblings (classes with the same parent class) shares
bandwidth with those siblings in the same manner.
•
Inbound Traffic: Network packets flowing into the ProxySG. Inbound traffic mainly consists of the
following:
375
Blue Coat ProxySG Configuration and Management Guide
❐
Server inbound: packets originating at the origin content server (OCS) and sent to the
ProxySG to load a web object.
❐
Client inbound: packets originating at the client and sent to the ProxySG for Web requests.
•
OCS: Origin content server.
•
Outbound Traffic: Network packets flowing out of the ProxySG. Outbound traffic mainly consists
of the following:
❐
Client outbound: packets sent to the client in response to a Web request.
❐
Server outbound: packets sent to an OCS or upstream proxy to request a service.
•
Parent Class: A class with at least one child. The parent class must share its bandwidth with its
child classes in proportion to the minimum/maximum bandwidth values or priority levels.
•
Sibling Class: A bandwidth class with the same parent class as another class.
•
Traffic Flow: Also referred to as flow. A set of packets belonging to the same TCP/UDP connection
that terminate at, originate at, or flow through the ProxySG. A single request from a client
involves two separate connections. One of them is from the client to the ProxySG, and the other is
from the ProxySG to the OCS. Within each of these connections, traffic flows in two directions—in
one direction, packets flow out of the ProxySG (outbound traffic), and in the other direction,
packets flow into the ProxySG (inbound traffic). Connections can come from the client or the
server. Thus, traffic can be classified into one of four types:
❐
Server inbound
❐
Server outbound
❐
Client inbound
❐
Client outbound
These four traffic flows represent each of the four combinations described above. Each flow
represents a single direction from a single connection.
Bandwidth Management Overview
To manage the bandwidth of different types of traffic that flow into, out of, or through the ProxySG,
you must do the following:
•
Determine how many bandwidth classes you need and how to configure them to accomplish your
bandwidth management goals. This includes determining the structure of one or more bandwidth
hierarchies if you want to use priority levels to manage bandwidth.
•
Create and configure bandwidth classes accordingly.
•
Create policy rules using those bandwidth classes to identify and classify the traffic in the
ProxySG.
•
Enable bandwidth management.
Bandwidth management configuration consists of two areas:
•
376
Bandwidth allocation
Chapter 10: Bandwidth Management
This is the process of creating and configuring bandwidth classes and placing them into a
bandwidth class hierarchy. This process can be done using either the Management Console or the
CLI.
•
Flow classification
This is the process of classifying traffic flows into bandwidth management classes using policy
rules. Policy rules can classify flows based on any criteria testable by policy. You can create policy
rules using either the Visual Policy Manager (VPM), which is accessible through the Management
Console, or by composing Content Policy Language (CPL). For more information about using
VPM to create policy rules, see Chapter 14: “The Visual Policy Manager” on page 453. For
information about composing CPL, refer to the Blue Coat ProxySG Content Policy Language Guide.
Bandwidth Allocation
The process of defining bandwidth classes and grouping them into a bandwidth class hierarchy is
called bandwidth allocation. Bandwidth allocation is based on:
•
the placement of classes in a hierarchy (the parent/child relationships)
•
the priority level of classes in the same hierarchy
•
the minimum and/or maximum bandwidth setting of each class
For example deployment scenarios, see "Bandwidth Allocation and VPM Examples" on page 388.
Bandwidth Classes
To define a bandwidth class, you will create the class, giving it a name meaningful to the purpose for
which you are creating it. You can configure the class as you create it or edit it later. The configuration
settings available are:
•
Parent: Used to create a bandwidth-management hierarchy.
•
Minimum Bandwidth: Minimum amount of bandwidth guaranteed for traffic in this class.
•
Maximum Bandwidth: Maximum amount of bandwidth allowed for traffic in this class.
•
Priority: Relative priority level among classes in the same hierarchy.
Parent Class
A parent class is a class that has children. When you create or configure a bandwidth class, you can
specify another class to be its parent (the parent class must already exist). Both classes are now part of
the same bandwidth-class hierarchy, and so are subject to the hierarchy rules (see "Class Hierarchy
Rules and Restrictions" on page 379).
377
Blue Coat ProxySG Configuration and Management Guide
Minimum Bandwidth
Setting a minimum for a bandwidth class guarantees that class will receive at least that amount of
bandwidth, if the bandwidth is available. If multiple hierarchies are competing for the same available
bandwidth, or if the available bandwidth is not enough to cover the minimum, bandwidth
management will not be able to guarantee the minimums defined for each class.
Note:
The ProxySG does not try to reserve any bandwidth on the network links that it is attached to
or otherwise guarantee that the available bandwidth on the network can be used to satisfy
bandwidth class minimums. The ProxySG can only shape the various traffic flows passing
through it, and prioritize some flows over others according to its configuration.
Maximum Bandwidth
Setting a maximum for a bandwidth class puts a limit on how much bandwidth will be available to
that class. It does not matter how much bandwidth is available; a class can never receive more
bandwidth than its maximum.
To keep a bandwidth class from using more than its maximum, the ProxySG inserts delays before
sending packets associated with that class until the bandwidth used is no more than the specified
maximum. This results in queues of packets (one per class) waiting to be sent. These queues allow the
ProxySG to use priority settings to determine which packet gets sent next. If no maximum bandwidth
is set, every packet is sent as soon as it arrives, so no queue is built and nothing can be prioritized.
Unlike minimums and priority levels, the maximum-bandwidth setting can slow down traffic on
purpose. Unused bandwidth can go to waste with the maximum-bandwidth setting, while the
minimum-bandwidth settings and priority levels will always distribute any unused bandwidth as
long as classes request it. However, priority levels are not meaningful without a maximum
somewhere in the hierarchy. If a hierarchy has no maximums, any class in the hierarchy can request
and receive any amount of bandwidth regardless of its priority level.
Priority
When sharing excess bandwidth with classes in the same hierarchy, the class with the highest priority
gets the first opportunity to use excess bandwidth. When the high-priority class uses all the
bandwidth it needs or is allowed, the next class gets to use the bandwidth, if any remains. If two
classes in the same hierarchy have the same priority, then excess bandwidth is shared in proportion to
their maximum bandwidth setting.
Class Hierarchies
Bandwidth classes can be grouped together to form a class hierarchy. Creating a bandwidth class
allows you to allocate a certain portion of the available bandwidth to a particular type of traffic.
Putting that class into a bandwidth-class hierarchy with other bandwidth classes allows you to specify
the relationship among various bandwidth classes for sharing available (unused) bandwidth.
The way bandwidth classes are grouped into the bandwidth hierarchy determines how they share
available bandwidth among themselves. You create a hierarchy so that a set of traffic classes can share
unused bandwidth. The hierarchy starts with a bandwidth class you create to be the top-level parent.
Then you can create other bandwidth classes to be the children of the parent class, and those children
can have children of their own.
378
Chapter 10: Bandwidth Management
In order to manage the bandwidth for any of these classes, some parent in the hierarchy must have a
maximum bandwidth setting. The classes below that parent can then be configured with minimums
and priority levels to determine how unused bandwidth is shared among them. If none of the higher
level classes have a maximum bandwidth value set, then bandwidth will flow from the parent to the
child classes without limit. In that case, minimums and priority levels are meaningless, because all
classes get all the bandwidth they need at all times. The bandwidth, in other words, is not being
managed.
Class Hierarchy Rules and Restrictions
Certain rules and restrictions must be followed to create a valid BWM class hierarchy:
•
Each traffic flow can only belong to one bandwidth management class.
You can classify multiple flows into the same bandwidth class, but any given flow will always be
counted as belonging to a single class. If multiple policy rules match a single flow and try to
classify it into multiple bandwidth classes, the last classification done by policy will apply.
•
When a flow is classified as belonging to a bandwidth class, all packets belonging to that flow will
be counted against that bandwidth class.
•
If a minimum bandwidth is configured for a parent class, it must be greater than or equal to the
sum of the minimum bandwidths of its children.
•
If a maximum bandwidth is configured for a parent class, it must be greater than or equal to the
largest maximum bandwidth set on any of its children. It must also be greater than the sum of the
minimum bandwidths of all of its children.
•
The minimum bandwidth available to traffic directly classified to a parent class is equal to its
assigned minimum bandwidth minus the minimum bandwidths of its children. For example, if a
parent class has a minimum bandwidth of 600 kbps and each of its two children have minimums
of 300 kbps, the minimum bandwidth available to traffic directly classified into the parent class
is 0.
Relationship among Minimum, Maximum, and Priority Values
Maximum values can be used to manage bandwidth for classes whether or not they are placed into a
hierarchy. This is not true for minimums and priorities, which can only manage bandwidth for classes
that are placed into a hierarchy. Additionally, a hierarchy must have a maximum configured on a
high-level parent class in order for the minimums and priorities to manage bandwidth.
This is because, without a maximum, bandwidth goes to classes without limit and there is no point to
setting priorities or minimum guarantees. Bandwidth cannot be managed unless a maximum limit is
set somewhere in the hierarchy.
When a hierarchy has a maximum on the top-level parent and minimums, maximums and priorities
placed on the classes related to that parent, the following conditions apply:
•
If classes in a hierarchy have minimums, the first thing that happens with available bandwidth is
that all the minimum requests are satisfied. If the amount requested is less than the minimum for
any class, it receives the entire amount, and its priority level does not matter.
Keep in mind that, even though a minimum is considered to be a guaranteed amount of
bandwidth, satisfying minimums is dependent on the parent being able to receive its own
maximum, which is not guaranteed.
379
Blue Coat ProxySG Configuration and Management Guide
•
When all of the classes in a hierarchy have had their minimums satisfied, any additional requests
for bandwidth will have to be obtained.When a class requests more than its minimum, it must
obtain bandwidth from its parent or one of its siblings. If, however, a class requests more than its
maximum, that request will be denied—no class with a specified maximum is ever allowed more
than that amount.
•
If a class does not have a minimum specified, it will have to obtain all of the bandwidth it requests
from its parents or siblings, and it cannot receive any bandwidth unless all of the minimums
specified in the other classes in its hierarchy are satisfied.
•
Classes obtain bandwidth from their parents or siblings based on their priority levels—the highest
priority class gets to obtain what it needs first, until either its entire requested bandwidth is
satisfied or until it reaches its maximum. After that, the next highest priority class gets to obtain
bandwidth, and this continues until either all the classes have obtained what they can or until the
maximum bandwidth available to the parent has been reached. The amount available to the
parent can sometimes be less than its maximum, because the parent must also participate in
obtaining bandwidth in this way with its own siblings and/or parent if it is not a top-level class.
Flow Classification
You can classify flows to BWM classes by writing policy rules that specify the bandwidth class that a
particular traffic flow belongs to. A typical transaction has four traffic flows:
1.
Client inbound—traffic flowing into the ProxySG from a client (the entity sending a request, such
as a client at a remote office linked to the ProxySG).
2.
Server outbound—traffic flowing out of the ProxySG to a server.
3.
Server inbound—traffic flowing back into the ProxySG from a server (the entity responding to the
request).
4.
Client outbound—traffic flowing back out of the ProxySG to a client.
Figure 10-1 shows the traffic flows between a client and server via the ProxySG.
Figure 10-1: Network Configuration Showing Traffic Flow Directions
380
Chapter 10: Bandwidth Management
Some types of traffic can flow in all four directions. The following example describes different
scenarios that you might see with an HTTP request. A client sends a GET to the ProxySG (client
inbound). The ProxySG then forwards this GET to a server (server outbound). The server responds to
the ProxySG with the appropriate content (server inbound), and then the ProxySG delivers this
content to the client (client outbound).
Policy allows you to configure different classes for each of the four traffic flows. See "Using Policy to
Manage Bandwidth" on page 387 for information about classifying traffic flows with policy.
Configuring Bandwidth Allocation
You can use either the Management Console or the CLI to do the following tasks:
•
Enable or disable bandwidth management.
•
Create and configure bandwidth classes.
•
Delete bandwidth classes.
•
View bandwidth management class configurations.
Note:
If you are planning to manage the bandwidth of streaming media protocols (Windows Media,
Real Media, or QuickTime), you might want to use the streaming features instead of the
bandwidth management features described in this section. For most circumstances, Blue Coat
recommends that you use the streaming features to control streaming bandwidth rather than
the bandwidth management features. For information about the differences between these
two methods, see "Choosing a Method to Limit Streaming Bandwidth" on page 594.
Enabling or Disabling Bandwidth Management
The following procedures explain how to enable or disable bandwidth management through the
Management Console or the CLI.
Note:
Bandwidth management is enabled by default if you have a valid license for this feature. For
information about getting a license for bandwidth management, see Chapter 2: “Licensing”
on page 35.
To Enable or Disable Bandwidth Management through the Management Console
1.
Select Configuration>Bandwidth Management>BWM Classes>Bandwidth Classes.
The Bandwidth Classes tab displays.
381
Blue Coat ProxySG Configuration and Management Guide
Figure 10-2: Bandwidth Classes Tab
2.
To enable or disable bandwidth management, select or deselect the Enable Bandwidth Management
checkbox.
3.
Click Apply.
To Enable or Disable Bandwidth Management through the CLI
At the (config) command prompt, enter the following commands to enable or disable bandwidth
management:
SGOS#(config) bandwidth-management
SGOS#(config bandwidth-management) enable | disable
Creating and Editing Bandwidth Classes
The following procedures detail how to create and edit a bandwidth management class.
To Create a BWM Class through the Management Console
1.
Select Configuration>Bandwidth Management>BWM Classes>Bandwidth Classes.
The Bandwidth Classes tab displays.
2.
To create a new BWM class, click New.
The Create Bandwidth Class dialog displays.
382
Chapter 10: Bandwidth Management
Figure 10-3: Create Bandwidth Class Dialog
3.
Fill in the fields as appropriate:
❐
Class name: Assign a meaningful name for this class. The name can be up to 64 characters long;
spaces are not allowed.
❐
Parent: If you want the class you are creating to be the child of another class in the bandwidth
class hierarchy, choose a class from the Parent drop-down list. This class must already exist.
❐
Min. Bandwidth: To set a minimum bandwidth for this class in kilobits per second (kbps), select
the Min. Bandwidth checkbox and enter a minimum bandwidth value in the field. The default
minimum bandwidth setting is Unspecified, meaning the class is not guaranteed a minimum
amount of bandwidth.
❐
Max. Bandwidth: To set a maximum bandwidth for this class in kbps, select the Max. Bandwidth
checkbox and enter a maximum bandwidth value in the field. The default maximum
bandwidth setting is Unlimited, meaning the class is not limited to a maximum bandwidth
value by this setting.
❐
Priority: Select a priority level for this class from the Priority drop-down list—0 is the lowest
priority level and 7 is the highest. The default priority is 0.
4.
Click OK.
5.
Click Apply.
To Create a BWM Class through the CLI
1.
At the (config) command prompt, enter the following commands to create a new BWM class:
SGOS#(config) bandwidth-management
SGOS#(config bandwidth-management) create bwm_class
where bwm_class will be the name of the new BWM class.
2.
Configure the newly created bandwidth class (see "To Edit a BWM Class through the CLI" on
page 384 for instructions).
To Edit a BWM Class through the Management Console
1.
Select Configuration>Bandwidth Management>BWM Classes>Bandwidth Classes.
The Bandwidth Classes tab displays.
383
Blue Coat ProxySG Configuration and Management Guide
2.
Highlight the class that you want to edit and click Edit.
The Edit Class dialog displays.
Figure 10-4: Edit Class Dialog
3.
Fill in the fields as appropriate:
❐
Class Name: this field cannot be edited. To change the name of a class, you must delete the
class and create a new one with the new name.
❐
Parent: If you want the class you are editing to be the child of another class in the bandwidth
class hierarchy, choose a class from the Parent drop-down list.
❐
Min. Bandwidth: To set a minimum bandwidth for this class in kilobits per second (kbps), select
the Min. Bandwidth checkbox and enter a minimum bandwidth value in the field. The default
minimum bandwidth setting is Unspecified, meaning the class is not guaranteed a minimum
amount of bandwidth.
❐
Max. Bandwidth: To set a maximum bandwidth for this class in kbps, select the Max. Bandwidth
checkbox and enter a maximum bandwidth value in the field. The default maximum
bandwidth setting is Unlimited, meaning the class is not limited to a maximum bandwidth
value by this setting.
❐
Priority: Select a priority level for this class from the Priority drop-down list—0 is the lowest
priority level and 7 is the highest. The default priority is 0.
4.
Click OK.
5.
Click Apply.
To Edit a BWM Class through the CLI
1.
To set the priority level and minimum/maximum bandwidth values for an existing BWM class,
enter the following commands:
SGOS#(config) bandwidth-management
SGOS#(config bandwidth-management) edit bwm_class
This changes the prompt and puts you into the Bandwidth-Class submode.
SGOS#(config bw-class bwm_class) min-bandwidth minimum_in_kbps
SGOS#(config bw-class bwm_class) max-bandwidth maximum_in_kbps
SGOS#(config bw-class bwm_class) priority value_from_0_to_7
384
Chapter 10: Bandwidth Management
where:
2.
min-bandwidth
minimum_in_kbps
Sets the minimum bandwidth for this
class in kilobits per second. The default
for this setting is unspecified, meaning
that the class is not guaranteed a
minimum amount of bandwidth.
max-bandwidth
maximum_in_kbps
Sets the maximum bandwidth for this
class in kilobits per second. The default
for this setting is unlimited (no
maximum).
priority
value_from_0_to_7
Sets the priority level for this class—0 is
the lowest priority level and 7 is the
highest. The default priority is 0.
(Optional) To reset the values to the defaults, enter the following commands:
SGOS#(config bandwidth-management bwm_class) no {min-bandwidth |
max-bandwidth}
where:
3.
no min-bandwidth
Sets the default minimum to the default, unspecified (no
minimum bandwidth guarantee).
no max-bandwidth
Sets the maximum-bandwidth setting to the default, unlimited (no
maximum).
To make this class a child of another class or to clear the parent class from this class, enter one of
the following commands:
SGOS#(config bandwidth-management bwm_class) parent parent_class_name
-orSGOS#(config bandwidth-management bwm_class) no parent
4.
To view the configuration for this class, enter the following command:
SGOS#(config bandwidth-management bwm_class) view
For example:
SGOS#(config bandwidth-management Office_A) view
Class Name:
Office_A
Parent:
<none>
Minimum Bandwidth:
unspecified
Maximum Bandwidth:
750 kbps
Priority:
0
5.
To view the configuration of any child classes of this class, enter the following command:
SGOS#(config bandwidth-management bwm_class) view children
385
Blue Coat ProxySG Configuration and Management Guide
Deleting a Bandwidth Management Class
The following procedures explain how to delete a bandwidth management class through the
Management Console or the CLI.
Note:
You cannot delete a class that is referenced by another class or by the currently installed
policy. For instance, you cannot delete a class that is the parent of another class or one that is
used in an installed policy rule. If you attempt to do so, a message will display explaining
why this class cannot be deleted.
To Delete a BWM Class through the Management Console
1.
Select Configuration>Bandwidth Management>BWM Classes>Bandwidth Classes.
The Bandwidth Classes tab displays.
2.
Highlight the class you want to delete and click the Delete button.
The Remove Object dialog displays.
3.
Click Yes to delete the class.
4.
Click Apply.
To Delete a BWM Class through the CLI
At the (config) command prompt, enter the following command to delete the specified BWM class:
SGOS#(config) bandwidth-management
SGOS#(config bandwidth-management) delete bwm_class
Viewing Bandwidth Management Configurations and Statistics
You can view bandwidth management configurations to see what the settings are for each class, and
you can view bandwidth management statistics to see the current and total bandwidth, packet rate,
and number of drops (the total number of packets dropped).
Bandwidth management configurations (minimum/maximum bandwidth, priority level, and
hierarchy relationships) are visible in the Management Console. The view commands allow you to
view the same information in the CLI. See "Bandwidth Management Statistics" on page 849 for
information about viewing bandwidth management statistics.
Viewing Bandwidth Management Configurations
You can view the following bandwidth class configurations through the Management Console or CLI:
•
Level in the hierarchy (parent/child relationships)
•
Priority level
•
Maximum bandwidth value
•
Minimum bandwidth value
To View BWM Configuration through the Management Console
1.
386
Select Configuration>Bandwidth Management>BWM Classes>Bandwidth Classes.
Chapter 10: Bandwidth Management
The Bandwidth Classes tab displays. On this tab, you can view a class’s minimum, maximum and
priority value. Top level classes are visible—classes with children have a folder icon on the left.
2.
To view the configurations of the child class(es) of a class, double-click the folder icon.
The child classes become visible. A second double-click closes the folder.
To View BWM Configuration through the CLI
1.
To view all BWM configuration information, enter the following commands at the (config)
command prompt:
SGOS#(config) bandwidth-management
SGOS#(config bandwidth-management) view configuration
2.
To view the BWM configuration for a specific class, enter the following command:
SGOS#(config bandwidth-management) view configuration bwm_class
For example:
SGOS#(config bandwidth-management) view configuration Office_A
Class Name:
Office_A
Parent:
<none>
Minimum Bandwidth:
unspecified
Maximum Bandwidth:
750 kbps
Priority:
0
3.
To view the BWM configuration for the children of a specific class, enter the following commands:
SGOS#(config bandwidth-management) edit bwm_class
SGOS#(config bw-class bwm_class) view children
Viewing Bandwidth Management Statistics
See "Bandwidth Management Statistics" on page 849 for information about viewing BWM statistics.
Using Policy to Manage Bandwidth
Once you have created and configured bandwidth management classes, you need to create policy
rules to classify traffic flows using those classes. Each policy rule can only apply to one of four traffic
flow types:
•
Client inbound
•
Client outbound
•
Server inbound
•
Server outbound
You can use the same bandwidth management classes in different policy rules, so that one class can
manage bandwidth for several types of flows based on different criteria. However, any given flow will
always be counted as belonging to a single class. If multiple policy rules match a flow and try to
classify it into multiple bandwidth classes, the last classification done by policy will apply.
387
Blue Coat ProxySG Configuration and Management Guide
To manage the bandwidth classes you have created, you can either compose CPL (see "CPL Support
for Bandwidth Management" below) or you can use VPM (see "VPM Support for Bandwidth
Management" on page 388). To see examples of policy using these methods, see "Bandwidth
Allocation and VPM Examples" on page 388 or "Policy Examples: CPL" on page 396.
CPL Support for Bandwidth Management
You must use policy to classify traffic flows to different bandwidth classes. Refer to the Blue Coat
ProxySG Content Policy Language Guide for more information about writing and managing policy.
CPL Triggers
You can use all of the CPL triggers for BWM classification (refer to the Blue Coat ProxySG Content
Policy Language Guide for information about using CPL triggers). Note that basing a bandwidth
decision on a trigger means that the decision will not take effect until after the information needed to
make that decision becomes available. For example, if you set the CPL to trigger on the MIME type of
the HTTP response, then the HTTP headers must be retrieved from the OCS before a classification can
be made. The decision to retrieve those headers is made too late to count any of the request bytes from
the client or the bytes in the HTTP response headers. However, the decision would affect the bytes in
the body of the HTTP response and any bytes sent back to the client.
Supported CPL
Bandwidth class can be set with policy on each of these four traffic flows:
•
limit_bandwidth.client.inbound(none | bwm_class)
•
limit_bandwidth.client.outbound(none | bwm_class)
•
limit_bandwidth.server.inbound(none | bwm_class)
•
limit_bandwidth.server.outbound(none | bwm_class)
If you set policy to none, the traffic is unclassified and it will not be bandwidth-managed.
VPM Support for Bandwidth Management
You can manage bandwidth using VPM in the Action column of four policy layers: Web Access, DNS
Access, Web Content, and Forwarding Layers. For more information about using VPM to manage
bandwidth, see "Manage Bandwidth" on page 518. For examples of bandwidth management scenarios
using VPM, see "Bandwidth Allocation and VPM Examples" below.
Bandwidth Allocation and VPM Examples
This section illustrates how to allocate bandwidth, arrange hierarchies, and create policy using the
Visual Policy Manager. It describes an example deployment scenario and the tasks an administrator
must accomplish to manage the bandwidth for this deployment. For specific instructions about
allocating bandwidth through either the Management Console or the CLI, see "Configuring
Bandwidth Allocation" on page 381. For examples of bandwidth management tasks done by
composing CPL, see "Policy Examples: CPL" on page 396.
388
Chapter 10: Bandwidth Management
Task One: Bandwidth Allocation
The administrator is responsible for managing the bandwidth of three branch offices. He has been told
to make sure that each office uses no more than half of its total link bandwidth for Web and FTP traffic.
The total link bandwidth of each office is as follows:
•
Office A: 1.5 Mb
•
Office B: 1 Mb
•
Office C: 2 Mb
He creates one bandwidth class for each of the three offices and configures the maximum bandwidth
to an amount equal to half of the total link bandwidth of each, as shown in Figure 10-5. He also creates
policy rules for each class, as described below in "Task One: VPM".
Figure 10-5: Bandwidth Hierarchy Diagram One
Each of the classes in Figure 10-5 has a maximum set at an amount equal to half of the total link
bandwidth for each office. A hierarchy does not exist in this scenario.
Task One: VPM
The administrator has created one bandwidth class for each office, setting a maximum bandwidth on
each one equal to the half of the total link bandwidth of each. Now he must create policy rules to
classify the traffic flows.
The administrator launches VPM and creates a new Web Access Layer, calling it FTP/HTTP
Limitations. He selects the Client IP Address/Subnet object in the Source column, filling in the IP
address and mask of the subnet used by Office_A, as shown in Figure 10-6.
389
Blue Coat ProxySG Configuration and Management Guide
Figure 10-6: Adding the Client IP Address and Subnet Mask to the Source Column
He selects a Combined Service Object in the Service column, calling it FTP/HTTP and adding a Client
Protocol for FTP and for HTTP. In the Add Combined Service Object dialog, he adds both protocols to
the top box, as shown in Figure 10-7.
Figure 10-7: Adding Protocols to a Combined Service Object
In the Action column, he selects Manage Bandwidth, naming it Office_A and setting it to manage the
bandwidth of Office_A on the Client side in the Outbound direction, as shown in Figure 10-8.
390
Chapter 10: Bandwidth Management
Figure 10-8: Manage Bandwidth Action Object
He adds two more similar rules for the other two offices. He is able to reuse the same Combined
Service Object in the Service column, but must add new objects specific to each office in the Source and
Action columns. The order of the rules does not matter here, because each office, and thus each rule, is
distinct because of its IP address/subnet mask configuration.
Task Two: Bandwidth Allocation
A few days later, the administrator gets a visit from the CEO of his company. She wants him to fix it so
that she can visit any of the branch offices without having her own Web and FTP access slowed down
unnecessarily.
The administrator creates two more classes for each office: one for the CEO and another for everyone
else (employees). He sets the parent class of each new class to the appropriate class that he created in
Task One. For instance, he creates Emp_A and CEO_A and sets their parent class to Office_A. He also
sets a priority level for each class: 0 (the lowest) for employees and 1 for the CEO. He then uses VPM
to create additional policy rules for the new classes (see "Task Two: VPM" below). Figure 10-9 shows
the hierarchical relationship among all of the classes.
Figure 10-9: Bandwidth Hierarchy Diagram Two
The administrator now has three separate hierarchies. In each one, bandwidth is limited by the
configuration of the parent class, and the two child classes are prioritized to determine how they share
any unused bandwidth. Because no minimums have been set, the highest priority class has the first
opportunity to use all of the available bandwidth; whatever is left then goes to the next priority class.
Priority levels are only effective among the classes in the same hierarchy. This means that the priority
levels for the Office_A hierarchy do not affect the classes in the Office_B or Office_C hierarchies.
391
Blue Coat ProxySG Configuration and Management Guide
Task Two: VPM
Because the CEO wants to prioritize FTP and HTTP access among employees and herself, the
administrator must create additional bandwidth classes (as described above in "Task Two: Bandwidth
Allocation") and write policy rules to classify the traffic for the new classes.
He first edits each of the three VPM rules for the three offices. He edits each the Manage Bandwidth
objects, changing the name of the objects to Emp_A, Emp_B, and Emp_C and changes the bandwidth
class to the corresponding employee class (see Figure 10-10).
Figure 10-10: Editing the Bandwidth Management Object
Next he creates three more rules for the CEO, moving them above the first three rules. For the CEO
rules, he selects the same combined FTP/HTTP object in the Service column; in the Action column, he
selects a Manage Bandwidth object configured for client side/outbound, as before, but this time, he
names the objects CEO_A, CEO_B, and CEO_C and selects the corresponding CEO bandwidth class.
In the Source column, he creates a Combined Source Object, naming it for the CEO. He combines the
the Client IP/subnet object already created for each office with a User object that he creates for the
CEO, as shown in Figure 10-11.
392
Chapter 10: Bandwidth Management
Figure 10-11: Adding a Combined Source Object
The administrator places all three CEO rules above the employee rules, because the ProxySG looks for
the first rule that matches a given situation and ignores the remaining rules. If he had placed the CEO
rules below the employee rules, the ProxySG would never get to the CEO rules, because the CEO’s
Web surfing client IP address matches both the CEO rules and the employee rules, and the ProxySG
would stop looking after the first match. With the CEO rules placed first, the ProxySG will apply the
CEO rules to the CEO’s Web surfing, and an employee’s Web surfing will not trigger the CEO rules
and will instead skip ahead to the appropriate employee rule.
Task Three: Bandwidth Allocation
It soon becomes apparent that CEO visits are causing problems for the branch offices. At times, she
uses all of the available bandwidth, resulting in decreased productivity throughout the office she
visits. Also, management has complained that they have been given the same priority for FTP and
HTTP traffic as regular employees, and they are requesting that they be given priority over employees
for this type of traffic.
First, the administrator creates two new classes for each office. In this example, we will look at the
classes and configurations for the first office only. He creates a class called Staff_A and sets a minimum
bandwidth of 500 kbps on it. He also creates a class called Mgmt_A, setting the priority to 1 and the
parent to Staff_A. He edits the class Emp_A, setting the parent to Staff_A. Finally, he edits the class
CEO_A, changing the priority to 2. The resulting hierarchy is illustrated in Figure 10-12. To see what
the administrator did to the policy rules, see "Task Three: VPM" below.
393
Blue Coat ProxySG Configuration and Management Guide
Figure 10-12: Bandwidth Hierarchy Diagram Three
In the example illustrated above, employees and management combined are guaranteed a total of 500
kbps. The CEO’s priority level has no effect until that minimum is satisfied. This means that the CEO
can only use 250 kbps of bandwidth if the rest of the staff are using a total of 500 kbps. It also means
that the CEO can use 750 kbps if no one else is using bandwidth at the time. In fact, any of the classes
can use 750 kbps if the other classes use none.
Priority levels kick in after all of the minimums are satisfied. In this example, if the staff requests more
than 500 kbps, they can only receive it if the CEO is using less than 250 kbps. Now notice that the
minimum setting for the staff is set on the parent class, Staff_A, and not on the child classes, Emp_A or
Mgmt_A. This means that the two child classes, representing employees and management, share a
minimum of 500 kbps. But they share it based on their priority levels. This means that management
has priority over employees. The employees are only guaranteed a minimum if management is using
less than 500 kbps.
Task Three: VPM
The administrator has added additional classes for each office and edited the existing employee
classes, as described above in "Task Three: Bandwidth Allocation". One of the new classes he added
for each office is a parent class that will not have traffic classified to it; it was created to provide a
minimum amount of bandwidth to its child classes. Not every class in the hierarchy has to have a
traffic flow. This means that he needs to add just three more rules for the three new management
classes. For the management rules, he selects the same combined FTP/HTTP object in the Service
column; in the Action column, he selects a Manage Bandwidth object configured for client
side/outbound with the bandwidth class one of the management classes (Mgmt_A, Mgmt_B, or
Mgmt_C). In the Source column, he creates a Combined Source Object containing the subnet object for
the office and the Group object for management.
The management rules must go above the employee rules, although it does not matter where they are
placed in relation to the CEO rules. This would not be true if the CEO was part of the same group as
management, however. If that were true, the CEO rules would still need to go on top.
Task Four: Bandwidth Allocation
The administrator decided later that he needed to guarantee employees some bandwidth. He
configures a minimum for the class Emp_A, as illustrated in Figure 10-13.
394
Chapter 10: Bandwidth Management
Figure 10-13: Bandwidth Hierarchy Diagram Four
He decides to leave the minimum on the parent class Staff_A and not to set a minimum for the class
Mgmt_A. This is okay, because the minimum of the parent class is available to its children if the parent
class does not use all of it, and the only way that the CEO can get more than 250 kbps is if the
employees and management combined use less than 500.
This last change does not require additional changes to policy; the administrator has added a
minimum to a class that he has already classified for traffic using policy.
In the above scenario, the class called Staff_A does not have traffic configured for it—it was created to
guarantee bandwidth minimums for its child classes. However, if it were configured for traffic, it
would have a practical minimum of 300 kbps. The practical minimum of a parent class is equal to its
assigned minimum bandwidth minus the minimums of its children. In that case, if the parent class
Staff_A used 300 kbps and the child class Emp_A used 200 kbps, the child class Mgmt_A would not
receive any bandwidth unless the class CEO_A was using less than 250 kbps. Under those
circumstances, the administrator would probably need to create a minimum for management as well.
Task Five: Bandwidth Allocation
The CEO makes another request, this time for the main office, the one the administrator himself works
from. This office uses the content filtering feature of the ProxySG to control the types of Web sites that
employees are allowed to view. Although the office uses content filtering, access to sports sites is not
restricted because the CEO is a big fan.
The administrator creates a bandwidth management class called Sports with a maximum bandwidth
of 500 kbps and launches VPM to create policy for this class as described below.
Task Five: VPM
To classify traffic for the Sports class, the administrator opens VPM, creates a Web Access Layer, and
sets the Destination column to the Category object that includes sports viewing (content filtering is
already set up in VPM). He sets the Action column to the Manage Bandwidth object, selecting Server
side/Inbound and the Sports bandwidth class he created. After installing the policy and making sure
that bandwidth management is enabled, he’s finished.
395
Blue Coat ProxySG Configuration and Management Guide
Policy Examples: CPL
The examples below are complete in themselves. The administrator uses CLI to create and configure
bandwidth management classes and writes CPL to classify traffic flow for these classes. These
examples do not make use of a bandwidth class hierarchy. For examples of hierarchies, see
"Bandwidth Allocation and VPM Examples" on page 388.
Example One: CPL
In this example, the administrator of a college is asked to prevent college students from downloading
MP3 files during peak hours, while still allowing the music department to download MP3 files at any
time. The CPL triggers used are authentication and/or source subnet and MIME type. The action
taken is to limit the total amount of bandwidth consumed by students to 40 kbps.
CLI commands:
SGOS#(config) bandwidth-management
SGOS#(config bandwidth-management) create mp3
SGOS#(config bandwidth-management) edit mp3
SGOS#(config bw-class mp3) max-bandwidth 40
CPL:
define condition student_mp3_weekday
client_address=student_subnet response_header.Content-Type="audio/mpeg" \
weekday=1..5 hour=9..16
end condition
<proxy>
condition=student_mp3_weekday limit_bandwidth.server.inbound(mp3)
Example Two: CPL
In this example, an administrator must restrict the amount of bandwidth used by HTTP POST
requests for file uploads from clients to 2 Mbps. The CPL trigger used is request method, and the
action taken is to throttle (limit) the amount of bandwidth used by client side posts by limiting
inbound client side flows.
CLI commands:
SGOS#(config) bandwidth-management
SGOS#(config bandwidth-management) create http_post
SGOS#(config bandwidth-management) edit http_post
SGOS#(config bw-class http_post) max-bandwidth 2000
CPL:
define condition http_posts
http.method=POST
end condition
<proxy>
condition=http_posts limit_bandwidth.client.inbound(http_post)
396
Chapter 10: Bandwidth Management
Example Three: CPL
In this example, the administrator of a remote site wants to limit the amount of bandwidth used to
pre-populate the content from headquarters to 50 kbps during work hours. The CPL triggers used are
current-time and pre-population transactions. The action taken is to limit the total amount of
bandwidth consumed by pre-pop flows.
CLI commands:
SGOS#(config) bandwidth-management
SGOS#(config bandwidth-management) create pre-pop
SGOS#(config bandwidth-management) edit pre-pop
SGOS#(config bw-class pre-pop) max-bandwidth 50
CPL:
define condition prepop_weekday
content_management=yes weekday=1..5 hour=9..16
end condition
<proxy>
condition=prepop_weekday limit_bandwidth.server.inbound(pre-pop)
397
Blue Coat ProxySG Configuration and Management Guide
398
Chapter 11: External Services
This chapter describes how to configure the ProxySG to interact with external ICAP and Websense
servers to provide content scanning, content transformation, and content filtering services.
This chapter contains the following sections:
•
"Section A: ICAP"—Describes the ICAP protocol and describes how to create and manage ICAP
services and patience pages on the ProxySG.
•
"Section B: Websense"—Describes how to create a Websense service
•
"Section C: Service Groups"—Describes how to create service groups of ICAP or Websense entries
and configure load balancing.
•
"Section D: Displaying External Service and Group Information"—Describes how to display
external service configurations through the CLI.
Related Topics:
•
Appendix 12: "Health Checks"
•
Appendix 18: "Content Filtering"
399
Blue Coat ProxySG Configuration and Management Guide
Section A: ICAP
Section A: ICAP
This section describes the Internet Content Adaptation Protocol (ICAP) solution of content scanning
and modification.
When integrated with a supported ICAP server, the ProxySG provides content scanning, filtering, and
repair service for internet-based malicious code. ICAP is an evolving architecture that allows an
enterprise to dynamically scan and change Web content. To eliminate threats to the network and to
maintain caching performance, the ProxySG sends objects to the integrated ICAP server for checking
and saves the scanned objects in its object store. With subsequent content requests, the appliance
serves the scanned object rather than rescan the same object for each request.
Configuring ICAP on the ProxySG involves the following steps:
1.
Install the ICAP server.
2.
Configure the ProxySG to use ICAP and configure basic features.
3.
Define scanning policies, then load the policy file on the ProxySG.
Supported ICAP Servers
The ProxySG supports the following ICAP servers:
•
Symantec AntiVirus Scan Engine (SAVSE) 4.0, version 4.04.46; ICAP 1.0
•
Trend Micro InterScan WebProtect (ISWP) 1.5, build_SOL_1266; ICAP 1.0
•
WebWasher 4.4, build 552; ICAP 1.0
•
Finjan Vital Security for Web v7.0; Service Pack 2; build 4.552; ICAP 1.0
Note:
While SGOS 2.x supported ICAP v0.95 servers and services, SGOS 3.2.x does not. Upon
upgrading to SGOS 3.2.x, any configured v0.95 services become inactive.
ICAP v1.0 Features
This section describes features of the ICAP v1.0 protocol.
Sense Settings
The Sense Settings feature allows the ProxySG to query any identified ICAP server running v1.0,
detect the parameters, and configure the ICAP service as appropriate. See "Creating an ICAP Service"
on page 403.
ISTags
An ICAP v1.0 server is required to return in each response an ICAP header ISTag indicating the
current state of the ICAP server. This eliminates the need to designate artificial pattern version
numbers, as is required in v0.95.
400
Chapter 11: External Services
Section A: ICAP
Note:
Backing out a virus pattern on the ICAP server can revert ISTags to previous values that
are ignored by the ProxySG. To force the ProxySG to recognize the old value, use the
Sense Settings option as described in "Creating an ICAP Service" on page 403.
Persistent Connections
New ICAP connections are created dynamically as ICAP requests are received (up to the defined
maximum connection limit). The connection remains open to receive further requests. If a connection
error occurs, the connection closes to prevent further errors.
About Content Scanning
The ProxySG ICAP scanning solution prevents the spread of viruses and other malicious code by
serving content that has been scanned by a supported ICAP server.
Determining Which Files to Scan
In determining which files to scan, this integrated solution uses the content scanning server’s filtering
in addition to ProxySG capabilities. Table 11.1 describes the supported content types and protocols.
Table 11.1: Content Types Scanned By ICAP Server and the ProxySG
ICAP Server
supported content types
ProxySG
supported protocols
Unsupported content
protocols
All or specified file types, based
on file extension, as configured
on the server.
• HTTP objects
• Streaming content (for example,
RTSP and MMS)
Examples: .exe (executable
programs), .bat (batch
files), .doc and .rtf
(document files), and .zip
(archive files), or with specific
MIME types.
• FTP objects (uploads and
downloads)
• Live HTTP streams (for example,
HTTP radio streams)
• Transparent FTP responses
HTTPS connections terminated at
a ProxySG.
HTTPS connections tunneled through
a Blue Coat client-side ProxySG.
After the ProxySG retrieves a requested Web object from the origin server, it uses content scanning
policies to determine whether the object should be sent to the ICAP server for scanning. If cached
objects are not scanned or are scanned before a new pattern file was updated, the ProxySG rescans
those objects upon:
401
•
the next request for that object, or
•
the object is refreshed.
Blue Coat ProxySG Configuration and Management Guide
Section A: ICAP
With the ProxySG, you can define flexible, enterprise-specific content scanning policies. Consider the
following example. A business wants to scan software downloaded by employees from popular
shareware Web sites. To do this, the business defines an appliance policy that includes a custom
scanshareware action for the purpose. This rule includes URL domains related to the relevant
shareware Web sites.
Before continuing, plan the types of policies you want to use. For more information, see "Creating
ICAP Policy" on page 413.
Performing Response Modification
The ProxySG sends the first part (a preview) of the object to the ICAP server that supports response
modification. The object preview includes the HTTP request and response headers, and the first few
bytes of the object. After checking those bytes, the ICAP server either continues with the transaction
(that is, asks the ProxySG to send the remainder of the object for scanning) or sends a notification to
the appliance that the object is clean and opts out of the transaction.
The ICAP server features and configuration determine how scanning works, including the following:
•
Handling of certain objects, including those that are infected and cannot be repaired.
•
Whether to attempt to repair infected files.
•
Whether to delete infected files that cannot be repaired from the ICAP server’s archive.
Performing Request Modification
The ProxySG sends the client request to a ICAP server that supports request modification. The server
might then return an HTTP response to the client (for example, sports not allowed); or the client
request might be modified, such as stripping a referer header, before continuing to the origin content
server.
Note:
Some ICAP servers do not support virus scanning for request modification, only content
filtering.
Returning the Object to the ProxySG
This object may be the original unchanged object, a repaired version of the original object minus a
virus, or an error message indicating that the object contained a virus. Each of these responses is
configured on the ICAP server, independent of the appliance and the ICAP protocol. If the appliance
receives the error message, it forwards the error message to the client and does not save the infected
file.
402
Chapter 11: External Services
Section A: ICAP
Caching and Serving the Object
Once an object has been scanned and is determined cacheable, the ProxySG saves it and serves it for
the subsequent content requests. When the appliance detects that the cached content has changed on
the origin server, it fetches a fresh version, then forwards it to the ICAP server for scanning. If the
ProxySG uses policies in the ICAP configuration, the policy applies to content fetches, distributes, and
refreshes, as well as pipelining fetches.
For more information on policies, see "Creating ICAP Policy" on page 413. For more information on
the <Cache> layer, refer to the Blue Coat ProxySG Content Policy Language Guide.
Installing the ICAP Server
Follow the manufacturer instructions for installing the ICAP server, including any configuration
necessary to work with the Blue Coat ProxySG. Based on your network environment, you might use
the ProxySG with multiple ICAP servers or multiple scanning services on the same server. Configure
options as needed, including the error message displayed to end users in the event the requested
object was modified or blocked.
Creating an ICAP Service
An ICAP service on the ProxySG is specific to the ICAP server and includes the server IP address or
hostname, as well as the supported number of connections. If you are using the ProxySG with
multiple ICAP servers or multiple scanning services on the same server, add an ICAP service for each
server or scanning service.
To Create and Configure an ICAP Service through the Management Console:
403
1.
Select Configuration>External Services>ICAP Services.
2.
Click New; the Add List Item dialog appears.
3.
In the ICAP service name field, enter an alphanumeric name; click OK.
4.
Highlight the new ICAP service name and click Edit; the Edit ICAP Service dialog appears.
Blue Coat ProxySG Configuration and Management Guide
Section A: ICAP
Figure 11-14: ICAP Service Dialog
The default ICAP version is 1.0 and cannot be changed.
5.
Enter or select the following information:
a.
The service URL, which includes the URL schema, ICAP server hostname or IP address,
and the ICAP port number. For example:
icap://10.x.x.x/
The default port number is 1344, which can be changed; for example:
icap://10.x.x.x:99. You can also give an HTTP URL, but you must define a port
number.
Note:
404
An ICAP service pointing to a WebWasher server must use icap as the
protocol in the URL. Blue Coat also recommends that you review your
specific ICAP server documentation, as each vendor might require
additional URL information.
Chapter 11: External Services
Section A: ICAP
b.
The maximum number of connections possible at any given time between the ProxySG
and the ICAP server. The range is a number from 1 to 65535. The default is 5. The number
of recommended connections is dependent on the capabilities of the ICAP server. Refer to
the vendor’s product information.
c.
The number of seconds the ProxySG waits for replies from the ICAP server. The range is
60 to 65536. The default timeout is 70 seconds.
d. Optional: You can enable the ProxySG to display a default patience page when an ICAP
server is processing a relatively large object. The page informs users that a content scan is
in process. If enabled, the patience page is displayed after the designated time value is
reached for scanned objects. Patience pages might not be displayed for truncated objects;
Blue Coat recommends increasing the maximum cacheable object size (up to 1 GB) to
reduce the amount of truncated objects.
Note:
Patience pages display regardless of any pop-up blocking policy that is in effect.
To enable the patience page, in the Patience page delay field, enter the number of seconds
the ProxySG waits before displaying the page. The range is 5 to 65535. Select Enable.
e.
6.
Select Notify administrator: Virus detected to send an email to the administrator if the ICAP
scan detects a virus. The notification is also sent to the Event Log and the Event Log email
list.
The following steps configure ICAP v1.0 features:
a.
Select the ICAP method: response modification or request modification.
Note:
b.
An ICAP server might have separate URLs for response modification and request
modification services.
Enter the preview size (in bytes) and select preview size enable. The ICAP server reads the
object up to the specified byte total. The ICAP server either continues with the transaction
(that is, receives the remainder of the object for scanning) or opts out of the transaction.
The default is 0. Only response headers are sent to the ICAP server; more object data is
only sent if requested by the ICAP server.
Note:
c.
Trend Micro does not support previews for request modification mode.
(Optional) Click Send: Client address or Server address to specify what is sent to the ICAP
server: Send: Client address, Server address, Authenticated user, or Authenticated groups.
d. (Optional) Clicking Sense Settings automatically configures the ICAP service using the
ICAP server parameters. If you use the sense settings feature, no further steps are
required; the ICAP service is configured. Otherwise, proceed with the manual
configuration.
7.
Click OK; click Apply.
To Register a Newly Created ICAP Service for Health Checking:
For convenience, the Edit ICAP Service dialog allows you to register a newly-created ICAP service for
health checking (this duplicates the functionality on the Configuration>Health Checks>General tab).
Registering for health checking requires that a valid ICAP server URL was entered.
405
Blue Coat ProxySG Configuration and Management Guide
Section A: ICAP
•
Click Register; a dialog prompts confirmation; click OK.
•
You can also click Health check to perform an immediate health check on this service.
To Monitor ICAP Health Checks:
In a browser, enter one of the following URLs to list health check information.
•
To list all health check entries and their configuration parameters, enter:
http://ProxySG_IP_address:8081/health_check/view
•
To list the statistics for all currently active entries, enter:
http://ProxySG_IP_address:8081/health_check/statistics
For more information about health checks, see Chapter 12: “Health Checks” on page 431.
To Create and Configure an ICAP Service through the CLI:
1.
At the (config) command prompt, enter the following commands:
SGOS# (config) external-services
SGOS# (config external-services) create icap service_name
Specify a unique alphanumeric name for each service.
2.
To configure the service, enter the following commands:
SGOS# (config external-services) edit service_name
SGOS# (config icap service_name) url icap://url
where url specifies the URL schema, ICAP server hostname or IP address, and the ICAP
port number. The default port number is 1344.
Note:
While http://url:1344 is valid, an ICAP service pointing to a WebWasher
server must use icap as the protocol in the URL.
SGOS# (config icap service_name) max-conn number
where number is the maximum number, from 1 to 65535, of connections the ICAP service
uses to connect to the ICAP server. The default is 5. Blue Coat recommends that the
setting not exceed 200.
SGOS# (config icap service_name) timeout timeout_seconds
where timeout_seconds is the number of seconds, from 60 to 65535, the ProxySG waits
for replies from the ICAP server. The default timeout is 70 seconds.
SGOS# (config icap service_name) notify virus-detected
Sends an email to the administrator if the ICAP scan detects a virus. The notification is
also sent to the Event Log and the Event Log email list.
3.
The following commands configure ICAP v1.0 features:
SGOS# (config icap service_name) methods {REQMOD | RESPMOD}
Specifies the ICAP service type: request modification or response modification.
Note:
On most ICAP servers, one URL is designated for response modification
and one for request modification.
SGOS# (config icap service_name) preview-size bytes
406
Chapter 11: External Services
Section A: ICAP
where number is the preview size in bytes. If specified, the ICAP server reads the object
up to the specified byte total. The ICAP server either continues with the transaction (that
is, receives the remainder of the object for scanning) or opts out of the transaction.
The default is 0. Only response headers are sent to the ICAP server; more object data is
only sent if requested by the ICAP server.
Optional:
SGOS# (config icap service_name) send {client-address | server-address}
Specifies to send the client IP address or the server IP address to the ICAP server.
SGOS# (config icap service_name) send {authenticated-user |
authenticated-groups}
Specifies to send authenticated user and group information to the ICAP server.
4.
Optional: If the ICAP server is a version 1.0 server, you can use the sense-settings command to
automatically configure the ICAP service using ICAP server parameters. Otherwise, proceed with
the manual configuration in Step 3. To use the ICAP server parameters, enter the following
command:
SGOS# (config icap services service_name) sense-settings
The ICAP service is now configured. No further steps are required.
5.
Optional: You can enable the ProxySG to display a default patience page when an ICAP server is
processing a relatively large object. The page informs users that a content scan is in process. If
enabled, the patience page is displayed after the designated time value is reached for scanned
objects. Patience pages might not be displayed for truncated objects; Blue Coat recommends
increasing the maximum cacheable object size (up to 1 GB) to reduce the amount of truncated
objects. To customize patience pages, see "Customizing ICAP Patience Text" on page 408.
SGOS# (config icap services service_name) patience-page seconds
where seconds is the duration before the patience page is displayed. The range is 5 to
65535. The default is disabled.
Note:
Patience pages display regardless of any pop-up blocking policy that is in effect.
Deleting an ICAP Service
The following steps describe how to delete an ICAP service.
Note:
You cannot delete an ICAP service used in a ProxySG policy (that is, if a policy rule uses
the ICAP service name) or that belongs to a service group.
To Delete an ICAP Service through the Management Console:
407
1.
Select Configuration>External Services>ICAP.
2.
Select the service to be deleted.
3.
Click Delete; click OK to confirm.
4.
Click Apply.
Blue Coat ProxySG Configuration and Management Guide
Section A: ICAP
To Delete an ICAP Service through the CLI:
At the (config) prompt, enter the following commands:
SGOS# (config) external-services
SGOS# (config external-service) delete service_name
Customizing ICAP Patience Text
This section describes how to customize text displayed during ICAP scanning.
HTTP Patience Text
The ProxySG allows you to customize the patience pages that are displayed when HTTP clients
experience delays as Web content is scanned. You can customize the following patience page
components:
•
Header—Contains HTML tags that define what appears in the dialog title bar. This component
also contains the <meta http-equiv> tag, which is used to specify a non-English character set.
Figure 11-15: Customizing the Header Component
•
408
Summary—HTML and text that informs users that a content scan is occurring.
Chapter 11: External Services
Section A: ICAP
Figure 11-16: Customizing the Summary Component
•
Details—Uses data to indicate scanning progress. The information includes the URL currently
being scanned, the number of bytes processed, and the elapsed time of the scan
.
Figure 11-17: Customizing the Details Component
•
409
Help—Displays instructions for users should they experience a problem with the patience page.
Blue Coat ProxySG Configuration and Management Guide
Section A: ICAP
Figure 11-18: Customizing the Help Component
All of these components are displayed on the patience page.
To Customize ICAP Patience Text through the Management Console:
1.
Select Configuration>External Services>ICAP>ICAP Patience Page.
2.
In the HTTP Patience Page Customization field, click Header, Summary, Details, or Help; the
appropriate customize dialog appears. Customize the information as appropriate.
3.
Click OK; click Apply.
Example
The following example demonstrates customizing the message summary.
Figure 11-19: Entering a Custom Summary Message
410
Chapter 11: External Services
Section A: ICAP
To Customize ICAP Patience Text through the CLI:
At the (config) command prompt, enter the following commands:
SGOS# (config) external-services
SGOS# (config external-services) icap-patience {details-inline |
header-inline | help-inline | summary-inline} eof
where:
eof
Specifies the end-of-file marker. After entering customized text, enter the
end-of-file marker to end the customizing process.
details-inline
The string that displays the progress of the content scanning.
header-inline
The tile of the page. Appears in the dialog title bar. The default is:
Please be patient
help-inline
Clients with browsers that do not support automatic refresh must click a link
to load the content after scanning is complete. The default is:
If your browser does not support automatic refresh, click
the following link to download the scanned object.
Continue.
Note: Closing this window terminates the download.
summary-inline
The text message informing users that a content scan is occurring. The default
is:
Your request is being scanned for security purposes.
Please be patient.
Example:
SGOS# (config) external-services
SGOS# (config external-services) icap-patience summary-inline eof
Your request is experiencing a slight delay while it is scanned for malicious
content or viruses. If the content is safe, you will receive the request.
Please be patient. eof
SGOS# (config external-services)
Windows XP, Service Pack 2 Behavior
With Windows XP, Microsoft is continually updating the security measures, which impacts how the
ProxySG manages patience pages.
•
•
411
Browsers running on Windows XP, Service Pack 2 (XP SP2), experience slightly different patience
page behavior when pop-up blocking is enabled.
❐
If pop-up blocking is not enabled, patience page behavior should be normal.
❐
If pop-up blocking is enabled (the default), the ProxySG attempts to display the patience page
in the root window.
❐
If the download triggers an invisible Javascript window, the user can track the scanning
progress with the progress bar at the bottom of the window; however, if other policy blocks
Javascript active content, this bar is also not visible.
If Internet Explorer blocks all downloads initiated by Javascript, the user must click the yellow
alert bar to download the scanned object.
Blue Coat ProxySG Configuration and Management Guide
Section A: ICAP
•
Users experience two patience page responses for non-cacheable objects.
Interactivity and Limitations
•
Patience pages and exceptions can only be triggered by left-clicking a link. If a user right-clicks a
link and attempt to save it, it is not possible to display patience pages. If this action causes a
problem, the user might see browser-specific errors (for example, an Internet site not found);
however, ICAP policy is still in effect.
•
A patience page is not displayed if a client object request results in an HTTP 302 response and the
ProxySG pipelines the object in the Location header. Once the ProxySG receives the client request
for the object, the client enters a waiting state because a server-side retrieval of the object is
already in progress. The wait status of the client request prevents the patience page from
displaying. To prevent the ProxySG from pipelining these requests (which decreases
performance) and retain the ability to provide a patience page, configure HTTP:
#ProxySG (config) http no pipeline client redirects
•
The status bar update does not work if it is disabled or if the Javascript does not have sufficient
rights to update it.
•
Looping: Certain conditions cause browsers to re-spawn patience pages. For example, a site states
it will begin a download in 10 seconds, initiates a pop-up download window, and returns to the
root window. If the download window allows pop-ups, the patience page is displayed in another
window. The automatic return to the root window initiates the download sequence again,
spawning another patience page. If unnoticed, this loop could cause a system hang. The same
behavior occurs if the user clicks the back button to return to the root window. For known and
used download sites, you can create policy that redirects the page so that it doesn’t return to the
root window after a download starts.
FTP Patience Text
The patience text displayed to FTP clients during an ICAP scan can be modified.
To Customize ICAP Patience Text through the Management Console:
1.
Select Configuration>External Services>ICAP>ICAP Patience Page.
2.
In the FTP Patience Page Customization field, click Summary; the Customize FTP Patience Text dialog
appears. Customize the FTP client patience text. Customize the information as appropriate.
3.
Click OK; click Apply.
To Customize ICAP Patience Text through the CLI:
At the (config) command prompt, enter the following commands:
SGOS# (config) external-services
SGOS# (config external-services) inline ftp icap-patience-text eof
412
Chapter 11: External Services
Section A: ICAP
Creating ICAP Policy
Defined ICAP policy dictates the anti-virus behavior for your enterprise. You can either use the Visual
Policy Manager (VPM) or you can manually edit policy files. For more information on the VPM and
defining policies, see Chapter 14: “The Visual Policy Manager” on page 453.
Use the request.icap_service() (request modification) or response.icap_service() (response
modification) properties to manage the ProxySG ICAP services.
VPM Objects
The VPM contains the following objects specific to AV scanning (linked to their descriptions in the
VPM chapter).
Table 11.1: VPM ICAP Objects
Object
Layer>Column
"Virus Detected"
Web Access>Service
"ICAP Error Code"
Web Access>Service
"Return ICAP Patience Page"
Web Access>Action
"Set ICAP Request Service"
Web Access>Action
"Set ICAP Request Service"
Web Content>Action
"Set ICAP Response Service"
Web Content>Action
Note:
For CPL policy, refer to the Blue Coat Systems ProxySG Content Policy Language Guide.
Example ICAP Policy
The following VPM example demonstrates the implementation of an ICAP policy that performs virus
scanning on both client uploads (to prevent propagating a virus) and responses (to prevent the
introduction of viruses).
For this example:
•
The ProxySG has configured ICAP services. The response service is corporateav1 and the request
service is corporateav2.
•
The ProxyAV is the virus scanner and is configured to serve password-protected files.
•
A group named IT is configured on the ProxySG.
•
The IT group wants to be allowed to download password protected files, but deny everyone else.
Procedure—To perform virus scanning, protecting both the server side and client side:
413
1.
In the VPM, select Policy>Web Content Layer. Name the layer RequestAV.
2.
Right-click the Action column; select Set. The Set Action Object dialog appears.
a.
Select Set ICAP Request Service; the Add ICAP Request Service Object dialog appears.
b.
From the Use ICAP request service drop-down list, select corporateav2.
Blue Coat ProxySG Configuration and Management Guide
Section A: ICAP
c.
Select Deny the client request. This prevents a client from propagating a threat. If a virus is
found, the content is not uploaded. For example, a user attempts to post a document that has
a virus.
Figure 11-20: Specifying an ICAP Request Service Object.
d. Click OK; click OK again to add the object to the rule.
Figure 11-21: The Web Content Layer policy.
3.
In the VPM, select Policy>Web Access Rule. Name the rule ResponseAV.
4.
Right-click the Action column; select Set. The Set Action Object dialog appears.
5.
a.
Select Set ICAP Response Service; the Add ICAP Response Service Object dialog appears.
b.
From the Use ICAP response service drop-down list, select corporateav1.
Select Deny the client request. This scans the responses for viruses before the object is delivered to
the client. If a virus is found, the content is not served.
Procedure—To log a detected virus:
414
1.
In the VPM, select Policy>Web Access Layer. Name the layer AVErrors.
2.
Right-click the Service column; select Set. The Set Service Object dialog appears.
a.
Select Virus Detected (static object).
b.
Click OK to add the object to the rule.
Chapter 11: External Services
Section A: ICAP
3.
Right-click the Action column. Select Delete.
4.
Right-click the Track column. Select Set; the Set Track Object dialog appears.
a.
Click New; select Event Log. The Event Log dialog appears.
b.
In the Name field, enter VirusLog1.
c.
From the scroll-list, select icap_virus_details, localtime, and client-address. Click
Insert.
d. Click OK; click OK again to add the object to the rule.
Figure 11-22: The AVErrors rule.
Procedure—Create an exception for IT group:
415
1.
In the VPM, select Policy>Add Web Access Layer. Name the rule AVExceptions.
2.
Add the IT group object to the Source column.
3.
Right-click the Service column; select Set. The Set Service Object dialog appears.
a.
Click New; select ICAP Error Code. The Add ICAP Error Code Object appears.
b.
Name the object password_protected.
c.
Select Selected Errors.
Blue Coat ProxySG Configuration and Management Guide
Section A: ICAP
d. From the list of errors, select Password Protected Archive; click Add.
Figure 11-23: Specifying an ICAP Error Code object.
e.
Click OK; click OK again to add the object to the rule.
4.
Right-click the Action column and select Allow.
5.
Click Add Rule.
6.
In the Service column, add the password_protected object.
7.
Right-click the Action column; select Deny.
Figure 11-24: The AVException layer.
Once this policy is installed:
•
416
Virus scanning is performed for client attempts to upload content and content responses to client
requests.
Chapter 11: External Services
Section A: ICAP
•
If a virus is detected and there were no scanning process errors, a log entry occurs.
•
As the ProxyAV is configured to serve password-protected objects, only the IT group can
download such files; everyone else is denied.
Exempting HTTP Live Streams From Response Modification
The following CPL examples demonstrate how to exempt HTTP live streams from response
modification, as they are not supported by ICAP. The CPL designates user agents that are bypassed.
<proxy>
url.scheme=http request.header.User-Agent="RealPlayer G2"
response.icap_service(no)
url.scheme=http request.header.User-Agent="(RMA)" response.icap_service(no)
url.scheme=http request.header.User-Agent="(Winamp)"
response.icap_service(no)
url.scheme=http request.header.User-Agent="(NSPlayer)"
response.icap_service(no)
url.scheme=http request.header.User-Agent="(Windows-Media-Player)"
response.icap_service(no)
url.scheme=http request.header.User-Agent="QuickTime"
response.icap_service(no)
url.scheme=http request.header.User-Agent="(RealMedia Player)"
response.icap_service(no)
Streaming Media Request Modification Limitation
Some HTTP progressive download streaming media transactions are complex enough to disrupt
ICAP request modification services. If such behavior is noticed (most common with RealPlayer),
implement the following workaround policy to bypass the ICAP request modification service for
HTTP progressive downloads:
<proxy>
url.scheme=http request_header.User-Agent="user_agent"
request.icap_service(no)
url.scheme=http request_header.User-Agent="user_agent"
request.icap_service(no)
where user_agent specifies a media player attribute that is disrupting service. For example:
<proxy>
url.scheme=http request_header.User-Agent="(RealMedia Player)"
request.icap_service(no)
url.scheme=http request_header.User-Agent="RMA" request.icap_service(no)
CPL Notes
•
If policy specifies that an ICAP service is to be used, but the service is not available, the default
behavior is to fail closed—that is, deny the request or response. The following CPL allows objects
to be served without ICAP processing if the server is down.
request.icap_service(service_name, fail_open)
response.icap_service(service_name, fail_open)
417
Blue Coat ProxySG Configuration and Management Guide
Section A: ICAP
Note:
•
Blue Coat recommends this CPL to be used for internal sites; use with caution.
To provide an exception to a general rule, the following CPL negates ICAP processing:
request.icap_service(no)
response.icap_service(no)
•
When the ICAP service is restored, these objects are scanned and served from the cache if they are
requested again.
Managing Virus Scanning
You might need to perform additional ProxySG maintenance concerning virus scanning, particularly
for updates to the virus definition on the ICAP virus scanning server.
Advanced Configurations
This section summarizes more-advanced configurations between the ProxySG and multiple ICAP
servers. These brief examples provide objectives and suggest ways of supporting the configuration.
Using Object-Specific Scan Levels
You can specify different scanning levels for different types of objects, or for objects from different
sources.
This requires a service group of ICAP servers, with each server configured to provide the same level
of scanning. For more information, see "Creating a Service Group" on page 425.
Improving Virus Scanning Performance
You can overcome request-handling limitations of ICAP servers. Generally, ProxySGs can handle
many times the volume of simultaneous user requests that ICAP servers can handle.
This requires multiple ICAP servers to obtain a reasonable performance gain. On the ProxySG, define
policy rules that partition requests among the servers. If you are going to direct requests to individual
servers based on rules, configure in rule conditions that only use the URL. Note that you can increase
the scale by using a service group, rather than use rules to partition requests among servers. For more
information on using multiple ICAP servers, see "Creating a Service Group" on page 425. For more
information on defining policies, see Chapter 13: “Managing Policy Files” on page 439, as well as the
Blue Coat ProxySG Content Policy Language Guide.
When the virus definitions are updated, the ProxySG stores a signature. This signature consists of the
server name plus a virus definition version. If either of these changes, the ProxySG checks to see if the
object is up to date, and then rescans it. If two requests for the same object are directed to different
servers, then the scanning signature changes and the object is rescanned.
Updating the ICAP Server
If there is a problem with the integration between the ProxySG and a supported ICAP server after a
version update of the server, you may need to configure the preview size the appliance uses. For
information, see "Creating an ICAP Service" on page 403.
418
Chapter 11: External Services
Section A: ICAP
Replacing the ICAP Server
If you replace an ICAP server with another supported ICAP server, reconfigure the ICAP service on
the ProxySG:
SGOS# (config) external-services
SGOS# (config external-service) edit service_name
SGOS# (config service_name) url url
For information about these commands, see "Creating an ICAP Service" on page 403.
Access Logging
The ProxySG provides access log support for Symantec, Trend Micro, and Finjan ICAP 1.0 server
actions (Management>Access Logging). The following sections describe access logging behavior for the
various supported ICAP servers.
Symantec AntiVirus Scan Engine 4.0
When this Symantec server performs a scan, identifies a problem (for example, a virus), and performs
a content transformation, the action is logged. For example:
“virus-id: Type=number; Resolution=[0 | 1 | 2]; Threat=name;”
where:
Type=number
Specifies the numeric code for the virus.
Resolution=
Specifies an integer value that indicates what action was taken to fix the
file. Zero (0) defines the file is unrepairable, one (1) specifies that the file
was repaired, and two (2) specifies that the file was deleted.
Threat=
Specifies the name of the virus.
Trend Micro Interscan WebProtect v 1.5
When of these Trend Micro ICAP servers performs a scan, identifies a problem (for example, a virus),
and performs a content transformation, the action is logged. For example:
“virus-id: name”
where name specifies the name of the virus.
Important: The ivscan.ini ISWP configuration file on the Trend Micro server must contain the
following entry:
‘yes’: security_gateway_virus_log=yes.
Finjan SurfinGate 7.0
When this Finjan ICAP server performs a scan, identifies a problem (for example, a virus), and
performs a content transformation, the action is logged. For example:
419
Blue Coat ProxySG Configuration and Management Guide
Section A: ICAP
“virus-id: name, response-info: Blocked, response-desc: virus_name was
detected”
Finjan ICAP servers also log occurrences malicious mobile code.
Note:
The access log string cannot exceed 256 characters. If the header name or value extends
the length over the limit, then that string does not get logged. For example, if the
x-virus-id header value is 260 characters, the access log displays "x-virus-id: " with
no value because the value is too long to display. Also, if the access log string is already
250 characters and the ProxySG attempts to append a "Malicious-Mobile-Type: "
string, the string is not appended.
Access log entries might vary depending upon the type of ICAP scan performed and the custom log
formats. For information about Access Logging, see Chapter 20: “Access Logging” on page 743.
References
The following are selected references for this feature.
Note:
•
As with any Web site, addresses are subject to change or deletion at any time.
Symantec—A provider of internet security technology, including content and network security
software and appliance solutions.
http://www.symantec.com/
http://enterprisesecurity.symantec.com/products/
•
Trend Micro—A provider of network anti-virus and internet content security software and
services.
http://www.trendmicro.com/
•
Finjan—A provider of proactive active content defense, virus protection, and Web and email
content filtering solutions.
http://www.finjan.com/
•
ICAP Forum—A resource on Internet Content Adaptation Protocol (ICAP), an evolving Web
architecture. ICAP effectively adapts content for user needs.
http://www.i-cap.org/
420
Chapter 11: External Services
Section B: Websense
Section B: Websense
This section describes how to create and manage Websense off-box services on the ProxySG. The
ProxySG supports Websense off-box server versions 4.3 and higher.
For more information about Websense and content filtering, see Chapter 18: “Content Filtering” on
page 635.
Creating a Websense Service
To Configure a Websense Off-box Service through the Management Console:
1.
Select Configuration>External Services>Websense.
2.
Click New; the Add List Item dialog appears.
3.
In the Add Websense Service field, enter an alphanumeric name; click OK.
4.
Highlight the new Websense service name and click Edit; the Edit Websense Service Name dialog
appears.
Figure 11-25: The Edit Websense Service Dialog
5.
421
Enter following information:
Blue Coat ProxySG Configuration and Management Guide
Section B: Websense
a.
Select the Websense server version: 4.3 or 4.4 and higher.
b.
In the Host field, enter the hostname or IP address of the remote Websense server.
c.
In the Port field, enter the port number of the Websense server; or leave as is to accept the
default (15868).
d. In the Maximum connections field, enter the maximum number of connections. The range is
a number from 1 to 65535. The default is 5. Blue Coat recommends that the setting not
exceed 200.
e.
6.
In the Receive Timeout field, enter the number of seconds the ProxySG waits for replies
from the Websense server. The range is 60 to 65535. The default timeout is 70 seconds.
Select the following options, as required:
a.
Fail open—If a default Websense service is selected (from the External Services>Websense
tab), a connection error with the Websense server results in requests and responses
proceeding, as the default Websense service is subjected to policy.
b.
Send client address—Sends the client IP address to the Websense server.
c.
Send Authenticated user—Sends user information to the Websense server.
d. Serve exception page when content is blocked—If the requested content is defined by
Websense as inappropriate, the client receives a page with information stating the content
is blocked. When this option is selected, the exception page originates from the ProxySG;
if not selected, the Websense server provides the exception page.
7.
Click OK.
8.
Optional: You can designate a default Websense service. On the Configuration>External
Services>Websense tab, select a service from the Default service to use drop-down list.
To Register a Newly Created Websense Service for Health Checking:
For convenience, the Edit Websense Service dialog allows you to register a newly-created Websense
service for health checking (this duplicates the functionality on the Configuration>Health Checks>General
tab). Registering for health checking requires that a valid ICAP server URL was entered.
•
Click Register; a dialog prompts confirmation; click OK.
•
You can also click Health check to perform an immediate health check on this service.
For more information about health checks, see Chapter 12: “Health Checks” on page 431.
To Configure an ICAP Service through the CLI:
1.
At the (config) command prompt, enter the following commands:
SGOS# (config) external-services
SGOS# (config external-services) create websense service_name
Specify a unique alphanumeric name for each service.
2.
To configure the service, enter the following commands:
SGOS# (config external-services) edit service_name
SGOS# (config websense service_name) version {4.3 | 4.4}
where version specifies 4.3 or 4.4 and higher.
SGOS# (config websense service_name) host {hostname | IP_address}
422
Chapter 11: External Services
Section B: Websense
where hostname or IP_address specifies the Websense server.
SGOS# (config websense service_name) port port_number
where port_number specifies the port number of the Websense server. The default port
number is 15868.
SGOS# (config websense service_name) max-conn number
where number is the maximum number, from 1 to 65535, of connections the Websense
service uses to connect to the Websense server. The default number is 5. Blue Coat
recommends that the setting not exceed 200.
SGOS# (config websense service_name) timeout timeout_seconds
where timeout_seconds is the number of seconds, from 60 to 65535, the ProxySG waits
for replies from the Websense server. The default timeout is 70 seconds.
SGOS# (config websense service_name) send {client-address |
authenticated-user}
Specifies to send the client IP address or authenticated user information to the Websense
server.
3.
Optional: You can automatically detect the categories defined on the Websense server.
SGOS# (config websense service_name) sense-categories
4.
Optional: You can designate a default Websense service.
SGOS# (config websense service_name) apply-by-default
This Websense service is now the default and is used if failover is enabled.
5.
Optional: You can enable failover. If a default Websense service is selected (from the External
Services>Websense tab), a connection error with the Websense server results in requests and
responses proceeding, as the default Websense service is subjected to policy.
SGOS# (config websense service_name) fail-open
6.
Optional: You can send a test URL to the Websense server to verify content filtering is active.
SGOS# (config websense service_name) test-url url
where url is a valid URL that points to a site determined categorized by Websense as
inappropriate.
Deleting a Websense Service
The following steps describe how to delete an Websense service.
Note:
You cannot delete a Websense service used in a ProxySG policy (that is, if a policy rule
uses the Websense service name) or if the service belongs to a service group.
To Delete a Websense Service through the Management Console:
423
1.
Select Configuration>External Service>Websense.
2.
Select the service to be deleted.
3.
Click Delete; click OK to confirm.
Blue Coat ProxySG Configuration and Management Guide
Section B: Websense
4.
Click Apply.
To Delete an Websense Service through the CLI:
At the (config) prompt, enter the following commands:
SGOS# (config) external-services
SGOS# (config external-services) delete service_name
424
Chapter 11: External Services
Section C: Service Groups
Section C: Service Groups
This section describes how to create and manage ICAP or Websense service groups. In high-traffic
network environments, a service group accelerates response time by a performing a higher volume of
scanning.
Creating a Service Group
Create the service group and add the relevant ICAP or Websense services to the group. Services
within group must be the same type (ICAP or Websense).
To Configure a Service Group through the Management Console:
1.
Select Configuration>External Services>Service-Groups.
2.
Click New; the Add List Item dialog appears.
3.
In the Add Service Group field, enter an alphanumeric name; click OK.
4.
Highlight the new service group name and click Edit; the Edit Service Group dialog appears.
Figure 11-26: The Edit Service Group Dialog
5.
425
Click New to add a service to the service group; the Add Service Group Entry dialog appears.
Blue Coat ProxySG Configuration and Management Guide
Section C: Service Groups
Figure 11-27: The Add Service Group Entry Dialog
6.
Select List ICAP services or List Websense services. The picklist displays the available configured
services that are eligible for this service group.
7.
Select a service; to select multiple services, use Ctrl-click. Click OK.
8.
To assign a weight value to a service, select a service and click Edit; the Edit Service Group Entry
weight dialog appears. In the Entry Weight field, assign a weight value. The valid range is 0-255.
For detailed information about service weighting, see the next topic, "About Weighted Load
Balancing" on page 427.
9.
Click OK; click OK again to close the Edit Service Group Entry dialog
10. Click Apply.
To Configure a Service Group through the CLI:
1.
At the (config) command prompt, enter the following commands:
SGOS# (config) external-services
SGOS# (config external-services) create service-group name
SGOS# (config service-group name) add service_name
Enter a unique alphanumeric name for each service; the ICAP or Websense service must
already exist on the ProxySG.
2.
Repeat the add service_name command for each service to be added.
The type of service group (ICAP or Websense) is determined by the first service added.
For example, if the first added service is an ICAP service, the service group is
automatically defined as an ICAP service group. If you attempt to add a Websense
service, an error is displayed.
3.
To assign weights to each service, enter the following commands:
SGOS# (config service-group name) edit service_name
SGOS# (config service-group name) weight value
where value is from 0 to 255. For information about weight values, see "About Weighted
Load Balancing" on page 427.
426
Chapter 11: External Services
Deleting a Service Group or Group Entry
You can delete the configuration for an entire service group from the ProxySG, or you can delete
individual entries from a service group.
Note:
A service or service group used in a ProxySG policy (that is, if a policy rule uses the entry)
cannot be deleted; it must first be removed from the policy.
To Delete a Service Group through the Management Console:
1.
Select Configuration>External Services>Service-Groups.
2.
Select the service group to be deleted.
3.
Click Delete; click OK to confirm.
4.
Click Apply.
To Delete a Service Group through the CLI:
At the (config) command prompt, enter the following commands:
SGOS# (config) external-services
SGOS# (config external-services) delete service_group_name
To Delete a Service Group Entry through the Management Console:
1.
Select Configuration>External Services>Service-Groups.
2.
Select the service group to be modified.
3.
Click Edit.
4.
Select the service entry; click Delete.
5.
Click OK; click Apply.
To Delete a Service Group Configuration through the CLI:
At the (config) command prompt, enter the following commands:
SGOS# (config) external-services
SGOS# (config external-services) edit service_group_name
SGOS# (config type name) remove entry_name
About Weighted Load Balancing
The ProxySG supports weighted load balancing in forwarding requests to service groups. By default,
the ProxySG performs typical round-robin load balancing and evenly forwards requests sequentially
to servers as defined within the service group. Manually assigning weights takes advantage of
round-robin load balancing in service groups that are not homogeneous, or where the servers have
different capacities.
Weighting determines what proportion of the load one server bears relative to the others. If all servers
have either the default weight (1) or the same weight, each share an equal proportion of the load. If
one server has weight 25 and all other servers have weight 50, the 25-weight server processes half as
much as any other server.
427
Blue Coat ProxySG Configuration and Management Guide
Before configuring weights, consider the relative weights to assign to each server. Factors that could
affect assigned weight of a ICAP server include the following:
•
The processing capacity of the server hardware in relationship to other servers (for example, the
number and performance of CPUs or the number of network interface cards)
•
The maximum number of connections configured for the service. Note that the maximum
connections setting pertains to how many simultaneous scans can be performed on the server,
while weighting applies to throughput in the integration. While these settings are not directly
related, consider both when configuring weighted load balancing For more information on
maximum connections, see "Creating an ICAP Service" on page 403 and "Creating a Websense
Service" on page 421.
The table below provides an example of how weighting works with a service group of three ICAP
servers, Server1, Server2, and Server3. Because Server3 is a higher-capacity server (including dual
CPUs and multiple network interface cards (NICs)) compared to Server1 and Server2, it is assigned a
heavier weight. Using the weights below, for every 100 requests forwarded to the service group,
Server3 receives 60 requests, while Server1 and Server2 each receive 20 requests.
Table 11.1: Example of Weighted Load Balancing for an ICAP Service Group
ICAP server
Capacity
ICAP service /
Maximum connections
Weight
Server1
Standard
Service1 / 10
1
Server2
Standard
Service2 / 10
1
Server3
High
Service3 / 25
3
Note:
Setting the weight value to 0 (zero) disables weighted load balancing for the ICAP service.
Therefore, if one ICAP server of a two-server group has a weight value of 1 and the
second a weight value of 0, should the first server go down, a communication error
results because the second server cannot process the request.
While you cannot specifically designate an ICAP server in a group as a backup, you can specify
weight values that create a large differential between a server that is used continuously and one that is
rarely used, thus simulating a backup server.
428
Chapter 11: External Services
Section D: Displaying External Service and Group Information
After configuring a service or service group, you can display information either for all or individual
service groups.
To Display Information about all External Services and Groups through the CLI:
At the (config) command prompt, enter the following commands:
SGOS# (config) external-services
SGOS# (config external-services) view
Individual service information is displayed first, followed by service group information. For example:
; External Services
icap4
ICAP-Version:
1.0
URL:
icap://10.1.1.1
Max-conn:
5
Timeout(secs):
70
Health-checks:
no
Patience-page(secs): disabled
Notification:
never
Methods:
RESPMOD
Preview-size:
0
Send:
nothing
ISTag:
websense4
Version:
4.4
Host:
www.websense.com/list
Port:
15868
Max-conn:
5
Timeout(secs):
70
Send:
nothing
Fail-by-default:
closed
Apply-by-default:
no
Serve-exception-page:yes
; External Service-Groups
CorpICAP
total weight 5
entries:
ICAP1
weight 4
ICAP2
weight 1
BranchWebsense
total weight
entries:
Websense1
weight
1
Websense2
weight
1
2
429
Blue Coat ProxySG Configuration and Management Guide
To Display Information about an Individual Service or Service Group through the CLI:
At the (config) command prompt, enter the following commands:
SGOS (config) external-services
SGOS# (config external-services) edit {service_name | service_group_name}
SGOS# (config type name) view
430
Chapter 12: Health Checks
This chapter discusses health checks for services and hosts and describes how to configure the
ProxySG.
About General Health Checks
The ProxySG can perform health checks on a forwarding host or external server that is providing a
service. The supported server types are HTTP, HTTPS, ICAP, Websense (off-box), and SOCKS
gateways, Layer-3, and Layer 4 forwarding hosts.
Based on the health check type, the ProxySG periodically verifies the health status, and thus the
availability, of the host. The time interval between checks is configurable. If the health check is
successful, the ProxySG considers the host available. If the initial health check is not successful for a
host, the ProxySG retries, using the number of attempts in the health check failure count. If the health
check is not successful for every server in a domain, the ProxySG might not serve stale content from its
object store, depending on the ProxySG configuration.
The following table describes the types of health checks.
Table 12.1: Types of Health Checks
Health check type
Description
HTTP
Use this type to confirm that the host can fulfill a content
request over HTTP by the ProxySG. The ProxySG accepts
only a 200 OK as a healthy response.
Criterion for success
The ProxySG fetches the object.
Criterion for failure
The ProxySG cannot fetch the object.
HTTPS
Use this type to confirm that the host can fulfill a content
request over HTTPS by the ProxySG. The ProxySG accepts
only a 200 OK as a healthy response.
Criterion for success
The ProxySG fetches the object.
Criterion for failure
The ProxySG cannot fetch the object.
Layer-3 health check
Use this type to confirm the basic connection between the
ProxySG and the origin server. The server must recognize
ICMP echoing. The ProxySG sends a ping (three Internet
Control Message Protocol [ICMP] echo requests) to the host.
Criterion for success
The ProxySG receives at least one ICMP echo reply.
Criterion for failure
The ProxySG does not receive a single ICMP echo reply.
Layer-4 health check
Use this type to confirm that the ProxySG can connect to the
host HTTP and FTP ports. The ProxySG attempts to establish
a TCP connection to an HTTP port or FTP port on the host.
431
Blue Coat ProxySG Configuration and Management Guide
Table 12.1: Types of Health Checks (Continued)
Health check type
Description
Criterion for success
The ProxySG establishes the connection to the defined port
(of any type), then closes it. For global forwarding checks, the
first defined port in the forwarding host port list is used for
the attempt (except for SOCKS gateways, in which the
SOCKS port is used).
Criterion for failure
The ProxySG cannot establish the connection.
ICAP health check and Websense 4 off-box
Requests are not sent to sick services. If a health check
determines the service is healthy, requests resume.
Configuring Service-Specific Health Checks
This section describes how to create a health check service for a specific host (for example, an ICAP
server). A failed health check results in administrator notification; however, unlike global forwarding
health checks, the ProxySG does not recognize the healthy or sick status of the host and thus alters
where it sends transactions.
To Configure Health Checks through the Management Console:
Part 1: General Tasks
This part of the procedures is the same for all health check types.
432
1.
Select Configuration>Health Checks>General.
2.
Click New.
3.
In the Add Health Check dialog, specify a name for the health check service; click OK.
4.
In the Health Check list, select the newly created service and click Edit; the Edit Health Check dialog
displays.
Chapter 12: Health Checks
Figure 12-1: Edit Health Check Dialog
5.
Select the health check type (HTTP, HTTPS, ICAP, Layer-3, Layer-4, or Websense off-box).
6.
Specify the healthy interval, in seconds, between health checks to the server. The default is 10.
7.
Specify the sick interval, in seconds, between health checks to the server that has been determined
to be sick, or out of service. The default is 10.
8.
Specify the failure trigger, or the number of failed connections to the server before a health check is
triggered. Valid values are 0-65535, where 0 disables the trigger. The default is 0.
9.
Specify the healthy threshold, or the number of successful health checks before an entry is
considered healthy. Valid values are 1-65535. The default is 1.
10. Specify the sick threshold, or the number of failed health checks before an entry is considered sick.
Valid values are 1-65535. The default is 1.
11. Optional: Select the Notify via email checkbox to send notification mail when the health of a service
changes. Recipients are specified in Management>Event Logging>Mail.
Part 2: Health Check Type Specific Tasks
This part of the procedure configures the health check based upon the type selected.
1.
Upon selecting the health check type, the Options section of the dialog changes to display the
appropriate configuration fields. Enter the required information:
❐
HTTP and HTTPS: Enter the URL of the server to be checked.
433
Blue Coat ProxySG Configuration and Management Guide
❐
ICAP: Select the ICAP service. The ICAP service must already be configured on the ProxySG
(see Appendix 11: "External Services").
2.
❐
Layer-3 and Layer-4: Enter the host name; for Layer-4, also enter the port number.
❐
Websense off-box: Select the Websense service. The Websense service must already be
configured on the ProxySG (see Appendix 11: "External Services"). Enter the URL to be
test-categorized, or click Use default.
Click OK to close the Edit Health Check dialog; Click Apply to apply the configuration to the
ProxySG.
To Specify a Health Check through the CLI:
At the (config) command prompt, enter the following commands:
SGOS#(config) health-check
SGOS#(config health-check) create name
SGOS#(config health-check) edit name
SGOS#(config health-check name) type {layer-3 | layer-4 | http | https | icap
| websense-offbox}
where type specifies the type of health check.
SGOS#(config health-check name) type parameter
where type is the type of health check and parameter is the required attribute:
layer-3
layer-4
layer-4
{http |
hostname host_name
hostname host_name
port port
https} url url
icap servicename service_name—The ICAP service must already be configured on the
ProxySG. See Appendix 11: "External Services".
websense-offbox servicename service_name—The Websense service must already be
configured on the ProxySG. For more information, see Appendix 11: "External Services".
websense-offbox {url | default-url}
SGOS#(config health-check name) interval healthy seconds
where seconds specifies the interval between health checks to the server. The default is
10.
SGOS#(config health-check name) interval sick seconds
where seconds specifies the interval between health checks to the server that has been
determined to be sick. The default is 10.
SGOS#(config health-check name) threshold healthy number
where number is the number of successful health checks before an entry is considered
healthy. Valid values are 1-65535. The default is 1.
SGOS#(config health-check name) threshold sick number
where number is the number of failed health checks before an entry is considered sick. Valid
values are 1-65535. The default is 1.
SGOS#(config health-check name) failure-trigger number
where number is the number of failed connections to the server before a health check is
triggered. Valid values are 0-65535, where 0 disables the trigger. The default is 0.
434
Chapter 12: Health Checks
Optional:
SGOS#(config) health-check name) notify
Sends email notification when the health of a service changes. The recipients are specified
in (config event-log) mail add option.
Perform an Instant Health Check
You can manually issue a health check request.
To Do a Health Check through the Management Console:
1.
Select Health Checks>General.
2.
Select a health check name.
3.
Click Edit.
4.
Click Health Check.
To Do a Health Check through the CLI:
At the (config) prompt, enter the following commands:
SGOS#(config) health-check
SGOS#(config) health-check) edit health_check_name
SGOS#(config) health-check name) perform-health-check
About Global Forwarding and SOCKS Gateway Health Checks
This section describes health checks that can be configured on the ProxySG that apply to all
forwarding hosts and SOCKS gateway hosts.
When the ProxySG performs a health check on one or more hosts, it determines whether the host
returns a response and is available to fill a content request. A positive health check indicates that there
is an end-to-end connection and that the host is healthy and is able to return a response.
With multiple forwarding hosts, health checks are vital to ProxySG efficiency. When hosts respond
positively to health checks, the ProxySG forwards requests to those hosts and not to unavailable hosts,
which provides quicker content fill requests. With a single forwarding host, health checking is also
important determine whether the host is available.
Note:
When a forwarding host or SOCKS gateway is created, it is automatically registered for
health checks. Similarly, when a forwarding host or SOCKS gateway is deleted, it is
removed from the health check registry.
Configuring Global Health Checks
This section describes how to configure the ProxySG to perform global health checks.
To Configure Global Forwarding Host or SOCKS Gateway Health Checks through the Management
Console:
1.
Select Configuration>Health Checks>Forwarding or SOCKS Gateway.
435
Blue Coat ProxySG Configuration and Management Guide
Figure 12-2: Global Forward Health Check Tab
2.
Select the health check type:
❐
Forwarding—HTTP, HTTPS, Layer-3, or Layer-4.
❐
SOCKS Gateway—Layer-3 or Layer-4.
3.
Specify the interval, in seconds, between health checks. The default is 60.
4.
Specify the failure count, which specifies the number of sequential failures before the host is
considered down. The default is 5.
5.
Click Apply.
To Configure Global Forwarding Host Health Checks through the CLI:
At the (config) command prompt, enter the following commands:
SGOS#(config) health-check
SGOS#(config health-check) forwarding type {http | https | layer-3 | layer-4}
SGOS#(config health-check) forwarding interval seconds
where seconds specifies the time between health checks.
SGOS#(config health-check) forwarding failcount count
where count specifies the number of sequential failures before the host is considered
down. The default is 5.
To Configure Global SOCKS Gateways Health Checks through the CLI:
At the (config) command prompt, enter the following commands:
SGOS#(config) health-check
SGOS#(config health-check) socks-gateways type {layer-3 | layer-4}
SGOS#(config health-check) socks-gateways interval seconds
where seconds specifies the time between health checks.
436
Chapter 12: Health Checks
SGOS#(config) health-check) socks-gateways failcount count
where count specifies the number of sequential failures before the host is considered
down. The default is 5.
Pausing or Resuming Global Health Checking
You can temporarily halt global health checks and resume when ready. This is helpful if the ProxySG
needs to be temporarily taken out of service.
Note:
If the health check is paused, the state remains paused until the resume option is invoked.
The paused state remains even after a reboot.
To Pause or Resume Health Checking through the Management Console:
1.
Select Configuration>Health Checks>Forwarding or SOCKS Gateway.
2.
Click Pause.
3.
To resume health checks, click Resume.
To Pause or Resume Health Checking through the CLI:
At the (config) command prompt, enter the following commands:
SGOS#(config)) health-check
SGOS#(config) health-check) {forwarding | socks-gateway} {pause | resume}
437
Blue Coat ProxySG Configuration and Management Guide
438
Chapter 13: Managing Policy Files
Policy files contain the policies that manage every aspect of the ProxySG, from controlling user
authentication and privileges to disabling access logging or determining the version of SOCKS.
The policy for a given system can contain several files with many layers and rules in each. Policies can
be defined through the Visual Policy Manager (VPM) or composed in Content Policy Language (CPL).
(Some advanced policy features are not available in VPM and can only be configured through CPL.)
Policies are managed through four files:
•
Central policy file—Contains global settings to improve performance and behavior and filters for
important and emerging viruses (such as Code Red and Nimda). This file is usually managed by
Blue Coat, although you can point the ProxySG to a custom Central policy file instead.
•
Forward policy file—Usually used to supplement any policy created in the other three policy files.
The Forward policy file contains Forwarding rules when the system is upgraded from a previous
version of SGOS (2.x) or CacheOS (4.x).
•
Local policy file—A file you create yourself. When VPM is not the primary tool used to define
policy, the Local file contains the majority of the policy rules for a system. If VPM is the primary
tool, this file is either empty or includes rules for advanced policy features that are not available in
VPM.
•
Visual Policy Manager—The policy created by VPM can either supplement or override the policies
created in the other policy files.
This chapter contains the following sections:
•
"About Policy Files"
•
"Creating and Editing Policy Files"
•
"Managing the Central Policy File"
•
"Viewing Policy Files"
To learn about writing policies, refer to the Blue Coat ProxySG Content Policy Language Guide.
About Policy Files
When creating the files, keep in mind:
•
The order in which the files are evaluated.
•
The transaction default settings, which control whether you allow everything or deny everything
by default.
•
Whether to use VPM.
439
Blue Coat ProxySG Configuration and Management Guide
Policy File Evaluation
The order in which the ProxySG evaluates policy rules is important. Changes to the evaluation order
can result in different effective policy, as the order of policy evaluation defines general rules and
exceptions. While this order is configurable, the default and recommended order is:
VPM File—Local Policy File—Central Policy File-Forward File
This prevents policies in the Central file that block virus signatures from being inadvertently
overridden by allow (access-granting) policy rules in the VPM and Local files.
When changing the policy file evaluation order, remember that final decisions can differ because
decisions from files later in the order can override decisions from earlier files (the Forward policy file
order cannot be changed).
For a new ProxySG, the default evaluation order is: VPM, Local, Central, and Forward.
For an upgraded ProxySG, the policy evaluation order is the order already existing on the appliance
before the upgrade.
To Change Policy Order through the Management Console:
1.
Select Configuration>Policy>Policy Options.
The Policy Options tab displays.
Figure 13-1: Policy Options Tab
2.
To change the order, select the file to move and click the Move Up or Move Down button. Remember
that the last file in the list overwrites decisions in files evaluated earlier.
To Change Policy Order through the CLI:
At the (config) command prompt, enter the command:
SGOS#(config) policy order v l c
where V (VPM), L (local), and C (central) specify the order of evaluation. These are
case-insensitive, but you must enter all three in any order, including a space between each
letter.
440
Chapter 13: Managing Policy Files
Note:
Use the show policy order command to check the current settings.
Transaction Settings: Deny and Allow
The default <Proxy> transaction policy is deny proxied transactions or allow proxied transactions,
depending on whether this is a new installation or an upgrade. You can change the default policy.
•
A default <Proxy> transaction policy of Deny prohibits proxy-type access to the ProxySG: you
must then create policies to explicitly grant access on a case-by-case basis. This is the default for
those who are installing a new release of SGOS without an upgrade and for administrator
transactions.
•
A default <Proxy> transaction policy of Allow permits any and all proxy-types access to the
ProxySG: you must then create policies to explicitly deny access on a case-by-case basis. This is the
default for those upgrading from a previous version of SGOS and for <Cache> transactions.
Changing the default <Proxy> transaction policy affects the basic environment in which the
overall policy is evaluated. It is likely that you must revise policies to retain expected behavior
after such a change.
Also consider:
•
Changes to the evaluation order might result in different effective policy, because the order of
policy evaluation defines general rules and exceptions.
•
Changes made to <Proxy> transactions do not affect <Cache> transactions and <Admin>
transactions.
To Configure Deny or Allow Default Policy through the Management Console:
1.
Select Configuration>Policy>Policy Options.
2.
Under Default Proxy Policy, select either Deny or Allow.
3.
Click Apply.
To Configure the Deny or Allow <Proxy> Transaction Policy through the CLI:
At the (config) command prompt, enter the following command
SGOS#(config) policy proxy-default {allow | deny}
Policy Tracing
Tracing enabled with the Management Console or CLI is global; that is, it records every policy-related
event in every layer. It should be used only while troubleshooting. For information on troubleshooting
policy, refer to the Blue Coat ProxySG Content Policy Language Guide. Turning on policy tracing of any
kind is expensive in terms of system resource usage, and it will slow down the ProxySG's ability to
handle traffic.
To Enable Policy Tracing through the Management Console:
1.
Select Configuration>Policy>Policy Options.
2.
Select Trace all policy execution.
441
Blue Coat ProxySG Configuration and Management Guide
3.
Click Apply.
To Enable Policy Tracing through the CLI:
From the command prompt, enter the following command:
SGOS# policy trace {all | none}
Creating and Editing Policy Files
You can create and edit policy files two ways:
•
Through the Management console (recommended).
•
Through the CLI inline policy command (not recommended because the policies can grow large
and using inline policy overwrites any existing policy on the ProxySG).
You can use VPM to create policy layers and rules in the VPM file. For information on managing the
VPM file, see Chapter 14: “The Visual Policy Manager” on page 453.
To create or edit policy files, use CPL to define policy rules (refer to the Blue Coat ProxySG Content
Policy Language Guide). You can use the Management Console or CLI to create or edit policy files
directly, or create a file that can be uploaded to the ProxySG through the Management Console or CLI.
Create and Edit Policy Files
You can install the policy files in the following ways.
•
Using the ProxySG Text Editor, which allows you to enter directives (or copy and paste the
contents of an already-created file) directly onto the ProxySG.
•
Creating a local file on your local system; the ProxySG can browse to the file and install it.
•
Using a remote URL, where you place an already-created file on an FTP or HTTP server to be
downloaded to the ProxySG.
•
Through the CLI inline command.
The ProxySG compiles the new policy from all source files and installs the policy, if the compilation is
successful.
Important: If errors or warnings are produced when you load the policy file, a summary of the
errors and/or warnings is displayed automatically. If errors are present, the policy
file is not installed. If warnings are present, the policy file is installed, but the
warnings should be examined.
To Define and Install Policy Files Directly through the Management Console:
1.
Select Configuration>Policy>Policy Files>Policy Files.
The Policy Files tab displays.
442
Chapter 13: Managing Policy Files
Figure 13-2: Policy Files Tab
2.
From the appropriate Install Local/Forward/Central File from drop-down list, select the method you
want to use to install the local, forward, or central policy configuration; click Install and complete
one of the three procedures below:
Note:
❐
A message is written to the event log when you install a list through the ProxySG.
Installing a policy file using a Remote URL:
In the Install Local/Forward/Central File dialog that appears, enter the fully-qualified URL,
including the filename, where the policy configuration is located. To view the file before
installing it, click View. Click Install. The Installation Status field summarizes the results; click the
Results button to open the policy installation results window. Close the window when you are
finished viewing the results; click OK in the Install Local/Forward/Central File dialog.
Figure 13-3: Policy Files Remote Installation Dialog
443
Blue Coat ProxySG Configuration and Management Guide
Note:
If you use the default Blue Coat Central policy file, load it from:
https://download.bluecoat.com/release/SG3/files/CentralPolicy.txt
If you install a Central policy file, the default is already entered; change this field only
if you want to create a custom Central policy file.
To load a Forward, Local, or a custom Central policy file, move it to an HTTP or FTP
server, and then use that URL to download the file to the ProxySG.
❐
Installing a policy file using a Local File:
In the Upload and Install File window that opens, either enter the path to the file into the File
to upload field, or click Browse to display the Choose file dialog, locate the file on the local
system, and open it. Click Install. When the installation is complete, the installation results
display. View the results and close the window.
Figure 13-4: Specifying the Local Location of a Policy File
444
Chapter 13: Managing Policy Files
❐
Installing a policy file using a Text Editor:
The current configuration is displayed in installable list format. Define the policy rules using
CPL in the Edit and Install File window that opens (refer to the Blue Coat ProxySG Content
Policy Language Guide); click Install. When the installation is complete, a results window opens.
View the results, close the results window and click Close in the Edit and Install File window.
Figure 13-5: Edit and Install File Window
Using the CLI Inline Command
To create policies using the CLI, you can use the ProxySG inline policy command. This command
either creates a new policy file or, if the specified file already exists, overwrites an existing policy file.
You cannot edit an existing policy file using this command.
Note:
If you are not sure whether a policy file is already defined, check before using the inline
policy command. For more information, see "Viewing Policy Source Files" on page 450.
To Create Policy Files through the CLI:
1.
At the (config) command prompt, enter the following command:
SGOS#(config) inline policy file end-of-input-marker
where file specifies the type of policy you want to define: Central (Central policy file),
Forward (Forward policy file), or local (local policy file).
Note:
Do not use the inline policy command with files created using the VPM
module.
445
Blue Coat ProxySG Configuration and Management Guide
end-of-file-marker—Specifies the string that marks the end of the current inline
command input; eof usually works as a string. The CLI buffers all input until you enter the
marker string.
2.
Define the policy rules using CPL (refer to the Blue Coat ProxySG Content Policy Language Guide).
Enter each line and press <Enter>. To correct mistakes on the current line, use <Backspace>. If a
mistake has been made in a line that has already been terminated by <Enter>, exit the inline
policy command by typing Ctrlc to prevent the file from being saved.
3.
Enter the eof marker to save the policies and exit the inline mode.
For more information on the inline command, refer to the Blue Coat ProxySG Command Line Reference.
To Load Policy Files through the CLI:
At the (config) command prompt, enter the following commands:
SGOS#(config) policy {forward-path | local-path | central-path} url
SGOS#(config) load policy {forward | local | central}
The ProxySG compiles and installs the new policy. The ProxySG might display a warning if the new
policy causes conflicts. If a syntax error is found, the appliance displays an error message. For
information about these messages, refer to the Blue Coat ProxySG Content Policy Language Guide.
Correct the error, then reload the file.
Unloading Policy Files
To disable policies, do the following procedure to unload the compiled policy file from the ProxySG
memory. These steps describe how to replace a current policy file with an empty policy file.
To keep a current policy file, either make a backup copy or rename the file before unloading it. By
renaming the file, you can later reload the original policy file. If you use multiple policy files, back up
or rename files as necessary. Alternatively, rather than use an empty policy file, you can delete the
entire contents of the file, then reload it.
To unload policies defined using the VPM, you can either:
•
Do the procedure below for unloading policies through the CLI.
•
Use the VPM and individually delete all layers.
To Unload Policies through the Management Console:
1.
Select Configuration>Policy>Policy Files>Policy Files.
2.
Select Text Editor in the Install Local/Forward/Central File from drop-down list and click the appropriate
Install button.
The Edit and Install the Local/Forward/Central Policy File window opens.
446
3.
Delete the text and click Install.
4.
View the results in the results page that opens; close the page.
5.
Click Close.
Chapter 13: Managing Policy Files
To Unload Policies through the CLI:
1.
At the (config) command prompt, enter the following command:
SGOS#(config) inline policy file end-of-input-marker
where:
file
Specifies the type of policy you want to define: central (central policy
file), local (local policy file), vpm-cpl, or vpm-xml (VPM policy files,
usually defined using the VPM).
end-of-input-marker Specifies the string that marks the end of the current inline command
input. The CLI buffers all input until you enter the marker string. eof is
commonly used as the marker.
Note:
If you use the CLI to unload VPM-generated policies, you must run the inline command
twice; once for the CPL file and once for the XML file.
2.
Enter an end-of-input-marker to save the policies and exit inline mode. Enter nothing else.
3.
If you use multiple policy files, repeat step 1 and step 2 for each policy file used.
For more information on the inline policy command, refer to the Blue Coat ProxySG Command Line
Reference.
Managing the Central Policy File
The Central policy file is updated when needed by Blue Coat. The file can be updated automatically or
you can request e-mail notification. You can also configure the path to point to your own custom
Central policy file.
Configuring Automatic Installation
You can specify whether the ProxySG checks for a new version of the Central policy file. If a new
version exists, the appliance can install it automatically.
Configuring the ProxySG for Automatic Installation
Do the following procedure to configure the ProxySG to check for and install a new version of the
Central policy file.
To Configure Automatic Installation through the Management Console:
1.
Select Configuration>Policy>Policy Files>Policy Files.
2.
Select Automatically install new Policy when central file changes.
3.
Click Apply.
To Configure Automatic Installation through the CLI:
At the (config) command prompt, enter the following command:
SGOS#(config) policy subscribe
447
Blue Coat ProxySG Configuration and Management Guide
Configuring a Custom Central Policy File for Automatic Installation
If you define your own Central policy file, you can configure the ProxySG to automatically install any
subsequent updated version of the file. To use this capability, you must change the Central policy file’s
first line with each version update. With automatic installation, the ProxySG checks for a change to the
first line of the file. In defining a custom Central policy file, add an item, such as a comment, to the
first line of the Central policy file that changes with each update. The following is a sample first line,
containing date information that is routinely updated with each version:
; Central policy file MonthDate, Year version
When you update and save the file in the original location, the ProxySG automatically loads the
updated version.
Configuring E-mail Notification
You can specify whether the ProxySG sends e-mail when the Central policy file changes. The e-mail
address used is the same as that used in diagnostic reporting: the event recipient for the custom
heartbeat e-mail. For information about diagnostic reporting, see "Diagnostic Reporting (Heartbeats)"
on page 958.
To Configure E-mail Notification through the Management Console:
1.
Select Configuration>Policy>Policy Files>Policy Files.
2.
Select Send me email when central file changes.
3.
Click Apply.
To Configure E-mail Notification through the CLI:
At the (config) command prompt, enter the following command:
SGOS#(config) policy notify
Configuring the Update Interval
You can specify how frequently the ProxySG checks for a new version of the Central policy file. By
default, the appliance checks for an updated Central policy file once every 24 hours (1440 minutes).
You must use the CLI to configure the update interval. You cannot configure the update interval
through the Management Console.
To Configure the Update Interval through the CLI:
At the (config) command prompt, enter the following command:
SGOS#(config) policy poll-interval minutes
Checking for an Updated Central Policy File
You can manually check whether the Central policy file has changed. You must use the CLI. You
cannot check for updates through the Management Console.
To Check for an Updated Central File through the CLI:
At the (config) command prompt, enter the following command:
448
Chapter 13: Managing Policy Files
SGOS#(config) policy poll-now
The ProxySG displays a message indicating whether the Central file has changed.
Resetting the Policy Files
You can clear all the policy files automatically through the CLI.
To Clear all Policy Files through the CLI:
1.
At the (config) command prompt, enter the following command:
SGOS#(config) policy reset
WARNING: This will clear local, central, forward and VPM policy. Are you sure
you want to reset ALL policy files? (y or n)
The ProxySG displays a warning that you will be resetting all of your policy files.
2.
Enter y to continue or n to cancel.
Note:
This command does not change the default proxy policy settings.
Moving VPM Policy Files from One ProxySG to Another
VPM policy files are specific to the ProxySG where they were created. But just as you can use the same
Central, Local, and Forward policy files on multiple ProxySG Appliances, you can use VPM policies
created on one appliance on other appliances.
For detailed information on moving VPM policy files, see "Installing VPM-Created Policy Files" on
page 545 in Appendix 14: "The Visual Policy Manager".
Viewing Policy Files
You can view either the compiled policy or the source policy files. Use these procedures to view
policies defined in a single policy file (for example, using VPM) or in multiple policy files (for
example, using the Blue Coat Central policy file and VPM).
Viewing the Installed Policy
Use the Management Console or a browser to display installed Central, Local, or Forward policy files.
Note:
You can view VPM policy files through the Visual Policy Files tab.
To View Installed Policy through the Management Console:
1.
Select Configuration>Policy>Policy Files>Policy Files.
2.
In the View File drop-down list, select Current Policy to view the installed and running policy, as
assembled from all policy source files. You can also select Results of Policy Load to view any
warnings or errors resulting from the last attempt (successful or not) to install policy.
3.
Click View.
The ProxySG opens a separate browser window and displays the installed policy file.
449
Blue Coat ProxySG Configuration and Management Guide
To View the Currently Installed Policy through a Browser:
1.
Enter a URL in one of the following formats:
❐
If an HTTPS-Console is configured, use
https://ip_address_of_ProxySG:HTTPS-Console_port/Policy/current (the default
port is 8082).
❐
If an HTTP-Console is configured, use
http://ip_address_of_ProxySG:HTTP-Console_port/Policy/current (the default port
is 8081).
The ProxySG opens a separate browser window and displays the policy.
2.
Review the policy, then close the browser.
To View the Currently Installed Policy through the CLI:
At the (config) command prompt, enter the following command:
SGOS#(config) show policy
Viewing Policy Source Files
You can display source (uncompiled) policy files on the ProxySG.
To View Policy Source Files through the Management Console:
1.
Select Configuration>Policy>Policy Files>Policy Files.
2.
To view a policy source file, select the file you want to view (Local, Forward, or Central) from the
View File drop-down list and click View.
The ProxySG opens a separate browser window and displays the appropriate source policy file.
To View Policy Source Files through the CLI:
At the (config) command prompt, enter one of the following commands:
SGOS#(config) show configuration
-orSGOS#(config) show sources policy {central | local | forward | vpm-cpl |
vpm-xml}
The show configuration command displays general configuration information, followed by the
policy source file contents. If the ProxySG is using multiple policy files, file source displays in this
sequence: Central file, local file, VPM. The show sources policy command allows you to specify the
policy files you want to view.
Note:
450
You can use the show configuration command to save the output to a file for reference,
in addition to displaying the current configuration. For more information, refer to the Blue
Coat ProxySG Command Line Reference.
Chapter 13: Managing Policy Files
Viewing Policy Statistics
You can view policy statistics on all requests processed by the ProxySG. Use the Management Console
or a browser. You cannot view policy statistics through the CLI.
To Review Policy Statistics through the Management Console:
1.
Select Statistics>Advanced.
2.
Click the Policy link.
3.
Click the Show policy statistics link.
A separate browser window opens and displays the statistics.
4.
Examine the statistics, then close the browser.
To Review Policy Statistics through a Browser:
1.
Enter a URL in one of the following formats:
❐
If an HTTPS-Console is configured, use
https://ip_address_of_ProxySG:HTTPS-Console_port/Policy/statistics (the default
port is 8082).
❐
If an HTTP-Console is configured, use
http://ip_address_of_ProxySG:HTTP-Console_port/Policy/statistics (the default
port is 8081).
The ProxySG opens a separate browser window and displays the statistics.
2.
Examine the statistics, then close the browser.
451
Blue Coat ProxySG Configuration and Management Guide
452
Chapter 14: The Visual Policy Manager
The Visual Policy Manager (VPM) is a graphical policy editor included with the ProxySG. The VPM
allows you to define Web access and resource control policies without having an in-depth knowledge
of Blue Coat Systems Content Policy Language (CPL) and without the need to manually edit policy
files.
This chapter assumes that you are familiar with basic concepts of ProxySG policy functionality as
described in Appendix 13: "Managing Policy Files".
While VPM creates only a subset of everything you can achieve by writing policies directly in CPL, it
is sufficient for most purposes. If your needs require more advanced policies, consult the Blue Coat
ProxySG Content Policy Language Guide.
This chapter contains the following sections:
•
"Section A: About the Visual Policy Manager"
•
"Section B: Policy Layer and Rule Object Reference"
•
"Section C: Detailed Object Column Reference"
•
"Section D: Managing Policy Layers and Files"
•
"Section E: Tutorials"
Related topics:
•
Blue Coat ProxySG Content Policy Language Guide
•
Appendix 13: "Managing Policy Files"
•
Appendix 18: "Content Filtering"
453
Blue Coat ProxySG Configuration and Management Guide
Section A: About the Visual Policy Manager
Section A: About the Visual Policy Manager
This section contains the following topics:
454
•
“System Requirements” on page 455—Discusses the Java Runtime Environment component
requirement.
•
"Launching the Visual Policy Manager" on page 456—Describes how to start VPM from the
Management Console.
•
"About the Visual Policy Manager User Interface" on page 457—Describes VPM menu items, tool
bars, and work areas.
•
"About VPM Components" on page 460—Provides definitions of the policy layers and describes
how rule objects comprise the layers.
•
"The Set Object Dialog" on page 463—Describes the dialog used to select objects to be added or
edited.
•
"The Add/Edit Object Dialog" on page 465—Describes the dialog used to add and edit rule
objects.
Chapter 14: The Visual Policy Manager
Section A: About the Visual Policy Manager
System Requirements
Before launching the VPM, verify client computers that are to access the VPM meet the basic
requirements.
Supported Operating Systems
This VPM version supports the following operating systems:
•
Windows 2000 Professional; SP4 or later
•
Windows XP; SP 2 or later
Supported Browsers
This VPM version supports the following browsers on the supported operating systems:
•
Internet Explorer 6.0; SP or later
•
Netscape 7.2
•
Firefox 1.0
The VPM might operate on other browsers; however, Blue Coat has not tested other browsers and
support is not available.
JRE Requirement
The VPM requires the Java Runtime Environment Standard Edition (JRE). This VPM version supports
JRE versions 1.4.1_07 and 5.0 (also listed as 1.5).
If a client attempting to start the VPM does not have a valid JRE version, the ProxySG automatically
connects to the Sun Microsystems download center to begin the download and installation. Follow the
on-screen instructions to download v5.0 (the default version for this release).
The VPM is completely independent from the Management Console. If the browser is configured
properly with its default JRE, the VPM uses the later of the valid versions.
Notes and Limitations
455
•
If you are updating to JRE v5.0, Blue Coat recommends the option to remove any version previous
to 1.4.1_07 before the update. Removing the obsolete version after updating might cause the
browser to not recognize v5.0, though it remains installed, and instigate a download prompt.
•
JRE v5.0: When viewing objects in a drop-down list, you can press a letter key to skip to the first
object name that starts with that letter. Pressing the same letter cycles to the next object. However,
immediately pressing another letter key does not take you to the next object if you have not
waited a few seconds. For example, in searching protocols you can repeatedly press H to cycle
through the protocols HTTP, HTTPS, and so on, but if you do not wait a short interval to press F to
go to FTP, no action occurs.
Blue Coat ProxySG Configuration and Management Guide
Section A: About the Visual Policy Manager
Launching the Visual Policy Manager
To Launch VPM:
1.
Select Configuration>Policy>Visual Policy Manager.
Figure 14-1: Launching VPM from the Management Console
2.
Launch VPM. If this is the first time launching VPM following an OS upgrade, or to ensure you
are launching the most current VPM version, click Force Download before clicking Launch.
If a valid JRE is already installed on your workstation, the ProxySG opens a separate browser
window and starts VPM. The first time you start the policy editor, it displays an empty policy.
If a valid JRE is not installed on your workstation, a security warning dialog box appears. Click
Yes to continue. Follow the instructions to install the JRE. After installation completes, a Launch
VPM tab briefly displays before VPM starts.
Note:
456
If using Internet Explorer: Depending on the browser version and settings, launching
VPM from an HTTPS URL might display security warning messages (page contains
secure and non-secure items). This is caused by the HTML link in the VPM launch page
that links to the JRE download site at the Sun Web site. This message can be ignored. You
can adjust the browser settings to display or not to display this message concerning
secure and non-secure items.
Chapter 14: The Visual Policy Manager
Section A: About the Visual Policy Manager
About the Visual Policy Manager User Interface
The following figure labels VPM components.
Menu bar
Tool bar
Layer tabs
Object types
Rules
Figure 14-2: Visual Policy Manager
457
Blue Coat ProxySG Configuration and Management Guide
Section A: About the Visual Policy Manager
Menu Bar
The following table describes VPM Menu Bar items.
Table 14.1: VPM Menu Bar Items
Install Policy On ProxySG
Saves all new policy rules.
Revert to existing Policy on ProxySG
Ignores changes and reloads installed policy rules.
Exit
Exits the application.
Add Rule
Delete Rule
Adds a new blank rule to the visible policy layer or
removes a rule from the visible policy layer.
Cut Rule
Copy Rule
Paste Rule
Standard cut, copy, and paste operations.
Move Rule Up
Move Rule Down
Moves rules up or down one position in a policy layer.
Reorder Layers
Delete Layer
Reorders the policy layers.
Deletes a specific policy layer.
Policy
Add Admin Authentication Layer
Add Admin Access Layer
Add DNS Access Layer
Add SOCKS Authentication Layer
Add Web Authentication Layer
Add Web Access Layer
Add Web Content Layer
Add Forwarding Layer
The Policy menu items add policy layers to be
populated with policy rules.
Configuration
Set DNS Lookup Restrictions
Restricts DNS lookups during policy evaluation.
Set Reverse DNS Lookup Restrictions
Restricts reverse DNS lookups during policy
evaluation.
Set Group Log Order
Configures the order in which the group information
is logged.
Edit Categories
Edits content filtering categories.
File
Edit
458
Chapter 14: The Visual Policy Manager
Section A: About the Visual Policy Manager
Table 14.1: VPM Menu Bar Items
View
Help
Generated CPL
Displays the CPL generated by VPM.
Current ProxySG VPM Policy Files
Displays the currently stored VPM policy files.
Object Occurrences
Lists the user-created object(s) in the selected rule; lists
use in other rules as well.
All Objects
Displays a dialog that displays current static and
user-defined VPM objects. You can also create, edit,
and delete objects. See "Centralized Object Viewing
and Managing" on page 534.
Tool Tips
Toggles the tool-tip display on and off.
Help Topics
Displays the online help.
About
Displays copyright and version information.
Tool Bar
The VPM Tool Bar contains the following functions:
•
Add Rule—Adds a blank rule to visible policy layer; all values for the rule are the defaults.
•
Delete Rule—Deletes the selected rule from the visible policy layer.
•
Move Up—Moves a rule up one position in the visible policy layer.
•
Move Down—Moves a rule down one position in the visible policy layer.
•
Install Policy—Converts the policies created in VPM into Blue Coat Content Policy Language (CPL)
and installs them on the ProxySG.
Policy Layer Tabs
Every policy layer you create from the Policy>Add Layer menu is displayed as a tab. Click a tab and the
rules included in that policy layer display below in the main body of the pane. Right-clicking a tab
displays the options of renaming and deleting the policy layer.
Figure 14-3: Right-click a Policy Tab to Rename or Delete a Policy Layer
Each VPM policy layer is described in later sections in this chapter.
459
Blue Coat ProxySG Configuration and Management Guide
Section A: About the Visual Policy Manager
Rules and Objects
A policy layer can contain multiple rules. Every rule is numbered and listed in a separate row. To
create a new rule, click the Add Rule button; a new rule is added to the bottom of the list. If multiple
rules exist within a policy layer, the ProxySG finds the first one that matches a given situation and
ignores the remaining rules. Therefore, rule order is important. Use the Move buttons on the rule bar to
reorder the rules in a policy.
Each rule is comprised of objects. The objects are the individual elements of a rule you specify. With
the exception of No. (number), which indicates the order of the rule in the layer and is filled in
automatically, all objects are configurable.
To specify or edit an object setting, position the mouse in the appropriate object cell within a rule and
right-click to display the drop-down the menu.
Figure 14-4: Right-click a Rule Cell to Set or Edit the Object Properties
Each object type is described in "Policy Layer and Rule Object Reference" on page 466.
About VPM Components
This section describes the specific policy layer types and rule objects.
Policy Layers
The layers are:
•
Administration Authentication—Determines how administrators accessing ProxySG must
authenticate.
•
Administration Access—Determines who can access the ProxySG to perform administration tasks.
•
DNS Access—Determines how the ProxySG processes DNS requests.
•
SOCKS Authentication—Determines the method of authentication for accessing the proxy through
SOCKS.
•
Web Authentication—Determines whether user clients that access the proxy or the Web must
authenticate.
460
Chapter 14: The Visual Policy Manager
Section A: About the Visual Policy Manager
•
Web Access—Determines what user clients accessing the proxy or the Web can access and any
restrictions that apply.
•
Web Content—Determines caching behavior, such as verification and ICAP redirection.
•
Forwarding—Determines forwarding hosts and methods.
As you create policy layers, you will create many different layers of the same type. Often, an overall
policy requires layers of different types designed to work together to perform a task. For example,
Authentication and Access layers usually accompany each other; an Authentication layer determines
if a user or client must authenticate, and an Access layer subsequently determines where that user or
client can go (what ProxySG or Web sites they can access) once they are authenticated.
Each object type is described in "Policy Layer and Rule Object Reference" on page 466.
Rule Objects
Policy layers contain rule objects. Only the objects available for that policy layer type are displayed.
There are two types of objects:
•
Static Objects—A self-contained object that cannot be edited or removed. For example, if you
write a rule that prohibits users from accessing a specific Web site, the Action object you select is
Deny.
Static objects are part of the system and are always displayed.
•
Configurable Objects—A configurable object requires parameters. For example, consider the rule
mentioned in the previous item that prohibits users from accessing a specific Web site. In this case,
the user is a Source object. That object can be a specific IP Address, user, group, user agent (such as
a specific browser), and so on. Select one and then enter the required information (such as a
verifiable user name or group name).
Configurable objects do not exist until you create them. A created object is listed along with all
static objects in the list dialog, and you can reuse it in other applicable policy layers. For example,
an IP address can be a Source or Destination object in many different policy-layer types.
Important: The orders of policy layers, and the order of rules within a layer are important. For
more information, see "How Policy Layers, Rules, and Files Interact" on page 541.
While individual object-type menus occasionally contain entries specific to the object type, the basic
menu options are:
•
Allow—(Web Access Layer Action column only) Quick menu access; sets the policy to allow.
•
Deny—(Web Access Layer Action column only) Quick menu access; sets the policy to deny.
•
Set—Displays the Set Object dialog where you select an object or create a new one.
•
Edit—Opens the Edit Object dialog where you edit an object or change to another.
•
Delete—Removes the selected object from the current rule and restores the default.
•
Negate—Defined as not. Negate provides flexibility in writing rules and designing the structure of
policies. The following is a simple Web Access rule that states: “When any client tries to access a
URL contained in an object of JobSearch, allow access.”
461
Blue Coat ProxySG Configuration and Management Guide
Section A: About the Visual Policy Manager
Figure 14-5: A Simple Web Access Policy Rule
The rule now specifies: “Allow access to everywhere but these JobSearch sites.”
Dragging the pointer to the Destination list, right-clicking to display the drop-down list, and
clicking Negate invokes a red circle with a horizontal white line in the icon in the cell.
Figure 14-6: The Red Icon in the Cell Indicates Negation, or “Not”
•
Cut, Copy, and Paste are the standard paste operations with the following restrictions: you can only
paste anything cut or copied from the same column in the same table and the copy and paste
functions do not work across multiple layers.
The following table describes the general function of each object type:
462
Object
Description
Source
Specifies the source attribute, such as an IP address, user, or group.
Destination
Specifies the destination attribute, such as a URL, IP address, and file extension.
Service
Specifies the service attribute, such as protocols, protocol methods, and IM file transfer
limitations.
Time
Specifies day and time restrictions.
Action
Specifies what to do when the rule matches.
Track
Specifies tracking attributes, such as event log and E-mail triggers.
Comment
Optional. You can provide a comment regarding the rule.
Chapter 14: The Visual Policy Manager
Section A: About the Visual Policy Manager
Policy Layer/Object Matrix
The following table displays which object types are available in each policy layer
.
Policy Layer
Source
Destination
Service
Time
Action
Track
Comment
Admin Authentication
x
x
x
x
Admin Access
x
x
x
x
DNS Access
x
x
x
x
SOCKS Authentication
x
x
x
x
Web Authentication
x
x
x
x
x
Web Access
x
x
x
x
x
x
x
x
x
x
x
x
x
x
x
x
Web Content
Forwarding
x
x
x
x
The Set Object Dialog
This section discusses the Set Object dialog used to select objects for configuration.
The object rules in all policy layer types determine the conditions for a particular policy rule.
Depending on the type of policy layer, an object can be anything from a user or group to an IP address
or a URL and so forth.
To create a rule, right-click a cell in an object cell. The relevant Set Object dialog displays. In this dialog,
select the objects for the rule or create new objects as necessary.
Objects have type-specific icons to provide a visual aid in distinguishing among different types in the
list.
Figure 14-7: Set Source Object Dialog with Selectable Objects
463
Blue Coat ProxySG Configuration and Management Guide
Section A: About the Visual Policy Manager
The Set Object dialog only displays or allows you to create the objects allowable in the specific option
of the rule type you are creating. But if more than one policy-layer type uses the same object type (for
example, IP address can be a source in rules for four of the five types of policies), then those existing
objects display in all Set Object dialogs, regardless of policy-layer type.
Controlling the List of Objects in the Set Object Window
As you create more policies, it is likely that the lists of existing objects in the various Set Object dialogs
expand. You can restrict the display of objects in the list to a specific type by selecting an object type
from the Show drop-down list above the list. The following figure demonstrates the window
displayed above with the list restricted to Client IP addresses.
Figure 14-8: Limiting the Set Object Dialog View
The Add/Edit Object Dialog
From the Set Object dialog, the Add Object dialog is used to define configurable objects. Existing
configurable options can be altered using the Edit Object dialog. In terms of functionality, the two
dialogs are identical.
For the initial configuration of an object, click New on the Set Object dialog to display the Add Object
dialog. Perform the tasks required to configure the object and click OK. The newly named and
configured object appears in the list of selectable objects in the Set Object dialog and is ready to be
selected for the rule.
To edit an existing object, select an object from the list and click Edit. The Edit Object dialog appears
with the existing parameters on display. Edit as necessary and click OK.
To remove an existing object, select an object from the list and click Remove. A secondary prompt
verifies your attempt to remove the object; click OK. The object is deleted.
464
Chapter 14: The Visual Policy Manager
Section A: About the Visual Policy Manager
Online Help
The VPM contains its own Help module (a porting of this chapter). Each object in the VPM contains a
Help button that links to the corresponding object reference in the Help file. This reference describes
the purpose of the object. Interaction with other policy and references to feature-related sections in the
Configuration and Management Guide are provided, if relevant. Also, this Help module contains
navigation buttons and its own Table of Contents.
Note:
465
The online Help file is displayed in a separate window and requires a few seconds to load
and scroll to the correct object. The speed of your system might impact this slight lag time.
Furthermore, this lag time increases on slower machines running JRE v1.5.
Blue Coat ProxySG Configuration and Management Guide
Section B: Policy Layer and Rule Object Reference
Section B: Policy Layer and Rule Object Reference
This section contains the following topics:
466
•
"About the Reference Tables" on page 467—Describes the table conventions used in this section.
•
"Administration Authentication Policy Layer Reference" on page 467—Describes the objects
available in this policy layer.
•
"Administration Access Policy Layer Reference" on page 467—Describes the objects available in
this policy layer.
•
"DNS Access Policy Layer Reference" on page 468—Describes the objects available in this policy
layer.
•
"SOCKS Authentication Policy Layer Reference" on page 468—Describes the objects available in
this policy layer.
•
"Web Authentication Policy Layer Reference" on page 469—Describes the objects available in this
policy layer.
•
"Web Access Policy Layer Reference" on page 469—Describes the objects available in this policy
layer.
•
"Web Content Policy Layer Reference" on page 472—Describes the objects available in this policy
layer.
•
"Forwarding Policy Layer Reference" on page 473—Describes the objects available in this policy
layer.
Chapter 14: The Visual Policy Manager
Section B: Policy Layer and Rule Object Reference
About the Reference Tables
The tables in this section list the static and configurable objects available for each policy layer.
Note:
If viewing this document as a PDF, you can click an object name to jump to a description
of that object (all objects are described in Section C). To jump back to a specific policy
layer reference, click policy layer name in any object reference table that appears in the
next section.
Administration Authentication Policy Layer Reference
The following table provides the objects available in the Administration Authentication policy layer.
Source Objects
Action Objects
Track Objects
Client IP Address/Subnet
Do Not Authenticate
Trace
Client Hostname
Deny
Proxy IP Address/Port
Authenticate
Combined Objects
Force Authenticate
Administration Access Policy Layer Reference
The following table provides the objects available in the Administration Access policy layer.
Source Objects
Action Objects
Track Objects
Client IP Address/Subnet
Allow Read-Only Access
Event Log
Client Hostname
Allow Read-Write Access
Email
Proxy IP Address/Port
Deny
SNMP
User
Force Deny
Trace
Group
Attribute
Combined Objects
467
Combined Objects
Blue Coat ProxySG Configuration and Management Guide
Section B: Policy Layer and Rule Object Reference
DNS Access Policy Layer Reference
The following table provides the objects available in the DNS Access policy layer.
Source Objects
Destination Objects
Time Objects
Action Objects
Track
Objects
Client IP
Address/Subnet
DNS Response
Contains No Data
Time
Bypass DNS
Cache
Event Log
Proxy IP
Address/Port
DNS Response IP
Address/Subnet
Combined
Objects
Do Not Bypass
DNS Cache
Email
DNS Request
Name
RDNS Response
Host
Allow DNS From
Upstream Server
SNMP
RDNS Request IP
Address/Subnet
DNS Response
CNAME
Serve DNS Only
From Cache
Trace
DNS Request
Opcode
DNS Response
Code
Enable/Disable
DNS Imputing
Combined
Objects
DNS Request
Class
Category
Send DNS/RDNS
Response Code
DNS Request
Type
Combined Objects
Send DNS
Response
DNS Client
Transport
Send Reverse
DNS Response
Combined Objects
Reflect IP
Manage
Bandwidth
Combined Objects
SOCKS Authentication Policy Layer Reference
The following table provides the objects available in the SOCKS Authentication policy layer.
Source Objects
Action Objects
Track Objects
Client IP Address/Subnet
Do Not Authenticate
Trace
Client Hostname
Authenticate
Proxy IP Address/Port
Force Authenticate
SOCKS Version
Combined Objects
468
Chapter 14: The Visual Policy Manager
Section B: Policy Layer and Rule Object Reference
Web Authentication Policy Layer Reference
The following table provides the objects available in the Web Authentication policy layer.
Source Objects
Destination Objects
Action Objects
Track Objects
Client Hostname
Unavailable
Destination IP
Address/Subnet
Do Not Authenticate
Trace
Client IP Address/Subnet
Destination Host/Port
Deny
Client Hostname
URL
Authenticate
Proxy IP Address/Port
Category
Force Authenticate
User Agent
Combined Objects
Request Header
Combined Objects
Web Access Policy Layer Reference
The following table provides the objects available in the Web Access policy layer.
Web Access policy layers regulate, from a general to a granular level, who or what can access specific
Web locations or content.
•
Users, groups, individual IP addresses, and subnets, as well as object lists comprised of any
combination of these, can be subject to rules.
•
Rules can include access control for specific Web sites, specific content from any Web site,
individual IP addresses, and subnets.
•
Actions taken can range from allowing and denying access to more finely tuned changes or
limitations.
•
Rules can also be subject to day and time specifications and protocol, file type, and agent
delimiters.
Source Objects
Destination Objects
Service Objects
Time Objects
Action Objects
Track Objects
Streaming Client
Destination IP
Address/Subnet
Using HTTP
Transparent
Authentication
Time
Allow
Event Log
Client Hostname
Unavailable
Destination
Host/Port
Virus Detected
Combined
Objects
Deny
Email
Authenticated
User
URL
Client Protocol
Force Deny
SNMP
Client IP
Address/Subnet
Category
Protocol Methods
Bypass Cache
Trace
469
Blue Coat ProxySG Configuration and Management Guide
Section B: Policy Layer and Rule Object Reference
Source Objects
Destination Objects
Service Objects
Client Hostname
File Extensions
Proxy IP
Address/Port
Time Objects
Action Objects
Track Objects
IM File Transfer
Do Not Bypass
Cache
Combined
Objects
HTTP MIME Types
IM Message Text
Check/Do Not
Check
Authorization
User
Response Code
IM Message
Reflection
Always Verify
Group
Response Header
Streaming
Content Type
Use Default
Verification
Attribute
IM Buddy
ICAP Error Code
Block/Do Not
Block PopUp
Ads
User Agent
IM Chat Room
Combined
Objects
Force/Do Not
Force NTLM for
Server Auth
IM User Agent
Combined Objects
Reflect/Do Not
Reflect IM
Messages
Request Header
Block/Do Not
Block IM
Encryption
SOCKS Version
Return
Exception
IM User
Return Redirect
P2P Client
Send IM Alert
Client Negotiated
Cipher
Modify Access
Logging
Client Negotiated
Cipher Strength
Override Access
Log Field
Combined Objects
Rewrite Host
Reflect IP
Suppress
Header
Control Request
Header/Control
Response
Header
470
Chapter 14: The Visual Policy Manager
Section B: Policy Layer and Rule Object Reference
Source Objects
Destination Objects
Service Objects
Time Objects
Action Objects
Notify User
Strip Active
Content
Set Client HTTP
Compression
Set Server
HTTP
Compression
Set SOCKS
Compression
Manage
Bandwidth
Modify IM
Message
Return ICAP
Patience Page
Set External
Filter Service
Set ICAP
Request Service
Set FTP
Connection
Set SOCKS
Acceleration
Set Streaming
Max Bitrate
Combined
Objects
471
Track Objects
Blue Coat ProxySG Configuration and Management Guide
Section B: Policy Layer and Rule Object Reference
Web Content Policy Layer Reference
The following table provides the objects available in the Web Content policy layer.
The Web Content policy layer applies to requests independent of user identity.
Content scanning policy layers scan requested URLs and file types for viruses and other malicious
code. You must have an ICAP service installed on the ProxySG to use this policy type.
Destination Objects
Action Objects
Track Objects
Destination IP
Address/Subnet
Check/Do Not Check
Authorization
Event Log
Destination Host/Port
Always Verify
URL
Use Default Verification
Email
Category
Use Default Caching
SNMP
File Extensions
Do Not Cache
Trace
HTTP MIME Types
Force Cache
Combined
Objects
Combined Objects
Mark/Do Not Mark As
Advertisement
Enable/Disable Pipelining
Set Dynamic
Categorization
Set External Filter Service
Set Client HTTP
Compression
Set Server HTTP
Compression
Manage Bandwidth
Set ICAP Request Service
Set ICAP Response
Service
Set TTL
Modify Access Logging
Override Access Log Field
Combined Objects
472
Chapter 14: The Visual Policy Manager
Section B: Policy Layer and Rule Object Reference
Forwarding Policy Layer Reference
The following table provides the objects available in the Forwarding policy layer.
Source Objects
Destination
Objects
Service Objects
Action Objects
Track
Objects
Streaming Client
Destination IP
Address/Subnet
Client Protocol
Send Direct
Trace
Authenticated User
Destination
Host/Port
Combined Objects
Integrate/Do Not
Integrate New Hosts
Client IP
Address/Subnet
URL
Allow Content From
Origin Server
Client Hostname
Combined Objects
Serve Content Only
From Cache
Proxy IP
Address/Port
Select SOCKS Gateway
User
Select Forwarding
Group
Reflect IP
Attribute
Manage Bandwidth
SOCKS Version
Set IM Transport
P2P Client
Set SOCKS Gateway
Compression
Combined Objects
Set Streaming Transport
Combined Objects
473
Blue Coat ProxySG Configuration and Management Guide
Section C: Detailed Object Column Reference
Section C: Detailed Object Column Reference
This section contains the following topics:
474
•
"Source Column Object Reference"
•
"Destination Column Object Reference"
•
"Service Column Object Reference"
•
"Time Column Object Reference"
•
"Action Column Object Reference"
•
"Track Object Column Reference"
•
"Comment Object Reference"
•
"Using Combined Objects"
•
"Creating Categories"
Chapter 14: The Visual Policy Manager
Section C: Detailed Object Column Reference
Source Column Object Reference
A source object specifies the communication or Web transaction origin that is evaluated by the policy.
Not all policy layers contain the same source objects.
Any
Applies to any source.
Streaming Client
This is a static object. This rule applies to any request from a streaming client.
Client Hostname Unavailable
This is a static object. This rule applies if the client IP address could not be looked up with a reverse
DNS query.
Authenticated User
This is a static object. This rule applies to any authenticated user.
Client IP Address/Subnet
Specifies the IP address and, optionally, a subnet mask of a client. The policy defined in this rule
applies only to this address or addresses on this subnet. This object is automatically named using the
prefix Client; for example, Client: 1.2.0.0/255.255.0.0.
Client Hostname
Specifies a reverse DNS hostname resolved in the reverse lookup of a client IP address. Enter the host
name and select matching criteria. This object is automatically named using the prefix Client; for
example, Client: host.com. If you select a matching qualifier, that attribute is appended to the object in
parentheses. For example, Client: host.com (RegEx).
Proxy IP Address/Port
Specifies the IP address and, optionally, a port on the ProxySG. The policy defined in this rule applies
only to this address or addresses with this subnet.
User
Specifies an individual user in the form of a verifiable username or login name. Enter a user name and
an authentication realm. The dialog then displays different information depending on the type of
authentication realm specified. Select the appropriate realm from the drop-down list. Items in the list
are taken from the realms configured by the administrator in the ProxySG.
475
Blue Coat ProxySG Configuration and Management Guide
Section C: Detailed Object Column Reference
LDAP
You can optionally select a User Base DN from a drop-down list. Entries in the User Base DN list come
from those specified by the administrator in the ProxySG. You can also edit an entry selected in the
list, or type a new one. Edited names and new names are retained in the list. Notice in the Full Name
field that VPM takes the User Attribute type specified by the administrator in the ProxySG (cn= in the
following illustration), and associates it with the user name and Base DN entered here.
Important: When you configure a realm, the ProxySG assumes a default primary user attribute
(sAMAccountName for Active Directory; uid for Netscape/iPlanet Directory
Server/SunOne; cn for Novel NDS). You can accept the default or change it.
Whatever is entered there is what VPM uses here, entering it in the Full Name display
field once a Base DN is selected.
If the primary user attribute specified in the ProxySG differs from the primary user attribute specified
in the directory server, enter the latter in the User field with the appropriate value (in the format
attribute=value). This replaces the entry in the Full Name field. Examine the following screenshot.
Assume that the organization uses phone as the primary attribute in its LDAP directory:
Figure 14-9: Specifying an LDAP Primary User Attribute
You can only enter a user attribute and equal sign in the User field if a User Base DN is selected.
NTLM
Entries in this list are not prepopulated. You must enter a name in the Domain Name field. An entered
name is retained and can subsequently be selected and edited. Notice in the Full Name field that VPM
displays domain name and user name entered above.
476
Chapter 14: The Visual Policy Manager
Section C: Detailed Object Column Reference
Figure 14-10: Adding an NTLM User with a FQDN or DN
RADIUS
Entries in this list are not prepopulated. You must enter a name in the User field. An entered name is
retained and can subsequently be selected and edited. Notice in the Full Name field that VPM displays
domain name and user name entered above.
Local
Entries in this list are not prepopulated. You must enter a name in the User field. An entered name is
retained and can subsequently be selected and edited. Notice in the Full Name field that VPM displays
domain name and user name entered above.
Certificate
If a Certificate realm is selected and that realm uses an LDAP realm as authentication realm, the
Browse button is clickable. This option allows you to browse the LDAP database and select users, thus
preventing typing errors possible from manually entering names in the fields. If the Certificate realm
does not use an LDAP authentication realm, Browse is not displayed.
Netegrity SiteMinder
Entries in this list are not prepopulated. You must enter a name in the User field. An entered name is
retained and can subsequently be selected and edited. Notice in the Full Name field that VPM displays
domain name and user name entered above.
477
Blue Coat ProxySG Configuration and Management Guide
Section C: Detailed Object Column Reference
Oblix COREid
Entries in this list are not prepopulated. You must enter a name in the User field. An entered name is
retained and can subsequently be selected and edited. Notice in the Full Name field that VPM displays
domain name and user name entered above.
Policy Substitution
Entries in this list are not prepopulated. You must enter a name in the User field. An entered name is
retained and can subsequently be selected and edited. Notice in the Full Name field that VPM displays
domain name and user name entered above.
Sequences
Entries in this list are not prepopulated. You must enter a name in the User field. An entered name is
retained and can subsequently be selected and edited. Notice in the Full Name field that VPM displays
domain name and user name entered above. From the Member Realm drop-down list, select an
authentication realm (already configured on the ProxySG). Depending on the realm type, new fields
appear.
Group
Specifies a verifiable group name. Enter a user group and an authentication realm. The dialog then
displays different information depending on the type of authentication realm specified.
•
Group field—Replace the default with a verifiable group name.
•
Authentication Realm field—Select the appropriate realm from the drop-down list. Items in the list
are taken from the realms configured by the administrator in the ProxySG.
❐
LDAP—Entries in the Group Base DN list come from those specified by the administrator in the
ProxySG. You can also edit an entry selected in the list, or type a new one. Edited names and
new names are retained in the list. Notice in the Full Name field that VPM takes the User
Attribute type specified by the administrator in the ProxySG (cn= in the following
illustration), and conjoins it with the group name and Base DN entered here.
Important:
478
When you create a group, the default attribute is cn= in the Full Name display
field.
Chapter 14: The Visual Policy Manager
Section C: Detailed Object Column Reference
Figure 14-11: Creating an LDAP Group Object
If the primary user attribute specified in the ProxySG differs from the primary user attribute
specified in the directory server, you need to enter the latter here. Do that by typing it in the
Group field with the appropriate value (in the format attribute=value). Doing so replaces the
entry in the Full Name field. Unlike the comparable situation when creating a user (described
immediately above), when creating a group, the Group Base DN does not need to be selected in
order to type the attribute=value pair in the Group field.
❐
479
NTLM—Entries in this list are not prepopulated. You must enter a name in the Domain Name
field. A name typed in is retained and can subsequently be selected and edited. Notice in the
Full Name field that VPM displays the domain name and group name entered above.
Blue Coat ProxySG Configuration and Management Guide
Section C: Detailed Object Column Reference
Figure 14-12: Creating an NTLM Group Object
❐
Local—Entries in this list are not prepopulated. You must enter a name in the Group field. A
name typed in is retained and can subsequently be selected and edited. Notice in the Full
Name field that VPM displays the group name entered above.
❐
Certificate—If a Certificate realm is selected and that realm uses an LDAP realm as
authentication realm, the Browse button is clickable. This option allows you to browse the
LDAP database and select users, thus preventing typing errors possible from manually
entering names in the fields. If the Certificate realm does not use an LDAP authentication
realm, Browse is not displayed.
❐
Netegrity SiteMinder—Entries in this list are not prepopulated. You must enter a name in the
Group field. A name typed in is retained and can subsequently be selected and edited. Notice
in the Full Name field that VPM displays the group name entered above.
❐
Oblix COREid—Entries in this list are not prepopulated. You must enter a name in the Group
field. A name typed in is retained and can subsequently be selected and edited. Notice in the
Full Name field that VPM displays the group name entered above.
❐
Policy Substitution—Entries in this list are not prepopulated. You must enter a name in the
Group field. A name typed in is retained and can subsequently be selected and edited. Notice
in the Full Name field that VPM displays the group name entered above.
❐
Sequences—Entries in this list are not prepopulated. You must enter a name in the Group field.
An entered name is retained and can subsequently be selected and edited. Notice in the Full
Name field that VPM displays domain name and user name entered above. From the Member
Realm drop-down list, select an authentication realm (already configured on the ProxySG).
Depending on the realm type, new fields appear.
480
Chapter 14: The Visual Policy Manager
Section C: Detailed Object Column Reference
Attribute
Specifies an LDAP or Radius realm attribute or service.
LDAP
Specifies a specific LDAP attribute (and optional value).
To Specify an LDAP Attribute:
1.
In the Name field, enter a name for the object or leave as is to accept the default.
2.
Select All LDAP or a specific realm.
3.
Enter an Attribute Type.
4.
Enter an Attribute Value, or leave blank to accept any value.
Figure 14-13: Specifying an LDAP Attribute
RADIUS
Specifies a RADIUS attribute.
To Specify a RADIUS Attribute:
Select from a drop-down list of available services.
481
1.
In the Name field, enter a name for the object or leave as is to accept the default.
2.
Select All RADIUS or a specific realm.
3.
Select a RADIUS Attribute.
Blue Coat ProxySG Configuration and Management Guide
Section C: Detailed Object Column Reference
Figure 14-14: Specifying a RADIUS Attribute
DNS Request Name
Specifies a DNS request. Enter the host name and select matching criteria. This object is automatically
named using the prefix DNS; for example, DNS: host.com. If you select a matching qualifier, that
attribute is appended to the object in parentheses. For example, DNS: host.com (RegEx).
RDNS Request IP Address/Subnet
Specifies the reverse DNS IP address and, optionally, a subnet mask. The policy defined in this rule
applies only to this address or addresses on this subnet. This object is automatically named using the
prefix RDNS; for example, RDNS: 5.6.0.0/255.255.0.0.
DNS Request Opcode
Specifies OPCODEs to represent in the DNS header.
To Specify a DNS Request OPCODE Object:
1.
In the Name field, enter a custom name or leave as is to accept the default.
2.
Select one or more of the OPCODEs.
3.
Click OK.
DNS Request Class
Specifies the DNS request class (QCLASS) properties.
To Specify a DNS Request Class Object:
482
1.
In the Name field, enter a custom name or leave as is to accept the default.
2.
Select one or more of the request classes.
Chapter 14: The Visual Policy Manager
Section C: Detailed Object Column Reference
3.
Click OK.
DNS Request Type
Specifies the DNS request types (QTYPE) attributes.
To Specify a DNS Request Type Object:
1.
In the Name field, enter a custom name or leave as is to accept the default.
2.
Select one or more of the request types.
3.
Click OK.
DNS Client Transport
Specifies the DNS client transport method, UDP or TCP.
To Specify a DNS Client Transport Object:
1.
Select UDP Transport or TCP Transport. This object is automatically named using the prefix DNS; for
example, DNS: Client Transport UDP.
2.
Click OK.
SOCKS Version
Specifies the SOCKS version, 4 or 5. This object is automatically named as SOCKSVersion4 or
SOCKSVersion5.
User Agent
Specifies one or more agents a client might use to request content. The choices include specific
versions of: Microsoft Internet Explorer, Netscape Communicator, Microsoft Windows Media Player
and NetShow, Real Media RealPlayer and RealDownload, Apple QuickTime, Opera, and Wget.
The policy defined in this rule applies to these selected agents. You can name this list and create other
custom lists to use with other policy layer rules.
483
Blue Coat ProxySG Configuration and Management Guide
Section C: Detailed Object Column Reference
Figure 14-15: Selecting User Agents
Note:
If you require a user agent not contained in this list, use the Request Header object, which
can contain user agent specified as a header.
IM User Agent
Checks the specified string for a match in the user agent provided by the IM client. For example,
specify the string Lotus to distinguish between the Lotus AOL client and the standard AOL client.
To Specify a Header:
1.
In the IM User Agent field, enter a string.
2.
From the drop-down list, select a matching criteria.
3.
Click Add.
Request Header
Specifies the rule applies to requests containing a specific header. Blue Coat supplies a list of standard
headers, but you can also select a custom header.
To Specify a Header:
484
1.
In the Name field, enter a custom name or leave as is to accept the default.
2.
From the Show drop-list select the viewing field from All to Standard or Custom, as desired. Standard
displays only the default standard headers. Custom displays any admin-defined headers that exist.
Chapter 14: The Visual Policy Manager
Section C: Detailed Object Column Reference
3.
From the Header Name drop-list, select a standard or custom header or enter a new custom header
name.
4.
In the Header Regex field, enter the header values to which this rule applies.
Example
An object named CorporateHeader with client IP address 10.1.1.1.
Figure 14-16: Specifying a Header
IM User
Specifies an IM user by their handle. IM traffic sent to or from this user is subject to this rule. You can
enter a complete User ID, a string that is part of a User ID, or a string with a regular expression. Select
the match type from the drop-down list to the right (Exact, Contains, or RegEx).
Figure 14-17: Specifying an IM User
P2P Client
Specifies peer-to-peer (P2P) clients.
To Specify P2P Clients:
485
1.
In the Name field, enter a name for the object or accept the default.
2.
Select All P2P Clients (all protocols become selected), or one or more P2P protocols.
3.
Click OK.
Blue Coat ProxySG Configuration and Management Guide
Section C: Detailed Object Column Reference
Client Negotiated Cipher
Specifies a cipher code. Select a code from the drop-down list. This object is automatically named
using the prefix Cipher; for example, Cipher: RC4-MD5.
Client Negotiated Cipher Strength
Specifies the cipher strength. Select Export, Low, Medium, or High from the drop-down list. This object is
automatically named using the prefix Cipher Strength; for example, Cipher Strength: Medium.
Combined Source Object
Allows you to create an object that combines different source types. Refer to "Using Combined
Objects" on page 530.
Source Column/Policy Layer Matrix
The following matrix lists all of the Source column objects and indicates which policy layer they apply
to.
Object
Admin
Auth
Admin
Access
DNS
Access
SOCKS
Auth
Web
Auth
Web
Access
Web
Content
Forwarding
x
Streaming Client
Client Hostname
Unavailable
x
Authenticated User
Client IP Address/Subnet
x
Client Hostname
x
Proxy IP Address/Port
x
x
x
x
x
x
x
x
x
x
x
x
x
x
x
x
x
x
x
x
User
x
x
x
Group
x
x
x
Attribute
x
x
x
DNS Request Name
x
RDNS Request IP
Address/Subnet
x
DNS Request Opcode
x
DNS Request Class
x
DNS Request Type
x
DNS Client Transport
x
486
Chapter 14: The Visual Policy Manager
Section C: Detailed Object Column Reference
Object
Admin
Auth
Admin
Access
DNS
Access
SOCKS
Auth
Web
Auth
x
SOCKS Version
x
x
User Agent
Web
Access
Forwarding
x
x
x
IM User Agent
x
Request Header
x
IM User
x
P2P Client
x
Client Negotiated Cipher
x
Client Negotiated Cipher
Strength
x
Combined Objects
Web
Content
x
x
x
x
x
x
x
x
Destination Column Object Reference
A destination object specifies the communication or Web traffic destination that is evaluated by the
policy. Not all policy layers contain the same destination objects.
Any
Applies to any destination.
DNS Response Contains No Data
This is a static object.
Destination IP Address/Subnet
Specifies the IP address and, optionally, a subnet mask of a destination server. The policy defined in
this rule only applies to this address only or addresses within this subnet. This object is automatically
named using the prefix Destination; for example, Destination: 1.2.0.0/255.255.0.0.
Destination Host/Port
Specifies the hostname or port of a destination server. The policy defined in this rule applies to this
host on this port only. Enter the host name and port number, and select matching criteria. This object is
automatically named using the prefix Destination; for example, Destination: company.com:80.
URL
Specifies a URL entered by a user.
487
Blue Coat ProxySG Configuration and Management Guide
Section C: Detailed Object Column Reference
To Specify a URL:
Select a radio button and enter the required information in the fields:
•
Simple Match—Matches a partial URL. If a host name is specified, all hosts in that domain or
subdomain match; if a path is specified, all paths with that path prefix match; if a scheme or port
number is specified, only URLs with that scheme or port match. This object is automatically
named using the prefix URL; therefore, the object is displayed as URL: host.com.
•
Regular Expression Match—Specifies a regular expression. This object is automatically named using
the prefix URL; therefore, the object is displayed as URL: host.com (RegEx).
•
Advanced Match—Specifies a scheme (protocol), host, port range, and/or path. Enter a name at the
top of the dialog to name the object. With host and path, you can select from the drop-down list to
match exactly as entered or parts thereof: Exact Match, Contains, At Beginning, At End, or RegEx. If
you select a matching qualifier, that attribute is appended to the object in parentheses. For
example, URL: host.com (Contains).
Figure 14-18: Specifying Destination URLs
Category
Allows you to create and customize categories of URLs.
•
Policy—Displays all current pre-defined and user created URL categories. This includes all
category-related configurations created in the VPM, as well as in the Local and Central policy files
(once installed). Select and deselect categories as required.
488
Chapter 14: The Visual Policy Manager
Section C: Detailed Object Column Reference
You can also create new categories from this dialog, which is similar to the dialog accessed
through the VPM Menu Bar as described in "Creating Categories" on page 536.
If you enable a service, such a content filter, those relevant categories appear in this object.
•
System—Displays hard-coded ProxySG configurations. These are not editable, but you can select
or deselect them.
To create a policy category:
1.
Select Policy; click Add. The Object Name dialog appears.
2.
Name the category and click OK.
3.
Drop the Policy list and select the created category; click Edit URLs. The Edit Locally Defined
Category Object dialog appears.
4.
Enter URLs appropriate for the content filter category you are creating; click OK.
5.
Click OK.
Note:
If one or more other administrators have access to the ProxySG through other
workstations and are creating categories either through VPM or with inline commands,
consider that newly-created or edited categories are not synchronized until the policy is
installed. When the policy is installed with VPM, the categories are refreshed. If confusion
occurs, select the File>Revert to Existing Policy on ProxySG Appliance option to restore the
policy to the previous state and reconfigure categories.
Category Hierarchy Behavior
Once categories have been created, they can be selected and deselected as required. If you create
sub-categories (a parent and child category hierarchy), the category selection behavior is the
following:
489
•
Selecting a parent category automatically selects all child categories if no child categories are
already selected.
•
Deselecting a parent category automatically deselects all child categories if all child categories are
already selected.
•
If one or more of the child categories are already selected or deselected, selecting or deselecting
the parent category does not affect child categories—the status of selected or deselected remains
the same.
Blue Coat ProxySG Configuration and Management Guide
Section C: Detailed Object Column Reference
This behavior applies to as many levels as you create.
File Extensions
Creates a list of file extensions. The rule is triggered for content with an extension matching any on the
list. You can create multiple lists that contain various extensions to use in different rules. For example,
create a list called Pictures, and select file extension types such as GIF, JPEG, BMP, XPM, and so on.
HTTP MIME Types
Creates a list of HTTP MIME content types. The rule is triggered for content matching any on the list.
You can create multiple lists that contain various MIME types to use in different rules. For example,
create a list called MicrosoftApps, and select MIME types application/vnd.ms-excel,
application/vnd.ms-powerpoint, application/vnd.ms-project, and application/vnd.works.
Note:
If you require a MIME type not contained in this list, use a URL object that uses the At
End matching criteria.
Response Code
Specifies the rule applies to content responses containing a specific HTTP code. Select a code from the
drop-down list. You can name the rule object or accept the default name.
Figure 14-19: Specifying a Response Code
Response Header
Specifies the rule applies to content responses containing a specific header. Blue Coat supplies a list of
standard headers, but you can also enter a custom header.
490
Chapter 14: The Visual Policy Manager
Section C: Detailed Object Column Reference
To Specify a Header:
1.
In the Name field, enter a custom name or leave as is to accept the default.
2.
From the Show drop-down list select the viewing field from All to Standard or Custom, as desired.
Standard displays only the default standard headers. Custom displays any admin-defined headers
that exist.
3.
From the Header Name drop-down list, select a standard or custom header.
4.
In the Header Regex field, enter the header string this rule applies to.
Figure 14-20: Specifying a Response Header
IM Buddy
Specifies an IM buddy by their handle. IM traffic sent to or from this buddy is subject to this rule. You
can enter a complete buddy ID, a string that is part of a buddy ID, or a string with a regular
expression. Select the match type from the drop-down list to the right (Exact, Contains, or RegEx).
IM Chat Room
Specifies an IM chat room by name or other triggers. IM traffic sent to this chat room is subject to this
rule.
To Create a Chat Room Trigger:
1.
In the Name field, enter a name for the object or leave as is to accept the default.
2.
Select one or more of the following triggers:
3.
491
❐
Room ID—Specifies a specific IM chat room by its name. Enter a name and from the
drop-down list select an option: Exact Match, Contains, or RegEx.
❐
Type—Specifies the type of room. Select Private or Public.
❐
Invite Only—Specifies to trigger if user must be invited or not.
❐
Voice Enabled—Specifies whether room supports voice chat or not.
❐
Conference—Specifies whether room is a conference or not.
Click OK.
Blue Coat ProxySG Configuration and Management Guide
Section C: Detailed Object Column Reference
Example
An object named ChatRoom1 that triggers the rule if the room is private.
Figure 14-21: Chat Room Object
DNS Response IP Address/Subnet
Specifies the destination DNS IP address and, optionally, a subnet mask. The policy defined in this
rule only applies to DNS responses containing this address or addresses within this subnet. This
object is automatically named using the prefix DNS; for example, DNS: 1.2.3.4/255.255.0.0.
RDNS Response Host
Specifies a reverse DNS response hostname resolved in the reverse lookup of a client IP address. Enter
the host name and select matching criteria. This object is automatically named using the prefix RDNS;
for example, RDNS: host.com. If you select a matching qualifier, that attribute is appended to the object
in parentheses. For example, RDNS: host.com (RegEx).
DNS Response CNAME
Specifies the rule applies to DNS CNAME responses matching a given hostname. Enter the host name
and select matching criteria. This object is automatically named using the prefix DNS CNAME;
therefore, the object is displayed as DNS CNAME: host.com.
DNS Response Code
Specifies the rule applies to DNS responses containing a specific DNS Response code. Select one or
more codes from the list. You can name the rule object or accept the default name.
Combined Destination Objects
Allows you to create an object that combines different destination types. Refer to "Using Combined
Objects" on page 530.
492
Chapter 14: The Visual Policy Manager
Section C: Detailed Object Column Reference
Destination Column/Policy Layer Matrix
The following matrix lists all of the Destination column objects and indicates which policy layer they
apply to.
Object
Admin
Auth
Admin
Access
DNS
Access
Web
Auth
Web
Access
Web
Content
Forwarding
Destination IP
Address/Subnet
x
x
x
x
Destination Port
x
x
x
x
URL
x
x
x
x
x
x
x
File Extensions
x
x
HTTP MIME Types
x
x
Response Header
x
Response Code
x
IM Buddy
x
IM Chat Room
x
Category
x
DNS Response IP
Address/Subnet
x
RDNS Response Host
x
DNS Response CNAME
x
DNS Response Code
x
Combined Objects
x
SOCKS
Auth
x
x
x
x
Service Column Object Reference
A service object specifies a service type, such as a protocol, that is evaluated by the policy. Not all
policy layers contain the same service objects.
Any
Applies to any service.
Using HTTP Transparent Authentication
This is a static object. The rule applies if the service is using HTTP transparent authentication.
493
Blue Coat ProxySG Configuration and Management Guide
Section C: Detailed Object Column Reference
Virus Detected
This is a static object. The rule applies if ICAP scanning detects a virus.
Client Protocol
Specifies the client protocol types and subsets. From the first drop-down list, select a type from the
drop-down list: Endpoint Mapper, FTP, HTTP, HTTPS, Instant Messaging, P2P, Shell, SOCKS, Streaming, or
TCP Tunneling.
The second drop-down list allows you to select a protocol subset:
•
All—Applies to all communication using this type of protocol.
•
Pure—Applies if the protocol is using a direct connection.
•
Over—Applies if a protocol is communicating through a specific transport method.
For example, you can select the Instant Messaging protocol and select Pure Yahoo Instant Messaging.
Figure 14-22: Specifying Client Protocol Type
Protocol Methods
Specifies the protocol methods. Select a protocol from the drop-down list: FTP, HTTP, HTTPS, Instant
Messaging, SOCKS. Next, select each specific method.
494
Chapter 14: The Visual Policy Manager
Section C: Detailed Object Column Reference
Figure 14-23: Specifying HTTP Protocol Methods
IM File Transfer
Specifies the rule is applied to IM file transfers, which can be triggered by matching the file name, file
size, or both.
To Specify IM File Transfer Parameters:
1.
In the Name field, enter a name for the object or accept the default.
2.
To trigger by file name, select File. In the File field, specify a file name; from the drop-down list,
select if file is matched exactly (Exact Match), if the file contains the name (Contains), or matched by
regular expression (RegEx).
3.
To trigger by message size, select Size. Enter a range; from the drop-down list, select the size
attribute: bytes, kilobytes, megabytes, or gigabytes.
Figure 14-24: Limiting IM File Transfers
495
Blue Coat ProxySG Configuration and Management Guide
Section C: Detailed Object Column Reference
IM Message Text
Specifies the rule is applied to IM message text, which can be triggered by any or all of the following:
matching content keywords, message size, service type, and whether the content type is text or
application.
To Specify IM Message Text Parameters:
1.
In the Name field, enter a name for the object or accept the default.
2.
To trigger by content keywords, select Text. In the Text field, specify a keyword; from the
drop-down list, select if the file contains the text (Contains), or if it is to be matched by regular
expression (RegEx).
3.
To trigger by message size, select Size. Enter a range; from the drop-down list, select the size
attribute: bytes, kilobytes, megabytes, or gigabytes.
4.
To specify the message route, select Route. From the drop-down list, select Service, Direct, or Chat.
5.
To specify message type, select Text or Application.
Text specifies messages entered by a user; Application specifies messages sent by the client
application, such as typing notifications.
Figure 14-25: Triggering IM Rule with Text and Route Type
IM Message Reflection
Allows policy to test whether or not reflection is enabled for the current message and, if enabled,
whether it is possible.
•
Succeeded—IM reflection is enabled and is performed for this message.
•
Failed—IM reflection is enabled, but not possible for this message because the recipient is not
connected through this ProxySG.
•
Disabled—IM reflection is not enabled for this message.
The objects are automatically named based on the selection and can be used in any rule.
496
Chapter 14: The Visual Policy Manager
Section C: Detailed Object Column Reference
Streaming Content Type
Specifies streaming protocols.
To Specify Streaming Protocols:
1.
In the Name field, enter a name for the object or accept the default.
2.
Select All Streaming Content (all protocols become selected), or one or more streaming protocols.
3.
Click OK.
ICAP Error Code
Defines an object that recognizes one or more ICAP error codes returned during an antivirus scan. The
rule applies if the scan returns the specified errors.
To Specify ICAP Error Codes:
1.
In the Name field, enter a name for the object or accept the default.
2.
Select an option:
❐
No errors—An ICAP scan was performed without scanning errors.
❐
Any errors—An ICAP error code was returned during a scan.
❐
Selected errors—An ICAP error code of a specific type or types.
In the Available Errors field, select one or more ICAP error codes (press and hold the Control
key to select more than one type or the Shift key to select a block of types). Click Add.
3.
Click OK.
Combined Service Objects
Allows you to create an object that combines different service types. Refer to "Using Combined
Objects" on page 530.
Service Column/Policy Layer Matrix
The following matrix lists all of the Service column objects and indicates which policy layer they apply
to.
Object
Admin
Auth
Admin
Access
DNS
Access
SOCKS
Auth
Web
Auth
Web
Access
Web
Content
Forwarding
Using HTTP Transparent
Authentication
x
Client Protocol
x
x
x
Protocol Methods
x
x
x
497
Blue Coat ProxySG Configuration and Management Guide
Section C: Detailed Object Column Reference
Object
Admin
Auth
Admin
Access
DNS
Access
SOCKS
Auth
Web
Auth
Web
Access
IM File Transfer
x
IM Message Text
x
IM Message Reflection
x
Streaming Content Type
x
ICAP Error Code
x
Combined Objects
x
Web
Content
Forwarding
x
x
Time Column Object Reference
A time object specifies a block of time or time trigger that determines client access regarding other
parameters in the rule (such Web sites and content types). Currently, the Time object is only applicable
to the Web Access Layer.
Any
Applies anytime.
Time
Specifies the time restrictions.
To Configure Time Restrictions:
1.
In the Name field, enter a name for the object or leave to accept the default.
2.
Select Use Local Time Zone or Use UTC Time Zone.
Local time sets the rule to follow the ProxySG internal clock. UTC sets the rule to use the
Universal Coordinated Time (also known as Greenwhich Mean Time or GMT).
3.
To specify a range for any given day, select Enable; in the Specify Time of Day Restriction (hh:mm)
field, configure the times. The time style is military.
The range can be contained within one 24-hour calendar day, or overlap days. For example,
configuring the time to range from 22:00 to 06:00 sets a limit from 10 at night to 6 the following
morning.
498
4.
To specify a day of the week restriction, select Enable; in the Specific Weekday Restriction field, select
one or more days.
5.
To specify a day of the month range restriction, select Enable; in the Specify Day of Month Restriction
field, select the days, which are numbered from 01 to 31. To limit the range to specific day,
configure the numbers to be the same. For example, selecting 22 and 22 specifies the rule to apply
only the 22nd day of every month.
Chapter 14: The Visual Policy Manager
Section C: Detailed Object Column Reference
6.
To specify a restriction that spans one or more months, select Enable; in the Specify
Annually-Recurring Date Restriction field, select the month and day ranges. This calendar restriction
applies every year unless the restriction is altered.
Overlapping months is allowed, similar to the behavior of day ranges in Step 3.
7.
To specify a one-time only restriction, select Enable; in the Specify Non-Recurring Date Restriction
field, select the year, month, and day ranges. This calendar restriction applies only during the time
specified and will not repeat.
Figure 14-26: Configuring Time Limitations
Combined Time Object
Allows you to combine a time object that adheres to multiple time restrictions. See "Using Combined
Objects" on page 530.
Time Column/Policy Layer Matrix
The following matrix lists all of the Time column objects and indicates which policy layer they apply
to.
499
Blue Coat ProxySG Configuration and Management Guide
Section C: Detailed Object Column Reference
Object
Admin
Auth
Admin
Access
DNS
Access
SOCKS
Auth
Web
Auth
Web
Access
Time
x
x
Combined Objects
x
x
500
Web
Content
Forwarding
Chapter 14: The Visual Policy Manager
Section C: Detailed Object Column Reference
Action Column Object Reference
An action object determines which action to take if other parameters, such as source, destination,
service, and time requirements validate the rule.
Important: Because of character limitations required by the generated CPL, only alphanumeric,
underscore, and dash characters can be used to define an action object name.
Allow
This is a static object. Selecting this overrides other related configurations and the specified user
requests are allowed.
Deny
This is a static object. Selecting this overrides other related configurations and denies the specified
user requests.
Force Deny
This is a static object. Forces a request to be denied, regardless if rules in subsequent layers would
have allowed the request.
Allow Read-Only Access
This is a static object. Grants full access to view data on the appliance.
Allow Read-Write Access
This is a static object. Grants full access to view and manipulate data on the appliance.
Do Not Authenticate
This is a static object. Selecting this overrides other configurations and the specified users are not
authenticated when requesting content.
Authenticate
Creates an authentication object to verify users. An authentication realm must exist on the ProxySG to
be selected through VPM.
Note:
In the SOCKS Authentication policy layer, the object is SOCKS Authenticate.
To Create an Authentication Object:
1.
501
In the Name field, enter a name for the object or leave as is to accept the default.
Blue Coat ProxySG Configuration and Management Guide
Section C: Detailed Object Column Reference
2.
From the Realm drop-down list, select an authentication realm, which must already exist on the
ProxySG.
3.
Optional (in the Web Authentication policy layer only): from the Mode drop-down list, select a
mode. The mode determines the way the ProxySG interacts with the client for authentication
specifying the challenge type and the accepted surrogate credential:
❐
Auto—The default; the mode is automatically selected, based on the request. Selects among
proxy, origin-IP, and origin-IP-redirect, depending on the type of connection (explicit or
transparent) and the transparent authentication cookie settings.
❐
Form Cookie—For forms-based authentication: cookies are used as surrogate credentials. The
cookies are set on the OCS domain only, and the user is presented with the form for each new
domain. This mode is most useful in reverse proxy scenarios where there are a limited
number of domains.
❐
Form Cookie Redirect—The user is redirected to the authentication virtual URL before the form
is presented. The authentication cookie is set on both the virtual URL and the OCS domain.
The user is only challenged when the credential cache entry expires.
❐
Form IP—The user’s IP address is used as a surrogate credential. The form is presented
whenever the user’s credential cache entry expires.
❐
Form IP Redirect—This is similar to Form IP except that the user is redirected to the
authentication virtual URL before the form is presented.
❐
Proxy—For explicit forward proxies: the ProxySG uses an explicit proxy challenge. No
surrogate credentials are used. This is the typical mode for an authenticating explicit proxy.
❐
Proxy IP—The ProxySG uses an explicit proxy challenge and the client's IP address as a
surrogate credential.
❐
Origin—The ProxySG acts like an OCS and issues OCS challenges. The authenticated
connection serves as the surrogate credential.
❐
Origin IP—The ProxySG acts like an OCS and issues OCS challenges. The client IP address is
used as a surrogate credential.
❐
Origin Cookie—For transparent proxies: for clients that understand cookies but do not
understand redirects; the ProxySG acts like an origin server and issues origin server
challenges. The surrogate credential is used.
❐
Origin Cookie Redirect—For transparent forward proxies: the client is redirected to a virtual
URL to be authenticated, and cookies are used as the surrogate credential. The ProxySG does
not support origin-redirects with the CONNECT method.
502
❐
Origin IP Redirect—Significantly reduces security; only useful for reverse proxy and when
clients have unique IP addresses and do not understand cookies (or you cannot set a cookie).
Provides partial control of transparently intercepted HTTPS requests. The client is redirected
to a virtual URL to be authenticated, and the client IP address is used as a surrogate
credential. The ProxySG does not support origin-redirects with the CONNECT method.
❐
SG2—The mode is selected automatically, based on the request using the SGOS 2.x-defined
rules.
Chapter 14: The Visual Policy Manager
Section C: Detailed Object Column Reference
4.
(Optional) If you selected a Form mode in Step 3, the Form drop-down list becomes active. Select
5.
Click OK.
Figure 14-27: Specifying an Authentication Realm
Users are prompted to provide a valid user name and password.
Force Authenticate
Forces the user to authenticate even though the request is going to be denied for reasons that do not
depend on authentication. This action is useful to identify a user before the denial so that the
username is logged along with the denial.
Note:
In the SOCKS Authentication policy layer, the object is Force SOCKS Authenticate.
Bypass Cache
This is a static object. Prevents the cache from being queried when serving a proxy request, and
prevents the response from the origin server from being cached.
Do Not Bypass Cache
This is a static object. The ProxySG always checks if the destination is cached before going to the origin
server; also, the content is cached if cacheable.
Bypass DNS Cache
This is a static object. Prevents the request from querying the DNS cache list of resolved lookup names
or addresses.
Do Not Bypass DNS Cache
This is a static object. The ProxySG always queries the DNS cache list of resolved lookup names or
addresses.
503
Blue Coat ProxySG Configuration and Management Guide
Section C: Detailed Object Column Reference
Allow DNS From Upstream Server
This is a static object. Allows the ProxySG to send requests for data not currently cached to DNS
servers.
Serve DNS Only From Cache
This is a static object. Instructs the ProxySG to only serve a DNS request from content that is already
cached.
Enable/Disable DNS Imputing
These are static objects. If DNS imputing is enabled, the ProxySG appends the suffixes in the DNS
imputing list to hostnames looked up when the original name is not found.
Check/Do Not Check Authorization
These are static objects. These actions control whether or not the ProxySG forces a request to be sent to
an upstream server every time to check authorization, even if the content is already cached. The check
action is not usually required for upstream origin content servers performing authentication, as the
ProxySG automatically tracks whether content required authentication in each case. However, it can
be required when an upstream proxy is performing proxy authentication because of the way some
proxies cache credential information, causing them not to reliably challenge every request. When
requests are directed to an upstream proxy which operates in this manner, enabling Check
Authorization ensures that all such requests are properly authorized by the upstream proxy before the
content is served from the local cache.
Always Verify
This is a static object. Cached content is always verified for freshness for the sources, destinations, or
service specified in the rule. For example, the CEO and Executive Staff always require content to be
the most recent, but everyone else can be served from the cache.
Use Default Verification
This is a static object. Overrides the Always Verify action and instructs the ProxySG to use its default
freshness verification.
Block/Do Not Block PopUp Ads
These are a static objects. Blocks or allows pop up windows. Blue Coat recommends creating separate
Web Access policy layers that only contain pop up blocking actions. Furthermore, many Web
applications require pop up windows. As it is unlikely that your Intranet contains pages that pop up
unwanted advertising windows, Blue Coat recommends disabling pop up blocking for your Intranet.
For example:
•
504
Web Access rule 1: Specify the Intranet IP address and subnet mask in the Destination column and
select Do Not Block Popup Ads in the Action column.
Chapter 14: The Visual Policy Manager
Section C: Detailed Object Column Reference
•
Web Access rule 2: Select Block Popup Ads in the Action column.
As you continue to modify policy, you can add more policy layers to block or allow specific IP
addresses, but the policy layer as defined in the Web Access rule 2 above must always be positioned
last. Blocking pop up ads is the default if a previous policy rule does not trigger.
For more concept information about pop up windows, refer to "Blocking Pop Up Windows" on
page 562.
Force/Do Not Force NTLM for Server Auth
These are static objects. When configured for explicit proxy, Internet Explorer (IE) does not support an
NTLM challenge from an origin server. If Force NTLM for Server Auth is applied, the ProxySG converts
the 401-type server authentication challenge to a 407-type proxy authentication challenge, which IE
supports. The ProxySG also converts the resulting Proxy-Authentication headers in client requests to
standard server authorization headers, which allows an origin server NTLM authentication challenge
to pass through when IE is explicitly proxied through the ProxySG.
Reflect/Do Not Reflect IM Messages
These are static objects. IM traffic can be contained and restricted to the network so that it never
reaches the IM server. A hierarchy of ProxySG appliances manage the traffic and routes it depending
on each ProxySG fail open and fail closed configurations. For detailed information about this
deployment, refer to Chapter 16, Instant Messaging, of the Blue Coat ProxySG Configuration and
Management Guide.
Block/Do Not Block IM Encryption
These are static objects. AOL IM provides the option for clients to send encrypted messages through
both standard messaging (through the IM service) and direct connection messaging. These objects
allow you to block or not block the ability to send encrypted messages through AOL IM. For detailed
information about security benefits of this feature, see Chapter 16, Instant Messaging, of the Blue Coat
ProxySG Configuration and Management Guide.
Return Exception
Allows you to select exception types and associate a custom message, if desired. Blue Coat provides a
list of standard exceptions, but VPM also accepts user-defined values.
To Create a Return Exception Object:
1.
In the Name field, enter a name for the object or leave as is to accept the default.
2.
Perform one of the following:
3.
505
❐
Standard exception type: select one from the Built-in exception drop-down list.
❐
Custom exception (which already must be defined on the ProxySG) type: select one from the
User-defined exception drop-down list.
Optional: Select Force exception even if later policy would allow request to
Blue Coat ProxySG Configuration and Management Guide
Section C: Detailed Object Column Reference
4.
Optional: Select Allow re-authentication to
5.
Optional: in the Details field, enter a message that is displayed along with the summary and
exception ID on the exception page displayed to the user when the exception is returned.
Example
An object named DNSException2 that upon a DNS server failure returns a message to the user
instructing them to contact their support person.
Figure 14-28: Return Exception Object
To create custom exceptions, see "Defining Exceptions" on page 568.
Return Redirect
Aborts the current transaction and forces a client request to redirect to a specified URL. For example,
used to redirect clients to a changed URL; or redirecting a request to a generic page stating the Internet
access policy. Applies only to HTTP transactions.
Note:
Internet Explorer (IE) ignores redirect responses from FTP over HTTP requests, although
Netscape Navigator obeys the redirect. To avoid problems with IE, do not use redirect
when url.scheme=ftp.
If the URL that you are redirecting the browser to also triggers a redirect response from your policy,
then you can put the browser into an infinite loop.
In the Name field, enter a name for the object (or leave as is to accept the default); in the URL field,
enter the redirect destination URL.
Example
An object that redirects clients to an HTML policy statement page.
506
Chapter 14: The Visual Policy Manager
Section C: Detailed Object Column Reference
Figure 14-29: Return Redirect Object
Send IM Alert
Defines a message that is sent to an IM user by the ProxySG. The message is triggered by the IM
parameters defined in the policy (for example, client login, sent or received messages, and buddy
notification). Chapter 17: “Instant Messaging” on page 621 provides more information about
regulating IM through the ProxySG, as well as VPM examples.
Example
A message that informs IM users their messaging is logged.
Figure 14-30: Send IM Alert Object
Modify Access Logging
Defines access logging behavior.
•
Disable all access logging—No activity is logged for the requests matched by the rule.
•
Reset to default logging—Resets to logging the request to the default log specified by the ProxySG
configuration, if one exists.
507
•
Enable logging to—Enables logging of requests matched by this rule to the specified log.
•
Disable logging to—Disables logging of requests matched by this rule to the specified log.
Blue Coat ProxySG Configuration and Management Guide
Section C: Detailed Object Column Reference
Override Access Log Field
Allows you to manipulate access log entries. For any specific log value, you can suppress the value,
encode the value in Base64, or rewrite the value.
To Override Access Log Fields:
1.
In the Name field, enter a name for the object or leave as is to accept the default.
2.
From the Log Name drop-down list, select a log (must already be configured on the ProxySG).
3.
From the Field Name drop-down list, select an access log field.
4.
Select one of the following:
❐
Log original value—Records unmodified value in the access log.
❐
Suppress value—Prevents value from appearing in the access log.
❐
Base64 encode value—Records an encoded version of the value in the access log.
❐
Rewrite value—In the field, enter a string that replaces the value.
❐
Edit—Clicking Edit calls the Select The Rewrite String dialog. The substitution variables
instruct the ProxySG to append specific information to the object. The variables are
categorized alphabetically, according to prefix.
Note:
5.
Some variables do not have prefixes, which allows you to substitute the value
with information defined by other field types.
Click OK.
Example
An object called CEOLogRewrite that suppresses log entries so persons, such as support personal,
cannot view economically sensitive information to gain improper knowledge.
Figure 14-31: Overriding Access Log Fields
508
Chapter 14: The Visual Policy Manager
Section C: Detailed Object Column Reference
Rewrite Host
Rewrites host component of a URL, specifying either Windows Media, Real Media, or all protocols.
Use this to redirect the request to a different host. For example, rewrite www.foo.com to www.bar.com.
You can create and name multiple rewrites, but you can only specify one per rule.
To Specify a Rewrite:
1.
In the Name field, enter a name or leave as is to accept to the default.
2.
From the Scheme drop-down list, Windows Media, Real Media, or All to rewrite all URLs, regardless of
protocol.
3.
In the Pattern field, enter a host name (for example, foo).
4.
In the Replacement field, enter the name the patter is rewritten as (for example, bar).
5.
Click OK.
Figure 14-32: Specifying a Host Rewrite
Reflect IP
Specifies which IP address is used when making connections to upstream hosts.
To Create a Reflect IP Object:
1.
In the Name field, enter name for the object or leave as is to accept the default.
2.
In the In outgoing client IP, reflect field, select one of the following:
❐
Do not reflect IP—Disables reflecting IPs; the ProxySG uses the IP address of the interface that
request is sent out on.
❐
Incoming client IP [IP spoofing]—Reflects the client IP address.
❐
Incoming proxy IP—Reflects the IP address of where the request arrived to.
❐
Proxy IP—Specifies to reflect a specific IP of the ProxySG; enter the IP address in the field.
❐
Use services configuration—Specifies whether to reflect IP in the configuration of the service
which is used to process the request.
509
Blue Coat ProxySG Configuration and Management Guide
Section C: Detailed Object Column Reference
3.
Click OK.
Example
This object reflects another IP address configured on the ProxySG.
Figure 14-33: Reflect IP Object
Suppress Header
Specifies one or more standard headers that are suppressed (not transmitted) on the outbound
request, the outbound response, or both.
To Create a Suppress Header Object:
1.
In the Name field, enter name for the object or leave as is to accept the default.
2.
Select Request, Response, or Both.
3.
Select one or more header types from the list.
4.
Click OK.
Example
An object called IntranetHeaders that suppresses headers so specified users can access economically
sensitive information without people, such as support personal, being able to gain knowledge of
sources.
510
Chapter 14: The Visual Policy Manager
Section C: Detailed Object Column Reference
Figure 14-34: Creating a Suppressed Header List Object
"Section C: Modifying Headers" provides more conceptual information about header modification.
Control Request Header/Control Response Header
For any request or response, specifies to:
511
•
Insert a header with a specific value.
•
Rewrite the value of a specific header.
•
Suppress a specific header.
Blue Coat ProxySG Configuration and Management Guide
Section C: Detailed Object Column Reference
Figure 14-35: Rewriting the Request Header
Notify User
This action displays a notification page in the user’s Web browser. A user must read the notification
and click an Accept button before being allowed to access the Web content. You can customize the
following:
•
The page title, notification message, and the Accept button.
•
The conditions that cause a notification to be displayed again. By default, the notification is
displayed each time a user begins a new Web browsing session (reboots, logs out, or closes all
Web browser windows). You can configure re-notification to occur for each new visited host or
Web site, or after a time interval.
Note:
The Accept button click action is logged if HTTP access logging is enabled. A URL is
logged that contains the string: accepted-NotifyName, where NotifyName is the
name of the Notify User object.
This feature is designed to provide the following functionality:
•
Web-use compliance: A compliance page is a customized notification page displayed on a user’s
Web browser when attempting to access the Internet. This page ensures employees read and
understand the company’s Acceptable Use Policy before Internet use is granted. Typically, a
compliance notification is displayed each time a browser is opened, but you can configure a time
condition to display the page at specific intervals or times of the day, week, or month.
•
Coach users: A coaching page displays when a user visits a Web site that is blocked by content
filtering policy. This page explains why the site is blocked, the consequences of un-authorized
access, and a link to the site if business purposes warrants access. A coaching page is configured
to display each time a user visits a new Web page that is barred by content filtering policy;
however, you can also configure this page to appear at different time intervals.
To configure HTML notification:
512
1.
In the Name field, enter a name for the object or leave as is to accept the default.
2.
In the Title field, enter a name that is the title of the page (text only; no HTML is allowed).
Chapter 14: The Visual Policy Manager
Section C: Detailed Object Column Reference
3.
In the Body field, compose a block of HTML that displays the message to the user. You can also
customize the Accept link or button text. The HTML body must contain an Accept button or link.
The default is:
<p><a href="$(exception.details)" onclick="Accept();">Accept</a> </body>
You can also use a button image (the image resides on an external Web server, as in the following
example:
<p><a href="$(exception.details)" onclick="Accept();">
<img src=”http://server.com/images/accept.png”> </a> </body>
If you use an HTML editor to compose code, you can paste it into the VPM; however, only copy
the HTML from the <body> tag to the </body> tag.
4.
Under Notify mode, select an option that determines notification when visiting a new Web site:
❐
Notify once for all hosts—The notification page is displayed only once; this is used for
configuring compliance pages. This option uses a Virtual Notify URL. If you must change the
URL from the default value, please read the limitation section following this procedure.
Note:
❐
Notify only once for related domains—The notify page reappears each time the user visits a new
Web site; this is used for configuring coaching pages.
Note:
❐
This option might cause users to experience some noticeable Web browsing
slowness.
This option interferes with some Web advertising banners. In some cases, the
notification page appears inside the banner. In other cases, banner ads are
disabled by javascript errors. To fix these problems, do not serve notification
pages for URLs that belong to the Web Advertising, Advertising, or Web Ads
category. The actual name of this category varies with the content filtering
vendor, and some vendors do not have an equivalent.
Notify on every host—The notify page reappears each time the user visits a new Web host. Blue
Coat recommends that only highly experienced administrators employ this option. In
addition to breaking banner ads, as described above in the previous option, this option, on
some internet Web sites, might cause Javascript errors that impair the functionality of the site.
5.
Under Notify users again, select an option that specifies when the notification expires and
re-notification is required:
❐
At next browser session— The notification page does not reappear until the next browser
session. When a user reboots, logs out, or closes all Web browser windows, this ends the
browser session.
❐
After (time interval)—Notification reoccurs after the defined elapsed time (minutes or hours);
this is useful for coaching.
❐
After (specific time)—Notification reoccurs at a specific time of day. You can specify an interval
of days; this is useful for compliance.
Note:
513
The time is referenced from the local workstation. If a compliance page is
configured, verify the workstations and ProxySG clocks are synchronized.
Blue Coat ProxySG Configuration and Management Guide
Section C: Detailed Object Column Reference
Figure 14-36: A User Notify object with a custom message and set to display once a day after 7AM.
Limitations and Workarounds
If you must change the default Virtual Notify URL, consider the following:
•
The Virtual Notify URL consists of an HTTP domain name or IP address (http://); a port
number is optional.
•
Do not use a host name that is explicitly defined as a trusted site on Internet Explorer 6 for
Windows XP, Service Pack 2. Furthermore, only use domain names that contain dots. If you use
domain names that do not contain dots, the HTTP redirects generated by the notification action
causes Internet Explorer to display false warning messages each time the user is redirected from
an untrusted site to a trusted site, or the other way around.
•
For transparent proxy deployments, the domain name must be DNS-resolvable to an IP address
that is in the range of destination IP addresses that are routed to the ProxySG.
Policy Interactions
This action generates CPL that might interfere with other policy or cause undesired behavior.
Enhancements will occur in future SGOS releases. For this release, consider the following guidelines:
514
Chapter 14: The Visual Policy Manager
Section C: Detailed Object Column Reference
•
Do not create VPM policy that modifies the Cookie request header.
•
Do not create VPM policy that modifies the Set-Cookie and P3P response headers.
•
Notification pages exist in the browser history. Therefore, if you click Accept and are taken to the
requested page, then click the back button, you get the notification page again.
•
If you have a chain of ProxySGs, with different notification pages configured on each appliance in
the chain, then each notification page must have a different object name.
Strip Active Content
Strips HTTP tags from specified active content HTML pages. For each item you select for removal,
you can also create a customized message that is displayed to the user.
Note:
Pages served over an HTTPS tunneled connection are encrypted, so the content
cannot be modified.
"Section B: Stripping or Replacing Active Content" provides detailed information about the different
types of active content.
To Create a Strip Active Content Object:
1.
In the Name field, enter name for the object or leave as is to accept the default.
2.
Select the active content to be stripped.
3.
The default message in the Replacement Text column is Active Content Removed. To replace the
default message, double click the field and enter a message. For example, Java applets have been
removed. To not display a message, delete the default and leave blank.
Figure 14-37: Creating a Strip Active Content Action Object
515
Blue Coat ProxySG Configuration and Management Guide
Section C: Detailed Object Column Reference
Exempting the ProxySG
Stripping active content might interfere with Web applications deployed on your intranet. For
example, if you create a policy rule that removes Java applets, and the destination defined in the rule
contains an IP address of a ProxySG functioning as a proxy, the policy rule actually disables the
Management Console because the Console itself is comprised of Java applets.
To prevent this, for each ProxySG functioning as a proxy, create a rule that exempts the IP address of
the ProxySG from the stripping action.
1.
Click Add Rule.
2.
Click Move Up; the rule to exempt the ProxySG must precede the rule that strips active content.
3.
In the Destination field, enter the ProxySG IP address.
4.
With the IP address entered, right-click it in the Destination field and select Negate from the
drop-down list.
5.
In the Action field, enter the Remove Active Contents, Java Apps action.
Figure 14-38: Exempting a ProxySG IP Address
Set Client HTTP Compression
Specifies the behavior when the client wants the content in a different compression form than is in the
cache.
To specify compression actions:
1.
In the Name field, enter name for the object or leave as is to accept the default.
2.
This object has two instructions:
❐
A client requests compressed content, but only uncompressed content is available. Select to
either compress the content before serving it, or serve uncompressed content.
❐
A client requests uncompressed content, but only compressed content is available. Select to
either uncompress the content before serving it, or serve compressed content.
The default is to compress or decompress content, respectively, before serving it.
3.
Click OK.
For recommended compression configurations, see "HTTP Compression" on page 178.
Set Server HTTP Compression
Enables or disables HTTP compression.
516
Chapter 14: The Visual Policy Manager
Section C: Detailed Object Column Reference
To specify compression options:
1.
In the Name field, enter name for the object or leave as is to accept the default.
2.
Select a compression option:
3.
❐
Disable HTTP compression—The default. Objects are not compressed.
❐
Use client HTTP compression options—Default to the type of content requested by the client.
❐
Always request HTTP compression—Force clients to always request compressed content.
Click OK.
For recommended compression configurations, see "HTTP Compression" on page 178.
Set SOCKS Compression
SOCKS compression reduces bandwidth and improves the latency between the main office, or core,
and the edge proxies. This also applies to non-Web protocols (for example, Microsoft Exchange) that
comprise large percentages of the enterprise traffic.
For incoming SOCKS connections, this object determines if compression is allowed or not. This is
typically used by a core (upstream) SOCKS proxy to allow SOCKS connections from an edge
(downstream) SOCKS proxy.
•
•
Allow compression—The gateway request to allow compression is granted.
Do not allow compression—The gateway request to allow compression is not granted and the
connection fails.
For detailed information about SOCKS compression and policy, refer to "Understanding SOCKS
Compression" on page 188.
Set SOCKS Gateway Compression
SOCKS compression reduces bandwidth and improves the latency between the main office, or core,
and the edge proxies. This also applies to non-Web protocols (for example, Microsoft Exchange) that
comprise large percentages of the enterprise traffic.
This object determines whether a forwarded SOCKS connection requests compression or not. This is
typically an edge (downstream) SOCKS proxy request to a core (upstream) SOCKS proxy.
Note:
The success of the compression request is determined by the upstream proxy, which can
allow or deny a compression request.
•
Request compression—Asks the upstream proxy to allow a compressed SOCKS connection.
•
Do not request compression—The request is forwarded, but compression is not required.
•
Use gateway configuration setting—The request is forwarded, using the
For detailed information about SOCKS compression and policy, refer to "Understanding SOCKS
Compression" on page 188.
517
Blue Coat ProxySG Configuration and Management Guide
Section C: Detailed Object Column Reference
Manage Bandwidth
Allows you to manage bandwidth for all protocols or specific protocols, on both inbound and
outbound traffic.
To manage bandwidth:
1.
In the Name field, enter name for the object or leave as is to accept the default.
2.
Select to limit bandwidth on the: Client side or Server side.
3.
❐
Client side—Traffic flowing between a client and the ProxySG.
❐
Server side—Traffic flowing between a server and the ProxySG.
Select to limit bandwidth for: Inbound or Outbound traffic.
❐
Inbound—Network packets flowing into the ProxySG. Inbound traffic mainly consists of
packets originating at the origin content server (OCS) and sent to the ProxySG to load a Web
object and packets originating at the client and sent to the ProxySG for Web requests.
❐
Outbound—Network packets flowing out of the ProxySG. Outbound traffic mainly consists of
packets sent to the client in response to a Web request and packets sent to an OCS or other
service (such as a virus scanner) to request a service.
4.
Select a Bandwidth Class from the drop-down list.
5.
Click OK; click Save Changes.
For complete information about Bandwidth Management, see Chapter 10: “Bandwidth Management”
on page 375.
Modify IM Message
In IM clients, replaces or appends the given text that is displayed to IM messages in clients that are
logged in through the ProxySG. For example, inform users that their IM messaging activity is
monitored.
1.
In the Name field, enter a name for the object, or accept the default.
2.
In the large, blank field, enter text to be displayed.
3.
Select Set message text to replace the text displayed to the user. For example, Instant Messaging is
not allowed during these hours. Alternatively, select Append to message text to add the text to the
displayed message.
Chapter 17: “Instant Messaging” on page 621 provides more information about regulating IM through
the ProxySG, as well as VPM examples.
Return ICAP Patience Page
Specifies to display an ICAP patience page after a predetermined amount of time. Enter a time value
(in seconds) that the ProxySG waits for content to be serviced from the origin content server before
displaying the page that instructs users an ICAP scan is in progress.
518
Chapter 14: The Visual Policy Manager
Section C: Detailed Object Column Reference
Note:
Patience pages display regardless of any pop up blocking policy that is in effect.
Patience page management and limitations are described in "Customizing ICAP Patience Text" on
page 408.
Set Dynamic Categorization
Dynamic categorization extends the process of categorizing a URL. Traditional content filtering
involves searching of massive URL pattern databases, which are published by vendors and
downloaded to the ProxySG at specified intervals. As new content constantly reaches the Web, the
limitation is that it cannot be filtered until its existence is discovered, added, and uploaded. Dynamic
categorization enhances content filtering by scanning a new Web page, attempting to determine its
contents, and categorizing accordingly in real time.
When an un-categorized page is first encountered, the ProxySG calls an external service with a
categorization request. Once the content is scanned, a category is assigned (a majority of the time).
For related information, see "Configuring Dynamic Categorization for Blue Coat Web Filter" on
page 651.
To configure Dynamic Categorization:
1.
Select a mode:
❐
Do not categorize dynamically—The loaded database is consulted for category information.
URLs not in the database show up as category none.
❐
Categorize dynamically in the background—Objects not categorized by the database are
dynamically categorized as time permits. Proxy requests are not blocked while DRTR is
consulted. Objects not found in the database appear as category pending, indicating that DRTR
was requested, but the object was served before the DRTR response was available.
2.
❐
Categorize dynamically in realtime—The default. Objects not categorized by the database are
dynamically categorized on first access. If this entails consulting the DRTR service, the proxy
request is blocked until DRTR responds.
❐
Use dynamic categorizing setting from configuration—Default to the ProxySG configuration
(Content Filtering>Blue Coat>Dynamic Categorization).
Click OK.
Set External Filter Service
Specifies which installed content filtering service or service group a content request is subjected to or
bypasses, and specifies what occurs if a communication error occurs between the ProxySG and the
external service.
To Determine External Filter Service Request Behavior:
1.
519
In the Name field, enter a name for the object or leave as is to accept the default.
Blue Coat ProxySG Configuration and Management Guide
Section C: Detailed Object Column Reference
2.
To instruct all request types defined in the rule to not route through an external filter service for
content filtering, select Bypass external filter request.
3.
To instruct all requests defined in the rule to route to a specific external filter service, select Use
External Filter Service; from the drop-down list, select the external filter service or service group
(which must already exist on the ProxySG).
4.
Select an On communication error with external filter service option. To deny all requests if a
communication error occurs, select Deny the request; to allow requests to go through without
content filtering, select Bypass external filter service and process the request.
Figure 14-39: External Service Object
Set ICAP Request Service
Specifies which installed ICAP service or service group a content request routes to or bypasses, and
specifies what occurs if a communication error occurs between the ProxySG and the ICAP server.
To Determine ICAP Request Behavior:
1.
In the Name field, enter a name for the object or leave as is to accept the default.
2.
To instruct all request types defined in the rule to not route through an ICAP service for content
scanning, select Bypass ICAP request service.
3.
To instruct all request or response types defined in the rule to route to a specific ICAP service,
select Use ICAP Request Service; from the drop-down list, select the ICAP service or service group
(which must already exist on the ProxySG).
4.
Select an On communication error with ICAP service option. To deny all requests or responses if a
communication error occurs, select Deny the request; to allow requests or responses to go through
without ICAP scanning, select Bypass ICAP service and process the request.
When the ICAP service is restored, these objects are scanned and served from the cache if they are
requested again.
520
Chapter 14: The Visual Policy Manager
Section C: Detailed Object Column Reference
Figure 14-40: ICAP Service Object
Set ICAP Response Service
Identical to "Set ICAP Request Service", but applies to other protocol responses, such as HTTP and FTP.
Set FTP Connection
For an outgoing request over FTP, specifies whether the FTP connection should be made immediately
or deferred, if possible. The benefit of deferring connections is that requests for previously cached
content can be served without contacting the origin server, which reduces the FTP load on that server.
Set SOCKS Acceleration
Specifies whether or not accelerate SOCKS requests, and defines the transport method.
To Set SOCKS Acceleration:
1.
In the Name field, enter a name for the object or leave as is to accept the default.
2.
Select one of the following:
3.
❐
Automatically—Accelerates SOCKS requests automatically, based on the destination port
receiving the connection.
❐
Do Not Accelerate—Never accelerate SOCKS requests matched by this rule.
❐
Accelerate via [HTTP | AOL IM | MSN IM | Yahoo IM]—Specifies the type of acceleration applied
to requests matched by this rule.
Click OK.
Set Streaming Max Bitrate
Specifies the maximum bitrate, in kilobits per second, of requested streaming media. If a request
exceeds this rule, the request is denied.
521
Blue Coat ProxySG Configuration and Management Guide
Section C: Detailed Object Column Reference
Send DNS/RDNS Response Code
Specifies to send out the default response code or a selectable error response code. Perform one of the
following:
•
Select Send Default DNS Response; optionally, enter a TTL value.
•
Select Send Error Response Code and select a code from the drop-down list.
Send DNS Response
Specifies which IP address to return for a specified host.
To Set a DNS Response:
1.
In the Host field, enter a host name that is returned.
2.
To respond with the incoming IP address, select Respond with proxy IP.
3.
To respond with one or more IP addresses:
a.
Select Respond with listed IPs.
b.
Click Add. The Add DNS Response IP dialog appears.
c.
Enter an IP address and click Add.
d. Repeat as desired; click Close when finished.
4.
(Optional) In the TTL field, enter a time-to-live value.
5.
Click OK.
Send Reverse DNS Response
Specifies which host to return for a reverse DNS response. Optional: define a time-to-live value.
Do Not Cache
This is a static object. Specifies that objects are never cached.
Force Cache
This is a static object. Specifies that (cacheable) objects are always cached. Objects that are not
cacheable (for example, RealMedia file types) and supported in pass-through mode only are not
cached.
Use Default Caching
This is a static object. Overrides the Do Not Cache and Force Cache actions and instructs the ProxySG to
use its default determination of whether or not to cache the content.
522
Chapter 14: The Visual Policy Manager
Section C: Detailed Object Column Reference
Mark/Do Not Mark As Advertisement
These are static objects. Specifies content to be identified as an advertisement. The ProxySG still
fetches content from the cache (if present); however, just after serving to the client, the content is
re-fetched from the ad server so that hit counters are updated.
Enable/Disable Pipelining
These are static objects. Enables or disables the ProxySG pipelining feature, which, when enabled,
examines Web pages for embedded objects and requests them from the origin server in anticipation of
a client request.
Set TTL
Specifies the time-to-live (TTL) an object is stored in the ProxySG. In the Name field, enter a name for
the object (or leave as is to accept the default); in the TTL field, enter the amount of time in seconds.
Send Direct
This is a static object. Overrides forwarding host, SOCKS gateway, or ICP configurations and instructs
the ProxySG to request the content directly from the origin server.
Integrate/Do Not Integrate New Hosts
This is a static object. Used in server accelerator deployments. When enabled, the corresponding host
that is accessed is added to the list of hosts for which the ProxySG performs health checks. If that host
name resolves to multiple IP addresses that correspond to different servers, the ProxySG fetches
content from the available servers and ignores the servers that fail the health check.
Allow Content From Origin Server
This is a static object. Allows request to access content from an origin server if the content is not
cached.
Serve Content Only From Cache
This is a static object. Requests to access content that is not cached are denied. If the content is cached,
the content is served.
Select SOCKS Gateway
Specifies which SOCKS gateway, if any, to use; defines behavior if communication between the
SOCKS gateway and the ProxySG is down.
•
To instruct the rule to connect directly without routing through a SOCKS service, select Do not use
SOCKS gateway.
523
Blue Coat ProxySG Configuration and Management Guide
Section C: Detailed Object Column Reference
•
To instruct the rule to connect through a SOCKS gateway, select Use SOCKS Gateway and select an
installed SOCKS service from the drop-down list.
In the If no SOCKS gateway is available field, select Deny the request or Connect directly, which allows
requests to bypass the SOCKS service.
Select Forwarding
Specifies which forwarding host or group, if any, to use; defines behavior if communication between
the forwarding and the ProxySG is down.
•
To instruct the rule to connect directly without redirecting to a forwarding host or group, select Do
not forward.
•
To instruct the rule to redirect to a forwarding host, select Use Forwarding and select an installed
forwarding host from the drop-down list.
In the If no forwarding is available field, select Deny the request (fail closed) or Connect directly (fail open),
which allows requests to bypass the forwarding host.
•
To instruct the rule to forward using the ICP configuration, select Forward using ICP.
Set IM Transport
Specifies the transport method used for IM traffic.
•
Auto—Connects using the transport method used by the client.
•
HTTP—Tunnels the IM requests over HTTP.
•
Native—Connects using the native transport used by the service.
Set Streaming Transport
Specifies which streaming transport method the rule uses.
•
Auto—Connects using the transport method used by the client.
•
HTTP—Streaming over HTTP.
•
TCP—Streaming over TCP.
Combined Action Objects
Allows you to combine an action object that invokes multiple actions. See "Using Combined Objects"
on page 530.
Action Column/Policy Layer Matrix
The following matrix lists all of the Action column objects and indicates which policy layer they apply
to.
524
Chapter 14: The Visual Policy Manager
Section C: Detailed Object Column Reference
Object
Admin
Auth
Admin
Access
DNS
Access
SOCKS
Auth
Web
Auth
Web
Content
x
Allow
Deny
Web
Access
x
x
Allow Read-Only Access
x
Allow Read-Write Access
x
x
Do Not Authenticate
x
x
x
Authenticate
x
x
x
Force Authenticate
x
x
x
x
Bypass Cache
x
Do Not Bypass Cache
x
Check Authorization
x
x
Do Not Check Authorization
x
x
Always Verify
x
x
Use Default Verification
x
x
Block Up Ads
x
Do Not Block PopUp Ads
x
Force NTLM For Server Auth
x
Do Not Force NTLM For
Server Auth
x
Reflect IM Messages
x
Do Not Reflect IM Messages
x
Block IM Encryption
x
Do Not Block IM Encryption
x
Return Exception
x
Return Redirect
x
Send IM Alert
x
Modify Access Logging
x
x
Override Access Log Field
x
x
Rewrite Host
x
525
Forwarding
Blue Coat ProxySG Configuration and Management Guide
Section C: Detailed Object Column Reference
Object
Reflect IP
Admin
Auth
Admin
Access
DNS
Access
x
SOCKS
Auth
Web
Auth
Web
Access
Web
Content
x
Suppress Header
x
Control Request Header
x
Control Response Header
x
Notify User
x
Strip Active Content
x
Set Client HTTP Compression
x
Set Server HTTP
Compression
x
Set SOCKS Compression
x
x
Set SOCKS Gateway
Compression
Modify IM Message
x
Return ICAP Patience Page
x
x
Set Dynamic Categorization
Set External Filter Service
x
Set ICAP Request Service
x
x
Set ICAP Response Service
x
Use Default Caching
x
Set FTP Connection
x
Set SOCKS Acceleration
x
Set Streaming Max Bitrate
x
Send DNS/RDNS Response
Code
x
Send DNS Response
x
Send Reverse DNS Response
x
Do Not Cache
x
Force Cache
x
Mark As Advertisement
x
526
Forwarding
Chapter 14: The Visual Policy Manager
Section C: Detailed Object Column Reference
Object
Admin
Auth
Admin
Access
DNS
Access
SOCKS
Auth
Web
Auth
Web
Access
Web
Content
Do Not Mark as
Advertisement
x
Enable Pipelining
x
Disable Pipelining
x
Set TTL
x
Forwarding
Send Direct
x
Integrate New Hosts
x
Do Not Integrate New Hosts
x
Allow Content From Origin
Server
x
Serve Content Only From
Cache
x
Select SOCKS Gateway
x
Select Forwarding
x
Reflect IP
x
Set IM Transport
x
Set Streaming Transport
x
Combined Objects
x
x
x
x
Track Object Column Reference
A track object defines the parameters for tracking and tracing traffic. All policy layers contain the same
trace objects, but tracking parameters are layer-specific.
Note:
Because of character limitations required by the generated CPL, only alphanumeric,
underscore, and dash characters can be used to define an action object name.
Event Log, E-mail, and SNMP
You can customize the event log, E-mail notification, and SNMP with triggers. These triggers are the
same for all three object types.
Customize an event log, E-mail, or SNMP object:
1.
527
Right-click the Tracking cell in a policy layer and select Set; the Set Track Object dialog appears.
Blue Coat ProxySG Configuration and Management Guide
Section C: Detailed Object Column Reference
Figure 14-41: Add Track Object Dialog
2.
Click New and select Event Log, Email, or SNMP; the appropriate add object dialog appears.
3.
In the Name field, enter a name for this object or leave as is to accept the default.
Note:
The E-mail object also contains a Subject field.
4.
In the Message Text field, enter a customized message that appears with each entry.
5.
Optional: In the Substitution Variables field, select a variable and click Insert. Repeat as required.
The substitution variables instruct the ProxySG to append specific information to the tracking
object. The variables are categorized alphabetically, according to prefix.
Note:
Some variables do not have prefixes.
Tracing Objects
This object specifies rule and Web traffic tracing.
Click Trace Level and select one of the following trace options:
•
No Tracing—The default.
•
Request Tracing—Generates trace output for the current request. The trace output contains request
parameters (such as URL and client address), the final values of property settings, and
descriptions of all actions taken.
•
Rule and Request—Generates trace output that displays each rule that was executed
•
Verbose Tracing—Generates the same output as Rule and Request, but also lists which rules were
skipped because one or more of their conditions were false, and displays the specific condition in
the rule that was false.
Furthermore, a trace destination can be entered that specifies the destination for any trace produced
by the current transaction. To specify a destination path, select Trace File and enter a path in the field.
For example, abc.html.
528
Chapter 14: The Visual Policy Manager
Section C: Detailed Object Column Reference
If a trace destination is configured in multiple layers, the actual trace destination value displayed is
the one specified in the last layer that had a rule evaluated (which has a destination property
configured). Consider the following multiple Web Access Layer example, demonstrated by the
generated CPL:
<PROXY>
url.domain=aol.com trace.request(yes) trace.rules(all)
trace.destination("aol_tracing.html")
url.domain=msn.com trace.request(yes) trace.rules(all)
trace.destination("msn_tracing.html")
<PROXY>
client.address=10.10.10.1 trace.request(yes) trace.rules(all)
The resulting actions are:
•
Requests to the aol.com domain are logged to aol_tracing.html.
•
Requests to the msn.com domain are logged to msn_tracing.html.
•
Requests from the client with the IP of 10.10.10.1 are logged to the default location of
default.html.
Note:
After using a trace to troubleshoot, remove the trace to save log space.
The Trace File option can be used in conjunction or separately from the Trace Level option.
Figure 14-42: Creating a Trace Object
The default path of the trace file is accessible through one of the following URLs.
If the Management Console secure mode is enabled (the default on a new or upgraded system):
https://ProxySG_IP_address:8082/Policy/Trace/default_trace.html
If the Management Console is deployed in non-secure mode:
http://ProxySG_IP_address:8081/Policy/Trace/default_trace.html
529
Blue Coat ProxySG Configuration and Management Guide
Section C: Detailed Object Column Reference
Combined Track Object
Allows you to combine track objects into one. See "Using Combined Objects".
Track Objects/Policy Layer Matrix
The following matrix lists all of the Track and column objects and indicates which policy layer they
apply to.
Admin
Auth
Admin
Access
DNS
Access
Event Log
x
Email Log
SNMP Objects
Object
x
Trace
Combined Objects
SOCKS
Auth
Web
Access
Web
Content
x
x
x
x
x
x
x
x
x
x
x
x
x
x
x
x
x
x
x
x
Web
Auth
x
Forwarding
x
Comment Object Reference
The Comment object allows you to write any text to aid in labeling the policy layer. The text in this
field does not impact the performance of the rule.
Using Combined Objects
As previously discussed, you select one object for as many object types as required for a given rule.
Most object types also have the option of using a combined object. This feature allows you to select
multiple objects for a given type, thus creating more complex tools. There are two uses for combined
conditions: lists and multiple object types. Also consider the Negate option, which exempts the objects
in the list.
Example One
Consider the following example. You want a Web Content policy layer that as an action forces
authorization and sends the response to an ICAP service for content scanning.
530
Chapter 14: The Visual Policy Manager
Section C: Detailed Object Column Reference
Figure 14-43: Set Action Object dialog
1.
In the Set Action Object dialog, select New>Combined Action Object.
Figure 14-44: Add Combined Object Dialog
531
2.
Select Check Authorization; click Add.
3.
Select an existing ICAP service object. For this example, the object is named ICAPReqServ1. Click
Add.
Blue Coat ProxySG Configuration and Management Guide
Section C: Detailed Object Column Reference
Figure 14-45: Creating a Combined Object
4.
532
Click OK. The CombinedAction1 object appears as a separate, selectable object.
Chapter 14: The Visual Policy Manager
5.
Select CombinedAction1; click OK. The object is now part of the rule.
Based on the other parameters specified in the rule, all requests are forced to an upstream server
for authorization and the Web responses are subject to content scanning through the ICAP service.
Example Two
In the following example, the rule searches for one of the IP Address/Subnet objects and one of the
streaming client user agents.
Figure 14-46: Combined Object with Multiple Object Types
Note
The VPM displays various warning messages if you attempt to add objects that creates an invalid
combined object. However, it is possible to add a combined object to another combined object, even if
doing so presents duplication of simple object definitions without receiving validation warnings. For
example, the contents of a child combined object may have already been included either within the
parent combined object directly, or indirectly within other child combined objects. This is allowable
because of the complexity some combined objects and policies can achieve.
533
Blue Coat ProxySG Configuration and Management Guide
Centralized Object Viewing and Managing
The All Objects feature allows you view a list of all objects—both static and user-defined—that
currently exist across all layers and columns. To view all configured VPM objects, in the Menu Bar
select View>All Objects.
Figure 14-47: The All Objects dialog.
534
Chapter 14: The Visual Policy Manager
The objects are displayed according to the policy layer order (click Policy in the menu bar) and the
column order (as presented in "Policy Layer and Rule Object Reference" on page 466). To narrow the
scope of the displayed objects, use the Show drop-down list at the top. You can select to display only
the static objects for the Source, Destination, Service, and Action columns, or any object type. For
example, you want to only view the user-defined P2P Client objects. Scroll down and select P2P Client
Objects.
Figure 14-48: Narrowing the list to user-defined P2P objects.
Creating Objects
The All Objects dialog also allows you to create objects. Once an object is created, it appears in the list.
When creating or editing policy layers, the objects are available to add to rules.
To create an object:
1.
Select New. The available columns and relevant objects are displayed in a cascade style.
2.
Select Column>Object. The Add dialog for that object appears.
3.
Define the object as required.
4.
Click OK.
Note:
When creating Combined Objects, not all objects that appear in the left column are valid
for more than one policy layer type. For example, the IM User object is only valid in the
Web Access Layer>Source column. If you attempt to add an object that is not valid, a dialog
appears with that information.
Editing Objects
Any user-defined object can be modified. Highlight the object and click Edit. After editing the object,
re-install the policy to apply the modified object in every policy layer it exists in.
Deleting Objects
You cannot delete an object that is currently part of an installed policy or combined object. Before
removing an object, you can use the View>Object Occurrences feature to identify which policy layers
contain the object.
535
Blue Coat ProxySG Configuration and Management Guide
Creating Categories
This feature allows you create the content filter URL categories that can be used in the Category object.
The Destination column in the DNS Access, Web Access, Web Authentication, and Web Content policy
layers contain the Category object. Similarly, categories created in the Category object (see "Category"
on page 488) appear in this dialog and can be edited.
To Create a Category:
1.
In VPM, select Configuration>Edit Categories. The Edit Categories dialog appears.
Figure 14-49: The Edit Categories Dialog
2.
Select Policy; click Add. The Object Name dialog appears.
3.
Name the category and click OK.
4.
Drop the Policy list and select the created category; click Edit URLs. The Edit Locally Defined
Category Object dialog appears.
5.
Enter URLs appropriate for the content filter category you are creating; click OK.
6.
Click OK.
Note:
536
If other administrators have access to the ProxySG through other workstations and are
creating categories either through VPM or with inline commands, consider that
newly-created or edited categories are not synchronized until the policy is installed.
When the policy is installed with VPM, the categories are refreshed. If too many
categories are created at the same time and confusion occurs, select the File>Revert to
Existing Policy on ProxySG Appliance option to restore the policy to the previous state and
reconfigure categories.
Chapter 14: The Visual Policy Manager
Refreshing Policy
In between occurrences when either VPM is closed and reopened or Install Policies is invoked, VPM
does not recognize changes to VPM-managed policy that were made on the ProxySG through another
method. For example:
•
Another administrator opens a separate VPM to make changes.
•
Another administrator edits the local or central policy file through the serial console.
•
Another administrator makes edits the local or central policy file through the Management
Console.
•
A new content filter database is downloaded automatically and the new update
contains category changes.
•
A new content filter database is downloaded manually by an administrator through the CLI or the
Management Console.
Restricting DNS Lookups
This section discusses DNS lookup restrictions and describes how to create a list.
About DNS Lookup Restriction
The DNS lookup restriction list is a list of domain names that apply globally, regardless of policy layer
definitions. Once a domain name is added to the list, DNS lookup requests do not occur for that
domain name while policy is evaluated. For more detailed information about using DNS lookups,
refer to the Blue Coat ProxySG Content Policy Language Guide.
Creating the DNS Lookup Restriction List
The list is created from the VPM Menu bar.
To Create the DNS Lookup Restriction List:
1.
Select Configuration>Set DNS Lookup Restrictions; the Set DNS lookup restrictions dialog appears.
The default is None; no domain names are restricted.
2.
To restrict every domain name, select All.
3.
To add specific domain names, perform the following steps.
a.
Select Listed Host Patterns.
This enables the Host Patterns field.
b.
Click Add; the Add Host Pattern dialog appears.
c.
Enter a domain name; click OK.
d. Repeat to add other domain names.
e.
Click OK.
537
Blue Coat ProxySG Configuration and Management Guide
Restricting Reverse DNS Lookups
This section discusses reverse DNS lookup restrictions and describes how to create a list.
About Reverse DNS Lookup Restriction
The Reverse DNS lookup restriction list is a list of subnets that apply globally, regardless of policy
layer definitions. Once a subnet is added to the list, the ProxySG will not perform a reverse lookup of
addresses on that subnet during policy evaluation. For more detailed information about using reverse
DNS lookups, refer to the Blue Coat ProxySG Content Policy Language Guide.
Creating the Reverse DNS Lookup Restriction List
The list is created from the VPM Menu bar. This prevents the ProxySG from performing reverse DNS
lookups of addresses in the list while evaluating policy.
To Create the Reverse DNS Lookup Restriction List:
1.
Select Configuration>Set Reverse DNS Lookup Restrictions; the Set Reverse DNS lookup restrictions
dialog appears.
The default is None; no subnets are restricted.
2.
To restrict every subnet, select All.
3.
To add specific subnets, perform the following steps.
a.
Select Listed Subnets.
This enables the Subnets field.
b.
Click Add; the Add Subnet dialog appears.
c.
Enter a subnet; click OK.
d. Repeat to add other subnets.
e.
Click OK.
Setting the Group Log Order
This section discusses the group log order and describes how to create a list.
About the Group Log Order
The Group Log Order object allows you to establish the order group data appears in the access logs.
For more detailed information about using group log ordering, refer to the Blue Coat ProxySG Content
Policy Language Guide.
Creating the Group Log Order List
The list is created from the VPM Menu bar.
To Create the Group Log Order List:
1.
538
Select Configuration>Set Group Log Order; the Set Group Log Order dialog appears.
Chapter 14: The Visual Policy Manager
2.
Click Add; the Add Group Object dialog appears.
3.
In the Group Name field, enter the name of a group.
The group must be already configured on the ProxySG.
4.
From the Authentication Realm drop-down list, select a realm.
5.
Click OK.
6.
Repeat as required to add more groups.
7.
To order the list, select a group and click Move Up or Move Down until you achieve the desired order.
8.
Click OK.
539
Blue Coat ProxySG Configuration and Management Guide
Section D: Managing Policy Layers and Files
This section contains the following topics:
540
•
"How Policy Layers, Rules, and Files Interact" on page 541—Describes the importance of rule
order policy layer order.
•
"Managing Policy Files" on page 544—Describes how to save and install policies on the ProxySG.
•
"Installing VPM-Created Policy Files" on page 545—Describes how to propagate a policy file
created on one ProxySG to another.
•
"Viewing the Policy/Created CPL" on page 547—Describes how to view the underlying CPL that
is created with VPM.
Chapter 14: The Visual Policy Manager
How Policy Layers, Rules, and Files Interact
The following critical points discuss the behaviors and priorities of policy rules, layers, and files:
•
Rules in different policy layers of the same type work together, and the order of policy layers is
important.
•
The order of policy layers of different types is important.
•
The order of rules in a policy layer is important.
•
Policy created in VPM is saved in a file on the ProxySG; the state of the VPM user interface is also
stored as an XML file on the ProxySG.
Note:
•
These files are stored only if the policy is installed without any errors.
How the appliance evaluates those rules in relation to policy layers that exist in the central and
local policy files is important. For more information, see Appendix 13: "Managing Policy Files".
How VPM Layers Relate to CPL Layers
VPM generates CPL in various layers, but the concept of layers presented in VPM is slightly different.
VPM provides policy layers for special purposes. For example, Web Authentication and Web
Authorization, which both generate CPL <Proxy> layers. This minimizes timing conflicts by
restricting the choices of triggers and properties to those compatible timing requirements. The
following table summarizes how to use VPM layers and which CPL layers result.
Table 14.2: VPM-Generated CPL Layers
Policy Purpose
VPM Layer
CPL Layer
Establish Administrator identities.
Admin Authentication
<Admin>
Control Administrator access.
Admin Authorization
<Admin>
Control DNS access.
DNS Access
<Proxy>
Establish SOCKS user identities.
SOCKS Authentication
<Proxy>
Establish user identities.
Web Authentication
<Proxy>
Control user access.
Web Access
<Proxy>
Control content independent of users.
Web Content
<Cache>
Control forwarding.
Forwarding
<Forward>
Note:
VPM currently does not support the <Exception> layer.
Ordering Rules in a Policy Layer
The ProxySG evaluates the rules in the order in which they are listed in a policy layer. When it finds a
rule that applies to the situation, it skips the remaining rules in the policy layer and goes on to the next
policy layer.
Consider the following simple example. Assume that a company has a policy that prohibits everyone
from accessing the Web. This is a policy that is easy to create with a Web Access layer rule.
541
Blue Coat ProxySG Configuration and Management Guide
There are, however, likely to be exceptions to such a broad policy. For example, you require the
manager of the purchasing department to be able to access the Web sites of suppliers. Members of the
sales department need to access their customer Web sites. Creating Web Access rules for both these
situations is also simple. But if you put all these rules in a single policy layer, then the rule prohibiting
access to everyone must be ordered last, or the other two rules will not be applied.
The principle design of rules within policy layers is:
Always go from the specific to the general.
Using Policy Layers of the Same Type
Because the ProxySG skips the remaining rules in a policy layer as soon as it finds one that meets the
condition, multiple policy layers and a combination of rules might be required to accomplish a task.
Consider the following example. A company does not want to prohibit its employees from accessing
the Web, but it does not want them to abuse the privilege. To this end, the company wants employees
who access the Web to authenticate when they do so; that is, enter a username and password. So the
company creates a Web Authentication policy layer with a rule that says: “If anyone from anywhere in
the company sends a request to a URL on the Web, authenticate the client before granting access.”
The company also allows members of the group Sales to access various sports Web sites only during
non-work hours. Given the Web Authentication rule above, these people must authenticate when they
do this. But the company feels that it is not important for people going to these sites after hours to
authenticate. So the company creates the following Web Access policy-layer rule:
•
Grant Sales personnel access to sports Web sites from 5:00 PM to midnight.
But there are additional issues. Some members of the sales department spend a lot of time
watching game highlights on video clips, and this takes up a lot of bandwidth. At the same time, a
lot of customers access the company Web site in the evening (during non-work hours), so internal
bandwidth should remain manageable. The company, therefore, limits the bandwidth available to
the people in the Sales department with a Web Access layer rule that is identical to the one above
in all respects except for the action:
•
Grant Sales personnel access to sports Web sites from 5:00 PM to midnight, but limit the
maximum streaming bitrate to 300 kilobits per second.
For both these rules to work, they need to be in separate policy layers. If they were in the same policy
layer, the rule listed second would never be applied.
Ordering Policy Layers
The order of policy layers is also important. The ProxySG evaluates policy layers in the order in which
they are listed in VPM. When the ProxySG is going through policy layers, it does not execute a given
rule as soon as it finds that it meets the specific situation. Rather, it compiles a list of all the rules that
meet the condition; when it has gone through all the policy layers, it evaluates the list, resolves any
apparent conflicts, and then executes the required actions. If there is a conflict between rules in
different policy layers, the matching rule in the policy layer evaluated last takes precedence.
The principle design of policy layers is: Always go from the general to the specific; that is, establish a
general rule in an early policy layer, and then write exception rules in later policy layers.
542
Chapter 14: The Visual Policy Manager
In the above example, there are two Web Access policy layers: one contains a rule stating that Sales
personnel can access certain Web sites without authenticating, and the other states that when they do
access these Web sites, limit the available bandwidth. The order of these policy layers is irrelevant. The
order is irrelevant because there is no conflict between the rules in the layers.
The following is an example in which the order of policy layers does matter. Assume all URL requests
from members of the purchasing department are directed to a single proxy server. To discourage
employees from surfing the Web excessively during business hours, a company creates a Web
Authentication Policy rule that says: “Whenever a client request comes in to the proxy server, prompt
the client to authenticate.”
Members of the purchasing department, however, need to access specific Web sites for business
reasons, and the company does not want to require authentication every time they do this. So they
create a Web Access policy rule that says: “If any member of the purchasing department sends a
request to a specific URL contained in a combined-object list, allow access.”
The policy layer with the first rule needs to come first in evaluation order; it is then overridden by the
second rule in a subsequent policy layer.
Installing Policies
As you add policy layers and rules, your work is saved in a file on the ProxySG. However, policies
only take effect after you install the policies and the generated XML has been validated. The ProxySG
then compiles the policies into CPL format and saves the resulting policies in the vpm.cpl file. This
overwrites any policies previously created using VPM. The appliance saves VPM-generated policies in
a single file and loads it all at once. You do not need to load policies separately, as is the case with the
local or central policy files.
To Install Policies:
•
Select File>Install Policies, or
•
Click Install Policies on the Rule bar.
The VPM validates the generated XML for any issues, such as missing layers. If the validation
passes, the CPL is generated and the policies are loaded.
If the XML fails the validation, a dialog appears allowing you to:
•
Revert to the policy currently installed on the ProxySG, or
•
Continue to edit the policy and attempt another installation.
Furthermore, the failed XML file is written to your hard disk; view this file to troubleshoot the
failed XML. The default location for this file is:
C:\Documents and Settings\user.name\bluecoat\vpm_err.xml
Notes:
The Category and Notify User objects and the DNS Lookup Restrictions, Reverse DNS Lookup Restrictions,
and Group Log Order configuration objects generate CPL, regardless if they are or are not included in
rules. These specific objects and features allow users to edit categories and lists that might or might
not be used in current policies.
543
Blue Coat ProxySG Configuration and Management Guide
Managing Policy Files
This section describes how to manage the policy files generated by the VPM.
Refreshing Policy
In between occurrences when either VPM is closed and reopened or Install Policies is invoked, VPM
does not recognize changes to VPM-managed policy that were made on the ProxySG through another
method. For example:
•
Another administrator opens a separate VPM to make changes.
•
Another administrator edits the local or central policy file through the serial console.
•
Another administrator makes edits the local or central policy file through the Management
Console.
•
A new content filter database is downloaded automatically and the new update
contains category changes.
•
A new content filter database is downloaded manually by an administrator through the CLI or
the Management Console.
Reverting to a Previous Policy
If after creating new policies or editing an existing policy you decide to abandon the process and
continue with the existing policy installed on the ProxySG, you can revert to that version. All current
changes are deleted (VPM provides a verification prompt).
To Revert to an Existing Installed Policy:
Select File>Revert to Existing Policy on ProxySG Appliance.
Changing Policies
You can change, edit, delete, add to, and otherwise manage policies created in VPM at any time by
returning to VPM and working with policy layers and rules just as you did when creating them.
Disabling and Enabling Policy Rule
Occasionally, you may need to temporarily disable rules in a policy layer; for example, when
troubleshooting compiles errors and warnings. This might help confirm that the ProxySG can
successfully compile the remaining policy. After disabling a rule, you can edit the objects and
re-enable the rule.
To Disable or Enable A Rule:
544
1.
Click the appropriate policy layer tab.
2.
Right-click in the No. column.
3.
Click Disable Rule on the shortcut menu. The policy editor changes the rule text color to red.
Chapter 14: The Visual Policy Manager
4.
To enable the rule, repeat step 3. After you enable a disabled rule, the policy editor changes the
rule text color to black.
Deleting a Policy Layer
To Delete a Policy Layer:
1.
Right-click the tab of the policy layer to be deleted.
2.
Select Delete Policy from the drop-down list.
You can also right-click the policy layer tab and select Edit>Delete Layer.
Installing VPM-Created Policy Files
Policies created with VPM are saved on the specific ProxySG on which they are created. SGOS
automatically creates the following files when saving VPM-created policies:
config_policy_source.xml
config_policy_source.txt
You can install VPM policies that were created on another ProxySG. This requires the following steps:
1.
Copy the two VPM files, to be shared, to a Web server from the ProxySG on which they reside.
2.
Use the Management Console or CLI to load VPM files on another ProxySG.
To Copy VPM Files from a ProxySG to a Web server:
1.
Select Statistics>Advanced.
2.
Scroll down and click Policy.
The page jumps down to the Policy files links.
Figure 14-50: Policy Files in Custom URLs
3.
Right-click the Show VPM CPL policy link.
4.
In the Save As dialog, enter the full path to a directory on the Web server before the file name and
click OK.
545
Blue Coat ProxySG Configuration and Management Guide
Important:
5.
The Save As dialog offers the appropriate default file name
(config_policy_source.xml or config_policy_source.txt). You can
change the names, including the extension. This can be helpful if an enterprise
is using various sets of shared VPM files. You could rename files to indicate the
ProxySG on which they were created, for example, or for a department that has
a set of VPM-specific policies, used perhaps in multiple locations (sales_vpm.cpl
and sales_vpm.xml).
Repeat the previous step for the second VPM file.
To Load VPM Files to a ProxySG through the Management Console:
1.
Select Conifiguration>Policy>Policy Files>Visual Policy Files.
Figure 14-51: Visual Policy Files Tab
2.
In the Install Visual Policy field:
a.
Select Remote URL from the Install VPM-CPL from drop-down list.
b.
Click Install. The Install VPM-CPL dialog appears.
c.
In the Installation URL field, enter the URL to the VPM CPL file copied to the Web server
(this is the file with the default .txt extension) and click Install.
d. Repeat Steps a through c to enter the URL to the second VPM XML file copied to the Web
server (this is the file with the default .xml extension) and click Install.
3.
Click Apply.
Notes
546
•
If VPM files already exist on the ProxySG, the URLs to those files display in the two file fields. To
replace them, delete the URLs and type new ones. Installing new files overwrites any that are
already present.
•
To review VPM-generated policies before installing them, enter the URL to the CPL file on the
Web server and click View.
Chapter 14: The Visual Policy Manager
•
Regardless of whether you are installing new VPM files, you can review the CPL or XML files of
the policies currently on the ProxySG. Click VPM-CPL and VPM-XML in the View Visual Policy Files
box at the bottom of the dialog.
•
Never edit either of the VPM files directly. Change the files only by working with the policies in
VPM and saving changes there.
To Load VPM Files to a ProxySG through the CLI:
The two commands in the first step load one of the VPM policy files; the commands in the second step
load the other policy file. In each case, url is the complete path, including file name, to the appropriate
file on the Web server.
1.
At the config command prompt, enter the following commands:
SGOS#(config) policy vpm-cpl-path url
SGOS#(config) load policy vpm-cpl
2.
At the config command prompt, enter the following commands:
SGOS#(config) policy vpm-xml-path url
SGOS#(config) load policy vpm-xml
Viewing the Policy/Created CPL
View the CPL generated by installing VPM-created policy from VPM or the Management Console.
To View the Generated CPL through VPM:
Select View>Generated CPL.
To View the VPM Policy File:
Select View>Current ProxySG Appliance VPM Policy Files.
Important:
Do not edit or alter VPM-generated files by opening the VPM policy file and
working in the generated CPL. To edit, change, or add to VPM policies, edit the
policy layers and re-install the policy.
547
Blue Coat ProxySG Configuration and Management Guide
Section E: Tutorials
This section contains the following topics:
548
•
"Tutorial—Creating a Web Authentication Policy" on page 549
•
"Tutorial—Creating a Web Access Policy" on page 554
Chapter 14: The Visual Policy Manager
Tutorial—Creating a Web Authentication Policy
This section is a tutorial that demonstrates how to create policies and rules for Web authentication.
Use Web Authentication policies to specify whether the individual making a request is prompted to
authenticate by entering a username and password. In this example, a company uses a PAC file to
configure most employee browsers to connect to a specific IP address on the ProxySG. It wants these
users to authenticate when their browsers send a request to the proxy.
Create a Policy Layer
1.
Start VPM from the Management Console, Configuration>Policy>Visual Policy Manager.
2.
Select Policy>Add Web Authentication Layer.
Figure 14-52: Creating a Policy Layer
3.
A dialog displays offering a default name for the layer, consisting of the layer type and a number.
Rename the layer or accept the default and click OK.
Figure 14-53: Add New Policy Table Dialog
4.
VPM creates the new layer tab and adds a blank rule.
Example 1: Create an Authentication Rule
1.
By default, the unmodified rule applies to everyone whose browsers connect to a specific IP
address.
Figure 14-54: Creating a Web Authentication Rule
2.
Right-click the Source cell to drop the menu.
3.
Select Set to open the Set Source Object dialog.
549
Blue Coat ProxySG Configuration and Management Guide
Figure 14-55: Selecting an IP Address Source Object
4.
Select a proxy IP address or port; if necessary, click New to create a new one. This example selects
IP address on the ProxySG where the PAC file sends most employee browsers.
5.
Click OK to enter the IP address in the Source cell.
Figure 14-56: Completed Source Object
6.
Create an authentication Action object. Right-click the Action cell to drop the menu and select Set;
the Set Action Object dialog displays.
7.
The only objects available are the pre-existing static objects, so you must create a new
Authenticate object. Click New and select Authenticate.
Figure 14-57: Selecting Authenticate
550
Chapter 14: The Visual Policy Manager
8.
The Add Authenticate Object window displays. Note the following:
❐
Name—Every configurable object has a name. The default name Authenticate1; change to
Authenticate_XYZ_Corp, which is how it will be listed in the Add Object window.
❐
Realm—Specifies the realm to be authenticated against from the drop-down list.
❐
Mode—Specifies the authentication realm mode.
Figure 14-58: Specifying the Authentication Realm
9.
Click OK to close the Add Action Object window, with the new Authenticate object in the list.
Figure 14-59: New Authentication Action Object
10. Click OK.
Figure 14-60: Completed Action Object
11. Create a Trace object to log all authentication activity. Right-click the Track cell to drop the menu
and select Set; the Set Track Object dialog appears.
12. You must create a new Trace object. Click New and select Trace; the Add Trace Object appears.
551
Blue Coat ProxySG Configuration and Management Guide
13. In the Name field, enter AuthTrace.
14. Name the object AuthTrace1. Click Trace Level and Verbose to enable verbose tracing, which lists the
rules that were skipped because one or more of their conditions were false and displays the
specific condition in the rule that was false.
Figure 14-61: Creating a Trace Object
15. Click OK; click OK again to add the object. The rule is complete.
Figure 14-62: Completed Rule
Example 2: Exempt Specific Users from Authentication
Certain individuals and groups are exempt from the above restriction. Individuals in the purchasing
department are allowed to the Web so they can order online from supplier Web sites. And the
company does not want them to authenticate.
1.
To create a new rule, click Add Rule.
Figure 14-63: Adding a Second Web Authentication Policy Layer Rule
2.
552
People in the purchasing group use the same PAC file and thus their browsers are directed to the
same IP address. A Combined Source Object is needed that includes the purchasing group, who
are their own subnet.
Chapter 14: The Visual Policy Manager
Figure 14-64: A Combined Object
The new rule in the policy layer accepts the default Action Object to not authenticate and does not
require a Trace Object.
Figure 14-65: Updated Second Rule
However, a problem exists. The second rule cannot be evaluated because the first rule affects
everyone who goes through the proxy. The rules need to be reversed.
3.
Select the second rule and click Move Up to reorder the rules.
Figure 14-66: Reordered Rules
553
Blue Coat ProxySG Configuration and Management Guide
Tutorial—Creating a Web Access Policy
This section is a tutorial that demonstrates how to create policies and rules for Web access.
Use ProxySG policies to define end-user access to Web resources. For more information about Web
access policies, see Appendix 18: "Content Filtering". This section provides examples.
Example 1: Restrict Access to Specific Websites
This example demonstrates a simple rule that denies everyone access to specific job searching Web
sites. This rule requires you to configure only one rule option; it uses the defaults for all other options.
1.
Start the policy editor and select Policy>Add Web Access Layer. VPM displays a tab with the name of
the new policy; beneath that is a new rule-specific row. Notice that the default Action is Deny.
Figure 14-67: Creating a New Policy Layer
2.
Right-click Destination and select Set; the Set Destination Object dialog appears.
Figure 14-68: Set Destination Dialog
3.
554
Click New; select Combined Destination Object. The Add Combined Destination Object dialog
appears.
Chapter 14: The Visual Policy Manager
a.
Name the object JobSearchURLs.
b.
Select New>URL. The Add URL Object dialog appears.
Figure 14-69: Add URL Object Dialog
555
Blue Coat ProxySG Configuration and Management Guide
c.
Click Simple Match; in the URL field, enter hotjobs.com and click Add.
d. Repeat Step c twice, entering bajobs.com and monster.com.
e.
Click Close; the entered URLs appear as selectable items.
Figure 14-70: Jobsite URLs
4.
Select each newly added URL and click the first Add button.
Figure 14-71: Creating a Combined Destination Object with URLs
5.
556
Click OK. The Set Destination Object now contains the individual URL objects and the combined
object.
Chapter 14: The Visual Policy Manager
6.
Select the JobSearchURLs combined object and click OK. The object is now part of the rule.
Figure 14-72: Completed Rule
As the default action is deny, the rule is complete. No one can access these Web sites.
7.
To activate the rule, click Install Policies.
Example 2: Allow Specific Users to Access Specific Websites
The after-hours IT shift is comprised of part-time college interns who are on call to handle small
problems, but are not involved in major projects. Therefore, you allow them to browse certain sports
and entertainment Web sites when all is quiet; access is allowed from two workstations and you still
want to track their browsing activity.
Configuring the Source Object
1.
Add a new rule to the policy and position the pointer in the Source cell.
Figure 14-73: Setting a Source Rule Option
2.
Right-click the Source cell and select Set to display the Add Source Object dialog.
3.
Click New and select Combined Source Object; the Add Combined Source Object appears.
4.
Name the object IT_PM_Shift.
5.
Under the selectable list of objects, click New and select Client IP Address/Subnet; the Add Client IP
Address/Subnet Object dialog appears.
6.
Enter the IP address of the first workstation and click Add; repeat for the second; click Close.
7.
Select each IP address and click the first Add.
557
Blue Coat ProxySG Configuration and Management Guide
Figure 14-74: Combined IP Address Object
8.
Click OK; click OK again to add the Source object to the rule.
Configuring the Destination Object
1.
Right-click the Destination field and select Set; the Set Destination Object dialog appears.
2.
Click New and select Category; the Add Category Object dialog appears.
Figure 14-75: Category Dialog
558
3.
Select Policy and click Add; the Enter Name for New Category dialog appears.
4.
Name the object Allowable_Sports and click OK.
Chapter 14: The Visual Policy Manager
5.
Select Sports URLs and click Edit URLs. The Edit Locally Defined Category Object dialog appears.
6.
Enter the URLs for the allowable sports Web sites.
Figure 14-76: Sports URLs Category
7.
Click OK. Under Policy, select Allowable_Sports; click OK.
8.
Repeat Steps 3 through 7, creating a category called Allowable_Entertainment with the URLs ew.com,
rollingstone.com, and variety.com.
9.
Create a Combined Object named Allowable PM IT Websites with the two categories: Allowable_Sports
and Allowable_Entertainment. Click OK twice to add the object to the rule.
Configuring the Time Object
This example allows the specified users to access the sports and entertainment Websites after business
hours.
1.
Right-click the Time field and select Set; the Set Time Object dialog appears.
2.
Click New and select Time Object; the Add Time Object dialog appears.
3.
Name the object After Hours.
4.
Select Local Time. In the Specific Time of Day Restriction field, select Enable and set the time from 18:00
to 05:59.
This defines after hours as 6:00 PM to 6:00 AM.
5.
In the Specific Weekday Restriction field, select Enable and select Monday, Tuesday, Wednesday,
Thursday, and Friday.
This defines the days of the week to which this rule applies.
559
Blue Coat ProxySG Configuration and Management Guide
Figure 14-77: After Hours Time Object
6.
Click OK to add the Time Object to the rule.
Configuring the Action Option
1.
Right-click Action select Set; the Set Action Object dialog appears.
2.
Allow is a static object. Select Allow and click OK.
The rule is now complete.
Figure 14-78: Completed Rule
560
Chapter 15: Advanced Policy
This chapter provides conceptual information about ProxySG advanced policy features. While many
Blue Coat Systems features have a policy component, some features have no configuration component
outside policy. Configuring advanced policy is done by defining rules in the Visual Policy Manager
(VPM) or by composing Content Policy Language (CPL). While some examples are provided in this
chapter, references to the relevant VPM chapter component are included in each section.
This chapter contains the following topics:
•
"Blocking Pop Up Windows"
•
"Stripping or Replacing Active Content"
•
"Modifying Headers"
•
"Defining Exceptions"
•
"Managing Peer-to-Peer Services"
Excluding exceptions, you must use policy to implement these capabilities. (For exceptions, you can
create a list outside of policy to install on the system.)
561
Blue Coat ProxySG Configuration and Management Guide
Section A: Blocking Pop Up Windows
Section A: Blocking Pop Up Windows
This section describes the Blue Coat solution for blocking unwanted pop up windows.
About Pop Up Blocking
The ProxySG allows you to block pop up windows, which are usually in the form of unsolicited
advertisements. Pop up windows are blocked by inserting Javascript code into each HTML Web page.
Every time the Web page tries to open a new window, the code attempts to determine if the window is
a result of user click. The window is allowed to open if the ProxySG determines a user clicked a button
or link; otherwise, the window does not open.
Limitations
Because of the dynamic nature of the Web, blocking pop up windows is not a perfect solution. Keep in
mind the following limitations before configuring this feature:
•
Windows that contain desired or useful information cannot be distinguished from undesired
content, such as advertisements.
•
If the Web browser caches a page that spawns pop up windows before the blocking policy was
installed, pop up ads continue to be served from that page regardless of current policy.
•
Animated ads contained within Web pages are not blocked. Commonly seen in scrolling or
drop-down form, these are not true pop up windows but are contained within the page. Users
who see these ads might believe that pop up window blocking is not implemented.
•
Pop up windows that are delivered through HTTPS are not blocked.
•
Although the Blue Coat request headers tell a Web server not to use compression, it is possible
(though not likely) for a Web server to be configured to send compressed responses anyway. The
pop up blocking feature does not work on compressed HTML pages.
Recommendations
•
To compensate for limiting factors, administrators and users can override pop up blocking:
❐
Administrators—Use VPM to create policy rules that exempt pop up blocking for specific
Web sites and IP address ranges. For example, Blue Coat recommends disabling pop up
blocking for your Intranet, which commonly resides on a IP address range.
❐
Users—When a pop up window is blocked, a message is displayed in the status bar:
blocked popup window -- use CTRL Refresh to see all popups.
While pressing the Control key, click the Web browser Refresh button; the page is reloaded
with pop up blocking disabled for that action.
562
•
Create a separate Web Access policy layer for pop up blocking actions. This alleviates interference
with Web applications deployed on your Intranet that require pop up windows.
•
To prevent a cached Web page from spawning pop up windows, clear the browser cache, then
reload the page without holding down the CTRL key.
Chapter 15: Advanced Policy
Section A: Blocking Pop Up Windows
Blocking pop up windows is accomplished through the Visual Policy Manager. See "Block/Do Not
Block PopUp Ads" in Chapter 14: “The Visual Policy Manager” on page 453 for information about
how to create blocking actions in a policy layers.
563
Blue Coat ProxySG Configuration and Management Guide
Section B: Stripping or Replacing Active Content
Section B: Stripping or Replacing Active Content
This section describes the Blue Coat solution for stripping or replacing unwanted active content.
About Active Content
Scripts activated within Web pages can pose a security concern. The ProxySG policy can be configured
to supplement standard virus scanning of Web content by detecting and removing the HTML tags
that launch active content such as Java applets or scripts. In addition, the removed content can be
replaced with predefined material, a process referred to as active content transformation.
When the ProxySG is configured to perform active content transformation, Web pages requested by a
client are scanned before they are served and any specified tags and the content they define are either
removed or replaced. Since the transformed content is not cached, the transformation process is based
on a variety of conditions, including time of day, client identity, or URL.
Note:
Pages served over an HTTPS tunneled connection are encrypted, so the content cannot be
modified.
The following tags and related content can be removed or replaced:
•
<APPLET>—Java applets, as defined by HTML <applet> elements.
•
<EMBED>—Embedded multimedia objects displayed using Netscape Navigator plug-ins as
defined by HTML <embed> elements.
•
<OBJECT>—Embedded multimedia objects displayed using Internet Explorer Active-X controls
and other multimedia elements, as defined by HTML <object> elements
•
<SCRIPT>—Embedded Javascript and VBScript programs, whether these are represented as
HTML <script> elements, Javascript entities, Javascript URLs, or event handler attributes. The
<noscript> tag is not affected by this features.
Stripping active content is accomplished through the Visual Policy Manager or by composing CPL.
•
See "Strip Active Content" in Chapter 14: “The Visual Policy Manager” on page 453 for
information about how to create a strip active content object in a Web Access policy layer.
•
Refer to the Blue Coat ProxySG Content Policy Language Guide.
About Active Content Types
The following sections provide more detail about the types of active content that can be removed or
replaced.
Script Tags
Scripts are generally placed between the start and end tags <SCRIPT> and </SCRIPT>. The type of
script used is defined by the LANGUAGE attribute; for example, <SCRIPT LANGUAGE=”JavaScript
1.0”>). When the LANGUAGE attribute is undefined, the browser assumes JavaScript.
564
Chapter 15: Advanced Policy
Section B: Stripping or Replacing Active Content
When transform active_content is configured to remove scripts, the basic operation is to remove
all content between and including <SCRIPT> and </SCRIPT>, regardless of the language type, and
substitute any defined replacement text. A notable exception occurs when a script is defined in the
header portion of the HTML document (defined by the <HEAD> tag). In this case, the script is simply
removed. This is because images, objects, and text are not allowed in the header of an HTML
document. If the end script tag </SCRIPT> is missing from the document (the end of the document is
defined as either up to the </BODY> or </HTML> tag, or the last character of the document), then all
content from the start <SCRIPT> tag to the end of the document is removed.
JavaScript Entities
JavaScript entities have the following format: &{javascript code} and are found anywhere in the
value part of an attribute (that is, <IMG SRC=”&{images.logo};”). You can define more than one
entity in the value portion of the attribute. When transform active_content is configured to
remove scripts, all JavaScript entities attribute/value pairs are removed. No replacement text is put in
its place.
JavaScript Strings
JavaScript strings have the following format: javascript: javascript code and are found
anywhere in the value part of an attribute, though usually only one of them can be defined in an
attribute. Most modern browsers support JavaScript strings. When transform active_content is
configured to remove scripts, all JavaScript string attribute/value pairs are removed. No replacement
text is put in its place.
JavaScript Events
JavaScript events are attributes that start with the keyword on. For example, <A HREF=”index.html
onMouseOver=”javascript code”>. The HTML 4.01 specification defines 21 different JavaScript
events:
onBlur, onChange, onClick, onDblClick, onDragDrop, onFocus, onKeyDown,
onKeyPress, onKeyUp, onLoad, onMouseDown, onMouseMove, onMouseOut,
onMouseOver, onMouseUp, onMove, onReset, OnResize, onSelect, onSubmit,
onUnload
Both Microsoft Internet Explorer and Netscape have defined variations on these events as well as
many new events. To catch all JavaScript events, the active content transformer identifies any attribute
beginning with the keyword on, not including on itself. For example, the attribute onDonner in the tag
<A HREF=”index.html” onDONNER=”DONNER”> is removed even though onDonner does not exist as a
valid JavaScript event in the browser. In this case, the transformed file would show <A
HREF=”index.html”>.
565
Blue Coat ProxySG Configuration and Management Guide
Section B: Stripping or Replacing Active Content
Embed Tags
HTML <EMBED> tags are not required to have an </EMBED> end tag. Many Web browsers do, however,
support the <EMBED> </EMBED> tag pair. The text between the tags is supposed to be rendered by the
browsers when there is no support for the embed tag, or if the MIME-type of the embed object is not
supported. Thus, when transform active_content is configured to transform embed tags, only the
<EMBED> tag is removed and replaced with any replacement text. Any occurrence of the end tag
</EMBED> is simply removed, leaving the text between the beginning and end tags intact.
Object Tags
Objects tags have a start <OBJECT> and end </OBJECT> tag pair, and the attributes CODETYPE and
TYPE determine the type of object. The text between the tags is supposed to be rendered by the
browsers when the object tag is not supported, so when transform active_content is configured to
transform object tags, only the <OBJECT> and </OBJECT> tags are removed and replaced with any
replacement text. The text between the tags remains. The CODETYPE or TYPE attributes do not affect
the transformation. Also, if the end </OBJECT> tag is missing, the transformation will not be affected.
566
Chapter 15: Advanced Policy
Section C: Modifying Headers
Section C: Modifying Headers
The request headers are sent when users access Web objects that contain a lot of information. This can
raise a concern that such details compromise the privacy or security of the enterprise or user.
When a user clicks on a link, the Web browser sets the request’s Referer header to the URL of the Web
page that contained the link. (This header is not set if the URL was entered or selected from a favorites
or bookmarks list.) If an internal Web page provides links to external Web sites, users clicking those
links sends the URL of the internal pages, and are logged in the Web logs of those external sites. This is
not usually an issue; however, if the external Web site is a competitor Web site or another site with
interest in the internal details of your enterprise, this might be a concern.
For example, how you structure your intranet might suggest something about your company’s
current or future direction. Certain project names or codewords might show up in directory or file
names. Exposing the structure of the intranet makes it easier for hackers to attack the network.
The broad solution of deleting Referer headers from all requests presents a problem because some
Web sites will not serve images or other linked objects unless the Referer header is set to a referring
page on that same Web site. The solution implemented by Blue Coat is to strip the Referer header only
when the target Web page resides on the Internet and the referring page is on an internal host.
Suppressing headers is accomplished through the Visual Policy Manager or by composing CPL.
567
•
See "Suppress Header" in Chapter 14: “The Visual Policy Manager” on page 453 for information
about how to create a strip active content object in a Web Access policy layer.
•
Refer to the Blue Coat ProxySG Content Policy Language Guide.
Blue Coat ProxySG Configuration and Management Guide
Section D: Defining Exceptions
Section D: Defining Exceptions
Exceptions (formerly called message or RMG pages) are sent in response to certain ProxySG client
requests, such as denial by policy, failure to handle the request, and authentication failure. Exceptions
are returned to users based on policy rules defined by the ProxySG administrator. For example, if a
client sends a request for content that is not allowed, an exception HTML page (for HTTP
connections) or an exceptions string (for non-HTTP connections) is returned, informing the client that
access is denied.
Two types of exceptions are used: built-in and user-defined.
Built-in Exceptions
Built-in exceptions are a set of pre-defined exceptions contained on the ProxySG. Built-in exceptions
send information back to the user under operational contexts that are known to occur, such as
policy_denied or invalid_request.
Built-in exceptions are always available and can also have their contents customized; however,
built-in exceptions cannot be deleted, and you cannot create new built-in exceptions.
The table below lists the built-in exceptions and the context under which they are issued.
Table 15.1: Built-in Exceptions
568
Exception Type
Issued When
authentication_failed
The transaction cannot be authenticated, usually because the
credentials were incorrect. authentication_failed is a
synonym for deny.unauthorized.
authentication_failed_password_
expired
The authentication server reports that the credentials
provided have expired, and a new password must be
obtained.
authentication_mode_not_supported
The configured authentication mode is not supported for the
current request.
authentication_redirect_from_
virtual_host
Transparent redirect authentication is being used. This
exception redirects the transaction from the virtual
authentication host to the original request.
authentication_redirect_off_box
The request is being redirected to an authentication service
on another device.
authentication_redirect_to_
virtual_host
Transparent redirect authentication is being used. This
exception redirects the transaction to the virtual
authentication host.
authentication_success
Transparent redirect authentication with cookies is being
used. This exception redirects the transaction to the original
request, but removes the authentication cookie form the
request URL.
Chapter 15: Advanced Policy
Section D: Defining Exceptions
Table 15.1: Built-in Exceptions (Continued)
569
Exception Type
Issued When
authorization_failed
The deny.unauthorized policy action is matched. This
exception notifies the user that their currently authenticated
identity is not permitted to perform the requested operation,
but they may have some other credentials that would allow
their request through (for example. they get an opportunity
to enter new credentials).
client_failure_limit_exceeded
Too many requests from your ip address ($(client.address))
have failed.
configuration_error
A configuration error on the ProxySG was detected, and the
requested operation could not be handled because of the
configuration error. This exception is a likely indicator that
the administrator of the ProxySG will have to intervene to
resolve the problem.
connect_method_denied
A user attempted an CONNECT method to a non-standard
port when explicitly proxied. Blue Coat does not allow
CONNECT methods to non-standard ports by default
because it is considered a security risk to do so.
content_filter_denied
A particular request is not permitted because of its content
categorization.
content_filter_unavailable
An external content-filtering service could not be contacted,
and the ProxySG is failing closed in such a situation.
dns_server_failure
The request could not be processed because the ProxySG was
unable to communicate with the DNS server in order to
resolve the destination address of the request.
dns_unresolved_hostname
The request could not be processed because the ProxySG was
unable to resolve the hostname in the request with DNS.
dynamic_bypass_reload
The dynamic_bypass policy action is matched.
gateway_error
There was a network error while attempting to communicate
with the upstream gateway.
icap_communication_error
A network error occurred while the ProxySG was attempting
to communicate with an external ICAP server.
internal_error
The ProxySG encountered an unexpected error that resulted
in the inability to handle the current transaction.
invalid_auth_form
The submitted authentication form is invalid. The form data
must contain the username, password, and valid original
request information.
invalid_request
The request received by the ProxySG was unable to handle
the request because it detected that there was something
fundamentally wrong with the syntax of the request.
Blue Coat ProxySG Configuration and Management Guide
Section D: Defining Exceptions
Table 15.1: Built-in Exceptions (Continued)
570
Exception Type
Issued When
license_expired
The requested operation cannot proceed because it would
require the usage of an unlicensed feature.
method_denied
The requested operation utilizes a method that has been
explicitly denied because of the service properties associated
with the request.
not_implemented
The protocol cannot handle the requested operation because
it utilizes a feature that is not currently implemented.
notify
Used internally by VPM. You do not need to customize the
text of this exception, since in this case the entire HTML
response is generated by VPM and is not taken from the
exception definition.
notify_missing_cookie
This exception is returned when a VPM Notify User action is
being used to notify the user, and the user has disabled
cookies in the web browser.
policy_denied
policy_denied is a synonym for deny.
policy_redirect
A redirect action is matched in policy.
radius_splash_page
The RADIUS/TACACS splash generator feature is in use,
and the user must be authorized by RADIUS/TACACS. (The
RADIUS/TACACS secrets must be configured through the
(config)splash-generator commands.)
redirected_stored_requests_not_
supported
This applies to forms authentication with POST requests
only): The origin server returned a redirect for the request.
The ProxySG is configured to not allow stored requests to be
redirected.
refresh
A refresh (using the HTTP Refresh: header) is required.
The refresh exception (by default) refreshes the originally
requested URL (or in some cases, its post-imputed form).
server_request_limit_exceeded
Too many simultaneous requests are in progress to
$(url.host).
silent_denied
An exception(silent_denied) is matched in policy.
This exception is pre-defined to have no body text, and is
“silent” in that it results in only the status code being sent to
the client.
ssl_domain_invalid
There was a failure contacting an upstream host through
HTTPS because the certificate presented by the upstream
host was either the incorrect one or invalid.
ssl_failed
A secure connection could not be established to an upstream
host. This is typically because the upstream host is not
configured to accept SSL connections.
Chapter 15: Advanced Policy
Section D: Defining Exceptions
Table 15.1: Built-in Exceptions (Continued)
Exception Type
Issued When
tcp_error
A network error occurred attempting to communicate with
an upstream host.
transformation_error
The server sends an unknown encoding and the ProxySG is
configured to do content transformation.
unsupported_encoding
The client makes a request with an “Accept-Encoding:
Identity;q=0, …” header. Only uncompressed content is
available in cache, the ProxySG is not configured to compress
the content, or the compression license is expired, or the
client request results in to “Accept-Encoding: Identity;q=0”
due to the combination of request and configured policy.
unsupported_protocol
The protocol used in the request is not understood.
Most of the above exceptions can be initiated directly through the policy exception property.
However, some require additional state that makes initiating them either problematic or out of
context. The following are exceptions that cannot be initiated through the exception property:
•
authentication_failed
•
authentication_failed_password_expired
•
authentication_redirect_from_virtual_host
•
authentication_redirect_to_virtual_host
•
authentication_success
•
dynamic_bypass_reload
•
license_expired
•
radius_splash_page
•
ssl_domain_invalid
•
ssl_failed
To view the content of a built-in exception, enter the following commands at the (config) prompt:
SGOS#(config) exceptions
SGOS#(config exceptions) show exceptions configuration_error
configuration_error exception:
all protocols:
summary text:
ProxySG configuration error
details text:
Your request could not be processed because of a configuration error:
$(exception.last_error)
help text:
571
Blue Coat ProxySG Configuration and Management Guide
Section D: Defining Exceptions
The problem is most likely because of a configuration error,
$(exception.contact) and provide them with any pertinent information from
this message.
http protocol:
code: 403
User-Defined Exceptions
User-defined exceptions are created and deleted by the administrator. If a user-defined exception is
referenced by policy, it cannot be deleted. The default HTTP response code for user-defined
exceptions is 403.
Note:
For users who are explicitly proxied and use Internet Explorer to request an HTTPS URL,
an exception body longer than 900 characters might be truncated. The workaround is to
shorten the exception body.
Note also that an exception body less than 512 characters might cause a page does not exist 404 error. If
this occurs, use the exception.autopad(yes|no) property to pad the body to more than 513
characters. For more information on the exception.autopad property, refer to the Blue Coat ProxySG
Content Policy Language Guide.
About Exception Definitions
Each exception definition (whether built-in or user-defined) contains the following elements:
•
Identifier—Identifies the type of exception. Table 15.1 on page 568 lists the built-in exception
types. For user-defined exceptions, the identifier is the name specified upon creation.
•
Format—Defines the appearance of the exception. For an HTTP exception response, the format is
an HTML file. For other protocols, where the user agents are not able to render HTML, the format
is commonly a single line.
•
Summary—A short description of the exception that labels the exception cause. For example, the
default policy_denied exception summary is “Access Denied”.
•
Details—The default text that describes reason for displaying the exception. For example, the
default policy_denied exception (for the HTTP protocol) detail is: Your request has been denied
by system policy.
•
Help—An informative description of common possible causes and potential solutions for users to
take. For example, if you want the categorization of a URL reviewed, you can append the
$(exception.category_review_url) and $(exception.category_review_message)
substitutions to the $(exception.help) definition. Note that you must first enable this capability
through content filtering configuration. For information on enabling review categorization, see
"Selecting Category Providers" on page 636.
•
Contact—Used to configure site-specific contact information that can be substituted in all
exceptions. Although it is possible to customize contact information on a per-exception basis,
customizing the top-level contact information, which is used for all exceptions, is sufficient in
most environments.
572
Chapter 15: Advanced Policy
Section D: Defining Exceptions
•
HTTP-Code—The HTTP response code to use when the exception is issued. For example, the
policy_denied exception by default returns the 403 Forbidden HTTP response code.
Important: Fields other than Format must be less than 8000 characters. If they are greater than
this, they will not be displayed.
When defining the above fields, you can use substitution variables that are particular to the given
request. Some of the above fields are also available as substitutions:
•
$(exception.id)
•
$(exception.summary)
•
$(exception.details)
•
$(exception.help)
•
$(exception.contact)
Additionally, the Format, Summary, Details, Help and Contact fields can be configured specifically
for HTTP, or configured commonly for all protocols.
The Format field, the body of the exception, is not available as a substitution. However, the Format
field usually includes other substitutions. For example, the following is a simple HTML format:
<html>
<title>$(exception.id): $(exception.summary)</title>
<body><pre>
Request: $(method) $(url)
Details: $(exception.details)
Help: $(exception.help)
Contact: $(exception.contact)
</pre></body></html>
Some additionally useful substitutions related to exceptions are:
•
$(exception.last_error)—For certain requests, the ProxySG determines additional details on
why the exception was issued. This substitution includes that extra information.
•
$(exception.reason)—This substitution is determined internally by the ProxySG when it
terminates a transaction and indicates the reason that the transaction was terminated. For
example, a transaction that matches a DENY rule in policy has its $(exception.reason) set to
"Either 'deny' or 'exception' was matched in policy".
About the Exceptions Hierarchy
Unlike the error pages in previous SGOS releases, exceptions are not required to have its entire
contents defined. Exceptions are stored in a hierarchical model, and parent exceptions can provide
default values for child exceptions. There are two parent exceptions from which other exceptions are
derived: exception.all and exception.user-defined.all.
Each built-in and user-defined exception derives its default values from the all exception. For
example, by default the built-in exceptions do not define the format field. Instead, they depend on the
all exception's format field definition. To change the format text for all built-in and user-defined
exceptions, customize the format field for the all exception.
573
Blue Coat ProxySG Configuration and Management Guide
Section D: Defining Exceptions
The user-defined.all exception is the parent of all user-defined exceptions, but it is also a child of
the all exception. Configuring exception.user-defined.all is only necessary if you want certain
fields to be common for all user-defined exceptions, but not common for built-in exceptions.
The following example demonstrates using the exception inline command to configure the
$(exception.contact) substitution for every HTTP exception:
#(config exceptions) inline http contact EOF
For assistance, contact <a
href="mailto:[email protected]">sysadmin</a>EOF
The following example configures a different $(exception.contact) substitution for every HTTP
exception:
#(config exceptions) user-defined inline http contact EOF
For assistance, contact <a
href="mailto:[email protected]">policyadmin</a>EOF
About the Exceptions Installable List
The Exceptions Installable List uses the Structured Data Language (SDL) format. This format provides
an effective method to express a hierarchy of key/value pairs. For example, the following is SDL file
before customization:
(exception.all
(format "This is an exception: $(exception.details)")
(details "")
(exception.policy_denied
(format "")
(details "your request has been denied by system policy")
)
This SDL file defines an exception called policy_denied that defines the $(exception.details)
substitution as "Your request has been denied by system policy". Because the exception does
not define the format field, it inherits the format field from its parent exception (exception.all).
When the policy_denied exception is issued, the resulting text is: This is an exception: your
request has been denied by system policy.
Suppose you want to customize the $(exception.contact) substitution for every HTTP exception.
Edit the exception.all component.
Note:
The default HTTP format and built-in exception definitions have been removed for
example purposes.
(exception.all
(contact "For assistance, contact your network support team.")
(details "")
(format "$(exception.id): $(exception.details)")
(help "")
(summary "")
574
Chapter 15: Advanced Policy
Section D: Defining Exceptions
(http
(code "200")
(contact "")
(details "")
(format <<EOF
<format removed>
EOF
)
(help "")
(summary "")
)
<built-in exceptions removed>
)
To add the $(exception.contact) information, modify the contact substitution under the http
node:
(exception.all
(contact "For assistance, contact your network support team.")
(details "")
(format "$(exception.id): $(exception.details)")
(help "")
(summary "")
(http
(code "200")
(contact "For assistance, contact <a
href="mailto:[email protected]">sysadmin</a>")EOF
(details "")
(format <<EOF
<format removed>
EOF
)
(help "")
(summary "")
<built-in exceptions removed>
)
)
Keep in mind the following conditions when modifying exception installable lists:
•
Every exception installable list must begin with a definition for exception.all.
•
In the exceptions’ installable list, all definitions must be enclosed by
exception.all and its accompanying closing parenthesis; that is,
(exception.all
(exception.policy_denied)
)
575
•
Keep the definition strings under the enclosed parentheses short, no longer than one line if
possible.
•
Blue Coat strongly recommends downloading the existing exceptions installable list, then
modifying it.
Blue Coat ProxySG Configuration and Management Guide
Section D: Defining Exceptions
Creating or Editing Exceptions
You can create or edit an exception with the CLI or with installable lists on the Management Console.
Note:
You cannot create user-defined exceptions for Patience Pages.
To Create or Edit an Exception through the CLI:
1.
At the (config) prompt, enter the following commands:
SGOS#(config) exceptions
SGOS#(config exceptions) create definition_name
SGOS#(config exceptions) edit definition_name
SGOS#(config exceptions user-defined.definition_name) http-code numeric HTTP
response code
SGOS#(config exceptions user-defined.definition_name) inline ?
contact
Set the $(exceptions.contact) substitution
details
Set the $(exceptions.details) substitution
format
Set the format for this exception
help
Set the $(exceptions.help) substitution
http
Configure substitution fields for just HTTP exception