1
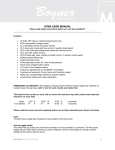
EK-DZ ILDA to ADAT Converter
User Manual
V1.1
Introduction
Recording laser images has been around for a very long time. The technology to record
this material has changed significantly over the years. Currently, hard drive recording of
laser shows is quite popular. An example of this would be the Alesis HD24.
Laser shows typically consist of 5 different signals; X axis, Y axis, Red, Green and Blue.
These signals are very similar to normal audio signals, which have, in part, made the
ADAT such an ideal solution. There is however, one major difference between a laser
signal and an audio signal.
In order to properly record laser show data, the recorder must be able to record a DC
signal. If you apply a steady +5V DC signal to one of the channels on an unmodified
ADAT, you would see that the recorded signal starts at +5V and slowly goes down to
0V. The input signal is the same +5V however; the recorded signal is now 0V. Why is
this? Most, if not all, recorders utilize a function known as AC Coupling. This
intentionally prevents a DC signal from being recorded. So in order to record a DC
signal, a modification is needed. The original Alesis “Blackface” ADAT was very easy
to modify to allow recording of DC signals. Simply soldering a bridge across several
capacitors allowed playback and recording of DC signals. As the technology progressed
it became more difficult (nearly impossible) to modify a unit for DC recording.
As an alternative, recording “digitally” to an ADAT resolves this problem completely.
The only problem left is to convert the analog laser signals to a digital stream of data
that an ADAT can understand. This is just what the EK-DZ ILDA to ADAT Converter is
designed to do!
Included with the Converter
A full Converter will include the enclosure, power supply and 6' optical cable.
An OEM Converter will only include a completely assembled/tested circuit board.
Please note, the Converter requires +9VDC power supply.
Front View
Rear View
How it Works
The Converter multiplexes 8 separate signals into a single optical stream of data in the
“ADAT Optical” format. The back of the Converter has an ILDA IN, AUX CH6 and a
Left/Right Audio. The ILDA IN converts the differential signal for X/Y to single ended
prior to being converted to the ADAT optical format. The signals recorded from the
ILDA connector are as follows: X (Pins 1 and 14), Y (Pins 2 and 15), Red (Pin 5), Green
(Pin 6) and Blue (Pin 7). As per the ILDA Standard, the recorded signals are assigned to
specific tracks:
Track 1 – X Axis
Track 2 – Y Axis
Track 3 – Red
Track 4 – Green
Track 5 – Blue
Track 6 – User Assigned (more on this later)
Track 7 – Left Audio
Track 8 – Right Audio
The ILDA PASSTHRU connector passes all the signals from the ILDA IN out to a
projector that can be used to monitor what's being recorded.
Audio Left/Right is AC coupled, to prevent recording DC signals on the audio line
which can damage speakers.
The AUX CH6 is a “user defined” channel that is recorded to Track 6 on the ADAT
optical signal. This channel can be used for a number of functions or not used at all.
With additional circuitry, AUX CH6 can be used to record MIDI or DMX. By default,
AUX CH6 is connected to ground to keep noise at a minimum when the channel is not
in use. To utilize this channel, you will need to open the enclosure and set a single green
jumper to the purpose chosen for the converter.
The green jumper options for AUX CH6 are:
Deep Blue – Connects to ILDA IN Pin 8
Yellow – Connects to ILDA IN Pin 9
Cyan – Connects to ILDA IN Pin 10
Shutter – Connects to ILDA IN Pin 13
AC Coupling – Used if recording an additional audio signal
DC Coupling – Used for all other signals, including SMPTE
Ground – Set by default.
Recording a Show in Microsoft Vista
Recording to an ADAT is simple, attach the optical cable from the Converter to “Digital
IN” on the ADAT and set your clock source to “External” (48 KHz). And that should be
it!
Recording to a PC is quite a bit different. The benefit is that it also allows for easier
manipulation via 3rd party software (Audacity, etc.) and quicker “drag and drop” copying
to backup your show data.
For this demonstration, we will look at recording a signal when the converter is
connected to an Echo Layla 24/96. The Echo Layla 24/96 is connected to a PC running
Microsoft Windows Vista with Audacity.
First you connect the optical cable to the “OPTICAL IN” on the back of the Layla and
open the Echo24 Console application. Then select the “Settings” tab and make sure your
Digital Mode is set to ADAT Optical and your Clock Source is set to ADAT.
Basically, you have just made the Echo Layla 24/96 a slave to the ILDA > ADAT
Converter. The Layla will now depend on the Converter for its clock source. If you have
a modified Echo Layla for playback of wave files and now disconnect the Converter, the
shows would playback at a very slow speed. To fix this, set your clock source back to
Internal. The Core Audio Sample Rate should be set to 48 KHz.
The VU Meters in the Echo24 Console should now show the inputs to the Converter.
With the ILDA Test Pattern, the VU Meters should look something like this.
Note that I also have an audio source connected to Audio L/R on the Converter, which is
routed to Track 7 and 8.
Once this is working, you may now open Audacity and ensure that the “Input Device” is
set to “Digital In 1-8 (Layla24)” and that “Input Channels = 8”.
Once all this is configured, you are ready to begin recording!
Saving the Show
To save the show in Audacity, you will need to Export the file as a Wave. Select File,
Export... Type in a file name and make sure “Wav (Microsoft) signed 16 bit PCM” is
selected and hit Save. You are now presented with the “Advanced Mixing Options”
dialog. Here you can rearrange the tracks if necessary:
Select OK and you are now presented with an “Edit Metadata” dialog, select OK again
and the 8 track wave file will now be rendered.
This completes the basics of using the Converter with a PC running Windows Vista and
the Echo Layla 24/96.
Recording a Show in Microsoft Windows 7 using Audacity
When recording audio in Windows 7, it is best to use ASIO audio drivers. This can be
accomplished by downloading the source code for Audacity 2.0.5 and recompiling it
using ASIO drivers supplied by Steinberg and graphical components by wxWidgets.
Everything is explained here:
http://www.hometownband.org/Audacity/CompilingAudacity.html
If preferred, do an Internet search for “audacity 1.3.13 with asio support (built 2010-1126)”
This will point you to a zip file that has been precompiled with ASIO drivers. It is an
older version of Audacity but it works fine in both 32 and 64 bit Windows 7. It will
handle all the recording needs of this converter.
To record, follow the steps in the “Recording a Show in Microsoft Vista” section of this
document. Make sure you have selected the correct audio device for playback and
record:
Using n-Track 7 in Microsoft Windows 7
As an alternative to Audacity, you can use n-Track 7. This commercial software can be
found here:
http://www.ntrack.com
There are two versions; either will work with the converter. One is $49 and one is $89.
One major benefit of n-Track is that you can play multichannel audio while editing a
file.
With Audacity you need to make your recording, save it and then open it in something
like Spider player to play it.
While building a show from recorded tracks in n-Track, you simply press the spacebar
or “Play” button and the file plays. This allows for quicker alignment and adjustment of
tracks when developing a new laser show.
Recording in n-Track is easy after you have everything set up correctly.
Setting up n-Track 7
After installing the software, the first thing you need to do is select your sound recording
device. Click on “Settings, Audio Device”. You will see a screen similar to this:
This shows all the available audio devices in your computer.
Select the ASIO driver for both playback and record. Click “OK”.
Click on “Settings, Soundcard’s settings”. Click on “Playback format”, you will see a
screen like this:
Click on “Select I/O channels”. On the “Select channels to use” screen, make sure all the
checkboxes are checked for both Input and Output. Click “OK”.
At this point you are ready to record. This is done by clicking the “Transport, Record”
menu option or just clicking the “Record” button on the transport.
Here is what the interface looks like with 8 tracks recorded:
You will notice a couple of things on this screen that are important for successful output
file creation.
First, the routing of each track to a specific audio channel must be specified. This can be
seen here:
Notice that tracks 1 and 2 are mapped to the same output, in this case “ASIO Echo PCI”.
This is important because each track is mono with both tracks being routed to the same
stereo channel.
The next thing to notice is the panning on these channels. This can be seen here:
Just beneath the vertical slider is the pan control for each track. Notice that track 1 is
panned to the Left and track 2 is panned to the Right.
With routing and panning setup, you are ready to save the tracks to a multichannel wave
file.
Saving a multichannel wave file in n-Track
When you have everything edited the way you like it, it is time to save the result into a
multichannel wave file. In n-Track this is done by clicking “File, Mixdown song”. Enter
a file name and click “OK”. When the screen appears, click “More options > >”. You
will see this screen:
Select all 8 tracks in the “Tracks to mixdown” selector:
In the lower Right corner of the screen, select “Single Multichannel file” from the drop
down:
Make sure the “Sample Frequency” dropdown has “48000” selected.
If you have set up all the options as just described, click the “Start” button. A file will be
created using the name you entered previously.
Here is what the created file looks like when opened in Audacity:
It sounds like a lot of work, but you only have to do the setup once.
DZ's Additional Notes:
Clipping – This is a very important concept to understand and something that needs to
be carefully managed. If you are constantly sending any of the signals into clipping the
results may be unpredictable. When configuring your setup, you may want to output the
brightest possible frame and look at the VU meters on the Echo Layla Console (or what
ever interface you choose to use) and make sure you are not clipping. If the very top red
bar on the VU meter is lit, you are in clipping and need to back off the signal until you
are out of clipping.
Clock Source – Always remember where your clock is coming from! If you make a
recording thru the converter, the converter must be the clock source for the Layla. If you
go to play back the show and disconnect the converter without changing the clock
source to internal you'll be in for a surprise! The clock source setting can be found on
the Layla Console under the settings tab.
Audacity Effects – There are numerous effects within Audacity that can be used to
modify a recording. One to be careful with is 'Normalize'. By default, this effect will
also remove DC offset, which is bad! Be sure to uncheck this function if using
Normalize on the laser data channels. There are several other effects that I find quite
useful; amplify, fade in/fade out, etc. There is another effect that's not native in Audacity
called 'Offset'. I find this to be a very handy tool and can be added to Audacity. A Google
search for “DC Offset Tool Audacity” will yield a couple links to Audacity's Forum
where the tool may be found along with instructions to install.
Setting Up an Echo Layla 24/96 – There are a couple important things to know and
understand about the Echo Layla Console. It is also very important that the console is
configured properly to record a clean show. We already know about setting the clock
source, but what does the rest of it do!?
So if you look at the top row, these are the output channel tabs. Currently, 'Analog 1-2
Out' is selected. Every slider on this page corresponds to analog output channel 1 and 2.
For our purpose, this would be X and Y. You will notice in the middle of the screen
everything is muted except for Analog In 1 and 2. If I wanted Analog Out 1 and 2 to
only play data from Analog in 7 and 8, I could mute 1-2 unmute 7-8. Or, if I unmute
Analog In 1-8, Analog Out 1-2 will look like garbage on the scanners!
If you click the left pointing arrow next to the word 'Digital', this will open the Digital In
1-8 sliders. When recording from the Converter, this is where you may want to make
adjustments and monitor the signals for clipping.
Also note the '+4' setting above the 'Pan' knob. If this is set for '-10' you may need to
change this to '+4'.
By default, your Analog In and Digital In 1-2 should be assigned to Analog Out 1-2 with
the other channels muted. If not, please make sure you adjust these setting!
Projector Connection – There are two ways you can connect your projector to monitor
the recording process. On the back of the Converter, there is an ILDA Passthru
connector, this directly connects your projector to your DAC. Alternatively, if using an
Echo Layla, you may connect your projector to the Layla to monitor the recording. This
will give a more accurate representation of what you're recording. Just be sure the Layla
Console settings listed above are verified!