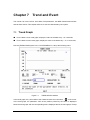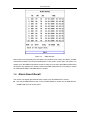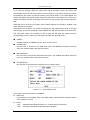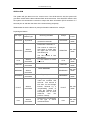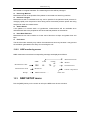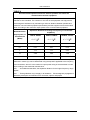
1
Veterinary Portable Multi-parameter Patient Monitor Operation Manual Content Chapter 1 Introduction........................................................................................................ 1-1 1.1 General Information .................................................................................................. 1-3 1.2 Screen Display .......................................................................................................... 1-4 1.3 Button Functions and Basic Operation ..................................................................... 1-8 1.4 Interfaces ................................................................................................................ 1-11 1.5 Built-in Battery(optional).......................................................................................... 1-13 Chapter 2 Getting Started ................................................................................................. 2-1 2.1 Open the Package and Check .................................................................................. 2-1 2.2 Connect AC power cord............................................................................................ 2-1 2.3 Power on the Monitor................................................................................................ 2-2 2.4 Connect Patient Sensors/Probe................................................................................ 2-2 2.5 Check the Recorder .................................................................................................. 2-2 Chapter 3 System Menu ................................................................................................... 3-1 3.1 Patient Information Setup.......................................................................................... 3-1 3.2 Default Setup............................................................................................................. 3-3 3.3 Review....................................................................................................................... 3-4 3.4 System Setup ............................................................................................................ 3-5 3.5 Selection Setup ....................................................................................................... 3-12 3.6 Monitor Version ....................................................................................................... 3-13 3.7 Drug Calculation...................................................................................................... 3-13 3.8 DEMO Function....................................................................................................... 3-14 3.9 Maintenance ............................................................................................................ 3-14 Chapter 4 Alarm................................................................................................................ 4-1 4.1 Alarm Modes ............................................................................................................. 4-1 4.2 Alarm testing during power-on .................................................................................. 4-4 4.3 Alarm types ............................................................................................................... 4-5 4.4 SILENCE/CLOSE/PAUSE ........................................................................................ 4-5 4.5 Parameter Alarm ....................................................................................................... 4-6 4.6 When an Alarm Occurs ............................................................................................. 4-7 Chapter 5 Freeze ............................................................................................................... 5-1 5.1 General ..................................................................................................................... 5-1 5.2 Enter/Exit Freeze Status ........................................................................................... 5-1 5.3 Frozen Menu ............................................................................................................. 5-2 5.4 Recording Frozen Waveform .................................................................................... 5-2 Chapter 6 Recording(optional) ........................................................................................... 6-1 6.1 General Recording Information................................................................................. 6-1 6.2 Recording Type ......................................................................................................... 6-1 6.3 Start Recording ........................................................................................................ 6-4 6.4 Recorder Operations and Status Information ........................................................... 6-6 Chapter 7 Trend and Event ................................................................................................ 7-1 1 Content 7.1 Trend Graph .............................................................................................................. 7-1 7.2 Trend Table................................................................................................................ 7-3 7.3 NIBP Recall ............................................................................................................... 7-5 7.4 Alarm Event Recall .................................................................................................... 7-6 Chapter 8 Drug Calculation and Titration Table................................................................ 8-1 8.1 Drug Calculation........................................................................................................ 8-1 8.2 Titration Table ............................................................................................................ 8-3 Chapter 9 Patient Safety................................................................................................... 9-1 Chapter 10 Maintenance / Cleaning ................................................................................. 10-1 10.1 System Check ....................................................................................................... 10-1 10.2 General Cleaning .................................................................................................. 10-1 10.3 Cleaning Agents .................................................................................................... 10-2 10.4 Sterilization............................................................................................................ 10-3 10.5 Disinfection............................................................................................................ 10-3 Chapter 11 ECG/RESP Monitoring ................................................................................ 11-1 11.1 What Is ECG Monitoring ....................................................................................... 11-1 11.2 Precautions during ECG Monitoring...................................................................... 11-1 11.3 Monitoring Procedure ............................................................................................ 11-2 11.4 ECG Screen Hot Keys........................................................................................... 11-5 11.5 ECG Menu............................................................................................................. 11-6 11.6 ECG Alarm Information and Prompt.................................................................... 11-10 11.7 ST Segment Monitoring (optional) .......................................................................11-11 11.8 Arr. Monitoring (optional) ..................................................................................... 11-15 11.9 Measuring RESP................................................................................................. 11-21 11.10 Maintenance and Cleaning ............................................................................... 11-24 Chapter 12 SpO2 Monitoring ............................................................................................ 12-1 12.1 What is SpO2 Monitoring....................................................................................... 12-1 12.2 Precautions during SpO2/Pulse Monitoring........................................................... 12-2 12.3 Monitoring Procedure............................................................................................ 12-3 12.4 Limitations for Measurement................................................................................. 12-4 12.5 SpO2 Menu............................................................................................................ 12-5 12.6 Alarm Description and Prompt .............................................................................. 12-6 12.7 Maintenance and Cleaning ................................................................................... 12-8 Chapter 13 NIBP Monitoring............................................................................................. 13-1 13.1 Introduction ........................................................................................................... 13-1 13.2 NIBP Monitoring .................................................................................................... 13-1 13.3 NIBP SETUP menu............................................................................................... 13-6 13.4 NIBP Alarm Message .......................................................................................... 13-11 13.5 Maintenance and Cleaning ................................................................................. 13-13 Chapter 14 TEMP Monitoring ........................................................................................... 14-1 14.1 TEMP Monitoring .................................................................................................. 14-1 14.2 TEMP SETUP Menu ............................................................................................. 14-2 14.3 TEMP Alarm message .......................................................................................... 14-2 14.4 Maintenance and Cleaning ................................................................................... 14-3 2 Content Chapter15 Accessories.................................................................................................... 15-1 15.1 ECG Accessories .................................................................................................. 15-1 15.2 SpO2 Accessories ................................................................................................. 15-2 15.3 NIBP Accessories.................................................................................................. 15-2 15.4 TEMP Accessories ................................................................................................ 15-3 Appendix A CE Marking .......................................................................................................A-1 Appendix B Product Specification ........................................................................................B-1 Appendix C EMC Declaration ..............................................................................................C-1 Appendix D System Alarm Prompt.......................................................................................D-1 3 Content FOR YOUR NOTES 4 Chapter 1 Introduction For an overall introduction to the monitor, please refer to General Information. For various messages displayed on the screen, please refer to Screen Display. For basic operations, please refer to Button Function and Basic Operation. For allocation of interface sockets, please refer to Interfaces. For precautions to be noted when the monitor is powered by built-in battery, please refer to Built-in Battery. For safety precautions of the monitor, please refer to Patient Safety. Warning The Monitor is intended for clinical monitoring application with operation only granted to appropriate medical staff. This monitor is not intended for treatment purpose. Note This equipment is not intended for family usage. Warning For continued safe use of this equipment, it is necessary that the listed instructions are followed. However, instructions listed in this manual in no way supersede established medical practices concerning patient care. Do not rely only on audible alarm system to monitor patient. When monitoring adjusting the volume to very low or completely muting the sound may result in the disaster to the patient. The most reliable way of monitoring the patient is at the same time of using monitoring equipment correctly, manual monitoring should be carried out. Use of this device may affect ultrasonic imaging system in the presence of the interfering signal on the screen of ultrasonic imaging system. Keep the distance between the monitor and the ultrasonic imaging system as far as possible. It is dangerous to expose electrical contact or applicant coupler to normal saline, other liquid or conductive adhesive. Electrical contact and coupler such as cable connector, power supply and parameter module socket-inlet and frame must be kept clean and dry. Once being polluted by liquid, they must be thoroughly dried. If to further remove the pollution, please contact your biomedical department or Mindray. 1-1 Introduction Warning There could be hazard of electrical shock by opening the monitor casing. All servicing and future upgrading to this equipment must be carried out by personnel trained and authorized by Mindray. Warning Possible explosion hazard if used in the presence of flammable anesthetics. Warning You must verify if the device and accessories can function safely and normally before use. Warning You must customize the alarm setups according to individual patient situation and make sure that alarm sound can be activated when alarm occurs. Warning Do not use cellular phone in the vicinity of this device. High level electromagnetic radiation emitted from such devices may greatly affect the monitor performance. Warning Do not touch the patient, table, or the device during defibrillation. Warning Devices connected to the monitor shall form an equipotential system (protectively earthed). Warning When used with Electro-surgery equipment, you (doctor or nurse) must give top priority to the patient safety. Warning Dispose of the packaging material, observing the applicable waste control regulations and keeping it out of children’s reach. Warning This equipment is accord with the standard CISPR11(EN55011) class A. Note The software was developed per IEC601-1-4. The possibility of hazards arising from errors in the software program is minimized. 1-2 Introduction Caution At the end of its service life, the product described in this manual, as well as its accessories, must be disposed of in compliance with the guidelines regulation the disposal of such products. Caution If you have any doubt to the grounding layout and its performance, you must use the built-in battery to power the monitor. It is important for the hospital or organization that employs this equipment to carry out a reasonable maintenance schedule. Neglect of this may result in machine breakdown or injury of human health. All illustrations in this manual are provided as examples only. They may not necessarily accord with the graph, settings or data displayed on your patient monitor. 1.1 General Information Note The system may not meet its performance specifications if stored or used outside the manufacturer’s specified temperature and humidity range. General instruction: The Monitor is applicable for bedside monitoring of Adult, Pediatric and Neonate. This Monitor is intended to monitor vital signals such as ECG, Respiratory Rate, SpO2, NIBP and TEMP. It integrates parameter measurement, display and recorder in one device, featured by compactness, lightweight and portability. Its large and high-resolution display can clearly display 4 waveforms and all parameter information. The POWER switch is on the right part of the front panel as shown in the figure below: The power switch is on the right part of the front panel (② in Figure 1-1). After turning on the monitor, the power indicator (③ in figure 1-1) and the charge indicator (④ in figure 1-1) will light on. When alarm occurs, the ALARM indicator (① in figure 1-1) will flash or light on. The sensor/probe sockets are on the right side of the monitor and the recorder socket on the left side. Other sockets and power plug-in are on the back of the monitor. The monitor has a user-friendly interface. All operations can be finished by using the buttons and knob on the front panel(⑤ in figure 1-1). For detailed information, refer to Button function. 1-3 Introduction The visible LED is CLASS 1 LED PRODUCT in accordance with EN 60825-1 A11 Oct 1996. ①ALARM INDICATOR ②POWER SWITCH ③POWER INDICATOR ④CHARGE INDICATOR ⑤BOTTONS AND KNOB Figure 1-1 Veterinary Portable Multi-Parameter Patient Monitor The Monitor can monitor following parameters: Heart Rate (HR) ECG 1-channel ECG waveform Arrhythmia and S-T segment analysis, Pace analysis Respiratory Rate (RR) RESP Respiration Waveform Oxygen Saturation (SpO2), Pulse Rate (PR) SPO2 SpO2 Plethysmogram NIBP Systolic Pressure (NS), Diastolic Pressure (ND), Mean Pressure (NM) Temperature DATA TEMP The Monitor can realize multiple functions such as visual & audible alarm, trend data storage and output, NIBP data storage and review, alarm event identification, and drug calculation. Contraindications: None. 1.2 Screen Display The Monitor uses a TFT display, which can display parameter data, waveforms, bed number, time and date, monitoring status, alarm messages and other prompt information. The main screen is divided into three areas: 1. Message Area①; 2.Waveform Area②; 3. Parameter Area③. (See Figure 1-2) 1-4 Introduction ① ② ③ Figure 1-2 Main Screen Message Area (①) The Message Area is at the top part of the screen, displaying the current status of both the monitor and the patient. z Patient information include: BED NO Bed numbers of all patients under monitoring Patient type Three options: Adult, Pediatric, Neonate “01-01-2000” Current date “13: 51: 32” Current time Male Patient sex, Male or Female ZHANG SHAN Patient name. This item will display blank if the operator does not input patient name Other information in the Message Area will appear and disappear together with the reported status. According to the content, the information is divided into: ■ Prompt information, reporting the current status of the monitor or sensor/probe, which always appears to the right of the system time. When this information appears, it will cover patient sex and name. ■ flag for alarm PAUSE. Press “SILENCE” button once (less than 2 second) to mute all alarm sounds are muted for the time being and the flag appears at the same time. Press the button again to terminate the PAUSE status. The duration for PAUSE status can be 1 minute, 2 minutes or 3 minutes. ■ flag for alarm SILENCE. Press “SILENCE” button once (more than 2 second) to manually mute the alarm sound and this flag appears at the same time. The SILENCE status terminates when you discharge the status or new alarm occurs. 1-5 Introduction ■ flag for Alarm Volume Off. It appears indicating that you have closed the alarm sound permanently. This status terminates when you discharges the status. Note If symbol appears, the system will no longer give audible alarm sound. You must be very careful in using this function. Two ways can be used to discharge this status. One is set the alarm volume to an option other than OFF in the USER MAINTAIN menu. The other method is to press SILENCE button to make the flag turn to . And then press SILENCE again and the system will restore the normal alarm status. ■ Parameter alarm information is displayed always in the upper right corner of the screen. ■ When the waveforms on the screen are frozen, the FREEZE prompt will appear in the bottom part of the screen. Waveform/Menu Area (○ 2 ) This area displays four waveforms, which are from top to bottom are: one-channel cascade ECG waveform (the two lines of the first two cascaded waveform are displayed in the Waveform Area), SpO2 Plethysmogram, RESP (generated by ECG module). You can choose the waveforms for display. Refer to Tracing Waveforms Selection for details. Name of each waveform is displayed to its upper left. ECG waveform can show the gain of this channel as well as the filter way of the ECG waveform. A 1mv scale bar is displayed to the right side of the ECG waveform. The same menu always appears in a fixed area on the screen when you are executing screen operations. The displayed waveform will always cover 2 to 3 waveforms. The system will restore the original screen once exiting the menu. The system can refresh the waveform at the user-set rate. Refer to related chapters for details of sweep speed. Parameter Area (○ 3 ) Parameters are displayed at a fixed position (①~⑦ in the following figure). They are (from top to bottom): 1-6 Introduction ① HR or PR ②ST analysis ③ PVC ④ NIBP ⑤ SPO2 ⑥ RESP ⑦ TEMP Figure 1-3 Main Screen ECG: ⎯ Heart Rate (①, Unit: bpm) ⎯ ST-segment analysis result (②, Unit: mV) ⎯ Arrhythmia (PVCs) events (③, Unit: event/min) NIBP — (From left to right) Systolic, Mean, Diastolic (④, Unit: mmHg or kPa) SpO2: ⎯ SpO2 (⑤, Unit: %) ⎯ Pulse Rate (Unit: beats/min) (When select ALL as the HR FROM in the ECG SETUP menu) RESP ⎯ Respiration Rate (⑥, Unit: Breath/min) TEMP ⎯ Temperature (⑦, Unit:℃ or ℉) The system displays values of these parameters mentioned above in the Parameter Area. The system refreshes each parameter value once per second except NIBP, which is refreshed after each measurement. You can customize the setups of each parameter in the corresponding setup menu displayed on the screen. Refer to the coming chapters for detailed information. Alarm indicator and status: In normal mode, no alarm indicator shall light on. In alarm mode, the alarm indicator lights on or flashes. The indicator color represents the alarm level. Refer to Chapter Alarm for detailed information. You can read relevant chapters to know alarm message and prompt information for each parameter. 1-7 Introduction Warning The system will automatically test if the audio and visual alarm function runs normally when the monitor is powered on. 1.3 Button Function and Basic Operation POWER ① FREEZE ② ③ SILENCE RECORD ④ ⑤ NIBP ⑥ KNOB Figure 1-4 Buttons and knob You can finish all operations by just using the buttons and knob on the front panel. These buttons have following function: ①POWER Turn On/Off the monitor. ②FREEZE In normal mode, push this button to freeze all the waveforms on the screen. Push this button again to unfreeze the frozen waveforms. ③SILENCE Push this button to suspend alarm for maximum 3 minutes (with 1 minute, 2 minutes and 3 minutes selectable). In Alarm PAUSE status, a symbol appears in the Message Area. Push this button for more than 2 second to mute all kinds of sounds (including alarm sound, heart beat, pulse tone, key sound). At the same time, a symbol appears in the Message Area. Push this button again to restore all kinds of sounds and the symbol appears from the screen. 1-8 Introduction Note If new alarm occurs in Alarm Pause/Silence status, the system will discharge Pause/Silence status automatically. For specific rules, see Chapter Alarm. Note The system will begin to give alarm information again once there exist alarm-triggering event. Nevertheless, remember pushing SILENCE button can permanently shut off audible alarm sound of ECG LEAD OFF and SPO2 SENSOR OFF alarms. ④RECORD Push this button and the recorder will start real-time recording. The recording time is set in the RT REC TIME of the RECORD submenu (Refer to relevant chapter for details). Push this button again in recording process to stop the recording. ⑤NIBP Push this button and the system will begin inflating the cuff and start NIBP measurement. Push this button again to stop NIBP measurement. ⑥Knob Rotate the knob to select and change the settings. All Operations can be performed by rotating it either direction and pushing it. Using Knob to realize screen operations The square frame that moves when turning the knob is called "cursor". You can fulfill operations at the items highlighted by the cursor. When no menu is displayed, you can highlight following hot keys by turning the knob clockwise: z ECG lead name z ECG gain z ECG filter z ECG menu z NIBP menu z SpO2 menu z RESP menu z TEMP menu z MENU system menu If any of the first three items is highlighted, you can change its current settings. When any of the last six items is highlighted, the system will display following popup menu, in which you can execute following operations. Highlight any item that you want to operate and push the knob, the system will fulfill one of the following three activities: 1-9 Introduction z A menu pops up, or the current menu is replaced by a new one; z The solid frame becomes a dotted one, indicating that rotating the knob can change its content; z The system can immediately execute an operation. Basic Operations To display desired waveform: Press the MENU button to access the SYSTEM MENU and then pick the [TRACE SETUP] item in the SYSTEM SETUP menu. The TRACE SETUP menu will appear, in which you can select the desired waveform. Refer to Tracing Waveforms Selection for details. To adjust waveform sweep speed: ECG: access the ECG SETUP menu and pick the [SWEEP] item; PLETH: access the SpO2 SETUP menu and pick the [SWEEP] item; RESP: access the RESP SETUP menu and pick the [SWEEP] item. To change Alarm limits: ECG: access the ECG SETUP menu and pick the [ALM HI] or [ALM LO] item. ST: access the ECG SETUP menu and pick the [ST ANALYSIS], then pick the [ALM HI] or [ALM LO] item. PVCs: access the ECG SETUP menu; pick the [ST ANALYSIS], then pick the [ALM HI] or [ALM LO] item. SpO2: access the SPO2 SETUP menu and pick the [SPO2 ALM HI] or [SPO2 ALM LO] item. PR: access the SPO2 menu and pick the [PR HI] or [PR ALM LO] item. NIBP Systolic: access the NIBP SETUP menu and pick the [SYS ALM HI] or [SYS ALM LO] item. NIBP MEAN: access the NIBP SETUP menu and pick the [MEAN ALM HI] or [MEAN ALM LO] item. NIBP Diastolic: access the NIBP SETUP menu and pick the [DIA ALM HI] or [DIA ALM LO] item. RESP: access the RESP SETUP menu and pick the [ALM HI] or [ALM LO] item. TEMP: access the TEMP SETUP menu and pick the [ALM HI] or [ALM LO] item. To record real-time waveform: Push RECORD button to start the real-time recording process. Refer to Chapter Recording for details. To adjust volume: z Alarm volume: Press the MENU hot key to access the SYSTEM MENU \ SYSTEM 1-10 Introduction SETUP \ ALARM SETUP and pick the [ALARM VOL] item. z Key volume: Press the MENU hot key to access the SYSTEM MENU \ SELECTION and pick the [KEY VOL] item. z Beat volume: Access the ECG SETUP\OTHER SETUPS and pick the [BEAT VOL]. You can select high, medium, low or OFF. z Pulse volume: Access the SPO2 SETUP Menu and pick the [PR SOUND]. To set up system date and time: Press the MENU hot key to access the SYSTEM MENU \ SYSTEM SETUP and pick the [TIME SETUP]. To restore default settings: Refer to Default Setup for details. 1.4 Interfaces For your convenience, we put different interfaces on different positions of the monitor. Recorder is on the left side of the monitor. See the figure below. Figure 1-5: Left side Patient cable and sensor/probe sockets are on the right side of the monitor. ① Socket for TEMP probe ② Socket for NIBP probe ③ Socket for SpO2 sensor ④ Socket for ECG cable 1-11 Introduction SPO2 probe ① ② TEMP sensor ECG cable ③ ④ NIBP probe Figure 1-6 Right Side This symbol means “BE CAREFUL". Indicates that the instrument is IEC-60601-1 Type CF equipment. The unit displaying this symbol contains an F-Type isolated (floating) patient applied part providing a high degree of protection against shock, and is suitable for use during defibrillation. Other symbols are explained in chapter Patient Safety. ④ Holes for fixing the bracket Network port ① ⑤ Equipotential grounding Reserved ② terminal ⑥ Power supply Reserved ③ Figure 1-7 Back Side Following sockets are on the rear panel: 1) Network port (①): Standard RJ45 socket 2) Reserved(②) 3) Reserved(③) 4) Holes for fixing the bracket (④) 5) Equipotential grounding terminal (⑤) 6) Power supply (⑥) 1-12 Introduction Warning Only an authorized or certified personnel can use this port to upgrade the system. Warning All analog and digital devices connected to the monitor must be IEC-certified (e.g. IEC 60950 for data processing equipment and IEC 60601-1 for medical equipment). Furthermore all configurations shall comply with the valid version of the system standard IEC 60601-1-1. Everybody who connects additional equipment to the signal input part or signal output part configures a medical system, and is therefore responsible that the system complies with the requirements of the valid version of the system standard IEC 60601-1-1. If in doubt, consult the technical service department or your local representative. 1.5 Built-in Battery(optional) This monitor is designed to operate run battery power when during transport or whenever the power supply is interrupted. The battery is charged automatically when the monitor is connected to AC power, no matter the monitor is powered on or not. The battery symbol displayed on the main screen tells the status of the battery. The battery is installed in the battery slot. The solid part indicates its capacity. No battery is installed in the battery slot. Figure 1-8 Battery slot cover The capacity of the internal battery is limited. When the battery capacity is too low, a high level alarm is triggered and the “Battery too low” message is given in the technical alarms area. At this moment, the AC power shall be applied to the monitor. Note Remove the battery before transport, or if the monitor is not likely to be used for an extended period of time. 1-13 Introduction Warning Keep the battery out of the reach of children. Use only the battery specified by the manufacturer. 1.5.1 Battery Maintenance Conditioning a Battery A battery should be conditioned before it is used for the first time. A battery conditioning cycle is one uninterrupted charge of the battery, followed by an uninterrupted discharge of the battery. Batteries should be conditioned regularly to maintain their useful life. Condition a battery once when it is used or stored for two months, or when its run time becomes noticeably shorter. To condition a battery, follow this procedure: 1. Disconnect the monitor from the patient and stop all monitoring or measuring. 2. Insert the battery in need of conditioning in the battery slot of the monitor, and leave the other slot empty if your minitor has two slots. 3. Apply AC power to the monitor and allow the battery to charge uninterrupted for 10 hours. 4. Remove AC power and allow the monitor to run from the battery until it shuts off. 5. Apply AC power again to the monitor and allow the battery to charge uninterrupted for 10 hours. 6. This battery is now conditioned and the monitor can be returned to service. Checking a Battery The performance of a rechargeable battery may deteriorate over time. To check the performance of a battery, follow this procedure: 1. Disconnect the monitor from the patient and stop all monitoring or measuring. 2. Apply AC power to the monitor and allow the battery to charge uninterrupted for 10 hours. 3. Remove AC power and allow the monitor to run from the battery until it shuts off. 4. The operating time of battery reflects its performance directly. If your monitor has two battery slots, you can check two batteries at the same time. Please replace the battery or contact with the maintenance personnel if its operating time is significantly lower than the specified time. Note Life expectancy of a battery depends on how frequent and how long it is used. For a properly maintained and stored lead-acid battery, its life expectancy is about 2 years. 1-14 Introduction For more aggressive use models, life expectancy can be less. We recommend replacing lead acid batteries every 2 years. The battery might be damaged or malfunctioned if its operating time is too short after being fully charged. The operating time depends on the configuration and operation. For example, measuring NIBP more frequently will also shorten the operating time. 1.5.2 Battery Recycling When a battery has visual signs of damage, or no longer holds a charge, it should be replaced. Remove the old battery from the monitor and recycle it properly. To dispose of the batteries, follow local laws for proper disposal. Warning Do not disassemble batteries, or dispose of them in fire, or cause them to short circuit. They may ignite, explode, leak or heat up, causing personal injury. 1-15 Introduction FOR YOUR NOTES 1-16 Chapter 2 Getting Started ■ Open the package and check ■ Connect AC power cord ■ Power on the monitor ■ Connect patient sensor/probe ■ Check the recorder Note You must read this chapter and chapter Patient Safety and install the monitor according to the requirements in order to ensure the monitor to run normally. 2.1 Open the Package and Check Open the package and take out the monitor and accessories carefully. Keep the package for possible transportation or storage in the future. Check the components according to the packing list. ■ Check for any mechanical damage. ■ Check all the cables, modules and accessories. If there is any problem, contact MINDRAY sales department or distributor immediately. 2.2 Connect AC power cord Procedures to connect AC power cord: Make sure the AC power supply complies with following specification: 100~240 VAC, 50/60 Hz. Use the power cord supplied with the monitor. Plug the power cord into the INPUT interface of the monitor. Connect the other end of the power cord into a grounded 3-phase power jack. Note Connect the power cord into the hospital-dedicated jack. Connect the equipotential earth line if necessary. Refer to Chapter Patient Safety for details. 2-1 Getting Started Note The battery needs to be charged after transportation or storage. If the power supply is not properly connected before turning on the monitor, the monitor may not work properly because of insufficient battery electricity. Connecting the power supply to charge the battery no matter if the monitor is turned on or off. 2.3 Power on the Monitor Push POWER to power on the monitor. The system will give a “Du…” sound and the alarm indicator will flash in turn in each kind of color. After about 10 seconds, the system will self-test successfully and enter the main screen. You can perform normal operations now. During self-test, the system can display machine version number. Note If the system detects any fatal error during self-test, it will give alarm. Note Check all usable functions in order to ensure the normal function of the monitor. Note The battery must be recharged to the full electricity after each use to ensure adequate electricity reserve. Warning If any sign of damage is detected, or the system displays some error messages, do not use it on any patient. Contact biomedical engineer in the hospital or Mindray Customer Service Center immediately. Note You must turn on the monitor at least 1 minute after turning off the monitor. 2.4 Connect Patient Sensor/Probe Connect all the necessary patient sensor/probe between the monitor and the patient. Note To know how to correctly connect sensor/probe, refer to Chapter 11-14. 2.5 Check the Recorder Check if the recorder on the left side of the monitor has paper. If there is no paper, refer to Chapter Recording for details. 2-2 Chapter 3 System Menu ■ New patient enrolment ■ Recording ■ Trend Graph/Table and Alarm Review ■ System Setup ■ Drug Calculation ■ Maintenance The Patient Monitor features flexible configurations. You can customize monitoring content, waveform sweep speed, sound volume, and output content. Turn knob to select the MENU hot key on the lower right part of the screen to call up the “SYSTEM MENU” menu. You can perform following operations in this menu. Figure 3-1 SYSTEM MENU Trend graph/table review, NIBP review and alarm review are discussed in Chapter: Trend and Event. 3.1 Patient Information Setup Note To clear current patient data, refer to New Patient for details. Pick the [PATIENT SETUP] item in the “SYSTEM MENU” to call up the following menu. 3-1 System Menu Figure 3-2 PATIENT SETUP You can setup following patient information: DEPT. Department in which the patient receives treatment. PAT NO Patient No. BED NO Patient bed number (Range: 1-100) DOCTOR Name of the doctor. NAME Patient name (Valid characters: A-Z, 0-9 and space bar; Max. length: 12 characters) SEX Patient gender (Available options: "F" for Female, "M" for Male) PAT TYPE Patient type (Available options: ADU, PED, and NEO) ADMIT Hospitalization starting date (format: year\month\ day) BIRTH Patient date of birth (format: year\month\day) HT. (cm/inch ) Patient height (turning the knob with the increase/decrease of 0.5 cm/inch each time).The other HT. unit in the other menus accord with the unit which you choosed here. WT. (kg/Ib) Patient weight (turning the knob with the increase/decrease of 0.5 kg/Ib each time).The other WT. unit in the other menus accord with the unit which you choosed here. BLOOD Patient blood type (Pick A, B, O, AB, or N. "N" represents unknown type) NEW PATIENT Admission of new patient Also in this menu, you may select the [NEW PATIENT] item to access the “CONFIRM TO 3-2 System Menu UPDATE PATIENT” dialog box as shown below, in which you can decide whether to monitor a new patient. Figure 3-3 Confirm To Update Patient Menu Pick [YES] to delete all information of the patient being currently monitored and exit the menu. Pick [NO] to give up updating the patient and the system will keep the information of the current patient and exit the menu. Note If you select [YES], the system will delete all information of the patient being currently monitored. 3.2 Default Setup Note After selecting any item in this sub-menu, the selected item will replace the current setup of the system and accordingly become the system default configuration. Figure 3-4 DEFAULT Menu 3-3 System Menu In this sub-menu, you can select both the factory default and the user-defined default. Also in this sub-menu, you can save the current system configuration as the user-defined default configuration. But at this time, the system will automatically save all the setups in the parameter menu, ECG gain and filter way as the user-defined default configuration according to the patient type. Also, the dialog box as shown below will pop up. Figure 3-5 CONFIRM DEFAULT CONFIG Note After selecting any item in the DEFAULT menu and exiting the box, the “CONFIRM DEFAULT CONFIG” Dialog box will pop up, in which you can select [YES] to confirm your selection or [NO] to give up your selection. Warning All configurations in the system will be replaced by “default configurations”. 3.3 Review In the “SYSTEM MENU”, there are [TREND GRAPH], [TREND TABLE], [NIBP RECALL] and [ALARM RECALL] items. Please refer to Chapter 7: Trend and Event for detailed information. 3-4 System Menu 3.4 System Setup Select the [system setup] item in the [system menu]: Figure 3-6 System setup In the [System setup] menu, users can setup the following items. 3.4.1 Face Select Select “FACE SELECT” item in “SYSTEM SETUP” menu to access “FACE SELECT” dialog box as shown below, in which two selections are available: STANDARD SCREEN and VIEWBED SCREEN. Only one selection can be chosen for each time. Figure 3-7 FACE SELECT Standard Screen: Select the “STANDARD SCREEN” to enter the Standard Screen. The Standard Screen is the basic operating screen of the monitor. 3-5 System Menu Figure 3-8 STANDARD SCREEN Viewbed Screen: If another monitor is connected on the same LAN of this monitor, you can use this monitor to view any measured waveform and information about all measured parameters from another monitor. Enter Viewbed Screen Select the “VIEWBED SCREEN” option in the “FACE SELECT” menu. Viewbed Screen window occupies the space of the bottom waveforms. Figure 3-9 VIEWBED SCREEN Hot key of Viewbed There are two hot keys in the Viewbed Screen: Select Bed Number and Select Waveform. The hot key of Select Bed Number displays the bed numbers and patient names of other monitors currently connected on the LAN. You can select a monitor to be monitored according to the patient name and bed number. If at this time no other 3-6 System Menu monitors are connected on the same LAN of this monitor, the hot key of Bed Number will therefore display “N/A”. After you use this hot key to select a monitor to be viewed, the system will toggle to the display of the selected monitor for your view. The selected waveform is one of those listed in the hot key of Select Waveform. The hot key of Select Waveform is used to select a waveform generated by the monitor being viewed. If the hot key of Select Waveform displays “N/A”, it indicates that the bedside monitor being viewed has no waveforms. You can use this hot key to select and therefore view different waveforms of the monitor being viewed. Alarm indicator of Viewbed On the upper right side of the Viewbed Screen, there is an Alarm Indicator used to tell the alarm status of the monitor being viewed. The activity of this alarm indicator is identical with that of the alarm lamp on the panel of the monitor being viewed. That is to say, if the monitor being viewed occurs medium/low level alarm, this alarm indicator illuminates yellow; if it occurs high level alarm, this alarm indicator illuminates red. If the monitor being viewed has no alarm or the alarm is screened, the icon for this alarm indicator will not be displayed. Parameter area of Viewbed Screen Under the hot key of Select Bed Number is the Parameter area, in which parameters of all monitors being viewed are displayed. Waveform area of Viewbed Screen Under the hot key of Select Waveform is the Waveform area. The Sweep manner (refreshing or scrolling) of the waveform is identical with that of this monitor. The feature description of the displayed waveform is given above the waveform. Sweep speed is also identical with that set up for the same waveform on this monitor. Technical Information area Technical Information area is to the right of patient name in Viewbed Screen. This area displays related technical information to Viewbed, such as due to network failure or network too busy, Viewbed is disabled. Close Viewbed Screen In the FACE SELECT menu, select options of other operating screens to close the Viewbed Screen. Rules for automatically selecting monitor to be viewed and waveform When you turn on the monitor or enter Viewbed Screen, the system will automatically select a networked bedside monitor and a waveform of this monitor for you to view. If the monitor being currently viewed is disconnected, the viewed monitor will automatically close, clear displays of all alarms, parameters and waveforms. However 3-7 System Menu in this situation, the Viewbed Screen still displays. If you want to view another monitor, you must select again through using hot keys. If a measure module of the viewed monitor is disconnected or closed, its corresponding waveform will disappear and the waveform in the waveform area will not be refreshed. Instead this waveform area will display empty. At this time, if you want to view other waveforms of this monitor, you need to select again. 3.4.2 Alarm setup The system provides three levels of alarm volume. You can select any of them as per the clinical requirement. The procedures are: Select the [ALARM SETUP] item in the “SYSTEM SETUP” sub-menu of the “SYSTEM SETUP” menu. The menu as shown below will pop up, in which you can set up the alarm volume and other alarm information. For detailed information, refer to Chapter Alarm. Figure 3-10 Alarm Setup You can highlight the [ALARM VOL] item and then turn the knob to set up the alarm volume. There are three options: LOW, MED and HIGH. 3.4.3 Time Setup Select the [TIME SETUP] item in the “SYSTEM SETUP” menu. The menu as shown below will pop up. System time is in the format of year, month, day, hour, minute and second. Use cursor to highlight the item that you want to modify and turn the knob to select time. Then select [EXIT]. Note You shall set up the system time upon turning on the monitor (if you need to set up the system time); otherwise, when you review the content with time information, the 3-8 System Menu system may not display the correct time. Figure 3-11 System Time Setup 3.4.4 Recorder setup Select the [RECORD] in the “SYSTEM SETUP” menu to call up the following menu: Figure 3-12 Record Setup In this menu, the user can set up to output two waveforms. The waveforms that can be selected include: ECG1 SPO2 RESP OFF If no ECG waveform is displayed on the screen, you cannot select this item. SpO2 Plethysmogram. (If no SpO2 Plethysmogram is displayed, you cannot select this item.) RESP waveform (If no RESP waveform is displayed, you cannot select this item). Do not select this waveform. 3-9 System Menu z RT REC TIME: this item has two options, CONTINUAL and 8s. “CONTINUAL” means once pushing the “RECORD” button on the recorder panel or the monitor panel, the recorder will continuously print out the waveform or parameter until this button is pushed again. z TIMING REC TIME: used to set up the time interval between two recordings. 10 selections are available: “OFF, 10min, 20min, 30min, 40min, 50min, 1hour, 2hours, 3hours and 4hours”. The system will start the recording process according to the selected time interval. The recording time is always 8 seconds. Note RT REC TIME takes priority over TIMING REC TIME. z REC RATE: this item has two options, 25.0 and 50.0 mm/s. z REC GRID: used to decide output format: OFF is without grid, and ON is with grid. z CLEAR REC TASK: used to clear the alarm event that has been generated and is waiting for recording out. Note If two same waveforms are selected, the system will automatically change one of the waveform to a different one. 3.4.5 Module Setup Select the [MODULE SETUP] item in the “SYSTEM SETUP” menu to call up the following menu: Figure 3-13 Module Setup You can choose the parameters to be monitored in this menu. This can avoid the interference from the parameters that need not attend. 3-10 System Menu 3.4.6 Tracing Waveforms Selection Select the [TRACE SETUP] in the “SYSTEM SETUP” menu to call up the following menu. Figure 3-14 Tracing Waveforms Selection You can choose the waveform to be displayed in this menu. 3.4.7 Event Setup The monitor has four types of events. You can specify their representations by yourself. Select the [MARK EVENT] item in the “SYSTEM SETUP” to call up the following menu: Figure 3-15 MARK EVENT Menu How to mark the event: Use the rotary knob to select one from event A, B, C and D. The @ symbol will appear in the frame of the event being selected. Once making a wrong selection, you can push the knob on the event again to give up the selection. Select [EXIT] to exit the menu and consequently the selection will come into effect. Event function has following significance: To classify the records into different categories, such as those having influence on patients and those having influence on parameter monitoring including dose taking, injection, therapy 3-11 System Menu status. Event will be displayed on the trend graph/table in order to assist the analysis on the patient parameters when the event happens. 3.5 Selection Setup Select the [SELECTION] item in the “SYSTEM MENU” to call up the following menu. Figure 3-16 Selection Setup Key Volume: Select the [KEY VOL] item in the “SELECTION” menu. Turn the knob to select the volume. There are four selections available, which are “OFF, LOW, MED, HIGH”. Help Function: The system provides On-line Help to menu operations. You can choose any help information as per your need. The method is: Select the [SELECTION] item in the “SYSTEM MENU” to access the “SELECTION” sub-menu, in which you can highlight the [HELP] item and turn the knob to select “ON” or “OFF”. When it is “ON”, you can browse the on-line help information. When it is “OFF”, the system will turn off the on-line help function. Alarm Limit: The system can display the alarm limits. You can choose this function as per your need. The method is: Select the [SELECTION] in the “SYSTEM MENU” to call up the “SELECTION” menu. You can set the “ALM LIMIT” switch to “ON” or “OFF”. 3-12 System Menu 3.6 Monitor Version Select the [VERSION] item in the “SYSTEM MENU” to know the software version of the monitor. Figure 3-17 Monitor Version Select the [DEVICE CONFIG LIST] to know the configuration of the monitor. Figure 3-18 Device Configuration List 3.7 Drug Calculation You can use the drug calculation and titration table function of the monitor to calculate the concentration of 15 kinds of drugs. Refer to Chapter: Drug Calculation and Titration Table for detailed information. 3-13 System Menu 3.8 DEMO function Select the [DEMO] item in the “SYSTEM MENU” to call up the “ENTER DEMO PASSWORD”. After entering the password, the system enters DEMO status. The purpose of waveform demonstration is only to demonstrate the machine performance, and for training purpose. In clinical application, this function is not forbidden because the DEMO will mislead the medical staff to treat the DEMO waveform and parameter as the actual data of the patient, which may result in the delay of treatment or mistreatment. Therefore before entering this menu, you shall enter password. 3.9 Maintenance Select the [MAINTAIN] item in the “SYSTEM MENU” to call up the “ENTER MAINTAIN PASSWORD” dialog box as shown below, in which you can enter password and then customize maintenance settings. You cannot execute factory maintenance function, which is only available for the service engineers of MINDRAY Company. Figure 3-19 Enter Maintain Password Input the password into the “ENTER MAINTAIN PASSWORD” box and press [CONFIRM], the “USER MAINTAIN” menu will pop up, in which you can set up following items. 3-14 System Menu Figure 3-20 User Maintain For the [LANGUAGE] language, you can set the screen language you need. For the [LEAD NAMING] item, you can select “AHA” or “EURO”. To know the difference between these two styles, refer to Chapter: ECG/RESP Monitoring. For the [ALM SOUND] item, you can set the alarm volume to “ON” or “OFF”. Warning When the alarm volume is set to “OFF”, you will not hear the alarm sound if new alarm occurs. Therefore, you must be very careful in using this selection. If setting the alarm volume to “OFF” when the system is in Silence or Pause status, the system will automatically discharge Silence or Pause status. If you select “Silence” or “Pause” when the alarm volume is set to “OFF”, the system will restore the alarm volume before the alarm volume is set to “OFF” and enter Silence or Pause status. Note After the alarm volume is set to OFF, a symbol will appear in the Technical Alarm Area. Note Setting Alarm Volume to “OFF” is valid only when the monitor is turned on for this time. After turning on the monitor next time, this setup will restore its value of the previous time when the system is turned on. 3-15 System Menu For the [ALM PAUSE TIME] item, you can set up the duration of Alarm Pause status. Three options are available, 1 minute, 2 minutes and 3 minutes. In the [TEMP SENSOR] item, you can choose either “YSI” or “CY-F1”. “YSI” is for imported TEMP probe and “CY-F1” is for homemade TEMP probe (i.e., made in China). In the [NET TYPE] item, you can choose “HYPER III” or “CMS”. In the [LOCAL NET NO] item, It refers to the net No. [COLOR SELF-DEFINE]: This is used to define the color of the waveform displayed on the screen. Five colors can be chosen from: green, cyan, red, yellow and white. Figure 3-21 Color Self-define 3-16 Chapter 4 Alarm This chapter gives general information about the alarm and measures to be taken accordingly. You can know the alarm and prompt information of each parameter in relevant chapter. Warning When the monitor is powered on, the system will test if the audio and visual alarm function can be run normally. Upon turning on the monitor, a “Dang-” will be heard and at the same time the indicator will flash each time in yellow and red. This is used to verify if the audio and visual alarm function of the system can run normally. Therefore, you should be careful in checking this testing result. If the audio and visual alarm appears abnormal, you shall not use monitor on the patient and must contact Mindray Company or service center. 4.1. Alarm Modes 4.1.1. Alarm Level Each alarm, either technical or physiological, has its own level. For alarm of higher level, when it occurs, the system will give prompt in various ways. You can set up some alarm’s level via software. Other alarms shall be set up by the system and therefore you cannot change them. Alarms of the monitor have three levels, high, medium and low. High-level alarm indicates the patient’s life is in danger or the monitor has serious technical problem. It is the most serious warning. Medium-level alarm means serious warning. Low-level alarm is a general warning. Alarms are classified into three categories, which are physiological alarm, technical alarm and general alarm. Physiological alarm refers to those alarms triggered by patient’s physiological situation such as heart rate (HR) exceeding the alarm limit (parameter alarm). Technical alarm refers to system failure which can make certain monitoring process technically impossible or make monitoring result unbelievable. Technical alarm is also called System Error Message. General alarm refers to those alarms other than the first two types, to which however attention must be paid. The monitor has preset the different alarm levels for various parameters. You can also modify 4-1 Alarm the alarm level using the method described in this chapter. The alarm level of System Error (technical alarm) Message is pre-set in the system. Alarm levels of all technical alarms and general alarms as well as some physiological alarms are pre-set in the system and accordingly you cannot change them. 4.1.2. Alarm Modes When alarm occurs, the monitor may raise your attention in three ways, which are audible sound, visual prompt and word description. Audio and visual prompts come from display, speaker on the monitor and alarm indicator. Word description is displayed on the screen. Physiological alarm is displayed in the Physiological Alarm area while most technical alarms are displayed in the Technical Alarm area. Note The Physiological Alarm area is on the upper right part of the screen. The Technical Alarm area is to the left side of the Physiological Alarm area. Note The presentation of each alarm prompt is related to the alarm level. How to indicate that the measured parameter has exceeded its alarm limits: When a physiological alarm occurs, that means the measured parameter has exceeded its alarm limits, in addition to the three prompt ways mentioned above, the monitor also gives alarm by making the monitored parameter flash in the frequency of 1Hz. If at this time the upper and lower limits of the parameter are displayed, they will flash in the same frequency (1Hz). Screen Display When the measured parameter exceeds its alarm limits and triggers a physiological alarm, the corresponding parameter value will flash. The “*” sign appears on upper right screen indicating there is alarm. “***” means high-level alarm, “**” the medium-level alarm, and “*” the low-level alarm. The system will not display “*” sign for technical alarm. Alarm indicator lamp The high/medium/low-level alarms are indicated by the system in following different visual ways: 4-2 Alarm Alarm level High Medium Low Visual prompt Alarm indicator flashes red with high frequency. Alarm indicator flashes yellow with low frequency. Alarm indicator lights on yellow. Alarm Sound The system identifies high/medium/low-level alarms in following different audio ways: Alarm level High Medium Low Audio prompt “DANG-DANG-DANG------DANG-DANG, DANG-DANG-DANG------DANG-DANG” once every 8 seconds. “DANG-DANG-DANG” once every 24 seconds. “DANG-” once every 24 seconds. Note When alarms of different levels occur at the same time, the monitor gives the sound of the highest level. 4.1.3. Alarm Setup You can set up parameter alarm limits in the “ALARM SETUP” menu. Select the [ALARM SETUP] item in the “SYSTEM SETUP” menu to call up the “ALARM SETUP” menu (default menu) as shown below, in which you can select any option in the [ALM SEL] item. The options are “COMMON ALM SETUP” and alarm setups for each parameter. Figure 4-1 ALARM SETUP 4-3 Alarm COMMON ALM SETUP Select the [COMMON ALM SETUP] to call up following setup items for all parameters. z ALARM VOL: which has three selections: LOW, MED and HIGH. z ALM REC TIME: which refers to the recording duration and has three options: 8S, 16S, 32S. The system can output the waveform of 4s, 8s or 16s prior to and after the alarm occurs (8s, 16s, 32s). z PARA ALM TYPE: which has two options: LATCH, UNLATCH. LATCH means that once alarm occurs, the system will give alarm all the time until manual intervention (such as push the “SILENCE” button on the panel). UNLATCH means that the system will stop giving alarm once the alarm condition does not exist. Alarm setup of each parameter In the “ALARM SETUP” menu, select the [ALM SEL] item to set up the alarm information for following parameters. They are HR, ST, PVC, SPO2, NIBP, RESP and TEMP. For example: z Method to set up HR alarm information: Step 1: Select the [HR ALM SETUP] option in the [ALM SEL] item. Then the menu only displays HR setup items. Step 2: You can set up five items in this menu, which are HR ALM (on/off of the alarm switch), ALM LEV (alarm level), ALM REC (alarm recording switch), ALM HI (higher limit of HR alarm), ALM LO (lower limit of HR alarm). You can move the cursor onto the item to be setup by using the knob and press the knob to make the setup. The method for setting the alarm information of other parameters is the same as HR. 4.2. Alarm testing during power-on During the monitor power-on period, the system will test the audio and visual alarm function. Every time when the monitor is powered on, the system will give “DANG-” alarm sound, and the LED indicator on the display will flash each time in yellow and red. If the system does not give “DANG-“ sound and the LED does not flash, you must stop using the monitor and notify MINDRAY Customer Service Department. Warning When the monitor is powered on, the system will test if the audio and visual alarm function is in normal status. If the system cannot give the alarm prompt as described above, you shall not use this monitor on the patient and must contact MINDRAY Customer Service Department. 4-4 Alarm 4.3. Alarm types Alarm will be triggered when following types of alarms occur. 1) Physiological alarms; 2) Technical alarms; 3) General prompt information and alarms A. Physiological alarms If the measured value of the physiological parameter exceeds the alarm limit and the alarm switch is set to “ON”, the system will give the alarm. The system will not give alarm if the alarm switch is set to “OFF”. B. Technical alarms Once system error occurs, the system will give alarm immediately and take corresponding troubleshooting measures, such as stop displaying corresponding parameter and waveform and clear the final displayed value to avoid misleading the treatment. If there are more than one error message for display, the system will display them in turn. C. General prompt information and alarms In some circumstances, some alarms are in their normal range, hence we don’t consider that they will affect the patient health. For example, if patient probe/sensor is connected when the monitored is turned on, the system will give technical alarm such as SENSOR OFF. 4.4. SILENCE/CLOSE/PAUSE SILENCE/CLOSE Push the SILENCE button on the panel for more than 2 second, the system will shut off all sounds. Push the SILENCE button again, the system can exit the SILENCE status and restore the PAUSE status and accordingly suspend the alarm as per the previously defined time duration. Push the SILENCE button for the third time, the system will exit the PAUSE status and restore the normal alarm status by giving the alarm sound again. When the system is in the SILENCE status, any new alarm will terminate the SILENCE status and make the system restore the normal alarm status. Note When the symbol appears indicating the alarm sound is shut off and accordingly the system will not give alarm sound. Therefore, you must be very careful in using this function. There are two methods to terminate this status. One is to set the 4-5 Alarm alarm volume to “ON” in the MAINTAIN menu. The other method is to push the symbol become SILENCE button shortly to make the ; push the SILENCE button again and the system will restore the normal alarm status again. PAUSE Push the SILENCE button on the panel shortly, the system will shut off all alarm sound and visual prompt as well as description of physiological alarm, and enter the PAUSE status. The countdown of PAUSE status is displayed in the Physiological Alarm area, in which area the symbol is also displayed. The time duration of the PAUSE status can be set to 1min, 2min or 3min. You can select in the [ALM PAUSE TIME] item in the “SYSTEM MENU\MAINTAIN”. After pushing the SILENCE button again, the system will restore the normal status. Besides, the occurrence of any new technical alarm will also terminate the PAUSE status and let the system restore the normal status. The symbol disappears, too. Note After the system goes back to the normal status, the existence of alarm depends on whether the alarm condition is complied with. After pushing the SILENCE button, the system will permanently shut off the alarm sound for LEAD OFF/SENSOR OFF alarm. 4.5. Parameter Alarm You can set up the alarm information for single parameter in its menu, such as alarm switch, alarm limit, alarm level, alarm status and alarm recording switch. When a parameter alarm is set to OFF, a “ ” symbol will appear beside the parameter in the Parameter Area. You can set up the alarm switch to ON/OFF for each parameter. For the parameter whose alarm switch is set to ON, once its value exceeds the alarm limits, the system will generate the alarm automatically as per the setup alarm level in following ways: 1. The system displays alarm prompt on the screen in the way as described in alarm modes; 2. If you have set up the alarm volume, the system can give alarm sound as per the pre-set alarm level and volume. When alarms of more than one parameter occur at the same time, the system will give the alarm information in the highest alarm level; 3. Alarm indicator flashes; 4. If you have set up the alarm recording time in the “ALARM SETUP” menu to 8s, 16s or 32s, the system will store the waveform of 4s, 8s or 16s prior to and after the alarm; 4-6 Alarm 5. If the alarm recording switch is set to ON, the system will automatically activate the recorder to start alarm recording. For detailed information, refer to Chapter: Recording. 4.6. When an Alarm Occurs Note When an alarm occurs, you shall always check the patient's situation first. The system displays the alarm information in the System Information Area or System Alarm Information Area. You need to identify the alarm and take the corresponding measures as per the alarm cause. 1. Check the patient's situation; 2. Identify the alarming parameter or the alarm type; 3. Identify the cause for the alarm; 4. If necessary, silence the alarm sound; 5. If the alarm status terminates, you need to check if the cause for the alarm has been removed. You can find the alarm information and prompt information for parameters in relevant chapters. 4-7 Alarm FOR YOUR NOTES 4-8 Chapter 5 5.1 Freeze General When monitoring a patient, you may freeze the waveforms of interest so as to view them carefully. If necessary, you may also use recorder to print out a frozen waveform. The Freeze function of this monitor has following features: Freeze status can be activated on any operating screen; At the same time of entering the Freeze status, the system exits all other operating menus and freezes all waveforms in the waveform area of the basic screen. However, the system can still refresh the parameters normally. 5.2 You can review and record the frozen waveforms. Entering/Exiting Freeze Status Entering Freeze Status In the Non-Freeze status, push the “FREEZE” button on the front panel of the monitor and the system will exit the menu being displayed (if available) and enter the Freeze status. At the same time, the “FROZEN” menu will pop up. In the Freeze status, the system freezes all waveforms and stops refreshing them. Exiting Freeze Status In the Freeze status, executing any of the following operations will let the system exit the Freeze status: Select [EXIT] on the “FROZEN” menu; Push the “FREEZE” button on the front panel again; Push the “MAIN” button on the front panel. After exiting the Freeze status, the system will clear the screen waveforms and start to display real-time waveforms. The system will sweep the waveforms from the left to right in the Waveform Area. 5-1 Freeze 5.3 FROZEN Menu Push the “FREEZE” button on the front panel, the FROZEN menu will appear on the bottom part of the screen and the system enter the Freeze status at the same time. Figure 5-1 WAVE 1: FROZEN menu Used to select the first frozen waveform to record. The pull-down list of this item gives you the names of all frozen waveforms displayed on the screen. WAVE 2: Used to select the second frozen waveform to record. The pull-down list of this item gives you the names of all waveforms displayed on the screen. REC: select REC and the system will begin recording the frozen waveforms selected in“WAVE 1” and“WAVE 2”. EXIT: select EXIT and the system will close the FROZEN menu and exit the Freeze status。 Note Pressing the “FREEZE” button repeatedly may result in discontinuous waveforms on the screen. 5.4 Recording Frozen Waveform In the Freeze status, you may output displayed frozen waveforms, with up to 2 waveforms at one time. On the FROZEN menu, the pull-down lists of both “WAVE 1” and “WAVE 2” show all of the frozen waveforms on the screen, from which you may select two. Select [REC] on the FROZEN menu to output parameters generated upon the freezing moment and the two selected frozen waveforms. If one of the two selected waveforms is closed or not available, only parameters and the other waveform are recorded. If these two selected waveforms are all closed or not available, the system will record parameters only. As for the function of recording frozen waveforms, you can only record the waveforms displayed upon the freezing moment. The recording length is the same as the length of the waveform displayed on the screen. For example, if the speed of a waveform is relatively fast, then it needs shorter time to record it. When recording frozen waveforms, the system is still in the Freeze status. After recording, you may once more choose the waveform for recording and select [REC] again to 5-2 Freeze record the chosen waveforms. In this way you can record all the waveforms. If the recorder does not exist, selecting [REC] can only call out the prompt “Recorder does not exist” in the STATUS bar. For more detailed information about recording, please refer to Chapter: Recording. 5-3 Freeze FOR YOUR NOTES 5-4 Chapter 6 Recording(optional) General recording information Configuring and recording Recording information General Recording Information 6.1 The monitor uses a thermal dot matrices recorder. The record paper is 48mm wide. Recorder Performance z Waveform recording speed is 25 or 50 mm/s; z Record up to two waveforms; z Output with grid selectable; z English / Chinese printout; z User-selectable real-time recording time and waveform; z User-selectable auto recording interval; waveform is the same as what is selected for real-time recording; z 6.2 Automatically select and output alarm-related waveforms for alarm recording Recording Type The monitor can record stripes of following types: Continuous real-time recording 8 second real-time recording Auto 8 second recording Parameter alarm recording Frozen waveform recording Trend graph/table recording ARR review recording Alarm review recording NIBP review recording Drug calculation and titration table recording Monitor status recording 6-1 Recording(optional) Real-time Recording Real-time recording starts as you push the RECORD button. The system automatically select waveforms (usually the first two waveforms displayed on the screen) for continuous real-time recording and continuous 8 second recording. Or you can specify the waveforms in the menu. Refer to related section for details. In the “RECORD” menu, you can choose the function to record two waveforms at the same time or to record only one waveform by closing the other one. If you start recording when two waveforms are closed, the recorder only outputs parameters. Note When the system is executing a recording task, the system can start executing next alarm recording task only when the current one is finished. Auto recording The monitor starts 8-second real-time recording automatically with the interval set up in the [TIMING REC TIME] item of the “RECORDER ” menu. Refer to Chapter 3.4.3 Recorder Setup for details. Alarm Recording Parameter Alarm Conditions for alarm recording: The alarm recording switch must be set to ON and there is parameter alarm. Recording length is 4, 8, or 16 seconds prior to and after the alarm (totally 8, 16 or 32 seconds) (which can be selected in the SYSTEM MENU). The monitor can output all parameter values when the alarm is happening. Output two waveforms as per following rules: 1) If more than one alarm switch is set to ON and more than one alarm is triggered simultaneously, the monitor will output the waveform of the parameter with the highest alarm level. If the alarms are of the same level, the monitor will output the waveform of the latest alarm. 2) If other parameters have alarms when the monitor is recording a parameter alarm, the monitor will record other alarms after it finishes the current recording process. 3) If many alarms occur at the same time, the monitor will first store part of them and then record them out later in turn. 6-2 Recording(optional) ST Segment Alarm The monitor can record ECG waveforms of 4, 8, or 16 seconds prior to and after the ST alarm (totally 8, 16, or 32 seconds) and all parameter values when the alarm is happening. Arrhythmia Alarm The monitor can record waveforms of 4 seconds prior to and after the alarm (totally 8 seconds) and all parameter values when the alarm is happening. Frozen Waveform Recording In the Freeze status, the monitor can output the specified screen waveforms. As the result, you can keep the abnormal waveforms for further study. Trend Graph / Table Recording The monitor can output the trend graph/table in the current trend review window. Arrhythmia Review Recording The monitor can output the Arrhythmia alarm event in the current ARR RECALL window. Alarm Review Recording The monitor can output the parameter alarm event in the current ALARM RECALL window. NIBP Review Recording The monitor can output NIBP review event in the current NIBP RECALL window. Monitor Status The monitor can output messages in the current STATUS window. Titration Table The monitor can output the messages in the current TITRATION window. 6-3 Recording(optional) Notes on Recording Record types: Continuous real-time recording 8 second real-time recording Auto 8 second recording Parameter alarm recording Frozen waveform recording Trend graph/table recording ARR review recording Alarm review recording NIBP review recording Drug calculation and titration table recording Monitor status recording Alarm parameters, alarm time and freeze time. Patient bed number, name, sex, height, weight, date of birth, admission date. Parameter name and value Recording time Waveform name Waveform scale (only for ECG waveform) ECG lead, scale, filter mode, (if having ECG waveforms, it will be printed out within the first second or when changing the lead, gain and filter mode during real-time recording.) IBP scale (the first second of IBP waveform) Date and time Company name 6.3 Start Recording You can use following ways to start the recording process: Continuous real-time recording Push the “RECORD” button to start/stop recording. 8 seconds real-time recording Push the “RECORD” button to start recording. The system will automatically stop recording in 8 seconds. Auto recording Start recording automatically as per the interval selected in the [TIMING REC TIME OFF] item in the “RECORD” menu. The system will automatically stop recording in 8 seconds. Alarm recording When the alarm recording switch is set to ON, the system will automatically start recording when alarm is happening 6-4 Recording(optional) Frozen waveform recording After accessing the FREEZE menu, you can use knob to select two waveforms for output and then select [REC] to output waveforms. If two waveforms are both closed, the monitor only outputs parameter values in the FREEZE status. Trend graph recording Pick [REC] in the “TREND GRAPH” menu, the monitor will output the trend graph of the parameters being currently displayed. Trend table recording Pick [REC] in the “TREND TABLE” menu, the monitor will output the trend table of the parameters being currently displayed. Arrhythmia review recording Pick [REC] in the “ARR WAVE RECALL” menu, the monitor will output the ARR waveform being currently displayed and its relevant parameter value. Alarm review recording Pick [REC] in the “ALARM RECALL CONDITION” sub-menu of the “SYSTEM MENU”, the monitor will output the waveforms of the alarming parameter and relevant parameter value. NIBP review recording Pick [REC] in the “NIBP RECALL” sub-menu of the “SYSTEM MENU”, the monitor will output the NIBP value in the current window. Monitor status recording Pick [REC] in the “MAINTAIN” sub-menu of the “SYSTEM MENU”, the monitor will output status information of the monitor. Titration table recording Pick [REC] in the “TITRATION” sub-menu of the “DRUG CALCULATION” menu, the monitor will output the information in the current titration table. Note You can push the RECORD button on the panel to stop the current recording process. You can stop recording process and clear the stored alarm recording tasks by selecting the [CLEAR REC TASK] item in the “RECORD” sub-menu of the “SYSTEM MENU”. 6-5 Recording(optional) 6.4 Recorder Operating and Status Information Record Paper Requirement You must use the thermal-sensitive record paper in accordance with requirement; otherwise the recorder may not function normally, the recording quality may be poor, and the thermo-sensitive printhead may be damaged. Proper operation ■ When the recorder is working, the record paper goes out steadily. Do not pull the paper outward with force; otherwise the recorder may be damaged. ■ Do not use the recorder before loading the paper. Paper Out When the monitor displays the "RECORDER OUT OF PAPER" message in the Information Area, the recorder cannot be started. At this time, you should load the record paper in accordance with the requirement. Procedures to load record paper ■ Open the recorder catch; ■ Lift up the bail on the left axis; ■ Load a new roll of record paper into the paper cassette with the printing side facing the printhead; ■ When you can see the paper from the other side, pull it outside. You must load the paper at the proper position with tidy margin; ■ Pull the bail back to the original position; ■ Feed the paper out from the recorder outlet; ■ Close the recorder catch. Note Be careful when loading record paper. Avoid damaging the printhead. Unless when loading paper or shooting troubles, do not leave the recorder catch open. Removing Paper Jam When the recorder functions abnormally or sounds strange, open the recorder catch to check 6-6 Recording(optional) for paper jam. You shall obey the following steps to remove the paper jam. ■ Cut off the record paper from the feeding edge; ■ Lift up the bail on the left axis of the recorder; ■ Pull the paper out from below; ■ Re-load the paper. Recorder Status Message (Technical Alarms) Message RECORDER HOT Cause HEAD REC HEAD IN WRONG POS. RECORDER OUT OF PAPER RECORDER PAPER JAM RECORDER COMM ERR RECORDER INIT ERR TOO MANY REC TASKS RECORDER INITIALIZING Alarm Level Remedy The thermal terminal is too hot. low The printhead is not in recording place. low Push down the bail on the left axis of the recorder. low Load a new roll of record paper. Record paper runs out. Recording continuously for more than 30m Operating status error Error occurs initialization low during Too many alarm events take place simultaneously. The recorder is initialization process. low in Stop using the recorder Re-load paper. Reset the recorder. low Shut down and re-start the monitor low Close alarm switch low Wait for the initialization process to end recording REC NOT AVAILABLE Working status of the recorder is incorrect. low Shut down and re-start the monitor RECORDER COMM ERR Serial port communication error. low Shut down and re-start the monitor. RECORDER BUSY In recording status low Wait for the recording process to end 6-7 Recording(optional) FOR YOUR NOTES 6-8 Chapter 7 Trend and Event The monitor can store 72-hour trend data of all parameters, 400 NIBP measurement results and 60 alarm events. This chapter tells how to view the data stored by the system. 7.1 Trend Graph ■ For the latest 1-hour trend graph, display the value of the data every 1 or 5 seconds; ■ For the latest 72-hour trend graph, display the value of the data every 1, 5 or 10 minutes; Pick the [TREND GRAPH] item in the “SYSTEM MENU” to call up the following menu: Figure 7-1 TREND GRAPH window In the trend graph, the y-axis refers to the measured value and x-axis time. “ ” is the cursor of the trend graph, the parameter value of the position pointed by the cursor is displayed below the trend graph and the corresponding time is displayed above the trend graph. Except 7-1 Trend and Event for NIBP trend, the system displays other trends in continuous curves. In the NIBP trend graph, "▼" indicates systolic value, "▲" the diastolic value, and "*" the mean value. Select to display trend graph of a specific parameter: Move cursor to highlight the [PARA] item and turn the knob to view its content and push the knob when the desired parameter appears. Then the system will display the trend graph of the selected parameter. Select 1-hour or 72-hour trend graph: Pick the [RES] item, you can select 1s or 5s to view 1-hour trend or 1min, 5min or 10min to view 72-hour trend. View other trend curves: When " " appears on the right part of the screen, pick the [L-RIGHT] item and turn the knob clockwise to view later trend curve. When " " appears on the left part of the screen, pick the same item and turn the knob counterclockwise to view earlier trend curve. Change the display scale You can change the proportion of y-axis by picking [ZOOM] item. The proportion of the trend curve will change accordingly. The value beyond maximum value will be represented by the maximum value. Obtain trend data of a specific time on the current trend graph The time at which the cursor points will change as the knob is turned. Parameter of the time is displayed below the x-axis. When " " appears on the right part of the screen, the trend graph will automatically page down for you to view later trend curve as the cursor moves here. When " " appears on the left part of the screen, the trend graph will automatically page up for you to view earlier trend curve as the cursor moves here. Output trend curve Press [REC] button to print out the trend curve of the current selected parameter. 7-2 Trend and Event Mark event If an event is marked A, B, C, or D, the corresponding event type will be displayed on the axis time of the trend graph, such as , , or . Operation example View the NIBP trend graph of the latest 1 hour: ■ Pick the MENU hot key in the lower right corner of the screen; ■ Pick the [TREND GRAPH] item in the SYSTEM MENU; ■ Select parameter: Pick the [PARA] item and turn the knob until NIBP appears; ■ Select 1S or 5S in the [RES.] Item; ■ Pick the [L-RIGHT] item and turn the knob, observe the changes of the trend graph time and the trend curve; ■ Stop at the trend time section to be observed. If the y-axis proportion is improper such as some trend values exceed the maximum value in the current y-axis, you can pick the [ZOOM] item to adjust; ■ To know the measured value of a certain time, you can pick the [CURSOR] item and move the cursor to the time, accordingly time will appear above and the measured value below the curve.; ■ To output the trend graph, you can pick [REC] and then the recorder will output the NIBP trend in the current review window; ■ Pick [EXIT] to exit trend graph window. 7.2 Trend Table The system can display the latest 72-hour trend table data with the resolution of 1min, 5min, 10min, 30min, or 60 minutes. Pick the [TREND TABLE] item in the SYSTEM MENU to call up the following menu: 7-3 Trend and Event Figure 7-2 TREND TABLE window Time corresponding to each group of trend data is display in the leftmost column with date in brackets. Events that are once marked are listed below the event. They correspond to the time of marked event. Trend data of each parameter is divided into groups. NIBP trend data is displayed in a special way. Except the measured NIBP value, the system also displays measurement time under the corresponding value. If there are many NIBP values in a time section, the system can only display one group and also a “*” symbol on the “MORE” to indicate that there are two or more than two measured results. Choose trend table of different resolutions Use the cursor to highlight the [RES] item and turn the knob to change its content so as to change the time interval of the trend data. View later or earlier trend curve When " " appears on the upper part of the screen, pick the [UP-DOWN] item and turn the knob clockwise to view later trend data. When " " appears on the lower part of the screen, pick the same item and turn the knob counterclockwise to view earlier trend data. 7-4 Trend and Event Obtain trend data of different parameter Pick the [L-RIGHT] to select one of the parameter groups. When there is ">" to the right of the rightmost parameter, it indicates the following page is available. When there is "<" to the left of the leftmost parameter, it indicates previous page is available. Output the trend table Pick [REC] to output the trend data of all parameters displayed in the current time section. Mark event If an event is marked A, B, C, or D, the corresponding event type will be displayed on the time indication of the trend table. Operation example View NIBP trend table: ■ Pick the [MENU] hot key on the lower right of the screen; ■ Pick the [TREND TABLE] item in the menu; ■ Select parameter: Pick the [L-RIGHT] and turn the knob until NIBP data appear in the window; ■ Select resolution: Pick the [RES] item to select the desired interval; ■ Pick the [UP-DOWN] item and turn the knob to view the NIBP trend data of different time; ■ To use recorder to output trend table, just pick [REC] and the recorder will print out the NIBP trend data; ■ 7.3 Pick [EXIT] to exit the TREND TABLE window. NIBP Recall The monitor allows you to review the latest 400 NIBP measurement data. Pick the [NIBP RECALL] in the SYSTEM MENU, the window as shown below will appear showing the NIBP results and time of the latest 10 measurements. 7-5 Trend and Event Figure 7-3 NIBP RECALL Data is listed chronologically from the latest to the earliest. Each screen can display 10 NIBP measurement results. Pick the [UP-DOWN] item to view earlier or later data. The system can display up to 400 NIBP measurement results. If there are more than 400 NIBP measurements, the system only displays the results of latest 400 NIBP measurements. Pick [REC] to output all measurement data in the NIBP RECALL window. 7.4 Alarm Event Recall The monitor can display the latest 60 alarm events in the ALARM RECALL window. Pick the [ALARM RECALL] item in the SYSTEM MENU to access the ALARM RECALL CONDITION menu as shown below. 7-6 Trend and Event Figure 7-4 ALARM RECALL CONDITION Menu In this menu, you can set up the conditions for alarm review. The conditions include: 1) Start and End time of alarm review: You can set up the start time of alarm review in the [START] item and the end time in the [END] item. You can set up the end time as the current time or user-defined time. 2) ALARM RECALL EVENT In the pull-down list of the [ALARM RECALL EVENT] item, you can select the parameter that you want to review. You can select ALL (alarm events of all parameters), ECG, RESP, SPO2, NIBP, TEMP, HR_H>180 (this value is higher than the upper alarm limit), HR_L<60(this value is below the lower alarm limit), SPO2<90%, RR_H>40, RR_L<10, TEMP_H>40℃, TEMP_L<34℃. After setting up all the review conditions, press the [ALARM RECALL] item to access the “ALARM RECALL” window. ALARM RECALL The ALARM RECALL window as shown below displays following: Alarming time span, ① in figure 7-5; Event type, ② in figure 7-5; Serial number (format: NO. xx of XX ), ③ in figure 7-5; Parameter value (exclude NIBP) when alarm is occurring, ④ in figure 7-5; Two waveforms, save 8s/16s/32s waveform, ⑤ in figure 7-5 7-7 Trend and Event ① ② ③ ④ ⑤ Figure 7-5 ALARM RECALL Menu View all waveforms during the alarming process Pick the [L-RIGHT] item and turn the knob to view all 8/16/32-second waveform data stored in the system. View other alarm events The system can display the data of up to 60 alarm events from the latest to the earliest. Pick the [UP-DOWN] item and turn the knob to view later or earlier events. Record Pick [REC] to command the recorder to output all review data in the window. 7-8 Chapter 8 Drug Calculation and Titration Table This Monitor can execute calculation for 15 drugs and display corresponding titration table. Besides, you can use recorder to output the content of the titration table. 8.1 Drug Calculation The drug calculations that can be performed by the system are AMINOPHYLLINE, DOBUTAMINE, DOPAMINE, EPINEPHRINE, HEPARIN, ISUPREL, LIDOCAINE, NIPRIDE, NITROGLYCERIN and PITOCIN. Besides DRUG A, DRUG B, DRUG C, DRUG D and DRUG E are also provided to flexibly replace any of the drugs. Pick the [DRUG CALC] item in the SYSTEM MENU to call up the “DRUG CALC” window as shown below. Figure 8-1 Drug calculation Following formulas are used for dose calculation: Concentrat = Amount / Volume INF Rate = DOSE / Concentrat 8-1 Drug Calculation and Titration Table Duration = Amount / Dose Dose = INF Rate × Concentrat Operating method: In the DRUG CALC window, you should first select the name of the drug to be calculated, confirm the patient weight and then enter other known values. Turn the knob to highlight the item to be calculated. Push the knob and then turn it to select the calculation value. After selecting the desired value, the value of the item being calculated will appear in the corresponding position. Each item has its calculation range. If the result exceeds the range, the system will display “---.--”. Note For drug calculation, you must first enter the patient weight and drug name and then the values of other menu items. The system gives a group of random initial values. You cannot use them as the calculation reference. Instead, you must enter a new group of values as per the doctor’s instruction. Note Each drug has its fixed unit or unit series. You must select the proper unit as per the doctor’s instruction. Of the same unit series, the system will change automatically as per the current input value. If the value exceeds the range allowed by the unit system, the system will display “---”. Note After entering a value, a conspicuous prompt will appear in the menu reminding you to confirm if all entered values are correct in order to ensure that the calculated results are reliable and safe. Note In Neonate mode, DRIP RATE and DROP SIZE items are disabled. Note The system will display a dialog box for each input value and ask you to confirm the value. You must be careful when answering each box. The calculated result is reliable only if the entered value is correct. ■ Select the drug name: Highlight the [DRUG NAME] item and turn the knob to select the drug name in the pull-down list, including AMINOPHYLLINE, DOBUTAMINE, DOPAMINE, EPINEPHRINE, HEPARIN, ISUPREL, LIDOCAINE, NIPRIDE, NITROGLYCERIN, PITOCIN, Drug A, Drug B, Drug C, Drug D and Drug E. You can only calculate one drug each time. 8-2 Drug Calculation and Titration Table Note A, B, C, D and E are only codes for drugs instead of their real names. The units for these five drugs are fixed. You may select the appropriate unit according to the drug application convention. The rules for units are: “mg” series units are fixedly used for drug A, B and C: g, mg, mcg. “unit” series units are fixedly used for drug D: unit, k unit, m unit. “mEq” is fixedly used for drug E. ■ Patient weight After accessing the DRUG CALC window, the first you should enter the patient weight which is used solely for calculating the drug concentration. Note This drug calculation function acts only as a calculator. It means that the values in the table may not be related to the patient monitored by the current monitor. Therefore, the patient weight in this menu and the patient weight of the system represent two different values. If you enter a new patient in the system, the values in this menu will not be affected. 8.2 Titration Table Access titration table: Select the [TITRATION] item in the DRUG CALC menu to enter titration table display. The figure below shows the TITRATION table. 8-3 Drug Calculation and Titration Table Figure 8-2 TITRATION Method to operate the titration table: 1. In the TITRATION table, highlight the [BASIC] item and then push the knob to select the desired item, which can be either DOSE or FLOW RATE. 2. Highlight the [STEP] item, push and rotate the knob to select step from 1 ~ 10. 3. Highlight the [DOSE TYPE] item, push and rotate the knob to select the dose unit. 4. Highlight the [UP-DOWN] item, push and turn the knob to view previous or later page of the table. 5. Highlight the [REC] item, push the knob to command the recorder to output the data displayed in the titration table. 6. Highlight the [EXIT] item, push the knob to return to the DRUG CALC menu. 8-4 Chapter 9 Patient Safety The monitor is designed to comply with the International National Safety requirements for medical electrical equipment, IEC60601-1, EN60601-2-27 and EN60601-2-30. This device has floating inputs and is protected against the effects of defibrillation and electrosurgery. If the correct electrodes are used and applied in accordance with the manufacturer instructions (see Chapter ECG/RESP Monitoring), the system can restore screen display within 10 seconds after defibrillation. This symbol indicates that the instrument is IEC60601-1 Type CF equipment. The unit displaying this symbol contains an F-Type isolated (floating) patient applied part providing a high degree of protection against shock, and is suitable for use during defibrillation. Warning Do not come into contact with patients, bed or the monitor during defibrillation. Environment Follow the instructions below to ensure complete and safe electrical installation. The environment where the monitor will be used should be reasonably free from vibration, dust, corrosive or explosive gases, extremes of temperature, humidity, and so on. For a cabinet mounted installation, allow sufficient room at the front for operation and sufficient room at the rear for servicing with the cabinet access door open. The monitor operates within specifications at ambient temperatures between 0℃ and 40℃. Ambient temperatures that exceed these limits may affect the accuracy of the instrument and cause damage to the modules and circuits. Allow at least 2 inches (5cm) clearance around the instrument for proper air circulation. Power Source Requirements Refer to Appendix A: Production Specification. 9-1 Patient Safety Grounding the monitor To protect the patient and hospital personnel, the monitor must be grounded. Accordingly, the monitor is equipped with a detachable 3-wire cable which grounds the instrument to the power line ground (protective earth) when plugged into an appropriate 3-wire receptacle. If a 3-wire receptacle is not available, consult the hospital electrician. Warning Do not use a 3-wire to 2-wire adapter with this instrument. Connect the grounding wire to the equipotential grounding terminal on the main system. If it is not evident from the instrument specifications whether a particular instrument combination is hazardous or not, for example due to summation of leakage currents, the user shall consult the manufacturers concerned or else an expert in the field, to ensure that the necessary safety of all instruments concerned will not be impaired by the proposed combination. Equipotential Grounding When other equipments are used together with the monitor, a grounding cable should be used to connect the equipotential grounding connectors of the monitor and of other equipments. This helps to reduce the potential differences between different pieces of equipment, and ensure the safety of the operator and patient. Condensing Make sure that during operation, the instrument is free of condensing. Condensing may form when equipment is moved from one room into another, thus being exposed to moisture and different temperature environment. Warning Possible explosion hazard if used in the presence of flammable anesthetics. Symbols used on the Monitor This symbol means 'BE CAREFUL '. Refer to the accompanying document of the Patient Monitor (this manual). This symbol indicates that the instrument is IEC60601-1 Type CF equipment. The unit displaying this symbol contains an F-Type isolated (floating) patient applied part providing a high degree of protection against shock, and is 9-2 Patient Safety suitable for use during defibrillation. Equipotentiality Power ON /OFF Alternating current (AC). Battery indicator The patient monitor bears CE mark indicating its conformity with the provisions of 84/539/EEC and 2004/108/EC. The following definition of the WEEE label applies to EU member states only. This symbol indicates that this product should not be treated as household waste. By ensuring that this product is disposed of correctly, you will help prevent bringing potential negative consequences to the environment and human health. For more detailed information with regard to returning and recycling this product, please consult the distributor from whom you purchased it. * For system products, this label may be attached to the main unit only. 9-3 Patient Safety FOR YOUR NOTES 9-4 Chapter 10 10.1 Maintenance/Cleaning System Check Before using the monitor, you shall check: ■ Check if there is any mechanical damage; ■ Check if all the outer cables, inserted modules and accessories are in good condition; ■ Check if all the monitoring functions of the monitor can work normally so as to make sure that the monitor is in good condition. If you find any damage on the monitor, stop using the monitor on patient, and contact the biomedical engineer of the hospital or Mindray Customer Service Department immediately. The overall check of the monitor, including the functional safety check, must be performed by qualified personnel once every 6 to 12 month or each time after fix up. All checks that need to open the monitor enclosure must be performed by qualified service personnel. Safety and maintenance check may also be conducted by persons from Mindray. You can obtain the material about the customer service contract from the local Mindray office. Warning If the hospital or agency that is responding to using the monitor does not follow a satisfactory maintenance schedule, the monitor may become invalid, and the human health may be endangered. Warning Replace the battery as instructed by Mindray service engineer. Warning To prolong the life cycle of the battery, it is recommended to use the battery at least once per month and recharge the battery each time only after the electricity is exhausted. 10.2 General Cleaning Warning Turn off the power and disconnect the line power before cleaning the monitor or the sensor/probe. 10-1 Maintenance/Cleaning The monitor must be kept dust-free. It is recommended that you should clean the outside surface of the monitor enclosure and the display screen regularly. Only use non-caustic detergents such as soap and water to clean the monitor enclosure. Caution Pay special attention to avoid damaging the monitor: 1. Avoid using ammonia-based or acetone-based cleaners such as acetone. 2. Most cleaning agents must be diluted before use. Dilute the cleaning agent as per the manufacturer's direction. 3. Do not use the grinding material, such as steel wool etc. 4. Do not let the cleaning agent enter the monitor. Do not immerse any part of the system into liquid. 5. Do not leave the cleaning agents at any part of the equipment. 10.3 Cleaning Agents Except the solutions specified in the above Caution, you can use any of the solutions listed below as the cleaning agent. ■ Diluted Ammonia Water ■ Diluted Sodium Hyoichlo (Bleaching agent). Note The diluted sodium hyoichlo from 500ppm (1:100 diluted bleaching agent) to 5000ppm (1:10 bleaching agents) is very effective. The concentration of the diluted sodium hyocihlo depends on how many organisms (blood, mucus) are left on the surface of the enclosure. ■ Diluted Formaldehyde 35% -- 37% ■ Hydrogen Peroxide 3% ■ Alcohol ■ Isopropanol Note You can use hospital-grade ethanol to clean the monitor and its sensor/probe and leave it to dry naturally or use clean cloth to dry it. Note Mindray has no responsibility for the effectiveness of controlling infectious disease 10-2 Maintenance/Cleaning using these chemical agents. Please contact infectious disease experts in your hospital for details. 10.4 Sterilization To avoid extended damage to the equipment, sterilization is only recommended when stipulated as necessary in the Hospital Maintenance Schedule. Sterilization facilities must be cleaned first. Recommended sterilization materials: Ethylate, and Acetaldehyde. Appropriate sterilization materials for ECG lead and blood pressure cuff are introduced Chapter ECG/RESP Monitoring and Chapter NIBP Monitoring respectively. Caution Follow the manufacturer’s instruction to dilute the solution, or adopt the lowest possible concentration. Do not let liquid enter the monitor. Do not immerse any part of the monitor into liquid. Do not pour liquid onto the monitor during sterilization. Use a moistened cloth to wipe off any agent remained on the monitor. 10.5 Disinfection To avoid extended damage to the equipment, disinfection is only recommended when stipulated as necessary in the Hospital Maintenance Schedule. Disinfection facilities should be cleaned first. Appropriate disinfection materials for ECG lead, SpO2 sensor, blood pressure cuff and TEMP probe are introduced in relevant chapters. Caution Do not use EtO gas or formaldehyde to disinfect the monitor. 10-3 Maintenance/Cleaning FOR YOUR NOTES 10-4 Chapter 11 11.1 ECG/RESP Monitoring What Is ECG Monitoring Monitoring the ECG produces a continuous waveform of the patient's cardiac electric activity to enable an accurate assessment of his current physiological state. Connecting ECG cable correctly is the prerequisite to obtaining correct measurement result. The monitor can display 2 lines of cascaded ECG waveforms. ■ The patient cable consists of 2 parts: Cable for connecting the monitor; Lead set for connecting the patient. ■ This monitor has 3-lead configuration. ■ Parameters that can be displayed by the monitor are HR, ST segment and Arrhythmia analysis result. ■ All of the above parameters can be set to be alarm-triggering parameters. Warning In the factory setups of the monitor, ECG waveforms are the top two waveforms in the Waveform Area. 11.2 Precautions during ECG Monitoring Warning Do not come into contact with the patient, table, or the monitor during defibrillation. Warning Use only the ECG cable supplied with the monitor to monitor the patient. Please select the ECG cable with no resistance for RESP monitoring. 11-1 ECG/RESP Monitoring Warning When connecting electrodes or patient cable, make sure no conductive part is in contact with the ground. Verify that all ECG electrodes, including neutral electrodes, are securely attached to the patient but not the conductive part or ground. Warning When apply the ECG cable with no resistances to Mindray patient monitor or other patient monitors which themselves with no current limit resistance, it can’t be applied to defibrillation. Note Interference from an unearthed instrument near the patient and ESU interference may result in the distorted waveform. EN60601-1-2 (protection against radiation is 3v/m) specifies that the electrical field density exceeding 1v/m may cause measurement error in various frequencies. It is accordingly suggested that do not use equipment generating electrical radiation near ECG/RESP monitoring devices. 11.3 Monitoring Procedures 11.3.1 Preparation 1. Prepare the patient's skin prior to placing the electrodes. ■ The skin is a poor conductor of electricity, therefore preparation of the patient's skin is important to facilitate good electrode contact to skin. ■ Shave hair from sites, if necessary. ■ Wash sites thoroughly with soap and water. (Do not use ether or pure alcohol, because this may increase skin impedance). ■ Rub the skin briskly to increase capillary blood flow in the tissues and remove skin scurf and grease. 2. Attach clip or snap to electrodes prior to placing the electrodes. 3. Attach the electrodes to the patient. Before attaching, apply some conductive cream on the electrodes if the electrodes are not electrolyte self-supplied. 4. Connect the electrode lead to the patient cable. 5. Make sure the monitor is turned on. Warning Placed the electrode carefully and make sure contact good. 11-2 ECG/RESP Monitoring Warning Check everyday whether there is skin irritation resulted from the ECG electrodes. If so, replace electrodes every 24 hours or change their sites. Warning To protect the environment, the used electrodes must be recovered or disposed properly. Warning Check if the lead connection is correct before monitoring. After plug off the ECG cable, the system will display “ECG LEAD OFF” and give audible alarm. 11.3.2 Installing ECG lead Placing ECG electrodes Following is the configuration per European standard when using three leadwires. ■ R (right arm) lead –on the right foreleg. ■ L (left arm) lead - on the left foreleg. ■ F (left leg) lead - on the left hind leg. Note The following table gives the corresponding lead names used in Europe and America respectively. (Lead names are represented by R, L, F in Europe, whose corresponding lead names in America are RA, LA, LL.) America Euro Lead name Color Lead name color RA White R Red LA Black L Yellow LL Red F Green 11-3 ECG/RESP Monitoring Figure 11-1 Electrode placement Note To ensure patient safety, all leads must be attached to the patient. Recommended ECG Lead Placement for Surgical Patients Warning When using Electrosurgery (ES) equipment, leads shall be placed in the middle of Electrosurgery knife and the ES earth plate with the equal distance to both sides to avoid burns. Cables of Electrosurgery equipment and ECG cable shall not be tangled up. The placement of the ECG leads depends on the operation type. For open chest surgery, the electrodes can be placed laterally on the chest or on the back. In the operating room, artifacts may affect the ECG waveform due to the use of ES (Electrosurgery) equipment. To reduce the artifacts, you can place the electrodes on the right and left shoulder, the right and left sides near abdomen, and the chest lead on the left side of the mid-chest. Do not place the electrode on the upper arm; otherwise the ECG waveform will be too small. Warning When using Electrosurgery (ES) equipment, do not place the electrode near the ES earth plate, otherwise there will be a great deal of interference with the ECG signal. A good signal shall be: 11-4 ECG/RESP Monitoring Tall and narrow with no notches. With tall R-wave completely above or below the baseline. With pacer spike not higher than R-wave height. With T-wave less than one-third of the R-wave height. With P-wave much smaller than the T-wave. To get 1 mv calibrated ECG wave, you shall execute ECG calibration. During the process, the system displays "when CAL, can't monitor! ". Figure 11-2 11.4 Standard ECG Waveform ECG Screen Hot Keys ECG lead name ECG gain Filter mode Figure 11-3 ECG hot keys ① ECG lead name, the lead name selections are I, II, and III. ② ECG waveform gain: used to adjust the amplitude of ECG waveform. You can select the gain for the channel from ×0.25,×0.5,×1,×2, and AUTO. AUTO means the monitor adjusts the gain automatically. The system displays a 1mv scale at the right side of the ECG waveform. The height of 1mv bar is directly proportional to the waveform amplitude. 11-5 ECG/RESP Monitoring NOTE When the input signals are too large, the peak of the waveform may not be displayed. In this case, you can manually change the gain of the ECG waveform according to the actual waveform so as to enable the system to display complete waveform. ③ Filter method: used to obtain clearer and more accurate waveform There are three selectable filter modes. In DIAGNOSTIC mode, the system displays the ECG waveform that has not been filtered. In MONITOR mode, the artifacts that may lead to false alarm can be filtered. In SURGERY mode, the artifacts and interference from the ES equipment can be reduced. The system displays the filter mode above the ECG waveform. Warning The system displays non-processed real signal only in Diagnostic mode. In Monitor or Surgery mode, ECG waveforms may have distortion of different extent. In either of the latter two modes, the system can only show the basic ECG and the results of ST analysis may also be greatly affected. In Surgery mode, ARR analysis result may be somewhat affected. Therefore, it is suggested that in the environment having relative small interference, you’d better monitor a patient in Diagnostic mode. Note ︱ The system will indicate the detected pacemaking signal by displaying " " above the ECG waveform. 11.5 ECG Menu ECG SETUP Menu Turn the knob to highlight the ECG hot key in the Parameter Area on the main screen and then push the knob to call up the ECG SETUP menu. 11-6 ECG/RESP Monitoring Figure 11-4 ECG SETUP menu ■ ECG alarm setting • HR ALM: pick "ON", the system will give alarm and save the alarm information when HR alarm occurs; pick "OFF", the system will not give alarm and instead display a beside “ECG”. • ALM LEV: three options are available, which are HIGH, MED, LOW. Level HIGH means the most serious case. • ALM REC: pick "ON", the system will start recording process once HR alarm occurs. • ALM HI: used to set up the upper limit of ECG alarm. • ALM LO: used to set up the lower limit of ECG alarm. ECG alarm is activated when the heart beat exceeds the ALM HI value or falls below the ALM LO value. ECG alarm limits: Max. ALM HI Min. ALM LO Step HR ADU 300 15 1 HR PED 350 15 1 HR NEO 350 15 1 Note You shall set up the alarm limits according to the clinical situation of the individual patient. The upper HR alarm limit is very important during clinical monitoring, which shall not be a very high value. You shall set up the higher HR alarm limit to a value at most 20beats/min higher than the patient’s heart beats. ■ HR FROM You can select the HR FROM. The ECG signal can be from ECG or SPO2. ECG takes priority over SPO2. You shall choose SPO2 as the HR source only when the ECG signal is too poor 11-7 ECG/RESP Monitoring to be used for analysis. Moreover, when ECG signal becomes normal, the system will automatically switch the HR source back to ECG waveform. If you select AUTO, the system will decide the HR source by itself according to the signal quality. If you select BOTH, the system will display HR and PR (pulse rate) at the same time. If the HR source is SPO2, the system will display “PULSE” at the right side of ECG hot key and give PR sound at the same time. When HR source is SPO2, the system will not make judgment on HR alarm. Instead, it will make judgment on PR alarm. When HR source is BOTH, the system will display the PR measurement value at the right side of SpO2 on the main screen and make judgment on HR and PR alarm at the same time. The heart beat sound will be based on HR. If there are HR data, the system will give corresponding sound. If there are no HR data, the system will give PR sound. ■ SWEEP Available options for SWEEP are 12.5, 25.0, and 50.0 mm/s. ■ ST ANALYSIS Pick this item to access the ST ANALYSIS menu, the detailed information about the menu is to be discussed in the following section. ■ ARR ANALYSIS Pick this item to access the ARR ANALYSIS menu, the detailed information about the menu is to be discussed in the following section. ■ OTHER SETUP Pick this item to access the ECG SETUP menu as shown below: Figure 11-5 ECG SETUP menu In this menu, following functions are available: z BEAT VOL Four selections are available: OFF, LOW, MED, HIGH. HIGH indicates maximum volume. OFF indicates no sound. z PACE ︱ "ON" detected signal will be marked by a " " above the ECG waveform. "OFF" mean the pacemaker analysis function is disabled. 11-8 ECG/RESP Monitoring Note If monitoring a patient with pacemaker, set “PACE” to ON,otherwise, set it to OFF. If “PACE” is ON, the system will not perform some types of ARR analysis and ST analysis. For detailed information, refer to the section: ARR ALARM. z NOTCH: The control switch for 50/60HZ notch waveform of ECG module. Three selections are available, which are 50HZ, 60HZ and OFF. If you select 50HZ or 60HZ, the system can respectively filter 50HZ or 60HZ industrial frequency interference. z ECG CAL Pick this item to start ECG calibrating process. Picking this item again or change lead name on the screen can end calibrating process. z ADJUST WAVE POS Used to adjust the position of ECG waveform on the screen. Pick this item to call up the ADJUST WAVE POS dialog box. Pick the [UP-DOWN] item and turn the knob to adjust the position of the waveform on the screen. Pick the [BACK TO DEFAULT] item to let the waveform go back to the default position on the main screen. Figure 11-6 z ADJUST WAVE POS menu DEFAULT Pick the [DEFAULT] item to call up the ECG DEFAULT CONFIG dialog box, in which you can select the [FACTORY DEFAULT CONFIG] or the [USER DEFAULT CONFIG] item. After selecting any of the items and exiting the dialog box, the system will pop up a dialog box asking for your confirmation. 11-9 ECG/RESP Monitoring Figure 11-7 ECG DEFAULT CONFIGURE Warning For a patient with pacemaker, the pacing impulse analysis function must be switched on; otherwise, the pacing impulse may be counted as normal QRS complex, which may cause the system not able to detect “ECG LOST”. If the monitor has functions of ST segment & Arrhythmia analysis, refer to ST Segment Monitoring and Arrhythmia Analysis for details. Note When Pacer Switch is ON, the system will not execute Arrhythmia analysis related to PVCs (including PVCs counting) and ST analysis. 11.6 ECG Alarm Information and Prompt Alarm Message Alarms occurring in the process of ECG measurement have two types: physiological alarm and technical alarm. Prompt message may also appear in the mean time. For the audio and visual features during the appearance of these alarms and prompt messages in the process of ECG measurement, please refer to the related description in Chapter Alarm. On the screen, physiological alarm messages and general prompt messages (general alarms) are all displayed in the Alarm Area while technical alarms and prompt messages unable to trigger alarms are displayed in the Message Area. This section does not introduce Arr. and ST analysis. When the alarm switches are set to ON in relevant menus, the physiological alarms caused by the parameter exceeding the alarm limit may possibly trigger the recorder to automatically output alarm information including parameter value and corresponding waveform. Tables below list out various alarms that may occur during the measurement. Physiological alarms: Message ECG LOST HR TOO HIGH HR TOO LOW Cause No ECG signal of the patient is detected. HR measuring value is above the upper alarm limit HR measuring value is below the lower alarm limit Alarm level HIGH User-selectable User-selectable Technical alarms: Message Cause 11-10 Alarm level Remedy ECG/RESP Monitoring ECG LEAD OFF ECG LL LEAD OFF or ECG F LEAD OFF ECG LA LEAD OFF or ECG L LEAD OFF ECG RA LEAD OFF or ECG R LEAD OFF ECG electrodes fall off the skin or ECG cables fall off the monitor. Make sure that all electrodes, leads and LOW patient cables are properly connected. ECG INIT ERR ECG INIT ERR1 ECG INIT ERR2 ECG INIT ERR3 ECG module failure ECG INIT ERR4 HIGH ECG INIT ERR5 Stop using measuring function provided by ECG module, and notify biomedical engineer or Mindray service staff. ECG INIT ERR6 ECG INIT ERR7 ECG INIT ERR8 ECG COMM STOP ECG module failure communication failure ECG COMM ERR Occasional failure HR ALM LMT ERR ECG NOISE or communication Functional safety failure ECG measuring greatly interfered. signal is HIGH Same as above HIGH If failure persists, notify biomedical engineer or Mindray service staff. HIGH Stop using HR alarm function, notify biomedical engineer or Mindray service staff. LOW Make sure the patient is quiet, the electrodes are properly connected and AC power system is well grounded. Prompt messages (include general alarms): Message Cause Alarm Level HR EXCEED HR measuring value exceeds the measurement range. HIGH 11.7 ST Segment Monitoring (optional) ST Segment Monitoring ■ ST segment monitoring function is shutoff by default. In this status, the system cannot 11-11 ECG/RESP Monitoring execute ST analysis. You can switch it to ON when necessary. Note If you set ST ANALYSIS to ON, the system will be in “DIAGNOSTIC” mode. But you can switch it to “MONITOR” mode or “SURGERY” mode as required. However at this time ST value has been severely distorted. ■ The system can measure the variance of ST segment over the user-specified lead and display the ST result numerically at ST1 and ST2 in the Parameter Area. You can also open the TREND GRAPH or TREND TABLE window to observe the trend data. ■ Measurement unit of ST segment: mv. ■ Measurement symbol of ST segment: "+" = elevating, "-" = depressing. ■ Measurement range of ST segment: -2.0 mv, ~ + 2.0 mv. Pick the [ST ANALYSIS] item in ECG SETUP menu to access the ST ANALYSIS menu as shown below. ST ANALYSIS menu Figure 11-8 ST ANALYSIS menu ST analysis alarm setting ■ ST ANAL: status switch of ST analysis. Set it to ON to activate ST analysis or OFF to disable ST analysis. ■ ST ALM: pick "ON", the system will give alarm and save the alarm information once ST alarm occurs; pick "OFF", the system will not give alarm and instead display a beside ST in the Parameter Area. ST alarm is activated when the result exceeds the ST HI value or falls below ST LO value. ■ ALM LEV: used to set up the ST alarm level. There are three selections: HIGH, MED and LOW. ■ ALM REC: pick "ON", the recorder will automatically start recording process once alarm occurs. ■ ALM HI: used to set up the upper limit of ST alarm. The maximum higher limit is 2.0. The 11-12 ECG/RESP Monitoring minimum higher limit must be 0.2 larger than the lower limit. ■ ALM LOW: used to set up the lower limit of ST alarm. The minimum lower limit is –2.0. The maximum lower limit must be 0.2 lower than the higher limit. ST analysis alarm limits: ST ■ Max. ST HI Min. ST LO Step 2.0 mv -2.0 mv 0.1mv DEF POINT: pick this item to access the DEF POINT window, in which you can set up the position of ISO point and ST point. 1) ISO (reference point): used to set up the reference point. Default is 80 ms. 2) ST (start point): used to set up the measurement point. Default is 112ms. Figure 11-9 DEF POINT window ISO and ST are two measurement points of ST segment. Both points can be adjusted. Set the reference point of ST measurement point to be peak point of R-wave (see Figure 11-10). R Wave T P } Q ISO -80 ms S ST +112 ms Figure 11 -10 DEF Point 11-13 ST Value ECG/RESP Monitoring The ST measurement for each beat complex is the vertical difference between the two measurement points. Note You shall adjust ST measurement point if the patient's HR or ECG waveform has obvious change. Adjusting ISO and ST Turn the knob to adjust these two points. When setting up the ST measurement point, the system will show the ST Measurement Point window. The system displays the QRS complex template in the window (If the template is not established, the system will display message “ST analysis key off!”). You can adjust the position of the highlighted line in the window. The method is first select ISO or ST, then turn the knob clockwise or counterclockwise to move the highlighted line horizontally so as to define the reference point or the measurement point. Note Abnormal QRS complex is not considered in ST segment analysis. ST Alarm Message If the alarm recording switches in relevant menus are set to ON, the physiological alarms caused by parameter exceeding alarm limit can trigger the recorder to automatically output alarming parameter value and corresponding measuring waveform. Tables below list out possible physiological alarms, technical alarms and prompt messages that may occur during ST measurement. Physiological alarms: Message Cause Alarm Level ST TOO HIGH ST measuring value is above the upper alarm limit. User-selectable ST TOO LOW ST measuring value is below the lower alarm limit. User-selectable Technical alarms: Message ST ALM LMT ERR Cause Functional safety failure 11-14 Alarm Level Remedy HIGH Stop using ST alarming function, notify biomedical engineer or Mindray service staff. ECG/RESP Monitoring Prompt messages (include general alerts): Message Cause Alarm Level ST EXCEED ST measuring value exceeds the measurement range. HIGH 11.8 Arr. Monitoring (optional) Arrhythmia Analysis The arrhythmia algorithm is used to monitor ECG of neonate and adult patient in clinical, detect the changing of heart rate and ventricular rhythm, and also save arrhythmia events and generate alarming information. Arrhythmia algorithm can monitor paced and non-paced patients. Qualified personnel can use arrhythmia analysis to evaluate patient’s condition (such as heart rate, PVCs frequency, rhythm and ectopic beat) and decide the treatment. Besides detecting changing of ECG, arrhythmia analysis can also monitor patients and give proper alarm for arrhythmia. ■ The arrhythmia monitoring is shutoff by default. You can enable it when necessary. ■ This function can raise the doctor's attention to the patient's heart rate by measuring and classifying the arrhythmia and abnormal heart beat and triggering the alarm. ■ The monitor can conduct up to 13 different arrhythmia analyses. ■ The monitor can store the latest 60 alarm events (4 seconds prior to and after alarm). You can edit these arrhythmia events through using the menu below. Pick the [ARR ANALYSIS] item in the ECG SETUP menu to access the ARR ANALYSIS menu. ARR ANALYSIS Menu Figure 11-11 ARR ANALYSIS Menu ■ ARR ANAL: Pick "ON" during monitoring. Default set is "OFF". ■ PVCs ALM: Pick "ON" and the system will give and store alarm information when alarm 11-15 ECG/RESP Monitoring is occurring. Pick "OFF" and the system will not give PVCs alarm, instead, it will display beside “PVCs”. a ■ ALM LEV: there are three options: HIGH, MED, LOW. Level HIGH represents the most serious PVCs alarm. ■ ALM REC: pick "ON" and the system will command the recorder to output information when PVCs alarm is occurring. ■ ALM HI: the system will give PVCs alarm once PVCs exceed the set PVCs ALM HI value. PVCs alarm upper limits: PVCs Max Min Step 10 1 1 PVCs alarm and prompt message: If the alarm recording switches in relevant menus are set to ON, the physiological alarms caused by parameter exceeding alarm limit can trigger the recorder to automatically output alarming parameter value and corresponding measuring waveform. Tables below list out the possible physiological alarms, technical alarms and prompt messages that may occur during PVCs measurement. Physiological alarms: Message Cause Alarm Level PVCs TOO HIGH PVCs measuring value is above upper alarm limit. User-selectable Technical alarms: Message Cause PVCs ALM LMT ERR Functional safety failure Alarm Level Remedy HIGH Stop using PVCs alarming function, notify biomedical engineer or Mindray service staff. ■ ARR RELEARN Pick this item to start a learning procedure. ■ ARR ALARM Pick this item to access the ARR ALARM dialog box to set arrhythmia alarm parameters. ALM: alarm switch. LEV: alarm level. REC: alarm recording switch. 11-16 ECG/RESP Monitoring Figure 11-12 ARR ALARM You can select the [ALL ALM ON] item to set all alarm switches of Arr. alarms to ON or the [ALL ALM OFF] to set all alarm switches of Arr. alarms to OFF. Similarly you can select the [ALL REC ON] item to set all alarm recording switches to ON or the [ALL REC OFF] to set all alarm recording switches to OFF. Change of the content of the [ALM LEV] item can let the levels of all Arr. alarms change uniformly. ■ ARR RECALL Pick this item to view and edit the ARR analysis information. Figure 11-13 ARR RECALL 11-17 ECG/RESP Monitoring The system displays the latest stored Arr. events (10events/page, maximum 6 pages) in the window. UP-DOWN Observe other event lists of other page. CURSOR Move the cursor to select the Arr. event in the list. DELETE Delete the selected Arr. event. If you do not want to delete it, just select it again to save it. RENAME Rename the selected Arr. event. Turn the knob until the desired name appears and push the knob. WAVE Pick this item and the system will display the waveform of the Arr. event and its occurring time as well as the parameter value when the alarm is occurring in the window. In the ARR RECALL window: UP-DOWN To observe the waveform of other Arrhythmia event. L_RIGHT To observe 8-second waveform of Arrhythmia event. REC To print out the waveform of the displayed Arrhythmia event. EXIT To return to the ARR RECALL menu of Arrhythmia event. Figure 11-14 ARR WAVE RECALL Note If there are more than 60 Arrhythmia events, the system will keep the latest Arr. event and delete the earliest one. For the monitor with power-off storage function, it can store information of up to 60 Arr. events upon power-off. 11-18 ECG/RESP Monitoring ARR ALARM The system will give alarm once Arr. event occurs. If the ALM switch is ON, the system will give alarm sound and the alarm indicator flash at the same time. If the ALM REC switch is ON, the system will command the recorder to output the alarm information (ECG waveform of 4 seconds prior to and after the alarm of the channel being analyzed). Tables below list out the alarms or prompt information related to Arr. analysis. Physiological alarms: Arr. Type Applicable Patient Type ASYSTOLE All patients VFIB /VTAC Without pacemaker Occurring Condition No QRS is detected for 4 consecutive seconds Fibrillatory wave for consecutive 4 seconds; or The number of continuous Vent beats is larger than the upper limit of cluster Vent beats (>5). Prompt Alarm Level ASYSTOLE User-sele ctable VFIB/VTAC User-sele ctable VT>2 User-sele ctable COUPLET User-sele ctable BRGEMINY User-sele ctable TRIGEMINY User-sele ctable R ON T User-sele ctable PVC User-sele ctable The RR interval is less than 600ms. VT>2 Without pacemaker 3 < the number of cluster PVCs < 5 COUPLET Without pacemaker 2 consecutive PVCs VENT BIGEMINY BIGEMINY TRIGEMINY Without pacemaker Without pacemaker Vent Trigeminy R ON T Without pacemaker A type of single PVC under the condition that HR<100 , R-R interval is less than 1/3 the average interval, followed by a compensating pause of 1.25X the average R-R interval(the next R wave advances onto the previous T wave). PVC Without pacemaker Single PVCs not belonging to the type of above mentioned PVCs. 11-19 ECG/RESP Monitoring TACHY All patients 5 consecutive QRS complex, RR interval is less than 500ms. TACHY User-sele ctable BRADY All patients 5 consecutive QRS complex, RR interval is longer than 1.5s. BRADY User-sele ctable BEAT MISS User-sele ctable Without pacemaker BEAT MISS When HR is less than 100 beats/min., no heart beat is tested during the period 1.75 times of the average RR interval; or When HR is larger than 100 beats/min., no beat is tested with 1 second. PNP PNC With pacemaker No QRS complex and pacing pulse appear during the period 1.75 times of the average R-R interval (only considering patients with pacemaker). PNP With pacemaker When pacing pulse is available, no QRS exists during the period 1.75 times of the average RR interval (only considering patients with pacemaker.) PNC User-sele ctable User-sele ctable Patient type: All patients: refers to perform Arr. analysis on patients either with pacemakers or without pacemakers. Without pacemaker: refers to perform Arr. Analysis only on the patients without pacemakers. With pacemaker: refers to perform Arr. Analysis only on the patients with pacemakers. Prompt message: Message Cause ARR LEARNING The QRS template building required for Arr. Analysis is in process. Note The system displays the Arrhythmia name in the Alarm Message area. 11-20 Alarm Level No alarm ECG/RESP Monitoring 11.9 Measuring RESP 11.9.1 How to measure RESP? The monitor measures respiration from the amount of thoracic impedance between two ECG electrodes. The change of impedance between two electrodes, (due to the thoracic movement), produces a respiratory waveform on the screen. 11.9.2 Setting Up RESP measurement For RESP monitoring, it is not necessary to attach additional electrodes. It is very important to attach the electrodes to the correct positions. Some patients, due to their clinical conditions, expand their chest laterally, causing a negative intrathoracic pressure. In these cases it is better to place the two RESP electrodes laterally in the right axillary and left lateral chest areas at the maximum point of breathing movement to optimize the respiratory waveform. Note You shall not execute RESP monitoring on the patient who is very active, as this can cause error alarms. Checklist for RESP Monitoring 1. Prepare the patient's skin prior to placing the electrodes. 2. Attach snap or clip to the electrodes and attach the electrodes to the patient as described in 11.9.3. 3. Turn on the monitor. 11-21 ECG/RESP Monitoring 11.9.3 Placing electrode for RESP measurement Placing the Electrodes for Respiratory Monitoring Figure 11-15 Electrodes placement NOTE Place the red and green electrodes diagonally to optimize the respiration waveform. Avoid the liver area and the ventricles of the heart in the line between the RESP electrodes so as to avoid cardiac overlay or artifacts from pulsating blood flow. This is particularly important for neonates. 11.9.4 RESP menu RESP SETUP Menu Turn the knob to highlight the [RESP] hot key in the Parameter Area of the screen; push the knob to access the RESP SETUP menu. 11-22 ECG/RESP Monitoring Figure 11-16 RESP SETUP RESP alarm setting • ALM: pick "ON", the system will give alarm prompt and save alarm information when RESP alarm occurs. Pick “OFF”, the system will not give alarm and instead display a beside “RESP”. • ALM REC: pick "ON", the system will command the recorder to output the alarm information when RESP alarm occurs. • ALM LEV: selectable from HIGH, MED and LOW. Level HIGH represents the most serious case. • ALM HI: used to set up the upper alarm limit. • ALM LO: used to set up the lower alarm limit. The system will give RESP alarm once the RESP value goes above the upper alarm limit or below the lower alarm limit. RESP alarm limits: Max. RR HI Min. RR LO Step RESP ADU 120 0 1 RESP NEO/PED 150 0 1 • APNEA ALM: used to set the standard of judging an apnea case. It ranges from 10 to 40 seconds with each turn of knob being 5s. • SWEEP: Available options are 6.25, 12.5 and 25.0 mm/s. • WAVE AMP: used to set up the magnified display of RESP waveform. The selections are 0.25, 0.5, 1, 2, 3, 4, 5. • HOLD TYPE: options are AUTO and MANUAL. When it is AUTO mode, HOLD HI and HOLD LO menus cannot be used and the monitor automatically calculates the RESP RATE. When it is MANUAL, you can use HOLD HI and HOLD LO items to respectively adjust the two dotted lines in the RESP waveform area. The positions of these two dotted lines are used to calculate the upper and lower RESP alarm limits. • HOLD HI and HOLD LO: When the HOLD TYPE is MANUAL, you can use the knob to pick either HOLD HI or HOLD LO and turn the knob to respectively adjust the two dotted lines in the RESP WAVEFORM area. The positions of these two dotted lines are used to calculate the upper and lower RESP limits. 11-23 ECG/RESP Monitoring • DEFAULT: pick this item to access the RESP DEFAULT CONFIG dialog box, in which you can select FACTORY DEFAULT CONFIG or USER DEFAULT CONFIG. After selecting an item and exiting the dialog box, the system will pop up the dialog box asking for the user’s confirmation 11.9.5 RESP Alarm Information and Prompt Information If the alarm recording switches in relevant menus are set to ON, the physiological alarms caused by parameter exceeding alarm limit can trigger the recorder to automatically output alarming parameter value and corresponding measuring waveform. Tables below list out the possible physiological alarms, technical alarms and prompt messages during RESP measurement. Physiological alarms: Message Cause Alarm Level RR TOO HIGH RESP measuring value is above upper alarm limit. User-selectable RR TOO LOW RESP measuring value is below lower alarm limit. User-selectable RESP APNEA RESP can not be measured within specific time interval. HIGH Technical alarms: Message RESP ALM LMT ERR Cause Alarm Level Functional safety failure HIGH Remedy Stop using RESP alarming function, notify biomedical engineer or Mindray service staff. Prompt message (general alarms): Message Cause Alarm Level RR EXCEED RR measuring value exceeds the measure range. HIGH 11.10 Maintenance and Cleaning Care and Cleaning Warning Turn off the power and disconnect the line power before cleaning the monitor or the 11-24 ECG/RESP Monitoring sensor. You must replace the ECG cable with a new one once the cable is found damaged or deteriorated. ■ Cleaning Use ethanol to clean the probe surface, and dry it in air or by using clean and dry cloth. ■ Sterilization To avoid extended damage to the equipment, sterilization is only recommended when stipulated as necessary in the Hospital Maintenance Schedule. Sterilization facilities shall be cleaned first. Recommended sterilization materials: ■ y Ethylate: 70% alcohol, 70% isopropanol y Acetaldehyde Disinfection To avoid extended damage to the equipment, disinfection is only recommended when stipulated as necessary in the Hospital Maintenance Schedule. Disinfection facilities should be cleaned first. 11-25 ECG/RESP Monitoring FOR YOUR NOTES 11-26 Chapter 12 12.1 SpO2 Monitoring What is SpO2 Monitoring SpO2 Plethysmogram measurement is employed to determine the oxygen saturation of hemoglobin in the arterial blood. If, for example, 97% hemoglobin molecules in the red blood cells of the arterial blood combine with oxygen, then the blood has a SpO2 oxygen saturation of 97%. The SpO2 numeric on the monitor will read 97% .The SpO2 numeric shows the percentage of hemoglobin molecules which have combined with oxygen molecules to form oxyhemoglobin. The SpO2/PLETH parameter can also provide a pulse rate signal and a plethysmogram wave. How the SpO2 / PLETH Parameter Works ■ Arterial oxygen saturation is measured by a method called pulse oximetry. It is a continuous, non-invasive method based on the different absorption spectra of reduced hemoglobin and oxyhemoglobin. It measures how much light, sent from light sources on one side of the sensor, is transmitted through patient tissue (such as a finger or an ear), to a receiver on the other side. The sensor measurement wavelengths are nominally 660nm for the Red LED and 940nm for Infrared LED. Maximum optical power output for LED is 4 mW. ■ The amount of light transmitted depends on many factors, most of which are constant. However, one of these factors, the blood flow in the arteries, varies with time, because it is pulsating. By measuring the light absorption during a pulsation, it is possible to derive the oxygen saturation of the arterial blood. Detecting the pulsation gives a PLETH waveform and pulse rate signal. ■ The SpO2 value and the PLETH waveform can be displayed on the main screen. ■ SPO2 is a non-invasive measurement of the functional oxygen saturation. Warning Pulse oximetry can overestimate the SpO2 value in the presence of Hb-CO, Met-Hb or dye dilution chemicals. 12-1 SpO2 Monitoring SpO2 / Pulse Monitoring Warning ES (Electrosurgery) equipment wire and SpO2 cable must not be tangled up. Warning Do not put the sensor on extremities with arterial catheter or venous syringe. Note Do not perform SpO2 measuring and NIBP measuring on same arm at one time, because obstruction of blood flow during NIBP measuring may adversely affect the reading of SpO2 value. Precautions during SpO2/Pulse Monitoring 12.2 Note ■ Make sure the nail covers the light window; ■ The wire should be on the backside of the hand. Note ■ SpO2 value is always displayed at the same position. ■ Pulse Rate will be displayed only under following situations: ◆ Select HR FROM as "SPO2" or “BOTH” in the ECG SETUP menu. ◆ Select HR FROM as “AUTO” in the ECG SETUP menu and there is no ECG signal. Note SpO2 waveform is not proportional to the pulse volume. Warning Check if the sensor cable is in normal condition before monitoring. After unplugging the SpO2 sensor cable from the socket, the system shall display the error message “SPO2 SENSOR OFF” and give the audible alarm. 12-2 SpO2 Monitoring Warning Do not use the SpO2 sensor once the package or the sensor is found damaged. Instead, you shall return it to the vendor. Warning Prolonged and continuous monitoring may increase jeopardy of unexpected change of dermal condition such as abnormal sensitivity, rubescence, vesicle, repressive putrescence, and so on. It is especially important to check the sensor placement of neonate and patient of poor perfusion or immature dermogram by light collimation and proper attaching strictly according to changes of the skin. Check per 2~3 hours the sensor placement and move it when the skin deteriorates. More frequent examinations may be required for different patients. 12.3 Monitoring Procedure SpO2 plethysmogram measurement 1. Select a sensor and clip that is appropriate for the patient. 2. Power on the monitor. 3. Attach the sensor to the proper site of the patient. 4. Plug the connector of the sensor extension cable into the SpO2 connector on monitor. The preferred sensor site for feline, canine and equine animals is on the tongue, with the optical components of the sensor positioned to the center of the tongue. Alternatively, the sensor and clip may be placed to the toe, lip, ear, vulva or prepuce of the animal. The process of SpO2 plethysmogram measurement is generally the same. But the SpO2 sensor selection and placement depend on the patient type. When choosing a site for a sensor, refer to the directions for that sensor. 12-3 SpO2 Monitoring ■ Tongue Sensor Placement You can easily place the tongue sensor as shown below. Figure 12-1 Tongue Sensor Placement Note Be sure that the sensor cable is positioned along the side of the animal’s face and body to avoid entanglement with the animal. 12.4 Limitations for Measurement Measurement Limitations In operation, the accuracy of oximetry readings can be affected by: z High-frequency electrical noise, including noise created by the host system, or noise from external sources, such as electrosurgical apparatus connected to the system. z Do not use oximeters and oximetry sensors during magnetic resonance imaging (MRI) scanning. Induced current could potentially cause burns. z Intravascular dye injections z Excessive patient movement z External light radiation z Improper sensor installation or incorrect contact position of the patient z Sensor temperature (optimal temperature between 28°C and 42°C) z Placement of the sensor on an extremity that has a blood pressure cuff, arterial catheter, or intravascular line. z Significant concentrations of dysfunctional hemoglobin, such as carboxyhemoglobin and methemoglobin. z SpO2 too low z Bad circular injection of the part being measured z Shock, anemia, low temperature and application of vasomotor may all cause the arterial blood flow to reduce and hence make the measurement impossible. 12-4 SpO2 Monitoring z The absorption of oxyhemoglobin (HbO2) and deoxyhemoglobin to the light of special wavelength may also affect SpO2 measurement. If there exist other objects (carbon hemoglobin, methemoglobin, methylene blue and indigo carmine) absorbing the light of the same wavelength, they may result in false or low SpO2 value. z It is recommended to use SpO2 sensors described in chapter Accessories and Ordering Information. 12.5 SpO2 Menu SPO2 SETUP Menu Turn the knob to move the cursor onto the SPO2 hot key in the Parameter area, push the knob to access the SPO2 SETUP menu. Figure 12-2 SPO2 SETUP menu Warning Setting the SpO2 upper alarm limit to 100% is equivalent to switching off the alarm on upper limit. High oxygen levels may predispose a premature infant to retrolental fibroplasia. Therefore, the upper alarm limit for oxygen saturation must be carefully selected in accordance with commonly accepted clinical practices. SpO2 alarm setting ■ ALM: pick "ON", the system will give alarm prompt and store alarm information when SpO2 alarm occurs; pick "OFF", the system will not give alarm and instead display a beside “SpO2”. ■ ALM REC: pick "ON", the system will command the recorder to output alarm information when SpO2 alarm occurs. ■ ALM LEV: used to set up alarm level, selectable from HIGH, MED and LOW. HIGH 12-5 SpO2 Monitoring represents the most serious case. ■ SPO2 ALM HI and SPO2 ALM LO: SpO2 alarm is activated when the result exceeds set SPO2 ALM HI value or falls below SPO2 ALM LO value. ■ PR ALM HI and PR ALM LO: PR alarm is activated when the pulse rate exceeds set PR ALM HI value or falls below PR ALM LO value. SpO2 and PR alarm limits: Max. Upper Limit Min. Lower Limit Step SpO2 100 0 1 PR 254 0 1 The default SpO2 and PR alarm limits: Parameters SpO2 PR ■ Max. Upper Limit Min. Lower Limit Adult 100 90 Pediatric 100 90 Neonatal 95 80 Adult 120 50 Pediatric 160 75 Neonatal 200 100 SWEEP Available options are 12.5mm/s, 25.0 mm/s. ■ PR SOUND Pulse beep volume. Options are OFF, HIGH, MED, LO W. ■ AVG TIME 4s, 8s, 16s represent times that SpO2 average value is counted. ■ DEFAULT Pick this item to access the SPO2 DEFAULT CONFIG dialog box, in which you can select FACTORY DEFAULT CONFIG or USER DEFAULT CONFIG. After selecting one item and exiting the dialog box, the system will pop up the dialog box asking for the your confirmation. 12.6 Alarm Description and Prompt SpO2 Alarm Message When the alarm switches are set to ON in relevant menus, the physiological alarms caused by the parameter exceeding the alarm limit may possibly trigger the recorder to automatically output alarming parameter value and corresponding waveforms. Tables below describe the possible physiological alarms, technical alarms and prompt 12-6 SpO2 Monitoring messages occurring during SpO2 measurement. Physiological alarm: Message Cause Alarm Level SPO2 TOO HIGH SpO2 measuring value is above upper alarm limit. User-selectable SpO2 TOO LOW SpO2 measuring value is below lower alarm limit. User-selectable PR TOO HIGH PR measuring value is above upper alarm limit. User-selectable PR TOO LOW PR measuring value is below lower alarm limit. User-selectable Technical alarms: Message SPO2 SENSOR OFF Cause SpO2 sensor may be disconnected from the patient or the monitor. Alarm Level Remedy LOW Make sure that the monitor and the patient are in correct connection with the cables. HIGH Stop using the measuring function of SpO2 module, notify biomedical engineer or Mindray service staff. HIGH Stop using the measuring function of SpO2 module, notify biomedical engineer or Mindray service staff. HIGH Stop using the measuring function of SpO2 module, notify biomedical engineer or Mindray service staff. HIGH Stop using the measuring function of SpO2 module, notify biomedical engineer or Mindray service staff. HIGH Stop using the measuring function of SpO2 module, notify biomedical engineer or Mindray service staff. SPO2 INIT ERR SPO2 INIT ERR 1 SPO2 INIT ERR 2 SPO2 INIT ERR 3 SPO2 INIT ERR 4 SpO2 failure module SPO2 INIT ERR 5 SPO2 INIT ERR 6 SPO2 INIT ERR 7 SPO2 INIT ERR 8 SPO2 COMM STOP SpO2 module failure or communication error SPO2 COMM ERR SpO2 module failure or communication error SPO2 ALM LMT ERR PR ALM LMT ERR Functional failure Functional failure safety safety 12-7 SpO2 Monitoring Prompt message (include general alerts): Message SPO2 EXCEED PR EXCEED SEARCH PULSE NO PULSE 12.7 Cause Alarm Level SpO2 measuring value exceeds the range. HIGH PR measuring value exceeds the range. HIGH SpO2 module is searching for pulse. SpO2 module cannot detect SpO2 signal for a long time. No alarm HIGH Maintenance and Cleaning Care and Cleaning Warning Turn of the monitor and disconnect the line power before cleaning the monitor or the sensor Warning Do not subject the sensor to autoclaving. Do not immerse the sensor into any liquid. Do not use any sensor or cable that may be damaged or deteriorated. Cleaning: Use a cotton ball or a soft mull moistened with hospital-grade ethanol to wipe the surface of the sensor, and then dry it with a cloth. This cleaning method can also be applied to the luminotron and receiving unit. The cable can be cleaned with 3% hydrogen dioxide, 7% isopropanol, or other active reagent. However, connector of the sensor shall not be subjected to such solution. 12-8 Chapter 13 13.1 ■ NIBP Monitoring Introduction The Non-invasive Blood Pressure (NIBP) module measures the blood pressure using the oscillometric method. ■ It is applicable for adult, pediatric, and neonatal. ■ There are three measurement modes: MANUAL, AUTO, and CONTINUOUS. The system displays systolic, mean and diastolic pressure for each mode. In MANUAL mode, the system executes one NIBP measurement each time. In AUTO mode, the system executes NIBP measurement repeatedly with the interval of 1/2/3/4/5/10/15/30/60/90/120/180/240/480 minutes. In CONTINUOUS mode, the system executes NIBP measurement continuously within five minutes. Warning Do not perform NIBP measurement on a patient of sickle-cell disease or with damaged skin or expected damaged skin. For a thrombasthemia patient, you must determine if to run AUTO NIBP measurement according to the clinical evaluation because haematoma may occur at the friction position between extremity and cuff. You must select correct mode especially for pediatric and neonate patients (refer to the PATIENT SETUP menu). Measurement under wrong mode may endanger patient because high adult blood pressure is not suitable for pediatric and neonate. 13.2 NIBP Monitoring 13.2.1 NIBP Measuring Warning Use accessories specified by Mindray only, otherwise; the device may not function normally. 13-1 NIBP Monitoring Warning ■ Before starting a measurement, verify that you have selected a measurement mode appropriate for your patient (adult, pediatric or neonate.) ■ Do not apply the cuff to a limb that has an intravenous infusion or catheter in place. This could cause tissue damage around the catheter when infusion is slowed or blocked during cuff inflation. Warning Make sure that the air conduit connecting the blood pressure cuff and the monitor is neither blocked nor tangled. Notes The blood pressure of the patient as the basis for establishing therapy may be obtained by using other method such as the cuff/stethoscope auscultation method. Accordingly, the clinical doctor must note that the values obtained by using other method and the monitor may be different. Notes NIBP monitoring uses the oscillometric method of measurement. Blood pressure determined with this device are equivalent to those obtained by a trained observer using the cuff/stethoscope auscultation method and an intra-arterial blood pressure measurement device, within the limits prescribed by the ANSI/AAMI SP10. Notes This equipment is suitable for using in the presence of electro-surgery. Notes Any blood pressure recording can be affected by the position of the subject, his or her physiologic condition, and other factors. To place the cuff, follow the procedure as below: 1. Identify the patient limb/tail circumference. 2. Select an appropriate cuff, which is identified with a specific limb circumference. 3. Verify the cuff is completely deflated. 4. Place the cuff over the proper site of the patient, making the cuff edge fall within the range of the <-> mark. 5. Verify that the cuff is not wrapped too tightly around the limb. 13-2 NIBP Monitoring The details about the cuff sites on different animals are as below. ■ For a CAT For conscious patients, measurements from the coccygeal artery can be taken by wrapping the cuff around the base of the tail. For anesthetized patients, measurements from the median artery on the foreleg can be used by wrapping the cuff around the forelimb, between the elbow and carpus. For cats less than five pounds when measurements are difficult to obtain, place the cuff around the leg above the elbow to obtain measurements from the brachial artery. Hair need not be clipped except when heavily matted. Figure 13-1 ■ Cat cuff placement For a DOG For measurements in dogs, it is preferable to use the right lateral, stemal or dorsal recumbent position. If the dog is in a sitting position, place the front paw on the operator’s knee and take measurements from the metacarpus. The metacarpus, metatarsus and anterior tibial are recommended for the cuff placement. For anesthetized patients, most surgeries are done on the posterior part of the body so the metacarpal area of the forelimb is most convenient. In situations where this is not possible, place the cuff around the metatarsus just proximal to the tarsal pad or around the hind leg next to the hock. For conscious patients, measurements from the coccygeal artery can be used over the tail site. Figure 13-2 ■ Dog cuff placement For larger animals It is preferable for a large animal, such as a horse and a cow, to be in a stock, standing still. Measurments from the coccygeal artery on the ventral surface may be used by placing the cuff around the base of the tail. 13-3 NIBP Monitoring Note The limb chosen for taking the measurement should be placed at the same level as the patient's heart. If the animal’s hair over the artery site is too thick or matted for good contact, it should be clipped. Warning The width of the cuff should be either 40% of the limb circumference or 2/3 of the upper arm length. The inflatable part of the cuff should be long enough to circle 50-80% of the limb. The wrong size cuff can cause erroneous readings. If the cuff size is in question, use a larger cuff. Do not apply the cuff to a limb that has an intravenous infusion or catheter in place. This could cause tissue damage around the catheter when infusion is slowed or blocked during cuff inflation. Make sure the air tubing connecting the blood pressure monitor is not blocked, twisted, or tangled. Operation Hints 1. To start AUTO measurement: Access the NIBP SETUP menu and pick the [INTERVAL] item, in which you may choose the time interval of AUTO measurement. After that, press NIBP button on the front panel to start the AUTO measurement according to the selected time interval. Warning Prolonged non-invasive blood pressure measurements in Auto mode may be associated with purport, ischemia and neuropathy in the limb wearing the cuff. When monitoring a patient, examine the extremities of the limb frequently for normal color, warmth and sensitivity. If any abnormality is observed, stop the blood pressure measurements. 2. To stop AUTO measurement: In the process of AUTO measurement, press the NIBP button on the front panel at any time to stop AUTO measurement. 3. To start a MANUAL measuring: Access the NIBP SETUP menu and pick the [INTERVAL] item. Pick the [MANUAL] option. Then press the NIBP button on the front panel to start a MANUAL measurement. During the idle period of AUTO measurement process, press the NIBP button on the front panel at any time to start a MANUAL measurement. After that, you can press 13-4 NIBP Monitoring the NIBP button again to stop the MANUAL measurement and the system will continue to execute AUTO measurement. 4. To start a MANUAL measurement during AUTO measurement process: Press the NIBP button on the front panel to start a MANUAL measurement. 5. To stop a MANUAL measurement in the process Press the NIBP button again to stop the MANUAL measurement. 6. To start a CONTINUOUS measurement: Access the NIBP SETUP menu and pick the [CONTINUAL] item to start a CONTINUOUS measurement. The CONTINUOUS measurement will last 5 minutes. Warning Prolonged non-invasive blood pressure measurements in Auto mode may be associated with purport, ischemia and neuropathy in the limb wearing the cuff. When monitoring a patient, examine the extremities of the limb frequently for normal color, warmth and sensitivity. If any abnormality is observed, stop the blood pressure measurements. 7. To stop CONTINUOUS measurement: During CONTINUOUS measurement, press the NIBP button on the front panel at any time to stop it. Note If you doubt accuracy of any reading(s), check the patient's vital signs by an alternative method before checking the functioning of the monitor. Warning If liquid is inadvertently splashed on the equipment or its accessories, or may enter the conduit or inside the monitor, contact local Customer Service Center. Measurement Limitations To different patient conditions, the oscillometric measurement has certain limitations. The measurement is in search of regular arterial pressure pulse. In those circumstances when the patient's condition makes it difficult to detect the pulse wave, the measurement becomes unreliable and measuring time increases. You should be aware that the following conditions could interfere with the measurement, making the measurement unreliable or longer to derive. In some cases, the patient's condition will make a measurement impossible. z Patient Movement Measurements will be unreliable or may not be possible if the patient is moving, shivering or having convulsions. These motions may interfere with the detection of the arterial pressure pulses. In addition, the measurement time will be prolonged. z Cardiac Arrhythmia's Measurements will be unreliable and may not be possible if the patient's cardiac arrhythmia 13-5 NIBP Monitoring has caused an irregular heartbeat. The measuring time thus will be prolonged. z Heart-lung Machine Measurements will not be possible if the patient is connected to a heart-lung machine. z Pressure Changes Measurements will be unreliable and may not be possible if the patient's blood pressure is changing rapidly over the period of time during which the arterial pressure pulses are being analyzed to obtain the measurement. z Severe Shock If the patient is in severe shock or hypothermia, measurements will be unreliable since reduced blood flow to the peripheries will cause reduced pulsation of the arteries. z Heart Rate Extremes Measurements can not be made at a heart rate of less than 40 bpm and greater than 240 bpm. z Fat Patient The thick fat under extremity may reduce the measurement accuracy because it may prevent the oscillation generated in the artery from reaching the cuff. 13.2.2 NIBP monitoring screen NIBP measurement result and corresponding message are displayed as follows: Measurement time NIBP Measurement value Measurement mode Prompt 13.3 108 16: 50 84 mmHg 70 BP unit NS 160 90 NS Alarm limit MANUAL Current cuff pressure Manual measure …… CUFF:100 NIBP SETUP menu Pick the [NIBP] hot key on the screen to call up the NIBP menu shown as below: 13-6 NIBP Monitoring Figure 13-3 NIBP SETUP Menu ■ NIBP alarm setups • ALM: pick "ON", the system will give alarm prompt and store alarm information once NIBP alarm occurs; pick "OFF", the system will not give any alarm information and instead display a beside “NIBP”. • ALM LEV: selectable from HIGH, MED to LOW. HIGH represents the most serious case. • ALM REC: pick "ON", the system will command the recorder to output the alarm information once NIBP alarm occurs. • SYS ALM HI, SYS ALM LO, MEAN ALM HI, MEAN ALM LO, DIA ALM HI, DIA ALM LO are for you to set up the alarm limit for each type of pressure. NIBP alarm is activated when the pressure exceeds the upper alarm limit or falls below lower alarm limit. NIBP alarm limits: Adult Mode SYS 40-270 mmHg DIA 10-215 mmHg Mean 20-235 mmHg Pediatric Mode SYS 40-200 mmHg DIA 10-150 mmHg Mean 20-165 mmHg Neonatal Mode ■ SYS 40-135 mmHg DIA 10-100 mmHg Mean 20-110 mmHg UNIT 13-7 NIBP Monitoring Options are mmHg and kPa. ■ INTERVAL Time interval for AUTO measurement. Available selections are: 1/2/3/4/5/10/15/30/60/90/120/180/240/480 minutes. After selecting the INTERVAL, the system will display the prompt “Please press START button” in the NIBP prompt area. At this time, you can press the NIBP button on the front panel to start the first AUTO measurement. Pick the [MANUAL] item in the list of INTERVAL and the system will end AUTO measurement and restore MANUAL measurement mode. ■ INFLATION Pick this item to choose the initial pressure when inflate the cuff next time. There are different selections of the initial pressure. Default initial value (mmHg/kPa) Default FACTORY DEFAULT ADU CONFIG 150 FACTORY DEFAULT PED CONFIG 100 FACTORY DEFAULT NEO CONFIG 70 USER DEFAULT CONFIG ADU 150 USER DEFAULT CONFIG PED USER DEFAULT CONFIG NEO 100 70 Options for Initial value in NIBP MANUAL menu (mmHg/kPa) 80/100/120/140/150/160/180/200/220/240 80/100/120/140/150/160/180/200 60/70/80/100/120 80/100/120/140/150/160/180/200/220/240 80/100/120/140/150/160/180/200 60/70/80/100/120 Press the MENU hot key, the system enters the DEAULT menu of SYSTEM MENU, in which you can select one of the six available configurations. After confirming your selection, return to the main screen and pick the NIBP hot key in the NIBP area on the main screen, the system will access the NIBP SETUP menu, in which the value shown in the [INFLATION] item is the initial inflating pressure value corresponding to the selected default configuration. Highlight the [INFALTION] item and pick it, you can see the initial inflation range as shown above. Warning The [INFLATION] item is to help you to select the initial inflation pressure of the cuff for the next time. However, the afterward initial pressure during measurement is based on the previous measured SYS value of the same patient. The system will remember this value so that the time required to measure the same patient can be reduced and also the accuracy increased. Warning If you only make setup in the [PATIENT TYPE] item of the PATIENT SETUP menu but 13-8 NIBP Monitoring not choose any option in DEFAULT, the system will automatically make initial setups for the relevant modules as per PTIENT TYPE. Also, any change in the DEFAULT may cause the PATIENT TYPE in PATIENT SETUP to change accordingly. ■ RESET Restore measurement status of NIBP pump. Pick this item to restore initial settings of the pressure pump. When the pressure does not work properly and the system fails to give message for the problem, pick this item to activate self-test procedure, thus restore the system from abnormal performance. ■ CONTINUAL Start CONTINUOUS measurement. When this item is picked, the menu will disappear automatically and the CONTINUOUS measurement start immediately. ■ CALIBRATE It is recommended to use a calibrated pressure meter with the precision higher than 1mmHg to calibrate the device. Pick the [CALIBRATE] item to start the calibration process and this item will display “STOP CAL”. If pick this item at this time, the system will stop the calibration. Warning You shall calibrate NIBP measurement once every two years (or as required in your hospital’s maintenance regulation). You shall check the performance according to following information. Procedures to calibrate Pressure Transducer: Replace the cuff of the device with a rigid metal vessel with a capacity of 500 ml ± 5%. Connect a calibrated reference manometer with an error less than 0.8 mmHg and a ball pump by means of a T-piece connector and hoses to the pneumatic system. Set the monitor in CALIBRATE mode. Inflate the pneumatic system to 0, 50 and 200 mmHg by ball pump separately. The difference between the indicated pressure of the reference manometer and the indicated pressure of the monitor will not exceed 3 mmHg. Otherwise, please contact our customer service. Monitor NIBP cuff connector Hose Ball pump Figure 13-4 Reference manometer Metal vessle Diagram of NIBP calibration 13-9 NIBP Monitoring ■ PNEUMATIC This item is used for air leakage test. After connecting NIBP cuff, you can pick this item to start NIBP inflating process so as to find if the NIBP airway is closed and in good condition. If the test is successful, the system will not give any prompt. If the test is failed, the system will display corresponding error message in the NIBP information area. ■ DEFAULT Pick this item to enter the NIBP DEFAULT dialog box, in which you can choose factory configuration or user configuration. After choosing one configuration, the system will display a confirmation box for you to confirm your selection. Warning This pneumatic test other than being specified in the EN 1060-1 standard is to be used by you to simply determine whether there are air leaks in the NIBP airway. If at the end of the test the system gives the prompt that the NIBP airway has air leaks, please contact the manufacturer for repair. Procedure of the air leakage test: 1) Connect the cuff securely with the socket for NIBP air hole. 2) Wrap the cuff around the cylinder of an appropriate size. 3) Access the NIBP SETUP menu. 4) Turn the knob to the PNEUMATIC item and press the knob. Then the prompt “Pneum testing…” will appear on the bottom of the NIBP parameter area indicating that the system has started performing pneumatic test. 5) The system will automatically inflate the pneumatic system to about 180mmHg. 6) After about 20 seconds, the system will automatically open the deflating valve, which marks the completion of a pneumatic measurement. 7) If no prompt appears on the bottom of the NIBP parameter area, it indicates that the airway is in good situation and no air leaks exist. However if the prompt “PNEUMATIC LEAK” appears in the place, it indicates that the airway may have air leaks. In this case, you should check for loose connection. After confirming secure connections, you should re-perform the pneumatic test. If the failure prompt still appears, please contact the manufacturer for repair. Cylinder Monitor NIBP cuff connector Figure 13-5 Hose Cuff Diagram of NIBP air leakage test 13-10 NIBP Monitoring 13.4 NIBP Alarm Message Among physiological alarms, those belonging to the type that the parameter has exceeded the limits may activate the recorder to automatically output the parameters and related measured waveforms when the alarms occur under the condition that the alarm record switch in the related menu is ON. Tables below describe the possible physiological alarms, technical alarms and prompt messages occurring during NIBP measurement. Physiological alarms: Message Cause NS TOO HIGH NS TOO LOW ND TOO HIGH ND TOO LOW NM TOO HIGN NM TOO LOW Alarm Level NIBP SYS measuring value is above upper alarm limit. NIBP SYS measuring value is below lower alarm limit. NIBP DIA measuring value is above upper alarm limit. NIBP DIA measuring value is below lower alarm limit. NIBP MAP measuring value is above upper alarm limit. NIBP MAP measuring value is below lower alarm limit. Technical alarms 1: (display in Information area) Alarm Message Cause Level NS ALM LMT ERR Functional safety failure HIGH NM ALM LMT ERR Functional safety failure HIGH ND ALM LMT ERR Functional safety failure HIGH User-selectable User-selectable User-selectable User-selectable User-selectable User-selectable Remedy Stop using NIBP alarm function and notify biomedical engineer or Mindray service staff. Stop using NIBP alarm function and notify biomedical engineer or Mindray service staff. Stop using NIBP alarm function and notify biomedical engineer or Mindray service staff. Technical alarms 2: (display in the area below the NIBP value) Alarm Remedy Message Cause Level Sensor or other Stop using NIBP measurement NIBP SELFTEST hardware of NIBP HIGH function, notify biomedical engineer ERR module is incorrect. or Mindray service staff. If failure persists, NIBP Communication with HIGH measurement, notify biomedical NIBP COMM ERR NIBP module is failed. engineer or Mindray service staff. Cuff is no properly LOOSE CUFF wrapped or no cuff LOW Properly wrap the cuff exists. Cuff, hose or Check and replace the leaking parts, AIR LEAK connector is LOW if required, notify biomedical damaged. engineer or Mindray service staff. 13-11 NIBP Monitoring AIR PRESSURE ERROR WEAK SIGNAL RANGE EXCEEDED EXCESSIVE MOTION OVER PRESSURE SIGNAL STURATED PNEUMATIC LEAK NIBP SYSTEM FAILURE CUFF TYPE ERR NIBP TIME OUT NIBP ILLEGALLY RESET MEASURE FAIL Stable pressure value is not available. e.g. hoses are tangled. Cuff is too loose or patient pulse is too weak. LOW Check if the hoses are tangled, if failure persists, notify biomedical engineer or Mindray service staff. LOW Use other method to measure blood pressure. HIGH Reset NIBP module, if failure persists, stop using NIBP measurement function, notify biomedical engineer or Mindray service staff. LOW Make sure that the patient under monitoring is motionless. HIGH Measure again, if failure persists, stop using NIBP measurement function and notify biomedical engineer or Mindray service staff. Excessive motion LOW Stop the patient from moving. During pneumatic test, leak is detected. LOW Measuring range exceeds the specified upper limit. Affected by arm motion, signal noise is too large or pulse rate is not regular. Pressure has exceeded the specified upper safety limit. Operation of blood pressure pump system is failed. Cuff type does not comply with the patient type. Measuring time has exceeded 120 seconds (adult) or 90 seconds (neonatal). Abnormal module reset Problem happens when measuring the curve. The system cannot perform measurement, analysis or calculation. HIGH Check and replace the leaking parts, if required, notify biomedical engineer or Mindray service staff. Stop using NIBP measurement function, notify biomedical engineer or Mindray service staff. LOW Select appropriate cuff type HIGH Measure again or measuring method. HIGH Reset again HIGH Check the cuff. Make sure that the patient under monitoring is motionless. Measure again. use Prompt message: (display in the prompt area below NIBP value) Message Cause Manual measure During manual measuring mode. Cont measuring During continuous measuring mode. Auto measuring During automatic measuring mode. Please start Meas over Calibrating After selecting interval between measurements in MENU Press START/STOP key during measuring to stop measurement During calibrating 13-12 Alarm Level No alarm other NIBP Monitoring Cal over Pneu testing Pneu test over Resetting Resseting Reset failed 13.5 Calibration over During pneumatic test pneumatic test over Resetting process after NIBP module is loaded In NIBP resetting process triggered that you start manufally NIBP module reset failed Maintenance and Cleaning Warning ■ Do not squeeze the rubber tube on the cuff. ■ Do not allow liquid to enter the connector socket at the front of the monitor. ■ Do not wipe the inner part of the connector socket when cleaning the monitor. ■ When the reusable cuff is not connected with the monitor, or being cleaned, always place the cover on the rubber tube to avoid liquid permeation. Reusable Blood Pressure Cuff The cuff can be sterilized by means of conventional autoclaving, gas, or radiation sterilization in hot air ovens or disinfected by immersion in decontamination solutions, but remember to remove the rubber bag if you use this method. The cuff should not be dry-cleaned. The cuff can also be machine-washed or hand-washed, the latter method may prolong the service life of the cuff. Before washing, remove the latex rubber bag, and for machine-washing, close the Velcro fastening. Allow the cuff to dry thoroughly after washing, then reinsert the rubber bag. See figure 13-5, 13-6. 13-13 NIBP Monitoring Figure 13-6 Replace Rubber Bag in Cuff To replace the rubber bag in the cuff, first place the bag on top of the cuff so that the rubber tubes line up with the large opening on the long side of the cuff. Now roll the bag lengthwise and insert it into the opening on the long side of the cuff. Hold the tubes and the cuff and shake the complete cuff until the bag is in position. Thread the rubber tubes from inside the cuff, and out through the small hole under the internal flap. Disposable Blood Pressure Cuffs Disposable cuffs are intended for one-patient use only. Do not use the same cuff on any other patient. Do not sterilize or use autoclave on disposable cuffs. Disposable cuffs can be cleaned using soap solution to prevent infection. Note To protect the environment, the disposable blood pressure cuffs must be recovered or disposed of properly. 13-14 Chapter 14 14.1 TEMP Monitoring TEMP Monitoring The monitor has only one TEMP measurement channel. You can use TEMP probe to measure the body temperature of the patient. TEMP monitoring setup If you are using disposable TEMP probes, you need to plug the TEMP cable into the monitor and then connect the probe to the cable. With a reusable TEMP probe you can plug the probe directly into the monitor Attach the TEMP probe securely to the patient. Turn on the system power. Warning Check if the probe cable is in good condition before start monitoring. Unplug the temperature probe cable from the socket, the system will display the error message “TEMP SENSOR OFF” and give the audible alarm sound. Note Disposable TEMP probe can only be used once. Warning Hold the TEMP probe and cable carefully and lightly. If not use, you should coil up the probe and cable into a loose circle. If the wire inside the cable is tensely pulled, it may cause mechanical damage to the probe and the cable. Warning The TEMP module shall be calibrated once every two years (or as required by your hospital’s regulation). When calibration is required, contact the manufacture please. Note The TEMP module will perform self-test once every 250 seconds in the monitoring process. The self-test process will last 1 second. Self-test will not affect the normal working of the TEMP module. 14-1 TEMP Monitoring 14.2 TEMP SETUP Menu Turn the knob to highlight the TEMP hot key and push the knob to access the TEMP SETUP menu. Figure 14-1 TEMP SETUP Menu ■ TEMP alarm setting ■ ALM: pick "ON", the system will give alarm prompt and store the alarm information once alarm occurs; pick "OFF", the system will not give alarm prompt and instead display a symbol beside TEMP. ■ ALM LEV: used to set up the alarm level, selectable from HIGH, MED or LOW. ■ ALM REC: used to start/stop recording TEMP alarms. Pick "ON", the system will command the recorder to output the current TEMP alarm information. ■ The system gives TEMP alarms according to the preset upper and lower limits. Once the TEMP value exceeds the upper limit or falls below the lower limit, the system will give the alarm. TEMP alarm limits: TEMP ■ Max. TEMP HI Min. TEMP LO Step 50ºC 0ºC 0.1ºC UNIT To set temperature unit (ºC or ºF). ■ DEFAULT Please refer to “DEFAULT” part in “ECG/TEMP Monitoring” for detailed information. 14.3 TEMP Alarm message When the alarm recording switches are set to ON in relevant menus, those physiological alarms generated because the parameter goes beyond the alarm limit will trigger the recorder to automatically output the alarming parameter value and the corresponding waveforms. 14-2 TEMP Monitoring Tables below show the possible physiological alarms, technical alarms and prompt messages occurring during TEMP measurement. Physiological alarms: Message TEMP TOO HIGH TEMP TOO LOW Cause Alarm Level Measuring value of sensor is above upper alarm limit. Measuring value of sensor is below lower alarm limit. User-selectable User-selectable Technical alarms: Alarm Message TEMP SENSOR OFF TEMP ALM LMT ERR Cause Temperature cable may be disconnected from the monitor. Functional safety failure Alarm Level Remedy LOW Make sure that the cable is properly connected. HIGH Stop using TEMP alarm function, notify biomedical engineer or Mindray service staff. Prompt message: Message TEMP EXCEED 14.4 Cause Measuring value measuring range. of sensor Alarm Level is beyond HIGH Maintenance and Cleaning Warning Turn off the monitor and disconnect the line power before cleaning the monitor or the probe. Reusable TEMP Probes 1 The TEMP probe should not be heated above 100℃ (212℉). It should only be 2 The probe must not be sterilized in steam. 3 Only detergents containing no alcohol can be used for disinfection. 4 The rectal probes should be used, if possible, in conjunction with a protective rubber subjected briefly to temperatures between 80℃ (176℉) and 100℃ (212℉). cover. 5 To clean the probe, hold the tip with one hand and hold the moist lint-free cloth with the other hand to clean the probe downward in the direction toward the connector. 14-3 TEMP Monitoring Note Do not re-sterilize or reuse the disposable TEMP probe. Note To protect the environment, the disposable TEMP probe must be recovered or disposed of properly. 14-4 Chapter 15 Accessories It is recommended to use following accessories on the Monitor. Warning Please use the specified accessories listed below with this patient monitor. The device will be possibly damaged or lead some harm if any other accessories are used. 15.1 ECG Accessories Description PN Monitoring Electrode (10 electrodes per pack) 0010-10-12304 Monitoring Electrode (Pediatric, 2245, 25 electrodes per pack) 9000-10-07469 Monitoring Electrode (Neonatal, 2258-3, 3 electrodes per pack) 900E-10-04880 3 Lead Leadwires of snap AHA (LL-22363) 9000-10-07445 6 Pin 3 Lead ECG Cable (LL-2325) 0509-10-00093 3 Lead Leadwires of snap IEC 9000-30-07470 6P 3 Lead ECG Cable with no resistance AHA 0010-30-12242 6P 3 Lead ECG Cable IEC with no resistance 0010-30-12243 6P 3 Lead ECG Cable with 1K resistance AHA 0010-30-12246 6P 3 Lead ECG Cable with 1K resistance IEC 0010-30-12247 6P ECG Trunk Cable with no resistance 0010-30-12256 6P ECG Trunk Cable with 1K resistance 0010-30-12257 3 Lead AHA Leadwires of clip 0010-30-12263 3 Lead IEC Leadwires of clip 0010-30-12265 3 Lead AHA Leadwires of snap 0010-30-12267 3 Lead IEC Leadwires of snap 0010-30-12269 6Pin 3-lead separable trunk cable with 1k resistance 0010-30-12377 6Pin 3-lead separable trunk cable with no resistance 0010-30-12378 Neonate 3-lead AHA leadwire of clip 0010-30-12381 Neonate 3-lead IEC leadwire of clip 0010-30-12382 Pediatric 3-lead AHA leadwire of clip 0010-30-12383 Pediatric 3-lead IEC leadwire of clip 0010-30-12384 Pediatric 3-lead AHA leadwire of snap 0010-30-12385 15-1 Accessories Description PN Pediatric 3-lead IEC leadwire, snap-on 0010-30-12386 Long 3-lead AHA leadwire of clip 0010-30-12388 Long 3-lead IEC leadwire of clip 0010-30-12390 Crocodile clip 9101-21-58104 15.2 SpO2 Accessories Description PN DS-100A Adult SpO2 Sensor (Reusable) 9000-10-05161 OXI-P/I Pediatric/Infant Sensor and Sensor Wraps 9000-10-07308 OXI-A/N Adult/Neonatal Sensor and Sensor Wraps 9000-10-07336 Multisite SpO2 Sensor (Reusable, 518A) 518A-30-90226 Finger SpO2 Sensor (Reusable, 512B) 512B-30-90134 Finger SpO2 Sensor (Reusable, 512D) 512D-30-90200 Small SPO2 Ear Sensor (ES-3212-9) 0010-10-12392 6Pin SpO2 Cable 512D-30-16752 Reusable Pulse Oximeter Sensor For Veterinary (FS-03, KTMED) 9101-10-58133 Veterinary Oxygen Sensor and Veterinary Sensor Clips (NELLCOR, Vetsat (V-SAT)) 9101-10-58134 15.3 NIBP Accessories Description PN NIBP Hose 509B-30-06259 Neonatal NIBP Hose 509B-30-06260 Infant 10 to 19 cm Arm Circumference (CM1201) 0010-30-12157 Child 18 to 26 cm Arm Circumference (CM1202) 0010-30-12158 Adult 25 to 35 cm Arm Circumference (CM1203) 0010-30-12159 Large Adult 33 to 47 cm Arm Circumference (CM1204) 0010-30-12160 Adult Thigh 46 to 66 cm Arm Circumference (CM1205) 0010-30-12161 M1872A Disposable Cuff (Size #4/7.1-13.1cm) 900E-10-04873 M1870A Disposable Cuff (Size #3/5.8-10.9cm) 900E-10-04874 M1868A Disposable Cuff (Size #2/4.3-8.0cm) 900E-10-04875 M1868A Disposable Cuff (Size #1/3.1-5.7cm) 900E-10-04876 15-2 Accessories Description PN W.A.BAUM Adult (Size 25-35cm Arm Circumference) 0010-30-12059 W.A.BAUM Child (Small Size 18-26 cm Arm Circumference) 0010-30-12060 W.A.BAUM Infant (Size 10-19cm Arm Circumference) 0010-30-12061 Cuff without connector (Adult, CM1203, 25-35cm) 0010-10-12146 Cuff without connector (Infant, CM1201, 10-19cm) 0010-10-12147 Cuff without connector (Child, CM1202, 18-26cm) 0010-10-12148 Cuff without connector (Large Adult, CM1204, 33-47cm) 0010-10-12149 Cuff without connector (Adult Thigh, CM1205, 46-66cm) 0010-10-12150 Disposable Soft-cuff (REF2121, 3-6cm,GE) 9101-10-58117 Disposable Soft-cuff (REF2122, 4-8cm,GE) 9101-10-58118 Disposable Soft-cuff (REF2124, 6-11cm,GE) 9101-10-58119 Disposable Soft-cuff (REF2125, 7-13cm,GE) 9101-10-58120 Disposable Soft-cuff (REF2126, 8-15cm,GE) 9101-10-58121 15.4 TEMP Accessories Description PN REF 427 Reusable Temperature Probe -Skin (Pediatric) 0010-10-12124 REF 401 Reusable Temperature Probe -Esophagesal /Rectal (Adult) 0509-10-00095 REF 402 Reusable Temperature Probe -Esophagesal /Rectal (Pediatric) 6000-10-01969 REF 409B Reusable Temperature Probe -Skin (Adult) 900E-10-04881 Adult reusable esophageal/rectal temperature probe 0011-30-90440 Pediatric/neonatal reusable esophageal/rectal temperature probe 0011-30-90441 Adult reusable skin-surface temperature probe 0011-30-90442 Pediatric/neonatal reusable skin-surface temperature probe 0011-30-90443 Reusable temperature probe extension cable 0011-30-90444 Disposable esophageal/rectal temperature probe 0011-30-90446 Disposable skin-surface temperature probe 0011-30-90447 15-3 Accessories FOR YOUR NOTES 15-4 Appendix A CE Marking The patient monitor bears CE mark indicating its conformity with the provisions of 84/539/EEC and 2004/108/EC. The patient monitor is in radio-interference protection class A in accordance with EN55011. The product complies with the requirement of standard EN60601-1-2 “Electromagnetic Compatibility – Medical Electrical Equipment”. A-1 CE Marking FOR YOUR NOTES A-2 Appendix B 1 Product Specification Classification Anti-electroshock type Class I equipment and internal powered equipment EMC type Class A Anti-electroshock degree ECG (RESP), SpO2, NIBP, TEMP: CF Harmful liquid proof degree Ordinary equipment (sealed equipment without liquid proof) Disinfection/sterilizing method Refer to Chapter 11 ~ Chapter 14 for details. Working system Continuous running equipment 2 Specifications 2.1 Size and Weight 2.2 Size 258(W) x 118(D) x 244(H) mm Weight 5.0 kg (max) Environment Temperature Working 0 ~ 40 °C Transport and Storage -20 ~ 60 °C Humidity Working 15% - 95 % (noncondensing) Transport and Storage 10% - 95 % (noncondensing) Altitude Working -500 to 4,600m Transport and Storage -500 to 13,100m Power Supply 100~240 VAC, 50/60 Hz, Pmax=80VA FUSE T 3.15A 2.3 Display Screen 8.4 in. TFT display , 800×600 Resolution B-1 Product Specification Messages 4 Waveforms Maximum 1 Alarm LED (Yellow/Red) 1 Working LED (Green) 1 Charge LED (Green) 3 Sound Modes corresponding to Alarm Modes 2.4 Battery Rechargeable 2.3 A/Hr 12V Lead-Acid battery Operating time 120 minutes under the normal use and full charge; About 5 ~ 15 minutes after the first alarm of low battery Charge time 2.5 Approximately 6hrs in the running status Recorder Record Width 48 mm Paper Speed 25/50 mm/s Trace 2 Recording types: Continuous real-time recording 8 second real-time recording Auto 8 second recording Parameter alarm recording Waveform freeze recording Trend graph/table recording ARR events review recording Alarm event review recording NIBP review recording Drug Calculation and titration table recording Monitor status recording 2.6 Recall Trend Recall Short 1 hrs, 1 s or 5 s. Resolution Long 72 hrs, 1 Min. Resolution Alarm Event Recall 60 alarm events of all parameters and 8/16/32seconds of corresponding waveform. NIBP Measurement Recall 400 NIBP measurement data Power-off Storage 72 hours of trend data, 400 NIBP measurement data, 60 alarm events and 60 Arr. events B-2 Product Specification 2.7 ECG Lead Mode 3 Leads (R, L, F or RA, LA, LL) Lead selection I, II, III Waveform 1 ch Gain ×2.5mm/mV, ×5.0mm/mV, ×10mm/mV, ×20mm/mV, AUTO HR and Alarm Range Adult 15 ~ 300 bpm Neo/Ped 15 ~ 350 bpm Accuracy ±1% or ±1bpm, use the greater Resolution 1bpm Sensitivity ≥200 (uV P-P) Differential Input Impedance > 5 MΩ CMRR Monitor ≥ 105 dB Surgery ≥ 105 dB Diagnostic ≥ 90 dB DC offset voltage ±300mV Patient leakage current < 10 uA Recovery time after defibrillation < 3 s ECG Signal Range ±5 m V (Vp-p ) Frequency Response (Bandwidth) Surgery 1 ~ 15 Hz Monitor 0.5 ~ 35 Hz Diagnostic 0.05 ~ 100 Hz Calibration Signal 1 m V (Vp-p), Accuracy: ±5% ST Segment Monitoring Measure and Alarm Range -2.0 ~ +2.0 mV Precision –0.8 ~ +0.8mV: ±0.02mV or ±10%, whichever is greater. Beyond this range: Undefined Update period 10s ARR Detecting Type ASYSTOLE, VFIB/VTAC, VPB, COUPLET, VT>2, BIGEMINY, TRIGEMINY, R ON T, MISSED BEATS, TACHY, BRADY, PNC, PNP Alarm Available Review Available B-3 Product Specification 2.8 RESPARATION (RESP) Method Impedance between R-F (RA-LL) Measuring Impedance Range: 0.3~5.0Ω Base line Impedance Range: 200 ~ 1500Ω Bandwidth 0.2 ~ 2 Hz Resp. Rate Measuring and Alarm Range Adult 0 ~ 120 BrPM Neo/Ped 0 ~ 150 BrPM Resolution 1 BrPM Accuracy 0 to 6 BrPM: Undefined 7 to 150 BrPM: ±2 BrPM or ±2%, whichever is greater Apean Alarm delay 2.9 10 ~ 40 s NIBP Method Oscillometric Mode MANUAL, AUTO, CONTINUOUS Measuring Interval in AUTO Mode 1, 2, 3, 4, 5, 10, 15, 30, 60, 90, 120, 180, 240,480 (Min) Measuring Period in CONTINUOUS Mode 5 Min Alarm Type SYS, DIA, MEAN Measuring range Adult Mode SYS 40 ~ 270 mmHg DIA 10 ~ 210 mmHg MEAN 20 ~ 230 mmHg Pediatric Mode SYS 40 ~ 200 mmHg DIA 10 ~ 150 mmHg MEAN 20 ~ 165 mmHg Neonatal Mode SYS 40 ~ 135 mmHg DIA 10 ~ 100 mmHg MEAN 20 ~ 110 mmHg Resolution Pressure 1mmHg Accuracy Pressure Maximum Mean error ±5mmHg B-4 Product Specification Maximum Standard deviation 8mmHg Overpressure Protection 2.10 Adult Mode 297±3 mmHg Pediatric Mode 240±3 mmHg Neonatal Mode 147±3 mmHg SpO2 Measuring Range 0 ~ 100 % Alarm Range 0 ~ 100 % Resolution 1% Accuracy 70% ~ 100%: ±2 % 0% ~ 69%: unspecified Update period about 1 s Pulse Rate 2.11 Measuring Range 20~254bpm Resolution 1bpm Accuracy ±3bpm TEMPERATURE (TEMP) Channel 1 Measuring and Alarm Range 0 ~ 50 °C Resolution 0.1°C Accuracy ±0.1°C Update period about 1 s B-5 Product Specification FOR YOUR NOTES B-6 Appendix C EMC Declaration The equipment meets the requirements of IEC 60601-1-2:2001. Note Use of accessories, transducers, and cables other than those specified may result in increased emission or decreased immunity of the equipment. Note The equipment should not be used adjacent to or stacked with other equipment, and if adjacent or tacked use is necessary, the equipment should be observed to verify normal operation in the configuration in which it will be used. Note The equipment needs special precautions regarding EMC and needs to be installed and put into service according to the EMC information provided below. Note The equipment may be interfered by other equipment, even if that other equipment complies with CISPR emission requirements. Note Operation of the device, in the case that the patient physiological signal is lower than the minimum amplitude or value specified in the product specifications, may cause inaccurate results. Note Portable and mobile RF communications equipment can affect this monitor. C-1 EMC Declaration TABLE 1 Guidance and MINDRAY declaration — electromagnetic emissions The equipment is intended for use in the electromagnetic environment specified below. The customer or the user of the equipment should assure that it is used in such an environment. Emissions test RF emissions Compliance Group1 CISPR 11 Electromagnetic environment — guidance The equipment uses RF energy only for its internal function. Therefore, its RF emissions are very low and are not likely to cause any interference in nearby electronic equipment. RF emissions Class A CISPR 11 Harmonic establishments other than domestic and those Class A directly connected to the public low-voltage power supply network that supplies buildings used for Emissions domestic purposes. IEC61000-3-2 Voltage The equipment is suitable for use in all Compliance Fluctuations/Flicker Emissions IEC 61000-3-3 C-2 EMC Declaration TABLE 2 Guidance — electromagnetic immunity The equipment is intended for use in the electromagnetic environment specified below. The customer or the user of the equipment should assure that it is used in such an environment. Immunity test IEC 60601 Test Compliance Electromagnetic environment level level — guidance Electrostatic ±6 kV contact ±6 kV contact Floors should be wood, concrete Discharge ±8 kV air ±8 kV air or ceramic tile. If floors are (ESD) IEC covered with synthetic material, 61000-4-2 the relative humidity should be at least 30%. Electrical fast ±2 kV for power ±2 kV for power Mains power quality should be Transient/burst supply lines supply lines that of a typical commercial or IEC 61000-4-4 ±1 kV for ±1 kV for hospital environment. input/output lines input/output (>3m). lines (>3m) Surge IEC ±1 kV differential ±1 kV different Mains power quality should be 61000-4-5 mode mode that of a typical commercial or ±2 kV common ±2 kV common hospital environment. mode mode Voltage dips, <5% UT <5% UT Mains power quality should be Short (>95% dip in UT) (>95% dip in that of a typical commercial or interruptions for 0.5 cycle UT) for 0.5 cycle hospital environment. If the and voltage 40% UT 40% UT user of our product requires variation on (60% dip in UT) (60% dip in UT) continued operation during power supply for 5 cycle for 5 cycle power mains interruptions, it is 70% UT 70% UT (30% dip in UT) (30% dip in UT) for 25 cycle for 25 cycle <5% UT <5% UT (>95% dip in UT) (>95% dip in for 5 sec UT) for 5 sec 3 A/m 3 A/m input lines IEC 61000-4-11 Power recommended that our product be powered from an uninterruptible power supply or a battery. Power frequency magnetic fields frequency should be at levels characteristic (50/60 HZ) of a typical location in a typical magnetic field commercial or hospital IEC 61000-4-8 environment. NOTE — UT is the a.c. mains voltage prior to application of the test level. C-3 EMC Declaration TABLE 3 Guidance — electromagnetic immunity The equipment is intended for use in the electromagnetic environment specified below. The customer or the user of the equipment should assure that it is used in such an environment Immunity IEC 60601 Complia test Test level nce level Electromagnetic environment — guidance Portable and mobile RF communications equipment should be used no closer to any part of the equipment, including cables, than the recommended separation distance calculated from Conduced 3 Vrms RF IEC 150kHz to 61000-4-6 80MHz the equation applicable to the frequency of the 3 Vrms transmitter. Recommended separation distance d = 1.2 x P d = 1.2 x P 80 MHz to 800 MHz d = 2.3 x P 800 MHz to 2.5GHz where P is the maximum output power rating of the transmitter in watts (W) according to the transmitter manufacturer and d is the recommended separation Radiated 3 V/m RF IEC 80MHz to 61000-4-3 2.5GHz distance in meters (m). 3V/m Field strengths from fixed RF transmitters, as determined by an electromagnetic site survey, a should be less than the compliance level in each frequency range b Interference may occur in the vicinity of equipment marked with the following symbol: Note — At 80 MHz and 800 MHz, the higher frequency range applies. Note — These guidelines may not apply in all situations. Electromagnetic propagation is affected by absorption and reflection from structures, objects and people. a Field strengths from fixed transmitters, such as base stations for radio (cellular/cordless) telephones and land mobile radios, amateur radio, AM and FM radio broadcast and TV broadcast cannot be predicted theoretically with accuracy. To assess the electromagnetic environment due to fixed RF transmitters, an electromagnetic site survey should be considered. If the measured field strength in the location in which the equipment is used exceeds the applicable RF compliance level above, the equipment should be observed to verify normal operation. If abnormal performance is observed, additional measures may be necessary, such as reorienting or relocating the equipment. b Over the frequency ranges 150kHz to 80MHz, field strengths should be less than 3V/m. C-4 EMC Declaration TABLE 4 Recommended separation distances between portable and mobile RF communication and the equipment The equipment is intended for use in an electromagnetic environment in which radiated RF disturbance are controlled. The customer or the user of the equipment can help prevent electromagnetic interference by maintaining a minimum distance between portable and mobile RF communication equipment (transmitters) and the equipment as recommended below, according to the maximum output power of the communication equipment. Separation Distance According to Frequency of Transmitter Rated Maximum M (Meters) Output power of 150kHz -80MHz 80MHz -800MHz 800MHz -2.5GHz (Watts) d = 1.2 P d = 1.2 P d = 2.3 P 0.01 0.12 0.12 0.23 0.1 0.37 0.37 0.74 1 1.17 1.17 2.34 10 3.69 3.69 7.38 100 11.67 11.67 23.34 Transmitter W For transmitters at a maximum output power not listed above, the recommended separation distanced in meters (m) can be determined using the equation applicable to the frequency of the transmitter, where P is the maximum output power rating of the transmitter in watts (W) according to the transmitter manufacturer. Note — At 80 MHz and 800 MHz, the separation distance for the higher frequency range applies. Note — These guidelines may not apply in all situations. Electromagnetic propagation is affected by absorption and reflection from structures, objects and people. C-5 EMC Declaration FOR YOUR NOTES C-6 Appendix D PROMPT System Alarm Prompt CAUSE "XX TOO HIGH" XX value exceeds the higher alarm limit. "XX TOO LOW" XX value is below the lower alarm limit. MEASURE Check if the alarm limits are appropriate and the current situation of the patient. XX represents the value of parameter such as HR, ST, RR, SpO2, NIBP, etc in the system. "ECG WEAK SIGNAL" “NO PULSE” "RESP APNEA" The ECG signal of the patient is too small so that the system can not perform ECG analysis. The pulse signal of the patient is too small so that the system can not perform pulse analysis. The respiration signal of the patient is too small so that the system cannot perform RESP analysis. "ASYSTOLE" Patient suffers from Arr. Of ASYSTOLE. "VFIB/VTAC" Patient suffers from Arr. of VFIB/VTAC. "BIGEMINY" Patient suffers from Arr. Of BIGEMINY. "TRIGEMINY" Patient suffers from Arr. of TRIGEMINY. "R ON T" Patient suffers from Arr. of R ON T. "PVC" Patient suffers from Arr. of PVC. "COUPLET" Patient suffers from Arr. of COUPLET. "TACHY" Patient suffers from TACHY. " BRADY" Patient suffers from BRADY. "VT>2" Patient suffers from Arr. of VT>2. D-1 Check if the electrodes and lead wires are connected correctly and the current situation of the patient. Check the connection of the sensor and the current situation of the patient. Check the connection of the linking wire and the current situation of the patient. Check the current situation of patient. Check the connection of electrodes and lead wires. Check the current situation of patient. Check the connection of electrodes and lead wires. Check the current situation of patient. Check the connection of electrodes and lead wires. Check the current situation of patient. Check the connection of electrodes and lead wires. Check the current situation of patient. Check the connection of electrodes and lead wires. Check the current situation of patient. Check the connection of electrodes and lead wires. Check the current situation of patient. Check the connection of electrodes and lead wires. Check the current situation of patient. Check the connection of electrodes and lead wires. Check the current situation of patient. Check the connection of electrodes and lead wires. Check the current situation of patient. Check the connection of electrodes and lead wires. the the the the the the the the the the the the the the the the the the the the System Alarm Prompt “MISSED BEATS” Patient suffers from Arr. of MISSED BEATS. "PNP" The pacemaker is not paced. "PNC" No pacemaker captured. "ECG LEAD OFF" "ECG LL LEAD OFF"; "ECG LA LEAD OFF"; "ECG RA LEAD OFF"; "ECG F LEAD OFF"; "ECG L LEAD OFF"; "ECG R LEAD OFF"; "SPO2 SENSOR OFF" "SEARCH PULSE" "TEMP SENSOR OFF" signal is ECG lead is not connected correctly. The LL lead wire of ECG is not connected correctly. The LA lead wire of ECG is not connected correctly. The RA lead wire of ECG is not connected correctly. The F lead wire of ECG is not connected correctly. The L lead wire of ECG is not connected correctly. The R lead wire of ECG is not connected correctly. SPO2 sensor is connected correctly. SPO2 sensor is connected correctly or patient arm moves. TEMP sensor is connected correctly. not not the not "ECG NOISE" Rather large interference signals appear in the ECG signals. "XX INIT ERR X" XX has error initialization. "XX COMM STOP" XX cannot communicate with the host. "XX COMM ERR" XX cannot communicate normally with the host. X Check the current situation of the patient. Check the connection of the electrodes and lead wires. Check the connection of the pacemaker. Check the connection of electrodes and lead wires. Check the current situation of the patient. Check the connection of the pacemaker. Check the connection of electrodes and lead wires. Check the current situation of the patient. Check the connection of ECG lead wire. Check the connection of LL lead wire. Check the connection of LA lead wire. Check the connection of RA lead wire. Check the connection of F lead wire. Check the connection of L lead wire. Check the connection of R lead wire. Check the connection sensor. Check the connection sensor. Check the current the patient. Check the connection sensor. of SpO2 of SpO2 situation of of TEMP Check the connection of ECG lead wire. Check the current situation of the patient. Check if the patient moves a lot. during Re-start up the monitor or re-plug in/out the module. If the error still exists, contact the manufacturer. XX represents all the parameter modules in the system such as ECG, NIBP, SpO2, etc. "XX ALM LMT ERR" "XX RANGE EXCEEDED" The alarm limit of parameter is modified chance. The measured value of parameter has exceeded measuring range of system. D-2 XX by XX the the Contact the manufacturer for repair. Contact the manufacturer for repair. System Alarm Prompt XX represents the parameter name in the system such as HR, ST, RR, SpO2, NIBP, etc. When the system displays 2000-1-1, the system gives this prompt reminding the user that the current system time is not right. The system has no cell battery or the battery has run out of the capacity. Re-set up the system time. It is better to set up the time just after the start-up and prior to monitoring the patient. After modifying the time, the user had better re-start up the monitor to avoid storing error time. "SYSTEM WD FAILURE" "SYSTEM SOFTWARE ERR" "SYSTEM CMOS FULL" "SYSTEM CMOS ERR" "SYSTEM EPGA FAILURE" "SYSTEM FAILURE2" "SYSTEM FAILURE3" "SYSTEM FAILURE4" "SYSTEM FAILURE5" "SYSTEM FAILURE6" "SYSTEM FAILURE7" "SYSTEM FAILURE8" "SYSTEM FAILURE9" "SYSTEM FAILURE10" "SYSTEM FAILURE11" "SYSTEM FAILURE12" The system has serious error. Re-start up the system. If the failure still exists, contact the manufacturer. "KEYBOARD AVAILABLE"; The keys on the keyboard cannot be used. Check the keys to see whether it is pressed manually or by other object. If the key is not pressed abnormally, contact the manufacturer for repair. "KEYBOARD COMM ERR"; "KEBOARD ERROR"; "KEYBOARD ERR1"; "KEYBOARD ERR2"; The keyboard has failure, which cannot be used. Contact the manufacturer for repair. "5V TOO HIGH" "5V TOO LOW" "POWER ERR3" "POWER ERR4" "12V TOO HIGH" "12V TOO LOW" "POWER ERR7" "POWER ERR8" "3.3V TOO HIGH" "3.3V TOO LOW" The power part of the system has failure. If the prompt appears repeatedly, contact the manufacturer for repair. "REAL NEEDSET" "REAL EXIST" CLOCK CLOCK NOT NOT "RECORDER SELFTEST ERR" During the selftest, the system fails connecting with the recorder module. D-3 Install or replace the rechargeable battery. Execute ‘Clear Record Task’ function in the recorder setup menu to re-connect the host and the recorder. If the failure still exists, contact the manufacturer for repair. System Alarm Prompt "RECORDER VLT HIGH" "RECORDER VLT LOW" The recorder module has voltage failure. "RECORDER HEAD HOT" The continuous recording time may be too long. "REC HEAD IN WRONG POSITION" "RECORDER PAPER" "RECORDER JAM" OUT OF PAPER "RECORDER ERR" The handle for the paper is not down. No paper is recorder. The paper in the is jammed. pressing pressed in the recorder COMM "RECORDER S. COMM ERR" "RECORDER W.P." PAPER "REC NOT AVAILABLE" The communication of the recorder is abnormal. "NIBP COMM ERR" "LOOSE CUFF" "AIR LEAK" "AIR ERROR" PRESSURE "WEAK SIGNAL" Place the paper into the recorder. Place the recorder correctly and try again. In the recorder setup menu, execute the function of clearing record task. The function can make the host and the recorder connect again. If the failure still exists, contact the manufacturer for repair. Place the paper roll in the correct position. Cannot communicate with the recorder. In the recorder setup menu, execute the function of clearing record task. The function can make the host and the recorder connect again. If the failure still exists, contact the manufacturer for repair. NIBP initialization error Execute the reset program in the NIBP menu. If the failure still exists, contact the manufacturer for repair. "NIBP SELFTEST ERR" ILLEGALLY After the recorder becomes cool, use the recorder for output again. If the failure still exists, contact the manufacturer for repair. Press down the recorder handle for pressing the paper. The paper roll of the recorder is not placed in the correction position. "NIBP INIT ERR" "NIBP RESET" Contact the manufacturer for repair. During NIBP measurement, illegal reset occurs. The NIBP communication part has problem. The NIBP cuff is not connected correctly. The NIBP cuff is not connected correctly or there are leaks in the airway. Problem happens when measuring the curve. The system cannot perform measurement, analysis or calculation. Problem happens when measuring the curve. The system cannot perform measurement, analysis or calculation. D-4 Check the airway of NIBP to see if there are clogs. Then measure again, if the failure still exists, contact the manufacturer for repair. Execute the reset program in the NIBP menu. If the failure still exists, contact the manufacturer for repair. Re-connect the NIBP cuff. Check the connection of each part or replace with a new cuff. If the failure still exists, contact the manufacturer for repair. Check the connection of each part or replace with a new cuff. If the failure still exists, contact the manufacturer for repair. Check if the setup of patient type is correct. Check the connection of each part or replace with a new cuff. If the failure still exists, contact the manufacturer for repair System Alarm Prompt "RANGE EXCEEDED" Problem happens when measuring the curve. The system cannot perform measurement, analysis or calculation. "EXCESSIVE MOTION" The patient arm moves. "OVER PRESSURE" Perhaps folds exist in the airway. "SIGNAL SATURATED" "NIBP TIME OUT" Problem happens when measuring the curve. The system cannot perform measurement, analysis or calculation. Problem happens when measuring the curve. The system cannot perform measurement, analysis or calculation. "CUFF TYPE ERR" Perhaps the used cuff does not fit the setup patient type. "PNEUMATIC LEAK" NIBP airway has leaks. "MEASURE FAIL" "NIBP SYSTEM FAILURE" Problem happens when measuring the curve. The system cannot perform measurement, analysis or calculation. Problem happens when measuring the curve. The system cannot perform measurement, analysis or calculation. D-5 Check the connection of each part or replace with a new cuff. If the failure still exists, contact the manufacturer for repair. Check the connection of each part and the patient situation. Measure again, if the failure still exists, contact the manufacturer for repair. Check for the smoothness in the airway and patient situation. Measure again, if the failure still exists, contact the manufacturer for repair. Check the connection of each part and the patient situation. Measure again, if the failure still exists, contact the manufacturer for repair. Check the connection of each part and the patient situation. Measure again, if the failure still exists, contact the manufacturer for repair. Check if the patient type is set up correctly. Check the connection of each part or replace with a new cuff. If the failure still exists, contact the manufacturer for repair. Check the connection of each part or replace with a new cuff. If the failure still exists, contact the manufacturer for repair. Check the connection of each part and the patient situation. Measure again, if the failure still exists, contact the manufacturer for repair. Check the connection of each part and the patient situation. Measure again, if the failure still exists, contact the manufacturer for repair. System Alarm Prompt FOR YOUR NOTES D-6 P/N: M1K5-20-78305 (1.0)