1
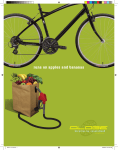
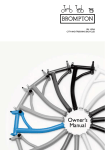
Freedom E-Bikes Owners Manual
Electric Bicycles that will transform the way you travel
Specific exclusions from normal use are:
• Carrying excess load – more than 130kg in total mass (bicycle, rider & luggage)
• Incorrect installation of the system
• Use of any third party electrical component (motor, controller, battery, throttle etc)
• Failure to comply with instructions in this manual
• Failure to attend to regular maintenance & routine checks
or to take action in response to indications of impending
failure (eg loose components, accident or impact)
© 2011 Freedom E-Bikes Owners Manual v. 1.1
Electric Bicycles that will transform the way you travel
2
15
Battery failure means that the battery no longer has sufficient
charge to propel the bike or has suffered more than a 30% loss
of capacity within the first 3 months of normal use or more
than 60% loss within the first 6 months of normal use.
Contents
Introduction ....................................................................4
About Freedom E-Bikes ................................................4
Guidelines For Normal Use
Introduction to the Kit ..................................................5
Simple Instructions on Installation & Use ..................6
The rider must pedal whenever the motor is in use.
Installing on Narrow Fork Bikes ..................................7
The battery pack must be disconnected from the controller
once you are finished riding.
Notes on Use of Your Kit ...............................................9
Once the battery does not have enough charge to power the
motor under load, the battery pack must be immediately
disconnected from the controller and then recharged at the
earliest opportunity.
Warranty ........................................................................13
Battery Use Guidelines ................................................12
Guidelines For Normal Use ........................................14
The battery pack should be disconnected from the charger
once the green “full charge” light comes on.
The controller and battery must be enclosed within a bag attached to the bike and should not be directly attached to the
bike.
The kit, including battery has not suffered physical impact or
other physical or electrical damage (incl short circuit).
When total weight of rider + bike and luggage (incl trailer)
exceeds 120kg two battery packs are used in parallel
Total weight of rider + bike and luggage (incl trailer) does not
exceed 150kg.
14
3
Introduction
Warranty
Thank you for choosing a Freedom E-Bikes kit to convert
your bike to an E-Bike (electric motor assisted bike). When
fitted and used correctly in accordance with this manual, the
Freedom E-Bikes system will transform the way you travel.
Kit Warranty
Please read this manual carefully to get the best performance
and life out of your Freedom E-Bike.
All kits carry a 12 month guarantee: if any part of our kit fails
within the first 12 months in normal use - we will replace it
free of charge except for shipping costs.
As our kit is modular its easy to replace parts.
In all cases the faulty part(s) must be returned to us or our
dealer.
About Freedom E-Bikes
Freedom E-Bikes has developed the world’s lightest e-bike kit
supporting virtually any bicycle, including folding bikes like
Brompton and Dahon. The patented kit turns your bike into a
freedom machine that makes even the steepest hills feel like a
gentle incline. Our solution uses custom developed nanotechnology battery packs that are more powerful than any other
ebike battery on the market, yet is smaller, lighter and faster to
charge.
Freedom E-Bikes gets you to your destination quicker, cheaper,
fitter and greener than any other transport option. We sell our
kits worldwide from the high tech centre of the world – Israel.
In addition if you’re not happy with your kit we’ll allow you
to return it within 2 months of purchase and get your money
back (excluding shipping and installation costs).
Please note that installation of any bicycle electric assist kit
may adversely impact on the manufacturer’s warranty for the
bicycle itself.
Battery Warranty
If a battery pack fails in normal use in the first 12 months we
will replace it free of charge, except for shipping costs.
If a battery pack fails in normal use in the second 12 months
we will replace it for 40% of the current retail standalone price
plus shipping costs.
In both cases the original battery must be returned to us or
our dealer.
Please note that as with all electronic devices including mobile
phones and laptops, batteries are a consumable item and will
suffer loss of efficiency over their lifetime.
4
13
Battery Use Guidelines
Introduction to the Kit
The cells used in the Freedom E-Bikes battery pack are supplied fully charged and balanced and should not require
regular cell balancing if the following guidelines (“battery use
guidelines”) are followed:
The Freedom E-Bikes conversion kit consists of 5 components:
battery, motor, throttle, controller, and charger. The kit is intended for installation by the customer or bike shop.
• total load (bike, rider & luggage) does not exceed 105kg
with one battery pack or 120kg with two battery packs
wired in parallel.
• The rider pedals with at least moderate effort whenever the
motor is engaged.
• The motor is only engaged once the bike is moving.
• Battery packs are recharged immediately after use.
• The rider ceases to use the battery (and either replaces or
recharges it) once it is discharged to the point where the
motor starts to cut out under load.
The kit is plug and play and the parts interconnect like this:
If battery packs are used outside of the above guidelines you
should perform cell balancing using the two white balancing
connectors on the battery pack
Occasional cell balancing will extend cell life and improve
performance.
Balancing Battery Packs
The batteries can be balanced where necessary with a charger balancer combination specifically designed to charge &
balance 12 LiFe A123 cells (eg. MegaPower Infinity 960SR or
Hyperion EOS0610I Duo II-Dual Port).
12
(iPhone not included
)
5
Simple Instructions on Installation & Use
For bikes with standard 100mm forks installation is very
simple:
1. Just fit the motorised wheel to the bike (cable exiting from
the left as you sit on the bike). Ensure that the axle (with
straight edges) fits snugly into fork and that the axle can’t
turn or move in the fork drop-out. Make sure you fit the
torque washer with the lug fitting into the hole on the fork.
2. Install the throttle on the right handlebar by using a hex
screw to loosen and then tightening when fitted.
3. The battery and controller go in a front or center mounted
bag.
4. Connect the red plugs (sparking is normal) and the big
black plugs together and notice that the red, yellow and
green lights on the throttle light up. You’re good to go.
5. When you’ve finished riding or when the battery is low
(green light does not stay lit) plug the charger into the
mains and connect the battery using the red plugs. The
battery has no memory and does not need to be fully discharged. It is advisable to disconnect the battery once its
fully charged
6
NB: The controller cuts off the motor once the battery voltage drops to 30V However, the controller continues to draw a
small amount of current regardless of whether its connected to
the motor or not and if left connected for a prolonged period of time (several hours or more), it may drain the battery
completely, effectively rendering it useless. For this reason we
recommend disconnecting the battery from the controller
whenever its not in use.
11
gear at a good speed up the hill.
Installing on Narrow Fork Bikes
Whenever you stop and get off the bike, disconnect the black
plugs so an accidental or curious turn of the throttle will not
turn the front wheel. This will protect you and others.
Whenever you leave the bike disconnect the red plugs to prevent the battery discharging. We recommend you take the bag
with the battery and controller with you. This means they are
more secure and can be charged in a safe, convenient environment, perhaps while you work, have lunch or even coffee.
Care & Feeding of Battery Packs
Freedom E-Bikes battery packs use the latest in lithium ion
cells with nano-technology to provide superior performance
and safety to traditional lithium cells.
The battery pack has 2 types of connectors:
• Red (female) main power connector – connects to controller & charger
• Two white balancing connectors for occasional balancing of
cells.
The battery packs should only be charged with the battery
charger provided or a specialised charger described below.
Each battery pack is 91Whrs (“watt hours”) which means
its below the 100Whr limit for transport of lithium batteries
under IATA and ADR transport regulations. This means you
can take your Freedom E-Bike kit on an airplane or transport
it by courier.
10
For bikes with a narrow fork (75mm-80mm), such as Brompton, Dahon, do the following:
First check to see whether the bike’s front fork needs to be
modified (eg Brompton, Dahon).
It may be necessary to stretch the fork moderately to accommodate the wider hub of the motor, as well as to widen the
actual dropouts to accommodate the thicker axle (eg. Bromptons).
1. Widening the dropouts is best done with a power tool
such as a Dremel or even with a hand file (although much
slower). First establish how much needs to be ground away
by measuring the axle against the dropouts and then slowly
grind/file away the dropouts evenly on each side until the
required width is achieved and the torque washer is able to
fit in snugly.
2. Using a a 100-110mm screw and a couple of nuts and washers, slowly turn the screws against the fork thus forcing
them apart.
3. Once the screw is removed, the fork will spring back. You
will need to chock the fork with a piece of wood or something before removing the screw.
4. Fit the wheel into the fork with the cable on the left hand
side of the wheel as you sit on the bike. Make sure you fit
the torque washer with the lug fitting into the hole on the
7
fork.
5. (Brompton Only) With the wheel fitted, the tricky part is
getting the hook in place due to the thicker axle. Short of
bending the hook around the axle, it might be easier to
grind/file out the inner part of the hook until it fits snugly
around the axle. The cable should pass back through the
hook thus keeping it secure and out of the way.
Notes on Use of Your Kit
The Freedom E-Bikes kit is designed to be used to assist pedaling and not as the only source of motive power.
Riding Style – Tips on getting best range.
The best way to use the Freedom E-Bikes kit is to use it to accelerate to cruising speed (20-25kmph) faster and with less effort and to maintain speed and use less effort, when riding up
hills. If you ride slower than cruising speed and use the motor
all the time you will get less range from your battery.
When starting off, pedal normally and twist the throttle at the
same time. You’ll notice significant assistance at lower speeds
which should allow you to accelerate quickly to cruising speed.
6. With the wheel in place, simply slide the throttle onto the
handle bar and fasten with the hex screw under the indicator lights. You may need to cut off the existing handle bar
cover if its glued on.
7. Place the battery/controller unit together in the rear pocket
of your carrier bag. Connect the plugs and you’re off.
Once you’re at cruising speed release the throttle and you’ll
notice that the motor is no longer providing power. You may
notice a slight drop in resistance. Then ride normally until the
next restart or hill.
Its best to ride in the higher gears on your bike so that you are
putting in a reasonable amount of effort yourself and not having the motor do all the work.
As you approach a hill ride normally until you begin to slow
below cruising speed and then instead of dropping down the
gears just twist the throttle and you can keep riding in high
8
9