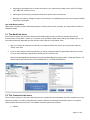
1
BrightQPro User Guide Version 2.5 BrightQ Pro User Guide Table of Contents 1 Product Overview 1.1 BrightQ-Pro Product Overview 1.1.1 BrightINSTALL 1.1.2 Printer Installation Wizard 1.1.3 License Manager 1.1.4 Configuration Tool 1.1.5 Device Status monitoring 1.1.6 Printer drivers and filters 1.1.7 Print Job Manager 2 System Requirements 2.1 Major Linux Distributions and Unix operating systems 2.2 Kernel: minimum supported version 2.3 X11 Window System 2.4 Hardware 2.4.1 AIX 2.4.2 FreeBSD 2.4.3 HP-UX 2.4.4 Linux 2.4.5 Solaris 2.5 Minimum Supported Linux Distributions and Versions Table 2.6 Minimum Supported Unix Versions and Architectures Table 2.6.1 Solaris * 2.6.2 FreeBSD ** 2.6.3 AIX *** 2.7 Supported Linux Printing Systems 2.7.1 CUPS (Common Unix Printing System) 2.7.2 LPRng (Line Printer Remote New Generation - BSD) 2.7.3 LPR, LPD (Berkeley Printing) 2.8 Supported Unix Printing Systems 2.8.1 CUPS (Common Unix Printing System) 2.8.2 LP (System V) 2.8.3 LPR, LPD (Berkeley Printing) 2.8.4 AIX Native 2.9 Supported Printers/Devices 3 Installing BrightQ-Pro on a Linux or Unix Computer 3.1 To install BrightQ-Pro on a Linux or Unix system 3.2 Locating the .run or setup.sh installer Page 2 of 100 3.2.1 Starting the Installation script 3.2.2 Command line feedback 3.2.3 End User License Agreement 3.3 Installation Classes 3.3.1 Expert Class Installation 3.4 Recommended Install 3.5 Registration, License Manager, License Activation 3.5.1 BrightQ-Pro Demo and Full License Activation Steps 3.5.2 Registration and License Activation - X Window System: 3.5.3 Registration and License Activation - Unix Shell-Based interface 3.5.4 Registration and License Activation without Internet Access – X Window System 3.5.5 Registration and License Activation without Internet Access – Unix Shell 3.6 Upgrading from a previous version of BrightQ to BrightQ-Pro 4 Printer Installation Wizard – X Window System 4.1 Launching the Configuration Tool 4.2 Adding/removing a printer 4.3 Printer Installation Wizard 4.3.1 Step 1 of 5 4.3.2 Step 2 of 5 (local printer) 4.3.3 Step 2 of 5 (remote printer) 4.3.4 Step 3 of 5 4.3.5 Step 4 of 5 4.3.6 Step 5 of 5 5 Adding a printer manually – X Window System 5.1 The Model tab menu 5.2 The Connection tab menu 5.2.1 Disabling filter processing 5.2.2 Enable Print Job Manager GUI 5.2.3 Parallel Printing 5.2.4 Universal Serial Bus (USB) Printing 5.2.5 Serial Printing 5.2.6 File (printing to a file) 5.2.7 Remote LPD 5.2.8 Internet Printing Protocol (IPP) 5.2.9 Socket/Raw TCP/IP (port 9100) 5.2.10 Samba/CIFS 5.3 Printer Properties Tab Menu 5.4 Printer Queue Tab Menu 5.4.1 Choose a name for this queue 5.4.2 Description 5.4.3 Location Page 3 of 100 5.4.4 Make this queue the system default 5.5 Maximum allowed characters in queue name - Table 6 Configuration Tool User Interface and Menus 6.1 Launching the Configuration tool 6.1.1 Launching the Configuration tool 6.2 Configuration tool - File Menu - Options (CUPS, LPD server, and Printcap) 6.2.1 Global Options 6.2.2 CUPS 6.2.3 Configuration Tool Options - LPR, LP (Berkeley and System V) 6.2.4 Configuration Tool Options – AIX Native 6.3 File Menu - PJM Tabs 6.4 Uninstalling BrightQ-Pro 6.4.1 Complete Uninstall 6.4.2 Uninstall a specific package 6.5 Print Menu - Test print and Document Printing 6.5.1 Printing a Codehost Test page 6.5.2 Printing a PostScript File 6.5.3 Printing an Image file 6.5.4 Printing an Adobe Acrobat file (PDF) 6.5.5 Printing a Text file 6.6 Printer Menu 6.6.1 Add Printer (Expert) 6.6.2 Printer Installation Wizard 6.6.3 Add Class (CUPS and System V only) 6.6.4 Export Printers 6.6.5 Import Printers 6.6.6 Duplicate Printer 6.6.7 Remove Printer 6.6.8 Set as system default 6.7 Enabling, Disabling, Rejecting, Accepting, and Removing Print Queues 6.7.1 Queuing System User interface 6.7.2 Info Tab Menu 6.7.3 Jobs Tab Menu 6.7.4 Properties tab menu 6.7.5 Connection tab menu 6.7.6 Device Status 7 Print Job Manager – Menu Tabs 7.1 Initial PJM menu 7.1.1 Name 7.1.2 Type 7.1.3 Description Page 4 of 100 7.1.4 Location 7.1.5 Status Icon 7.1.6 Properties 7.1.7 Set as default 7.1.8 Page Selection 7.1.9 Number of copies 7.1.10 Collate Copies 7.1.11 Reverse Order: 7.2 General Tab 7.2.1 Paper Size 7.2.2 Paper Type 7.2.3 Paper Source 7.2.4 Raw Mode 7.2.5 Orientation 7.2.6 Duplex Printing Pages per sheet 7.2.8 Banners 7.3 Status Tab 7.3.1 Green Alert 7.3.2 Yellow Alert 7.3.2 Red Alert 7.4 Layout Tab 7.4.1 Pages per sheet 7.4.2 Page Border 7.4.3 Layout of Pages 7.5 Margins Tab 7.5.1 Use custom margins 7.5.2 Top 7.5.3 Bottom 7.5.4 Left 7.5.5 Right 7.5.6 Units 7.6 Image Tab 7.6.1 Brightness 7.6.2 Hue 7.6.3 Saturation 7.6.4 Gamma 7.6.5 Resolution (ppi) 7.6.6 % of page 7.6.7 Image Position 7.7 Text Page 5 of 100 7.7.1 - Chars per inch 7.7.2 - Lines per inch 7.7.3 – Columns 7.7.4 - Syntax Coloring 7.8 HP-GL/2 7.8.1 - Use only black pen 7.8.2 - Fit plot to page 7.8.3 - Pen Width 7.9 Configured Printer 8 BrightQ-Pro - Unix shell-based interface 8.1 Installing a BrightQ-Pro printer with the Unix shell-based interface 8.2 "codehost-config" command 8.2.1 “codehost-config” arguments and descriptions- Table 8.2.2 codehost-config --system: (GLOBAL) arguments, and descriptions - Table 8.3 "codehost-license" command 8.3.1 “codehost-license” –argument - Table 8.4 "codehost-uninstall" command 8.4.1 “codehost-uninstall” –argument - Table 8.5 "pjm" command 8.5.1 “pjm” --argument - Table 8.6 Configuring LPD (515)-Unix Shell-Based interface 8.7 Configuring IPP (631)-Unix Shell-Based interface 8.8 Configuring Socket (9100)-Unix Shell-Based interface 8.9 Configuring SMB (Samba)-Unix Shell-Based interface 8.10 Configuring USB-Unix Shell-Based interface 8.11 Print to File-Unix Shell-Based interface 8.12 Serial-Unix Shell-Based interface 8.13 Parallel-Unix Shell-Based interface 8.14 Configuring a Printer Class 8.15 Removing a print queue 8.15.1 Removing a print queue from a print Class 8.15.2 Removing a print Class 8.16 Updating a print queue, queue description, and location 8.17 Listing all available queues and their configuration info. 8.18 Listing all available queues and their alert status. 8.19 Show status for a print queue. 8.20 Setting login and password when creating a new queue with CUPS 8.21 Setting the print queue's URI 8.22 Configuring a BrightQ-Pro printer 8.22.1 Determining the default ppd or filter options 8.22.2 Configuring the default PPD or filter options Page 6 of 100 8.23 BrightQ-Pro Printing with the Unix Shell-based interface 8.23.1 Printing with no GUI, -P, and -d 8.23.2 Number of copies (System V) 8.23.3 Number of copies (Berkeley) 8.24 Uninstalling BrightQ-Pro from the Unix shell-based interface 9.0 Unix Shell-Based Interface - Generic Filter Options 9.1 Media: 9.1.1 Setting the media type, size, and source 9.1.2 Setting the paper Orientation 9.1.3 Printing on Both Sides of the Paper (Duplex) 9.1.4 Banner Options: 9.2 Document Options: 9.2.1 Page Ranges 9.2.2 Selecting Even or Odd Pages 9.2.3 Setting the Output Order 9.2.4 N-Up Printing 9.2.5 Page Border 9.2.6 Number Up Layout (number-up-layout) 9.2.7 Mirroring Prints 9.2.8 Brightness 9.2.9 Gamma Control 9.3 Text Options 9.3.1 Setting the Number of Characters Per Inch (CPI) 9.3.2 Setting the Number of Lines Per Inch (LPI) 9.3.3 Setting the number of columns 9.3.4 Wrapping text 9.3.5 Setting the Page Margins 9.3.6 Set Pretty Print/Syntax Coloring 9.4 Image Options 9.4.1 Positioning the Image 9.4.2 Scaling the Image 9.4.3 Setting the PPI for an image 9.4.4 Setting the Hue for an image 9.4.5 Setting the Color Saturation 9.5 HP-GL/2 Options 9.5.1 Printing with the Black Pen 9.5.2 Fitting the plot to the page 9.5.3 Setting the Default Pen Width 9.6 Raw or Unfiltered output 9.6.1 Raw or Unfiltered output 10 User vs "root" while using BrightQ-Pro Page 7 of 100 BrightINSTALL, PJM, and Configuration Tool “user vs. root” - Table 11 Tables 11.1 Minimum Supported Linux Distributions and Versions – Table 11.2 Minimum Supported Unix Versions and Architectures – Table 11.3 Acronyms - Table 11.4 “codehost-config” arguments and descriptions- Table 11.5 codehost-config --system: (GLOBAL) - Table 11.6 “codehost-license” –argument - Table 11.7 “codehost-uninstall” –argument - Table 11.8 “pjm” –argument - Table 11.9 “pjm and codehost-config -o” –arguments for the Generic Filters - Table 11.10 Maximum Characters allowed in a print queue name 12 End User License Agreement (EULA) 13 Legal Stuff Page 8 of 100 Documentation Overview The User Guide is designed to assist in the installation, setup, configuration, and usage of BrightQPro. The manual is structured so that it follows the process of installing, registering, executing, configuring, and printing from BrightQPro. Listed below are some of the subjects covered. ● Installing BrightQPro on a Linux/Unix computer ● Installing and configuring BrightQPro via. Unix shellbased interface ● How to register your copy of BrightQPro and activate a BrightQPro license ● How to configure BrightQPro for Socket (9100) based printing ● How to configure BrightQPro for remote LPD based printing ● Setting the default print options for a print queue ● How to print a file 1 Product Overview Note; All following instructions, illustrations, Figures, etc, are done under the assumption that the user is "root", unless otherwise noted. 1.1 BrightQ-Pro Product Overview Codehost BrightQPro is a highly scalable, turnkey software package, which provides both a friendly, graphical user interface (GUI), and a Unix shellbased interface that links into all commonly utilized Unix and Linux print systems and spoolers (i.e. CUPS, System V/LP, BSD Printing/LPD). BrightQPro additionally provides access to device specific output functionality while printing. This access to the printers additional functionality is done without the need for end user developed complex filters or scripting. Increased output device functionality is provided via Original Equipment Manufacturer (OEM) device specific Printer Drivers, and the default printing system on the local or remote host. Codehost BrightQPro user software consists of multiple modules outlined below. 1.1.1 BrightINSTALL BrightINSTALL allows for an easy X Window System or Unix shellbased interface installation of BrightQPro. The installer has both a recommended and expert installation mode. . 1.1.2 Printer Installation Wizard The BrightQPro Add Printer Wizard allows for an X Window System driven tool with the ability to scan the local network for output devices. Scanning can discover devices based upon numerous criteria, including but not limited to; Available Port, Service Protocol, IP Address, IP Address range, etc. The “Add Printer Wizard” will also detect your devices Device Accessories, and automatically recommend the appropriate device drivers. 1.1.3 License Manager The license manager provides an easy to use X Window System or Unix shellbased interface for importing, activation, and management of Codehost License Files and Programs. The License manager controls product registration as well. Page 9 of 100 1.1.4 Configuration Tool The Configuration tool provides an easy X Window System or Unix shellbased interface that will define the default printing variables/options for a specific printing device, which may include, but is not limited to, the selection of the service level printing protocols, access to local printing, default Device Accessories, a graphical queuing manager, remote and local connectivity, and many other features. This data is saved as a user centric configuration file and queried via. the BrightQPro filters and the BrightQPro Print Job Manager (PJM). 1.1.5 Device Status monitoring BrightQPro allows for passive monitoring of the selected output device to ensure that the device is in the appropriate state to accept incoming print jobs. Device Status keeps the user up to date on the availability and status of the selected output device. Device status will also report back some of your output devices configuration information. This monitoring is based upon the supported and available private and public printer MIB’s (management information base). 1.1.6 Printer drivers and filters BrightQPro incorporates the OEM's latest printer drivers and integrates industry standard and, OEM specific PDL filters into the printing workflow. 1.1.7 Print Job Manager The Print Job Manager (PJM) allows for easy access to all output devices finishing options/features. This is performed via. any application that utilizes the default printing system/spooler that BrightQPro is compatible with and configured to support. The PJM presents all of the output device options in an easy to work with X Window System GUI, or Unix shellbased interface that is consistent across supported OS and distributions. The PJM will by default be symbolically linked to the printing systems default spooler 2 System Requirements Listed below are the minimum requirements to run Codehost Inc.'s BrightQPro with Linux and Unix Operating systems. BrightQPro supports the hardware platforms/architectures listed, as well as associated Operating Systems. It is assumed that if the hardware (HW) platform/architecture is not listed in this document it is not supported in BrightQPro. 2.1 Major Linux Distributions and Unix operating systems BrightQPro supports most major Linux distributions currently available. Listed in Table 2.5 are the minimum major distribution revisions supported. BrightQPro supports most major recent Unix OS currently shipping and available. Listed in Table 2.6 are the minimum versions of the supported Unix OS. 2.2 Kernel: minimum supported version Linux Kernel for BrightQPro is 2.4.12 or greater 2.3 X11 Window System The minimum version of supported Linux X Server for BrightQPro is Xfree86 version 4.0. The minimum version of supported Unix X Server for BrightQPro is version 11 release 5. The X Window system must be installed in order to run any of the BrightQPro tools graphically. Please refer to the Unix shellbased interface chapter of this document for instructions pertaining to usage without the X Window System. 2.4 Hardware For Linux distributions of BrightQPro software, must be installed on the Intel x86 series (or compatible), or AMD series of 32 bit and 64 bit processors. Currently there is no support offered for Linux distributions running on SPARC, UltraSPARC, PPC, Alpha, or additional architectures not mentioned in this document. In order to install, configure, and run BrightQPro to its fullest potential, the following minimum requirements should be met Page 10 of 100 ● 250MB free hard drive space to install and run BrightQPro ● 64MB RAM ● Unless otherwise noted, the minimum processor speed required by the OS will be acceptable for running BrightQPro. 2.4.1 AIX The AIX version of BrightQPro must be run on PowerPC processors. 2.4.2 FreeBSD The FreeBSD version of BrightQPro must be installed on Intel x86 processors (or compatible). The options (o) are only supported when using the BrightQPro Print Job Manager (PJM) vs. the standard (i.e. builtin) printing system spooler when printing to BrightQPro output devices. 2.4.3 HP-UX The HPUX version of BrightQPro must be run on PARISC processors. 2.4.4 Linux We recommend a minimum processor configuration of a Pentium 133 MHz (or compatible) with 64 MB of RAM, and 250 MB of free hard drive space. 64bit AMD CPUs are also supported with recent Linux distributions. 2.4.5 Solaris The Sun Solaris version of BrightQPro must run on UltraSPARC or Intel compatible processors. 2.5 Minimum Supported Linux Distributions and Versions Table Linux Distribution Red Hat EL / CentOS Fedora SuSE / OpenSuSE TurboLinux Debian Slackware Ubuntu Linux Minimum Supported Distribution Version 4 7 7.3 10.0 3.0 10 9.10 2.6 Minimum Supported Unix Versions and Architectures Table Unix OS Minimum Supported Version Processor Architecture Solaris * Solaris * HPUX Free BSD ** AIX*** 10 UltraSPARC 10 i86pc 11i 8.2 4.3 UltraSPARC II or III x86Intel and IntelCompatible PARISC x86Intel and IntelCompatible PowerPC Page 11 of 100 2.6.1 Solaris * As of the writing of this document, when using Solaris 9 there is an engineering defect in the Solaris 9 XServer when using applications created with the Gimp Tool Kit (GTK). The Solaris 9 X server will exit when running BrightQPro. In order for BrightQPro to work in conjunction with the default Solaris 9 X server you will need to download and install patch 11278606 from SunSolve (http://sunsolve.sun.com) 2.6.2 FreeBSD ** When using FreeBSD the options (o) are only supported when using the BrightQPro Print Job Manager (/usr/local/BrightQPro/bin/pjm) vs. the standard (i.e. builtin) printing system spooler (i.e. /usr/bin/lp, lpr) 2.6.3 AIX *** When using AIX, BrightQPro supports print via. System V (on AIX 5 and above) and the AIX printing system. To switch to SystemV from AIX or vice versa you can use "smit" or simply use the commands below before installing the software: /usr/sbin/switch.prt -s AIX (this switches from SystemV to AIX) /usr/sbin/switch.prt -s SystemV (this switches from AIX to SystemV) 2.7 Supported Linux Printing Systems BrightQPro supports most major Linux print spoolers/systems (i.e. Berkeley, LPR, LPRng, CUPS). When installing BrightQPro using the "Expert" option, you will be prompted to select the appropriate installed print spooler for BrightQPro to monitor (note this is only relevant if you have multiple spoolers installed). When installing BrightQPro using the "Recommended" installation option, the installer will select the default print spooler as the system to monitor and symbolically link to its default spooler. If no default print system is loaded or detected then BrightQPro will abort the installation, and prompt the user to install a default print system and reinstall BrightQPro. Note; When utilizing the Recommended mode of installation the BrightQPro Print Job Manager will by default be symbolically linked to the systems default print spooler (i.e. lp, lpr, cups, etc.). The three supported Linux print spoolers/systems are listed below, with their supported versions 2.7.1 CUPS (Common Unix Printing System) We support CUPS releases later than or equal to 1.1.15. CUPS focus is on the Internet Printing Protocol (IPP), but also supports other protocols such as Socket and LPD. CUPS is not included with BrightQPro, so therefore needs to be installed prior to installing BrightQPro. Note; As of the writing of this document Codehost recommends that CUPS version 1.1.20 be utilized in conjunction with BrightQ. 2.7.2 LPRng (Line Printer Remote New Generation - BSD) We support the LPRng release later or equal to 3.79. The LPRng software is an enhanced, extended, and portable implementation of the Berkeley LPR print spooler functionality. LPRng is not included on the BrightQPro CD or BrightQPro.xxx .run file, so therefore needs to be installed prior to installing BrightQPro. Page 12 of 100 2.7.3 LPR, LPD (Berkeley Printing) We support the LPR release later or equal to 1.6.3.1. LPR, LPD is the Berkeley Line Printer Daemon. This is commonly referred to as the Berkeley Software Distribution (BSD) printing system. 2.8 Supported Unix Printing Systems BrightQPro supports most major Unix print spoolers/systems (i.e. LP, LPR, AIX, CUPS). When installing BrightQPro using the "Expert" installation option you will be prompted to select the appropriate installed print spooler for BrightQPro to monitor. When installing BrightQPro using the "Recommended" installation option the installer will select the default print spooler as the system to monitor. If no print spooler is loaded or detected then BrightQPro will abort the installation, and prompt the user to install a default spooler and reinstall BrightQPro. The two supported Unix print spoolers/systems are listed below with their supported versions. Note; When utilizing the recommended mode of installation the BrightQPro Print Job Manager will by default be symbolically linked to the systems default print spooler (i.e. lp, lpr, etc.). 2.8.1 CUPS (Common Unix Printing System) We support the CUPS release later or equal to 1.1.15. CUPS focuses on the Internet Printing Protocol (IPP), but also supports other protocols such as Socket and LPD. CUPS is not included on the BrightQPro CD or BrightQPro.xxx .run file, so therefore, needs to be installed prior to installing BrightQPro. Note; As of the writing of this document Codehost Recommends that CUPS version 1.1.20 be utilized in conjunction with BrightQ. 2.8.2 LP (System V) We support the LP printing spooler/system. LP is the Line Printer system most commonly associated with the AT&T flavors of Unix, and is referred to as the System V printing system. Note; LP will work on systems that are BSD based as well as AT&T System V based. 2.8.3 LPR, LPD (Berkeley Printing) We support the LPR release later or equal to 1.6.3.1. LPR, LPD is the Berkeley Line Printer Daemon. This is usually referred to as the Berkeley Software Distribution (BSD) printing system. 2.8.4 AIX Native We support printing using the native AIX print system on any AIX system supported by BrightQ. 2.9 Supported Printers/Devices Please refer to the README document that is contained within the specific version of BrightQPro that you have chosen to install. Page 13 of 100 3 Installing BrightQ-Pro on a Linux or Unix Computer Note: It is always recommended that you check the Codehost, Inc., or your printer OEMs web site for recent BrightQPro updates, patches, FAQ/Technical notes, and the most recent release notes. Codehost updates can be found at the following URLs: http://www.codehost.com The installation of BrightQPro on either a Linux or UNIX computer involves the following core steps: 1. Ensure that all of the system requirements are in place prior to installing BrightQPro, including root or super user access to the system you will be installing BrightQPro on. 2. Download the appropriate binary file (.run file) or Mount the CD media, and install the program into an accessible directory. 3. If required define the path to the BrightQPro program directory in order for the BrightQ binary to be accessed. 4. Ensure that the correct default print spooler is selected while installing (expert class) or accepting the recommended installation class 5. Utilize the BrightQPro License Manager to license BrightQPro and ensure the proper Codehost License File's (CLF) or Codehost License Packages (CLP) are loaded. Note; Licensing BrightQPro, and loading .clf or .clp files is not required for some copies of BrightQPro. Some OEM copies of BrightQPro have the license files built into the program. Please refer to the information supplied with your copy of BrightQPro to determine if importing a license is required. 3.1 To install BrightQ-Pro on a Linux or Unix system Note: The procedure described and the illustrations utilized are Linux centric. Unix installations follow the same procedure but the look, feel, install paths, and core OS centric commands for installation may differ slightly. If it is required (for Unix installations) we will point out the core differences. The installation procedure below will work when installing the program via X11 or from the command line. BrightInstall will detect the following system attributes, and variables, and adjust the installation accordingly: ● Automatic detection of the System Architecture: The installer will auto detect the hardware platform/architecture the system is utilizing (i.e. x86, Sparc, MIPS, etc.) ● Automatic detection of the Operating System (UNIX): The installer will auto detect the Unix OS and utilize the appropriate binaries (i.e. Solaris, HPUX, IRIX, etc.) ● Automatic detection of the Distribution (Linux) and kernel: The installer will auto detect the Linux Distribution and kernel version in order to load and utilize the appropriate binaries (i.e. Red Hat, SuSE, Slackware, etc.) ● Automatic detection of the available Libraries (i.e. GLIBC, GTK, etc.) Page 14 of 100 ● Automatic detection of the existing and default printing spooler/system: The installer will auto detect the default printing system and (depending on the class of installation) will prompt to utilize the default spooler/printing system. A printing spooler/system must be preinstalled on either the Unix or Linux systems in order to successfully install and run BrightQPro. If one is not loaded the install will abort and you will be prompted to load one. ● Automatic detection of preinstalled printers: The preinstalled printers will be made available via. BrightQPro. Only printers installed via. BrightQPro will be modifiable from either the Print Job Manager or the configuration tool, the only exception to this is the generic BrightQ filter options (i.e. Properties, General, Layout, Margins, Image, Text, HPGL/2) and printers installed via. CUPS that have a device specific PPD associated with them. CUPS printers will be modifiable from either the Print Job Manager or the Configuration tool only if the appropriate BrightQPro CUPS license is installed and the options for “Feature Selection for other queues” and “User Print Job Manager or other queues” are selected. The detection of preinstalled printers is determined from the appropriate print spooler/systems default configuration files. Preinstalled nonBrightQPro printers can utilize BrightQPro conversion filters if the option is enabled via the ConfigurationTool options menu. Automatic detection of preinstalled copies of BrightQ or BrightQPro: If you have a preexisting copy of BrightQ or BrightQPro on your system the BrightInstall will detect this and retain your configured printers, as well as the configuration for the default printing system, and default print spooler link to the BrightQ spooler (the Print Job Manager or PJM). ● ● ● 3.2 Locating the .run or setup.sh installer The first installation step will involve locating the locally accessible BrightQPro installer either on CD or via the downloaded .run file 3.2.1 Starting the Installation script To start the setup process, locate the “brightq<os>.xxx.run” file and run the setup script to launch the installer. An example command to start the installation script is listed below. # sh BrightQ-Pro-2.x-solaris-2003-08-23.run # ./ BrightQ-Pro-2.x-solaris-2003-08-23.run If you are not logged into the system as root you will be prompted to supply the root password . Page 15 of 100 3.2.2 Command line feedback For a Unix shellbased interface you will first be presented with a menu that displays the operating system the installer is being run on and some basic information pertaining to the libraries being used (see example below). This is for informational purposes only, simply select "OK" to move to the next menu. X Window System's will not display this menu. ● Unix shellbased interface menu displayed for Solaris x86: You are running a x86 machine with glibc2.1 Operating System: Sun Solaris 5.8 (or similar) ● Unix shellbased interface menu displayed for Red Hat Linux: You are running a x86 machine with glibc2.1 Operating System: Red Hat Linux (or similar) 3.2.3 End User License Agreement The next menu you will be presented with will be the Codehost "End User License Agreement (EULA)". Please review the agreement and if you agree to the terms of the EULA select "I Agree". For Unix shellbased interface when you are finished reviewing the EULA first select "Exit" you will then be prompted whether or not you agree with the license. If you do not agree to the terms of the EULA select "cancel or no" and the installation will be aborted. Once you have accepted the EULA the menu system will vary based upon whether you are using an X Window System or a Unix shellbased interface. For the Unix shellbased interface you will be prompted as to whether or not you would like to read the README file. For the X Window System installation you will go directly into the setup menu that will prompt for the installation class, and provide a button for the viewing of the README file. Page 16 of 100 3.3 Installation Classes You will now be prompted by the BrightQPro setup menu to select the "class" of installation. The two classes are as follows: "Expert" or "Recommended". They are explained in the following sections. ● The two classes determine whether the BrightQPro installer will make certain installation decisions for you, or these decisions will be made by the individual conducting the installation. 3.3.1 Expert Class Installation The Expert installation class will allow the user to make certain decisions pertaining to the installation of BrightQPro. Under the Expert installation class, BrightINSTALL still auto detects all relevant items, such as default printing system, operating system, and system architecture. You will be able to choose the following items when utilizing the Expert Class installation. Global Options These options are consistent whether using an X Window System or a Unix shellbased interface. 3.3.1.1 Install Path This is the default path where BrightQPro will be installed on your local machine. The default path is /usr/local/brightq, but this path is user definable. Page 17 of 100 3.3.1.2 Link Path This is where the symbolic link resides for the installed print spooler binaries. The default is /usr/bin, but this path is user definable. Install Options/Printing System The Printing system options menus will vary whether you are using a X Window System or Unix shellbased interface. 3.3.1.3 Common Files This option is selected by default. If this option is unselected the installation will abort. This is only available as a selectable option with the Unix shellbased interface. With the X Window System you cannot deselect this option. Listed below is the option as displayed with the Unix shellbased interface. [X] Common Files 3.3.1.4 Components These are only available as a selectable option with the Unix shellbased interface, and only if a default OEM license is being shipped with the product. You will be presented with two component options. Listed below are the options as displayed with the Unix shellbased interface. Page 18 of 100 [X] Component Codehost BrightQPro [X] Component Printer OEM License Name 3.3.1.5 Currently Installed Printing System This option is selected by default. If this options is unselected the next menu will prompt you to select the appropriate printing system installed on your host. If left selected, BrightInstall will select the default printing system that was detected. It is highly recommended to leave this option selected. This option is not available in the X Window System. Instead it will be represented by the actual printing system being selected. Listed below is the option as displayed with the Unix shellbased interface. [X] Currently Installed Printing System 3.3.1.6 Replace the standard printing commands with BrightQPro PJM This option is selected by default. Selecting this option means that your printing system spooler (i.e. /usr/bin/lpr, /usr/bin/lp etc.) will be renamed to lp.brightq or lpr.brightq (depending on the operating system), and we will symbolically link the default spooler command with /usr/local/bin/pjm. Therefore, when using an X Window System and typing lp or lpr in a terminal you will see the BrightQPro Print Job Manager (PJM) as PJM is now symlinked with the lp/lpr/etc. spooler command. If your application is utilizing lp then it will now be using the BrightQPro PJM. [X] Replace Standard Printing commands with BrightQPro PJM If you choose not to select this option then no symlink will be established between the default print system spooler and the PJM. With no symlink in place you will need to call the PJM explicitly via. /usr/bin/pjm, /usr/local/brightq/bin/pjm, or ensure that that BrightQPro is in the systems path. Listed below is the option as displayed with the Unix shellbased interface. 3.3.1.7 CUPS Printing System Selecting this option assumes that you have the Common Unix Printing System (CUPS) installed and selected as the default print spooler/system on your host. Please ensure that you have a supported version of CUPS installed on your system prior to installation of BrightQPro. 3.3.1.8 LPRng/LPR Printing System Selecting this option assumes that you have a LPR variant (LPRng, BSD, LPR, GNU LPR...) Berkeley (BSD) based printing system installed and selected as the default print spooler on your host. BrightQPro will detect what the default print spooler/system is on your system and select this option. Please ensure that you have a supported version of LPRng/LPR installed on your system prior to installation of BrightQPro. 3.3.1.9 Unix Printing System Selecting this option assumes that you have a System V or LP variant printing system installed and selected as the default spooler on your host. BrightQPro will detect what the default print spooler/system is on your system and select this option. 3.3.10 AIX Printing System If you are installing BrightQPro on an AIX system, you will be able to select the native AIX print system. 3.3.1.11 Startup Menu Entries (KDE/GNOME/CDE) For users who are utilizing the KDE, GNOME, or the Common Desktop Environment (CDE) an entry will be placed in the "startup menu". Page 19 of 100 3.4 Recommended Install When using the "Recommended" installation class the installer will make the core decisions pertaining to the installation of BrightQPro for you. These decisions are the same as the Expert Class install (i.e. Install Path, Link Path, default print spooler/system, etc.). Under the Recommended installation BrightINSTALL still automatically detects and addresses all relevant items. ● The "Recommended Install" is designed for individuals who do not have a strong knowledge of either the Unix or Linux operating systems or are comfortable with the default installation options. Page 20 of 100 ● Once you have agreed to the EULA, selected the "Recommended Install", and selected the "Continue" button, the BrightQPro installation will run until completed. ● Note: if you cancel the installation of BrightQPro prior to its completion, all files installed up to that point will be removed, and your system will be returned to the original state it was prior to installation. 3.5 Registration, License Manager, License Activation Once you have completed the installation, you will be prompted to register and license your copy of BrightQPro. If you have a bundled and Original Equipment Manufacturer (OEM) licensed version of BrightQPro the appropriate OEM license will be included with the program. All others will require a license to be installed. ● All demo versions of BrightQPro will require that you both register and download a demo license. ● If you are working with a Demo version of BrightQPro you will be required to register via. the BrightQPro License Manager, Online Registration inside the application or at https://license.codehost.com in order to receive a Demo Codehost License Program (.clp), Codehost License File (.clf), or Codehost License Number (CLN). Please refer to the "BrightQPro Demo and Full License Activation Steps", chapter below for more details on this process. ● The aforementioned files will enable BrightQPro support for your Original Equipment Manufacturer (OEM) specific output device. If you are working with a Demo license, by registering your copy, you will be automatically emailed a Codehost License Certificate Number (CLN) that will download a .clp file, and subsequently activate BrightQPro. Listed below are the steps to register your copy of BrightQPro and to install either the .clp, .clf, or CLN. ● Listed below are step by step instructions on how to download, install, and activate the BrightQPro OEM specific license from the BrightQPro license manager and https://license.codehost.com 3.5.1 BrightQ-Pro Demo and Full License Activation Steps 3.5.1.1 Registration Not all copies of BrightQPro require registration. If you have a demo version of BrightQPro you will be required to register your copy of BrightQPro in order to download and activate an OEM BrightQPro license. 3.5.1.2 Online Registration If you are using an X Window System you can skip to "Registration with an X Window System:" chapter below. If you are not using an X Window System but instead a Unix ShellBased interface you will first need to register at the following URL; ● https://license.codehost.com Click on the registration option (Click here to REGISTER). Please ensure that all registration information is valid, and retain the email address and password you entered, as this information will be required later. 3.5.2 Registration and License Activation - X Window System: 1. To activate the BrightQPro license launch the BrightQPro License Manager by typing “register” at Unix Shell or Page 21 of 100 2. “codehostconfig” and then go to the “File/License Manager” menu option. Select “License Activation” 3. If you have not already registered online or via. BrightQPro, in the “Process an online order” menu select “Create an account”. 4. After filling out all of the registration information select “Register”. Please retain for your records the email address and passwords you entered. 5. You will now automatically be put back into the “Process an online order” menu. The email address and password you entered will be automatically populated. If this does not occur automatically then manually populate these menu fields. 6. Input the “License Program Certificate Number” which was either emailed to you, listed on the URL you registered on, or listed on page one of your BrightQPro License Certificate, and select submit. Following is an example of a Codehost “License Certificate Number”: OEMX10JQZBURXANTALKZHL5111 7. BrightQPro will validate your license on the Codehost License servers and download the appropriate files for you. For all additional systems, utilize the “License Activation”, (you will now be in the “Process an online order” dialog) as described above and input the Certificate number, email address, and password. If you have (for example) a five user license this process will work for five unique systems. You are now ready to use BrightQPro . ● Note: If you are downloading a demo license it is valid for 45 days, and can be installed on three unique computers . Page 22 of 100 3.5.3 Registration and License Activation - Unix Shell-Based interface 1. 2. 3. If you have not already registered please refer to the "Online Registration" chapter of this document and follow the online registration steps. To activate the BrightQPro license simply launch the Unix ShellBased, BrightQPro license manager by typing the “codehostlicense” command with the “activation or –a” option: "codehostlicense activation" or “codehostlicense a” You will be prompted to input the “Codehost License Certificate Number” (either emailed to you, listed on the URL you registered on, or listed on page one of your Codehost License Certificate Number), and once input select submit. You will also prompted to input the email address and password you input via the online registration. You can include all of the above information with the “codehostlicense” command if you choose, see below: codehost-license --activation --certificate OEMC-10-YQZI-SRXV-WTAP-HZHP-5111 –email [email protected]–password sample_password Page 23 of 100 or codehost-license –a –c (codehost license certificate number) –e email address –p password BrightQPro will validate your Certificate Number, email address, and password on the Codehost License Certificate Number servers and download the appropriate files for you. For all additional systems, utilize the steps as described above and input the Codehost License Certificate Number, email address, and password. If you have (for example) a five user license this process will work for five unique systems with five unique Network Adapters/MAC addresses You are now ready to use BrightQPro. ● Note: If you are downloading a demo license it is valid for 45 days, and can be installed on three unique computers. 3.5.4 Registration and License Activation without Internet Access – X Window System If the computer hosting BrightQPro does not have access to an Internet connection then you will need to generate what is referred to as a Codehost License Package (CLP) file from the http://license.codehost.com URL, in order to activate BrightQ. The following steps are only necessary if you cannot activate BrightQ via the built in License manager with a connection to the Codehost license servers via the Internet or you do not have a builtin license (i.e. OEM bundled copy of BrightQPro). Note: You are still required to register as outlined in chapters 3.5.23 Listed below are the steps to generate and install a .clp file (Codehost License Program) with an X Window System 1. In the BrightQPro GUI go to the “File/License Manager” and copy your machine ID from the screen listed next to “Your Machine ID is: (example ETHA6FFXXXX61234). 2. Go to URL https://license.codehost.com and login with your user name and password. If you have not already registered on the Codehost servers refer to chapter 3.5.23 above. 3. Enter your Codehost License Certificate Number listed on page #1 or your license document (if the number has been supplied in another manner use that number), in the field "Enter a new certificate number". Once the number is input, select "submit". 4. You will now be pushed to the customer page with the current certificate displayed. 5. Listed under "GET FULL DRIVERS & LICENSE" : Select your: Operating System Input your: Machine ID (i.e. ETHA6FF296B61234) 6. Now select "Product Activation" and you will be presented with a xxxx.clp file to save to your local system. 7. Save the xxxx.clp file to an accessible location (i.e. local drive, archive media, etc.) 8. In the BrightQPro GUI go to the “File/License Manager” select "Import" and locate the xxxx.clp file Page 24 of 100 9. Restart BrightQ. 3.5.5 Registration and License Activation without Internet Access – Unix Shell If the computer hosting BrightQPro does not have access to an internet connection then you will need to generate what is referred to as a Codehost License Program (CLP) file from http://license.codehost.com, in order to activate BrightQ. Note; You are still required to register as outlined in chapters 3.5.23 Listed below are the steps to generate and install a .clp file (Codehost License Program) with a Unix Shell based interface 1. The only element that varies in the Unix shell vs. the X Window system is the process to determine the Machine ID and the process to import the xxxx.clp 2. Go to URL http://license.codehost.com and login with your user name and password. If you have not already registered on the Codehost servers refer to chapters 3.5.23 above. 3. To get the machine ID simply type "codehostlicense machineid" or “codehostlicense –m” at a Unix Shell and the shell will respond with the following feedback; ETHA6FFXXXX61234 (this is an example Machine ID) d.) To import the xxxx.clp file type : # codehost-license -i xxxx.clp e.) When imported successfully you will get the following feedback. "License for 'xxxx License and Drivers' imported successfully. You may need to restart any running Codehost BrightQ programs for the changes to take effect." 3.6 Upgrading from a previous version of BrightQ to BrightQ-Pro If you are a current BrightQ 1.6.5 (or greater) user you can upgrade to BrightQPro without having to uninstall the previous version of BrightQ. The process is exactly the same as listed in the previous chapter (“3.0 Installing BrightQPro on a Unix or Linux computer”), with the exception of the following items. ● BrightQ 1.6.4 or earlier must be completely removed prior to installing BrightQPro ● The default print system you initially installed BrightQ in support of, cannot be switched. For example if you installed BrightQ in support of CUPS you cannot now select LPD as the default print system. If you have changed your print system to one that is different then when you initially installed BrightQ you will be required to Uninstall BrightQ prior to installing BrightQPro. ● The Print Job Managers (PJM) link to the default print spooler cannot be changed when upgrading. If you want to change this option while upgrading you will be required to Uninstall BrightQ and install BrightQPro. ● The Installation and Link Paths cannot be changed when upgrading from BrightQ to BrightQPro. If you wish to change these locations you will be required to Uninstall BrightQ prior to installing BrightQPro. Page 25 of 100 4 Printer Installation Wizard – X Window System Now that you have installed and registered BrightQPro it is time to begin the process of adding and configuring output devices. The configuration of printers on either a Linux/Unix X Window System or Unix Shellbased Interface involves the following core steps: ● Launching the BrightQPro configuration tool either via. X Window System or the Unix shellbased interface (chapters 89). Note the Unix shellbased interface requires a printer to be manually installed and configured. ● Selecting either the BrightQPro printer installation wizard or the expert mode Add Printer ● Selecting the appropriate model of output device and setting the default "Device Accessories” ● Selecting the appropriate local or remote connection to your output device (parallel, serial, USB, File, Remote LPD, SMB, IPP, socket 9100, etc.) ● Naming the print queue, and setting the system’s default print queue ● Printing a BrightQPro Test Page to ensure that the output device is configured properly Unix ShellBased interface Please refer to chapter 89 Unix shellbased interface, for the process to install, configure, etc. output devices without an X Window System 4.1 Launching the Configuration Tool The first step in configuring BrightQPro is to launch the Configuration tool. If you accepted the installation option to include "Startup Menu Entries for KDE/GNOME/CDE then you can launch the Configuration Tool via the appropriate window manager menu entries. You can additionally (at a Unix shellbased interface) type the following command (type without the quotes) to evoke the Configuration Tool: codehost-config 4.2 Adding/removing a printer Once you have the BrightQPro Configuration Tool launched you will need to add and subsequently configure your desired output devices. You can utilize the following steps to add, configure, and test your output device. There are two methods to add a printer in BrightQPro. You can add a printer using the Printer installation wizard which will guide you step by step through the configuration of your printer or you can add and configure a printer manually. 4.3 Printer Installation Wizard The Printer Installation Wizard is a tool designed to guide a user through the process of adding, configuring, and subsequently printing to a BrightQPro supported printer. The Printer Installation Wizard is designed to simplify the process of printer installation, and configuration. Listed below are the core steps (15) to install a BrightQPro printer. Page 26 of 100 4.3.1 Step 1 of 5 1. The first step in adding a device via the Printer Installation Wizard is to click the "Add Printer Icon" in the upper left of the configuration tool interface. 2. You will now be prompted to select the type of printer you will be installing. You will have a choice of “A local printer directly attached to this computer” (i.e. a printer connected via. Parallel, Serial, USB, or printing to a File) or a “Remote printer using a network protocol” (i.e. LPD, IPP, SMB, or Socket). Once you have made your selection click Next. 4.3.2 Step 2 of 5 (local printer) 1. If you selected to connect to a local printer you will be give the local connection configuration options. Please refer to the following chapters for more detail on all of the locally connected device options. ● Parallel – chapter 5.2.2 ● USB (Linux and Solaris only) – chapter 5.2.3 ● Serial – chapter 5.2.4 ● File – chapter 5.2.5 2. If you selected a remote printer, and you know the connection information select the appropriate protocol, input your configuration information, and select next. Please refer to chapters 5.x.x – 5.x.x for more detail on all of the remotely connected device and protocol option. ● Remote LPD – chapter 5.2.6 ● IPP – chapter 5.2.7 ● Socket (Direct to Port Printing) – chapter 5.2.8 ● SMB (thru Samba's SMB) – chapter 5.2.9 Page 27 of 100 4.3.3 Step 2 of 5 (remote printer) 1. 2. If you do not have the connectivity information for your output device or want to scan the network for available Printers select the “Discover Network Printers” icon in the lower left corner of step 2. The BrightQPro “Discover Printers” menu will allow you to easily scan your network for available printers based upon the multiple criteria listed below. . a. b. Protocol: You can scan your network for available printers based upon the LPD, IPP, Socket, SMB, Custom or Any supported service level protocol. Port Number: You can scan your network for available printers utilizing specific ports such as 515, 631, 9100, etc. You can also specify a custom port. c. 3. Host name, IP Address, or IP Address range: You can scan your network for a specific Host Name, IP Address, or range of IP Addresses. This will scan the specified host or hosts for available printers based upon protocol and port. Once you have chosen your method of discovery and IP range, select the “Start Discovery” button. BrightQPro will now scan your network for devices that are available based upon the criteria you supplied. This scan may take several minutes depending on the criteria supplied and the extensiveness your network. In order to expedite the discovery process please supply as much information as possible. 4. When the printer discovery process is complete you will be presented with a list of Hosts. Locate the appropriate printer and click “Select Printer”. You will now be automatically forwarded to step 3 of 5. Page 28 of 100 4.3.4 Step 3 of 5 1. If you did not use the discovery process to locate your printer or the discovery process did not find a (device driver) PPD for you printer you will now be prompted to make a few manual selections. a. b. Printer OEM: This is the Original Equipment Manufacturer of the printer you are configuring. If you only have single OEM license installed then you will only have one option in the drop down menu. Printer Model: This is the model of the printer you are configuring. All of the models listed are dependant upon the selection made under the “Printer OEM” menu. c. Installable Options: These are installed options on your printer such as additional paper decks, folding units, stapler units, etc. All of the options listed are dependant upon the selection made under the “Printer Model” menu. d. Features: These are the Printer Model and Installable Options specific features. The selections made here will become the defaults for the print queue being configured. 2. Once you have finished select next. 4.3.5 Step 4 of 5 1. You will now be prompted to input some data. a. b. Queue Name: This is a user definable queue name. Please refer to table 11.10 for maximum queue name lengths. Please note that spaces and nonalpha numeric characters cannot be utilized for queue names. Printer Location: This is a user definable field designed to correlate with the location of your printer. An example might be 4th floor mailroom, lab, etc. c. Disable Filter Processing: Please refer to chapter 5.2.1 for more detail on disabling filter processing. d. Enable BrightQ Print Job Manager: Please refer to chapter 5.2.2 for detail on enabling the PJM. e. Make this queue the new system default: This print queue will now become the system default print queue. 2. At this point selecting Next will enable the print queue on the system. Page 29 of 100 4.3.6 Step 5 of 5 1. Queue configuration confirmation. a. Queue Settings: This page will list the specific queue settings from previous steps. b. Print Test Page: This will print a default BrightQPro Test page to the configured printer c. Filter Options: This option will display the default device independent filter options. Please refer to chapter 7.2 for more detail on configuring the default “Filter Options” 2. Select “Ok” and the configuration of your print queue is now complete and read to utilize. 5 Adding a printer manually – X Window System Now that you have installed and registered BrightQPro it is time to begin the process of adding and configuring output devices. The configuration of printers on either a Linux/Unix X Window System or Unix Shellbased Interface involves the following core steps: ● Launching the BrightQPro configuration tool either via. X Window System or the Unix shellbased interface (chapters 89). Please note that the Unix shellbased interface requires a printer to be manually installed and configured. ● Selecting the Add Printer (Expert) (Ctl+A) menu option listed under the Printer Menu. ● Selecting the appropriate model of the output device. Page 30 of 100 ● Selecting the appropriate local or remote connection to your output device (parallel, serial, USB, File, Remote LPD, SMB, IPP, socket 9100, etc.) ● Selecting the device specific properties and the device specific Device Accessories ● Naming the print queue, setting the location, and description, and establishing this queue as the system’s default print queue if appropriate. Unix ShellBased interface Please refer to chapter 89 Unix shellbased interface, for the process to install, configure, etc. output devices without an X Window System 5.1 The Model tab menu This is the menu system you will use to determine which OEM model of printer you wish to install and which Device Accessories are on this printer. Options on your printer, such as additional paper decks, folding units, stapler units, etc. All of the options listed are dependent upon the selection made under the “Printer Model” menu. 1. Step one to adding an output device manually, is to select the Add Printer (Ctl+A) menu option listed under the “Printer” menu item. 2. Once you have selected "Add Printer (Expert)" you will be prompted to select the appropriate output device model. Once you have selected the appropriate model select the “Connection” tab. Please note that BrightQPro will display all currently installed BrightPro printers under “Configured Printers”. All printers listed under “Other Printers” were installed prior to, or outside of BrightQPro. 5.2 The Connection tab menu This is the menu system you will use to determine how your computer will communicate with the printer model that you have selected to configure. You will be presented with a number of different connectivity/communication options. The options relate to printers both local and remote. The available connection options are as follows: ● Parallel Page 31 of 100 ● USB (Linux and Solaris only) ● Serial ● File ● Remote LPD ● IPP ● Socket (Direct to Port Printing) ● SMB (thru Samba's SMB) ● Disable filter processing ● Enable Print Job Manager GUI 5.2.1 Disabling filter processing You will also be presented with the option to "Disable filter processing". This allows the file to be passed on to the destination output device without any data modifications or filtering done by BrightQPro. You might disable filter processing if (for example) you already have a printready data stream and you do not want any modifications performed. If you choose to not select this option the data stream handed to that queue will pass through the BrightQPro data, document, input, etc. filters. This option is applied on a queuebyqueue basis. Please note that BrightQPro does not FilterProcess queues for printers established outside of BrightQPro unless it is explicitly specified via. the BrightQPro options menu. This conversion filtering for other printers is enabled or disabled on a global vs queuebyqueue basis. 5.2.2 Enable Print Job Manager GUI You will also be presented with the option to "Enable BrightQ Print Job Manager GUI". You would enable this option if you want to have the Graphical User Interface (GUI) of BrightQPro appear each time the default print spooler is utilized (i.e. each time you print). With this option enabled you will have graphical printing UI to work with in order to select the appropriate printing (i.e. duplex, paper size, etc.) and finishing options (i.e. staple, fold, paper tray number x). If this option is disabled then in order to access the Print Job Manager (PJM) you will have to call the PJM specifically. To call the PJM explicitly the “pjm” command will need to be in the systems default path or it will need to be called from its install location (i.e. /usr/local/brightq/bin/pjm). Enabling the Print Job Manager GUI will still allow you to access printers installed outside of BrightQPro 5.2.3 Parallel Printing Parallel printing refers to a printer connected directly to the local computer via a parallel cable. You will have the option to specify the path to the printer. The default path is "/dev/lp0", but this is a user definable path. 5.2.3.1 Device Page 32 of 100 The usual default path for a parallel device is "/dev/lp0" but this path might exist as "/dev/lp1", "/dev/lp2", or it might exist as "/dev/par0", "/dev/parallel/0", etc. depending on your operating system. 5.2.4 Universal Serial Bus (USB) Printing When printing via the USB, you will need to have the printer directly connected via USB cable to the computer utilizing BrightQPro. You will need to define the default path to the device. Note: USB port printing does not support any port options. USB Printing is only a feature of Linux and Solaris versions of BrightQPro 5.2.4.1 Device The usual default path for a USB printer device is "/dev/usb/lp0" but this path might exist as lp1, lp2, or it might exist as "/dev/ulpt1", "/dev/unlpt1", "/dev/usblp1", "/dev/usb/lp1", "/dev/usb/usblp1", etc. depending on how you have configured your computer to use the USB port. Note; all numbers listed in the above paths are only examples and may be different on your individual setup 5.2.5 Serial Printing Page 33 of 100 BrightQPro supports the standard RS232C serial ports on the system (the ports on a normal PC are examples of RS232 connections). When printing via. the serial port of the computer you will need to have a Serial printer directly connected via. serial cable to the computer utilizing BrightQPro. You will need to define the default path to the device, speed of data transfer, Data Bits, Parity, and Flow Control parameters. 5.2.5.1 Device The usual default path for a Serial device is "/dev/ttyS0" but this path (/dev/) might exist as "ttyS1", "ttyS2", "cua0", or it might exist as "/dev/serial/0" etc. depending on how you have configured your computer to use the serial port or what generation your OS release or distribution is. 5.2.5.2 Speed (Baud Rate) Sets the speed of the serial port in bits per second (baud). You have to select a data transfer speed for the serial connection. You have a choice between 1200, 2400, 4800, 9600 (default), 19200, 38400, 57600, 115200, baud rates 5.2.5.3 Data Bits This determines the number of asynchronous data characters transmissions at a time. You have an option of 7 or 8 Data Bits to be asynchronously transferred at a time (8 is default). 5.2.5.4 Parity A calculated value that is used to reconstruct data after a transfer failure. Select None, Odd, or Even. ● None: Does not send a parity bit check (default) ● Odd: Send a parity check bit with every character; the result of the sum of all bits in each character must be odd. ● Even: Send a parity check bit with every character; the result of the sum of all bits in each character must be even. 5.2.5.5 Flow Control This is the management of data flow between computers or, in this case, a computer and a peripheral printing device. Flow control is designed so that computers and devices can handle data at an efficient pace. ● None: This effectively determines that no flow control is necessary and no parity check bit willbe sent by default (by default a parity check bit is sent). ● Soft: This uses the XON and XOFF characters to do flow control; note this is usually not reliable with printers for the following reasons. Software flow control is slower and usually less desirable than hardware flow control. Software flow control is used only for transmitting text. It cannot be used for binary file transfer because binary data may contain the special flow control characters. ● Hard: This sets the flow control to use the requesttosend (RTS) and cleartosend (CTS) signal lines. This should be used with all highspeed serial connections that compress data. ● DTR/DSR: This sets the flow control to use the dataterminalready (DTR) and datasetready (DSR) signal lines. Page 34 of 100 5.2.6 File (printing to a file) This option will allow you to configure a printer to print to a file vs. printing to an actual printer. All the data will be directed to the specified file path, instead of being sent to the printer. This can be utilized for testing, or to send files to a pipe or device (dev/*). You will need to define an absolute path for the file to be placed. 5.2.6.1 Path to file Path to file: You must supply the exact path to the file to be printed to, e.g. "/usr/local/tmp/psoutput/temp.ps". With this example BrightQPro will produce a file called "temp.ps" and place it in the "/usr/local/name/psoutput" directory. This can also be used to specify an arbitrary device that would not be explicitly supported by the configuration tool, such as hot folders. Be aware that most printing systems will not truncate the file, and thus each jobs data may be appended to the specified file which will make multiple outputs merge together and behave in a inconsistent manner. You must also ensure proper permissions on the file and directory so that the daemon has write access to it. ● Note: When printing to a file and using the Common Unix Print System (CUPS) you will need to edit the /etc/cups/cupsd.conf file so that the FileDevice entry has a Yes argument (see below); example: FileDevice Yes Page 35 of 100 5.2.7 Remote LPD This is the implementation of the protocol used by the Berkeley printing system (BSD) or Line Printer Daemon (LPD). Printers on the network using the LPD protocol (or LPD print servers). Both host and queue need to be specified. 5.2.7.1 Host The host address is either an IP address of the printer or LPD server supplying the LPD service, or the Fully Qualified Domain Name (FQDN) of the remote LPD server (e.g. printer.codehost.com). This is the IP address of the output device. 5.2.7.2 Queue The Queue is the name of the printing Queue on the LPD server. Note; some devices can have multiple queue names that redirect to specific locations (virtual or physical) on the printer. Examples of multiple queue names might be, "print", "hold", and "direct". Additionally many output devices have fixed remote queue names. We have built into BrightQPro four default remote LPD queue names of "print", "lp", "direct", and "hold". If your remote queue name is not one of the aforementioned names you can simply highlight the Queue name and type in the appropriate name. 5.2.7.3 Send data before control file (Available with nonCUPS system) A data file will be sent before the LPD control file, if the print server needs this. 5.2.7.4 Manual copies (Available with nonCUPS system) Multiple copies will be manually produced, instead of managed at the printer. So instead of a single file being produced and sent with a multiple copies option, multiple files will be sent. 5.2.7.5 Add banner (Available with nonCUPS system) This will tell the print server to add a banner for each print job 5.2.7.6 Reserve Ports – Part of the RFC 1179 for LPD (Available with nonCUPS system) This will reserve privileged ports to initiate LPD connections. The source port must be in the range 721 to 731, inclusive. 5.2.7.7 Sanitize my junk – (Available with nonCUPS system) This will sanitize job titles before sending them to the LPD server. This process will ensure that only supported characters are submitted as a job title. All unsupported control characters will be stripped out. Page 36 of 100 5.2.8 Internet Printing Protocol (IPP) The Internet Printing Protocol is a newer, open protocol for printing on IP networks. Many modern print servers, including CUPS, use it. Host, Port, and Resource need to be specified. 5.2.8.1 Host The host address is either an IP address of the printer or IPP server supplying the IPP service, or the Fully Qualified Domain Name (FQDN) of the remote IPP server (i.e. printer.codehost.com). 5.2.8.2 Port This is the port IPP will talk to, in order to send an outgoing job. Normally for CUPS this port is set at IPP (631), but may be HTTP (80), or HTTPS (443) for secure printing. This is determined by the printer OEM and/or IPP server. 5.2.8.3 IPP Resource The resource is the name of the IPP resource on the IPP server, or printer. The "IPP" URL scheme allows an IPP address to choose an appropriate IPP print service (for example, from a directory). The IPP client can establish an HTTP connection to the specified IPP print service. The IPP client (computer running BrightQPro) can send IPP protocol requests (for example, a 'PrintJob' request) and receive IPP protocol responses over that HTTP connection. 5.2.8.4 Login/Password If needed, you can specify the IPP Login name and Password combination. The need for such a Login and Password is defined by the printer OEM, or the IPP server administrator. Page 37 of 100 5.2.9 Socket/Raw TCP/IP (port 9100) Socket or direct to port printing allows you to print directly via. a raw TCP socket connection, or what is often called "AppSocket printing" or the "JetDirect" protocol. Both host and port need to be specified. 5.2.9.1 Host The host address is either an IP address of the printer or Server supplying the Socket/Raw service, or the Fully Qualified Domain Name (FQDN) of the remote server (i.e. printer.codehost.com). 5.2.9.2 Port The port number is usually 9100 and is usually associated with a HP Jet Direct box, but can apply to nonjet direct printers. 5.2.10 Samba/CIFS This is a filesharing protocol designed to allow networked computers to transparently access files that reside on remote systems over a variety of networks. The CIFS/SMB protocol defines a series of commands that pass information between computers. SMB uses four message types: session control, file, printer, and message. Page 38 of 100 Use this to connect to a Windows or Unix based SMB print server using the SMB protocol or utilizing Samba. Note: In order to use SMB printing you will need to have Samba's SMB client installed on your local host prior to setting up the BrightQPro SMB printer queue. If you do not have support for SMB installed on your local host prior to the establishment of a BrightQPro queue you will not have the "SMB (thru Samba)" option available in the "Add a Printer" dialog box. 5.2.10.1 Server This is the SMB name for the print server (this is not an IP address). 5.2.10.2 IP Address (this is only displayed with systems not running CUPS) This is the IP address for the print server, if necessary. 5.2.10.3 Resource: This is the name of the SMB resource on the server. For instance, if you want to access the printer commonly referred to as \\MACHINE\PRINTER\, then MACHINE would be the Server, and PRINTER would be the Resource. 5.2.10.4 User Password/Workgroup Specify if necessary. 5.2.10.5 Translate CR > CR/LF (this is only displayed with systems not running CUPS) This enables automatic translation between DOS and Unix text files. 5.3 Printer Properties Tab Menu Once you have completed selecting your output device and configuring the connection options, it will be time to select the default output device options. These will be the default options for the currently logged in user. Selections may include both Device Accessories (such as whether the output device you are printing to has certain addon equipment) as well as the actual option you want to be set up as default for a particular print queue. These options could be any of the device specific elements such as media size, media source, stapler modes, etc. The output device’s Properties that are selected will be associated with the user that configures the specific queue. For example if you are user 1 and you have configured queue 1 properties to include a stapler, and additional paper deck, and to select from tray 2 when printing then each time you log on to the system your configured queue 1 will have the stapler and paper deck options enabled and the data sent to that queue will pull from tray 2. If you are user 2 and you have logged on to Page 39 of 100 the system and have not configured a print queue’s properties then you will be presented with the output devices default options. If you are configuring the output device as the "root" user your configuration will be the default for all users. Installable options need to be configured by root. 5.4 Printer Queue Tab Menu Once you have completed configuring your output device's model, connection options, and properties it is time to choose your output device’s queue name. 5.4.1 Choose a name for this queue This is a userdefinable print queue name. This is the name for the output device you will interface with in all of the BrightQPro modules. Only standard alphanumeric characters are supported for the queue name. Depending on your default printing system/spooler this name may or may not be changed (creating an alias) without reinstalling the printer. Currently CUPS does not support queue name aliases or renaming of the queue. The Berkeley print system/spooler and some System V printing systems/spoolers support an alias and the queue renaming. 5.4.2 Description Description will only be available if BrightQPro is installed with a printing system supporting this attribute. This is a user definable description of the print queue. It will default to the model of printer installed and associated with this queue. 5.4.3 Location Location will only be available if BrightQPro is installed with a printing system supporting this attribute. This is a user definable location of the printer. This will not be populated by default. 5.4.4 Make this queue the system default This option will make this BrightQPro print queue the default print queue for the system. Setting a default printer can also be achieved by right clicking the appropriate print queue listed under the "Configured Printer" and selecting "Set as system default". This can also be done via. the "Printer/Set as System Default" option. Note; Other print queues set up as default with "printconf" on systems using the Berkeley based (BSD) print architecture will not allow BrightQPro to establish the default queue. 5.5 Maximum allowed characters in queue name - Table Print System Unix LP backends (including Solaris) AIX native CUPS and LPRng BSD LPR on Linux/FreeBSD Maximum allowed characters in print queue name 14 characters maximum 20 characters maximum 25 characters maximum 14 characters maximum 6 Configuration Tool User Interface and Menus Page 40 of 100 Unix ShellBased interface: Please refer to chapters 89 Unix shellbased interface, for the process to install, configure, etc. output devices without an X Window System. X Window System : The Configuration Tool (Config. Tool) is the primary User Interface for configuration, and management of BrightQPro printers. Listed below are some of the features the Config Tool UI can be used to control. ● Registering and Licensing BrightQPro (License Manager) ● Adding and configuring print queues and Printer Classes ● Start and Stop device Monitoring ● Showing Device Status ● Selecting a print queue ● Setting the default printer ● Naming the print queues ● Testing a print queue (test print) ● Optionally printing documents directly (Postscript, Image, PDF, and Text) ● Enabling, Disabling, and Removing print queues ● Queuing System UI ● Uninstalling BrightQPro or a BrightQPro license ● Defining the configuration tool options (CUPS, LPD, LP, Filter usage) 6.1 Launching the Configuration tool 6.1.1 Launching the Configuration tool The first step in BrightQPro operation is to launch the BrightQPro configuration tool in order to add, configure, set as default, etc an output device to the print spooling/queuing system. To launch the configuration tool either go to the menu item/application Icon, etc that was added to GNOME, KDE, or CDE during installation and launch the program from there, or type the following command at a Unix ShellBased interface; Unix ShellBased interface: Please refer to chapters 89 Unix shellbased interface, for more detail on the “codehostconfig” command and options. "codehostconfig" Page 41 of 100 6.2 Configuration tool - File Menu - Options (CUPS, LPD server, and Printcap) In BrightQPro you have the ability to define certain options pertaining to the default print spooler that BrightQPro is working in conjunction with. By selecting the "File/Options" menu option you will launch the Options dialog box. These options pertain to the location of certain configuration files, server addresses, encryption, etc. Additionally based upon what your default print system/spooler is, the options presented will vary. The Options are listed and explained below. 6.2.1 Global Options The following options are available whether utilizing CUPS, System V, AIX, or the Berkeley based printing system. 6.2.1.1 SNMP Timeout (ms) The SNMP timeout will determine how long BrightQ will continue to query a system via. SNMP until it times out. The default value is 1,000 milliseconds (1 second). The SNMP query is utilized for the “Device Status” tab menu. If this setting is set too high then BrightQPro’s performance might be degraded as it waits for a response from the Host it is querying. 6.2.1.2 Monitoring Interval (s) The “Monitoring Interval (s)” will determine how often BrightQPro will query the output devices that have “Enable status monitoring” checked in the “Device Status” tab menu. The default value is 15 seconds. If this value is set too low then BrightQPro’s performance might be degraded by constant SNMP queries to the Host it is querying. Page 42 of 100 6.2.1.5 Use Print Job Manager for other queues This feature will enable the BrightQPro PJM (Print Job Manager) for all print queues whether installed and configured via. BrightQPro, or the default system tools for printer configuration (i.e. lpadmin, etc.). If this option is not selected then the “Other Printers” queues will not invoke the BrightQPro PJM. 6.2.2 CUPS If you have CUPS installed as the default spooler on your system you will have the following CUPS centric options for BrightQPro; 6.2.2.1 User In order to configure a printer/device you need to be logged in as a user with administrative privileges on the CUPS server. 6.2.2.2 Password This is the password for the aforementioned logged in user. 6.2.2.3 Server Address This is the location of the CUPS server. By default this is the "localhost" or the local computer that you are loading BrightQPro on. This could also be a remote host that has a CUPS server on board. 6.2.2.4 Server Port This is port that the system will query the CUPS server on. This is by default 631, which is the default port for the Internet Printing Protocol or IPP. 6.2.2.5 Configuration Directory This is default local directory in which the CUPS configuration files are located. 6.2.2.6 Force Encryption This option forces all communication between the Unix shellbased interface and CUPS server to be encrypted (SSL). This is a user defined variable. 6.2.2.7 Restart CUPS daemon automatically This will force a restart of the CUPS daemon and all other element required to restart CUPS. In some instances the CUPS server might stop responding and this is an error recovery mechanism to restart the CUPS daemon automatically. ● Note: the CUPS Daemon does not require a restart to add printers, modify printers, etc. This option is a failsafe. This can also be done manually as outlined below. 6.2.2.8 Restart CUPS now This will manually force a restart of the CUPS daemon and all other elements required to restart CUPS. 6.2.2.9 Feature selection for other queues This option will only be available for systems running CUPS as the default printing system . This option allows for the selection of the generic filter options (i.e. nondevice specific), and device specific options for queue’s configured utilizing CUPS (i.e. queues that have a print driver associated with them) via the Configuration Tool and PJM. The generic filter options are listed in chapter 7.2. Page 43 of 100 6.2.3 Configuration Tool Options - LPR, LP (Berkeley and System V) If you are using BSD or System V based print spooling system then you will have the following options for BrightQPro 6.2.3.1 Printcap (Printer Capability Database file, BSD) This is the default user printcap location that you want BrightQPro to use to add and configure new printers. This is the file that contains the core info. for your printer. The values in the user printcap file override values in the /etc/printcap, which override the default values in the /etc/lpd.conf file. This dialog box is designed to allow a user to define the location of a local printcap file. 6.2.3.2 Printers Config File (System V) This is the default location for the System V printing configuration database file. By default this is /etc/printers.conf but this can vary. 6.2.3.3 LPD Server (BSD) This is the default address of the LPD server. This is the Line Printer Daemon, or the print server program of LPR or LPRng. By default the location of the LPD Server is the "localhost" that is running BrightQPro 6.2.3.4 Submit jobs with (System V) This is the default location of the binary that will be used to submit jobs to the printing system. This is by default /usr/bin/lp (or lp.brightq) 6.2.3.5 Restart LPD Now (BSD) This button will allow you to restart the systems default LPD daemon. This might be necessary for troubleshooting purposes. 6.2.3.6 Restart LP Now (System V) This button will allow you to restart the systems default LP daemon. This might be necessary for troubleshooting purposes. 6.2.3.7 Use conversion filters for nonBrightQ queues This feature will only be available for nonCUPS systems. This option allows for the selection of the generic filter options (i.e. nondevice specific) via the Configuration Tool and the PJM. The generic filter options are listed in chapter 7.2. Page 44 of 100 Please note that using the generic filters with “Other Printers” does not guarantee that the data stream produced will be compatible with “Other Printers”. 6.2.4 Configuration Tool Options – AIX Native If you are using the AIX Native print systems then you will have the following options for BrightQPro : 6.2.4.1 Printers Configuration File This is the location of the AIX Native print system configuration file. By default, it is /etc/qconfig 6.2.4.2 Submit jobs with This is the full path to the command that will be used to submit jobs to the print system. By default this will be /usr/bin/qprt.brightq 6.2.4.3 Job queuing discipline The AIX print system has two way of queuing jobs; either it will print jobs in the exact same order as they are submitted (as is normal for most print systems), called “First come, first serve”, or you may elect to print the shortest job first each time, “Shortest job next”. The second method has the benefit that faster jobs will come out of the printer much faster and not need to wait on very large jobs that may take some time. 6.3 File Menu - PJM Tabs BrightQPro enables you customize the look and feel of the X Window System driven Print Job Manager (PJM), on a per user basis. By selecting the "File/PJM Tabs" menu option you will launch the BrightQPro Print Job Manager Tabs dialog box. You will be presented with the option to enable and disable the various tab menus within the Properties Dialog box or disable the Properties Dialog box entirely. Page 45 of 100 The options selected will be viewable via the PJM. Any option unselected will be not be viewable via the PJM. The selection made will only apply to the current user of the Configuration Tool. For example if user “guest” deselects layout and image, then when user “guest” prints (with the PJM) the layout and image tabs will not be viewable. If user root has all tabs enabled then when user root prints (with the PJM) all tabs will be viewable. 6.4 Uninstalling BrightQ-Pro BrightQPro comes with both an installer and an uninstaller. By selecting the "File/Uninstall" menu option or by running the uninstaller in a shell you can Uninstall BrightQPro and all relevant supporting files. You will be presented with the following options to uninstall certain BrightQPro packages. 6.4.1 Complete Uninstall This will uninstall all BrightQPro related elements and return your system to the same state it was prior to installing BrightQPro. 6.4.2 Uninstall a specific package This will uninstall only the specific BrightQPro package you select. These packages can be licenses that are OEM specific or feature specific (BrightQProCUPS license). The Uninstall tool can be launched via the shell by typing "codehostuninstall" as. Note: Please refer to chapter 89 of this document for specifics of the Unix ShellBased interface for uninstalling. Page 46 of 100 6.5 Print Menu - Test print and Document Printing In BrightQPro via the Config Tools "Print" Menu, you have the ability to print both a test page and print documents in their native file format (without first opening them in their associated applications). 6.5.1 Printing a Codehost Test page In order to print a Test Page, you will select the "Print/Test Page" or Ctl+T; this will print a Test Page to your selected printer in the appropriate PDL for that printer. ● Printing the Test file will "not" engage the Print Job Manager (PJM). ● This page will print out utilizing the default PDL and default options of the device queue it is being printed to. 6.5.2 Printing a PostScript File BrightQPro will allow you to print a PostScript file directly from the Config tool program interface. To access this option, go to the "Print/Document/PostScript". You will be prompted to locate a RAW PS file for printing (*.ps). ● Once the PostScript file is loaded the PJM will be engaged so that you can select any relevant printing options. Please refer to chapter 7 for detailed information on the Print Job Manager (PJM) Job Properties tab menus. 6.5.3 Printing an Image file BrightQPro will allow you to print an Image file directly from the Config tool program interface. To access this option, go to "Print/Document/Image". You will be prompted to locate an Image file for printing. ● Once the Image file is loaded the PJM will be engaged so that you can select any relevant printing options. Please refer to chapter 7 for detailed information on the Print Job Manager (PJM) Job Properties tab menus. 6.5.4 Printing an Adobe Acrobat file (PDF) BrightQPro will allow you to print an Adobe Acrobat Portable Document Format (PDF) file directly from the Configuration tool program interface. To access this option go to the "Print/Document/PDF file". You will be prompted to locate a PDF file for printing. ● Once the PDF file is loaded the PJM will be engaged so that you can select any relevant printing options. Please refer to chapter 7 for detailed information on the Print Job Manager (PJM) Job Properties tab menus. Page 47 of 100 6.5.5 Printing a Text file BrightQPro will allow you to print any Text file directly from the Configuration tool program interface. To access this option go to the "Print/Document/Text". You will be prompted to locate a Text file for printing. ● Once the Text file is loaded the PJM will be engaged so that you can select any relevant printing options. Please refer to chapter 7 for detailed information on the Print Job Manager (PJM) Job Properties tab menus. 6.6 Printer Menu The printer dropdown menu will allow you to conduct the following operations; ● Add a printer (Expert Mode) ● Add a printer (Printer Installation Wizard) ● Add a printer Class ● Import printers ● Export printers ● Duplicate printers ● Remove printers ● Set a system default printer Page 48 of 100 6.6.1 Add Printer (Expert) This menu option will allow you to install, and configure a printer manually. You will be presented with four tab menu options; ● Model: This is the device model that you will connect to. ● Connection: This is the methodology that you wish to connect to the printer. The options include local (i.e. USB, Parallel, Serial, File) and remote (i.e. LPD, Socket, IPP, SMB). For more information please refer to chapter 5 ● Properties: These are the default device centric options you want associated with the print queue ● Queue: This is the user defined print queue name 6.6.2 Printer Installation Wizard The BrightQPro Add Printer Wizard allows for a GUI driven tool with the ability to scan the local network for output devices. This scanning can discover devices based upon numerous criteria, including but not limited to; Port (631, 515, 9100, 80, and 443) Service level Protocol, IP Address, IP Address range, hostname, etc. The “Add Printer Wizard” will also detect your devices Device Accessories (for supported output devices), and automatically load the appropriate device drivers. Please refer to chapter 4 for more information on the “Printer Installation Wizard”. Page 49 of 100 6.6.3 Add Class (CUPS and System V only) BrightQPro allows users to establish and print to Printer Classes. Printer Classes are a group of print queues established under a collective queue name. Setting up Printer Classes allows for printer redundancy. Printer queues and Classes can exist within other Printer Classes if supported by the underlying printing system. ● Printer Classes can only be established with CUPS and System V printing environments. The Berkeley Print System does not support printer classes. ● When printing to a Printer Class the job will be spooled to the first available print queue in that Class. ● The printer Class options will not be available when installing on a Berkeley based print system ● At least one print queue must be established prior to adding a Class 6.6.3.1 Adding a printer Class There are two ways in which to add a Printer Class in BrightQPro, additionally for the printing systems that support classes you can establish a Class via. the print system tools (i.e. lpadmin) The first way to add a printer class is by using the Configuration tool’s Printer menu. Listed under Printer is the menu option “Add Class”. When selecting “Add Class” you will be prompted to fill in a number of fields and select at least one print queue to be the “initial member”. The second method is to simply drag and drop a print queue or class on to an existing printer class (configured via. BrightQPro or otherwise), in the BrightQPro configuration tool. ● Class name: This is a user definable Class name. For both Class and queue names spaces and nonalpha numeric characters cannot be utilized for queue names. ● Description: This is a user definable Class Description. This option is only be available for users of the CUPS printing system, for all other systems it will be unavailable. ● Location: This is a user definable Class description. This option is only be available for users of the CUPS printing system, for all other systems it will be unavailable. 6.6.4 Export Printers BrightQPro allows users to export their printer configuration into a single xml formatted data file. Once exported the file can be reimported into BrightQPro to populate the user’s installation of BrightQPro with the same configured printers as the Host that exported the file. This allows for easy deployment of configured printers across a broad range of operating systems, architectures, and printing systems. 6.6.4.1 Exporting Printers Listed under the Printer menu you will have an option to “Export Printers”. Once selected you will be prompted to define the path for the exported printer’s XML file. Page 50 of 100 6.6.5 Import Printers BrightQPro allows users to import their exported printer configuration information from a single XMLformatted data file. Once imported, the data file will establish the print queues that were on the users system that originally exported the data file. 6.6.5.1 Importing Printers Listed under the Printer menu you will have an option to “Import Printers”, once selected you will be prompted to define the path to the exported printers’ file. When you have located and selected the printer data file to be imported click OK. ● You will be prompted to either “Import All Queues” in which case all exported printers will be loaded onto the system importing the file. You will also have the option to select a subset of the exported queues “Import Selected Queues”. ● Note; The system that is importing the printers must have a BrightQPro license installed that supports the imported print queues and subsequent drivers. If the appropriate license is not installed, then the queue that requires that license will not be successfully imported. ● Printers can be imported across Architectures, Operating Systems, and Printing Systems. For example you can export the printers from a Linux x86 System using CUPS and BrightQPro and import that exported data file onto a system running Solaris Sparc with System V printing. 6.6.6 Duplicate Printer BrightQPro allows users to duplicate their configured printer queues. The duplicate printer queue will require a unique queue name 6.6.6.1 Duplicating Printer Once the “Duplicate Printer Queue” menu is launched you will be prompted to select the print queue to be duplicated. The print queue will need to be assigned a new print queue name in order not to conflict with the existing queue. You can also accomplish the duplication of the queue by right clicking the appropriate queue listed under “Configured Printer”. Page 51 of 100 6.6.7 Remove Printer Removing a print queue can be done via the printer/Remove Printer option, by selecting “Remove the selected printer”, or by right clicking on the appropriate print queue listed under configured printers and selecting “remove”. This will remove all occurrences of the print queue in both BrightQPro and the underlying print system 6.6.8 Set as system default Setting a print queue as the system default can be accomplished via the printer/Set as System Default, or by right clicking the appropriate print queue listed under configured printer. This option will set the selected print queue as both the BrightQPro and underlying printing system default. 6.7 Enabling, Disabling, Rejecting, Accepting, and Removing Print Queues Please refer to chapter 89 of this document for specifics of the Unix ShellBased Enabling, Disabling, and Removing Print Queues. By disabling a printer you are not allowing any print jobs to be submitted to that queue and conversely by enabling it you are allowing jobs to be submitted to that queue. If you attempt to print to a disabled queue the default print spooler (i.e. PJM, lp, lpr, etc.) will not be allowed to submit the file to the printer. ● In order to Enable, Disable a printer or have it Accept, or Reject print jobs simply select the configured printer, right mouse click and select the appropriate option. You can also do this with the enable/disable printer icon. The icon is in the form of a switch that will be green if the currently selected printer is enabled and red if it is disabled. A full description of enable, disable, accept, and reject are listed in chapter 6.7.3.3 6.7.1 Queuing System User interface When using BrightQPro's configuration tool you can view an output devices Info, Queued Jobs, device properties, and the device Connection type. Listed below is a brief description of each tab menu. 6.7.2 Info Tab Menu The "Info Tab" supplies the user with certain information about the configured output device, that is currently selected. The output device’s specific information is listed below. 6.7.2.1 Type Defines the type of queue configured for the selected output device. Options are as follows : o Local Applies to all local connections (i.e. Parallel, USB, Serial, and File) Page 52 of 100 o Remote LPD Printer Printer is configured to use LPD. The default port for LPD is 515. o Remote IPP Printer Printer is configured to use IPP. The default port for IPP is 631. o Remote Socket Printer Printer is configured to use Socket. The default port for Socket is 9100. o Remote SMB Printer Printer is configured to use Samba's SMB client. 6.7.2.2 Description (some print systems only) This field will only appear if you are using a print system that supports it (such as CUPS), and only if you filled in the fields in the "Add a Printer" dialog box. 6.7.2.3 Location (some print systems only) This field will only appear if you are using a print system that supports it, and only if you filled in the fields in the "Add a Printer" dialog box This is a userdefinable field and applies to the physical location of the printer. 6.7.2.4 State This is the current state of the selected printer queue. o Idle / Accepting Jobs When the print queue is in this state it will allow jobs to be spooled into the printing system/BrightQPro and will release the jobs to the output device associated with the print queue. o Idle / Rejecting Jobs When the print queue is in this state it will reject jobs being spooled into the printing system/BrightQPro and will only process/release the jobs to the output device associated with the print queue that were already in the print queue prior to the Reject Jobs option being enabled. o o Disabled / Accepting Jobs When the print queue is in this state it will allow jobs to be spooled into the printing system/BrightQPro but will not release the jobs to the output device associated with the print queue until the queue is enabled. Disabled / Rejecting Jobs When the print queue is in this state it will reject jobs being spooled into the printing system/BrightQPro and will not release the jobs to the output device associated with the print queue until the queue is enabled Page 53 of 100 6.7.2.5 Language This is the Page Description Language (PDL) this output device supports by default (i.e. Postscript, PCL, etc.) 6.7.2.6 Device With a standard BSD (Berkeley) or System V spooler it is listed simply as remote or local. In the case of CUPS this defines the devices URL (universal resource locater) in the following format; protocol://address:resource f ile:/path/to/filename parallel:/dev/lp0 usb:/dev/usb/lp0 lpd://hostname/print, ipp://hostname/ipp/print socket://hostname:9100 (print to a file) (print to the parallel port) (print the USB port) (print using LPD) (print using the internet printing protocol – IPP) (print using port 9100) 6.7.2.7 Model This is the model of output device that you have installed. This is hard coded to the output device driver. 6.7.3 Jobs Tab Menu The jobs that you have queued to print will be visible by selecting the Jobs tab. The Jobs tab represents the queuing interface for BrightQPro. If you select the "Jobs" tab menu in the window on the right it shows the currently queued print jobs and displays the following information about the jobs; 6.7.3.1 Name This is the name of the file being printed or processed 6.7.3.2 ID This is a numeric identifier assigned to the job by the print system. Page 54 of 100 6.7.3.3 State This is the state that currently queued document is in. Each job object is always in one of the six states listed below: o Pending: This is a job that is waiting to be printed o Suspend: This is a job that has been suspended and is currently waiting to be resumed or deleted o Processing: This is a job that is being processed (filtered) or printing o Cancelled: This is a job that has been deleted o Aborted: This is a job that has been aborted by the system due to an error condition o Completed: This is a job that is completed 6.7.3.4 Printer This field will display the user defined queue name of the output device you are printing to 6.7.3.5 Owner This field will display the user name that is logged in to the system that is printing (i.e. "root", guest, etc.) 6.7.3.6 Priority This field will display the default priority of the print queue or the defined priority of the print queue. This is set in the default printing system by utilizing the “priority” (q). This will set the job priority from 1 (lowest) to 100 (highest). The default priority is 50. 6.7.3.7 Size This is the size of the currently printing file represented in bytes 6.7.4 Properties tab menu The output device's default options you selected during installation and configuration will be visible by selecting the Properties tab. The output device options selected under the Properties tab represents the default options for that device. If you are printing via BrightQPro the options selected in the Properties tab will be appended to your data file, document, etc. unless you select other options via the PJM that override’s the selections in the Properties menu. This is also the menu you will use to define your output devices "Installable Options". The devices Device Accessories may include Finisher options, paper deck options, staple options, duplex options, etc. If the appropriate Device Accessories are not selected, then when you print via the PJM, you might not have access to certain finishing features you need. Page 55 of 100 6.7.4.1 Filter Options This option will display the default device independent (i.e. not output device specific) filter options. Please refer to chapter 7.2 for more detail on configuring the default generic “Filter Options” 6.7.5 Connection tab menu This is the menu system you will use to determine how your computer will communicate with the printer model that you have selected to configure. You will be presented with a number of different connectivity/communication options to connect your printer. The options relate to printing both locally and remotely. Please refer to chapter 5.2 for more detail on the “Connection” menu. 6.7.6 Device Status This is the menu system you will use to determine what the current operating status is with the printer queue that you have selected. Device status can be enabled/disabled on a queue by queue basis and for the queues that are monitoring device status it can be enabled/disabled on a global basis. Page 56 of 100 Page 57 of 100 7 Print Job Manager – Menu Tabs The Print Job Manager or PJM is the primary tool that users will interface with while printing documents thru applications and BrightQPro whether via. the X Window System, or the Unix shellbased interface. ● PJM is similar in form and function to the printing interfaces utilized in other operating systems with integrated print spoolers and print systems. ● PJM is a program designed as a replacement for the popular System V, BSD, or CUPS print spoolers, that are traditionally used by applications to submit jobs to the printing system. Upon installation, PJM is set up so that it will symbolically link the default print spooler command, so that each program that calls the default print spooler command (i.e. lp, lpr, etc.) will in fact be calling the PJM. For X Window System users the PJM supplies an intuitive user interface. Page 58 of 100 For the Unix shellbased users of BrightQPro the PJM will act as a replacement for System V, BSD, and CUPS print spooler commands allowing for access to the BrightQPro printer specific options (o) and allowing access to and support for printers installed outside of BrightQPro. All of the printers default options will be made available to the user at the point of printing. If none are selected the PJM will default to the options set as default in the Configuration Tools properties tab menu. The PJM is the main printing interface for BrightQPro, designed to allow access to the core areas of the OEM print driver. Some of these core subcategories of printing are generic in nature while others are OEM print driver specific. ● Note: The PJM can be launched from the command line; ● "pjm" or "/usr/local/brightq/bin/pjm" (or equivalent location where BrightQ was installed). Listed below is the description of the PJM's (X Window System) menus and submenus. For a description of the equivalent options available via. the Unix Shellbased interface please refer to chapter 89. 7.1 Initial PJM menu Utilize the drop down menu to select the name of the printer queue name. 7.1.1 Name This is the name of the configured print queue 7.1.2 Type This is also defined by the spooling system, but in general will display the name of the device, the connection type and PDL. This will vary whether you are using a System V, BSD, or CUPS printing system. 7.1.3 Description This is displayed as the configured printer driver name. 7.1.4 Location This is a user definable field that is determined via the Configuration tool at the printer installation. This is a CUPS only field. 7.1.5 Status Icon This icon will indicate the current device status. The status of the device will either be idle (green), warning (yellow), or alert (red). By clicking the icon it will take you to the Status tab menu. 7.1.6 Properties By selecting the Properties button you will enable the "Job Properties" tab menus 7.1.7 Set as default This will set the currently selected printer as the user’s default printing device. 7.1.8 Page Selection All Pages, Even Pages, Odd Pages, or a page range separated by commas (1, 5, 7, 11) and hyphens (15, 6, 711). 7.1.9 Number of copies This will determine the number of copies of the document you want. The maximum value for this field is 100. Page 59 of 100 7.1.10 Collate Copies This option ensures that each copy of the job will be processed individually or electronically collated, it is designed to take multiple sets of documents and print them for example; pages 1, 2, 3 1, 2, 3 vs. uncollated which would produce 1, 1, 2, 2 3, 3. If Collate is not selected (then unless you have a "collator" on your output device) you will have to collate the output by hand. 7.1.11 Reverse Order: This will determine whether or not your documents come out 1, 2, 3, etc. or reversed 3, 2, 1, etc. This option ensures that the last page is printed first and that the first page is printed last. 7.2 General Tab 7.2.1 Paper Size This will determine the size of paper your output will print on. The printer’s device driver determines the options. 7.2.2 Paper Type This is the type of media that the printer can utilize. The printer’s device driver determines these options. 7.2.3 Paper Source This option will only be displayed if the printer has more than one available input source for paper. The printer’s device driver determines these options. Page 60 of 100 7.2.4 Raw Mode This option will allow you print out your documents in the raw PDL that they have been created in. By checking this box your files will not pass through any BrightQPro PDL filters but instead will be handed off "as is" to the appropriate IO filter. 7.2.5 Orientation This is the option that will define how the X and Y paper axis are displayed when printing. ● Portrait: This is the default paper orientation. This orientation is with the short paper edge on top. ● Landscape: This orientation is with the long edge of the paper on top. ● Reverse landscape: This is Landscape printing upside down. ● Reverse portrait: This is Portrait printing upside down. 7.2.6 Duplex Printing The printer’s device driver determines this option’s availability. ● None: This determines the job should be printed single sided (simplex) ● Long edge: This is duplex or two sided printing with the long edge (i.e. the 11in. edge on an 8.5”x11” piece of paper) of the paper. This will print the top of the page on side one on the same edge of the paper as the top of the page on side two. In the case of Long Edge, the top of the page would be the short edge. ● Short edge: This is duplex or two sided printing with the short edge (i.e. the 8.5in. edge on an 8.5x11 piece of paper) of the paper. This will print the top of the page on side one, and on the same edge of the paper as the top of the page on side two. In the case of short Edge, the top of the page would be the long edge. 7.2.7 Pages per sheet This option will automatically scale and place multiple pages per sheet depending on the number selected. The options are one (default), two, four, six and nine. 7.2.8 Banners ● Start: This will print a banner sheet prior to the print job ● End: This will print a banner sheet after the job prints Page 61 of 100 7.3 Status Tab This is the menu system you will use to determine what the current operating status is with the printer queue that you have selected. Device status can be enabled/disabled on a queuebyqueue basis and for the queues that are monitoring device status it can be enabled/disabled on a global basis. The Status Tab will also list a number of output device options based upon a listing the printer OEM has requested to be available. 7.3.1 Green Alert When the Device Status icon is green then the printer is idle and ready to have jobs submitted to it. 7.3.2 Yellow Alert When the Device Status icon is yellow then the printer is in an Alert status and requires attention. 7.3.2 Red Alert When the Device Status icon is red then the printer is in an Warning status and requires attention. Page 62 of 100 7.4 Layout Tab The Margins tab menu is designed to only work with either text or image files. Note margin adjustments are relative to paper orientation. 7.4.1 Pages per sheet This option will allow for multiple pages to be printed on a single sheet. The options are for 1 (default), 2, 4, 6, 9, and 16 pages per output sheet. 7.4.2 Page Border This option will place a black line (i.e. border) around the imageable area of the page being output. The border options are None (default), Single, Single Thick, Double, and Double Thick. 7.4.3 Layout of Pages This option will determine how the data on the page being printed will be laid out.. When looking at a page the standard layout for printing is “Left to Right, Top to Bottom”. The data starts on the left and continues to the right, and progresses down the page top to bottom. The additional options are “Bottom to top, Left to Right”, “Left to Right, Bottom to Top”, “Right to Left, Bottom to Top”, “Top to Bottom, Left to Right”, “Bottom to Top, Right to Left”, “Left to Right, Top to Bottom (default)”, “Right to Left, Top to Bottom”, and “Top to Bottom, Right to Left”. Page 63 of 100 7.5 Margins Tab The Margins tab menu is designed to only work with either text or image files. Note margin adjustments are relative to paper orientation. 7.5.1 Use custom margins When enabled this option will force the margins of Image or Text files to adhere to values input into the available fields. 7.5.2 Top This will determine how far down from the top of the document the imageable area of the page begins. 7.5.3 Bottom This will determine how far up from the bottom of the document the imageable area of the page begins. 7.5.4 Left This will determine how far in from the left of the document the imageable area of the page begins 7.5.5 Right This will determine how far in from the right of the document the imageable area of the page begins 7.5.6 Units You can select which units of measurement you will utilize for your margin adjustments. The options are cm (centimeters), in (inches), or points. Note the default unit of measurement is points and when enabled it will default to 13 points for all margins. Page 64 of 100 7.6 Image Tab The Image tab menu is designed to work with image files directly with the exception of the Brightness and Gamma adjustments. The Brightness and Gamma controls will work with Images, PostScript files, and PDF files with embedded Images The supported Image file formats are listed below; ● BMP, GIF, JPEG, PhotoCD, Portable bitmap (PBM, PGM, PNM, and PPM), PNG, SGI RGB, Sun Raster, and Tiff image files. ● In the PJM you have numerous menu options centric to printing an Image File. Listed below are the Image Printing options and a brief description of each. ● Note: This option only applies when printing an image unless otherwise specified. 7.6.1 Brightness Specifies the overall brightness of the Image. 100% is normal, 50% is half as bright and 200% is twice as bright. This affects all of the RGB or CMYK channels. o Note: This option only applies when printing an image, PDF with embedded images, or a PostScript file. 7.6.2 Hue This specifies a color Hue rotation. o Note: This option only applies when printing an image. Page 65 of 100 7.6.3 Saturation This specifies the saturation, or the distance the color's hue moves from neutral gray. If you increase the saturation then the hue will move farther from neutral gray. A value of 100 is unchanged, 50 is half as colorful or saturated as 100 and 200 is twice as saturated or colorful as100. Note: This option only applies when printing an image. 7.6.4 Gamma This specifies the overall gamma or luminance correction for the output. A value of 1.0 specifies no correction, whereas a correction of 0.5 or 2.0 will generate darker or lighter output, respectively. Gamma is applied to the RGB or Luminance for Grayscale output, equally. o Note: This option only applies when printing an image, PDF with embedded images, or a PostScript file. 7.6.5 Resolution (ppi) This specifies the resolution of the image in Pixels per Inch. Default value is that of the resolution of the actual file being printed or 128 PPI if no resolution information is available or selected. The Resolution (PPI) overrides the “% of page” options. o Note: This option only applies when printing an image. 7.6.6 % of page This specifies the scaling of the image with respect to the selected media. The default value is 100, which means that if you were to select Letter paper the image would cover the entire 8.5x11 printable area. The “% of Page” option overrides the Resolution (ppi) options. o Note: This option only applies when printing an image, and will retain the image files’ aspect ratio . 7.6.7 Image Position This specifies the location of the image file on the printed page. o Note: This option only applies when printing an image. Page 66 of 100 7.7 Text This filter converts Text files into PostScript and adds printer commands and options. In the PJM you have numerous menu options centric to printing a Text File. Listed below are the Text Printing options and a brief description. 7.7.1 - Chars per inch The default value is 10 characters per inch. Characters per inch determine the number of text characters per inch that will be printed. 7.7.2 - Lines per inch The default value is 6 lines of text per inch. 7.7.3 – Columns The default value is 1 column. These are columns of text. one Column will fill the entire imageable area of the page. If you select two columns, then the imageable area of the page would be separated into two columns each representing 50% of the page, etc. 7.7.4 - Syntax Coloring On/Off: The default value is off. This option will take any C, C++, shell script, and PERL code that is in the text file and color its language keywords accordingly. Page 67 of 100 7.8 HP-GL/2 The HPGL/2 tab menu is for printing HPGL/2 files to your PostScript output device (HPGL to PS). The options selected here will only apply to HPGL/2 files and will not affect any other data format. Please refer to. 7.8.1 - Use only black pen This will force the HPGL/2 plot to be output in grayscale 7.8.2 - Fit plot to page This will force the output to fit the page size selected via. the devices PPD regardless of the size of the HPGL/2 plot. 7.8.3 - Pen Width This option will determine the emulation of the pen width of the plot as it is converted to PostScript. Pen width is measured in micrometers and default is set to 1000. Page 68 of 100 7.9 Configured Printer Note: this will display the PPD or output device name ● This is the tab menu for your configured printers. The configured printer will display all relevant options for that device's printer driver. Any selection made here will override the selections for the device made in the Configuration tool, (with the exception of the Device Accessories). The Device Accessories can only be overridden within the configuration tool, and only by the root user. The print driver defines options available in this menu, and they will vary depending on the output device. Note: If the print queue you are printing to is set up as "Raw", the output device options will not be enabled. Additionally, you will not have the ability to view and/or select options within the Print Job Manager (PJM) which are centric to your printer, and all other options selected will be ignored. Page 69 of 100 8 BrightQ-Pro - Unix shell-based interface BrightQPro can be used within the X Window System or via a Unix shell interface. The BrightQPro Unix shellbased interface will allow you to install, configure, license, etc BrightQPro, as well as establish, delete, and configure print queues. The BrightQPro Unix shellbase interface will also allow you to print files with the same features and functionality as the X Windows System. Please refer to the Minimum Supported Linux/Unix Distributions and Versions for any OS or printing system related limitations. The following section will describe the steps required to install, query, and configure a printer with the Unix shellbased interface. 8.1 Installing a BrightQ-Pro printer with the Unix shell-based interface Please refer to chapter "3.1 To install BrightQPro on a Linux or Unix computer" for details on the various installation classes and options. The following chapter makes the assumption that you have already successfully installed BrightQPro on your system. This chapter is broken down by the selected printer connection type. 8.2 "codehost-config" command The “codehostconfig” command is one of the core BrightQPro commands. “codehostconfig” is what you will use to install, configure, restart, remove, and list print queues. “codehostconfig” arguments and their descriptions are listed below. Page 70 of 100 8.2.1 “codehost-config” arguments and descriptions- Table Format: command argument value (codehostconfig remove printqueue_name) “codehostconfig” – table Arguments help | h version | v Descriptions fast | f add | c <queue> <ppd> addclass | A <class> <queue1> <queue2> ... remove | r <queue removemember | R <class> <queue1> <queue2> ... update | u <queue> config | C <queue> default | d <queue> system | s list | a Print this help message Print version information and exit Fast startup; do not fetch initial status information. Implied for noninteractive commands. Configure a new printer Configure a class from existing queues or classes. Only available on CUPS and System V systems. Remove a queue from the system Remove one or more queue/class from an existing class Update the parameters for a queue Show available options for the queue Make the queue the system default option=value Set a printing system option List all available queues listqueues | q List all available queues with alert status status | t <queue> Show current status for the queue Optional Arguments login | l <login> Specify a user for login pass | p <password> description | D <desc> location | L <location> uri | U <URI> options | o <options> usepjm y|n Specify a password for the user Add/update a description for the printer Add/update the location for the printer Set the connection URI for the printer Change the default PPD settings Whether to use the PJM GUI for the printer 8.2.2 codehost-config --system: (GLOBAL) arguments, and descriptions - Table Listed below are the "codehostconfig system" Names and Values. These are options that are GLOBAL in nature and control the way BrightQPro interacts with the underlying print system. Format: command argument name=value (codehostconfig system replacedlp=true) “codehostconfig system” table Arguments Descriptions ghostscript smbclient Path to gs command Path to Samba smbclient program Page 71 of 100 replacedlp usepjmothers usecupsothers BrightQProdefaultprinter "true" if PJM was linked for the lp/lpr "true" PJM pop up for nonBrightQPro queues "true" to access all PPD features with CUPS and the corresponding cups license The name of the system default queue codehostconfig system “CUPS Commands” port lpr encrypt And its port (normally 631) The path to a script to restart the CUPS daemon (/etc/rc.d/init.d/cups or similar) The command called for submitting jobs (lp.cups or similar) If 'yes', force encryption when connecting to the server. autorestart If 'yes', automatically restart the CUPS daemon if we fail to connect to it. restart codehostconfig system “LPR/LPD/LP – Commands” printcap printconf printconfdb reload lpc lpr lpq lprm spooldir lpuser lpgroup usej The file where we write new queues The path to the printconfbackend command The path to the printconf database Path to the script to restart the daemon Path to the 'lpc' command Path to the actual 'lpr' command Path to the actual 'lpq' command Path to the actual 'lprm' command Root of the spooling directories (/var/spool/lpd) The user that owns the spool directories The group that owns the spool directories Set to "true" if the lpr J syntax is to be used to submit job options 8.3 "codehost-license" command “ codehost-license ” is one of the core BrightQPro commands. “codehostlicense” is what you will use to import, activate, register, etc. BrightQPro licenses. 8.3.1 “codehost-license” –argument - Table Listed below are the "codehostconfig system" Names and Values. These are options control the way BrightQPro interacts with the BrightQPro license manager. Format: command argument name option ( codehost-license --online ) The "codehostlicense" command, arguments, and descriptions are listed below: “codehostlicense” table Arguments Descriptions help | h import | i machineid | m online | o activation | a Print this help message i licence.cl[f|p] Import a license file m Print out the machine id for this computer o Online product registration a Online product activation (certificate needed) Page 72 of 100 certificate | c c CERT Specify the certificate number for activation email | e [email protected] [email protected] Specify the user account for activation password | p password Specify the password for the user account 8.4 "codehost-uninstall" command “codehostuninstall” is one of the core BrightQPro commands. Codehostuninstall is what you will utilize to remove BrightQ or BrightQPro components from your computer. 8.4.1 “codehost-uninstall” –argument - Table Listed below are the "codehostuninstall” Names and Values. These are options that are GLOBAL in nature and control the way BrightQPro is removed from your system. Format: command argument name option (register online) The "codehostuninstall" command, arguments, and descriptions are listed below: “codehostuninstall” table Arguments Descriptions help | h list | l version | v brightq product [component] Print this help message List all installed products and components. Gets the Uninstall Tool version information Uninstall the entire BrightQPro program Uninstalls the specified product, or its subcomponent (for example “codehostuninstall brightq” 8.5 "pjm" command The Print Job Manager or pjm, is one of the core BrightQPro commands. pjm, is what you will use to print from BrightQPro. PJM is by default symbolically linked to the printing system’s default print spooler (i.e. lp, lpr, etc.) 8.5.1 “pjm” --argument - Table Listed below are the "pjm" argument names and values. These are options that are GLOBAL in nature and control the way the BrightQPro PJM interacts with the underlying print system. All options that are device and/or filter specific must prefaced with the “o” switch Format: command argument name=value (duplex=yes) The "pjm" command, arguments, and descriptions are listed below: “pjm” – table Arguments Descriptions option | o nogui raw specifies the print job option(s) Do not use the Print Job Manager (pjm) GUI Print the data in raw unfiltered format (for example “pjm –o raw”) Page 73 of 100 Note; The PJM options (o) are variables based on the printer that the print job is being sent to and also the available data, document, input, etc. filters. 8.6 Configuring LPD (515) - Unix Shell-Based interface As listed in the above tables the core command to set up a device with BrightQPro is "codehostconfig". In order to set up a print queue for a device utilizing a remote line printer daemon (LPD) use the following arguments. Note: The local queue name, IP address of the remote machine that is hosting the LPD queue, device specific ppd (and path), and remote printer queue name are all variables. At a terminal or command prompt type the following; ● codehostconfig c <localqueue_name> /usr/local/brightq/ppd/C/<device specific ppd for this printer> U lpd://<IP address of the remote machine hosting the LPD queue>/<remote print queue> See the example below: ● codehostconfig c localprintqueue /usr/local/brightq/ppd/C/printer.ppd U lpd://10.0.0.20/print 8.7 Configuring IPP (631) - Unix Shell-Based interface In order to set up a print queue for a device utilizing the Internet Printing Protocol (IPP), use the following arguments. Note: The local queue name, device specific ppd (and path), user name, password, IP address of the remote machine that is hosting the IPP resource, the port number, and IPP resource are all variables. At a terminal or command prompt type the following; ● codehostconfig c <localqueue_name> /usr/local/brightq/ppd/C/<device specific ppd for this printer> U ipp://<username:password@IP address of the remote machine hosting the IPP queue:the port IPP is listening on/ipp resource/ipp resource> See the example below: ● codehost-config -c localprintqueue /usr/local/brightq/ppd/C/printer.ppd -U ipp://user:[email protected]:631/ipp/printer 8.8 Configuring Socket (9100) - Unix Shell-Based interface In order to set up a print queue for a device utilizing Socket or port 9100, use the following arguments. Note; The Host name or IP Address, are variables. At a terminal or command prompt type the following; ● codehostconfig c <localqueue_name> /usr/local/brightq/ppd/C/<device specific ppd for this printer> U socket://<IP address of the remote machine hosting the socket queue:the port socket is listening on> See the example below. Page 74 of 100 ● codehost-config -c localprintqueue /usr/local/brightq/ppd/C/printer.ppd -U socket://10.0.0.20:9100 8.9 Configuring SMB (Samba) - Unix Shell-Based interface In order to set up a print queue for a device utilizing the SMB protocol (via Samba), use the following arguments. Note; The local queue name, device specific PPD (and path), user name, password, server, workgroup, and SMB resource are all variables. SMB will require the installation of the Samba SMB client software. At a terminal or command prompt type the following; ● codehostconfig c <localqueue_name> /usr/local/brightq/ppd/C/<device specific ppd for this printer> U smb://<user name on the printer hosting the SMB resource:password@SMB server/SMB workgroup/SMB resource> See the example below: ● codehost-config -c localprintqueue /usr/local/brightq/ppd/C/printer.ppd -U smb://user:password@server/workgroup/resource 8.10 Configuring USB - Unix Shell-Based interface In order to set up a print queue for a device utilizing an USB connection utilize the following arguments. Note; The local queue name, device specific PPD (and path), and the path to the USB device, are all variables. At a terminal or command prompt type the following; ● codehostconfig c <localqueue_name> /usr/local/brightq/ppd/C/<device specific ppd for this printer> U usb:/<path to usb device> See example below; ● codehost-config -c localprintqueue /usr/local/brightq/ppd/C/printer.ppd -U usb:/dev/usb/lp0 8.11 Print to File - Unix Shell-Based interface In order to set up a print queue to print to a file use the following arguments. Note; The local queue name, device specific PPD (and path), and the path to the file, are all variables. At a terminal or command prompt type the following; ● codehostconfig c <localqueue_name> /usr/local/brightq/ppd/C/<device specific ppd for this printer> U file:</path to file> See example below; Page 75 of 100 ● codehost-config -c localprintqueue /usr/local/brightq/ppd/C/printer.ppd -U file:/tmp/file1.ps 8.12 Serial - Unix Shell-Based interface In order to set up a print queue to print to a printer use a serial connection use the following arguments. Note; The local queue name, device specific PPD (and path), path to the serial printer, baud rate, data bits, parity, and flow control are all variables. At a terminal or command prompt type the following; ● codehostconfig c <localqueue_name> /usr/local/brightq/ppd/C/<device specific ppd for this printer> U serial:/<path to serial device>baud=9600+bits=8 +parity=none flow=soft See example below; ● codehost-config -c localprintqueue /usr/local/brightq/ppd/C/printer.ppd -U serial:/dev/ttyS0?baud=9600+bits=8 +parity=none flow=soft 8.13 Parallel - Unix Shell-Based interface In order to set up a print queue to print to a printer use a parallel connection use the following arguments. Note; The local queue name, device specific ppd (and path), and path to the parallel printer are all variables. At a terminal or command prompt type the following; ● codehostconfig c <localqueue_name> /usr/local/brightq/ppd/C/<device specific ppd for this printer> U parallel:/<path to parallel device> See example below: ● codehost-config -c localprintqueue /usr/local/brightq/ppd/C/printer.ppd -U parallel:/dev/lp0 8.14 Configuring a Printer Class In order to configure a printer class with BrightQPro you will use the core command "codehostconfig". In order to create and configure a printer class named test_class use the "A" argument. ● codehost-config –A <class> <queue1> <queue2> See example below: ● codehost-config -A test_class localqueue_name Page 76 of 100 8.15 Removing a print queue In order to remove a queue set up and configured by BrightQPro you will use the core command "codehostconfig". In order to remove a print queue named localprintqueue use the "r" argument. ● codehostconfig r <localqueue_name> See example below: ● codehost-config -r localprintqueue 8.15.1 Removing a print queue from a print Class In order to remove a print queue from a print Class you need to specify the print Class and queue by using the “removemember” or “R” (note upper case R) argument. ● codehostconfig removemember or R <class> <queue> See example below ● codehost-config -R laser_printer_class laser_printer_queue 8.15.2 Removing a print Class In order to remove a print class, you need to specify the print Class by using the “removemember” or “R” argument. When removing a class all queues within that class will also be removed. ● codehostconfig removemember or R <class> See example below ● codehost-config -R laser_printer_class 8.16 Updating a print queue, queue description, and location In order to update a queue set up and configured by BrightQPro you will use the core command "codehostconfig". In order to update a print queue named localprintqueue utilize the "u" argument. In the first example you are updating the localprintqueue from a remote LPD queue to a socket queue. In the second example you are updating the IP Address of localprintqueue's remote LPD server. ● codehost-config -u localprintqueue -U socket://10.0.0.20:9100 See example below: ● codehost-config -u localprintqueue -U lpd://10.0.0.21/print In order to update a queue's description utilize the D argument. In the example below we are updating the localprintqueue's description to colorprinter. Page 77 of 100 ● codehost-config -u localprintqueue -D colorprinter In order to update a queue's location utilize the L argument. In the example below we are updating the localprintqueue's location to 2ndfloor. ● codehost-config -u localprintqueue -L 2ndfloor 8.17 Listing all available queues and their configuration info. In order to list the queues and their respective setup information, use the "a" argument. “codehostconfig” will print to the screen detailed information on the connection type, URI, Model, PPD being used, and the default PPD options for that queue. See the example below; ● codehostconfig a or list 8.18 Listing all available queues and their alert status. In order to list the queues and their current status, utilize the "q" argument. “codehostconfig” will print to the screen information on the alert status, queue status and URI for all available queues. See the example below; ● codehostconfig q or –listqueues 8.19 Show status for a print queue. In order to show the complete status for a print queue, utilize the "t" argument. “codehostconfig” will print to the screen information on all the current status for the print queue. See the example below; ● codehostconfig t or –status remoteprintqueue 8.20 Setting login and password when creating a new queue with CUPS In order to avoid having to enter a root login and password for CUPS each time you install a printer you can include those in the Unix shellbased interface. You will use the core command "codehostconfig". In order to include the login and password utilize the "l” for login and “p” for password arguments. The l and p arguments can be used for all aspects of BrightQPro and CUPS that require root login and password. ● codehost-config -c localprintqueue /usr/local/brightq/ppd/C/printer.ppd -U lpd://10.0.0.55/print -l root -p password 8.21 Setting the print queue's URI In order to configure the print queue's URI you will use the core command "codehostconfig". In order to set the URI utilize the "U" argument. The example below is updating the localprintqueue's default URI to lpd://10.0.0.22/hold. Page 78 of 100 ● codehost-config -u localprintqueue -U lpd://10.0.0.22/hold 8.22 Configuring a BrightQ-Pro printer Once you have installed your printer using the Unix shellbased interface commands and arguments listed above, it will now be necessary to configure the installed printer. The primary elements that you will need to configure are the default PPD or filter options, and the Device Accessories. Once you have configured these options they will become the default for that queue. Subsequently any job that goes through the configured queues will be filtered with the options that you have applied to that queue. These options will be statically linked to the queue and can only be overridden by specific Unix shellbased interface options applied when printing or by using the update (u) option. 8.22.1 Determining the default ppd or filter options In order to determine the default PPD or filter options utilize the following "codehostconfig" arguments. ● codehost-config -C localprintqueue Once you have run this command you will be presented with a list of default PPD or filter options. The list will display both the subsection of the ppd or filter and the options and default arguments. Next to each "default option" will be an asterisk (*). An example of the displayed "Installable" PPD options are listed below. InstallableOptions : Option 'Option2' (Multi-Cassette Unit) : True (Installed) <*> False (Not Installed) Option 'Option3' (Extra Paper Deck) : True (Installed) <*> False (Not Installed) Option 'Option4' (Output Option) : <*> None (Not Installed) Finisher1 (Finisher-1) Finisher2 (Finisher-2) 8.22.2 Configuring the default PPD or filter options The next step will be to configure or define the defaults for that queue. The core command to configure or define a device's defaults is "codehostconfig". In order to configure or define the default ppd or filter options you will use both the "u" (update) and "o" (option) arguments. An example of configuring a print queue named localprintqueue with an Output Option of Finisher1 is listed below. Page 79 of 100 Note: None of the PPD options are fixed and you will need to query the print queue via “codehostconfig C localqueue_name” in order to determine the available options. ● ● codehostconfig u localprintqueue o Option4=Finisher1 In order to configure multiple options in the same Unix shellbased interface string simply place the o (option) argument between each option. An example of configuring a print queue named localprintqueue with a default paper size A3 and an Output Option of Finisher1 is listed below. codehostconfig u localprintqueue o Pagesize=A3 o Option4=FinisherJ1 All options and arguments are variables and you will need to query the print queue via. “codehostconfig C localqueue_name” in order to determine them. If you want to chain multiple options together when updating a queue with the u please ensure that all options are chained together as listed above, or in quotes as listed below. ● codehostconfig u localprintqueue o "Pagesize=A3 Option4=FinisherJ1" 8.23 BrightQ-Pro Printing with the Unix Shell-based interface It will now be necessary to understand how to print and dynamically access the ppd or filter options for that queue. In order to determine the default ppd or filter options utilize the "codehostconfig C localqueue_name" command. Once you have run the "codehostconfig C localprintqueue" command you will be presented with a list of default PPD or filter options. The list will display both the subsection of the ppd or filter, the options, and default arguments. Next to each "default option" will be an asterisk (*). An example of the displayed "PageSize" PPD or filter options are listed below. General : Option 'PageSize' (Media Size) : Letter (Letter) Legal (Legal) <*> A3 (A3) A4 (A4) A5 (A5) B4 (B4) B5 (B5) Tabloid (11x17) Page 80 of 100 Once you have determined the option you want to use (in this case printing on Tabloid paper) use the syntax below to ensure that the data will be filtered appropriately. In order to utilize multiple options in the same Unix shellbased interface string simply place the "o" (option) argument between each option. 8.23.1 Printing with no GUI, -P, and -d lp, lpr, pjm, P, d, etc. are all the default system spooler commands, and all with the exception of pjm (print job manager) will be determined by the underlying print spooler/system. The nogui command can be utilized to suppress the pjm UI. ● lpr -P localprintqueue -o PageSize=Tabloid /path/to/file ● lp -dlocalprintqueue -o PageSize=Tabloid -o MediaType=Heavy /path/to/file ● pjm --no-gui -P localprintqueue -o PageSize=Tabloid /path/to/file 8.23.2 Number of copies (System V) In order to specify the number of copies being printed via the Unix shellbased interface, you must use the default print system option for number of copies. For example, “n” is the default number of copies option for the System V based (lp) print spoolers. ● lp -dlocalprintqueue -n3 /path/to/file 8.23.3 Number of copies (Berkeley) # is the default number of copies option for the Berkeley based (lpr) print spoolers as well as the BrightQPro Print Job Manager (PJM) ● lpr -P localprintqueue -#3 /path/to/file Listed below is a sample of printing a file with both the "nogui" and "raw" options ● lpr --no-gui -P localprintqueue -o raw /path/to/file ● lpr --no-gui -P localprintqueue -o PageSize=Tabloid /path/to/file ● lp --no-gui -dlocalprintqueue -o raw /path/to/file ● pjm --no-gui -P localprintqueue -o raw /path/to/file 8.24 Uninstalling BrightQ-Pro from the Unix shell-based interface If you need to uninstall BrightQPro from the Unix shellbased interface utilize the "codehostuninstall brightq" command. If you need help with the command, type "codehostuninstall help". In order to list all installed products utilize the "l" argument as displayed below (please refer to table 8.4.1 for a breakdown of the “codehostuninstall” option arguments) : ● codehost-uninstall -l In order to conduct a complete uninstall of BrightQPro and not select individual products or options, use the following command: Page 81 of 100 ● codehost-uninstall brightq If you would like to uninstall only a specific product or option utilize the "l" argument to list the products and options, then select the appropriate products or options and utilize the following command. Note: you will be prompted for each product or option as to whether or not you want to uninstall. ● codehostuninstall brightq "product or option in quotes" 9.0 Unix Shell-Based Interface - Generic Filter Options The Generic Filters refer to the following filters: Text to PostScript, Image to PostScript, PDF to PostScript, and PostScript to PostScript. 9.1 Media: The following options apply when printing; Media Size, Type, and Source. 9.1.1 Setting the media type, size, and source The o media=xyz option sets the media size, type, and/or source: usage; lp, lpr, pjm See example below: ● lpr -o media=Letter,MultiPurpose,Transparency filename The available media sizes, types, and sources depend on the printer, but most support the following options (case is not significant): ● Letter US Letter (8.5x11 inches, or 216x279mm) ● Legal US Legal (8.5x14 inches, or 216x356mm) ● A4 ISO A4 (8.27x11.69 inches, or 210x297mm) ● COM10 US #10 Envelope (9.5x4.125 inches, or 241x105mm) ● DL ISO DL Envelope (8.66x4.33 inches, or 220x110mm) ● Transparency Transparency media type or source ● Upper Upper paper tray ● Lower Lower paper tray ● MultiPurpose Multipurpose paper tray ● LargeCapacity Large capacity paper tray The actual options supported are defined in the printer's PPD file in the PageSize, InputSlot, and MediaType options. 9.1.2 Setting the paper Orientation The "o orientationrequested=4" option will rotate the page 90 degrees to print in landscape orientation. ● lpr -o landscape filename ● lpr -o orientation-requested=4 (this is landscape) ● lpr -o orientation-requested=3 (this is portrait) Page 82 of 100 9.1.3 Printing on Both Sides of the Paper (Duplex) The o sides=twosidedshortedge and o sides=twosidedlongedge options will enable duplexing on the printer, if the printer supports it. The o sides=twosidedshortedge option is suitable for landscape pages, while the o sides=twosidedlongedge option is suitable for portrait pages: Note: Duplex commands need to be crosschecked with the codehostconfig C queue_name to ensure that a generic approach like the one listed below will work. usage; lp, lpr, pjm ● lp -o sides=two-sided-short-edge filename ● lpr -o sides=two-sided-long-edge filename The default is to print singlesided: ● lpr -o sides=one-sided filename 9.1.4 Banner Options: The following options apply when printing all types of files. The o jobsheets=start,end option sets the banner page(s) to use for a job: usage; lp, lpr, pjm ● lp -o job-sheets=none filename ● lp -o job-sheets=standard filename ● lpr -o job-sheets=classified,classified filename If only one banner file is specified, it will be printed before the files in the job. If a second banner file is specified, it is printed after the files in the job. The available banner pages depend on the local system configuration; BrightQPro includes the following banner files: ● none Do not produce a banner page. ● classified A banner page with a "classified" label at the top and bottom. ● confidential A banner page with a "confidential" label at the top and bottom. ● secret A banner page with a "secret" label at the top and bottom. ● standard A banner page with no label at the top and bottom. ● topsecret A banner page with a "top secret" label at the top and bottom. ● unclassified A banner page with an "unclassified" label at the top and bottom. 9.2 Document Options: The following options apply when printing supported file types. 9.2.1 Page Ranges The o pageranges=pages option selects a range of pages for printing: usage; lp, lpr, pjm ● lpr -o page-ranges=1-4,7,9-12 filename Page 83 of 100 As shown above, the pages value can be a single page, a range of pages, or a collection of page numbers and ranges separated by commas. The pages will always be printed in ascending order, regardless of the order of the pages in the pageranges option. The default is to print all pages. 9.2.2 Selecting Even or Odd Pages Use the o pageset=set option to select the even or odd pages: ● lp -o page-set=odd filename ● lp -o page-set=even filename ● lpr -o page-set=even filename The default is to print all pages. 9.2.3 Setting the Output Order The o outputorder=order option to set the output order of all pages: usage; lp, lpr, pjm ● lp -o outputorder=normal filename ● lp -o outputorder=reverse filename 9.2.4 N-Up Printing The o numberup=value option selects NUp printing. NUp printing places multiple document pages on a single printed page. BrightQPro supports 1, 2, 4, 6, 9, and 16Up formats; the default format is 1Up: usage; lp, lpr, pjm ● lp -o number-up=1 filename ● lp -o number-up=2 filename ● lp -o number-up=4 filename ● lp -o number-up=6 filename ● lp -o number-up=9 filename ● lp -o number-up=16 filename 9.2.5 Page Border The o pageborder=value option chooses the border to draw around each page: usage; lp, lpr, pjm ● o pageborder=double; draw two hairline borders around each page ● o pageborder=doublethick; draw two 1pt borders around each page ● o pageborder=none; do not draw a border (default) ● o pageborder=single; draw one hairline border around each page ● o pageborder=singlethick; draw one 1pt border around each page 9.2.6 Number Up Layout (number-up-layout) The o numberuplayout=value option chooses the layout of the pages on each output page: usage; lp, lpr, pjm ● ● o numberuplayout=btlr; Bottom to top, left to right o numberuplayout=btrl; Bottom to top, right to left Page 84 of 100 ● ● ● ● ● ● o numberuplayout=lrbt; Left to right, bottom to top o numberuplayout=lrtb; Left to right, top to bottom (default) o numberuplayout=rlbt; Right to left, bottom to top o numberuplayout=rltb; Right to left, top to bottom o numberuplayout=tblr; Top to bottom, left to right o numberuplayout=tbrl; Top to bottom, right to left 9.2.7 Mirroring Prints You can mirror a print using the o mirror option: usage; lp, lpr, pjm ● lp -o mirror filename This is useful for printing mirrored pages on transfer paper, for Tshirts, mugs, etc. 9.2.8 Brightness You can control the overall brightness of the printed output using the o brightness=percent option: usage; lp, lpr, pjm Note; Brightness controls will only apply to Image, and supported image files being printed directly from BrightQPro ● lp -o brightness=120 filename Values greater than 100 will lighten the print, while values less than 100 will darken it. 9.2.9 Gamma Control You can control the overall gamma correction of the printed output using the o gamma=value option: usage; lp, lpr, pjm Note; Gamma controls will only apply to Image, and supported image files being printed directly from BrightQPro ● lp -o gamma=1700 filename ● lpr -o gamma=1700 filename Values greater than 1.000 will lighten the print, while values less than 1.000 will darken it. The default gamma is 1.000. 9.3 Text Options The following options apply when printing text files. usage; lp, lpr, pjm 9.3.1 Setting the Number of Characters Per Inch (CPI) The o cpi=value option sets the number of characters per inch: usage; lp, lpr, pjm ● lp -o cpi=10 filename ● lp -o cpi=12 filename ● lpr -o cpi=17 filename Page 85 of 100 The default characters per inch value is 10. 9.3.2 Setting the Number of Lines Per Inch (LPI) The o lpi=value option sets the number of lines per inch: usage; lp, lpr, pjm ● lp -o lpi=8 filename The default lines per inch value is 6. 9.3.3 Setting the number of columns The o columns=value option sets the number of text columns: usage; lp, lpr, pjm ● lp -o columns=2 filename The default number of columns is 1. 9.3.4 Wrapping text The –o wrap=true sets the text on the page to wrap to the next line when it hits the page borders usage; lp, lpr, pjm ● lp -o wrap=true filename 9.3.5 Setting the Page Margins Normally the page margins are set to the hard limits of the printer. Use the o pageleft=value, o pageright=value , o pagetop=value, and o pagebottom=value options to adjust the page margins: usage; lp, lpr, pjm Note: Page Margin controls will only apply to text, PostScript, PDF, and supported image files being printed directly from BrightQPro. The value argument is the margin in points; each point is 1/72 inch or 0.35mm . ● lp -o page-left=value filename ● lp -o page-right=value filename ● lp -o page-top=value filename ● lp -o page-bottom=value filename 9.3.6 Set Pretty Print/Syntax Coloring The o prettyprint option puts a header at the top of each page with the page number, job title (usually the filename), and the date. Also, C and C++ keywords are highlighted, and comment lines are italicized: usage; lp, lpr, pjm ● lp -o prettyprint filename 9.4 Image Options The following options apply when printing image files only. The supported image file formats are listed below: Page 86 of 100 BMP, GIF, JPEG, PhotoCD, Portable anymap (PBM, PGM, PNM, and PPM), PNG, SGI RGB, Sun Raster, and TIFF image files. 9.4.1 Positioning the Image ● ● ● ● ● ● ● ● ● The -o position=name option specifies the position of the image on the page: usage; lp, lpr, pjm center Center the image on the page (default) top Print the image centered at the top of the page left Print the image centered on the left of page right Print the image centered on the right of the page topleft Print the image at the top left corner of the page topright Print the image at the top right corner of the page bottom Print the image centered at the bottom of the page bottomleft Print the image at the bottom left corner of the page bottomright Print the image at the bottom right corner of the page 9.4.2 Scaling the Image The o scaling=percent, o ppi=value, and o naturalscaling=percent options change the size of a printed image: usage; lp, lpr, pjm ● lp -o scaling=percent filename ● lp -o ppi=value filename ● lpr -o natural-scaling=percent filename The scaling=percent value is a number from 1 to 700 (in the GUI) specifying the size in relation to the page (not the image.) A scaling of 100 percent will fill the page as completely as the image aspect ratio allows. A scaling of 200 percent will print on up to 4 pages. 9.4.3 Setting the PPI for an image The ppi=value value is a number from 1 to 800 (in the GUI) specifying the resolution of the image in pixels per inch. An image that is 3000x2400 pixels will print 10x8 inches at 300 pixels per inch, for example. If the specified resolution makes the image larger than the page, multiple pages will be printed to satisfy the request. Usage; lp, lpr, pjm The naturalscaling=percent value is a number from 1 to 800 specifying the size in relation to the natural image size. A scaling of 100 percent will print the image at its natural size, while a scaling of 50 percent will print the image at half its natural size. If the specified scaling makes the image larger than the page, multiple pages will be printed to satisfy the request. ● lp –o ppi=value filename 9.4.4 Setting the Hue for an image The o hue=value option will adjust the hue of the printed image, much like the tint control on a television: usage; lp, lpr, pjm. ● lp -o hue=value filename The value argument is a number from 180 to 180 (in the GUI) and represents the color hue rotation. The following table summarizes the change you will see with different colors: The default hue adjustment is 0. Page 87 of 100 Hue adjustments for an image Color hue 45 hue +45 Red Green Yellow Blue Magenta Cyan Purple Yellowgreen Orange Sky Blue Indigo Bluegreen Yelloworange Bluegreen Greenyellow Purple Crimson Lightnavyblue 9.4.5 Setting the Color Saturation Adjusting the Saturation (Color) of an Image. The o saturation=percent option adjusts the saturation of the colors in an image, much like the color knob on a television: usage; lp, lpr, pjm ● lp -o saturation=percent filename The percent argument specifies the color saturation from 0 to 200. A color saturation of 0 produces a blackandwhite print, while a value of 200 will make the colors extremely intense. The default saturation is 100. 9.5 HP-GL/2 Options 9.5.1 Printing with the Black Pen The o blackplot option specifies that all pens should plot in grayscale: usage; lp, lpr, pjm ● lp -o blackplot filename The default is to use the colors defined in the plot file or the standard pen colors defined in the HPGL/2 reference manual. 9.5.2 Fitting the plot to the page The o fitplot option specifies that the plot should be scaled to fit on the page: usage; lp, lpr, pjm ● lp -o fitplot filename The default is to use the absolute distances specified in the plot file. NOTE: This feature depends upon an accurate plot size (PS) command in the HPGL/2 file. If no plot size is given in the file than the HPGL/2 filter assumes the plot is ANSI E size. 9.5.3 Setting the Default Pen Width The o penwidth=value option specifies the default pen width for HPGL/2 files: usage; lp, lpr, pjm ● lp -o penwidth=value filename The pen width value specifies the pen width in micrometers. The default value of 1000 produces lines that are 1 millimeter in width. Specifying a pen width of 0 produces lines that are exactly 1 pixel wide. NOTE: This option is ignored when the pen widths are set in the plot file. Page 88 of 100 9.6 Raw or Unfiltered output The o raw option allows you to send files directly to a printer without filtering. This is sometimes required when Printing data that is already formatted for the output device: usage; lp, lpr, pjm 9.6.1 Raw or Unfiltered output ● lp -o raw filename The l option can also be used with the lpr command to send files directly to a printer: usage; lp, lpr, pjm ● lpr -l filename 10 User vs "root" while using BrightQ-Pro BrightQPro can be use by regular users as well as "root" users. There are core differences between the user experience with BrightQPro (when logged in as a user) or "root". The "root" user has full access to all BrightQPro functions. The regular user on the other hand cannot install/configure printers, restart the printing system, as well as access numerous other configuration options (they will be grayed out and unavailable). Listed in Tables below are the features that the user or "root" can access, modify, etc. These are listed by the Configuration Tool, which encompasses the installer and the Print Job Manager. BrightINSTALL, PJM, and Configuration Tool “user vs. root” - Table user vs. root options Function or menu options Normal User BrightQPro Installer Installing BrightQPro Uninstalling BrightQPro No * No “root” user Yes Yes Configuration Tool – File, Print, Printer, and Help menu’s Running the BrightQPro License Manager File/Options (CUPS, System V, Berkeley) PJM Tabs Print /Test page Print /Documents Printer/Add Printer (Expert) Printer/Add Printer (Wizard) Printer/Add Class Printer/Import Printers Printer/Export Printers Printer/Duplicate Printer Printer/Remove Printer Printer/Set as System Default Help/Index Help/User Guide Help/About No Yes Yes Yes Yes No No No No Yes No No No Yes Yes Yes Yes Yes Yes Yes Yes Yes Yes Yes Yes Yes Yes Yes Yes Yes Yes Yes Page 89 of 100 Configuration Tool – Icons Add printer wizard Remove the selected printer Enable/Disable printer Browse the online help Start/Stop Monitor Show Device Status Exit the program No No No Yes Yes Yes Yes Yes Yes Yes Yes Yes Yes Yes Configuration Tool – Info. Tab Menu Webbased administration Display Printer Information Yes Yes Yes Yes Configuration Tool – Info. Job Menu Yes (only the users jobs) No No Delete Suspend** Resume** Yes Yes Yes Configuration Tool – Properties Menu Device Accessories Filter Options Factory Device Defaults No Yes Yes Yes Yes Yes Configuration Tool – Connection Access to the menu No Yes Configuration Tool – Device Status Menu Refresh Enable Status Monitoring Yes No Yes Yes Configuration Tool – Configured Printer Right Click Menu Set as system default Set as user’s default Remove Duplicate Disable Enable Reject/Accept Jobs No Yes No No No No No Yes Yes Yes Yes Yes Yes Yes Print Job Manager Selecting printer outside the default Yes Yes Primary PJM Menu Yes Yes Properties Yes Yes Set as user default Yes Yes Device status icon Yes Yes Ok/Cancel/Help Yes Yes General/Status/Layout/Margins/Image/Text/HPGL/2 Yes Yes Device Specific Tab Yes Yes Device Specific Tab Installable options No Yes * You may execute this as a normal user and BrightInstall will ask for the "root" password ** Suspend/Resume are only supported for Root Users and are not supported at all for HPUX or IRIX Page 90 of 100 11 Tables 11.1 Minimum Supported Linux Distributions and Versions – Table Linux Distribution Minimum Supported Distribution Version Minimum Kernel Version Minimum Processor Recommendation RedHat EL 4 2.2.14 or 2.4.12 or greater Pentium 1 133MHz Fedora 7 2.2.14 or 2.4.12 or greater Pentium 1 133MHz SuSE 7.3 2.2.14 or 2.4.12 or greater Pentium 1 133MHz TurboLinux 10.0 2.2.14 or 2.4.12 or greater Pentium 1 133MHz Debian 3.0 2.2.14 or 2.4.12 or greater Pentium 1 133MHz Slackware 10 2.2.14 or 2.4.12 or greater Pentium 1 133MHz Ubuntu 9.10 2.2.14 or 2.4.12 or greater Pentium 1 133MHz Minimum Hard Drive space and Memory Recommendation 64 MB RAM, 250 MB free HD space 64 MB RAM, 250 MB free HD space 64 MB RAM, 250 MB free HD space 64 MB RAM, 250 MB free HD space 64 MB RAM, 250 MB free HD space 64 MB RAM, 250 MB free HD space 64 MB RAM, 250 MB free HD space 11.2 Minimum Supported Unix Versions and Architectures – Table Unix OS Minimum Supported Version Processor Architecture Solaris 10 UltraSPARC UltraSPARC II or III Solaris 10 i86pc x86Intel and IntelCompatible HPUX 11i PARISC FreeBSD * 8.2 x86Intel and IntelCompatible AIX ** 4.3 Power PC Minimum Hard Drive space and Memory Recommendation 64 MB RAM, 250 MB free HD space 64 MB RAM, 250 MB free HD space 64 MB RAM, 250 MB free HD space 64 MB RAM, 250 MB free HD space 64 MB RAM, 250 MB free HD space 1. * FreeBSD: When using FreeBSD, the options (o) are only supported when using the BrightQPro Print Job Manager (/usr/local/brightq/bin/pjm) vs. the standard (i.e. builtin) printing system spooler (i.e. /usr/bin/lp, lpr) 2. ** AIX: On AIX 5 and above, you can switch to System V from AIX or vice versa by using "smit" or simply using the commands below: /usr/sbin/switch.prt s AIX (switch from System V to AIX) /usr/sbin/switch.prt s SystemV (switch from AIX to System V) Page 91 of 100 11.3 Acronyms - Table BrightQPro Acronyms Acronym Description BrightINSTALL This is the BrightQPro installation wizard Config. Tool BrightQPro Configuration Tool PJM Print Job Manager Page Description Language Acronyms Acronym Description GDI Graphical Device Interface PCL Printer Control Language PDL Page Description Language PJL Printer Job Language PPD Postscript Printer Description PS PostScript System Acronyms Acronym Description BSD Berkeley Software Distribution CUPS Common Unix Printing System CLI Unix shellbased or Command Line interface FQDN Fully Qualified Domain Name GUI Graphical User Interface IP Internet Protocol IPP Internet Printing Protocol LP Line Printer (SVR4) LPD Line Printer Daemon LPR Line Printer Remote (BSD) LPRng Line Printer Remote New Generation MIB Management Information Block ms Milliseconds QA Quality Assurance SMB Server Message Block URL Uniform Resource Locator SNMP Simple Network Management Protocol SVR4 System Five release four AT&T Unix UI User Interface 11.4 “codehost-config” arguments and descriptions- Table Format: command argument value (codehostconfig remove printqueue_name) “codehostconfig” table Arguments Descriptions help | h add | c <queue> <ppd> remove | r <queue update | u <queue> config | C <queue> version | v Print this help message Configure a new printer Remove a queue from the system Update the parameters for a queue Show available options for the queue Print version information and exit Page 92 of 100 default | d <queue> system | s addclass | A <class> <queue1> <queue2> ... removemember | R <class> <queue1> <queue2> ... Make the queue the system default option=value Set a printing system option Configure a class from existing queues or classes. Only available on CUPS and System V systems. Remove one or more queue/class from an existing class Optional Arguments fast | f list | a Fast startup; do not fetch initial status information. Implied for noninteractive commands. login | l <login> pass | p <password> description | D <desc> location | L <location> uri | U <URI> options | o <options> usepjm y|n List all available queues Specify a user for login Specify a password for the user Add/update a description for the printer Add/update the location for the printer Set the connection URI for the printer Change the default PPD settings Whether to use the PJM GUI for the printer 11.5 codehost-config --system: (GLOBAL) - Table Listed below are the "codehostconfig system" Names and Values. These are options that are GLOBAL in nature and control the way BrightQPro interacts with the underlying print system. Format: command argument name=value (codehostconfig system replacedlp=true) “codehostconfig system” table Arguments Descriptions ghostscript smbclient replacedlp usepjmothers usecupsothers Path to gs command Path to Samba smbclient program "true" if PJM was linked for the lp/lpr "true" PJM pop up for nonBrightQPro queues "true" to access all PPD features with CUPS and the corresponding cups license The name of the system default queue BrightQProdefaultprinter codehostconfig system “CUPS Commands” port restart lpr encrypt autorestart And its port (normally 631) The path to a script to restart the CUPS daemon (/etc/rc.d/init.d/cups or similar) The command called for submitting jobs (lp.cups or similar) If 'yes', force encryption when connecting to the server. If 'yes', automatically restart the CUPS daemon if we fail to connect to it. codehostconfig system “LPR/LPD/LP – Commands” printcap printconf printconfdb reload lpc lpr lpq lprm The file where we write new queues The path to the printconfbackend command The path to the printconf database Path to the script to restart the daemon Path to the 'lpc' command Path to the actual 'lpr' command Path to the actual 'lpq' command Path to the actual 'lprm' command Page 93 of 100 spooldir lpuser lpgroup usej Root of the spooling directories (/var/spool/lpd) The user that owns the spool directories The group that owns the spool directories Set to "true" if the lpr J syntax is to be used to submit job options 11.6 “codehost-license” –argument - Table Listed below are the "codehostlicense" Names and Values. These are options that control the way BrightQPro interacts with the BrightQPro license manager. Format: command argument name option (register online) “register” table Arguments Descriptions help | h import | i online | o activation | a certificate | c email | e password | p Print this help message i licence.cl[f|p] Import a license file o Online product registration a Online product activation (certificate needed) c CERT Specify the certificate number for activation [email protected] Specify the user account for activation password Specify the password for the user account 11.7 “codehost-uninstall” –argument - Table Listed below are the "codehostuninstall” Names and Values. These are options that are GLOBAL in nature and control the way BrightQPro is removed from your system. Format: command argument name option (register online) “codehostuninstall” table Arguments Descriptions help | h list | l version | v brightq product [component] Print this help message List all installed products and components. Gets the Uninstall Tool version information Uninstall the entire BrightQPro program Uninstalls the specified product, or its subcomponent (i.e. “codehostuninstall brightq”) [email protected] Specify the user account for activation password Specify the password for the user account email | e password | p 11.8 “pjm” –argument - Table Listed below are the "pjm" Names and Values. These are options that are GLOBAL in nature and control the way the BrightQPro PJM interacts with the underlying print system. All device specific or generic filter specific options are listed separately. Format: command argument name=value (duplex=yes) “pjm” table Arguments Descriptions option | o nogui raw specifies the printing option/s Do not use the Print Job Manager (pjm) GUI Print the data in raw (unfiltered format) 11.9 “pjm and codehost-config -o” –arguments for the Generic Filters - Table Listed below are the "pjm, lp, lpr and codehostconfig o" Names and Values. These are options that are centric to the Generic Filters in BrightQPro. These are the filters that are centric to media, document types, Page 94 of 100 Images, text, HPGL/2, and printing RAW data. Please refer to chapter #8 for more detail on the names and values. Format: command argument name=value (duplex=yes) All options usage pjm, lp, lpr, unless otherwise noted Media Options Category name=value Media media=Letter Media Orientation o landscape orientationrequested=4 (this is landscape) orientationrequested=3 (this is portrait) Media Duplex/Simplex sides=twosidedshortedge sides=twosidedlongedge sides=onesided Banner Options lp o jobsheets=none lp o jobsheets=standard lpr o jobsheets=classified,classified Document Options Category name=value Page Ranges pageranges=14,7,912 Page Ranges/Odd/Even pageset=odd lp o pageset=even Output Order outputorder=normal outputorder=reverse Number up printing (Nup) numberup=1 numberup=2 numberup=4 numberup=6 numberup=9 numberup=16 Page border pageborder=double pageborder=doublethick pageborder=none (default) pageborder=single pageborder=singlethick Number up layout numberuplayout=btlr numberuplayout=btrl numberuplayout=lrbt numberuplayout=lrtb (default) numberuplayout=rlbt numberuplayout=rltb numberuplayout=tblr numberuplayout=tbrl mirror output mirror brightness brightness=120 gamma gamma=1.000 Text Options Category name=value Characters Per Inch (CPI) cpi=10 Lines Per Inch (LPI) lpi=6 Page 95 of 100 Columns Text Wrapping Page Margin Pretty Printing/Syntax Coloring Category Positioning the image on the page Scaling the image Pixel Per Inch Setting the hue Setting the saturation Category Printing with the black pen Fit the plot to the page Setting the default pen width Category To print data RAW without being filtered via. BrightQPro columns=1 wrap=true wrap=false pageleft=value pageright=value pagetop=value pagebottom=value prettyprint Image Options name=value position=center position=top position=left position=right position=topleft position=topright position=bottom position=bottomleft position=bottomright scaling=percent ppi=value naturalscaling=percent ppi=value hue=value saturation=percent HPGL/2 Options name=value blackplot fitplot penwidth=value RAW Options name=value raw 11.10 Maximum Characters allowed in a print queue name Listed below are maximum alphanumeric characters allowed in a print queue name listed by printing system. Print System Maximum allowed characters in print queue name Unix LP backends (including Solaris) 14 characters maximum AIX native 20 characters maximum CUPS and LPRng 25 characters maximum BSD LPR on Linux/FreeBSD 14 characters maximum Page 96 of 100 12 End User License Agreement (EULA) NOTICE TO USER: PLEASE READ THIS CONTRACT CAREFULLY. BY USING ALL OR ANY PORTION OF THE SOFTWARE YOU ACCEPT ALL THE TERMS AND CONDITIONS OF THIS AGREEMENT, INCLUDING, IN PARTICULAR THE LIMITATIONS ON: USE CONTAINED IN SECTION 2; TRANSFERABILITY IN SECTION 4; WARRANTY IN SECTION 5; AND LIABILITY IN SECTION 7. YOU AGREE THAT THIS AGREEMENT IS ENFORCEABLE LIKE ANY WRITTEN NEGOTIATED AGREEMENT SIGNED BY YOU. IF YOU DO NOT AGREE, DO NOT USE THIS SOFTWARE. IF YOU ACQUIRED THE SOFTWARE ON TANGIBLE MEDIA (e.g. CD) WITHOUT AN OPPORTUNITY TO REVIEW THIS LICENSE AND YOU DO NOT ACCEPT THIS AGREEMENT DO NOT USE THIS SOFTWARE. 1. Definitions. "Software" means (a) all of the contents of the files, disk(s), CDROM(s) or other media with which this Agreement is provided, including but not limited to (i) Codehost or third party computer information or software; (ii) related explanatory written materials or files ("User Manual"); and (iii) fonts; and(b) upgrades, modified versions, updates, additions, and copies of the Software, if any, licensed to you by Codehost (collectively, "Updates"). "Use" or "Using" means to access, install, download, copy or otherwise benefit from using the functionality of the Software in accordance with the Documentation. "Permitted Number" means one (1) unless otherwise indicated under a valid license (e.g. volume license) granted by Codehost. "Computer" means an electronic device that accepts information in digital or similar form and manipulates it for a specific result based on a sequence of instructions. "Codehost" means Codehost, Inc., 300 Corporate Pointe, Suite 383, Culver City, California 90230. 2. Software License. As long as you comply with the terms of this End User License Agreement (this "Agreement"), Codehost grants to you a nonexclusive license to Use the Software for the purposes described in the User Manual. Some third party materials included in the Software may be subject to other terms and conditions, including the General Public License, which are typically found in a "Read Me" file located near such materials. 2.1. General Use. You may install and Use a copy of the Software on your compatible computer. 2.2 Backup Copy. You may make one backup copy of the Software, provided your backup copy is not installed or used on any computer. You may not transfer the rights to a backup copy unless you transfer all rights in the Software as provided under Section 4. 3. Intellectual Property Rights. The Software and any copies that you are authorized by Codehost to USE are the intellectual property of and are owned by Codehost, Inc., and its suppliers, with the exception of any code that falls under the GNU General Public License (please refer to section 13 of the End User License Agreement). Aside from opensource code, the structure, organization and code of the Software are the valuable trade secrets and confidential information of Codehost, Inc. The Software is protected by copyright, including without limitation by United States Copyright Law, international treaty provisions and applicable laws in the country in which it is being used. You may not copy the Software, except as set forth in Section 2 ("Software License"). Any copies that you are permitted to make pursuant to this Agreement must contain the same copyright and other proprietary notices that appear on or in the Software. Unless specifically and expressly permitted by Codehost or a valid opensource license, you agree not to modify, adapt or translate the Software. You also agree not to reverse engineer, decompile, disassemble or otherwise attempt to discover the source code of the nonopen source Software except to the extent you may be (1) expressly permitted to decompile under applicable law (please refer to section 14), or (2) it is essential to do so in order to achieve operability of the Software with another software program, and (3) you have first requested Codehost to provide the information necessary to achieve such operability and Codehost has not made such information available. Codehost has the right to impose reasonable conditions and to request a reasonable fee before providing such information. Any information supplied by Codehost or obtained by you, as permitted hereunder, may only be used by you for the purpose described herein and may not be disclosed to any third party or used to create any software which is substantially similar to the expression of the Software. Requests for information should be directed to the Codehost Page 97 of 100 Customer Support Department. Trademarks shall be used in accordance with accepted trademark practice, including identification of trademarks owners' names. Trademarks can only be used to identify printed output produced by the Software and such use of any trademark does not give you any rights of ownership in that trademark. Except as expressly stated herein, this Agreement does not grant you any intellectual property rights in the Software and Codehost reserves all rights not expressly granted herein. 4. Transfer. You may not, rent, lease, sublicense or authorize all or any portion of the Software to be copied onto another user's computer except as may be expressly permitted herein. You may, however, transfer all your rights to Use the Software to another person or legal entity provided that: (a) you also transfer each this Agreement, the Software and all other software or hardware bundled or preinstalled with the Software, including all copies, Updates and prior versions, and all copies of font software converted into other formats, to such person or entity; (b) you retain no copies, including backups and copies stored on a computer; and (c) the receiving party accepts the terms and conditions of this Agreement and any other terms and conditions upon which you legally purchased a license to the Software. Notwithstanding the foregoing, you may not transfer education, prerelease, or not for resale copies of the Software. 5. NO WARRANTY. The Software is being delivered to you "AS IS" and Codehost makes no warranty as to its use or performance. CODEHOST AND ITS SUPPLIERS DO NOT AND CANNOT WARRANT THE PERFORMANCE OR RESULTS YOU MAY OBTAIN BY USING THE SOFTWARE. EXCEPT FOR ANY WARRANTY, CONDITION, REPRESENTATION OR TERM TO THE EXTENT TO WHICH THE SAME CANNOT OR MAY NOT BE EXCLUDED OR LIMITED BY LAW APPLICABLE TO YOU IN YOUR JURISDICTION, CODEHOST AND ITS SUPPLIERS MAKE NO WARRANTIES CONDITIONS, REPRESENTATIONS, OR TERMS (EXPRESS OR IMPLIED WHETHER BY STATUTE, COMMON LAW, CUSTOM, USAGE OR OTHERWISE) AS TO ANY MATTER INCLUDING WITHOUT LIMITATION NONINFRINGEMENT OF THIRD PARTY RIGHTS, MERCHANTABILITY, INTEGRATION, SATISFACTORY QUALITY, OR FITNESS FOR ANY PARTICULAR PURPOSE. 6. Prerelease Product Additional Terms. If the product you have received with this license is precommercial release or beta Software ("Prerelease Software"), then the following Section applies. To the extent that any provision in this Section is in conflict with any other term or condition in this Agreement, this Section shall supersede such other term(s) and condition(s) with respect to the Prerelease Software, but only to the extent necessary to resolve the conflict. You acknowledge that the Software is a prerelease version, does not represent final product from Codehost, and may contain bugs, errors and other problems that could cause system or other failures and data loss. Consequently, the Prerelease Software is provided to you "ASIS", and Codehost disclaims any warranty or liability obligations to you of any kind. WHERE LEGALLY LIABILITY CANNOT BE EXCLUDED FOR PRERELEASE SOFTWARE, BUT IT MAY BE LIMITED, CODEHOST'S LIABILITY AND THAT OF ITS SUPPLIERS SHALL BE LIMITED TO THE SUM OF FIFTY DOLLARS (U.S. $50) IN TOTAL. You acknowledge that Codehost has not promised or guaranteed to you that Prerelease Software will be announced or made available to anyone in the future, that Codehost has no express or implied obligation to you to announce or introduce the Prerelease Software and that Codehost may not introduce a product similar to or compatible with the Prerelease Software. Accordingly, you acknowledge that any research or development that you perform regarding the Prerelease Software or any product associated with the Prerelease Software is done entirely at your own risk. During the term of this Agreement, if requested by Codehost, you will provide feedback to Codehost regarding testing and use of the Prerelease Software, including error or bug reports. If you have been provided the Prerelease Software pursuant to a separate written agreement, your use of the Software is also governed by such agreement. You agree that you may not and certify that you will not sublicense, lease, loan, rent, or transfer the Prerelease Software. Upon receipt of a later unreleased version of the Prerelease Software or release by Codehost of a publicly released commercial version of the Software, whether as a standalone product or as part of a larger product, you agree to return or destroy all earlier Prerelease Software received from Codehost and to abide by the terms of the End User License Agreement for any such later versions of the Prerelease Software. Notwithstanding anything in this Section to the contrary, if you are located outside the United States of America, you agree that you will return or destroy all unreleased versions of the Prerelease Software within thirty (30) days of the completion of your testing of the Page 98 of 100 Software when such date is earlier than the date for Codehost'sfirst commercial shipment of the publicly released (commercial) Software. 7. LIMITATION OF LIABILITY. IN NO EVENT WILL CODEHOST OR ITS SUPPLIERS BE LIABLE TO YOU FOR ANY DAMAGES, CLAIMS OR COSTS WHATSOEVER OR ANY CONSEQUENTIAL, INDIRECT, INCIDENTAL DAMAGES, OR ANY LOST PROFITS OR LOST SAVINGS, EVEN IF A CODEHOST REPRESENTATIVE HAS BEEN ADVISED OF THE POSSIBILITY OF SUCH LOSS, DAMAGES, CLAIMS OR COSTS OR FOR ANY CLAIM BY ANY THIRD PARTY. THE FOREGOING LIMITATIONS AND EXCLUSIONS APPLY TO THE EXTENT PERMITTED BY APPLICABLE LAW IN YOUR JURISDICTION. CODEHOST'S AGGREGATE LIABILITY AND THAT OF ITS SUPPLIERS UNDER OR IN CONNECTION WITH THIS AGREEMENT SHALL BE LIMITED TO THE AMOUNT PAID FOR THE SOFTWARE, IF ANY. Nothing contained in this Agreement limits Codehost's liability to you in the event of death or personal injury resulting from Codehost's negligence or for the tort of deceit (fraud). Codehost is acting on behalf of its suppliers for the purpose of disclaiming, excluding and/or limiting obligations, warranties and liability as provided in this Agreement, but in no other respects and for no other purpose. For further information, please see the jurisdiction specific information at the end of this Agreement, if any, or contact Codehost's Customer Support Department. 8. Export Rules. You agree that the Software will not be shipped, transferred or exported into any country or used in any manner prohibited by the United States Export Administration Act or any other export laws, restrictions or regulations (collectively the "Export Laws"). In addition, if the Software is identified as export controlled items under the Export Laws, you represent and warrant that you are not a citizen, or otherwise located within, an embargoed nation (including without limitation Iran, Syria, Sudan, Libya, Cuba, North Korea, and Serbia) and that you are not otherwise prohibited under the Export Laws from receiving the Software. All rights to Use the Software are granted on condition that such rights are forfeited if you fail to comply with the terms of this Agreement. 9. Governing Law. This Agreement will be governed by and construed in accordance with the substantive laws in force in the State of California. This Agreement will not be governed by the conflict of law rules of any jurisdiction or the United Nations Convention on Contracts for the International Sale of Goods, the application of which is expressly excluded. 10. General Provisions. If any part of this Agreement is found void and unenforceable, it will not affect the validity of the balance of the Agreement, which shall remain valid and enforceable according to its terms. This Agreement shall not prejudice the statutory rights of any party dealing as a consumer. A writing signed by an authorized officer of Codehost may only modify this Agreement. Codehost may license updates to you with additional or different terms. This is the entire agreement between Codehost and you relating to the Software and it supersedes any prior representations, discussions, undertakings, communications or advertising relating to the Software. 11. Notice to U.S. Government End Users. The Software and Documentation are "Commercial Items," as that term is defined at 48 C.F.R. §2.101, consisting of "Commercial Computer Software" and "Commercial Computer Software Documentation," as such terms are used in 48 C.F.R. §12.212 or 48 C.F.R. §227.7202, as applicable. Consistent with 48 C.F.R. §12.212 or 48 C.F.R. §§227.72021 through 227.72024, as applicable, the Commercial Computer Software and Commercial Computer Software Documentation are being licensed to U.S. Government end users (a) only as Commercial Items and (b) with only those rights as are granted to all other end users pursuant to the terms and conditions herein. Unpublishedrights reserved under the copyright laws of the United States. Codehost, Inc., 300 Corporate Pointet, Suite 383, Culver City, California 90230, USA. For U.S. Government End Users, Codehost agrees to comply with all applicable equal opportunity laws including, if appropriate, the provisions of Executive Order 11246, as amended, Section 402 of the Vietnam Era Veterans Readjustment Assistance Act of 1974 (38 USC 4212), and Section 503 of the Rehabilitation Act of 1973, as amended, and the regulations Page 99 of 100 at 41 CFR Parts 601 through 6060, 60250, and 60741. The affirmative action clause and regulations contained in the preceding sentence shall be incorporated by reference in this Agreement. 12. Compliance with Licenses. If you are a business or organization, you agree that upon request from Codehost or Codehost's authorized representative, you will within thirty (30) days fully document and certify that use of any and all Software at the time of the request is in conformity with your valid licenses from Codehost. 13. Exceptions. Any portion of the Software or any software distributed alongside, attached to or part of the Software that is governed by the GNU, General Public License or any license other than this Agreement, shall abide by the provisions of such relevant licenses and agreements. All such known licenses and agreements are typically provided in the "Read Me" file. If you have any questions regarding this Agreement or if you wish to request any information from Codehost, please use the address and contact information included with this product to contact the Codehost office serving your jurisdiction. Codehost and BrightQ are either registered trademarks or filed trademarks of Codehost, Inc. in the United States and/or other countries. 2010 13 Legal Stuff Codehost and BrightQPro are either registered trademarks or filed trademarks of Codehost, Inc. in the United States and/or other countries. Copyright 20072015 Codehost, Inc. Copyright laws protect this publication and all rights are reserved. This software is based on CUPS and the Common Unix Printing System, Copyright 19932007 by Easy Software Products, All Rights Reserved. The Common Unix Printing System, CUPS, the CUPS logo, and CUPS are the trademark property of Apple Inc. Red Hat, and Red Hatbased trademarks and logos are trademarks or registered trademarks of Red Hat, Inc. in the United States and other countries. SPARC is a registered trademark of SPARC International, Inc. Products bearing SPARC trademarks are based on an architecture developed by Sun Microsystems, Inc. Linux is a registered trademark of Linus Torvalds. All other trademarks are the property of their respective owners. Page 100 of 100