Download ARCHOS FM Remote Control User manual
Transcript
1
User manual
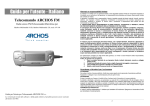
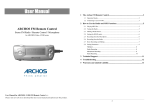
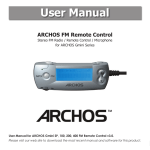
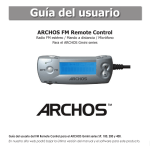
ARCHOS FM
Remote Control
Stereo FM Radio / Remote Control / Microphone
for ARCHOS AV 400, AV500 and Gmini 500 series
User Manual for ARCHOS FM Remote Control (ref. 500 656)
V2
Please visit our web site to download the most recent manual and software for this product.
1
2
English
Contents
1
3
Operation Modes
3
1.2
Connecting to your device
3
2
2
The Archos FM Remote Control
1.1
How to Use the Radio and MP3 Functions
6
2.1
Playing Music files
6
2.2
Tuning the Radio
6
2.3
Making a Radio Preset
6
2.4
Locking the buttons
7
2.5
Recording from the Microphone
7
2.6
Recording from the Radio
8
2.7
Retro Recording and Editing
8
3
Technical Support
12
4
Troubleshooting
13
5
Warranty and Limited Liability
14
3
1 The Archos FM Remote Control
This FM Remote control will allow you to:
•
Play music files that are on your device.
•
Record your voice with its microphone.
•
•
Listen to FM Stereo radio.
Record off the FM radio
1.1
Operation Modes
•
•
•
•
•
Browse Mode:
Play Mode:
Voice Record Mode:
FM Play Mode:
FM Record Mode:
1.2
Connecting to your device
Allows browsing through files and folders on the device
Plays music files from the device
Allows the recording of voice from the remote’s microphone
Plays from the built-in FM radio
Records from the built-in FM radio
Plugging the connector into the multi-connect jack.
The FM remote is hot pluggable. You do not have to shut off the device in
order to plug in the FM Remote control or remove it. Plug it in as shown.
Now plug your headphones into the FM Remote Control itself.
Once connected, the regular buttons on the device will still work in addition to the remote control buttons.
3
English
4
A
Built-in microphone
B
Record voice or FM Radio
C
Battery level / Playing / Recording / Paused / Repeat play / Volume level
D
HOLD: Press Hold for 3 seconds to de-activate/reactivate all buttons
E
FM Mode:
Short press changes between Stereo and mono reception
Browse Mode:
4
Short press moves browser up to the parent directory
5
F
Increase +: Volume Up
Decrease - : Volume Down
G
Rocker Control : (left, right, center click)
Browse Mode:
Left: Previous item in current directory
Right: Next item in current directory
Center: Play song / Pause / Enter directory
FM Mode:
Left: Go down the FM band or to previous preset
Right: Go up the FM band or to next preset
Center: Change FM mode (Preset/Manual/Search)
Center: (Long) Make a preset at the current frequency or delete current preset
(preset mode)
H
3.5mm jack for headphones
I
(Quick press) Switch between FM mode and MP3 (browse) mode. Stop/Esc.
(Long press) Go back to home <Music> icon.
Hold for 3 seconds to turn off device.
5
6
English
2 How to Use the Radio and MP3 Functions
2.1
Playing Music files
You can connect your FM Remote to the device at any time. The remote’s screen will show your current directory or the file name you are currently playing. Make a long press on the FM/MP3 mode button and you will be
sent to the main screen of the device. You can choose for example the <Music> or <Browser> icon. Move the
remote’s rocker control left and right (__/``) to use it as you would use the UP/DOWN buttons. Press the rocker
control into the remote control (`) whenever you would use the ENTER/PLAY
button on the device. This
will allow you to search your directory structure to find songs and playlists that you want to play. If you are in the
FM mode, just click on the MP3/FM button to go to MP3 mode. Use the Increase a and Decrease b buttons
on the Remote FM to control headphone volume.
2.2
Tuning the Radio
Once the remote is plugged in, click on the mode button MP3/FM
to go to the radio mode. Use the rocker control Left __ and Right
`` to go up and down the frequency range. A short press on the
rocker button will rotate through the three FM tuning modes, Preset
(you can choose one of your 20 preset stations), Manual (tune your
station manually), Search (let the radio search for the next clear station). Press the MP3/FM button to leave the Radio mode and go
back to the MP3 mode.
2.3
Making a Radio Preset
You can save up to 20 preset stations with the FM remote control.
Once you have found the radio frequency you want to save as a preset, press and hold the rocker PLAY ` button for 3 seconds. The Re6
7
mote will show P2 Saved, for example, indicating that this radio station is now program number 2. If you would
like to erase a preset station, go to the tuning Preset mode, scroll to the preset number you want to clear, then
hold down on PLAY ` for three seconds. You now have a free program slot to make a different FM preset.
If you would like to name your Preset radio stations, you can do this by editing, with a text editor such as Notepad (Windows®) or SimpleText (Macintosh®), the file FMPreset.txt which you will find in the System folder
on the root directory of the device’s hard drive. Each line of the text file should contain the station frequency,
a space, and then the name of the station. You can also download a Windows® based program created by
Archos that can create the FMPreset.txt file for you by just typing in the names of the stations and their respective frequencies. You can download this at www.archos.com under the category Download > Software > FM
Preset Editor.
2.4
Locking the buttons
Use this feature if you would like to prevent the FM Remote from changing stations or settings accidentally if a
button is pressed or hit. Hold down for three seconds on the HOLD button to activate this. The buttons will be
locked and not respond if pressed. To de-activate HOLD and make the buttons usable, press the HOLD button again for 3 seconds. Using the HOLD on the Remote will lock both the Remote’s buttons and the device’s
buttons. On the AV 400, you can also hold down on the left function button of the device to de-activate HOLD.
On the AV 500 and Gmini 500, use the Unlock action icon.
2.5
Recording from the Microphone
First make sure you are in the MP3 mode (MP3/FM button to change modes). Simply click once on the REC
button and the recording starts. The REC button will light up red to indicate that you are making a recording.
When you are done, click on REC again and the recording will finish and write to your hard drive. Your recorded
file will be saved in the last folder that was used for audio recording.
For example, if you have a folder /HD/Music/Voice that you made an audio recording in, then the next time
you click the REC on the remote control, it will save the file to that Voice folder. The file name for this recording
will be VOICExxxx, where xxxx are incremental numbers. During the recording, you can change the recording
7
8
English
gain. Press the rocker control to the left __ (less gain) when the sound you’re recording is loud, or to the right
`` (more gain) when the sound is soft.
Note that the actual recording quality parameters are those that are set in AudioCorder for recording from the
Analog Line-in settings.
2.6
Recording from the Radio
When you hear something on the radio you would like to record, click once on the REC button. The REC button
will light up red to indicate that a recording is taking place. Click it again when you want to stop the recording.
Your recorded file will be saved in the last folder that was used for audio recording. For example, if you have
a folder /HD/Music/Radio that you made an audio recording in, then the next time you click the REC on the
remote control, it will save the file to that Radio folder. The file name for this recording will be RADIOxxxx,
where xxxx are incremental numbers. During the recording, the gain is fixed so that you get the best possible
radio recording.
2.7
Retro Recording and Editing
Retro-recording
This is a feature that allows you to capture the 30 seconds (approximately) of radio broadcast before the record
button is pressed. It does this by continuously recording a 30 second loop of music in a buffer. Then, when
you click on Rec to record the radio, it adds this 30 seconds to the beginning of your recording. This way, if
you start recording a radio song after it has started, you will actually have the entire song in the recording. The
Retro-Record setting must be set to On in order for this to work. See the description in section 2.8 on how to
turn on or off the Retro-record function.
Editing
Once a retro-recorded song has been recorded, it can be edited on the device itself. Often, the beginning of
the recording will include a commercial or announcer talk that you do not want to keep, but was also recorded
during the buffered 30 seconds.
8
9
To enter the Audio Edit screen, locate and highlight the
recorded radio file on your device and then click on the
center function button File (AV 400)/action icon File
management (AV 500, Gmini 500) and then select
Edit.
AV 400: Edit screen
AV 500, Gmini 500: Edit screen
Shown here is the Audio Edit mode. You will notice that your radio recording has started to play. It will continuously loop so that you can hear the changes to it as the Cut-INs and Cut-OUTs are made. As normal, when
playing a song, you can use the Reverse _ and Forward ` buttons to move back and forward within the song.
While the song is playing, wait for the precise moment that you want the edited song to start and select the left
function button/action icon Cut-IN.
9
English
10
This is the point that your new edited song will start. You will notice that the song length will be reduced. This
is normal, because you just shortened the song with the cut. You will also notice the point at which the cut was
made at the Cut-IN indicator (0:00:12 in the example screen).
Let the song continue (or fast forward it) and then at the precise moment you want the edited song to stop,
select the right function button (AV 400)/action icon (AV 500/Gmini 500) Cut-OUT. This is the point that your
new edited song will stop. You can let the song loop so that you can listen to and verify that the cuts you made
are to your liking. If not, Click on the STOP to clear the edit points and re-edit the cuts, or just exit the audio
editor without changing the radio file. Once you are satisfied with the edit, use the center function button/action
icon Save to save your edit as a new file. The device will execute a read/write process and create a new file
named oldfilename_Edit and place it in the same directory as the original file.
2.8
Setting Parameters
To change the Remote FM parameters, you must attach the FM remote control, enter FM mode, and then
select the center function button Settings/action icon Contextual Settings on the device.
FM Band
Make sure you have the correct FM setting. Go to
the parameter FM Band. The specifications for the
modes are as follows:
USA: 87.5 - 108 Mhz de-emphasis 75µs
Europe: 87.5 Mhz – 108 Mhz de-emphasis 50 µs
Japan: 76 Mhz - 91 Mhz de-emphasis 50 µs
10
11
Radio Recording
You can adjust the quality of the FM recording with this
setting. A sample rate of 44.1 kHz corresponds to CD
quality. The higher each of these settings is made, the
more space will be consumed on your hard drive for each
recording. Your recording will be saved in a compressed
.WAV format (ADPCM).
Retro-Recording
To activate the Retro-Recording function, set it to On.
Each time you make a recording from the radio, you will
get approximately 30 seconds of what was playing from
the radio before you had pressed the REC button. When
off, radio recordings start within a second of the moment
you click the REC button.
11
12
English
3 Technical Support
In case you should encounter any technical difficulties using your product, we suggest you go through these
steps in order to resolve any issues as efficiently as possible:
1) Please read carefully through the appropriate sections of this manual. Some subject areas may be treated
in two different chapters depending on how the device is being used.
2) Look at the Troubleshooting section at the back of this manual. In this section, we have included answers
to some commonly asked questions.
3) Look at our Support section on the website (www.archos.com). Here, you will find Frequently Asked Questions (FAQ) for our different products, and there is a chance that somebody else has already asked your
question.
4) If these steps did not help you in resolve your technical difficulty, you can always contact us either via email
or by calling the helpline. Telephone support will be provided in the language of the countries listed at the
end of this manual. For other countries, please use email technical support.
DO NOT USE phone or e-mail support for marketing and sales questions. These numbers
are to aid those who have technical difficulties / malfunctions.
12
13
4 Troubleshooting
Problem: None of the buttons on the remote control respond.
Solution: Did you press and hold the HOLD button? This locks the operation of all buttons on the remote
control. Hold the HOLD button for 3 seconds to turn the hold function on or off.
Problem: The sound quality of the FM radio is not so good.
Solution: Your headphone cable acts as the antenna for the FM radio. Try moving the cable or turning it toward another direction. You could also check to make sure the correct region is selected under the parameter
FM Band (USA, Europe, Japan).
Problem: My preset radio stations do not work correctly or are no longer available.
Solution: This could be due to the fact that either the file FMPreset.txt has incorrect lines in it or that this file
had been deleted from the System folder of your device. Download from the Archos website the FM Preset
Editor program to help you to easily enter the radio stations and their names for your presets.
Question: I always miss the beginning of the songs I want to record, what can I do?
Answer: Set the Retro-Record to On. This way, when you start a radio recording, the device will actually
include the previous 30 seconds in the recording. You can then later edit out the parts you don’t want with the
Audio Edit function.
Question: Why can I only edit some of my music files?
Answer: Only radio recordings can be edited.
Question: How can I shut off my device with the remote FM?
Answer: Hold down on the MP3/FM button for 3 seconds.
Question: How can I turn on my device with the Remote FM?
Answer: This cannot be done. You must turn on the device the normal way.
13
14
English
5 Warranty and Limited Liability
This product is sold with a limited warranty and specific remedies are available to the original purchaser in
the event the product fails to conform to the limited warranty. Manufacturer’s liability may be further limited in
accordance with its sales contract.
In general, the manufacturer shall not be responsible for product damages caused by natural disasters, fire,
static discharge, misuse, abuse, neglect, improper handling or installation, unauthorized repair, alteration or
accident. In no event shall the manufacturer be liable for loss of data stored on disk media.
MANUFACTURER SHALL NOT BE LIABLE FOR ANY SPECIAL, INCIDENTAL OR CONSEQUENTIAL
DAMAGES. EVEN IF INFORMED OF THE POSSIBILITY THEREOF IN ADVANCE.
Archos licensor(s) makes no warranties, express or implied, including, without limitation, the implied
warranties of merchantability and fitness for a particular purpose, regarding the licensed materials.
Archos’s licensor(s) does not warrant, guarantee or make any representations regarding the use or the
results of the use of the licensed materials in terms of its correctness, accuracy, reliability, correctness
or otherwise. The entire risk as to the results and performance of the licensed materials is assumed by
you. The exclusion of implied warranties is not permitted by some jurisdictions. The above exclusion
may not apply to you.
In no event will Archos’s licensor(s), and their directors, officers, employees or agents (collectively
Archos’ licensor) be liable to you for any consequential, incidental or indirect damages (including
damages for loss of business profits, business interruption, loss of business information, and the
like) arising out of the use of inability to use the licensed materials even if Archos’ licensor has been
advised of the possibility of such damages. Because some jurisdiction do not allow the exclusion or
limitation of liability for consequential or incidental damages, the above limitations may not apply to
you.
Please see your sales contract for a complete statement of warranty rights, remedies and limitation
of liability.
14
15
Furthermore, warranty does not apply to:
1.
Damages or problems resulting from misuse, abuse, accident, alteration or incorrect electrical current or
voltage.
2.
Any product tampered-with or damaged warranty seal or serial number label.
3.
Any product without a warranty or serial number label.
4.
Batteries and any consumable items delivered with or in the equipment.
Warnings and Safety Instructions
CAUTION
To prevent risks of electric shock, this unit must only be opened by qualified service personnel.
Power off and disconnect the power supply cable before opening the unit.
WARNING
To prevent fire or shock hazard, do not expose the unit to rain or moisture.
Use of this product is for personal use only. Copying CDs or loading music, video, or picture files for sale or
other business purposes is or may be a violation of copyright law. Copyrighted materials, works of art, and/or
presentations may require authorization to be fully or partially recorded. Please be aware of all such applicable
laws concerning the recording and use of such for your country and jurisdiction.
FCC Compliance Statement
FCC Compliance
This equipment has been tested and found to comply with limits for a Class B digital device, pursuant to Part
15 of the FCC Rules. These limits are designed to provide reasonable protection against harmful interference
in a residential installation. This equipment generates, uses and can radiate radio frequency energy and, if not
installed and used in accordance with instructions, may cause harmful interference to radio communications.
However, there is no guarantee that interference will not occur in a particular installation. If this equipment
does cause harmful interference to radio or television reception, which can be determined by turning the
equipment off and on, the user is encouraged to try to correct the interference by one or more of the following
measures:
15
16
English
• Reorient or relocate the receiving antenna.
• Increase the separation between the equipment and receiver.
• Connect the equipment into an outlet on a circuit different from that to which the receiver is connected.
• Consult the dealer or an experienced radio/TV technician for help.
CAUTION : Modifications not authorized by the manufacturer may void users authority to operate this device.
FCC Part 15 - Operation is subject to the following two conditions:
1. This device may not cause harmful interference;
2. This device must accept any interference received including interference that may cause undesired operation.
Electrostatic Discharge
Note: During electrostatic discharge, the product may be malfunctioning. Reset the device to return normal
operation. The device reset is actuated by pressing and holding the STOP/ESC button for 10 seconds. The
unit will power off. Restart normally.
Copyright Notice
Copyright ARCHOS © 2005 All rights reserved.
This document may not, in whole or part, be copied, photocopied, reproduced, translated or reduced to any
electronic medium or machine-readable form without prior consent, in writing, from ARCHOS. All brands and
products names are registered trademarks and the property of their respective owners. Specifications are
subject to change without notification. Errors and omissions accepted. Images and illustrations may not always
match contents. Copyright ® ARCHOS. All rights reserved.
Disclaimer of warranty: to the extent allowed by applicable law, representations and warranties of non-infringement of copyrights or other intellectual property rights resulting from the use of the product under conditions other than as here above
specified, are hereby excluded.
16
ARCHOS™
ARCHOS™ Technology
ARCHOS™ S.A.
3, Goodyear - Unit A
12, rue Ampère
Irvine, CA 92618 USA
91430 Igny
France
Phone:
1 949-609-1483
Phone:
+33 (0) 169 33 169 0
Fax:
1 949-609-1414
Fax:
+33 (0) 169 33 169 9
ARCHOS™ (UK) Limited
ARCHOS™ Deutschland GmbH
PO Box 1420
Business Park Vierwinden
Southampton
Konrad-Zuse-Str. 22
SO15 1WF
41516 Grevenbroich
United Kingdom
Deutsch
Phone:
+44 (0) 1264 366022
Tel:
+ 49 (0) 21 82 – 570 41-0
Fax:
+44 (0) 1264 366626
Fax:
+ 49 (0) 2182/57041-70
Telephone support
Canada
949-609-1400
Nederland
020-50 40 510
Danmark
35 25 65 67
Norge
22 57 77 71
Deutschland
069-6698-4714
Schweitz/Suisse
442 004 111
España
09-1745-6224
Suomi
09 2311 3434
France
01 70 20 00 30
Svenska
08 579 290 80
Ireland
01-601-5700
UK
0207-949-0115
Italia
02-4827-1143
USA
877-300-879 (toll free)
Email support
English (United States and Canada customers)
English or French/Anglais ou Français
(Europe and the rest of the planet/Europe et reste du monde)
Deutsch (Deutschland)/German (Germany)
[email protected]
[email protected]
[email protected]


