Download TVCC75100 TVCC75200 User manual
Transcript
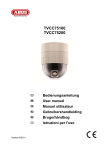
TVCC75100 TVCC75200 User manual Version 6/2011 Original English user manual. Keep for future use. ĭ Introduction Dear Customer, Thank you for purchasing this product. This product meets the requirements of the applicable European and national guidelines. The corresponding declarations and documents can be obtained from the manufacturer (www.abus-sc.com). To maintain this condition and to ensure risk-free operation, you as the user must observe these operation instructions! Before initial start-up, read through the complete operating instructions observing operating and safety instructions. All company and product names mentioned in this document are registered trademarks. All rights reserved. If you have any questions, please contact your installer or your local dealer! Disclaimer This user manual was prepared with greatest care. If you should notice omissions or inaccuracies, please inform us about these on the back of this manual given address. The ABUS Security-Center GmbH & Co. KG assumes no liability for technical and typographical faults and reserves the right to make at any time modifications to the product or user manual without a previous announcement. The company is not liable or responsible for direct and indirect subsequent damages which are caused in connection with the equipment, the performance and the use of this product. No guarantee for the content of this document is taken. 45 Important safety instructions The warranty will expire for damage due to non-compliance with these operating instructions. We shall not be liable for any consequential loss! We do not accept liability for damage to property or personal injury caused by incorrect handling or non-compliance with the safety-instructions. In such cases the warranty will expire. Dear customer, The following safety instructions are intended not only for the protection of your health, but also for the protection of the device. Please read through the following points carefully: x x x x There are no parts on the inside of the product which need to be serviced. Apart from this, the license (CE) and the guarantee/warranty will lapse if you open/take the product apart. The product will be damaged even it falls from a low height. This device can be used in inside as well as outside. During the installation of the camera please take care that direct sunlight cannot fall onto the image sensor of the device. Please follow the installation instructions in the corresponding chapter of this user manual. Avoid using the device under the following unfavorable ambient conditions: x x x x x x x x wetness or excessive air humidity extreme cold or heat direct sunlight dust or combustible gases, vapors or solvents strong vibration strong magnetic fields, such as those found in the vicinity of machinery or loudspeakers The camera should not positioned with opened iris towards the sun – this can lead to the destruction of the sensor. the camera may not be installed on unstable surfaces General safety instructions: x x x x x x x Do not leave packaging material lying around carelessly. Plastic/ foil/bags and polystyrene parts etc. could become dangerous toys for children. For safety reasons don’t give the camera into child hands due to them being able to swallow small parts. Please do not insert objects through the openings into the device. Use only accessories which are specified by the manufacturer. Please do not connect incompatible parts to the device. Please pay attention to the safety instructions and user manuals of the other connected devices. Check the device for damages before installation. If this should be the case please do not use it. Please adhere to the operational voltage limitations listed in the technical data. High voltage could destroy the device and pose a health hazard (electric shock). During the installation into an existing video surveillance system make sure that all devices are disconnected from the low and supply voltage circuit. If in doubt allow a professional electrician to mount, install and wire-up your device. Improper or make-do electrical connection to the mains does only represent at threat to you but also to other persons. Wire-up the entire system making sure that the mains and low voltage circuit remain separated and cannot come into contact with each other in normal use or due to any malfunctioning. 46 Table of contents 1. SCOPE OF DELIVERY ............................................................................................................................. 48 2. FEATURES ............................................................................................................................................... 48 3. COMPONENTS NAMING ......................................................................................................................... 49 4. INSTALLATIONS INSTRUCTIONS.......................................................................................................... 50 4.1 CONNECTION METHOD ................................................................................................................................ 50 4.2 CEILING MOUNT TYPE .................................................................................................................................. 52 4.3 EMBEDDED MOUNT TYPE .............................................................................................................................54 4.4 INDOOR ADAPTOR ....................................................................................................................................... 55 4.5 DROPPED CEILING MOUNT BRACKET OR GOOSE NECK MOUNT BRACKET ......................................................... 56 4.5 ADDITIONAL ACCESSORIES .......................................................................................................................... 58 5. QUICK GUIDE CONTROL DEVICES ....................................................................................................... 60 5.1 CONTROL USING OPERATOR PANEL TV7605 ................................................................................................... 60 5.2 CONTROL USING TV3000-TV3031 RECORDERS .............................................................................................. 60 6. QUICK OPERATING KEYS...................................................................................................................... 61 7. DIAGNOSTIC ............................................................................................................................................ 63 8. OSD MENU SETTING .............................................................................................................................. 64 8.1 OSD MENU TABLE ........................................................................................................................................ 64 8.2 DOME SETUP .............................................................................................................................................. 65 8.3 CAMERA SET .............................................................................................................................................. 70 8.4 PRESET SETTINGS ...................................................................................................................................... 72 8.5 AUTO SCAN SET .......................................................................................................................................... 73 8.6 TOUR SET................................................................................................................................................... 74 8.7 PRIVACY SET .............................................................................................................................................. 75 8.8 PATTERN SET ............................................................................................................................................. 76 8.9 ALARM SET ................................................................................................................................................. 77 8.10 SECTOR ................................................................................................................................................... 78 8.11 EXIT ......................................................................................................................................................... 78 9. DIP SWITCH SETTING ............................................................................................................................. 79 9.1 ID SETTING ................................................................................................................................................. 79 9.2 RS-485 TERMINATION ................................................................................................................................... 81 9.3 PROTOCOL ................................................................................................................................................. 81 9.4 BAUD RATE SETTING ................................................................................................................................... 81 10. SPECIFICATIONS .................................................................................................................................... 82 11. DIMENSIONS ............................................................................................................................................ 82 47 1. Scope of Delivery No. 1 2 3 4 5 6 7 8 9 10 11 12 13 14 Item Pan / Tilt dome camera Ceiling Mount Bracket 24 V AC Power Supply Wrench Screws (Ø 3x6 screw) Screws (Ø 4x16 screw) Safety Wire Manual Ceiling cover Cable ties Terminal Block 2 PIN Terminal Block 3 PIN Terminal Block 5 PIN Terminal Block 6 PIN Qty. 1 1 1 1 2 5 1 1 1 5 2 1 1 1 2. Features The Pan/Tilt dome camera has among other the following functions: x x x x x x x x x x x x x x x Speedy response with 27 respectively 36 times continuous auto-focus zoom lens and 12 times Digital Zoom Up to 560 TVL resolution Password protection Low-Noise-Technology for extremely quiet movement with 0,024° accuracy Slip ring for long life time (20 million rotate ring tested) Advanced DSP camera, including Auto White Balance, Backlight Compensation and Auto Iris Control 165 Preset Points Setup 8 programmable group tours, each one with up to 60 preset steps Continuous Auto Focus 350°/sec pan and 250°/sec tilt speed on preset Built in 4 Alarm Inputs and 2 Relay outputs (NO/NC) Remote control via RS-485 (up to 127 Speed Dome Cameras controllable) Power misconnection protection on terminal Changeable IR-filter for true day/night Supports PECLCO (D and P) and Maxpro protocol 48 3. Components Naming FIG.1 1. Bubble 2. Lock Screw 3. DIP Switch 1 4. DIP Switch 2 5. Camera 6. Lock Holder 7. Power input 8. Video Output 9. Loop RX 10. Loop TX 11. Power LED 12. Aux terminal 13. Alarm terminal 14. Mount Holder 49 4. Installations Instructions 4.1 Connection Method 2 mm UNLOCK FIG.2 FIG.3 FIG.4 1. To separate camera body loosen Lock Screw (2 mm), turning the wrench counterclockwise. (Don’t pull the screw out) (FIG. 2) Separate the upper body from the lower body by turning counterclockwise. (FIG. 3, 4) 2. After separating set DIP switches (Refer to the page 78) FIG.5 FIG.6 FIG.7 Screw up to flat with the body surface LOCK 3. To assemble camera body rotate the upper body clockwise to assemble both bodies. (FIG. 5, 6). Screw up turning the wrench clockwise. (FIG. 7) Don’t screw to tight, it can cause defects. 50 1. Alarm: 2. AUX: 3. 4. 5. 6. 7. 4 Alarm inputs DC 12 V with up to 1 A can be used at the AUX terminal. Possible applications using AUX are e.g. turning on a light or remote control. TX: TX transmits data signal received from RX to other equipment. TX is convenient terminal for daisy chain connection. RX: RX receives control signal from controller or DVR. Video out: BNC connector (1Vp-p) Power: AC 24 V 1.0 A adaptor * Do not connect power supply to the middle screw of the power terminal. Middle screw is for grounding only. Power ON LED 51 4.2 Ceiling mount type The Ceiling mount type is for suspended ceilings with at least 4 cm distance between structural slab and ceiling. The complete camera body will be visible. 1. Select a ceiling board which is strong enough to hold a weight of approximately 2 kg. 2. Prepare a Ø 145 mm hole in the ceiling board. (FIG. 9) Fix the safety wire to a suspension to prevent camera from falling. Fix the other side of safety wire to the safety wire hole. (FIG. 10) 3. Fix the Ceiling Mount to the Ceiling with 4 screws (Ø 4.0 mm tapping screw). (FIG. 11) 4. Tie the wire using the cable ties. (FIG. 12) 5. Mount the wires through the square hole. Place the Camera Mount Holder in the Bracket Mount Hole. (FIG. 12) To insert them easily, keep 10° interval of Lock Holder1 and Lock Holder2. (FIG. 13) 52 6. To assemble, rotate the Camera clockwise 10°. (FIG. 13) 7. Screw up Lock Holders with screws (M3). SCREW (M 3.0) LOCK HOLDER .1 10° LOCK HOLDER .2 FIG.14 FIG.13 8. Assemble the Cover. Fix three Cover Locks to three Cover Holes rotating clockwise. (FIG. 15) 53 4.3 Embedded Mount Type TV7607 (Embedded mounting frame) is not scope of delivery. Embedded mount frame is for suspended ceilings with at least 14 cm distance between structural slab und and ceiling. Only the bubble of the camera will be visible. 1. Prepare an Ø 190 mm hole in the ceiling board. Fix the safety wire to a suspension to prevent camera from falling. Other side of safety wire is fixed to the safety wire hole. (FIG. 16) 2. Fold the Lock Levers and insert the Bracket into the Ceiling Hole. Fix the Bracket to the ceiling using the driver. (FIG. 17) 3. Hereafter installation is the same way as the Ceiling Mount Type. (Refer to the page 51 and 52) 54 4.4 Indoor Adaptor Indoor Housing Adaptor (TV7608) is not in scope of delivery. Indoor adaptor is for on-ceiling mounting of cameras. Loch Ø20 1. Hold the indoor adapter with the open side facing down in the position you would like to mount the camera on the ceiling. Use a pen to mark the three drill holes on the ceiling. 2. Drill the three holes and insert a wall plug which is suitable for the ceiling material. Make sure that the wall plug is able to bear a load of approx. 3 kg. 3. Fit the indoor adapter exactly on the drill holes and fasten the adapter with appropriate screws. Use nuts to prevent slipping. 4. Connect the individual lines to one another using the cable strap and guide the cable through the opening in the indoor adapter. 5. Use the four screws supplied to attach the retaining plate of the mount type (included in the camera’s scope of delivery) to the indoor adapter. To do this, place the mount type plate on the indoor adapter so that the external drill holes of the plate are exactly on the four spacer threads of the indoor adapter and screw the four screws in. 6. Proceed in the same way as points 6 to 8 on pages 216 and 217. 55 4.5 Dropped ceiling mount bracket or Goose neck mount bracket In combination with Indoor Adaptor (TV7608) it is possible to use Dropped ceiling mount bracket (TV7609) or Goose neck mount bracket (TV7612) indoor. These optional accessories are not in scope of delivery. Ø10 Drilling distances TV7612 Ø35 Dimensions TV7612 56 Drilling distances TV7609 Dimensions TV7609 Ø10 Ø35 1. Mark the drill holes with a pen. Note the correct drilling distances. In addition, ensure the drill holes are horizontally aligned for the goose neck mount bracket (TV7612) exactly. Remember that the wall or ceiling selected for mounting must be strong enough to bear loads of up to approx. 6 kg. 2. Use a drill bit with a sufficiently large diameter. Insert suitable wall plugs. Note that the wall plugs and screws must bear a load of approx. 6 kg. The wall plugs and screws must also be able to withstand strong drawing forces for the goose neck mount bracket (TV7612). 3. Connect the individual wires together with a cable clip. 4. Depending on the way the cables are laid (flush or surface), the cables can be guided directly through the retaining plate or through the side cable feed. 5. Screw one of the two threaded rings (included in the indoor adapter’s delivery scope) onto the thread of the goose neck mount/ceiling bracket. Place the indoor adapter on the thread with the opening facing down and attach the indoor adapter, by screwing the second threaded ring firmly onto the thread. 6. Use the four screws provided to attach the retaining plate of the mount type (included in the camera’s scope of delivery) to the indoor adapter. To do this, place the mount type plate (in the camera’s delivery scope) on the indoor adapter so that the external drill holes of the plate are exactly on the four spacer threads of the indoor adapter and screw the four screws in. 7. Screw in the ceiling bracket and the goose neck mount with suitable screws to the ceiling/wall. 8. Proceed in the same way as in points 6 to 8 on pages 216 and 217. 57 4.5 Additional Accessories Following accessories are not in scope of delivery! The outdoor housing (TV7606) offers the possibility, to use the High Speed Motor Dome in outdoor weathering (Protection class IP66). It is possible to use the outdoor housing with a Wall mount bracket (scope of delivery), a Dropped ceiling mount bracket and or a Goose neck mount bracket. For further information please refer to installation manual of outdoor housing. Goose neck mount bracket and Wall mount bracket (TV7613) can be combined with Pole mount adapter (TV7610) and Corner mount adaptor (TV7611). Dimensions TV7610 Pole mount adapter 58 Dimensions TV7611 Corner mount adaptor 59 5. Quick Guide Control Devices Basically you can control High Speed Motor Domes with all RS485 devices that can handle Pelco P or Pelco D protocol. Please refer to respective instruction manual for the connection method and further information. 5.1 Control using Operator Panel TV7605 See all information about the connection method and other information in instruction manual of TV7606. This operator panel is designed specially for TV7600-TV7604 and supports all functions. 5.2 Control using TV3000-TV3031 recorders You can also control your high-speed motor dome with the HDVR. This requires the following actions. 1. Connect the RS-485 lines to the interface for controlling on the HDVR. 2. Link up the analogue camera to the software. Refer to the operating manual for more details. 3. Activate the Pan/Tilt control. 4. Select ABUS Security-Center as the protocol type. 5. Enter the ID for the camera. 6. Select COM 3 as the port interface. 7. Settings for the interface: Enter the baud rate used by your camera. The remaining settings do not need to be changed. 8. Click on Save and Apply to accept the changes. You can then control the high-speed motor dome with the VMS software. To go to the configuration menu of your camera, right-click with the mouse on the preview image. Now select the Pan/Tilt configuration menu item. You are in the configuration menu of the camera and can navigate in the menu using the arrow keys. 60 6. Quick Operating Keys This dome provides three protocols: Pelco D, Pelco P and Maxpro. These protocols are provided by several DVRs (e.g. TV3000-TV3031) and other controllers so that the domes can be controlled with these devices. Default setting of this dome is Pelco D / P (auto detection) with 2400 bps (bits per second). In this manual relates to controller TV7605. It is possible to operate cameras with other controller, but keys could have other names. 7.1 Pelco D/P Protocols The dome has a lot of shortcuts to support following functions: Number 1~64 and 100~200 are for Preset-Positions, other keys are for function operations. For example, to enter OSD MENU, press the button 95 + PRESET. Quick Operation Key Table 1 Number 1~64,100~200 +Preset 67 +Preset 69 + Preset Note Preset Function Executing Preset 1 ~ 64, 100~200 Auto Flip DSS 80~85 + Preset 86 + Preset 87~89 + Preset 90 + Preset 91 + Preset 92 + Preset 93 + Preset 94 + Preset 95 + Preset 96 + Preset 97 + Preset Pattern Auto Scan Group Tour OSD Zero Position Freeze BLC Day / Night OSD Focus Adjust Vibration Correction 98 + Preset 99 + Preset AUX 1 AUX 2 Selectable On/Off in Auto Flip mode Selectable On/Off in Digital Slow Shutter function Executing Pattern #1 ~ #6 Executing Auto Scan Executing Group Tour #1 ~ #3 Entering OSD Main Menu Searching Pan / Tilt Zero Position Select Freeze image when camera is working Selectable On/Off in BLC function Selectable Day / Night / Auto Mode Entering OSD Main Menu Focus adjust Selectable On/Off in Vibration Correction function Selectable On/Off in Aux1 Selectable On/Off in Aux2 Quick Operation Keys Table 2: Use these function keys if controller has these keys Menu Tilt Up / Down Pan Left / Right Focus Near Focus Far Zoom Tele Zoom Wide Function Sub menu cursor moves up / down Enter to the sub menu or status change or decrement Using for Enter key when user select YES or NO Using for function changing keys when set coordinate Status cursor to the right Status cursor to the left 61 x x x 65 + preset: “Status Report” is displayed, if user wants to remove this screen, press Focus Near button. 70 + preset: This feature provides picture stabilization image. This feature is available only by entering the preset number and is not included in OSD main menu. 92 + preset: With this feature it is possible to freeze the current picture during tour, auto scan or pattern operation. When 92 + preset button has been pressed, the image stops but the camera is still working as per operation such as tour, pattern or auto scan. To return to operating image, press 92 + preset button again. This feature is available only by enter the preset number and is not included in OSD main menu. 7.2 Maxpro Protocol If you want to choose Maxpro Protocol, the user must change the dip switch first. Baud Rate: 9600 (Maxpro default) Maxpro protocol is almost same as Pelco D/P protocol operating system but some special features are different way as noted below: Quick Operation Key Table 1 Number 1~64,100~200 +Preset 67 +Preset 69 + Preset Note Preset Function Executing Preset 1 ~ 64, 100~200 Auto Flip DSS 80~85 + Preset 86 + Preset 87~89 + Preset 90 + Preset 91 + Preset 92 + Preset 93 + Preset 94 + Preset 95 + Preset 96 + Preset 97 + Preset Pattern Auto Scan Group Tour OSD Zero Position Freeze BLC Day / Night OSD Focus Adjust Vibration Correction 98 + Preset 99 + Preset AUX 1 AUX 2 Selectable On/Off in Auto Flip mode Selectable On/Off in Digital Slow Shutter function Executing Pattern #1 ~ #6 Executing Auto Scan Executing Group Tour #1 ~ #3 Entering OSD Main Menu Searching Pan / Tilt Zero Position Select Freeze image when camera is working Selectable On/Off in BLC function Selectable Day / Night / Auto Mode Entering OSD Main Menu Focus adjust Selectable On/Off in Vibration Correction function Selectable On/Off in Aux1 Selectable On/Off in Aux2 Quick Operation Keys Table 2: Use these function keys if controller has these keys Menu Tilt Up / Down Pan Left / Right Focus Near Focus Far Zoom Tele Zoom Wide Function Sub menu cursor moves up / down Enter to the sub menu or status change or decrement Using for Enter key when user select YES or NO Using for function changing keys when set coordinate Status cursor to the right Status cursor to the left 62 7. Diagnostic When power supply is connected to the camera, POWER ON LED on the underside glows and DIAGONOSTIC is started. The following messages are displayed on the monitor. CAMERA ID : 001 BAUD RATE : 2400 BPS WAITING… PAN ORIGIN TILT ORIGIN TX CONNECTION CAMERA COMM TEST OK TEST OK TEST OK TEST OK 1. Pan Origin Test Zero point of Pan is found after Pan test. 2. Tilt Origin Test Zero point of Tilt is found after Tilt test. 3. TX Connection Test TX Connection Test takes about 60 seconds. Set camera ID in DVR or controller and press any key. “OK” will be displayed if camera receives any command by DVR or controller during that 60 seconds addressed to ID of camera (not necessary for function). (ID is displayed at start-up, refer to page 78 according ID setting). * If “No Tested” is displayed - the camera did not receive any signal from DVR or controller - wrong connecting way such as the protocol, baud rate or RS-485 connection. The user may check the installation way carefully. 4. Camera Comm. Test Communication test with the camera is automatically checked. OK should be displayed in these four tests in the first installation. After all tests above are done, “NOW EEPROM CHECKING” and “ALL DATA INITIALIZING” is displayed and the camera is ready to operate. 63 8. OSD Menu Setting 8.1 OSD Menu Table 64 To enter OSD Menu, press the MENU button or 95+Preset (Maxpro 90+Preset) and Menu is displayed: MAIN MENU DOME SETUP CAMERA SET AUTO SCAN TOUR PRAVACY PATTERN ALARM SECTOR EXIT x Move the joystick up or down to move to the position and left or right to make selection or change values. 8.2 Dome Setup To enter Dome setup, move the joystick rightwards when cursor is on dome setup. DOME SET CAMERA ID : CAM1ƑƑƑƑƑƑƑƑƑƑƑ RECOVER : OFF MANUAL SPEED : 150¶/S AUTO FLIP : OFF ZOOM SPEED : FAST ALARM : DISABLE LANGUAGE : ENGLISH [NEXT PAGE] SAVE AND EXIT EXIT DEFAULT SETTING 1. DOME SET – CAMERA NAME To set camera name, select up to 16 characters moving Joystick to the left or right. Press ZOOM TELE button to move to the next character from the left to the right and ZOOM WIDE button to move to the prior character from the right to left. Space is displayed when “ ” appears. 2. DOME SET – RECOVER This feature allows the dome to activate the last specified operation (auto scan, group tour, preset, pattern or sectors) after a programmed time of inactivity or restart after power shut down. The procedure is as following: define any operation and then go to DOME SET and change RECOVER to any value. Recover time can be programmed from 15 second to 99 seconds and the default setting is OFF. 65 3. DOME SET – MANUAL SPEED Manual Speed of Pan/Tilt is selectable from 100°/sec up to 200°/sec. The default setting is 150°/sec. 4. DOME SET – AUTO FLIP Auto Flip is available. Move joystick rightwards or leftwards for selecting ON or OFF. The default setting is OFF. This feature also can be enabled with 67 + preset button. 5. DOME SET – ZOOM SPEED Zoom speed is selectable between FAST or SLOW mode. Move joystick to the right direction for selecting FAST or SLOW. The default setting is FAST. 6. DOME SET – ALARM All alarms inputs are available after set as ENABLE. Move joystick to the right or left direction to select ENABLE/DISABLE. The default setting is DISABLE and this feature can be enabled with 97 + PRESET button. 7. DOME SET – LANGUAGE Several languages are available: German, English, French, Dutch and Danish. Move joystick rightwards or leftwards to select language. The default setting is GERMAN. DOME SET DEFAULT SETTING SYSTEM LOCK: OFF [PASS WORD] [OSD DISPLAY] [SYSTEM STATUS] [INITIALIZATION] [PREVIOUS PAGE] 8. DOME SET – [NEXT PAGE] – SYSTEM LOCK Password protection helps to keep stored settings. It prevents changes by anybody without password. In order to enter [PASSWORD] page, system lock status must be ON. Move joystick to rightwards or leftwards to select ON. The default setting is OFF. 66 9. DOME SET – [NEXT PAGE] – [PASSWORD] To enter this page for setting a password, move joystick to the right. The password is selectable between number 001 and 255. Confirm with PRESET button. The default setting is BLANK. ENTER PASSWORD BY ENTERING PRESET CODE PASSWORD *** CONFIRM *** Press any number from 001~255 and preset button twice on password typing field and on confirm field. Then “CONFIRMED” is displayed on the monitor and the menu will change to the previous page automatically. ENTER PASSWORD ENTER PASSWORD BY ENTERING PRESET CODE PASSWORD *** CONFIRM ***CONFIRMED BY ENTERING PRESET CODE PASSWORD *** CONFIRM ***CANCELLED <CONFIRMED> <CANCELLED> If user enters different numbers between PASSWORD and CONFIRM, “CANCELLED” is displayed on the monitor and the menu will return to the previous page automatically if user fails 3 times. x x x After setting a Password, the operator has to type in memorized password in order to enter OSD MAIN MENU, or to change any stored settings, e.g. Pattern, Tour etc. The operator must remember the password for the operation since the manufacturer does not provide a master password. Do not forget to leave menu with SAVE AND EXIT on first page. 67 10. DOME SET – [NEXT PAGE] – [OSD DISPLAY] Various information are displayed on monitor after set ON in this menu. It can be hidden when OFF is selected. Move joystick rightwards or leftwards in order to select OFF/ON when the cursor is located on mentioned item. OSD DISPLAY CAMERA NAME PRESET NAME SECTOR NAME COORDINATE : ON [PREVIOUS PAGE] : OFF : OFF : OFF DEFAULT SETTING 11. DOME SET – [NEXT PAGE] – [SYSTEM STATUS] A variety of system information is displayed at SYSTEM STATUS. SYSTEM STATUS PROTOCOL BAUD RATE FIRMWARE VER. UPGRADE DATE 17.04.07 CAMERA MODULE [PREVIOUS PAGE] x x x : PELCO , P : 2400 BPS : 2.01 : DEFAULT SETTING : EX980SP Protocol and baud rate are shown due to the dip switch setting (Refer to page 245) Firmware version and upgrade date will change after upgrade. Upgrade date format is DD.MM.YY. 68 12. DOME SET – [NEXT PAGE] – [INITIALIZATION] To clear all stored settings for tour, preset, sector, privacy or pattern, move joystick rightwards when the cursor is on [INITIALIZATION]. INITIALIZATION [TOUR CLEAR] [PRESET CLEAR] [SECTOR CLEAR] [PRIVACY CLEAR] [PATTERN CLEAR] [LOAD OPTIMIZED DEFAULT] [PREVIOUS PAGE] To clear memorized data, move joystick rightwards when cursor is on concerning item. TOUR CLEAR TOUR CLEAR ARE YOU SURE? YES NO Press FOCUS NEAR button when the cursor is at YES to clear memorized data. Each item flickers for about 5~10 seconds such as tour, preset and so on. After this process, the menu returns to the previous page. x [PRESET CLEAR], [SECTOR CLEAR], [PRIVACY CLEAR], [PATTERN CLEAR] has the effect of [TOUR CLEAR] too, because each tour consists is a combination of presets, sector. LOAD FACTORY DEFAULT NOW EEPROM CHECKING ALL DATA INITIALIZING ARE YOU SURE? YES x x x To clear all data and to return to factory default, move joystick rightwards when cursor is at [LOAD FACTORY SETTINGS] to enter the above page. Move joystick to the right or left direction in order to select YES, press FOCUS NEAR button. “NOW EEPROM CHECKING” and “ALL DATA INITIALIZING” is displayed about 5~7 seconds and the menu returns to the previous page automatically. 13. DOME SET – [NEXT PAGE] – SAVE AND EXIT To save the stored data and escape this page, move joystick to the right direction when cursor is at SAVE AND EXIT. 14. DOME SET – [NEXT PAGE] – EXIT To escape this page without saving, move joystick to the right direction when cursor is at EXIT. 69 8.3 Camera Set CAMERA SETUP FLICKER MIRROR APERTURE D ZOOM WB MODE PIC FLIP BLC D/N MODE DSS MODE EXIT : OFF : OFF : 10 DEFAULT SETTING : OFF : AWB MODE : OFF : OFF : AUTO : OFF 1. CAMERA SET – FLICKERLESS Flickerless feature is selected between 50Hz and 60Hz. The default setting is OFF. Set flicker mode ON when power source frequency does not conform to the frequency of video system (NTSC: 60 Hz / PAL: 50 Hz). The default setting is OFF. This feature is only necessary whether a PAL camera is used in countries with 60Hz power source frequency for example. 2. CAMERA SET – MIRROR This feature mirrors the picture image. Left and right side of picture are inverted when setting is ON. The default setting is OFF. 3. CAMERA SET – APERTURE Aperture enhances picture detail by increasing gain of the camera and sharpening the edges in the picture. The default seeting is 10 (the aperture level is adjustable from 01 ~ 15). 4. CAMERA SET – DIGITAL ZOOM Move joystick rightwards in order to set ON, whether you want to activate digital zoom. The default setting is OFF. 5. CAMERA SET – WB MODE 4 different white balance modes for varied conditions of vicinity illumination are available. The default setting is AWB and it is possibly to change the mode option according to the lighting conditions as below: AWB Mode – 3,200°K to 6, 000°K (Default) Indoor – up to 3,200°K Outdoor – up to 5,800°K ATW Mode – 2,000°K to 10, 000°K 70 6. CAMERA SET – PIC FLIP Picture flip feature mirrors picture horizontally. Top and bottom of picture inverted when setting is ON. Move joystick to the right or left to select OFF/ON. The default setting is OFF. 7. CAMERA SET – BLC (not TVCC75200) The default setting of backlight compensation is OFF and the camera provides modes OFF/ON. OFF – Backlight compensation is not activated. ON – Back light compensation is activated. BLC also can be switched ON/OFF with 93 + PRESET button. CAMERA SET – WDR (only TVCC75200) Huge contrasts in picture (e.g. sunlight throu window or artificial light sources) can lead to incorrect display of picture. If areas in with intense light sources has to be observed, select WDR setting ON. 8. CAMERA SET – D/N MODE IR filter is changeable due to the lighting conditions as AUTO – NIGHT MODE – DAY MODE. The default setting is AUTO MODE. Auto mode switches automatically between dayand night mode due to changing lighting conditions. D/N mode also can be changed with 94 + PRESET button. Notice: Night mode provides only black and white pictures and is suitable with IR LED illumination. 9. CAMERA SET – DSS MODE (DIGITAL SLOW SHUTTER) Digital slow shutter slows the picture frame rate and increases the camera sensitivity under low light conditions. The picture will develop a granular appearance and motion may show some lag, resulting in streaking on fast moving objects. The default setting is OFF. This feature can be changed with 69 + PRESET button. 10. CAMERA SET – EXIT To escape this page, move joystick rightwards. 71 8.4 Preset settings Presets are saved positions, which can be recalled by a shortcut. Alternatively is is possible to store data out of menu. Type in any number (1~64 and 100~200) and hold PRESET button for at least two seconds. The actual camera position will be saved under this number and a confirmation is shown on screen. To enter PRESET SETUP, move joystick rightwards when cursor is on PRESET SET. PRESET SET DEFAULT SETTING PRESET NO :001 PRESET ID :PRESET001ƑƑƑƑƑƑƑƑƑ PAN: XXX.X TILT: XX.X SAVE EXIT 1. PRESET – PRESET NO. Up to 165 numbers (1~64, 100~200) of preset positions are available. Move joystick to the right or left direction to select preset no. 2. PRESET – PRESET NAME To set preset name, select up to 16 characters moving Joystick to the left or right. Press ZOOM TELE button to move to the next character from the left to the right and ZOOM WIDE button to move to the prior character from the right to left. Space is displayed when appears. 3. PRESET – PAN: XXX.X TILT: XX.X Press FOCUS FAR button in order to set preset position, then use the joystick to the position which is needed memorized preset no. Then press FOCUS FAR button again after setting a position of preset location. 4. PRESET – SAVE Move joystick to the right direction when the cursor is at SAVE to save the memorized preset data and name. Then the cursor is jumps on preset name for the continuous preset no. setting. 5. PRESET – EXIT To escape this page, move joystick to the right direction. Attention: The camera comes with two light barriers to calibrate pan/tilt coordinates. If the light barriers are not crossed for a long period, it could lead to inaccuracy and the camera could not approach the preset positions exactly anymore. Therefore the camera should cross the light barriers at 0° tilt and 180° pan in every tour or pattern. 72 8.5 Auto Scan Set 66 + preset (Maxpro: 86+Preset) button starts AUTO SCAN after setting. AUTO SCAN SET START ANGLE : XXX.X.XX.X END ANGLE : XXX.X.XX.X DIRECTION : CW ENDLES : OFF SPEED : 10¶/S DWELL TIME : 03 SAVE AND EXIT EXIT DEFAULT SETTING 1. AUTO SCAN – START ANGLE To set start angle, press FOCUS FAR button and move joystick to the starting angle which is needed to be memorized. Press FOCUS FAR button again to escape. 2. AUTO SCAN – END ANGLE To set end angle, press FOCUS FAR button and move joystick to the starting angle which is needed to be memorized. Press FOCUS FAR button again is escape. 3. AUTO SCAN – DIRECTION Auto scan direction of rotation can be set clockwise or counterclockwise. CW: Clockwise direction (Default) CCW: Counterclockwise direction 4. AUTO SCAN – ENDLESS Auto Scan rotation can be set endless. Move joystick rightwards in order to select ON. The default setting is OFF. 5. AUTO SCAN – SPEED Auto scan speed can be adjusted from 05° per second up to 35° per second. The default setting is 10°/S. 6. AUTO SCAN – DWELL TIME This menu item is the delay time when an angle is arrived and the dome starts to drive back to another angle. This menu item does not affect when endless is adjusted. Move joystick to the left or right in order to adjust dwell time. Dwell time can be adjust from 01 second to 99 seconds and the default setting is 03 seconds. 7. AUTO SCAN – SAVE AND EXIT To save the changed data and return to the main menu, move the joystick to the right with the cursor on SAVE AND EXIT. 73 8. AUTO SCAN – EXIT To exit the AUTO SCAN menu without saving the changes, select EXIT. 9. AUTO SCAN – SAVE AND EXIT To save the memorized data and escape this page, move joystick to the right direction when cursor is at SAVE AND EXIT. 10. AUTO SCAN – EXIT To escape this page without saving, move joystick rightwards here. 8.6 Tour Set 8 programmable tours can be set and each tour is capable to memorize up to 60 preset steps. After setting the data to each tour group, 71~78 + preset buttons are working as group tour # 1~8. x Maxpro protocol provides only three quick operation keys (87~89 + preset) for group tour, but it is possible to set up to group tours #8. TOUR SET TOUR NO TOUR TITLE TOUR STEP PRESET NO. DWELL TIME SPEED SAVE EXIT : 01 : TOUR01ƑƑƑƑƑƑƑƑ : 01 : 01 : 03 : 300¶/S DEFAULT SETTING 1. TOUR SET – TOUR NO. Up to 8 group tours are available to set by the joystick. 2. TOUR SET – TOUR TITLE To set tour title, select up to 16 characters moving Joystick to the left or right. Press ZOOM TELE button to move to the next character from the left to the right and ZOOM WIDE button to move to the prior character from right to left. Space is displayed when appears. Tour title is not displayed on the monitor, it is only for the reference of menu controller. 3. TOUR SET – TOUR STEP Each tour group consists of up to 60 preset steps for sequential images with different dwell time and speed. It is possibly to match any preset # for each tour step. 74 4. TOUR SET – PRESET NO. Connect with tour step #1 ~60; it is possible to select any preset no. from 1 to 64 and 100 to 200. The default setting is BLK for blank, which means tour step is not assigned to any preset number. 5. TOUR SET – DWELL TIME Each Tour step has its own dwell time from 01 second up to 99 seconds. The default setting is 03 seconds. 6. TOUR SET – SPEED Motional speed can be separately set for each tour step. Auto scan speed can be adjusted from 10° per second up to 300° per second. Move joystick to the right or left to select tour speed. The default setting is 300°/S. 7. TOUR SET – SAVE To save the memorized data, move joystick rightwards when cursor is at SAVE. The cursor will automatically move to the next tour step then. 8. TOUR SET – EXIT Move joystick to the right to return to main menu. 8.7 Privacy Set 24 Privacy masking zones make it easy to block out confidential areas (e.g. keyboard entries) and will be shown as blue squares. PRIVACY SET PRIVACY NO : 01 DISPLAY : OFF ACTION : MOVE SAVE EXIT DEFAULT SETTING 1. PRIVACY SET – PRIVACY NO. Up to 24 privacy masking zones (TVCC75200) respectively 4 (TVCC75100) are available. 2. PRIVACY SET – DISPLAY Move joystick to the right or left to switch on the selectable block in the central of the monitor. This block is appearing as a translucency square with blue colour after set ON. The default setting is OFF. 75 3. PRIVACY SET – ACTION (MOVE / ADJUST) To set the blocking area, press FOCUS FAR button when the cursor is on MOVE MODE. Use Joystick to move to position where masking zone should be. Then press FOCUS FAR button again to escape of MOVE MODE. To adjust size of blocking area, move joystick to the right when the cursor is on ACTION. After Move mode changed to ADJUST MODE, press FOCUS FAR button in order to adjust the size of blocking area. Use the joystick to adjust the size of blocking area. After adjusting size of blocking area, press FOCUS FAR button to escape ADJUST mode. 4. PRIVACY SET – SAVE To save the data after set the privacy masking zone, move joystick to the rightwards when the cursor is on SAVE. After saving of data, the cursor automatically jumps to PRIVACY NO.2 to prepare the next privacy masking zone. 5. PRIVACY SET – EXIT Move joystick to the right to return to main menu. 8.8 Pattern Set 8 programmable patterns are available with 16 characters for title. After setting the data of each pattern, 81~88 + PRESET buttons are working as Pattern # 1~8. x Maxpro protocol provides 6 quick operation keys (80~85 + preset) for patterns, but it is possible to set up to pattern #8. PATTERN SET PATT NO PATT TITLE: DATA FILL SAVE EXIT : 01 : PATTERN01ƑƑƑ : 100% DEFAULT SETTING 1. PATTERN SET – PATT NO. Up to 8 programmable user-defined patterns are available to set by joystick movement. 2. PATTERN SET – PATT TITLE To set pattern title, select up to 16 characters moving Joystick to the left or right. Press ZOOM TELE button to move to the next character from the left to the right and ZOOM WIDE button to move to the prior character from right to left. Space is displayed when appears. Pattern title is not displayed on the monitor, it is only for the reference of menu controller. 3. PATTERN SET – DATA FILL Press FOCUS FAR button to start recording process. The dome saves all joystick movements to its memory during this time. A number on monitor shows the percentage of filled memory. Press FOCUS FAR button again in order to escape. 76 4. PATTERN SET – SAVE To save the filled data, move joystick to the rightwards when the cursor is on SAVE. This may take several seconds. Then the cursor moves to the following pattern no in order to prepare next pattern. 5. PATTERN SET – EXIT Move joystick to the right to return to main menu. 8.9 Alarm Set 4 Alarm inputs are available and each of them is able to activate a preset, group tour or pattern. ALARM SET ALARM NO : 01 ALARM INPUT : OFF ALARM ACT : 001 SAVE EXIT DEFAULT SETTING 1. ALARM SET – ALARM NO. Up to 4 alarm inputs are selectable by moving joystick right or left when cursor is on ALARM NO. This number represents the corresponding alarm input on the rear side of speed dome. 2. ALARM SET – ALARM INPUT The alarm inputs supports 3 different connection states: NC (Normally Close), NO (Normally Open) or OFF (disabled) The default setting is OFF 3. ALARM SET – ALARM ACT Alarm inputs can activate various surveillance modes. Preset number from1~64 and 100~200, Group tour 1 to 8 and Pattern 1 to 8 are available. Move joystick right or left to select desired preset position, group tour no. or pattern no. 4. ALARM SET – SAVE After setting the alarm input state and activation, move joystick rightwards when the cursor is on SAVE in order to save changes. After saving, the cursor jumps to the following alarm no. to set the next alarm. 5. ALARM SET – EXIT Move joystick to the right to return to main menu. * Before activating the Alarm, the user must set ALARM ENABLE at DOME SET – ALARM 77 8.10 Sector Up to 8 programmable sectors are available with 16 characters each. This feature is useful to entitle certain locations such as a parking zone. SECTOR SET Start-Position SECTOR NO : 01 SECTOR ID : SECTOR01ƑƑƑƑƑƑƑƑ SECTOR START : XXX.X.XX.X SECTOR END : XXX.X.XX.X SAVE EXIT End-Position 1. SECTOR SET – SECTOR NO. Up to 8 programmable sectors are available to set. 2. SECTOR SET – SECTOR NAME To set SECTOR NAME, move joystick right or left to change each digit. Press ZOOM TELE button to moves to the next character from the left to the right and ZOOM WIDE button to move to the prior character from the right to left. Space is displayed when appears. 3. SECTOR SET – SECTOR START To set start position of sector, press FOCUS FAR button. Use the joystick to go to the start position of sector. Press FOCUS FAR button again to escape. 4. SECTOR SET – SECTOR END To set end position of sector, press FOCUS FAR button. Use the joystick to go to the end position of sector. Press FOCUS FAR button again to escape. 5. SECTOR SET – SAVE After setting the sector start- and end position, move joystick rightwards when the cursor is on SAVE in order to save changes. After saving, the cursor jumps to the following sector no. to set the next sector. 6. SECTOR SET – EXIT Move joystick to the right to return to main menu. 8.11 Exit To escape OSD Main Menu, move joystick right or left when cursor is on exit. Camera is ready to operate then. 78 9. DIP Switch Setting 9.1 ID Setting Set an ID for the camera which you can use for accessing from a controller or DVR. An ID may only be assigned once! Once you have opened the camera cover, you can set the ID (e.g. using a small flat screwdriver) on DIP switch 1 by pushing the pins up or down. x Default setting: camera ID = 1 (1-ON, 0-OFF) DIP SW ID VALUE DIP SW 10000000 01000000 11000000 00100000 10100000 01100000 11100000 00010000 10010000 01010000 11010000 00110000 10110000 01110000 11110000 00001000 10001000 01001000 11001000 00101000 10101000 01101000 11101000 00011000 10011000 01011000 11011000 00111000 10111000 01111000 11111000 1 2 3 4 5 6 7 8 9 10 11 12 13 14 15 16 17 18 19 20 21 22 23 24 25 26 27 28 29 30 31 00000100 10000100 01000100 11000100 00100100 10100100 01100100 11100100 00010100 10010100 01010100 11010100 00110100 10110100 01110100 11110100 00001100 10001100 01001100 11001100 00101100 10101100 01101100 11101100 00011100 10011100 01011100 11011100 00111100 10111100 01111100 DIP SW ID VALUE DIP SW 01111010 11111010 94 95 00101001 10101001 ID VALUE 32 33 34 35 36 37 38 39 40 41 42 43 44 45 46 47 48 49 50 51 52 53 54 55 56 57 58 59 60 61 62 ID VALUE 148 149 79 DIP SW 11111100 00000010 10000010 01000010 11000010 00100010 10100010 01100010 11100010 00010010 10010010 01010010 11010010 00110010 10110010 01110010 11110010 00001010 10001010 01001010 11001010 00101010 10101010 01101010 11101010 00011010 10011010 01011010 11011010 00111010 10111010 DIP SW 01010011 11010011 ID VALUE 63 64 65 66 67 68 69 70 71 72 73 74 75 76 77 78 79 80 81 82 83 84 85 86 87 88 89 90 91 92 93 ID VALUE 202 203 00000110 10000110 01000110 11000110 00100110 10100110 01100110 11100110 00010110 10010110 01010110 11010110 00110110 10110110 01110110 11110110 00001110 10001110 01001110 11001110 00101110 10101110 01101110 11101110 00011110 10011110 01011110 11011110 00111110 10111110 01111110 11111110 00000001 10000001 01000001 11000001 00100001 10100001 01100001 11100001 00010001 10010001 01010001 11010001 00110001 10110001 01110001 11110001 00001001 10001001 01001001 11001001 96 97 98 99 100 101 102 103 104 105 106 107 108 109 110 111 112 113 114 115 116 117 118 119 120 121 122 123 124 125 126 127 128 129 130 131 132 133 134 135 136 137 138 139 140 141 142 143 144 145 146 147 01101001 11101001 00011001 10011001 01011001 11011001 00111001 10111001 01111001 11111001 00000101 10000101 01000101 11000101 00100101 10100101 01100101 11100101 00010101 10010101 01010101 11010101 00110101 10110101 01110101 11110101 00001101 10001101 01001101 11001101 00101101 10101101 01101101 11101101 00011101 10011101 01011101 11011101 00111101 10111101 01111101 11111101 00000011 10000011 01000011 11000011 00100011 10100011 01100011 11100011 00010011 10010011 150 151 152 153 154 155 156 157 158 159 160 161 162 163 164 165 166 167 168 169 170 171 172 173 174 175 176 177 178 179 180 181 182 183 184 185 186 187 188 189 190 191 192 193 194 195 196 197 198 199 200 201 11010011 00110011 10110011 01110011 11110011 00001011 10001011 01001011 11001011 00101011 10101011 01101011 11101011 00011011 10011011 01011011 11011011 00111011 10111011 01111011 11111011 00000111 10000111 01000111 11000111 00100111 10100111 01100111 11100111 00010111 10010111 01010111 11010111 00110111 10110111 01110111 11110111 00001111 10001111 01001111 11001111 00101111 10101111 01101111 11101111 00011111 10011111 01011111 11011111 00111111 10111111 01111111 11111111 80 203 204 205 206 207 208 209 210 211 212 213 214 215 216 217 218 219 220 221 222 223 224 225 226 227 228 229 230 231 232 233 234 235 236 237 238 239 240 241 242 243 244 245 246 247 248 249 250 251 252 253 254 255 9.2 RS-485 Termination The 1st DIP of SW2 is used for 100 termination. Set on 1st DIP of SW2 only by the last connected camera from the loop (CAM n). Even in case of only one camera, set ON 1st-DIP of SW2. 9.3 Protocol The 3rd, 4TH of DIP SW2 above are used for Protocol Setting. Factory Default: Pelco-D or Pelco-P (Auto detection) DIP SW2 - 3rd 4th OFF / OFF ON / ON Pelco-D or Pelco-P Maxpro protocol 9.4 Baud Rate Setting The 7th, 8th SW of DIP SW2 is used for baud rate setting. With DIP SW2 baud rate can be changed to 4800bps, 9600bps. Factory Default: 2400bps. DIP SW2-7th OFF OFF ON ON DIP SW2-8th OFF ON OFF ON BAUD RATE Not Used 2400bps 4800bps 9600bps * The 2nd, 5th, 6th of DIP SW2 are not used. 81 10. Specifications MODEL Pan Rotation Angle TVCC75200 360° Endless 0.5°/sec ~ 200°/sec (64step) Max 300°/sec -2° ~ 90° 0.5° ~ 45°/sec (64step) Max 250° /sec 0.024° Manual Preset Pan Speed PAN /TILT TVCC75100 Tilt Rotation Angle Manual Preset Tilt Speed System Accuracy 165 positions with 16 character labels available for each position with different speed steps Presets Max. 8 Programmable group tours (each one consisting of up to 60 preset steps with different steps) Group Tour FUNCTIONS POWER OTHERS Auto pan Pattern Sector Password Protection Privacy Zone Alarm Input Alarm Actions Aux Output Auto Flip OSD Menu Communication Protocol Power Consumption Power Supply Construction Dimensions Weight Motor Type Micro Steps Storage Temperature Operating Temperature Certifications Image Sensor Total Image Pixels Number Of Effective Pixels Programmable Auto Scan 8 Programmable Patterns (total 480 seconds) 8 Selectable Sectors with 16 charactors Yes 8 NTSC PAL NTSC PAL Horizontal resolution Optical 27x Optical Zoom (F1.6~F2.8; f=3.5~95.0mm) Digital 16x (432x with optical) Lens CAMERA MODULE 24 4 alarms (with various programmable states) Activate preset, Group scanning or output per alarm input 2 Replay Output ON / OFF German, English, French, Dutch, Danish RS-485 Built in Pelco-D, Pelco-P 18W Max 18~32VAC 60/50Hz 850mA Cool Gray Body(ABS) , Anti-vandal bubble (Poly Carbonate) 147ij (D) * 190mm (H); 5.8" (D) * 7.5"(H) 1.9 kg (5 lbs) Stepper 1/8 Micro Step -20°C ~ 60°C (-4°F ~140°F) -10°C ~ 50°C (14°F ~122°F) CE, FCC 1/4" Interline Transfer CCD 1/4" Sony Exview HAD CCD 811(H) * 508(V) 410K 811(H) * 508(V) 410K 795(H) * 596(V) 470K 795(H) * 596(V) 470K 768(H) * 494(V) 380K 768(H) * 494(V) 380K 752(H) * 582(V) 440K 752(H) * 582(V) 440K 550 TVL 560 TVL 1,5m(Tele) 0.32m(Wide)/1.5m(Tele) 0.2Lux (50IRE) 0.02Lux (ICR On) 0.1Lux (50IRE) 0.01Lux (ICR On) Min.Shooting Distance Normal mode Night mode More than 50dB VBS:1.0Vp-p (sync negative), Y/C Output ON / OFF Luminance S/N Ratio Video Output BLC Flickerless 11. 12x (432x with optical) Auto/ Day/ Night Day & Night (ICR) Min. illumination 36x Optical Zoom (F 1.6~4.5; f=3.4~122.4mm ) NTSC ON / OFF Dimensions 82 190.0 147.0 134.0 Einheiten: mm 83


