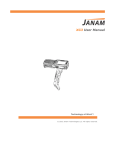
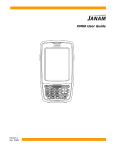
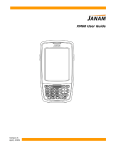
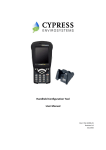
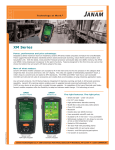
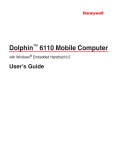
Download XM5 WEH 6.5 User Manual
Transcript
XM5 WEH 6.5 User Manual Technology at Work ® XM5 User Manual 1. INTRODUCTION ·············································································· 1-1 XM5 Overview ···························································································· 1-1 Hardware Overview ····················································································· 1-2 2. GETTING STARTED ·········································································· 2-1 Unpack Your XM5 ······················································································ 2-1 Recommended Host Computer ····································································· 2-1 Janam XM5 SDK ························································································ 2-1 Install the Battery························································································ 2-2 Charging the Battery ··················································································· 2-4 Attach the Handstrap ··················································································· 2-8 LED Indicators ··························································································· 2-8 Turn the XM5 On ························································································ 2-9 Screen Alignment ····················································································· 2-10 Startup Screen ························································································· 2-11 Fundamental Navigation ············································································ 2-12 Status Icons and Controls ·········································································· 2-13 Turning the XM5 Off ·················································································· 2-14 Battery Charging & Power Alert Info ····························································· 2-15 3. SETTING UP THE XM5 ······································································ 3-1 Location Key Controls & Components ····························································· 3-1 XM5 Connector ·························································································· 3-1 USB Port ·································································································· 3-2 Installing a microSD Card ············································································· 3-3 Installing a SIM Card ··················································································· 3-3 LCD Screen Options & Calibration ································································· 3-4 Setting Basic User Preferences ···································································· 3-5 Getting Started··························································································· 3-5 Setting a Background ·················································································· 3-6 Device Password························································································ 3-6 Changing Password ···················································································· 3-7 Screen/Keyboard Locking & Unlocking ···························································· 3-7 Regional Settings ······················································································· 3-8 Owner Information ······················································································ 3-9 Screen Orientation ···················································································· 3-10 Device Name ··························································································· 3-11 Volume & Alert Adjustments ······································································· 3-13 Additional Sounds & Notifications ································································· 3-14 Battery Power/Battery Conservation ····························································· 3-15 Opening Applications ················································································ 3-19 Removing Programs ················································································· 3-19 Communication Ports ················································································ 3-20 4. RESETTING THE XM5········································································ 4-1 Resetting the XM5 ······················································································ 4-1 Soft Reset (Warm Boot) ··············································································· 4-1 Hard Reset (Cold Boot) ················································································ 4-2 Master Reset ····························································································· 4-2 5. DATA ENTRY ··················································································· 5-1 Entering Information ···················································································· 5-1 Changing On-Screen Keyboards ··································································· 5-2 Keyboard Shortcuts ···················································································· 5-2 Enabling ClearType Text ·············································································· 5-2 Text Size ·································································································· 5-3 Freehand Drawing & Writing ········································································· 5-3 Voice Notes······························································································· 5-4 6. DATA CAPTURE - BARCODE SCANNING ··············································· 6-1 Introduction ······························································································· 6-1 Laser-based Configurations ·········································································· 6-2 Imager-based Configurations ········································································ 6-4 Capturing Images ······················································································· 6-7 ScanWedge ······························································································ 6-7 7. SYNCHRONIZATION ········································································· 7-1 Exchange & Update ···················································································· 7-1 Setting Up & Deleting Partnerships································································· 7-1 Partnership Connection Settings ···································································· 7-2 End of Partnership ······················································································ 7-2 8. WIRELESS CONNECTIVITY ································································ 8-1 Introduction ······························································································· 8-1 Phone ··································································································· 8-1 Volume & Alert Adjustments ········································································· 8-2 Muting ··································································································· 8-3 Using a Headset························································································· 8-3 Making Calls······························································································ 8-4 Text Messaging·························································································· 8-5 Connecting to the Internet ············································································ 8-7 9. CAMERA ························································································· 9-1 Introduction ······························································································· 9-1 Adjustments & Options ················································································ 9-2 Activate the Camera ···················································································· 9-3 Taking Photos···························································································· 9-3 Recording Video························································································· 9-3 View Photos & Video ··················································································· 9-5 Photo & Video Management ········································································· 9-5 10. 802.11 WIRELESS CONFIGURATION ················································· 10-1 Configuring the WLAN Radio ······································································ 10-1 11. BLUETOOTH ·················································································· 11-1 Overview ································································································ 11-1 Enabling the Bluetooth Radio ······································································ 11-2 Pairing Bluetooth Devices ·········································································· 11-2 12. USING THE XM5 DEMOS ·································································· 12-1 Scan Demo ····························································································· 12-1 Image Demo···························································································· 12-3 Print Demo ······························································································ 12-4 GPS Demo······························································································ 12-4 PING Demo····························································································· 12-6 NFC Demo ······························································································ 12-7 Introduction XM5 User Manual About the XM5 Mobile Computer Because it supports Android™ and Microsoft Windows Embedded® Handheld 6.5 on the same device, Janam’s super-rugged, super-capable and super-affordable XM5 mobile computer eliminates the stress and cost associated with forced application migration and expensive hardware upgrade. Customers can choose the operating system that meets their business needs today while extending their mobility investment years into the future. The XM5 redefines productivity and is built to withstand the rigors of heavy-duty use in the field. It combines the latest technological advancements in mobile devices with a sleek and rugged design to provide the power and flexibility that enterprise and government customers demand. Equipped with 4Gready WWAN and 802.11a/b/g/n Wi-Fi communications, the XM5 ensures mobile workers will be able to access voice and data anytime, anywhere. Additional features include the choice between a 1D/2D imager or 1D laser scanner, as well as integrated RFID and NFC reading capabilities, front and rear facing cameras, Bluetooth and smart battery power management. The XM5 survives repeated 5’ drops to concrete across a wide operating temperature range, is sealed to IP65 standards and is UL-certified to provide ultimate reliability in extreme and hazardous locations. Janam Technologies LLC 1―1 Introduction XM5 User Manual Hardware Overview Janam Technologies LLC 1―2 Introduction XM5 User Manual Hardware Overview (continued) Janam Technologies LLC 1―3 Getting Started XM5 User Manual 2 Getting Started Unpack Your XM5 Mobile Computer Make sure you have the following: ― Janam XM5 mobile computer ― Janam-authorized XM5 Series battery ― Handstrap ― Stylus ― Documentation (Quick Start Guide) ― Charging accessory (one or more of the following power/connection kits ordered/packaged separately): ― Janam micro-USB cable with AC wall mount adapter ― Janam mobile communication cable with AC adapter ― Janam 1-Slot or 4-Slot Cradle with AC adapter ― Janam 4-Slot Battery Charger with AC adapter Recommended Host Computer Requirements ― Windows-compatible host computer ― Microsoft® Windows® 8, Windows 7, Windows XP or Windows 2000 operating system ― 100 MB of available hard disk space ― One available serial or USB port Janam XM5 Series SDK The Janam XM5 Series Software Development Kit enables programmers to develop applications for Janam XM5 Series rugged mobile computers running Android 4.2.2 operating system. It contains details and instructions for developing applications that access Janam XM5 Series libraries, including scanning, imaging and hardware utilities. The development kit, which can be downloaded from Janam’s Product Zone site (login required), is designed for use with Eclipse or Android Studio development environment. Janam Technologies LLC 2―1 Getting Started XM5 User Manual Install the Battery The XM5 mobile computer is shipped with the battery packaged separate from the unit. Follow the steps below to install the battery. Remove the battery compartment door by moving the Battery door’s lock to the up position while pulling on the extended rib on either side of the battery door. Rib Battery door lock Up Insert the battery with battery information label facing up with guide tabs facing the door lock. 1 2 Replace the battery door starting at the bottom inserting the tabs #1 then pressing the door closed a nd locking the door in place. Janam Technologies LLC 2―2 Getting Started XM5 User Manual 2 1 ☞NOTE: The battery door must be installed prior to booting the unit. WARNING: Use only Janam-approved Li-Ion battery packs. Unauthorized battery may result in damage not covered by the warranty. Changing the Main Battery Pack Before installing a battery pack, press the Power key to put the terminal in Suspend Mode so that Janam Technologies LLC 2―3 Getting Started XM5 User Manual operations are suspended before removing the main power source. Always put the terminal in Suspend Mode prior to changing the battery. ☞NOTE: The battery door must be installed prior to booting the unit. 1 4 2 3 Main battery pack Charging Options When the battery is installed in the terminal, you can use any of the peripherals listed below to charge the battery. • AC Power Supply to USB Port direct • Single slot docking cradle/Single slot Ethernet cradle • Insert the battery in the spare battery charging well in the back of either the Mobile Computer slot cradle or Mobile Computer Ethernet cradle Charging Time The standard capacity 4000mAh Li-ion battery pack requires five hours to charge to full capacity. Charge the Battery XM5 mobile computers ship with only the main battery pack significantly charged. Charge the main battery pack with the XM5 charging cable for a minimum of 4 or 6 hours depending on your battery before initial use. Janam Technologies LLC 2―4 Getting Started XM5 User Manual Alternatively, it is also possible to recharge the battery pack by using the single slot cradle, the single Ethernet cradle or the 4-slot battery charger. 1. Attach the appropriate plug adapter to the wall cube. 2. Insert the plug into the appropriate power source. Plug the Mobile Computer power cable into the USB jack on the end of the unit. WARNING: Use only Janam-approved peripherals, power cables and power adapters. Unauthorized peripherals, cables or power adapters may cause batteries to explode or damage your device. DO NOT attempt to charge damp/wet Mobile Computers or batteries. All components must be dry before connecting to an external power source. Batteries must be charged at a temperature ranging from 0 to 45℃ (32 to 113F). ☞NOTE: after the battery has been charged, disconnect the DC Power Jack from the terminal. ☞NOTE: Rechargeable battery packs are not initially charged. ☞NOTE: If you remove the battery pack, you have 30 minutes of backup power. Managing Main Battery Power Data and files saved on the XM5 may be stored in RAM memory; therefore, maintain a continuous power supply to the terminal to help prevent data loss. When you remove a battery pack, insert another charged battery pack in the XM5. If the main battery pack is low, insert the terminal into a charging peripheral to power the terminal and begin recharging the battery. Janam Technologies LLC 2―5 Getting Started XM5 User Manual ☞NOTE: If the main battery is low and the terminal is in Suspend Mode, pressing the Power button does not wake the XM5; you must replace the discharged battery with a fully charged battery or apply AC power to the terminal. Checking Battery Power The XM5 OS displays the battery capacity in the Status Bar shown below. ☞NOTE: You can also check battery power by tapping Home -> Settings -> Battery. Janam Technologies LLC 2―6 Getting Started XM5 User Manual Guidelines for Battery Pack Use and Disposal The following are general guidelines for the safe use and disposal of batteries: Store the terminal and the spare batteries between 20 to 30℃ (68 to 86F) in order to maintain optimal battery performance. Standard batteries must be charged at a temperature ranging from 0 to 45℃ (32 to 113F) The XM5 gets warm during charging. This is normal and does not indicate a malfunction. To achieve the best battery life, turn off the radios not in use. Annual replacement of rechargeable battery pack avoids possible risks or abnormalities and ensures maximum performance. WARNING: DO NOT attempt to charge damp/wet Mobile Computers or batteries. All components must be dry before connecting to an external power source. WARNING: Never throw a used battery in the trash. It contains heavy metals and should be recycled according to local guidelines. WARNING: Installing, charging and/or any other action should be done by authorized personnel and following this manual. The battery pack may get hot, explode, ignite and/or cause serious injury if exposed to abusive conditions. If the battery pack is replaced with an improper type, there is risk of explosion. Use only a Janam approved power supply. The use of an alternative power supply will void the product warranty, may cause product damage and may cause it to explode or ignite. Collect and recycle waste batteries separately from the device in compliance with European Directive 2006/66/EC, 2011/65/EU, 2012/19/EU and subsequent modifications, US and China regulatory and others laws and regulations about environment. Janam Technologies LLC 2―7 Getting Started XM5 User Manual Attach the Handstrap 1. Insert the metal fastener on the handstrap facedown into the XM5 handstrap retainer clip pressing down and back until it clicks securely into place. 2. Extend the other end of the handstrap toward the base of the XM5. Feed it through the hand strap bar as shown in diagram . 3. Pull handstrap through handstrap bar and fasten Velcro to secure the strap. Adjust the Velcro as needed to fit and secure the XM5 to the user’s hand. LED Indicators LED Color Red Meaning Lights when main battery is charging Blinks, when the battery is very low (<10%), Lights when the battery is low (<20%), Blinks Red/ Green when battery fault Green Lights, when the PDA resets Lights when main battery charging has completed. Blue Lights when a scan Pass Lights when PDA wakes up Janam Technologies LLC 2―8 Getting Started Red XM5 User Manual Lights when a scan fails. Turn the XM5 On With a fully charged battery installed, press and release the red Power button on the right side above the orange scan button. Pressing the power button again will suspend the XM5’s operation. Holding the power button for an extended time will invoke the boot option screen. Power button See Chapter 4 for additional information about On (Resume), Off (Suspend) and Reset functions. Screen Alignment Upon Initial startup of the XM5 and/or after a clean boot, the device will launch the on-screen align screen instructions. Aligning the Janam Technologies LLC 2―9 Getting Started XM5 User Manual screen calibrates the device’s internal circuitry with its touchsensitive screen, optimizing stylus-to-screen detection. To align the screen: 1. Tap the screen when automatically instructed to do so during initial setup or after a clean boot. 2. Follow the on-screen instructions, tapping the screen where indicated by the crosshair symbol. Follow the on-screen instructions. Continue to tap each changing crosshair position with the stylus until the screen exits the align screen function and returns automatically to the Screen Orientation screen. If, during use, there is a noticeable decrease in stylus response accuracy, the unit may be easily recalibrated. See Chapter 3 for more information about manually initiating the screen alignment procedure. Janam Technologies LLC 2―10 Getting Started XM5 User Manual Startup Screen The XM5 displays the Home screen at startup, providing quick access to key functions, device setup tools and easy navigation to additional functions and applications. Home Screen When enabled, calendar reminders will be displayed on the Home screen at startup. Status Toolbar Start Screen Main Screen Tile Toolbar Getting Started Begin by tapping getting started which will present the Clock menu. From the Clock menu you can take the minimally required action of setting the date and time or tap View All to review all Getting Started options, including: ― Make a call ― Set date and time ― Set up a device password ― Set up a Bluetooth headset ― Setup PC synchronization ― Set background ― Set ring tone ― Transfer music ― Online Help & how-to ― Add/remove Getting Started Once these XM5 options are set as desired, the Add/remove Getting Started function allows the removal of the Getting Started tab from the home screen menu. Refer to Chapter 3 for more on Setting Basic User Preferences. Janam Technologies LLC 2―11 Getting Started XM5 User Manual Fundamental Navigation Basics Start Screen Home Screen ― Tap the Windows icon from the Home screen to access the Start screen of the Windows Desktop. ― Tap the Home icon on the Windows Desktop to access the Home screen. ― Tapping the Windows icon from the Windows Desktop provides alternative access to the Getting Started menu. Windows Icon IMPORTANT NOTE! Always use the supplied stylus for tapping or making strokes on the screen. DO NOT use a pen, pencil or any other object on the touch screen. Connectivity Key Status Icons and Controls Signal Audio Battery Notifications Windows Mobile Desktop Time Stop, Home Screen Toggle, Windows Mobile Desktop /Home Screen Lock Janam Technologies LLC 2―12 Getting Started XM5 User Manual Indicator Icons The command bar, located at the upper of application screens, provides access to many system functions and programs. Icons Meaning Open the start menu Access the Wireless Manager Open the Scanner option menu Indicates the Keypad value Shows phone signal mode Shows the volume Indicates the Battery Control Panel (CPL) Indicates Clock & Alarm CPL Zoom in/ out Access the Bluetooth radio Janam Technologies LLC 2―13 Getting Started XM5 User Manual Left and right arrows are used to scroll through additional icons Icon Meaning Indicates AC connection mode Indicates WAN (Phone) connection mode Indicates Sound connection mode Indicates LAN / Bluetooth mode Indicates Keypad mode Turning the XM5 Off — Suspending Operation To suspend operation: ― Press and release the red Power button located on the right side. Power button Janam Technologies LLC 2―14 Getting Started XM5 User Manual XM5 Battery Charging and Power Alert Information Battery Charging and Power Alert Information Question Battery / Power Supply Alert Threshold / Charge Time Main Battery: “Main Battery Low” appears with approx. 20% of battery power remaining. When will Low Battery “Main Battery Very Low” appears Warnings first appear? with approx. 10% of battery power (Without external remaining. power source connected) Backup Battery: “Backup Battery Very Low” appears with approx. 20% of backup battery power remaining. How often will the Low One additional warning “Main Battery Warning Main Battery: Battery Very Low” appears before a reappear when first critically low condition forces alert is dismissed by the suspension of XM5 operation. user? Main Battery: A critically low condition forces At what Main Battery suspension of XM5 operation when capacity will the XM5 battery’s capacity reaches approx. force itself to suspend? 5%. 1 Cradle Accessories How long does it take 4000 mAh Std. battery: Approx. 5 hours from a fully to charge the Main discharged state. Battery? How long does it take to charge the Backup Battery? How long will a fully charged Backup Battery supply power to retain user data with the Main Battery discharged or properly removed? Backup Battery: Backup Battery: When discharged, the Backup battery requires approx. 1.5 hours to recharge with (and from) a fully charged Main battery. An external power source is not required to charge the Backup battery. Approx. 30 minutes. Note: When swapping out batteries, the Phone radio should be turned off in order to retain data on the terminal. Note: All times reflect suspension of terminal operation while charging. Janam Technologies LLC 2―15 Getting Started Janam Technologies LLC XM5 User Manual 2―16 Setting Up the XM5 XM5 User Manual 3 Setting Up the XM5 Locating Key Controls and Components Bottom Panel Layout I/O connector USB port XM5 Connector The XM5 I/O connector powers the terminal, charges the main battery and facilitates communication. This connector supports High speed USB 2.0 communication (up to 480 Mbps). Through this connector, you can communicate with a host workstation via Microsoft ActiveSync or Windows Device Center (see Sync Communication on paragraph 10.4). Janam Technologies LLC 3―1 Setting Up the XM5 XM5 User Manual The I/O connector supports the following signals: Pin Description Direction 1 DC IN +5V PWR 2 DC IN +5V PWR 3 TXD (RS-232 ) OUT 4 RTS (RS-232 ) OUT 5 USB Host +5V Enable OUT 6 USB Host D+ IN/OUT 7 USB Host D- IN/OUT 8 USB Host Detect# IN 9 CTS (RS-232 ) IN 10 RXD (RS-232 ) IN 11 GND 12 GND 13 CRADLE Detect# 14 USB Client D+ IN/OUT 15 USB Client D- IN/OUT 16 USB Client +5V IN PWR ☞NOTE: Signals referenced are for a DTE device. USB Port This connector supports High speed USB 2.0 communication (up to 480 Mbps). It also supports external power from the MicroUSB Adaptor that is included with the terminal. When connected to the XM5 MicroUSB Adaptor, the terminal is powered and the main battery pack is charging. Janam Technologies LLC 3―2 Setting Up the XM5 XM5 User Manual Keyboard-Controlled Screen Navigation The keyboard offers additional navigational controls, including the Screen Scroll Up/Left and Screen Scroll Down/Right buttons. To scroll up or down, press the Up or Down arrow button. To scroll left or right, left or right button. microSD Removable Memory XM5 mobile computers are compatible with microSD memory cards with a capacity of up to (and not more than) 32GB. SIM Card XM5 mobile computers feature a removable SIM (Subscriber Identity Module) card slot. The XM5 Phone function cannot operate without a SIM card installed. Contact your wireless telephone service provider for additional SIM card information and refer to Chapter 8 for more about the XM5 phone function. microSD and SIM Card Slots (located beneath removable battery) The product label under the battery has a picture of the microSD and Mini SIM card showing orientation for insertion. Gently insert the card and push it until it locks in. To remove gently push it again until it ejects. IMPORTANT NOTE! To avoid possible damage to microSD and/or SIM cards or the XM5, ESD (electrostatic discharge) precautions are recommended when installing or removing microSD and/or SIM cards. At a minimum before handling, discharge any personal static electric buildup to a point of discharge other than the device. Janam Technologies LLC 3―3 Setting Up the XM5 XM5 User Manual LCD Screen Options and Calibration IMPORTANT NOTE! Always use the supplied stylus for tapping or making strokes on screen. DO NOT use a pen, pencil or any other object on the touch screen. The XM5 provides a utility that enables users to customize LCD screen orientation and to recalibrate the screen’s tapping function accuracy. Accessing the Screen Menu: 1. From the Windows Start Desktop, tap Settings. 2. From the Settings screen, tap System. 3. From the System Screen, scroll down and tap Align Screen. 4. From the Align Screen screen, select the preferred display orientation (Portrait (the default setting), Landscape (right-handed) or Landscape (left-handed). 5. If you notice a decrease in accuracy or responsiveness when using the stylus, repeat steps 1 through 3 and tap Align Screen. Follow the on-screen instructions. Continue to tap each changing crosshair position with the stylus until the screen exits the align screen function and returns automatically to the Screen Orientation screen. Janam Technologies LLC 3―4 Setting Up the XM5 XM5 User Manual Setting Basic User Preferences The XM5 can be customized in many ways to suit task requirements, security and/or individual user preferences. The following is an overview of a selection of key XM5 settings with instructions on how to make changes. The general navigations and actions used to affect these changes are instructive to other similarly controlled settings. Key XM5 Option Settings Getting Started Open the getting started menu: 1. Tap getting started. 2. Tap View All to access the Getting Started menu options. Setting a Background: 1. Tap Set background on the Getting Started menu screen. 2. Tap the arrow to the right of Change the background in Settings > Home. 3. Select a graphic theme or picture as the screen background and tap OK. Janam Technologies LLC 3―5 Setting Up the XM5 XM5 User Manual Key XM5 Option Settings (continued) Note: Picture backgrounds can affect the readability of text within some applications. Tip: Tapping the Getting Started icon on the Windows Start screen is an equally effective means of navigating to the Getting Started menu. Device Password Setting up a device password: 1. Tap Set up a device password on the Getting Started menu screen. 2. Tap the arrow to the right of Set up a password in Settings > Lock. 3. Check the Prompt if phone (device) unused for box and select a delay from 0 minutes to 24 hours. Checking this box enables the password setup process to continue. Note: Leaving the “Prompt if phone (i.e. device) unused for” box unchecked leaves the device without password protection. It is recommended that the “Prompt if device unused” time strike a practical balance between security and convenience. Selecting a delay of 0 minutes will result in a condition requiring password input every time the device is used. Janam Technologies LLC 3―6 Setting Up the XM5 XM5 User Manual Key XM5 Option Settings—Device Password (continued) 4. Tap the down arrow in the Password type box. 5. From the pull-down menu, select the type of password you would like to use – Simple PIN (Personal Identification Number) or Strong alphanumeric. Enter the password and enter in the same password again for confirmation. Simple PIN passwords contain only numeric characters and must be at least 4 characters in length. Overly simplistic sequences such as “1234, “1111”, etc. will be rejected as unsafe. Strong alphanumeric passwords must include at least 7 characters, 3 of which must be a combination of UPPERCASE and lowercase letters, numerals or punctuation. Examples: Upc4003 UPC?4003 To remove password protection: 1. Tap Start menu > Settings > Personal tab > Lock. 2. Enter your current password. 3. Un-check the Prompt if device unused for check box. 4. Tap OK. Changing Passwords Passwords may be changed by following the same procedure used to set the initial password. However, the process will be interrupted with the password entry screen. Entering the current password will enable continuation of the password change process. Screen/Keyboard Locking & Unlocking Note: When the device is locked, neither the on-screen keyboard nor the physical keypad will accept user input, preventing unintentional input. This level of locking does not take the place of the added security of password protection. To lock the device: ― Tap the Lock (icon) on the Tile Toolbar. To unlock the device: ― Slide the Unlock (bar) left or right. Janam Technologies LLC 3―7 Setting Up the XM5 XM5 User Manual Key XM5 Series Device Option Settings (continued) Regional Settings The style in which numbers, currency, dates and times are displayed is controlled by Regional Settings. XM5 mobile computers are shipped with regional, language and input settings pre-set to English (United States). To change Regional settings: 1. From the Windows desktop Start screen; Tap Settings (icon) > System > (folder) > Regional Settings (icon). 2. Select the desired setting from the Regional Settings pulldown menu. Janam Technologies LLC 3―8 Setting Up the XM5 XM5 User Manual Key XM5 Option Settings (continued) Owner Information Entering owner information: 1. From the Windows Start menu, tap Settings > Personal folder > Owner Information. 2. Select the Identification tab and enter Owner Information. 3. Select the Notes tab to enter additional owner information-related text such as “Reward if Found." To display owner information: From the Windows Start menu, tap Settings > Personal folder > Owner Information. Janam Technologies LLC 3―9 Setting Up the XM5 XM5 User Manual Key XM5 Option Settings (continued) Screen Orientation The default Screen Orientation is Portrait. If preferable, orientation can be changed to Landscape (right-handed or left-handed). Changing screen orientation: 1. From the Windows Start Screen, Tap Settings (icon) > System (folder) > Screen (icon). 2. Select the preferred screen orientation and tap OK. Landscape Screen Example Janam Technologies LLC 3―10 Setting Up the XM5 XM5 User Manual 3. To auto rotate the screen orientation using the XM5 Accelerometer sensor go to Start > Settings > System > Sensor (Icon) > Accelerometer (tab). Select the check box for Auto Display Orientation. Device Name The XM Series Device name (which may already be assigned) is used to identify the device in the following situations: ― Synchronizing with a PC ― Connecting to a network ― Restoring information from a backup Assigning or changing the device name and/or description: 1. From the Start menu tap Settings (icon)> System (folder) > About (icon). 2. Tap the Device ID tab. 3. Enter a Device name. The Device name cannot exceed 15 characters. It must begin with a letter, consist of letters from A to Z, numbers from 0 to 9 and cannot contain spaces. Use the underscore character to separate words. Janam Technologies LLC 3―11 Setting Up the XM5 XM5 User Manual 4. Enter a Description. The Description cannot exceed 50 characters. It must begin with a letter, consist of letters from A to Z, numbers from 0 to 9 and cannot contain spaces. Use the underscore character to separate words. IMPORTANT NOTE! To synchronize multiple XM5 mobile computers with the same PC, each device must have a unique name. Janam Technologies LLC 3―12 Setting Up the XM5 XM5 User Manual Key XM5 Series Device Option Settings (continued) Volume and Alert Adjustments The Volume Up and Volume Down button controls each perform multiple functions for device volume and phone volume. Volume Up/Down button SCAN button To adjust device volume: 1. Press either the Volume Up or Volume Down button to open the Volume control screen. 2. Select Device (figure 1) or Phone (figure 2) by tapping the corresponding slider on the screen. 3. Pressing the Volume Up or Volume Down button increases or decreases the selected volume in preset increments. Figure 2 ― Pressing the Volume Down button from its lowest position toggles the control to the On, Vibrate and Off buttons. enabling the choice of these functions for the Device and the Phone. ― Pressing the Volume Down button from this position toggles down Janam Technologies LLC Figure 2 To mute the microphone: — QWERTY key pad: Press Yellow function button, then press — Numeric key pad: Press Yellow function button, then press 3―13 Setting Up the XM5 XM5 User Manual through the On, Vibrate and Off selections. Pressing the Volume Up button up through the On, Vibrate and Off selections. Additional Sounds and Notifications Additional sound-related settings are available, making it possible to adjust select device functions to suit the user’s preference. 1. Tap Settings > Sounds & Notifications. 2. From the resulting Sounds & Notifications <Sounds> screen, choose device functions by tapping the corresponding checkbox(s). 3. For Screen taps and Hardware buttons, tap the preferred setting (Soft or Loud.) 4. Select the Notifications tab to assign notifications to specific events such as Incoming calls and ActiveSync activity. 5. From each Events options screen, select the preferred settings. 6. Tap OK. Janam Technologies LLC 3―14 Setting Up the XM5 XM5 User Manual Battery Power Main and backup battery status 1. Tap Settings (icon) from the Windows Start desktop. 2. Tap Power (icon). Main Battery and Backup Battery status are displayed in bar charts from 0% to 100%. Power Management Conserving Battery Power XM5 Series devices feature multiple power conservation options, some of which employ timers that can be set to strike a balance between user preference and optimal battery life. On battery power timers control the selected action only when the device is being operated on battery power. On external power timers control the selected action only when the device is being used with an external power supply. Tip: Whenever practical, you can conserve battery life by: 1. Using the AC adapter to plug the XM5 Series device into an external power source. 2. Manually or auto-suspend device operation as often as is practical 3. Reduce the backlight brightness setting 4. Turn off any wireless functionality (phone, Wi-Fi, Bluetooth or GPS) when not in use Janam Technologies LLC 3―15 Setting Up the XM5 XM5 User Manual Battery Power- Conserving Battery Power (continued) Screen Off Function To adjust Screen Off function (device suspend mode): 1. Tap Settings, system on the Windows Start desktop. 2. Tap Power on the Windows Settings desktop. 3. Tap Advanced on the Power 4. Check On battery power. 5. Select the preferred length of inactivity before activation of the screen off power saving function from the pull-down menu. Shorter off delays will increase battery power conservation. 6. Check On external power. 7. Repeat Step 5. 8. Tap OK. Janam Technologies LLC 3―16 Setting Up the XM5 XM5 User Manual Battery Power- Conserving Battery Power (continued) Backlight Off Delay Function To adjust backlight off delay function: 1. Tap Settings (icon) on the Windows Start desktop. 2. Tap System (folder) on the Windows Settings desktop. 3. Tap Backlight (icon) on the Windows System desktop. 4. Check the “Turn off the backlight if device not used for” box and select the preferred length of inactivity before activation of the screen off power saving function from the pull-down menu. Shorter off delays will increase battery power conservation. Backlight Brightness Adjustment Function To adjust backlight brightness function: 1. Tap Settings (icon) on the Windows Start desktop. 2. Tap System > Backlight (tab) 3. Adjust the brightness level using the sliding bar in 20% increments 4. The Backlight will be turned off when the Enable Backlight check box is disabled Janam Technologies LLC 3―17 Setting Up the XM5 XM5 User Manual Keylight Enable and Duration Function To adjust keylight duration function: 1. Tap Settings (icon) on the Windows Start desktop. 2. Tap System > Backlight (tab)> Keypad backlight 3. Enable the keylight function by selecting the check box. Janam Technologies LLC 3―18 Setting Up the XM5 XM5 User Manual Disabling Connectivity In conditions where it is not necessary to maintain Phone, Bluetooth or wireless connectivity, battery power can be conserved and battery life extended by disabling any or all of these connectivity functions. To disable connectivity functions: 1. Tap Settings (icon) on the Windows Start desktop. 2. Tap Connections (folder) on the Windows Settings desktop. 3. Tap Wireless Manager (icon) on the Windows Connections desktop. — Tap ALL to disable Wi-Fi, Bluetooth and Phone connectivity for maximum battery power conservation. — Alternatively, tap only the connectivity function or functions you prefer to disable. — Tapping a connectivity function again will re-enable it. Opening Applications To open an application: Tap the desired application from the Windows desktop. Removing Programs (applies only to user-installed programs) To remove a program: 1. From the Start screen, tap Settings (icon)> System (folder) > Remove Programs (icon). 2. From the Remove Programs screen, select (tap) the program to be removed. 3. Tap the Remove button. Janam Technologies LLC 3―19 Setting Up the XM5 XM5 User Manual Communication Ports The table below identifies the XM5 Comm Ports that are currently allocated. When selecting a Virtual Comm Port the Comm Ports below will not be available for use if the XM5 is configured with that function. COM6 Physical COM for Bluetooth Will be occupied when the Bluetooth function is turned on COM1 Physical COM for bottom connector Fully accessible by user application COM7 Physical COM for u-blox GPS module COM9 Virtual COM for GPS applications Janam Technologies LLC By default, COM9 will occupy and control COM7. If an application uses COM7 directly, then other applications will not be able to access the GPS data In order for multiple applications to simultaneously acquire GPS data, the applications need to configure GPS communication with COM9 3―20 Resetting the XM5 Series Device XM5 User Manual 4 Resetting the XM5 Resetting In addition to On (Resume) and Off (Suspend) functions, XM5 mobile computers provide a range of device reset (boot) procedures whose functions may be called upon when required. IMPORTANT NOTE! Some device reset options irretrievably delete stored user data! Always read and understand the parameters of selected reset procedures before execution. On (Resume) / Off (Suspend) and Reset Functions On (Resume) / Off (Suspend) To Suspend or Resume XM5 mobile computer operation: ― Press the Red Power key once to suspend operation and press again to resume. Reset the XM5 To soft reset (or warm boot): A soft reset restarts the device and reboots the operating system. Applications and files remain intact. However, any data in RAM that has not been saved could be lost. Make sure to save any open work before executing a soft reset. To perform a soft reset: 1. Press the Power button and hold for 3 seconds. 2. Choose ‘Soft Reset’ on the power menu. Janam Technologies LLC 4―1 Resetting the XM5 Series Device XM5 User Manual To hard reset (or cold boot): A hard reset, resets the hardware and cold starts the operating system. All applications and files remain but any unsaved data in RAM will be lost. Make sure to save all open work before executing a hard reset. To perform a hard reset: 1. Press the Power button and hold for 3 seconds. 2. Choose ‘Hard Reset’ on the power menu. To master reset (or clean boot): A master reset or clean boot returns the XM5 to factory settings, removing ALL applications and data stored on the device. Any files or programs stored in the \Application folder or a micro SD card will remain. Be sure that all data is backed up before performing a master reset. To perform a master reset/clean boot: 1. 2. 3. 4. 5. Perform a ‘Hard Reset’ The terminal will reboot automatically. As soon as you see COLD BOOT type the code 1277. This will take you to the bootloader menu Type 12 to perform Factory reset. When clean boot is completed, calibrate screen. Janam Technologies LLC 4―2 Data Entry―Alpha, Numeric and Importing XM5 User Manual 5 Data Entry―Alpha, Numeric and Importing Entering Information on the XM5 Mobile Computer Information can be entered into the Janam XM5 Series mobile computer in a variety of ways: Barcode scanning Scan barcodes to automatically capture data. See Chapter 6 for information about barcode scanning. Typing Use the physical keypad or the on-screen keyboard to input text, numbers and other characters. Drawing and Writing Freehand drawing and/or handwriting can be entered using the stylus within the Notes application. Audio The Notes application provides the ability to record voice notes. Photography The integrated digital camera provides the ability to capture photographic images. See Chapter 10 for information about the camera function. Synchronizing Import or exchange data between a PC and the device using ActiveSync or Windows Mobile Device Center. See Chapter 7 for more on synchronization. Note: The XM5 features either a QWERTY physical keypad suited for frequent input of alphabetic data or a 10-key numeric physical keypad, for users focused on numeric data input. Both versions provide an on-screen keyboard for entering alpha, numeric and special character data. Typing XM5 mobile computers are capable of running a variety of applications, many of which rely upon or require the input of alpha, numeric or special character data. In addition to either a QWERTY or numeric physical keypad (depending on the model configuration) XM5 devices feature the ability to key in data with the supplied stylus on an integrated On-Screen Keyboard. To use the On-Screen Keyboard: 1. Tap the On-Screen Keyboard (icon) in the Tile Toolbar at the bottom of the screen. 2. Use the supplied stylus to tap keys on the keyboard displayed on the screen. This function is available only in modes when text entry is possible. Janam Technologies LLC 5―1 Data Entry―Alpha, Numeric and Importing XM5 User Manual Entering Information on the XM5—Typing (continued) Changing on-screen keyboards: The default on-screen keyboard is a standard lowercase QWERTY keyboard. ― To switch to the UPPERCASE (all CAPS) keyboard, tap the CAP key above the Shift key. ― To switch to the expanded Numeric keyboard, tap the 123 key in the upper left corner. ― To select the International keyboard, tap on áü key at the lower left of the keyboard. Lowercase Keyboard Uppercase Keyboard Numeric Keyboard International Keyboard Custom Key Programming A selection of XM5 keypad function keys can be reprogrammed as shortcuts to an assortment of actions. The selection of reprogrammable keys varies, depending on the XM5 Series configuration (QWERTY or Numeric.) To reprogram function keys: 1 Tap Settings from the Windows desktop. 2. Tap Personal (folder) > Buttons (icon). 3. Select the reprogrammable button. 4. Select the action to be assigned to the selected button from the drop-down menu. Entering Information on the XM5—Options Enabling ClearType Text Clear Type softens the edges of the screen fonts for many applications. Janam Technologies LLC 5―2 Data Entry―Alpha, Numeric and Importing XM5 User Manual To use ClearType for screen text: 1. Tap the Settings (icon) from the Windows Start menu > System (folder) > Screen (icon) > ClearType (tab). 2. Select the Enable ClearType check box. Text Size To increase or decrease screen text size: 1. Tap the Settings (icon) from the Windows Start menu > System (folder) > Screen (icon) > Text Size (tab). 2. Using the supplied stylus, move the slider left to decrease text size or to the right to increase text size. Drawing and Writing The Notes application accepts input from the physical keypad, the on-screen keyboard and accepts handwriting and drawing using the supplied stylus. To draw or write freehand: ― Tap the Notes (icon) from the Windows Start menu. Janam Technologies LLC 5―3 Data Entry―Alpha, Numeric and Importing XM5 User Manual Audio—Voice Note Recording The Notes application provides an audio recording function to capture voice notes. To record voice notes: 1. Tap the Notes (icon) from the Windows Start menu. 2. Tap the Menu (icon) on the Tile Toolbar. 3. Select the Review Recording Toolbar option from the pull down menu. 4. Tap the red recording dot to begin voice notes capture. 5. Tap the square stop icon to stop voice notes capture. 6. Tap the speaker icon in the main screen area to select a voice note for playback. Janam Technologies LLC 5―4 Data Capture—Barcode Scanning XM5 User Manual 6 Data Capture—Barcode Scanning Introduction Janam XM5 mobile computers are available with two barcode scanning technology options, each of which is suited for varying end-user requirements, preferences and workspace environments. This chapter covers each of the available XM5 barcode scanning technologies. Therefore, some of the barcode functions described in this chapter may not apply to the XM5 Series device(s) you are using. For that reason, and depending on the configuration of your XM5 Series device(s), some information in this chapter may not apply. If you have questions about the scanning technology utilized by specific XM5 Series device(s), please contact your Janam dealer or Janam Technical Support at: +1.866.915.5311 Key Barcode Scanning Systems The two key data capture technologies offered are: Laser: Honeywell N4300 miniature laser scan engine Provides close-range and distance 1D barcode scanning and reads damaged or hard-toread barcodes. Imager: Honeywell N5600 Adaptus® Imager Provides omnidirectional 1D barcode scanning and two dimensional barcode (2D) scanning. IMPORTANT NOTE! The following Barcode Scanning Demonstration and Setup material provides Janam XM5 users with fundamental barcode scanning information to familiarize users with general scan functions. However, your devices’ barcode scanning functions will likely be governed and/or managed by a third-party application not covered in this manual. Janam Technologies LLC 6―1 Data Capture—Barcode Scanning XM5 User Manual A. Laser-Based Configurations This section is specific to XM5 Series configurations equipped with the Honeywell N4300 miniature laser scan engine. Please see Section B for barcode scanning with XM5 Series configurations with Adaptus Imager scanning technology. Overview Designed from the ground up the N4300 series delivers aggressive bar code scanning performance with new, advanced Honeywell decoding technologies. Poor quality codes can be scanned quickly and easily. Reading errors cost organizations time and money. The N4300 series engines achieve the highest reading accuracy among available laser scanning engines. Depth of Field for N4313 (Near Far Decode Range) Reference Range Code Size Near Distance Far Distance (in/cm) (in/cm) Code 39 4 mil 5in / 12.7cm 5.4in / 13.8cm Code 39 5 mil 4.1in / 11.7cm 7.2in / 18.4cm Code 39 7.5 mil 4.1in / 10.4cm 10.7in / 27.4cm Cede 39 10 mil 3.4in / 8.7cm 14.5in / 36.9cm UPC 13 mil, 100% 1.9in / 4.7cm 16.8in / 42.8cm Code 39 15 mil 1.9in / 4.7cm 19.9in / 50.4cm Code 39 20 mil (*) 25.5in / 64.6cm Code 39 40 mil (*) 26.7in / 67.5cm Code 39 55 mil (*) 31.8in / 80.8cm Janam Technologies LLC 6―2 Data Capture—Barcode Scanning Supported Bar Code Symbologies Symbology Symbology Name Type Codabar 1D Code 39 Symbologies Interleaved 2of 5 Nec 2of5 Code 93 Straight 2of5 Industrial Straight 2 of 5 IATA Matrix 2 of 5 Code 11 Code 128 GS1 128 Telepen XM5 User Manual UPC A UPC E EAN 13 EAN 8 MSI Plessey GS1 Databar Omnidirectional GS1 Databar Limited) GS1 Databar (Expanded China Post Trioptic Activating the Barcode Scanner When a scanning application is open, press any of the three orange Scan keys to activate the laser engine. Examples below show laser line positioning to provide you with the best scanning performance. Using Demos The XM5 comes preloaded with software applications that demonstrate the advanced features of the terminal. To access these demos, tap Start > Demos. • Select Scan Demo to verify decoding 1. Tap Start > Demos > Scan Demo. 2. Position the Mobile Computer over one of the Sample Bar Codes on paragraph 7.8. A range of 4-10 inches (10-25 cm) from the bar code is recommended. 3. Project the aiming beam by pressing and holding the Scan key. The Scan LED lights red. 4. Center the aimer beam horizontally over the bar code and highlight all of the vertical bars of the bar code. The aiming pattern is smaller when the terminal is held closer to the code and larger when the terminal is held farther from the code. Symbologies with smaller bars or elements (mil size) should be read closer to the unit whereas larger bars or elements (mil size) should be read farther from the unit. 5. When the bar code is successfully decoded, the decode LED lights green and the terminal beeps. Janam Technologies LLC Sample Bar Code You can use the following bar code to verify decoding: 6―3 Data Capture—Barcode Scanning XM5 User Manual B. 2D Imager-based Configurations Overview The XM5 with an N560X 2D imager scanner will read all popular 1D and 2D bar codes and supports omni-directional aiming and decoding. The imager scanner can also capture digital images, such as signatures and pictures. Full-area Imaging With full-area imaging the XM5 supports omni-directional aiming meaning that a positive read can be obtained from many positions. For details, see Omni-Directional Scanning Positions on paragraph 6.10. Depth of Field for N560X Symbology Near Distance Far distance (in/cm) (in/cm) ______________________________________________ 5 mil C39/128 3.0 (7.6) 6.1 (15.5) 10 mil C39/128 1.9 (4.8) 12.0 (30.5) 100% UPC 2.1 (5.3) 15.0 (38.1) 6.7 mil PDF417 2.5 (6.4) 6.6 (16.8) 10 mil Data Matrix 2.9 (7.4) 7.3 (18.5) 10 mil QR 2.6 (6.6) 6.9 (17.5) Supported Bar Code Symbologies Symbology Type 1D Symbologies Janam Technologies LLC Symbology Name Codabar Code 11 Code 128 Code 39 Code 93 / 93i EAN-8 EAN-13 Interleaved 2 of 5 Reduced Space Symbology UPC-A UPC-E MSI Trioptic Code Code 32 Pharmaceutical (PARAF) Matrix 2 of 5 Telepen GS1-128 ISBT 128 Straight 2 of 5 (Industrial) UPC-A (Coupon Code) UPC-E1 Straight 2 of 5 (IATA) 6―4 Data Capture—Barcode Scanning 2D Symbologies Composite Codes OCR Postal Codes XM5 User Manual Aztec Code Data Matrix MaxiCode MicroPDF417 PDF417 QR Code and Micro QR Code Han Xin EAN.UCC Composite Codablock F TCIF Linked Code 39 (TLC39) OCR Postnet British Post(BPO) Canadian Post Australian Post Japanese Post Planet Code KIX (Netherlands) Post China Post Korea Post 4-CB(4-State Customer Barcode) ID-Tag(UPU 4-State) To Decode a Bar Code 1. Tap Start -> Demos -> Scan Demo. 2. Position the Mobile Computer over one of the Sample Bar Codes on paragraph 6.9. A range of 4–10 inches (10–25 cm) from the bar code is recommended. 3. Project the aiming brackets by pressing and holding the Scan key. The Scan LED lights red. 4. Center the aimer crosshair over the bar code. The aiming beam should be oriented in line with the bar code to achieve optimal decoding; Omni-Directional Scanning Positions on paragraph 6.10. 5. When the bar code is successfully decoded, the decode LED lights blue and the terminal beeps. Janam Technologies LLC 6―5 Data Capture—Barcode Scanning XM5 User Manual Sample Bar Codes You can use the following bar codes to verify decoding: Code 39 PDF 417 Omni-Directional Scanning Positions The high-vis aiming pattern frames the bar code to provide you with the best scanning performance. ☞NOTE: To achieve the best read, the aiming beam should be centered horizontally across the bar code. Activating the Imager Scanner When a scanning application is open, press the Scan key to activate the image engine. Using Demos The XM5 comes preloaded with software applications that demonstrate the advanced features of the terminal. Image Demo and Scan Demo To access these demos, tap Start -> Demos. • Select Scan Demo to verify decoding, or Image Demo to verify imaging (not available on device using the N4313 laser engine). Janam Technologies LLC 6―6 Data Capture—Barcode Scanning XM5 User Manual Capturing Images The image-capture process is an intuitive, split-second operation for experienced users. By following basic guidelines, however, new users can easily develop their own technique and, with practice, quickly learn to adapt to different application environments. Image Preview When the imaging process is initiated, the touch screen displays a preview of the object. This is a live video image of what the imager is currently viewing and has a slightly degraded appearance compared to the captured image. This is normal; the captured image has a higher resolution. File Formats The Mobile Computer supports BMP file format only. Using ScanWedge Overview ScanWedge sends data from the installed scan engine(N4313 or N560X) to the foreground application as keystrokes or clipboard. The foreground application is the open software application whose window is currently active on the display. Enabling ScanWedge ScanWedge is enabled by default in XM5 Mobile Computers. To review or change ScanWedge settings tap the ScanWedge icon once Settings”. Janam Technologies LLC from the taskbar or go to “Start”, “Settings”, “System”, “Scanner 6―7 Data Capture—Barcode Scanning XM5 User Manual ScanWedge Menu Items Menu Item Notification Sub Item This item … Beep Enables and disables the audio notification for decode/data reception. There is one sound for success and another sound for an error. LED Enables and disables LED notification for decode/data reception. Vibrator Enables and disables Vibrator notification for decode/data reception. Specifies the method to use when sending the decoded message to the foreground application Keyboard Event Send decoded bar code data as Keyboard event(stroke) Clipboard Send decoded bar code data to clipboard(copy & paste) None Add nothing at end of decoded bar code data CRLF Add CRLF at end of decoded bar code data Space Add Space at end of decoded bar code data Tab Add Tab at end of decoded bar code data Auto Scan - Enable Auto Scan feature Continuous Scan - Enable Continuous Scan feature Setting - Open Scanner setting applet Disable Scanner - Disable Scanner trigger Close - Close Scan wedge Result Type Terminator The “Label”, Prefix/Suffix values can be any printable characters. Janam Technologies LLC 6―8 Data Capture—Barcode Scanning XM5 User Manual The “Transmit Barcode ID” is a user defined value. To assign a value tap the “Detail” tab. Please refer below picture: Janam Technologies LLC 6―9 Synchronizing the XM5 Series Device XM5 User Manual 7 Synchronizing the XM5 Microsoft® Windows Mobile Device Center and ActiveSync allow you to synchronize data between an XM5 and a PC. ActiveSync and Windows Mobile Device Center share some similarities. This User Guide includes setup for Windows Mobile Device Center. If you need additional assistance, please contact the JanamCare Service and Support Center. Synchronization—Exchange and Update Data Using Windows Mobile Device Center Create a User Profile 1. 2. 3. ― 4. Tap Start menu > Settings > Personal tab. Select Owner Information. Enter Identification, Notes and display Options information. Check the Identification information check box only if you prefer Owner Information to be the first screen to appear at start up. Tap ok to save changes. Setting Up and Deleting Partnerships A partnership enables you to automatically synchronize selected XM5 device files at startup when all synchronization conditions are met (see Note below). Alternatively, you can run synchronization manually (on command); copying only the files you want to sync. To set up a partnership to automatically sync files: 1. Connect your XM5 to your PC and power the XM5 device on. Synchronization requires any one of the following: ▪ ▪ A USB cable connected to a Janam USB Cradle with the XM5 docked in the cradle. A direct connection between the XM5 and the host PC, using a micro USB “B” cable. 2. 3. On your PC, select Start > Programs > Windows Mobile Device Center. At the Microsoft Mobile Device Center Home screen (on your PC), click Set up your Device. The Set Up Windows Mobile Partnership window appears. Select the data types that you want to synchronize and tap Next. 4. 5. The Set Up Windows Mobile Partnership (Device name) window appears. Use the default name or enter a new name. Janam Technologies LLC 7―1 Synchronizing the XM5 Series Device 6. XM5 User Manual Tap Set Up to proceed. Set Up will start, followed by synchronization between the PC and the XM5. The Windows Mobile Device Center screen on your PC will indicate synchronization progress. To add/remove files to/from the device: 1. Select (mouse over) Mobile Device Settings > Change content sync settings on the PC’s Windows Mobile screen. 2. The Change content sync settings window appears. Click the checkboxes of the desired file categories and click Save. Clicking Save will initiate file synchronization automatically. Sync verification is provided as the time of the last sync, displayed at the bottom-left of the host PC’s Windows Mobile screen. To change partnership (connection) settings: 1. Open the Windows Mobile Device Center control panel. 2. Move the mouse icon over the Mobile Device Settings option, revealing the sub-menu of options. 3. Click Connection Settings. 4. Apply your preferences and click OK. To end a partnership: 1. Unplug the USB cable from the PC to break the ActiveSync connection. 2. Open the Windows Mobile screen on the PC. 3. Click Mobile Device Settings and click End a partnership from the pop-up screen. 4. From the resulting End a partnership screen, select the partnership to be deleted click the End partnership button. 5. Click Yes on the resulting confirmation screen. 6. If there is a Synchronized Files folder, a Confirm Folder Deletion screen will appear. Tap Yes to proceed. Janam Technologies LLC 7―2 Wireless Wide Area Networking (WWAN) XM5 User Manual 8 Working with Wireless Wide Area Networking (WWAN) Chapter 8 Introduction Wireless connectivity is a cornerstone of the XM5 device functionality, providing users with the ability to make and take wireless telephone calls, send and receive text (SMS) messages, send and receive email along with easy access to the Internet. Phone Fundamental to the XM5 connectivity is the integrated wireless telephone function and a removable SIM (Subscriber Identity Module) card slot which enables the exchange of SIM cards between different compatible mobile devices. Refer to Chapter 3 for more about SIM card installation. With a SIM card installed and wireless subscription service activated, the XM Series device is ready to make and receive phone calls, keep track of calls and send or receive text messages. Depending on the features offered by your wireless service provider and/or opted for, the XM5 may also provide additional services such as voice mail, call forwarding, caller ID and more. Phone Function To activate Phone function: ― From the Windows desktop Start menu, tap the Phone (icon) or press the green phone icon button on the device keypad. To set Phone options: 1. Tap the Menu (icon) on the Phone screen. 2. Select “Options” from the resulting menu. Janam Technologies LLC 8―1 Wireless Wide Area Networking (WWAN) 3. XM5 User Manual From each of the top Tabs (Internet, Sounds and Security), select the preferred Options from the pull-down menus. Selectable Options Tabs include: Sounds • Ring type • Ring tone • Keypad Sound options may be sampled by tapping the screen’s Play () and Stop () buttons. Internet • Internet Calling Security • PIN Security Services • Call Barring • Caller ID • Call Forwarding • Wall Waiting • Voice Mail and Text Messages • Fixed Dialing Volume and Alert Adjustments The Volume Up and Volume Down button controls each perform multiple functions for device volume and phone volume. To adjust device volume: 1. Press either the Volume Up or Volume Down button to open the Volume control screen. 2. Select Device or Phone by tapping the corresponding slider on the screen. 3. Pressing the Volume Up or Volume Down button increases or decreases the selected volume in preset increments. Janam Technologies LLC 8―2 Wireless Wide Area Networking (WWAN) XM5 User Manual — Pressing the Volume Down button from its lowest position toggles the control to the On, Vibrate and Off buttons, enabling the choice of these functions for the Device and the Phone. — Pressing the Volume Down button from this position toggles down through the On, Vibrate and Off selections. Pressing the Volume Up button up through the On, Vibrate and Off selections. Muting/Speaker/Hold/Add Call/Contacts Once a call has been answered call control options appear on the XM5 screen to mute, place on speaker, hold, add a call and show contacts. Using a Headset For workplace efficiency, privacy and/or hands-free safety and convenience, a wired or Bluetooth headset with microphone can be used in lieu of conventional integrated voice input/output functionality. To use a wired headset: 1. Locate the wired headset with microphone receptacle cover on the right-hand side of the device. 2. Lift the cover and insert the headset’s plug into the uppermost (black) receptacle. To use a Bluetooth Headset: To use a Bluetooth headset, refer to the instructions included with the headset to be used and to Chapter 11 for more on Bluetooth device pairing. Janam Technologies LLC 8―3 Wireless Wide Area Networking (WWAN) XM5 User Manual Making Calls Wireless telephone calls may be initiated on the XM5 series device in a variety of ways, including manually dialing the telephone number, using the on-screen dial pad, selecting a number from stored Contact information or selecting a number from the automatically stored list of recently placed and answered calls. To manually dial a telephone number: 1. Using the supplied stylus, navigate to the Main Phone Dial Pad by tapping the Phone (icon) on the Windows Start screen. 2. Tap the number keys of the desired telephone number. Use the left-facing arrow button to correct dialing errors. — If the keyed number matches a number associated to a stored Contact, the Contact will be displayed. Otherwise, the “No Matches: [dialed number]” message will appear. 3. Initiate dialing by tapping the green on-screen Talk button or press the green handset button on the physical keypad. 4. End the call by tapping the red on-screen End button or by pressing the red handset button on the physical keypad. Calling Stored Contacts The XM5 stores and organizes Contact information efficiently, making it easy and convenient to initiate telephone dialing from that stored information. To call a Contact stored on the device: 1. Tap the Contacts (icon) on the Windows Start screen. 2. The Contact to be dialed can be found and selected in two ways. a. Scroll through the alphabetically-ordered Contact list and select a Contact by tapping it. b. Activate the on-screen keyboard, tap the window labeled Enter a name… and begin typing the desired Contact name. Contacts containing a string of information matching the letters you enter will instantly populate the screen. The selection of matching Contacts displayed will shrink quickly as your entered string of letters becomes longer and more complete and as such, more accurate. 3. Tap the desired Contact name when it appears. 4. Tap Call. Calling Recently Dialed or Call-Received Numbers Re-dialing a recently made call or returning a recently received call is common practice and is simplified by the XM5. Janam Technologies LLC 8―4 Wireless Wide Area Networking (WWAN) XM5 User Manual To call a number associated to a recently placed or answered call: The two most recent calls made or received will appear in the window above the phone dial pad. Use the supplied stylus along with the right-hand scroll slider to display additional recent calls. 1. Tap the desired call from the list of recent calls. If the number exists in the device’s stored contacts, the contact will be displayed. Otherwise, a number information screen titled “Unknown” will appear. In either instance, the default, highlighted action displayed will be “Call”. 2. Tap Call to dial the displayed number. Alternatively, tap Send text message to communicate with the selected number via text. — Refer to Text Messaging section of this Chapter for more information on text messaging. Speed Dialing Up to 99 stored Contacts can be assigned a Speed Dial number, after which, calls can be initiated to the contact with just two stylus taps. Assigning a Speed Dial number to a Contact: 1. Using the supplied stylus, tap the Speed Dial button on the telephone dial pad to display the Speed Dial number list. 2. Tap the Menu (icon). 3. Tap New. 4. Locate and Select (tap) a stored Contact for assignment to a Speed Dial number which will bring up the Speed Dial information screen. 5. If the default Speed Dial list Location is acceptable, tap OK. Otherwise, select a preferred Speed Dial list Location number from the Location pull-down menu. Text (SMS) Messaging Text (SMS, Short Messaging System) Messaging is a fast convenient a means of sending and receiving brief (up to 160 characters) character-based messages, using the XM5 device’s wireless telephone number as the message portal. Text messaging is functional only between text message-enabled wireless telephone devices. Text messages may not be sent to or received from conventional landline telephone numbers. Typically, Text Messaging is provided by your wireless telephone service provider as an integral or optional part of a service subscription. Check with your provider for details about text service, including text message limitations, fees, etc. The following applies only if text messaging is part of your wireless telephone subscription service. Janam Technologies LLC 8―5 Wireless Wide Area Networking (WWAN) XM5 User Manual Launching text messaging: — Tap the Text (icon) from the Windows Start screen to open the default Text Messages Home/Inbox screen, first displaying stored text messages with a message preview. To view an existing (stored) message: 1. Tap the message to be viewed. When opened, the message and the related Conversation (message thread) will appear. 2. Tap OK to return to Text Message Inbox. To create, save and/or send a new text message: 1. Tap the Menu (icon) Text Messages Home/Inbox screen. 2. Tap New from the menu. 3. 4. 5. Tap the highlighted To: box to select a recipient from the device’s stored Contacts or enter the recipient manually by keying in the Contact name or mobile telephone number. Tap the text Message content area and enter message. — With content entered, the message can be saved as a Draft by tapping OK and Yes. Tap the Send (icon) to send the text message. Janam Technologies LLC 8―6 Wireless Wide Area Networking (WWAN) XM5 User Manual Connecting to the Internet using WWAN: 1. 2. 3. 4. 5. 6. Tap “Start”, “Settings”. Tap “Add a new modem connection” Select modem type “Cellular Line (GPRS) Enter access point name provided by your service provider. Tap OK to complete. Connecting to the internet through Internet Explorer should be available. Janam Technologies LLC 8―7 XM5 Camera XM5 User Manual 9 Camera Introduction The XM5 features an integrated camera for capturing still photographic pictures and video which is useful for documentation of inventory locations, product damage or work procedure and more. Camera Function To activate the Camera: 1. From the Windows Start menu, tap the Pictures & Videos (icon). 2. Tap the Camera (icon) or the Camera button to enter the default still picture Camera Viewfinder mode. Tip: It is from the Pictures & Videos screen that all still and video camera functions, adjustments and options are set. The Pictures & Videos screen is also the portal from which pictures and videos can be selected for viewing, editing, sharing. Janam Technologies LLC 9―1 XM5 Camera XM5 User Manual Camera Adjustments and Options Still pictures (default setting) Resolution (still mode) – 320x240, 640x480, 1280x960 1MP – 1600x1200 2MP – 2048x1536 3MP – 2592x1944 5MP Modes – Normal (single shot still pictures) – Burst (continues shooting of still pictures – Timer (delayed shutter release) Video recording – QVGA 320x280 or – VGA 640x480 – – – Brightness (+- 2 f-stops) Flash (On, Off) Picture quality/compression High Normal Low Full Screen (viewfinder) File Options – File name prefix – Save-to location To make camera Adjustments and set Options: 1. From the Pictures & Videos screen, tap the Camera (icon) or the Camera button to enter the default still picture Camera Viewfinder mode. 2. Tap Menu (button). 3. From the menu, tap the Adjustment/ Option to change. 4. Tap the desired setting from the resulting menu. Janam Technologies LLC Tip: The film icon indicates that you are in the still picture mode. 9―2 XM5 Camera XM5 User Manual To activate the Camera: 1. From the Windows Start menu, tap the Pictures & Videos (icon). 2. Tap the Camera (icon) or the Camera button to enter the default still picture Camera Viewfinder mode. Camera Function Taking Pictures and Recording Video To take a still picture: 1. With the Camera function activated and in the default still picture Camera Viewfinder mode, compose the picture on the device screen. 2. To capture the picture, press the enter key from the hard keypad or the keyboard from the soft input panel. The device screen will become the picture monitor and the captured picture will appear on the screen. 3. Tap the OK or Camera button to return the device to the picture capture mode. Janam Technologies LLC 9―3 XM5 Camera XM5 User Manual To record video clips: 1. With the Camera function activated and in the default still picture Camera Viewfinder mode, tap Menu > Video. 2. Press the enter key to begin video recording . 3. Press the enter key again to end video recording. Tip: The video icon indicates that you are in the video recording mode. Note: The default duration of individual video clips is limited to 30 Seconds. Optionally, clip duration can be set to either 15 Seconds or No Limit. The selected clip duration limit, counting up, is displayed in the lower right-hand corner of the video viewfinder frame. The clip recording time, counting up, is displayed in the lower left-hand corner of the video viewfinder frame when each recording segment begins. Janam Technologies LLC 9―4 XM5 Camera XM5 User Manual Camera Function To view camera pictures or video clips: 1. From the Windows Start menu, tap the Pictures & Videos (icon). or From the Camera menu, tap Thumbnails. 2. Tap a picture thumbnail or video icon to view it. 3. Tap OK to return to the Thumbnail menu. Picture and Video Management The Menu buttons located on the Thumbnails and Picture Viewing screens provide a variety of picture and video controls. They include: Zoom Play Slideshow Set As Home Background Beam Picture Send Save Janam Technologies LLC Edit – Crop Properties Options – Email Size – Rotate Picture Direction 9―5 Wireless Local Area Network (WLAN) XM5 User Manual 10 WLAN (802.11 a/b/g/n) Radio The XM5 has a 2.4 GHz and 5GHz 802.11 a/b/g/n WLAN (Wireless Local Area Network) radio. The radio is interoperable with other 802.11a/b/g/n, Wi-Fi compliant products including wireless controllers, access points (APs), workstations via PC card adapters, and other wireless portable devices. By default, the 802.11a/b/g/n radio is powered-off (i.e., disabled) “out of the box”. Once enabled the state of the radio will survive subsequent soft and hard resets. The next step is to configure the connection parameters of the radio to connect to a wireless network. Configuring the WLAN Radio The WLAN radio is configured using the Portable Wireless Configuration Utility (PWC) from the “Start” screen. 1. Tap PWC 2. Tap “Power On” 3. Tap “Config” 4. Select the desired WLAN Profile or tap “New” to create your unbroadcasted wireless profile. 5. Enter your PreShared Key/Credentials. Janam Technologies LLC 10―1 Wireless Local Area Network (WLAN) XM5 User Manual 6. Configuration is complete and accurate when the “Status” changes to “COMPLETE”. The “Status” panel provides usefull information about your wireless connection including the channel, Band and signal strength (RSSI). The IP tab shows your network configuration Janam Technologies LLC 10―2 Wireless Local Area Network (WLAN) XM5 User Manual The “Settings” tab allows access to higher level radio controls. The default values have been derived and set to accommodate the majority of environmental conditions and should not be changed without a good working knowledge of the subject matter. Janam Technologies LLC 10―3 Bluetooth XM5 User Manual 11 Bluetooth Overview Bluetooth is a short-range wireless communications technology. Devices with Bluetooth capabilities can beam to exchange information over a distance of about 10 meters (30 feet). Unlike infrared, you don't need to line up the devices to beam information with Bluetooth. You can even beam information to a device in a different room, as long as it's within range. You can use Bluetooth as follows: • Beam information, such as files, appointments, tasks and contact cards, between devices that have Bluetooth capabilities. • Use a Bluetooth service. Once you connect to another device or computer using Bluetooth, you can locate and use any of the services available on that device. ☞NOTE: In order to conserve battery capacity, the Bluetooth, module is off by default. ☞NOTE: Suspending the terminal powers off the Bluetooth radio and drops the Bluetooth connection. When the terminal resumes, it takes approximately 10 seconds for the Bluetooth radio driver to re-initialize the radio. Janam Technologies LLC 11―1 Bluetooth XM5 User Manual Enabling the Bluetooth Radio 1. 2. 3. 4. Tap on the Bluetooth icon in in “Start”, “Settings”. The Bluetooth Manager is launched. Tap “Mode” to enable the radio Tap “Add new device”, the Bluetooth Manager will search for discoverable devices. Pairing Bluetooth Devices 1. Tap on the desired device in the Bluetooth Manager. 2. Tap the Next Button on the bottom Janam Technologies LLC 11―2 Bluetooth XM5 User Manual 3. Enter 4 digit passkey and tap the Next button. 4. Enter the same passkey on the other device when prompted. 5. Pairing is complete. 6. The paired device will show as disconnected while viewing the Bluetooth Manager. 7. For devices like serial printers select “Com Ports” and assign a “New Outgoing Port” Janam Technologies LLC 11―3 XM5 Demos XM5 User Manual 12 Using the XM5 Demos The XM5 comes preloaded with these helpful demonstration and troubleshooting applications. Scan Demo – Upon successful decode provides the barcode type and scanned result. 1. Basic : Allows setting of trigger mode, Auto/Continuous. Decode Mode: Standard, the scan engine looks for any bar code within range. Quick Omni: The scan engine scans only those bar codes within the aiming beam or aiming pattern. Clipboard: Place the data into the system clipboard and 'paste' the data into whatever window control has keyboard focus. Keyboard Event: Putting scanned data into the keyboard buffer one at a time. Terminator: allows suffix of CR/LF, TAB or space. Janam Technologies LLC 12―1 XM5 Demos XM5 User Manual 2. Notification: Sets the enable/disable of scan beep, LED and vibrator indicators. 3. Symbologies: Allows enable or disable of symbology types. 4. Wedge: Allows input of up to 8 characters as a prefix or suffix to the decoded data. Janam Technologies LLC 12―2 XM5 Demos XM5 User Manual Image Demo – Overview The Imaging Demo demonstrates the imaging functionality of the on-board image engine, such as picture formatting, saving and printing. To Capture Images 1. Tap Start > Demos > Imaging Demo. The Imaging Demo opens. The screen is blank until you press any of the three scan buttons. 2. Press any SCAN key to activate the image engine. A preview of the image appears on the screen. The previewed image has a degraded appearance. This is normal. The previewed image is not the same as the captured image; the captured image will not have the same degradation. 3. Release the button or trigger. The captured image appears on the screen. To Save Images You can save images two ways: Save and Save As. Save saves one image with a default name. Save Tap Save > The image remains on the screen and is saved as a grayscale .bmp with the name "captured.bmp" in the My Documents folder. Janam Technologies LLC 12―3 XM5 Demos XM5 User Manual Print Demo – Overview The Print Demo test-prints a sample barcode or receipt to compatible Bluetooth printers. The barcode and receipt files that print are formatted for their respective printer hardware. Accessing the Print Demo Tap Start > Demos > Print Demo. The Print Demo window opens. GPS Demo – Overview The Janam XM5 provides integrated GPS functionality engineered to meet the needs of mobile handheld applications. Fast satellite acquisition and excellent tracking performance is combined to offer accurate navigation information. In order to acquire the GPS data, third party navigation software is required. For Demo purposes, the XM5 has an application from u-blox installed in the Start, Demos Folder, called GPS Demo. For additional information from u-blox visit http://www.u-blox.com It may take a few minutes to acquire satellite signals and the best results will be obtained when the XM5 is positioned outside with a clear and unobstructed view of the sky. When indoors or without a clear view of the sky, the acquisition time to get a fixed position will take much longer or the GPS signal may be completely unavailable. GPS performance can also be negatively affected if your vehicle has thermal glass windows, so position your XM5 where there is a clear view of the sky. In addition, Janam’s XM5 Series supports Assisted GPS (A-GPS) modes, which significantly increases the time to acquire a fixed position, also called Time To First Fix (TTFF). Visit http://www.u-blox.com for more information. Janam Technologies LLC 12―4 XM5 Demos XM5 User Manual Also the power to the GPS module will turn off when the XM5 suspends, so after resuming there could be a delay in receiving the GPS data depending on where the unit is located upon resuming. To set up the GPS function: The XM5 Operating System manages access to the GPS module and can allow multiple programs to simultaneously access GPS data. The default settings are as described below: 1. From the Windows Start screen, tap the Settings (icon) > System (folder) > GPS (icon). 2. Under the Programs Tap, the GPS program port (or virtual port) will be set to None. 3. Under the Hardware Tab, the GPS hardware port will be set to COM5 and Baud rate of 9600. Janam Technologies LLC 12―5 XM5 Demos XM5 User Manual Ping Demo – Overview The Ping Demo is a basic Internet program that allows a user to verify that a particular IP address exists and can accept requests. To setup the Ping Demo 1. Tap Start > Demos > Ping Demo. The Ping Tool opens. Ensure you have a WiFi connection using the Portable Wireless Configuration utility (chapter 10). The Ping tool is default to send requests to www.google.com. 2. The “Options” tab provides a log to file and “Ping Options” provides setting to ping continuous. Janam Technologies LLC 12―6 XM5 Demos XM5 User Manual NFC Demo – Overview Near Field Communication (NFC) is a set of ideas and technology that enables smartphones and other devices to establish radio communication with each other by touching them together or bringing them into proximity, typically a distance of 10 cm (3.9 in) or less. It operates within the globally available and unlicensed radio frequency ISM band of 13.56 MHz on ISO/IEC 18000-3 air interface and at rates ranging from 106 kbit/s to 424 kbit/s. 2006). The NFC Forum defines four types of tags that provide different communication speeds and capabilities in terms of flexibility, memory, security, data retention and write endurance. The Forum also promotes NFC and certifies device compliance and if it fits the criteria for being considered a personal area network. Using the NFC Demo The NFC Demo demonstrates the basic NFC capabilities of the terminal and is not intended as a functional business solution. NFC Tag Reading 1. Start the NFC Tag Demo from “Start”, “Demos”. 2. To read information from a passive tagged item hold the NFC tag close to the scanner window at the top of the XM5 3. Tap the “Start” button to read and populate the application data fields. Janam Technologies LLC 12―7


