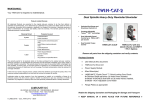
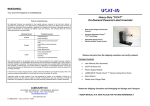
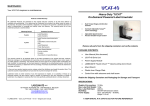
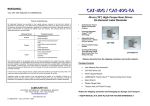
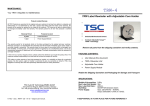
1
MAINTENANCE:
MC-11
Your MC-11 requires no maintenance.
MINI-CAT Label Rewinder with Adjustable Core Holder
Product Limited Warranty
All Labelmate Products are warranted to the original end-user customer to be free from defects in
materials and workmanship. If it is determined by Labelmate that a product has failed under the terms of
this warranty, the product will be repaired or replaced at no charge to the customer. Labelmate reserves all
rights to determination of coverage and liability under this warranty. The warranty period for all new
Labelmate products is outlined below:
Warranty Period
Products Covered
5 years
Label Rewinders
Label Unwinders
3 years
Label Counters (mechanical parts
only)
Label Slitters (mechanical parts
only)
Label Dispensers
Printer Mechanisms
1 year
Power Supply Modules
Counter modules
Encoders
Any products not specified above.
The warranty period for all products starts on the date purchased by the original end-user customer.
Warranty coverage is not transferable with ownership and will terminate immediately upon rental, resale or
any other change in ownership. This warranty does not cover repair to any product which is damaged, has
been modified, is missing parts, or has been opened or repaired by any unauthorised person. Use of any
unauthorised accessory or attachment will void coverage. Purchase documentation should be retained for
coverage verification.
In the event your product requires service, please contact the distributor you bought the product from. The
customer assumes responsibility for all cost and risk incurred in transport for service.
Labelmate makes no other warranty of any kind expressed or implied, or to suitability or fitness for a
particular purpose. No other person, agent or reseller is authorised to give any warranties on behalf of
Labelmate. Any obligation to warranty other than that specifically addressed above is hereby disclaimed.
LABELMATE LLC
69 AVENUE ALPHONSE XIII, 1180 BRUSSELS, BELGIUM
TEL: +322.375.69.60 – FAX: +322.375.38.96
[email protected]
www.labelmate.com
© LABELMATE – User_MC-11 – 02/07
•
Switched Bi-Directional Control.
•
Constant Adjustable Torque™
"CAT" Technology.
Remove all parts from the shipping container and verify contents.
Package Contents
•
User Manual (this document)
•
MC-11 Rewinder Unit
•
Adjustable Core Holder
•
Power Supply Module
Retain the Shipping Container and Packaging for Storage and Transport
● KEEP MANUAL IN A SAFE PLACE FOR FUTURE REFERENCE ●
SPECIFICATIONS:
Max. Label Roll Weight:
Max. Label Roll Size:
Start/Stop:
Power Supply:
REWINDING LABELS:
3Kg (6.6Lb)
220mm (8.7")
ON/OFF/ON Direction Switch
Input: 220-240VAC – 50-60Hz.
Output: Selectable 1.5VDC to 12VDC.
Rewind labels onto any core 25-101mm diameter.
1. Loosen the three (3) black Lock Levers on the back of the Core Holder Flange Plate.
2. Grasp the front Flange Plate with one hand and the rear Flange Plate with the other.
Notice the rear Flange Plate has convenient cutouts for your thumb.
3. Rotate the Plates in opposite directions until the three (3) Core Fingers move to the
!
WARNING
This Product is for indoor use only.
Not for use in wet locations.
SET-UP:
1. Place the MC-11 so that the three (3) Rewind Fingers are perpendicular to the web of
the labels to be rewound. The MC-11 is bi-directional, and can be operated in either
direction.
2. Verify that the (ON-OFF-ON Direction) Switch on the rear of the MC-11 is in the OFF
(0) position.
3. Insert the Power Supply Cord into the Power Jack on the rear of the MC-11.
4. Set the VOLT CHANGE SW slide switch on the AC/DC Adapter to “4.5” as an initial
setting.
5. Plug the AC/DC Adapter into a suitable electrical outlet. The AC/DC Adapter can be
left plugged in at all times.
6. The Rewinder has a combination Power and Direction (ON-OFF-ON Direction)
Switch on the rear panel. See the photo below. The Center Position of the Switch is
"OFF" (0). To make the Rewinder run to the right (looking from the rear of the
Rewinder), press the Power / Direction Switch in the direction of the right arrow. To
make the Rewinder run to the left, press the Power / Direction Switch in the direction
of the left arrow.
center next to each other.
4. Slide an empty cardboard core ONLY PART WAY over the Fingers.
5. Now rotate the Flange plates in the opposite direction to expand the Fingers against
the inside of the cardboard core. While you hold the Flanges so the Fingers are tight
against the inside of the Core, move one of the Locking Levers to the LOCK position.
NOTE: If one or more of the Locking Levers is up against the Hub and won’t lock,
pull up on the Lever (away from the Flange Plate) and reposition it.
6. Now move the other two (2) Locking Levers to the LOCK position.
7. Slide the cardboard core all the way up against the Flange Plate.
8. Pull the label web to the cardboard core and use a piece of tape to secure the label
web.
9. Adjust the position of the MC-11 if necessary so it is square with the label path.
10. If you are using the APG-MC Adjustable Paper Guide, move the Arm into position to
guide the outer edge of the labels and lock it into place.
11. Place the MC-11 (ON-OFF/Direction) Switch to the ON position in the desired
direction of operation, left or right.
12. Start the printer and observe that the labels are being rewound correctly. You can
adjust the (VOLT CHANGE SW) Slide Switch on the AC/DC Adapter to provide more
or less rewind force as desired.
13. When rewinding is finished, place the MC-11 (ON-OFF/Direction) Switch to the OFF
(0) position.
14. If the APG-MC Adjustable Paper Guide is in use, unlock and move the Arm out of the
way.
15. Slide the cardboard core and the wound labels off the MC-11. You do not need to
loosen the three (3) Locking Levers unless you want to use a different diameter core.
UNWIND FEATURE:
To use the MC-11 as an Unwinder, place the VOLT CHANGE SW to the “1.5” position and place the
(ON/OFF/ON Direction) Switch in the reverse direction to provide resistance to the roll of labels you
wish to unwind.