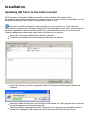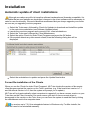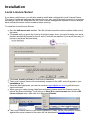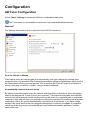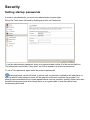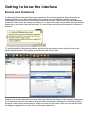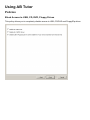
1
User Guide
7.2.8
Introduction
1-1 What is AB Tutor?
1-2 Requirements
1-3 Pre-installation Checks
1-4 Installation Planning
Installation
2-1 Installation on typical school architecture
2-2 Download and install - Windows
2-2a Download and install - Mac
2-2b Download and install - iPad
2-3 Software Activation
2-4 Updating AB Tutor
2-5 Automatic Update of clients
2-6 De-Installation
2-7 Remote Deployment Utility
2-8 Local Licence Server
AB Tutor Configuration
3-1 Configuring your machines
3-2 AB Tutor Configuration
3-3 Configuration File
3-4 Startup switches
Security
4-1 Passwords Introduction and Access Levels
4-2 Startup Passwords
4-3 Setting Startup Passwords
4-4 Connection Passwords
4-5 Additional Security
The Interface
5-1 Overview
5-2 Understanding the Icons
5-3 Console, as seen by a Tutor
5-4 Icon Watch View
5-6 Events and Violations
5-7 Administrative Tools
Using AB Tutor
Computer and Command Menus
6-1-1 Find, Connect, Rename, Remove
6-1-2 Power on Computers
6-1-3 Live Watch
6-1-4 Give Demo
6-1-5 Exhibit
6-1-6 Chat
6-1-7 Audio Chat
6-1-8 Send Message
6-1-8a Snapshot and Record
6-1-9 Request Student Name
6-1-a Lock
6-1-b Send Files
6-1-c Transfer Files
6-1-d Collect Files
6-1-e Logon
6-1-f Logoff
6-1-g Reboot
6-1-h Shutdown
6-2 Application launch
Policies
6-3-1 Policies - Introduction
6-3-2 Creating Policies
6-3-3 Block Internet Access
6-3-4 Block Websites
6-3-5 Block Applications
6-3-6 Block External Drives
6-3-7 Block Printers
6-3-8 Enable Privacy
6-3-9 Keyword Monitoring
6-3-a Enable Logging
6-3-b Mute Sound
6-3-c System Actions
6-3-d Lock Computer
6-3-e Screen Capture
6-3-ea Groups of Policies
6-3-eb Set System Proxy
6-3-f Applying a Policy
6-3-g Viewing a Log File
6-3-h Clearing Policies
6-4 Groups
6-5 Tools
6-6 Assessment
6-7 Remote Deployment Utility
8-1 Terminal Server support
License Mangement System
9-1 LMS Introduction
9-2 Creating an Account
9-3 Purchasing Licences
9-4 Trial Download
9-5 Managing Licences
Troubleshooting
a-1 Frequently Asked Questions
a-2 Error Codes
a-3 Speed Optimisation
Appendices
b-1 Deploying through GPO
b-2 Registry Restrictions
b-3 Connection Problems
Copyright
Manual Copyright © 2000-2014 AB Software Consulting Ltd. All rights reserved.
AB Software Consulting Ltd. reserves the right to revise this document and to make changes from time to time in the content hereof without
obligation to notify any person or persons of such revisions or changes. The software described in this document is supplied under a licence
agreement and is protected by UK and international copyright laws.
Any implied warranties including any warranties of merchantability or fitness for a particular purpose are limited to the terms of the express warranties
set out in the licence agreement.
Software Copyright © 2000-2014 AB Software Consulting Ltd. All rights reserved.
Trademarks
AB Tutor is the registered trademark of AB Software Consulting Ltd. Windows, Windows NT/95/98/ME/2000/XP/Vista/7/8/2003/2008 are trademarks
of Microsoft Corporation. Other products, trademarks or registered trademarks are the property of their respective owners.
Introduction
What is AB Tutor?
AB Tutor is a networked classroom, instruction, monitoring and teaching tool that lets you train
students in a networked classroom or lab, simply, effectively, at a very affordable price. Teachers,
trainers and administrators can use the software to easily control, manage, monitor and support
their students.
This is a list of the key features of AB Tutor
Cross platform
Windows, Mac and Linux tutor applications
Windows and Mac client applications
Broadcast and share
Broadcast tutor screen to students
Show static, locked, screen to students
Show a student's screen to others
Annotate live demo
Record tutor screen and audio for lesson playback
Monitor
Simultaneous watch by multiple tutors
Network efficient sizeable thumbnail views, with changeable refresh times
Real-time remote screen watch
Create different thumbnail tab view for each group
Monitor running applications and files
Identify what site/file the student is working on
Monitor and log student activity (applications, printing, websites and keystrokes)
Take time and name-stamped snapshots of student activity
Record and play back student screen activity
Violation notification
Inform tutor when specific keywords are typed
Automatically take snapshots of violations
Option to launch remote screen recording upon violation
View all violations, screenshots, user details and context
Notify teacher if student visits specified sites
Remote Control
Take over remote mouse and keyboard
Share control of applications with student
Launch and close down applications remotely
Automatically launch websites or open files remotely
Set policy to immediately prevent application from running
Lock remote screen, keyboard and mouse, with option to blank screen
Create customised lock screen messages (for lesson plans)
Classroom Management
Power up remote machines
Remote logon
Remote logoff and shutdown
Schedule remote shutdown
Block printing
Auto-connect to computers
Auto-connect when connection lost
Create defined classroom groups of computers and/or users
Automatically apply different policies to different groups of users
Import computers and users from active directory
Either connect to all clients or only to pre-set groups
Internet Control
Block ports to prevent any Internet activity
Limit web browsing to specified sites
Black-list specific sites
Filter by keyword/wildcard
Application control
Limit applications that can be launched
Specify applications that cannot be run
Close down inappropriate applications
Communication
One-to-one and one-to-many text chat
One-to-one and one-to-many audio chat
Broadcast text messages
Polling and examination
Create + distribute one-question polls to remote computers
Results of poll collected in real-time
Create and distribute more complex exams to remote computers
File management and distribution
Distribute files to student machines
Collect files from students
Remote file management
Administrative tools
Detailed inventory of remote hardware/software
View and manage remote services and processes
Administer remote machines via command prompt
Optional privacy setting
Inform users when AB Tutor is running
Let users know when they are being watched
Allow user to block a watch
Introduction
Requirements - Workstation/server environment
As AB Tutor is a complex piece of software, we cannot guarantee that it will work perfectly
with every possible configuration of hardware, software and security. For this reason, we
recommend that you trial AB Tutor for 30 days to check that it is compatible with your
environment. Please contact [email protected] if you encounter any issues at all during the
trial period.
Operating system:
Microsoft Windows XP, 2003, 2008, Vista, Windows 7
Mac OSX 10.6 (Leopard) or newer
No special requirements are necessary to run the AB Client in a Windows Terminal Server
environment. Any system that supports normal Windows Sessions is supported (e.g. Citrix,
nComputing)
Network and access:
TCP/IP and UDP network protocol running Windows Sockets 2.0, using static or dynamic
IP addresses
TCP and UDP port 5151and an alternate port, 5152, must be available and not blocked by
firewalls etc. (See Appendix II)
Multicast option enabled in all routers and firewalls if computers are situated on different
subnets and if you want to connect over a wireless network.
Unrestricted access to the Internet for registration and licensing. You must make sure the
domain name www.abtutor.com is not blocked and that you do not allow any filters to
restrict access to this site.
Introduction
Pre-installation checks
There are a few pre-installation checks you should run through before you install AB Tutor to
make sure that the software runs correctly:
1. For installing, activating the software and for setting and changing passwords you need
administrative rights on the tutor and the student computers.
2. You have details of all filtering, policy setting, security, firewall and virus protection software
(including windows firewalls and windows Defender) running on your computers and you
know how to configure these to allow software to work through them. You need to set up
these programs to allow communication via TCP and UDP on ports 5151 and 5152).
3. You have got an open Internet Connection on the tutor machines (this is required for
software activation and licensing). If you do not allow the tutor machines access to the
internet, please contact [email protected] for information on activating AB Tutor without
connecting to the Internet.
4. If you connect to the Internet via a Proxy Server, do you have details of that server and the
port through which it connects? (Ideally you need to be able to create a special AB Tutor
Account to allow the software to connect to the Internet through your proxy server. That way
you can hardcode these settings into the tutor program and not use each teacher proxy
server details)
5. There is a working network connection between the computer on which you want to install
the tutor program and the client/student machines you wish to monitor.
6. You have details of any software such as Deep Freeze and know how to exclude
files/folder and registry settings from being re-set by such software.
Introduction
Installation Planning
AB Tutor has a number of powerful features, and we would recommend that you spend some
time planning how it will be deployed. You need to think carefully about where the software will
be installed, the level of access you wish to give to different sets of users, and whether you wish
to limit access to specified groups and functions.
You may find it helpful to run through the following questions in your planning:
Should you install the client program on the computers running the tutor
console?
It is often useful for an administrator to be able to connect to and remotely maintain a machine
running the AB Tutor program. For that reason, we recommend that you install both the tutor and
the client program on the tutor machine. However, if you do so, you will need to make sure that
you open up port 5152 as well as 5151.
You may experience problems when "Scanning" your network for computers if the client program
is also installed and running. If you connect to classroom groups and not the "find <all>" group,
then running the tutor and client on the same machine will not be a problem.
We strongly recommend that you do not install the tutor and client program by default on all client
computers as this could pose a security risk if students get easy access to the tutor program.
What can AB Tutor do?
Carefully look through the features that AB Tutor offers - make sure you understand the power of
the software.
Who do you want to allow access to AB Tutor and what features should
they be allowed to use?
We would recommend that you do not allow all staff administrative rights to AB Tutor. Instead, we
recommend you do the following:
create classroom groups
set restrictions on each of these groups - these restrictions will determine what functionality
is available to anyone who logs on with tutor level access (you may choose to disable the
policy manager for tutors, and only allow them to apply policies that you have created.)
create policies that you wish to be available to tutors
finally set different tutor and admin logon passwords
What groups should you divide your network up into?
Unless you have groups created, Tutor users will be unable to see any of the machines on the
network. Administrators will potentially have access to all machines, and it will not be obvious
which machines are in which classroom. We strongly recommend that the administrator user is
only available for setup and administration and that only the tutor user is available for normal
operation.
Instead of giving every tutor access to all the computers in the school, we recommend that on
each tutor program you set up a group which corresponds to the computers to which that
computer will need to connect. So, in a typical installation, you may have a classroom with one
tutor machine and, say, three clients. We would recommend that you set up a classroom group
for that classroom, and then protect the installation with a log-on password. That way, anybody
who launches AB Tutor, with tutor access only, will only be able to see and connect to computers
within that classroom.
This also prevents teachers inadvertently breaking the software and allows the administrator to
slim down and simplify the interface for them through the use of group restrictions.
Installation
Installation on Typical School Architecture
Install AB Client on all student machines
in classroom 1.
Install AB Tutor and AB Client on the Teacher's machine
in classroom 1 (Teacher
1).
Launch AB Tutor on Teacher 1.
Create a new group called Group 1 and add all workstations in the classroom to it (e.g.
Students 1 to 3).
Set the Administrator and Tutor passwords on Teacher 1.
Give the Tutor password to all teachers who will use classroom 1.
When the teacher logs in on Teacher 1, they will only be able to connect to workstations in
that classroom (i.e. Students 1 to 3)
Repeat the above in classroom 2, running AB Tutor on Teacher 2.
The administrator's workstation will have the ability to connect to all workstations on the
network, including the Teacher machines if the client program has been installed on them.
Installation - Windows
Download and Install
Download the AB Tutor install file (abtsetup7??.exe where ?? represents the sub-version) from
www.abtutor.com. This single install file is used to install both the client and the tutor programs.
The trial version that is available for download is a fully working but time-limited copy of the
program. If you decide to purchase AB Tutor, you will not need to uninstall and re-install the
software. You will simply need to activate the trial version with an activation serial number.
If you already have an account with AB Tutor, you can log into your account in the licence
management system to download the most up-to-date file for the software version you have
purchased. Use the 'Download' button in the top menu bar.
There are four steps you need to run through to get AB Tutor up and running:
1.
2.
3.
4.
Start by installing the tutor program
Next, install the client programs
Configure your setup to allow AB Tutor to work
Activate the tutor (but not client) software
As of version 7.1.0, the software can be pushed out to clients (and subsequent tutors) using the
included Remote Deployment Utility. This is an alternative to pushing it out through Active
Directory and can make large installs much simpler.
Install the tutor program
Before you start, make sure that you have got Administrator rights on the computer on which
you want to install the tutor program. We recommend that you close down all running
applications before installing.
Locate the AB Tutor installation program file (abtsetup7??.exe) you downloaded previously.
Double-click it to start installation and follow the simple on-screen instructions.
After agreeing to the licence agreement and specifying the install location, you will be asked to
specify whether you are installing the AB Client (Student), AB Tutor (Teacher) program or both.
AB Tutor consists of two separate programs:
The Tutor or Control program
This component should be installed on workstations which will be used to connect to and control
other workstations (e.g. the teacher's or network administrator's machine only).
The Student or Client program
Install this component on workstations that will be remotely controlled, usually the student
workstations. By installing this component on a workstation, you are allowing a tutor machine to
connect to, control and monitor that workstation.
Select the AB Tutor option.
If you wish a network administrator to be able to connect to, control and monitor the tutor
machines, then select Install the AB Client program as well.
You will also be prompted to enter a Connection Password (See Connection passwords).
Passwords must not be more than 16 characters long.
It is highly recommended you use Connection Passwords to prevent unauthorised tutor
programs from accessing your student workstations. Please make sure that you keep these
passwords secure: for security reasons, there is no built-in way to reveal the connection
password set on remote computers, and if you forget the password that has been set, you will
need to re-install the software.
Type in the connection password you wish to set on your tutor machine (you MUST then set the
identical password when you install the software on your clients otherwise you will not be able to
connect to them.) Click on Next to continue.
The ABC Mirror Driver is only installed on Windows machines and will improve screen
update performance of AB Tutor. You do not, however, have to install this driver.
Choose whether to create Desktop and Start Menu icons and select install to install the software.
Once you have clicked on 'Finish' in the Setup Complete screen, your installation of the AB Tutor
will be complete - you may need to re-start Windows.
No icons are created if you just install the Client or Student component. To uninstall the
client you must go to Control Panel - Add/Remove Programs. This will only be possible if you
have not chosen the option to prevent the client program from being uninstalled via the Tutor
program. For more information, see Additional Security.
Install the Client Program
Now you need to install the AB Client program on all the client machines:
You will also need Administrator rights to install the student/client program.
It can save you time if you copy the abtsetup7??.exe file to a common shared network drive
that each client computer has access too and then just run it from each client machine.
Alternatively, copy the msi file to a USB memory stick to insert it into each remote client machine
you wish to install. Remember to delete this later so it is not available to all!
Log into each student workstation in turn. Go through exactly the same steps as above except:
When you get to the Choose Setup Type screen, be sure to only select AB Client and Mirror
Driver (selected by default).
Type in the same connection password as you typed into the tutor program. The tutor and client
connection passwords MUST be identical or you will not be able to connect to the clients from
the tutor program.
If you wish to remotely deploy the client software to the student workstations via Active
Directory and Group Policies, please see the section on the Remote Deployment Utility. This can
be used to modify the msi file to embed the password, and also to push the installer out to
multiple client machines simultaneously. You may also find the following knowledgebase article
helpful: Can I automate the installation of the client software? .
You will not see any icons to indicate that the AB Client program has been installed. The
client runs silently in the background and starts automatically when the machine is turned on and
Starts up. You can also prevent the software being uninstalled or the software stopped - see
Additional Security.
Manual silent Client Install
A silent installation is one that requires no interaction from the user, providing a convenient
method for performing a set of automated remote installations.
abtcsetup.exe /verysilent
To specify a connection password as part of the silent install use the command line parameter
'PASSWORD=' followed by the password. (Passwords must not be longer than 16 characters
and must not contain any spaces). This will be encrypted and stored in the client installation.
e.g. abtcsetup.msi /quiet PASSWORD=<password>
Installation
Download and Install - Mac
Download the appropriate AB Tutor Mac install files from www.abtutor.com. The Mac version has
separate installers for the Tutor and the Client called ABTutor7??.pkg and ABClient7??.pkg,
where the ?? represent the current release. If you are using OSX 10.5, please download the
release for that version. The trial version available for download is a fully working but time-limited
copy of the program; if you decide to purchase AB Tutor, you will not need to uninstall and reinstall the software - you will simply need to activate the trial version with an activation code.
If you already have an account with AB Tutor, you can log into your account in the licence
management system to download the most up-to-date files for the software version you have
purchased. Use the 'Download' button under 'My User'.
There are four steps you need to run through to get AB Tutor up and running:
1.
2.
3.
4.
Start by installing the tutor program
Next, install the client programs
Configure your setup to allow AB Tutor to work
Activate the tutor (but not client) software
There is a tool available for embedding the connection password in the installer, allowing silent
installs of the client software, allowing deployment with other utilities, such as Apple Remote
Desktop. See below for instructions on using this tool.
Install the tutor program
Before you start, make sure that you have got Admin rights on the computer on which you
want to install the tutor program. We recommend that you close down all running applications
before installing.
Locate the AB Tutor installation program file (ABTutor7??.pkg) you downloaded previously.
Double-click it to start installation and follow the simple on-screen instructions.
Accept the licence and press Install. Enter the Admin's password, and the software will install.
When the Control program is installed, the AB Tutor icon will be added to your Applications
folder.
When you first run the software, we recommend setting up a Connection Password (See
Connection passwords). Passwords must not be more than 16 characters long.
It is highly recommended you use Connection Passwords to prevent unauthorised tutor
programs from accessing your student workstations. Please make sure that you keep these
passwords secure: for security reasons, there is no built-in way to reveal the connection
password set on remote computers, and if you forget the password that has been set, you will
need to re-install the software.
Go to Tools, Connection Security and type in the connection password you wish to set on your
tutor machine (you MUST then set the identical password when you install the software on your
clients otherwise you will not be able to connect to them.) Click on OK to continue.
When the Control program is installed, the AB Tutor icon will be added to your Windows desktop.
Install the Client Program
Now you need to install the AB Client program on all the client machines:
You will also need Admin rights to install the student/client program.
It can save you time if you copy the ABTClient7??.pkg file to a common shared network drive
that each client computer has access too and then just run it from each client machine.
Alternatively, copy the msi file to a USB memory stick to insert it into each remote client machine
you wish to install. Remember to delete this later so it is not available to all!
Log into each student workstation in turn and run the ABClient7??.pkg installer.
Agree to the licence and enter your password when prompted.
When the software finishes installing, you will be prompted to enter a connection password. This
must be the same as the password entered on the Tutor. Finally, restart the client machine when
prompted.
You will not see any icons to indicate that the AB Client program has been installed. The
client runs silently in the background and starts automatically when the machine is turned on and
Starts up. You can also prevent the software being uninstalled or the software stopped - see
Additional Security.
Using the ABClient Silent Installer
Download the ABClient Silent Installer dmg from the downloads section of the AB Tutor website.
Extract and run the ABClientSetInstallerPassword.app:
Drag and drop the installer pkg onto the target. It will turn green when the file is accepted. Next,
enter the password into both boxes and select Patch .pkg. This will create a new installer called
ABTutor7??.silent.pkg in the same location as the original installer. If this new installer is run on
the client machines, it will install without asking for the password.
Installation
Download and Install - iPad
Pre - Installation Checks
Check that you have iOS 5.0 or greater installed on the iPads. All iPads can be upgraded to iOS
5.0 if they are not on that already. We also recommend that you check that you have a good Wi-Fi
setup; one way to do so is to run a YouTube video on all the iPads at the same time. If you can
run them all without stuttering then your Wi-Fi should be good enough. If your system fails that
test then AB Tutor will work but some of the more bandwidth demanding features such as Watch ,
Demo and Exhibit may not work as well as they can.
Installing the AB Tutor iPad Client
The iPad Client can be downloaded from the app store from: https://itunes.apple.com/gb/app/abtutor-client/id681725833?mt=8
Once installed, this app is designed to work in Guided Access Mode to ensure your student stays
focused in class. This will prevent the students from closing the AB Tutor app and using other
apps. The other alternative is to disable access to other apps on the iPad. This can be done by
going to Settings - General - Restrictions and setting up a pin. Ensure this pin is recorded for
future use! Once the pin has been set, you can set which apps are allowed to run in the Allow
section.
Due to restrictions on the iPad, a connection password can't be set during installation. To set the
connection password on the iPad, select them in the Tutor console (the iPad doesn't have to be
connected, so there's no need to change the connection password on the computer) then go to
Tools - Connection Security - Change Remote. Leave the current password blank and put the
password you want to use in the other two fields. Finally, click send to push the modified
password out to the clients.
Installation
Software Activation
Once you have installed the software, you will need to activate it (you only need to activate the
tutor program - you do not need to activate the client software).
When you first launch the AB Tutor program on the tutor machine, a window will appear asking
what sort of activation you would like to use:
Create a 30 day trial
Enter your website username and password.
If your internet connection requires a proxy server, tick the proxy box and enter the
details.
Select Activate
If the automatic activation fails, AB Tutor can be activated via the website.
Select No Internet connection.
Copy the code from the top box to the Activate Trial page on the AB Tutor website.
Copy the returned code from the website to the second box in AB Tutor.
Select Activate
Activate the Software
If activating a normal single use licence, select Activate Online via external licence
server
Enter a unique friendly name for this installation. This must be different from all
other computers registered on your account.
Either enter in your website username and password, or your account's 20 digit
serial number.
If your internet connection requires a proxy server, tick the proxy box and enter
the details.
Select Activate
If you have an Internal Licence Server, eg for a site licence, select Activate using
internal licence server.
Enter the server name or IP address and port number as requested. No other
configuration is required. For more information, see Installing the Local Licence
Server for more information.
Select Activate
Advanced activation for help desk
This option is intended only to be used when AB Tutor cannot connect directly to the
external licence server. If the normal activation methods don't work, please contact us
and we will try to determine the problem.
If everything is configured properly, then your software should register with the licence
management system and you should be able to start connecting to your clients.
Activation messages
After pressing the Activate button one of the following messages will be displayed:
Successful activation
If the licensing is successful, the activation window will disappear, and AB Tutor will finish
loading and start working.
No licences available
You get this message if there are no more free licences available. For example, you may
have purchased 5 licences, and already activated them previously. To check your account
and licence status, you need to log onto the online licence management system and
possibly free up any obsolete licences. (You can identify these by noting when they last
were run.) See Managing Licences
No account associated with this serial number
The account serial number you entered cannot be found. We usually recommend that you
use cut and paste to enter serial numbers as this avoids any typing mistakes. Please check
the number carefully and try again. If you still cannot get through, contact
[email protected] giving your customer account number, and any details you have of
your order.
Validation error
An error occurred in validating your licence. Please make sure you have access to the
Internet from this machine.
If this occurs, check to make sure that you have an Internet connection, that you, your
firewall/virus protection software has not blocked AB Tutor from accessing it. If you use a
proxy server to connect to the Internet, press the Setup button to configure the proxy server
and try again. (The Setup button only appears when an Internet connection failure occurs).
Contact [email protected] if you keep getting this error.
Installation
Updating AB Tutor to the latest version
AB Tutor has an Automatic Update feature that, when initiated, will connect to the
www.abtutor.com website and check for a newer version. If a newer version is available, you will
be asked whether you would like to download and install it now.
Because you will be charged for major updates (e.g. from version 6 to 7) the option to
automatically update to the next major version will not be available. In this case, you will need to
purchase upgrades to the next version of AB Tutor, download them from your account in the
licence management system and install them over the previous version.
Select the Tools menu followed by Check for Updates.
If updates are available then the following dialog box will appear:
Select the version you wish to upgrade to and click Download and Install to update the
software..
Once the Update file has been successfully downloaded, the Tutor program will close and
the update program will start automatically.
After successfully installing the update, re-start the Tutor program and check the version
number has changed to the newer one (select the Help menu followed by About).
If you know that a newer version is available but the Automated update indicates that you are
running the latest version, then the software may have a problem in connecting to our update
server. Please re-download the full MSI setup file from our web site and install over the top of
your current installation. This can be found in the download folder under 'my user'.
Installation
Automatic update of client installations
Although we make every effort to keep the software backwards and forwards compatible, it is
inevitable that as new features are developed, changes in the client software will be necessary to
cater for new functionality. We would therefore recommend that you always upgrade your clients
as soon as you upgrade your tutor programs.
Select the Tools menu, followed by Check for Updates to download and install the update
to the main tutor workstation (see Software Updates below)
Launch the new tutor program and connect to ALL client workstations.
Select the Tools menu followed by Client Maintenance.
Select the option Check for Older Client Programs and press the OK button.
If the system detects any older remote clients, then the following dialog box will be
displayed.
Select the workstations to update and press the Update Now button
Forced Re-installation of the Clients
When you run the 'Check for older Client Programs', AB Tutor checks the version of the remote
client program against the version on the Tutor's machine. (e.g. if the local client version is 7.1
and the remote version is 6.6, then the system will prompt you to update).
AB Tutor will only automatically select computers to upgrade if you have a newer version on your
Tutor than on the Client, however if for some reason you wish to force a remote client to
downgrade to the version on the Tutor, then you can force the system to send the files by ticking
the checkboxes next to the computer name.
For versions up to 7.2.6, the autoupdate feature is Windows only. For Mac installs, the
client will need to be reinstalled manually.
Installation
Uninstalling
Uninstalling the Tutor Program on Windows
Use the Add/Remove Programs function in the Windows Control Panel to un-install the program.
If you also have the client installed on the Tutor Machine, this will be un-installed at the same
time.
Uninstalling the Client Program on Windows
As no icons are created when you install just the client program, you will need to use the
Add/Remove Programs function in the Windows Control Panel to un-install the client installation.
By using the Client Maintenance function, you can remotely uninstall multiple client workstations.
Connect to the clients you wish to uninstall from, select them in the main window, then go to
Tools - Client Maintenance - Uninstall. The selected clients will be shown with tickboxes.
Ensure any clients you wish to uninstall are ticked, then click uninstall.
If you have run AB Tutor and specified that the uninstallation of the software should be
prevented, you will first need to launch the tutor program and connect to all the clients and
remove this setting from the clients before uninstalling the client software.
See Tools - Connection Security - Additional, un-tick the option 'Prevent ABClient from being
Uninstalled' then press the Apply button.
Uninstalling the Tutor Program on Mac OS
To uninstall the Tutor from a Mac, simply right click on it in the Applications menu, and select
Move to Trash. This will perform an uninstall.
Uninstalling the Client Program on Mac OS
To uninstall the Client from a Mac, we recommend you use the Client Maintenance function, as
described above. If this is not possible for some reason, please contact us at
[email protected].
Installation
Remote Deployment Utility
Since version 7.1.0, AB Tutor includes a Remote Deployment Utility for installing software on
remote Windows machines. It is designed for pushing the initial AB Tutor client installation out
to fresh machines, but can also be used to install the tutor program, or other software entirely.
To open the Deployment Utility select it from the Tools menu.
Click the ... button at the top to browse for the installer file. If the installer is recognised as an AB
Tutor installer, the Configure AB Tutor button will be ungreyed, and will allow you to set the
options for the install:
Note that as of AB Tutor 7.2.3, there are two installers available, an msi and an exe. We
recomment using the exe with the RDU.
Here, you can select what part(s) of AB Tutor are installed - client, tutor or both - where it installs
to, the connection password and whether the mirror driver is included.
Next, select the computers you wish to install to from the list on the left, then click Add at the
bottom. Additional machines can be added manually by hostname by clicking the Add New
button at the bottom. Additionally, groups of computers can be loaded and saved using the
Import and Export buttons. After selecting computers, fill in a username with administrator
access and the associated password in the boxes in top right. Finally, click Start and the
software will be installed on the selected machines.
Installation
Local Licence Server
If you have a site licence, you will also need to install and configure the Local Licence Server.
This piece of software manages the licences for your site - your tutors will connect to it to register
themselves, and it will check with the AB Tutor Licence Management System to ensure that you
have sufficient licences for the number of tutors running.
To install the Local Licence Server:
Run the ablicserver.msi installer. The file will also have the version number at the end of
the name.
Click next until you get to the Licence Activation page. Here, you need to enter your serial
number and friendly names for the v6 and v7 licences as required. If you don't have any v6
licences, just leave this box blank.
Click next, install and finish to finalise the installation.
The Local Licence Server will automatically connect to the LMS, and will appear in your
Installations list.
Once this has happened, you need to contact [email protected] to get the licence
server activated.
When you get a reply saying it has been activated, please restart the licence server to
refresh the licence settings. To do this go to Start, Run, services.msc then find the AB
Licence Server entry, right click on it and select Restart.
The Local Licence Server is now running properly. Finally, set up your tutors to license
against this server instead of the main one, as described in Software Activation.
AB Tutor Configuration
Configuring your machines to work with AB Tutor
AB Tutor communicates with its clients over port 5151. (If you install both the client and tutor on
the same machine, it will also use port 5152). This kind of communication will normally be
blocked by default by your firewalls. Additionally, to be able to communicate with the remote
licence management system (LMS), the AB Tutor program needs free access to the Internet. In
order to allow AB Tutor to work, please configure your machines as below:
1. Ensure that your firewall software (including Windows XP Firewall) allows both the Tutor
program (ABTutor.exe) and the Client programs (ABClient.exe) to communicate with other
computers in your network over port 5151/5152.
2. Ensure that your firewall software (including Windows XP Firewall) allows the Tutor
program (ABTutor.exe) to communicate with www.abtutor.com over the Internet. It requires
full access not just outbound access.
If your tutor machines connect to the Internet via a Proxy Server, you will need to configure AB
Tutor to use it. To do this, go to Tools, Settings, Licence Server and enter the relevant details.
We would recommend that you create a new user, e.g. ABTutor, with access to the Internet,
and enter that user's details into the User Name and Password fields. That way, the software will
connect to the Internet automatically and will not need someone with access rights to sign on.
This prevents a tutor having to sign into the Internet every time AB Tutor is launched.
Ensure that your routers and/or network switches do not block port 5151/5152 and allow AB
Tutor full access to the Internet.
You will need to refer to your firewall and network routers/switch documentation for
instructions on how to open up ports 5151/5152 and allow AB Tutor full access to the Internet.
Configuration
AB Tutor Configuration
Select Tools - Settings to access the AB tutor configuration dialog box.
The Tools menu is only available to users who log in with administrator access
General
The Settings menu allows you to customise how AB Tutor functions.
Scan for Clients at Startup
If this option is set, the tutor program will automatically scan your network for running client
programs when it is launched. We do not recommend this setting on installations where most of
the connections will be by pre-set groups. This is because AB Tutor will scan for machines to
which a tutor may not wish to connect - using valuable bandwidth.
Automatically connect to found clients
By default, when the system scans the network and finds client workstations, these are simply
listed in the program as 'Found, but not yet connected'. This makes the program more efficient
since it does not connect to machines which will not be used. Any command sent to a selected
computer in this state will first connect before sending the command. By enabling the automatic
connection option, the system automatically connects to all found clients. If you have a large
network, this could result in the tutor program attempting to connect to hundreds of computers,
which would be very heavy on bandwidth and could cause functionality problems. Use this
option with care.
Auto re-connect when connection is lost
If for some reason the connection to the remote machine is lost (e.g. machine re-booted or
network failure etc), then with this option selected, the tutor program will continue to attempt to reconnect to the machine up to the defined maximum number of attempts.
We would recommend that you keep the defined maximum number of attempts low to prevent
Microsoft's in-built spam protection features from kicking in and stalling your network
applications. (You will know that this has happened if you find EventID 4226 in your system log.)
Allow Duplicate Computer Names
By default, the system will not allow you to connect to computers with duplicate computer names
(only one of the computers with duplicate names will be shown in the list). If you wish to override
this restriction, then check this option.
It is not good practice to use the same computer name for different computers as this can cause
identification problems for users and network administrators.
Check for updates every
You can get the software to automatically check for any updates by enabling this option and
setting the checking period. When the system detects that it is time to check for updates, it will
connect to the www.abtutor.com website and check for a newer version of the software. If a new
version is found, a message box is displayed showing you your current version, the newer
version, and asking if you wish to download it and start the update process.
Use compression during file transfers
If this option is selected, then any files transferred to or from a remote workstation will be
compressed. This greatly increases the file transfer speeds.
Using compression for files that are already compressed will have little or no effect on speed
of file transfer.
Disable remote screensaver and power management
When a machine goes into standby or hibernation, you will lose connection to that machine. To
prevent this, you could of course change the power management setting on all remote machines,
but this can be very time-consuming. So if you select this option then while any Tutor program is
connected, that machine will not go to sleep.
This does not prevent the screen from going into standby.
Show System Tray Icon
Shows an icon in the system tray on the tutor machine whenever the application is running. This
will show any alerts triggered by events from the clients, allowing the application to be minimised
without missing any violations.
Watch/Demo
Compression
This is the type of compression used to transmit data to and from the students' workstations. The
optimum compression type again depends on your network and computers.
Default This is the standard compression, using zlib. It is lossless and doesn't use much
processing power, however the compression is fairly low.
High This uses jpeg compression, which is lossy, however it will provide the fastest screen
updates. It is good for slow connections.
Medium This uses RLE and zlib, to give a slightly better compression than Default, but
requires more processing. It is also lossless.
Low Low uses lossless block level RLE, allowing very good compression on large plain
areas of screen, but poor compression in more detailed areas.
If the video driver is turned off, you can select Use 16 bit colour, which will reduce the amount
of data transferred, however it will also significantly reduce the image quality.
Optimize Local Windows Desktop for best performance
If you enable this option then the desktop of your own computer will be modified for optimum
screen transfer performance during a Show command.
Desktop optimization means that:
Any desktop background pictures or patterns are removed.
All menu display effects are removed (scrolling or fades etc.)
All menu drop shadows are removed.
All window title bar gradient fills are removed.
Font smoothing is turned off.
Tool-tip animations are removed.
Smooth scrolling of list boxes is turned off.
Window minimise/maximise animation effects are removed.
Optimize Remote Client Desktop for best performance
If you enable this option then the desktop of the remote client will be modified for optimum screen
transfer performance during Watch command.
When this option is applied, the screen will flicker a few times as the changes are made. If you
do not want the remote student to know they are being watched, then turn this option off.
Use Video Driver
When you install the AB client program on Windows NT based systems (e.g.
2000/XP/2003/2008/Vista or Windows 7 machines), you are given the option to install a special
Mirror Driver to greatly enhance the screen update performance. Select this option to use this
driver if possible, as it will enhance performance.
Except for Vista or Windows 7 Clients
When the Video Driver is activated on windows Vista/Window 7 machines, the desktop will
automatically switch out of Windows Vista Aero theme in to the Standard Basic Windows
Theme. This is a known quirk when using mirror drivers on Windows. If you do not want to
indicate to the users on these machines that you are viewing their screen, then tick this
option. The mirror driver will not be used, but you will not benefit from the enhanced
performance and on some Windows 7 systems, this is quite significant.
Use Drivers back buffer
If this option is selected, then the remote screen data is grabbed directly from the mirror
driver and will not use the standard Windows graphics libraries to get screen data. This will
greatly improve performance. However, on some systems the remote cursor does not get
displayed and so you will need to enable the local cursor if you wish to control the remote
machine.
Capture Layered Windows
Some applications (e.g. Microsoft Office Ribbon Menu), use a technique to display menus or
windows in a transparent (or layered) way. In order to pickup these windows AB Tutor must use a
different method of grabbing the screen. Although this alternative method works, it can on some
systems, cause the mouse cursor to flicker.
Show content of both monitors
If you are using AB Tutor on a system with dual monitors, then by default only the primary (or left
hand) monitor will be shown during a Show command. If you wish to show the content of both
monitors, then you need to select this option.
This option is only visible if dual monitors are detected.
Do not minimise during a demo
If you are using the AB Tutor demo function to train other staff members on how to use AB Tutor,
you may wish to keep the main window open while running the demo. This option prevents it
from being hidden.
Network
The program sends a 'limited' broadcast message on port 5151/5152. It is limited because the
message will be restricted to a single subnet (VLAN) and will not get forwarded by routers to
other subnets. This can help reduce unnecessary network traffic across subnets and enhance
connection security.
Direct IP Address or subnet range
If you know the exact IP address or name of a remote computer, this can be entered directly. You
can also enter a range of IP addresses that will be scanned during a Find. This allows you to
specify subnet ranges of computers that are not picked up by a normal network broadcast.
To enter new IP addresses, computer names or subnet ranges, press the Add button.
Enter the computer name, domain name or direct IP address into the box (one per line).
Individual entries will be added directly into your computer list when performing a Scan whether
these machines are found or not.
To specify a subnet range, enter the start and end IP addresses of the subnet to scan. The
system will attempt to connect to each IP address in this range even after the Scanning process
has finished. This is because the subnet scanning may take a while depending on the number of
computers in the range. Remote computers will appear in the AB Tutor list as they are found.
Be specific with your IP address ranges to minimise the processing and network traffic. (We
force a maximum range of 2000 computers which can take up to 60 seconds for the scan to
complete.)
Press the Add button to apply the additions or Cancel to abort.
A remote address/range can be removed from the list by first selecting it and then pressing the
Remove button.
Ranges (IPv4 and IPv6) can be added manually by typing them directly into the list in the form:
192.168.1.1 - 192.168.1.254
fe80::f8ff:fe21:67af - fe80::f8ff:fe21:67ff
Lock Message
When you Lock the remote workstation you can display a message and/or a picture on the
screen indicating that the keyboard and mouse are locked.
Show Text
Enable this option to display a message on the remote workstation's screen. Type the text you
wish to display in the box. Press the Font... button to change the font attributes (e.g. Font type,
size, colour etc.)
Background Colour
Select the colour to be used as the background when the remote workstation is locked.
Show Image
This option allows you to select the option to display a picture as the background to a locked
screen. Press the
button to browse your local hard drive for an image.
One of the sample lock screens provided with the software.
We provide a number of sample lock screen images for you to use, but you can create your own
using any normal image package.
When you lock a remote workstation for the first time and the background image is not found
by that machine, then it will be transferred and stored on the remote machine automatically.
Select the Stretch to fit option to resize the image to fill the remote workstation's screen no
matter what screen resolution is used.
Snapshot
By default, AB Tutor will save any screen captures to a '%MYDOCUMENTS%\AB
Tutor\Snapshots' directory. '%MYDOCUMENTS%' is substituted by the current user's personal
'My Documents' folder or home directory. Click on
to change the location for your screen
captures. You can also choose to add a time stamp to the image, and play a capture sound to let
you know that you have successfully captured the chosen screen.
Capture Quality
By default, Capture Quality is set to medium. If you need to have a high resolution capture, select
'High', but be aware that this will greatly increase the size of the file created. For multiple
captures, try 'Low'.
Add time stamp to image
This option will put a pale text box in the top right corner of the image, showing the computer
name, user name, date and time of the screenshot.
Password
This is such an important area that we have dedicated a whole section to password
management. Please refer to this section for information on setting and using passwords.
System Messages
This screen allows you to change the default text displayed on the remote machines when a user
accesses a banned web site, blocked application, blocked drive or attempts to print when a print
block is in place. Note that if changes are made here, they will not be pushed out to clients until
the next time you connect to them.
The Don't show popup message box for HTTPS blocking will suppress the warning popup
when a student attempts to go to a blocked https website. This is to prevent excessive popups for
blocked https elements on normal webpages. Note that this will mean that if the student attempts
to go directly to a blocked https site, they will only get a 404 error message, and no AB Tutor
warning.
Terminal Servers
This tab should only be used if you are using terminal servers on your network and you want to
automatically connect to them to detect which clients are active on the terminal server.
Enter the name of your terminal server and press the Add button.
Hide from Tutor and Auto Connect
Select this option to automatically connect to all the terminal servers in the list at AB Tutor startup. If the tutor program is launched with Tutor access level, then these terminal server
connections are not shown to the tutor but any connected clients will be shown depending on
whether the client's computer name or user name exists within the selected Classroom Group.
Auto Connect to Found Sessions
Tick this option to automatically connect to any terminal server clients that become active.
Disable Shutdown/Reboot of Server
This is an extra level of security to prevent the terminal server from inadvertently being shutdown
or rebooted. We recommend that this option is always selected.
Folders
This tab allows you to customise where various files are stored (e.g. screen capture, log files,
inventories, video or poll questions).
%MYDOCUMENT% is a variable that will get replaced by the currently logged on users 'My
documents' folder or home directory.
Licence Server
If your network environment requires that you need to access the internet via a Proxy Server, then
you must enter the details in this screen.
Proxy Server: The IP address or server name of your Proxy Server
Port: The Port number used to access the proxy server
Username: If your proxy server requires authentication, then enter the username
Password: The password used to access the proxy server
Internal Licence Server: If you have an internal licence server at your site, fill the details in
here and AB Tutor will use it instead of the remote one.
Advanced
Encrypt settings file
If this option is selected, then the ABControl.xml file will be encrypted preventing anyone from
viewing or editing this file outside of the AB Tutor program.
Once encrypted, versions of AB Tutor older than 6.2 will not be able to read this settings file.
Poll clients every
For v6 and earlier only: When connected, AB Tutor needs to poll each remote client for changes
in various states. (e.g. If the user logs on/off, when applications are run or policies are set or
change etc). This is done on a timer (default: every 5 seconds). If you want to reduce network
traffic, then you can increase this timer to poll after longer periods.
Monitor Sessions
If a non-server operating system (eg Windows 7) is being used as an RDP host, select the
relevant computer(s), tick this option and select Apply. This will tell AB Tutor to look for
additional sessions on the computer.
Mute Interval
This option adjusts how often the client programs check the status of the audio mute, if a mute
policy is applied. It can be reduced (to 50 or even 5ms) to prevent abuse, or increased (to
2000ms) to reduce load on the client.
Configuration
The Config File
Most AB Tutor settings (including policies and groups etc.) are stored in a file called
ABControl.xml. This file is located in:
Windows XP: c:\Documents and Settings\All Users\Application Data\AB Tutor\
Windows Vista/7/8: c:\ProgramData\AB Tutor\
Mac OS: /etc/AB Tutor/ or /Users/$user/library/preferences/AB Tutor/ or /Users/$user/AB
Tutor/
After you have configured one tutor program you can copy this file to other tutor installations so
you don't need to re-enter all the settings each time.
Shared Configuration Files
By using a command line parameter you can specify where the ABControl.xml file is located.
This allows you to save the file on a shared network drive so all tutor programs can use the same
file.
Use the p switch:
-p <path to file>
or
/p <path to file>
eg: C:\Program Files\ABTutor\ABTutor.exe -p n:\shared
eg: open -a "ABTutor" --args -p /home/user/abtfiles
Note that the trailing slash on the address should be removed.
We recommend you protect this shared file from being changed inadvertently by other tutor
programs and that only the network administrators have control over the settings. Make the file
Read Only by using normal NTFS or network security. Also, for security reasons only allow
known teachers access to this network folder.
Advanced Config Options
AB Tutor has some advanced options which can be applied by editing the ABControl.xml file.
The xml file is encrypted by default to protect it from tampering. To unencrypt it, load AB Tutor as
an Administrator, go to Tools - Settings - Advanced and untick Encrypt settings file:
Additional options should be added to the config file after the <abtc_settings> line and before
the </abtc_settings> line. The order does not matter.
<LeaveProxyBypass>1</LeaveProxyBypass>
This option will leave proxy bypass settings on the client unchanged when a web block or web
log policy is applied. This means that the AB Client internal proxy can be bypassed for local
addresses, to allow authentication to work. Please note that this also means that use of these
sites will not be logged.
<BlockCADonLockoutXP>1<BlockCADonLockoutXP>
This option will block ctrl+alt+del in Windows XP when Lockout is selected from a watch session.
This is to get around a known issue in XP where if C-A-D is blocked for the student, it will also be
blocked for the Tutor. The default is 0 which allows the Tutor to use the C-A-D button in the watch
toolbar, but doesn't block it for the student. If this is changed to 1 (as shown), it will be blocked for
both Tutor and student.
Configuration
Startup Switches
Some startup options for AB Tutor can be configured with command line switches. Currently
available are:
-g to make AB Tutor automatically connect to a specific group. This is useful on PCs that
are always used in a specific classroom.
-p to change the path to the settings file. This allows a single settings file to be kept on a
server for all Tutors to use. Note that the path should be stated without the trailing
slash/backslash and without the filename, eg -p c:\temp\abfiles or -p /home/user/abfiles these can also be network shares. AB Tutor will automatically add the /abcontrol.xml to the
end of the path.
-t to automatically log in as a tutor if no tutor password is set, bypassing the password
prompt.
Startup Switches in Windows
To set startup switches in windows, right click the AB Tutor icon on the desktop and select
properties:
Add the switches and their parameters to the end of the Target field, as shown.
Startup Switches in Mac OS
Run Automator from the Applications menu. Select Application. Next, select Utilities and
double click Run Shell Script:
Enter open -a "ABTutor" --args followed by the switches and their options as applicable.
Network shares (eg SMB shares) appear in the /Volumes/ directory when mounted, so to use a
shared config file, you would use open -a "ABTutor" --args -p
/Volumes/sharename/directoryonshare
Security
AB Tutor provides powerful remote monitoring and control functionality. You must therefore
take steps to secure your installations of the tutor and client software and prevent un-authorised
users from misuse of the system.
There are two types of passwords that you can set in AB Tutor to help protect the security of your
workstations. These are start-up passwords and connection passwords.
Startup passwords and levels of access
There are two levels of access to the Tutor program: Administrator and Tutor. Access to both of
these are controlled by start-up passwords.
The Administrator access level allows a network manager to control how the Tutor program
connects to other workstations through its settings, group management and policy management
tools. It also allows an administrator to restrict Tutor level access to pre-set groups and to limit the
functions that are available to tutors connecting to those groups. The Administrator has access to
some very powerful features (such as controlling windows policies) and should therefore be
limited to users with sufficient technical and networking expertise.
Tutor access rights are simply to prevent unauthorised users from using the program. The
administrator controls whether to enable this security level or not. Someone at Tutor access level
cannot get to any of the configuration options within the system and cannot connect to
workstations outside the classroom groups created by the administrator.
The following table gives an overview of the rights of the Administrator and Tutor.
Feature
Tutor Admin
List view tab
Icon view tab
Question polling tab
Events tab
Administrative tools tab
Find and connect to computers within a pre-defined group
Find and connect to all computers
Connect
Remote watch and control
Send key sequences
Manage key sequences
Show
Chat
Audio
Launch and close programs
Create policies
Set and remove policies which have previously been created
View log files
Lock/unlock remote machines
Logon/logoff/shutdown/reboot remote machines
Send/collect files
Customise toolbar settings
Licence activation
Groups - set up and manage groups and classrooms
Settings (General, View, Network, Lock Message, Capture, Passwords)
Setting and removal of connection passwords
Client maintenance
Check for and perform updates
Purge remote log files
All those functions marked with a question mark can be disabled by an administrator, so might
therefore not be available to everyone logged in as a tutor. (See Group Restrictions)
Security
Start up passwords
Start-up with no passwords set.
By default, no start-up passwords are set in AB Tutor. With no start-up passwords set, one of the
following dialogues is displayed upon launch of the Tutor program. They will automatically
disappear after a few seconds, or immediately if you click on them.
If you are still in the trial period then the following will be displayed:
Start-up once passwords have been set
If start-up Administrator or Tutor passwords have been set through tools, settings, passwords,
a different dialog box is displayed and you must enter the correct password to gain access to the
program.
If you have set an Administrator password, this must be entered to gain access to the
administrative features.
If you have specified an administrator password, but no tutor password, then if the user simply
presses the OK button, they will gain access as a normal tutor. If a tutor password has also been
set, then the password field cannot be left blank and a valid password must be entered to gain
access to the program.
It can sometime be confusing for a tutor if they are presented with a password box but do not
have to enter a password to gain access. To get round this, you can add a command line switch
to the launch shortcut which will not display this box if an admin password has been set and no
tutor password has been set.
Syntax: -t or /t
E.g: C:\Program Files\ABTutor\ABTutor.exe -t
With this command line switch set, the normal AB Tutor splash screen will be displayed and will
disappear when the user clicks on it or waits for 3 seconds.
If you forget your start-up password, you will have to un-install and re-install your installation,
or delete your settings file to continue running the software.
Security
Setting startup passwords
In order to set passwords, you must have administrator access rights.
Select the Tools menu followed by Settings and click on Passwords
To set the administrator password, enter your password and confirm it in the second edit box.
The passwords must match; if they don't, you will be asked to re-enter the passwords.
To set a Tutor password, again enter the required passwords.
Both passwords can be left blank, in which case no password validation will take place on
start-up and full administrator access will be granted to whoever launches the program. It is
strongly recommended that you create passwords as soon as possible, carefully control who has
access to these passwords and change them on a regular basis in case they have been
inadvertently disclosed.
Security
Connection passwords
Connection passwords are how you protect your clients from being remotely watched and
controlled by other tutor programs. Until you have set a connection password on your client
machines, any computer running the tutor program will be able to connect to your clients. Once a
connection password has been set on all clients, only those tutor machines with the same
password as the clients will be able to connect to them. If a tutor machine with no connection
password, or with an invalid password (e.g. passwordA) set, tries to connect to a client with a
different password (e.g. passwordB), an 'Authentication Failure' message will appear on the main
screen, and the status of the client will read 'Invalid Connection Password.' This same message
will appear if a tutor with a password set (e.g. passwordA) tries to connect to a client with no
password set.
To prevent unwanted monitoring of your clients, we recommend that you protect them with
connection passwords as soon as possible. Please carefully control who has access to these
passwords and change these on a regular basis in case they have been inadvertently disclosed.
How Connection Passwords Work
The diagram below shows three tutor programs, each with different connection password
configurations.
Setting connection passwords
There are two ways of setting connection passwords. You can either do this at installation or later
using the AB Tutor program.
Setting connection passwords at installation
During install, you will be presented with the following dialog box:
Enter your password in the edit box and repeat it in the re-enter password box. The password
you set here will be encrypted and saved on the machine on which you are installing the
software. This applies to both the tutor and client programs.
You must make sure that the connection password set on the tutor machine exactly matches that
set on the client workstations to which you want the tutor to connect. Once you have set a
connection password on a client workstation, only tutor programs with the identical password will
be able to connect to that machine. Tutor programs with either no password set or a different
password will not be able to connect.
It is also possible to create connection passwords through a silent install. See Download and
Install.
Setting connection passwords later
It is possible to set connection passwords after the software has been installed. To do this, first
make sure that you are connected to all the clients to which you intend to connect. When you are
connected, select the clients on which you want to set the connection password then choose
Tools - Connection Security. This will open up the following dialog box:
Enter the Connection password and re-type it in the Confirm box.
Press OK to simply change the password within this copy of AB Tutor program. The password
will NOT be transmitted and set on any clients. This is mainly used if you have multiple
connection passwords set on different client machines or classrooms.
To change the connection password on remote machines, select the machines you wish to push
it out to, bring up the connection security dialogue and select the 'Change Remote' tab:
Fill in the details, then press Send to encrypt and transmit the new password to all selected and
connected clients where it will be stored. Whenever any Tutor program connects to a client
machine on your network, the Connection password is verified and if they don't match, then the
connection status for that client will show 'Invalid Connection Password' and no access to that
client is allowed.
In networks that have multiple Tutor programs installed that need to connect to the same client
machines, each Tutor program must have the same Connection password.
Please note that due to limitations in the iPad, the client will initially be installed with a blank
password. We recommend that this is updated as soon as possible from a Tutor, using the
Change Remote option detailed above.
Security
Additional Security
Prevent older AB Tutor programs from connecting and Only allow registered copies to
connect
Unless you have very tight control over software installation on your machines/network, it is
possible that trial copies or even older 'cracked' versions of the software can be installed and
used to gain access to all your remote client machines. This can cause a serious security risk on
your network. To prevent this you can optionally choose to prevent older versions of AB Tutor
from connecting to your clients and/or only allow fully registered copies to connect. A registered
copy is one that has been fully activated with AB Consulting via the Licence Management
System (LMS).
Prevent the AB Client service from being stopped
Normally you should lock down the remote client machines so students are not able to access
the Control Panel or the Administrative Tools etc. But in some instances students need
administrative rights to the local machine. In these cases, you can further secure the remote client
program by preventing the Client programs service from being stopped. If you select this option
and 'Apply' it, then no one will be able to use the Windows interface to stop, pause or restart the
service.
Prevent the AB Client program from being Uninstalled (Windows specific)
By selecting and applying this option, you can prevent the client program from being de-installed
via the normal Add/Remove programs features of Windows.
Start the ABClient Service if Windows is booted in 'Safe Mode with networking'
(Windows specific)
By selecting and applying this option, you can force the remote client program to start up even if
it's booted up in 'Safe Mode with networking'.
Normally Safe Mode is there to resolve problems with your computer by not starting
applications and services to give you a chance to fix Windows problems. Enable this option with
caution!
Press the Apply to encrypt and transmit these settings to all selected and connected clients
where it will be stored. Whenever any Tutor program connects to a client machine on your
network, the versions and/or registration details are verified and if they fail, then the connection
status for that client will show 'Invalid Connection Password' and no access to those clients are
allowed.
Group passwords
As an added security measure, it is possible for an Administrator to create group passwords.
(See Group Connection Password)
Getting to know the interface
Depending on whether you are logged onto AB Tutor as tutor or administrator, you will be
presented with slightly different interfaces:
Administrator Overview
Menu bar
The menu bar contains a series of drop-down menus that can be used to access various
commands, tools and configuration utilities. These menus can change depending on your access
level (e.g. Tutors do not see the Groups or Tools menus)
Toolbar
The Toolbar contains shortcuts to many of the most frequently used commands. Clicking on a
button executes that command or action, eliminating the need to work through the drop-down
menus. Positioning the cursor over an icon will display a brief description of its function in the
Status bar and, if you pause the mouse, a tool-tip will appear, describing the command. It is
possible to add icons to specific policies on the toolbar (refer to the section on 'Policies' for
information on how to do this), so that you can apply restrictions and policies at the click of a
button.
Group Tabs
The group tabs are a feature to allow administrators to manage a large number of computers
more easily. If <All groups> is selected from the find menu, tabs will be shown for all the defined
groups, allowing easy access to any computer in the school.
Main Window
This window displays a list of the currently found workstations. The default view shows an
overview of the computer's status and what is currently happening with it:
the computer name
the logon name and real name of the current user
the connection status (see 'Status' table below)
policies currently applied (see 'Policies' table below)
applications/files currently running (the dotted red box indicates that this is the one in focus
at the time)
the version of the AB Tutor client currently running on the machine
the group (if any) that computer is in
Hovering the mouse over any workstation icon in any view mode will display a pop-up tool-tip
showing the current information/status of that computer. Hovering over any policy or application
icon will show the name of that policy or application.
If AB Tutor is being run in administrator mode, it is possible to have multiple groups displayed as
tabs at the top of the main window, allowing easy viewing and administration of a large number
of machines.
Tab Bar
Allows you quick access to the following features:
Icon View
Allows you to change the view in the main window to show each workstation as a large
thumbnail of that computer's screen, labelled with the computer's name. This view allows you to
move each icon within the window to a different position by using the mouse. This is often used
with a classroom layout image set as the background.
Depending on the scale of icons used in this view, running applications and active policies can
also be displayed, giving almost as much information as the standard list view.
Question Polling
Enables you to send simple questions to the remote users and process the answers they give.
Event/Violations
If a Keyword Monitoring policy has been applied to the remote machines, then whenever an
event/violation occurs, any connected Tutor program are immediately notified.
Administrative Tools
Gives administrators access to some advanced functions to administer the remote machines.
Status Window
This is simply used to output information, warning or error messages whilst using the program.
For example, if the connection to a remote computer is lost, then a message is output to this
window informing you what has happened. Many of the error messages are hyper-links to the AB
Tutor knowledgebase, which will give you more information about the error message and how to
handle it.
To hide/show this window, right-click the mouse within the main window and tick/untick Show
Status Window. You can also clear the messages by right-clicking the mouse in the status
window and selecting Clear from the drop-down menu.
Status Bar
The Status Bar is displayed at the bottom of the AB Tutor Window. It is used to show information
about selected menu items or buttons, the current group being watched, the number of found
workstations, the number of connected workstations and the current date and time.
Getting to know the interface
Understanding the icons
The table below shows the different status icons that you will find in this window, and what they
mean.
Status of remote computers
Computer found, but not yet connected
Attempting to connect or re-connect to computer
Connected to computer, no user logged on
Connected to computer with user logged on
Connection to computer failed (including after shut
down)
Single
Computer
Thin Client
Session
The table below lists the default icons relating to policy types
Policy types
Port blocking for complete Internet block
Website blocking
Application blocking
USB/CD/Floppy drive blocking
Print blocking
Privacy
Keyword monitoring
Logging (activity, printing, websites, applications)
Mute sound
System actions (e.g. shut down)
Lock computer
Screen capture
Group of policies
Single Computer
Getting to know the interface
Console as seen by a Tutor
The Tutor Console is identical to the Administrator Console, except that the Groups and Tools
menus are not available, nor is the Administrative Tools tab. The administrator is able to disable
further functionality:
Getting to know the interface
Icon watch view
Click on the
tab to reveal a window which will show a series of thumbnail views of the
screens of remote computers. The remote screens will only be displayed when you connect to
those computers. If you have not connected or there is a connection problem, then the normal
computer state icons will be displayed.
In this view, you have the same icons as in the list view across the top of the window. These give
you control over the connected clients and allow you to start programs, apply policies etc. The
main window shows thumbnails of all the machines in the current group.
The icons along the bottom of the main window allow you to change the size of the thumbnails.
The small, medium, large and extra large squares in the middle change the size and also the
level of detail shown. Fine adjustment can be made by dragging the Scale slider in the bottom
left of the screen. The next two icons allow you to choose between automatically aligning the
thumbnails to a grid, or allowing them to be moveable, perhaps to mirror the layout of your
classroom (see the groups page for more detail).
The thumbnail refresh rate can also be changed. By default, the screens are refreshed every 5
seconds. If you want faster updates (which will increase network traffic) then reduce the number
of seconds between updates. Finally, the cycle option will automatically page through the
displayed thumbnails, allowing a teacher to keep an eye on a whole class. In order to use the
cycle mode, select the Fixed Grid option, size the icons appropriately and click the cycle button.
AB Tutor will automatically scroll down every few seconds, with the delay set in the bottom right.
Ensure that the refresh every option is set lower than cycle every or you may end up with
blank thumbnails.
Shift+click a thumbnail to enlarge it - this is especially useful if you have a large number of
computers, and are using very small thumbnails. Double-click on a thumbnail to issue a normal
Live Watch of that remote machine.
Right-clicking on any thumbnail will pop up a menu giving you direct access to issue commands
to that remote computer. (e.g. Snapshot, chat, lock, shutdown etc).
Thumbnail layouts are stored as a per-user setting in the registry by default. If you wish to
have multiple users on the same computer share the thumbnail layout, tick the box in the group
manager, on the General tab.
Getting to know the interface
Events and Violations
If a Keyword Monitoring policy has been applied to the remote machines, then whenever an
event/violation occurs, any connected tutor programs are immediately notified. A popup
notification will be shown from the system tray icon as shown. There is an aditional notification
inside AB Tutor where the events are shown in red text in the main Tutors status window and the
status text in the main view also turns red. A count of the events during the session is shown in
brackets.
To see the details of the event/violation, double click the mouse on the red event line in the
bottom status window. This opens up the Event view on the right.
Details of all events that have occurred during the session are shown in the top part of the pane.
If you select an event, then a screen shot (or video recording) is displayed in the bottom half of
the pane. If the remote screen shot is a little too small to see clearly, then you can double-click
the image to toggle from a small view to full screen and back.
In some cases a tutor may have set the policy so that screen recording happens for a specified
time period after the violation. You will not be able to view this recording until it has finished.
Click on the View Log File... after a period of time to see if the video file is available yet.
Here it is possible to see screenshots/recordings of all violations as well as other log files. A
small floating window will show any associated screenshot or video clip. This window has two
size settings and can be toggled between them by double clicking.
Getting to know the interface
Administrative Tools
Select the
tab to access four administrative tools. All these administrative tools work on
the selected computers in the Main window and are available to administrators only:
Inventories
It is possible to view a detailed inventory of various hardware/software components for either a
single computer or for multiple computers.
To obtain an inventory:
Select the one or more machines in the main window
Press the Refresh button
If multiple computers have been selected, then you will get a message asking you to wait a few
seconds. Then to view each inventory file, select the computer from the drop down History list.
Each time you select a machine in the Main Window, the History list is populated with previous
inventories for that computer.
All inventory files are stored in a folder specified under Tools - Settings - Folders. Inventory files
are stored in simple HTML format and so you can also view these files within any Web Browser
by going to this folder and double-clicking on the inventory file.
Process management tool
This tool allows you to view all processes running on a remote computer. This can only be done
on one remote computer at a time. If you have multiple computers selected in the Main window,
then the Refresh button will be disabled.
Once you have pressed the Refresh button for the first time, then the list will automatically
refresh every 4 seconds.
If you want to forcibly end a remote process, right-click on the process to end and select Kill this
process.
If you are killing a remote application then it will terminate it immediately and not prompt the
user to save any work.
Click on the column heading to sort the list alphabetically or numerically.
Running services tool
With this tool, it is possible to view all the remote services running on a computer. Like
processes, it only works on a one computer at a time. If you have multiple computers selected in
the Main window, then the Refresh button will be disabled.
You can use this tool to start, stop and re-start remote services. Right-click on any service to
show a popup menu with the commands you are allowed to issue.
Click on the column heading to sort the list alphabetically or numerically.
Command prompt
This option allows command line instructions to be sent to the client machine. For Windows, this
tab allows you to send DOS based commands to one or more selected remote machines, and
Bash commands for Mac clients.
To send a command:
Select one or more computers on the Main window
Enter the command to execute (Multiple commands can be entered by holding down the
Ctrl key and hitting return to get to the next line.) Commands are executed in sequence top
to bottom and one per line.
Press the Send button
If you are sending the command to a single remote computer, then the output from the command
is immediately displayed. If you have sent the command to multiple machines, then to view the
output for each machine, you need to select that machine only in the Main Window.
A history of previously sent commands is stored and can be retrieved from the drop-down list.
Using AB Tutor
Computer menu
Find
Toolbar:
Menu: Computer - Find
This command will populate the main view with computers. As an administrator, you have the
option to use "<Discovery>" which will search for all the workstations found on the network and
specified in the network configuration, or load up one or all groups. Tutors will only have access
to the groups. This command can be automatically issued each time you start AB Tutor. (See
Tools - Settings - General to set this option.)
Connect
Toolbar:
Menu: Computer - Connect
This command will connect to all computers highlighted in the found computer list. If a connection
is lost due to a re-boot, unplugged network cable or a temporary network failure, you can reconnect by highlighting the unconnected workstation and pressing the Connect option. Although
it is possible to connect to a very large number of computers simultaneously, we would not
recommend more than 50 concurrent connections from a single machine as this may cause
bandwidth problems with resultant deterioration in network performance.
Rename Computers
Menu: Computer - Rename
This menu item allows computers to be renamed, to turn a cryptic hostname into a more
recognisable friendly name. Note that this will not change the hostname of the target computer,
AB Tutor will simply change the name which is displayed inside the software.
Computers can also be renamed by pressing F2.
Remove Computers
Menu: Computer - Remove
This menu item can be used to remove unwanted computers from the list.
E.g. If a remote machine is powered off, you don't want to accidentally select this computer in the
list and issue a command to it as this will pause the program as it tries to connect but fails and
eventually times out. It is good practice to remove computers from the found list if you no longer
need to monitor them.
Using AB Tutor
Computer menu
Restart ABClient
Menu: Computers - Restart Client
This option can be used to restart the abclient service on the client machines. This is designed to
force a reinitialise and reconnect if the client stops responding properly. There are two different
mechanisms for restarting the client which work in different ways. These options are only
available for admins.
Power On Computers
Toolbar:
Menu: Computers - Power On Computers
This is an advanced feature: it requires a certain amount of technical knowledge to enable the
remote computers to accept the Wake-on-LAN command.
The remote client workstations must have a Wake-on-LAN network adapter and a BIOS that will
support it. You must consult the network adapter and machine's hardware manuals for
information on setting this up.
To issue this command from within AB Tutor program requires some initial setup.
1. You must have found and been connected to all machines you wish to power on at least
once before.
2. Since machines that are turned off cannot be found by the AB Tutor program, you must add
the machines to a Classroom Group (See Groups).
3. At start-up (or after pressing the Find button) you must select the Group to connect to. This
will add all computers to the list even though they can not be found by the network
scanning (since they are off!).
4. Highlight the machine you wish to power on and select the Computer menu followed by
Power On.
5. A special Wake-on-LAN command is broadcast to the remote machines network cards and,
if they have been configured correctly, the machine will be switched on.
Using AB Tutor
Command menu
Live Watch
Toolbar:
Menu: Right click - Watch or double click
This command allows the tutor to view a selected workstation screen in live mode.
To View a workstation
1. Select one or more clients to view.
2. Press the Watch button or select the Command menu followed by Watch or right-click the
mouse on one of the client icons and select Watch from the drop-down menu.
Whilst Watching client workstations, the toolbar will be available at the top of the client screen.
Click on the handle or a blank part of the bar to hide it and click on the handle at the top of the
screen to unhide it.
Shared
When this button is pressed, it enables you to take control of the currently viewed workstation
and allows the student to also use their mouse and keyboard at the same time.
Lockout
When this button is pressed, it enables you to take control of the currently viewed workstation
and disable the student's mouse and keyboard. Please note that the intention here is not to
completely lock the student out - for that option, select the Lock function.
Ctrl+Alt+Del
This will send a Ctrl+Alt+Del command to the workstation to activate the Windows login or
security screen.
Blank Screen
This simply blanks the screen for the client, but not the tutor (optionally displaying a message),
allowing the tutor to do things on the client machine without the user seeing it.
Chat
Press this button to initiate the Chat window to send and receive text messages with remote
client workstations.
Snapshot
Pressing this button whilst viewing a remote screen will take a screen shot and automatically
save the image to file. The location and resolution of this image can be set by the Administrator in
the Settings menu.
Scale
Pressing this button will shrink the remote view to fit in the current window size. If the window is
significantly smaller than the resolution of the student workstation, it can be tricky to read text on
the screen. If this is the case, make the window bigger.
Note that scaling can reduce the performance and refresh rate. Actual size will run more
smoothly.
Resize
This button toggles between windowed view and fullscreen view.
Close
Close the window and end the Watch session.
Using AB Tutor
Command menu
Give Demo
Toolbar:
Menu: Command - Demo
This command will show the tutor's workstation screen to all selected student workstations. This
can be used to demonstrate to the entire class how to use the computer or an application etc.
When this command is activated, the AB Tutor window is minimised.
The tutor's screen will only be shown to the student workstations selected.
To end the show session, you simply click on the minimised ABTutor in the system entry in the
taskbar. This will re-display the application and removes the tutor's screen from all student
workstations.
There are 2 modes you can use when showing your screen to the students: Full Screen or
Thumbnail Window. Click the small down arrow symbol to the right of the main Demo button to
reveal the following drop-down menu:
Full Screen (the default action for the Show button), will show your screen in actual size on all
the selected remote machines and lockout the student's keyboard and mouse.
Thumbnail Window will show the tutor entire screen in a small 1/4 sized scalable window on the
remote screen. The student can then continue to work on their computer whilst watching the tutor
screen at the same time. Clicking the drawing pin in the thumbnail window will make sure that
the window is always on top of other applications.
Using AB Tutor
Command menu
Exhibit
Toolbar:
Menu: Command - Exhibit
This command allows you to display a student's screen to other connected students.
Please note, this icon is not added to the toolbar by default. You can add it yourself by going to
View, Customise...
To Exhibit a remote client:
1. Select the remote workstation to exhibit
2. Select Command - Exhibit (or click on the exhibit icon)
3. Select the other remote workstations to which you wish to exhibit (Notice that you cannot
select the workstation you are exhibiting)
4. Press Start
The workstation you are exhibiting will be displayed on your screen and you are then put straight
into a Show command.
This allows you to see the exhibited screen, to take control of it and use the Annotation tools
available during a normal Show command.
To end the Exhibit mode press the Close button
in the taskbar.
on the toolbar and then the AB Tutor entry
Command menu
Launch
Launch is covered in the Application section.
Using AB Tutor
Command menu
Chat
Toolbar:
Menu: Command - Chat
This command will display a dialog box allowing the tutor to send a text message to all selected
students. The tutor can then wait for a reply back from the student(s).
To send a message:
1. Select the remote workstation(s) to which you want to send the message.
2. Enter your name. This lets the remote user(s) know who the message is from. (This name
will be remembered for all subsequent chat sessions).
3. Enter the message you want to send.
4. Press the Enter key or Send button.
5. Wait for replies to appear.
Using AB Tutor
Command menu
Audio Chat
Toolbar:
Menu: Command - Audio
This command will display a dialogue box allowing the tutor to have an audio conversation with
a remote student via a microphone and speakers. This function will only work if both the Tutor
machine and remote workstations have audio capabilities (i.e. a sound card with a microphone
and headphones or speakers attached).
Two Audio commands are available:
Broadcast: You can select one or more workstations to which you want to send an audio
announcement, but the students are not able to reply.
Two-way Chat: You can instigate a two-way audio conversation with the remote student.
To Broadcast a message:
1. Select the remote workstation(s) you want to send the audio message to.
2. Press the Broadcast button.
To have a two-way conversation:
1. Select the remote workstation you want to talk to.
2. Press the Two-way Chat button.
Press the Stop button to end the audio session.
The Audio dialog box will remain open allowing you to use other features. (E.g. you can
have an audio conversation with a remote student at the same time as viewing/controlling their
screen.)
Settings:
You can mute the audio output at any time by clicking the Volume Mute button. You can also
adjust the master volume control by click on the slider and moving it left (quieter) or right (louder).
This has the same affect as adjusting the volume control from within your system tray (the
Speaker icon bottom right).
Press the Microphone mute button to disable your microphone whilst still enabling you to listen to
the remote student.
Audio Devices:
AB Tutor uses the default audio devices for input and output. If you have multiple audio output
devices (e.g. headphones and speakers), then you need to set the default. (eg, in Windows; right
click on the Speaker icon in the Windows system tray and select 'Adjust Properties'.)
Using AB Tutor
Command menu
Send Message
Toolbar:
Menu: Command - Send Message
This command will display a dialog box allowing the tutor to send a simple text message to all
selected students. The message is displayed on the students' screen in the form of a simple
message box with an OK button to clear the message. You can force the remote message box to
close after a given number of seconds.
To send a message:
1. Select the remote workstation(s) to which you want to send the message.
2. Select the 'Send Message' menu or button on the toolbar.
3. Enter your name. This lets the remote user(s) know who the message is from. (This name
will be remembered for all subsequent chat/sending messages).
4. Enter the message you want to send.
5. Alternatively, select a previously sent message from the drop-down list.
6. Enter the number of seconds you want the message box to remain visible. (Enter 0 to
disable the timeout feature. Then, the only way to remove the message box is by pressing
the OK button).
7. Press the Send button
Each time you press the Send button, the system also adds the message to the 'Previous
Messages' list for subsequent selection.
Using AB Tutor
Command menu
Snapshot
Menu: Command - Snapshot or Right click - snapshot
This command allows the tutor to take a snapshot of the selcted computer's desktops which will
be saved in the event log. Multiple computers can be selected and snapshots taken
simultaneously.
Record
This command records any activity on the client's desktop for the specified time. The Tutor can
set the desired record time and frame rate, and whether the user's details are printed on the
video. Note that the available frame rates are all low to save space, and that large amounts of
recording could fill hard drives.
Once created, snapshots and videos will show in the status window, and if double clicked will
open the event viewer in the right hand side of the screen. From here, individual events can be
displayed by selecting them in the top panel and videos can be played using the on screen
controls. Double click a video/screenshot to pop it out into its own window, which can then be
resized.
To see events from before the current session, click the "view log files" button to open the log file
viewer
Using AB Tutor
Command menu
Request Student Name
Menu: Command - Request Student Name
Some schools or organisations use a common shared account to logon to Windows for each
machine. This makes if difficult to identify who is using which machine. By sending this command
to a remote workstation, the user is asked to enter their name which will be shown in the 'User'
column next to the computer name. The following dialog box is displayed on the remote user's
computer asking them to enter their name.
Once the command has been issued by the tutor program a '?' will be displayed until they have
enter a name and pressed the Send button. This enables you to know who has yet to give a
name.
After users have entered their names:
There is no name validation done, so it is up to you to police the validity of the student's
entries.
Using AB Tutor
Command menu
Lock
Toolbar:
Menu: Command - Lock
The tutor can quickly lock the students' keyboard and mouse to ensure that the student
workstations are not used whilst a demonstration/lecture is being given. The remote workstations'
screens will be blanked and a message displayed. The default message is 'Attention please!',
but this can be changed or set to a picture in the Configuration options (Tools/Settings/Lock
Message).
Highlight the student workstations to lock before selecting this function. Normal Windows
multiple selection functions apply (e.g. Hold the Ctrl key down and click multiple items, or select
a range using the left mouse button and shift, or press ctrl+A to select all).
All locked computers are indicated in the status column as Locked.
It is possible for teachers to create their own lock messages and save them to be reused later.
Press the 'down arrow' next to the lock button image and select 'Lock Messages...'
This shows the following window.
Enter your text in the box on the left and use the formatting buttons to set the text attributes (e.g.
Font, size, colour, alignment, lists etc.)
To save this message:
Enter a short name in the 'Menu Text' box and press Save.
Tick the option 'Make this my default' to apply this message whenever you simply press
the lock button or select 'Lock' from the commend menu. (This overrides the default system
lock message and only one message can be set as the default.)
Previously saved messages can be displayed by selecting the required message from the
'Previous messages' drop-down box.
To delete a previous message:
Select the message from the drop-down list
Press the Delete button
Confirm the delete action by selecting Yes
To apply a previous message, select the down arrow next to the lock button and pick the
message to send from the menu.
Unlock
Toolbar:
Menu: Command - Unlock
This will unlock previously locked remote workstations.
Highlight the student workstations to unlock as described above before selecting this function.
Using AB Tutor
Command menu
Send Files
Toolbar:
Menu: Command - Send Files...
This enables the tutor to send one or more files in a directory to all selected student workstations.
On selecting this command, the following dialogue box is displayed.
Use the folder list on the left to browse to the required directory that contains the files you
want to send.
Select one or more files from the files list on the right.
Click and hold the left mouse button on the selected files and drag and drop them into the
Files to Send list below.
To change the Destination folder to which the files will be sent, either double-click the
mouse on the file or right-click and select Change destination folder.
Select %DESKTOP% from the drop-down list to save this file to the remote user desktop or
%MYDOCUMENTS% to save it to the users personal folder.
Continue to add all the files you want to send
Press the Send button to start sending the files to the selected workstations
Files can be removed from the Send list by right-clicking the mouse and selecting Remove from
list
By Dragging/dropping a folder from either the folder view or file view, all the files contained
in that folder will be added to the Send file list. Files within sub-folders will not be added.
The Send Files dialog window can be re-sized and the windows within the dialogue resized to optimise the file/folder views.
Using AB Tutor
Command menu
Transfer Files
Toolbar:
Menu: Command - Transfer Files...
This enables the tutor to send/receive one or more files or folders to a selected student
workstation. On selecting this command, the following dialog box is displayed
The top half of the dialog box shown the directory and files on your current machine and the
bottom half shows the folders and files on the remote workstation.
Browse to the local folder by using the top left folder view. When you select a folder, the
files within that folder will be displayed on the right.
Browse to the required remote folder using the lower left window.
Select one or more files from either the local files list or remote and drag/drop to the other
file list window.
If a file exists, you will be prompted to confirm the overwrite operation.
Using AB Tutor
Command menu
Collect Files
Toolbar:
Menu: Command - Collect Files...
This command allows you to collect one or more files from multiple workstations.
To Collect files:
1. Select the clients you wish to collect files from.
2. Select Collect Files from the Command menu or from the right click menu.
3. Specify the file(s) to collect. Use wildcards to obtain all files of a specific type (eg *.doc).
You can also enter multiple file specs by separating each one by a semi colon ';' character.
4. Specify the Remote Folder to search for the files.
5. Specify the local folder to save the collected file to.
6. Press the Get file Listing button to show a list of files found.
7. Un-tick any file you do not want to collect. You can tick or untick Select All to select or
deselect all files at once.
8. If you wish to delete the files from the remote clients when they have been collected, tick
the Delete remote files after collection checkbox.
9. Press the Collect Files button to start collecting the remote file and saving them on your
machine. As files are successfully collected, they are removed from the list. A message will
be displayed if any errors occurred in collecting the files and this file will remain in the list.
10. Press Close to finish.
All files are downloaded to the specified local folder; the computer names and user names are
appended to the file name to indicate where the file was downloaded from.
e.g. in the above example the selected files are copied into the local user's "My Documents"
folder.
Special Inserts:
When specifying the Remote Folder, two special inserts can be used to access the remote user's
personal folders.
To access the user's 'My Documents' folder use %MYDOCUMENTS%
To access the user's 'Desktop' use %DESKTOP%
eg %MYDOCUMENTS%\Course Work - will find all files in a sub folder called 'Course Work'
from the users 'My Documents' folder.
Absolute paths (eg c:\temp, h:\English\Essays or /home/user/) can also be used.
Using AB Tutor
Command menu
Log on
Toolbar:
Menu: Command - Logon
This command can automatically log all selected workstations onto the network.
Enter the required username and password.
Enter the required Windows Workgroup or Domain name. This is normally left blank so the
default domain name for the workstation will be used.
If the remote workstation displays the 'Acceptable Use Policy' message, then you need to
select this option to clear this message prior to logon.
Press the Logon button or Cancel to abort the command.
Using AB Tutor
Command menu
Logoff
Toolbar:
Menu: Command - Logoff
This will logoff all selected workstations. Users will be automatically logged off from the networks
and the default logon screen will be displayed ready for the next user.
You will be asked to confirm sending the logoff command to the selected machines.
You can also optionally display a count-down message on the remote client's screen to indicate
to any user still using the machine to save tall their work before being logged off.
Select the Allow user override option to display a button on the remote count-down window to
allow the user to abort the logoff.
This is a forced logoff command so be careful not to logoff users unexpectedly or before they
have a chance to save their work. Also double-check which computers you have selected before
executing this command so you do not inadvertently logoff all the computers in your school's
network!
Using AB Tutor
Command menu
Reboot
Toolbar:
Menu: Command - Reboot
This will force all selected workstations to reboot. (i.e. The machine will be shut down and
automatically re-started.)
You will be asked to confirm sending the Reboot command to the selected machines.
You can also optionally display a count-down message on the remote client's screen to indicate
to any user still using the machine to save all their work before the reboot.
Select the Allow user override option to display a button on the remote count-down window to
allow the user to abort the reboot command.
This is a forced shutdown/reboot command so be careful not to execute it without the
knowledge of the user, especially before they have a chance to save their work. Also doublecheck which computers you have selected before executing this command so you do not
inadvertently logoff all the computers in your school's network!
Using AB Tutor
Command menu
Shutdown
Toolbar:
Menu: Command - Shutdown
This will force all selected workstations to shutdown.
You will be asked to confirm sending the Shutdown command to the selected machines.
You can also optionally display a count-down message on the remote clients screen to indicate
to any user still using the machine to save all their work before the shutdown.
Select the Allow user override option to display a button on the remote count-down window to
allow the user to abort the shutdown command.
This is a forced shutdown command so be careful not to execute it without the knowledge of
the user, especially before they have had a chance to save their work. Also double-check which
computers you have selected before executing this command so you do not inadvertently logoff
all the computers in your school's network!
Using AB Tutor
Application
Launch
Toolbar:
Menu: Application - Launch...
Programs can be launched on the student workstations from the tutor workstation. For example,
the tutor can launch the same application on all student workstations in preparation for the next
activity/exercise.
Enter the application to launch, or select a previously entered application by clicking the
down arrow.
Enter any command line parameters to be passed to the launched application (e.g. a file to
open).
Click the Run button.
To remove entries from the drop down list, select them, right click and select clear. The whole list
can be wiped using clear all.
Some applications can be launched without the need to enter a full path. (e.g. notepad.exe or
winword.exe). If the application doesn't launch without a path then you must add one.
It is always better where possible to specify the full path to the application especially with
Microsoft Office applications. This is to ensure that the program is run under the context to the
currently logged-on user. Failing to do this can result in files being saved in unexpected
locations.
You can also specify document files without giving information about the application needed to
open them. (e.g. U:\Personal\StudyGroup.doc) as the client application will attempt to find the
launching application associated with the file's extension. In this case the extension is '.doc' and
Windows knows that Microsoft Word is the application that uses this extension.
Also note that you must enter the file extension in order to launch a document in its associated
application. Windows will hide extensions by default, but they can be shown by opening
Windows File Explorer and going to tools, folder options, view and unticking Hide extensions
for known file types.
It is also possible to enter a simple web address or URL (e.g. www.mycompany.com) and the
default web browser on the remote client machine will launch and show this web page.
To launch Mac apps, use the full path to the app, eg /Applications/Safari.app. If you wish to
use any command line parameters, the actual executable must be specified, not just the
container, eg /Applications/Safari.app/Contents/MacOS/Safari - you can then put open
http://www.google.com in the Optional program parameters box to automatically open a
website. Other applications will work similarly, however there may be slight differences, for
example Firefox doesn't require the open parameter.
Items can be added to the applications main pop-down menu by using the Launch Manager.
These items then appear under the Launch menu or as a drop-down menu when you press the
small down arrow to the right of the Launch button.
or
Launch Manager
Menu: Launch - Manager...
This command, available only to Administrators, opens the launch manager window to allow you
to add applications to run on remote workstations. Items appear under the Launch menu or as a
drop-down menu when you press the small down arrow to the right of the Launch button.
Press the Add button to create a new entry
Enter the Menu Text to be shown in the drop down menus
Enter or select
to find the application to be launched
Check that applications on the Client machines are installed in the same location as on the
Control to ensure successful execution.
Add any start-up command line parameters to be passed to the launched application. (e.g.
the path/filename of a file to open in Word)
Repeat the above process to add more applications
Press OK to save or Cancel to abort the additions
The order of the items in the menu can be changed by using the Move Up and Move Down
buttons so the most commonly used applications can be placed at the top of the list.
A maximum of 25 applications can be added to the launch menu.
Close Applications
Menu: Application - Close...
Programs can be closed on the student workstations from the tutor workstation. For example, if a
tutor has launched an application on all student workstations, they may wish to close that
application on all workstations ready for the next activity / exercise.
To specify the application to close you can either:
1. Specify filename of the application to close - case-insensitive (e.g. winword.exe or
IEXPLORE.EXE )
2. Specify the applications title text or part text using wildcards (e.g. *Microsoft*) will close all
running applications with the text Microsoft in its window title.
It is possible to close all running applications by simply entering '*'
No warning message will be displayed prior to closing the applications on the remote
machines.
Application Monitoring
AB Tutor can monitor and show all running applications on the remote workstations. A column in
the main views window called 'Applications' shows a small icon representing each running
application.
By hovering the mouse over an icon, a popup 'tool-tip' is displayed showing the application's
current title and its executable file name.
By right-clicking the mouse on an icon, a popup down menu is displayed.
Select Close 'app name' - If you want to force the remote running application to close. This
command first sends a gentle close command to allow the user to save any changes. If the
application has not been closed after 5 seconds, then a hard close will force the application to
shutdown and all unsaved work will be lost.
Select Apply Temporary Block to 'app name' - If you wish to prevent the user from relaunching the application. This will create and apply a temporary (30 minute) application
blocking policy to the remote student.
Using AB Tutor
Policies
Policies can be applied to a remote student's machine to restrict access to specified applications
or web pages and to set the level of privacy you would like to give your student and to generally
lock their machine down to prevent them doing non-work related tasks.
The screenshot below shows an example of various policies applied to remote computers. All
policies applied to a remote machine show up as icons in the Policies column.
By hovering the mouse over a policy icon, a popup 'tool-tip' is displayed describing the policy
and indicating whether it is temporary or permanent.
There are two steps to setting up and applying policies: first the policies need to be created. This
is often done by an administrator, who can protect policies against being removed by users.
These pre-created policies can then be applied to selected computers by a tutor, who is also able
to clear policies. Both tutors and administrators can create, set and remove policies, unless an
administrator has protected them.
Using AB Tutor
Policies
Creating Policies - Policy Manager
Toolbar:
Menu: Policies - Policy Manager...
Policies are a powerful way to control what a student can and cannot do on their machine.
You can choose to block or allow specific applications, web sites and system settings. These can
be applied on a permanent or temporary basic. If temporary, then the policy will remain in effect
for the amount of time pre-specified in the policy set-up. If permanent, the policy will remain in
effect on the computer to which it has been applied until it is removed. This means that anyone
logging onto a machine with a permanent policy set will be affected by that policy.
The image below shows the Policy Manager with several policies created. This box will be blank
when you first start up AB Tutor as there are no pre-set policies. The steps below will take you
through the creation of a new policy.
Policies can be exported to a simple XML file for importing to other AB Tutor installations. If you
are importing a policy file and the name of a policy already exists, then it will not be imported and
the current policy with that name will remain unchanged.
To create a new policy:
Press Add New... to create a new policy
Select the type of policy you wish to create
There are 15 types of policies you can create:
1. Block Internet Access - This works by blocking all access to specified Internet ports.
2. Block Web Sites - This allows you to filter specified web sites.
3. Block Applications - This allows you to control what applications are allowed to run.
4. Block Access to USB, CD, DVD drives - This allows you to control access to drives.
5. Block Access to Printers - Using this policy, you can disable access to one or many
printers.
6. Enable Privacy - This policy shows a small Icon in the remote users' system tray to
indicate the Client program is running and whether the Tutor is watching. It also
allows the remote user to block watching.
7. Keyword Monitoring - This policy monitors all keystrokes and notifies the tutor when
set keywords are typed.
8. Microsoft Windows Registry Control - Allows specific components to be locked down
via the Windows Registry. This option is intended for advanced users. See Appendix
1 - Registry Controls for more details.
9. Enable Logging - Log the remote users' activity (e.g. login, applications and web
pages).
10. Mute Sound - Allows you to mute the master volume on the remote computers' sound
card.
11. System Action - Allows you to execute a command on the remote machine (e.g.
Shutdown, launch or close an application at a set time of the day).
12. Lock Computer - Allows you to apply the normal screen lock via a policy. (E.g. at a set
time of the day)
13. Video Capture - This policy is used to record the screen of remote users.
14. Group of Policies - This allows you to group and apply a number of policies at once.
15. Set System Proxy - This allows the client machine's proxy server settings to be set
from AB Tutor.
Highlight the required policy and press Next
Policy Name
This page of options applies to all policy types.
1. Enter a name to identify this policy (e.g. 'Block All Web Access')
2. Select For Specified Time if you want this policy to apply to all users temporarily. It will
remain active until a command it issued from a Tutor program to remove it, or one of the
following conditions occur:
Remove after - Enter the time in minutes for the policy to remain active after which it
will get automatically removed.
Remove when user logs off - The policy will get removed automatically when the user
logs off.
It does not get re-applied when the next user logs on or if the same user logs off and
straight back on again.
3. Select Permanent if you want this policy to apply to all users permanently, either all the time
or at specified times. It will remain active until a command is issued from a Tutor program to
remove it.
4. If you are running AB Tutor as an Administrator, then you will also see the Administrator
Security options
Protected - If this option is set, then tutors will not be able to apply, edit or remove this
policy.
If remove re-apply after X mins - You often want to apply a policy that remains active
except during a lesson. Previously, the tutor would remove the policy but forget to reapply it at the end of the lesson. This option will automatically re-apply the policy with
or without the tutor's intervention.
Or re-apply when user logs off - The policy will get automatically re-applied when the
user logs off.
5. Choose an icon if you wish to add this policy to the toolbar.
6. Press Next
We recommend that you do not set any permanent policies close to the end of your trial of
AB Tutor. Once the 30 days' trial has run out, the policies that you have applied will remain in
force and cannot easily be removed. Therefore please make sure that you remove all permanent
policies well before the trial expires.
Policy Time
If you select a Permanent policy, then you are given the option to control when that policy will be
active throughout the day.
By default, the policy is active all day every day. If you wish to de-activate a policy during normal
school hours, then:
1. Move the mouse over the box indicating the start time (e.g. Monday at 8 am)
2. Click the left mouse button and drag the mouse to the end time (e.g. Friday 4.30 pm)
3. Release the left mouse button.
You can also click and drag to colour areas back in again, if you want to re-add times to the
policy.
Areas marked in white means the policy will be inactive, areas in green means the policy will be
set. In the above example, the policy will become active at exactly 5pm Monday to Friday.
The day is broken down into blocks of 30 minutes, 48 in total, so you cannot specify times
outside these values.
Using AB Tutor
Policies
Block Internet Access (Windows NT: 2000 - Win7 and MacOS)
This works by blocking access to specific TCP/IP ports. All web browsers access the Internet via
port 80 or 443. If these ports are blocked then browsers or applications using these ports will not
be able to connect to the Internet.
1. Select the specific ports to block (e.g. Internet access by browsers)
2. If you wish to block additional ports, enter them into the 'Block the following ports' box
separated by commas. (e.g. 8080 for proxy servers, 1863 MSN)
There are literally thousands of ports used by various applications and games, below are just a
few. For a full and comprehensive list, please check the Internet.
Service
Port
Web server
80
SSL (Secure Sockets Layer) Web server 443
FTP
21
POP3
SMTP
Remote Desktop (Terminal Services)
IMAP3
110
25
3389
220
IMAP4
Telnet
SQL Server
143
23
1433
LDAP
MSN Messenger
Yahoo! Messenger
AOL Instant Messenger and ICQ
389
1863
5050
5190
IRC (Internet Relay Chat)
DNS
pcAnywhere
6665-6669
53
5631
Because this policy blocks ports on a physical machine, we do not recommend using it on
Terminal Servers or machines that run multiple sessions. Instead, use the blocking ports method
with Block Web Sites policies. If you do wish to apply it to all sessions on a terminal server,
please apply the policy directly to the server, not to a session.
Using AB Tutor
Policies
Block Web Sites
This policy allows you to restrict access to one or more web sites. You can block/allow a website
:
Select Allow access to all sites to block specific sites and allow all others, or Block
access to all sites to allow specific sites and block all others.
To create the exceptions press the Add... button.
Enter the web address of the site to be an exception (ie, blocked if all are allowed or
allowed if all are blocked).
Press OK to confirm.
Repeat to add multiple web addresses.
Wildcards can be used to pick up web addresses that contain certain words (e.g. *sex*
will block web addresses that contain the word 'sex', including ones like 'Sussex').
We recommend using wildcards when blocking web sites to catch all possible urls that
could point to the site. (e.g. *.youtube.* will block www.youtube.com and uk.youtube.com
and www.youtube.co.uk etc.). You can also block file downloads by specifying the file
extensions to block. (e.g. *.exe or *.zip will stop the user from downloading these files
types.)
Repeat to add multiple web addresses
Alternatively, instead of manually adding the addresses, press the Import... button and
select a text file located on your hard drive that contains a list of web sites to add. (Each
web address entry must be on a separate line in the text file.)
Web addresses protected with SSL certificates (e.g. https://www.xyz.com ) cannot be
blocked since the url itself gets encrypted before it leaves the web browser. If you need to
block a web address using the https protocol, then you must find the IP address the url
connects to and specify that as the web address to block.
Please be aware that there are websites on the internet that allow users to bypass any web
address filtering. This is called 'Proxy Tunneling'. Students can use these sites to enter
banned web addresses and then browse them freely.
Web site blocking also includes support for Regular Expressions (regex). This is an
extremely powerful tool for creating rules. Any line item which is enclosed in forward
slashes (/) will be treated as a regex.
Some example rules (this is not by any means an exhaustive list):
. matches any single character.
* matches zero or more of the previous character, eg .* matches anything. This is
useful for padding the ends of a term, like * in standard rules.
+ matches one or more of the previous character.
[abcd] will match any single a, b, c or d character.
[0-9] will match any single numerical character.
[^a] specifies any character other than a
For example, /.*setup7[12][29]a+/ would match foosetup712a, setup719aa,
barsetup722aaaaa, but not setup722.
Regex support is not provided by ABT technical support, however there are guides
available on the internet.
Blocking Entire Ports (An alternative to Port blocking)
By specifying ':X' as the web address to block, you can prevent all access to the internet via
that port number. E.g.
:80 - blocks all access to the internet via port 80
:443 - blocks all access to the internet via the SSL secure channel (https)
:8080 - blocks internet access via some proxy servers
Using AB Tutor
Policies
Application Blocking
This allows you to restrict access to one or more applications on the student's machine. You can
block/allow an application by giving its actual file name or by specifying its window title and/or
folder.
If you apply an application blocking policy to a remote machine and the application you wish
to block is already running, then the application will be closed without saving any changes.
Select the Allow All applications to run or Block All applications
Press the By file Name... button
Browse to and select the program you would like to block
If the program to be blocked does not exist on your machine but does on the student's
machine, then simply type the application's file name in the File name box and press Open
The application's name is added to the list of Exceptions
Repeat the Add process if you wish to block/allow multiple applications
Press By App Title/Path to block/allow by the application's title and/or folder location.
Use wildcards to search for parts of the title or folder. The text is case insensitive so both
*solitaire* and *Solitaire* will work.
e.g.
*Microsoft Word* Filters for Microsoft Word
*Solitaire*
Filters for the Solitaire application
F:\*
Filters for any application run from the F Drive
*\Microsoft Office\* Filters for all applications located in any \Microsoft Office\... folders
Application blocking also includes support for Regular Expressions (regex). This is an
extremely powerful tool for creating rules. Any line item which is enclosed in forward slashes (/)
will be treated as a regex.
Some example rules (this is not by any means an exhaustive list):
. matches any single character.
* matches zero or more of the previous character, eg .* matches anything. This is useful for
padding the ends of a term, like * in st andard rules.
+ matches one or more of the previous character.
[abcd] will match any single a, b, c or d character.
[0-9] will match any single numerical character.
[^a] specifies any character other than a
For example, /.*setup7[12][29]a+/ would match foosetup712a, setup719aa, barsetup722aaaaa,
but not setup722.
Regex support is not provided by ABT technical support, however there are guides available on
the internet.
Take great care when blocking applications (especially if you are using wildcards) as you
may inadvertently block an essential application.
e.g. if you specify *word* then applications like wordart.exe or any application with word in its
path name (c:\program files\swordfish\main.exe) will be blocked.
Using AB Tutor
Policies
Block Access to USB, CD, DVD, Floppy Drives
This policy allows you to completely disable access to USB, CD/DVD and Floppy/Zip drives.
Using AB Tutor
Policies
Block Access to Printers
This policy allows you to control printing from remote machines. You have the option to Allow all
printers... except ones you specify, or to block all printers except those that you list.
To add printers to the exclusion list, click on the 'Add...' button. This will bring up the following
dialog box, which lists all printers available on the network:
You can then select the printer(s) you wish to allow/block, and click on 'OK'. Alternatively, you
can block access to all printers, except... and use wildcards to specify the printers you wish to
block.
Using AB Tutor
Policies
Enable Privacy
This policy allows you to indicate to the remote user that the AB Client program is running and
that the Tutor is connected and watching. If this policy is set on the remote machine, then a small
icon is displayed in the user's System Tray ( bottom right or top right).
There are three privacy options you can set:
Indicate to the User that a Tutor is connected - this shows the icon when a tutor
connects.
Indicate to the user that the Tutor is Watching - the icon will flash indicating that a tutor
is watching them.
Allow user to block tutor from watching - this option allows the remote user to prevent
the tutor from seeing their screen. To enable/disable tutor watching they need to click the
mouse on the icon in the system tray and select the 'Block Tutor Watch' menu.
If this third option is selected and the policy applied to a remote computer, then the block
watch is set on by default and must be disabled by the remote user before any Tutor programs
can see the remote screen or applications running.
Using AB Tutor
Policies
Keyword Monitoring
With keyword monitoring, you can specify a set of words which will trigger a tutor notification and,
if specified, take a screen shot of the occasion when the keyword was used and even record the
screen activity on the remote computer.
Just enter the trigger words in the dialog box, decide on the action to take when the trigger word
is entered by the user, and click on Finish to create your policy.
You can also use keyword monitoring to inform you when a student accesses a particular
website. So, for example, you could add https:// as a keyword so that you are notified when a
student attempts to log onto a secure site. Alternatively you might want to be notified if a student
tries to access www.facebook.com by adding facebook as the trigger word.
Using AB Tutor
Policies
Enable Logging
This policy allows you to enable logging of specific activities.
Log user Login/Logoff activity - This will log the date and time a user logs on and also
logs off the machine. It will also log the machine's start-up and shutdown times.
Log Applications used - This will log all applications run on the remote machines. It logs
the date, time, filename and the application's title.
Log Web sites visited - This logs each unique URL visited using any web browser.
Log Printer Activity - This logs any files printed, their file names and the computers from
which the printing was sent.
Log Keyboard Activity - This logs all keystrokes typed on a remote machine.
Select Only log visible characters if you do not want to log non-visible keys pressed by
the user (e.g. <BACKSPACE><F1><DELETE><UP><RIGHT> etc)
(See Viewing Log Files)
Using AB Tutor
Policies
Mute Sound
This policy allows you to mute the sound on clients. There are no additional options in the policy
creation page for this policy, however the frequency AB Tutor checks that the client is muted can
be changed through tools - settings - advanced.
Using AB Tutor
Policies
System Action Policy
It can be very useful to set up policies that will execute an action at a set time of the day (e.g.
Shutdown at 5.00PM each day)
There are 5 actions you can perform with this policy:
1.
2.
3.
4.
5.
Log off
Reboot
Shutdown
Launch application
Close Application
Disable for X minutes after executing
Action policies are designed to execute continuously, but most of the time you just want the
action to execute once. Therefore, we've added an option to disable the policy once activated for
X minutes. Once X minutes has passed, the policy will become active once more. The default
time is 31 minutes, 1 minute greater that the minimum policy Active time block. (See Policy Time)
Log off, Shutdown and Reboot
If you want to display a count-down timer on the remote machine before the log off, shutdown or
reboot, select the option and enter the text to be displayed to the user.
You can optionally enable a button to allow the user to abort the command if they wish.
Launch Application
Enter the application (including path) to execute on the remote machine.
This is useful for scheduling the running of updates or virus scans at a set time of the day or for
launching applications ready for use in a lesson.
Close Application
Enter the application to close. The same rules apply as described in Close Applications. (i.e
close via the applications filename or title text using wildcards)
Using AB Tutor
Policies
Lock Computer Policy
You might wish to create a policy that locks the remote computers at set times of the day limiting
student access.
You can customise the message displayed on the remote screen and/or display an image.
If the student attempts to reboot the machine, then when the system starts up again, this policy
will activate and lock the screen, keyboard and mouse.
Use this option with care! It will activate whether or not the user logging on is a full
Administrator to the computer.
Using AB Tutor
Policies
Screen Capture
By setting a screen capture policy on a remote machine, you can record the screen activity of that
computer.
Rate: Select the rate of video capture - you can set this to run from one frame per second to as
rarely as one frame a minute. The option you choose will depend on what you wish to use the
video for. If you wish to just monitor remote usage, then you can set the rate to say 1 frame every
30 seconds. This will be enough to get an overview of what that user has been doing throughout
the lesson and will keep the capture file size small.
Max Capture Time: We would always recommend that you set a suitable maximum time to
prevent a situation in which you start recording a remote screen, forget about it, and come back a
day later to find that the file produced is so large it cannot be stored on your system.
You also have the option to add the user details, date and time to the video. This will be printed
in the top right-hand corner of the video.
The video capture files created are stored on remote machines in the 'log' sub-folder from the
installed folder. In order to view these capture files, use the Log file Viewer and Fetch log entries
from selected remote machines. Once you have retrieved the log entries for a remote machine,
they are stored on your local machine under a folder defined in Tools - Settings - Folders.
Using AB Tutor
Policies
Group of Policies
By creating a Group of Policies you can apply any number of policies to remote machines in one
go.
Select one or more policies to add to this group (Hold the Ctrl key down to select multiple
items)
Press Finish when done
Applying a group of policies has the same effect as if you applied each individual policy in turn.
(i.e. each policy in the group will be shown and must be cleared separately.)
Using AB Tutor
Policies
Set System Proxy
This policy allows the proxy settings on a client to be forced to specific settings, and through
using the time options, allows different proxies to be used at different times of day.
The proxy policy options mirror the standard Windows proxy setup dialogue, allowing auto proxy
detection, PAC files and manual proxy setup. Once applied to a client, these will override the
system proxy settings.
Note that if using both proxy policy and web block policy, the proxy policy should be applied
first.
Using AB Tutor
Policies
Applying a Policy
To apply a policy:
Select the student workstation/s on which you wish to set a policy.
Select the Policy menu followed by 'Set Policy: <xyz>' where: <xyx> is the policy name
entered in the Policy Manager.
Alternatively: Click on the down arrow next to the Policies button on the toolbar to pop
down a menu to allow you to select the policy to apply.
When a policy is successfully applied, the policy's name will be added to the information for
that computer in the main computers list.
Using AB Tutor
Policies
Viewing a Log File
The Log file Viewer allows you to retrieve remote log file data and screen captures and store
them on your local hard drive. Once the log file data has been stored locally, you can analyse the
data at any time without the need to be connected to the remote machines.
The location to store log files can be changed (See Tools - Settings - Folders)
To open the log file viewer:
Select the Policies menu followed by View Log File...
Or select View Log File from the drop down menu displayed when you press the down
arrow next to the Policies button on the toolbar.
To retrieve the latest remote log entries:
Switch to the Main AB Tutor application
Select the computers you which to retrieve the latest log files
Switch back to the Log File Viewer window and press the Fetch button
AB Tutor will now connect to and start receiving all the latest log files and screen captures from
the selected computers.
Each time you Fetch remote log files data, only new entries are retrieved from each remote
computer. (e.g. the first time to fetch remote log data, all log files from the past 30 days are
downloaded, but subsequent download will only receive data since the last download)
Viewing Log Data
Log entries are grouped by day. The 'Filter' window shows a list of days for which log entries
have been created, and highlights in red any days where a violation has occurred (as opposed to
normal usage logging). If you select one or more log files from this window, all the log entries will
be displayed in the main list. To select multiple log files, press and hold the Ctrl key and click
each file to be added.
If you have a large number of log files and each log file contains a large number of entries,
then processing and displaying all these entries may take a while!
Log entries are colour coded to make it easier to see the different types.
Black: Applications - launched and closed
Red: Keyboard activity and events/violations
Purple: System start-up and user logon/logoff
Green: Printer activity
Blue: Web site activity
If you select a log entry and there is additional data associated with it (e.g. event screen shots)
then a small preview window is displayed showing a thumbnail view of the image. Double-click
this image to expand to a larger window if necessary. If the data is to a web address, you can
click this url in the preview window to launch that web site in your default web browser.
By default, the data is sorted by date and time so the most recent log entries are at the top of the
list. To sort by any of the other columns, simply click on that column's heading. Click again to
toggle between sort ascending or descending.
Filtering and Searching Log Data
If you are searching for specific log entries for a known user or computer, then you can use the
Filter section.
Enter the text you are searching for
Specify the column to focus the searching to (default: Any column)
Specify the activity type to search (default: All activities)
Press the Apply button
Now select the log file dates to include in the search (don't forget you can select multiple
dates)
We suggest to specify the filter before selecting the log files to search otherwise, if you
select all log files first, then the system has to populate the list with possibly tens of thousands of
log entries before the filter is applied.
Search text tips:
All searching is case insensitive
Multiple words separated by a space means a match is found only if all words are present
in the log entry.
All searches find the specified text anywhere in the log (e.g. andy will find a match for user
Mandy or Sandy etc.)
To search for words containing spaces, enclose the text in double-quotes (e.g. "internet
explorer" )
Use the special word OR to find a match for one word or another (e.g. youtube or facebook)
This means you can never search for the text OR on its own.
Clearing the Filter
The filter will remain active until you either press the 'Clear' button or you close the Log File
Viewer window.
Deleting Local log files
To delete local log files:
Select the log file date in the list
Right-click the mouse and select Delete
You are asked to confirm the delete operation
Select Yes to continue or No to abort the deleting
All screen capture files associated with the log file being deleted are also deleted.
Purging Remote log files
If you wish to delete all remote log files from remote machines:
Switch to the main AB Tutor window
Select the computers you wish to purge all log files
Switch back to the Log File Viewer window
Press the Purge button.
You will be asked to confirm the delete command.
Press Yes to confirm the deletion of all remote log files on all selected computers
Press No to cancel
This deletes ALL remote log files on the selected machines but does not delete any local
copies of these log entries previously downloaded.
Export Log data to file
The currently viewed log file data can be saved to file for loading into other software (e.g.
Microsoft Excel). Files are created in HTML format but contain special tags specific to Excel. The
HTML file can then be viewed directly using a web browser or loaded into a spreadsheet.
If you wish to save the current log data to file:
Press the Export button.
Browse to the required save folder and enter a file name
Press Save
If the file exists, you will be asked to confirm it is ok to overwrite it.
Using AB Tutor
Policies
Clearing Policies
Quick clear on a single machine
If you right-click the mouse on any policy icon you can choose to clear that policy for the selected
student. Alternatively, you can choose to or clear all policies applied on that machine.
Using the policy menu
To clear a policy or multiple policies:
Select the workstation(s) from which you wish to clear policies
Select the Policy menu followed by Clear Policies...
Alternatively: Press the down arrow next to the button on the toolbar to pop down a menu
and select Clear Policies...
Select the polices to remove and press OK
Clear All Policies
To clear all policies set on remote machines:
Select the workstation(s) from which you wish to clear policies
Select the Policy menu followed by Clear All Policies
Alternatively: Press the down arrow next to the button on the toolbar to pop-down a menu
and select Clear All Policies
You will only be able to clear permanent policies from machines/users to which you are
connected. Temporary policies will automatically be cancelled upon closing the Tutor
Programme, but you need to connect to machines/users to remove permanent policies.
How long a policy remains in force, where it is stored, and how best to clear it will depend on the
kind of policy applied and whether it is permanent or temporary.
Using AB Tutor
Groups (administrators only)
Managing Groups
Menu: Groups - Manage Groups...
Since AB Tutor will scan and connect to all computers on the school's network (with the client
program installed and running), it will find computers located in other classrooms. In a large
network, this could run into hundreds of computers. To only connect to computers in the
classroom in which you wish to work, you must create a separate group consisting of the
computers (identified by their computer name) and/or users (identified by their user name) in that
room.
You can resize this dialogue box to maximise the space to view the various controls. The
size/position of the window will be saved and restored on subsequent re-opening.
To create a new Group:
Open the Group Manager by selecting Groups, Manage Groups.
Click on the Add button under the group list to add a new group or right-click in this Groups
list and select Add New.
Enter the name of the new group.
or
Do a Discovery scan.
Select the computers you wish to add to the new group.
Select Groups, Add to new group
To change the name of a group, right-click the mouse on group name and select Edit.
To add computers to an existing group:
Open the Group Manager and select the group you want to work with.
Click on the Add button under the member list to add a new computer name to the
classroom group (or right-click and select Add Computer - right clicking and selecting Add
multiple computers allows a pre-made list to be pasted in).
Click on the Add User button to add a new user to the group (or right-click and select Add
Username - right clicking and selecting Add multiple users allows bulk adding from
existing lists).
Add additional computers until all have been added.
or
If you have access to Active Directory, then you can add computer/username directly to the
list from the Active Directory tab.
Find the computers or users you wish to add in the AD structure, select them and click Add
to Members.
or
Do a Discovery scan.
Select the computers you wish to add to the new group.
Select Groups, Add to existing group and select the group name.
To remove entire groups or members from a group:
Select an unwanted item.
Either press the Delete key or button. A warning message will be displayed to confirm the
delete operation.
Press OK when done or Cancel to abort the additions.
Once Classroom groups have been added, then each time the Find button is pressed or when
the tutor program first starts up, then following dialogue box will be displayed.
By selecting a classroom from the drop-down list, the system will only connect to
computers/users found in that classroom or group.
The <Discovery> group is only available to administrator to allow them to continue to connect to
all workstations on the network. If a Tutor password is set (See Tools - Settings - Passwords),
then this <Discovery> group will not be available to tutors, thus preventing them from accessing
computers outside their classroom. <All Groups> is also only available to the administrator
account, and will connect to computers in all defined groups.
When you have created a group with users, the user names in the group will be automatically
loaded into the tutor Main Window and their user names will be listed when the group is selected.
However, until a user logs on, their status will show as 'Not connected.'
Automatic Group Selection
It is possible to use a command line parameter on the AB Tutor shortcut so that when started, the
tutor program will automatically select a group. Other groups (including <All Groups> and
<Discovery> for the administrator) will still be accessible via the find button.
Syntax: -g <group name> or /g "<group name>"
e.g. "C:\Program Files\ABTutor\ABTutor.exe" -g "Classroom 4"
or ABTutor -g "Classroom 4"
or open -a "ABTutor" --args -g "Classroom 4"
Make sure you enclose the group name with double quotes if it contains a space.
For more information on setting up parameters, please see section 3-4: Startup Switches
General tab
Background Images
By using a graphics package, you can create a simple layout plan of your classroom and display
it as a background to the icon view. You can then position each workstation in roughly the correct
position on the plan to give you an idea as to where the machine is located.
Press the
button to browse for your classroom layout image.
The following image formats are supported:
JPEG
GIF
PNG
BMP
In order to see the background picture, you must re-connect to the classroom group via the
Find button and you must select the icons tab, not the list tab.
Use the Auto Arrange button
to re-position all the icons ready for positioning.
By default the location of computers in a group is a per-user setting, however if you want all
users on a computer to share the same positioning, you can tick the box in the Group Manager
labelled Fixed thumbnail positions and save in common settings file. Note that this will
prevent any changes Tutors make from being saved - only Administrators will be able to update
the icon locations.
Policies Tab
It is possible to automatically apply one or more Policies to all remote machines to which you
connect to as part of a selected group.
Select the Policies tab
The list show all policies currently available from the Tutor program (To add new policies,
close the Group manager dialog box and select Policies - Policy Manager menu)
Place a tick in the box next to the policy you which to apply
These policies are applied as though you set them manually from the Policies menu after
connecting to the remote machines. So it you select 'Permanent' policies, they will remain even
when you disconnect from the group or close AB tutor.
Security tab
Group Connection Password
By specifying group connection passwords, you can add an additional layer of security to
classrooms or machines. Follow the steps below to set classroom passwords:
1. In the main tutor window, find, select and connect to all the computers in your chosen
classroom.
2. When you are connected to all the computers in your classroom, select Tools Connection Security.
3. Select the Change Remote tab.
4. Enter the old connection password in the Current Remote Password box.
5. Enter your classroom password (e.g. classroom1PW) into the New Connection Password
and Confirm Password boxes.
6. Click the Apply button. Your new classroom password (classroom1PW) will now be
transmitted to all selected machines.
7. Now go into your Group Manager (menu Groups - Manage Groups) and select the
appropriate classroom. (If you have not yet created a classroom group, you will need to do
so now.)
8. Type your new password (classroom1PW) in the Group Connection Password box under
the Security taband click on OK.
Now, whenever a tutor selects that classroom group at start-up, they will be able to connect to all
the clients in that classroom, even if a different password is set as the primary connection
password.
Group Access
By adding computer names and/or usernames to this list, you can restrict access to this group to
only these members. If this list is empty, then all tutors will see this group in the drop down group
selection at start-up or when they press the Find button.
Right-click the mouse in the list window and select either Add Computer or Add
Username
Enter the name of the computer or the username of the tutor
Add additional computers/users until all required names have been added
If you have access to Active Directory, then you can add computers/usernames directly to
the list from the Active Directory tab
To remove items from this list, select all unwanted items and either press the Delete key or
right-click the mouse and select Delete
When a Tutor launches the program and the resulting security only allows access to one
group, then that group is automatically selected and the Group Selection popup window is not
displayed. This includes cases where there is only one group set up on a machine.
Restrictions tab
An administrator can set command/feature restrictions to each group. This enables you to create
groups that prevent the tutors from performing file transfers or viewing screens etc.
Select the Restrictions tab
Select the restrictions to apply to this group
Restriction
Description
Prevents the tutor from being able to find computers outside
Disable Find
of the group.
Disable Remote Watch
Prevents the tutor from Watching remote screens
Disable Remote Control
Disable Demo
Disable Exhibit
Prevents the tutor from being able to control remote screens
Prevents the tutor from Demoing their screen to remote
machines
Prevents the tutor from Exhibiting a student's screen to other
remote machines
Disable Chat
Prevents the tutor from using the Chat feature
Prevents the tutor from being able to use the Audio chat
Disable Audio Chat
feature
Disable Sending Messages Prevents the tutor from being able to send simple messages
Disable Request Student
Prevents the tutor from being able to request remote student
Name
to enter their actual name
Disable Lock
Prevents the tutor from being able to Lock remote screens
Prevents the tutor from being able to Launch remote
Disable Launch
applications
Disable Remote Application Prevents the tutor from being able to close remote
Closing
applications
Disable Remote Screen
Prevents the tutor from being able to use the remote screen
Capture
capture
Prevents the tutor from being able to transfer files back and
Disable File Transfer
forth to remote machines
Prevents the tutor from being able to send files to remote
Disable Sending Files
machines
Disable Collecting Files
Prevents the tutor from being able to collect remote files
Disable Login
Prevents the tutor from being able to logon remote users
Disable Logoff
Prevents the tutor from being able to logoff remote users
Prevents the tutor from being able to reboot remote
Disable Reboot
machines
Prevents the tutor from being able to shutdown remote
Disable Shutdown
machines
Disable Sending
Prevents the tutor from being able to issue a Ctrl+Alt+Del
Ctrl+Alt+Del
command
Disable Sending Custom
Prevents the tutor from being able to send custom key
Key Command
sequences
Prevents the tutor from being able to add, edit or delete
Disable Policy Manager
policies
Prevents the tutor from being able to apply policies to
Disable Sending Policies
remote machines
Prevents the tutor from being able to remove policies from
Disable Clearing Policies
remote machines
Disable Power On
Computers
Disable Log File Viewer
Prevents the tutor from being able to issue the 'Power On'
command
Prevents the tutor from being able to view remote log files
Hide Question Poll tab
Hide Events Tab
Don't show keyword
events/violations
Disable exam module
Prevents the tutor from being able to access the Question
Polling functions
Prevents the tutor from being able to access the event
viewer tab.
Prevents keyword violations from showing up in the status
window.
Prevents the tutor from using the exam module.
Active Directory
The final tab in the group manager allows an administrator to populate groups and add security
entries from Active Directory without having to enter all the computers in it manually.
To add computers, find them in the AD tree view, select the ones you wish to add (using shift to
select a range, and ctrl to select individual machines) and click add to members. If you wish to
use the computer descriptions as a friendly name, tick the box at the bottom of the window,
otherwise the computer names will be used. This interface can also be used to add computers to
the only allow list on the security tab by clicking Add to Security.
For more details on using this tab, see the Managing Groups and Security sections of this page.
Using AB Tutor
Tools (Administrators only)
Settings
Menu: Tools - Settings
This opens the configuration dialog to specify General settings, Show/Watch modes, network
connections, lock messages, client capture settings and start-up passwords. See section 3-2:
Settings
Connection Security
Menu: Tools - Connections Security
This shows the connection passwords settings, allowing an admin to update local and remote
passwords. See section 4-4: Connection Passwords
Check for Updates
Menu: Tools - Check for Updates
By selecting this option the system will check for newer version of the program by connecting to
the AB Consulting web-site. If any updates are found, then you will be notified and asked which
update you would like to apply.
Client Maintenance
Menu: Tools - Client Maintenance
This option will check the selected remote workstation for older versions of the ABClient
application and show a list of all selected clients.
If older versions are found, they will be automatically ticked, ready to update.
To update the remote clients:
Select the clients to update from the list
Press the Update Now button
The window will be closed and the clients updated in the background.
Clients can update themselves without a re-boot, however there will be a short disconnected
period whilst the remote client is closed, updated and restarted.
If the Automatically connect to found clients option has been set, then the tutor program will
attempt an automatic re-connection after about 4 seconds. If this fails, then simply press the Find
button once again to re-connect.
The Client Maintenance option can also be used to uninstall the client:
Select the machines to uninstall from the main list view.
Select Tools, Client maintenance, Uninstall.
Ensure the machines to be uninstalled are ticked.
Click Uninstall.
Send Key Sequence Manager
Menu: Tools - Send Key Sequence Manager...
This command opens the Key sequence manager window to allow an administrator to create
their own keyboard sequences to send to remote workstations. Key command menu items are
appended to the Commands menu and to the Control drop-down menu button on the remote
view toolbar shown when viewing workstations.
Press the Add button to create a new entry.
Enter the Key Sequence to send in the bottom box.
Select Menu Text in order to enter your own text that will appear on the menu.
Repeat the above process to add more key commands.
Press OK to save or Cancel to abort the additions.
By selecting the Capture keys as you type option, all keys you press on the keyboard are
inserted into the Key sequence window. This allows you to quickly build long sequences of key
strokes, including special keys such as Ctrl and Alt.
The order of the items in the menu can be changed by using the Move Up and Move Down
buttons so the most commonly used commands can be placed at the top of the list.
A maximum of 10 commands can be added to the menu.
All special keys are put between '<' and '>' characters. For example to simulate an Enter key, you
should use <Enter> or <Return>. Or to press Shift key, use <Shift>. Here are some more
examples:
To send Ctrl+A use <Ctrl+A>
To send Alt+F4 use <Alt+F4>
To send Ctrl+Alt+Shift+A use <Ctrl+Alt+Shift+A>
You can also use <Ctrl+Alt>, <Ctrl+Shift> and <Alt+Shift>
To hold Shift key and many keys, use <SHIFT_LOCK>write your keys
here<SHIFT_UNLOCK>
You can also use <ALT_LOCK>, <ALT_UNLOCK>, <CTRL_LOCK> and
<CTRL_UNLOCK>
To add a delay use <DELAY xxx> where xxx is the amount of time in milliseconds. For
example, <DELAY 1500> waits 1.5 seconds.
The key commands are appended to the Command menu as shown:
Languages
Menu: Tools - Languages
Alternative languages can be selected here. Note that AB Tutor will need to be restarted before
the change will take effect.
Using AB Tutor
Assessment
AB Tutor includes a number of ways to assess your students' understanding of the material, of
varying levels of depth and complexity.
Easy Polling allows you to verbally ask the students a question and have them reply from
their computers, using simple "yes/no", "true/false", colour based or multiple choice answer
options.
Poll allows you to send written multiple choice questions out to students' computers, and
then save the results. You can also create questions ahead of time and save them for future
use.
Self-Paced Questions allows a much larger test, consisting of multiple questions to be
sent to students' computers for them to work through at their own pace. This function can
also prevent the students doing anything else on the computers during the exam to prevent
cheating. Again, the results of the test can be exported to a table for future use.
Easy Polling
Menu: Assessment - Easy Polling
The Easy Polling system is designed to be used during a lesson to allow a teacher to quickly
check their students' understanding. Instead of asking an individual student, the entire class can
answer independantly from their computers. The questions can have yes/no, true/false or
multiple choice answers. When the students answer, the teacher will see a summary of the
answers given, and can see a detailed breakdown of the answers on the list view.
To send an Easy Poll form, select the relevant computers in AB Tutor, then select Assessment Easy Polling. A window will open with the available answer sets:
Select the answer set you want to send, and click OK. The options will appear on the student
computers allowing them to answer your question. As they do, feedback will appear on the
teacher console. If you want more detailed feedback, each individual student's response will be
displayed by their name on the list view.
Poll
Menu: Assessment - Poll or use the poll button on the right hand toolbar.
The Poll option is intended for slightly more detailed questions, and will send the question out to
the student machine along with the answer form.
To create a question:
Enter your question text
Select from the drop down list the type of question. You can send either a Single Choice or
Multiple Choice question.
Add one or more answers by right-clicking the mouse in the Answers section and select
Add New
Double-click on the answer text to edit it (Alternatively, right-click on the answer and select
Edit)
Only answers that have a Tick in the box will be sent to the remote machine.
To delete an answer, select it (hold down the Ctrl key to select multiple answers) then
either press the Delete key or right-click and select Delete
When you are ready to send the question, select the remote computers in the Main Window
(list on the left) and press the Send button.
Press the Send button once only otherwise the Tutor program will send multiple copies of
the question. This is done deliberately so that you can send the question multiple times if
computers are shared by more than 1 student.
If you want to save this question and its answers for future use, press the Save button bottom
right. To restore saved questions, select the required question from the drop-down list of
previously saved questions.
If you want to delete a previously saved question, select the question from the drop down list and
press the Delete button. (If this button is disabled, then it means you have not selected a question
yet)
If you want to completely reset the question text and answers, then right-click the mouse in the
answers window and select 'Clear All'
Analysing the Results
As students submit their answers, the results are displayed in the Results columns and in the
Status column of the main window. By scanning over the Status column, you can easily see who
has not yet answered and also actual answers from those who have.
To save the results, press the Export button. You will be prompted to specify a folder and
filename for the results file. The results are stored in HTML format and can be later opened using
any web browser or imported into a spreadsheet package for further analysis.
Ending or Resetting the Feedback
When you have finished, press the End button to stop any further processing of replies. The
Question Polling will also automatically end if you click on one of the other tabs on the right to
change the view.
Self-Paced Questions
Menu: Tools - Self-Paced Questions
The Self-Paced Questions system allows longer and more in depth testing of students than the
single question polls, but is designed along a similar system.
When opening the Self-Paced Questions module, you will get the following window:
The top row of buttons are for options which affect the entire test, saving and loading allow
completed tests to be copied between computers, preview will show you the test as the pupils
will see it and do a dry run through it. Save result and export are for dealing with the results after
the test has been taken, and start, stop and clear deal with running the test once it has been
created.
Settings
This tab configures the basic settings for the test. It can be given a title and description, and
allows the teacher to choose what rules apply. The title will be used as the filename when an test
is saved.
Exam is timed: Allows a time limit to be placed on the exam, from 1 minute to 10,000
minutes.
Randomise questions: This option gives the questions in a random order, making copying
between students harder.
Randomise answers: This option shuffles the order the possible answers to each question
are displayed.
Students are allowed to pause the exam: Allows the exam clock to be stopped, but
prevents input during this time. Note that the current question is still visible at this point.
Allow students to review answers before submitting: Allows the student to view all their
answers on one page for easy checking before submitting.
Allow students to verify with tutor after submitting: Shows a summary of correct
answers against the ones submitted by the student.
Allow students to see their results after sumitting: After the student submits the exam,
they will see a summary of their results, telling them how many questions they answered
and right/wrong totals.
Allow students to switch to and run other applications: If this is unticked, the exam will
run full screen and prevent access to anything else on the computer.
Questions
On this tab, the questions for the exam can be entered. The buttons across the top of the first
panel allow adding, removing, rearranging and copy/pasting questions, the area on the right
allows for the details to be entered.
To create a question:
1. Click the green + button to create a new question.
2. Ensure the new question is selected in the question list.
3. Type the question into the top middle text box. The font and style options can be used if
required, and images can be embedded or used as a background.
4. Select "single choice" or "multiple choice" from the dropdown box. Single choice means
that there is one answer for the question, multiple choice allows the student to select
multiple options from the list.
5. Press the add choice button and edit the text for the first possible answer. Repeat for all
possible answers.
6. Select the "correct answer" tab and tick the correct answer(s). This will allow AB Tutor to
automatically mark the exam.
Repeat this process for all the questions in the exam. Once the exam is finished, click save. The
preview option will allow you to see the exam as the students will.
Progress
When an exam is running, this tab will show you how the exam is going; which questions have
been looked at and which have been answered, plus how long each question is taking the
students. This allows the teacher to easily tell which questions are proving difficult and how far
through the exam the students have got.
Previous Results
This tab gives access to the results from previously taken exams. Results can be shown by
student, giving a summary and details (showing which questions they got right, wrong, and
whether they looked at unanswered ones) and also by question, giving a summary of which
answers were given for each question.
The results can be exported as an html table by selecting the Export button from the toolbar.
Using AB Tutor
Remote Deployment Utility
The AB Tutor Remote Deployment Utility allows installers to be pushed out to remote Windows
machines without needing AB Tutor to be installed. It is intended mostly as an alternative to
using Active Directory to deploy the software. It can also be used to modify the installer msi file to
embed the connection password and other install options, in preparation for Active Directory
deployment.
Creating a modified MSI
To create a modified MSI file for deployment outside the Remote Deployment Utility:
Open the Remote Deployment Utility.
Select the AB Tutor installer you wish to modify by selecting the
button.
Select the Configure AB Tutor button and enter the details for the install:
Click Start to generate the new MSI. It will be created in the same directory as the original
MSI file.
If you wish to actually install the software from the Remote Deployment Utility:
Configure the install as above. (Not including clicking Start.)
Select the computers you wish to install to from the left hand pane. Click Add >> to add
them to the deploy list.
If you need to add additional computers which weren't picked up from the scan, click the
Add New button and enter the hostnames.
If you wish to save or load a list of computers, use the Export and Import buttons.
Enter the username and password for an account with administrator access to these
computers in the top right.
Press Start. The RDU will install the selected software on the remote machines. The
Status entry will change to show the progress of the install.
The Remote Deployment Utility can be used to install any software which is provided as an
msi file. Simply select the installer by pressing the
button.
Terminal Server Support
Terminal Services is a component of Microsoft Windows operating systems (both client and
server versions) that allows a user to access applications or data stored on a remote computer
over a network connection without the need to install the application locally.
AB Tutor works on a terminal server by running an instance of the ABClient program in each
session.
Installation
Run the abtcsetup7.msi set-up program on the terminal server and follow the simple on-screen
instructions for installing the 'client' program only. Apart from making sure the ABClient program
is not blocked by the Windows or third party firewalls, no further setup is required.
Connection to Terminal Service Clients
To get a list of all the currently active terminal server sessions (or clients), you must first connect
to the terminal server itself. Once a connection to the server has been established, a list of
terminal server sessions are automatically displayed within the tutor programs connection list.
Terminal Server clients appear in the list with a different icon
client icon
as opposed to the normal
.
Status of remote computers
Single
Computer
Thin Client
Session
Computer found, but not yet connected
Attempting to connect or re-connect to computer
Connected to computer, no user logged on
Connected to computer with user logged on
Connection to computer failed (including after shut
down)
Which TS client computers are added to the Tutor list are controlled in the same way as normal
connections to a computer; via Groups (See Groups).
Configuring AB Tutor to Auto Connect to Terminal Servers
Because the tutor program must connect to a terminal server in order to display all connected
client sessions, you can configure the program to automatically connect to your terminal server
without even showing the server in the tutor list.
Select 'Tools' - 'Settings' and click on the 'Terminal Servers' tab
Enter the name of your terminal server and press the Add button.
Hide from Tutor and Auto connect...
Select this option to automatically connect to all the specified terminal servers at AB Tutor startup (irrespective of whether they are part of a classroom group). If the tutor program is launched
with Tutor access level, then these terminal server connections are not shown to the tutor but any
connected clients will be shown depending on whether the client computer name exists within
the selected Classroom Group.
Auto Connect to Found Sessions
Tick this option to automatically connect to any terminal server clients that become active.
Disable Shutdown/Reboot of Server
This is an extra level of security to prevent the terminal server from inadvertently being shutdown
or rebooted.
Terminal Server Connection Status
Once you have connected to a session on a terminal server, the session status is shown in
brackets after the normal status text.
There are 2 main session states: Active and Inactive.
Active: This indicates that the session is active and a user is connected and using the session.
Inactive: This indicates that the session is running but the user is not actually connected. NOTE:
in this state, you cannot view the sessions screen, if you try you will simply get a black screen. As
soon as the session status changes to 'Connected' you will see what the remote user sees.
Applying policies to Terminal Servers
Most policies will work on Terminal Server clients in exactly the same way as on normal PC
clients. The exception to this is the Internet Block option. As this works by blocking ports, it
affects the entire computer instead of just the specified session. As a safety measure, Internet
Block policies cannot be applied to a session, and must be applied to the server directly.
Licence Management System
In order to allow customers more flexibility in managing their AB Tutor Licences, an online
Licence Management System has been developed. Upon purchasing a licence, an online
account is created for every customer. Through the Licence Management System, a customer
can:
See how many licences they have purchased, how many have been activated, and how
many are still free.
Identify the computers on which the licences have been activated and when the software
was last run on them.
De-activate the software on computers on which it is no longer required, thus freeing up
licences that can be used on another computer.
Order and pay for more licences by credit card.
The Licence Management System also covers purchasing and user management, allowing an
administrator to keep an eye on all details of their account in a single place.
Licence Management Server
Creating an Account
Before using the AB Tutor website, you will need to set up a user account on the Licence
Management System. The email address that you give will be your username. Setting up a user
account allows you access to:
Trial downloads
Technical support
Feature requests
Knowledgebase
A user account can also be joined to an organisation account, allowing access to:
Licence purchasing
Licence Management:
Monitor connections
Free up in-use licences
Manage existing orders and invoices
The Licence Management System can be accessed by going to www.abtutor.com/login
To create a new user, click the "Register Now" button and fill in your details on the registration
page. When you click register, you will be sent an activation email.
Upon successful login as a new customer, you will see the following page:
From here, you can check pricing and request a trial copy of AB Tutor. If you wish to buy the
software, you will need to link your user to a school or company account. If the school already
has an account, please contact AB Tutor to have your user account linked to the school account.
If you are setting up a new school account, simply click on "Buy Licences". This will ask for the
details to create a new school account, and when created will automatically link your user to the
new school account.
This will automatically take you to the products page, allowing you to browse while your account
awaits activation.
Licence Management System
Purchasing licences
Click the "Buy Licences" link to get to the products page. From here, you can choose how many
licences you would like to buy. If you already have some licences, any additional ones will be
charged at the discounted rate. Enter the number you wish to buy in the "Qty" box and select
"Add to Cart".
You will now be shown a summary of your order. Please check this over, and when you're sure
it's correct, add an order reference, confirm the terms and conditions and confirm the order.
Pay by credit/debit card
Select the Buy button. This will take you to an order confirmation page, allowing you to check
your order and add an order reference for your records. Once you are happy with the details, read
and tick the box for terms and conditions, and select the Confirm Order button. You will then be
shown the invoice. Press Pay Now to enter your card details. Once the payment has been
successful, you will get a paid invoice shown on screen as your order confirmation. Once your
order has been placed, we will activate it and you will be able to start using the software.
Pay by purchase order
Select the Quote button. This will show you the order confirmation page, to allow you to check
your order and add an order reference. Read and confirm the terms and conditions by ticking the
checkbox, then select Generate Quote. This will display a quote, with a Quote # at the top.
Please contact us with your purchase order, referencing this quote number.
Licence Management System
Trial Download
To request a trial download:
Click Request Download.
Please ensure that your details are correct, and enter a reason for the request. This is to
allow us to vet the trial download requests to ensure that they are from valid end users, as
opposed to students trying to break into their school's system.
Once your trial has been verified, an email confirmation will be sent. Once you have
received this email, the Request Download link will be replaced with a Download link.
The Download link will allow you to download and install the latest version of AB Tutor.
Once installed, please see Licence Activation for instructions on how to activate the trial.
Licence Management System
Managing Licences
Your organisation account on the LMS will allow you to manage your licences and keep an eye
on where they are in use and how many you have available. When you log in you will see a
summary of your account. At the top are your Account Details, including your serial number.
This is the serial number you will use whenever you install a copy of AB Tutor to register against
the licence server.
Below this is the Products section. This shows what licenses you own, and hence how many
copies of AB Tutor you are able to install. It also tells you how many of your available licences
are currently in use:
The next section shows your Installations. This is a complete list of all Tutor installations which
are currently registered against the LMS. Each entry will show information about that licence:
Name
The friendly name assigned to this install
Type
The licence type - eg Normal, Roaming, Unlock Code, Site Licence
Created
The date and time this computer first connected to the LMS
Last
The date and time this computer last connected to the LMS
Connected
Connections How many times this computer has connected to the LMS
Product
The product type of this installation - eg Tutor 6, Tutor 7
The version number of the installation. This allows you to quickly check whether
Version
any of your tutor installations need updating
If there is a Free button, you can release this licence for reuse. Note that not all
Action
licence types can be freed up
The next two sections show all past invoices and orders. These can be clicked on to show the
full invoice or order for your records.
Finally, a list of Account Managers is shown. If you wish to have any added or removed, please
contact us at [email protected]. Similarly to installations, this will also show when account
managers were created and when they last logged in.
Troubleshooting
Question
I have just installed the tutor
program but it does not find
any remote machines.
Answer/Solution
Please make sure you have installed the client program on all
the machines to which you wish to connect.
If this doesn't help, try adding the appropriate IP address ranges
to tools, settings network to force those addresses to be
scanned. Also, please see Connection Problems
This usually means that a firewall either on the Tutor or client
side is blocking communications. Double-check the Windows
firewall or third party Internet security software on the client and
The Tutor and Client programs tutor machines. Also make sure any routers/hardware firewalls
are installed and running but or switches are not blocking port 5151
the Tutor program does not
Verify that the client program has installed and is running. (See
find any remote clients.
Windows-Services-AB Client Manager)
If machines are still not showing up, try creating groups with
them in.
Please check your wireless router has 'Multicast' enabled and
does not block port 5151.
I can connect to the clients fine
when using a direct LAN
connection, but it fails to find
the client when using a
wireless connection.
If this doesn't help, try adding the appropriate IP address ranges
to tools, settings network to force those addresses to be
scanned. Also, please see Connection Problems
If machines are still not showing up, try creating groups with
them in.
In order to allow the AB Tutor scan to find computers on different
subnets, add the IP address ranges in Tools, Settings,
Network
As soon as I try to connect to a
remote machine it gives an
'Authentication failure'
message and indicates an
'Invalid connection password'
I can't connect when
connecting to computers in a
group, but can connect to them
as normal from a scan.
I can't seem to find the 'Tools'
menu to be able to configure
and set passwords. Neither
can I create groups or policies.
This happens when the connection password saved in the tutor
machine does not match the password set on the client. Please
refer to the User Guide for information on working with
passwords.
There is probably a problem with your DNS server, it's giving the
wrong IP addresses for the hostnames. This can be checked
using ping <hostname> from the tutor and ipconfig on the
client.
To do this, you must have administrator level access to the tutor
program. This is controlled through start-up passwords. See
Startup Passwords.
This happens when the connection between the tutor and client
Some of the remote machines machine is lost or fails. This can happen when the remote
keep unexpectedly
machine is rebooted, powered off, the cable is disconnected, a
disconnecting.
network fault occurs (e.g. poor wireless signal), or a system
failure. Try selecting and re-connecting to the machines.
This is usually down to the setting of the router/switch between
The Tutor program cannot find
clients across different
subnets but within the same
subnet it's fine.
subnets. Check the router or switch documentation and make
sure that port 5151 is open and not blocked. You can also try
adding IP ranges to scan (See Tools - Settings - Network).
Alternatively, add the problem computers to groups and AB
Tutor will be able to connect to them.
This only happens on Windows Server 2003 machines running
the AB Tutor program.
I'm running the Tutor program There is a work around and it is to install and start the ABClient
on a Win2003 Server and am program on the Windows 2003 machine as well.
getting the following message
when I launch the program:
Then, when you launch AB Tutor program it will warn you that
the Client program is running and can cause a problem when
Unable to bind listening Scanning for clients. When this message appears, select No to
socket: an attempt was not stop the client program. AB Tutor program will scan the
made to access a socket network to find the clients and should find them OK.
in a way forbidden by its
access permissions.
You will get a warning message in the output window indicating
(10013)
that AB Tutor program will not be able to Listen for Clients. This
is a feature that allows AB Tutor program to pick up Client
machines that are switched on without the need to press the
Find button again.
I get the following error
message after launching the
tutor program.
"setsockopt()
This error message indicates that you do not have a network
IP_ADD_MEMBERSHIP
connection at all
address failed: The
requested address is not
valid in its context.
(10049)"
This message occurs when you are trying to connect to a
machine by its name only not via the machine's IP address.
When classroom groups are selected, only the computers name
I get the following message
is stored since most machines have dynamic IP addresses. If
when trying to connect to a
your network supports DNS or WINS, then a computers IP
remote machine
address can be obtained simply from its name and you shouldn't
Warning: (XYZ) Unable get this error message. If not, then the tutor program must try to
to resolve host by name: get the IP address from one of the following methods. During a
No such host is known scan any remote machines found will send back its IP address. If
(11001)
the scan does not find these machines, then every 10 seconds,
each machine will broadcast its presence and send its IP
address to the tutor. Once the tutor program has the remote
machine IP address then a direct connection can be made.
Policies I apply to the remote Check the policies are not temporary. Temporary policies are
machines disappear when the designed to clear when a user logs off or the tutor program is
user logs off.
closed. Try using a permanent policy.
You must make sure the machine AB Tutor program is installed
on has access to the internet.
When I enter my Account
Serial Number it fails to
validate over the internet.
If you are using a Proxy Server to access the Internet, then these
settings must be configured.
validate over the internet.
After you get a message indicating a connection failure, you
should see a Setup button. Press this button and enter your
Proxy Server settings and press Activate once again.
This is to do with security rights the remote client program is
running under. The ABClient runs as a Windows Service using
the default Local SYSTEM account of the machine. Although the
SYSTEM account normally has full access to the local machine,
it does not have access to network resources.
I get an 'Access denied' error
message when transferring
files from the Tutor machine to There are 2 solutions:
the clients but onto a network
1. Change the account the AB Client service runs under to
drive not the local C drive.
one with access right to the local machine and the network
drive.
2. Change the security rights on the network drive to allow
the local SYSTEM account to have access.
This is usually down to your DHCP and DNS server (or WINS if
you use NetBios) not releasing/refreshing correctly.
The Microsoft DNS services are meant to map the computers
Name to its dynamically assigned IP address from the DHCP
When I view a remote
server. If your DNS server caches the IP addresses assigned to
computer the screen shown is
computer names and are not refreshed at the same rate as
different to what's on that
DHCP, then you will get these problems.
physical machine.
Try changing the 'Lease Time' for your DHCP Server and make
sure your DNS server refreshes on a regular basis. There is an
option called 'Always dynamic update DNS A and Ptr records' in
the DHCP setup, try enabling this.
Event logs not appearing is usually a permissions problem. In
AB Tutor, please go to tools, settings, folders and ensure that the
When I collect event logs from other tutors have write access to all the locations specified. We
a client, they don't appear on generally recommend setting them to "%MYDOCUMENTS%\AB
the tutor
Tutor\log" or similar - this puts them in the current user's "my
documents", which more or less guarantees they have write
access and keeps each tutor's logs and captures separate.
This error message is due to the Windows Installer registry
becoming corrupted. To fix it, first ensure that AB Tutor is
uninstalled from control panel ("add and remove programs" or
"programs and features") then ensure "c:\Program
Files\ABControl" and "c:\Program Files\ABTutor" have been
deleted. This will probably require a reboot.
When installing, I get a "Not
marked for installation" error
If any files are still blocked, it will be because Windows still
thinks it's in use. Go to a command prompt (start, run, "cmd") and
enter:
netsh winsock reset
then reboot and delete the ABControl and ABTutor folders, the
program should install successfully.
If this doesn't fix it, Microsoft have a tool for cleaning up the
installer registry. For Windows XP, please use the tool at
http://support.microsoft.com/kb/971187 or for Windows Vista/7
http://support.microsoft.com/mats/Program_Install_and_Uninstall
- these will fix your installation logs and allow the installer to run.
Settings aren't getting saved
(especially Windows 7)
The user probably doesn't have write access to the config file.
To fix this, load Windows Explorer and go to c:\ProgramData\AB
Tutor\ (or wherever you keep the log file if you are specifying it
manually) and find the file ABControl.xml. Right click, select
properties, security, edit, users and ensure that the user who is
having the problem has "allow" for "full control". This will allow
the user to edit the file, and so any changes to the settings will
be saved.
Troubleshooting
Error Codes
10013
10024
10035
10036
An attempt was made to access a socket in a way forbidden by its access permissions.
Too many open sockets.
A non-blocking socket operation could not be completed immediately.
A blocking operation is currently executing.
An operation was attempted on a non-blocking socket that already had an operation in
10037
progress.
10038 An operation was attempted on something that is not a socket.
10039 A required address was omitted from an operation on a socket.
10041
A protocol was specified in the socket function call that does not support the semantics
of the socket type requested.
The requested protocol has not been configured into the system, or no implementation
for it exists.
10044 The support for the specified socket type does not exist in this address family.
10045 The attempted operation is not supported for the type of object referenced.
10043
The protocol family has not been configured into the system or no implementation for it
exists.
10047 An address incompatible with the requested protocol was used.
Only one usage of each socket address (protocol/network address/port) is normally
10048
permitted.
10046
10049 The requested address is not valid in its context.
10050 A socket operation encountered a dead network.
10051 A socket operation was attempted to an unreachable network.
10052
10053
10054
10055
10056
10057
10058
10060
10061
10062
10063
10064
The connection has been broken due to keep-alive activity detecting a failure while the
operation was in progress.
An established connection was aborted by the software in your host machine.
An existing connection was forcibly closed by the remote host.
An operation on a socket could not be performed because the system lacked sufficient
buffer space or because a queue was full.
A connect request was made on an already connected socket .
A request to send or receive data was disallowed because the socket is not connected
and no address was supplied.
A request to send or receive data was disallowed because the socket had already been
shut down in that direction with a previous shutdown call.
A connection attempt failed because the connected party did not properly respond after
a period of time, or established connection failed because connected host has failed to
respond.
No connection could be made because the target machine actively refused it.
Cannot translate name.
Name component or name was too long.
A socket operation failed because the destination host was down.
10065 A socket operation was attempted to an unreachable host.
10067
A Windows Sockets implementation may have a limit on the number of applications that
may use it simultaneously.
10070 File handle reference is no longer available.
10091
WSAStartup cannot function at this time because the underlying system it uses to
provide network services is currently unavailable.
10092 The Windows Sockets version requested is not supported.
10093 Either the application has not called WSAStartup, or WSAStartup failed.
10101
Returned by WSARecv or WSARecvFrom to indicate the remote party has initiated a
graceful shutdown sequence.
10105 The requested service provider is invalid.
10106 The requested service provider could not be loaded or initialized.
Troubleshooting
Speed Optimisation
The best way to get fast remote control displays is to have fast PCs with good video cards and
fast network connections. You get what you pay for!
This is not always possible, particularly in educational environments, so below are some further
ways to speed up remote control.
Make sure all the remote workstations in the classroom are of similar specification and have the
same operating system and applications installed.
Use good graphics cards with plenty of on-board memory.
Do not set the screen resolution to higher than 1280x1024. The higher res the screen, the more
data needs to be transferred. This is especially important on the Tutor's machine when giving a
demonstration to student machines.
Try to avoid animation or video on the Tutor machine if giving demonstrations. This creates lots
of changes on the screen and hence lots of data needs to be transferred.
Consider turning off Windows Aero and transparency, especially on Tutor PCs.
Make sure you network is running at at least 100Mbits not 10Mbits. 1000Mbits (Gigabit) is ideal.
On Windows machines, use the Mirror Driver to speed up screen change detection.
Appendix 1 - Deploying the MSI through
Group Policy
This tutorial will describe how to deploy the AB Client program on multiple machines by using
Active Directory - Group Policies.
Methods of deployment
Group Policy supports two methods of deploying a MSI package:
Assign software - A program can be assigned per-user or per-machine. If its assigned peruser, it will be installed when the user logs on. However, if its assigned per-machine then
the program will be installed for all users when the machine starts.
Publish software - A program can be published for one or more users. This program will
be added to the Add or Remove Programs list and the user will be able to install it from
there.
Create a distribution point
The first step in deploying a MSI through GPO is to create a distribution point on the publishing
server. This can be done by following these steps:
log on to the server as an Administrator user
create a shared network folder (this folder will contain the MSI package)
set permissions on this folder in order to allow access to the distribution package
copy the MSI in the shared folder
In the shared folder you can also perform an administrative install for a MSI package contained
by an EXE bootstrapper.
Create a Group Policy Object
A MSI package is deployed (distributed) through GPO as a Group Policy Object. In order to
create an object for your package, you can follow these steps:
click on the Start button, go to Programs, select Administrative Tools and then select
Active Directory Users and Computers
right-click your domain name in the console tree and select the Properties context menu
select the Group Policy tab and click New
set the name of the policy (for example AB Client Application)
click Properties and select the Security tab
check the Apply Group Policy checkbox only for the groups to which the policy will be
applied
click on the OK button
Assign a MSI package
A package can be assigned per-user or per-machine. Also, if the package is assigned, it will
automatically be installed silently. In order to assign a package you can follow these steps:
click on the Start button, go to Programs, select Administrative Tools and then select
Active Directory Users and Computers
Active Directory Users and Computers
right-click your domain name in the console tree and select the Properties context menu
go to the Group Policy tab, select the object you want and click Edit
expand Software Settings under Computer Configuration
right-click Software Installation, select the New context menu and then click on Package
in the Open dialog type the full UNC path of the shared package you want to assign
click on the Open button
click on Assigned and then click OK (the package will be added to the right pane of the
"Group Policy" window)
close the Group Policy snap-in, click OK and exit the Active Directory Users and
Computers snap-in
when the client computers start, the assigned package will be installed automatically
Do not use the Browse button in the Open dialog to access the UNC location. Make sure
that you use the UNC path to the shared package.
Publish a MSI package
When using Group Policy, you can publish a package in order to allow the target user to install it
by using Add or Remove programs. The steps for publishing a package are:
click on the Start button, go to Programs, select Administrative Tools and then select
Active Directory Users and Computers
right-click your domain name in the console tree and select the Properties context menu
go to the Group Policy tab, select the object you want and click Edit
expand Software Settings under User Configuration
right-click Software Installation, select the New context menu and then click on Package
in the Open dialog type the full UNC path of the shared package you want to publish
click on the Open button
click on Publish and then click OK (the package will be added to the right pane of the
"Group Policy" window)
close the Group Policy snap-in, click OK and exit the Active Directory Users and
Computers snap-in
test the package:
log on to the target computer
click on the Start button and go to Control Panel
double-click the Add or Remove programs applet and select Add New Programs
in the Add programs from your network list select the program you published
use the Add button to install the package
click OK and then Close
Do not use the Browse button in the Open dialog to access the UNC location. Make sure
that you use the UNC path to the shared package.
Redeploy a MSI package
Sometimes you may need to redeploy a package (for example when doing an upgrade). For
redeploying a package you can follow these steps:
click on the Start button, go to Programs, select Administrative Tools and then select
Active Directory Users and Computers
right-click your domain name in the console tree and select the Properties context menu
go to the Group Policy tab, select the object you used to deploy the package and click Edit
expand the Software Settings element (per-user or per-machine) which contains the
deployed package
expand the Software Installation element which contains the deployed package
right-click the package in the right pane of the Group Policy window
select the All Tasks menu and click Redeploy application
click the Yes button for reinstalling the application wherever it is installed
close the Group Policy snap-in, click OK and exit the Active Directory Users and
Computers snap-in
Remove a MSI package
Group Policy also allows you to remove packages which have been deployed in the past. Here
are the steps for removing a package:
click on the Start button, go to Programs, select Administrative Tools and then select
Active Directory Users and Computers
right-click your domain name in the console tree and select the Properties context menu
go to the Group Policy tab, select the object you used to deploy the package and click Edit
expand the Software Settings element (per-user or per-machine) which contains the
deployed package
expand the Software Installation element which contains the deployed package
right-click the package in the right pane of the Group Policy window
select the All Tasks menu and click Remove
select from the following options:
Immediately uninstall the software from users and computers
Allow users to continue to use the software but prevent new installations
click the OK button to continue
close the Group Policy snap-in, click OK and exit the Active Directory Users and
Computers snap-in
Appendices
Appendix 2 - Registry Restrictions
This appendix covers the advanced registry controls which can be applied to Windows PCs
through Registry Control Policies. See Creating policies for more information on policies.
The controls are separated off into catagories, any entry or entire catagory can be activated or
deactivated by clicking the tickbox:
: Unchanged
: Inactive
: Active
Contents
Active Desktop
Control Panel
Desktop and Explorer
Login and Authentication
Network
Privacy
Start Menu and Taskbar
File System
General Security
Internet Explorer
Internet Explorer
Active Desktop
Disable Active Desktop (All Windows)
This will disable the use of the Active Desktop feature.
Force the Use of Active Desktop (All Windows)
The user is normally given the option of disabling Active Desktop through the display
properties. This removes the ability to disable Active Desktop.
Active Desktop Restrictions (All Windows)
Features of the Windows Active Desktop can be selectively controlled by modifying
options in the Windows registry.
Disable the ability to change wallpapers.
Disable components.
Disable the ability to add components.
Disable the ability to delete components.
Disable the ability to edit components.
Prevents adding, dragging, dropping and closing the Taskbar's toolbars.
Restrict adjustments to desktop toolbars
Remove Active Desktop Options from the Settings Menu (All Windows)
The will remove the Active Desktop options from Settings on the Start Menu.
Restrict Changes to Active Desktop Settings (All Windows)
This allows you to have Active Desktop enabled, but to restrict any changes to the
settings.
Control Panel
Display
Deny Access to the Display Settings (All Windows)
This option disables the display settings control panel icon, and stops users
from accessing any display settings.
Restrict Desktop Theme Controls (Windows XP)
These restrictions control access to the desktop theme settings including the
Windows styles, buttons, schemes and fonts.
Disable the "Windows and buttons" style control
Disable the "Colour scheme" control
Disable the "Font size" control
Hide the Themes Settings Page (Windows XP)
This option hides the Themes tag which prevents the user from selecting an
alternate theme. Themes normally include a background plus sounds, icons
and other elements.
Hide the Display Settings Page (All Windows)
This option hides the Settings page from the display properties control.
Hide the Screen Saver Settings Page (All Windows)
This option hides the screen saver page from the display settings control, which
stops users having access to change screen saver settings.
Hide the Display Background Page (All Windows)
This option hides the background page stopping users from changing any
background display settings.
Hide the Display Appearance Page (All Windows)
When enabled this setting hides the display settings appearance page.
Printers
Disable the Addition of Printers (All Windows)
Any user can add a new printer to their system, this option once enabled
disables the addition of new printers to the computer.
Disable the Deletion of Printers (All Windows)
Printers can be deleted simply by any user pressing the delete key, enabling
this setting stops users from being able to delete printers.
Hide Set Program Access and Defaults in Add/Remove Programs (Windows
2000/XP)
This restriction is used to hide "Set Program Access and Defaults" on the Add or
Remove Programs page. This feature was introduced with Windows XP SP1 and
Windows 2000 SP3 to allow users to configure the default applications used on the
PC.
Disable Control Panel (Windows 2000/XP)
This setting allows you to restrict user access to the Control Panel options and
settings.
Hide Control Panel Applets (Windows NT/2000/XP)
This allows you to show or hide specific applets found in the Windows Control Panel.
Accessibility Applet
Add/Remove Programs Applet
Console Applet
Date and Time Applet
Display Applet
Fax Applet
Hardware Wizard Applet
Infrared Port Applet
International and Regional Applet
Internet Settings Applet
Joystick Applet
Licensing Applet
Mouse and Keyboard Applet
Mail Applet
Sound and Multimedia Applet
Modem and Phone Applet
Network and connectivity Applet
Network and Dial-up Connectivity Applet
Netware Client Applet
ODBC Applet
PC Card Applet
Ports Applet
Power Management Applet
Scanner and Camera Applet
Server Manager Applet
Speech Properties Applet
System Applet
Telephony Applet
TweakUI Applet
User Manager Applet
WSP Client Applet
QuickTime Applet
Norton Live Update Applet
Compaq Insight Agents Applet
Hide Control Panel, Printer and Network Settings (All Windows)
This restriction removes the Control Panel, Printers and Network Connection settings
from the Start menu. If the Taskbar settings are also hidden it causes the Settings
menu to be completely removed.
Add or Remove Programs Restrictions (Windows 2000/XP)
These restrictions apply to the Add/Remove Programs feature of Control Panel. They
allow you to entirely or individually disable components.
Disable Add/Remove Programs
Disable Change and Remove Programs
Disable Add Programs
Disable Windows Components Wizard
Hide "Add a program from CD-ROM or disk" option
Hide "Add programs from Microsoft" option
Hide "Add programs from your network" option
Go directly to Windows Components Wizard
Disable Support Information
Desktop and Explorer
Hide All Items on the Desktop (All Windows)
Enabling this option hides all the items and programs on the Windows desktop.
Remove Shared Documents from My Computer (Windows XP)
The Shared Documents folder allows users to easily share files and folders over a
network. This restriction will remove the "Shared Documents" object from My
Computer
Hide the Internet Explorer Icon (All Windows)
This option hides the Internet Explorer icon from the Windows desktop.
Remove My Documents from the Desktop (All Windows)
This setting is used to remove the My Documents folder from the Windows desktop.
Disable the Ability to Right Click on the Desktop (All Windows)
This removes the context menu that would normally appear when the user right clicks
on the desktop or in the Explorer right results pane.
Restrict the Screen Saver (Windows 2000/XP)
This restriction can be used to specify the screen saver or to stop screen savers from
running. Also, the Screen Saver settings page is disabled, so users cannot change
the screen saver options.
Screen Saver Password Protection Policy (Windows 2000/XP)
This restriction determines whether the screen saver is password protected and
prevents users from changing the password-protection setting.
Enforce Shell Extension Security (All Windows)
This restriction can be used to limit the system to only run files that have an approved
shell extension.
Remove the Security Tab (Windows XP)
This restriction removes the Security tab from Windows explorer which prevents users
from accessing or changing the security permissions of folder and file objects.
Remove the Hardware Tab (Windows 2000/XP)
This restriction removes the hardware tab from applicable items in the Control Panel
and from the local drive properties. This prevents users from changing the hardware
device properties.
Disable the Ability to Customize Toolbars (All Windows)
By right clicking on a toolbar you are usually given the option to Customize, which
allows you to change which functions are available from the toolbar. This allows you
to disable that function.
Remove the Option to Change or Hide Toolbars (All Windows)
By default users are able to select which toolbars are displayed either be right
clicking the toolbar itself, or by changing the options from the View menu. This locks
the toolbars, removing the ability to change which are displayed.
Remove File Menu from Explorer (All Windows)
This setting is used to remove the File option from the Explorers toolbar.
Remove My Computer from the Desktop and Start Menu (Windows 2000/XP)
This restriction removes My Computer from the desktop and Start menu.
Hide the Network Neighborhood Icon (All Windows)
The Network Neighborhood icon is shown on the Windows desktop whenever
Windows networking is installed; by enabling this setting the icon will be hidden.
Disable Folder Options Menu (All Windows)
This allows you to hide the Folder Options function from the folder Tools menu
allowing you to restrict access to numerous advanced folder features.
Remove Properties from My Computer (Windows XP)
This restriction removes the properties option from My Computer and hides the
"System Properties" screen.
Remove the Ability to Modify File Types (Windows 2000/XP)
This setting allows you to remove the ability to change, add or delete file types using
explorer the Folder Options interface.
Disable Save Settings at Exit (All Windows)
When Windows exits it normally saves the desktop layout, including icon location,
appearance and other parameters. This setting disables any changes from being
saved, therefore allowing you to preserve a configured layout.
Login and Authentication
Restrict Showing the Last Username (Windows 2000/XP)
This restriction removes the ability to view which user was last logged onto a
computer by clearing the username box on the login screen.
Disable the Lock Workstation Button (Windows NT/2000/XP)
Add this setting to the registry to stop unauthorized users from locking machines from
the Windows Security dialog box.
Disable the Change Password Button (Windows NT/2000)
This setting disables the 'Change Password' button on the Windows Security dialog
box. Enabling this setting stops casual users from being able to change the
password.
Network
Network Connection Restrictions (Windows 2000/XP)
These restrictions control access to the features and properties of LAN, RAS and
other network connections.
Restrict add and remove network components
Restrict changes to Advanced Settings
Restrict changes to advanced TCPIP configuration
Restrict changes to protocol and service bindings
Restrict deletion of public RAS connections
Restrict deletion of RAS connections
Restrict changes to the Dial-up Preferences
Enable Windows 2000 network connections for administrators
Restrict access to component properties of a LAN connection
Restrict connecting and disconnecting a LAN connection
Restrict access to properties of a LAN connection
Disable the Network Connection wizard
Restrict access to properties of public RAS connections
Restrict access to properties of a RAS connection
Restrict connecting and disconnecting a RAS connection
Restrict access to private RAS connection properties
Restrict renaming of public RAS connections
Restrict renaming of connections
Restrict renaming of LAN connections
Restrict renaming of private RAS connections
Disable status statistics for an active connection
Remove Log Off from the Start Menu (All Windows)
This allows you to remove the Log Off [Username] option from the Start menu.
Disable Recent Shares in Network Places (Windows 2000/XP)
This restriction stops remote shared folders from being added to Network Places
whenever you open a document in the shared folder.
Hide the Active Directory Folder in My Network Places (Windows 2000)
This restriction is used to remove the Active Directory folder from My Network Places.
This still allows users to search but not browse the Active Directory.
Hide Entire Network in Network Neighborhood (All Windows)
Entire Network is an option under Network Neighborhood that allows users to see all
the Workgroups and Domains on the network. Entire Network can be disabled, so
users are confined to their own Workgroup or Domain.
Hide Workgroup Content from Network Neighborhood (All Windows)
Enabling this option hides all Workgroup contents from being displayed in Network
Neighborhood.
Remove the Map and Disconnect Network Drive Options (Windows NT/2000/XP)
Prevents users from making additional network connections by removing the Map
Network Drive and Disconnect Network Drive buttons from the toolbar in Explorer and
also removing them from the Context menu of My Computer and the Tools menu of
Explorer.
Hide Computers Near Me in Network Places (Windows 2000/XP)
This setting allows you to show or hide the computers listed Near Me in My Network
Places.
Privacy
Empty Temporary Internet Files on Exit (All Windows)
This setting controls whether Internet Explorer should delete all of the temporary
Internet files stored during the session when the browser is closed.
Clear the Cached Run Commands (All Windows)
Do you have a lot of items in the run command history on Start Menu? This will allow
you to clear the most-recently-used (MRU) list.
Clear the Internet Explorer Typed Address History (All Windows)
Internet Explorer caches any URLs that are typed into the address bar. This may
become a privacy issue on a shared computer, or a nuisance if there is a particular
URL you want to remove without clearing the whole history.
Disable User Tracking (Windows 2000/XP)
This setting stops Windows from recording user tracking information including which
applications a user runs and which files and documents are being accessed.
Start menu and Taskbar
Documents and Folders
Remove Favorites from the Start Menu (All Windows)
This allows you to remove the Favorites folder from the Start Menu.
Remove Recent Documents from the Start Menu (All Windows)
This setting can be used to remove the recent Documents folder from the Start
Menu.
Remove Network Connections from the Start Menu (Windows 2000/XP)
This allows you to hide the Network and Dial-up Connections option on the
Start Menu.
Disable Recent Documents History (All Windows)
Normally when you open or access a document or file it is added to the list of
recent documents on the Start Menu. This will stop files from being added to the
list.
Remove My Documents from the Start Menu (Windows 2000/XP)
This restriction removes My Documents which is shown under the Documents
folder on the Start Menu.
Remove My Pictures from the Start Menu (Windows 2000/XP)
This restriction removes My Pictures from the Documents folder on the Start
Menu.
Remove My Music from the Start Menu (Windows 2000/XP)
This restriction removes My Music from the Documents folder on the Start Menu.
Hide or Display Administrative Tools Menu (Windows 2000/XP)
As with Windows NT, Windows 2000 has an 'Administrative Tools' folder on the Start
Menu. This folder contains powerful administration utilities and therefore can be
hidden to avoid accidental use.
Remove the Windows Security on Start Menu (Windows Terminal Server)
This setting is used to hide the Windows NT Security menu item on the Start Menu of
a terminal server session. These settings are compatible with Windows Server 2003.
Hide Control Panel, Printer and Network Settings (All Windows)
This restriction removes the Control Panel, Printers and Network Connection settings
from the Start menu. If the Taskbar settings are also hidden it causes the Settings
menu to be completely removed.
Hide the Taskbar Settings on the Start Menu (All Windows)
This restriction removes the Taskbar and Start Menu item from the Control Panel, and
it also removes the Properties item from the Start menu context menu.
Remove Common Program Groups from Start Menu (All Windows)
Disables the display of common groups when the user selects Programs from the
Start menu.
Remove My Network Places from the Start Menu (Windows XP)
This restriction hides the My Network Places button on the Windows XP simple Start
menu.
Force Logoff on the Start Menu (Windows 2000/XP)
This setting forces the Logoff button to appear on the Start menu and prevents users
from removing or hiding it.
Restrict the Start Menu Log Off Option (Windows 2000/XP)
This restriction removes the ability for a user to enable the "Log Off..." option on the
Start Menu.
Disable Drag-and-Drop on the Start Menu (Windows 2000/XP)
This restriction prevents users from modifying the Start menu by dragging and
dropping items.
Remove Run from the Start Menu (All Windows)
Removes the ability to launch commands or processes from the Start menu by
removing the Run option.
Remove Search from the Start Menu (All Windows)
This restriction removes the Search feature from the Start Menu.
Remove the Help Option from the Start Menu (Windows 2000/XP)
This restriction removes the Help option from the Start Menu.
Remove Tray Items from Taskbar (Windows XP)
This setting removes and restricts access to the tray icons normally found next to the
clock on the taskbar.
Disable Taskbar Context Menus (All Windows)
This setting removes the context menus (right click on the taskbar) for the system tray,
including the Start button, Tab control, and Clock.
Remove the Toolbars on the Taskbar (Windows XP)
This restriction is used to remove all the toolbars, including Quick Launch, from the
taskbar. It also restricts the ability to re-enable them.
Lock the Taskbar (Windows XP)
This restriction is used to force the locking of the taskbar and restrict users from
making any changes to its position.
Force the Use of the Classic Start Menu (Windows XP)
This restriction forces users to use the classic Windows start menu, instead of the
new format introduced with Windows XP.
Hide the Taskbar Clock (Windows XP)
This setting allows you to remove the clock from the system tray on the taskbar.
File System
Prevent Access to the Contents of Selected Drives (Windows 2000/XP)
This restriction prevents users from using My Computer or Explorer to access the
content of selected drives. Also, they cannot use Run, Map Network Drive, or the Dir
command to view the directories on these drives.
Hide Drives in My Computer (All Windows)
This setting allows you to control which drives are visible in My Computer and
Explorer. It is possible to hide all drives or just selected ones.
Show Hidden Operating System Files (All Windows)
This setting controls whether the normally hidden operating system files should be
displayed when using explorer to browse the file system.
Disable 'Auto Run' (All Windows)
Determines whether the Autoplay feature is enabled on each drive connected to the
system. When Autoplay is enabled, media is started automatically when it is inserted
in the drive.
General Security
Disable Task Manager (Windows NT/2000/XP)
This setting controls the ability for users to start Task Manager and view processes,
running applications and make changes to the priority or state of the individual
processes.
Disable Registry Editing Tools (All Windows)
This restriction disables the ability to interactively run the standard Microsoft registry
editing tools such as REGEDIT and REGEDT32.
Disable the Shut Down Command (All Windows)
This option allows you to stop users from being able to shutdown the computer by
disabling the shut down command.
Disable Fast User Switching Command (Vista/7)
This option allows you to stop users from using Fast User Switching.
Disable the Windows Hotkeys (All Windows)
This restriction allows you to disable the use of the Windows hotkey combinations
that provide shortcuts to the Start Menu and task swapping.
Restrict Access to the Windows Update Feature (All Windows)
The Windows Update feature allows users to easily update Windows components
and software over the Internet. These settings allow can be used to grant or restrict
access to this function.
Disable Command Prompt and Batch Files (Windows 2000/XP)
This restriction allows you to selectively disable the Command Prompt (CMD) and the
ability to execute DOS batch files.
Disable command prompt but allow batch files (Windows 2000/XP)
This restriction allows you to disable the command prompt but allow the ability to
execute DOS batch files.
Restrict Changes to User Folder Locations (Windows 2000/XP)
These restrictions disable the ability for users to change the location of user-specific
folders such as My Documents, My Pictures, My Music and Favorites.
Restrict changes to My Documents
Restrict changes to My Pictures
Restrict changes to My Music
Restrict changes to Favorites
Internet Explorer
Internet Explorer Toolbar Restrictions (All Windows)
These restrictions allow you to selectively control which toolbars are available in
Internet Explorer, including the Address, Tool and Links bars.
Disable the ability to change toolbar selection.
Disable the address bar.
Disable the tool bar.
Disable the links bar.
Restrict Import and Export of Internet Explorer Settings (All Windows)
This restriction can be used to disable the import and export of Internet Explorer
cookies and favorites. When users utilize the "Import and Export" wizard on the File
menu they will be shown a message when clicking "Finish".
Internet Explorer Restrictions (All Windows)
These settings and restrictions allow you to selectively control a range of features
available in Microsoft Internet Explorer 5 and 6.
Always prompt user when downloading files.
Disable changes to browsers bars.
Disable the option of closing Internet Explorer.
Disable right-click context menu.
Disable the Tools > Internet Options menu.
Disable the ability to Save As.
Disable the Favorites.
Disable the File > New command.
Disable the File > Open command.
Disable the Find Files command.
Disables the Forward and Back navigation buttons
Disable Open in New Window option.
Remove Print and Print Preview from the File menu.
Disable the option of selecting a download directory.
Disable the Full Screen view option.
Disable the ability to view the page source HTML.
Remove Mail and News menu item.
Empty Temporary Internet Files on Exit (All Windows)
This setting controls whether Internet Explorer should delete all of the temporary
Internet files stored during the session when the browser is closed.
Clear the Internet Explorer Typed Address History (All Windows)
Internet Explorer caches any URLs that are typed into the address bar. This may
become a privacy issue on a shared computer, or a nuisance if there is a particular
URL you want to remove without clearing the whole history.
Disable Save As Web Page Complete (All Windows)
This restriction disables the ability to save complete web pages including images,
scripts, linked files and other elements in Internet Explorer.
Disable the Ability to Customize Toolbars (All Windows)
By right clicking on a toolbar you are usually given the option to Customize, which
allows you to change which functions are available from the toolbar. This allows you
to disable that function.
Remove the Option to Change or Hide Toolbars (All Windows)
By default users are able to select which toolbars are displayed either be right
clicking the toolbar itself, or by changing the options from the View menu. This locks
the toolbars, removing the ability to change which are displayed.
Disable File Download in Internet Explorer (All Windows)
This setting allows you to restrict the ability to download files using Internet Explorer.
Disable Access to File URLs in Internet Explorer (All Windows)
Normally you can use the Internet Explorer address bar to access standard files and
folders. This setting disables that functionality and only allows access to Internet
URLs.
Internet Explorer Control Panel Restrictions (All Windows)
These allow you to control access to the Internet Explorer setup and control panel
functions (found under Tools -> Internet Options).
Prevent changes to advanced settings
Prevent changes to Automatic Configuration
Prevent changes to temporary file settings
Prevent changes to calendar and contacts
Prevent changes to security certificates
Prevent changes to default browser check
Prevent Colour changes
Prevent changes to connection settings
Disable the Connection Wizard
Disable font changes
Disable changes to History settings
Disable changes to Home Page settings
Disable Language changes
Disable Links changes
Disable Messaging changes
Disable changes to Profiles
Disable changes to Proxy settings
Disable Ratings changes
Disable changes to Wallet settings
Disables all options under Accessibility
Removes General tab
Removes Security tab
Removes Content tab
Removes Connections tab
Removes Programs tab
Removes Privacy tab
Removes Advanced tab
Prevents changing Personal Certificate options
Prevents changing Site Certificate options
Prevents changing Publisher Certificate options
Prevents changing Security Levels for the Internet Zone
Prevents adding Sites to any zone
Prevents changes to privacy settings
Disables AutoComplete for forms
Prevents Prompt me to save password from being displayed
Disables the Internet Connection Wizard
Prevents any changes to Temporary Internet Files
Disables the Reset web Setting button
Appendix 3 - Troubleshooting Connection
Problems
Overview
This appendix will help you diagnose connection problems between AB Tutor and the remote
Student machines running the AB Client program. Most connection problems are down to your
internal network setups. (e.g. firewalls, routers, switches or DNS/DHCP configurations) Below
are some common problems to do with connections between the AB Tutor program and remote
clients and what to check for to try to solve them. Also, there is a section below on how to test for
connectivity issues and ways to resolve them on your networks.
Contents
Common Problems
I can't connect to computers in a group, but I can with discovery.
Discovery doesn't find all my computers.
AB Tutor connects to the wrong computers.
I can't find computers on a different subnet.
Error messages
Unable to connect to host: The attempt to connect timed out without establishing a
connection (10060)
I can scan and find a computer, but when I connect I get a connection failed error
Unable to resolve host name: The requested name is valid. But no data of the requested
type was found (11004)
Methods of Testing Connectivity
Simple PING test
More comprehensive test using TELNET
Checking DNS / DHCP problems
Check no other programs are using ports 5151/5152
Checking for problems with AB Tutor
Check for Errors in the ABClient program
Check the Windows Event log for errors
Common Problems
Discovery doesn't find all my computers.
When AB Tutor performs a full Scan to find remote machines, it broadcasts a simple and small
UDP message on your network. This message is then picked up by any running remote client
programs and they then send back a reply saying "yes - I am here and this is my IP address and
computer name". AB Tutor will then add this computer name to the list ready for you to connect
directly to it.
If a machine does not appear in the list then check the following:
The remote machine is turned on and not in Sleep or Hibernate mode
The remote machine has a copy of the ABClient program installed and the service is
running (see Control Panel - Administrative Tools - Services and find a service named
AB Client Manager)
If the Windows firewall is enabled, make sure the ABClient.exe program has been added
as an exception. (This should be done by default by the ABTCSETUP7.MSI Windows
installer)
If using a third-party firewall (e.g. AVG or Symantec), make sure the ABClient.exe program
has been added as an exception.
AB Tutor uses UDP port 5151/5152 to broadcast and TCP port 5151/5152 to communicate
directly, make sure your switches, routers or hardware firewalls do not block access
through this port.
It is possible that your network hardware is blocking broadcast packets. To get round this, add
the IP address range your clients use to the list in Tools - Settings - Network
Please see the section on TELNET tests to verify if you have a valid connection to the remote
machines.
I can't find computers on a different subnet.
By default, AB Tutor will broadcast a message only within the local subnet. If you are not able to
find machine due to them being on other subnets, then you will need to add the additional subnet
ranges in Tools - Settings - Network or connect via Groups:
Launch AB Tutor and select Groups and Manage Groups
Create a new Group with an appropriate name.
Add all the Computer names to which you want to connect, to this Group.
If you have Active Directory, you can add the computers quickly by selecting the Active
Directory tab and browsing for the group/groups containing the computer names, multiple select
them and press the Add to Member button
You can also export your current set of Groups/computers to file (Press the Export button).
Then locate this file and manually build the groups by editing it with a simple text editor. The file
is in XML format and can be interpreted very easily. Once you have manually added all the
computers, press the Import button to reload the groups from this file.
If you want to protect this group so only you as an administrator will see it, then click on the
Security tab, right click the mouse in the Allow access box and select Add username. Then
enter your Windows login username to this list.
Unable to connect to host: The attempt to connect timed out without
establishing a connection (10060)
Common causes of this error are:
A firewall is blocking the connection to/from the remote machine on port 5151. Check your
Windows firewall on both the Tutor and remote machine.
The IP address of the machine you are connecting to is invalid
The computer name you are connecting to has a different IP address registered on the
Tutor machine. This can occur when your DHCP server allocates a new dynamic IP
address to a computer name but your DNS server has not been told about it. So, then your
Tutor machine asks the DNS server for the IP address assigned to the remote computer
name, then the wrong IP will be returned. See the section below on diagnosing this
problem.
I can scan and find a computer, but when I connect I get a connection
failed error
Common causes of this error are:
A firewall is blocking the connection to/from the remote machine on TCP port 5151 but
UDP port 5151 is ok. Check your Windows firewall on both the Tutor and remote machine.
Also check the firewall setting in your third-party firewall software (e.g. AVG or Symantec)
An internal problem has occurred with the ABClient program. See the section on checking
for errors in the ABClient program below
Unable to resolve host name: The requested name is valid. But no data of
the requested type was found (11004)
Common causes of this error are:
The computer name specified in the Group is invalid or does not exist
Check the computer name is typed correctly in the Group
Check the name exists in your DNS / DHCP server
Try the PING test to see if your network recognizes the machine name and returns a valid IP
address
I seem to be connecting to computers in a different classroom
This will only occur if you are selecting a Group of computers and connect to them but when you
view the remote machine it show a screen from a computer in a completely different part of the
school. Another symptom is that you suddenly find a computer saying invalid connection
password.
This is almost always a problem with your DNS / DHCP server not synchronizing properly.
See Check DNS / DHCP problems.
If you get an invalid connection password, then what could be happening is that the IP
address returned by your DNS server for the computer you are trying to connect to actually
belongs in a different classroom or location when a different connection password has
been applied. Again see Check DNS / DHCP problems.
been applied. Again see Check DNS / DHCP problems.
I can connect to a machine from a Discovery Scan, but not from a group
This is almost certainly due to a problem with your DNS server. When a Discovery scan is run,
the tutor machine sends a broadcast message out to its local subnet (and any additional
addresses specified). Any client which receives this message will respond and the tutor then
connects to them by IP address.
When you connect to a group, the tutor tries to connect to each computer in the group
individually. To find them, it looks up their name with your DNS server to get the IP address and
then connects to that IP. To check this, please try the DNS/DHCP test.
Methods of Testing Connectivity
Simple PING test
This test will simply check that you have a network connection to the remote machine (i.e. it's
turned on and is connected to the network)
Launch the Windows command prompt ('Start' - 'Run' - enter 'cmd.exe' and press OK)
Enter: ping <computer name> and press ENTER (where <computer name> is the actual
hostname - in our example GMS-DSK-006 - of the remote computer)
If you get a reply saying the Destination host unreachable then that machine may be
switched off or not connected to the network, or there may be a firewall running on it which
is blocking ping. Note that by default, the Windows Firewall blocks ping.
If you get a reply saying Ping request could not find <computer name>. Please check
the name and try again then your network does not recognise that computer name. You
should check the spelling of the name or that the computer has been correctly registered on
your DNS and DHCP server.
More comprehensive test using TELNET
TELNET is a connection utility that comes with Windows. On Windows Vista or Windows 7
machines this utility may need to be activated.
To enable telnet on Windows Vista/Windows 7
Open the Windows Control Panel.
Then go into Programs and Features.
Then in programs and features there should be a part that says Turn windows features on
or off.
Click Turn windows features on or off then on the list that appears simply check the box
beside: Telnet Client.
Click OK.
You may need to reboot.
Using telnet
Login on to the computer where AB Tutor is installed
Launch the Windows command prompt (Start - Run - enter cmd.exe and press OK)
Enter: telnet <computer name> 5151 and press ENTER (where <computer name> is the
actual name or IP address of the remote computer)
If everything is working fine, then you will see the following reply:
Press the RETURN key 9 or 10 times until your get the Connection to host lost message.
If you get the following reply, then this shows that there is a problem connecting to this machine
on TCP port 5151:
Check the following:
The remote machine is turned on and not in Sleep or Hibernate mode
The remote machine has a copy of the ABClient program installed and the service is
running (see Control Panel - Administrative Tools - Services and find a service named
AB Client Manager)
If the Windows firewall is enabled, make sure the ABClient.exe program has been added
as an exception. (This should be done by default by the ABTCSETUP7.MSI Windows
installer)
If using a third-party firewall (e.g. AVG or Symantec), make sure the ABClient.exe program
has been added as an exception.
Try entering the IP address of the remote machine to rule out problems with your
DNS/DHCP server (Enter: telnet <IP Address> 5151 and press ENTER)
Checking DNS / DHCP problems
If you connect to a computer that you think is in one location but is actually connecting to a
computer in a different class, or a client connects from a Discovery scan, but not from a
Groupthen you have a DNS problem on your network.
To investigate this:
Login on to the computer where the Tutor program is installed
Launch the Windows command prompt (Start - Run - enter cmd.exe and press OK)
Enter: ping <computer name> and press ENTER (where <computer name> is the actual
computer name of the remote computer)
Note the IP address returned. The ping itself may fail, but this doesn't matter as long as you
get an IP address.
Now go to the actual client computer you have just pinged
Logon (with admin level rights)
Launch the Windows command prompt (Start - Run - enter cmd.exe and press OK)
Enter: ipconfig and press ENTER
Note the IP address returned (usually under IP Address or IPv4 Address for your Local
Area Connection)
If the IP address from the Tutor machine and this IP address are different, then you have a
problem with the DNS server not being updated properly by your DHCP server.
You may be able to solve this by:
Go back to the Tutor machine and open up the Command Prompt Window
Type: ipconfig /flushdns and press ENTER
Then type: ping <computer name> and see if the IP address returns the correct one found
on the actual remote machine.
If the IP addresses are still different, then you need to refer to your DNS/DHCP server to get then
to re-sync.
Check no other programs are using ports 5151/5152
It has been known that other software providers have opted to use ports 5151 for their own
application. To check for this:
Login on to the remote computer to which you are having problems connecting
Launch the Windows command prompt (Start - Run - enter cmd.exe and press OK)
Note: On Windows Vista or Windows 7, you must run the cmd.exe program with
elevated privileges. (Run as Administrator)
Enter: netstat -a -b and press ENTER
Analyse the output and look for any application that uses TCP or UDP ports 5151
You should only see 2 entries:
TCP 0.0.0.0:5151 LISTENING [ABClient.exe]
UDP 0.0.0.0:5151
[ABClient.exe]
If you find another application using ports 5151, please report it to AB Consulting.
If you find another application using ports 5151, please report it to AB Consulting.
Check for Errors in the ABClient program
If the ABClient program detects errors with the connections, it reports these messages to a log
file. These log files are located in the ABClient data directory (Windows XP: c:\Documents and
Settings\All Users\Application Data\AB Tutor\, Windows Vista/7: c:\ProgramData\AB Tutor\,
MacOS: /var/log/AB Tutor/) This folder will contain a file called debug.log and on multi-user
OSes, there will be other files called DebugUserModeX.log (where X is a number from 1
upwards and represents the ID number of the user's session)
The debug.log file is usually where you will see errors to do with connections. It's a simple text
file and so can be edited with any text editor.
A typical error may be:
26 Aug 2010, 15:53:12, [4204], TcpListener on port 5151 failed (Unable to bind listening
socket: Only one usage of each socket address (protocol/network address/port) is normally
permitted. (10048))
This indicates that 2 programs on the machine are trying to listen on port 5151 for a connection,
but only 1 is allowed. Maybe another program is using the port or maybe the ABClient program
has been started incorrectly and 2 copies are running!
If in doubt, zip and e-mail this debug.log file to [email protected] with a description of your
problem so we can check the file for errors.
Check the Windows Event log for errors
Windows logs various system events that can also help locate problems. To launch the Windows
Event Viewer:
Select Start - Run - enter eventvwr.exe and press OK
Click on System in the left hand tree view
Right click on System and either select Find (or View then Find on XP)
Enter AB Client in the Find What (or Description on XP )
Keep clicking Find next until you find something other than information
Note: If you see the following error on Windows Vista/7/2008 then this can be ignored:
The following event log shows that the ABClient program has terminated unexpectedly. The
debug.log file may give glues as to what has happened here.