Download www proceq usa com www proceq europe com
Transcript
www.proceq-usa.com
www.proceq-europe.com
www.proceq-asia.com
www.proceq.com
Sales and Service Contacts:
Europe/Africa
Proceq SA
Ringstrasse 2 CH-8603 Schwerzenbach
Switzerland
Phone: +41 (0)43 355 38 00
Fax: +41 (0)43 355 38 12
[email protected]
810 30 004E ver 12 2007
Americas
Proceq USA, Inc.
117 Corporation Drive
Aliquippa, PA 15001
USA
Phone: +1-724-512-0330
Fax: +1-724-512-0331
[email protected]
Asia/Pacific
Proceq Asia Pte Ltd
12 New Industrial Road #02-02A
Singapore 536202
Republic of Singapore
Phone:+65-6382-3966
Fax: +65-6382-3307
[email protected]
Portable Concrete Testing Instruments
For Non-Destructive Site Investigation
www.proceq.com
Proceq®
...50 Years of Know-How You Can Measure
Proceq manufactures high quality testing instruments for nondestructive testing in the concrete, metal and paper industries.
Our range of products includes: Original SCHMIDT and SilverSchmidt
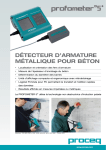
concrete test hammers, PROFOMETER ® 5+ rebar locating system,
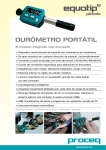
EQUOTIP®, EQUOSTAT portable metal hardness testers, and
PAROtester 2 for testing paper and film roll hardness. A variety of
other quality instruments expands our offering and range of application
in the mentioned industries.
Proceq SA was established on April 8, 1954 by Antonio Brandestini
in Zurich, Switzerland. Over the years, Proceq assembled a group of
specialists to handle the detailed design work and technical
specifications of both its own and third-party products and projects.
Today these specialists are involved in coordinating internal and
external developments, as well as design and manufacturing of test
instrumentation to satisfy market needs. The result of their efforts is a
modern and extensive product range positioned to satisfy various
testing requirements for paper, metal, wood and other materials.
Since its inception, Proceq has continued to enhance its products and
business activities. The company is a global supplier, and has built its
business worldwide through Proceq subsidiaries in Asia, Europe, the
Americas and agent partners.
Proceq remains a privately owned company by the founder’s family
Brandestini/Valsangiacomo. Throughout the fifty plus years, the
company has remained dedicated to building on its solid experience
gained through successful association with the metals, paper, film and
concrete markets. Our commitment remains to supply quality solution
oriented products to meet specific market needs with reliable products
incorporating advanced technology and whose economical value is
created by the excellent long term price/performance ratio. Proceq
assures customer satisfaction through the quality of its people,
products and services.
Table of Contents
SilverSchmidt Concrete Test Hammer . . . . . . . . . . . . . . . . . . . . . . . 2 – 3
Original SCHMIDT Concrete Test Hammers . . . . . . . . . . . . . . . . . . . . . 4
DIGI-SCHMIDT 2000 Concrete Test Hammers . . . . . . . . . . . . . . . . . . . 5
PROFOMETER 5+ Rebar Locating System . . . . . . . . . . . . . . . . . . . 6 – 7
CANIN+ Corrosion Analyzing Instrument . . . . . . . . . . . . . . . . . . . . . 8 - 9
TICO Ultrasonic Testing Instrument . . . . . . . . . . . . . . . . . . . . . . . . . . . 10
TORRENT Permeability Tester . . . . . . . . . . . . . . . . . . . . . . . . . . . . . . . 11
DYNA Pull-off Tester . . . . . . . . . . . . . . . . . . . . . . . . . . . . . . . . . . . . . . . 12
DYNA Estrich Adhesive Tester . . . . . . . . . . . . . . . . . . . . . . . . . . . . . . . 12
1
SilverSchmidt
Concrete Test
Hammer
Applications
•Suitable for testing a wide variety of
concrete, mortar, rock , paper and
plastics
•Ideally suited for on-site testing
•Handy for difficult to access or
confined test areas (i.e. working
overhead)
•Especially convenient for testing on
tunnel linings as measurements are
independent of impact direction
Useful to
•Contractors
•Engineers, consultants
•Quality control, site supervision
•Universities, education and research
establishments
•Laboratories
•Geologists
On concrete walls, decks and pillars
SilverSchmidt - The Original SCHMIDT fully
integrated electronic concrete test hammer
The new SilverSchmidt - a Swiss-made instrument - offers unprecedented benefits to users.
The new instrument features unrivalled ease of
use, higher readability and accuracy, as well
as an extended measuring range. A number
of user-benefits have been incorporated, such
as the automatic correction of readings based
upon the impact direction - eliminating the
need to refer to impact direction conversion
curves. The robust, lightweight unit also makes
automatic corrections for carbonation.
Extended Range of Applications
• Conversion curves are provided for a wide range of compressive concrete
strength, including low and high strength concrete fc <10 N/mm2 (1'450 psi)
and up to 170 N/mm2 (24'650 psi)
• Conversion curves for different types of modern concrete are preset in the
SilverSchmidt, based on tests performed by an independent institution
Compliance with Industry Standards
• Data collection and processing of test results comply with major industry
standards EN 12504-2, ENV 206 ASTM C805, BS 1881 Part 202, ASTM D5873
(Rock), JGJ/T 23-2001
Dependable Measuring Results
• High accuracy due to differential optical absolute velocity encoder
• Measurement inherently independent of impact direction, meaning no
corrections necessary
• Built-in correction for carbonation and form factor gives increased test accuracy
and dependendability of test results
• Registration of true rebound coefficient yields extended resolution across a
wider range
• SilverSchmidt can also display the classic "R"-value
Controlled Functionality
• Automatic control of functionality by monitoring impact energy
• Low power consumption, high capacity lithium-ion battery
• Tightly sealed instrument providing a higher number of impacts without
servicing
Measuring the true Rebound Coefficient
("Q"-value)
...at any angle
The classic "R"-value is the mechanical travel of the mallet on rebound. It is
affected by its friction on the guide rod, the friction of the drag pointer on the
scale, the influence of gravity during its travel, the relative velocity between unit
and mechanical parts. This is true for all concrete test hammers currently on the
market.
The "Q"-value [=rebound velocity divided by inbound velocity] represents the
physical rebound coefficient. It is virtually free of all the above error sources. It is
thus the indicator of choice to be used as a
basis to convert to compressive strength.
The SilverSchmidt acquires the "Q"-value
by measuring the velocity of impact and of
rebound immediately before and after the
impact.
The "Q"-value need not be corrected for
impact direction. There is however a clear relationship between the "Q" and the "R"-value.
Averaging and Conversion
... on soft concrete
(with mushroom plunger)
2
To obtain a reading in units of compressive strength select:
•Desired unit
• Length of series and averaging mode
•Carbonation depth (if applicable)
• Form factor
•Conversion curve for concrete mixture
Perform a test series of specified length.
Manual cancellation of obvious outliers is
possible. At the end of the series, the
instrument will display the average converted to the desired unit.
Typical Display Window
Operation
Single Impact
A typical display after an impact shows:
• The actual "Q"-value
ZERO MARKER
• A pseudo-analog scale
• A counter with double function
either displays the last two digits
of the 4-digit-totalizer or the
actual number of valid impacts
in a test series
UNIT
PSEUDO ANALOG SCALE
ALERT SYMBOL
Average Mode
"Q" VALUE
"50" MARKER
SINGLE IMPACT
ORSERIES OF "n"
IMPACT COUNTER
ORTOTALIZER
• Simple operation with the "one button"
user interface
• Language independent through the
use of graphic user interface
• Automatic conversion to the required
measurement unit (N/mm2, kg/cm2, psi)
• Various statistics to comply with
standards or user specified procedures
• Custom presets of test parameters for
various testing scenarios can be stored
and later recalled
• Quick review of previous measurements
Programming the
SilverSchmidt
Median/Mean after a test series
compressive strength displayed
in N/mm2, psi (kg/cm2 also possible)
Specifications
Mechanical data
Impact Energy
Hammer Mass
Spring Constant
Spring Extension
BN–type
2.207 Nm
115 g
0.79 N/mm
75 mm
Housing Dimensions
Dimensions
(visible part of plunger)
Weight
55 x 55 x 250 mm (340 mm to tip of plunger)
105 x ø15 mm / radius of spherical tip 25 mm
Electrical data
Display
Power Consumption
Accumulator Duty
Charger Connection
Useful ranges
Concrete Compressive
strength
Operating Temperature
Storage Temperature
BL–type
0.735 Nm
115 g
0.26 N/mm
75 mm
600 g
17 x 71 pixels; graphic / alphanumeric
~13mA measuring, ~4 mA setup and review, ~0.02 mA idle
>1000 impacts (before recharging)
USB type B (5V, 100 mA)
10 N/mm2 to 170 N/mm2 (1'450 psi to 24'650 psi)
0 to 50 °C
-10 to 70 °C
Hold the SilverSchmidt horizontally in
front of you; enter Setup mode by
clicking the SELECT button.
The SELECTOR will appear on the
display.
Scroll and center the desired icon by
tilting the unit, then click the SELECT
button to enter one of six intuitive menus
allowing to program the SilverSchmidt for
your needs. Clicking on the center icon
lets you review the last twenty
measurements.
Performing the Impact
Test
Ergonomic, lightweight design facilitates
reliable measuring
Ordering Information
341 10 000
Includes
SilverSchmidt BN (black cap with impact energy of 2.207 Nm)
SilverSchmidt BN with standard accessories including USB kit (USB cable
and USB charger global), carrying strap, grinding stone, chalk, user manual,
quick reference guide, certificateand carrying case
341 20 000
Includes
SilverSchmidt BL (silver cap with impact energy of 0.735 Nm)
SilverSchmidt BL with standard accessories including USB kit (USB cable
and USB charger global), carrying strap, grinding stone, chalk, templates,
user manual, quick reference guide, certificate and carrying case
1. Place the unit
perpendicular to the
test surface
2. Load the unit by
pushing it towards
the test surface
Accessories
341 80 100
Carrying case complete
351 90 018
USB cable 1.8 m (6 ft)
341 80 112
USB charger, global
341 80 202
USB memory stick SilverSchmidt with documentation
341 80 203
Carrying strap (loop)
341 80 204
Impact templates
310 99 037
Grinding stone
325 34 018
Chalk
Optional Accessories
341 90 001
3. Impact is triggered when the end position
is reached
Patents pending.
Mushroom plunger (for soft-material-testing i.e. young concrete)
3
Original SCHMIDT
Concrete Test
Hammers
engineered for your
Application
Engineers worldwide use Original
SCHMIDT Concrete Test Hammers to
assess concrete quality and strength
characteristics. Proceq manufactures
the industry’s widest range of hammer types to fit virtually every in situ
test application – including the
Original SCHMIDT Hammers type
N and L, recording type NR and
LR, digital types ND and LD DIGISCHMIDT.
Accurately measuring compressive
strength – which directly determines
the load-bearing capacity and durability of concrete structures – is
achieved by striking the concrete at
a defined energy, then measuring the
hammer’s rebound. The rebound corresponds to the concrete’s hardness.
Using conversion tables, the rebound
value can be correlated to compressive strength.
This instrument enables engineers
to measure the strength of existing
concrete structures in situ to control
concrete quality and to detect weak
spots.
Features
•Original SCHMIDT Swiss made
hammers
•Proven performance for over 50
years
•Wide range available for almost any
test application
Type N/NR Original SCHMIDT Test Hammer
The type N hammer is designed
for testing concrete items
100 mm (4") or more in thickness, or concrete with a maximum particle size less than or
equal to 32 mm (1.25").
The type NR hammer provides
a record of test data. Rebound
values are recorded as a bar
chart on a paper strip. One roll
of paper strip documents 4'000
test impacts.
Both hammers are also used
for the testing of massive rock.
Testing Standards:EN 12 504-2, ENV 206, DIN 1048 part 2, BS 1881 Part
202, ASTM C805, ASTM D5873 (Rock), D5873, JGJIT 23-2001, JJG 817-1993
Specifications
Measuring Range:
10 to 70 N/mm² (1'450 psi to 10'150 psi) compressive strength
Impact Energy:
2.207 Nm (1.6 ft-lbs)
Case Dimensions:
type N:
type NR:
140 x 114 x 324 mm (5.5" x 4.5" x 12.75")
325 x 298 x 102 mm (12.75" x 11.75" x 4")
Weight:
type N:
type NR:
Net 1.6 kg (3.5 lbs.); Shpg. 1.8 kg (4 lbs.)
Net 2.7 kg (6 lbs. ); Shpg. 3.2 kg (7 lbs.)
Type L/LR Original SCHMIDT Test Hammer
The type L/LR hammer operates with significant lower impact energy, making
this hammer the ideal option for testing thin walled items with a thickness
between 50 to 100 mm (2" and 4") or for testing small components.
The type L/LR is suitable for testing cast stone components which are sensitive to
impact. In rock mechanics, the type L/LR hammers are commonly used for
classification testing of rock cores and brittle rock.
Testing Standards: Same as for N/NR type hammers
Specifications
Measuring Range:
10 to 70 N/mm² (1'450 psi to 10'150 psi) compressive strength
Impact Energy:
0.735 Nm (0.54 ft-lbs)
Case Dimensions:
Type L:
Type LR:
5.5" x 4.5" x 12.75" (140 x 114 x 324 mm)
12.75" x 11.75" x 4" (325 x 298 x 102 mm)
Weight:
Type L:
Type LR:
Net 3.5 lbs. (1.6 kg); Shpg. 4 lbs. (1.8 kg)
Net 6 lbs. (2.7 kg); Shpg. 7 lbs. (3.2 kg)
Ordering Information
Type NR/LR Hammer
310 01 001
Includes
Original SCHMIDT type N with N/mm² scale
Grinding stone, carrying case and operating instructions
310 01 002
Includes
Original SCHMIDT type N with psi scale
Grinding stone, carrying case and operating instructions
310 02 000
Includes
Original SCHMIDT recording type NR with N/mm² scale
Grinding stone, carrying case and operating instructions
310 03 002
Includes
Original SCHMIDT type L with N/mm² scale
Grinding stone, carrying case and operating instructions
310 04 000
Includes
Original SCHMIDT recording type LR with N/mm² scale
grinding stone, carrying case, 3-Rolls of registration paper and
operating instructions
Accessories
4
310 09 040
Proceq cerification/calibration Euro anvil (meets EN 12504-2)
310 US 001
ASTM Test Anvil, available in USA only (meets ASTM C805 testing standard)
310 99 072
Registration paper (NR/LR) pack of 5 rolls
Type ND/LD DIGI-SCHMIDT 2000 Test Hammer
The DIGI-SCHMIDT 2000 Concrete Test Hammer performs rapid non-destructive
quality testing. It provides automatic
conversion of rebound values to the
concrete’s compressive strength.
Factors can be selected to adjust for
concrete age and specific test specimen differences, maintaining accurate
measurement over a wide range of
test parameters.
DIGI-SCHMIDT Hammers – available
in type ND or type LD configurations –
are ideally suited to quality assurance
applications requiring many measurements of mass produced components. Large scale building projects,
which require correlation of many
measurements, also benefit from this
High Resolution, high
Repeatability with the
DIGI-SCHMIDT 2000
Features
•Automatic conversion of rebound
values to compressive strength
•Automatic calculation of median or
mean value with standard deviation
•Automatic correction for impact
direction
•Automatic correction for carbonation
depth
•Internal data acquisition with data
transfer to PC or printer direct
capabilities
electronic technology.
Electronic technology automatically calculates median, mean values and standard deviation. The carbonation of concrete near the surface can be automatically considered in the calculations.
The graphic LCD 128 x 128 pixel display unit immediately displays the rebound
value. A non-volatile memory provides a maximum of 500 measurements of ten
values each. Integrated software prints the measured values and/or transmits
them to a PC via a RS 232 interface.
Measured values can be printed or plotted as bar charts, and the entire measurement series can be transferred to a PC using the included Windows-based
ProVista software for subsequent evaluation.
Testing Standards: EN 12504-2, ENV 206 ASTM C805, ASTM C805C
(Rock), JGJ/T23-2001, JJG 817-1993
Screen Display
Specifications
Measuring Range:
10 to 70 N/mm² (1'450 psi to 10'150 psi)
compressive strength
Impact Energy:
type ND:
type LD:
Accuracy:
±0.2 R
Reproducibility:
±0.5 R
2.207 Nm (1.6 ft-lbs)
0.735 Nm (0.54 ft-lbs)
Display Unit Temperature Range: -10° to +60° (14° to 140°FC)
Battery Operation:
60 hours with six AA (LR 6) batteries (1.5V)
Case Dimensions:
415 x 500 x 125 mm (16.3” x 19.7” x 4.9”)
Ordering Information
340 00 202
Includes
Concrete Test Hammer DIGI-SCHMIDT 2000 type ND
Test hammer, indicating device, RS 232 C Interface or with adapter to USB,
data transfer cable, ProVista software, grinding stone, carrying strap, carrying
case and operating instructions
340 00 211
Includes
Concrete Test Hammer DIGI-SCHMIDT 2000 typ LD
Test hammer, indicating device, RS 232 C interface or with adapter to USB,
data transfer cable, ProVista PC-Software, grinding stone, carrying strap,
carrying case and operating instructions
Control and data transmission to
PC/Laptop
Accessories
310 09 040
Proceq verification/calibration Euro anvil (meets EN 12504-2)
310 US 001
ASTM test anvil, available in USA only (meets ASTM C805 testing standard)
310 99 072
Registration paper (NR/LR) pack of 5 rolls
390 00 540
Adapter RS 232 / USB
Example of ProVista chart
5
Precise Detection of
reinforcing Bars using
the PROFOMETER 5 +
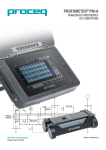
PROFOMETER 5+ Rebar Detection System
The compact, lightweight
PROFOMETER 5+ Rebar Detection
System brings the power of nondestructive pulse-induction technology to the detection of rebars.
Using the pulse induction measuring method enhances accuracy
by making the instrument virtually
insensitive to external interferences.
In addition, a correction can be
included for the effect of adjacent,
parallel bars on diameter determination and concrete cover measurement. A second correction is
for measurement of cover depth in congested bar arrangements.
Basic display
With the universal probe, not only can the instrument measure two concrete
cover regions at the push of a button, but also the diameter determination can
be performed without changing probes.
Several optical and acoustical locating aids are integrated in the device. One of
them has a variable tone level that can be heard over the internal loudspeaker or
on a headset.
Features
•Measures up to 50% more accurate than required by industry standards
•Single probe design with push-button range selection
•Can be operated in metric and imperial units
•Includes Proceq ProVista processing and report generation software
•LCD with backlight
The Model S Basic Unit offers:
“CyberScan” function display
•Precise location and orientation of rebars
•Fast measurements of concrete cover over rebar
•Determination of rebar diameter
•Built-in memory for storage of individual
cover values and statistical analysis
•Accurate determination of closely spaced
parallel rebar diameters
•Rapid detection of insufficient concrete cover
The Model SCANLOG advanced System offers all of the
above plus:
•ScanCar probe carriage with integral path measuring device for scanning the
rebars
“Measuring with grid” function display
•Cyberscan function for displaying the rebars in the concrete
•Grey-scale display of the concrete cover over the rebar via the measure with
grid function
PROCEQ - PROFOMETER 5 (V2.2.0, 50.1002)
Title:
Remarks:
Date:
300422
Rebar Locator
Name:
06-Sep-2002
1/1
x [m]
0.00
0.50
1.00
1.50
2.00
2.50
0.00
y [m]
Cover
< 26
26-28
29-31
32-34
35-37
38-40
41-43
44-46
>= 47
mm
R
S
A
0.0
0.0
0.0
0.0
2.8
2.8
30.6
33.4
30.6
64.0
36.1
100.1
0.0
100.1
66.7
0.0
100.1
0.0
100.1
%
%
%
33.3
Limit: 35 mm
Set parameters
Bar diameter
Limit value of covers
X grid width
Y grid width
D
s(Min)
dX
dY
= 18
= 35
= 150
= 150
Statistics
mm
mm
mm
mm
Number of measured covers
Total Area of measured grids
Average measured cover
Standard deviation
Maximum of measured covers
Minimum of measured covers
Span
Cover values below limit
"2-Layer-correction" for precise cover depth
measurement
= 36
= 0.81 m≤
= 36.0 mm
= 2.6 mm
= 40 mm
= 30 mm
= 10 mm
= 33.3 %
Presentation of bar arrangement and concrete covers using included ProVista PC-Software
Measured covers [mm]
x[m]
y[m]
0.00
0.15
6
N
A
m
sa
Max
Min
R
<s(Min)
0
.00
.15
.30
.45
.60
.75
.90
1
.05
.20
.35
.50
.65
.80
.95
2
.10
.25
.40
.55
37
38
38
34
35
32
32
32
34
30
37
34
37
39
37
37
37
40
38
38
34
38
33
38
33
39
37
39
37
38
34
37
35
38
32
39
PROFOMETER 5+ Rebar Detection System
Accessories for both
Models
Test block
Testing Standards: SN 505 262, DIN 1045, DGZfP B2, BS 1881 Part 204
Specifications
Measuring Range: Small Range: up to 100 mm (3.94”) deep depending on bar size
Large Range: up to 188 mm (7.41”) deep depending on bar size
Example: 16 mm (#5) bar: 80 mm (3.15”) deep in small measuring
range or 147 mm (5.71”) deep in large measuring range
Measuring Accuracy: Better than ±2 mm (0.08”) or ±5% for concrete cover
Bar Sizing:
8-40 mm (#3-12) diameter bars at better than ±1 bar size
Display:
128 x 128 pixel graphic LCD with backlight
Memory:
Model S: up to 40’000 measured values that can be stored in up
to 60 test file locations (Non volatile)
Model Scanlog: Extended memory for CyberScan and 120’000
values in Measure with grid graphical data files (Non-volatile)
Data Output:
RS 232 interface, USB via adapter
Case Dimensions: 415 x 500 x 125 mm (16.3” x 19.7” x 4.9”)
Weight:
Model S: net 4.2 kg (9.2lbs.); Shpg. 6.2 kg (13.7 lbs.)
Model Scanlog: net 4.5 kg (9.9lbs.); Shpg. 6.5 kg (14.3 lbs.)
Telescopic rod for universal probe or
ScanCar
Ordering Information
390 00 050
Includes
PROFOMETER 5+ (Model S)
Indicating device, universal probe, probe cable, data transfer cable, USB-serial
adapter, ProVista PC-Software on USB-memory stick, headset, carrying strap,
carrying case and operating instructions
390 00 054
Includes
PROFOMETER 5+ (Model SCANLOG)
Indicating device, universal probe, probe cable, ScanCar probe carriage, path
measuring cable, data transfer cable, USB-serial adapter, ProVista
PC-Software on USB-memory stick, headset, carrying strap, carrying case and
operating instructions
Marking pen for universal probe
Accessories
390 00 363 Telescopic extension rod
390 00 270 Test block
390 00 280 Marking pen with 3 refills
390 00 542 Adapter RS 232 / USB
390 00 168 Path measuring device cable, 1.55 m (5 ft.)
330 00 265 Path measuring device cable, 3 m (10 ft.)
390 00 090 Upgrade package (Model S to SCANLOG)
Includes
ScanCar probe carriage with path measuring cable, indicating device software
upgrade for CyberScan and measuring with grid afunctions
7
Early Corrosion
Detection with the
CANIN+ reduces
Risk of catastrophic
Damage
CANIN+ Corrosion Analyzing Instrument
The CANIN+ instrument offers two
methods for investigating and assessing the corrosion of steel in concrete.
Firstly, the instrument can measure
the corrosion potential and secondly,
it can measure the resistivity of the
concrete. The same CANIN+ device
can perform both tasks.
Features
•Accurate field potential measurements
aid in detecting corrosion in rebars
•Immediate presentation of test area
and reading - directly on the instrument display
•Optional rod or wheel electrode for
increased testing speed and productivity
•Four-point Wenner probe
•Total memory for up to 240,000
measurements
Corrosion of steel in concrete is an
electrochemical process. A potential
field can be measured on the
concrete surface by the use of an
electrode, known as a half-cell, and a high-impedance voltmeter.
The CANIN+ Corrosion Analyzing Instrument highlights corrosion activity before
rust becomes visible. This early detection can be key in preventing an unanticipated structural failure.
CANIN+ is ideally suited for assessment of corrosion potentials on large areas of
8,000 m² (83,000 sq.ft.) or multiple thereof, depending on the individual selectable grid size. 235,000 values can be stored by the intelligent memory. Up to
240 measurement values are displayed at a time in easy to read grey-scale and
a menu-driven approach facilitates simple operation using just nine keys.
The concrete resistivity is measured by the four-point Wenner probe. A low concrete resistivity indicates a greater chance of corrosion of the reinforcement and
also a greater corrosion rate.
The instrument can also store up to 5,800 resistivity values.
Data can be transferred to a PC.
Testing Standards: ASTM C876-91, BS 1881 Part 201, SIA 2006,
DGZfP B3, UNI 10174
Measuring with rod electrode according to
standards.
Specifications
Potential Mesurement
Measurement Range:
± 999 mV
Resolution: 1 mV
Memory:
non-volatile memory for up to 235,000 measurements stored in
up to 71 object files
Software:
ProVista software for downloading data and evaluation on PC
Battery Operation:
six LR 6 batteries, 1.5 V for 60 hours
or 30 hours with activated backlight
Resistance Measurement
Wheel electrode with moistening wheel for
continuous wetting up to a length of 200 m
(650 ft). Linear distance recorder with travel
direction detection. Automatic measurement
of pre-selected intervals.
Measurement Range:
0 to 99 kΩcm
Resolution:
1 kΩcm
Memory:
non-volatile memory for up to 5,800 measurements stored in
up to 24 object files
Data Transfer:
by Windows Hyperterm
Battery Operation: six LR 6 batteries, 1.5 V for 40 hours
or 20 hours with activated backlight
General
Four-point Wenner probe.
8
Impendance: 10 MΩ
Temperature Range:
0 °C to 60 °C
Display:
128 x 128 pixels graphic LCD with backlight
Data Output:
RS 232 interface, USB with adapter
Case Dimensions:
580 x 480 x 210 mm (22.8" x 18.9" x 8.3")
Weight:
Net. 10.6 kg (23.5 lbs); Shpg. 14 kg (31.1 lbs)
CANIN+ Corrosion Analyzing Instrument
Ordering Information
330 00 201
Includes
330 00 202
Includes
330 00 203
Includes
330 00 204
Includes
CANIN+ Half-Cell Configuration with Rod Electrode
CANIN+ indicating device, carrying strap, protection sleeve for
indicating device, rod electrode with spare parts, electrode cable 1.5 m
(4.9 ft.), cable coil 25 m (82 ft.), CANIN ProVista PC software on
memory stick, transfer cable, USB-serial adapter, bottle with copper
sulphate 250 g, operating instructions, CANIN+ carrying case
CANIN+ Half-Cell Configuration with Rod and Wheel Electrodes
CANIN+ indicating device, carrying strap, protection sleeve for
indicating device, rod electrode with spare parts, electrode cable 1.5 m
(4.9 ft.), cable coil 25 m (82 ft.), one-wheel electrode system, tool kit
to wheel electrode system, CANIN ProVista PC-Software on memory
stick, transfer cable, USB-serial adapter, bottle with copper sulphate
250 g, bottle with citric acid 250 g, operating instructions, CANIN+
carrying case
CANIN+ Configuration with Wenner Probe
CANIN+ indicating device, carrying strap, protection sleeve for
indicating device, Wenner resistance probe with spare rubber foam
pads, cable for Wenner probe, control plate for Wenner probe,
operating instructions, CANIN+ carrying case
CANIN+ Combined Configuration with Rod and Wheel Electrodes and
Wenner Probe
CANIN+ indicating device, carrying strap, protection sleeve for
indicating device, rod electrode with spare parts, electrode cable 1.5 m
(4.9 ft.), cable coil 25 m (82 ft.), one-wheel electrode system, tool kit
to wheel electrode system, CANIN ProVista PC-Software on memory
stick, transfer cable, USB-serial adapter, bottle with copper sulphate
250 g, bottle with citric acid 250 g, Wenner resistance probe with spare
rubber foam pads, cable for Wenner probe, control plate for Wenner
probe, operating instructions, CANIN+ carrying case
Rapid and Reliable
Measurement of very
large Areas
One-wheel electrode system
Accessories
330 00 956 One-wheel electrode system
330 02 520 Wenner probe with cable, spare rubber foam pads and control plate
390 00 542 USB-serial Adapter
CANIN ProVista PC-Software
The CANIN ProVista Windows-based software, developed by Proceq SA, makes
it possible to download, present and edit data measured by the CANIN half-cell
instrument in an easy and fast way using an IBM-compatible PC. The program
generates a potential map, a relative frequency and a cumulative frequency diagram and provides a chipping graph. This statistical presentation is the basis for
an efficient interpretation of the half-cell potentials by the corrosion engineer.
The software allows the
engineer to rotate and mirror
files. Single potential maps
can be combined to form a
complete graph representing
the total investigated surface
area.
Potential map
Relative frequency diagram
Cumulative frequency diagram
Chipping graph
Based on the determined threshold potentials that represent certain conditions
of the structure, up to four characteristic potential intervals can be chosen. The
corresponding partial areas are marked with different colors in the presentation
as a „chipping graph“.
9
The Proceq TICO, a
truly non-destructive
Testing Method for
evaluating the Quality
TICO Ultrasonic Testing Instrument
Direct transmission
The TICO instrument uses transducers as transmitters and receivers to calculate pulse velocity by measuring transmission time. This flexible unit can measure via direct transmission, semi-direct
transmission, indirect or surface transmission to accommodate the demands
of virtually any test site. Optional exponential transducers with pointed tips are
available for testing on rough surfaces like shotcrete.
Semi-direct transmission
The ultrasonic pulse velocity
method is used to determine material strength and quality, based on
the relationship to material density
and elasticity. Using this ultrasonic
method, the TICO instrument determines, indirectly, the modulus of
elasticity and concrete strength. The
instrument is typically used on site
to assess uniformity of concrete and
to locate cracks, voids, cavities, and
defects due to fire and frost.
Ultrasonic testing is often coupled with Schmidt hammer tests to aid in final
location of specific weak areas. All information is displayed clearly in a large,
easy to read format. The measurements can be transferred to a printer or to a
PC for analysis and evaluation.
Features
• Crack depth measurements
• Detection of areas with cavities and voids
• Estimate mechanical properties of concrete, strength and Modulus of Elasticity
Testing Standards: EN 12504-4:2004 (former BS 1881 Part 203)
ASTM C 597
Indirect or surface transmission
Specifications
Memory:
Nonvolatile, up to 250 measured values
Display:
128 x 128 pixel LCD graphic
Measuring Range:
Approx. 15 to 6550 μs
Resolution:
0.1 μs
Voltage Pulse:
1 kV
Pulse Rate:
3/s
Impedance at Input: 1 MΩ
Transducers:
54 kHz with 5 ft. (1.5 m) BNC cables, two included
Temperature Range: -0° to +60° C
Battery Operation:
30 hours with 6 AA (LR 6) batteries, 1.5 V
Case Dimensions:
325 x 295 x 105 mm (12.8" x 11.6" x 4.15")
Weight:
Net 3 kg (6.6 lbs.); Shpg. 5.4 kg (12 lbs. )
Ordering Information
325 40 006
Includes
Ultrasonic Instrument TICO
Indicating device with RS 232 interface or adapter to USB, two 54 kHz
transducers with 1.5 m (5 ft.) BNC cables, calibration rod, coupling
paste, carrying case and operating instructions
Accessories
10
325 40 022
Cable BNC. 10 m (33 ft.) long (cables of other length available)
325 40 026
Transducer, 24 kHz (for larger concrete structures with
larger size aggregates)
325 40 027
Transducer, 37 kHz (for larger concrete structures with
larger size aggregates)
325 40 090
Transducer, 82 kHz (for smaller samples and finer material)
325 40 029
Transducer, 150 kHz (for smaller samples and finer material)
325 40 033
Exponential transducer, 45 kHz (for use on rough surfaces)
325 40 041
Coupling paste, 3.5 L can
330 00 456
Data transfer cable
390 00 540
Adapter RS 232 / USB
TORRENT Permeability Tester
The permeability of concrete at the
surface is a major factor determining
the durability of concrete structures.
The permeability coefficient which is
determined completely non-destructive
by the instrument correlates well with
the results of destructive methods that
give information on the ingress of
harmful substances.
In the TORRENT Permeability Tester,
a two-chamber vacuum cell provides
exactly defined measurement of cover concrete to determine durability.
A pressure regulator assures accuracy by eliminating atmospheric airflow to the
measuring chamber. Data is automatically collected by the display unit.
Measurements can be transferred to a printer or to a PC for detailed analysis and
evaluation.
Durability Testing
using the TORRENT
Permeability
System aids in the
Assessment of a
Structure’s Life Span
Features
•Fast, reliable and totally nondestructive
•User-friendly menu system
•Optional Wenner-Proceq resistance
probe for resistivity measurements
Specifications
Memory:
Non-volatile memory for 200 measured objects
Display:
128 x 128 pixel LCD graphic display
Data Output:
RS 232 C interface
Temperature Range: -10° to +60° C
Battery Operation:
60 hours with six AA (LR 6) batteries (1.5V)
Case Dimensions:
Electronics: 325 x 295 x 105 mm (12.8" x 11.6" x 4.15")
Control Unit: 520 x 370 x 125 mm (20.5" x 14.6" x 4.9")
Weight:
Net 8.4 kg (18.5 lbs.); Shpg. 11.3 kg (25 lbs.)
Ordering Information
380 02 200
Includes TORRENT Permeability Tester
Display unit, pressure/vacuum control unit, data transfer cable, printer
cable, carrying strap, carrying cases and operating instructions
(Note: Vacuum pump required for operation, but not included)
Note: Vacuum pump with 1.5 m³ / h suction capacity and 10 mbar final total pressure
required for system operation, not included with system. Purchase separately.
Display before start of the measurement.
Accessories
380 02 500 WENNER-PROCEQ Resistance probe with cable
WENNER-PROCEQ Resistance probe
Two-chamber vacuum cell with
sealing rings
11
Accurately measure
the Concrete
Surface Strength and
Adhesive Strength
of applied Coatings
with the DYNA Pull-off
Tester
Features
•Portable design ideal for virtually any
field test application
•Smooth, constant jerk-free loading
•Available in a wide range of capacities
to meet specific test requirements
•Separate display unit with data
acquisition and RS 232 C port or to
USB on DYNA 6E/16E Series units.
DYNA Pull-off Tester
The easily transported, manual DYNA
Pull-off Tester determines strength of
concrete overlay adhesion and is also
ideal for measuring the strength of
applied coatings, such as plastics, mortars, plasters, bituminous coats, as well
as paint and other coatings on metals.
Available in manual and electronic versions, the DYNA Pull-off Tester tests at
any measuring point on the component,
without requiring specimen preparation.
A crank drive, available as a manual unit
or with an electric drive option, provides a constant, jerk-free load increase.
Adjustable legs optimize measurements for the specific test situation.
This instrument is essential for diagnosing damage to building structures
and for verifying quality of completed renovations.
Testing Standards: EN 10115-12, EN 1348, DIN 1048 Part 2,
BS 1881 Part 207, ASTM C 4541, ACI 503-30
Specifications
Tensile Force:
Z6 Series:
Z16 Series:
6 kN (1,350 lbf.)
16 kN (3,600 lbf.)
Display Type:
Z6/Z16 Series: Integrated digital pressure gauge with selectable
force or stress display, min / max values and peak
hold functions; Accuracy better than ±2%
DYNA Z6E/Z16E Series
DYNA Estrich
Adhesive Tester
The DYNA Estrich adhesive strength
tester measures an adhesive’s ability to
bond to concrete. This instrument is specifically designed to measure the adhesive
strength of floor coatings by an absolutely
non-destructive testing method.
DYNA Estrich
Z6E/Z16E Series:Separate indicating device with nonvolatile
memory for 1'000 measured values, 128 x 128
pixel LCD display, RS 232 C interface or with
adapter to USB and accuracy better than ±1%
Test Disc:
50 mm (2") diameter (one included)
Maximum Stroke:
Z16 Series 3,5 mm (0.14"), Z6 series 4,0 mm (0.16")
Case Dimensions: Z6/Z16 Series: 300 x 280 x 240 mm (11.8" x 11.0" x 9.4")
Z6E/Z16E Series:300 x 280 x 240 mm (11.8" x 11.0" x 9.4") and
320 x 295 x 105 mm (12.6" x 11.6" x 4.1")
Weight:
Z6/Z16 Series: Net 6 kg (13.2 lbs.); Shpg. 8.2 kg (18 lbs.)
Z6E/Z16E Series:Net 7.8 kg (17.2 lbs.); Shpg. 10 kg (22 lbs.)
Ordering Information
345 00 217
Includes
DYNA Z 6 with digital manometer
6 kN (1,350 lbf) digital force gauge with kN, N/mm², lbf and psi, selectable
unit display, 50 mm diameter, test disc, tensile draw bolt, carrying case an
operating instructions
345 00 220
Includes
DYNA Z 6 E with electronic indicating device
6 kN (1,350 lbf) stand alone indicating device with force transducer, 50 mm
diameter test disc, tensile draw bolt, carrying cases and operating instructions
345 00 117
Includes
DYNA Z 16 with digital manometer
16 kN (3,600 lbf) digital force gauge with lbf, psi, kN and N/mm², selectable
unit display, 50 mm diameter test disc, tensile draw bolt, carrying case and
operating instructions
345 00 120
Includes
DYNA Z 16 E with electronic indicating device
16 kN (3,600 lbf) stand alone indicating device with force transducer, 50 mm
diameter test disc, tensile draw bolt, carrying cases and operating
instructions
345 00 310
Includes
DYNA Estrich Pull-off Tester
4,2 kN (850 lbf), analog force gauge with N/mm² sccale, 50 mm diameter
steel test disc, tensile draw bolt, carrying case, and operating instructions
Accessories
DYNA EDm Motor Drive option
345 08 001
Test discs (50 mm) FOR Z 6/16 (M8), set of ten (other test discs, dia. 20 mm,
dia 100 mm, square 50 x 50 mm are available)
345 09 220
DYNA EDm motor drive, battery powered
390 00 540
Adapter RS 232 / USB
Replacement Parts
345 09 002 Draw bolt, steel, M8 DYNA Z6/16
12
All information contained in this documentation is presented in good faith and believed to be correct. Proceq SA makes no warranties and excludes all liability as
to the completeness and/or accuracy of the information. For the use and application of any product manufactured and/or sold by Proceq SA explicit reference is
made to the particular applicable operating instructions.


