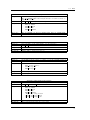
1
NAVIS
North Atlantic Vessel Identification System
BEXUS Flight 2009
Student Experiment Documentation
Aalborg University
Change Record
Document Revisions
Version
0-0
0-1
0-3
0-4
1
2
Date
03/01/2009
03/04/2009
03/15/2009
03/15/2009
03/15/2009
05/24/2009
Changed chapters
All
All
All
All
All
All
Remarks
Latex template created
Document started
First internal review
Comment from JDN
Preliminary Design Review (PDR)
Critical Design Review (CDR)
Future Document Revisions
Version
3
4
5
Date
Changed chapters
XX/XX/2009
XX/XX/2009
XX/XX/2009
Remarks
Mid-Term Report (MTR)
Launch campain
Final report
Abstract: This is the NAVIS project Student Experiment Documentation.
Keywords: SED BEXUS09 AIS AAUSAT3 AAU SDR
i
Table of Contents
Preface
vii
1 Introduction
1.1 Experiment Objectives . . . .
1.2 Experiment Overview . . . .
1.3 Scientific Support . . . . . . .
1.4 Similar scientifically projects
1.5 Team Organisation . . . . . .
1.6 Funding Support . . . . . . .
.
.
.
.
.
.
.
.
.
.
.
.
.
.
.
.
.
.
.
.
.
.
.
.
.
.
.
.
.
.
.
.
.
.
.
.
.
.
.
.
.
.
.
.
.
.
.
.
.
.
.
.
.
.
.
.
.
.
.
.
.
.
.
.
.
.
.
.
.
.
.
.
.
.
.
.
.
.
.
.
.
.
.
.
.
.
.
.
.
.
.
.
.
.
.
.
.
.
.
.
.
.
.
.
.
.
.
.
.
.
.
.
.
.
.
.
.
.
.
.
.
.
.
.
.
.
.
.
.
.
.
.
.
.
.
.
.
.
.
.
.
.
.
.
.
.
.
.
.
.
.
.
.
.
.
.
.
.
.
.
.
.
.
.
.
.
.
.
.
.
.
.
.
.
.
.
.
.
.
.
1
1
2
4
5
5
8
2 Mission Requirements
10
2.1 Technical Requirements . . . . . . . . . . . . . . . . . . . . . . . . . . . . . . . . . 10
2.2 Functional Requirements . . . . . . . . . . . . . . . . . . . . . . . . . . . . . . . . . 10
2.3 Operational Requirements . . . . . . . . . . . . . . . . . . . . . . . . . . . . . . . . 10
3 Experiment Description
3.1 Experiment Overview . . .
3.2 Experiment Setup . . . . .
3.3 Mechanical Design . . . . .
3.4 Thermal Design . . . . . . .
3.5 Power System . . . . . . . .
3.6 Experiment Control System
3.7 Economy . . . . . . . . . .
.
.
.
.
.
.
.
.
.
.
.
.
.
.
.
.
.
.
.
.
.
.
.
.
.
.
.
.
.
.
.
.
.
.
.
.
.
.
.
.
.
.
.
.
.
.
.
.
.
.
.
.
.
.
.
.
.
.
.
.
.
.
.
.
.
.
.
.
.
.
.
.
.
.
.
.
.
.
.
.
.
.
.
.
.
.
.
.
.
.
.
.
.
.
.
.
.
.
.
.
.
.
.
.
.
.
.
.
.
.
.
.
.
.
.
.
.
.
.
.
.
.
.
.
.
.
.
.
.
.
.
.
.
.
.
.
.
.
.
.
.
.
.
.
.
.
.
.
.
.
.
.
.
.
.
.
.
.
.
.
.
.
.
.
.
.
.
.
.
.
.
.
.
.
.
12
12
17
19
22
24
26
27
4 Review and Test
4.1 Experiment Selection Workshop (ESW)
4.2 Preliminary Design Review (PDR) . . .
4.3 Test Plan . . . . . . . . . . . . . . . . .
4.4 Critical Design Review - CDR . . . . . .
4.5 Experiment Acceptance Review - EAR .
.
.
.
.
.
.
.
.
.
.
.
.
.
.
.
.
.
.
.
.
.
.
.
.
.
.
.
.
.
.
.
.
.
.
.
.
.
.
.
.
.
.
.
.
.
.
.
.
.
.
.
.
.
.
.
.
.
.
.
.
.
.
.
.
.
.
.
.
.
.
.
.
.
.
.
.
.
.
.
.
.
.
.
.
.
.
.
.
.
.
.
.
.
.
.
.
.
.
.
.
.
.
.
.
.
.
.
.
.
.
.
.
.
.
.
.
.
.
.
.
28
28
28
28
28
29
5 Project Planning (Phase B and C)
5.1 WBS - Work Breakdown Structure . . . . . . . . . . .
5.2 Time Schedule Of The Experiment Preparation . . . .
5.3 Resource Estimation . . . . . . . . . . . . . . . . . . .
5.4 Hardware and Software Development and Production
5.5 Risk Management . . . . . . . . . . . . . . . . . . . .
.
.
.
.
.
.
.
.
.
.
.
.
.
.
.
.
.
.
.
.
.
.
.
.
.
.
.
.
.
.
.
.
.
.
.
.
.
.
.
.
.
.
.
.
.
.
.
.
.
.
.
.
.
.
.
.
.
.
.
.
.
.
.
.
.
.
.
.
.
.
.
.
.
.
.
.
.
.
.
.
30
31
32
32
34
35
.
.
.
.
.
.
.
.
.
.
.
.
.
.
.
.
.
.
.
.
.
.
.
.
.
.
.
.
.
.
.
.
.
.
.
.
.
.
.
.
.
.
6 Outreach Program
38
6.1 Presentations . . . . . . . . . . . . . . . . . . . . . . . . . . . . . . . . . . . . . . . 38
6.2 Articles in national newspapers . . . . . . . . . . . . . . . . . . . . . . . . . . . . . 38
iii
TABLE OF CONTENTS
6.3
Workshop and lectures . . . . . . . . . . . . . . . . . . . . . . . . . . . . . . . . . .
38
7 Launch Campaign
7.1 Experiment Preparation . . . . . . . . .
7.2 Experiment Time Event During Flight .
7.3 Operational Data Management Concept
7.4 Flight Readiness Review - FRR . . . . .
7.5 Mission Interference Test - MIT . . . . .
7.6 Launch Readiness Review - LRR . . . .
7.7 Inputs For The Flight Requirement Plan
7.8 Post Flight Activities . . . . . . . . . . .
.
.
.
.
.
.
.
. . .
. . .
. . .
. . .
. . .
. . .
FRP
. . .
.
.
.
.
.
.
.
.
.
.
.
.
.
.
.
.
.
.
.
.
.
.
.
.
.
.
.
.
.
.
.
.
.
.
.
.
.
.
.
.
.
.
.
.
.
.
.
.
.
.
.
.
.
.
.
.
.
.
.
.
.
.
.
.
.
.
.
.
.
.
.
.
.
.
.
.
.
.
.
.
.
.
.
.
.
.
.
.
.
.
.
.
.
.
.
.
.
.
.
.
.
.
.
.
.
.
.
.
.
.
.
.
.
.
.
.
.
.
.
.
.
.
.
.
.
.
.
.
.
.
.
.
.
.
.
.
.
.
.
.
.
.
.
.
.
.
.
.
.
.
.
.
.
.
.
.
.
.
.
.
39
39
41
41
41
41
41
41
43
8 Experiment Report
8.1 Launch Campaign
8.2 Results . . . . . . .
8.3 Outreach Activities
8.4 Lessons Learned .
.
.
.
.
.
.
.
.
.
.
.
.
.
.
.
.
.
.
.
.
.
.
.
.
.
.
.
.
.
.
.
.
.
.
.
.
.
.
.
.
.
.
.
.
.
.
.
.
.
.
.
.
.
.
.
.
.
.
.
.
.
.
.
.
.
.
.
.
.
.
.
.
.
.
.
.
.
.
.
.
.
.
.
.
.
.
.
.
46
46
46
46
46
.
.
.
.
.
.
.
.
.
.
.
.
.
.
.
.
.
.
.
.
.
.
.
.
.
.
.
.
.
.
.
.
.
.
.
.
.
.
.
.
.
.
.
.
.
.
.
.
.
.
.
.
.
.
.
.
9 Abbreviations and References
47
9.1 Abbreviations . . . . . . . . . . . . . . . . . . . . . . . . . . . . . . . . . . . . . . . 47
10 Attachments
A Subsystem
A.1 EPS .
A.2 LOG .
A.3 FPF .
A.4 UHF .
A.5 ELA .
A.6 AIS1 .
A.7 AIS2 .
requirements
. . . . . . . . .
. . . . . . . . .
. . . . . . . . .
. . . . . . . . .
. . . . . . . . .
. . . . . . . . .
. . . . . . . . .
49
.
.
.
.
.
.
.
.
.
.
.
.
.
.
.
.
.
.
.
.
.
.
.
.
.
.
.
.
.
.
.
.
.
.
.
.
.
.
.
.
.
.
.
.
.
.
.
.
.
.
.
.
.
.
.
.
.
.
.
.
.
.
.
.
.
.
.
.
.
.
.
.
.
.
.
.
.
.
.
.
.
.
.
.
.
.
.
.
.
.
.
.
.
.
.
.
.
.
.
.
.
.
.
.
.
.
.
.
.
.
.
.
.
.
.
.
.
.
.
.
.
.
.
.
.
.
.
.
.
.
.
.
.
.
.
.
.
.
.
.
.
.
.
.
.
.
.
.
.
.
.
.
.
.
.
.
.
.
.
.
.
.
.
.
.
.
.
.
.
.
.
.
.
.
.
.
.
.
.
.
.
.
.
.
.
.
.
.
.
.
.
.
.
.
.
.
.
.
.
.
.
.
.
.
.
.
.
.
.
.
.
.
.
.
.
.
.
.
.
.
.
.
.
.
.
.
.
.
.
.
.
.
.
.
.
.
.
.
50
50
51
51
52
52
52
53
B Introduction to AIS
55
B.1 System Objectives . . . . . . . . . . . . . . . . . . . . . . . . . . . . . . . . . . . . 55
B.2 High Altitude Challenges . . . . . . . . . . . . . . . . . . . . . . . . . . . . . . . . 55
B.3 The AIS Protocol . . . . . . . . . . . . . . . . . . . . . . . . . . . . . . . . . . . . . 56
C Interface
C.1 EPS
C.2 FPL
C.3 LOG
C.4 UHF
C.5 ELA
C.6 AIS1
C.7 AIS2
Control Documents
. . . . . . . . . . . . .
. . . . . . . . . . . . .
. . . . . . . . . . . . .
. . . . . . . . . . . . .
. . . . . . . . . . . . .
. . . . . . . . . . . . .
. . . . . . . . . . . . .
.
.
.
.
.
.
.
.
.
.
.
.
.
.
.
.
.
.
.
.
.
.
.
.
.
.
.
.
.
.
.
.
.
.
.
.
.
.
.
.
.
.
.
.
.
.
.
.
.
.
.
.
.
.
.
.
.
.
.
.
.
.
.
.
.
.
.
.
.
.
.
.
.
.
.
.
.
.
.
.
.
.
.
.
.
.
.
.
.
.
.
.
.
.
.
.
.
.
.
.
.
.
.
.
.
.
.
.
.
.
.
.
.
.
.
.
.
.
.
.
.
.
.
.
.
.
.
.
.
.
.
.
.
.
.
.
.
.
.
.
.
.
.
.
.
.
.
.
.
.
.
.
.
.
.
.
.
.
.
.
.
.
.
.
.
.
.
.
.
.
.
.
.
.
.
.
.
.
.
.
.
.
.
.
.
.
.
.
.
.
.
.
.
.
.
.
.
.
.
.
.
.
.
.
.
.
.
.
.
.
.
.
.
.
.
.
.
60
60
63
65
66
67
68
70
D Component List
73
E Circuits
74
F Mechanical drawings
75
G Pre-PDR experiments
77
G.1 Power Regulator Unit . . . . . . . . . . . . . . . . . . . . . . . . . . . . . . . . . . 77
G.2 Platform MCU . . . . . . . . . . . . . . . . . . . . . . . . . . . . . . . . . . . . . . 77
G.3 Radio transceiver . . . . . . . . . . . . . . . . . . . . . . . . . . . . . . . . . . . . . 78
iv
TABLE OF CONTENTS
G.4 AIS1 & ELA MCU . . . . . . . . . . . . . . . . . . . . . . . . . . . . . . . . . . . .
G.5 DSP development board . . . . . . . . . . . . . . . . . . . . . . . . . . . . . . . . .
78
78
H Pre-CDR experiments
80
H.1 Isolation test . . . . . . . . . . . . . . . . . . . . . . . . . . . . . . . . . . . . . . . 80
I
Link budget
81
J PDR Comments
85
Bibliography
87
v
Preface
The SED (Student Experiment Documentation) provides EuroLaunch and other readers with all
important information about the NAVIS (North Atlantic Vessel Identification System) experiment
from Aalborg University. During all experiment phases - development, experiment production,
launch campaign and post flight - this SED is the place to find documentation that describes the
experiment in detail. The SED is built on the basis of ”Guidelines for Student Experiment Documentation”, except from section 3.7, Economy. In this version 2 of the SED, nearly all chapters
are altered, and more information has been put to this document, as well as the budgets has been
adjusted. A special focus has been on the mechanical system, which was poorly documented in
the first version of this SED. Also note that AIS2 subsystem has changed its computing platform
to an Analog Devices DSP.
The NAVIS experiment was formerly known as ”AAUSAT3 AIS receiver”.
The goal of the NAVIS experiment is to test two student developed AIS receivers, as a milestone
in the development of the 3rd Cubesat from Aalborg University.
The NAVIS team can be contacted at [email protected]. Our website is located at
http://navis-project.eu.
Author Signatures
Hans Peter Mortensen
Jeppe Ledet-Pedersen
Mads Hjorth Andersen
Nikolaj Pedersen
Troels Jessen
Troels Laursen
Ulrik Wilken Rasmussen
vii
Chapter 1
Introduction
1.1
Experiment Objectives
The Danish Maritime Safety Administration’s (DaMSA) mission is to have the safest seaways
in the world. They are well underway in the Danish waters, but around Greenland, which is
also DaMSA’s area of responsibility, the waters are not perfectly charted. To build a tracking
system around Greenland will be an enourmase task due to the size of Greenland and the hostile
environment. Therefore DaMSA would like to track the ship traffic by Automatic Identification
System (AIS) as they are doing in Denmark, so that they know where to concentrate their charting
activities. A short introduction to AIS for readers who are unfamiliar with the system is found
in Appendix B.
DaMSA traditionally tracks ships via AIS by placing ground stations on the shores, to receive
transmissions from the ships, but also to act as electronic lighthouses. This method is impractical
in the regions around Greenland and will still not cover the open seas, as the ground stations can
not receive transmissions from ships beyond the line of sight. Ground stations typically receives
signal from approximately 40 nautical miles away (74 km.)[Cervera 08].
AAUSAT3 is the third student satellite developed at Aalborg University. The satellite’s mission
is to evaluate the possibilities of receiving AIS messages from ships via satellite as a preliminary
step in the development of operational AIS satellites. By analyzing the communication path from
ship to satellite, it has been estimated that it is possible to receive AIS signals in both 35 km
altitude (Appendix I) and in Low-Earth Orbit (LEO).
Figure 1.1: AAUSAT3 communication path
The main objective of the NAVIS project is to test the ability of two student developed AIS
receivers to receive and decode real life AIS radio signals in high altitude. As the receivers
are designed for AAUSAT3 a number of natural restrictions applies such as size, weight, power
consumption and general robustness of the construction. Based on the outcome of the BEXUS
flight, the final design of the primary payload of AAUSAT3 will be selected. The balloon flight
1
CHAPTER 1. INTRODUCTION
will include an adapted Engineering Model (EM) of AAUSAT3, to test the satellite design.
1.2
Experiment Overview
The AIS system was originally only intended to be used for ship-to-ship and ship-to-land transmission. This design raises some challenges when receiving signals in space. A satellite will be able to
receive AIS messages from a much larger area than a ground station, due to the increased altitude
and thereby line-of-sight. This means that a satellite might receive collided AIS massages, due to
the fact that a ship only synchronizes its transmissions with other ships within the line-of-sight.
This problem is illustrated in Figure 1.2.
Figure 1.2: Each circle represents a possible ship synchronization zone. When receiveing from high altitude more than one zone will be in the satellites footprint.
An altitude of 35 km will give a footprint radius of approximately 650 km (Appendix I).
Today no AIS receivers is known to be in operation in space. One commercial LEO experiment
of lower complexity than the AAUSAT3 AIS receivers exists, but the results are not published, so
getting a functional AIS receiver in high altitude will be breaking news [COM DEV International 07].
The expected outcome of the NAVIS project is a test of the AIS systems, collection of raw
AIS data and a test of the general AAUSAT3 structure. DaMSA will provide reference AIS data
from land based stations in the relevant area for comparison. It is of high scientific interest to
get access to raw data as well as test the AIS signal decoding algorithms for both students and
researchers at Aalborg University. The data obtained will be further analyzed in master projects
as well as by researchers at the university.
1.2.1
Experiment subsystems
The experiment is developed with two different solutions to receive AIS from AIS transponders.
This is done for testing how the two different solutions will react due to the climate and to compare
the two solutions for further development. Because the two AIS system are redundant, it raises
the reparability for a success, even if one of the systems will malfunction. The experiment is
divided into the following subsystems:
• Hardware AIS receiver
• Software AIS receiver
• Splitter
2
1.2. EXPERIMENT OVERVIEW
• UHF radio
• E-link adapter
• Platform system
This is illustrated in Figure 1.3.
RF
Front-end
Software
AIS Receiver
E-Link
Adapter
RF
Receiver
Hardware
AIS Receiver
Platform
System
UHF
Transceiver
UHF Radio
E-Link
Splitter
Batteries
Figure 1.3: System flowchart
In order to keep the system as modular as possible, the internal communication is handled by
CAN Space Protocol (CSP), a CAN (Controller Area Network) protocol developed at Aalborg
University for use in AAUSAT3. The protocol enables socket-like communication between all
subsystems simply by assigning addresses to subsystems and ports to services.
Hardware AIS receiver (AIS1)
The goal of AIS1 is to receive AIS using a well know and thoroughly tested technology. AIS1
consist mainly of a COTS hardware receiver and demodulator. The selected general purpose
receiver must be configured both by external discrete components and by software to the right
frequency and modulation scheme. This receiver will use an MCU to handle the AIS protocol.
More information about the AIS protocol is found in Appendix B.3.
Software AIS receiver (AIS2)
The AIS2 will use a hardware down converter and sample the low Intermediate Frequency (IF)
output. A Digital Signal Processor (DSP) is used for filtering and demodulation of the data. This
allows advanced demodulation algorithms to be tested and permits in-flight reconfiguration and
optimization of the algorithms in space. AIS2 is able to store raw sampled data to be used for
development, optimization and algorithms evaluation on ground after the BEXUS flight.
Splitter
The purpose of the splitter is to distribute the received signal from one antenna to the two AIS
subsystems. Furthermore, the splitter contains components for amplification and filtering of the
signal.
E-Link adapter (ELA)
The ELA acts as a gateway between the BEXUS E-Link, and the internal CAN. By using both
E-Link and the AAUSAT3 UHF Transceiver, the experiment will have redundant communication
channels.
3
CHAPTER 1. INTRODUCTION
Platform system
The Platform system will handle battery management, power conversion, distribution and measurements. Furthermore the Platform system will act as a subsystem watchdog timer and enable
remote monitoring and power control of the individual subsystems. The subsystem also contains
a system log and the flight plan, which can be modified during flight.
UHF Transceiver
The UHF radio is an experiment in itself and is based primarily on the work of a master thesis
started in 2008 and ending in may 2009. The thesis focuses on the development of a new radio
system for amateur spacecrafts and uses a simple off-the shelf radio platform with new coding
techniques to obtain a large improvement over traditional radio systems. Flying the UHF radio
on the high altitude baloon will influence the system in ways similar to a low-earth-orbit satellite.
The goal of the test is to predict and model the effect of these influences and of course be able
to maintain a reliable data-link for telemetry. The system uses the AAUSAT-II’s licensed UHF
channel at 437.425 MHz using 2FSK modulation.
1.3
Scientific Support
NAVIS has support from a number of individuals associated with Aalborg University and DaMSA.
The department of Electronic Systems at the university provides supervision for the two project
groups, and Center for Software Defined Radio will assist in the implementation of the DSP
software for AIS2. The following people will assist the NAVIS project:
Hans Ebert
Associate professor, Group 09gr650 supervisor.
Ole Kiel Jensen
Associate professor, Group 09gr651 supervisor.
Jens Dalsgaard Nielsen
Associate professor, AAUSAT3 project supervisor.
Jesper A. Larsen
Assistant professor, Assisting AAUSAT3 project supervisor.
AAUSAT3 System Engineering group
A group consisting of project supervisors and students from each participating group in the
AAUSAT3 project.
Peter Koch
Associate Professor, Head of Center for Software Defined Radio, Aalborg University.
Muhammad Mahtab Alam
Research Assistant, Center for Software Defined Radio, Aalborg University.
Claus Sølvsten
Contact person at the Danish Maritime Safety Administration.
4
1.4. SIMILAR SCIENTIFICALLY PROJECTS
Daniel Winter Uhrenholt
Employee at Aalborg University. Responsible for mechanical design and construction on the
NAVIS project.
Aalborg University
Aalborg University (AAU) offers approx 60 different study programmes and has nearly 14,000
students. Aalborg University Space Center was founded in 2004 by the the Faculty of Engineering
and Science. The university was involved in the development of the first danish satellite, Ørsted,
which was launched in 1999 and still is operational. The student satellite program has resulted
in launch of two Cubesats — one of which is still operartional after more than 1 year in space.
Furthermore, students from Aalborg University were highly involved in the European SSETI
Express satellite.
• Involved in the Ørsted satellite (launched 1999)
• AAU CubeSat (launched 2003)
• SSETI Express (launched 2005)
• AAUSAT-II (launched April 28th 2008 - Still in operation)
1.4
Similar scientifically projects
AISsat-1
Norwegian satellite developed for AIS surveillance of the Arctic Sea. Expected launch in 20092010.
http://www.spacecentre.no/
ComDev/CanX-6
Commercial satellite launced April 2008. Reported to be a success in a press release from June
5th 2008, but no results have been published.
http://www.comdev.ca/
ESA research
ESA has produced a paper in which the possibility of receiving AIS signals in space is investigated.
http://www.dlr.de/iaa.symp/Portaldata/49/Resources/dokumente/archiv5/1304_Hoye.pdf
1.5
Team Organisation
The NAVIS team consists of two groups from Aalborg University, studying 6th semester Communication Technology. Group 1 is developing the hardware based AIS receiver (AIS1) and group 2
is responsible for the software AIS receiver (AIS2). The numbers 09gr650 and 09gr651 refers to
the internal group numbers at Aalborg University. All students in the project are from Denmark.
1.5.1
Group 1 - 09gr650 - AIS1
Mads Hjorth Andersen (MH)
Born 1985.
• Media contact person
5
CHAPTER 1. INTRODUCTION
(a) Mads Hjorth Andersen
(b) Troels Laursen
(c) Nikolaj Pedersen
Figure 1.4: Portraits of group members from group 1
• Project manager
[email protected]
Troels Laursen (TL)
Born in 1986.
• Electrical interfaces
• Software test
[email protected]
Nikolaj Pedersen (NP)
Born in 1985.
• PCB design
• HF reponsible
[email protected]
Ulrik Wilken Rasmussen (UW)
Born in 1982.
• Software designer
• AIS Protocol
[email protected]
1.5.2
Group 2 - 09gr651 - AIS2
Troels Jessen (TJ)
Born in 1985.
• PSU responsible
• ESA contact person
[email protected]
6
(d) Ulrik Wilken Rasmussen
1.5. TEAM ORGANISATION
(a) Troels Jessen
(b) Jeppe
Pedersen
Ledet-
(c) Hans
Mortensen
Peter
Figure 1.5: Portraits of group members from group 2
Jeppe Ledet-Pedersen (JL)
Born in 1986.
• DSP integration
• GMSK demodulation
• Code review
[email protected]
Hans Peter Mortensen (HP)
Born in 1987.
• System implementation
• Matlab simulations
• DaMSA Contact person
[email protected]
1.5.3
Others
As part of the AAUSAT3 project, two other students are contributing to the development of
subsystems for the NAVIS project:
Anders Bech Borchersen (AB)
6th semester Automation and Control at Aalborg University and is developing the software and
Ethernet-CAN protocol for the E-Link Adapter (ELA) in his spare time.
[email protected]
Johan De Claville Christiansen (JC)
10th semester Networks and Distributed Systems student developing the UHF communication link
(COM) for AAUSAT3 wich will also be included in the NAVIS experiment and the communication
link will be tested. Johan is developing the UHF subsystem as his masters thesis.
[email protected]
7
CHAPTER 1. INTRODUCTION
Jesper Abildgaard Larsen (JAL)
Lecturer at AAU will be assisting with PCB layout.
[email protected]
Jens Frederik Dalsgaard Nielsen (JDN)
Associate professor at AAU supervisor for AAUSAT3 projekt will be helping with media contakt
and general advise.
[email protected]
1.6
Funding Support
The NAVIS project is sponsored equally by the Danish Maritime Safety Administration and
Aalborg University. A total of 3000 EUR is allocated for hardware and PCB production.
1.6.1
The Danish Maritime Safety Administration
The Danish Maritime Safety Administration(DaMSA) (Danish: Farvandsvæsenet,
short FRV) is the approving authority for navigation systems and buoyage in Denmark, Greenland and the Faroe Islands. It is part of the Danish combined Search and
Rescue Service organization (SAR) and runs 21 coast-rescue stations. It is a department under the Danish Ministry of Defence. The central administration is located in
Søkvæsthuset in Christianshavn in Copenhagen. [Wikipedia]
For more information, visit http://www.frv.dk (danish)
1.6.2
Aalborg University
Aalborg University supports the project by doubling every subsidies from the business world.
1.6.3
Polyteknik
Polyteknik (North Jutland) has been generous to supply us with a high capacity vacuum pump for
AAUSAT-II and AAUSAT3. We believe we have the fastest vacuum pump in a student satellite
vacuum chamber north of the Alps.
1.6.4
Thrane and Thrane
Thrane and Thrane has kindly lent us a UAIS-1900 AIS transponder.
1.6.5
Actec
Actec has kindly donated batteries for AAUSAT3-NAVIS Bexus08 flight.
8
1.6. FUNDING SUPPORT
1.6.6
Rubico
Rubico AB has generously sponsored a Blackfin MMC/SD-Daughtercard for the AAUSAT3NAVIS Bexus08 flight.
We are currently in the process of applying for further funding for upcomming projects and are
always open for companies that are interested in helping us. For more information on sponsors,
visitwww.space.aau.dk
9
Chapter 2
Mission Requirements
This chapter defines all requirements to perform the NAVIS experiment. Requirements for the
individual subsystems is shown in appendix A
2.1
Technical Requirements
The experiment will run continuously during the entire balloon flight (Estimated MAX 6 hours).
AIS1 stores data from one AIS channel of 9k6 baud, thereby creating the following amount of
data on the 2 GB microSD card:
Dais1 ≈ 6 hr · 9600 bit/sec ≈ 26 MB
(2.1)
AIS2 stores samples from the In-phase and Quadrature channels of the ADF7020-1, down converted to 200 kHz and each sampled with 12 bit at 1 MSPS. The amount of data created during
a 6 hour flight will be:
Dais2 ≈ 6 hr · 24 Mbit/sec ≈ 65 GB
(2.2)
AIS2 must save 10 % of this data, so an 8 GB microSD card is enough to save this data. The saved
data will be analysed after the flight and used for further processing to optimise the algorithms
for data processing of the packets and make the AIS receiver better.
2.2
Functional Requirements
Most data will be evaluated after the BEXUS flight, althrough it is planned to download a bit of
data to the ground station using E-Link and UHF to evaluate this live at Esrange.
AIS messages includes a CRC checksum, which allows quick verification of received messages.
Futhermore, the Danish Maritime Safety Administration will supply reference data after the flight,
which contains ship names (MMSI), position and timestamp [Sølvsten 09]. These will also be used
for evaluating received data using a standard PC.
Afterwards, the data is used to optimize the demodulating algorithm developed in MATLAB.
2.3
Operational Requirements
The first AIS message is expected to be received in an altitude of 3.8 km, as the antenna footprint
radius in this altitude is approximately 220 km (figure 2.1). The interesting collision of AIS
messages is expected to occur from this height and above.
10
2.3. OPERATIONAL REQUIREMENTS
700
600
740 AIS transponters →
Receiver range [km]
500
400
300
200
← first expected AIS message received
100
0
0
5
10
15
20
Balloon height [km]
25
30
35
Figure 2.1: Receiver range as a function of balloon height
The minimum required height of the experiment is 20 km, which equals a footprint radius of
500 km. Within this range, there will be more than 500 AIS borne vessels in reach, according to
a snapshot from the 5th of February 2009, 10:26:43 UTC there was approxmately 740 ships with
AIS transponders in the aeaa of where the ballon flight is done[Sølvsten 09].
If the balloon altitude increases to 35 km, the receiving range will increase to 650 km. With the
selected receiving antenna, this gives the field of view shown in figure 2.2. For more information
on the pressure and temperature under the flight, see figure 3.15.
Figure 2.2: Balloon footprint - 35 km height (from appendix I
11
Chapter 3
Experiment Description
3.1
Experiment Overview
In this section, the functionality of the individual subsystem components is explained. A component budget is also included to give an estimate of the cost of each subsystem. The prices are
current market prices from the electronics store www.digikey.com quoted 15 March 2009. Some
components can only be ordered in large quantities, but the university has good connections
regarding this hurdle.
3.1.1
Hardware AIS receiver (AIS1)
Splitter
RF
Receiver
MCU
To SW-AIS
Figure 3.1: Hardware AIS flowchart
RF-receiver
This part consists of an on-chip hardware receiver and demodulator (Analog Devices ADF7021),
in daily terms called ADF. This module has to be fitted with certain external discrete components
to match the required frequency spectrum, but other parameters like the demodulation type is
configured by software through the serial SPI interface. The receiver handles the received RFsignal, from the antenna and through the splitter, and feeds the MCU (Micro controller unit)
with a demodulated bit stream through the SPI interface.
MCU
The MCU is receiving the demodulated bit stream from the RF-receiver. The packages are decoded and checked for consistency errors due to packet collision etc. The MCU’s final job is to
save the received messages on local flash memory and communicate with the other subsystems
(E-link and UHF) by using CSP.
12
3.1. EXPERIMENT OVERVIEW
Major component costs
Component
Name
Manufacturer
Development platform
MCU
RF-receiver
Low noise amplifier
CAN Transceiver
Power splitter
SAW filter
Antenna
AT91SAM7X256-EK
AT91SAM7X256
ADF7021
MAX2371
SN65HVD230
PSC-2-4
LBT16201
KM-3A
Atmel
Atmel
Analog Devices
Maxim
Texas Instruments
Minicircuits
SipAtSaw
Marine
Ordered
yes
no
yes
yes
yes
yes
yes
yes
Cost [€]
170.12.5.2.3.7.Sponsered
35.-
Table 3.1: AIS1 component economy table
The total cost of the significant components thats is used in this subsystem will be € 64.-.
3.1.2
Software AIS receiver (AIS2)
Splitter
RF
Front-end
ADC
MCU + DSP
To HW-AIS
Figure 3.2: Software AIS flowchart
RF front-end
The RF front-end is an on-chip down converter (Analog Devices ADF7020-1), with an output
intermediate frequency (I and Q) at 200 kHz and with a programmable bandwidth from 100 to
200 kHz. These frequencies are sufficient for the DSP to demodulate the signal even in case of
small frequency drift according to figure 3.3.
25 kHz
25 kHz
Frequen cy [MHz]
161.97 5
AIS Cha nnel 1
162
162.02 5
AIS Cha nnel 2
Figure 3.3: AIS frequency spectrum
ADC
The ADC will sample and digitalize the signal and send the digital signal to the MCU.
MCU and DSP
The DSP will demodulate the digital signal. After the signal is demodulated the MCU will decode
the AIS packages and check for CRC errors. The MCU’s final job is to save the received messages
on to local flash memory and communicate with the other subsystems (E-link and UHF) by using
the CSP.
Splitter
The RF-signal splitter module amplifies, filters and splits the RF-signal to the two AIS receivers.
This is done by the following parts:
LNA: Physically placed near the receiving antenna, a Low-Noise Amplifier (LNA) will amplify
the RF-signal from the antenna to improve SNR.
13
CHAPTER 3. EXPERIMENT DESCRIPTION
Major component costs
Component
Name
Manufacturer
DSP
Radio Front-end
RAM
ADC
CAN Transceiver
ADSP-BF537
ADF7020-1
TBD
AD7262
SN65HVD230
Analog Devices
Analog Devices
Analog Devices
Texas Instruments
Ordered
yes
no
no
no
yes
Cost [€]
115.4.45
8.3.-
Table 3.2: AIS2 component economy table
BPF: This filter is a surface acoustic wave (SAW) filter, attenuating frequencies outside the desired frequency spectrum.
Power splitter: This passive splitter distributes the RF-signal to the two AIS receivers.
The total price for the significant components in this subsystem will be € 175.-.
3.1.3
UHF Transponder/receiver
UHF
Transceiver
MCU
Figure 3.4: UHF transceiver flowchart
Functional Description
The UHF radio interfaces to the other components in the NAVIS experiment through the CSP
protocol. This protocol is both a network layer protocol facilitating routing and a transport layer
protocol for connection oriented communication. The UHF radio will work like a router, sending
CSP packets to and from the ground-segment. The CSP protocol takes care of fragmentation/defragmentation on the CAN bus while the radio must take care of converting data into a proper
space-link protocol. The functionalities of the UHF transponder is going to be tested on the Bexus
flight to ensure its functionality for use on AAUSAT3 satellite.
Space-link
The recommendations from the CCSDS 131.0-B-1 TM SYNCHRONIZATION AND CHANNEL
CODING [CCSDS Secretariat 03] is implemented on the space link. This is a preview of the final
protocol implementation for AAUSAT3 which will be one of the first cubesats to exchange the
old AX.25 protocol with more recent CCSDS recommendations.
One of the main objectives with the UHF radio experiement is to test the performance of the
various components in the CCSDS protocol stack. For downlink a R = 1/2, K = 7 convolutional
encoder is used, and for uplink a K = 3 encoding will be used, due to the decoding complexity.
For uplink the decoder will be implemented with a hard-decision viterbi decoder which will
give an approximate coding gain of 3.5 dB at a BER of 10( − 5). However at higher Eb/N o the
coding gain will be much larger yeilding a very low bit-error and thus a low packet error rate.
For downlink a K = 7 soft-decision viterbi decoder is the goal. This will give a coding gain of
up to 6 dB, and make data-communication possible down to about 5 dB Eb/N o. This lowers the
14
3.1. EXPERIMENT OVERVIEW
requirements to the transmitter output and the ground station antennas. Compared to existing
AX.25 / AFSK spacelinks commonly used by cubesats which has a Eb/N o requirements of almost
16-20 dB this is a performance gain over an order of magnitude. The balloon flight will give the
first real-life performance measurements and help validate the various components of the linkbudget.
GENSO coorporation
There is an active collaboration with the GENSO project since (JC) is a GENSO mentor on
the hardware interface and protocol layer of the GENSO software platform. There is currently
an ongoing effort to implement an FSK software modem that will facilitate soft-decision viterbi
decoding. At the time of writing this is the only missing piece of software in order to make GENSO
support the new CCSDS framing format that will be used on the UHF radio. The software for
the viterbi decoder and CCSDS framer is already completed. This means that there is a good
possibility that the GENSO Ground Station Server performance can be tested on the balloon
flight as well.
Hardware
The system hardware consists of a computer-platform developed by a student group in the fall
2008 [08gr414 08], a commercial UHF transciever chip (ADF7021) and a power-amplifier. The
computer is based on an AVR 8-bit microcontroller and runs the lower layers of the CCSDS
protocol stack using convolutional coded forward error correction. The computer interfaces to the
transceiver chip via an SPI interface. The transciever also contains a modem and is able to output
a directly FSK modulated RF signal at up to 13 dBm. The signal is amplified to about 1 Watt
of output power depending on test scenario. A list of components can be seen in table 3.3. The
ADF7021 is temperature regulated which means that the output frequency will not deviate more
than +300 Hz and -800 Hz from the desired center frequency. The ADF7021 evaluation board
has been tested to comply with its datasheet temperature range of -40 deg. celcius to +85 deg.
and the microcontroller is tested up to 160 deg.
Component
Name
Manufacturer
MCU
Radio
Power Amplifier
CAN Transceiver
Antenna
AT90CAN128
ADF7021
SHF-0289
SN65HVD230
NA-702
Atmel
Analog Devices
RFMD
Texas Instruments
Nagoya
Ordered
no
yes
no
yes
yes
Cost [€]
13.5.
Free
3.16.-
Table 3.3: COM-U component economy table
The total price for the significant components in this subsystem (without power amplifier) will
be € 37.-. Note that RFMD offers free components for the AAUSAT3 project.
Portable Ground Station
To support the UHF experiement, a ground-station will be needed. This ground station will
consist of a relatively small gain handheld yagi antenna on a microphone stand. A LNA will be
attached directly on the antenna making it possible to have quite a long cable run to the ”mission
control center” where the transceiver will be placed. The transciever used on the ground station
is the same as used on the experiement.
15
CHAPTER 3. EXPERIMENT DESCRIPTION
Description
Value
Max. Experiment TX power
Max. Ground station TX power
Max. 3db Bandwidth
Frequency
Adjacent channel power
Harmonics
1W
4W
25 kHz
437.475 MHz
TBD
TBD
Table 3.4: RF caracteristics
RF caracteristics
All communication is held within a reserved satellite frequency band (AAU Cubesat) and harmonics and spurs will be filtered by a harmonics filter, so the ajdacent channel power will not
interfer with any other systems.
3.1.4
E-Link adapter
E-Link
E-Link
Adapter
Figure 3.5: E-link flowchart
E-link adaptor.
The E-link is communicating with earth by using the communication link on the balloon provided
by BEXUS. The E-Link is also communicating with all the other subsystems by using CSP protocol.
Component
Name
Manufacturer
CPU
CAN Transceiver
AT91SAM7X256
SN65HVD230
Atmel
Texas Instruments
Ordered
no
yes
Cost [€]
12.2.-
Table 3.5: ELA component economy table
The total price for the significant components in this subsystem (without power amplifier) will
be € 14.-.
3.1.5
Platform system
Batteries
Platform
System
Figure 3.6: Platform system flowchart
16
3.2. EXPERIMENT SETUP
This subsystem takes care of all flight planning (activation of the various subsystems) and
power distribution of the experiment, and is therefore the most vital part of all the subsystems.
The power management includes power distribution with fault detection and battery management.
Batteries
The batteries, which supplies the whole system with all the subsystems, are connected to the MCU.
MCU
The MCU is monitoring the distribution of power to the individual subsystems. The MCU is also
responsible of the flight planner. It can communicate and control the power to all the subsystems
and thereby shot down and turn on individual subsystems. The MCU is frequently logging the
system status.
Component
Name
Manufacturer
MCU
3.3V DC-DC
5V DC-DC
I2C Port Expander
Real-time Clock
CAN Transceiver
AT90CAN128
TPS62111
TPS62112
MAX7326
DS1374
SN65HVD230
Atmel
Texas Instruments
Texas Instruments
Maxim
Maxim
Texas Instruments
Ordered
Cost [€]
no
no
no
no
no
yes
13.3.3.2.3.3.-
Table 3.6: Platform component economy table
The total price for the significant components in this subsystem will be € 27.-.
3.2
3.2.1
Experiment Setup
Interfaces
Mechanical Interfaces
The system housing consists of a cubesat frame of 10x10x16 cm. The cubesat frame is mounted
inside a Experiment box, which is mounted on a BEXUS mounting interface.
Electrical Interfaces
Figure 3.7 shows the connector placement on the end of the Experiment Box. Details on the
connector type and pinout are shown in the following tables. The Experiment box has 4 external
connectors, one service interface and a remove before flight.
System Status LED The LED will blink with green light when the system is running and the
power-on self test has gone through without errors, and will blink red in different error codes if
the system has detected any errors. The flight plan will handle the LED.
Remove Before Flight A reed magnetic contact will be used for remove before flight. When
the contact is influenced by a magnet, the DC-DC converters in the platform will disable their
output. A piece of iron will be placed next to the reed contact to ensure that the magnet will
keep in place under transport.
E-Link Interface Panel connector: MIL-C-26482-MS3112E-12-10S. Table 3.7 shows the pinout
in according to the Bexus user manual v. 5. Internal the E-link interface is connected to the ELA
subsystem.
17
CHAPTER 3. EXPERIMENT DESCRIPTION
Figure 3.7: Electrical Interface on Experiment Box
E-Link
RJ-45
A
B
C
D
E
F
G
H
I
J
1
2
3
4
5
6
7
8
Cable
Signal
Pair
Pair
Pair
Pair
Pair
Pair
Pair
Pair
Tx +
Tx –
Rx +
GND
GND
Rx –
GND
GND
NC
NC
1
1
2
3
3
2
4
4
Table 3.7: E-Link pinout
18
3.3. MECHANICAL DESIGN
UHF Antenna Connector A female N-connector that makes connection to the UHF subsystem.
AIS Antenna Connector A female UHF-connector which makes the internal connection .
Service Connector MIL-C-26482-MS3112E-10-6P Service Connector will be used for debugging, system monitoring and testing via CSP over CAN, and for battery charging. A 6 pin
connector is chosen to avoid confusion with the BEXUS power connector, which uses the same
type of connector, but with 4 pins. Table 3.8 shows the pinout for the service connector.
Pin
Signal
A
B
C
D
E
F
Supply
CAN +
CAN –
GND
NC
NC
Table 3.8: Service connector pinout
Interface Control Documents
Preliminary Interface Control Documents (ICDs) describing all subsystem commands are located
in Appendix C.
3.3
3.3.1
Mechanical Design
Experiment Box
Figure 3.8 shows the experiment box, which have been added since the PDR, due to review
panel concerns about thermal and mechanical design. The outer frame allows 50 mm of isolation
around the Cubesat frame. The isolation used are firm foam, of the kind normally used for flight
cases[Support 09]. The outer frame are build of 20x20 mm structural aluminum, with a material
thickness of 1.25 mm, and corners from System Standex A/S (figure 3.9). On all 6 sides of the
Experiment Box, aluminum side panels will be mounted, with a material thickness of 1.5 mm.
3.3.2
Bexus Mountings
The Experiment Box will be mounted in the balloon gondola using right-angled structural aluminum. The structural aluminum is 30x30 mm, with a material thickness of 3 mm. The weight
is 0.495 kg/m, and two pieces with a length of 405.5 mm each is used. The oval-shaped mounting holes (R=5.25 m) allows mounting both on Egon and S-Egon. An illustration of the Bexus
mountings are shown on figure 3.10. The outher distance between the two mountings are 209 mm,
and therefore the distance between the mounting holes will be
3.3.3
Isolation
Figure 3.11 shows the isolation between the Experiment Box (without side panels) and the Inner
frame. For more information about the isolation, see section 3.4.
19
CHAPTER 3. EXPERIMENT DESCRIPTION
Figure 3.8: Experiment box for mounting of Cubesat frame (200x200x260 mm)
Figure 3.9: Experiment box corners from System Standex A/S
Figure 3.10: Bexus Mountings
20
3.3. MECHANICAL DESIGN
Figure 3.11: Isolation between Experiment Box and Inner frame
3.3.4
Inner frame
The experiment electronic will be mechanically mounted inside a extended Cubesat frame to
ensure a mechanical robust system. The frame is shown in figure 3.12.
Figure 3.12: Extended Cubesat frame for mounting of PCB’s (100x100x160 mm)
3.3.5
PCB outline
Each subsystem (PCB) will be produced in same space quality as AAUSATII PCB’s. The mechanical outline for all subsystem is shown in figure 3.13. A stack connector are used to distribute
power and connect CAN communication between the different subsystems.
21
CHAPTER 3. EXPERIMENT DESCRIPTION
21
87
5
71
87
11
7
8
4
1
11
Ø
6x45~
15
18
af:
Tegningsnr.:
Figure 3.13: PCB mechanical Tegnet
outline
(87x87mm
)
Antal:
Materiale:
Samlingstegning:
DMS9 Gr. 69B
3.3.6
Antennas and mounting
Aalborg Universitet
Institut for Maskinteknik
Pontoppidanstræde 101
9220 Aalborg
Komponent:
EPS-PCB
Første vinkel:
The experiment contains two external antennas, one VHF dipole (length 110 cm) and a UHF
antenna (length 34 cm). Figure 3.14 shows how the two antennas will be hanging in a steel wire
beneath the gondola. This allows replacing when working on the balloon on ground. It doesn’t
matter if the antennas will be destroyed during landing.
3.3.7
Mass budget
An estimated mass budget of the NAVIS experiment is shown in table 3.9. Remark that the
masses are estimates only, therefore the 250 g buffer. The weight of PCB’s including components
originates from AAUSAT-II experiences. The weight budget has increased since SED v1.0, from
1.4 kg to 4.5 kg. This is mainly due to the added Experiment Box and mountings.
3.4
Thermal Design
As seen in section 3.3, the outer frame of the experiment makes room for 5 cm of isolating material.
A sort of foam rubber that is normally used to line flight cases is chosen, since it has the mechanical
temper so that the cubesat frame does not need specifically mountings to the outer frame that
normally will result in a thermal bridge.
To make sure the batteries will supply as expected, it is desired to calculate the power usage
necessary for holding an internal experiment temperature of minimum 0 ◦ C. On figure 3.15 the
measured temperature from another BEXUS flight is shown.
The mechanic is designed for a insulation thickness, x, of 5 cm. The radiated power is calculated using the law of thermal conduction[Serway 04, p. 624]:
P = kA
∆T
x
Where the surface area of the cubesat frame is give by:
A = 4 · 0.016 m2 + 2 · 0.01 m2 = 0.084 m2
22
Dato:
13/12/2004
Skala:
3.4. THERMAL DESIGN
Figure 3.14: Antennas hanging beneath gondola
Component
Weight
Electronics
Platform
6 Batteries
AIS-HW
AIS-SW
ELA
Heating
PCB shielding
Mechanics
Cubesat frame
Cubesat panels
Experiment box
Side panels
Isolation
Bexus mountings
VHF antenna
UHF antenna
Buffer
Total mass
42
264
60
80
42
42
150
g
g
g
g
g
g
g
142
10
1083
1215
300
500
210
150
g
g
g
g
g
g
g
g
250
g
4540
g
Table 3.9: Estimated mass of total experiment
23
CHAPTER 3. EXPERIMENT DESCRIPTION
Figure 3.15: Expected temperature for the experiment[SSC 09]
Experiments have shown that the foam rubber has an isolating effect that corresponds to
polystyrene, thus k is chosen to be:
k = 0.04
W/m ·◦
C
The following power is necessary to secure an internal temperature of about 0 ◦ C, when the
lowest expected temperature is 70 ◦ C will be:
P = 4.7 W
This heat will be generated by the subsystems themselves and with effect resistors placed
around the batteries. The resistors will be active controlled on the basis of the inner temperature
of the experiment. Experiences from AAUSAT-II has shown that the inner heat transport will be
sufficient to keep all subsystems within their designed range.
3.5
Power System
The project will include its own battery power supply. The batteries will be six Panasonic
CGR18650CF as they have been tested with success on AAUSAT-II and are proved to function excellent in space. The battery pack will have enough power to run all subsystems on an
average duty cycle for at least 6 hours. The batteries will be isolated and electrically heated if
considered necessary.
Power for each subsystem is managed by the Power Distribution Unit (PDU) located on the
platform system. The PDU supplies 3.3 V and 5 V channels, each channel is able to deliver 1 A.
Table 3.10 gives an estimate of the power usage for each subsystem. The power consumption
is estimated on a basis of all significant components on the different subsystems. Note that some
subsystems has more than one state, which are all described in section 1.2.1. The calculation from
24
3.5. POWER SYSTEM
Subsystems
Platform
AIS1
AIS2
E-Link
Duty
15
100
100
15
%
%
%
%
Active1
1488
455
1062
417
mW
mW
mW
mW
Duty
Active 2
85
0
0
85
323
0
0
37
%
%
%
%
Duty
mW
mW
mW
mW
0
0
0
0
Idle
%
%
%
%
0
0
0
0
mW
mW
mW
mW
Total
Average
498
455
1062
94
mW
mW
mW
mW
2109 mW
Table 3.10: Estimated power consumption
Power consumption including heat
Total flight time
Nominal apacity per battery
Max usage of batteries
1
4700
6
7400
70
Number of batteries2needed
mA
hr
mWhr
%
6
3
Table 3.11: Battery requirement calculation
section 3.4 is used to compute the number of batteries needed, thus the subsystems themselves
will not generate enough heat to fill the requirement found in section 3.4.
VBAT2
GND
VBAT2
VBAT2
D1
Diode
D2
Diode
D3
Diode
BT1b
Battery
BT2b
Battery
BT3b
Battery
BT1a
Battery
BT2a
Battery
BT3a
Battery
GND
GND
Figure 3.16: Battery package suggestion 1
Two suggestions for the battery package is shown i figure 3.16. The diodes in suggestion 1
are placed for security, such that if one cell in the battery package looses it’s voltage, the system
will keep running with the remaining cells pairs. Each cell voltage will be measured, such that
a cell failure can be monitored and a new flight plan can be initiated. In battery suggestion 2,
the protection diodes are removed, which will make a common charge of the batteries, just as the
voltage drop over the diodes will be avoided. I return, the batteries will be tested individual prior
to flight, just as the build-in security circuit on the batteries will be in place. It is chosen to use
battery constellation number 2.
For regulated voltage supplies, two DC-DC converters are used. One (TPS62111) for 3.3 V
supply, and another (TPS62112) for 5 V supply. Each capable of delivering 1.2 A. The TPS62111
25
Title
Size
Nu
CHAPTER 3. EXPERIMENT DESCRIPTION
VBAT2
VBAT2
VBAT2
BT1b
Battery
BT2b
Battery
BT3b
Battery
BT1a
Battery
BT2a
Battery
BT3a
Battery
GND
GND
GND
Figure 3.17: Battery package suggestion 2
has been tested for efficiency according to Appendix G.1. This is IC U30 in the attached file
platform.pdf.
3.6
3.6.1
Experiment Control System
Electronic Design
The experiment will be build as distributed subsystems, each of these with its own CPU.
Subsystem
CPU
Main core
Platform
COM-U
AIS1
AIS2
ELA
Atmel AT90CAN128
Atmel AT90CAN128
Atmel AT91SAM7X256
Analog Devices ADSP-BF537
Atmel AT91SAM7X256
AVR
AVR
ARM7TMDI
Blackfin
ARM7TMDI
Max Core speed [MHz]
16
16
55
500
55
Title
Size
Table 3.12: Central processing units
1
An overview of the processing units used
in the project is shown in table 3.12, with their3
2
maximum core frequency. To ensure a minimum power usage, most of the CPU’s will run at a
lower clock speed than designed for.
3.6.2
Data Management
Up/downlink usage
The experiment will autonomously send system status reports to ground every 30 seconds, containing important information, such as battery voltage and state of the AIS receivers. Downlink of
received AIS packages are obvioulsy important as well. Therefore, it is estimated that a 9.6 kbit/s
downlink is necessary. Uplink will be 1.2 kbit/s as the uplink is only used for sending commands
from ground to the system. 1 sec of raw sampled AIS data will give about 3 MB of data. Using
9k6 downlink this is approximately 5 minutes of transfer time. It is desired to download this
amount of data two times each our and more often if possible. Along with this, decoded position
reports will continuous be transferred to ground.
Remark that the experiment will be designed to run autonomously so a ground link is not
crucial for the success of the experiment. UDP on the E-Link will be used for additionally
communication, along with the UHF communication included in this experiment.
26
A4
Date:
File:
3.7. ECONOMY
Data storage
Data will be logged redundantly on the BEXUS flight, partly using NOR flash (SPI interface) and
Kingston 2GB microSD card. The AIS2 subsystem is fitted with two Kingston microSD cards,
for logging of raw sampled data. The 8 GB available space will be used for periodic logging of
raw data. Beyond that, the 9.6 kbit/s binary data will be simultaneously logged (ca. 26 MB) for
further investigation after the flight. The Kingston SD cards are rated operational from -25 to 85
deg C.
Subsystem
Storage
AIS1
16 MB SPI NOR flash
16 MB SPI NOR flash
2 GB SD NAND flash
8 GB SD NAND flash
AIS2
Table 3.13: Available storage
3.6.3
Radio Frequencies
The two AIS subsystems will receive signals transmitted on Marine VHF channels AIS1 and AIS2
(not to confuse with the subsystems with same names) at 161.975 MHz and 162.025 MHz.
The COM-U subsystem will be transmitting and receiving on UHF frequency 437.425 MHz.
This channel is licensed to Aalborg University and is also used for AAUSAT-II with callsign
OZ2CUB. The subsystem will transmit with maximum 1 W. The speed will be varying from 1k2
to 9.6 kbit/s. The ground station will transmit at maximally 50 W. In order to avoid interference
with systems at Esrange, the ground station can be placed away from the control room and remote
controlled. The antennas on ground will be a Yagi-Uda antenna array with a remote controlled
rotor. The position of the balloon will be supplied from BEXUS.
3.7
Economy
In this section, the overall economic situation is stated.
The major component expense is a total of € 185.-. This expense will be doubled because two
even versions of the experiment will be produced - one for testing and one for flight. However
the major expense is the manufacturing of 4-layer PCB’s for the subsystems. The expense of 3
even PCB’s is € 335.-. The number of PCB’s are 4. Discrete components, accessories for building
the systems and mechanical components will be provided by the university. The estimated total
expenses are are shown in table 3.14.
Subsystem
2x Platform
2x UHF
2x AIS1
2x AIS2
2x ELA
PCB’s (4x335.-)
Total:
Cost [€]
50.74.128.175.28.1340.1795.-
Table 3.14: Economy of the project
27
Chapter 4
Review and Test
4.1
Experiment Selection Workshop (ESW)
At the ESW, the presentation named esw presentation.pdf in this folder was shown. After the
presentation, the following comment was received:
You should assess the footprint of your system and the estimated number of ships present in
the area during the launch campaign in October.
It is planned that the comment will be accounted for in this SED and at the PDR.
4.2
Preliminary Design Review (PDR)
The comments from the PDR is located in Appendix J.
4.3
Test Plan
To test the selected system platform for space and balloon flight fitness, the system must undergo a number of tests. The primary concerns are thermal design and vacuum/thermal stability.
Therefore two tests are performed.
- A thermal stress test is performed, where the system is exposed to temperatures from -40 degC
to +85 degC while executing a program. Throughout the test the temperatures on the MCU
and the ADF radio chips are monitored, frequencies of both MCU system clock and ADF radio
TXCO clock is logged, and the test data stream from the received data on the ADF is monitored
for errors.
- A vacuum test is performed to test if any components are fragile to this environment and to
observe the thermal behavior of both the MCU and the ADF radio chips. In this test the chip
temperatures on both chips are monitored and logged while letting the system process test data
generated from a GMSK signal modulator and outputting them on the RS232 serial port of the
MCU. Any errors or unexpected behavior is monitored and logged.
Many other tests has been done but not yet documented, the result of these will be presented and
discussed at the CDR.
4.4
Critical Design Review - CDR
This document contains the documentation for the CDR.
28
4.5. EXPERIMENT ACCEPTANCE REVIEW - EAR
4.5
Experiment Acceptance Review - EAR
29
Chapter 5
Project Planning (Phase B and C)
30
5.1. WBS - WORK BREAKDOWN STRUCTURE
5.1
WBS - Work Breakdown Structure
NAVIS
1.0
Product
development
1.2.0
Build AIS2
receiver
1.1.0
Build AIS1
receiver
1.1.1
Analyse AIS
structure
2.0
System integration
1.3.0
Build E-link
adaptor (ELA)
1.2.1
Perform GMSK
MATLAB
simulation
2.1
Run integration
tests
1.4.0
Build power
supply (EPS)
1.3.1
Analyse and
specify link
structure
1.4.1
Design hardware
switches
1.1.2
Build prototype
platform
1.2.2
Build AGC + LNA
+ splitter
1.3.2
Setup OS on
prototype
1.4.2
Develop software
routines/flight
planner
1.1.3
Develop ADF to
MCU interface
1.2.3
Build RF frontend
1.3.3
Develop
datastorage
interface
1.4.3
Design EPS PCB
1.1.4
Setup OS on
prototype
1.2.4
Develop ADC +
antialiasing filter
1.3.4
Develop link
adaptor interface
1.4.4
Build and test
PCB
1.1.5
Develop bitstream
decoding
1.2.5
Implement OS
1.3.5
Perform tests on
prototype
1.1.6
Develop AIS
packet verification
1.2.6
Implement GMSK
to NMEA code to
DSP
1.3.6
Develop ground
station software
1.1.7
Perform functional
tests on prototype
1.2.7
Develop bitstream
decoding
1.3.7
Test E-link
1.1.8
Design AIS1 PCB
1.2.8
Perform functional
tests on prototype
1.1.9
Build PCB
1.2.9
Design AIS2 PCB
1.1.10
Perform physical
tests on PCB
1.2.10
Build PCB
2.2
Debug system
2.3
Pack and prepare
experiment for
flight
V. 1.3
19-05-09
1.2.11
Perform physical
tests on PCB
Figure 5.1: NAVIS work breakdown structure.
31
CHAPTER 5. PROJECT PLANNING (PHASE B AND C)
5.2
Time Schedule Of The Experiment Preparation
The time schedule is implemented in a Gantt chart, see attached file: Time_schedule_v2.pdf
which is also included in the end of this document.
5.3
Resource Estimation
The timewise resources available in 2009 for the project are limited by primarily two factors:
Number of people assigned to the project groups and number of semester courses attended by the
group members. A week is rated as 45 working hours per student, from which the courses must
be deducted. These courses are placed in Q1 which is reflected in table 5.1.
During the semester all project members (7) will be available full time, but during the summerholydays (July and August) the resources will be limited. There will also be limited resources
available during June, due to semester exams and evaluations.
Project work is therefore expected to be minimal during this month. In september the group
members will start a new semester which also results in very limited resources for the project.
The actual availability is however strongly dependant on which projects are chosen by the project
members and is therefore to be determined later in the project. The total estimated resources,
available for the project, are stated in the following scheme:
Resources pr. student [hr]
Total resources [hr]
Feb.
Mar.
Apr.
May
Jun.
Jul.
Aug.
Sep.
Total
70
490
70
490
135
945
190
1330
40
280
210
630
190
570
TBD
NA
905
4735
Table 5.1: NAVIS project resources
The critical part of the development will take place in July and August. In this period
the project members are working voluntarily on the project and therefore a detailed resource
estimation has been calculated based on a availability assessment from each team member. This
assessment is stated in table 5.2
During July and August each team member has been assigned to specific tasks on the subsystems in order to manage the resources and to secure the follow-up on each system. This
assignment is stated in table 5.3 for July and table 5.4 for August.
32
5.3. RESOURCE ESTIMATION
Person
Percentage
July [hr]
August [hr]
40%
80%
20%
20%
80%
25%
80%
50%
64
129
32
32
129
40
129
81
59
118
29
29
118
37
118
74
TL
NP
MH
UW
JL
TJ
HP
JC
Table 5.2: NAVIS project member resources during summer holidays.
Subsystem
Members
AIS1
AIS2
MECH
ELA
UHF
GND
EPS
In + FP
NP, MH, UW, TL
JL, TJ
HP
AB, MH
JC
JC, JAL
HP
NP, HP, JC, MH
Total
Available
TL
NP
MH
UW
64
129
17
32
JL
TJ
129
40
HP
JDC
Total July
242
169
29
15
60
21
100
0
29
15
60
21
100
64
64
129
129
32
32
32
32
129
129
40
40
129
129
81
81
636
636
Table 5.3: NAVIS project subsystem resource assignment, July.
Subsystem
Members
AIS1
AIS2
MECH
ELA
UHF
GND
EPS
In + FP
NP, MH, UW, TL
JL, TJ
HP
AB, MH
JC
JC, JAL
HP
NP, HP, JC, MH
Total
Available
TL
NP
MH
UW
59
28
17
29
JL
TJ
118
37
HP
JDC
Total August
30
35
39
59
59
90
12
118
118
29
29
48
40
29
29
118
118
37
37
118
118
74
74
133
155
30
0
35
39
48
142
582
582
Table 5.4: NAVIS project subsystem resource assignment, August.
TL
NP
MH
UW
JL
TJ
HP
JDC
Troels Laursen
Nikolaj Petersen
Mads Hjorth Andersen
Ulrik Wilken Rasmussen
Jeppe Ledet Pedersen
Troels Jessen
Hans Peter Mortensen
Johan de Claville Christiansen
Table 5.5: Members abbreviations
33
CHAPTER 5. PROJECT PLANNING (PHASE B AND C)
5.4
5.4.1
Hardware and Software Development and Production
Hardware
AIS1
Development boards of both the ADF radio and the MCU has been tested and verified in thermaland vacuum tests and is working. PCB layout for the flight model has been designed but needs
reviewing and production.
AIS2
Blackfin DSP is currently running on development board. AD converters and ADF down-converter
has been implemented on a custom PCB and is working. PCB for DSP needs development.
UHF communication link (COM)
MCU platform is running, with ADF radio on development board excluding amplifier. PCB for
this system needs to be developed.
Platform system (EPS)
MCU platform is running on rev. 1 PCB. PCB for power supply part and subsystem switches
needs to be developed. This PCB should also include MCU platform rev. 2
E-link communication (ELA)
MCU platform is running on evaluation board with ethernet working.
Radio front-end (RFF)
LNA has been tested and is working. AIS2 front-end PCB has been designed to include SAW
filter and splitter, but SAW filter has not yet arrived The receiver is therefore tested without SAW
filter, which is working. It is still planned to mount the SAW filter when it arrives.
Appendix E includes schematics and PCB layout of AIS1 and AIS2.
BEXUS mechanics (BME)
The mechnical subsystem has been designed. The final sticks to carry the PCBs is to be produced,
when its length is finally designed.
5.4.2
Software
AIS1
Operating system on platform is running with ADF radio communication working. Flash storage
and CAN driver needs development.
AIS2
Functional algorithms for GMSK demodulation and NRZI decoding are implemented in MATLAB.
The uClinux distribution is running on the Blackfin, with example code and SD card I/O working.
High-speed serial port (SPORT) for ADC data acquisition and ADF7020-1 device driver needs
development.
34
5.5. RISK MANAGEMENT
UHF communication link (COM)
All functional requirements are met, except CAN bus communication. ADF7021 drivers and
CSMA MAC protocol done. FEC (r=1/2), Viterbi (K=3) and Reed–Solomon (255,223) implemented. RTOS integration done. Software will be finished in June.
Platform system (EPS, LOG, FP)
Functional prototypes of EPS, LOG and FP was implemented in the spring of 2008. Additional
work is needed in the summer holiday, in order CSP protocol. JC has been assigned this task.
E-link communication (ELA)
ELA will use the same CAN driver as AIS1. TCP/IP needs work by ABB in the summer holiday.
5.5
Risk Management
In this chapter you will find the following five most important risk analyses:
• Battery failure
• SW failure
• PCB failure / design-error
• UHF subsystem not ready
• Radio front-end not usable
In general the NAVIS team try to eliminate the most risks by thorough testing, and by building
both a Engineering Model (EM) and a Flight Model (FM). The testing facilities includes mainly
vacuum chamber and climate chamber.
35
CHAPTER 5. PROJECT PLANNING (PHASE B AND C)
5.5.1
Battery failure
ID
Name
Consequences
Severity
Probability
Total Risk
Prevention
Reaction
Recovery
I/M - 01
Battery failure / explosion
No experiment data. Possible personal/balloon damage
5
1
5
Correct and careful usage of batteries
Change possible damaged parts of the experiment
The Platform system, including EPS (Electric Power Supply), will monitor temperature, current and voltage of each battery, and will shut down the system if a critical situation occurs.
Furthermore, tests will be preformed to ensure that the batteries can handle the expected environmental impacts. If nessesary the batteries will be isolated and electrically heated.
5.5.2
SW failure
ID
Name
Consequences
Severity
Probability
Total Risk
Prevention
Reaction
Recovery
5.5.3
I - 02
SW failure
No experiment data.
5
2
10
Thorough tests. Code review.
EPS will be able to reboot subsystems.
PCB failure / design-error
ID
Name
Consequences
Severity
Probability
Total Risk
Prevention
Reaction
Recovery
I - 03
Defect PCB
Parts of the system fails
2
3
6
Doublecheck all layouts before production, and make
in-house PCB’s of the different modules in the experiment
Make a hack on the PCB to find a possible solution
Fix the error in the layout, and order new PCB’s
Aalborg University have one week PCB delivery time. Also, it has been decided to use 4-layer
PCB. Two inner layers for GND and supply, and the two external layers for nets. This allows
quick ”hack” to test functionalities.
36
5.5. RISK MANAGEMENT
5.5.4
UHF subsystem not ready
ID
Name
Consequences
Severity
Probability
Total Risk
Prevention
Reaction
Recovery
5.5.5
I - 04
COM-U misses deadline
Redundant communication will not be present
2
3
6
It is a master thesis, so it is expected that the project
will be finished, although the NAVIS team does not
have much influence in this development
The system will be changed so that only the E-Link
will be used
Radio front-end not usable
ID
Name
Consequences
Severity
Probability
Total Risk
Prevention
Reaction
Recovery
I - 05
Small sensitivity with ADF7020-1 front-end
The software-based receiver will not be able to decode the signals from it’s frontend
3
3
9
A test must be made to conclude if the I/Q signal is
strong enough to be sampled without errors
A new front-end must be designed
A new front-end design will take more time, which will make the schedule tight.
37
Chapter 6
Outreach Program
The outreach of the BEXUS flight consists of several elements
• The development of the AIS1 and AIS2 receivers will be documented in two publicly available
bachelor project reports in spring 2009.
• A scientific article with results and experience gained from the BEXUS flight will be produced in fall 2009.
• At least 4 presentations per year about the AAUSAT3 project for students in high schools
and universities.
• The AAUSAT3 website at aausat3.aau.dk will be updated with news.
• The NAVIS website at http://www.navis-project.eu
The student satellite projects at Aalborg University generally have a good relationship with
national media, including major newspapers and television channels.
6.1
Presentations
May 5th, 2009: Associate Professor and AAUSAT3 project supervisor Jens Dalsgaard Nielsen,
will present the Aalborg University Student Satellite program at ”Folkeuniversitetet”.
May 19th, 2009: Jens Dalsgaard Nielsen; ”Satellite activities at Aalborg University, Students and
Space”, Seminar about Software Defined Radio in Satellite Applications, Danish Technological
Institute and CSDR.
6.2
Articles in national newspapers
January 15, 2009: Article in the national danish newspaper Jyllands-Posten about the progress
of developing AAUSAT3 and its subsystems – http://jp.dk/arkiv/?id=1570884
6.3
Workshop and lectures
6-7 April 2009 in Würzburg Germany: NATO, RTO workshop about ”Small Satellite Formations
for Distributed Surveillance: System Design and Optimal Control Considerations”
38
Chapter 7
Launch Campaign
7.1
7.1.1
Experiment Preparation
Team organization
The NAVIS team at the launch campaing will consist of 10 persons, each responsible for particular parts of the experiment. The responsibilities during the launch are stated in table 7.1.
Furthermore pre- and post launch responsibilities are stated in table 7.2.
Team member
MH
HP
TJ
UW
NP
TL
JL
JC
Responsibility
Mission Manager
In charge of the experiment procedures and mission coordination
General system supervisor
Responsible for the ground station operations, including DB/Elink computer
Telecommand operator
In charge of the experiment telecommand transmissions
AIS data analyst
Responsible for analyzing AIS experiment data during flight
AIS data analyst
Responsible for processing of experiment data during flight
AIS1 system operator
In charge of the AIS1 experiment flight plan
AIS2 system operator
In charge of the AIS1 experiment flight plan
UHF-link manager
In charge of UHF wireless link stations and link operations
Table 7.1: Team organization during flight.
7.1.2
Timeline
7.3 shows the main events for the NAVIS team, at the Bexus launch campaign. Day one will be
spent on accommodation, installation of equipment and on physical inspection of the experiment.
If possible the initial test will be done at day 1. Day two will be spent on physical and electrical
integration on the gondola followed by th RF interference test and the Flight Simulation Test. Day
3 - 7 will, when the launch is initiated, be spent on monitoring and controlling the experiment.
39
CHAPTER 7. LAUNCH CAMPAIGN
Team member
MH
HP
TJ
TL
JL
UW
NP
JC
JDN
JAL
Responsibility
Flight preparations supervisor
Mechanical integration
Electrical and EMC tests
Ground station installation
Ground station installation
E-link and connections
UHF-link
UHF-link
PR supervisor
AAU representative
Table 7.2: Team responsibilities for pre- and post flight operations.
Day 7 will be spent on securing data and removing experiment from the recovered gondola.
Furthermore the equipment will be packed up and the workspace will be cleaned.
Day 1
Day 2
Day 3-7
Day 7
Start of campaign
Safety briefing and general information
Equipment installation
Experiment post transport inspections
Experiment preparation and testing
RF interference Tests
Flight Simulation Test
Flight Readiness Review
Pre-flight meeting
Possible launches
Evaluation of data
Post flight meeting
Cleaning of workplaces
Dismantling and pack-up of experiment
Equipment pack-up
Campaign dinner
Table 7.3: Bexus launch campaign overview
7.1.3
Operational procedures
For the events stated in table 7.3 procedures has been devised. The procedures includes an overall
test procedure, which links to the EPS failure handling. If a subsystem fails during any tests the
hardware module is exchanged with a spare. Figure 7.1 shows procedures for initial test, RF
test and Flight Simulation Test, respectively. For the experiment recovery the helicopter pilot
will have to re-attach the remove before flight (RBF) connector on the experiment to ensure a
complete experiment shut down. Drawing of placement on experiment will be available at the
time of launch.
7.1.4
Launch and flight schedule
Table 7.4 states the NAVIS experiment launch procedure.
40
7.2. EXPERIMENT TIME EVENT DURING FLIGHT
Time (h:min)
T-3:00
T-1:30
T-1:10
T-0:40
T-0:15
T=0:00
T+n:00
T+6:00
Action
Experiment pre-flight test
E-link test
UHF-link test
Connect service cable for pre-heating heating
Experiment prep. finished. Go from NAVIS team
Experiment service cable for pre-heating removal
Ground station operational and fully staffed
Lift off
Team operation meeting every n=1:5 hours
Experiment automated shut-down
Table 7.4: NAVIS experiment launch procedure
7.2
Experiment Time Event During Flight
When the remove before flight connector has been removed for one minute the experiment enters
flight mode where AIS data is stored on both AIS1 and AIS2 memory cards. During the flight
the ground station receives status from each AIS receiver with data statistics. The ground station
requests ongoing download of data from the experiment when the status from the receivers returns
positive packages received. The data is then downloaded to the ground station data base, for
analysis, which is handled by the AIS data analysts. The experiment will log data on to the
on board flash storage during the whole flight. The UHF link by default sends beacons every
30 seconds, but the ground station can request download of experiment data through this link,
primarily to test UHF link quality. Every hour the ground station team gathers for a status
meeting to determine any changes in the flight plan and to get a briefing from the experiment
supervisors. The experiment flight planner will automatically shut down the experiment after 6
hours.
7.3
Operational Data Management Concept
On figure 7.2 the database ground station data management system is showed. The UHF radio
and the E-link communicates with the Data Base computer. All the data and communications
with the balloon is stored in the data base and can be read from other computers by requesting it
from the data base trough a LAN. The Tele Command computer can send commands trough the
Data Base to the required subsystem on the balloon. The Tele command can for example send a
request for AIS data using E-link and then all the requested data will be stored in the Data Base
which then can be accessed by a request computer via LAN.
7.4
Flight Readiness Review - FRR
7.5
Mission Interference Test - MIT
7.6
Launch Readiness Review - LRR
7.7
Inputs For The Flight Requirement Plan - FRP
7.7.1
Requirements On Laboratories
We will bring our own test equipment, spare parts and all tools needed for integration of the
experiment, so laboratory access is not required.
41
CHAPTER 7. LAUNCH CAMPAIGN
7.7.2
Requirements On Integration Hall
Three tables are needed; one for experiment integration, one for test equipment and one for general
use. 10x230 V power outlets are needed for test equipment. If possible, an internet connection
would be preferred. We will bring our own test equipment, spare parts and all tools needed for
integration of the experiment. No consumables are needed from EuroLaunch.
7.7.3
Requirements On Trunk Cabling
Refer to Requirements On Launcher.
7.7.4
Requirements On Launcher
One 230 V cable from Block House to Launcher is needed for battery charging and pre-heat of
the experiment. The experiment requires minimum one hour of pre-heating before launch, and
the battery charger should be connected to up until 30 minutes before launch. When charging
the batteries, it is desirable to monitor the experiment. If the E-Link is not active pre-launch, a
single Ethernet cable is required for monitoring.
7.7.5
Requirements On Blockhouse
If possible, the NAVIS Mission Control Center will be located in the scientific center.
7.7.6
Requirements On Scientific Centre
Tables are required for seven persons: Monitor PCs for AIS1, AIS2 and COM, a general System
Monitor, a Command Client, a Ground Station Contact and a Mission Manager. If possible, our
portable ground station(section 3.1.3) will be set up near Esrange or, if allowed, inside the facility.
An Ethernet link for communication and data between the NAVIS Mission Control Center and
the portable ground station is needed.
7.7.7
Requirements On Countdown (CD)
The battery charger should be disconnected 30 minutes prior to CD. Tower access is not needed
during CD. On aborted launch procedure, the Ground Station will issue a command to disable the
default flight plan, and put the system in idle state (No TX). The experiment has no requirement
to a latest hold in CD.
7.7.8
List Of Hazardous Materials
No hazardous materials will be used in the experiment.
7.7.9
Requirements On Recovery
The experiment will stop transmitting beacons after 6 hours. No special requirements for recovery.
7.7.10
Consumables To Be Supplied By Esrange
No need for consumables from Esrange.
7.7.11
Requirement On Box Storage
We will bring our own test equipment, spare parts and all tools needed for integration of the
experiment.
42
7.8. POST FLIGHT ACTIVITIES
7.7.12
Arrangement Of Rental Cars & Mobile Phones
A rental car will be preferred for transporting equipment and persons to the Integration Hall and
Scientific Center. Three mobile phones or hand-held radios for team communication is preferred.
7.7.13
Arrangement Of Office Accommodation
No offices are required. Access to a meeting room will be preferred depending on the facilities in
Scientific Center/Integration Hall.
7.8
Post Flight Activities
After flight, data that has come through the radio links will be backed up to an external server.
The ground station and the systems used for communicating will be taken down, and the arrival
of the experiment will be awaited. When the experiment arrives, the content of the storage cards
will be copied to a PC through a USB card reader, and this data will be backed up too.
43
CHAPTER 7. LAUNCH CAMPAIGN
Initial test
Test start
Remove RBF plug
StatusLED
Indication?
Red
Follow EPS failure
procedure
RF interference test
Flight Simulation Test
Test start
Test start
Remove RBF
connector
Startup
Groundstation
StatusLED
indication?
Reconnect RBF
plug
Red
Remove RBF
connector
Green
Green
Connect service
cable
StatusLED
indication?
Perform RF
interference test
StatusLED
Indication?
Follow EPS failure
procedure
Initiate RF com
with experiment
Re-connect RBF
connector
Green
Connect charger
to service
interface
Initiate E-link
Test end
Make go for flight
test
CAN bus: Request
self-test data
All systems
nominal?
No
Monitor housekeeping data from
EPS
Replace faulty
subsystem
Yes
EPS failure procedure
CAN bus: Request
subsystem data
Re-connect RBF
connector
Start
Test E-link
connectivity
Make readout of
AIS1+AIS2
memories
Reconnect RBF
plug
Test UHF link
connectivity
CAN bus: Clear
flash
Remove service
cable and connect
RBF connector
2nd. occurrence
1 st. occurrence
Replace EPS
Return
Test end
Figure 7.1: Overall pre-launch procedures
44
Clear memories
Test end
Follow EPS failure
procedure
7.8. POST FLIGHT ACTIVITIES
UHF Radio
DB
E-Link
Req comp
Req comp
Tele comm
Figure 7.2: Block diagram showing the Database system
45
Chapter 8
Experiment Report
8.1
Launch Campaign
8.2
Results
8.3
Outreach Activities
8.4
Lessons Learned
46
Chapter 9
Abbreviations and References
9.1
Abbreviations
ADC
ADF
AGC
AIS
BER
BPF
CAN
CDR
CSDR
CSP
DaMSA
DLR
DSP
ELA
EPS
ESA
Esrange
ESTEC
ESW
FPL
FSK
GENSO
GMSK
LNA
LOG
LRR
MCU
NMEA
PCB
PDR
PFR
RTOS
SAW
SED
SNR
Analog to Digital Converter
ADF7021 Radio transciever
Automatic Gain Control
Automatic Identification System
Bit Error Rate
Band Pass Filter
Controller Area Network
Critical Design Review
Center for Software Defined Radio
CAN Space Protocol
Danish Maritime Safety Administration
Deutsches Zentrum für Luft- und Raumfahrt
Digital Signal Processor
E-Link Adaptor
Electronic Power Supply
European Space Agency
European Sounding Rocket Launching Range
European Space Research and Technology Centre, ESA
Experiment Selection Workshop
Flight Planner
Frequency Shift Keying
Global Educational Network for Satellite Operations
Gaussian Minimum Shift Keying
Low-Noise Amplifier
Logging subsystem
Launch Readiness Review
Micro Controller Unit
National Marine Electronics Association
Printed Circuit Board
Preliminary Design Review
Post Flight Report
Real Time Operating System
Surface Acoustic Wave
Student Experiment Documentation
Signal to Noise Ratio
47
CHAPTER 9. ABBREVIATIONS AND REFERENCES
SSC
STW
T
TBD
UHF
VHF
48
Swedish Space Corporation (Eurolaunch)
Student Training Week
Time before and after launch noted with + or To be determined
Ultra High Frequency
Very High Frequency
Chapter 10
Attachments
esw_presentation.pdf: The presentation used at the ESW
pdr_presentation.pdf: The presentation used at the PDR
Time_schedule_v1.pdf: Gantt chart describing tasks and resources (03-15-09)
Time_schedule_v2.pdf: Gantt chart describing tasks and resources (05-24-09)
platform: Schematics for the platform system
SAM7x_basic: MCU schematics for AT91SAM7X256 CPU
SAM7x_io: MCU schematics for AT91SAM7X256 CPU
pdu.pdf: Power Distribution Unit
switch.pdf: Switch used in pdu.pdf
ais2_frontend.pdf: Schematics for the AIS2 frontend and ADC
All attachments is included at the end of this document.
49
Appendix A
Subsystem requirements
In this appendix, the requirement specification for the individual subsystems is presented. Some
requirements are defined before this semester, which is why the structure of the presentation can
be different.
A.1
EPS
The EPS must:
1. be able to supply 1 A @ 3.3 V
• Stable means that a load on 1 A will impact the regulated voltage less than 0.2 V, a
ripple on 0.5 V in maximally 1 ms is accepted.
• The voltage convertion must stop when the battery voltage is 6.0 V and start automatically when the voltage is 6.2 V
2. be able to supply 1 A @ 5 V
• Stable means that a load on 1 A will impact the regulated voltage less than 0.2 V, a
ripple on 0.5 V in maximally 1 ms is accepted.
• The voltage convertion must stop when the battery voltage is 6.0 V and start automatically when the voltage is 6.2 V
3. have an efficiency of more than 90% on the conversion between battery voltage and the
regulated voltages when the current is between 1 mA and 1 A
4. turn on and of the supply voltages for up to 8 subsystems when ordered to by CSP
• Turned off means that the subsystem must not be able to use more than 1 nA of current
when shorted
• The maximally time to turn on and off a subsystem must maximally be 10 ms
5. Turn off all subsystems when the EPS is rebooted
6. Be able to measure each subsystem by a precision of 20% from 50 mA to 500 mA
7. Turn off a given subsystem autonomously before 1 s if the current or temperature of the
subsystem exceeds a predefined level.
8. Be able to measure the battery voltage with a precision of 0.05 V
50
A.2. LOG
9. Be able to measure the charge and discharge current of the batteries with a precision of
10 mA
10. Be able to measure 10 temperatures in the platform and mechanical structure and one
temperature pr subsystem with a precision of 2 ◦ C in the interval -40 ◦ C to +120 ◦ C
11. Send a message to LOG through CSP when operations is effected or fails
A.2
LOG
The LOG subsystem must:
1. Archive log messages from all subsystems
2. Save log messages in four priorities.
3. Keep the content of the log tables even if the system is rebooted
4. Save all log messages with a timestamp of four bytes
5. Be able to store log of seven days when one log messages is stored every 2 seconds which
equals to 203,400 log messages
6. Send all log data or parts of it when requested through CSP
A.3
FPF
The flight planner must:
1. Be able to save commands that is received through CSP about tasks that have to be executed
at the time that is defined in the message
2. Be able to delete a task that is already created in the flight planner when commanded to
by CSP
3. Must execute the received tasks within 1 s of the given time, where the time reference in
the experiment is used as reference
4. The tasks must not be deleted if the FPL subsystem is rebooted or turned off
5. Contain a real time timer that maximally must differ 10 s per day
• The timer must not be reset, even if the system is rebooted
6. Answer correctly at a time query from other subsystems
7. Contain 270 tasks, which each holds a time for executing, a subsystem ID and the command
to execute
8. Send a message to LOG each time a task is executed
9. Be able to send all content of the flight plan over CSP when commanded to over CSP
10. Have all tasks stored redundantly and with checksum
11. Only execute tasks with a correct checksum. If a checksum fails is detected, the same
procedure must be used for the other version of the task
51
APPENDIX A. SUBSYSTEM REQUIREMENTS
A.4
UHF
1. The radio must interface to on-board sub-systems using CSP
2. The radio must bridge traffic from the on-board CAN network to the spacelink in a transparent matter depending on the destination address of the traffic
3. The sofware should be so general that the same system can be used for ground-station, or
a redundant radio can be inserted
4. The radio should keep other subsystems aware of the state of the spacelink
A.5
ELA
1. The subsystem must interface to onboard subsystems using CSP
2. The subsystem must bridge traffic from the onboard CAN network to the E-link supplied
by BEXUS in a transparent matter depending on the destination address of the CSP traffic
A.6
A.6.1
AIS1
Hardware requirements
1.1 Temperature
The temperature will be very low when the balloon ascends. The system needs to be fully functional at all time during the balloon flight. Which means that the receiver needs to be capable of
working in temperature below -40 ◦ C.
1.2 Vacuum
When the balloon reaches an altitude of approximately 35 km the air is very thin, almost like
vacuum. So the system needs to be working in vacuum like conditions.
*1.3 Size
All the PCB’s is going to be mounted in the AAUSAT frame which size is 10*10*10 cm. The
PCB’s needs be able to fit in the AAUSAT frame.
1.4 Power usage
The experiment on the balloon will run on batteries and those batteries needs to fit in the AAUSAT
along with the PCB’s. This reduces the amount of power the experiment can use, which must be
held to a minumum.
1.5 EMC
The system must comply with the general EMC directive DS/EN 61000-6-3:2007[Standard 09].
The balloon is equipped with several communications systems which the experiment is not allowed to interfere with. The limits is not specified in the Bexus balloon flight manual but an
interferes test will be done right before flight. If the experiment fails this test, the experiment
will be grounded. Furthermore the system must be able to withstand the high-power RF signals,
transmitted from the balloon communications systems and comply with DS/EN 61000-6-3:2007
[Standard 09].
A.6.2
Functional requirements
2.1 AIS receiver must receive AIS messages
The system must be able to receive AIS data from the Norwegian cost to the North Atlantic
Sea and the Gulf of Bothnia in the Baltic Sea when mounted on the Bexus balloon flying at an
altitude of 35 km over Esrange in Sweden.
52
A.7. AIS2
2.2 Store demodulated data
The system must be able to store continually received raw bits data on the Bexus balloon flight
on a non-volatile memory.
2.3 Interface with CAN using CAN-Space-Protocol (CSP)
The system must interface with CAN and use the CSP protocol to enable communication with
other devices.
2.4 Readout signal strength
The system must be able to measure and readout the Signal strength of the AIS signal.
2.5 Set the center frequency in the receiver
The environment the system will needs to be working in is very hostile and due to low temperature
and weather conditions the center frequency can changes. The systems needs to be able of changes
the center frequency so that it can be adapted to the conditions.
2.6 The system must be able to convert raw data to NMEA strings
The ground station will be equipped with a NMEA to map plotter which can convert a NMEA
package into a dot on a map on a screen. So the systems needs to be able of creating NMEA
packages which can be used on the ground station.
2.7 The system needs to sort in the received packages
The system must be able to read which type of message that is received, and be able to store a
specific type of package. The system only needs to store the type of packages which contains the
MMSI position.
2.8 The system needs to be suitable of uploading all the received data
The system must be able to sent the raw bit data collected and the stored NMEA packages using
either the UHF radio or the E-link.
A.7
AIS2
1. be able to sample raw data which contains both AIS channels with a sufficient sample rate
to satisfy the Nyquist sample theorem
2. must do the demodulating in software and must be able to update all parts of the demodulating and decoding software remotely
3. be able to demodulate and decode 90% of received AIS messages correctly when received
effect is ?? mW and SNR is ?? dB
4. be able to compensate for frequency drift, including dobbler shift when the satellite is moving
with 7.5 km/s
5. be able to store raw sampled data for 3600 sec (1 hr) and 1000 decoded packets
6. be functional from -40 - +85◦ C
7. have a weight of maximally 150 g
8. be operating for at least 6 months
9. comply with the standards defined by the AAUSAT3 system engineering group
a) be able to run at 3.3 V and/or 5 V only
b) use no more power than 1 W
c) comply with the PCB layout for AAUSAT3 including definition of stack connector and
board outline
53
APPENDIX A. SUBSYSTEM REQUIREMENTS
d) have at least one temperature sensor placed on a central part of the PCB
e) be able to be controlled completely over CSP
f) send telemetry to the LOG subsystem
54
Appendix B
Introduction to AIS
This appendix will give a brief introduction to the functionality of Automatic Identification System
(AIS).
B.1
System Objectives
AIS is an ITU standard designed to enhance safety at sea by automatic exchange of ship identification data. All ships with a gross weight of more than 300 tons and all ships carrying passengers
is required by law to have an AIS transponder on board. For all other ships it is optional. AIS
transponders continuously broadcasts info such as position, heading, speed, destination and name
to other ships as well as shore based stations. The system is designed to function autonomously
and allow ships to exchange information without influence of an operator. [ITU 07]
The AIS signal has several advantages compared to conventional radar systems. First of all,
the AIS signal can be received even if the ship is hidden by landmass where a radar systems
cannot detect vessels. AIS signal also contains information about more than just ship position, so
the AIS receiver is often coupled directly to the radar of a ship, so all information can be found
in one place.
As described, not all ships are required to have AIS equipment on board, this means the system
can not give a complete picture of nearby ships. AIS is thus not intended to replace traditional
radar or collision avoidance systems, but to function as an additional safety feature. It must be
noticed that AIS defines several different packet types, so not all information is contained in a
single packet.
Besides ship-to-ship identification, AIS is used for monitoring ships by using shore based
stations, strategically placed bouyes and electronic lighthouses.
B.2
High Altitude Challenges
AIS is build on using Time Division Multiple Access. At open sea it is not desirable to have special
“master ships” that determine when other ships are allowed to broadcast in TDMA. In order to to
avoid signal collisions when multiple ships broadcasts AIS messages, SOTDMA (Self-Organized
TDMA) is therefore used.
This scheme raises some complications when attempting to receive AIS signals from space. As
a satellite in Low Earth Orbit (LEO) can receive signals from a much larger area than ships at
sea level, it is possible that the satellite will receive AIS packets from several TDMA zones. Message broadcast is only synchronized within each zone, so a satellite receiving traffic from different
zones could lead to collision of packets being broadcasted by ships that are unaware of each others
presence. It is necessary to apply probability theory to the signals, to estimate how many of the
55
APPENDIX B. INTRODUCTION TO AIS
signals will collide. Picture B.1(a) shows the footprint of a high altitude plane, and B.1(b) shows
the footprint of a LEO satellite. In rarely sailed seas, a considerable part of the messages are
expected to be received uncorrupted. More information about the footprints size from the Bexus
ballon is to be found in apendix I.
(a) Illustration of how a
planes AIS receive multiple
TDMA zones in its field of
view
(b) The circle illustrates how
a LEO satellites field of view
might be, compared to the
dashed circle that illustrate a
planes field of view
Figure B.1: Satellite and plane footprint of the Earth
B.3
The AIS Protocol
The different data types of information transmitted by AIS can be divided into two groups: Static
Data and Dynamic Data. Figure B.3 lists the various types of messages that are transmitted in
an AIS system.
Data
Type
Interval
Ship 0-14 knots
Ship 14-23 knots
Ship ¿ 23 knots
MMSI number
Call sign & name
IMO number
Lenght and beam
Type of ship
Position (lat/long)
Position accuracy
Time stamp (UTC)
Course and speed
Heading
Rate of turn
Navigation status
Static
Static
Static
Static
Static
Dynamic
Dynamic
Dynamic
Dynamic
Dynamic
Dynamic
Dynamic
6
6
6
6
6
3
3
3
3
3
3
3
6
6
6
6
6
2
2
2
2
2
2
2
6
6
6
6
6
2
2
2
2
2
2
2
min
min
min
min
min
min
min
min
min
min
min
min
-
3,33
3,33
3,33
3,33
3,33
3,33
3,33
sec
sec
sec
sec
sec
sec
sec
min
min
min
min
min
- 6 sec
- 6 sec
- 6 sec
- 6 sec
- 6 sec
- 6 sec
- 6 sec
min
min
min
min
min
sec
sec
sec
sec
sec
sec
sec
Table B.1: Overview of AIS messages with travel information. The dynamic data
transmitted is depending on how fast the ship is moveing. [ITU 07]
To give a short introduction to the basics of AIS and technical characteristics of the system,
the AIS network protocol is reviewed based on the Open System Interconnection (OSI) model.
Figure B.3 illustrates sublayers of AIS and their corresponding layer in the OSI model. The
AIS standard covers the layers 1 to 4 (physical-, link-, network- and transport layer), which are
described in the following sections
56
B.3. THE AIS PROTOCOL
Application layer
Presentation layer
Session layer
Transport layer
Network layer
Data Link layer
Link Management Entriry sublayer
Data Link Service sublayer
Medium Access sublayer
Physical layer
Rx AIS 1
Link Management Entriry sublayer
Data Link Service sublayer
Medium Access sublayer
Physical layer
Tx AIS 1/2
Rx AIS 2
Figure B.2: Protocol stack of AIS
B.3.1
Layer 1: Physical Layer
In the OSI model the physical layer is the first and lowest layer. It comprises the basic hardware
transmission technology of the network underlying the logical data structures of the higher level
functions in a network. The physical layer is responsible for transmitting raw bits over the network
and handling these over the Data Link Layer.
The AIS operates on the maritime VHF band on channels 87B and 88B (161.975 MHz and
162.025 MHz), with a bandwidth of 25 kHz. The bit rate of the AIS channels is 9600 bits//s.
The modulation scheme used is bandwidth adapted frequency modulated Gaussian minimum
shift-keying (GMSK) due to the robustness of the scheme. During transmission, the GMSK modulator converts packets of network data into waveforms suitable for transmission over the channel.
For receiving, it demodulates similar waveforms to data.
B.3.2
Layer 2: Data Link Layer
The data link layer provides the functionality to transfer data over the network. It provides the
means to detect and the possibility to correct errors that may have occurred in the physical layer.
In the OSI model the data link layer is divided into three sublayers, the Medium Access Control
(MAC) layer, the Data Link Service (DLS) layer and the Link Management Entity (LME) layer.
Medium Access Control sublayer
The MAC sublayer provides a method for granting access to the data transfer media. To ensure a
reliable and robust operation AIS builds on using Time Division Multiple Access (TDMA) scheme
with a common time reference. The system is defined such that one frame equals one minute and
is divided into 2250 slots with a length of 26,67 ms, where the slot length equals the length of a
default transmission.
The synchronisation is achieved by using the global positioning system (GPS) co-ordinated
universal time (UTC) as a reference for syncronication of the frames in AIS. This raises the
probability of the frames in the different SOTDMA’s starts at the same time. When the system is
turned on it will listen for packets transmitted over the AIS channels and synchronises after these
or as described listen for the UTC and use this to create a new SOTDMA cell. See figure B.3
Data Link Service sublayer
The DLS sublayer provides the methods for data link activation and release, data transfer and
error detection and control. The data transfer uses a bit oriented protocol based on the high-level
57
APPENDIX B. INTRODUCTION TO AIS
60 seconds
2250 time slots
161,975MHz
162,025MHz
Figure B.3: AIS data divided into frames and slots
data link control (HDLC) protocol. For packet detection and synchronisation to work properly
the data field of the packet is handled with bit stuffing.
AIS Packet structure - 256 bits
Ramp up Training Start
Sequence flag
8 bit
24 bit
8 bit
Data
CRC End
flag
168 bit
16 bit
8 bit
Buffering
24 bit
Figure B.4: AIS HDLC packet structure
Figure B.4 shows an 256 bits AIS packet, equal to one slot. The packet consists of the following
fields:
• Ramp up (8 bits), is added so the transmission distance and synchronization errors does not
affect the packet
• Training sequence (24 bits), alternating ones and zeros (01010101...) is used for synchronizing the packet
• Start flag (8 bits), the frame is (01111110)
• Data, payload (168 bits), 6-bit data field type. The data is bitstuffed
• CRC (16 bits), cyclic redundancy check
• End flag (8 bits), similar to the start flag
• Buffering (24 bits)
Link Management Entity sublayer
The LME sublayer controls the operations of DLS, MAC and the Physical Layer. The sublayer
uses the TDMA information from the MAC sublayer to grant access to transmit data on the
channel. Normally when powering on a AIS system, it will monitor the TDMA channel for one
minute to determine the channel activity, current slot assignments and reported positions of other
AIS users. The AIS transponder then enters the network and starts transmitting on the channel.
If the system does not receive any AIS data in the first minute, it will start to transmit by
using SOTDMA (Self Obtained TDMA) In this report this sublayer is not important, as the AIS
subsystem developed is only intended to receive data.
58
B.3. THE AIS PROTOCOL
B.3.3
Layer 3: Network Layer
The purpose of the network layer is to:
• Establish and maintain channel connections
• Manage and assign priorities to messages
• Distribute transmission packets between channels
The two frequency channels that are reserved for AIS use worldwide are AIS1 (161.975 MHz)
and AIS2 (162.025 MHz). In normal mode of operation the system should simultaneously receive
on both of these channels in parallel and to achieve this two TDMA receivers are required. The
network layer is responsible for the reporting rate of the system, i.e. the time between AIS
broadcasts. The reporting rate is influenced by speed and course changes of the ship.
B.3.4
Layer 4: Transport Layer
The transport layer acts as an interface to the presentation layer and is responsible for converting
data, received from the presentation interface, into transmission packets of correct size.
[Munsin 02, pp. 26-27][ITU 07]
59
Appendix C
Interface Control Documents
PRELIMINARY VERSION - TO BE CONFIRMED!
Be aware that this is a preliminary version. Arguments and return values are very much a work
in progress. The ICDs are primarily included to provide a functional overview of the subsystems.
C.1
EPS
Purpose:
Command:
Arguments:
Response:
Comment:
Purpose:
Command:
Arguments:
Response:
Comment:
60
Turn on subsystem
Turns on a particular subsystem.
EPS ICD SS ON(Subsystem nr)
Subsystem nr (
EPS SS CAM,
EPS SS ADCS,
EPS SS AIS,
EPS SS COM-S
)
EPS SS ON OK, EPS SS ON FAIL
Turn off subsystem
Turns off a particular subsystem.
EPS ICD SS OFF(Subsystem nr)
Subsystem nr (
EPS SS CAM,
EPS SS ADCS,
EPS SS AIS,
EPS SS COM-S
)
EPS SS OFF OK, EPS SS OFF FAIL
C.1. EPS
Purpose:
Command:
Arguments:
Response:
Comment:
Purpose:
Command:
Arguments:
Response:
Comment:
Purpose:
Command:
Arguments:
Response:
Comment:
Purpose:
Command:
Arguments:
Response:
Comment:
Ask whether subsystem is on
Returns whether a particular subsystem is turned on. Returns
EPS SS STATE FAIL if the subsystem has been turned off due too
high use of current.
EPS ICD SS STATE(Subsystem nr)
Subsystem nr (
EPS SS CAM
EPS SS ADCS
EPS SS AIS
EPS SS COM-S
)
EPS SS STATE ON, EPS SS STATE OFF, EPS SS STATE FAIL
Measure temperature
Get a measure of the temperature of a chosen sensor.
EPS ICD TEMP
Selected sensor
char temperature
Answer will be delayed about 1 sec
Measure voltage
To measure battery voltage or voltage on one the stabilized sources.
EPS ICD voltage
(
EPS Voltage Battery
EPS Voltage 3V
EPS Voltage 5V
)
char voltage
There might will come more than one 3 V source
Measure subsystem-power-usage
To measure current on a chosen subsystem.
EPS ICD PowerUsage Messurement
(
EPS SS CAM
EPS SS ADCS
EPS SS AIS
EPS SS COM-S,
EPS Power Usage Actual
EPS Power Usage Mean
EPS Power Usage Peak
)
char current
The peak and mean value is a 2 sec value
61
APPENDIX C. INTERFACE CONTROL DOCUMENTS
Activate power-usage peak and mean measurement
Purpose:
To enable the satellite to make a peak and mean measurement.
Command:
EPS ICD PowerUsage Activate
Arguments: Subsystem nr. (
EPS SS CAM
EPS SS ADCS
EPS SS AIS
EPS SS COM-S
) Measure type (
EPS Power Usage Mean
EPS Power Usage Peak
)
Response:
EPS Power Usage Activate OK, EPS Power Usage Activate Fail
Comment:
62
C.2. FPL
C.2
FPL
Enqueue new FP task
Purpose: To enqueue a new task to the FP, that the FP is to execute at the scheduled time
Command: uint8 t FP FUNCTIONS NEW(struct fp task)
Arguments: struct{
uint16 t time;
uint8 t can0;
uint8 t can1;
uint8 t can2;
uint8 t can3;
uint8 t can4; }fp task;
Response: FP TASK ENQUEUED, FP TASK NOT ENQUEUED Comment:
Lookup FP task by id
Purpose: To lookup an already enqueued FP task by it’s id, which is the execution time
Command: *fp task FP FUNCTIONS LOOKUP ID(uint16 t)
Arguments: uint 16, which is the id
Response: *fp task, a pointer to the struct having the id from the arguent
Comment: Argument: execution-time = id
Returns a pointer to the requested struct
Lookup FP task by queue number
Purpose: To lookup an already enqueued FP by it’s location in the FP, i.e. lookup the 1st FP to
be executed
Command: *fp task lookup FP FUNCTIONS LOOKUP NR(uint16 t)
Arguments: uint16 t being the FP’s number in line - from 0 to 269
Response: *fp task, a pointer to the struct having the position given in the argument
Comment:
Lookup all FP task
Purpose: To make a full FP download poissble
Command:
Arguments:
Response:
Comment:
Delete FP task by id
Purpose: To delete an already enqueued FP task by it’s id, which is the execution time
Command:
Arguments:
Response:
Comment:
63
APPENDIX C. INTERFACE CONTROL DOCUMENTS
Delete FP task by queue number
Purpose: To delete an already enqueued FP task by it’s location in the FP, i.e. delete the 1st FP
to be executed
Command:
Arguments:
Response:
Comment:
Delete all FP tasks
Purpose: To reset the entire FP
Command:
Arguments:
Response:
Comment:
64
C.3. LOG
C.3
LOG
Save a logmessage
Purpose: A subsystem wants data to be logged.
Command: LOG ICD SAVE
Arguments: (uint8 t log identifier), (uint16 t data), (uint8 t priority (0-3))
Response: LOG OK, LOG FAIL
Comment:
Send latest logdata
Purpose: A subsystem/ground want to read the latest log-data. You must choose a number of
log messages and a priority
Command: LOG ICD SEND LATEST
Arguments: (uint8 t identifier), (uint8 t identifiermask), (uint8 t priority (0-3)), (uint16 t number
of log messages)
Response: uint8 t identifier, uint16 t data, uint8 t identifier, uint16 t data, uint8 t identifier,
uint16 t data, uint8 t identifier, uint16 t data, .........
Comment:
Send logdata since time
Purpose: A subsystem/ground want to read the latest log-data. You must choose a number of
log messages and a priority
Command: LOG ICD SEND LATEST
Arguments: (uint8 t identifier), (uint8 t identifiermask), (uint8 t priority (0-3)), (uint16 t number
of log messages), (uint32 t timestamp)
Response: uint8 t identifier, uint16 t data, uint8 t identifier, uint16 t data, uint8 t identifier,
uint16 t data, uint8 t identifier, uint16 t data, .........
Comment:
Number of logmessages since time
Purpose: Returns how much log has been saved since a given timestamp
Command: LOG ICD NUMBER
Arguments: (uint8 t identifier), (uint8 t identifiermask), (uint8 t priority (0-3)), (uint32 t timestamp)
Response: uint8 t identifier, uint16 t data, uint8 t identifier, uint16 t data, uint8 t identifier,
uint16 t data, uint8 t identifier, uint16 t data, .........
Comment:
65
APPENDIX C. INTERFACE CONTROL DOCUMENTS
C.4
TBD
66
UHF
C.5. ELA
C.5
ELA
TBD
67
APPENDIX C. INTERFACE CONTROL DOCUMENTS
C.6
AIS1
Purpose:
Command:
Arguments:
Response:
Comment:
Get Current System State
Get System State: Temperature, Menory Usage, Frequency etc.
AIS1 SYSSTATE
None
System State Data on success,
Preliminary Version!
Purpose:
Command:
Arguments:
Response:
Comment:
Change configuration of radio
Change configuration of the ADF7021
AIS1 CONFIG
What config to change and to what
What configuration now is.
Preliminary Version!
Purpose:
Command:
Arguments:
Response:
Comment:
Tune frequency
Tune the frequency of the VCO
AIS1 TUNE
UP or DOWN , stepsize
New Frequency
Preliminary Version!
Number of received messages with correkt checksum
Purpose:
Get number of received messages
Command:
AIS1 NUMMES
Arguments: None
Response:
Number of received messages
Comment:
Preliminary Version!
68
C.6. AIS1
Purpose:
Command:
Arguments:
Response:
Comment:
RSSI of last received AIS-message
Get RSSI of last received message
AIS1 RSSI
None
Value of RSSI
Preliminary Version!
Purpose:
Command:
Arguments:
Response:
Comment:
Get last received AIS-message
Get last received AIS-message
AIS1 LMSG
None
last received AIS-message
Preliminary Version!
Purpose:
Command:
Arguments:
Response:
Comment:
Get AIS-message number
Get a specifik AIS-message
AIS1 MSG
Message number
AIS-message
Preliminary Version!
Purpose:
Command:
Arguments:
Response:
Comment:
Get a string of AIS-messages
Get a more than one AIS-message
AIS1 MSGSTRING
Message number start and messages number stop
AIS-message string
Preliminary Version!
Purpose:
Command:
Arguments:
Response:
Comment:
Turn OFF
To prepare the AIS1 to be turned off
AIS1 OFF
None
Ready to be turned off
Preliminary Version!
69
APPENDIX C. INTERFACE CONTROL DOCUMENTS
C.7
AIS2
The AIS2 subsystem has two main states: Manual Mode or Automatic Mode. This is illustrated
in Figure C.7.
Figure C.1: AIS2 Main States
Comment:
Abort Current Operation
Abort the current operation and return to Manual Mode
AIS2 ABORT
None
AIS2 OK on success. If any issues arise, the system should still
return to Manual Mode but return AIS2 WARNING
Preliminary Version!
Purpose:
Command:
Arguments:
Response:
Comment:
Get Current System State
Get System State: Mode, Memory Usage, Temperature, etc.
AIS2 ABORT
None
System State Data on success, AIS2 FAIL on failure
Preliminary Version!
Purpose:
Command:
Arguments:
Response:
Purpose:
Command:
Arguments:
Response:
Comment:
70
Enable Automatic Mode
Set the AIS2 subsystem in Automatic Mode
AIS2 MODE AUTO(SUB MODE)
SUB MODE (
AIS2 MODE AUTO SAMPLE
AIS2 MODE AUTO PTRACK
AIS2 MODE AUTO FREQEST
AIS2 MODE AUTO DEMOD
AIS2 MODE AUTO BITSYNC
AIS2 MODE AUTO DECODE
)
Selected mode on succes, AIS2 FAIL on failure
Preliminary Version!
C.7. AIS2
Purpose:
Command:
Arguments:
Response:
Comment:
Enable Manual Mode
Set the AIS2 subsystem in Manual Mode
AIS2 MODE MANUAL
None
AIS2 OK on success, AIS2 FAIL on failure
Preliminary Version!
Purpose:
Command:
Arguments:
Response:
Comment:
Sample Data
Sample Data
AIS2 SAMPLE
None
AIS2 MODE OK on success, AIS2 MODE FAIL on failure
Preliminary Version!
Purpose:
Command:
Arguments:
Response:
Comment:
Track Packets
Track packets in the sampled data
AIS2 PTRACK
None
Number of packets found in data
Preliminary Version! Low resolution FFT
Purpose:
Command:
Arguments:
Response:
Comment:
Center Frequency Estimation
Estimate the center frequency of packets in the sampled data
AIS2 FREQEST
None
AIS2 MODE OK on success, AIS2 MODE FAIL on failure
Preliminary Version! High resolution FFT
Purpose:
Command:
Arguments:
Response:
Comment:
Demodulate Data
Demodulate packets in the sampled data
AIS2 DEMOD
None
AIS2 MODE OK on success, AIS2 MODE FAIL on failure
Preliminary Version!
Purpose:
Command:
Arguments:
Response:
Comment:
Bit Synchronization
Perform bit synchronization on the demodulated data
AIS2 BITSYNC
None
AIS2 MODE OK on success, AIS2 MODE FAIL on failure
Preliminary Version!
Purpose:
Command:
Arguments:
Response:
Comment:
Decode AIS packets
Decode AIS packets in demodulated data
AIS2 BITSYNC
None
AIS2 MODE OK on success, AIS2 MODE FAIL on failure
Preliminary Version!
71
APPENDIX C. INTERFACE CONTROL DOCUMENTS
Command:
Arguments:
Response:
Comment:
Received Packets Stats
Return stats on received packets: Number of packets, Passed/Failed
CRC, Package type distribution
AIS2 RECEIVER STATS
None
AIS2 MODE OK on success, AIS2 MODE FAIL on failure
Preliminary Version!
Purpose:
Command:
Arguments:
Response:
Comment:
List Received Packets Headers
List received packets headers
AIS2 LIST PACKETS
None
AIS2 MODE OK on success, AIS2 MODE FAIL on failure
Preliminary Version!
Purpose:
Command:
Arguments:
Response:
Comment:
Get Specific Packet Content
Get specific packet content
AIS2 GET PACKET
Package number
AIS2 MODE OK on success, AIS2 MODE FAIL on failure
Preliminary Version!
Purpose:
Command:
Arguments:
Response:
Comment:
Set Algorithm Parameters
Set Algorithm Parameter
AIS2 ALGORITHM PARAM
Sample length, Store Failed CRC packets, Log settings, etc
AIS2 MODE OK on success, AIS2 MODE FAIL on failure
Preliminary Version!
Purpose:
Command:
Arguments:
Response:
Comment:
Software Upload
Not applicable for BEXUS
-
Purpose:
Command:
Arguments:
Response:
Comment:
Run Test Case
Run Test Case
AIS2 TEST
Test case number
AIS2 TEST PASSED on success, AIS2 TEST FAILED on failure
Preliminary Version!
Purpose:
Command:
Arguments:
Response:
Comment:
Power-On Self-Test (POST)
Run Power-on Self Test
AIS2 POST
None
AIS2 TEST PASSED on success, AIS2 TEST FAILED on failure
Preliminary Version!
Purpose:
72
Appendix D
Component List
The individual components are mentioned in chapter 3.
73
Appendix E
Circuits
Scematics for the Platform subsystem can be found in the file named platform.pdf.
Here the Power Distribution Unit (PDU) can be found in pdu.pdf and switch.pdf.
Schematics for the SAM7x system can be found in the files named SAM7x_basic.pdf and SAM7x_
io.pdf.
Schematics for the AIS2 frontend is included in the file named ais2_frontend.pdf.
All PDF files are included at the end of this document.
74
Appendix F
Mechanical drawings
21
87
5
71
87
11
4
7
8
11
1
Ø
6x45~
15
18
Figure F.1: PCB mechanical
outline
Tegnet af:
Tegningsnr.:
Antal:
Materiale:
Samlingstegnin
DMS9 Gr. 69B
Aalborg Universitet
Institut for Maskinteknik
Pontoppidanstræde 101
9220 Aalborg
Komponent:
EPS-PCB
Dato:
Første vinkel:
13/12/2004
75
APPENDIX F. MECHANICAL DRAWINGS
7
M3
n6
13,50
6
UNF 8-36 dybde 10,5
A
5
5
A-A ( 1 : 1 )
4
4
C
A
3
1
de
yb
0 D
,2
+0 0,00
,50
3
n5,9
e1
0 ybd
+ 0,2 D
2 - 0,00
Ikke angivne tolerancer `0,1 mm
3
,00
2
140,59 `0,14
Antal:
2
M3
R0,50
Materiale:
Første vinkel:
Komponent:
C (3:1)
B (3:1)
R1
Tegningsnr.:
R2,0
0
R3,00
(45~ view)
Tegnet af:
DMS9 Gr. 69B
Aalborg Universitet
Institut for Maskinteknik
Pontoppidanstræde 101
9220 Aalborg
1
Skala:
Samlingstegning:
3
1
20/12/2004
Dato:
F
A
B
C
D
E
Figure F.2: Cubesat frame for mounting of PCB’s
8
4,50
29,74
50,00
F
13,50
M2
6
R2
,0
0
,0
0
R2
UNF 8-36 dybte 10,5
0,00
E
D
0,00
3,00
5,25
7,50
B
R1
,00
70,26
74,91
76,00
81,00
82,09
86,74
91,50
100,00
C
103,00
106,00
107,00
108,25
110,50
113,50
7
76
B
A
8
8,50
13,26
17,91
19,00
24,00
25,09
16xR1,00
Appendix G
Pre-PDR experiments
In order to spot possible future problems, we have executed the following four preliminary tests.
G.1
Power Regulator Unit
The DC-DC converter, TPS62111, is planed to be used from our battery to supply the 3.3 V
parts. Likewise, the TPS62112 is planed for 5 V supply.
TPS62111 has been tested for efficiency using a 8.4 V input supply.
90
Efficiency [%]
85
80
75
70
0
200
400
600
800
1000
1200
1400
Iout [mA]
Figure G.1: 3.3 V DC-DC converrter test
G.2
Platform MCU
Using a previous developed PCB, the platform MCU (AT90CAN128) have been tested from -38
to 161 ◦ C. The tested interfaces are parallel flash and CAN. The CAN interface have been tested
using a standard PC and a USB-to-CAN adapter (PEAK USB CAN Dongle). At 161 ◦ C the CAN
communication fails.
77
APPENDIX G. PRE-PDR EXPERIMENTS
G.3
Radio transceiver
The radio transceiver, ADF7021, are planed to be used, both in the AIS1 receiver and in the
UHF up/down link. Also, the ADF7020-1 is planed to be used as a down converter for the AIS2
receiver.
Two ADF7021 was tested, using two AT90CAN128. One setup for transmitting and one for
receiving. First, the transmitting setup was in the climate chamber, then the receiving setup.
The test was executed from -40 to 85 ◦ C. The maximum transmitting frequency offset detected
was 1 kHz, due to the internal temperature compensation. This test revealed some difficulties
with the SPI interface of the AT90CAN128 when transmitting, no matter what temperature. This
problem seems to be moisture related and requires more investigation.
G.4
AIS1 & ELA MCU
Both the AIS1 receiver and the ELA plan to use the AT91SAM7X MCU. Therefore, a development board, AT91SAM7X-EK, has been tested in climate chamber from -30 to 75 ◦ C March 8th
2009. The test executed a freeRTOS demonstration code, counting network errors and packages.
The only interface tested was ethernet, using a standard PC. No significant errors was detected,
however a test of the other interfaces needed for the project must be executed.
Figure G.2: AT91SAM7X development board test
G.5
DSP development board
The OMAP3530 are planed to be used on the AIS2 receiver. A development board (aka. Beagleboard v. B6) was tested in climate chamber from -42.6 to 86 ◦ C
The test included a linux distribution (Ångström), running from a 2 GB Kingston microSD card.
The tested interfaces are: USB + USB hub, HDMI for display and SD card.
78
G.5. DSP DEVELOPMENT BOARD
Figure G.3: OMAP development board test
79
Appendix H
Pre-CDR experiments
H.1
Isolation test
H.1.1
Vacuum
H.1.2
Isolation and heating
2 x 47R 4W resistor. 7.91 v * 0.345 A = 273W
Ambient: 22.5 Start: 22.5 t + 2: 35
Isolation power test:
80
Appendix I
Link budget
To make sure that it is possible to receive AIS messages in up to 35 km altitude, the received
power is calculated at different altitudes. In this section, Friis transmission equation is used for
calculations on the received power in the case of AIS reception and with a half-wavelength dipole
as the transmitting and the receiving antenna. Assumptions have been made for simplifying the
calculations. It is assumed that polarization mismatch is negligible, that impedance match is
perfect and that weather has no influence on the signal attenuation. These assumptions are made
on that the balloon only reaches 35 km in height and than the radio transmitted signal is normally
reachable up to 75 km away [Pratt 03, pp. 317-326].
The ground effect (reflections) is not evaluated even though the ground effect may have a big
impact on the received power in some regions. The worst case and best case scenario with ground
effect is respectively when the signal is cancelled out and when the signal strength is doubled. The
distribution of the to scenarios is considered random due to waves etc. and therefore considered
not necessary for the link budget. The assumptions believe to be fair in order of calculating a
good estimation on the received power. In order of using Friis’s transmission equation, equation
I.1.
2
λ
Pr =
Gt Gr|ρ̂ · ρ̂|2 Pt
(I.1)
4πR
Where Gt and Gr is the directive gain for the transmitting and receiving antennas respectively.
The length from the ship to the balloon is R. The signal wavelength is λ. In the calculations it’s
assumed that polarisation mismatch has no influence, which means that |ρ̂ · ρ̂| = 1.
The directive gain for transmitting and receiving antennas, the length from the ship to the balloon
and the signal wavelength, needs to be calculated. Each of these parameters will be calculated in
the following. The calculations are done in Matlab.
Transmitter and receiver directive gain
It is assumed that ships are using half wavelength dipoles as transmitting antenna. In section 3.3
it was stated that a half wavelength dipole is used as receiving antenna on the balloon.
The electric field for at half wavelength dipole is given as. [Balanis 05, pp. 182]
I0 e−jkr
Eθ ≈ jη
2πr
cos
! cos (θ)
V
sin (θ)
m
π
2
(I.2)
The constants j,η,I0 ,k,r and θ in eqaution I.2 are respectively: The imaginary unit, free space
impedance (intrinic)[120π], current [A], wavelenght [ 2π
λ ], length of the antenna [m] and angle
81
APPENDIX I. LINK BUDGET
[rad] The antennas are vertically polarized and are independent of the azimuth angle. The timeaverage power density and radiation intensity can be written respectively as. [Balanis 05, pp. 182]
|I0 |2
=η 2 2
8π r
Wav
cos
cos (θ)
sin (θ)
π
2
!2 W
m2
(I.3)
and
U = r Wav
2
|I0 |2
=η 2
8π
cos
!2 cos (θ)
W
sin (θ)
UnitSolidAngle
π
2
(I.4)
The total radiated power can be calculated as.
Prad =
Z Z
|I0 |2
Wav · ds = η
8π
s
π
Z
cos2
0
cos (θ)
sin (θ)
π
2
[W]
(I.5)
The maximum directivity for a half wavelength dipole is:
4πUmax
[−]
Prad
4πU |θ= π2
4
=
≈ 1.643
=
Prad
2.435
D0 =
(I.6)
(I.7)
2
The maximum directivity can replace η |I8π0 |2 in equation I.4. The term sin3 (θ) can replace
2
cos( π
2 cos(θ))
in equation I.4. This replacing forms two new expression.
sin(θ)
Gt = 1.643 sin3 (θ)
(I.8)
Gr = 1.643 sin (θ)
(I.9)
3
The maximum gain for a half wavelength dipole antenna is 10 · log(1.643) = 2.15dB in θ =
Equation I.8 and equation I.9 are used for the transmitting and the receiving antenna.
π
2.
Geometric analysis
The link budget is calculated using Friis transmission equation as described earlier. The angle
from where maximum gain is obtained to the line of sight is to be calculated for the receiving
and the transmitting antenna. This is important since neither the receiving nor the transmitting
antenna has an isotopic radiation pattern. The following subsection is an explanation on how
the two angles ”Vship” , ”Vsat” and the length ”R” is calculated. ”Vship” , ”Vsat” and ”R” are
shown in figure I.1. The direct length from the balloon to the ship is called R (line of sight) and
can be calculated with the following equation.
p
(I.10)
R = (b2 + c2 ) − (2 · b · c · cos(V )) [m]
The angle between the directivity for the balloon antenna and R is obtained by focusing on the
triangle formed by a, R and part of b.
sin(V ) · c
V sat = arccos
[Rad]
(I.11)
R
82
a
Vsat
R
vship
b
c
V
Figure I.1: Angles and lengths used in the calculations
The angle between the directivity for the ship and R can be expressed as.
π π
V ship =
− V sat − V [Rad]
−
2
2
(I.12)
The two angles are used to calculate the gain of the ship and baloon antennas in the given
direction. The length R is used in Friis transmission equation.
Calculating the link budget
The calculations for the link budget are done by sweeping the angle between the balloon and the
ship starting from 0. The angle 0 is where the ship is located beneath the balloon. The sweep
stops when the ships reaches the border for the FOV (field of view). The result of the simulation
is illustrated in figure I.2. The calculations in figure I.2 is done by assuming earth’s radius to be
6371 km constant. The transmitting antenna mounting height for the ship is set to 10 m. The
frequency is set to 162,025 MHz (AIS ch. 2). The balloon altitude is set to 35 km. The radius
of the footprint for the balloon can be calculated using the angles from figure I.13 and equation
I.13.
2π · earth0 s radius
· Angle in centre of earth
360◦
(I.13)
This can be used to calculate the signal strength as a function of the footprints radius. Strength
as a function of the footprint size is illustrated in figure I.3. The graph in figure I.3 is plotted whit
a map as background. Centre of the circles is ESRANGE (launch site for bexus balloon). Figure
I.3 illustrates the signal strength. In the datasheet for the radio receiver a best case sensitivity is
-113 dBm and it can thereby be concluded that it’s possible to receive AIS massages even though
launch site is fare from water.
83
APPENDIX I. LINK BUDGET
−72
−74
Received power in dBm
−76
−78
−80
−82
−84
−86
−88
−90
−92
0
1
2
3
4
5
6
Angle between ship and balloon in the centre of earth
Figure I.2: Received power measured in dBm as a function of the angle in the centre
of earth measured in degrees
Figure I.3: Received power measured in dBm as a function of the radius of the
footprint
84
Appendix J
PDR Comments
Organization and project planning
• Team seems to cover all competences and be well supported by CubeSat group and university.
• No test plan.
• Test facility only goes down to -25°C.
Mechanics
• Integration: add a plate to fix the experiment to the bottom of the gondola using rails.
Another option would be to attach to the ceiling.
• Structure analysis (FEA and/or tests) is missing.
• Should withstand 10g vertical and 5g horizontal.
• Antenna: consider having a hanging antenna (for safety reasons).
• Assess the EMC and mechanical interferences with E-Link antenna.
Thermal
• The insulation of the experiment and batteries needs to be assessed not “assumed”.
• Consider active thermal control
Electrical / Electronics
• Batteries: Same as used on AAUSAT2.
• Space qualified and rechargeable via external charger.
• Reliable (don’t need BX batteries).
• Should assess the frequencies/power used.
• Swedish legislation.
• Local oscillators could disturb and/or be disturbed.
85
APPENDIX J. PDR COMMENTS
• Connectors: Use MIL-C connectors.
• Connections: Choice to be made between
• Either a cable coming out of the experiment going to BX (but long cable needed)
• Or a socket on experiment.
• E-Link: UTP protocol will be used by the team. Drivers and libraries already exist.
• Bandwidth needed/available on E-Link need to be assessed (also check requirements of other
experiment teams).
Software
• Software is an major part of the experiment.
• Work started but need to give more details in the SED.
Risk assessment
• Assessment needs to include risks to the experiment but also to ground personnel and vehicle.
Operations
• Safety distances from antenna (prior and after flight) to be assessed.
• Team will have a full set of spare parts (mech and elec).
Outreach
• OK but need to make sure that there are specific actions about NAVIS-BEXUS and not
only about AAUSAT3.
• Papers written need to be mentioned in the SED.
Summary of main actions for the experiment team
• Frequency assessment (ground station and broadcast).
• Proper analysis of boats in Baltic sea (consider footprint when balloon is drifting towards
Finland).
• Mechanical integration on gondola.
• Test plan.
86
Bibliography
[08gr414 08]
Aalborg University 08gr414. Platform system for AAUSAT3, 2008.
[Balanis 05]
Constantine A. Balanis. Antenna theory. John Wiley & Sons, Inc,
2005.
[CCSDS Secretariat 03]
NASA CCSDS Secretariat. TM synchronization and channel
coding CCSDS 131.0-B-1, 2003. http://public.ccsds.org/
publications/archive/131x0b1.pdf.
[Cervera 08]
Miguel A. Cervera & Alberto Ginesi. On the Performance Analysis
of a Satellite-based AIS System. 2008.
[COM DEV International 07] COM DEV International. ComDev And GateHouse Announce Alliance To Bring Space-Based AIS Data Services To Global Maritime
Community, 2007. http://www.spacenewsfeed.co.uk/2007/18_
11_2007/18November2007_7.html.
[ITU 07]
ITU. Technical characteristics for an automatic identification system using time division multiple access in the VHF maritime mobile
band. 1998-2001-2006-2007.
[Munsin 02]
Helena Munsin, Martin Eriksson & Peter Bergljung. R3-ais - reference document. Saab TransponderTech AB, 2002.
[Pratt 03]
Timothy Pratt, Charles W. Bostian & Jeremy E. Allnutt. Satellite
communications. John Wiley & Sons, Inc, 2003.
[Serway 04]
Raymon A. Serway & Jr. John W. Jewett. Physics for scientists
and engineers. Thomson Brooks/Cole, 2004.
[Sølvsten 09]
Claus Sølvsten. Contact person, The Danish Maritime Safety Administration, 2009. http://www.frv.dk.
[SSC 09]
SSC & DLR. Bexus user manual. http://rexusbexus.net/
index.php?option=com_content&view=article&id=51&Itemid=
63, 2009.
[Standard 09]
Dansk Standard. Standards package - Basic EMC. http:
//axapta.ds.dk/default.asp?WMFN=EG_WebAdvancedMIS&WMFT=
D&WPG=EPHomepageOnline&WP=M221927, 2009.
[Support 09]
Disco Support.
Flightcase Fittings, 2009.
http://www.
discosupport.dk/shop.php?hkatId=59&skatId=162.
87