1
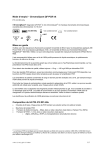
Kit Components The Kit includes reagents for 50 tests (2 x 25) using the 5-Chromosome PCR Mix, and 25 (1 x 25) additional tests each for Chromosome 21 PCR Mix and Sex Chromosome PCR Mix. 5-Chromosome PCR Mix (Yellow Cap) 20-900-50 part 1 (X2) 500μl Chromosome 21 PCR Mix (White Cap) 20-900-50 part 2 (X1) 500μl Sex Chromosome PCR Mix (Red Cap) 20-900-50 part 3 (X1) 500μl PCR Enzyme (Orange Cap) 20-900-50 part 4 (X4) 25μl Read More 1 E59/5 05/14 V3 April 2014 Table of Contents 1. Product Description and Principles of the Procedure 2. Product Components and Storage Conditions 2.1. Kit Components 2.2. Reagents Required But Not Supplied 2.3. Storage and Handling Requirements 2.4. Symbols used on Labels 3. Before You Begin 3.1. Precautions 3.2. Spectral Calibration 4. PCR: Sample Preparation and Amplification Setup 4.1. DNA Extraction 4.2. Working Solution Preparation 4.3. Amplification Setup 4.4. Thermal Cycling Protocol 5. Capillary Electrophoresis: Sample Preparation and Instrument Setup 5.1. Sample Preparation 5.2. Running Parameters 5.3. Instrument Setup 6. Data Analysis 6.1. Importing New Panel and Bin Settings in the Panel Manager 6.2. Importing GeneMapper Analysis Settings in the GeneMapper Manager 6.3. Performing Data Analysis 6.4. Reviewing QF-PCR Data 6.5. Using the GeneMapper Report Format 6.6. Modifying the Analysis Method Setting 6.7. Missing Allele Calls – Analysis Method and Bin Set Connection Lost 6.8. Disclaimers 7. Interpretation of Results 8. Troubleshooting 8.1. Unusual conditions 8.2. PCR Artifacts 8.3. Electrophoretic Artifacts 9. Analysis Examples 10. References 11. Appendixes 11.1. The Internal Size Standard 11.2. Advantages of Using the Loci in the 3ZOMYKit 11.3. Contact Information 3 6 6 6 6 7 8 8 8 9 9 9 9 10 11 11 11 11 17 17 17 18 18 19 20 22 22 21 24 24 25 25 26 33 33 32 30 31 V3 April 2014 2 1. Product Description and Principles of the Procedure The 3ZOMY Kit is a DNA-based multiplex QF-PCR (Quantitative Fluorescent Polymerase Chain Reaction) assay designed to test aneuploidy of 5 chromosomes (13, 18, 21, X, and Y) in DNA. DNA can be extracted from prenatal samples: amniotic fluid (AF), chorionic villus (CVS) and fetal tissue samples to determine fetal aneuploidies. A parent (mother or father) sample (blood or tissue) is used as a control for ensuring the origin of the fetal sample and to prevent sample mixing. The product is not intended nor tested to be used for non invasive procedures. The 3ZOMY Kit includes a multiplex STR marker set used to perform initial aneuploidy diagnosis of the chromosomes 21, 18, 13, X, and Y, and two additional chromosome-specific marker sets for the chromosomes 21 and XY that can be used to confirm the diagnosis. The 3ZOMY Kit uses a five-dye fluorescence system and is intended for DNA fragment analysis on Applied Bio systems Genetic Analyzers (ABI 310, 3100, 3130, 3500, and 3730). The 3ZOMY Kit is for professional and special trained users. QF-PCR analysis includes amplification, detection, and analysis of chromosome-specific, repeated DNA sequences known as short tandem repeat (STR).Fluorescently labeled primers are used for amplification, visualization, and quantification of the fluorescently labeled PCR products. The resulting PCR products are separated and analyzed by a genetic analyzer. DNA amplified from a normal diploid sample will present two alleles of a chromosome-specific STR marker as two peaks in a 1:1 ratio when the marker is heterozygous (Fig.1) or as one peak when the marker is homozygous (Fig.2).The relative amount of the PCR product is quantified by calculating the allele peaks’ height ratio or areas. STRs vary in size between subjects, depending on the number of tetra repeats present on each allele. Heterozygous STR markers are considered to be informative. Figure 1.Heterozygous marker (area ratio 1:1) Figure 2. Homozygous/monosomic marker The detection of three peaks in a 1:1:1 ratio (Fig.3), or two peaks in a 2:1/1:2 ratio (Fig.4), may indicate the presence of an additional STR sequence possibly corresponding to an additional chromosome, as in the case of trisomy. Figure 3.Trisomic marker (area ratio 1:1:1) Figure 4. Trisomic marker (area ratio 1:2) V3 April 2014 3 3ZOMY Chromosome Marker Overview Chromosome 13 Chromosome 18 Genetic Marker Location Size Range (bp) Dye Color D13S742 13q12.12 222 - 334 Green D13S634 13q21.32-q21.33 365 - 435 Blue D13S628 13q31.1 420 - 475 Yellow D13S305 13q13.3 435 - 505 Green D13S1492 13q21.1 100 - 175 Red D18S978 18q12.3 195 - 230 Yellow D18S535 18q12.3 300 - 350 Blue D18S386 18q22.1 338 - 430 Green D18S976 18p11.31 440 - 495 Red GATA178F11 18p11.32 350 - 410 Yellow D21S1435 21q21.3 150 - 208 Blue D21S11 21q21.1 215 - 290 Blue D21S1411 21q22.3 245-345 Yellow D21S1444 21q22.13 440-495 Blue D21S1442 21q21.3 362-420 Red D21S1437 21q21.1 105-152 Yellow AMELX/AMELY Xp22.2,Yp11.2 X=104, Y=110 Blue DXYS267 Xq21.31, Yp11.31 175-217 Green DXYS218 Xp22.33, Yp11.32 215-260 Red DXS1187 Xq26.2 120-170 Green XHPRT Xq26.2-q26.3 265-308 Red DXS2390 Xq27.1-q27.2 312-357 Red SRY Yp11.31 236 Yellow ZFY, ZFX Yp11.31, Xp22.11 157-166 Yellow TS3 3p24.2, Xq21.1 3=133, X=137 Blue TS7 7q34, Xq13 7=181, X=201 Red Chromosome 21 Chromosomes X and Y Table 1. 3ZOMY genetic markers for 5-Chromosome PCR Mix V3 April 2014 4 Chromosome 21 Genetic Marker Location Size Range (bp) D21S1435 21q21.3 150 - 208 Dye Color Blue D21S11 21q21.1 215 - 290 Blue D21S1411 21q22.3 245-345 Yellow D21S1444 21q22.13 450-505 Yellow D21S1442 21q21.3 362-420 Red D21S1437 21q21.1 105-152 Yellow D21S2055 21q22.2 385-488 Blue D21S1409 21q21.2 160-220 Green D21S1280 21q22.11 295-470 Green Table 2. 3ZOMY – genetic markers for Chromosome 21 PCR Mix Genetic Marker Location Size range (bp) Dye Color AMELX/AMELY Xp22.2,Yp11.2 X=104, Y=110 Green 175-217 Blue 215-260 Red DXYS267 DXYS218 Sex Chromosomes Xq21.31, Yp11.31 Xp22.33, Yp11.32 DXS1187 Xq26.2 120-170 Green XHPRT Xq26.2-q26.3 265-308 Yellow DXS2390 Xq27.1-q27.2 312-357 Red DXS6807 Xp22.33 245-280 Blue DXS981 Xq13.1 230-260 Green DXS6809 Xq21.33 290-340 Blue DXS6854 Xq25-26.1 392-430 Green DXS6803 Xq21.31 100-140 Blue sY625 Yq11.21 247-253 Green SRY Yp11.31 236 Blue ZFY, ZFX Yp11.31, Xp22.11 157-166 Yellow TS2 2p23.2, Xq23 2=118, X=114 Yellow TS3 3p24.2, Xq21.1 3=133, X=137 Red TS7 7q34, Xq13 7=181, X=201 Green Table 3. 3ZOMY – genetic markers for Sex Chromosome PCR Mix V3 April 2014 5 2. Product Components and Storage Conditions 2.1 Kit Components The Kit includes reagents for 50 tests (2 x 25) using the 5-Chromosome PCR Mix, and 25 (1 x 25) additional tests each for Chromosome 21 PCR Mix and Sex Chromosome PCR Mix. 5-Chromosome PCR Mix (Yellow Cap) 20-900-50 part 1 (X2) 500μl Chromosome 21 PCR Mix (White Cap) 20-900-50 part 2 (X1) 500μl Sex Chromosome PCR Mix (Red Cap) 20-900-50 part 3 (X1) 500μl PCR Enzyme (Orange Cap) 20-900-50 part 4 (X4) 25μl 2.2 Reagents Required But Not Supplied Reagent Preparation Consumables for the thermal cycler. Micropipette/dispenser with aerosol barrier tips or displacement tips. Disposable protective gloves (powder free). PCR Amplification Thermal cycler: ABI GeneAmp® PCR System 9700, using 9600 mode. Micropipette/dispenser with aerosol barrier tips or displacement tips. Detection ABI Genetic Analyzer (ABI 310, 3100, 3130, 3500, 3730). Performance optimized polymers: POP-4™ or POP-7™. Hi-Di™ Formamide, Genetic Analysis Grade. 1x Genetic Analyzer Buffer. Micropipette/multipipette/dispenser with aerosol barrier tips or displacement tips. Spectral calibration dye set: 5-Color Dye Set (BI Cat# 20-910-00) for the ABI 31XX, 3730 and 500 Genetic Analyzers, or the 5-Color Dye Set –Single Capillary for the ABI 310 Genetic Analyzer (BI Cat# 20-911-00). Size Standard: 3ZOMY size standard (BI Cat# 20-920-00), or GeneScan™ 600 LIZ® Size Standard (Life Technologies Cat# 4366589). 2.3 Storage and Handling Requirements a. Store all components below -18°C. b. The activated reaction mixes (prepared by adding the 3ZOMY Chromosome Mix to the PCR) may be stored at +2° to +8°C for at least 7 days, and at below -18°C for at least 90 days. c. Avoid repeated freeze-thawing. d. Dispose of unused reagents and waste in accordance with country, federal, state, and local regulations. e. Do not mix reagents from different kit lot numbers. V3 April 2014 6 2.4 Symbols used on Labels Lot or batch number Expiry date Number of tests In vitro diagnostic device Store below temperature shown Catalogue number Manufacturer V3 April 2014 7 3. Before You Begin 3.1 Precautions a. The laboratories should process their own validation studies and quality control (QC) measures. Internal QC samples of known genotypes should be processed in each assay to assess the validity of the procedure. b. Work under sterile conditions to avoid contamination, e.g., bacterial. c. Do not pool reagents from different lots or from different vials of the same lot. d. Do not use the kit after its expiry date. e. Each test is for single-use only. f. Do not use opened or damaged kit reagent vials. g. Work flow in the laboratory should proceed in a unidirectional manner: Begin in the reagent preparation area, move to the DNA extraction area, then to the amplification area, and finally to the detection area. Pre-amplification activities should begin with reagent preparation and proceed to DNA extraction. Reagent preparation activities and DNA extraction activities should be performed in separate areas. Supplies and equipment should be dedicated to each activity and not used for other activities or moved between areas. Gloves should be worn in each area and should be changed before leaving that area. Equipment and supplies used for reagent preparation should not be used for DNA extraction activities, for pipetting, or processing amplified DNA or other sources of target DNA. Amplification and detection supplies and equipment should remain in the amplification and detection area at all times. h. Handling of kit components and samples, their use, storage, and disposal should be in accordance with the procedures defined by national biohazard safety guidelines or regulations. i. Wear powder-free disposable gloves, laboratory coats, and eye protection when handling specimens and kit reagents. Wash hands thoroughly after handling specimens and kit reagents. 3.2 Spectral Calibration Proper generation of a matrix file is critical for evaluating fluorescent labeled multiplex systems with ABI Genetic Analyzers. A matrix must be generated for each individual instrument. The Kit has been calibrated with the following dye sets: The 5-Color Dye Set (BI Cat# 20-910-00), required for spectral calibration on ABI 31XX, 3500, and 3730 Genetic Analyzers. The 5-Color Dye Set –Single Capillary (BI Cat# 20-911-00), for ABI 310 Genetic Analyzer. For protocols and additional information about spectral calibration, see the 3ZOMY Spectral Calibration protocol that can be obtained by request from BI’s technical support team. V3 April 2014 8 4. PCR: Sample Preparation and Amplification Setup 4.1 DNA Extraction The 3ZOMYKit is for use with human genomic DNA extracted from whole blood, amniotic fluid, and chorionic villus samples. The product is not intended nor tested to be used for non invasive procedures. The 3ZOMY Kit has been validated using the QIAamp DNA Blood Mini Kit (QiagenCat#51104) for extraction of DNA from human whole blood and amniotic fluid (AF), and QIAamp DNA Mini Kit (QiagenCat#51304) for extraction of DNA from chorionic villus (CV) biopsies. It is recommended that alternative DNA extraction methods and sample materials using the 3ZOMY Kit is carefully evaluated prior to the results being used for diagnostic use. 4.2 Working Solution Preparation 4.2.1 First-time use: If the complete process is performed in one day, the working solution should be prepared before preparing the samples. The reverse order is advisable only if the samples are prepared the day before amplification or earlier. The working solution is prepared by adding the Chromosome PCR Mix (yellow/white/red caps) to the PCR Enzyme (orange cap). Ensure that the Chromosome PCR Mix is completely thawed before use. Centrifuge the Chromosome PCR Mix tube briefly to collect the contents. Do not vortex the tubes at this step. Add 500μl of Chromosome PCR Mix to one tube of PCR Enzyme. Carefully mix by pipetting several times from the bottom of the tube. Vortex the working solution and centrifuge briefly to collect the contents. Add 20μl of the working solution to separate PCR reaction tubes. Cap the reaction tubes and centrifuge briefly to collect the contents. Continue to step 4.3. Unused working solution should be aliquoted into 20μl per tube and frozen. 4.2.2 Subsequent use: Completely thaw the 20μl working solution tubes to be used. Continue to step 4.3. 4.3 Amplification Setup Under optimal PCR conditions and using the recommended analysis settings (see below), acceptable results are consistently obtained at genomic DNA concentrations of 1-10ɳ g / PCR reaction. The 3ZOMY Kit has been validated using a total PCR reaction volume of 25μl. Any change to the reaction volume may impair the Kit’s performance. We recommend using the following controls in every run: Negative control (no DNA) 46 chromosomes from known origin(normal DNA) 47 chromosomes from known origin for Chromosome 21 trisomy V3 April 2014 9 Addition of Sample Samples and controls should be added in a dedicated area separated from the reagent preparation, amplification, and detection areas. Each PCR reaction should be prepared as follows: Components 3ZOMY Working Solution (from step 4.2.2) DNA H2O Final PCR Reaction Volume Samples Positive Control Negative Control 20μl 20μl 20μl 1-5μl (1-10ng) 1-5μl(1-10ng) None Up to 5μl Up to 5μl 5μl 25μl 25μl 25μl Cap the tubes and centrifuge briefly to collect the contents. 4.4 Thermal Cycling Protocol The 3ZOMY Kit has been optimized for the GeneAmp PCR System 9700 thermal cycler. Turn on the thermal cycler at least 30 minutes prior to amplification. For ABI GeneAmp® System 9700 set “ramp speed” to “9600 mode”. For use of alternative thermal cyclers the following ramping rates must be applied: heating 0.8°C/sec., cooling 1.6°C/sec. Program the thermal cycler for amplification as follows: 1 Temp / Time / Cycle No. 95°C for 15 min 2 94°C for 30 sec 3 58°C for 90 sec 4 72°C for 90 sec Step For 26 cycles 5 72°C for 30 min Start amplification (duration approximately 3 hours). Following amplification, remove the tubes containing completed PCR amplification reaction from the thermal cycler and place into a suitable holder. Centrifuge briefly to collect the contents. Remove the caps carefully to avoid aerosol contamination. Do not bring amplified material into the pre-amplification areas. Amplified material should be restricted to the amplification and detection areas. V3 April 2014 12 5. Capillary Electrophoresis: Sample Preparation and Instrument Setup Refer to the respective ABI Genetic Analyzer User Manual for instructions on maintenance and handling. Prior to running the 3ZOMY Kit, the instrument must be spectrally calibrated to support detection of the 5-Color Dye Set. See Section 3.2 for details. 5.1 Sample Preparation a. Prepare a loading solution by combining and mixing 2μl of the Size Standard (3ZOMY size standard (BI Cat# 20-920-00) or GeneScan™ 600 LIZ® Size Standard (Life Technologies Cat# 4366589)) with 100μl of Hi-Di™ Formamide (sufficient mix for 6 wells/tubes). b. Vortex for 15 seconds. c. Dispense 15μl of the loading solution into the required number of wells in a 96-well plate or into individual tubes (ABI310) to be placed on the Genetic Analyzer. d. Add 1.5μl of the sample PCR product to the corresponding well/tube containing loading solution. e. Seal the plate/tubes. 5.2 Running Parameters: Instrument parameters ABI 310 ABI 3100/3130 ABI 3500 Run parameters POP-4 POP-4/POP-7 POP-7 Capillary Length 47 cm 36 cm 50 cm Run Temperature 60°C 60°C 60°C Injection Voltage 15 kV 1.5 kV 1.6 kV Run Voltage 15 kV 15 kV 19.5 kV Run Time 40 min 1500 s 1500 s The amount of PCR product injected into the capillaries can be adjusted by increasing/decreasing the injection time and/or injection voltage. 5.3 Instrument Setup The following instructions are for an ABI 3130xl Genetic Analyzer with 3ZOMYKit. The dye set used is the 5-Color Dye Set 3010/3130/3500 (BI Cat# 20-910-00). However, the procedure is similar for the other instruments as well. For further details, refer to the User Guide for the instrument used. Before starting the electrophoresis for fragment analysis, the following settings need to be set-up in the instrument's Data Collection Software: Run Module, Instrument Protocol, and Plate. V3 April 2014 11 5.3.1. Create a Run Module: In the left navigation window select Module Manager and New. Fill out the Run Module Editor according to the Kit’s instructions for use. a. Name: Enter a name. b. Type: Regular. c. Template: FragmentAnalysis36_POP4 (default template for the capillary array and polymer used). d. Specific Parameters: As specified in section 5.2. e. Click: OK. V3 April 2014 12 5.3.2. Create an Instrument Protocol: In the left navigation window select Protocol Manager and New. a. Fill out the Protocol Editor b. Name: Enter a name for the Run Module. c. Type: Regular d. Run Module: Select the Run Module created in step 5.3.1:3ZOMY_36_POP4 e. Dye Set: 5-Color Dye Set. f. Click: OK. V3 April 2014 13 5.3.3. Set up a Plate for Run: In the left navigation window select Plate Manager and New. Fill out the new Plate Dialog: a. Name: Enter a name for the plate. b. Application: GeneMapper-Generic c. Plate Type: 96-Well d. Owner Name: Enter the name of the owner e. Operator Name: Enter the name of the operator. f. Click: OK V3 April 2014 14 Fill out the GeneMapper Plate Editor a. Sample Name: Enter the sample names. b. Comment: Optional. c. Results Group 1: Location where the raw data files (fsa files) will be saved. d. Instrument Protocol 1: Select the instrument protocol that you created in step 5.3.2. e. Click: Ok a. In the left navigation window select Run Scheduler and Find All V3 April 2014 15 b. Select the plate created in Step 5.3.3 (Status Pending). Link the plate by clicking on the yellow plate position indicator, which will turn green when linked. Start the run on the green arrow. c. The Process Plates dialog box appears. Click OK to start the run V3 April 2014 16 6. Data Analysis One of the following software programs is required for data analysis: GeneMapper (Applied Biosystems) or GeneMarker (Softgenetics). GeneMapper/GeneMarker settings for the 3ZOMY Kit and size marker must be imported before analysis of raw data. The latest versions can be obtained by request from BI’s technical support team. 6.1 Importing New Panel and Bin Settings in the Panel Manager a. Open the Panel Manager by selecting Tools and Panel Manager in the GeneMapper main menu or by clicking on the icon. b. Import panels by clicking on the Panel Manager in the left navigation window. Panel Manager will now appear highlighted in blue. c. Select File and Import Panels. d. Navigate to and select the appropriate 3ZOMY Kit Panel file (.txt file) on your computer. Click Import. e. The imported panel will now be displayed in the left navigation window. f. Add a Bin Set to the imported panel by highlighting the panel in the left navigation window. g. Select File and Import Bin Set. h. Navigate to and select the appropriate 3ZOMY Kit Bin Set file (.txt file) on your computer. Click Import. i. The imported Bin Set will appear in the Bin Set drop-down list. Click Apply and OK to confirm the imported panel and bin settings. 6.2 Importing GeneMapper Analysis Settings in the GeneMapper Manager a. Open the GeneMapper Manager by selecting Tools and GeneMapper Manager in the GeneMapper main menu, or by clicking on the icon. b. In the GeneMapper Manager select the Analysis Methods tab, and then click Import. c. Navigate to and select the appropriate 3ZOMY Kit Analysis Methods file (.xml file) on your computer. Click Import. d. The imported Analysis Method will now be listed in the Analysis Methods tab. e. Repeat the process, selecting the appropriate tab and importing the corresponding file for: Plot Settings Table Settings Report Settings Size Standards f. Select “Done” to confirm the imported analysis settings. Note: A matrix file (mtx file) needs to be generated or imported in the Matrices tab when analyzing raw data generated from capillary electrophoresis using the ABI 310 Genetic Analyzer. V3 April 2014 17 6.3 Performing Data Analysis a. Import the raw data files (fsa files) from the capillary electrophoresis by selecting File and Add Samples to Project, or by clicking on the icon. b. Navigate to the desired run folder using the folder tree in the left navigation window. Double click or use the plus symbol to display all files contained in the folder. Highlight the complete folder or selected samples, and click on Add to List. c. The added run folder will now appear in the Samples to Add window. Add the samples by clicking on Add. d. Set the appropriate analysis settings (Analysis Method, Panel and Size Standard) for each sample, alternatively fill down the columns by selecting the settings for one sample, highlighting the desired number of samples, and typing Ctrl D keys to copy the settings. Note: The matrix has to be set when analyzing fsa files from an ABI 310 Genetic Analyzer. e. Initiate the data analysis by selecting Analysis and Analyze or by clicking on the Assign a project name when prompted. icon. 6.4 Reviewing QF-PCR Data a. Highlight the sample row for the sample(s) to be selected for analysis in the GeneMapper main window. b. Display the sample plot by selecting Analysis and Display Plots, or by clicking on the icon. c. In the Samples Plot window, select the 3ZOMY Plot Setting from the drop-down menu. d. To add or remove information shown in the peak labels, open the GeneMapper Manager, select the Plot Settings tab. Highlight the 3ZOMY Plot Setting, and then click Open. e. Select the Labels tab. In the Show Labels box, select the information to be shown on the labels by using the drop down lists in the Label 1 to Label 4 options. To confirm the modified label format, click OK and Done. Changes in the Plot Settings will be directly applied in the Samples Plot without re-analyzing the samples. V3 April 2014 18 6.5 Using the GeneMapper Report Format The Report format can be used to facilitate the calculation of peak area ratios for the markers included in the analysis. The 3ZOMY Report Setting is included in the product settings folders. Use the 3ZOMY Table Setting with the corresponding 3ZOMY Report Setting. Report and Table Settings are imported into GeneMapper through the GeneMapper Manager tool. a. Select the appropriate Table Setting from the Table Setting drop-down menu in the GeneMapper main window. b. Generate a report by highlighting the Sample file(s) to be analyzed, and then selecting Analysis and Report Manager, or by clicking on the Report Manager icon . Or In the Report Manager window select the appropriate Report Setting from the Report Setting drop-down menu. c. To review the report data in a Samples Plot: Highlight a marker to be reviewed and then click on the icon. To edit data in the Samples Plot window: right click on the marker and select the appropriate function in the menu box that appears. Any changes made will appear immediately in the Report. V3 April 2014 19 6.6 Modifying the Analysis Method Setting Depending on the ABI Genetic Analyzer used, it might be necessary to modify the Minimum Peak Height in the Analysis Method. a. In the Analysis Method provided for the kit, the default Minimum Peak Height is applicable for instruments with a lower detection scale, i.e., ABI 310, ABI 3100, and ABI3130 (maximum detection 8000 RFU). When using ABI 3500 or ABI 3730 Genetic Analyzers (maximum detection at 32000 RFU), the Minimum Peak Height needs to be adjusted. b. Open the GeneMapper Manager by selecting Tools and GeneMapper Manager in the GeneMapper main menu or by clicking on the icon. Or In the GeneMapper Manager, select the Analysis Methods tab. Highlight the desired Analysis Method, and then click Open. c. Select the Peak Detector tab. The user specified (RFU) values of 100 for the blue, green, yellow, and red, and 50 for the orange, are applicable for the ABI 310, 3100, 3130 Genetic Analyzers. If using an ABI 3500 or 3730 Genetic Analyzer, values of 500 for the blue, green, yellow, and red, and 200 for the orange, are applicable. d. Click OK and Done after entering the user specified (RFU) values. 6.7 Missing Allele Calls – Analysis Method and Bin Set Connection Lost Occasionally the Analysis Method looses its connection with the Bin Set. This is the likely explanation when the allele calls and bins cannot be displayed. Instead, question marks are displayed in the peak labels. Follow the instructions below to ensure that the Bin Set is connected to Analysis Method. a. To connect the Bin Set to the Analysis Method, open the GeneMapper Manager by selecting Tools and GeneMapper Manager in the GeneMapper main menu, or by clicking on the icon . Or In the GeneMapper Manager select the Analysis Methods tab. b. Highlight the desired Analysis Method, and then click Open. c. In the Analysis Method Editor, select the Allele tab. If the Bin Set has been lost, the Bin Set is set to none. Make sure that the correct Bin Set is added (in this example 3ZOMY). d. Click OK and Done. If the Analysis Method has been modified, the samples need to be reanalyzed. 6.8 DISCLAIMER RESULTS OBTAINED WITH ANY IVD KIT SHOULD ONLY BE EMPLOYED AND INTERPRETED WITHIN THE WHOLE CLINICAL PICTURE. BIOLOGICAL INDUSTRIES LTD. CANNOT BE CONSIDERED RESPONSIBLE FOR ANY CLINICAL DECISIONS TAKEN. THIS KIT IS NOT INTENDED TO BE USED FOR THE RISK EVALUATION OF TRISOMY 21 V3 April 2014 22 7. Interpretation of Results For interpretation of results, see Best Practice Guidelines for QF-PCR at http://www.cmgs.org. 1) At least one peak should be observed for each marker tested. The acceptable range for marker peaks analyzed on the 3130 Genetic Analyzer is between 50 and 6000 RFU, and for the 3500 Genetic Analyzer between 175 and 32000 RFU. Peak heights falling outside this range must not be analyzed. 2) The negative control should not show peaks above 50 RFU. 3) The positive control must show all the expected peaks. 4) To interpret a result as normal for a particular chromosome, at least two informative markers consistent with a normal genotype are required, with all other markers being uninformative. 5) To interpret a result as abnormal for a particular chromosome, at least two informative markers consistent with an abnormal genotype are required, with all other markers being uninformative. 6) Normal allelic pattern is determined by: Marker showing two peaks of similar height/area, and the peak ratio is classified as 1:1. 7) Abnormal allelic pattern is determined by: a) Marker showing two peaks of differing height/area and the peak ratio is classified as 2:1 or 1:2 (Trisomic Diallelic pattern). b) Marker showing three peaks of similar height/area and the peak ratio is classified as 1:1:1 (Trisomic Triallelic pattern). 8) The Kit includes three X-chromosome counting markers (TS2, TS3, and TS7) to be used to determine the number of X chromosomes when monosomy X is suspected. 9) X-chromosome counting markers: The TS2, TS3, and TS7 markers are non-polymorphic X-chromosome counting markers that may be used to determine the number of X chromosomes when monosomy X is suspected. The X-chromosome counting markers define sequences present on the X chromosome and an autosomal chromosome that are amplified using identical primers. The amplified marker fragments are separated according to length, and the X chromosomal copy number is determined by fragment area ratio calculation. V3 April 2014 21 In a normal female an X-chromosome counting marker area ratio of 1:1 is expected (Fig. 5). In normal males and females with monosomy X a 2:1 ratio is expected (Fig. 6). Fig. 5. Area ratio 1:1 Fig.6. Area ratio 2:1 10) Monosomy X pattern is determined by: a) All X and XY markers showing a homozygous allelic pattern. b) The AMELY and SRY peaks are not detected. c) Marker TS3 showing two peaks of differing height/area, and the peak ratio is classified as 2:1. d) Marker TS7 showing two peaks of differing height/area, and the peak ratio is classified as 2:1. 11) Non-Polymorphic Markers: The AMELXY and SRY markers amplify non-polymorphic sequences on the X (AMELX) and Y (AMELY and SRY) chromosomes, and can be used to determine the presence or absence of a Y chromosome. SRY will give a single peak in normal males. AMELXY may be used to assess the relative number of X to Y chromosomes. 12) Pseudo-Autosomal XY Markers: a) The DXYS267 and DXYS218 markers are polymorphic STR markers present on both the X and Y chromosomes. b) The ZFY, ZFX marker is a non-polymorphic (non-STR) marker present on both the X and Y chromosomes. c) These markers may be used to assess the total number of sex chromosomes when informative. d) It is not possible to determine which allele represents the X or Y chromosome. 13) The use of the additional PCR mixes for chromosome 21 and sex chromosomes is recommended as back-up in case all the markers in the 5-Chromosome Mix are noninformative (homozygous), and can also be used individually for the respective aneuploidy diagnosis. V3 April 2014 22 14) Analysis of heterozygous markers displaying two allele peaks is performed by calculating peak area ratios (Peak1/Peak2). Peak1 is the peak area of the shorter length fragment, and Peak2 is the peak area of the longer length fragment. Ratio Criteria (RC) Interpretation: Due to the occasional preferential amplification of the smaller allele, the ratio between fluorescent peaks may vary within limits shown in the following table: Ratio RC 1* RC 2** 1:2 <0.65 <0.65 Inconclusive 0.65-0.74 0.65-0.74 1:1 0.75-1.44 0.75-1.54 Inconclusive 1.45-1.75 1.55-1.75 2:1 >1.75 >1.75 For markers displaying three allele peaks the ratio is always calculated starting with the area of the shortest length fragment (Peak1), i.e.,Peak1/Peak2, and Peak1/Peak3, respectively. Ratio RC 1* RC 2** Inconclusive <0.74 <0.74 1:1:1 0.75-1.44 0.75-1.54 Inconclusive >1.45 >1.55 *RC 1 is used when peak distance is <24bp **RC 2 is used when peak distance is ≥24bp Homozygous markers are considered uninformative. 15) Height Ratio a) Height ratio may be calculated when an area ratio is classified as inconclusive. The same RC is applied as for area ratio calculation. b) Allele ratios that fall between the normal and abnormal ranges are classed as inconclusive and must be re-analyzed. c) If both normal and abnormal allelic patterns are obtained for a particular chromosome, it is recommended that follow-up studies be performed to identify the reason. V3 April 2014 23 8. Troubleshooting If heterozygous markers results fall in the inconclusive range or are not detected, it may be due to a number of factors such as: 8.1 Unusual conditions: Symptoms Maternal cell contamination Chromosome mosaicism Microvariants Primer site polymorphism Somatic microsatellite mutation Copy number variation (CNV) Description Profiles demonstrate the presence of two genotypes (a second genotype is seen at all the markers). Skewed allele ratios and/or minor third allele peak are detected on a chromosome-specific group of markers. 15-25% of mosaicism could be detected by QF-PCR. STRs occasionally demonstrate incomplete repeat sequences. The interrupted repeat can be 1, 2 or 3 bases long. Microvariants are designated by the number of full repeats and the size of the incomplete repeat eg. A 9.3 allele indicates 9 full repeats and a 3 base microvariant. Partial or complete allele drop-out. If a complete drop-out is seen in a normal sample, the profile shows apparent homozygosity for an individual marker. In the case of a trisomic sample the profile may show apparent disomy. Partial drop-out is seen as an additional peak at a reduced height which can result in skewed, inconclusive or apparent 1:2/2:1 allele ratios. SMM is detected as a novel allele at a single locus and is probably caused by a mitotic replication error. It usually involves 1-2 repeats increase or decrease in the repeat unit. Can be identified in a profile when present in a subpopulation of cells (mosaic). SMMs are more frequent in CVS than in AF. Comments Amplification of the maternal DNA should be done. Skewed and/or extra peaks should be investigated further. 1. In rare cases, amplification failure due to mutation of the primer site has been reported for the AMELY sequence. 2. In rare cases, ratio skewing due to mutation of the primer site has been reported for the TS1 marker sequences. Have been reported for markers D13S742, D13S634, D13S628, D13S305, D18S978, D18S535, D18S386, D21S11, D21S1411, D21S1437, XHPRT, DXYS218, AMELXY, ZFYX, and TS7. V3 April 2014 24 8.2 PCR Artefacts: Symptoms Description Comments Stutter peaks Are detected as extra peaks that are one repeat smaller than the actual STR allele. The stutter peak area is typically less than 15% of the corresponding STR peak area. Stutter peaks may be included in the ratio calculation. (-) A peaks Large difference in size between two alleles Are detected as extra peaks that are one base smaller than the full length (+A peak) PCR product due to incomplete addition of the 3' A residue. (-) A peaks may be included in the ratio calculation. PCR is a competitive reaction. Where alleles are separated by a large number of repeats, the shorter allele can be preferentially amplified, leading to an imbalance between the two alleles. 8.3 Electrophoretic Artifacts: Symptoms Extra peaks visible in one or all channels Description Comments DNA concentration is too high. Excessive amount of DNA on amplification. Low signal – Missing peaks in one or all channels DNA concentration is too low. Reduced amount of DNA template can result in preferential amplification of one allele resulting in skewing and/or uneven amplification of markers. Insufficient template on amplification. If sufficient sample is available, it can be reextracted and re-suspended in a lower volume. Larger loci showing much more product than smaller loci. Pull-up or bleedthrough between dye channels Dye blobs may appear in the sample analysis range Failed analysis due to low sizing quality Electropherogram data is of poor quality Unexpected electrophoretic spikes DNA is degraded or of poor quality Can occur when peak heights are too high, or if a poor or incorrect matrix has been applied to the samples. Pull-up peaks should be excluded from the analysis. Dye blobs appear as broad, undefined peaks of a single color and tend to occur relatively early in the data. Dye blobs should not be included in the analysis. Low sizing quality might be caused by insufficient peak height of the size standard fragments or incorrect identification of the fragments by the software due to sample overloading, spectral overlap or preterminated runs. The size standard can be corrected manually in the Size Match Editor, or re-run the sample with a new Formamidesize standard mix. Data should not be interpreted. The PCR product may be reinjected and re-analyzed. Minor voltage changes or urea crystals passing the laser. Re-inject samples for confirmation. V3 April 2014 25 9. Analysis Examples Normal Male (46, XY) Sample (5 Chromosome PCR Mix) All informative autosomal STR markers demonstrate a normal 1:1 marker ratio. The presence of AMELY and SRY is consistent with male gender. The X-chromosome counting markers (TS3 and TS7) demonstrate a 2:1 marker ratio, and all the X-chromosome STR markers are uninformative, in line with the expected dosage of X chromosomes in a normal male. The 1:1 marker ratio of the informative pseudo-autosomal XY chromosome STR markers (DXYS267 and DXYS218) and the non-polymorphic XY markers (AMELXY and ZFYX) confirm a normal male sex chromosomal dosage. Down Syndrome, Trisomy 21 (47, XX, +21) Sample (5 Chromosome PCR Mix) All informative autosomal STR markers on chromosome 21 demonstrate abnormal 1:2, 2:1, or 1:1:1 marker ratios consistent with trisomy 21. Edwards Syndrome, Trisomy 18 (47, XY, +18) Sample (5 Chromosome PCR Mix) V3 April 2014 26 All informative autosomal STR markers on chromosome 18 demonstrate abnormal 1:2, 2:1, or 1:1:1 marker ratios consistent with trisomy 18. Patau Syndrome, Trisomy 13 (47, XY, +13) Sample (5 Chromosome PCR Mix) All informative autosomal STR markers on chromosome 13 demonstrate abnormal 1:2, 2:1, or 1:1:1 marker ratios consistent with trisomy 13. V3 April 2014 27 Turner Syndrome (45, X) Sample (5 Chromosome PCR Mix) All informative autosomal STR markers demonstrate a normal 1:1 marker ratio. The presence of AMELX and the absence of AMELY and SRY confirm female gender. The X-chromosome counting markers (TS3 and TS7) demonstrate an abnormal female 2:1 marker ratio consistent with the dosage of a single X chromosome. All X and XY STR markers are uninformative (DXS1187, DXYS267, DXYS218, XHPRT, DXS2390), consistent with the dosage of a single X chromosome. Triploidy Sample (5 Chromosome PCR Mix) All informative STR markers on chromosomes 13, 18, 21, X, and Y demonstrate abnormal 1:2, 2:1, or 1:1:1 marker ratios consistent with triploidy. V3 April 2014 28 Down syndrome, Trisomy 21 (47, XX, +21) Sample (Chromosome 21 PCR Mix) All STR markers demonstrate abnormal 1:2, 2:1, or 1:1:1 marker ratios consistent with trisomy 21. Turner Syndrome (45, X) Sample (Sex Chromosome PCR Mix) The presence of AMELX and the absence of AMELY and SRY confirm female gender. The X-chromosome counting markers (TS3 and TS7) demonstrate an abnormal female 2:1 marker ratio consistent with the dosage of a single X chromosome. All X and XY STR markers are uninformative (DXS1187, DXYS267, DXYS218, XHPRT, DXS2390), consistent with the dosage of a single X chromosome. V3 April 2014 29 10. References Professional guidelines for clinical cytogenetics and clinical molecular genetics .QF-PCR for the diagnosis of aneuploidy best practice guidelines (2012), v3.01, January 2012. 11. Appendixes 11.1 The3ZOMY size standard (BI Cat# 20-920-00) The 3ZOMY size standard contains 21 DNA fragments of 73, 88, 123, 148, 173, 198, 223, 248, 273, 298, 324, 349, 373, 398, 423, 448, 470, 495, 520, 545, and 555 bases in length. It is detected as a fourth color in the presence of 3ZOMY amplified DNA in the orange channel. 11.2 Advantages of Using the Loci in the 3ZOMY Kit 3ZOMY QF-PCR has the major advantage of providing rapid, accurate, and cost-effective analysis for the diagnosis or exclusion of aneuploidy in chromosomes 13, 18, 21, X, or Y. The complete procedure from sample to results takes less than five hours, thus enabling your laboratory to provide results in just one day. Requires small amounts of genomic DNA. The 3ZOMY Kit’s excellent assay performance and large number of highly informative markers significantly reduce the number of re-runs. In addition, a single PCR mix and detection reduces the risk of sample mix-up. V3 April 2014 32 The kit includes: 16 different somatic markers for chromosomes 21, 18, and 13, and 10 different sex chromosome markers to perform initial aneuploidy diagnosis. Two additional chromosome-specific marker sets for chromosomes 21 and XY to confirm the initial diagnosis or to be used individually for the trisomy of chromosome 21 and sex chromosome aneuploidy. Three unique X-chromosome counting markers for reliable detection of Turner syndrome. 3ZOMY can be used for maternal cell contamination detection. 3ZOMY is a CE-IVD certified kit. BI provides a complete technical support service. 11.3 Contact Information Life Technologies (India) Pvt. Ltd. 306, Aggarwal City Mall, Opposite M2K Pitampura, Delhi – 110034 (INDIA). Ph: +91-11-42208000, 8111, 8222 Mobile: +91-9810521400 Email: [email protected] Web: www.lifetechindia.com V3 April 2014 31