1
User Manual
User Manual
l.
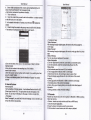
Appearance
Gontents
I
APPANCEANO
2, USING MilORY
8
mNTACTS
''
KEYPAD
CMDS
-',-',_
OPEMTIONS,."''"
U
..'.,..,.''.,,.,,.'-
-.3
-'-
12
DISK.,..'"'..'-'-'
_
L INTEilET uPLoRER ""
19. NOTICES FORTHE USE OF PHONE
,-,.'"
14
T
a Press it to sbd the menu, which allows you to perfom
in the ilrent intetram o.
it to return lo lhe previous interfa@ . or to close
dialog box
options'menu, notm@fion @nd orthe
,
aPress itto open the phone's m€nu, then you @uld
choose to lock the screen, turn off the phone, or set it to
a Press it to inqeas th€ volume
aPcs jl to tum the phone lo vibration mode fiom lhe silent
sitd€d
to lhe frcnt
€me€
User Manual
User Manual
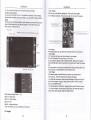
3.
2. lJsing Memory Card as U Disk
lfyou wantlo send music, pidures or oiher
frles to the phone's memory card
from the computer, you shou d set memory card as u disk flrst.
Set memory card as u dlsk
1)Connect the phone to the computerwith USB cable. The notification lcon will
appear in the shtus box.
2)Open lhe notiication panel.
3)ln the notincaiion panel, touch USB is connected , ihen touch Open the USB
Storaqe Device".
Witi
,l'tsFi provides as far as 300feet (100M) nnge of wieless netuork access. lf
!tu use cell phone to connect wifr, you should mnnectlo the wreless access
Fintor lhotspob] .
. Noties. The availabilityand coverage of WLFi signal depend on lhe numbei
infrashcture and otherobjects penetated by the signal
OEn Wifi and to connect to the wfeless netuo*
i)Press home>menu, then touch setingewifr and internet
z)Selectthe
wii
box, to open WLFi. Phone will auiomatically
s€n
for available
3)Touch WLFi setings. Then a list ofWLFi netoo.k will show the founded
neMork name and security setings. (open netuork or WEP' WPAryPtr wiih
Fssword).lf yo(Hable the notiicaUon ln WiFi setings, The shtus box will
Touch USB is
conneded in the
notiication will
rightone
. Noiices:
lf you connect your phone io lhe compuier then choose open ihe
USB devie, lhe phone €nt read the memory card. You temporarily can nol
use some appli€tions, such as camera.
. Uninsbtl the U Disk from comouter
show this con (e) when open available wfteless neMork founded.
4)Touch one ofthe WLFi choices to mnned the neMork. When you choose
open netuork, phone will connect to it automatically lf you choose WEP.
WPffiPtr with password, you should iype the password frrst, ihen touch io
. Nolices: when the phone is @nneded io the wkeless netuork,
ne sbius boxwillshow{his WLFilcon (E) , and the approximate
signal srengthen (ihe number of li1 bars).lfiouch the connected
netuork, will display the name of Wi-Fi neMo*, status, speed, signal,
sfength. secunty. iniomaton and lP address.
lf you want to delete ihe wireless sefiings, please touch 'not aeseNe'
as in the right pidure. lfyou wantto @nned to lhis netuork, you
should re-enterthese
Unless you choose not to resetoe the netuork, otheMise, ihere is no need io
reenteilhe coresponding password when nexliime connecting to the
previously encrypted wfeless netuofi. WLF| will search automatically, thal is'
5
User Manual
phon€ needn't to perform additional steps to @nned WLFi netuorks.
. Notices,
Unlsss you choce not b ro*rye the neMoft wilh Fssword, olhoNise, there
is no ned to re+nter the @rEsponding password when netrtime conneding
lo the previously encrypt€d wirelss netuork. WLF| will search aulomati@lly,
that is, phone oeedn't to pedom additional steps to connectWLFi netuorks.
. Conned to other WLFi netuo*s
1)ln the interfacg ofwirelBs and netuork, touch WiF, setings. The founded
Wi-Fi netuo*s will show on lhe WLFi neMo* list.
2)Touch oherw-Fi nefoorks, and then you can conned to this neko*.
. Noti@s: in addfrion, you €n surf the internet via GPRS. We default thathe
GPRS in SlMl is openod aflersbded, usere €n seted manually,the specific
loction is 'seting*wireless and intemeFdaE connedion", touch 'SlMl.
SlM2, no dab @nnedion', when the dotturns green, ifs alreadyopened.
Tre
Cut the connedon to the Bluetooth
1)Pre$ home>menDsefrings>wireless
4. Bluetooth
Turn on Bluet@th or sel the phone €n be deteded
1)PEss home>menu, lhe touch sefrings2)Toud wheless and intemet, then choce Eluetooth
.
and intemot>Bluetoo$ sefr ngs.
or bp and hold the connoded
6e lisl of Bluetooth equipment, touch
handj@ headset.
2)ln
bx
to open the Btuetooth
fundion.Afrer shded, the status boxwill showthis i@n (8). Touch "sGn for
devi@s"the itsbb to s€n for all devices frthin range.
3)Toud Bluetootr se6ngs, all he devices foundd will display in the tist under
( s#
Se bx "@n be d6tedd". *t fr to be detdd, the other Bluetooth
deG *ll b Sle to fnd Se phme. )
,ntffi:
k @imum detdre tme of the ptune is 2 minutes.
. kidrig d ffffi
of Blebth hadst
1) P6 ture>m,
tuntuafi Sjngs. _
2)Toud ffrele$ and int€mebBlueMh $flings, hen select Bluel@th box,
then your phone frllwn brthe Bluebth dovic6s within 6nge .and show the
founded devi@s in the list underthe i@n.
a.lf the list cn'tfind yourequipment, touch s€nning quipmenl to rssGn it_
b. Make sure that the devi@s Mnied are under fte deteded mode.
3)Touch headset in the equipment listtofnish Se @nnedion.
. Notices: geneElly Bluetooth d€vices need password to b6 paired, oflen use
100001 asthe defaultpassword.4)Th6 paidng and @nneding statuswill show
underlhe headset in he Blusl@th devi@s list. When bo headset connected to
your phone, the sbtus box will show this icon(EI)m@ns conneded. Then you
can use the headsel to make or re@ive 6llings,.
3)Press and seled'@ncel the paidng".
. Bluoboth proximity sensor
ffier pailing the tuo device,you can test out the signal is saong or weak by the
Bluet@th proximity sensor device
5. uait
5.1 Gmall
.
Creale an electrcnic mail amunt
Seled mail> setings. You €f, activate oreditexisting e-mail aeounb as well
as creale a new e-mail acmunl.
a.Selet mail, Google a@untsetrng interface appears. Then touch next step'>
s€te acmunb€nter name, last name and email amount.
b.G@gle seNe6detemine whetherthe name can be used, ifso, new interfa@
areaE prcmpting enter password, then judge fre password' se@dty, use6
fr d@sn't meet the requirmenb need to re-enler the mssword,
c. Su@ssfully register a new Gmail ac@unt, a messenger creaied
dmati€lly for tesling.
. LGdinS mailac@unt
a. OFn Gmail skip inboduction scren>loading inteface app€6 >*led load
b. Enter name, passwod hen l@d
E.mil acount initialiation,prompting "lqin successful" All Google ac@unb
Slbe sFchonizd.
. CMing and sending ,mails
ffien cHtng mails, selet mail> ceating mails.
llr€re and @ntents. Pres
ssd ordisGrded-
MENU you
Enterlhe address(redpient),
6uld append'. 'Add CdBcc', select
User Manual
User Manual
There is tone for new mails, in ihe status box wit, show this bffion l!g., pr""s
Menu >?efresh', refrcsh and update the numberof the unread maits io a proper
. Delete
maijs
When loading a mail accounl ifyou wanl to delete it,you need to restore factory
setings . When loading a second one, you could press lhe menu buton to
delele it.
Notces, manyflnctions depend on GmailAccount, for example: Electonic
Market. Googie Talk, Sync Contad and Catendar.
5"2 Email
. Load Email
Enlerthe @rred address and password >seflings cotrect pod and pop seruel
chsck the seryer sedngs automaticarty.
Set lhe corect SMTP seryer. check lhe maits seruer's sending and receiving
setings, then enterthe specifred accouni name and displayed name on the-
outinge-mail.>
Finish.
Create and send mails
When creating mails, select mails > create maits. Enterthe address(recipient).
theme and conlenh. Press MENU you coutd ,append . ,Add Cc/Bcc,. seted
send or discarded or save as drafr.
.
6. Dialling
ffien he i@n of internet
@ive €llings-
seruer appears in the screen, you coutd diat or
The signatbar on the top ight comer showthe stength of
maximum ffi 4 signat bars) .
reMofr signal (lhe
. Sa( dialins
OFn appli€hs main menu>dial.
dialing.
.
m
You @uld choose
SlMl
or SjM2 io do lhe
k
inledace or press menu key to select"delay2 se@nds", and then enterthe
^umber of the exienslon.
. Telephone calls in the @ll log
ayerytelephone numbercalled ahd received in'SlM1, SlM2"wiil reserued ln
tune's menu of call log. On the top lefr of every callrecod willshow"SlMl or
S}M2"
numbere ln the call log can be d aled by c icking the bufion "dial" on the
Ai
number list appearing , click it to catch deiails i press it for long you could
aial via SlMl or SlM 2", meanwhile you can ed t, delete, save th€ number or do
'ivhen calling comes (top leflwill showfrom which SIM €rd) press"Answed'and
sllde towards rlght unil ihe middle button, ihen you can receive €llings.
A@ording to the distance beMeen phone and human body, it wlll adjust
automatically the switch ofthe backlight.
During the call, close the phone to the eai the backlightwill tum otr
automatical y, which could save bateries and prevent inadvedenUy iouching.
. Refuse to answer the phone
a. When standby, G lling comes , press lefuse"buton and slide towards lefl side
unlil the midd e buflon, then you could retuse the Glling.
b.When uslng,calling comes,c ick on be lefuse"buton to refuse the €lling.
. Two-way call/multiparty call(conference cll)
. Notices, this funciion needs that SIM card open multipady call features.
1)Akeady exist a call in the phone
2)Click"Add calls", dia another call (or receive another call, phone default
open"callwaiting'(setingedialingsetings-oiherdialingsettings),
afterboth
mnnected, could view the status of calllng.
Diating
At the interfa@ of "dialed, enterlhe phone number, and then ctick lhe diating
key, afrerlhat,you should choose one StM card or internet cati. tf needed to calt
the efension,you could click the "diat pad" in the botom ofthe screen to open
8
ight
,ten
3
mmm
select'combine call'- you can combine fuo calls into one way
User Manual
multiFrty
call connected , you coutd separate the cails or hang up one
oflhem via"lhe small atrow of @nference call".
7. Messaging
Telephone recording
During the €ll, more>sbfr re@rd, you @utd .ecord be dialog of the @[.
1 ) seting9set olher fundions of the call in ihe diating setings, for exampte:
Call Transfer- afrer all lhe sefijngs fnished and tumed on, you coutd tansfer
ihe @llto a c€fuin number
2) lnseting9dialingsefiings>olherdiatingseflings, open"callwaiting,,.Afler
tumed on , you can receive another call when already exist one, The answedng
and rejecting tundions arejusl like the ordinary phone.
. Only in 73 platform
Video call
When you use video call,ensure to inslall 3G StM €rd. in thediating
.wryed
4 ) afrer
.
intedace,enter numbers ,then press the
symbot @
,so tnat
omplete
fie
. hFtunt:
the message tite of lhis phone is tho phone number, will be
dialog, instead of the usual folder structure.
and messageswith white
in s similar for of
kges
with blue backgrcund are those received,
*grcund are those sent.
. Snd S[/S to cetuin phone number
1)P€ss home>messaging, touch'new messages'.
2)ln the intetrace of'edit':
a. Click lecipient"box to shfr input method, you cn also click'entefboxto
Sd input method, in that way you can enter charadere.
b. Clickthe buton of"send from SiMl orSlM2"to sladsending.
. Send MMS to cetuin phone number
men creating message, il was defaulted as SMS, itwill be tumed to i,1MS
Sen following operatjons were done. You can send MIVS via clicking "send'
afrer editing.
1)ln be intedace of
"edit". Click the buton of "Menu",
2)Click'append",you can spend thefollowing ahchments,then
itwill be turned
f oor*o.r*
xvd.$ ort" raThe se@nd wayto uss
Open the menu of appli€tions>@nbcb, press one conbct of the
@nbcb,then press long the phone numbeiand seled the" video @ll"
HT
:
l=::
**,.".*
Ld
I
I
I
O^*
a, lf you want send MMS wlth many pages, you
should select '?ppend PPT" in the %ppend"
b, You can append 10 pictures, with the form of
GIEIPEG,
c, click "adding themes", the box of"theme" will
appear under the box of aecip,ent", meanwhile
t tstumed to MMS automatically
User Manual
.
Send messages to multiple numbers
Entermultiple numbere in the box of entering, each number is divided bythe
comma in English.
. Noti@s: Fornowthis phone can mass messages lo almost20 numbers, the
corcct numberdepends on the charade.s, you can only enter 3j2 characteG
in the box ofTecipienl".
When a message is sent or sent again, a tifle yelow lefierwiil appeal The
number I or 2 on the teter refers to StMi or Sttr42.
When message sending failed, a red kiangte with exctamaiion wil appear
when editing infomation other
: contact9[,,lenu>new contact>
$led Save contacb 1o phone or SIM card ,then
inio lhe inledace ofediting
vou @n editthe contacts'picture, name, phone numbei e-mail, post4l address,
nen touch 'fnish".
2) 6ntacts>Menu>searcher
a. Enler numbere or leters,if match with conta6 ,they will be disptayed in the
b. Ifthere is no search to match the
8. Contacts
.
Open
he
menu
ofappli@tone@nbcb
Defaufrdisplay phone @nbcE and StM @rd
conh6. soil conlacb bvfrsl
conbcb,
the intedace witt be'no matching
3) conlacPMenu>delete @ntacb
a. You can select all, cllckthe delete bunon to delete all contacb, including the
ontacts of phone and SIM card
b. You cn select one or more individual conlaci, click Delete, delete att the
4) contacb>Menu>groups
a. defauli group include:VlqSchoolmate,friends,Family,Co-worket
!. SelectAdd Groups, edit the new group name, and go to the conhct search
nterface, you Gn add the group contad,
5) conbcb>menu>speed dial
ry.*.
&#.i*.,r.
ler;ki
a
--''"
No.2-gnumbers,click"Tap
to add speed dail",seled a conbct as a speed
jail.Affer successfully sefling the dialer interface, long press the number keys,
Gn dial the contact number
_.cu
3. click impodexpod,ln the local phone, SIM card and SD card three copies of
4ch olherto achieve conbct information.You can select "Copy Source" and
3en select Ne(, select the conbcb to copy, so shat complete ihe copy of
K
Click lhe Search i@n to enterthe conbct search intedace Ctick the "+" ro
.
Dispay options,can select the whole or pa& @ntads
,rones "."Phone Contacls "o/SlMs Contacb"
a
12
in "Only
Accounb,canchoosethe"Backgroupdala"and"Auto-sync".
13
conbcb with
User Manual
User Manual
d.
ShareVsible conb*,all of the @ntacb €i be impofred into the SD
€rd,or sharing via Bluetoolh,Te( messageor cfi ail,
. Add @mmon conh6 to the collection interface.
1) Touch @ntadbb.
) Touch the @nbct thal you want to add io the
on the SIM €d @n not be added) .
2
3)
ln the dohiled
infomaton
d@nb*,
@Iedion (@nbcb reseryed
touch this i@n
conbd-
4\
Press for long the
The interla@ of
@nEd
in lhe
pofup
&
besides the
menu to add it to the
mlledion.
.
I
Functionsofmenu
)Menu>Backward
brows:ng through multiple pages, will retum to
trer
drent
Affe. browsing through multplo pages, will move to
Fge.
a Enter he firet lefrer of the names in the list(Chinese o. Iefrer) to fnd lhe
mdMonhd.
b Enter the fi6t number in he snhing box to fnd @nb6
mmd under nuhbeG.
c EntaSe ee{y maffid numbeE Sth @ntad in the searching box, then
plB he 'sraft' hfion.
d lf bere is no mdching @nbd, then Se interface wiI appear .no mnEct
founded'
9. lnternst Explorer
1 )ln the interrae of intemel explorer, touch address filed and onter lhe URL.
2)Use kepad to enter URL. The appropdateweb sites wiil appear on the
screen. You @n touch il dkedly go tothe page orcontinue to enter URL.
.
Homepage
Select "homeFge', you @uld load in
use the vendor's preset sites.
ffll
be
set homepage. tf
yo!
previous
a
Fgethe
web [Egs afler Se curent
Yd €n view all open windom to the curent.
4)Menu>B@kmafts
a.Click the'Booha*s'to make the curent URLas a bokmark saved.
b.Click the bookmark underthe bookmarks list,will open the URL.
5)Menu>More
a.Add bookmarks,save the curent URLas bookmark.
b.Find on page,search whatyou need in curent page.
d Select text,in the text, dick and d6g to select a piec of lext.
d.Page info,display Fqe addrc$ and other information oflhe curent
e.Share pags,seled the Bluetooth or SMS b shaethe current page.
:. Downloads,show all the @nlentdrynloaded.
*HHory Show your broreing history, and view lhe mosl visiled pages of
lt6.maton.
I
Seffng.conbrnb a variety ofbrowers€tings.
10. Recorder
R@dercan
do not set it, you
he
page-
record voice, and send itquickly via Bluetooh or MMS
de fras ing tone.
. kt@s: recorder @n only save
1) Oi* the re@rder application.
2l
3)
the audio fles as AMR
fomat.
Xep the phone's microphone nearthe vd@ source.
Cli*
re@rderto re@rd voices,and click to stop or playback.
t5
aswellas
User Marual
User Manual
' &ightness confol. touch itto set
ft brightness of the interface.
Zfum, touch alarm to enterthe intefa@
: PPT, touch itto shuffe bs pictures
I he:
go back to the intedace of ldle
{stunctions
set, phone will amves in the seting time to aled you by ringing or
r&tng to achieve it's fundion. Prcss Menu to add alarm, you can also add it
h the adding intedace. You @uld set the alarm ac@ding to your needs. In
tu intedae of alarm will show three closed alarms (tuo alarm clocks are
hdayto Friday 8130,9:00) .
Edfr
'
ve cn
:'!r1l
All recordings save in my recording folder in the default music program
11.Clock
Open the menu ofapp cation,
odit the current
and tabs
alam. you 6uld
edii
tme. dnging lones.
vibral on
%atform
tvl
clrclH
Pressfor long thetime you could: stopthe alarm,change aia.m setings'cancel
alam. ln the interfa@ ofalam sefrings, you could perfom the operations of
#nging iime. repeat , dng tones, vibEiion. hbs, elc.
l2.Caculator
*
,t
,r.t;-t
ril;l
function @f, turn your phone into calculator,
i1
can do some simple
TNch the number keys to make it appear in the blank box.
ln he intetrace of@lculatoi p€ss tr4ENU buton or hold down the screen to the
d, hen the senior panel appearc,
User Manual
13. CameE
13.1 camem
lnshll memory @d before using the cmera orvideo camera.
bken by the phone are stored in memorycard.
All your photos
or videos
Press home, touch menu, select camera, Choose lhe video mode ifyou wanl to
make videos. The screen will automatielty switch to tandscape mode.
. Take piclures
1 ) Aim your objed wjth the screen.
2) Toud the'shuned buton on the sren
3) AfterEking, photos will sve toSe €mera's galtey fotderwith the name of
hking ilme.
4) You €n view he photos by touching the preview box buton.
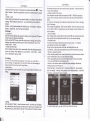
5) Camora setings
You €n touch the bufion of"s6ting Menu" in the inteda@ of camera to do the
setings
Under cameE viewfinder mode, press Menu, you can switch to video or photos,
gallery
On the top right olcamera vieffnder mode, disptaylhe previewofthe previous
pidure. Touch preview box, the photo disptay on futt screen and you can
enlarge il to view delails.
1, EV
2, Scene mode.
3, Picture Size.
4: white balance.
5, lmage adjustmont-
Gmera setings: buton
Mon
hton
Mon
ffion
TNch
"set" buton, you can do seuings in the €mera.
13.2 Video camera
,6bll memory card before using the cameE orvideo €meE. Al
rtreos bken by the phone are sbrcd in memorycad.
fu
sen
your photos
home, touch menu, seled camera. Choose video camera mode, The
willautomaXcally switch to landscape mode.
: Am your objecl with the screen.
2 Touch lhe'shute/ buton on lhe screen3 After laking , photos will save to the came€'s
*ng time.
galley folder with the name ol
User Manual
4)
You can viewlhe videos by iouching the preview box bunon.
5) Video camera setings
You can louch the buton of'set'in the intedace ofcamera to do the sefrings
U nder camera vie#inder mode, press Menu , you can switch io video or ph;tos
' 3pen lmaSes
:s home, touch labelof
- h interfa@ ofcamera,
applications, the. touch photos'galley
it, ihen touch to opemte
Press menu to open
gallery
On the top right ofcamera vieMnder mode, disptay the preview otthe previous
video. Touch preview box, the video wil disptay on fuil screen and you en
iouch the play buton to view it.
li::1l
l*
-
I;,"*--.--
".-
=,::rary:{'
ASer bking pictures, you can viewthem and share them with yourfriends.
1, l1 rhe piqure int€dace. touch phoro album b view imagec.
2) Touch the lhumbnail to view pictures on full screen.
Ye €n choose to display small or large thumbnails. Hold down the screen
wards the lefr sideto viewthe next photo ortowads dghtto view the previous
ln the photo album or lisl, press and hold down the picture
or towards dght to view the previous one.
tu nen piclure.
. Crop images
towads
lefr to view
he photos'gallery press the photo you wantlo crop, choose menu,
mre'and'crop', then the instumenb of cropplng will appear
2 To adjust the timmer size, press and hold the edge of cuting 1ool. Afrer the
:mmerarrcw appears, dmg yourfrngertrom the center inward or ouMard,
in
B you can adjust the size.
: To keep fre raiio of lhe tdmmer, please press any one of lhe four comerc.
: To move Se l.immer to otherareas ofthe pidure, hold down the centerof
ltng device, then drag yourfngerto @dajn position.
Video camera sefrings
buton 2: Sene mode,
buton
3:
4:
buton I
I
EV
White balance
buton
EtS.
butonS. lmageadjustment.
Touch set" buton, you can do sefrings in the camera
'14,
lmages
"
User Manual
User Manual
k
o1e album, then lhe songs in it witl be played.
-
u;tu;.]
lirrit:I a_
l
*f"--*;;;l
. S€nd
imagesviamails
1) ln the images gallery press the wanted photo, choose menu, then louch
share. Touch Gmail when tips appear Pidurewill be automati€lly aftched to
e-mail. Editthe mail, then louch send.
. Send images via messages
1) ln the images gallery press the wanted photo, choose menu, then touch
share. Touch Gmail when tips appear Piclurewill be automati€lly ahched to
me$age. Edil the mail, and then louch send.
Afrervideo bken, you
€n view itor
share itwfrh
-{:**rr*1{
yourft€nds.
1) ln the intedac€ ofphotos'gallery touch videos album. You can waich movies
afrer touching the wanted Udeo.
2) Touch the screen, then the play contml keys appear
15. Music
The
phone can play digiial audio files in memory crd.The
AMR. M4A. MlDl. MP3. WAV, OGG.
folloilng formab
'E5!a*..xjoidl
ry'l*,i.,d*r&(.
are availabb
.
l
i
Open Music
Press home, touch the label ofapplications, touch music. Then the intedace of
EY:111a-"l
Music Mdia appeaE.
Your musicfiles areclassifed according tothe following iourcategofres: Afrisb,
albums, songs and play lists. Touch one ofthese Gtegodes; you can view lhe
lisl insideContinue the opeElions, until yourwanted music appears, Such as, if you
chooseAfrisb a list ofadisb sofrod by the numbers in English will appear
Choose any on to open the list, then all the albums and songs will appeaf,
. IF: You cn play all ofthe songs in the inledace of music media, in
.#m sequence . Press Menu, and then louch the Party Shufffe Then will
S playing lhe fjrst song randomly selected . To close the Party Shuffe, press
bu, Sen touch io tum offthe Pady Shffie-
22
23
User Manual
User Manual
When the coresponding tracks have lyrics frle, the player displays the lyncs
sources. Clicklhe up arrow, you €n play music, view lyrics at the same time
16. Cal6nder
Enter the calender appliction
ssd
Goggles ac@unts, enterthe appli€ton,ln be inttudllmh
willuse gray to highlight the day DisplaydefaultSe dde d tu ffit
llmbln the lntedace, press menu, 4 display modes willapEr,
1) Schedule lntffa@ shows a cedain schedule(cfick on tu inM tm d @
ioMard,click the frnal time to view bactuards )
2) day
Intedace displays a day's sched ule (last clickd date),Slide a@nd to
tum page accoring day
3) week lnledace displays a week's schedule (last clicked date),Slide
around io turn page accodng week.
4) iday lnierface displays a day's schedule, ln the inlerface of month orweek
use gray to highlightthe day
5) month nledace displays a month's schedule (lasi clicked date) Slide
around to turn page accoring month.
ioad
. Create a play list
1) Touch any categoryof music media on the screen.
2) ln the lisl, you can press and slide up and down the
screen lo browse the
adist, album or song that you wanl to add to the play list.
3) Press the adist, album or song, and then touch the options menu in the play
lisi.
4) ln the intedace of addi.g io the play lisl window, louch the new play
5) Enter the new name of ihe play list, and ihen touch to save.
. Manage the play list
list.
the intedace of music media ihen touch the play list.
play songs ofthe play list, touch the name of play list.
delete a play list, pre$ and hold the Play list, and ihen touch Remove.
refresh the listofsongs orremove songs, hold down the play list, and lhen
the options menu in lhe editor.
delete the list of songs, hold down lhe songs, and then touch play listto
delete it.
5) To rename a play iist, press and hold the play list, then touch Options menu
renamed. Enter the new play list name, and then touch "save"
6) lfyou want to set the song tothe ring tones, and then touch the song as a
ring tone- The song will be set as lhe default ing tone.
7)if you wantlo use the song as nolice ringtone,you can press menu and touch
lhe song as ilngtone.and ihen touch the Notice dngtone.The song will be sei as
Enter
1) To
2) To
3) To
touch
4) To
the notice ilngtone.
8)ifyou want to cut the song to the dngtone,you can press the menu and select
the song as ringtone,and then iouch the cut ringtone.As shown,you €n choose
the sbdlime and the end time,at lasitouch ihe'save',it will be saved to
ringtone.lt can be set lothe defaulttingtone,can be asslgned to the conbct as
the dngtone ofthe contacb.
1)Press menu, more < touch new adivities,
7)Lrier the name ofa.tivily in th€ activities box.
{oti@s, Such as special occasions such as bifrhday ora day with evenb, st
ne ailday option to Yes. lf the adivity is at a @dain time period, seledbe sEd
:me and end time,
3)Enterthe event lo€tion, desc.iption, guesb, repeat, remind time.
rl Click frnish lo relurn to calendar
User Manual
. $llect the channel you are favorite
:4 he menu buton in the Fl\,,l inierface,click lhe "search&save" .and then
w he chan nel list,press long one channel click "Add to Favorile"to rename
,
5i|+rFr $4
-E-Hria+ 6
ili,'-'-.**
'g^.
--r:**ttt:ti:$e
""**&&;&s,rr&
Noiices, AlLday
events appear in the calendarheading.ltwill
not show the
Cancel adivities, ln the lime trame, press for long to deleiethe adavity
rycry
.ri
,i
ri
-arn
lli::::.:iit:;xlI
,
ni
:iafl or
-l
.l'i
r
lose ihe
17. FM Radio
FM Radio
Through this program, you may listen to FM radio on fre devi@, FM radio use
the w[ed headset as an antenna to re@ive signals, before opening this
progEm ,you €n install the original equipmenLheadphones, when listening,
you @n switch il manually lo speakers orlhe mode with wked headphones.
nBlnct ihe
slerp tine
1E.
!
P.essmenuandclrk t]3
ft
toextradio.
rare
Settings
/@rserui@ providermay defaultsome device setings, so you may notbe able
chanoe these setinos.
of FV radio
,o or". tn"
Touch this tabet El
move to the background, and you can
Click lhe Back buton, the radio progGm "or,"aton
still continue to listen to programs and other applications run atthe same time.
ffi
tt* s[d
Il
elalre
. a,, *rO
."*0"
B
i ) Touch itio choose orlo disable the SIM card, the card is greywhen disabld,
flight mode displays on sbtus bar
2) The default SIM card ,you can choose Voi@
€ll,Vdeo €tt,Messaging,Dah
. wretess ana intmeE
1)Flight mode Touch lo open orclose.
2)WLFI and WLFisefrings roucn wir@
to open&I. open WLFi ,it @n
search for available netuotu automati@lly, netuotrs wfrhout password €n be
used dhedy, othe6 need to enler the password fiEt.
Noti@: Opef, Wi-Fithen the flightmode, WLF|willclose automati@tly; Op6n
flight mode then @nned WLFi, it can be usd normally
WPS @nnsdon,ffrelessAP and mobile phone are needed to suppod
AOSS,you €n dfuedy @nned without entering a key.
3)Bluelooth and Bluetooth sefrng.
4)Tethedng&potuble hobrct Share yourdiqibl dab via USB
s)Vidual Pdvate Netuorks(VPN) Settings.
6)Mobile netuork enl6r "mobile netuo* setingskhich include, a Dab
rcaming bA@ss pint name c Nefuo* opeEto6.
7)GPRS daE pdority mode
.
Catting seunsE
1)Voi@ Call
a,Voice mail,in the vojce seflings,you en enterthe voice mail numbef,
b.Call bward,You can seiAlways foMard,Foruard when busyFoMard when
unansweiFoMard when unreachable.
c.Call bardng
d.Additingal seflings,Call lD and Call waiting
2)Video Call
a.Picturefor replacing lo€l video,set a pifure to displaywhen camera offuse,
b.Enable bad €mera,available to Mtd €moEs trbm off.
c. Peer video bigger than lo@l video,trun on to make peer video bigger than
d.Lo€lvideo disply
Can add
a@uts
4)Other setings
a.Fixed Dialing Numbere
b.Call@sl
c.Cell broad€st
e.Phone setings
seflings
i fl
.
Audion
tt
t'ds callor in@ming video cll.
€ll fofl ard,ell badng,additional s6tings.
,to make outgoing
o.Other sefl ings,include
3)lntemet Call
orofile$
Dis
option gives the phonetones'setings
underthe status of.eceiving calls or
mtffication. lncluding: VibEton, volume, ring tones, ring tones notification and
bedback (Buton opeEtion tone, seled Sound, scre€n lock tone, touch) .To
adapt evory envilonment.
1 )Seled "Standad / Mute / Conference
/ Outdoor, Touch the spot on the dght,
Sen lums green ,it opens,
2)Volume. lncluding the ring volume and alarm clock setings, you €. ronGry
dide to select.
oi"pr"vI
a. BrightnessAdjustthe
dange diredion
bdghlnes b Ado @tiB w
c.tuimation Ch@selodisphyaffi
delav before ihe
sqen ad(rutd
ffi
aso.sr@
%
@
E
&lEi
.L*.ii".E
1)Usewkel6 k#btubc&6rE#t.cqbe,.
loudfrto(F{cle
2)tu drEtE GPSsgltu po*i*g, g@rybsEbr{da
beveffiry}
Twd fr b op€n or dos
3) GPS EPO assishne,use GPS a$isb@ffi(Erc)b
spd E
pdfioning
4)
'a
Opa
.
ac@lerab he pl@$
il and remind voult produce GPRS f,ows when using
A€PS
Use auxiliary
dab
€n
GPS
dcPS rcitimire.
A4PS'.
ds,I
1) Set up sceen locks Use images. PIN or password to lock lhe sc@n.
Touch"images', the frret time there will be a simple unlock ;nstudons atu
examples, click'nefrstep'to continue the step'make the unlocking iroge".
b. Touch PIN Entor PIN numbeE to unlock the screen.
c. Touch password Set password to unlock the screen.
d. Toud 'no" Stop this applicalion.
2) Set up Sll\,1 €rd lock Enter (4{numbe6) PIN to set the IGk of SlM.
SIM @rd PIN (Personal ldentf€tion Numbeo is to prevent unaffidd
@
ofSlM cards.PlN code provided with SlM. fte seMc€ prcvidergiv6 tu inH
a.
Change a blocked PIN code, you need to open the "SlM L6k ", then 9ob
Change Password screen, the phoneilll automati€lly promptenterthe M
PIN code and askd to entera new PIN codetujce,finally the phone Sllpmpt
Sat change the 6de successfully. lf you enterthe PIN with ercrforbe t|lE
SIM cad PIN @des will b€ automatcally lockd, PUKcdes is usuailysupdiql
#th SIM @rd. lfno, you should go tothe seruiG providerforbe@des.
User Manual
User Manual
wrong PUK code, the SIM card will be permanently locked.
3) Password visible Password visible when ent€r il
4) Seled device administation Add or delele devie manager.
5) Use security credentials Allow application visil security credentials or other
credentials
6) lnsull frcm SD @rd lnstall the encrypted cedificat€ from SD card.
7) set password Set or change Cedifi€te store password
8) clear storage Clear all Se @ntents of the @ditcate store and reset thek
lfyou enter
10 times
,il
. Applicatonsl
1) Unknown sourcesAlow to insbll non-electrcnic maftet applicatons
2) Manage appli@tions Manage and delete the inshlled appli@tions3) Running seNices Touch any ofthe services listed in> pop up'to stop lhe
sewice?'MGbuflon operation box, touch te 'Slop 'the servi@ is stopped, and
disappearfrom Se "running seNices" list,
4)Sorage use you @n viewlhe prcgram ofdownloaded,all,on sd @rd or
running how many memory spa@ they o@upy
s)Bafrery usd you can see the using power situation ofcell SbndybyPhone
idle,Display and Brcreer.
o)development a. USB debug' USB debug only apply in the develop prc@ss.
This functiof, allows @py dab in compuler and mobile devices.
. lccounr
anc Synchroniz8
1) Backgrcund dah
Applications using the background dab
synchronizalion atany time, send and re@ive data, disable the background
dah extend bafery life and reduce data usage. Howevei some applicationswill
use the background dab forthe connection.
2)Automatic synchronizalion tum orroffAutomaticsynchrcnizalion, applictions
Aulomatiellv svnchrcnize dah o. asynchrcnous dah
.
"n,""I'
-"inss
crear a"
da*
s'io'red on the phone
#
key), Displaying tips(activate predictive tundion when you inputwords);
l-bTei(Autoffatically inputcedain words when press space key or speciied
! hpul
.
:
:
:
Convercion Seting
""n,nn"
E
to an example play a shoddemonstraM .'p&ays Lse my seflingsdefauli sehng Es :,-G
lsten
=r".r::Es
sry
-cra,r .-*
bfault Engine sels he spsh spBs
E
.g E
lnsbllvoice dab inshll&e voie 5E ffit =oc
ffi=
tu
y s :.=
e Speech rale spes al f f,
I bnguage
I Pi@ [S
seb he
brgqE-€i
..E d tu l@
.mriaryr,.'tI
1)EtuWc4Effi,&:,B@c
E
il
r.d
.**-*E
'ltffir
€rfrftffiqE:
_i@'-'fr"--os&
2 SEh
: -ffig-m:n
SeTGZE@*BbtuFifr.Fd
::Er#gr.ffi,c,ksefuTft'.
4)-ETa
Td'+'d1'b9tu.
ONOtr
']hIfET@Fffi
6l
H
h Fffi
Thec @ 3 kinds of fma6 you en choose from:
Day{onh-Year and YeatsMonth-Day among which
Ys-MmhDay is he default se(nq.
ktFDry-YBi
.
saeoute poweronlor
You
€n
El
settime of b@t orshutdown by touching it, You may also seled to
it or a cetuin dav dunno a week
Aboul
E-
phonel
You can checkthe infomalion on slatus barand remaining power
.
Lanquaqes and reyboad l3l
1) Seleding Language Distdd
selectAndroid keyboa.d or google pinyin inpul
Sp€ech lnput and Output
_<io-Speech
.
1) View SD Card and Phone Memory
2) Uninstall or Fomat SD Card.
€n
.
recal
:':::::E*'
method you
lnclude all the languages on the phone and
19.
Notices for the use of phone
or delete.
3) Keyboard Setings Vibrating when butons are pressed, Playing sound when
buflons a.e pressed, Capihlizing automati€lly. Speech Input(by hicrophone
on the keyboard), lnputing words(speech_can be altered by sliding fnger on
Your phone is a prcdudofsuperior design and cmflsmanship and should be
treated wilh care. The following suggestions can help you @mply wilh the
tems of repak kits, to efrend the life ofmobile phone.
1)Pla@ the mobile phone and theh pads and @mponenb out of reach of small
c$ildren.
1)Keep the phone dry, rain, humidity and all types of liquids which conlain
30
31
ioblly amount of 12 kinds.
2) Custom DidonaryAdd words lo custom didionary
User Manual
mineEls will mrcd6 ddrcnic circuib.
2)Don'ttouch the phone with wet handswhen charging, itwill @us et€Cfic
shock or damage the phone.
s)Avoid pla@ he devi@ in high tempeEture envircnment. Tempemturcs will
shoden the lif6 of oldrcnjc devi@s, damage batedes, and warp or mett
@tuin plastics.
4)Avoid dae the device in bo low l€mpeEture envircnment. When he
tempeEfure dss, the phonewill pduce wabrvaporthat may damage
eledrcnic circuit.
s)Avcid pla@ he phone in dusty, didy places, oberuise Fre may be
damaged.
6)T0 avoid the phone in a lit cigaete, near open f,ame or any heat oure.
7)Do nol oFn the device, non-ircfessionel app@a€h willdo damage to th6
phone.
8)Do notthrowittum height. knock orshake he phone, rcugh handting can
damage intemal ci@il boards.
g)Do not paint he phone, bMuse the paintfrll block headphones,
micrcphones or oher .emovable Ffu, and lead jt not m*.
10) Use clean, sofr , dry cloth to cloan the @meE, light sonsor lenses. prchibit
the us ofhamful chemi@ls and cleanjng agenE, cleaning fluidsto ctean the
phone
I 1 ) lf mobile phone, bafrery chargel or mobil€ phone ac@s$ri€s ar€
defudive, send to the nea6t qualified seM@ @nter for inspedion.
12) I f ne$ary Seryi@ Cent@ sbff will asi$ you and will anang€ for phone
rcpaire.