1
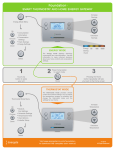
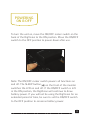
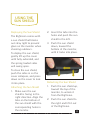
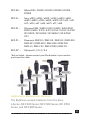
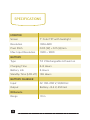
CM-7L
RIGVISION
7˝ FIELD MONITOR
WITH SHUTTER RELEASE
USER
MANUAL
2
INTRODUCTION
Thank you for choosing the Elvid 7˝ Field Monitor
with Shutter Release. The RigVision gives you a
crisp, clear, full color view on a screen that’s large
enough to help you bring focus to the details of
your creative vision that are lost on your camera’s
small screen. Whether you use the RigVision for
filmmaking or photography, the vibrant 7˝ display
allows you to comfortably preview and review
your work both in the field or while working in the
studio.
3
KEY
FEATURES
High Resolution:
1024 × 600 pixels on
a 7˝ LCD Screen
160° View:
Get a great view with the
screen’s 160° viewing angle
Remote Focus & Shutter
Release:
Dedicated shutter release,
Autofocus, and Bulb
buttons to trigger your
camera
HDMI Loop Through:
With HDMI Loop Through,
you can connect your
monitor to a second
monitor, allowing others to
follow the action without
the need for a converter or
splitter box.
Backlit TFT:
Flicker-free and vibrant
even in low light conditions
Cable Clamp:
Holds your HDMI cables
close to the monitor body
without allowing them to
dislodge
4
Speaker & Headphones:
Easily check sound levels
through the built-in
speakers or the 3.5 mm
headphone jack
Fully Adjustable:
Adjust resolution, contrast,
position, and input options
Dual Power:
Operates on either AC
or battery power (both
included)
Versatile:
Accepts HDMI and
AV (Composite Cable)
connections
IR Remote:
Control the functions of
your monitor from the
palm of your hand with the
handheld IR remote
1/4˝ - 20 Mount:
The standard 1/4˝-20 mount
allows for mounting your
monitor many ways including on the included shoe
mount ball head.
5
BOX
CONTENTS
• RigVision 7 ˝ LCD Monitor
• Sun Shield
• NP-F750 Lithium Battery
• HDMI & Shutter Release
Cables:
• Battery Charger
• AC Power Adapter
1. RCC-C1
• IR Remote
3.RCC-N1
• Protective Neoprene Bag
4.RCC-N2
• Shoe Mount Ball Head
6
5.RCC-S1
2.RCC-C2 6.RCC-O1
7. RCC-P1
SAFETY
WARNINGS
• There are no userserviceable parts inside the
device. Do not attempt to
disassemble or perform any
unauthorized modification.
• Do not handle with wet
hands or immerse in or
expose to water or rain.
Failure to observe this
precaution could result in
fire or electric shock.
• Keep out of the reach
of children. This device
contains small parts which
may pose a choking hazard.
• Observe caution when
handling batteries.
Batteries may leak or
explode if improperly
handled. Use only the
batteries listed in this
manual.
• Batteries are prone
to leakage when fully
discharged. To avoid
damage to the product,
be sure to remove the
batteries when leaving the
product unattended for
prolonged periods or when
no charge remains.
• Do not operate the
RigVision in the presence of
flammable gas or vapors.
• Do not use or leave the
device in conditions of
extreme heat, severe cold,
or high humidity.
• Turn off the camera’s
power and the RigVision’s
power before connecting or
disconnecting the cables.
• Dispose used batteries,
packaging, and old
devices in accordance
with appropriate local
environmental regulations.
7
PRODUCT
USAGE
1. Provides the user with a
high-resolution, larger view to
aid composition
2.Lets you check composition
and autofocus when you can’t
reach the camera’s shutter
button
3.Review recorded images and
video
4.Assist when shooting at
extreme angles
8
INFRARED
REMOTE
The Infrared Remote can be used to turn the
RigVision’s power on and off, adjust the volume, and
access and adjust all the menu settings.
Sync
Mute
Power On/Off
Up
Increase Volume;
Navigate Left In
Menus
VOL-
OK
VOL+
Down
Access Menu
Decrease Volume;
Navigate Right In
Menus
Select Option
MENU
ZOOM
EXIT
Exit Menus
Zoom
9
MONITOR
DIAGRAM
The monitor can be used in a variety
of settings and configurations to provide the viewer with access to images
appearing on actual camera screen.
Battery Charging LED
AV Inputs
Battery Release Switch
HDMI In / Out Ports
Power Port
On / Off Switch
Cable Clamp
Camera Accessory Port
Tripod Socket
Built in Speakers
Headphone Jack
Battery Port
10
Menu Button
AF Button
Sleep
( )
Power Light
Bulb Exposure
Button
IR Receiver
Source
Button
( )
Shutter Button
Left
Button
Right
Button
11
BEFORE YOU
BEGIN
Charge the included battery
by placing it on the battery
charger and gently clicking
the battery into place.
Plug the charger into an
outlet. The status LED will
glow red while the battery
charges, and will turn
green once the charging is
complete.
Attach the charged battery
by placing it on the battery
port on the back of the
RigVision and pushing the
battery down, locking it
into place.
To remove the battery
from the RigVision for
charging or storage, push
the Battery Release switch
12
in the direction indicated
by the arrow, and slide the
battery up and out of the
battery port.
You can operate the
monitor with the included
AC adapter while charging
the battery on the back of
the unit simultaneously.
Plug the AC adapter into
the unit while the battery
is attached and check
the Battery Charging
LED on the back of the
RigVision. The light will
glow red while the battery
is charging, and will turn
green once the charging is
complete.
POWERING
ON & OFF
To turn the unit on, move the ON/OFF rocker switch on the
back of the RigVision to the ON position. Move the ON/OFF
switch to the OFF position to power down after use.
Note: The ON/OFF rocker switch powers all functions on
and off. The SLEEP button ( ) on the front of the monitor
switches the LCD on and off. If the ON/OFF switch is left
in the ON position, the RigVision will continue to draw
battery power. If you will not be using the RigVision for an
extended period of time, be sure to set the ON/OFF switch
to the OFF position to conserve battery power.
13
THE VIDEO
CABLE
1. Turn off the camera and the RigVision.
2. Select the appropriate cable [HDMI or AV].
3. Insert the cable into the appropriate port located
on the back of the RigVision.
4. Attach the other end of the cable to the camera.
5. Turn on the camera and the RigVision.
14
THE SHUTTER
RELEASE/AF
CABLE
1. Turn off the camera and the RigVision.
2. Insert the cable into the camera accessory port located
on the back of the RigVision.
3. Connect the other end of the cable to your camera’s
shutter release jack.
4. Turn on the camera and the RigVision.
15
USING THE
HDMI OUT
PORT
The RigVision features an HDMI output port that
lets you send the original camera signal to another
monitor or device that supports HDMI input. To
take advantage of this feature, plug a Type A HDMI
cable into the HDMI Out port on the back of the
RigVision, and the other end of the cable into the
HDMI input of your compatible device.
16
USING THE
CABLE CLAMP
The cable clamp lets you
keep your right-angle
HDMI cables organized
and close to the body of
the RigVision. To use the
cable clamp, follow these
instructions:
1.
Loosen the screw and pick up the clamp.
2.
Place your cable in the corresponding groove.
3.
Replace the clamp and tighten the screw until
secure. Be careful not to overtighten.
SETTING
THE VIDEO
SOURCE
Press the Source button ( ) to switch between
HDMI and AV input modes. The selected input mode
will appear in the top right corner of the screen.
17
TAKING A
PHOTO
Single Shots
1.
Turn on the RigVision.
2.
Engage Live View mode on your camera.
3.
To see focus before shooting, press and hold
the AF button and then release. The RigVision
will then display the focused shot for you
to look at. To shoot more quickly, push the
shutter button on the RigVision, and the
camera will begin to shoot as soon as the
camera finds focus.
4.
To trigger the shutter, fully depress the
Shutter Release button.
*Please consult your camera manual to determine
auto focus capabilities of your camera during live
view.
18
Continuous Shots
1.
Turn on the RigVision.
2.
Set the camera to continuous mode.
3.
Engage Live View mode on your camera.
4.
Press the Bulb button on the RigVision. This
will trigger the camera to take continuous
photos until you press the Bulb button again.
Bulb Mode (Long Exposure)
1.
Turn on the RigVision’s power.
2.
Set the camera to bulb mode.
3.
Engage Live View mode on your camera.
4.
Press the Bulb button on the RigVision. The
shutter will remain open until you press the
Bulb button again.
Note: The RigVision will beep continuously while
Bulb mode is engaged.
19
SHOOTING
VIDEO
Only cameras capable of starting video capture
through the camera’s shutter button will be able to
start video capture through the RigVision. Please
consult your camera’s manual to see if your camera
is capable of this action.
SPEAKERS &
HEADPHONES
Adjusting the Volume
The volume of the RigVision’s speaker can be
adjusted via the display’s Left and Right buttons.
Using Headphones
To listen to your video recordings via headphones,
plug a pair of standard 3.5mm stereo headphones
into the RigVision’s headphone jack.
20
MENU
SELECTION
The RigVision offers many
customizable options via
the device’s menus. You
can adjust the display’s
contrast, brightness,
picture scale, sleep timer,
sound settings, and more.
Option: For setting the
display language, screen
color, and reset to the
default settings.
Picture: For picture mode
presets and precise control
over contrast, brightness,
color, sharpness, color
temperature, scale, and
noise reduction.
2. Press the source button
( ) to cycle through the
five menus.
Sound: For sound mode
presets and control over
treble, bass, right/left
balance, automatic volume
control, surround sound,
and equalizer settings.
Time: For setting the clock,
sleep and wake times, sleep
timer, and auto sleep.
1. Press the Menu button
to access the menus.
3. When you reach the
desired menu, press the
Right button to access
it, and the Source
button ( ) to cycle
through the selected
menu options.
4. When you reach the
desired menu option,
press the Right button
to cycle through the
sub-options.
21
5. For menu options that
feature an adjustment
bar, such as display
contrast and sound
balance:
f. Press the Right
button to access the
adjustment bar.
g. Press the Right
and Left buttons to
incrementally increase
or decrease the setting.
h. Press the Menu
button again to lock in
the changes and return
to the Menu screen.
22
6. Press the Menu button
within any of the five
menus to exit Menu mode.
Note: The display will
auto-exit Menu mode if no
selection is made after 30
seconds.
USING THE
SUN SHIELD
Deploying the Sun Shield
The RigVision comes with
a sun shield that blocks
out stray light to prevent
glare on the monitor when
shooting outdoors.
To deploy the sun shield,
gently lift up the cover
until fully extended, and
the spring loaded sides
will swing open.
To close the sun shield,
push the sides in so the
cover collapses, and press
down on the cover to lock
it into place.
Attaching the Sun Shield
1. Make sure the sun
shield is facing in the
right direction. Align the
tabs on the bottom of
the sun shield with the
corresponding holes in
the monitor.
2. Insert the tabs into the
holes and push the sun
shield to the left.
3. Push the sun shield
down, toward the
bottom of the monitor,
until it locks into place.
Detaching the Sun Shield
1. Push the sun shield up,
toward the top of the
monitor, to unlock it
from the RigVision.
2. Push the sun shield to
the right and lift it out
of the RigVision.
23
SHUTTER
RELEASE
CABLES
The RigVision includes Shutter Release Cables that enable
the device to work with almost all current SLR models on
the market today.
Below are models of Shutter Release Cables for the
RigVision and the cameras they support. For these cables,
and cables for other camera models, check with your
Elvid dealer.
RCC-C1 –
Canon EOS 300D / Digital Rebel / 350D / Digital
Rebel XT / 400D / Digital Rebel XTi / 450D / Rebel
XSi / 500D / Rebel T1i / 550D / Rebel T2i / 600D
Rebel T3i / 650D / Rebel T4i / 1000D / Rebel XS
1100D - Digital Rebel T3
PowerShot G-10 / G11 / G12 / G1 X Contax N / 645
Pentax K100D / K110D / K200D K10D / K20D / K-5
K-7 / K-30 / *ist DS / DS2 / DL2 / DL / D
Samsung GX-1S /GX-1L / GX-10 / GX-20
Sigma SD1 / Hasselblad H Series
RCC-C2 –
Canon EOS 10D / 20D / 30D / 40D / 50D / 5D 5D
Mark II / 5D Mark III / 6D / 7D / 1D / 1Ds Mark I
Mark II / Mark II N / Mark III / Mark IV / 1D X
RCC-N1 –
Nikon D1 / D1H / D1X / D2 / D200 / D2H / D2Hs
D2X / D2Xs / D3 / D300 / D300s / D3s / D3x / D4
D600 / D700 / D800 / D800e / Fuji S3pro / S5Pro
Kodak DCS-14N
24
RCC-N2 –
Nikon D90 / D3100 / D3200 / D5000 / D5100
D7000
RCC-S1 –
Sony a100 / a200 / a300 / a350 / a500 / a550
a560 / a580 / a700 / a850 / a900 / SLT a33 / a35
a37 / a55 / a57 / a65 / a67 / a77 / a99
RCC-O1 –
Olympus EM5 / E400 / E410 / E420 / E450 E510
E520 / E620 / E-P2 / E-P3 / E-PL2 / E-PL3 / E-PM1
SP-510UZ / SP-550UZ / SP-560UZ / SP-570UZ
XZ-1
RCC-P1 –
Panasonic DMC-G1 / DMC-G2 / DMC-G3 / DMC-G10
DMC-GF1 / DMC-GH1 / DMC-GH2 / DMC-GX1
DMC-L1 / DMC-L10 / DMC-FZ100 / DMC-G3
RCC-02* –
Olympus E-1 / E-3 / E-5
*Not included - please contact your Elvid dealer if you need to
purchase this cable.
RCC-S1
RCC-O1
RCC-N2
RCC-C2
RCC-N1
RCC-C1
RCC-P1
Additional & Replacement Batteries
The RigVision accepts batteries from the Sony
L-Series; NP-F300 Series; NP-F500 Series; NP-F700
Series; and NP-F900 Series.
25
SPECIFICATIONS
MONITOR
Screen
7˝ Color TFT with backlight
Resolution
1024×600
Pixel Pitch
0.05 (W) × 0.15 (H) mm
Max. Input Resolution
1920 × 1080
BATTERY
Type
7.2 V Rechargeable Lithium Ion
Charging Time
6–8 Hours
Battery Life
6 Hours
Standby Time (LCD off)
165 Hours
BATTERY CHARGER
Input
AC 100–200 V, 50/60 Hz
Output
Battery ~8.4 V, 450 mA
IR Remote
Range
26
10 m
AC Adapter
Input
100–200 V, 50/60 Hz, 0.6 A Max.
Output
12 V, 2 A
AUDIO & VIDEO
Input
TYPE A HDMI, AV, Camera Accessory Input
Output
TYPE A HDMI,
Earphone Jack 3.5 mm
CAMERA FUNCTION
Quick Access Buttons
Shutter release, Bulb (Bulb Mode;
Continuous Shooting), Auto Focus
MULTILINGUAL
SUPPORT
Languages
English, German, Spanish,
French, Italian, Chinese, Arabic,
Persian, Danish, Greek, Croatian,
Hungarian, Dutch, Norwegian,
Polish, Portuguese, Russian
27
LIMITED ONE-YEAR WARRANTY
Elvid provides a limited warranty that this product is free from
defects in materials and workmanship to the original purchaser
under normal use for a period of one (1) year from the original
purchase date or thirty (30) days after replacement, whichever
occurs later (the “Warranty Period”). Our responsibility with
respect to this limited warranty shall be limited solely to repair
or replacement, at its option, of any product which fails during
normal consumer use. To obtain warranty coverage during the
Warranty Period, contact your place of purchase (“Seller”) to
obtain a return merchandise authorization (“RMA”) number,
and return to Seller the defective product along with proof
of purchase and the RMA number. This warranty does not
extend to damage or failure which results from misuse, neglect,
accident, alteration, abuse, improper installation or maintenance.
EXCEPT AS PROVIDED HEREIN, ELVID MAKES NEITHER ANY
EXPRESS WARRANTIES NOR ANY IMPLIED WARRANTIES,
INCLUDING BUT NOT LIMITED TO ANY IMPLIED WARRANTY
OF MERCHANTABILITY OR FITNESS FOR A PARTICULAR
PURPOSE. This warranty provides you with specific legal rights,
and you may also have additional rights which vary from state
to state.
www.elvidcinema.com
© Copyright 2012 Gradus Group


![Di28.manual_eng [更新済み]](http://vs1.manualzilla.com/store/data/006248510_1-4715480d32b4655833aa4eb8b5d462bc-150x150.png)