1
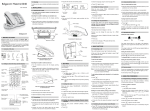
Belgacom Twist™ 476
User manual
This cordless telephone simplifies your telephoning.
20403036
Need to know more about Belgacom’s Smart Services?
• Call 0800 55 800
• Go to one of our Belgacom sales outlets
• Surf to www.belgacom.be/services
Safety precautions
This DECT cordless telephone is designed for transmitting voice calls over the analogue telephone network. Any other use whatsoever is not permitted and is regarded as in violation of
the provisions. The user manual with safety precautions is a part of the product package and
must be passed on to the new owner on reselling.
Caution!
Use only approved rechargeable batteries: Nickel-metal-hydride (Ni-MH AAA 750mAh).
Using other rechargeable batteries or non-rechargeable batteries/primary cells can be dangerous and cause malfunctions in or damage to the telephone.
To insert the batteries, please follow the instructions in the chapter entitled “Setting up the
handsets”.
Please note that the ringer for incoming calls as well as signal tones are emitted
on the handset loudspeaker.
Do not therefore hold the handset close to your ear while one of these functions
is on, otherwise your hearing may be affected.
Please note:
➭ Do not immerse batteries in water or throw in the fire.
➭ Rechargeable batteries can become warm while recharging. This is a normal occurrence and
is not dangerous.
➭ Do not use any other type of charging unit since this may damage the batteries.
➭ Before using the telephone, wearers of hearing aids should note that radio signals can
be picked up by the hearing aid and cause an unpleasant buzzing noise.
➭ Do not use your DECT cordless telephone in environments at risk from explosion (e.g. paintworks, petrol stations etc.)
➭ Do not position the base station or charging station in bathrooms or showers.
➭ The radio signals may influence the working of medical equipment.
➭ In the event of a power cut or if the batteries are discharged, your DECT cordless telephone
will not function!
➭ The handset must not be charged up without batteries or the battery cover in place.
➭ Do not touch open contacts!
➭ Use only the mains units supplied for the base station or charging unit.
Contents
Your Twist 476 is designed for connection to the analogue telephone network.
The telephone is available with a single handset or as set with 2 or 3 handsets for
the Duo/Trio versions. Please read these operating instructions carefully to familiarise
yourself with and take full advantage of the benefits of your new Twist 476.
Keep this user manual in a safe place!
Safety precautions
20403036en_ba_a0
Setting up the telephone……………………………………………………………………7
Contents of the package ……………………………………………………………………7
Accessories ……………………………………………………………………………………7
Location ………………………………………………………………………………………8
Repeater ………………………………………………………………………………………8
Setting up the base station or charging unit ………………………………………………9
Listening protection ……………………………………………………………………………9
Connecting the phone ………………………………………………………………………10
Setting up the handsets ……………………………………………………………………11
Inserting the rechargeable batteries ……………………………………………………11
Charging the batteries …………………………………………………………………12
Installation assistant …………………………………………………………………………13
Getting to know your telephone ………………………………………………………14
Handset keys …………………………………………………………………………………14
Handset display symbols ……………………………………………………………………16
About the menus ……………………………………………………………………………17
Menu navigation …………………………………………………………………………17
Back to previous menu …………………………………………………………………17
End menu …………………………………………………………………………………17
Twist 476 base station ………………………………………………………………………18
1
Contents
20403036en_ba_a0
Telephoning …………………………………………………………………………………19
Making an external call ………………………………………………………………………19
Call preparation …………………………………………………………………………19
Ending a call ……………………………………………………………………………19
Accepting a call ………………………………………………………………………………19
Second call (Call waiting)* …………………………………………………………………19
Recall …………………………………………………………………………………………20
Call back (Ring Back) ……………………………………………………………………20
Auto Redial (OPTION, AUTO REDIAL) …………………………………………………20
Handsfree operation …………………………………………………………………………20
Handset / handsfree volume …………………………………………………………………21
Handset secrecy ………………………………………………………………………………21
Redial …………………………………………………………………………………………21
Redialling a number from the list ………………………………………………………21
Copying numbers from the redial list …………………………………………………22
Deleting individual entries/entire redial list ……………………………………………22
Sending SMS messages from the redial list ……………………………………………22
Group call (paging) …………………………………………………………………………22
Keypad lock …………………………………………………………………………………23
Internal calls …………………………………………………………………………………23
Enquiries ………………………………………………………………………………………24
Internal enquiry call ……………………………………………………………………24
External enquiry call ……………………………………………………………………24
Brokering (switching between two calls) …………………………………………………25
Call transfer …………………………………………………………………………………25
Call transfer during a call ………………………………………………………………25
* Supplementary service. You have to subscribe to this service.
2
Contents
Three-party conference call …………………………………………………………………26
Three-party conference call with an internal/external call partner …………………26
Three-party conference call with two external call partners …………………………26
Call anonymously (Identification restriction) ………………………………………………27
Directory………………………………………………………………………………………28
Directory entries ………………………………………………………………………………28
Adding a new entry ……………………………………………………………………28
Tips for entering names/numbers ………………………………………………………28
Editing entries ……………………………………………………………………………29
Deleting directory entries/entire directory ……………………………………………29
Dialling numbers from the directory ………………………………………………………29
Sending SMS messages from the directory ………………………………………………29
Copying directory entries ……………………………………………………………………30
Copying entries/entire directory to another handset …………………………………30
Belgacom directory …………………………………………………………………………31
20403036en_ba_a0
Calls list ………………………………………………………………………………………32
Viewing/dialling a number from the calls list ………………………………………………32
Sending SMS messages from the calls list …………………………………………………32
Saving numbers from the calls list to the directory ………………………………………33
Deleting individual entries …………………………………………………………………33
Deleting the entire calls list …………………………………………………………………33
Audio …………………………………………………………………………………………34
Handset/base station ringer …………………………………………………………………34
Tones …………………………………………………………………………………………34
Key beeps …………………………………………………………………………………34
Range beeps ……………………………………………………………………………34
Charging beep ……………………………………………………………………………34
Accu beep ………………………………………………………………………………34
Confirmation beep ………………………………………………………………………34
3
Contents
Family …………………………………………………………………………………………35
Direct call (baby call) …………………………………………………………………………35
Room monitoring (baby surveillance) ………………………………………………………36
Call costs ……………………………………………………………………………………37
Cost of last call ………………………………………………………………………………37
Summary ………………………………………………………………………………………37
Settings ………………………………………………………………………………………37
Type of display ……………………………………………………………………………37
Charge factor ……………………………………………………………………………37
Currency …………………………………………………………………………………37
Calendar/clock ………………………………………………………………………………38
Appointments ………………………………………………………………………………38
Alarm …………………………………………………………………………………………38
Time/date ……………………………………………………………………………………38
20403036en_ba_a0
Network functions …………………………………………………………………………39
1919 (automatic recall) ………………………………………………………………………39
Call forwarding* ……………………………………………………………………………39
Call forwarding unconditional …………………………………………………………39
Call forwarding no reply ………………………………………………………………39
Call forwarding busy ……………………………………………………………………40
Call waiting* …………………………………………………………………………………40
Fixed destination call* ………………………………………………………………………40
Deactivate call back (Ring Back) ……………………………………………………………41
Deactivate Auto Redial ………………………………………………………………………41
PhoneMail ……………………………………………………………………………………41
* Supplementary service. You have to subscribe to this service.
4
Contents
SMS ……………………………………………………………………………………………42
SMS – Short Messaging Service ……………………………………………………………42
Writing SMS messages ………………………………………………………………………42
Inbox …………………………………………………………………………………………42
Drafts …………………………………………………………………………………………42
Outbox ………………………………………………………………………………………43
Templates ……………………………………………………………………………………43
Settings ………………………………………………………………………………………43
SMS service centre ………………………………………………………………………43
Send service ………………………………………………………………………………43
SMS mailbox ……………………………………………………………………………44
SMS alert on/off …………………………………………………………………………45
20403036en_ba_a0
Settings ………………………………………………………………………………………46
Language ……………………………………………………………………………………46
Handset name ………………………………………………………………………………46
Display …………………………………………………………………………………………46
Font ………………………………………………………………………………………46
Contrast …………………………………………………………………………………46
Backlight …………………………………………………………………………………46
Telephony ……………………………………………………………………………………47
Auto Talk …………………………………………………………………………………47
System PIN ……………………………………………………………………………………47
PBX ……………………………………………………………………………………………48
Coverage ……………………………………………………………………………………48
Repeater Mode …………………………………………………………………………48
Additional handsets/base stations ………………………………………………………49
Registering additional handsets ……………………………………………………………49
Deregistering a handset ……………………………………………………………………49
Selecting the base station ……………………………………………………………………49
5
Contents
PBX access ……………………………………………………………………………………50
Compatibility …………………………………………………………………………………50
Exchange Access Code EAC …………………………………………………………………50
Entering the EAC ………………………………………………………………………50
Incoming code on/off ……………………………………………………………………51
Maintenance …………………………………………………………………………………52
Reset …………………………………………………………………………………………52
20403036en_ba_a0
General information ………………………………………………………………………53
Declaration of conformity and the responsibility of the user ……………………………53
Guarantee ……………………………………………………………………………………53
Guarantee terms …………………………………………………………………………53
Environmental information …………………………………………………………………55
6
Setting up the telephone
Contents of the package
Twist 476
➭ 1 base station
➭ 1 connector cable
➭ 1 telephone connector
➭ 1 mains unit
➭ 1 handset (and 2 or 3 handsets for the Duo/Trio versions)
➭ 2 rechargeable batteries per handset
➭ 1 user manual
➭ 1 belt clip per handset (already assembled)
➭ 1 or 2 desktop charging bays with Adapter for Duo/Trio
Accessories
The following accessories are available:
➭ Additional handsets /charging units
➭ Repeater
Note
• Connect only authorised accessories.
20403036en_ba_a0
• Attention: Do not use a headset to telephone if the handset is on the
base station.
7
Setting up the telephone
Location
To obtain the best possible range, we recommend positioning the telephone in a location
central to your sphere of activity. Avoid positioning the telephone in niches, recesses and
behind steel doors.
The maximum range between the base station and handset is approximately 40 meters
indoors and 250 meters outdoors. Depending on the surrounding conditions as well as
spatial and structural factors, the range may be smaller. Silent zones can occur due to the
digital transmission in the frequency range used – even within the range, depending on
the structural environment. In this case the transmission quality may be reduced through
the increased incidence of short breaks in transmission. Normal call quality can be restored if you move slightly out of the silent zone. If the range is exceeded, the call will be
disconnected unless you move back into range within five seconds.
To avoid radio signal interference from other electronic equipment, we recommend that
the base station and handset are situated at the greatest possible distance (min. 1 meter)
from other equipment.
Repeater
20403036en_ba_a0
You can use a repeater to extend the range and receiving power of your base station.
The repeater must first be registered and activated on the base station. (Your telephone
is delivered with the default setting “off”).
8
Setting up the telephone
Setting up the base station or charging unit
➭ Do not expose the base station or charging unit to direct sunlight.
➭ Protect the base station or charging unit against moisture. Do not position the base
station or charging unit in rooms exposed to condensation, corrosive steam or excessive
dust. Condensation can be present in basements, garages, conservatories or sheds.
➭ The ambient temperature must be between 5 °C and 40 °C.
Position the base station and charging unit in a clean, dry and well-aired location. Choose a place which is stable, level, and not subject to vibrations. To avoid mutual interference, do not position the base station or charging unit in the immediate vicinity of electronic equipment such as hi-fi systems, office equipment or microwave ovens. Avoid positioning the telephone near heat sources such as heating elements or near obstacles such as
metal doors, thick walls, niches and cupboards.
There is no mains switch on the base station or charging unit. For this reason the socket
to which it is connected must be easy to access.
Listening protection
When you are on the telephone, the base station and handset are connected to each
other over a radio link. The base station handles switching between the telephone network and the handset. To ensure that no-one can eavesdrop or telephone at your cost,
the base station and handset exchange codes. If the codes do not match, the connection
with third-party handsets cannot be set up.
Listening protection in the device is also ensured by voice encryption
(except in repeater mode).
20403036en_ba_a0
Note
9
Setting up the telephone
Connecting the phone
Before you can start using your telephone you must plug in the telephone connector
cable and the mains cable.
➁ Socket for mains cable
➀ Socket for telephone connector cable
Safety note
Use only the mains units supplied for the base station or charging unit.
➀ Telephone connector cable
The telephone connector cable has two different plugs. Insert the smaller plug in the
socket marked with the telephone symbol on the base station, and fit the cable into the
corresponding cable duct. Insert the larger plug in your telephone connection socket.
➁ Mains cable
First, insert the mains cable in the socket marked with the mains connector symbol on
the base of the base station or charging unit, and fit the cable in the moulded cable
duct. Then insert the mains plug in the 230 V socket.
Your telephone will not function if the mains connector is not plugged in or
during a power failure.
20403036en_ba_a0
Note
10
Setting up the telephone
Setting up the handsets
Your handsets will be ready for operation (for making or accepting calls) only once the
batteries have been fully charged for the first time.
Inserting the rechargeable batteries
The bottom part of the handset contains a battery compartment for housing two
type AAA batteries.
Removing the battery
compartment cover:
Slide the battery compartment cover downwards
(approx.3 mm) and lift.
20403036en_ba_a0
Inserting the two rechargeable batteries (note the polarity!):
Insert the batteries in the battery compartment. Make sure the polarity is correct. Insert
the batteries so that the flat end (negative polarity) of the battery is pressing against the
spring. The handset will not function if the batteries are incorrectly inserted. This may
result in damage. Replace the compartment cover by placing it approximately 3 mm offset and slide it upwards until it clicks into place.
11
Setting up the telephone
Charging the batteries
The batteries are not yet charged when you first unpack the telephone. Insert the handset in the base station or charging unit for charging. The flashing battery symbol on the
handset shows the charging status. The batteries will take around 13 hours to fully charge.
Note
• Do not insert the handset in the base station or charging unit without
batteries.
• Do not use any other type of charging unit since this may damage the
batteries.
The following symbols indicate the charging status on the handset display:
Charging status “empty”
Charging status “1/2”
Charging status “full”
Once the new batteries have been inserted, the display on the handset indicates the
actual charging status only after a complete charging cycle.
20403036en_ba_a0
Your telephone is now ready to use.
Important!
After you have inserted the batteries for the first time, the battery display will
indicate the correct information on the charging status only after a complete
charging cycle.
Use only NiMH rechargeable batteries. Never use disposable primary cells.
!
12
Setting up the telephone
Note
You can replace the handset in the charging/base station after every call.
Charging is electronically controlled to ensure optimal charging of batteries in
different charge states. Avoid removing the batteries from the handset for no
good reason, since this affects the optimum charging cycle.
You can telephone for up to 17 hours with fully charged batteries.
The handset has a standby time of 170 hours.
If the battery charge status has reached its lower limit, the battery symbol
(
) flashes in the display and a warning signal is heard. You have 10 minutes of talk time left.
Installation assistant
An installation assistant simplifies things for you by guiding you step by step through the
setup procedure for your telephone.
Enter the preferred language as well as time and date according to the displayed instructions.
Note
• The installation assistant will re-appear following a reset of the telephone
(reset to default settings).
20403036en_ba_a0
• If you make the language setting without installation assistant, see chapter
“Settings, Language”.
13
Getting to know your telephone
Handset keys
Earpiece
Backlit display
Navigation key
Softkey
(multifunctional key)
Softkey
(multifunctional key)
Redial
Message key
Internal call key
Call list
Talk key
“End call” key
Headset connectivity
Alphanumerical
keypad
Activating
the key lock
“R”-key
Belgacom
directory key
20403036en_ba_a0
Switch handset ringer on/off
Microphone
14
Getting to know your telephone
Softkeys (multifunctional keys)
Right softkey: Choose menu options, confirms entries/settings.
Left softkey: returns to previous menu step.
Navigation key
Redial
For scrolling up/down or right/left.
Open redial list (dialled numbers).
Message key
Access to new unanswered calls and SMS.
Opens calls list.
INT
Internal call key
Call key
free.
For conducting handset-to-handset calls.
For conducting and accepting calls and switching to hands-
“End call” key Press briefly to end a call or return to standby mode.
Press and hold down to switch the handset on/off.
…
Alphanumerical keypad For dialling telephone numbers. Letters
printed on housing. Press and hold down “0” when entering a telephone
number to insert a dialling pause between two digits.
PhoneMail Press and hold down for direct access to network answer
machine messages.
Call anonymously Press and hold down to suppress caller ID for next call.
Asterisk key For entering asterisks. Press and hold down to switch
handset ringer on/off.
20403036en_ba_a0
Hash key For entering the hash symbol. Press and hold down to
switch keylock on.
Keypad locked
inadvertently.
A locked keypad prevents numbers being dialled
“R”-key
Belgacom directory key
numbers.
15
Direct access to certain Belgacom service
Getting to know your telephone
Handset display symbols
The following symbols are displayed on your handset.
Coverage symbol
Reception displayed when the handset is
within range of the base station.
Flashes when out of range of the base station
or not registered with the base station.
Alarm set
Indicates that the alarm is set.
Handsfree on
Indicates that handsfree speaking is activated.
Battery full
Indicates that the batteries are fully charged.
Battery empty
Indicates that the batteries are almost
discharged.
Unanswered calls
Displayed if you have unanswered calls in the
calls list.
You have new SMS messages
Indicates that you have new SMS messages.
Active call
Indicates that a call is in progress.
You have PhoneMail messages
Indicates that you have new network answer
machine messages.
Ringer off
Indicates that the ringer is switched off.
) Auto Redial activated
Keypad lock
Indicates that the keypad is locked.
20403036en_ba_a0
Indicates that automatic redial is activated.
16
Getting to know your telephone
About the menus
Menu navigation
Your handset provides you with an easy-to-follow menu. As a rule, every menu offers a
list of options. To select main menu, sub-menu and options, press the softkey below the
corresponding display text.
With the handset switched on and ready for use, press the softkey under MENU to open
the main menu and use the navigation key
to scroll to the option you are seeking.
Press OK to open the options list, use the navigation key
to scroll down the list to the
preferred option, and confirm the option by pressing OK.
Back to previous menu
Press BACK to return to the previous menu.
End menu
20403036en_ba_a0
To exit a menu, press the softkey under BACK. If you want to return to standby mode,
confirm by pressing
.
17
Getting to know your telephone
Twist 476 base station
Short press: group call on handsets (paging)
Long press: registering a handset
20403036en_ba_a0
“In operation” display
18
Telephoning
Making an external call
Press
, wait for the dialling tone and dial the number.
Call preparation
First, enter the number. If you enter an incorrect number, you can delete the entry.
Press
to dial the number.
Ending a call
Press
or replace the handset in the charging unit/base station.
Accepting a call
The caller’s number and name saved in the directory is displayed only if you have
subscribed to the “Caller Display (CLIP)” service by Belgacom.
Press
to accept the call.
Second call (Call waiting)*
When the service is activated, another incoming external call is signalled with a short beep.
Press the softkey
• under OPTION, ACCEPT 2nd CALL to accept an incoming call (the first caller is put
on hold).
• under OPTION, END to end the active call and to accept the incoming call.
20403036en_ba_a0
• under OPTION, REJECT to reject the incoming call.
Note
To deactivate call waiting see chapter “Network functions, call waiting signal”.
* Supplementary service. You have to subscribe to this service.
19
Telephoning
Recall
Call back (Ring Back)
If a number you have dialled is busy, you can activate call back by pressing the softkey
under OPTION, CCBS. When you hear a message prompting you to do this, activate the
Ring Back service. A signal is heard as soon as the called party has replaced the receiver
i.e. as soon as his or her line becomes free.
Note
An activated Ring Back can be deactivated in the menu FUNCTIONS,
DEACTIVATE CCBS.
Auto Redial (OPTION, AUTO REDIAL)
The automatic redial calls for you an occupied number in regular intervals.
Note
An activated auto redial can be deactivated in the menu FUNCTIONS,
DEACTIVATE AUTO REDIAL.
Handsfree operation
You can use the handsfree function to conduct calls with the handset on-hook and allow
others present in the room to take part in the call.
Activating handsfree before a call:
1. Press
. The display shows
. Press
again. The display shows
can hear the ringing signal over the handset loudspeaker.
20403036en_ba_a0
2. Press
to deactivate handsfree speaking.
Switching to handsfree speaking during a call:
Press
. To deactivate handsfree speaking, press
20
again.
and you
Telephoning
Handset / handsfree volume
You can adjust the handset and handsfree loudspeaker volume in 5 steps. Press
during a call to adjust the volume. The selected setting is saved after the end of the call.
Note
The handset and handsfree loudspeaker volumes are independent but the
setting procedure is identical.
Handset secrecy
During a call you can talk to someone else in the room without the caller hearing.
1. Press the softkey under SECRECY during a call. This switches handset secrecy on and
your caller cannot hear you.
2. Press the softkey under OFF to return to the call.
Redial
The 10 last-dialled numbers are saved in a redial list. If name and number are already
stored in the directory, the name is shown instead of the number.
Redialling a number from the list
Press
to open the redial list and press
to scroll through the list. Press
as you have reached the number you are seeking.
If the redial list is empty, a message to this effect appears.
20403036en_ba_a0
Note
21
as soon
Telephoning
Copying numbers from the redial list
You can copy a number from the redial list to the directory.
Press
to open the redial list. Use
to scroll through the list to find the number you
are seeking, and press the softkey under OPTION, SAVE NUMBER. Enter the name and
associated number and save the entry.
Note
If the number is already in the directory, the Save function is not displayed.
Deleting individual entries/entire redial list
Press
to open the redial list. Scroll through until you reach the entry you are seeking.
Press the softkey under OPTION and delete the entry or the entire list.
Sending SMS messages from the redial list
1. Press the softkey under
. Use
to scroll through the list to find the entry you are
seeking, and press the softkey under OPTION, WRITE MESSAGE.
2. Choose your relevant SMS mailbox (if programmed), write and send your SMS message.
Group call (paging)
You can activate a group call to locate a mislaid handset.
on the base station. The handsets ring.
2. Press
again to end the ringing signal or press
20403036en_ba_a0
1. Press
22
on a handset.
Telephoning
Keypad lock
If you want to carry the handset around in your pocket, you can activate the key lock.
This prevents you inadvertently dialling a number.
1. Press and hold down
. The display shows KEYPAD LOCKED.
2. To unlock the keypad, press the softkey under UNLOCK, then press
Note
.
If the keypad is locked,
• you can dial the emergency numbers 100, 101, 103, 105, 106, 107, 108,
110, 112 (in call preparation only) and incoming calls can still be accepted.
• you cannot dial a number or access menus.
Internal calls
You can call other handsets which are registered with your base station. This allows you
to make internal calls free of charge.
1. Press INT, dial the relevant handset number and press OK to confirm. Pressing INT
automatically dials the second handset if only two handsets are registered with the
base station.
2. Press
20403036en_ba_a0
Note
to end the call.
• If you receive an external call while conducting an internal call, every handset which is not in use will ring.
• If a handset is in use, you will hear a signal alerting you to the incoming
external call. Press the softkey under OPTION, ACCEPT/END to end
the internal call and accept the external call. Or press the softkey under
OPTION, ACCEPT/HOLD to put the internal call on hold or under OPTION,
REJECT to reject the external call.
23
Telephoning
Enquiries
Internal enquiry call
You are conducting a call and want to call an internal party without ending the external
call. Internal enquiries are managed by the base station.
Procedure:
1. Press
INT and select the handset. The external caller is put on hold.
2. To end the internal call and to return to the external call, press the softkey under
OPTION then END.
3. To initiate a telephone conference call, press the softkey under OPTION then JOIN.
External enquiry call
Procedure:
1. You are conducting a call and want to call another external party without ending the
active external call.
2. Press the enquiry key
An external enquiry call is managed by the public telephone network.
20403036en_ba_a0
Note
to start the second call.
24
Telephoning
Brokering (switching between two calls)
You have two active calls, one of which is on hold. You can switch between the two by
brokering.
1. You are conducting two calls.
2. Press the softkey under OPTION, ALTERNATE to switch between the call partners.
3. Press
to end one of the calls. The remaining call partners are automatically
connected with each other.
Note
Brokering between two external call partners is managed by the public telephone network.
Call transfer
You can transfer the call you are conducting to another handset (= switching).
Call transfer during a call
1. Press INT and dial the handset to which you wish to transfer the call. The external caller is put on hold.
2. If the second handset answers, you can talk to the internal call partner without the
external caller hearing you. Press
to transfer the call.
20403036en_ba_a0
Note
• You cannot use the
INT key if the call duration is not displayed.
• If the second handset does not answer, you can end the ringing signal and
return to the original call by pressing the softkey under END.
25
Telephoning
Three-party conference call
You can set up a three-party conference call by connecting an external call partner and a
second handset (internal), or by connecting two external call partners:
Three-party conference call with an internal/external call partner
If you are conducting a call:
1. Press
INT and dial the relevant handset. The external caller is put on hold.
2. If the second handset answers, you can talk to the internal call partner without the external caller hearing you.
3. Press the softkey under OPTION, ALTERNATE to talk to each call partner individually,
or press the softkey under OPTION, JOIN to connect all three call partners with each
other. To return to brokering, press the softkey under OPTION, END CONFERENCE.
Each call partner can leave the conference call by pressing
Note
• You cannot use the
INT key if the call duration is not displayed.
• If the second handset does not answer, you can end the ringing signal and
return to the original call by pressing the softkey under END.
Three-party conference call with two external call partners
If you are conducting a call:
1. Press the softkey under OPTION, INIT. 2ND CALL.
2. Enter the number (the active call is put on hold).
20403036en_ba_a0
3. When the seond call partner answers, press the softkey under OPTION, 3PTY.
Note
You can also set up a three-party conference call after you have accepted a
second incoming call.
26
Telephoning
Call anonymously (Identification restriction)
When you call someone, your number is shown on the other person's phone if it supports this function.
You can withhold your number for the next call i.e. you can call anonymously.
Note
• If you call from the directory, you have to activate “Anonymous call”.
“Anonymous call” is reactivated for each call.
20403036en_ba_a0
• “Anonymous call” for the next call can also be activated directly by
pressing and holding down key
. Dial the number then press
“Anonymous call” only functions when you dial first and then
press
.
27
.
Directory
You can store up to 100 names and numbers in the directory on each handset. Every
entry contains a name and telephone number. Names can be up to 16 letters long and
numbers up to 24 digits long.
Directory entries
Adding a new entry
If the telephone is in standby mode:
1. Press the softkey under NAMES. All entries are displayed in alphabetical order.
2. Press the softkey under OPTION. Select NEW ENTRY and enter name, number and
relevant status (PBX/external). You can also set “CALL ANONYMOUSLY” to ”ON” if
you wish to withhold your number when calling. Save the entry.
Note
• If the directory is empty, a message to this effect is displayed.
• If your telephone is operated on a PBX, it is in vain to set
“CALL ANONYMOUSLY” to ”ON” as it is a BELGACOM service that
only functions with “external” numbers or without PBX.
Tips for entering names/numbers
• Press
to insert a space,
or
to enter a symbol.
• The available special characters appear in the lower display line. Press the relevant key
to scroll through the characters.
to switch between upper and lower case
20403036en_ba_a0
• When entering names, you can press
lettering.
28
Directory
Editing entries
1. Press the softkey under NAMES. Use
to scroll through the list to find the entry you
are seeking, and press the softkey under OPTION.
2. Select EDIT ENTRY, modify the name and/or number and save the entry.
Deleting directory entries/entire directory
You can delete individual entries or the entire directory.
1. Press the softkey under NAMES. Use
to scroll through the list to find the entry you
are seeking, and press the softkey under OPTION.
2. Delete the entry or the entire list.
Dialling numbers from the directory
1. Press the softkey under NAMES. All entries are displayed in alphabetical order.
2. Use
to scroll through the directory, select the entry you are seeking and press
The number is displayed and dialled.
.
You can also search by name: press the first letters of the name and press
to confirm.
Sending SMS messages from the directory
1. Press the softkey under NAMES. Use
to scroll through the list to find the entry you
are seeking, and press the softkey under OPTION.
20403036en_ba_a0
2. Choose your relevant SMS mailbox (if programmed), write and send your SMS message.
29
Directory
Copying directory entries
If you operate several handsets, you can copy entries from one handset to another. This
way, you only have to enter names and numbers once.
While you are copying entries from one handset to another, you can make external calls
on another handset registered with the base station.
If the entire directory is copied, it overwrites all entries on the other handset. If the directory on the handset to which you are copying is full, a message to this effect is displayed.
Copying entries/entire directory to another handset
You can copy individual entries or the entire directory from one handset to another provided both handsets are registered with the base station.
1. Press the softkey under NAMES and
to select the entry you wish to copy. Press the
softkey under OPTION. Select the submenu you are seeking and press OK to confirm.
2. Select the number of the destination handset and press OK to confirm.
3. Confirm the option with YES on the relevant handset.
Note
• The copy procedure is aborted if an incoming call is received.
• If you are copying an entire directory, all entries transferred before the call
are saved.
20403036en_ba_a0
• You cannot perform the copy procedure if the handset to which you wish
to copy is conducting a call.
30
Directory
Belgacom directory
Your telephone is delivered with 10 Belgacom service numbers preprogrammed:
1919
Automatic Recall
1200
Speaking clock (dutch)
1300
Speaking clock (french)
1400
Speaking clock (german)
1207
National inquiries (dutch)
1307
National inquiries (french)
1407
National inquiries (german)
1920
Configuration of services active on your line (dutch)
1930
Configuration of services active on your line (french)
1940
Configuration of services active on your line (german)
You have direct access to this directory with
.
To programme a new number, you first have to delete one of the preprogrammed
numbers. Press then the softkey under OPTION. Choose NEW ENTRY, enter a description
and number and save. You may edit and/or delete the entries at any time.
Note
• Scroll through the directory with
.
20403036en_ba_a0
• To call a Belgacom service number, select the number in the list and
press
.
31
Calls list
If you have subscribed to the service «Caller Display», the caller’s number (if not withheld)
is displayed before you accept the call.
If you have received new calls, a message to this effect appears in the display. A list is
kept of answered and missed calls.
The calls list can hold up to 30 entries. If the list is full, the oldest entry is overwritten by
the most recent entry.
Note
If the calls list is empty, a message to this effect is displayed.
Viewing/dialling a number from the calls list
Press
to open the calls list. Press
number.
to scroll through the list. Press
to dial the
Sending SMS messages from the calls list
1. Press
to open the calls list. Use
to scroll through the list to find the entry you are
seeking, and press the softkey under OPTION.
20403036en_ba_a0
2. Choose your relevant SMS mailbox (if programmed), write and send your SMS message.
32
Calls list
Saving numbers from the calls list to the directory
1. Press
. Scroll through until you reach the entry you are seeking.
2. Press the softkey under OPTION, SAVE NUMBER. Enter the associated name and save
the entry.
Deleting individual entries
1. Press
. Scroll through the relevant calls list (for answered and unanswered calls) until
you reach the entry you are seeking.
2. Press the softkey under OPTION, DELETE CALL and delete the entry.
Deleting the entire calls list
and DELETE ALL CALLS to delete the entire list.
20403036en_ba_a0
Press
33
Audio
Procedure:
1. Press the softkey under MENU. Press
to scroll to AUDIO ad press OK to confirm.
2. Scroll to the relevant submenu and make the relevant settings:
Handset/base station ringer
You can programme different ringer melodies on the handset and base station to signal
external and internal calls. Choose from the 5 standard ringer melodies and 10 polyphonic ringer melodies (handset only).
Set the preferred ringer melodies and associated volume for external/internal calls. You
can also set an ascending volume.
Tones
Your telephone supports various tones which you can activate or deactivate:
Key beeps
Every time a key is pressed, a brief beep is heard.
Range beeps
A warning beep is sounded if you exceed the maximum range. Move closer to the base
station.
Charging beep
When you insert your handset in the charging unit/base station, the batteries are automatically charged up. A short beep is heard.
20403036en_ba_a0
Accu beep
Sounds when the batteries are running low.
Confirmation beep
Settings and entries are confirmed by a short beep.
34
Family
Procedure:
1. Press the softkey under MENU. Press
to scroll to FAMILY and press OK to confirm.
2. Scroll to the relevant submenu and make the relevant settings:
Direct call (baby call)
If you activate direct call on your telephone, the handset dials a preprogrammed number
when any handset key is pressed. “Direct call” can be very useful, especially for parents
with young children. If the parents are not at home, the children can reach their parents
(or neighbours) simply by pressing any key on the handset. The direct call number must
be preprogrammed by the parents beforehand.
Note
• You must deactivate the direct call function to restore your telephone’s
normal functions.
20403036en_ba_a0
• Please note that direct call may not function in exceptional cases, e.g. if
the preprogrammed number is busy, if the preprogrammed mobile
phone number has no reception, in case of a power outage or when the
recheargable batteries are empty.
35
Family
Room monitoring (baby surveillance)
You can set a baby call/noise alarm. Once this function is set, your phone monitors noises
in its immediate vicinity and triggers a call to the programmed number if the noise
exceeds a set level (defined by the user). The person called hears the noises and is alerted
to the fact that, for instance, a child is crying in the room.
Note
• If room monitoring is active, incoming calls are not signalled.
• You must deactivate the room monitoring function to restore your
telephone’s normal functions.
• The monitoring call is automatically repeated if the called number is
occupied or does not answer.
• At the end of a monitoring call the surveillance can generate a new
monitoring call after a time-out.
20403036en_ba_a0
• Please note that room monitoring may not function in exceptional cases,
e.g. if the preprogrammed number is busy, if the preprogrammed mobile
phone number has no reception, in case of a power outage or when the
recheargable batteries are empty.
36
Call costs
Procedure:
1. Press the softkey under MENU. Press
to scroll to CHARGES and press OK to confirm.
2. Scroll to the relevant submenu and make the relevant settings:
Cost of last call
You can display the cost of the last call.
Summary
You can display the total per handset and the total for all calls.
Settings
Type of display
You can display the cost or duration of a call. The following settings must be made
before you can display costs:
Charge factor
To display costs accurately, you must set the charge per unit (factor).
Currency
To display costs accurately, you may need to set the currency.
Note that for technical reasons the displayed charges may differ from the
amount billed. The amount indicated on your phone bill is binding.
20403036en_ba_a0
Note
37
Calendar/clock
Procedure:
1. Press the softkey under MENU. Press
to confirm.
to scroll to CALENDAR/CLOCK and press OK
2. Scroll to the relevant submenu and make the relevant settings:
Appointments
Your telephone also acts as an appointments reminder: You can set 5 different appointment reminders. The relevant melody is played on the handset at the defined time.
You can choose from 5 standard and 10 polyphonic alarm melodies.
Note
As soon as the time of the appointment arrives, it is displayed and the phone
rings during a certain time. By pressing the softkey under SILENCE (or after
the ringing), the appointment will further be displayed. If you do not need
the reminder in the display any longer, press CLEAR.
Alarm
To set the alarm, you need to activate the alarm function and enter the time and preferred alarm melody. You can choose from 5 standard and 10 polyphonic alarm melodies.
Note
The alarm only sounds on the handset on which it has been set.
Time/date
You must set the time, date and day.
20403036en_ba_a0
Note
• If the power supply is cut, the settings are lost and must be preprogrammed.
• You can also set the time format (12/24 hours).
38
Network functions
To activate some network functions, you need to send special codes to the network.
Often these codes contain special characters such as
or
. In some cases,
the so-called flash signal is required. You can enter this by pressing
.
Procedure:
1. Press the softkey under MENU. Press
to confirm.
to scroll to NET FUNCTIONS and press OK
2. Scroll to the relevant submenu and make the relevant settings:
1919 (automatic recall)
Thanks to 1919, Automatic Recall, you can check from whom the last unanswered call
was and contact this number instantly. 1919 service is free of charge. You only pay the
cost of the call.
Call forwarding*
Call forwarding allows callers to reach you even if you are not near your own telephone.
Choose the relevant type of call forwarding (unconditional, no reply, busy) in the submenu
TURN ON or TURN OFF and enter the forwarding number (i.e. the number to which calls
are to be forwarded).
Call forwarding unconditional
Incoming calls are forwarded immediately.
20403036en_ba_a0
Call forwarding no reply
Incoming calls are forwarded after a delay.
* Supplementary service. You have to subscribe to this service.
39
Network functions
Call forwarding busy
Calls are forwarded if the line is busy.
Once you have defined the call forwarding option, enter the forwarding number
(i. e. the number to which calls are to be forwarded).
At any time you can:
• edit or delete the forwarding number
• deactivate call forwarding.
Call waiting*
You can activate/deactivate the beep that signals an incoming call while you are
conducting a call in the submenu TURN ON / TURN OFF.
Fixed destination call*
This reassuring service enables you to programme the number (as long as it is not any of
the 3-digit emergency numbers) of a trustworthy person you can count on in the event
of a problem.
20403036en_ba_a0
For example: you are going out and leaving your children with a babysitter. You can
program a number where you can be reached, and all the babysitter has to do in case
of problems is press
. The number will be dialled automatically, and the babysitter
will have you on the line within five seconds.
* Supplementary service. You have to subscribe to this service.
40
Network functions
Deactivate call back (Ring Back)
An call back (Ring Back) activated in the net can be deleted in the submenu
DEACTIVATE CCBS.
Note
For further details see chapter “Telephoning/Recall”.
Deactivate Auto Redial
The auto redial activated in the device can be deleted in the submenu DEACTIVATE
AUTO REDIAL.
Note
For further details see chapter “Telephoning/Recall”.
PhoneMail
Belgacom offers the option of setting up a network answer machine (PhoneMail).
20403036en_ba_a0
is displayed to alert you to new messages. To access new messages quickly and
simply, press and hold down
for around 2 seconds to automatically dial the access
number of your network answer machine.
41
SMS
SMS – Short Messaging Service
Your telephone supports SMS messages up to 160 characters in length for sending and
612 characters in length for receiving. You can save up to 40 SMS messages in your lists.
Procedure:
1. Press the softkey under MENU. Press
to confirm.
to scroll to SMS MESSAGES and press OK
2. Scroll to the relevant submenu and make the relevant settings.
Writing SMS messages
Write your message. Refer to the chapter on “Directory entries” for tips on writing.
You can also use symbols and templates in the menu SMS MESSAGES, WRITE MESSAGE.
Inbox
New SMS messages are signalled in the display by
and saved in the inbox. Press the
softkey under INBOX to read new SMS messages. Or BACK, to read SMS messages later.
Once you have read the SMS messages, you can answer, forward, save or delete them,
or call the sender.
20403036en_ba_a0
Note
If you have no SMS messages in your inbox, a message to this effect is displayed.
Drafts
You can create and save a draft SMS for subsequent sending, and edit and send it
whenever you wish.
42
SMS
Outbox
Sent SMS messages are automatically saved in your outbox. You can edit and forward
SMS messages in the outbox or call the recipient.
Note
• You can accept calls while writing an SMS.
• If the SMS is not transmitted, a message to this effect is displayed and the
SMS is saved in the outbox. You can delete the unsent SMS message to
return to standby mode, or select “read” to open the SMS message and
re-send it.
Templates
To simplify writing SMS messages, you can create up to 5 templates. You can edit and
delete these templates or create a new SMS message template.
Settings
SMS service centre
Before you can send and receive SMS messages, an SMS service centre must be programmed:
• for sending, the access number is 1717 (your phone is delivered with this number
preset in Service Center 1)
20403036en_ba_a0
• for receiving, the access number is 01717 (your phone is delivered with this number
preset in Service Center 2).
Send service
Select which service centre you want to use for sending SMS messages (default:
Service Center 1).
43
SMS
SMS mailbox
Your telephone is set to enable all users to access all SMS messages (General Mailbox).
To enable each user to have his own private inbox you can set up three specific users, if
necessary with PIN code protection.
Important
If you have more than one SMS terminal on your line, each device must
have a different mailbox number. In this case you need to change the
number of the General Mailbox (0) of your Twist 476.
• Setting up SMS users
1. Press MENU, use
to scroll to SMS MESSAGES and press OK to confirm.
2. Use
to scroll to SMS SETTINGS and press OK to confirm.
3. Use
to scroll to SMS MAILBOXES and press OK to confirm.
4. Use
to scroll to the relevant user.
5. Select EDIT.
6. Enter MAILBOX NAME, MAILBOX ADDRESS, activation of PIN PROTECTION, PIN CODE
and SAVE.
• Choose SMS mailbox
1. Press MENU, use
to scroll to SMS MESSAGES and press OK to confirm.
20403036en_ba_a0
2. The menu offers 4 SMS mailboxes. Choose the relevant SMS mailbox.
44
SMS
• Delete SMS mailbox
Press MENU, use
to scroll to SMS MESSAGES, MAILBOX 1...3, SMS SETTINGS,
SMS MAILBOXES, MAILBOX 1...3, DELETE and press OK to confirm.
• Sending an SMS message to an SMS user
To forward SMS messages to your personal inbox, the person sending the SMS must
include the number of your presonal inbox along with the telephone number.
• Defining SMS users
Before you can read, write and send SMS messages, you must open your SMS user.
1. Press MENU, use
to scroll to SMS MESSAGES and select the relevant SMS user.
2. Enter your PIN code (if applicable) and press OK to confirm.
SMS alert on/off
If activated, a brief beep is heard every time a new SMS message is received.
Using SMS services the answer delay of your telephone answering machine
for your line must be of 3 rings at least.
20403036en_ba_a0
!
Important
45
Settings
Language
Procedure:
1. Press the softkey under MENU. Press
and press OK to confirm.
to scroll to LANGUAGE in the SETTINGS menu
2. Set the preferred display language. Display texts will appear in the set language.
Handset name
Procedure:
1. Press the softkey under MENU. Press
to scroll to HANDSET NAME in the SETTINGS
menu, select the relevant handset and press OK to confirm.
2. Give each handset a name to better distinguish between them.
Display
Procedure:
1. Press the softkey under MENU. Press
and press OK to confirm.
to scroll to DISPLAY in the SETTINGS menu
2. Scroll to the relevant submenu and make the following display settings:
Font
You can choose between large and small fonts. If you select “large”, fewer characters
will appear on the display (the rest are “cut off”).
20403036en_ba_a0
Contrast
To optimise legibility, you can adjust the display contrast.
Backlight
You can activate or deactivate backlighting for the display.
46
Settings
Telephony
Procedure:
1. Press the softkey under MENU. Press
menu and press OK to confirm.
to scroll to TELEPHONY in the SETTINGS
2. Scroll to the relevant submenu and make the following settings:
Auto Talk
An incoming call can be accepted by pressing the talk key. If you activate Auto Talk, you can
accept a call simply by lifting the handset from the base station without pressing any key.
System PIN
Procedure:
1. Press the softkey under MENU. Press
menu and press OK to confirm.
to scroll to SYSTEM PIN In the SETTINGS
2. Change the existing system PIN as required.
Note
• If you wish to register/deregister new handsets with the base station, you
must enter the base station's 4-digit system PIN (default setting: 000).
20403036en_ba_a0
• We recommend that you change the system PIN to protect your telephone
against unauthorised access.
47
Settings
PBX
See “PBX access”.
Coverage
You can use up to 6 repeaters to extend the range and receiving power of your base station. The repeaters must first be registered and activated on the base station.
Procedure:
1. Press the softkey under MENU. Press
and press OK to confirm.
to scroll to COVERAGE in the SETTINGS menu
2. Scroll to the relevant submenu and make the following settings:
Repeater Mode
You can activate up to 6 repeaters per base station. Per repeater, up to 2 handsets can
conduct a call simultaneously.
For details on setting up repeaters, please follow the repeater user manual.
20403036en_ba_a0
Note
48
Additional handsets /base stations
Registering additional handsets
You can register up to 6 handsets with the base station. The base station must be within
range.
Note
If you purchase additional handsets for your base station,
• the batteries must first be fully charged!
• the handsets must be registered with the base station before use!
Procedure:
1. Press the softkey under MENU. Scroll to REGISTRATION in the SETTINGS menu. Select
the base station and enter the base station system PIN (default on delivery: 0000).
2. Press and hold down
on the base station for around 10 seconds.
3. Release
when you hear a beep on the base station. The handset is automatically
assigned the next available handset number.
Deregistering a handset
You can deregister a handset from the base station. The base station must be within
range.
Press the softkey under MENU. Scroll to REGISTRATION in the SETTINGS menu and
deregister the handset in the relevant submenu.
20403036en_ba_a0
Selecting the base station
Press the softkey under MENU. Scroll to REGISTRATION in the SETTINGS menu and
select the base station in the relevant submenu.
Note
This submenu only appears if the handset is registered with more than one
base station.
49
PBX access
Compatibility
Your telephone is designed for use in the analogue telephone network and can be operated
on a PBX that supports DTMF dialling and flash signalling.
Exchange Access Code EAC
You may need to enter an exchange access code (e.g. 0) to allow the public exchange
to assign an external line for external calls or for calling back numbers in the calls list.
Entering the EAC
Procedure:
1. Press the softkey under MENU. Scroll to PBX in the SETTINGS menu and press OK
to confirm.
2. Enter the exchange access code.
Note
• After having programmed an exchange access code you do not have to
enter it again in a directory entry. However, if you dial off-hook or in call
preparation you still have to enter the exchange access code manually.
• This exchange access code is saved in the handset. The relevant settings
have to be repeated for each handset.
• To give the exchange sufficient time to assign a public line, you may need
to program a “pause” after the exchange access code by pressing and
holding down
.
20403036en_ba_a0
• For further information, refer to your PBX operating instructions.
50
PBX access
Incoming code on/off
Some exchanges automatically insert the EAC. Make the necessary setting (on or off) in
the menu SETTINGS, PBX, FUNCTIONS.
Note
• If you have a PBX that adds the EAC with an incoming call, the EAC is
added before the caller’s number and you choose: ON.
20403036en_ba_a0
• In the opposite case choose: OFF.
51
Maintenance
Reset
You can reset the telephone to default status as follows:
Procedure:
1. Press the softkey under MENU. Scroll to MAINTENANCE in the SETTINGS menu. Press
OK to confirm.
2. Select the handset or base station, press RESET and press OK to confirm. The default settings are restored.
Note
• A reset deletes all preferences and lists except the directory.
20403036en_ba_a0
• After a reset, the installation assistant re-appears.
52
General information
Declaration of conformity and the responsibility of the user
This phone meets the requirements of EC directive 99/5/EC R&TTE. It is compliant with
the following standards and recommendations:
“Electromagnetic compatibility” directive 89/336/CEE
“Low voltage” directive 73/23/CEE.
I-CTR 37: “Access requirements”
CTR 38:
“Telephonometric requirements”
According to directive 99/5/CE R&TTE, the user is solely reponsible for the use made of
the phone, so the user ist obliged to comply with the instructions for use and prodecures
set out in the “user’s guide” and in particular:
– this product is designed for the Belgian market.
– this product is designed for connection to the Belgacom analoque public switched
phone network.
– any other recommendations specified in this manual.
Guarantee
Guarantee terms
20403036en_ba_a0
The Equipment you have bought has been carefully selected by Belgacom and is covered
by a two-year warranty on spare parts and labor in the event of any material or manufacturing defect, unless otherwise specified. The warranty shall be valid from the date on
which the equipment is collected or delivered.
If you have any problems with the equipment, you should take it to a Teleboutique or to
one of our authorized agents, in its entirety and in its original packaging, or in packaging
providing the same degree of protection, together with the original receipt. The addresses
for our Teleboutiques and authorized agents are given in the Information Section of the
White Pages.
53
General information
Your equipment will be repaired or replaced free of charge, on presentation of the
receipt, in the event of any material or manufacturing defect.
Belgacom alone shall determine what repairs and/or replacements are necessary.
The warranty on the repaired or replaced equipment shall end on the date on which the
original warranty on the purchased equipment expires, but shall not be less than 3 months.
The warranty shall not cover:
• damage of any kind that does not predate the sale;
• any damage, faults or defects attributable to the Customer or to causes unrelated to
the Equipment: lightning, power surges, humidity, accidental damage, improper use or
poor maintenance, failure to comply with the instructions in the user manual, and
force majeure;
• the repair or replacement of movable parts (cords, wires, plugs, aerials, etc.),
consumables (cells, batteries, paper, ink, etc.) needing regular replacement and the
supply of cleaning products.
The warranty shall not apply:
• to any changes or repairs to the terminal Equipment undertaken by the Customer
himself/herself or through the services of persons not designated by Belgacom;
• if the Customer removes or tampers with the manufacturer’s serial numbers and/or
brand names on the terminal Equipment.
20403036en_ba_a0
Belgacom shall not be liable for any indirect or immaterial loss sustained by the
Customer as a result of the malfunctioning of the terminal Equipment, such as any loss
of production, revenue or contracts.
Note
The General Terms and Conditions for the Sale of Terminal Equipment can be
obtained on request from any Belgacom service available to the public or
at www.belgacom.be
54
General information
Environmental information
• The equipment that you bought has required the extraction and use of natural resources for its production. It may content hazardous substances for the health and the
environment.
• In order to avoid the dissemination of those substances in our environment and to
diminish the pressure on the natural resources, we encourage you to use the appropriate take-back systems. Those systems will reuse or recycle most of the materials of
your end life equipment in a sound way.
• The crossed-bin symbol invites you to use those systems.
• If you need more information on the collection, reuse and recycling systems, please
contact your local or regional waste administration.
20403036en_ba_a0
• You can also contact us for more information on the environmental performances of
our products.
55
56
20403036en_ba_a0
Belgacom reserves the right to update and alter any data and information at any time
without prior notice.
20403036en_ba_000_a0
Belgacom SA under public law,
du Roi Albert II BE 0202.239.951, Brussels Register of Legal Entities