1
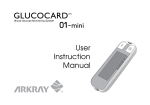
BLOOD GLUCOSE MONITORING SYSTEM
User Instruction Manual
Read this User Instruction Manual
carefully before you start testing.
CAUTION:
Before using any product to test your blood sugar (blood
glucose), read all instructions and practice the test. Do all
quality control checks as directed and consult with a diabetes
healthcare professional.
TABLE OF CONTENTS
Introduction . . . . . . . . . . . . . . . . . . . . . . . . . . . . . . . . . . . . . . . . . . . 5
Intended Use . . . . . . . . . . . . . . . . . . . . . . . . . . . . . . . . . . . . . . . . 6
Important Safety Instructions . . . . . . . . . . . . . . . . . . . . . . . . . . . 6
Warnings, Precautions & Limitations. . . . . . . . . . . . . . . . . . . . . . 8
Understanding the GLUCOCARD 01 Blood Glucose Meter . . . . . . 11
Changing the Battery. . . . . . . . . . . . . . . . . . . . . . . . . . . . . . . . . 14.
Meter Set-up. . . . . . . . . . . . . . . . . . . . . . . . . . . . . . . . . . . . . . . . . . 17
Basic Rules. . . . . . . . . . . . . . . . . . . . . . . . . . . . . . . . . . . . . . . . . 17
Audible Beep . . . . . . . . . . . . . . . . . . . . . . . . . . . . . . . . . . . . . . . 20
Year. . . . . . . . . . . . . . . . . . . . . . . . . . . . . . . . . . . . . . . . . . . . . . 22
Month/Day. . . . . . . . . . . . . . . . . . . . . . . . . . . . . . . . . . . . . . . . . 23.
Hour/Minute . . . . . . . . . . . . . . . . . . . . . . . . . . . . . . . . . . . . . . . 24.
Test Averaging . . . . . . . . . . . . . . . . . . . . . . . . . . . . . . . . . . . . . . 25.
Ending Set-up. . . . . . . . . . . . . . . . . . . . . . . . . . . . . . . . . . . . . . 26
Performing a Control Solution Test . . . . . . . . . . . . . . . . . . . . . . . . . 27
Troubleshooting Control Solution Test . . . . . . . . . . . . . . . . . . . . 34
3
Blood Glucose Testing . . . . . . . . . . . . . . . . . . . . . . . . . . . . . . . . . . . . . . . .
Obtaining a Drop of Blood . . . . . . . . . . . . . . . . . . . . . . . . . . . . . . . . . . .
Performing a Blood Glucose Test . . . . . . . . . . . . . . . . . . . . . . . . . . . . . .
Flagging Test Results. . . . . . . . . . . . . . . . . . . . . . . . . . . . . . . . . . . . . . .
Cleaning & Disinfecting Meter & Lancing Device . . . . . . . . . . . . . . . . . . . .
Alternate Site Testing (AST) . . . . . . . . . . . . . . . . . . . . . . . . . . . . . . . . . . . .
Downloading Test Results to a Computer . . . . . . . . . . . . . . . . . . . . . . . . . .
Understanding Test Results . . . . . . . . . . . . . . . . . . . . . . . . . . . . . . . . . . . .
Recalling Results - Entering Memory Mode. . . . . . . . . . . . . . . . . . . . . . . .
Maintenance . . . . . . . . . . . . . . . . . . . . . . . . . . . . . . . . . . . . . . . . . . . . . . . .
Display Screen and Error Messages . . . . . . . . . . . . . . . . . . . . . . . . . . .
Storage and Handling. . . . . . . . . . . . . . . . . . . . . . . . . . . . . . . . . . . . . . .
Product Information. . . . . . . . . . . . . . . . . . . . . . . . . . . . . . . . . . . . . . . . . . .
Product Specifications . . . . . . . . . . . . . . . . . . . . . . . . . . . . . . . . . . . . . .
Warranty . . . . . . . . . . . . . . . . . . . . . . . . . . . . . . . . . . . . . . . . . . . . . . . .
4
37
37
40
44
46
52
60
61
67
71
71
76
78
78.
79
INTRODUCTION
Thank you for choosing the GLUCOCARD 01 Blood Glucose Monitoring
System. This system measures blood glucose in fresh capillary whole blood.
Results are shown as plasma values. This makes it easy to compare the
GLUCOCARD 01 blood glucose meter and lab results.
Please read this manual before using the system. If you have any questions,
call ARKRAY Customer Service at 800.566.8558 (24 hours a day, 7 days a
week, USA and Canada only). Contact your healthcare professional with
questions if you are unable to reach Customer Service.
5
Intended Use
The GLUCOCARD 01 Blood Glucose Monitoring System is intended for the
quantitative measurement of glucose in fresh capillary whole blood samples
drawn from the fingertips or palm. Testing is done outside the body (In Vitro
diagnostic use). It is indicated for use at home by persons with diabetes
as an aid to monitor the effectiveness of diabetes control. It is not intended
for the diagnosis of or screening for Diabetes Mellitus, and is not intended
for use on neonates. It is intended for single patient use and should not be
shared with other individuals.
Important Safety Instructions
WARNING:
• The meter and lancing device are for single patient use. Do not share
them with anyone including other family members! Do not use on
multiple patients!
• All parts of the kit are considered biohazardous and can potentially
transmit infectious diseases, even after you have performed cleaning
and disinfection.¹,²
6
Cleaning & Disinfecting Meter & Lancing Device
All parts of the blood glucose meter and lancing device are considered
biohazardous and can potentially transmit infectious diseases. CLEANING
removes dirt and other visible material whereas DISINFECTING destroys
organisms that can cause infection or disease such as Hepatitis B, C, and HIV.
For complete cleaning and disinfecting instructions see page 48 of this manual.
¹ “ FDA Public Health Notification: Use of Fingerstick Devices on More than One Person Poses Risk for Transmitting Bloodborne Pathogens: Initial Communication” (2010) http://www.fda.gov/MedicalDevices/
Safety/AlertsandNotices/ucm224025.htm
² “CDC Clinical Reminder: Use of Fingerstick Devices on More than One Person Poses Risk for Transmitting Bloodborne Pathogens” (2010) http://www.cdc.gov/injectionsafety/Fingerstick-DevicesBGM.html
7
Warnings, Precautions & Limitations
• Never make significant changes to your diabetes control program or ignore physical symptoms without consulting with your healthcare professional.
• Patients undergoing oxygen therapy may yield false results.
• Severe dehydration (excessive water loss) may cause false low results. If you believe you are suffering from dehydration, consult your healthcare professional right away.
• Extremes in hematocrit may affect test results. Hematocrit levels less than 30% may cause falsely high readings. Hematocrit levels greater than 55% may cause falsely low readings.
• Inaccurate results may occur in severely hypotensive individuals or patients in shock. Inaccurate low results may occur for individuals experiencing a hyperglycemic-hyperosmolar state, with or without ketosis. This meter should not be used to test critically ill patients.
• Triglycerides up to 3,000 mg/dL do not significantly affect test results. However, glucose values in specimens beyond this triglycerides level should be interpreted with caution.
8
• Normal endogenous (within body) natural levels of uric acid, ascorbate (vitamin C), bilirubin, triglycerides, and hemoglobin do not interfere with your blood glucose results obtained.
• Externally taken drugs L-dopa, dopamine, methyl-dopa, acetaminophen, and ibuprofen will not interfere with
GLUCOCARD 01 blood glucose results when taken at therapeutic concentrations.
• The GLUCOCARD 01 Blood Glucose Monitoring System should not be
used for the diagnosis of diabetes.
• Use only fresh capillary blood.
• Do not use the GLUCOCARD 01 Blood Glucose Monitoring System to test neonates. It has not been validated for neonatal use.
• Always insert the test strip into the meter first, then lance the finger. Not doing so may result in an“E-6” appearing on the display or a test result that is higher than the actual value.
• Do not use at altitudes higher than 10,000 ft (3,048 m).
9
The System Includes:
• Meter
• Carrying Case
• User Instruction Manual
• Quick Reference Guide
• Self-testing Logbook
• Test Strips*
• Control Solution*
• Lancing Device and/or Lancets*
*Required, but may be sold separately
Control Solution
10
Carrying Case
UNDERSTANDING THE GLUCOCARD 01 BLOOD GLUCOSE METER
Top
Bottom
Battery
Compartment
Cover
Tab
Display
Test Strip
Port
Orange/Up
Arrow
Data Connection
Terminal
Gray/Down
Arrow
11
Explanation of the full display screen:
Memory Mode Symbol
Battery Symbol
Audible Beep Off
Apply Blood Symbol
Unit of Measurement
Date
Time Format
Temperature Warning
Delete Symbol
Control Solution
NOTE: The correct unit of measurement in the U.S. is mg/dL. If your meter is
not set to mg/dL at the time of purchase, contact ARKRAY Customer Service at
800.566.8558.
12
GLUCOCARD® 01 SENSOR PLUS TEST STRIPS
These test strips need only 0.3 µL (microliter) of blood. Apply blood to the
sample application tip. The strip draws in the blood by capillary action. The
blood glucose reacts with the enzyme on the test strip. This produces a current
proportional to the blood glucose level. The meter detects the current and
converts it into a blood glucose reading.
Test Strip Bottle
Test Strip
Code No.
(F-2, 3 or 4)
Contact Bars
Insert
this way
into
meter
Front
Back
Sample
Application Tip
(Apply blood to
end of test strip.
Capillary draw
will pull blood to
reaction site).
13
Changing the Battery
The GLUCOCARD 01 blood glucose meter comes with one lithium battery CR2032
(or DL2032).
CAUTION: Replacing the battery will not delete meter settings or test results
stored in the meter unless you:
• Take over 5 minutes to replace battery.
• Load the battery incorrectly.
• Load a used or weak battery.
NOTE:
• To save battery power, the meter turns itself off 3 – 5 minutes after last use.
• Replace batteries when low battery symbol appears. Otherwise
inaccurate results could be obtained.
•Discard used batteries as per local guidelines.
WARNING: Keep all batteries out of children’s reach. If a battery is
swallowed, consult a doctor immediately.
14
To replace battery:
1. Open the battery cover on the back
side of the meter by pushing the tab
in the direction of the arrow and
pulling the cover up.
2. The battery is held in place on the
underside of the cover. Slide the
battery out of the cover.
3. Load a new battery into the battery
cover. Place the “+” side down when
loading the battery into the cover.
4. Make sure the battery is loaded in the
proper position. Otherwise, the
preprogrammed times will be reset.
15
5. Put the battery cover back into correct position and snap to close.
If the clock setting has been deleted, either “12:00” or “0:00” will blink
when you put a test strip into the meter. The low battery symbol
means you need to replace the battery as soon as possible. Discard used
batteries as per local guidelines.
16
METER SET-UP
Before using the GLUCOCARD 01 blood glucose meter for the first time, set
the time and date. Do not perform a blood glucose test until you have setup the meter.
Meter set-up allows you to adjust the audible
beep volume and to set time, date, and test
averaging.
Basic rules for meter set-up:
Step 1: Enter meter set-up by first
making sure the meter is turned off.
Orange/Up
Arrow
Gray/Down
Arrow
17
Step 2: Press the Orange/Up Arrow and Gray/
Down Arrow buttons at the same time for 5 seconds.
A beep sounds and the meter turns on. Next, a second
beep sounds and “SET” shows on the screen.
Step 3: Use the Orange/Up Arrow to change the set-up screen. When you
press the Orange/Up Arrow, the set-up screen changes in the order shown
in the diagram to the right. Press the Gray/Down Arrow button to change a
setting within a set-up screen menu.
NOTE: If you need to go back to a setting, you must scroll through each
set-up option. You cannot go backwards in set-up mode. In set-up mode,
the meter will turn off automatically after 3 minutes of non-use.
18
Setting
the
1 Audible
Beep
Orange
Arrow
Orange
Arrow
Orange
Arrow
Orange
Arrow
Setting
Setting
7 Test
Set-up
<Power OFF>
the Day
Month
Return
8 Ending
Orange
Arrow
4 Setting
3 the
the Year
Orange
Arrow
Gray Arrow
Setting
2 Setting
6 the
Averaging
Orange
Arrow
Minute
Setting
5 the Hour
Orange
Arrow
Orange
Arrow
19
Setting the Audible Beep
If the audible beep is turned “on”, the beep will sound when:
• You insert a test strip into the meter.
• You apply blood or control solution to a test strip.
• The test has ended and the result is displayed.
• The meter is turned on, but you do not use it for several minutes. Meter will beep and automatically shut off.
• You go into Memory Mode.
Make sure the meter is off. Press the Orange/Up Arrow and Gray/Down Arrow buttons at the same time for 5 seconds. A beep sounds and the meter ep
turns on. Next, a second beep sounds and “SET” Be shows on the screen.
Press the Orange/Up Arrow button. The screen will
display “bUZ” and the current beep setting.
20
Press the Gray/Down Arrow button to cycle through the volume levels: “OFF” (no sound)
”on 1” (low)
[1]
“on 2”(middle)
“on 3” (high)
“OFF” (no sound) …, etc.
A beep sounds at the set volume
at each step. If “OFF” is set, the
“audible beep mute (Off)” symbol
lights up in the upper right of the
screen. After you select the beep
volume, press the Orange/Up Arrow
button to confirm the setting. The
screen changes to the year
set-up screen.
[1]
Be
ep
Be
[1]
ep
ep
Be
[1]
21
Setting the Year
In the year set-up screen, the last two digits of the
currently set year appear at the top of the screen.
“yER” appears in the middle of the screen. All four
digits of the currently set year appear at the
bottom of the screen. The last two digits will blink.
Press the Gray/Down Arrow to change the last
two digits of the year to the correct year. After you
set the year, press the Orange/Up Arrow button to
confirm the setting. The screen changes to the
month set-up screen.
[1]
[2]
[3]
22
Setting the Month
Press the Gray/Down Arrow button to change the month.
After you set the month, press the Orange/Up Arrow
button to confirm the setting. The screen changes to the
day set-up screen.
Setting the Day
Press the Gray/Down Arrow button to change the day.
After you set the day, press the Orange/Up Arrow button
to confirm the setting. The screen changes to the hour
set-up screen.
[1]
[2]
[3]
[4]
23
Setting the Hour
Press the Gray/Down Arrow button to change the hour.
After you set the hour, press the Orange/Up Arrow
button to confirm the setting. The screen changes to the
minute set-up screen.
[1]
Setting the Minute
Press the Gray/Down Arrow button to change the
minute. After you set the minute, press the Orange/
Up Arrow button to confirm the setting. The screen
changes to the test averaging set-up screen.
[2]
[3]
[4]
24
Setting Test Averaging
NOTE: “Lo” results are included as 20 mg/dL in the averages. “Hi” results
are included as 600 mg/dL in the averages.
Press the Gray/Down Arrow button to cycle
through the test averaging choices: “oFF”
(not displayed), “14” (14-day average), or “30”
(30-day average).“AVE” appears near the
middle of the screen.
If you select either 14-day or 30-day averaging,
your average test result will appear when you
recall results from memory. See page 69.
After you set test averaging, press the
Orange/Up Arrow button to confirm the
setting. The display changes to the data
download baud rate set-up screen.
25
Ending Set-up
To make further changes to set-up settings, press the Gray/Down Arrow button while “End” is
displayed. This will bring up the Audible Beep
set-up screen. You can then move through the
set-up mode and adjust any settings that you wish.
If you are done with set-up, press the Orange/Up
Arrow button while “End” is displayed. This
confirms all settings and turns the meter off.
ep
Be
<Power OFF>
The meter will turn off automatically 3 minutes after “End” is displayed.
26
PERFORM A CONTROL SOLUTION TEST
It is recommended to use GLUCOCARD® 01 CONTROL to check if:
• the meter and test strips are working correctly as a system.
• you are testing correctly.
Call your local supplier or pharmacy to order control solution. If they do not
stock it, call ARKRAY Order Services at 800.566.8558 (USA and Canada only).
27
It is recommended to perform a Control Solution Test:
•
•
•
•
•
•
When you open a new bottle of test strips.
Whenever you suspect the meter or test strips may not be functioning properly.
If test results appear to be abnormally high or low or are not consistent with clinical symptoms.
The test strip bottle has been left open or has been exposed to temperatures below 34°F (1°C) or above 86°F (30°C), or humidity levels outside the range of 20%-80% relative humidity.
To check your technique.
When the GLUCOCARD 01 blood glucose meter has been dropped or stored below 32°F (0°C) or above 122°F (50°C).
IMPORTANT:
• Use only with GLUCOCARD 01 blood glucose meter and GLUCOCARD 01 SENSOR PLUS blood glucose test strips.
28
• GLUCOCARD 01 CONTROL is not intended for human consumption. Do not drink.
• Do not apply to eye. Contact your healthcare professional immediately if solution is swallowed, injected, or applied to the eye.
• Dye in control solution may stain skin, clothing, or surfaces.
• Store the control solution between 34-86°F (1-30°C). Keep away from direct sunlight, fluorescent light, and heat. Do not freeze.
• Use before the expiration date printed on bottle.
• Use the control solution within 3 months of first opening. It is recommended that you write the date of opening on the control solution bottle label (OPEN DATE) as a reminder to dispose of the opened solution after 3 months.
• Always replace the cap immediately after use.
• GLUCOCARD 01 CONTROL is not a cleaning solution. Do not clean your GLUCOCARD 01 blood glucose meter with GLUCOCARD 01 CONTROL.
• Use the Control Solution between 72-82°F (22-28°C).
29
Step 1: Insert a test strip as shown in diagram. Test strip should seat
firmly into meter. The meter will turn on automatically. The full screen will
come on for a moment. Make sure all symbols appear on the screen (see
page 12). Then the code number (F-2, F-3, or F-4) will appear and will
alternate with the Apply Blood symbol. Make sure that the code number
on the screen matches the code number on the test strip bottle. If screen
code does not match the test strip code, use a new test strip. If code still
does not match, use a new bottle of test strips or call Customer Service at
800.566.8558 (24 hours a day, 7 days a week, USA and Canada only).
30
Step 2: Press the
Orange/Up Arrow
button to enter the
control mode. You
will see “CONT” on
the bottom right of
the screen.
If you do not
enter the control
solution mode,
the control
solution result
will NOT be
valid.
Orange/Up
Arrow
Gray/Down
Arrow
31
Step 3: Mix control solution by gently
inverting bottle. Remove the cap from the
control solution bottle. While the Apply Blood
symbol and Code No. (F-2, F-3 or F-4) are
alternating, place a drop of the control solution
on the end of the test strip. DO NOT put
control solution on top of the test strip.
The test strip will draw up the solution and the
meter will beep. The meter will begin to count
down.
Step 4: In 7 seconds the meter will beep
again and display the control solution result.
Compare the result to the range printed on
the test strip bottle. Make sure the result is
within the acceptable range. If the result falls
within this range, the meter and test strip are
working correctly.
32
Do not use the system if control solution result is out of range. See
Troubleshooting Control Solution Test (page 34).
Result is automatically stored in memory. See page 69 for additional
information
Step 5: Remove test strip. Dispose of the used test strip.
Control solutions are available in three (3) levels - L1, L2, and L3.
Repeat Steps 1-5 with other Control Solution levels as per
recommendations of your healthcare professional.
Call your local supplier or pharmacy to order control solution. If they do not
stock it, call ARKRAY Order Services at 800.566.8558 (USA and Canada
only)
NOTE: Control solution test results are not included in the averages.
33
Troubleshooting Control Solution Test
If the control solution test result is out-of-range, check the following and repeat the test:
Check
Action
Did you do the test in control solution mode? Do you see “CONT” on the screen with the result? If not, do the test again. Insert a
test strip; press the Orange/Up Arrow
button for control solution mode.
“CONT” should appear on screen.
Make sure that test strips and control
solutions are not past expiration date.
Have the test strips and/or
This date is shown on bottle. Make
control solution expired?
sure bottles have not been opened
for more than three months.
Were control solutions at room If not, retest with new bottle
temperature (72-82°F (22-28°C))
of control solution, or warm up/cool
when used?
down to room temperature.
Does the code on the test strip bottle If not, obtain a new bottle
match the code on the meter screen? of test strips.
34
Check
Did you insert test strip
firmly into meter?
Did you follow the procedure correctly?
Action
Make sure test strip is inserted
all the way into test strip port.
See diagram on page 30.
Reread “Performing a Control
Solution Test” (pages 27-33) and retest.
Were test strips stored correctly (between 34-86°F (1-30°C))?
If not, retest with a
Was the bottle cap replaced
new bottle of test strips.
immediately after removing
a test strip?
Is the meter damaged? If yes, contact ARKRAY Customer Service at
Does it show an error code? 800.566.8558.
35
Does your Control Solution result still read outside the range printed on the
test strip bottle? If yes, the system may not be working correctly. DO NOT
USE the system to test your blood glucose until the control solution result
is within range. If you need help, please call ARKRAY Customer Service at
800.566.8558 (24 hours a day, 7 days a week, USA and Canada). Contact
your diabetes healthcare professional if you cannot reach Customer Service.
36
BLOOD GLUCOSE TESTING
Obtaining a Drop of Blood
Step 1: Wash hands with soap and warm water. Dry
hands thoroughly. If you use alcohol wipes to cleanse
fingers, make sure the area is dry before lancing finger.
Residual alcohol may lead to inaccurate readings.
Step 2: Let the arm hang down for 10 to 15 seconds.
(Holding the arm below the heart and massaging
the wrist, palm and finger makes it easier to obtain
a blood drop).
Step 3: Choose a site on the side of a fingertip to
minimize pain.
37
Step 4: Press the lancing device to the side of the fingertip.
Press the lancing device button. Follow manufacturer’s
instruction for how the lancing device or lancet should
be used.
Step 5: Set aside the lancing device and wait a few seconds for a blood
drop to form. Keeping the hand warm, lowering the hand to waist level and
gently massaging your wrist, palm or the base of the finger helps the flow of
blood. Use a different site each time you test to help prevent soreness and
calluses.
DO NOT share used lancets with another person. To prevent possible
infection, a used lancet should not be touched by another person.
A lancet should only be used once. After use, put the protective cap
back on and dispose of lancet in a safe manner to avoid accidental
stick injuries.
38
NOTE: Do not use the lancet if the cap is missing or damaged.
WARNING: Lancing devices, lancets and meters are for single-patient use
only and should never be shared with another person, even a family member.
This lancing device should not be used for multi-patient testing by healthcare
providers or at healthcare provider sites.
All parts of the kit are considered biohazardous and can potentially transmit
infectious diseases, even after you have performed cleaning and disinfection.
39
Performing a Blood Glucose Test
NOTE: Four and a half minutes after test strip insertion, a beep sounds
every 5 seconds. After 5 minutes, a beep sounds and the meter turns off.
Take out unused test strip and insert it again to turn meter back on.
Step 1: Remove test strip
from the bottle. Immediately
replace the bottle cap tightly.
Insert test strip as shown in
diagram. A beep will sound
and the meter will turn on
automatically. Verify that
all symbols appear on
the screen.
40
Step 2: The beep will sound again. The Apply Blood symbol
and the
code number (F-2, F-3, or F-4) will alternate on the screen. Verify that
the code number on the screen matches the code number printed
on the bottle. If the code number does not match, the meter may give
a false reading. If code does not match, use a new strip. If code still does
not match, use a new bottle of test strips or call Customer Service at
800.566.8558 (24 hours a day, 7 days a week, USA and Canada only). Verify
that the date and time appear on the screen and are correct. If date and time
are not correct, reset them (see Meter Set-up, page 17).
41
Step 3: Obtain a blood drop (see pages 37-39).
Apply blood to the end of the test strip. Capillary
action will pull the blood into the strip. The meter will
beep when it detects that blood has been applied.
The meter will begin to count down. Do not add
blood on top of the test strip, as you may receive
an inaccurate result.
IMPORTANT: Ensure that enough blood is applied
to fill the check window and it turns red. When the
check window is filled with blood and a beep
sounds, remove the tip of the test strip from your
finger. If there is not enough blood, “E-7” or “Lo”
will be displayed.
Filled
42
Filled
Not Filled
Not
If it takes longer than 20 seconds to obtain a blood sample and
to touch the test strip to the blood drop, repeat Step 3.
Step 4: The meter will count down, starting from “7”.
After 7 seconds, a beep sounds and the test result
and date/time are shown.
Results will be shown in units of mg/dL.
Record result in your logbook.
Step 5: When the test is done, pull out test
strip. Dispose of used test strip carefully. The
meter shuts off automatically when you
remove the test strip.
A lancet should be used once. After use, put protective
cap back on and remove lancet from lancing device.
Dispose lancet in a safe manner so as not to cause
accidental injury.
mg/dL
43
Flagging Test Results
You can mark a test result with either “DEL” or
“CONT” or leave it unmarked.
You must mark the test result after it has been
displayed, but before you remove the test strip
from the meter. You cannot change the marker
after removing the test strip from the meter.
mg/dL
• “DEL”: Mark a test result with “DEL” if you feel the result is incorrect or the test procedure was not followed correctly. The result will be stored
in memory, but will not be used for Test Averaging. (See page 25).
• “CONT”: Mark control solution test results with “CONT”.
(See page 31).
Step 1: Wait for test result to be displayed. Be sure test strip is still in meter.
Press the Orange/Up Arrow button to cycle through the options:
“DEL”—> “CONT” —> Unmarked —> “DEL”, etc.
44
Step 2: When you have selected the desired
marker, remove the test strip. When you recall
the result from memory, the selected marker
will be displayed (“DEL”, “CONT” or no marker). mg/dL
NOTE: The following are NOT included in
the 14-day or 30-day test averages: • Results collected in Control Solution mode (and therefore marked“CONT”).
• Results marked “CONT” or “DEL” by you.
• Results obtained when date and time have not been set.
[1]
mg/dL
[2]
mg/dL
NOTE: Results collected in Control Mode automatically show “CONT” when
the result is first displayed and when it is reviewed in Memory.
45
CLEANING & DISINFECTING METER & LANCING DEVICE
WARNING:
• The meter and lancing device are for single patient use. Do not share them with anyone including other family members! Do not use on multiple patients!
• All parts of the kit are considered biohazardous and can potentially transmit
infectious diseases, even after you have performed cleaning and disinfection.¹,²
CLEANING removes dirt and other visible material whereas DISINFECTING
destroys organisms that can cause infection or disease such as Hepatitis B, C,
and HIV.
Your meter and lancing device should be CLEANED and DISINFECTED
a minimum of once per week and immediately when blood is visible, for up
to 2 cleaning and disinfection cycles per week over the 4 year use life of the
device.
46
If meter is being operated by a second person who is providing testing assistance
to the user, the meter and lancing device should be cleaned and disinfected prior
to use by the second person. In addition, caregivers should wear gloves when
testing another person’s blood. Wash hands thoroughly with soap and water after
handling the meter, test strips, lancing device or disinfecting wipes.
For technical assistance or questions on cleaning and disinfecting,
call ARKRAY Customer Service at 800.566.8558 (24 hours a day, 7 days a
week, USA and Canada only).
¹ “ FDA Public Health Notification: Use of Fingerstick Devices on More than One Person Poses Risk for Transmitting Bloodborne Pathogens: Initial Communication” (2010) http://www.fda.gov/MedicalDevices/
Safety/AlertsandNotices/ucm224025.htm
² “CDC Clinical Reminder: Use of Fingerstick Devices on More than One Person Poses Risk for Transmitting Bloodborne Pathogens” (2010) http://www.cdc.gov/injectionsafety/Fingerstick-DevicesBGM.html
47
CLEANING and DISINFECTING your meter or lancing
device with germicidal disposable wipes.
Use one wipe for cleaning and a second wipe for disinfecting.
The following product has been validated to CLEAN and DISINFECT your
meter and lancing device.
Manufacturer’s
Active
Product
Item No.
Ingredients
Clorox® Germicidal
30577
Sodium
Wipes
Hypochlorite............0.55%
*Product accessibility may vary according to retail availability.
48
Where to Buy*
Retail:Kmart, Sears,
Office Depot, Office Max
Online: www.amazon.com
and www.walmart.com
CLEANING
Step 1: Remove wipe from container.
Step 2:
METER: Hold the meter in an upright position with test strip
port toward the floor and wipe down all exposed surfaces of
meter.
• DO NOT WRAP THE METER IN A WIPE.
• Do not over saturate with liquid or let drops of disinfectant
flow into test strip port, buttons, lens or other meter
openings.
• Do not wipe inside battery compartment, inside data
connection port or inside test strip port as this may damage
the meter.
LANCING DEVICE: Remove removable cap.
Wipe down entire lancing device and removable cap.
Step 3:
Dry the device thoroughly with a dry cloth.
49
DISINFECTING
Two wipes must be used; one wipe to clean and a second wipe to disinfect.
After cleaning your meter or lancing device, repeat steps 1, 2 and 3 using a
second germicidal wipe to disinfect.
Allow meter and lancing device to remain visibly wet for full contact time
detailed below.
Contact Time
Clorox® Germicidal Wipes
1 minute
NOTE: Your meter and lancing device should be CLEANED and DISINFECTED
a minimum of once per week and immediately when blood is visible, for up to 2
cleaning and disinfection cycles per week over the 4 year use life of the device.
Over time, cleaning and disinfecting may cause meter and lancing device
deterioration. ARKRAY has validated a 4 year use life by exposing the meter
and lancing device to 832 wipes (416 cycles) with the disinfectant product
listed on page 50 of this user manual. This supports cleaning and disinfection
twice per week over the 4 year use life of the device.
50
Physical signs of deterioration include:
• Cloudy or cracked meter lens.
• Cracked meter case.
• Debris under meter lens.
• Meter display missing components.
• Lancing device cap is cloudy or streaked.
• Body of lancing device shows signs of cracking, swelling, streaking, softening
or brittleness.
Performance signs of deterioration include:
• Meter buttons not working properly.
• Meter doesn’t register test strip, control solution or blood sample.
• Meter turns off.
• Firing button on lancing device is stuck and won’t release.
• Lancing device depth setting dial is frozen/stuck.
• Lancing device disposal-and-set lever is frozen/stuck.
• Lancing device cap can’t be removed or replaced.
If you notice any signs of deterioration, as mentioned above, stop using the
device and please call ARKRAY Customer Service at 800.566.8558
(24 hours a day, 7 days a week, USA and Canada only).
51
ALTERNATE SITE TESTING (AST)
Important Information About AST
Sites other than your fingertip may have fewer nerve endings so obtaining a blood
sample from these sites may be less painful. The technique for alternate site testing
is different from fingertip testing. Blood glucose results from sites other than your
fingertip could be significantly different due to blood glucose levels changing rapidly
after a meal, insulin, or exercise.
Consult with your diabetes healthcare professional prior to testing from a site other
than your fingertips.
Results obtained from sites other than the fingertip may differ significantly as is the
case with all blood glucose monitoring systems. Rapidly changing results are likely
to occur after eating. Insulin dosing and physical activity are shown in the fingertip
more quickly than in alternate sites.
AST results must not be used to calibrate continuous glucose monitoring systems or
for insulin dose calculations.
52
Consider Alternate Site Testing When
• Testing before a meal.
• You are in a fasting state.
• Two hours have passed since a meal.
• Two hours have passed since insulin dosing.
• Two hours have passed since physical activity.
Use Fingertip Testing
• Within two hours after a meal.
• Within two hours after insulin dosing.
• Within two hours after physical activity.
• If you have a history of hypoglycemia, are experiencing low blood glucose, or suffer from hypoglycemic unawareness (you cannot tell when you have low blood glucose).
• To confirm your blood glucose level if your AST result is not consistent with how you feel.
• During times of stress or illness.
53
Ask your diabetes healthcare professional about recommended testing
procedures when operating machinery or driving a car, as fingertip testing is
usually the preferred method of testing under these circumstances.
Preparing to Test Your Blood Glucose From an Alternate Site
Choose a Site: Select a soft, fleshy
area on the palm that is free of visible
veins and moles and away from bone.
Wash the area with warm, soapy water.
Rinse and dry completely. If you use
alcohol wipes to cleanse the site, make
sure the area is dry before lancing the site.
54
Performing a Blood Glucose Test From an Alternate Site
Step 1:
Insert lancet and cock lancing device.
Step 2:
Remove test strip from the bottle.
Immediately replace the bottle cap
tightly. Insert test strip as shown
in diagram. The meter will turn on
automatically. The Apply Blood
symbol will flash on screen.
55
Step 3:
a) Press and vigorously rub the selected area for
10 seconds until it starts to feel warm to the touch.
b) Firmly hold the cocked lancing device
against the clean skin for 5-10 seconds.
c) Press the release button on the lancing device
to lance the skin. Drop your hand down to your
side and let the blood drop pool to a deep red color.
If blood drop does not build bigger, lance again. Look
for a round drop of blood.
Actual size
56
IMPORTANT
• Repeat blood draw if fluid is not a deep red color.
•DO NOT TEST BLOOD if sample is smeared, flattened out, or not forming a round drop. Repeat steps starting at Step 3.
• If it takes longer than 10 SECONDS to obtain a blood sample, and any sample has been applied to the strip, discard strip and use a
new strip before proceeding.
Step 4:
Pick up the meter. Check screen to make sure Apply
Blood Symbol is flashing. If meter has shut off, reinsert
strip. Touch the end of the test strip to the blood sample
until the reaction site is full. Immediately remove the
meter and test strip from the blood drop.
DO NOT push test strip through blood drop
and make contact with skin. This may block
off wicking action into the strip.
57
IMPORTANT
• Was the sample deep red in color and free of watery fluid?
• Was the drop large enough (at least 0.3 µL)?
• Did the reaction site fill with enough blood all at once?
IF NOT, REPEAT TEST.
Step 5:
The meter will count down and display result in 7 seconds.
CONSIDER YOUR RESULT. REPEAT ALTERNATE SITE TEST:
• IF the blood sample appeared to be diluted with clear fluid.
• IF you did not vigorously rub the test site.
• IF the blood drop was not large enough to fill the reaction site.
• IF the test was accidentally marked as a “Control” result.
• IF your result was not consistent with how you feel.
• IF more than 10 seconds elapsed from sample collection to measurement
(evaporation of the blood sample may cause an inaccurate result).
Filled
58
Not Filled
Any of the listed situations can lead to an inaccurate test result.
If the repeated alternate site result is still not consistent with how you feel,
confirm your blood glucose level with fingertip testing.
Step 6: Dispose of used test strip. The meter shuts off automatically.
The result is automatically stored in memory with the time and date.
Record result in your logbook.
59
DOWNLOADING TEST RESULTS TO A COMPUTER
We offer a variety of diabetes management software systems to help you
download your test results to a computer. For more information on ARKRAY
Diabetes Management Software and which software system meets your
needs, call ARKRAY Customer Service at 800.566.8558 (24 hours a day, 7
days a week, USA and Canada only).
60
UNDERSTANDING TEST RESULTS
The GLUCOCARD 01 blood glucose meter is referenced to a fresh plasma
sample. Your meter results may differ from clinical lab results. This is due
to normal variation. To compare your meter with lab results, follow the
guidelines below.
Perform a control solution test. This makes sure your meter and test strips
are working correctly. Wait at least 2 hours after a meal or drink (other than
water) before doing a comparison. If the lab test needs venous blood, you
must fast before giving a blood sample.
Blood samples for both tests must be taken and tested within 15 minutes
of each other. Collect blood for the lab test with an approved preservative.
See test strip insert for additional information. GLUCOCARD 01 blood
glucose meter is plasma referenced.
61
ALWAYS wash hands with warm soapy water. Rinse and dry them before
testing. ALWAYS use fresh capillary whole blood on meter tests.
You may still see a difference from the lab result. This can be due to several
causes. Blood glucose levels can change over short periods of time, for
example due to food or stress. Test strip results also may vary due to
medications or to low or high hematocrit.
Analyze data with a clinically acceptable method.
Your test results will vary over time. For example, results may vary due to:
1) The time of day the test was done.
2) The food you eat.
3) Activities you do.
4) The insulin and other medications you take.
If your readings do not seem correct, repeat the test. Contact your
healthcare professional immediately if:
• abnormally high or low readings persist.
• your test results do not match your symptoms.
62
Expected Blood Glucose Readings
Expected blood glucose levels for adults without diabetes¹:
Fasting and before meals <100 mg/dL
1-2 hours after meals <140 mg/dL
High Blood Glucose Readings
If your blood glucose is above 600 mg/dL, you will receive a “Hi.” Repeat
the test with a new test strip. If this message shows again, contact your
healthcare professional immediately!
Contact your physician for advice if test results are very high2 (above 240
mg/dL) or you have symptoms of high blood glucose. These symptoms
include dry mouth, thirst, frequent urination, nausea, vomiting, blurred
vision, sleepiness, or abdominal pain. Symptoms will vary person to person.
You may have one or more of these symptoms, or none at all.
63
Low Blood Glucose Readings
If your blood glucose is below 20 mg/dL, you will receive a “Lo.” Repeat
the test with a new test strip. If this message shows again, contact your
healthcare professional immediately!
Contact your physician for advice if test results are very low3 (below 70 mg/
dL) or you have symptoms of low blood glucose. Symptoms of low blood
glucose include sweating, shakiness, trembling, blurred vision, hunger,
headache, confusion, rapid heartbeat, or tingling or numbness around the
mouth or fingertips. Symptoms will vary person to person. You may have
one or more of these symptoms, or none at all.
Diabetes Findings
In 1993, the National Institutes of Health concluded an extensive long-term
study of people with Type 1 diabetes. This study, called the Diabetes Control and
Complications Trial (DCCT), found that by keeping your blood glucose close to the
levels of people without diabetes you can reduce the risk of complications involving
the eyes, kidneys, and nervous system by approximately 60%4.
64
What This Means for You
Frequent blood glucose testing is the best means you have for keeping track of how
well you are doing with the factors that affect your diabetes-medication, diet, exercise,
and stress management. Blood glucose test results can also tell you whether your
diabetes is changing in ways that might require an adjustment to your treatment plan.
Always consult your healthcare professional before making any changes in managing
your diabetes.
Frequency of Testing
How often you need to test your blood glucose will vary according to your age,
the type of diabetes you have, the medications you are taking, and your physical
and emotional health. Your healthcare professional will guide you. After deciding
when and how often you should test, it is important that you make testing part
of your routine.
Recommendations for Better Diabetes Control
• Follow the advice of your healthcare professional.
• Follow the exercise and meal plans recommended by your healthcare
professional.
65
•
•
•
•
Take insulin or diabetes medication at your scheduled times.
Keep in touch with your emotional and physical condition. Stress or illness can affect diabetes.
Watch for symptoms of hypoglycemia (low blood glucose) and
hyperglycemia (high blood glucose).
• Always record your test results in your logbook. The logbook assists you in
keeping a record of your blood glucose results, along with information on
your food intake, exercise, and medication.
• Review your logbook of test results with your healthcare professional
regularly.
References
1American Diabetes Association: Diabetes Care Vol 36 (Supp.1) January 2013, pS1-S100.
2 Krall, L.P. and Beaser R.S.: Joslin Diabetes Manual. Philadelphia: Lea and Fibiger
(1989), 261–263.
3 Kahn, R. and Weir, G.: Joslin’s Diabetes Mellitus. Philadelphia: Lea and Fibiger
(1994), 489.
4American Diabetes Association position statement on the Diabetes Control and Complications Trial (1993).5
66
RECALLING RESULTS - ENTERING MEMORY MODE
The GLUCOCARD 01 blood glucose meter stores up to 360 test results.
When more than 360 test results have been performed, the meter drops
the oldest result each time you add a new result. Before using the memory,
remove test strip from meter and make sure meter is turned off.
Step 1: Press the Orange/Up Arrow button for
2 seconds. A beep sounds and the test meter turns
on and shows all screen symbols. The meter next
shows the year, date, and time. After 2 seconds,
either the Test Average or the most recent
test result will appear.
Orange/Up
Arrow
Gray/Down
Arrow
67
• If Test Averaging has been turned on, the
average result will appear first. Either “14d”
or “30d” will show at the bottom of the screen for either a 14-day or 30-day average. “AVE” will appear above “14d” or “30d”.
[1]
• If Test Averaging has been set to “Off”, the
display will briefly flash the number “1” at the
bottom of the screen. Then, the most recent test result appears with the date and time of the test.
“MEM” will display at the top of the screen.
This shows it is a stored result.
Step 2: Press the Orange/Up Arrow button
to scroll through memory. Press and hold the
Orange/Up Arrow button to move through the
results quickly. Press the Gray/Down Arrow
button to move backwards through results in
memory.
68
[3]
mg/dL
mg/dL
mg/dL
mg/dL
mg/dL
[2]
Step 3: After all test results have been reviewed, “End” appears. •
•
Press the Orange/Up Arrow button once to go back to the first result in memory. You can then scroll through results in memory again.
Press the Gray/Down Arrow button for 2 seconds to exit Memory and turn off the meter. You can exit Memory in this way at any time when recalling results.
NOTE:
• If no tests have been performed, or all test results have been deleted, the current date and time appear first, then “End” appears.
• If 3 minutes elapse before either the upper or lower button is pressed, a beep sounds and the test meter turns off automatically.
69
Deleting all test results
Step 1:
Press both the Orange/Up Arrow and
Gray/Down Arrow buttons for 5 seconds while
“End” is shown. You will see “dEL” and “ALL”
alternating on the screen.
[1]
Step 2:
[2]
Step 3:
[3]
Next press the Gray/Down Arrow
button for 5 seconds. “End” appears again. All
test results have now been deleted.
Press the Gray/Down Arrow button for
2 seconds to turn off test meter.
NOTE: To get to “End” of memory results quickly, turn off meter, then enter
Memory Mode. Next press the Gray/Down Arrow button to go backwards in
the memory list to reach “End”. NOTE: Deleted test results cannot be recovered.
70
MAINTENANCE
Display Screen and Error Messages
Please first read this section. If you still have questions, call ARKRAY
Customer Service at 800.566.8558 (24 hours a day, 7 days a week, USA
and Canada only). Contact your healthcare professional if you cannot reach
Customer Service. Do not send your meter to ARKRAY or your local dealer
without first calling to get approval to do so.
If any part of the display screen is missing
when the meter is turned on, call ARKRAY
Customer Service at 800.566.8558 (24 hours a day,
7 days a week, USA and Canada only).
71
Your blood glucose level is less than 20 mg/dL or there was
not enough blood on test strip. Repeat test with new test
strip. Make sure you use enough blood to fill the strip. If this
message shows again, contact your healthcare professional
immediately!
Your blood glucose level is more than 600 mg/dL. Repeat
test with new test strip. If this message shows again, contact
your healthcare professional immediately.
Battery power is too low for testing. Replace batteries
immediately. Results may not be accurate when testing
with low battery symbol on.
Thermometer symbol. The meter temperature is outside
acceptable range of 50˚F-104˚F (10˚C-40˚C). Allow the meter
and test strips to warm up or cool down slowly (20 minutes)
until the temperature warning symbol goes away.
72
The meter is faulty. Contact ARKRAY Customer Service
at 800.566.8558.
The meter temperature is outside acceptable
range of 50˚F-104˚F (10˚C-40˚C). Allow the meter
and test strips to warm up or cool down slowly
(20 minutes) until the temperature warning
symbol goes away.
The meter is faulty. Contact ARKRAY Customer Service
at 800.566.8558.
The meter is faulty. Contact ARKRAY Customer Service
at 800.566.8558.
73
Test strip problem. Contact bars on test strip may be
dirty. Incorrect test strip used. Used test strip has been
inserted. Repeat test with new test strip.
Not enough blood added to test strip. Or incorrect
blood application technique. Retest with new test strip.
Code Number. This shows the code number currently in
the meter. The number on the screen must match the
number on the test strip bottle. If screen code does not
match the test strip code, use a new test strip. If code still
does not match, use a new bottle of test strips or call
ARKRAY Customer Service at 800.566.8558.
Apply Blood Sample. The Apply Blood symbol flashes
alternately with strip code number (F-2, F-3, or F-4).
This shows that the meter is ready for the blood sample.
74
Apply Control Solution. The Apply Blood symbol flashes
alternately with the strip code number (F-2, F-3, or F-4)
and “CONT” appears at the bottom of the screen.
This shows the meter is ready for you to apply control
solution.
Test Result. The meter shows results between 20
and 600 mg/dL.
mg/dL
Test Average has no results stored. Test Averaging has
been set to 14-day or 30-day but there are no results
stored yet in memory.
For errors not listed, do not attempt to use meter.
Contact ARKRAY Customer Service at 800.566.8558
(24 hours a day, 7 days a week, USA and Canada only).
75
Storage and Handling
• Store meter at 32°F-122°F (0°C-50°C).
• Do not leave the meter in very hot or cold places. Do not leave it near a heat source (radiator) or in a car in hot or cold weather.
• Do not store or use meter or test strips in high humidity, such as a
bathroom or kitchen.
• Do not use a meter that has been dropped into water, or if any water has entered the meter. Even if you dry it, correct test results may not be obtained, and malfunction may result.
• Do not store meter or test strips near bleach or cleaners that contain bleach.
• Do not drop meter. This can damage the meter. If you do drop meter, check it with a control solution test.
• Do not take the meter apart. • Do not leave test strips out of their bottles.
• Do not hold test strips with fingers for a long period of time.
• Do not hold test strips with wet or dirty fingers. Otherwise correct test results may not be obtained.
76
If you have technical problems or questions, please call Customer Service
at 800.566.8558 (24 hours a day, 7 days a week, USA and Canada only).
Contact your healthcare professional with questions if you cannot reach
ARKRAY Customer Service.
77
PRODUCT INFORMATION
Product Specifications
Test Strips: Result Range: Calibration: Sample Size: Blood Source: Hematocrit Range: Test Time: Assay Method: Power Source: Battery Life: Screen Type: Memory: Average: Automatic Shut Off: Size: Weight: Operating Ranges: Altitude: Unit of Measurement: 78
GLUCOCARD 01 SENSOR PLUS.
20-600 mg/dL.
Plasma referenced.
Minimum 0.3 µL.
Fresh capillary whole blood.
30% - 55%.
7 seconds.
Biosensor, Glucose Oxidase (Aspergillus niger sourced).
One 3-volt lithium battery (CR2032 or DL2032).
Approximately 2,000 tests.
Liquid Crystal Display (LCD).
360 results with time & date stamp.
14-day or 30-day averaging.
3 – 5 minutes after last user action.
2" x 3.9" x 0.5".
1.6 oz (with battery).
50°F-104°F (10°C-40°C), 20% - 80% relative humidity.
10,000 ft. (3,048 meters).
mg/dL.
Warranty
You are a valued customer of ARKRAY. It is important to us that you are
completely satisfied with your GLUCOCARD 01 blood glucose meter.
ARKRAY warrants your GLUCOCARD 01 blood glucose meter will be free
from defects in materials and workmanship for a period of five years from
the date of the original purchase. If during this time the meter does not work
properly because of a defect in materials or workmanship, ARKRAY agrees to
replace or repair, free of charge any and all parts proven to be defective and
subject to warranty.
This warranty is in lieu of all other warranties, expressed or implied, including
any implied warranty of merchantability or fitness for any purpose, other than
stated herein.
This warranty does not apply to the performance of the GLUCOCARD 01 blood
glucose meter that has been damaged by accident or has been altered, misused,
tampered with, or abused in any way. This warranty only applies to the original
purchaser of the meter and/or its agents.
79
Returns
You must contact ARKRAY Customer Service at 800.566.8558 before
returning your meter. You will be instructed how to return the meter to
ARKRAY. Returned meters without this authorization will not be accepted.
ARKRAY USA, Inc.
Minneapolis, MN 55439 USA
TEL 800.566.8558
FAX 952.646.3110
www.arkrayusa.com
©2015 ARKRAY, Inc.
GLUCOCARD® is a registered trademark of ARKRAY
PN 7267-02
Rev 01/15