1
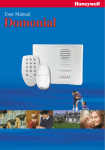
DOMONIAL USER MANUAL Congratulations on the purchase of your DOMONIAL security system This system is designed to operate on an authorised radio frequency and will in no way endanger the user. To make the best out of your system we advise you to read this manual carefully. INDEX 1 Introduction to the security system 4 2 Understanding the system tones 6 3 How to use the wireless keypad with display* 8 4 How to use the wireless keypad with prox reader 22 5 How to use the keyfob with 1 LED 26 6 How to use the keyfob with 3 LEDs 28 7 Understanding detector* operation 31 8 How to control your system over the telephone 32 9 Maintenance and recommendations 34 *Optional: your installation may include one or more controlling devices and/or one or more detectors. 3 1 Introduction to the security system The Domonial control panel/communicator unit is the brain of your security system. It exchanges information with the associated wireless peripherals. The control panel centralises the data sent by the detectors, records the arming and disarming operations and communicates with your Alarm Company. The control panel also includes a speaker for alarm signalling and audio verification. CHARACTERISTICS RADIO Narrow band frequency modulation Identification code specific to each component (no possible interference between neighbouring systems) Protection against attempted jamming Radio monitoring of the system detectors and sirens ELECTRICAL 240V mains with battery backup Built-in voltage surge protection System supply monitoring TRANSMISSION Built-in telephone transmission Telephone line loss detection Transmission monitoring by periodical tests Optional GSM transmitter OPERATIONAL Up to 3 protected sets : total set, partial set, annex set Up to 30 detectors Alert functions Control panel and detectors protected against tampering 4 INDICATOR LIGHTS The front cover of the control panel features LED indicators which show the status of your security system. Indicators 2, 3, 4 and 5 show the faults, which are occurring or in memory for one set at a time. Indicators are only active when the system is unset and during the arming and disarming phases. When the system is set, the indicator lights turn off after a few seconds. 1- LED INDICATOR “SYSTEM ARMED” On: Total set is being armed. Flashing slowly: Partial set is being armed. Flashing quickly: Annex set is being armed. Off: The system is disarmed. 2- LED INDICATOR “SET ASSOCIATED WITH FAULT” On: Faults indicated on LEDs 3, 4, and 5 correspond to the total set. Flashing slowly: Faults indicated on LEDs 3, 4, and 5 correspond to the partial set. Flashing quickly: Faults indicated on LEDs 3, 4, and 5 correspond to the annex set. OFF: Faults indicated on LEDs 3, 4, and 5 correspond to the entire system. 3- LED INDICATOR “SYSTEM FAULT” On: A system fault is occurring on set indicated on LED 2. System faults include battery or power failure, supervision fault, phone line failure or radio Jamming. Please contact your alarm company if this indication persists. Flashing slowly: A system fault is in memory on set indicated on LED 2 and requires a reset. Off: No system fault. 4- LED INDICATOR “TAMPER ALARM” On: A tamper alarm is occurring on set indicated on LED 2. Flashing slowly: A tamper alarm is in memory on set indicated on LED 2 and requires a reset. Off: No tamper alarm. 5- LED INDICATOR “INTRUDER ALARM” On: An intruder alarm is occurring or a detector is triggered on set indicated on LED 2. This includes open door-contact, movement detection or smoke detection. Flashing slowly: An intruder alarm is in memory on set indicated on LED 2 and requires a reset. Flashing quickly: A confirmed alarm is in memory and requires a remote reset. Please call your monitoring operation at the alarm company. Off: No intruder alarm. 5 2 Understanding the system tones SIRENS A siren is an effective deterrent due to its power and very irrating tone. The system has a siren built into the control panel, and an optional outdoor and/or indoor wireless siren can be added. The panel siren emits an audible confirmation tone when arming and disarming the security system and a fire tone when a smoke detector is triggered. Volume levels can be adjusted by the installer. 6 SYSTEM TONES Sequence of 3 modulated sounds TOTAL SET ARMING When arming, total set, confirms that the control panel has received a valid code or TAG and is preparing to arm total set. Duration : 4 seconds PARTIAL SET ARMING Sequence of 2 modulated sounds ANNEX SET ARMING Duration : 2,5 seconds When arming the partial set, confirms that the control panel has received a valid code or TAG and is preparing to arm partial set. Total set arming: beeps continue until final exit door is closed. Partial set arming: beeps continue for 30s* until partial set is armed. Upon arming ... EXIT DELAY one beep per second After closing the final door ARMING COMPLETE When closing the final exit door, confirms that the system is armed. Three fast beeps Upon entry... ENTRY DELAY This entry tone sounds for 30 seconds* after you open the entry door. You should disarm your system within this time. one beep per second Long and continuous beep When Disarming, confirms that the control panel has been successfully disarmed. DISARMING Duration : 2,5 seconds 2 times 7 fast beeps This signal indicates a fault in the system. FAULT 4 beeps upon alert ... Confirms the transmission of an alert to the alarm company. ALERT sent via the keypad * Defined by user during installation 7 3 How to use the wireless keypad with display INTRODUCTION TO THE TCU KEYPAD Screen TAG identification area Keytag (TAG) for identification Total set arming key Partial set arming key Total set arming light Partial set arming light Validation & Status key Disarming / Go to previous menu / Cancel choice key Shortcuts and menu browsing key Shortcuts and menu browsing key Codes/text entry keypad The wireless keypad with display offers a complete range of tools to manage your alarm system, from normal operation to dedicated user functions. This keypad is optional, but 1 to 4 keypads of this type may be included with this system. The keypad is used to arm and disarm your security system using a valid access code or key TAG. The master code or TAG is required to modify other users’ codes and TAGs, and to authorise the alarm company to access the system for maintenance. Other user functions include remote control of electrical equipment*, manual bypass of detectors, setup of beeps and equipment testing. This keypad also provides full system status information, with display icons, messages, and beeps emitted by the keypad. You can also view the history of alarms that have occurred. NB: This keypad is suitable for indoor use only. * This function requires an optional X10 extension with X10 receivers. 8 THE TCU SCREEN AND ICONS 1 Total set armed Tamper fault* Partial set disarmed Radio transmission* in progress System disarmed System fault* Annex set armed State of keypad battery Annex set disarmed Blinking: replace keypad battery Receiver 1 'ON' Silent mode Receiver 2 'ON' Bypassed detector Menu scrolling and choice validation Detector activated Alarm in memory Power supply fault Message area *Please contact your installer if these faults persist The TCU display clears after a few seconds in order to save energy. THE TCU MENUS THE MAIN MENU 1 - ANNEX 2 - EVENTS 3 - TOOLS 4 - USERS 5 - TESTS 6 - PREFERENCES ► Press the keys to enter the main menu. ► Navigate through the menus with and ► Confirm your choices with ► Abort your choice with ► Return to the main menu with 9 THE SUB-MENUS ANNEX This menu is used to arm or disarm the Annex set. See Arming of the Annex Set, on page 11. EVENTS The security system records events with their time and date. These can be viewed from the keypad when the system is disarmed. TOOLS This function allows you to control receivers, detectors, and so on. Refer to The Tools Menu, on page 17 for complete instructions. USERS Use this function to specify the users of your installation. The master user must be identified by his code or TAG. This menu item is described in detail in The Users Menu, on page 15. TESTS You can initiate tests of your security system to confirm that it is operating correctly. There are three options: Sirens, lights, maintenance. Sirens: Each siren operates in turn for 5 seconds Lights: All indicator lights on the control panel and keypad light for 5 seconds. Maintenance: This function can be active or inactive, depending on your configuration. It allows you to control certain functions from a distance. See your installer for details. PREFERENCES This function allows you to choose various modes of operation, and activate or deactivate the panel siren’s beeps. See The Preferences Menu, on page 19. 10 ARMING THE SYSTEM USING YOUR CODE OR TAG Before arming the Total Set, ensure that the keypad is in its base. (Total Set arming) or (Partial Set arming) Press Enter your user code (programmed during installation. Refer to The Users Menu, p.15) or present your TAG to the TAG reader of the TCU. If the system diagnoses a fault on arming, a message is displayed. Press the arming key again to bypass the faults and continue the arming process. or press The start of the arming process is signalled by a series of keypad beeps (and by the siren, if set up). The screen counts down the exit time remaining and the Total or Partial set arming light comes on to confirm arming. ARMING -------PRESENT TAG OR ENTER CODE To complete Total Set arming, close the final door. Partial Set arming is completed at the end of the arming delay. At the end of the arming delay, or is displayed to confirm that the system is armed. The arming light then goes out and the screen clears after a few seconds. Note: Depending on the configuration of your keypad, you may be able to arm your system without the identification process. ARMING OF THE ANNEX SET This can only be done from the TCU menu. Press 1 - ANNEX 2 - EVENTS 3 - TOOLS 4 - USERS 5 - TESTS 6 - PREFERENCES Select ANNEX SET from the menu, using Confirm your choice with Enter your user code or present your TAG. The arming process is signalled by a series of beeps and the screen counts down the exit time remaining. 11 ARMED IN 20 SECONDS If your system is set up to arm once the final door has been closed, close this door to complete the arming process. Otherwise, you must leave the premises before the end of the exit delay. The icon confirms arming of the Annex set. The screen clears after a few seconds. NB: Depending on the configuration of your system, you may not have an Annex. In this case, the message INACTIVE FUNCTION will be displayed on the TCU screen. DISARMING USING YOUR CODE OR TAG Note that the disarming process may vary, depending on your system configuration. Your installer may set an entry delay of several seconds. Enter your 4 to 6-digit user code or present your TAG. The disarming tone is emitted by the keypad and by the panel siren (if set up). Depending on the configuration of your keypad, this will disarm the Total Set or the entire system. In the latter case, the annex set might need to be rearmed. Disarming the system will also stop the sirens if you have accidentally triggered an alarm. In certain circumstances, you may wish to cancel the arming process before the system has finished arming. In this case, press to disarm. Stopping the siren does not interrupt the transmission to the alarm company. PERSONAL ATTACK* * The activation of this function is optional and can be performed at installation. If set up on your system, you can send an alarm at any time. Press the Total and Partial arming keys simultaneously. Depending on the configuration of your keypad, this action will result in: An alarm being sent to the alarm company. The siren being triggered. 12 INCORRECT CODE OR INVALID TAG After five attempts to enter a 4- or 6-digit code , the keypad locks out all users for five minutes. If an invalid TAG is touched to the keypad, the screen displays: IDENTIFICATION ERROR After five attempts to use the TAG, the keypad locks out all users for five minutes. FAULTS ON ARMING When faults are present or in the memory while you are trying to arm the system, they are indicated by an icon and a message on the keypad screen: ALARM ----------------------TAMPERING ALL SETS OVERRIDE? ----------------------OK <= Press to acknowledge the messages and continue the arming process. Memorised faults are cleared from the memory and faults currently occurring are bypassed. Press to cancel the arming process. FAULTS ON DISARMING When faults are present or in the memory after you have disarmed the system, they are indicated by an icon and a message on the keypad screen. MEMO ----------------------INTRUDER TOTAL SET RESET? ----------------------OK <= END OF FAULTS Press to clear faults in the memory and reset the system. Press review the list of faults currently occurring . Press to exit the screen. See also System Lock, below. 13 again to SYSTEM LOCK After a confirmed alarm, your system requires an operator reset. Call your alarm company. The operator will provide the remote reset code, based on the code displayed on the keypad. MEMO ----------------------INTRUDER TOTAL SET SYSTEM LOCKED ----------------------OK <= SYSTEM LOCKED ----------------------CALL OPERATOR CODE: XXXXXX ----------------------OK <= UNLOCK SYSTEM ----------------------PLEASE ENTER RESET CODE ----------------------OK <= 14 SYSTEM RESTORED THE USERS MENU The USERS item is a very important item in the menu, because all users must key in their code or present their TAG in order to make any settings or adjustments to the system or to access information about system status. Note that some menus are only available using the Master Code or TAG. ADDING OR MODIFYING CODES You can add codes or modify existing codes, but all new codes must be at least 2 figures higher than any existing codes. ► For example, if a code for an existing user is 2345, you cannot allocate code 2346 to someone else, but 2347, 2348, etc. To modify existing codes: to see the list of users. Select 1-CODES and press Enter the Master Code or present the Master TAG. , as shown in the first screen below. Select a user with or press to return to the menu. Confirm your choice with A beep confirms your choice. Select the user Enter the code Authorise the code CODES 1- USER 1 2- CHRISTOPHER 3- VIRGINIA 4- WILLIAM 5- SOPHIE 6- ETC... CODES CHRISTOPHER NEW : - - - - CODES CHRISTOPHER AUTHORISE CODE? NO YES Press CODES 1- USER 1 2- CHRISTOPHER 3- VIRGINIA 4- WILLIAM 5- SOPHIE 6- ETC... to confirm each screen or to cancel. After the last screen, a tone confirms your settings. 15 ADDING, MODIFYING OR REMOVING TAGS This function allows you to allocate TAGs to different users. Select 2-TAGS and press Enter the Master Code or present the Master TAG. The list of users is displayed. TAGS 1- USER 1 2- CHRISTOPHER 3- VIRGINIA 4- WILLIAM 5- SOPHIE 6- ETC... To assign a TAG to an existing user: Select a user from the list with and confirm your choice with The following screens are displayed. Show the TAG Authorise the TAG TAGS ATTRIBUTE TAG TO VIRGINIA TAG ALLOWED? NO Press VIRGINIA SHOW YOUR TAG YES CANCEL Accept the TAG ATTRIBUTE TAG TO VIRGINIA ACCEPT THE NEW TAG? NO YES to validate each screen, or to cancel the operation. Touch the Tag to the Tag Identification Area within 10 seconds. A tone confirms that the tag has been recognised and added to your security system. ► When a new TAG is assigned to a user, it overwrites the existing tag. To disable a TAG: Select a user with Pressing and confirm your choice with will disable this user’s TAG. ► If you disable a TAG, the name of the owner is struck through. 16 THE TOOLS MENU REMOTE CONTROL OF APPLIANCES This function allows you to control remote receivers. Select 1-REMOTE PLUGS in the TOOLS menu, then select the name of the receiver you wish to modify, using to move up and down. Confirm your choice with The screen displays one of the states below. REMOTES LAMP HALLWAY < OFF > NO YES Confirm with A keypad beep confirms the change of state of the remote receiver. Press to return to the Tools menu. LOCATING TCU KEYPADS If a second keypad has been misplaced, the SEARCH TCU test will cause a keypad not located in its base to beep. If you have only one keypad, this function is not active. To locate the keypad by phoning the control panel: Dial the telephone number of the panel. After the music, enter your code. A high-pitched tone confirms your code. Press <* 55>, then hang up. The missing keypad beeps. 17 MANUALLY BYPASSING DETECTORS This function allows you to temporarily bypass one or more detectors. Bypassed detectors are returned to normal operation the next time the security system is disarmed. Select 3-BYPASS DETECTOR in the TOOLS menu. Enter your User Code or present a TAG.. Select the name of the detector you wish to bypass, using to move up and down. Confirm your choice with BYPASS DETECTORS SITTING-ROOM ROOM 1 ROOM 2 KITCHEN GARAGE ETC... , as in the first screen below. BYPASS DETECTORS ROOM 1 < ACTIVE > < INACTIVE > NO YES Select Active or Inactive, using , then confirm your choice with A keypad beep confirms your choice. Press to return to the Tools menu. Bypassed detectors are displayed with their names struck through. The icon to tell you that one or more detectors are bypassed. blinks CANCELLING OPERATOR ACCESS This function allows the master user to disable the operator’s maintenance access to the system. Select 4-OPERATOR ACCESS in the TOOLS menu. Enter the User Code or present a User TAG. The screen displays 1234- TOOLS REMOTE PLUGS SEARCH TCU BYPASS DETECTOR OPERATOR ACCESS OPERATOR ACCESS ACCESS TO MY SYSTEM <ALLOWED> <NOT ALLOWED> NO YES Select Allowed or Not Allowed, using , then confirm your choice with A keypad beep confirms your settings. Press to return to the Tools menu. 18 THE PREFERENCES MENU SETTING SILENT MODE The panel siren’s arming and disarming beeps can be modified by activating or deactivating Silent Mode. Note: You cannot deactivate the fire or intruder siren. ► Active: No beeps on the panel ► Inactive: Beeps on the panel are active ► Partial Set only: Beeps are not active when the Partial Set is armed. This does not affect the keypad’s local beeps. To set Silent Mode: Select 6-PREFERENCES in the MAIN menu, then select Silent Mode, using to move up and down. Select Active, Inactive or Partial Set only, using , then confirm your choice with A keypad beep confirms your settings. Press to return to the Preferences menu. SETTING THE CHIME When a chime is set up for doors equipped with door contacts, the panel chime can be activated using the keypad. Please note that when activating the chime, the silent mode is automatically set to inactive. To set the Chime: Select 6-PREFERENCES in the MAIN menu, then select Chime, using to move up and down. In the Chime menu, select Active or Inactive, using choice with A keypad beep confirms your settings. Press to return to the Preferences menu. 19 , then confirm your ALLOCATING SHORTCUT KEYS This function allows you to allocate a shortcut to the keys (left and right arrow keys) to enable easy access to your most commonly-used menu items. Select 3-SHORTCUTS in the PREFERENCES menu. Select the function to be allocated to the left arrow, using the arrow keys, and confirm your choice with Repeat the procedure for the right arrow. A keypad beep confirms your settings. SELECTING THE KEYPAD LANGUAGE This function allows you to select the language to be used for the keypad display. Select 4-LANGUAGE in the PREFERENCES menu. and confirm your choice with Select the language using A keypad beep confirms your settings. 20 INFORMATION & MAINTENANCE CHECKING THE STATUS Press Enter your code or touch the Tag Identification area of the keypad with your tag. The screen displays the following information: ► The current arming status ► The current active icons (whether blinking or steady) ► Faults affecting the system. To clear memorised faults and reset the system, press again. To view any other current faults, press When all the faults have been viewed, the screen displays “END OF FAULTS”. Press to clear the screen, or it will clear automatically after 20 seconds. REPLACING THE BATTERY A blinking battery indicator light informs you that the keypad battery needs to be replaced. Remove the keypad from its base Remove the battery cover by inserting a screwdriver into the slot at the base of the cover, and levering upwards, as shown in the diagram. Replace the battery, respecting the polarities, and secure the cover. Return the keypad to its base. WARNING There is a risk of explosion if incorrect batteries are used. Replace only with a battery of the same or an equivalent type, recommended by the manufacturer. Dispose of batteries in accordance with the regulations in force CLEANING THE KEYPAD To clean the keypad, use a dry cloth only (no detergent). 21 4 How to use the wireless keypad with prox reader This keypad is used to arm and disarm your security system using a valid access code or key TAG. It is equipped with a proximity reader, positioned in the TAG Identification Area. ARMING USING YOUR CODE OR TAG Press an arming key on the keypad and enter the code or present a programmed TAG. 4- or 6-Digit code Arms the total set 4- or 6-Digit code Arms the partial set 4- or 6-Digit code Arms the annex set A flashing red light on the keypad confirms that the code is valid. The arming tone exit delay beeps. is emitted by the panel siren followed by the Total set arming is completed after you close the final exit door. After the door is closed, the exit delay beeps stop and the ‘arming complete’ tone is emitted by the panel siren. Partial set or annex set arming is completed automatically at the end of the delay. (Depending on your system configuration) Notes: Always make sure that your arming request is followed by the arming tone. Always disarm the system when re-entering the premises. NB: On some keypad models, presenting the TAG for more than 2 seconds will arm the system without pressing the Arm key. 22 ARMING WITH FAULT If the system diagnoses a fault on arming, you cannot set the alarm. Faults include system faults, tampering and triggering of detectors. ► A tone indicating a fault is emitted by the panel siren after the arming request, instead of the arming tone. Check that all doors and windows equipped with detectors are closed. You can override prevention of arming by requesting arming a second time within two minutes of the first request. This will bypass all faults. The arming process restarts: the arming tone is emitted by the panel siren followed by the exit delay beeps. Arming is completed at the end of the delay. DISARMING USING YOUR CODE OR TAG To enable you to get to the keypad without triggering an alarm, your installer may have programmed an entry delay. Enter a valid code or present a programmed TAG. A green light on the keypad confirms that the code is valid. The disarming tone is emitted by the panel siren. Disarming the system will also stop the sirens if an alarm is triggered. Note: Depending on your keypad’s configuration, this will disarm the total set or the entire system. In the latter case, the annex set might need to be re-armed. Stopping the siren does not interrupt the transmission of the alarm to the alarm company. RESETTING THE SYSTEM AFTER AN ALARM If light 3, 4 or 5 is flashing slowly on your control panel, an alarm has occurred. When an alarm is in the memory, the system cannot be armed until it has been reset. To reset the system, simply disarm it using a valid code or programmed key TAG. If there is more than one alarm in the memory, repeat this operation for each alarm until light 3, 4 or 5 stops flashing slowly. If LED 5 is flashing quickly on your alarm panel, a confirmed alarm has occurred and a reset must be performed by your alarm company, otherwise you cannot operate the system. Call the operator. 23 INCORRECT CODE PROTECTION IF YOU ENTER 5 SUCCESSIVE INCORRECT CODES, THE KEYPAD IS BLOCKED FOR 5 MINUTES. PERSONAL ATTACK* * This function is optional, and can be set up at installation. You can send an alarm at any time, even when your system is not armed: Press and hold and simultaneously. The siren is triggered (depending on the configuration). The alarm company is alerted. PROGRAMMING FUNCTIONS WARNING: The system will automatically exit programming mode after 15 seconds if no keys are pressed during this period, and the red light will time out. If this occurs, you must repeat all the steps necessary for the function you are using. CHANGING OR SETTING ADDITIONAL CODES The keypad can have up to 10 users. User 1 has the master code or master TAG and is the only person who can add or modify users. To change or set additional user codes, you need to enter programming mode: Press and simultaneously. The red light will flash slowly. Enter the master code or present the master TAG Select and enter a single-digit user ID (0 to 9). Enter the new code for this user. (NB: User 1 is always the master). A double beep on the keypad will confirm acceptance of the new code. Re-enter the new code to confirm. A double beep on the keypad will confirm acceptance of the new code. Exit programming mode by pressing 24 CHANGING OR SETTING ADDITIONAL KEY TAGS A key TAG can only be programmed for a user who already has a code. To change or set additional key TAGs, you need to enter programming mode: Press and simultaneously. The red light will flash slowly. Enter the master code or present the master TAG (user 1). Enter an existing single-digit user ID (0 to 9). Present the new key TAG. A double beep on the keypad will confirm that the new TAG is programmed and replace the previous TAG if any. Exit programming mode by pressing ADJUSTING THE BEEP LEVEL The level of system tones emitted by the panel siren can be adjusted using the keypad. To change the beep level of the panel siren, you need to enter programming mode Press and simultaneously. The red light flashes slowly. Press , followed by Enter a new level from 1 to 7. A double beep on the keypad will confirm that the level has been changed. Exit programming mode by pressing 25 5 How to use the keyfob with 1 LED The keyfob can be used to arm or disarm your security system to trigger an audible or silent alert, as well as to control electrical appliances from a distance (see Special Key, on page 29 ). This keyfob is optional, but 1 to 10 keyfobs of this type may be included with this system. ARMING OF THE TOTAL OR PARTIAL SET To arm the Total or Partial set: press the Total or Partial arm button. The indicator light on the keyfob comes on briefly when you release the button. The arming tone is emitted by the panel siren. ► The Total Set arming tone ► The Partial Set arming tone Always make sure that your arming request is followed by the tone. ARMING WITH FAULT If the system diagnoses a fault on arming, you cannot set the alarm. Faults include system faults, tampering and triggering of detectors. ► A tone indicating a fault is emitted by the panel siren after the arming request, instead of the arming tone. Check that all doors and windows equipped with detectors are closed. You can override prevention of arming by requesting arming a second time within two minutes of the first request. This will bypass all faults. The arming process restarts: the arming tone is emitted by the panel siren followed by the exit delay beeps. Arming is completed at the end of the delay. 26 DISARMING To disarm, press the disarm button The indicator light comes on briefly when you release the button. The disarming tone is emitted by the panel siren. PERSONAL ATTACK * This function is optional, and can be set up at installation. These keys enable you to send an alarm at any time. Press and The indicator light on the keyfob comes on briefly when you release the button. The siren is triggered. The alarm company is alerted. The panic function can be used even when your system is not armed. If this has been set up by the installer, the siren stops automatically after 30 seconds, but you can stop it manually by pressing the disarm button Stopping the siren does not interrupt the transmission to the alarm company. SPECIAL KEY The action of the key is dependent on your configuration. As an assistance button it enables you to call for assistance from your alarm company. Press the key, pause until the indicator light comes on, then press again. As a remote control for electrical appliances, press the key to turn each appliance on and off successively. * This function requires an optional X10 extension with X10 receivers. Depending on your needs, your installer will advise you on the different options for controlling appliances. 27 6 How to use the keyfob with 3 LEDs The keyfob can be used to arm or disarm your security system, to trigger an audible or silent alert, as well as to control electrical equipment from a distance (see Remote Control of Appliances, page 29). This keyfob is optional, but 1 to 10 keyfobs of this type may be included with this system. It comes with a carrying strap for attachment to a keyring. ARMING OF THE TOTAL OR PARTIAL SET Note that with this keyfob arming is immediate. Only arm the system once you are outside the area to be protected. To arm the Total or Partial set: Press the Total or Partial arm button. The associated light blinks during communication with the panel and remains lit for 3 seconds to confirm that the system is armed. The arming tone is emitted by the panel siren. ARMING WITH FAULT If the system diagnoses a fault on arming, you cannot set the alarm. Faults include system faults, tampering and triggering of detectors. ► A tone indicating a fault is emitted by the panel siren after the arming request, instead of the arming tone. Check that all doors and windows equipped with detectors are closed. You can override prevention of arming by requesting arming a second time within two minutes of the first request. This will bypass all faults. The arming process restarts. ARMING OF THE ANNEX SET If the system is set up with an Annex Set: To arm the Annex Set: press and To disarm, press and simultaneously. simultaneously. 28 DISARMING To disarm the Total and/or the Partial Set, press the disarm button The associated light blinks during the communication with the panel and then lights for 3 seconds to confirm the instruction. The disarming tone is emitted by the panel siren. Disarming also stops the siren but does not interrupt the transmission to the alarm company. DISARMING AFTER AN ALARM If there is an alarm in your absence: When you press the disarm button all three lights blink slowly. The system will not disarm, in order to avoid beeps that could attract the attention of an intruder. To confirm disarming, press the disarm button again. The associated light blinks rapidly during communication with the panel, then lights for 3 seconds to confirm disarming. REMOTE CONTROL OF APPLIANCES This function requires an optional X10 extension with X10 receivers. Depending on your needs, your installer will advise you on the different options for controlling appliances. If this has been configured by the installer, you can control up to 4 household appliances, however, the default is 2. ► The Control button controls the first appliance (receiver 1). The 3 lights blink until the request has been accepted by the system, and then remain lit for 3 seconds. ► The Control and Partial Arm buttons control the next appliance (receiver 2). Lights 1 and 2 blink until the request has been accepted by the system and then remain lit for 3 seconds. 29 CHECKING THE STATUS OF YOUR SYSTEM To check the status of your system, press the control button for 1 second. All three LEDs light several times in succession, and then the LED for the current arming status remains lit for 3 seconds. PERSONAL ATTACK * This function is optional, and can be set up at installation. You can call for assistance at any time, even when your system is not armed. Press buttons 1 and 3 simultaneously for 2 seconds. Depending on the configuration, the siren may be triggered. Your alarm company is alerted. CHANGING THE BATTERY When the battery starts to run down, instead of remaing fixed, the LEDs will fade out gradually. Insert a small screwdriver into the space in the back of the casing, as shown in the illustration. Push with the screwdriver while levering upwards, and the front of the casing will release. Use the screwdriver to push the old battery gently out of its housing and slide the new battery into place. To close the casing, insert the lower part of the front into the rear casing, then slide the upper portion into place and press firmly until it clicks. WARNING There is a risk of explosion if the correct battery is not used. Replace only with battery type CR2032 (Panasonic or GP). 30 7 Understanding detector operation PIR DETECTOR A PIR detector is a motion detector that reacts to the temperature fluctuations caused by a person in motion. If the detector’s light indicator is set up, it will flash when movement is detected. In order to save the batteries of the wireless detectors, the next detection will be delayed for a few minutes. So the indicator will flash again only after a few minutes of rest. DOOR CONTACT A door contact is a magnetic contact with two parts. One part is attached to a door frame and the other to the door itself. When the door or window is opened, the detector is triggered. Before leaving the premises, always make sure that all openings are properly closed. When arming your security system, triggering of a detector will be indicated if one or more contacts outside the exit route are not secured. GLASS BREAK DETECTOR A glass break detector analyses the various frequencies emitted by breaking glass. SMOKE DETECTOR A smoke detector mounted on the ceiling ensures the coverage of about 50 square metres. Refrain from smoking in the vicinity of this detector. SMOKE DETECTOR A shock detector mounted on a window or doorframe detects the vibrations caused by forced entry. 31 8 How to control your system over the telephone Control of your system over the phone is only possible from a multi-frequency (tone dialling) or cellular phone. This function must be configured by the installer. Remote control is authorised only after you have entered a valid code. The control panel picks up your call after the number of rings configured by the installer or after it has been called twice in succession. REMOTE ACCESS TO YOUR SECURITY SYSTEM Dial the phone number of your security system. A 2-second beep is emitted, followed by the "Arpeggio" invitation tune. You then have 30 seconds to enter your secret code. High-pitched A high-pitched beep confirms that the code is valid. You are then connected to your security system. REMOTE ARMING You can arm a set over the phone if the system has not been programmed to arm once the final door is closed. Press keys *, 2, 1 for total set arming. Press keys *, 2, 2 for partial set arming. Press keys *, 2, 3 for annex set arming. 32 Arming is confirmed as soon as you hear a tune. REMOTE CONTROL OF ELECTRICAL EQUIPMENT* You can activate/deactivate up to 12 electrical appliances (lights, etc.) from a distance using a telephone. Key in plus the number of the appliance (101 to 112) using the keypad. l c One short beep informs you that your appliance is active. Two beeps inform you that your appliance is not active. To turn the appliance on, press 1. To turn the appliance off, press 0. * This function requires an optional X10 extension with X10 receivers. TERMINATING THE COMMUNICATION To terminate the communication, press and Your security system ends the call. 33 on your telephone. 9 Maintenance and recommendations Check your system (once a month or according to your operator’s specifications). Avoid shocks for all the components and especially avoid dropping the keyfob. Do not immerse in water. Only use a damp rag to clean the components (no detergent). Keep in a clean, dry place at room temperature. Dispose of old batteries in containers provided for this purpose. Avoid prolonged exposure to siren emissions. Do not hide motion detectors behind curtains, furniture, etc. Do not paint or paper the components. Do not try to open or move the components. They are tamper-protected and some of them may cause electric shocks. 34 Honeywell Security & Custom Electronics 1198, Avenue du Docteur Maurice Donat BP1219, 06254 Mougins Cedex Sophia-Antipolis, France Tel : +33 (0) 492 942 950 Fax : +33 (0) 492 942 960 All data and images in this document are subject to change without prior notice. ©Honeywell International Inc. EKZ006600F 02/08 EKZ b Fe