1
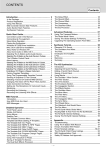
Mileage
DISTRICT WIDE APPLICATIONS
Mileage
SDCS PeopleSoft Training – Financials
May 2006
5/3/2006
1
Mileage
Table of Contents
Introduction and General Information ..............................................................3
How to Log Into PeopleSoft to do Mileage Expense Reports ...........................3
Chartfield Setup ....................................................................................................4
Enter Your Budget Information – Example Exercise.............................................................. 4
Authorizing Other Employees to Create Travel Authorizations & Expense
Reports on Your Behalf........................................................................................5
Have Someone Else Create & Submit Your Travel Reports For You – Example Exercise ... 5
Mileage Expense Reports .....................................................................................7
Mileage Within San Diego County – Creating an Expense Report from a Blank Form –
Example Exercise .................................................................................................................... 7
Delete a Single Day Entry from a Mileage Expense Report – Example Exercise ................ 16
Mileage Within San Diego County – Using A Template – Example Exercise..................... 18
Mileage Within San Diego County – Copy from an Old Existing Report – Example Exercise
............................................................................................................................................... 27
Tips & Tricks for Expense Reports ..................................................................33
Maintain the Best PeopleSoft Connections.......................................................34
Clear Cache Files – Example Exercise.................................................................................. 34
Support – How to Find Help..............................................................................38
5/3/2006
2
Mileage
Introduction and General Information
Many employees can get reimbursed from the district for eligible mileage incurred on their own
private vehicles. Generally, this means that if your supervisor requires you to use your own
vehicle to accomplish a work task, you can get reimbursed for the mileage. To get reimbursed
you must create and submit an Expense Report that contains only mileage expenses.
If you want to get reimbursed for mileage incurred within San Diego County, you do not need
prior authorization (Travel Authorization). If you want to get reimbursed for mileage incurred
outside San Diego County, you will need to submit a Travel Authorization prior to the travel.
(Please see the Travel & Expenses Manual chapter on creating Travel Authorizations).
How to Log Into PeopleSoft to do Mileage Expense Reports
•
•
•
•
•
•
•
5/3/2006
Launch Microsoft Internet Explorer
Go to: https://dwa.sandi.net
Enter your User ID # (6-digit Employee ID number. If you don’t know it, ask your
supervisor or just look on your paycheck stub)
Enter your personal DWA password (You must create one the first time you use
PeopleSoft. Please see the Job Aid “Setting Up Your DWA Password”)
Click “Sign in”
On the next page (portal page) click “Financials Supply Chain 8.4”
On the next page, in the main menu on the left, click “Employee Self Service” or
“Travel and Expenses” depending on what you want to do.
3
Mileage
Chartfield Setup
The 1st time an employee submits a travel authorization or expense report, the employee must
setup their Chartfield String. This allows for the proper accounting of their travel expenses.
This is a one-time setup. For most employees, it does not need to be repeated each time an
employee submits a travel authorization or expense report. However, there is an exception to
this. If an employee works for one Department but is paid or reimbursed from a different
Department, there is one additional task the employee must do on each and every travel
authorization and expense report. Namely, the employee must double-check the Chartfield string
via a different navigation than what is explained in the Step by Step instructions below. This
additional task is explained later in this manual. It is called “Default Accounting”.
Enter Your Budget Information – Example Exercise
Step by Step: One-Time Chartfield Setup
The following Steps show how to set up your Chartfield string. This string of numbers tells the
district which budget account to use to pay for your travel & expenses. Once you enter the string
of numbers and save it, the string will stay put whether you shut down the computer or not. You
can change the Chartfield string at any time. (The only exception to this is mentioned in the
paragraph above, and will be covered later under the Default Accounting section of this
manual).
Step 1
Navigate to the One-Time Chartfield page:
Travel & Expenses Æ Employee Information Æ Updated Chartfields
5/3/2006
4
Mileage
Step 2
Enter your department’s accounting information into the Chartfield string textboxes. If you don’t
know what numbers to enter, please check with your department’s secretary, financial clerk, or
principal/department head. You can also ask the budget analyst. Upon completing the
Chartfield string, click Save in the lower left corner.
Enter your
Department’s
Chartfield budget
numbers here
Authorizing Other Employees to Create Travel Authorizations &
Expense Reports on Your Behalf
An employee may authorize another employee to create Travel Authorizations or Expense
Reports on his/her behalf. An example would be a teacher authorizing the main office Financial
Clerk or Administrative Assistant to create a Mileage Expense Report on the teacher’s behalf.
Have Someone Else Create & Submit Your Travel Reports For You –
Example Exercise
Step by Step: Set Up Another Employee to Create & Submit Travel
Authorizations and Expense Reports on Your Behalf
The following steps walk you through the two tasks you must complete to accomplish this.
Step 1
First, you must update your Chartfield string just one time. Please follow the Step-by-Step
instructions above, entitled “One-Time Chartfield Setup”.
Step 2
Next, to authorize another employee (to become your “proxy”), you must follow this navigation:
Employee Self-Service Æ Travel & Expenses Æ User Preferences Æ Delegate Entry Authority
(See Illustration on Next Page).
5/3/2006
5
Mileage
Step 3
Click the plus sign
on the right side of the page. This opens a new, blank ID box.
Step 4
In the blank ID box, type the Employee ID number for the person you want to create and submit
travel authorizations and expense reports on your behalf. (For example, if you are a teacher, you
would enter the ID # for the office person).
5/3/2006
6
Mileage
Step 5
Click the Save button in the lower left area of the page. After that, make sure that the person’s
name appears next to the box where you typed h/her ID number.
You are done. You may now log out of PeopleSoft. The person you added can now sign into
PeopleSoft Financials themselves to create and submit travel authorizations and expense reports
on your behalf, with your name attached to them.
Mileage Expense Reports
To get reimbursed for eligible mileage you incur on your own private vehicle, you must create
and submit an Expense Report whose only expenses are for Mileage.
If you want to get reimbursed for mileage within San Diego County, it does not require
authorization prior to incurring the expense.
Mileage Within San Diego County – Creating an Expense Report from a
Blank Form – Example Exercise
The following steps walk you through how to create an Expense Report for Mileage within San
Diego County.
Step by Step: Create a Mileage Expense Report from a Blank Form
Step 1
Navigate to the Expense Reports home page, and start a new Expense Report by clicking
Create/Update.
Navigation: Employee Self-Service Æ Travel & Expenses Æ Expense Report Æ Create/Update
5/3/2006
7
Mileage
Step 2
Click Add a New Value.
Step 3
If the screen shown here does not appear, skip ahead to Step 4. If this screen does appear, it
means that someone else has authorized you in the system to create and submit Expense Reports
on h/her behalf. If so, then you must choose to create this Expense Report either for yourself (if
you incurred the mileage) or for the other person (if h/she incurred the mileage).
Type the correct person’s Employee ID number in the EmplID textbox (or click the Search icon
to view a list of those who authorized you, and choose from the list). Then click Add.
Step 4
Click a dot into the choice: Open a Blank Expense Report. Then click Continue.
5/3/2006
8
Mileage
Step 5
On the General Information page you must do two things: Fill in the required information, and
verify or update the default accounting information (budget Chartfield String). It doesn’t matter
which you do first. However, you must perform the default accounting function before you
click to the next screen.
The screen shown below displays typical details in the required fields:
•
Report Description – Type “Mileage” and the month and year, thus: Mileage Feb. 2006
•
Business Purpose – Choose a reason for the travel from the drop-down list (most people
use the “Other” choice which is a miscellaneous category).
•
Default Location – Type San Diego.
•
Reference – This is rarely used. Its purpose is for you to enter the ID # of an old
Expense Report in case this one is to be considered an addendum to the old one. If that is
not the case, then just skip this field, and leave it blank.
•
Comment – Here you must include a few more details about this Expense Report,
particularly your justification for getting reimbursed for mileage.
The next thing you must do on this page is verify/update the default accounting.
Step 6
At the bottom of the General Information page click the link: Default Accounting For This
Expense Report.
5/3/2006
9
Mileage
Step 7
The last step brought you into the Chartfield page that affects only this one Expense Report.
Budget code numbers you enter or edit here will affect this report, and no other. Take the time to
check each Chartfield to be sure it is correctly filled in. Pay special attention to the DeptID
Chartfield. Be sure it contains the Department code number for the approver you want to
approve this Expense Report. When done, click OK.
Step 8
Click Continue.
Step 9a
Step 8 brought you into the Expense Report Details page, illustrated below.
5/3/2006
10
Mileage
Step 9b
Click the Expense Type drop-down menu to see the choices you have. These are the eligible
expenses for which the district will pay or reimburse. Choose Mileage IN SD County. Then
click Add. This will add a single day’s entry for mileage onto the Expense Report.
Step 10a
On the Add Expense – Mileage in SD County page, you must enter all the details for a day’s
worth of eligible travel, and Update the page. The left side of the page is where you enter
information into the individual fields. The right side of the page shows a running
balance/summary for the Expense Report. (See illustration for Step 10b).
•
Expense Date – Enter the date for a single day for which you want to claim mileage. It
must be within the date range you entered on the General Information page earlier.
•
Payment Type – For mileage, always choose Not Applicable.
•
Billing Type – This should always remain Internal.
•
Miles – Enter the total number of eligible miles you drove that day. Eligible miles are
generally those driven between district sites only; not to or from your home.
•
Calc Mileage – This button is optional. You can click it now to see how much money
you will be reimbursed for this day; but clicking the Update button does the same thing.
•
Description – It is very important for you to type all pertinent information here: Where
you went that day, and the odometer readings on the vehicle you used that day.
o
NOTE: The odometer readings must match up with the total number of eligible
miles you entered.
o EXCEPTION: If you drove your car on personal business during that day,
exclude those miles from the Miles textbox, but include those miles in the
odometer readings. Also include a brief explanation in the Description box.
5/3/2006
11
Mileage
o EXAMPLE: You drove a total of 35 miles while working. In between, you
drove an additional 3 miles to go to lunch at a restaurant. When you began your
working day, your odometer was at 40,500. When you ended, your odometer was
at 40,538. So for that day’s entry, you would put 35 for the Miles, and the
odometer readings would be: Began odo 40,500. End odo 40,538. Your
Description would read: From Point A to Point B to lunch to Point C, etc.
•
Personal Expense, No Receipt – Leave both of these checkboxes blank.
Step 10b
When done, click Update.
Below is an example of how the details of the Description textbox should look:
From Mission Bay High to
Gompers Jr. High to Adams
Elementary.
35,204 - 35,227
Step 11
Destinations
Odometer showing total
mileage from first destination
through final destination
To add another day’s entry to your Mileage Expense Report, go to the bottom of the page and
click the Expense Type drop-down list again. Choose Mileage IN SD County and then click
Add.
5/3/2006
12
Mileage
Step 12
An additional day entry has been added to the running balance. You must now complete the
fields (textboxes) on the left side of the page with the required details for the new day of
mileage. Don’t forget to click Update when you’re done.
Step 13
When you are ready to either Save for Later or Submit for Approval, click Done in the lower
left corner of the Add Expense – Mileage in SD County page.
(Steps 14a-c show how to Save for Later.)
(Steps 15a-d show how to Submit for Approval.)
Step 14a
The last step (clicking Done) brought you back to the Expense Report Details page. If you
want to save your work and keep working, or if you want to save your work, log out, and pick up
where you left off at a later date, click Save for Later at the bottom of the page. (See
Illustration on Next Page).
5/3/2006
13
Mileage
Step 14b
The last step brought you to the Save Confirmation page. Click OK.
Step 14c
The last step saved your Expense Report and brought you back to that report’s Expense Report
Details page. At this point you can either elect to keep working on the report, or you can safely
log out of the system. When you log back in next time, you will be able to locate this report and
pick up where you left off.
It’s a good idea to scroll down to the Expense Report Status area at the bottom, to view the
information found there. (See the illustration for Step 15d).
Step 15a
If you are ready to submit the Expense Report now, you can do so by clicking Submit for
Approval after you click the Done button (Step 13). (See Illustration on Next Page).
5/3/2006
14
Mileage
Step 15b
You are asked if you really want to submit the report. Remember that if you click OK at this
point, you are submitting the report for approval and you CANNOT retrieve it or edit it
after that! If you’re ready, click OK.
Step 15c
You will see the Submit Confirmation page. Click OK again.
5/3/2006
15
Mileage
Step 15d
You are returned to the Expense Report Details page. If you scroll down to the bottom, you can
view the information found in the Expense Report Status area. You can log out at this time.
Delete a Single Day Entry from a Mileage Expense Report – Example
Exercise
The following steps walk you through how to delete one or more single day entries from a
Mileage Expense Report. You might want to delete a day (or several days) from your report
before you submit it. For example, if you accidentally entered an extra day into the report, or if
you entered a range of days but were out sick during a day or two within the range, you would
need to delete such days.
NOTE: You can ONLY delete days from a Mileage Expense Report if you have not yet
submitted the report! Once you submit the report, you can no longer edit it in any way.
Step by Step: Delete a Single Day from Your Mileage Expense Report
Step 1
You must first be sure you are viewing the Expense Report Details (summary) page of the report.
The Expense Report Details page looks like the example on the next page. (If you are viewing a
detail page of a single day’s entry, and need to navigate to the Expense Report Details page,
simply click the Done button in the lower left corner):
5/3/2006
16
Mileage
Step 2
Find the day you wish to delete, within the Expense Line Items list. (Do NOT click on the
“Mileage in SD County” hyperlink).
Step 3
Click on the minus sign button
that corresponds to the day you wish to delete.
Step 4
When you see the confirmation box appear, click OK.
Now you can continue to submit the Mileage Expense Report normally.
5/3/2006
17
Mileage
Mileage Within San Diego County – Using A Template – Example Exercise
The following steps walk you through how to create an Expense Report for Mileage within San
Diego County using a Template that you create. Using a Template allows you to enter in a range
of days for the Expense report – e.g., a range of 6/1/04 – 6/30/04 would provide 30 lines for
recording your daily travel.
Once you create and save the template, you can use it to create and submit Expense Reports any
time you wish. You would have to edit/update each Expense Report you create with current
details.
Step by Step: Create and Use a Mileage Expense Report Template
Step 1
Navigate to the Expense Reports home page, and start a new Expense Report by clicking
Create/Update.
Step 2
Click Add a New Value.
Step 3
If the screen shown here does not appear, skip ahead to Step 4. If this screen does appear, it
means that someone else has authorized you in the system to create and submit Expense Reports
5/3/2006
18
Mileage
on h/her behalf. If so, then you must choose to create this Expense Report either for yourself (if
you went on the trip) or for the other person (if h/she went on the trip).
Type the correct person’s Employee ID number in the EmplID textbox. Then click Add.
Step 4
Choose Use a Template and click Continue.
Step 5
Ignore the Use Existing Template area, since you are going to create a new template for
yourself. Click a checkmark into the box on the left side labeled Mileage IN SD County. Also
click a checkmark into the box to the right, labeled Daily. (See Illustration on Next Page).
5/3/2006
19
Mileage
Step 6
At the bottom of the page enter the Date Range you wish to have on the template. The district’s
Accounts Payable department requires that you create a separate Mileage Expense Report for
each month you wish to claim. In this example, we chose the month of April.
Step 7
In the Save As New Template area enter a New Template name and a Description for the
template. Then click Continue. (See Illustration on Next Page).
5/3/2006
20
Mileage
Step 8
This next screen is the General Information page. Here you must fill in the fields with the
details about this Expense Report. Then click the link, Default Accounting For This Expense
Report at the bottom.
Step 8
This next screen displays the Chartfield string for this Expense Report. It is VERY
IMPORTANT that you verify each Chartfield, from DeptID through Extended; you must
make sure that all the budget code numbers are entered correctly into each Chartfield.
Please pay SPECIAL ATTENTION to the DeptID Chartfield, and make sure it is correct
so that the appropriate Dept. Approver receives this Expense Report to approve it. When
you are finished updating the Chartfields here, click OK. (See Illustration on Next Page).
5/3/2006
21
Mileage
Step 9
Click Continue.
Step 10a
The next screen you come to is the Expense Report Details page. Notice that there are daily
entries for every day in April, including weekends. You must go through and delete the weekend
days, as well as any other days when you did not incur eligible mileage. You can delete an entry
by clicking its minus button
on the right side. (See Illustration on Next Page).
5/3/2006
22
Mileage
5/3/2006
23
Mileage
Step 10b
After you have deleted all the unnecessary day entries, you must edit and update each individual
entry. Begin by clicking on the first entry; in this example, we will click on April 1st.
Step 11
The last step brought you into the Add Expense – Mileage in SD County page for the day of
April 1, 2005. On the left side of the screen are the fields you must fill in with the details of your
mileage for that day. On the right side of the screen you see the running balance of the entire
Expense Report. It reflects any changes you make after you update a day entry.
Go ahead and fill in the details for April 1st. (See Illustration on Next Page).
5/3/2006
24
Mileage
Step 12
When you’re done filling in the fields on the left side, (beginning with Payment Type and
ending with Description), you must click Update. This refreshes the running balance on the
right side.
Step 13
Now you must edit and update each and every day entry the same way. You can access the
details page for each day entry by clicking on the entry itself (Mileage IN SD County) in the list
on the right side. Remember to UPDATE every entry after you complete filling in the fields
on the left side.
NOTE: You don’t
have to update all
entries during the
same session. You
can do as many as
you want, and then
Save For Later.
You can then choose
to finish at another
time.
5/3/2006
25
Mileage
Step 14
After you have completed updating all the day entries for the entire report (or as many as you
want right now), click Done in the lower left corner of the page.
Step 15
At this point you can either Save For Later and come back to the report another time, or you can
Submit For Approval if you are ready to submit the report. Remember, once you submit the
Expense Report you cannot edit it anymore.
Step 16
In this example, we chose to Save For Later. Either way, you must click OK until you are
returned to the Expense Report. You may print out a copy if you wish, or simply log out.
5/3/2006
26
Mileage
Mileage Within San Diego County – Copy from an Old Existing Report –
Example Exercise
The following steps walk you through how to create an Expense Report for Mileage within San
Diego County by copying from a previously created Expense Report and simply changing or
updating the information. This approach may save you time if the report you are creating needs
to be quite similar to a past report.
Step by Step: Create a Mileage Expense Report from an Old Existing
Report
Step 1
Navigate to the Expense Reports home page, and start a new Expense Report by clicking
Create/Update.
Step 2
Click Add a New Value.
5/3/2006
27
Mileage
Step 3
If the screen shown here does not appear, skip ahead to Step 4. If this screen does appear, it
means that someone else has authorized you in the system to create and submit Expense Reports
on h/her behalf. If so, then you must choose to create this Expense Report either for yourself (if
you went on the trip) or for the other person (if h/she went on the trip).
Type the correct person’s Employee ID number in the EmplID textbox. Then click Add.
Step 4
Choose Copy From Existing Report. Then click Continue.
Step 5
Click the Select button next to the old report you wish to copy from.
5/3/2006
28
Mileage
Step 6
You will now see the General Information page of the new Expense Report, filled in with the
details from the old report. You can edit it as much as you like. In this example, we changed
some of the details, such as the Description and the Comments.
In addition to editing the information here, you must ensure that the Chartfield string for this new
report is accurate. Since you copied it from an old report, this new one automatically picked up
the Chartfield string that was used in the old one. If you want to continue to use that same
Chartfield string, then just leave it alone. If you feel you should check it, or change it, you need
to click the link at the bottom of this page BEFORE you continue on. The link is called Default
Accounting For This Expense Report.
When you’re done editing, click Continue.
Step 7
You are now brought into the Expense Report Details page. You must edit and update all the
day entries to reflect the information you are claiming for this new report. The day entries still
show old information (old dates, miles, odometer readings) from the old report they were copied
from. You have to change and update them to show the current information. You can also add
to or delete from the number of day entries. You begin by clicking on the first day entry, to get
into its details page.
5/3/2006
29
Mileage
Step 8
You are brought into the Add Expense – Mileage IN SD County details page for that day’s
entry. You must edit all pertinent information in the fields on the left side. Then, click Update.
The results of the update are shown in the running balance on the right side of the page.
Step 9
You must continue to edit and update each day’s entry of the report. To get into the details page
of any given day entry, just click on that day in the running balance list on the right side.
5/3/2006
30
Mileage
Remember to click UPDATE after editing each day entry. When you are finished, click
Done.
Step 10a
When you clicked Done you were brought back to the Expense Reports Details page. Now is
the time for you to add more day entries to the report, or to delete any day entries you do not
want.
To delete an entry, click on its minus
the deletion.
button (on the right side), and then click OK to confirm
To add a new day entry, choose Mileage IN SD County from the Expense Type drop-down list.
Then click Add.
Step 10b
Complete the details for the new day entry on the left side. Click Update and then click Done if
you are finished adding days, or choose Mileage IN SD County from the Expense Type dropdown list (now located at the bottom of the page). Then click Add.
Continue to add and update new day entries until you are ready to click Done.
5/3/2006
31
Mileage
Step 11
To save the report and work on it some more now, or work on it later, click Save For Later.
Then click OK. Then you can continue working or choose to log out.
To submit the completed report for approval, click Submit For Approval.
Step 12a
If you are sure the report is ready for approval, click OK. If not, click Cancel to return to the
report where you can finish it or log out.
Step 12b
Click OK to confirm.
You are brought back to the report’s main page where you can log out.
5/3/2006
32
Mileage
Tips & Tricks for Expense Reports
Don’t Get Logged Out Unexpectedly! If you think it might take you longer than 15 minutes to
complete an Expense Report, take these steps to ensure the system won’t kick you out
unexpectedly, which can cause you to lose the Expense Report.
•
After you log into PeopleSoft and after you click the Financials Supply Chain link, go
back to the portal page (where you signed in) and close that window by its X button in
the upper right corner.
•
As soon as you complete one expense line entry, click Done and then click Save For
Later. That is the only way to save your Expense Report so you can go on working on it
without risking losing it.
Be as Complete as Possible – Include all pertinent details for each and every expense line in the
Expense Report. Don’t assume you can abbreviate or take shortcuts. You may end up having
the report denied, which means a delay since you will have to either edit it or resubmit it, or start
all over.
Verify Chartfields on Each Report – In the beginning of every Expense Report you create, as
soon as you arrive at the General Information page, you should ALWAYS verify your
Chartfield string (budget code numbers). Do this by going to the bottom of the page and clicking
the link, Default Accounting For This Expense Report. It will take you right to the Chartfield
page. Make sure that all budget code numbers are entered correctly in the Chartfields, especially
the DeptID code. Then click OK. This procedure can save you enormous headaches later on; it
prevents the Expense Report from being sent to the wrong approver, and it ensures that the
proper budget is used.
Save Your Work – After completing the first expense entry in any Expense Report and clicking
Update, go ahead and click Done to get out to the Expense Report Details page. Then click
Save For Later. This procedure saves your report and prevents you from losing it in case your
computer crashes or logs you out unexpectedly. You should save your work in this way every
five minutes or so, just to be safe.
Complete Mileage Entries with All Details – Be sure to include all necessary details and
information when you fill in the Description fields for your day entries on Mileage Expense
Reports. Include your destinations and your odometer readings. If you leave anything out, your
Expense Report will be denied, and your reimbursement check will be delayed.
No Future Dates on Expense Reports – Expense Reports do not allow you to enter any future
dates. You can only enter current or past dates for expenses incurred.
SDCS Expense Rules – At the bottom of any Expense Report Details page, you will find a link
called SDCS Expense Rules. When you click this link it brings you to a page with all the
district’s rules and policies on eligible expenses. At the bottom of this page you can click
Return to go back to where you left off.
5/3/2006
33
Mileage
Don’t Click the Back Button – A general rule to follow when using any PeopleSoft
applications is to never click the Back button
on your browser window. Doing so can
make you lose your work, and even kick you completely out of the software program. You will
always be able to find a menu choice or other link to click on within the page, to bring you back
to the previous page or to other pages.
Maintain the Best PeopleSoft Connections
It is important for you to maintain your PeopleSoft application connection so that it remains in
optimum working condition at all times.
To do this, you must complete a quick, simple, routine task every day. The task is called
“Clearing [or Deleting] Your Cache Files”.
Cache files are files that are deposited onto your computer’s hard drive every time you click to a
new web page while you’re on the Internet. They are also referred to as Cookies or Temporary
Internet Files. They are generally harmless. But if you ignore them, they pile up every time you
use the Internet. They can pile up so much that it can cause your computer to perform
sluggishly, or even start to get weird error messages that make no sense. So, it’s important for
you to clear out all the cache files every day, to make room for the new ones that will come in.
The following steps walk you through the procedure for clearing cache files.
Clear Cache Files – Example Exercise
Step by Step: Clear Cache Files
Step 1
Launch Microsoft Internet Explorer
page is displayed on your screen.
. It makes no difference which web site or web
Step 2
Click Tools on the menu bar at the top of the screen.
5/3/2006
34
Mileage
Step 3
Click Internet Options on the Tools menu.
Step 4
Click Delete Cookies on the General menu.
Step 5
Click OK.
5/3/2006
35
Mileage
Step 6
Click Delete Files.
Step 7
Click a checkmark into the box labeled Delete all offline content.
Step 8
Click OK.
5/3/2006
36
Mileage
Step 9
Click the “big” OK button at the bottom.
Step 10
Close your browser window (Microsoft Internet Explorer). Re-launch it when you are ready to
resume working on the Internet. This last step will refresh the browser and make it completely
clean.
5/3/2006
37
Mileage
Support – How to Find Help
NOTE: DO NOT call the IT Help Desk. They do not offer support on any PeopleSoft
applications.
You have several ways to get help with using the district’s PeopleSoft Financials Travel &
Expenses software. Your support options are listed and explained here in the order of how you
should proceed.
1) First, you need to carefully read (or re-read) your training materials (user manual, job aids).
Most questions can be answered there.
To print out copies of training materials please go online to:
http://www.sandi.net/peoplesoft
On this website, click the “Read & Learn” link on the left side. That brings you to a page
where you can click and print out many different job aids and manuals.
2) If you need more help than what the training materials provide, the second thing you can do
is attend an Open Lab session. Open Lab is a free help clinic provided for all district employees
who have already completed the related training class. Open Lab is held on a regular basis. At
Open Lab you can receive individualized, one-on-one assistance from the Travel & Expenses
instructor with any problems or questions you may have while using the Travel and Expenses
software. Open Lab is a first-come-first-served arrangement. No appointments are taken. Just
show up, and bring your work and all pertinent information with you.
For details on when and where Open Lab takes place (the schedule is posted every month on the
district’s DWA web site), please go online to:
http://www.sandi.net/peoplesoft
On this website, click the “Training” link on the left side. That brings you to a page where you
can find the Open Lab schedule, as well as other information about training classes.
3) After you have done Steps 1 and/or 2 above, if you still feel you need further assistance,
please contact the appropriate Travel & Expenses expert. As of the printing of this manual, there
is a list of Accounts Payable staff members who can assist you. Please find your designated
contact person from this list. It begins here and ends on the next page.
ACCOUNTS PAYABLE VENDOR ASSIGNMENTS EFFECTIVE 04/03/06
Vendors are assigned to A/P staff alphabetically by the payee's last name or company name.
Employee Travel Authorizations and Expense Reports with receipts are assigned to A/P staff alphabetically by the traveler's
last name.
Employee Mileage Reports are assigned to A/P staff by the last 2 digits of the employee's six-digit employee number.
Abe Caluza 725-7771
Mi - Mz, Ph - Pz, Mileage emp id's 85 - 92,
Water/Sewer Utility
Hours: 7:00 - 3:30
[email protected]
5/3/2006
Nancy Miraflor 725-7766
"San Diego",Q,U,V, X - Z, Mileage emp id's 53 - 60
Procurement Card 0002
Hours: 7:30 - 4:00
[email protected]
38
Mileage
Cindy Stephens 725-7763
C, D, L, Mileage emp id's 00 - 06,
Procurement Card 0050
Hours: 7:30 - 6:00 Tue - Fri
[email protected]
Phuong Pham 725-7761
H, W (except Whoo's Smart),
Mileage emp id's 61 - 68, Cell Phones
Hours: 7:30 - 4:00
[email protected]
CoCo Velazquez 725-7759
I, Ma - Mh, T, Mileage emp id's 07 - 14,
Procurement Card 0020, Vendor set-ups
Hours: 6:30 - 5:00 off Thur
[email protected]
Sandy Davis 725-7756
Supervisor
Hours: 7:30 - 4:00
[email protected]
Cordae Auld 725-7770
Bi - Bz, G, Mileage emp id's 23 - 29,
Procurement Card 0003, Vendor set-ups
Hours: 7:00 - 5:30 Tue - Fri
[email protected]
Sandy Deck 725-7755
Accountant, Lead Person
Hours: 7:30 - 4:00 Mon, Wed, Fri
7:30 - 4:30 Tue, Thu
[email protected]
Kathy Herman-Albrektsen 725-7757
A, J, Mileage emp id's 46 - 52
Hours: 5:15 - 2:45, off every other Friday
[email protected].
Stephanie Trump 725-7765
O, Pa - Pg, Mileage emp id's 69 - 76
Procurement Card 0010, Vendor set-ups
Hours: 8:00 - 6:30, off Wednesdays
[email protected]
Kitty Jackson 725-7751
N, R, "Whoo's Smart",
Mileage emp id's 15 - 22,
Procurement Card 0040
Hours: 5:15 - 2:45, off every other Fri
[email protected]
Tina Jair 725-7764
Sk - Sz (except "Supt. Of Schools"),
Mileage emp id's 77 - 84, Long Distance,
Procurement Card 0041
Hours 7:30 - 5:00, off every other Thu
[email protected]
Kristina Rucker 725-7767
Open/distribute/scan mail, gas/electric, ASB
1099 data compilation, filing, assist A/P techs
Hours: 7:00 - 3:30
[email protected]
Valerie Hall 725-7758
Ba - Bh, Sa - Sj,
Mileage emp id's 93 - 99
Hours: 9:00 - 5:30
[email protected]
Magda Henein 725-7760
E,K, Gas Credit Cards, Mileage emp id's 30 - 37
Procurement Card 0042, Local Telephone
Hours: 6:30 - 4:00, off every other Friday
[email protected]
Vacant 725-7671
Margaret Gomes 725-7768
F, Supt of Schools, Mileage emp id's 38 - 45
Procurement Card 0030
Hours: 7:00 - 3:30
[email protected]
5/3/2006
39
Mileage
NOTES
5/3/2006
40
Mileage
NOTES
5/3/2006
41
Mileage
5/3/2006
42