1
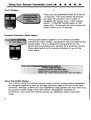
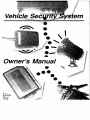
..
-Owner's Manual
Y-11
INS0882
Rev. A
12/98
Table of Contents. •
•
•
•
•
•
•
•
•
Features and Benefits of Your Security System ..................................... 3
Using Your Remote Transmitter ................................................................ 4
Arming the Security System .................................................................. 4
Sensor Override
Pre-arm Mode
Faulty Trigger Bypass
Disarming the Security System ............................................................. 5
Trunk Release ........................................................................................ 6
Personal Protection (Panic) Alarm
Valet Mode ............................................................................................. 7
Automatic Arming ....................................................................................... 7
Shock Sensor .............................................................................................. 8
Override / Programming Button ................................................................ 7
When Your Security System Is Triggered ................................................. 9
The Interior Status Indicator ...................................................................... 9
Trigger Identification ................................................................................... 9
System Maintenance ................................................................................ 10
Adding Remote Transmitters to Your System
Programming Selectable Options
Changing the Remote Transmitter Battery
This device complies with part 15 of the FCC rules and with RSS-210 of
the industry Canada. Operation is subject to the following two conditions:
(1) this device may not cause harmful interference, and (2) this device
must accept any interference received, including interference that may
cause undesired operation.
2
Features and Benefits of Your Security System.
•
•
•
Certain features of the system operation may be progra~med to operate differently.
Refer to the programmable features section at the end of this manual.
~ Automatic Arming
If automatic arming is enabled the alarm will automatically arm and disable the vehicle starter 1
minute after the ignition is turned off. Automatic arming can be disabled through vehicle option
programming. placing the vehicle in valet mode or by pressing the disarm button after the
ignition is turned off.
Automatic arming may entitle you to receive a discount on your insurance policy,
see your agent for details.
• Automatic Door Lock and Unlock
If all protected openings are closed when the ignition key is turned to the on position, the
security system will lock the doors. When the key is turned back off, the system will unlock
the doors to allow an easy exit from the vehicle. If desired, either one or both of these can be
turned of by your installer.
J'" Starter Immobilization
The vehicle's starter is disabled when the system is armed. Additionally, the vehicle will not
start if power is disconnected from the alarm module.
~A/I entrances protected
Opening any door or entrance protected by the security system triggers the alarm's 125db
siren and flashes the vehicle parking lights.
W Impact Detector
The impact detector senses any jolts or bumps associated with vehicle intrusion.
~ Personal Protection Feature (Panic Alarm)
The Panic feature sounds the siren and flashes the vehicle parking lights, bringing attention to
your vehicle and surrounding area.
• Interior Status Indicator
The bright-red warning light creates an .~ffective visual deterrent to a would-be thief.
~ illuminated Entry
Vehicle courtesy lights turn on for one minute when the system is disarmed.
i'!ff
Remote Keyless Entry"
Doors conveniently lock and unlock when the alarm system is armed and disarmed.
, . Trunk Release"
The trunk release can be activated via the remote transmitter.
* If vehicle is equipped with power door locks and they are connected to the alarm system by
your installer.
*. May require additional connections, components, and/or charges. See your installer for
details.
.
3
Using Your Remote Transmitter
•
•
•
•
•
•
•
•
The remote transmitters included with your secur~ system are high-quality, durable
instruments. Each transmitter has a moisture-resistant case and sealed rubber
buttons to protect the internal circuitry and 12-volt alkaline battery. Also, each
transmitter is uniquely coded, with one out of a possible 4 billion code combinations.
Your security system has the ability to oper~te from up to four (4) remote transmitters.
Arming the Security System
To arm the system, exit the vehicle, close all
doors, then press and release the ARM button.
• The siren will "chirp" twice.
• The parking lights will flash twice.
• The doors will also lock at this time (if
equipped and connected).
• The status indicator will blink steadily, once
per second.
The system is now armed and protecting your
vehicle.
Using Your Remote Transmitter (cant.).
•
•
•
•
•
"
Pre-Arm Mode
If the siren chirps and the parking lights flash only once, this indicates that the
system is in pre-arm mode. The system has detected that the vehicle courtesy light
is on, or that an entrance is not closed securely. In pre-arm mode, the status indicator
stays on and does not blink. Check to see that all vehicle entrances are closed
securely. Once all entrances are secured (and the courtesy light is off), the system
will chirp / flash again, and the status indicator will blink steadily. The system is now
fully armed.
Faulty Trigger Bypass
If a door or entrance protected by the security system is left open, the system will
arm after 4 minutes and ignore that trigger point. If that trigger point is closed while
the system is still armed, the system will begin to monitor that point again. For
example, if a door was open then closed and then opened again the alarm would go
off.
Sensor Override
Your security system is equipped with an impact detector (see page 8). It may be
necessary at times to temporarily disable the sensor feature, especially in areas
such as airports or train stations where severe vibration can cause false alarms.
Press ARM, wait for sytem to arm and then ARM again within three (3) seconds. The
system will respond with three (3) chirps and three light flashes, indicating that the
system is armed with the sensor disabled. This procedure disables the sensor for
only one arm/disarm cycle. The sensor will be enabled the next time the alarm
system is armed.
Disarming the Security System
To disarm the system, press and release the
DISARMffRUNK button.
• The siren will chirp one time.
• The parking lights will flash once.
• Doors will unlock (if equipped and connected).
• Dome light turns on for 60 seconds or until
the ignition key is turned on.
• The Status Indicator will turn off.
If the siren chirps and/or the parking lights flash four (4) times, the system was triggered
in your absence. See the Trigger 10 section (page 9) to determine the cause of the alarm
trigger.
5
Using Your Remote Transmitter (cont.).
•
•
•
•
•
Trunk Release
Press and hold DISARMfTRUNK BUTTON for
1.5 seconds. The trunk release will activate
and open the vehicle's trunk or hatch (if
equipped with factory trunk / hatch release
option.) If DISARMfTRUNK button is held
longer than 1.5 seconds the trunk release will
remain active up to 10 seconds.
Personal Protection (Panic Alann)
Pressing both buttons together on the remote transmitter
activates the Panic feature, sounding the siren and flashing the
parking lights. Panic is designed to bring attention to the
vehicle and surrounding area, warding off a would-be intruder.
Press either button on the remote transmitter to turn off the
Panic alarm.
1a. .~~
..m.~..
llt~
' ~2.~I~.~~~~•.
QwVrIg" RMICIIe It..nIIr 8iDIry
AddIng AIna; ha. __ to 'ItIut s,.m
. DiIIIIng.1..oiI 01 Stolen AImcM ~ ....... from 'ItIut 9J*n
About Transmitter Range.. "
The receiver inside your vehicle security system and the remote control transmitters
are designed together to have an average operating range of 50 feet during ideal
conditions . Although at times you may experience range greater than that, there may
be occasions when range is less than normal. Atmospheric conditions or
interference from other RF-emitting devices can effectively reduce transmitter
range .
6
U~/ng Your Remote Transmitter (cont.) •
•
•
•
•
•
Valet Mode
"
Valet mode, sometimes referred to as "keyless mode", when engaged prevents the
security system from arming - automatically or via the remote control transmitter while allowing the convenience features (remote control door lock, unlock and
trunk) to remain functional. Valet mode is useful when leaving your vehicle for
service or any time you do not what your vehicle to be armed inadvertently.
To engage the valet mode:
1.
2.
Turn key to the ON or RUN position.
Press the ARM button on the remote transmitter. The status indicator to begin
blinking a double flash pattern to confirm security system is in valet mode
and continue to double flash until the status indicator is disengaged.
To disengage valet mode and return your system to the normal operating mode:
1.
2.
Turn the key to the ON or RUN position.
Press DISARM button on remote control transmitter. Status indicator will turn off.
To prevent your system from arming just one time without engaging valet mode,
simply press the disarm button on your remote control transmitter after turning the
ignition key off. This is useful when unloading your vehicle or anytime when you do
not want your system to arm automatically but will want to arm the system later
without reentering the vehicle.
Hint: When doing so, remember to arm the system with your remote control.
Automatic Arming • •
•
•
•
•
•
•
•
•
•
If the system is not armed manually by the user, the system will arm automatically
one minute after the ignition key is off .
• The siren will chirp twice .
• The parking lights will flash two (2) times
The system is now armed, protecting your vehicle.
Note: If the siren only chirps once when arming the system check the status
indicator. If the status indicator is on SOLID, indicating your vehicle is in pre-arm
mode there is a door hood, trunk or hatch open. The system will arm after that
opening is closed or after four (4) minutes if the trigger point remains open. (See
Faulty Trigger Bypass on page 5.)
7
Impact Detector
•••••••••••
The Impact Detector, also referred to as "Shock SQf1sor", is designed to detect
impacts to the body of the vehicle. The force of impact (or threshold) required to '1rip"
the Impact Detector is fully adjustable by your installer. The threshold can be
adjusted from a tap on the body (not a recommended setting) to a very hard impact
that could cause damage to the vehicle.
At the time of installation, your installer will set the impact detector threshold to a
medium level. Should you want to change the threshold level, contact your dealer they can adjust the shock sensor to your desired setting.
When the system is armed, the shock continually monitors for impact to the body of
the vehicle. Impacts of greater magnitude than the threshold setting will trigger a full
a alarm cycle. If the Impact Detector is triggered more than four times when the
system is armed, the system will bypass the sensor inputs until the system is
disarmed then rearmed. All other protected entry points are still armed and alert.
LITE TOUCHTM
When the Impact Detector senses a nonthreatening impact to the body of the vehicle
the siren will sound a short "lite-touch" chirp to warn away potential intruders.
If the "lite-touch" is tripped more than ten (10) times within a ten (10) minute period,
the lite-touch stage is disabled until the system is disarmed then rearmed .
OVERRIDE/PROGRAMMING BUTTON
••••••
The Override/programing button is a hidden push button switch that can be used to
disarm the security system if your remote control transmitter is lost or stolen. The
override/ programming button is also used to for programming new transmitters to
the system. To prevent unauthorized use of the override/programming button, the
ignition key is also needed to disarm the system or program transmitters.
Disarming system without the remote control transmitter
1.
2.
3.
4.
8
Enter vehicle (the alarm will begin sounding as soon as the door is opened).
Turn the ignition key to the on poSition.
Press the override button.
The security system is now disarmed.
When Your Security System Is Triggered.
•
•
•
•
•
The security system will trigger if one of the following events occurs while it
"
is armed:
:: ~
"'" • Any protected entrance is opened
__
'"
• The vehicle ignition is turned on
• The vehicle is jolted hard enough to signal the shock sensor
Once the alarm is triggered, the alarm sounds its 125db siren and flashes the
vehicle parking lights for 30 seconds. After 30 seconds, the system checks to see if
all entrances are closed. The alarm will resume sounding if an entrance is open.
Otherwise, the system will re-arm, awaiting the next intrusion attempt.
The Interior Status Indicator.
•
•
•
•
•
•
•
•
The Status Indicator is a high-intensity red light mounted in a visible location on the
vehicle dashboard. This red light gives a visual indication of the alarm system's state
of operation. Note the chart below:
..
'6:,he Status IndlC8
:.::::t.:.;::o;.;.r.;;:.ls~••;.;.,. .......~...;;;;.::.~;;;;::r=I.;= ~~:"'O;'-~~'C'i:!"')
Flashing Slowly (about once
per second)
Trigger Identification.
Fully Armed
•
•
•
•
•
•
•
•
•
If the siren chirps four times when you disarm your security system or you notice the
status indicator flashing rapidly when you enter the vehicle, this indicates that the
system was triggered in your absence. Perform the following operation to determine
the protected zone that triggered the system:
• Press the Override/programming button before turning the ignition key on. The
siren will chirp a number of times to indicate the cause of the alarm trigger:
Q
System Maintenance
•••••••••
Adding Remote Transmitters to Your System
Your security system has memory locations for four (4) transmitters.
ALL FOUR MEMORY LOCATIONS MUST BE. FILLED FOR THE SYSTEM TO
OPERATE PROPERLY UNLESS YOU ARE PROGRAMMING MORE THAN TWO
TRANSMITTERS TO THE SYSTEM, PROGRAM EACH OF THE SUPPLIED TRANSMITTERS TWO (2) TIMES IN ANY SITUATION, MAKE SURE THAT FOUR (4)
TRANSMITTERS ARE PROGRAMMED TO THE SYSTEM AT ALL TIMES.
1.
2.
3.
4.
5.
6.
7.
8.
9.
10
Open the driver's door and leave open.
If not already on, turn the ignition key to the "RUN" position.
Press and hold the programming button.
In 15 seconds the system will chirp the siren.
Release the override/programming button.
The system is now in the transmitter learn mode.
Wait five (5) seconds.
Press ARM button on the first transmitter.
The system will chirp the siren to indicate that this transmitter code has been
learned.
Repeat step 6 for any additional transmitters.
Turn the ignition key off to exit the learn mode.
Close all doors to reset the system operation.
System Maintenance (cont.) •
•
•
•
•
•
•
•
•
Programming Selectable Options
Note: You can go into option programming mode Jthout exiting the transmitter learn
mode, To do so, do not turn the ignition key off or close the doors at the end of the
transmitter programming section and proceed directly to step 2 below.
1. Enter the transmitter programming mode as indicated on page 10.
2. Press and release the programming but.ton one time .
The siren will chirp three (3) times to indicate the system is in the option
programming mode.
3, Press the ARM button one time to select option #1 .
The siren will chirp one time.
Pressing the disarm button on a programmed transmitter toggles the selected
option's state on or off.
The status indicator (LED) will display the state of the selected option.
Pressing the ARM button on a programmed transmitter selects the next option.
The siren will emit a number of short chirps corresponding to the selected
option number.
Pressing ARM and DISARM buttons at the same time will reset all options to
their factory preset states.
The siren will chirp and the door locks will cycle once to indicate that the
options have been reset to their factory preset programming.
4, When all options are set as desired, turn the ignition key off to exit the options
programming mode.
5. Close all doors to reset the system operation.
"0' /
/
',','
"
[f:::i
:i1
Status Indicator
', Displays Option Status
(ON or OFF)
Number of Siren Chirps
Indicate Option Number
1 Arming I disarming chirp enable
2 Passive arming enable ,
NO
'
..
'> , ,-
3 (1) Siren output enable (2) hom output enable
4 Ignition triggered fOcII
enable' ,
5 Ignition triggered door unlock enable
'
6 Double unlock pulse enable
7 Armed Output enable
8 Door lock I unlocll outpOt dt.ifatIori is (1)
':YES.'''<' ;'«:'' - ";
(1)
i""'\'ES
YES
0.4 s9OOndor (~) 5 S8c::OndS "'"
(2)
" "":'
NO
, """'YES' :"";' 'N'O'"
YES
NO
: '(2) ,": ' (1 ) "
11
System Maintenance. •
•
•
•
•
•
•
•
•
•
Your security system does not require any specific maintenance except for
occasionally changing the transmitter battery. How8ver, it is suggested that the
system be armed and all protected entrances be checked about once a month to
make sure that they trigger the alarm.
Changing the Remote Transmitter Battery
The 12-volt alkaline battery supplied in younemote transmitter should last
approximately one year, depending on usage. When the battery begins to weaken,
you will notice a decrease in range, or the distance from your vehicle that your
remote transmitter will operate. Follow the instructions below to change the remote
transmitter battery.
1. Use a small coin or screwdriver to pry off the back of the transmitter case and
expose the battery.
2. Remove the battery, being careful not to remove the transmitter circuit board.
3. Replace with a new battery (Ouracell-type MN21, Gold Peak-type GP-23A or
equivalent). Be sure to observe the (+) and (-) signs in the battery compartment,
and install the battery appropriately.
4. Replace the case backing, then test the remote transmitter.
Note: It is not necessary to reprogram the remote transmitter after changing the
battery.
+
Open Back of
Remote Transmitter
12