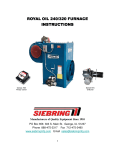
1
FFIRS.qxd 6/16/04 8:37 AM Page i Quark03 Quark03:Desktop Folder:Chapter-FM: Audel ª HVAC Fundamentals Volume 2 Heating System Components, Gas and Oil Burners, and Automatic Controls All New 4th Edition James E. Brumbaugh FFIRS.qxd 6/16/04 8:37 AM Page ii Quark03 Quark03:Desktop Folder:Chapter-FM: Vice President and Executive Group Publisher: Richard Swadley Vice President and Executive Publisher: Robert Ipsen Vice President and Publisher: Joseph B. Wikert Executive Editor: Carol A. Long Acquisitions Editor: Katie Feltman Editorial Manager: Kathryn A. Malm Senior Production Manager: Fred Bernardi Development Editor: Kenyon Brown Production Editor: Vincent Kunkemueller Text Design & Composition: TechBooks Copyright 2004 by Wiley Publishing, Inc., Indianapolis, Indiana. All rights reserved. Published simultaneously in Canada No part of this publication may be reproduced, stored in a retrieval system, or transmitted in any form or by any means, electronic, mechanical, photocopying, recording, scanning, or otherwise, except as permitted under Section 107 or 108 of the 1976 United States Copyright Act, without either the prior written permission of the Publisher, or authorization through payment of the appropriate per-copy fee to the Copyright Clearance Center, Inc., 222 Rosewood Drive, Danvers, MA 01923, (978) 750-8400, fax (978) 646-8700. Requests to the Publisher for permission should be addressed to the Legal Department, Wiley Publishing, Inc., 10475 Crosspoint Blvd., Indianapolis, IN 46256, (317) 572-3447, fax (317) 572-4447, E-mail: [email protected]. Limit of Liability/Disclaimer of Warranty: The publisher and the author make no representations or warranties with respect to the accuracy or completeness of the contents of this work and specifically disclaim all warranties, including without limitation warranties of fitness for a particular purpose. No warranty may be created or extended by sales or promotional materials. The advice and strategies contained herein may not be suitable for every situation. This work is sold with the understanding that the publisher is not engaged in rendering legal, accounting, or other professional services. If professional assistance is required, the services of a competent professional person should be sought. Neither the publisher not the author shall be liable for damages arising herefrom. The fact that an organization or Web site is referred to in this work as a citation and/or a potential source of further information does not mean that the author or the publisher endorses the information the organization or Web site may provide or recommendations it may make. Further, readers should be aware that Internet Web sites listed in this work may have changed or disappeared between when this work was written and when it is read. For general information on our other products and services, please contact our Customer Care Department within the United States at (800) 762-2974, outside the United States at (317) 5723993 or fax (317) 572-4002. Trademarks: Wiley, the Wiley Publishing logo, and Audel are trademarks or registered trademarks of John Wiley & Sons, Inc., and/or its affiliates. All other trademarks are the property of their respective owners. Wiley Publishing, Inc., is not associated with any product or vendor mentioned in this book. Wiley also publishes its books in a variety of electronic formats. Some content that appears in print may not be available in electronic books. Library of Congress Cataloging-in-Publication Data: eISBN: 0-7645-7436-1 Printed in the United States of America 10 9 8 7 6 5 4 3 2 1 FFIRS.qxd 6/16/04 8:37 AM Page iii Quark03 Quark03:Desktop Folder:Chapter-FM: For Laura, my friend, my daughter. FFIRS.qxd 6/16/04 8:37 AM Page iv Quark03 Quark03:Desktop Folder:Chapter-FM: FTOC.qxd 6/16/04 8:39 AM Page v Quark03 Quark03:Desktop Folder:Chapter-FM: Contents Introduction xv About the Author xvi Chapter 1 Oil Burners Gun-Type Oil Burners Construction Details Operating Principles Flame-Retention Head Burners High-Static Oil Burners Rotary Oil Burners Vaporizing (Pot-Type) Oil Burners Combination Oil and Gas Burners Fuel Pump Single-Stage Fuel Pump Two-Stage Pump Fuel Pump Capacity Fuel Pump Service and Maintenance Priming Fuel Pumps Adjusting Fuel Pump Pressure Troubleshooting Fuel Pumps 1 3 3 10 16 16 16 18 18 19 21 25 26 26 29 29 31 Fuel Supply Tank and Line Oil Burner Nozzles Electrodes 32 32 36 Troubleshooting Electrodes Servicing Electrodes 37 37 Oil Burner Air System Primary Safety Control Service Installing an Oil Burner Starting an Oil Burner Air Delivery and Blower Adjustment Combustion Testing and Adjustments Troubleshooting Oil Burners 37 40 40 42 43 43 48 v FTOC.qxd 6/16/04 8:39 AM Page vi Quark03 Quark03:Desktop Folder:Chapter-FM: vi Contents Chapter 2 Chapter 3 Gas Burners Operating Principles Electrical Circuits Automatic Controls Types of Gas Burners Integral-Type Gas Burners Gas Conversion Burners Gas Conversion Burner Combustion Chambers Gas Piping for Conversion Burners Venting and Ventilation Safety Precautions Troubleshooting Gas Burners Coal Firing Methods Coal-Firing Draft Requirements Firing Anthracite Coal Firing Bituminous Coal Firing Semibituminous Coal Stoker Firing Stoker Construction Stoker Automatic Controls Stoker Operating Instructions Coal Selection Starting the Fire Natural Stack Draft Manual Air Adjustment Automatic Air Control Changing Coal Feeds Motor Overload Protection Transmission Overload Protection Removal of Obstruction Lubrication Summer Service How to Remove Clinkers How to Adjust Coal Feed 57 57 61 61 63 65 66 67 68 71 72 73 77 77 78 80 81 81 84 86 90 91 91 91 92 92 92 92 93 93 93 93 94 94 FTOC.qxd 6/16/04 8:39 AM Page vii Quark03 Quark03:Desktop Folder:Chapter-FM: Contents vii Chapter 4 How to Adjust Air Supply Troubleshooting Coal Stokers 94 94 Thermostats and Humidistats Automatic Control Systems Temperature Control Circuits Thermostats 99 99 100 100 Thermostat Components Thermostat Terminal Identification Thermostat Anticipators Types of Thermostats Room Thermostats Programmable Thermostats Insertion Thermostats Immersion Thermostats Cylinder Thermostats Boiler Thermostats Remote-Bulb Thermostats Proportional Thermostats Outdoor Thermostats Troubleshooting Thermostats Humidistats Location of Room Humidistats Troubleshooting Humidistats Chapter 5 Gas and Oil Controls Gas Controls Gas Control Circuits Gas Burner Primary Control Servicing a Gas Burner Primary Control Gas Valves Solenoid Gas Valves Solenoid Coils Direct-Acting Heat Motor Valves Diaphragm Valves Pressure Regulators Pressure Switches 105 109 109 119 119 125 125 126 127 129 129 132 132 134 134 140 142 145 145 146 146 151 153 153 158 163 164 166 170 FTOC.qxd 6/16/04 8:39 AM Page viii Quark03 Quark03:Desktop Folder:Chapter-FM: viii Contents Automatic Pilot Safety Valve Thermopilot Valves Thermocouples 174 178 181 Troubleshooting Thermocouples 183 Thermopiles (Pilot Generators) Pilot-Operated Diaphragm Valves Combination Gas Valves 184 185 187 Standing Pilot Combination Gas Valves Continuous Pilot Dual Automatic Gas Valve Universal Electronic Ignition Combination Gas Valve Pilot Burners Installing a Pilot Burner Replacing the Pilot Burner Orifice Lighting the Pilot Pilot Flame Adjustment Main Burner Ignition Pilot-Pressure Switch Electronic Ignition Modules Intermittent Pilot Ignition Module Direct-Spark Ignition Module Hot-Surface Ignition Module Igniters Flame Sensors Mercury Flame Sensors Oil Controls Oil Valves Oil Burner Primary Control Cadmium Cell Primary Controls Stack Detector Primary Control Combination Primary Control and Aquastat Troubleshooting the Oil Burner Primary Control 187 191 194 194 198 200 201 202 202 203 203 204 207 208 211 214 216 217 217 219 220 223 227 231 FTOC.qxd 6/16/04 8:39 AM Page ix Quark03 Quark03:Desktop Folder:Chapter-FM: Contents ix Chapter 6 Other Automatic Controls Fan Controls 233 233 Fan Control Air Switch Fan Relays Fan Center Fan Manager Fan Timer Switch Fan Safety Cutoff Switch 233 236 237 239 241 241 242 Limit Controls Limit Control Secondary High-Limit Switch Combination Fan and Limit Control Switching Relays Impedance Relays Heating Relays/Time-Delay Relays Potential Relay Pressure Switches Sail Switches Other Switches and Relays Sequence Controllers Contactors Troubleshooting Contactors Cleaning Contactors Replacing Contactors 244 244 248 251 256 259 261 263 265 266 268 269 275 277 280 280 Motor Starter Overload Relay Heater Inherent Protector Pilot Duty Motor Protector Capacitors 281 281 282 283 284 Troubleshooting Capacitors Replacing Capacitors 287 287 High-Pressure Cutout Switch Low-Pressure Cutout Switch Transformers Sizing Transformers 288 289 290 291 FTOC.qxd 6/16/04 8:39 AM Page x Quark03 Quark03:Desktop Folder:Chapter-FM: x Contents Installing Transformers Chapter 7 291 Control Panels 293 Ducts and Duct Systems Codes and Standards Types of Duct Systems Perimeter Duct Systems Extended Plenum Systems Crawl-Space Plenum Systems Duct Materials Duct System Components Supply Air Registers, Grilles, and Diffusers Return Air and Exhaust Air Inlets Duct Run Fittings Air Supply and Venting Duct Dampers Damper Motors and Actuators Installing Damper Motors Troubleshooting Damper Motors Blowers (or Fans) for Duct Systems Designing a Duct System Duct System Calculations Duct Heat Loss and Gain Air Leakage Duct Insulation Equal Friction Method Balancing an Air Distribution System Duct Maintenance Roof Plenum Units Mobile Home Duct Systems Proprietary Air Distribution Systems Duct Furnaces Electric Duct Heaters 295 295 295 296 297 297 298 299 301 302 303 305 305 313 316 320 321 322 323 324 325 325 326 331 331 332 333 336 338 347 FTOC.qxd 6/16/04 8:39 AM Page xi Quark03 Quark03:Desktop Folder:Chapter-FM: Contents xi Chapter 8 Pipes, Pipe Fittings, and Piping Details Types of Pipe Materials 355 355 Wrought-Iron Pipe Wrought-Steel Pipe Galvanized Pipe Copper and Brass Pipes and Tubing Plastic Tubing Synthetic Rubber Hose Composite Tubing 356 363 363 363 367 369 369 Pipe Fittings Classification of Pipe Fittings Extension or Joining Fittings Reducing or Enlarging Fittings Directional Fittings Branching Fittings Shutoff or Closing Fittings Union or Makeup Fittings Flanges Pipe Expansion Valves Pipe Threads Pipe Sizing Sizing Steam Pipes Sizing Hot-Water (Hydronic) Pipes/Tubing Pipe Fitting Measurements Calculating Offsets First Method Second Method Third Method Fourth Method Pipe Supports Joint Compound Pipe Fitting Wrenches Pipe Vise 369 370 370 378 380 380 382 382 382 382 384 384 384 385 393 396 397 400 401 401 403 403 403 406 409 FTOC.qxd 6/16/04 8:39 AM Page xii Quark03 Quark03:Desktop Folder:Chapter-FM: xii Contents Installation Methods Pipe Cutting Pipe Threading Pipe Reaming Pipe Cleaning Pipe Tapping Pipe Bending Assembling and Make–Up Nonferrous Pipes, Tubing, and Fittings Soldering Pipe Brazing Pipes Braze Welding Pipe Welding Pipe Gas Piping Insulating Pipes Piping Details Connecting Risers to Mains Connections to Radiators or Convectors Lift Fittings Drips Dirt Pockets Siphons Hartford Connections Making Up Coils Relieving Pipe Stress Swivels and Offsets Chapter 9 410 410 412 414 414 414 415 415 420 420 424 425 425 429 429 430 431 431 431 432 434 434 434 434 436 439 Eliminating Water Pockets Pressure Tests 440 444 Valves and Valve Installation Valve Components and Terminology 445 445 Valve Materials Globe and Angle Valves Gate Valves Check Valves 451 454 456 458 FTOC.qxd 6/16/04 8:39 AM Page xiii Quark03 Quark03:Desktop Folder:Chapter-FM: Contents xiii Stop Valves Butterfly Valves Two-Way Valves Three-Way Valves Y Valves Valve Selection Troubleshooting Valves Valve Stuffing-Box Leakage Valve Seat Leakage Damaged Valve Stems Chapter 10 463 465 467 469 469 469 472 474 474 475 Automatic Valves and Valve Operators Valve Pipe Connections Valve Installing Pointers Soldering, Brazing, and Welding Valves to Pipes Soldering or Silver-Brazing Procedure Butt-Welding Procedure Socket-Welding Procedure 492 494 495 496 Steam and Hydronic Line Controls Steam and Hydronic System Pumps 497 497 Condensate Pumps Circulators (Water-Circulating Pumps) Circulator Selection Steam Traps Sizing Steam Traps Steam Trap Maintenance Automatic Heat-Up Installing Steam Traps Float Traps Thermostatic Traps Balanced-Pressure Thermostatic Steam Traps Maintenance Float and Thermostatic Traps Thermodynamic Steam Traps 475 487 489 497 505 511 518 519 520 520 522 523 524 525 526 526 529 FTOC.qxd 6/16/04 8:39 AM Page xiv Quark03 Quark03:Desktop Folder:Chapter-FM: xiv Contents Bucket Traps Flash Traps Impulse Traps Tilting Traps Lifting Traps Boiler Return Traps Expansion Tanks Closed Steel Expansion Tanks Diaphragm Expansion Tanks Sizing Expansion Tanks Troubleshooting Expansion Tanks Air Eliminators Pipeline Valves and Controls Temperature Regulators Electric Control Valves (Regulators) Water-Tempering Valves Hot-Water Heating Control Flow Control Valve Electric Zone Valve Balancing Valves, Valve Adapters, and Filters Manifolds Pipeline Strainers 530 534 534 536 537 537 540 541 543 543 544 545 547 548 548 550 554 558 559 561 564 565 Appendix A Professional & Trade Associations 567 Appendix B Manufacturers 579 Appendix C Data Tables 591 Appendix D Conversion Tables 629 Index 639 FLAST.qxd 6/16/04 8:38 AM Page xv Quark03 Quark03:Desktop Folder:Chapter-FM: Introduction The purpose of this series is to provide the layman with an introduction to the fundamentals of installing, servicing, troubleshooting, and repairing the various types of equipment used in residential and light-commercial heating, ventilating, and air conditioning (HVAC) systems. Consequently, it was written not only for the HVAC technician and others with the required experience and skills to do this type of work but also for the homeowner interested in maintaining an efficient and trouble-free HVAC system. A special effort was made to remain consistent with the terminology, definitions, and practices of the various professional and trade associations involved in the heating, ventilating, and air conditioning fields. Volume 1 begins with a description of the principles of thermal dynamics and ventilation, and proceeds from there to a general description of the various heating systems used in residences and light-commercial structures. Volume 2 contains descriptions of the working principles of various types of equipment and other components used in these systems. Following a similar format, Volume 3 includes detailed instructions for installing, servicing, and repairing these different types of equipment and components. The author wishes to acknowledge the cooperation of the many organizations and manufacturers for their assistance in supplying valuable data in the preparation of this series. Every effort was made to give appropriate credit and courtesy lines for materials and illustrations used in each volume. Special thanks is due to Greg Gyorda and Paul Blanchard (Watts Industries, Inc.), Christi Drum (Lennox Industries, Inc.), Dave Cheswald and Keith Nelson (Yukon/Eagle), Bob Rathke (ITT Bell & Gossett), John Spuller (ITT Hoffman Specialty), Matt Kleszezynski (Hydrotherm), and Stephanie DePugh (Thermo Pride). Last, but certainly not least, I would like to thank Katie Feltman, Kathryn Malm, Carol Long, Ken Brown, and Vincent Kunkemueller, my editors at John Wiley & Sons, whose constant support and encouragement made this project possible. James E. Brumbaugh xv FLAST.qxd 6/16/04 8:38 AM Page xvi Quark03 Quark03:Desktop Folder:Chapter-FM: About the Author James E. Brumbaugh is a technical writer with many years of experience working in the HVAC and building construction industries. He is the author of the Welders Guide, The Complete Roofing Guide, and The Complete Siding Guide. xvi GB039-1317G-P01[001-056].qxd 6/8/04 7:11 PM Page 1 Quark03 Quark03:Desktop Folder:repro: Chapter 1 Oil Burners An oil burner is a mechanical device used to prepare the oil for burning in heating appliances such as boilers, furnaces, and water heaters. The term oil burner is somewhat of a misnomer because this device does not actually burn the oil. It combines the fuel oil with the proper amount of air for combustion and delivers it to the point of ignition, usually in the form of a spray. The fuel oil is prepared for combustion either by vaporization or by atomization. These two methods of fuel oil preparation are used in the three basic types of oil burners employed in commercial, industrial, and residential heating. The following are the three basic types of oil burners: 1. Gun-type (atomizing) oil burners. 2. Vaporizing (pot-type) oil burners. 3. Rotary oil burners. Gun-type atomizing oil burners are available as either low-pressure or high-pressure types (see Figures 1-1, 1-2, and 1-3). Both are used in residential heating applications with the latter being by far the more popular of the two. The remainder of this chapter is devoted to a description of the gun-type high-pressure atomizing oil burners used in residential and light commercial oil heating systems. Figure 1-1 Basic shape of a gun-type oil burner. (Courtesy Stewart-Warner Corp.) 1 GB039-1317G-P01[001-056].qxd 6/8/04 7:11 PM Page 2 Quark03 Quark03:Desktop Folder:repro: 2 Chapter 1 TRANSFORMER IGNITION AND FIRING ASSEMBLY PLATE DRAFT TUBE OIL FEED TUBE FROM PUMP TO PYPEX FIRE INSPECTION HOLES PUMP STRAINER AND VALVE UNIT BUILT-IN MOTOR PROTECTOR MOTOR COUNTER-BALANCED DRAFT SHUTTER FAN HOUSING LEGS FOR PEDESTAL-MOUNTED ATTACHMENT Principal components of an S.T. Johnson gun-type oil burner. (Courtesy S.T. Johnson Company) Figure 1-2 The advantage of the vaporizing (pot-type) oil burner is its low operating cost. It is the least expensive to use, but it has limited heating applications. It is currently used only in small structures located in milder climates. Vaporizing burners can be divided into the three following types: 1. Natural-draft pot burners. 2. Forced-draft pot burners. 3. Sleeve burners. Rotary oil burners are commonly used in the heating systems of commercial or industrial buildings, although they can and have been used for residential heating applications (see Figures 1-4 and 1-5). The following types of rotary oil burners are available for heating purposes: GB039-1317G-P01[001-056].qxd 6/8/04 7:11 PM Page 3 Quark03 Quark03:Desktop Folder:repro: Oil Burners 3 MOTOR FAN FUEL LINE REFRACTORY FIREPOT STRAINER PUMP TRANSFORMER AIR TUBE Gun-type oil burner firing into furnace combustion chamber. (Courtesy U.S. Department of Agriculture) Figure 1-3 • • • Vertical rotary burners Horizontal rotary burners Wall-flame rotary burners Gun-Type Oil Burners Gun-type, high-pressure atomizing oil burners are sometimes called sprayers or atomizing burners because they spray the fuel oil instead of vaporizing it. They are also referred to as gun or pressure oil burners because the oil is forced under pressure through a special gun-like atomizing nozzle. The liquid fuel is broken up into minute liquid particles or globules to form the spray. Construction Details The principal components and parts of a gun-type, high-pressure atomizing oil burner used in residential and light commercial oil heating systems are illustrated in Figures 1-6 and 1-7. The GB039-1317G-P01[001-056].qxd 6/8/04 7:11 PM Page 4 Quark03 Quark03:Desktop Folder:repro: 4 Chapter 1 Cutaway view of a vertical rotary burner of the vaporizing or wall-flame type. (Courtesy Integrated Publishing) Figure 1-4 construction details of gun-type oil burners will vary somewhat in different makes and models, but the overall design of these burners is now nearly standardized. The components and parts of a typical gun-type oil burner can be divided into the following categories: GB039-1317G-P01[001-056].qxd 6/8/04 7:11 PM Page 5 Quark03 Quark03:Desktop Folder:repro: Oil Burners 5 FUEL TUBE TIP (STATIONARY) OIL SWIRLS IN COUNTERCLOCKWISE DIRECTION PRIMARY AIR AUTOMIZING CUP (ROTATING) FAN FUEL TUBE OIL FILM HOLLOW MAIN SHAFT AIR SWIRLS IN CLOCKWISE DIRECTION ANGULAR-VANE AIR NOZZLE NOZZLE PROTECTOR Figure 1-5 1. 2. 3. 4. 5. 6. 7. BAFFLE PLATE Horizontal rotary burner. (Courtesy Integrated Publishing) Burner control. Primary safety control. Gun assembly. Ignition transformer. Burner motor and coupling. Fuel pump. Combustion air blower. Burner Control The burner control is the operational control center of the burner. As shown in Figures 1-6 and 1-7, it is located on the right side of the burner assembly directly above the combustion air blower housing. It operates in conjunction with the primary control and a bimetallic GB039-1317G-P01[001-056].qxd 6/8/04 7:12 PM Page 6 Quark03 Quark03:Desktop Folder:repro: 6 Chapter 1 RETAINING CLIP FLANGE GASKET AIR TUBE ASSY FOR FB HEADS FLANGE AIR TUBE SCREWS HOLE PLUG ELECTRONIC IGNITION TRANSFORMER MAIN HOUSING ASSY ESCUTCHEON PLATE FB-HEAD CONNECTOR TUBE HEAD INSULATOR NOZZLE ADAPTER NOZZLE LINE ELECTRODE HEAD ELECTRODE ASSY ASSY Figure 1-6 Typical gun-type oil burner (side view). (Courtesy Lennox Industries Inc.) temperature sensor. When the room thermostat calls for heat and the ignition cycle begins, the burner control will start the burner only when the cad cell detects (proves) a flame. The burner control shuts off the burner if the cad cell fails to prove the flame or if the bimetallic sensor detects a temperature too high for safe operation. Primary Safety Control The primary safety control is an automatic safety device designed to stop the flow of fuel oil at the burner should ignition or flame failure occur. Modern oil-fired furnaces and boilers use a cad cell as the primary control to prove the flame; older ones were equipped with a stack detector primary control. The former is mounted inside the burner behind the access door (see Figure 1-8), and the latter is located in the stack. Gun Assembly The oil burner gun assembly consists of a burner nozzle, the electrodes, and a tube connecting the electrodes to the fuel pump (see Figure 1-9). The burner nozzle changes the fuel oil into a form that can be burned in the combustion chamber. It accomplishes this by forcing the oil under pressure through a small hole at the end of the nozzle. The atomized fuel oil is ignited by spark from the electrodes. GB039-1317G-P01[001-056].qxd 6/8/04 7:12 PM Page 7 Quark03 Quark03:Desktop Folder:repro: Oil Burners 7 ELECTRONIC IGNITION TRANSFORMER BURNER CONTROL RESET BUTTON REAR ACCESS DOOR GASKET VIEW PORT REAR ACCESS DOOR ASSY AIR ADJUSTMENT DIAL 0 1 SPLINED NUT 3 4 5 6 7 8 OIL PUMP COUPLING Figure 1-7 COMBUSTION AIR MOTOR BLOWER WHEEL INLET AIR SCOOP Typical gun-type oil burner (front view). (Courtesy Lennox Industries Inc.) Ignition Transformer A step-up ignition transformer located on top of the burner assembly produces the voltage used by the electrodes to ignite the fuel oil. This type of transformer is designed to increase the voltage of a high-voltage (110 VAC) circuit to the ultrahigh 14,000 volts required to ignite the fuel oil. Burner Motor and Coupling As shown in Figure 1-5, the burner motor is located on the right side of the oil burner assembly. The drive shaft of the burner motor is connected to both the fuel pump and the combustion air blower by a coupling that functions as the drive shaft for both of these units. A burner motor is also sometimes called an oil pump motor or a pump motor because it is connected to and drives the fuel (oil) pump. GB039-1317G-P01[001-056].qxd 6/8/04 7:12 PM Page 8 Quark03 Quark03:Desktop Folder:repro: 8 Chapter 1 BURNER CONTROL CAD CELL FLAME DETECTOR LOCATED INSIDE BURNER ASSEMBLY FUEL PUMP COMBUSTION AIR BLOWER ASSEMBLY Locations of burner control and cadmium cell primary safety control. Figure 1-8 Fuel Pump The fuel pump (also called an oil pump or a fuel unit) is used to draw fuel oil from the storage tank and deliver it under high pressure (100 to 140 psi) to the nozzle assembly (see Figure 1-11). It is driven by the burner motor and coupling and is located on the left side of the oil burner. Combustion Air Blower The combustion air blower is also driven by the burner motor and coupling. It is located between the burner motor and the fuel pump. Its function is to introduce the required amount of air for the GB039-1317G-P01[001-056].qxd 6/8/04 7:12 PM Page 9 Quark03 Quark03:Desktop Folder:repro: Oil Burners 9 NOZZLE ADAPTER IGNITION POINTS BAFFLE PLATE PORCELAIN INSULATORS ELECTRODE SPRINGS OIL-TIGHT FITTINGS Oil burner with transformer removed revealing the gun assembly. (Courtesy Wayne Home Equipment Co., Inc.) Figure 1-9 GB039-1317G-P01[001-056].qxd 6/8/04 7:12 PM Page 10 Quark03 Quark03:Desktop Folder:repro: 10 Chapter 1 CONNECTOR TUBE GUN ASSEMBLY OIL PUMP Figure 1-10 Gun assembly details. (Courtesy Lennox Industries Inc.) combustion process. The amount of air can be manually adjusted by an air adjustment gauge located between the blower wheel and the inlet air scoop (see Figure 1-7). Depending on the oil burner manufacturer, a combustion air blower is also sometimes called a blower wheel, a burner motor fan, or an induction blower. Do not confuse the combustion air blower with the furnace indoor blower. The former delivers air to the oil burner for combustion. The latter delivers the heated air to the rooms and spaces inside the structure. Operating Principles The operation of a gun-type, high-pressure atomizing oil burner can be traced in Figure 1-12. The fuel oil is drawn through a strainer from the supply tank by the fuel pump and is forced under pressure past the pressure relief cutoff valve via the oil line where it eventually passes through the fine mesh strainer and into the nozzle. The amount of pressure required to pump the fuel oil through GB039-1317G-P01[001-056].qxd 6/8/04 7:12 PM Page 11 Quark03 Quark03:Desktop Folder:repro: Oil Burners 11 PRESSURE GAUGE PORT (1 ⁄ 8" [3 MM]) INLET PORT SHOWN (1 ⁄ 4" [6 MM]) NOZZLE PORT (1 ⁄ 8" [3 MM]) BLEED PORT INLET PORT (1 ⁄ 4" [6 MM]) RETURN PORT (1 ⁄ 4" [6 MM]) Figure 1-11 Typical fuel pump. (Courtesy Lennox Industries Inc.) the line depends on the size and capacity of the oil burner and the purpose for which it is used. For example, residential oil burners require 80 to 125 psi, whereas commercial and industrial oil burners operate on 100 to 300 psi. As the fuel oil passes through the nozzle, it is broken up and sprayed in a very fine mist. The air supply is drawn in through the inlet air scoop opening (see Figure 1-5) and forced through the draft tube portion of the casing by the combustion air blower. This air mixes with the oil spray after passing through a set of vanes, GB039-1317G-P01[001-056].qxd 6/8/04 7:12 PM Page 12 Quark03 Quark03:Desktop Folder:repro: 12 Chapter 1 AIR ADJUSTMENT COLLAR AIR ENTRANCE ELECTRODES BRACKET CASE OR HOUSING NOZZLE TUBE NOZZLE FAN ELECTRIC MOTOR SO-CALLED ONE-PIPE OIL LINE STRAINER OIL SUPPLY LINE FROM TANK PUMP Figure 1-12 NOZZLE STRAINER ROTARY TURBULATOR VANES IGNITION ELECTRODES CUTOFF VALVE BYPASS PRESSURE AROUND PUMP RELIEF VALVE Schematic of a gun-type oil burner. called a turbulator. The turbulator gives a twisting motion to the air stream just before it strikes the oil spray, producing a more thorough mixture of the oil and air (see Figure 1-13). Ignition of the oil spray is provided by a transformer that changes the house lighting current and feeds it to the electrodes to provide a spark at the beginning of each operating period. TURBULATOR AIR CONE DRAFT TUBE ELECTRODE JET LINE Details of draft tube illustrating the location of the turbulator, air cone, and electrode. Figure 1-13 GB039-1317G-P01[001-056].qxd 6/8/04 7:12 PM Page 13 Quark03 Quark03:Desktop Folder:repro: Oil Burners 13 The starting cycle of the oil burner is initiated by the closing of the motor circuit. When the motor circuit is closed (automatically by room temperature control), the motor starts turning the fan and the pump. At the same time, the ignition transformer produces a spark at the electrodes ready to light the oil and air mixture. The action of the pump draws the fuel oil from the tank through the strainer on the fuel line. Its flow is controlled by an oil cutoff valve, which prevents oil passing to the nozzle unless the pressure is high enough to spray the oil (approximately 60 lbs of pressure). Because the pump in the oil burner pumps oil much faster than it can be discharged through the nozzle at that pressure (i.e., 60 lbs of pressure), the oil pressure continues to rise very fast between the pump and the nozzle. When the pressure begins to rise above the normal operating pressure (100 lbs), a pressure relief valve opens and allows the excess oil to flow through the bypass line to the inlet, as in the so-called one-pipe system, or to flow through a second or return line to the supply tank. The pressure relief valve in either system maintains the oil at the correct operating pressure. When the oil burner is turned off (i.e., when the burner motor stops), the oil pressure quickly drops below the operating pressure, and a pressure relief valve closes. The flame continues until the pressure drops below the setting of the cutoff valve. The cutoff and pressure relief (regulating) valves may be either two separate units or combined into one unit. Figure 1-14 shows the essentials of the two-unit arrangement. These are, as shown, simply elementary schematics designed to illustrate basic operating principles. The cutoff needle valve is shown with a spring inside the bellows, and the pressure relief (mushroom) valve is shown with exposed spring. In the cutoff valve arrangement, the spring acts against oil pressure on the head of the bellows (tending to collapse it); in the pressure relief valve, the spring acts against the oil pressure, which acts on the lower face of the mushroom valve (tending to open it). When the pump starts and the pressure in the line rises to about 60 lbs (depending on the spring setting), this pressure acting on the head of the bellows overcomes the resistance of the spring, causing the cutoff valve to open. Since the pump supplies more oil than the nozzle can discharge, the pressure quickly rises to 100 lbs, overcoming the resistance of the relief valve spring and causing the valve to open. This allows excess oil to bypass or return to the tank. The relief valve will open high enough to maintain the working pressure constant at 100 lbs. When the oil burner is turned off, the oil pressure quickly drops, and the pressure relief valve closes. GB039-1317G-P01[001-056].qxd 6/8/04 7:12 PM Page 14 Quark03 Quark03:Desktop Folder:repro: 14 Chapter 1 ADJUSTING SCREW INLET CLOSING SPRING STRAINER CUTOFF VALVE RETURN TO INLET LINE "ONE-PIPE" BELLOWS PUMP NOZZLE SPRAY ADJUSTING SCREW PRESSURE-RELIEF VALVE RETURN TO TANK "TWO-PIPE" CLOSING SPRING Schematic sectional view of separate unit cutoff valve and pressure relief valve showing strainer, pump, and piping. Figure 1-14 However, oil will continue to discharge from the nozzle until the pressure drops below the cutoff valve setting when the cutoff valve closes and stops the nozzle discharge. A passage to the return line is provided by a small slot cut in the seat of the mushroom valve. This causes any remaining pressure trapped in the line by the closing of the cutoff valve to be equalized. Frequently the cutoff valve and pressure relief valve are combined in a compact cylindrical casing (see Figure 1-15). Here the two valves are attached to a common stem with a flange, which comes in contact with a stop when moved upward by the pressure of the valve actuating the spring. The position of the stop limits the valve movements to proper maximum lift. A piston, free to move in the cylindrical casing, has an opening in its head that forms the valve seat for the pressure relief GB039-1317G-P01[001-056].qxd 6/8/04 7:12 PM Page 15 Quark03 Quark03:Desktop Folder:repro: Oil Burners 15 SCREW ADJUSTING STRAINER INLET PISTON SPRING BYPASS "ONE-PIPE" PISTON RETURN TO TANK "TWO-PIPE" COMMON STEM PRESSURE-RELIEF VALVE STOP VALVE FLANGE VALVE ACTIVATING SPRING PUMP MAXIMUM VALVE LIFT NOZZLE SPRAY PRESSURE RELIEVING SLOT CUTOFF VALVE Figure 1-15 Schematic sectional view of combined cutoff valve and pressure relief valve showing the strainer, fuel pump, and piping locations. valve. The strong piston spring tends to move the piston downward and close the pressure relief valve and then the cutoff valve. When the pump starts and the pressure in the cylinder below the piston rises to about 60 lbs (depending on the piston spring setting), the piston and the two valves (i.e., the cutoff and pressure relief valve) rise until the valve flange contracts with the stop. At this GB039-1317G-P01[001-056].qxd 6/8/04 7:12 PM Page 16 Quark03 Quark03:Desktop Folder:repro: 16 Chapter 1 instant, the cutoff valve is fully opened, allowing oil to flow to the nozzle, the pressure relief valve still being closed. Since the nozzle does not have sufficient capacity to discharge all the oil that is supplied by the pump, the pressure below the piston will continue to rise. Flame-Retention Head Burners Most oil furnaces and boilers prior to 1980 were installed with cast-iron head burners that had an efficiency rating of only about 60 percent. The efficiency of these cast-iron head burners can be increased by reducing the firing rate. This can be accomplished by reducing the burner nozzle size, but the size reduction is controlled by the minimum firing rate for the appliance. Note Never reduce the nozzle size below the minimum firing rate listed on the manufacturer’s rating plate. As a rule, it is a good idea not to reduce the nozzle more than one size if the conventional ironhead burner is retained. Many conventional oil furnaces and boilers are being retrofitted with flame-retention head oil burners. A flame-retention head oil burner is designed to mix the air and fuel more efficiently than the traditional iron-head units. As a result, the amount of excess air required for good combustion is significantly reduced, resulting in a hotter and cleaner flame. In these units, the nozzle size can be reduced more than one size to achieve the maximum firing rate for the burner. The lower limit of the firing rate of a flame-retention head burner is governed by the flue gas temperature leaving the furnace or boiler. High-Static Oil Burners High-static oil burners are improved versions of flame-retention burners. They have an increased efficiency of 20 percent over flame-retention burners, and the high-static pressure developed in these burners allows them to run at even lower excess air levels. Rotary Oil Burners Rotary burners operate with low-pressure gravity and are available in a number of designs depending on the different conditions of use. In each case, the operating principle involves throwing the oil by centrifugal force. Rotary oil burners can be classified either as rotary nozzle or rotary cup burners. The essential components of the rotary nozzle burner are shown in Figure 1-16. Air pressure acting on the pro- GB039-1317G-P01[001-056].qxd 6/8/04 7:12 PM Page 17 Quark03 Quark03:Desktop Folder:repro: Oil Burners 17 VAPOR SPRAY ROTARY NOZZLES VAPORIZING RIM PROPELLER OIL DUCT Figure 1-16 Elementary rotary nozzle oil burner. peller causes the nozzle assembly to rotate at a very high speed. Oil is supplied through the hollow shaft to the nozzles, and the rotary motion causes the oil to be thrown off in a fine spray by centrifugal force. The flame from this spray heats up the metal vaporizing rim hot enough to vaporize the oil spray as it comes in contact with it. Being thoroughly mixed with air, a blue flame is produced. On some designs, the spray vaporized by the vaporizing rim is superheated by passing through grilles. The rotary cup oil burner (see Figure 1-17) contains a coneshaped cup that rotates on ball bearings carried by a central tube. The fuel is supplied to the cup through this tube. In operation, drops of oil, issuing from the oil feed tip, come into contact with the cup as shown; by centrifugal force the drops are both flattened into a film and projected toward and off the rim of the cup, as shown in Figure 1-18. Because the rim is surrounded by a concentric GB039-1317G-P01[001-056].qxd 6/8/04 7:12 PM Page 18 Quark03 Quark03:Desktop Folder:repro: 18 Chapter 1 PROPELLER OIL TUBE AIR AIR AIR PRIMARY AIR INLET Figure 1-17 ROTARY CUP BALL BEARINGS OIL FEED TIP Elementary rotary cup oil burner. opening of the casing, the oil is met by the surrounding blast of primary air with which it mixes, giving the proper mixture for combustion. Vaporizing (Pot-Type) Oil Burners Figures 1-19 and 1-20 show a typical vaporizing (pot-type) oil burner. The fuel oil is vaporized for combustion by heating it from below. The vaporized fuel oil rises vertically where it is burned at the top. The following are the two basic types of vaporizing, or pot, oil burners: 1. The natural-draft pot burner. 2. The forced-draft pot burner. In the former, the air necessary for combustion is provided by the chimney. The forced-draft pot burner relies on both the chimney and a mechanical device (e.g., a fan) for the air supply. Sleeve burners (also referred to as perforated sleeve burners) represent a third type of vaporizing, or pot, burner. Although these burners are used mostly in conjunction with small oil-fired equipment (e.g., kitchen ranges and space heaters), they can also be employed to heat a small house, if outside temperatures do not become too low. Combination Oil and Gas Burners Some oil burners are available with combination oil and gas firing accessories that make it possible to use either of these fuels in the GB039-1317G-P01[001-056].qxd 6/8/04 7:12 PM Page 19 Quark03 Quark03:Desktop Folder:repro: Oil Burners 19 CENTRIFUGAL FORCE INCREASING B A-B CENTRIFUGAL FORCE RIM OF CUP C A OIL DROPLETS FLATTENED INTO FILM A-C COMPONENT OF CENTRIFUGAL FORCE PROJECTING OIL DROPS TOWARD RIM OF CUP OIL FEED TIP Detail of cup showing centrifugal forces acting on the droplets of oil, which flatten them into a film and project them toward and off of rim. Figure 1-18 same burner. This is particularly advantageous in areas where lowcost gas is sometimes available. The combination gas and oil burner illustrated in Figure 1-21 contains independent ignition and control systems for gas or oil. One convenience built into these combination burners is that the oil burner components and parts are standard and require only conventional service procedures. The safety features include a standard cadmium sulfide detection cell and primary relay control. Fuel Pump A wide variety of different makes and models of fuel pumps are available for use with oil burners. Both single-stage and two-stage GB039-1317G-P01[001-056].qxd 6/8/04 7:12 PM Page 20 Quark03 Quark03:Desktop Folder:repro: 20 Chapter 1 POT OR VAPORIZER ASSEMBLY FLAME SPREADER AIR DUCT FAN HOUSING ELECTRIC MOTOR OIL CONTROL VALVE ELECTRIC JUNCTION BOX CLEANOUT ROD ADJUSTABLE LEGS Vaporizing (pot-type) oil burner illustrating the connection to the pot or vaporizing assembly. Figure 1-19 Vaporizing (pot-type) oil burner with cutaway of pot or vaporizing assembly. (Courtesy U.S. Department of Figure 1-20 Agriculture) AIR HOLES FUEL LINE OIL POOL FAN OIL-LEVEL CONTROL VALVE GB039-1317G-P01[001-056].qxd 6/8/04 7:12 PM Page 21 Quark03 Quark03:Desktop Folder:repro: Oil Burners 21 Figure 1-21 Combination oil and gas burner. (Courtesy Wayne Home Equipment Co., Inc.) fuel pumps are available in a number of different sizes and designs (see Figure 1-22). Single-Stage Fuel Pump A single-stage pump contains only one set of pumping gears (see Figure 1-23). These pumps are commonly used in single-pipe gravityfeed installations or two-pipe installations under low-lift conditions with up to 10 inches of vacuum. The following are the principal components of a single-stage fuel pump: 1. 2. 3. 4. 5. 6. 7. 8. Pumping gears. Cutoff valve. Strainer. Shaft seal. Noise-dampening device. Shaft bearing. Body. Bleed valve. GB039-1317G-P01[001-056].qxd 6/8/04 7:12 PM Page 22 Quark03 Quark03:Desktop Folder:repro: 22 Chapter 1 PRESSURE GAUGE PORT 1 ⁄ 8" RETURN 1 ⁄ 8" REGULATE PRESSURE NOZZLE PORT 1 ⁄ 8" INLET 1 ⁄ 4" AIR BLEED VALVE RETURN 1 ⁄ 4" INLET 1 ⁄ 4" Figure 1-22 1 ⁄ 16" BY-PASS PLUG INSERT FOR 2 PIPE SYSTEM Fuel pump assembly. (Courtesy Sundstrand Hydraulics) Fuels Used in Oil Burners No. 1 and No. 2 fuel oil are both commonly used for residential heating purposes. The No. 2 is slightly more expensive, but the fuel oil gives more heat per gallon used.The lighter No. 1 fuel oil is used in vaporizing, or pot-type, oil burners.The No. 2 fuel oil is used in both atomizing and rotary oil burners. The manufacturer of the oil burner will generally stipulate the grade of fuel oil to be used. If this information is unavailable, the label of Underwriters Laboratories, Inc., and the Underwriters Laboratories of Canada will stipulate the correct grade of fuel oil to be used. The heavier the grade of fuel oil used in an oil burner, the greater the care that must be taken to ensure that the oil is delivered for combustion at the proper atomizing temperature. If the oil is not maintained at this temperature prior to delivery for combustion, the oil burner will fail to operate efficiently. An efficient oil burner is one that burns the fuel oil completely using the smallest amount of air necessary for combustion. GB039-1317G-P01[001-056].qxd 6/8/04 7:12 PM Page 23 Quark03 Quark03:Desktop Folder:repro: Oil Burners 23 SHAFT SEAL BODY PUMPING GEARS STRAINER SHAFT BEARING NOISE DAMPENING DEVICE CUTOFF VALVE Figure 1-23 BLEED VALVE Cutaway view of a single-stage fuel pump. (Courtesy Sundstrand Hydraulics) The fuel oil first enters the unit by passing through the strainer, where foreign particles such as dirt and line filter fibers are removed. The fuel oil then moves through the hydraulically balanced pumping gears and is pumped under pressure to the valve (see circuit diagram in Figure 1-24). The pressure forces the piston away from the nozzle cutoff seat, and the fuel oil then flows out the nozzle port. Oil in excess of nozzle capacity is bypassed through the valve back to the strainer chamber in a single-pipe system or is returned to the tank in a two-pipe system. Pressure is reduced on the head of the piston when the pump motor is shut off. At this point, the piston snaps back, causing the nozzle port opening to close. A bleeder valve opening in the piston provides for automatic air purging on a two-pipe system, providing for fast cutoff. GB039-1317G-P01[001-056].qxd 6/8/04 7:12 PM Page 24 Quark03 Quark03:Desktop Folder:repro: 24 Chapter 1 (A) Single-stage unit. PRESSURE GAUGE ANTI-HUM DEVICE FROM TANK STRAINER GEARS EASY FLOW BLEED VALVE TO NOZZLE BLEED ORIFICE OPTIONAL BYPASS TO TANK LEGEND BYPASS TO SUCTION OIL UNDER SUCTION PRESSURE REGULATING AND CUT OFF VALVE OIL RETURNED TO STRAINER CHAMBER OIL UNDER PRESSURE (B) Circuit diagram of single-stage circuit. Figure 1-24 Circuit diagram of a single-stage fuel pump. (Courtesy Sundstrand Hydraulics) GB039-1317G-P01[001-056].qxd 6/8/04 7:12 PM Page 25 Quark03 Quark03:Desktop Folder:repro: Oil Burners 25 Two-Stage Pump A two-stage pump has two sets of pumping gears. These pumps are used in installations with underground tanks where the combination of lift, horizontal run, fittings, and filters does not exceed the manufacturer’ s rating in inches of vacuum. A major advantage of a two-stage fuel unit is that all air is eliminated from the oil being delivered to the nozzle. The inlet of the first stage is located above the inlet for the second stage. As a result, any air drawn into the fuel unit after priming is picked up by the first stage and discharged to the tank before it reaches the second stage. Consequently, the second stage draws completely air-free oil. As the air is being discharged into the tank by the first stage, pressure begins to build up in the second stage, causing the regulating valve to bypass excess oil back into the strainer. These operating principles are illustrated by the circuit diagram in Figure 1-25. 2ND STAGE GEARS FROM TANK PRESSURE GAUGE EASY FLOW BLEED VALVE STRAINER 1ST STAGE GEARS BLEED ORIFICE TO NOZZLE ANTI-HUM DEVICE BYPASS TO SUCTION LEGEND OIL UNDER SUCTION DISCHARGE TO TANK OIL RETURNED TO OPTIONAL INTERNAL STRAINER CHAMBER RETURN TO SUCTION PRESSURE REGULATING AND CUTOFF VALVE OIL UNDER PRESSURE OIL RETURNED TO TANK Figure 1-25 Circuit diagram of a system using a two-stage fuel pump. (Courtesy Sundstrand Hydraulics) GB039-1317G-P01[001-056].qxd 6/8/04 7:12 PM Page 26 Quark03 Quark03:Desktop Folder:repro: 26 Chapter 1 Fuel Pump Capacity The capacity of an oil burner fuel pump should be sufficient to handle the total vacuum in the system. The vacuum is expressed in inches and can be determined by the following procedure: • • • • 1 inch of vacuum for each foot of lift 1 inch of vacuum for each 90° elbow in either the suction or return lines 1 inch of vacuum for each 10 feet of horizontal run (3⁄8-inch OD line) 1 inch of vacuum for each 20 feet of horizontal run (1⁄2-inch OD line) After you have calculated the total vacuum, you can use these data to select the most suitable pump for the burner. Table 1-1 lists various vacuums and suggests appropriate pump capacities. Table 1-1 Types of Pumps Recommended for Different Vacuums Total Vacuum Type of Pump Up to a 3-inch vacuum 4–13-inch vacuum 14-inch vacuum or more Single-stage pump Two-stage pump Single-stage pump for the burner and a separate lift pump with a reservoir (Courtesy National Fuel Oil Institute) Fuel Pump Service and Maintenance A vacuum gauge and a pressure gauge are both used to service a fuel unit. With these two gauges, the individual can check the following: • • • • • • Vacuum Lift Air leaks Pressure Cutoff Delivery Figures 1-26 and 1-27 illustrate the attachment of the vacuum and pressure gauges to a fuel unit. The pressure gauge (shown as GB039-1317G-P01[001-056].qxd 6/8/04 7:12 PM Page 27 Quark03 Quark03:Desktop Folder:repro: Oil Burners 27 the upper gauge in Figure 1-26 and the gauge attached to the nozzle line opening in Figure 1-27) will indicate whether a positive cutoff is operable or whether an adequate and uniform buildup of pressure is present. When the pressure gauge is attached to the nozzle line opening, it should indicate a reading of 75 to 90 psi (see Figure 1-27). Any drop of the pressure gauge reading to zero indicates leaky cutoff and probable difficulty with the shutoff valve in the nozzle line. The existence of air leaks in the supply line can be determined by vacuum gauge readings once the gauge is attached to the optional inlet connection (see Figure 1-26). An evaluation of the gauge reading is itself determined by the location of the oil storage tank. If the tank is located above the burner, and the oil is supplied by gravity flow, the vacuum gauge must show a reading of zero, unless there is a problem in the system. These problems can take the following forms: • • • A partially closed cutoff valve of the oil supply tank A kinked or partially blocked oil supply line A blocked line filter Figure 1-26 Attachment of vacuum and pressure gauge. (Courtesy Wayne Home Equipment Co., Inc.) GB039-1317G-P01[001-056].qxd 6/8/04 7:12 PM Page 28 Quark03 Quark03:Desktop Folder:repro: 28 Chapter 1 75--90 PSI cutoff point should hold. If pressure drops back to zero, indicates leaky cutoff. INLET LINE RETURN LINE Figure 1-27 Pressure gauge attached to the nozzle line. (Courtesy Wayne Home Equipment Co., Inc.) A system with an oil supply tank located below the level of the oil burner that supplies the fuel oil through a line filter must produce a reading on the vacuum gauge if the system is operating properly. A zero reading will indicate the presence of an air leak. Table 1-3 lists a few of the problems that may be encountered with fuel units and some suggested remedies for dealing with them. Most manufacturers of fuel units or gauges generally supply troubleshooting recommendations along with the installation and maintenance instructions. The cause of improper cutoff can be determined by inserting a pressure gauge in the nozzle port of the fuel unit (see Figure 1-28). Figure 1-28 Checking fuel pressure with a gauge. (Courtesy Sundstrand Corp.) GB039-1317G-P01[001-056].qxd 6/8/04 7:12 PM Page 29 Quark03 Quark03:Desktop Folder:repro: Oil Burners 29 Allow the fuel unit to operate for a few minutes and then shut off the burner. If the pressure drops to 0 psi on the gauge, the fuel unit should be replaced. A gauge reading above 0 psi indicates that the fuel unit is operating properly. The probable cause of improper cutoff in those cases where a gauge reading is obtained is usually air in the system. Priming Fuel Pumps On occasion, the oil burner may fail to pump oil. When this occurs, check the oil supply line to the furnace for leaks. If there are no leaks, it may be necessary to prime the fuel pump. Pumps are selfpriming for single-stage, two-pipe systems and for two-stage pumps. A single-stage pump (one-pipe system) should be primed as follows: 1. Turn off the electrical power supply to the unit. 2. Read and follow the priming instructions provided by the manufacturer. 3. Prime the pump until the oil is free of bubbles. When a new pump fails to prime, it may be due to dry pump conditions, which can be corrected by removing the vent plug and filling the pressure cavity slowly so that the fuel oil wets the gears (see Figure 1-29). Other possible causes of the pump failing to prime include the following: • • • • • Suction inlet vacuum is greater than 15 inches of vacuum. Suction line is incorrectly sized. Oil suction line strainer or filter capacity does not match the pump suction gear capacity. Bypass plug is not in position on two-pipe installations. Plug(s) and/or suction line connections are not airtight. Adjusting Fuel Pump Pressure The oil-pressure regulator on the fuel pump is generally factory-set to give nozzle oil pressures of 100 psig. The firing rate is indicated on the nameplate and can be obtained with standard nozzles by adjusting the pump pressures as follows: 1. Turn the adjusting screw clockwise to increase pressure. 2. Turn the adjusting screw counterclockwise to decrease pressure. 3. Never exceed the pressures indicated in Table 1-2. GB039-1317G-P01[001-056].qxd 6/8/04 7:12 PM Page 30 Quark03 Quark03:Desktop Folder:repro: 30 Chapter 1 RETURN PORT 1 ⁄ 4" pipe thread, used as return on twopipe installation. May be used as optional inlet or vaccum test port on single pipe installation. T0 VENT PUMP Attach 1 ⁄ 4" ID plastic tube. Use 3⁄ 8" wrench to open vent 1 ⁄ 8" turn maximum. FOR USE AS GAGE PORT remove plug to install 1 ⁄ 4" pipe threaded gage. Remove insert to install 1 ⁄ 8" pipe threaded gage. NOZZLE RETURN WEBSTER ELECTRIC NOZZLE PORT pipe thread. Racine, wisconsin a sta-rite industry. Single stage full unit 1725 RPM. U L Insert by-pass plug for two-pipe system thru INLETS bottom inlet. 1 ⁄ 8" TO ADJUST PRESSURE remove cover plug of pressure adjusting port located behind inlet port. Insert standard screwdriver. turn counterclockwise to below pressure desired. Turn clockwise to set to desired pressure. INLET PORT BYPASS PLUG pipe thread, allen. Access through bottom inlet. 1 ⁄ 16" 9⁄ 64" INLET PORT 1 ⁄ 4" pipe thread. COLOR OF PRINTING DENOTES OPERATING SPEED BLUE — 1725 RPM GREEN — 3450 RPM Figure 1-29 INLET PORT pipe thread. 1 ⁄ 4" Webster model M series fuel pump. (Courtesy Webster Electrical Co., Inc.) Table 1-2 Maximum Recommended Pressures Bonnet Capacity (1000 Btu/h) Firing Rate (gph) Standard Nozzle Size Pump Pressure (psig) 85 100 125 150 200 250 335 0.76 0.90 1.12 1.35 1.80 2.25 3.00 0.75 0.90 1.10 1.35 1.75 2.25 1.50 103 100 104 100 112 100 100 (Courtesy Carrier Corp.) GB039-1317G-P01[001-056].qxd 6/8/04 7:12 PM Page 31 Quark03 Quark03:Desktop Folder:repro: Oil Burners 31 Troubleshooting Fuel Pumps The troubleshooting list in Table 1-3 contains the most common operating problems associated with fuel pumps and fuel units. Each problem is given in the form of a symptom, the possible cause, and a suggested remedy. The purpose of this list is to provide the operator with a quick reference to the cause and correction of a specific problem. Table 1-3 Troubleshooting Fuel Pumps Symptom and Possible Cause Possible Remedy No oil flow to nozzle. (a) Clogged strainer or filter. (b) Air binding in two-pipe system. (c) Frozen pump shaft. (a) Remove and clean strainer; repack filter element. (b) Check and insert bypass plug. (c) Remove pump and return it to the manufacturer for repair or replacement. Oil leak. (a) Loose plugs or fittings. (b) Leak at pressure-adjusting end cap nut. (c) Blown seal. (d) Seal leaking. (a) Dope with good-quality thread sealer. (b) Fiber washer may have been left out after adjustment of valve spring; replace washer. (c) Replace fuel unit. (d) Replace fuel unit. Noisy operation. (a) Air inlet line. (b) Bad coupling alignment. (c) Pump noise. (a) Tighten all connections and fittings in the intake line and unused intake port plugs (see Figure 1-10). (b) Loosen mounting screws and shift fuel pump to a position where noise is eliminated. Retighten mounting screws. (c) Work in gears by continued running or replace. (continued) GB039-1317G-P01[001-056].qxd 6/8/04 7:12 PM Page 32 Quark03 Quark03:Desktop Folder:repro: 32 Chapter 1 Table 1-3 Symptom and Possible Cause (continued) Possible Remedy Pulsating pressure. (a) Air leak in intake line. (b) Air leaking around strainer cover. (c) Partially clogged strainer. (d) Partially clogged filter. (a) Tighten all fittings and valve packing in intake line. (b) Tighten strainer cover screws. (c) Remove and clean strainer. (d) Replace filter element. Low oil pressure. (a) Nozzle capacity is greater than fuel pump capacity. (b) Defective gauge. (a) Replace fuel pump with one of correct capacity. (b) Check against another and replace if necessary. Improper nozzle cutoff. (a) Filter leaks. (b) Partially clogged nozzle strainer. (c) Air leak in intake line. (d) Strainer cover loose. (e) Air pockets between cutoff valve and nozzle. (a) Check face of filter cover and gasket for damage. (b) Clean strainer or change nozzle. (c) Tighten intake fittings and packing nut on shutoff valve; tighten unused intake port plug. (d) Tighten screws. (e) Start and stop burner until smoke and afterfire disappear. Fuel Supply Tank and Line The installation, maintenance, and troubleshooting of fuel supply tanks is described in Chapter 12 (“Oil Furnaces”) in V olume 1. Oil Burner Nozzles An oil burner nozzle is a device designed to deliver a fixed amount of fuel to the combustion chamber in a uniform spray pattern and spray angle best suited to the requirements of a specific burner. The oil burner nozzle atomizes the fuel oil (i.e., breaks it down into extremely small droplets) so that the vaporization necessary for combustion can be accomplished more quickly. GB039-1317G-P01[001-056].qxd 6/8/04 7:12 PM Page 33 Quark03 Quark03:Desktop Folder:repro: Oil Burners 33 The components in a typical nozzle (see Figure 1-30) include the following: 1. 2. 3. 4. 5. 6. 7. 8. Orifice. Swirl chamber. Orifice disc. Body. Tangential slots. Distributor. Retainer. Filter. Fuel oil is supplied under pressure (100 psi) to the nozzle, where it is converted to velocity energy in the swirl chamber by directing it through a set of tangential slots. The centrifugal force caused within the swirl chamber drives the fuel oil against the chamber ORIFICE DISTRIBUTOR BODY TANGENTIAL SLOTS RETAINER FILTER Figure 1-30 Details of an oil burner nozzle. (Courtesy Wayne Home Equipment Co., Inc.) GB039-1317G-P01[001-056].qxd 6/8/04 7:12 PM Page 34 Quark03 Quark03:Desktop Folder:repro: 34 Chapter 1 walls, producing a core of air in the center. The latter effect moves the oil out through the orifice at the tip of the nozzle in a coneshaped pattern. The following are the two basic spray cone patterns: 1. The hollow cone. 2. The solid cone. Each has certain advantages depending on its use. The hollow cone pattern (see Figure 1-31) is recommended for use in smaller burners (those firing 1.00 gph and under). As shown in Figure 1-31, they are characterized by a concentration of fuel oil droplets all around the outer edge of the spray. There is little or no distribution of droplets in the center of the cone. The principal advantage of the hollow cone patterns is a more stable spray pattern and angle under adverse conditions than solid cone patterns operating under the same conditions and at the same flow rate. The solid cone pattern, illustrated in Figure 1-32, is characterized by a uniform or near-uniform distribution of fuel oil droplets throughout the cone pattern. Nozzles producing this cone pattern are particularly recommended for smoother ignition in oil burners firing above 2.00 or 3.00 gph. They are also recommended where long fires are required or where the air pattern or the oil burner is heavy in the center. A combination cone pattern that is neither a true cone nor a true hollow cone can be used in oil burners firing between 0.40 gph and 8.00 gph. Figure 1-31 Hollow spray cone pattern. (Courtesy Wayne Home Equipment Co., Inc.) GB039-1317G-P01[001-056].qxd 6/8/04 7:12 PM Page 35 Quark03 Quark03:Desktop Folder:repro: Oil Burners 35 Figure 1-32 Solid spray cone pattern. (Courtesy Wayne Home Equipment Co., Inc.) Oil burner nozzles are also selected on the basis of the spray angle they produce (see Figure 1-33). The spray angle refers to the angle of the spray cone, and this angle will generally range from 30° to 90°. The angle selected will depend on the requirement of the burner air pattern and combustion chamber. For example, 70° to 90° spray angles are recommended for round or square combustion chambers (see Figure 1-34), and 30° to 60° spray angles are recommended for long, narrow chambers (see Figure 1-35). Recommended combustion chamber dimensions and spray angles for nozzles are given in Table 1-4. 90° 80° 70° Figure 1-33 60° 45° 30° Varieties of spray angles. (Courtesy Wayne Home Equipment Co., Inc.) GB039-1317G-P01[001-056].qxd 6/8/04 7:12 PM Page 36 Quark03 Quark03:Desktop Folder:repro: 36 Chapter 1 70° TO 90° Spray angles (70° to 90° ) suitable for round or square chambers. (Courtesy Wayne Home Equipment Co., Inc.) Figure 1-34 Electrodes The electrodes must be frequently checked and adjusted to ensure proper and efficient ignition of the fuel oil. Broken or malfunctioning electrodes can result in smoke leaking out into the rooms of the structure. This problem, called a puffback, is not an uncommon one in oil-fired appliances (see sidebar). Puffbacks A puffback, or the leaking of sooty smoke from the combustion chamber of an oil furnace or boiler, is caused by the accumulation of fuel oil in the combustion chamber of the furnace or boiler after an ignition failure. When the oil burner is successfully restarted, the accumulated fuel oil burns too rapidly for the exhaust system to carry away the smoke. The excess smoke is forced out into the rooms through the seams in the furnace or boiler combustion chamber walls. Damaged electrodes are not the only cause of puffback. Other causes include the following: • • • • • • Ignition transformer failure Contaminated or eroded oil burner nozzle Fuel pump malfunction Clogged oil filter Clogged burner air intake Damaged combustion chamber linings GB039-1317G-P01[001-056].qxd 6/8/04 7:12 PM Page 37 Quark03 Quark03:Desktop Folder:repro: Oil Burners 37 30° TO 60° Figure 1-35 Spray angles (30° to 60° ) suitable for long, narrow chambers. (Courtesy Wayne Home Equipment Co., Inc.) Troubleshooting Electrodes The gun assembly must be removed from the oil burner in order to inspect the electrodes. The following conditions require electrode replacement: • • • Cracks in the electrode coating Dull electrode points Broken electrodes Servicing Electrodes Remove the electrodes by loosening the screw connecting them to the gun assembly. If the electrodes are round and appear worn, use a file to reestablish a good point. Reinstall them in the electrode holder and set the electrode gap at 1⁄2 inch. Set the distance between the center of the nozzle and the tips at 1⁄4 inch. Broken electrodes or electrodes with cracked ceramic coatings must be replaced with new ones. Oil Burner Air System The air system for the average oil burner is generally composed of the air shutter draft tube, the turbulator, and the fan. The draft tube and turbulator have already been shown (see Figures 1-2 and 1-12). The fan construction consists of a (squirrel cage) series of vanes or blades mounted on the rim of a wheel. These vanes are slanted forward in such a manner as to provide the maximum discharge of air. Figure 1-36 shows the construction of a fan and flexible coupling. The operating principles of the air system are fairly simple. The fan draws air into the fan housing and forces this air through the GB039-1317G-P01[001-056].qxd 6/8/04 7:12 PM Page 38 Quark03 Quark03:Desktop Folder:repro: 38 Chapter 1 Table 1-4 Recommended Combustion Chamber Dimensions Square or Rectangular Combustion Chamber Nozzle Size of Rating (gph) Spray Angle L Length (inches) W Width (inches) H Height (inches) C Nozzle Height (inches) Round Chamber Diameter (inches) 80° 60° 80° 45° 60° 80° 8 10 9 14 11 10 8 8 9 7 9 10 11 12 13 12 13 14 4 4 5 4 5 6 9 * 10 * * 11 1.25–1.35 45° 60° 80° 15 12 11 8 10 11 11 14 15 5 6 7 * * 12 1.50–1.65 45° 60° 80° 16 13 12 10 11 12 12 14 15 6 7 7 * * 13 1.75–2.00 45° 60° 80° 18 15 14 11 12 13 14 15 16 6 7 8 * * 15 2.25–2.50 45° 60° 80° 18 17 15 12 13 14 14 15 16 7 8 8 * * 16 3.00 45° 60° 80° 20 19 18 13 14 16 15 17 18 7 8 9 * * 17 0.50–0.65 0.75–0.85 1.00–1.10 *Recommend oblong chamber for narrow sprays. (Courtesy of Wayne Home Equipment Co., Inc.) draft tube and turbulator and into the combustion chamber. The amount of incoming air can be regulated by adjusting the air shutter. As the air is forced through these vanes, it is given a swirling motion just before it strikes the oil spray. This motion provides a more thorough mixture of the oil and air, resulting in better combustion. GB039-1317G-P01[001-056].qxd 6/8/04 7:12 PM Page 39 Quark03 Quark03:Desktop Folder:repro: Oil Burners 39 FLEXIBLE COUPLING Figure 1-36 Fan and flexible coupling. The shape of the turbulator varies in different models, but the purpose is the same: to thoroughly mix the air and oil spray. Figure 1-37 shows a double turbulator consisting of an air impeller and nose piece. HIGH-TENSION WIRES TO TRANSFORMER NOSE PIECE AIR CONE AIR IMPELLER ADJUSTMENT NOZZLE PIPE ELECTRODE ASSEMBLY AIR SHUTTER Details of a draft tube showing double turbulator consisting of air impeller and nose piece. Figure 1-37 NOZZLE GB039-1317G-P01[001-056].qxd 6/8/04 7:12 PM Page 40 Quark03 Quark03:Desktop Folder:repro: 40 Chapter 1 Primary Safety Control Service The cadmium detection cell is the most effective type of primary safety control used on oil burners. Malfunctions cause primary safety control to build up electrical resistance across the cell until the burner is automatically shut off. As soon as the burner shuts off, a reset button pops up on the burner. The button must be reset (pushed down) to restart the burner. Caution If the burner does not restart when the reset button is pushed down, do NOT keep resetting the button. Doing so will flood the firebox with oil. If ignition does not take place, the flooded firebox could result in a fire or an explosion. The primary safety control can be tested by removing the motor lead from the burner and allowing the ignition circuit to be energized. Figures 1-38 and 1-39 illustrate two typical wiring diagrams for primary safety controls. Installing an Oil Burner Under most circumstances, oil burners and oil-fired units should be installed in rooms that provide adequate clearance from the combustible material. The only exception to this rule is when specific instructions are given otherwise. In this case, the manufacturer pro- PRIMARY CONTROL CAD CELL FLAME DETECTOR 120 V LIMIT IGNITION TRANSFORMER THERMOSTAT HOT GND BURNER MOTOR For color code or terminal marking refer to wiring diagram inside primary control cover. Figure 1-38 Constant-ignition wiring diagram. (Courtesy Stewart-Warner Corp.) GB039-1317G-P01[001-056].qxd 6/8/04 7:12 PM Page 41 Quark03 Quark03:Desktop Folder:repro: Oil Burners 41 CAD CELL FLAME DETECTOR PRIMARY CONTROL 120 V LIMIT IGNITION TRANSFORMER THERMOSTAT HOT GND BURNER MOTOR For color code or terminal marking refer to wiring diagram inside primary control cover. Figure 1-39 Intermittent-ignition wiring diagram. (Courtesy Stewart-Warner Corp.) vides or specifies a suitable combustion chamber (stainless steel, firebrick, etc.). Note All local codes and ordinances take precedence over the oil burner manufacturer’s installation and operation manuals. Where local codes do not exist, install the oil burner in accordance with the most recent instructions and regulations of the National Fire Protection Association and the provisions of the National Electrical Code (ANSI/NFPA 70-199 or latest edition). Warning Only certified HVAC technicians or those with equivalent experience should attempt to install an oil burner. Some sort of manual shutoff control should be provided for the oil burner in order to stop the flow of oil to the burner when the air supply is interrupted. This must be placed at a safe distance from the unit and in a convenient location. These manual shutoff valves generally consist of either a switch in the burner supply circuit (for electrically driven units) or a shutoff valve on the oil supply line. GB039-1317G-P01[001-056].qxd 6/8/04 7:12 PM Page 42 Quark03 Quark03:Desktop Folder:repro: 42 Chapter 1 Primary safety controls (automatic shutoff devices) must be provided for all oil burners and oil-fired units that operate automatically without the need of an attendant on duty—in other words, those types of equipment found where a stationary engineer would not be employed (i.e., noncommercial and nonindustrial locations). One problem encountered when converting solid-fuel heating equipment to oil use is the accumulation of potentially dangerous vapors in the ashpit of the unit. This can be avoided by removing the ash door or by providing bottom ventilation to the unit. This precaution is unnecessary if the ashpit also serves as a part of the combustion chamber. Never install or permit the installation of an oil burner until the boiler or furnace has first been inspected and found to be in good condition. The flue gas passages must be tight and free of any leaks. All oil burners listed by Underwriters Laboratories, Inc., and Underwriters Laboratories of Canada meet the safety requirements detailed in the various booklets of the National Fire Protection Association. Starting an Oil Burner Oil burner manufacturers provide detailed starting and operating instructions for their burners in their user manuals. These instructions should be carefully followed when attempting to start an oil burner. If there is no available user manual, contact a local representative of the manufacturer or contact the manufacturer directly for a copy. The procedure for starting an oil burner may be summarized as follows: Open all warm-air registers. Check to be sure all return air grilles are unobstructed. Open the valve on the oil supply line. Reset the burner primary relay. Set the thermostat above the room temperature. Turn on the electric supply to the unit by setting the main electrical switch to the on position. 7. Change the room thermostat setting to the desired temperature. 1. 2. 3. 4. 5. 6. The oil burner should start after the electric power has been switched on (step 6). There is no pilot to light as is the case with gas-fired appliances. The spark for ignition is provided automatically on demand from the room thermostat. GB039-1317G-P01[001-056].qxd 6/8/04 7:12 PM Page 43 Quark03 Quark03:Desktop Folder:repro: Oil Burners 43 Note Allow the burner to operate at least 10 minutes before making any final adjustments. Whenever possible, use instruments to adjust the fire. Air Delivery and Blower Adjustment It is sometimes necessary to adjust the blower speed to produce a temperature rise through the furnace that falls within the limits stamped on the furnace nameplate. Blower adjustment procedures are described in Chapter 11 (“Gas Furnaces”) of V olume 1. Combustion Testing and Adjustments The following instruments are recommended for combustion testing and adjustments: • Draft gauge Smoke tester Carbon dioxide tester 200/1000°F stack thermometer 0/150-psig pressure gauge 0/30-inch mercury vacuum gauge • • • • • Smoky combustion indicates poor burner performance. The amount of smoke in the flue gas can be measured with a smoke tester (see Figure 1-40). The tube of the smoke tester is inserted through a 3⁄8-inch hole drilled in the flue pipe, and the test is run as shown in Figure 1-41. Any smoke in the air drawn into the smoke tester will register on a filter paper inserted in the device. The results are interpreted according to the smoke scale in Table 1-5. One of the most common causes of smoky combustion is soot formation on the heating surfaces. This is easily corrected by cleaning. Other possible causes of smoky combustion include the following: • • • • • • • Insufficient draft Poor fuel supply Fuel pump malfunctioning Defective firebox Incorrectly adjusted draft regulator Defective oil-burner nozzle Wrong size oil-burner nozzle GB039-1317G-P01[001-056].qxd 6/8/04 7:12 PM Page 44 Quark03 Quark03:Desktop Folder:repro: 44 Chapter 1 Figure 1-40 Bacharach true-spot smoke tester. (Courtesy Bacharach Instrument Co.) Insert filter test paper into TRUE-SPOT. Figure 1-41 Withdraw gas sample from Grade soot spot test paper flue pipe by 10 pump strokes. by comparison with shadings on scale. A smoke tester in use. (Courtesy Bacharach Instrument Co.) GB039-1317G-P01[001-056].qxd 6/8/04 7:12 PM Page 45 Quark03 Quark03:Desktop Folder:repro: Oil Burners 45 Table 1-5 Smoke Scale Bacharach Smoke Scale No. Rating Sooting Produced 1 2 Excellent Good 3 Fair 4 Poor 5 Very poor Extremely light, if at all. Slight sooting, which will not increase stack. May be some sooting but will rarely require cleaning more than once a year. Borderline condition; some units will require cleaning more than once a year. Soot produced rapidly and heavily. (Courtesy Bacharach Instrument Co.) • Improper fan delivery Excessive air leaks in boiler or furnace Unsuitable fuel-air ratio • • Net stack temperatures in excess of 700°F for conversion units and 500°F for packaged units are considered abnormally high. The net stack temperature is the difference between the temperature of the flue gases inside the pipe and the room air temperature outside. For example, if the flue gas temperature is 600°F and the room temperature is 75°F , then the net stack temperature is 525°F (600°F – 75°F 525°F). A 200/1000°F stack thermometer is used to measure the flue gas temperature. The thermometer stem is inserted through a hole drilled in the flue pipe (see Figure 1-42). A high stack temperature may be caused by any of the following: • • • • • • • Undersized furnace Defective combustion chamber Incorrectly sized combustion chamber Lack of sufficient baffling Dirty heating surfaces Excessive draft Boiler or furnace overfired GB039-1317G-P01[001-056].qxd 6/8/04 7:12 PM Page 46 Quark03 Quark03:Desktop Folder:repro: 46 Chapter 1 Running a stack-gas temperature test with a stack thermometer. (Courtesy Bacharach Instrument Co.) Figure 1-42 • • Unit unsuited to automatic firing Draft regulator improperly adjusted When the carbon dioxide (CO2) content of the flue gas is too low (less than 8 percent), heat is lost up the chimney and the unit operates inefficiently. This condition is usually caused by one of the following: • • • Underfiring the combustion chamber Burner nozzle is too small Air leakage into the furnace or boiler When the carbon dioxide content is too high, the furnace operation is generally characterized by excess smoke and/or pulsations and other noises. A high carbon dioxide content is usually caused by insufficient draft or an overfired burner. The carbon dioxide reading is also taken through a hole drilled in the flue pipe with a CO2 indicator (see Figure 1-43). The CO2 indicator is used as shown in Figure 1-44. The results are indicated by a test liquid on a scale calibrated in %CO2. A correct draft is essential for efficient burner operation. Insufficient draft can make it almost impossible to adjust the oil burner for its highest efficiency. Excessive draft can reduce the percentage of carbon dioxide in the flue gases and increase the stack temperature. GB039-1317G-P01[001-056].qxd 6/8/04 7:12 PM Page 47 Quark03 Quark03:Desktop Folder:repro: Oil Burners 47 Bacharach Fyrite CO2 indicator. Figure 1-43 (Courtesy Bacharach Instrument Co.) rubber connecter down-then Turn bottom side up and back again. fluid level on scale for percent1Push 3 Read 2 squeeze bulb 18 times. age of gas. Figure 1-44 CO2 test. (Courtesy Bacharach Instrument Co.) GB039-1317G-P01[001-056].qxd 6/8/04 7:12 PM Page 48 Quark03 Quark03:Desktop Folder:repro: 48 Chapter 1 For the most efficient operating characteristics, the overfire draft generally should be not less than 0.02 inch wg. Smoke and odor often occur when the overfire draft falls below 0.02 inch wg. It may be necessary to adjust the barometric draft regulator to obtain the correct overfire draft. If it is not possible to adjust the overfire draft for a 0 – .01 to 0.02 inch wg, install a mechanical draft inducer between the chimney and the barometric draft regulator. The primary air band should be adjusted to a 0+ smoke or until a hard clean flame is visible. A clean flame is preferred to one with high carbon dioxide. Adjust the overfire draft for a 0 – .01 to a 0 – .02 inch wg. An excessive overfire draft condition will cause high stack temperature and inefficient operation. A too low or positive draft over the fire will usually cause the flue gases and fumes to seep into the space upon startup or shutdown. The flue pipe draft in most residential oil burners is between 0.04 and 0.06 inches of water. This is sufficient to maintain a draft of 0.02 inches in the firebox. The furnace or boiler draft is measured with a draft gauge as shown in Figure 1-45. A hole is drilled in either the fire door (overfire draft measurement) or flue pipe (flue pipe draft measurement), and the unit is run for approximately 5 minutes. The draft tube is then inserted into the test hole, and the gauge is read (see Figure 1-46). Troubleshooting Oil Burners Individuals involved in the installing and repairing of oil burners should be aware of a number of different indicators of malfunctions in the equipment, their probable causes, and some suggested remedies. Figure 1-45 Bacharach model MZF draft gauge. (Courtesy Bacharach Instrument Co.) GB039-1317G-P01[001-056].qxd 6/8/04 7:12 PM Page 49 Quark03 Quark03:Desktop Folder:repro: Oil Burners 49 (A) Overfire draft. Figure 1-46 (B) Flue pipe draft. Overfire and flue pipe draft tests. (Courtesy Bacharach Instrument Co.) The average individual is most aware of malfunctions that warn the senses through excessive noise, smoke, or odor. These are external warning signals that require immediate investigation. Their nature is such that tracing the probable cause of the malfunction is made easier. Excessive noise (pulsation, thumping, rumbling, etc.) in the heating unit is generally caused by a problem with the oil burner nozzle. It can usually be corrected by any one of the following methods: • Replace the nozzle with one having a wider spray angle. Replace the nozzle with one having the next size smaller opening. Install a delayed-opening solenoid on the nozzle line (this reduces pulsation). • • Sometimes a noisy fire is caused by cold oil originating from outside storage tanks. This noise may be greatly reduced or eliminated by pumping the fuel oil under 120 to 125 psi through the next size smaller nozzle. Excessive smoke has a number of possible causes, including the following: • The air-handling parts of the oil burner may be too dirty to operate efficiently. GB039-1317G-P01[001-056].qxd 6/8/04 7:12 PM Page 50 Quark03 Quark03:Desktop Folder:repro: 50 Chapter 1 • The combustion chamber or burner tube may be damaged by burn-through or loose materials. The oil burner nozzle may be the wrong size. • The dirty air-handling parts (e.g., the fan blades, air intake, and air vanes in the combustion head) can be made to operate more efficiently by a thorough cleaning. If the excessive smoke is caused by the oil burner nozzle, this can be corrected by replacing the nozzle with one that is a size smaller or one having the next narrower spray angle. A damaged combustion chamber is a more difficult problem to correct than the other two. In any event, all leakage through the walls must be eliminated before the oil burner can be expected to operate efficiently. Excessive odors can be caused by flue obstructions or poor chimney draft. If the draft over the fire is lower than 0.02 to 0.04, it is usually an indication that the problem lies with the flue or chimney draft. The cause is usually an obstruction in the flue or poor chimney draft. Other causes of excessive odor include the following: • • Delayed ignition Too much air through the burner Delayed ignition is commonly traced to a problem with the electrodes. This condition can result from a variety of causes, including the following: • • • • • • • Improper electrode setting Insulator cracks A coating of soot or oil on the electrode Incorrect pump pressure setting Incorrect spray pattern in the nozzle Clogged nozzle Air shutter open too far Table 1-6 lists a number of recommended electrode settings that should eliminate delayed ignition if the electrode setting is the cause of the problem. The type of nozzle spray pattern can also result in delayed ignition. This is particularly true when using a hollow spray pattern in oil burners firing 2.00 gph and above. It can be corrected by replacing the nozzle with one having a solid spray pattern. GB039-1317G-P01[001-056].qxd 6/8/04 7:12 PM Page 51 Quark03 Quark03:Desktop Folder:repro: Oil Burners 51 Table 1-6 Recommended Electrode Settings Nozzle 45° 60° 70° 80° 90° GPH A 0.75 to 4.00 0.75 to 4.00 0.75 to 4.00 0.75 to 4.00 0.75 to 4.00 ⁄8 to ⁄16 ⁄8 to 3⁄16 1 ⁄8 to 3⁄16 1 ⁄8 to 3⁄16 1 ⁄8 to 3⁄16 1 1 B 3 C ⁄2 to ⁄16 ⁄16 to 5⁄8 9 ⁄16 to 5⁄8 9 ⁄16 to 5⁄8 9 ⁄16 to 5⁄8 1 ⁄4 ⁄4 1 ⁄8 1 ⁄8 0 9 1 9 1 Table 1-7 lists a variety of problems encountered with oil burners, many of which are of an internal nature and require a great degree of experience and training to correct. Table 1-7 Oil Burner Troubleshooting Symptom and Possible Cause Possible Remedy No heat—circulator (pump) off and burner running. (a) Defective circulator. (b) Defective thermostat. (c) Defective relay. (d) Defective aquastat. (e) Incorrect aquastat setting. (f) Loose or disconnected wiring. (g) Defective zone valve. (a) Replace circulator. (b) Replace thermostat. (c) Replace relay. (d) Replace aquastat. (e) Reset aquastat. (f) Tighten or reconnect wiring. (g) Replace zone valve. No heat—both circulator (pump) and burner running. (a) Defective or loose circulator coupling. (b) Broken circulator impeller. (c) Air trapped in lines. (a) Repair or replace. (b) Repair or replace circulator. (c) Locate point of entry and repair; purge air from lines. (d) Loose or disconnected wiring. (d) Tighten or reconnect wiring. (e) Defective zone valve. (e) Replace zone valve. (f) Frozen flow valve. (f) Repair or replace flow valve. No oil flow at nozzle. (a) Oil level below intake line in oil storage tank. (b) Clogged strainer. (c) Clogged filter. (a) Fill tank with oil. (b) Remove and clean strainer. (c) Replace filter element. (continued)