1
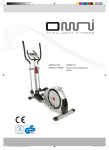
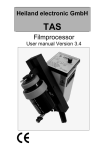
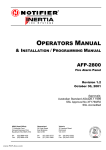
1 User Manual Version 1.0 2 Caution Precautions and maintenance For indoor use only To avoid risk of fire or electric shock, do not expose the unit to moisture or condensation. To avoid overheating, do not block the ventilation holes on the back of the Photo Display. Keep the Photo Display out of direct sunlight. Always use the eject buttons on the memory storage card slots to remove the storage cards. Do not dismantle the Photo Display. There is a risk of electric shock and there are no user-serviceable parts inside. Dismantling the Photo Display will void your warranty. Cleaning the LCD Screen Treat the screen carefully. Because the screen of the Photo Display is made of glass and it would easily be broken or scratched. If finger prints or dust accumulate on the LCD screen, we recommend using a soft, non-abrasive cloth such as a camera lens cloth to clean the LCD screen. Moisten the cleaning cloth with the cleaning solution and apply the cloth to the screen. WARNING: Please power off the unit before inserting or removing a card or USB device. Failure to do so may cause damage to the card/USB and the unit. To reduce the risk of fire or electric shock, do not expose this appliance to rain or moisture. 3 Introduction: Thank you for your purchase of the Photo Display NANO 8. It is designed to allow quick and easy view of photos taken from your digital camera, mobile phone, or from a memory storage card. Please read this User Manual carefully to learn the correct way to use the Photo Display NANO 8. Features: High-contrast, bright 20.32 cm color TFT LCD Ultra-stylish, ultra-slim: just 9.5 mm thick Picture display in full screen, thumbnail or slide show mode with various adjustable transition effects and time intervals Slide show starts automatically when memory card is inserted Clock and calendar function User-friendly operation via the remote control included or the touch-sensitive buttons on the frame Display resolution: 800 x 600 pixels 4:3 aspect ratio for optimum, distortion-free display. Package Content: PhotoDisplay Nano 8 User Manual Remote control AC/DC adapter Short USB Cable (used to connect with the USB Disk) 4 CONTENT 1. Product Overview ....................................................................................... 5 1.1 Remote Control ..................................................................................... 5 1.2 Touch Buttons ...................................................................................... 6 1.3 Right Side of Frame ............................................................................... 6 1.4 Left Side of Frame ................................................................................. 6 2. Installing & Replacing the Battery................................................................ 6 3. Getting Started.......................................................................................... 7 4. Memory Card Selection Screen...................................................................... 7 5. Main Menu ................................................................................................ 8 5.1. Slide Show .......................................................................................... 8 5.2. Photo ................................................................................................. 8 5.3. Calendar ............................................................................................. 9 6. Set up Menu.............................................................................................. 9 7. Technical Specifications............................................................................ 11 8. Troubleshooting Guide .............................................................................. 11 9. Warranty conditions ................................................................................. 11 10. Service ................................................................................................. 12 5 1. Product Overview 1.1 Remote Control 1. Power = Power On/Off 2. SETUP = Go directly to Setup mode. 3. Rotate = In the photo mode, press this button, the picture will rotate 90 in counterclockwise. 4. UP arrow = Scroll pictures in up/down mode. Also use to make menu selections during programming and setup. 5. Zoom = In single picture mode, magnify or reduce picture display size. 6. LEFT arrow = Use for menu selections in Startup, Setup, Thumbnail, Music and Video modes. Revert to previous page when displaying folders. 7. OK = Press to confirm selection. 8. RIGHT arrow = Use for menu selections in Startup, Setup, Thumbnail, Music and Video modes. Advance to next page when displaying folders. 9. Slideshow = Press to start slideshow or pause when playing the picture. 10. DOWN arrow = Use for menu selection in Startup, Setup, Thumbnail, Calendar. 11. Exit = Press to return to upper page, or enter to the main menu. 6 1.2 Touch Buttons 1. Power On/Off 2. Menu 3. Up Arrow 4. Down Arrow 5. OK / Play / Pause 6. Left Arrow 7. Right Arrow 8. Exit 1.3 Right Side of Frame 1. SD/ MMC /MS card slot 1.4 Left Side of Frame 1. DC 5V (Power Input) 2. MINI USB 2. Installing & Replacing the Battery Place the upside of the remote control down, press down on the ridged area of the battery cover and pull towards you to remove the tray. Place one CR2025 lithium button-cell battery on the tray with the positive “+” side facing you. Reinsert the tray. 7 3. Getting Started Put the Photo Display NANO on stand, then plug one end of the included AC adapter into a standard 110-240V AC electrical outlet and the other end into the right side the frame. Remove the protective film covering the LCD. Remove the plastic battery insulator from the battery compartment and make sure the remote control has a battery inside. Please refer to “Installing & Replacing Battery” if you need a new battery. Then the screen will display as following: If there are JPG files in the memory card or build-in memory, the player will wait for a moment and then start the slideshow. JOBO starting screen 4. Memory Card Selection Screen In the Memory Card Selection Screen you can choose the source for your images. To enter this menu press Exit twice. Using the arrow buttons “left” and “right” you can select a memory CARD or a connected USB Disk. Press OK to confirm your selection. 8 Card Selection Screen 5. Main Menu After you have selected the photo source you enter the main menu. Here you can choose between Slide Show, Photo or Calendar. Using the arrow buttons “left” and “right” you can select your choice. Press OK to confirm your selection. Main Menu 5.1. Slide Show Choosing this function will playback all photos from the selected source in a slide show. Press OK to confirm and start the show. 5.2. Photo This function allows you to preview photos in single window or in a thumbnail view of nine images. You can also zoom and rotate images when they are shown in full screen mode. Being in the thumbnail preview mode you can delete and copy images from the memory source. The thumbnail view is the first window you see after you have selected this icon. The yellow frame around the image shows the chosen photo. On the left hand you can see the photo information such as the name and the size. Use the arrow buttons to select the picture you want to view in full screen. Press Enter to confirm. 9 Thumbnail view 5.3. Calendar The calendar function allows you to use the Photo Display NANO as a regular clock and calendar. Your photos are shown as a slide show on the left hand side. Using the arrow buttons you can move through the calendar. When you want to change the clock or date, please press EXIT button to exit this calendar Interface, then press SETUP button to enter "set time" menu. Use EXIT button to exit calendar show. 6. Set up Menu In the SETUP menu, you can use the arrow buttons to select one item to set up or operate. When the item is shown in gray color, you can not deal with it at the moment. While the photo is shown in full screen press SETUP to open the options you have to edit the photo. 10 The following options are available: o Image size This function allows you to optimize the way how to display a photo. There are 3 different ways: Auto fit, Optimal and Full o Slideshow effect You can choose form 16 various transition effects. o Slide show interval The slideshow interval gives you the opportunity to change the time between the transistion effects. You can select between 1 to 59 seconds, 1 to 59 Minutes and 1 to 4 hours o Split Slide Show Here you can split the screen in 4 parts. In each window the various photos are shown. This function can be turned ON and OFF. o Start Slide Show This option starts the slide show o Rotate You can rotate the shown photo 90, 180, 270 degree by pressing OK o Zoom Activate this function and you have 4 zoom steps to zoom into the photo by pressing the OK button. After the fourth step the image is in original size again. o Save Picture This option save (if the unit has internal memory) the current photo to the internal build in memory. o Delete File To select files in the thumbnail view press the zoom button on your remote control. Then the image will be marked. Then you can select the delete function and either delete one image or all selected images. o Format Memory You can format the selected memory source. But be aware ALL files on this source will then be deleted and forever gone! o Reset Settings This option will set the unit back to its original factory setting. o Language Here you can change the language of the user interface to either: English, French, German or Portuguese. o Brightness Confirming this icon you can change the brightness of the panel with the “right” and “left” arrows of your remote control. o Color Confirming this icon you can change the color of the panel with the “right” and “left” arrows of your remote control. o Tint Confirming this icon you can change the tint of the panel with the “right” and “left” arrows of your remote control. o Time With this function you can set time and date for your frame. 11 7. Technical Specifications Screen Size 8 inch TFT Aspect Ratio 4:3 Brightness 350cd/m2 Response Time 20ms Viewing Angle 60°(left/right/vertical), 40°(horizontal) Working Temperature 0℃~40℃, Humidity: 10-85% Panel Resolution 800 x 600 Pixel Contrast 300:1 AC Adapter Input: AC 100-240V 50/60HZ Output: DC 5V/2A Supported Photo Format JPEG Supported Memory Card SD/MS/MMC USB Port USB Host (high speed 2.0 connected with the short USB Cable) 8. Troubleshooting Guide No power Please check whether the plug is inserted correctly. Remote control no function Please check whether the battery has power (the battery can be used for half a year in normal conditions). Replace with new battery if necessary. Can not read the CARD or USB Please confirm whether there is storage in the card or USB device. Empty devices cannot be read. Can not play the file Please confirm whether the file format is compatible with the player. Display too bright or too dark Please adjust the brightness or contrast in the setup menu. The color is light or no color Please adjust the color and contrast setup. 9. Warranty conditions This product is subject to the legal warranty periods relating to manufacturing faults and defects. Substance of the warranty: 12 Substance of warranty 1. In the event of malfunctioning caused by manufacturing defects JOBO AG will repair or replace the defective product at its own discretion. 2. JOBO AG and its suppliers do not assume any liability for data losses occurring during operation of the device or consequential damage resulting from this. Under no circumstances will JOBO AG assume liability for any direct, concrete or special damage or consequential damage like for example damage to or loss of property or devices, loss of profits or sales, costs for spare parts, expenditure or inconvenience caused by the interruption of service or any other damage. The user will be exclusively responsible for the loss, damage or destruction of data during the operation of a JOBO product. Under no circumstances will JOBO AG be liable for the recreation of such data. Under no circumstances can claims be lodged that exceed the purchase price of the product. 3. The following repairs are not covered by the warranty and must be paid for separately: - Malfunctions after the end of the legal warranty periods - Change of battery after the end of the warranty period - Change of hard disk after the end of the warranty period - Malfunctions due to incorrect operation by the user (if device is not used as described in the manual) - Malfunctions caused by other devices - Changes or damage to the device not caused by the manufacturer; especially, warranty claims will lapse if the device has been opened by anyone other than by a JOBO AG repair workshop - Damage caused by natural disasters (acts of God) - A hard disk change during the warranty period must only be performed by JOBO. Such a change by any other party will entail the loss of all warranty claims. If you want to make any claims under the warranty you are asked to contact the Technical Service of JOBO AG. You will be expected to quote the serial number of the JOBO product and may also have to submit proof of purchase to show that the warranty period has not yet elapsed. 10. Service If you have any questions on or need help with our products please do not hesitate to get in touch with our Technical Service. JOBO AG Service Department Kölner Straße 58 D-51645 Gummersbach E-Mail: [email protected] Website: www.jobo.com Subject to technical modification! 15/09/2009 STS