1
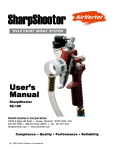
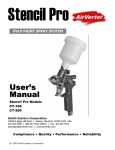
ProT ProTouch ouch HVLP PAINT SPRAY SYSTEM User’s Manual Model PT-100AC Smith Eastern Corporation 10630-S Riggs Hill Road • Jessup, Maryland 20794-9425 USA 301.497.7600 • 800.937.HVLP (4857) • Fax 301.497.7613 [email protected] • www.airverter.com Compliance • Quality • Performance • Reliability ©1999 Smith Eastern Corporation AirVerter® ProTouch HVLP Paint Spray System AirVerter® ProTouch HVLP Paint Spray System Please Read This Owner’s Manual BEFORE Using Your ProTouch Spray Gun DO NOT OPERATE THIS EQUIPMENT WITHOUT USING PROPER PERSONAL SAFETY EQUIPMENT INCLUDING RESPIRATOR, GOGGLES AND SAFETY CLOTHING. OBSERVE ALL PRECAUTIONS RELATED TO SPRAYING. WARNING THIS EQUIPMENT IS OPERATED USING PRESSURIZED AIR. ALWAYS DISCONNECT SPRAY GUN FROM AIR & FLUID HOSES AND DEPRESSURIZE SYSTEM PRIOR TO ANY MAINTENANCE OR DISASSEMBLY PROCEDURE. WARRANTY Smith Eastern Corporation warrants to the Purchaser that the ProTouch PT-100AC Spray Gun is free from defects in material or workmanship under normal use and service for a period of twelve (12) months from the date of purchase. Should any failure appear during this period, Smith Eastern shall, if given prompt written notice by the Purchaser, correct such nonconformity by repair or replacement of the non-conforming part, F.O.B. Smith Eastern’s repair facility. Repair parts are warranted for ninety (90) days from the date of shipment, but repairs or replacements to original equipment shall not renew or extend the warranty period of such equipment. Equipment and parts furnished by Smith Eastern but manufactured by others shall be limited to the warranty offered by the manufacturer thereof. Smith Eastern reserves the right to limit this warranty in cases of misuse or abuse. Any modifications to spray guns or recommended procedures will void the warranty. The foregoing warranty is exclusive and in lieu of other warranties of quality or performance, expressed, implied or statutory, including any warranties of merchantability or of fitness for a particular purpose. Why AirVerter Spray Gun Systems Work Better To accomplish effective atomization of a liquid at low pressure (below 10 PSI) it is necessary to substantially increase the air volume (CFM). The AirVerter® Inductor, a patented system, converts high-pressure compressed air to low pressure air (10 PSI or below) and increases air volume substantially. The result is less overspray and greater transfer efficiency. AirVerter® systems are designed to prevent the operator from taking AirVerter spray guns out of compliance (10 PSI) with EPA and California’s South Coast Air Quality Management District (SCAQMD) regulations. DO NOT OPERATE SPRAY GUNS WITHOUT PERSONAL SAFETY EQUIPMENT AirVerter® ProTouch HVLP Paint Spray System EQUIPMENT REQUIREMENTS Air Compressor High Pressure Air Hose ® Air compressors used with AirVerter Spray Guns must be able to HOLD a minimum of 40 PSI while spraying. Note: Position a pressure gauge in the air hose nearest the spray gun to be assured of the PSI required to satisfactorily spray your coating. A. Air hose lengths up to 50 feet MUST have an I.D. of 3/8" including fittings. B. Air hose lengths greater than 50 feet MUST have an I.D. of 1/2" including fittings. Paint Cup, Pressure Pot or Diaphragm Pump Be certain to follow manufacturer’s instructions. OPERATING INSTRUCTIONS A. The Protouch Model PT-100AC Spray Gun operates with the trigger controlling both the air and fluid flow. B. Select the proper Needle/Nozzle combination for the coating and finish quality desired. Too much pressure will create unnecessary overspray! Using an 8-oz. Paint Cup A. Attach the 8-oz. Paint Cup (PT-24) to the Fluid Fitting (PT-15) on the bottom of the gun and tighten. Attach the One-Way Check Valve (DT-021) on the cup lid to the Air Pressure Elbow (PT-16) on the gun. B. The 8-oz. Paint Cup must be air tight, clean and free of obstructions. • The seal between the paint cup lid gasket and the lip of the cup MUST BE airtight. • The One-Way Check Valve supplying air to the paint cup MUST BE clean and free of obstructions. • The One-Way Check Valve must be installed with the arrow on the valve pointing towards the cup. Paint will not flow if the valve is not properly installed. C. Never fill an 8-oz. Paint Cup more than ¾ full. This allows sufficient air space in the cup for pressurization. Using a Two-Quart or Larger Remote Pressure Pot or Diaphragm Pump A. Remove the Air Pressure Elbow (PT-16) and replace it with the Air Pressure Plug (AV-177) found in your parts kit. B. Attach the fluid hose from your pressure pot to a Fluid Fitting Adapter (PT-35). Attach the Fluid Fitting Adapter to the Fluid Fitting (PT-15) on the gun and tighten. Before Spraying A. Follow the Air Management and Paint Management Guidelines listed in this manual. B. Before paint is poured into the cup or diaphragm pump, make certain paint is properly mixed. This is particularly true when mixing multi-component paints. Use a paint shaker, rotary mixer, or paint paddle to achieve a homogeneous mixture. (Hint: Split your paint into two parts; the top will be lighter and the bottom will be heavier. Completely stir the bottom half of the paint and slowly add small amounts of the top half into the heavier bottom.) C. Strain your paint to remove impurities. Use a cone strainer or a 100-mesh nylon bag or equivalent strainer. D. Thin your paint according to the manufacturer’s specifications. DO NOT OPERATE SPRAY GUNS WITHOUT PERSONAL SAFETY EQUIPMENT AirVerter® ProTouch HVLP Paint Spray System E. Ensure needle packings are properly adjusted. Needle packings are preset at the factory to proper tension. However, use and cleaning may alter this setting. To adjust needle packings to proper tension: 1. Disconnect from air and fluid sources. 2. Remove the Pattern Control Ring (PT01), Air Cap (PT-02), Detent Plate (PT03, and Air Cap Spring (PT-04). 3. Using a 10 mm wrench, remove the Fluid Nozzle (PT-05). Always retract the Needle prior to removing the Nozzle 4. Remove the Adjustment Screw (PT14), Needle Spring (PT-13) and Needle (PT-12). 5. Using a fine tip slotted screw driver tighten the Packing Adjustment Screw ¼ turn. 6. Replace all parts. 7. Repeat as necessary until Packings (PT-07) are snug around the needle without interfering with Needle travel. Spraying A. Air pressure forces paint from the paint container into the fluid chamber of the gun and out through the Nozzle where the flow of atomizing air breaks the paint stream into tiny particles, creating the spray. 1. Needle position controls the amount of paint flowing through the fluid nozzle. 2. Trigger action controls needle position. 3. The Fluid Control Knob at the rear of the spray gun controls trigger action. Turning the knob to the right will reduce the fluid flow, turning it to the left increases the flow. B. Adjust the pattern by turning the Air Cap (PT-02) at the front of the gun. 1. Round Pattern - used to draw fine lines with the gun close to the work, for touchup work, camouflage patterns and painting surfaces in difficult to reach places distant from the spray gun. This pattern is achieved by turning the Air Cap 45 degrees. 2. Full Fan Pattern - used with the spray gun 6"-8" from the work. Overlap not more than 50% of the previous pass. Do not “fog” coat. This pattern is achieved by turning the Air Cap either horizontally or vertically C. If you are having problems with the operation of your paint gun, check the Trouble Shooting Guide at the end of the manual for possible causes and solutions. PATTERN CONTROL FAN SHAPE AND SIZE • The pattern shape is determined by the 3 different positions of the air cap shown below. Vertical Pattern • Horizontal Pattern Round Pattern The pattern size is determined by adjusting the needle adjustment screw found at the rear of the gun body. A counter clockwise turn gives a narrow stream; a clockwise turn gives a wider spray pattern. DO NOT OPERATE SPRAY GUNS WITHOUT PERSONAL SAFETY EQUIPMENT AirVerter® ProTouch HVLP Paint Spray System SPRAYING TECHNIQUES 1. For the best results, keep gun at a right angle to the surface and about 7" from the surface. 2. Smooth, even strokes across the work with 50% overlap will result in an even finish. Cross coating is not necessary. 4. When spraying from top to bottom use horizontal pattern. 5. Select the round jet pattern for intricate work. 6. Spray a test pattern to ensure your gun is performing correctly. 3. When spraying from left-to-right use vertical pattern AIR AND PAINT MANAGEMENT GUIDELINES Approximate PSI Application Thin Coatings Machines and implements, small parts, plant maintenance, controlled production work, work in enclosed areas with poor ventilation, priming. ZAHN #2 Test: 16 to 22 seconds Minimum 40 PSI compressor pressure Thin to Medium Coatings ZAHN #2 Test: 22 to 30 seconds 40 to 60 PSI compressor pressure High Solid Coatings ZAHN #3 Test: 37 + seconds 50 to 70 PSI compressor pressure 80% Solids Coatings 60 to 80 PSI compressor pressure Dual gun work for all of the above listed applications - will support up to 50' of 3/8" ID hose for each gun. Also for higher production levels of all of the above. Marine epoxies, marine enamels, high production steelwork, high production with conveyer lines, large surfaces with thinner viscosity material, latex on wood or metal. Ultra high production levels on extremely large surfaces; un-thinned epoxies, enamels, latex, urethane. DO NOT OPERATE SPRAY GUNS WITHOUT PERSONAL SAFETY EQUIPMENT AirVerter® ProTouch HVLP Paint Spray System WARNING Gun must be de-pressurized prior to any maintenance or disassembly procedure. Disconnect all air and fluid hoses prior to performing any maintenance operation. MAINTENANCE INSTRUCTIONS 1. Disconnect gun from the air and fluid supply. 7. Thoroughly clean the Fluid Body (PT-09) and Fluid Fitting (PT-15) 2. Relieve pressure on the fluid. 8. Reassemble all parts 3. Remove the Pattern Control Ring (PT-01), Air Cap (PT-02), Detent Plate (PT-03), and Air Cap Spring (PT-04) and clean thoroughly. 9. Clean the 8-oz. Cup ensuring that the Cup Pressure Valve (PT-19) is clean and free of obstructions. 4. Remove the Fluid Control Knob (PT-14), Needle Spring (PT-13), and Needle (PT12). 5. Thoroughly clean the Needle 10. Check cup gasket for wear. Rotate or replace as necessary. 11. Keep the Air Pressure Elbow (PT-16) clean and free of obstructions. 12. Clean the Inductor Filter (AV-009). 6. Using a 10mm wrench, remove the fluid Nozzle (PT-05) and clean thoroughly LUBRICATION INSTRUCTIONS To maintain your ProTouch gun in the best working condition, be sure to check and lubricate each indicated item in the diagram. Use petroleum jelly or non-silicon grease as a lubricant. A B A C C A - Must Clean B - Lubricate C - High Wear A DO NOT OPERATE SPRAY GUNS WITHOUT PERSONAL SAFETY EQUIPMENT AirVerter® ProTouch HVLP Paint Spray System PROTOUCH MODEL PT-100AC ILLUSTRATED PARTS BREAKDOWN PT-01 PT-04 PT-05 PT-06 PT-07 PT-10 PT-12 PT-13 PT-09 AV-009 PT-16 PT-02 PT-03 PT-14 PT-15 AV-177 AV-021 PT-20 PT-40-1 DT-021 PT-21 PT-41 PT-19 PT-23 PT-22 PT-24 Part # Description Part # Description Part # Description PT-01 Pattern Control Ring PT-11 Trigger PT-22 Fluid Tube PT-02 Air Cap PT-12-056* Needle, Small PT-23 Paint Cup PT-03 Detent Plate PT-12-072* Needle, Large PT-24 Cup Assembly PT-04 Air Cap Spring PT-13 Trigger Spring PT-40-1 Inductor Body PT-05-056* Fluid Nozzle, Small PT-14 Adjustment Screw PT-41 Inductor Repair Kit PT-05-072* Fluid Nozzle, Large PT-15 Fluid Connector AV-009 Inductor Filter PT-06 Packing Adjustment Screw PT-16 Air Pressure Elbow AV-021 Filter Retainer PT-07 Teflon Packing PT-19 Cup Pressure Valve AV-177 Air Pressure Plug PT-10 Trigger Pin PT-20 Cup Lid DT-021 One-Way Check Valve PT-09 Gun Body PT-21 Cup Gasket *PT-05-056 and PT-12-056 are standard; PT-05-072 and PT-12-072 are optional. DO NOT OPERATE SPRAY GUNS WITHOUT PERSONAL SAFETY EQUIPMENT AirVerter® ProTouch HVLP Paint Spray System PROTOUCH MODEL PT-100AC BENCH STOCK PARTS KIT PART # PT-225 Part # PT-225 includes all parts listed in quantities indicated. Individual parts may be ordered in any quantity desired. Part # NSN Description Quantity PT-01 4940-01-440-0892 Pattern Control Ring 1 PT-02 4940-01-395-8586 Air Cap 1 PT-03 3040-01-396-7791 Air Cap Detent Plate 1 PT-04 4940-01-440-0890 Air Cap Spring 1 PT-05-056 4940-01-395-7394 Fluid Nozzle .056 STANDARD 1 PT-07 5330-01-395-3027 Teflon Packing (Pkg. of 3) 1 PT-12-056 4940-01-395-7967 Needle .056 STANDARD 1 PT-13 5360-01-395-7774 Trigger Spring 1 PT-21 5330-01-395-1465 Cup Gasket 3 PT-22 4710-01-439-9115 Fluid Tube 6 PT-41 4940-01-467-7136 Inductor Repair Kit 1 AV-009 4310-01-395-7387 Inductor Filter (pkg. of 5) 1 AV-021 5365-01-395-1464 Filter Retainer 10 DT-021 4820-01-457-3857 One-Way Check Valve 5 PROTOUCH MODEL PT-100 HIGH WEAR MAINTENANCE KIT PART # PT-227 Part # PT-227 includes all parts listed in quantities indicated. Individual parts may be ordered in any quantity desired. Part # NSN Description Quantity AV-009 4310-01-395-7387 Inductor Filter (pkg. of 5) 1 AV-021 5365-01-395-1464 Filter Retainer 2 PT-07 5330-01-395-3027 Teflon Packing (pkg. of 3) 2 DT-021 4820-01-457-3857 One-Way Check Valve 2 PT-21 5330-01-395-1465 Cup Gasket 2 DO NOT OPERATE SPRAY GUNS WITHOUT PERSONAL SAFETY EQUIPMENT AirVerter® ProTouch HVLP Paint Spray System PROTOUCH PT-100AC TROUBLESHOOTING GUIDE Trouble Probable Cause 1. Blockage in fluid nozzle 2. Loss of air pressure in cup Paint will not flow Inconsistent Spray Pattern (Spits and Sputters) Leakage at Front of Gun Distorted Spray Pattern Air Control not Working Properly Remedy 3. Loose fluid nozzle 4. Paint tube loose, damaged or clogged 5. Coating is too thick 6. Loose Needle Packing 1. Clean or replace; strain paint 2. Search for air leaks and check cup gasket 3. Tighten 4. Tighten, replace or clean; strain paint 5. Thin the coating 6. Adjust packing 1. 2. 3. 4. 5. 1. 2. 3. 4. 5. Running out of paint Loose fluid tube Loss of fluid pressure Loose needle packing Damaged air pressure tube 1. 2. 3. 4. 5. 6. Fill cup or pot, but never the top ¼ Tighten Search for air leaks or blockages Adjust packing Air pressure tube requires replacing or close inspection Damaged fluid needle Wrong size fluid needle Dirty fluid nozzle Impurities in paint Loose fluid nozzle Fluid adjustment screwed all the way out 7. Needle not firmly seated in the nozzle 8. Packing too tight 1. 2. 3. 4. 5. 6. Replace Replace Clean Strain paint Tighten Rotate Fluid Control Knob (PT-14) on rear of gun clockwise 7. Check for nozzle obstruction 1. Dirty or damaged air cap 2. Dirty or damaged fluid nozzle or needle 3. Fluid nozzle partially clogged 4. Fluid nozzle not centered with air cap 5. Air Cap not seated correctly 1. Clean or replace 2. Clean or replace 1. Air Control Rod out of adjustment 2. Valve is stuck 1. Adjust Air Control Rod 8. Loosen and adjust to correct tension 3. Clean 4. Replace air cap 5. Re-seat air cap 2. Clean valve DO NOT OPERATE SPRAY GUNS WITHOUT PERSONAL SAFETY EQUIPMENT AirVerter® ProTouch HVLP Paint Spray System NOTES DO NOT OPERATE SPRAY GUNS WITHOUT PERSONAL SAFETY EQUIPMENT