1
Digital Laser Printer LN15
Ethernet Interface
User Manual
Introduction
1 - Introduction
1.1 Overview
The Digital Laser Printer LN15 Ethernet interfaces are multiprotocol interfaces
which provide shared network access to the Digital Laser Printer LN15 for a variety of network protocols and operating systems. There are two kind of interfaces:
the LN15X-NA interface provides a thinwire (10-BASE-2) connector for network connections. The LN15X-NB interface provides a twisted pair (10-BASET) connector. Both the LN15X-NA and the LN15X-NB queue multiple pending
jobs and service those jobs in the order in which they are received from the hosts.
Throughout this manual, the DIGITAL Laser Printer LN15 Ethernet interfaces
are referred to as RP600 (RapidPrint 600).
NOTE: The interfaces do not allow outgoing connections to
hosts. It is intended solely to service requests from network hosts.
1.1.1 Protocols
A network protocol is a method of communicating over the Ethernet. Each protocol specifies a certain arrangement of data in the Ethernet packets, and provides
different services for its users. The interfaces support the LAN Manager, Local
Area Transport (LAT), TCP/IP and NetWare (IPX) protocols.
The interface can use and interpret all 3 protocols at once, and can queue print
requests from hosts using any of the 3 protocols simultaneously.
DIGITAL Laser Printer LN15 Ethernet Interface User Manual
1-1
Introduction
1.1.2 Configuration
The installation configuration software is shipped with the DIGITAL Laser
Printer LN15 CD-ROM.
Although this software is the recommended way to configure the interface, the
unit may also be configured using any of the following methods:
•
By logging into the interface over the network via LAT,
NCP/TSM, NetWare or Telnet/Rlogin
•
Via BOOTP replies from a TCP/IP network host; these
replies may be used to define the IP address, loadhost, and
download filename
•
Via RARP replies from a TCP/IP host; these replies may be
used to define the IP address
•
By downloading a configuration file containing the interface
commands from a LAT, NetWare, or TCP/IP host at boot
time
1.1.3 Software
The RP600 interface stores its executable code in Flash (rewritable) ROM, meaning that it does not need to download software from a host each time it boots.
Downloading host software is necessary only when updating the code in the
Flash ROM with a new version of the software.
The interface requires no additional software to print jobs when using in most
environments (NetWare or UNIX with LPR, LAN Manager, and LAT). (Configuration may involve configuration software, shipped with the interface.)
DIGITAL Laser Printer LN15 Ethernet Interface User Manual
1-2
Introduction
1.2 RP600 components
The DIGITAL Laser Printer LN15 Ethernet Interface comes in two versions:
a. The DIGITAL Laser Printer LN15N-A is equipped with a 10-Base-2 interface,
the DIGITAL LN15X-NA and
b. The DIGITAL Laser Printer LN15N-B is equipped with a 10-Base-T interface,
the DIGITAL LN15X-NB.
The panel of the interface has 2 LEDs, a Test button and a network connector.
NOTE: Throughout this manual, the green LED is referred to as
the PWR/LINK LED. The other LED is referred to as the
ACT LED.
The green LED indicates a good network connection (on the LN15N-A) or power
(on the LN15N-B). The other LED gives information about what the interface is
doing; for example, when code is downloaded as the unit boots, the LED blinks
green quickly.
The Test button serves two functions; to print a test/status page, and to force the
interface to return to the factory default configuration. To print a test page, press
the button briefly. To return to the factory default configuration, power down the
printer, press the test button. Then switch the printer on and hold down the Test
button for 5 seconds.
1.2.1 Power-up Diagnostics
The RP600 boot-up procedure consists of four steps, listed below. In normal
operation, these four steps require approximately 45 seconds to complete.
DIGITAL Laser Printer LN15 Ethernet Interface User Manual
1-3
Introduction
1.
The RP600 runs through a set of power-up diagnostics for
approximately 10 seconds. The PWR/LINK LED remains
solid green, the ACT LED shows varying patterns corresponding to the test being run.
2.
It tries to obtain TCP/IP configuration information via
BOOTP and RARP. This takes approximately 10 seconds if
no hosts answer the requests. During this step, the ACT LED
blinks yellow approximately 3 times per second as network
requests are transmitted.
NOTE: For more information about BOOTP and RARP, refer to
your operating system’s documentation.
3.
The RP600 then determines if the code in the Flash ROMs is
valid. If so, it will load that code and begin normal execution. This takes approximately 20 seconds.
4.
When the unit is running normally, the ACT LED blinks
once every 2 seconds. (If data is being transmitted, the LED
blinks yellow, rather than green.)
At this point, the server is running normally.
1.3 Was the Installation Successful?
If the RP600 appears to be working (the ACT LED is blinking once every two
seconds) and the unit is connected to the network, there are various ways to confirm that the unit is working correctly:
•
Print a test page by pressing the Test button.
•
If the RP600 was configured with an IP address, telnet to
the console port from a TCP/IP host.
•
The Digital RapidPrint 600 software utility (provided on the
enclosed DIGITAL Laser Printer LN15 CD-ROM) can be
used to show available print servers.
NOTE : Throughout this manual, this software is referred to as RP600 software.
DIGITAL Laser Printer LN15 Ethernet Interface User Manual
1-4
Introduction
•
From a VMS host, the RP600 will be accessible from NCP
or TSM.
•
From Windows NT, the RP600 will reply to NT machines
that scan for DLC printers.
DIGITAL Laser Printer LN15 Ethernet Interface User Manual
1-5
Getting Started
2 - Getting Started
2.1 Overview
This chapter covers the steps needed to get the RP600 interface on-line and running. There are two ways to log into the interface:
1.
Incoming (Remote) Logins: Digital RapidPrint 600 software
utility (RP600 software) is the preferred method of login and
configuration.
2.
Remote Console Logins: Connections to port 7000 can be
made by LAT users and TCP/IP users via a Telnet connection.
NOTE: Windows NT users must use TCP/IP. It is the only way to log
into the unit.
It is important to consider the following points before logging into and configuring the interface:
•
The RP600 interface’s IP address must be configured before
any TCP/IP functionality is available.
•
Only one person at a time may be logged into the remote
console port regardless of the protocol being used. This
eliminates the possibility of several people simultaneously
attempting to configure the interface.
•
Although all other login sessions may be disabled, remote
console logins cannot be disabled. The system manager will
always have access to the unit.
•
Logging into the remote console port does not automatically
create privileged user status. You must use the Set Privileged command to configure the unit.
The remote console port is password protected.
Default login password: access
Default privileged password: system
DIGITAL Laser Printer LN15 Ethernet User Manual
2-1
Getting Started
2.2 Command Syntax
2.2.1 Set/Define Commands
Set/Define commands appear frequently in this manual; therefore, it is important
to note the difference between them. Set makes an immediate change, but is not
permanent. Conversely, Define makes a permanent change, but doesn’t take
effect until the interface is rebooted or until the affected port is logged out.
2.2.2 Command Format
The commands in this manual and the Reference Manual appear in the following
format. Optional parameters are enclosed in brackets []. Curly braces {} indicate
that one and only one of the enclosed items must be used. User supplied parameters, such as a particular port number or host name, are shown in italics. Commands can be entered in upper, lower, or mixed case.
The interface’s command completion feature will complete partially-typed commands for you. This can save time and reduce errors if you’re entering a number
of commands. To use command completion, type part of a command, then press
the space bar; the interface will automatically “type” the remainder of the command. To enable command completion, use the Set/Define Port Command
Completion command.
DIGITAL Laser Printer LN15 Ethernet User Manual
2-2
Getting Started
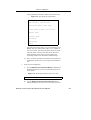
2.3 IP Address Configuration
The RP600 IP address must be configured before any TCP/IP functionality is
available. To set the IP address, the following methods can be used: a directed
Ping packet, a BOOTP or RARP reply, or commands entered at the command
line (Local>) interface from the RP600 software login. All methods of setting the
IP address are discussed in the following sections; choose the method that is most
convenient for you.
To access the interface, hosts must know the RP600 IP address. This is typically
configured in the host’s /etc/hosts file (UNIX) or via a nameserver. For configuration instructions, refer to the host’s documentation.
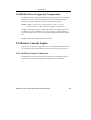
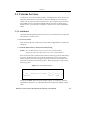
2.3.1 Using a Directed Ping Packet
If the RP600 has no IP address, it sets its address from the first directed IP ICMP
(ping) packet it receives. To generate such a packet, create an entry in the host's
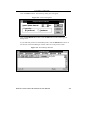
ARP table. The following figure shows how to create an entry in the host’s ARP
table. Note that this requires superuser privileges.
Figure 2-1: Adding to the ARP Table
arp -s 192.0.1.228 00:80:a3:xx:xx:xx
Substitute the intended IP address and the hardware address of the server. Then
ping the server:
Figure 2-2: Ping Command
ping 192.0.1.228
NOTE: If a router is between the server and the ARP host, this procedure won’t work.
When the server receives the ping packet, it notices that its own IP address is not
currently set and sends out broadcasts to see if anyone else is using this address.
If no duplicates are found, the server uses this IP address and responds to the ping
packet. The interface will not save the IP address permanently; it is set temporarily to enable RP600 software to communicate with the server, or to allow an
administrator to telnet into the interface remote console port.
DIGITAL Laser Printer LN15 Ethernet User Manual
2-3
Getting Started
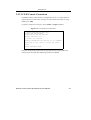
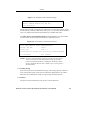
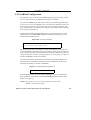
To telnet to this port, use the Telnet command. Specify the RP600 IP address and
7000 as the port number.
The interface will display the remote console port prompt ( # ). In order to successfully log into the port, the login password must be entered at this prompt. The
default login password is access. To make the IP address permanent, use the
Define Server IPaddress command.
Figure 2-3: Telnetting to the Console Port
% telnet xxx.xxx.xxx.xxx 7000
Trying xxx.xxx.xxx.xxx
Connected to xxx.xxx.xxx.xxx
Escape character is ‘^]’
# access (not echoed)
Digital RapidPrint 600 Version n.n/n (yymmdd)
Type Help at the ‘Local_>’ prompt for assistance.
Enter Username> xxxx
Local> SET PRIVILEGED
Password> system (not echoed)
Local>> DEFINE SERVER IPADDRESS xxx.xxx.xxx.xxx
DIGITAL Laser Printer LN15 Ethernet User Manual
2-4
Getting Started
2.3.2 Using a BOOTP or RARP Reply
At boot time a host-based BOOTP or RARP server can respond to an interface
request for an available IP address. For information about configuring the
BOOTP or RARP servers, see the host documentation. Keep in mind that many
BOOTP daemons will not reply to a BOOTP request if the download filename in
the configuration file does not exist. If this is the case, create a file with the same
pathname specified in the configuration file.
By default, the interface attempts BOOTP and RARP queries. You can disable
these queries by doing either of the following:
•
Within the RP600 software, use the Maintenance:Server Boot Parameters menu.
•
At the Local> prompt (accessible via the RP600
software or a Telnet/Rlogin, enter the Define
Server BOOTP Disabled and Define Server
RARP Disabled commands.
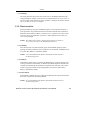
2.3.3 Using the Command Line Interface
To define the IP address at the local prompt (Local>), log into the interface via
the RP600 software and press Return.
A Username> prompt will be displayed. After you enter a username, you will get
the Local> prompt. To set the IP address at this prompt, you need to be the privileged user. Once you’ve obtained privileged access, use the Set/Define Server
Ipaddress command:
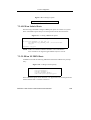
Figure 2-4: Set/Define Server IPaddress
DEFINE SERVER IPADDRESS 192.0.1.228
DIGITAL Laser Printer LN15 Ethernet User Manual
2-5
Getting Started
2.4 RP600 software Logins and Configuration
The RP600 software, shipped on the DIGITAL Laser Printer LN15 CD-ROM, is
the easiest way to log into and configure the interface. The RP600 software
guides you through configuration using a point-and-click interface.
NOTE: NetWare users must be running Windows version 3.1 or later
with the NetWare VLM or a Winsock compliant TCP/IP stack.
NetWare, and TCP/IP versions of the RP600 software are shipped with on the
CD-ROM. To use the CD-ROM, refer to the instructions on the CD-ROM. To
install the RP600 software, refer to the appropriate RP600 software README
file.
NOTE : On-line help through internet is provided.
2.5 Remote Console Logins
Remote console logins are supported from LAT, NCP/TSM, NetWare, and TCP/
IP. All remote console login methods are discussed in the following sections.
2.5.1 NetWare Console Connections
NetWare users can make remote console connections via the RP600 software.
Instructions for using RP600 software are included with the CD-ROM.
DIGITAL Laser Printer LN15 Ethernet User Manual
2-6
Getting Started
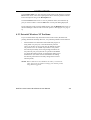
2.5.2 TCP/IP Console Connections
The RP600 enables a TCP/IP user to configure the server via a single Telnet or
rlogin connection to the remote console port. The remote console port is designated as port 7000.
To make a connection to this port, use the Telnet or rlogin command.
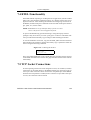
Figure 2-5: Connecting to Console Port
% telnet xxx.xxx.xxx.xxx 7000
Trying xxx.xxx.xxx.xxx
Connected to xxx.xxx.xxx.xxx
Escape character is ‘^]’
# access (not echoed)
Digital RapidPrint 600 Version n.n/n (yymmdd)
Type Help at the ‘Local>’ prompt for assistance
Enter Username> xxxx
Note that the # prompt requires that the login password be entered before the
connection can be made. The default login password is access.
DIGITAL Laser Printer LN15 Ethernet User Manual
2-7
Getting Started
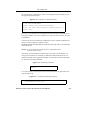
2.5.3 VMS Console Connections
From a VMS host machine, a connection to the remote console port can be established using NCP or TSM.
NOTE: The NCP name cannot exceed six characters.
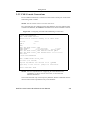
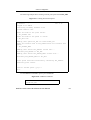
First, the node must be configured in the NCP database. Once the node has been
created in the database, the Connect command can be used to establish a session.
Figure 2-6: Configuring the Node and Establishing a Connection
$ RUN SYS$SYSTEM:NCP
NCP> SHOW KNOWN CIRCUIT
Known Circuit Volatile Summary as of <date time>
Circuit
QNA-0
NCP>
NCP>
Node
Node
NCP>
NCP>
NCP>
State
on
SET NODE server_name
Address
(1.1-63.1023):
13.141
Name
(1-6 characters): server_name
SET NODE server_name SERVICE CIRCUIT QNA-0
SET NODE server_name HARDWARE ADDRESS 00-80-A3-xx-xx-xx
EXIT
$ RUN SYS$SYSTEM:NCP
NCP> CONNECT NODE server_name
# access (not echoed)
Digital RapidPrint 600 Version n.n/n (yymmdd)
Type Help at the ‘Local>’ prompt for assistance.
Enter Username> xxxx
NOTE: For more information on configuring the NCP database and
establishing a remote console connection, see the NCP and
TSM documentation.
This creates the node only in the temporary database; Define commands must be
used in order to make a permanent entry in the database.
DIGITAL Laser Printer LN15 Ethernet User Manual
2-8
Getting Started
2.6 Controlling Incoming logins
By default, incoming LAT connections are disabled. To change these settings,
use the Set/Define Server Incoming command.
Incoming logins do not require that the user enter a login password; therefore,
you may wish to disable incoming logins as a security measure. If it is undesirable to disable incoming logins, the RP600 can be configured to require a login
password for incoming connections with the Set/Define Server Incoming Password command.
The Set/Define Server Incoming command can be used with the
following parameters:
Figure 2-7: Set/Define Server Incoming Parameters
Parameter
Function
Telnet
Enables Telnet logins
LAT
Enables LAT logins
Both
Enables both Telnet and LAT logins
None
Disables both Telnet and LAT logins
Enabling LAT logins automatically creates a service, a resource on the host
which will allow LAT users to connect to the RP600 using the Connect command. The default name of this service will be LPS_xxxxxx. (The xxxxxx notation represents the last six numbers of the RP600 service address.) This service is
created automatically when the unit boots if incoming LAT connections are
enabled. To change the service name, change the RP600 name.
If outgoing LAT connections on a VMS host are enabled, use the following command to connect to the RP600:
Figure 2-8: Connecting to the RP600 from a VMS Host
set host /LAT LPS_xxxxxx
DIGITAL Laser Printer LN15 Ethernet User Manual
2-9
Services
3 - Services
3.1 Overview
With few exceptions, setting up a print queue on the RP600 requires the use of a
service. A service is a resource accessible to network hosts; for example, a Novell user may queue print jobs to a service.
The RP600 has 3 default services for use with the parallel port. These services
will be sufficient for most users. Default services cannot be edited; therefore, if
you cannot use the default services, you will need to configure custom services.
Once you have either enabled or created the appropriate services for your system,
you can use these services to connect to the RP600 and queue print jobs.
3.2 Default Services
NOTE: Default services cannot be changed, they can only be enabled
or disabled. The DLC characteristic is an exception.
The RP600 comes equipped with 3 default services which reference the parallel
port:
LPS_xxxxxx_TEXT:
All text print jobs should be queued to this service.
LPS_xxxxxx_PCL:
All binary print jobs (for example, plotter or PCL
files) should be queued to this service.
LPS_xxxxxx_PS:
All PostScript print jobs should be queued to this service.
NOTE: The default service names are based on the server name; therefore, if you change the server name, the new name must be no
more than 12 characters.
DIGITAL Laser Printer LN15 Ethernet Interface User Manual
3-1
Services
When the RP600 boots, all default services are available. To disable (or later
enable) a service, use the Set/Define Service Default command. Figure 3-1 displays the syntax for this command.
Figure 3-1: Disabling PostScript Default Service
DEFINE SERVICE DEFAULT POSTSCRIPT DISABLED
Each default service has a list of service characteristics enabled on it. The list of
service characteristics can not be changed on default services. If you need to use
a service which has different characteristics, you must configure a custom service.
The following characteristics are enabled on the default services:
LPS_xxxxxx_TEXT
Banner, Connections, FormFeed, LAN Manager, NetWare, Queueing, RTEL
LPS_xxxxxx_PCL
Binary, Connections, LAN Manager, NetWare,
Queueing, RTEL
LPS_xxxxxx_PS
Connections, LAN Manager, NetWare, PostScript,
Queueing, RTEL
DIGITAL Laser Printer LN15 Ethernet Interface User Manual
3-2
Services
3.3 Custom Services
A custom service consists of three primary “building blocks”; these “blocks” are
attributes, characteristics, and protocols. Since the default services cannot be
edited, you may need to create a custom service. For example, if you are using
the NetWare protocol, and the FormFeed attribute prevents you from using a
default service, you will need to configure a custom service with FormFeed disabled.
3.3.1 Attributes
Attributes describe global properties of the service. Listed below are the possible
attributes for a custom service:
3.3.1.1 Service Name
Each service must have a name with no more than 12 alphanumeric or underscore
characters.
3.3.1.2 EOJ (End-of-Job) or SOJ (Start-of-Job) String
NOTE: The commands that you may need to enter in EOJ and SOJ
strings are printer-specific and are not covered in this manual.
Each service may have an End-of-Job or Start-of-Job string (or both). EOJ strings
are sent to the printer after every print job; SOJ strings are sent to the printer
before each print job. These strings are typically used to force the printer into a
particular mode (such as PostScript or PCL). When specifying a string, use the
following syntax:
Figure 3-2: EOJ and SOJ Syntax
SET
SOJ string
SERVICE ServiceName
DEFINE
EOJ NONE
The keyword None clears any string already in place. A string may consist of
alphanumeric characters, or of hexadecimal character pairs preceded by a backslash.
DIGITAL Laser Printer LN15 Ethernet Interface User Manual
3-3
Services
Figure 3-3: Examples of EOJ and SOJ Strings
Local>> DEFINE SERVICE LPS_PRT SOJ “startchar”
Local>> DEFINE SERVICE LPS_PRT EOJ
“\23\4e\9atext”
Strings are converted to all uppercase, unless they are enclosed in quotes. If you
need to add any character other than a letter (A-Z, a-z), you must locate the character on a ASCII chart and enter that number as a hexadecimal value.
The Show Service Local Characteristics command displays any current Endof-Job or Start-of-Job strings associated with a particular service.
Figure 3-4: Show Service Local Characteristics
Local> SHOW SERVICE LOCAL CHARACTERISTICS
Service: LPS_PRT
Ident:
Rating: 255
Ports: 1
Characteristics: Banner Rtel PostScript Formfeed NetWare
SOJ: startchar
EOJ: endchar
NOTE: If you are using PostScript printing on an auto-sensing printer,
you may not need to enter EOJ or SOJ strings to force the
printer into PostScript mode; enabling the PostScript characteristic should do this. For more details, refer to your printer’s
documentation.
3.3.1.3 Ident String
Each service may have an identification string. This string typically contains a
more verbose description of the service and will be displayed by LAT when a
Show Services command is issued. It is ignored by all other protocols.
3.3.1.4 Ports
The port list shows which port(s) the service is associated with.
DIGITAL Laser Printer LN15 Ethernet Interface User Manual
3-4
Services
3.3.1.5 Rating
The rating describes the current state of the service; the RP600 determines the
rating based upon whether or not the port associated with the service is in use. A
non-zero value means that the service is available. A rating of zero means that the
service is either in use or not available.
3.3.2 Characteristics
These parameters specify how the RP600 appears to network hosts and how it
treats print data. All possible characteristics and their default states (enabled or
disabled) are listed below. When a custom service is created, it has a list of characteristics which are enabled on it; however, unlike default services, these services can be changed.
NOTE: The default state of these characteristics applies to custom services, not necessarily to the RP600 default services.
3.3.2.1 Banner
This characteristic only affects banner pages that the RP600 generates when
printing via LPD or NetWare. If a host generates its own banner, the RP600 treats
it as print data. Banner is enabled by default.
NOTE: Users should disable the Banner and FormFeed characteristics
for PostScript queues.
3.3.2.2 Binary
If the Binary characteristic is enabled, the RP600 does not perform character processing on the data. When Binary is disabled, the RP600 expands linefeeds into
carriage return/linefeeds and performs tab expansion for LPD jobs. This characteristic is typically enabled for printing graphics jobs (PCL or plotter files).
Binary is disabled by default.
3.3.2.3 FormFeed
If Formfeed is enabled, the server appends a formfeed to the end of LPD and NetWare jobs. FormFeed is enabled by default.
NOTE: Users should disable the Banner and FormFeed characteristics
for PostScript queues.
DIGITAL Laser Printer LN15 Ethernet Interface User Manual
3-5
Services
3.3.2.4 Password
Specifies a 1 to 6 character service access password that the user must supply in
order to connect to the service. This characteristic is disabled by default.
3.3.2.5 PostScript
If enabled, the RP600 sends a small PostScript job to the printer before the user’s
print data to force auto-selection printers into PostScript mode. It also attempts to
confirm that the printer finished a job before starting the next one. If the printer
attached to this service is to be used only for PostScript, this option must be
enabled. PostScript is disabled by default.
3.3.2.6 PSConvert
This characteristic allows a PostScript printer attached to the RP600 to print nonPostScript jobs. When a file is queued to a service with the PSConvert attribute
enabled, the file is encapsulated within a PostScript job. When printed, the file
looks as if it was printed on a line printer. PSConvert is disabled by default.
3.3.2.7 TCP Port
Associates a numeric TCP socket (between 4000 and 4999) with the service.
Connections to this socket are accepted only if the service is currently available.
This is an 8-bit clean connection.
3.3.2.8 Telnet Port
Associates a numeric TCP socket (between 4000 and 4999) with the service. Telnet IAC interpretation will be done on the connection. Connections to this socket
are accepted only if the service is currently available.
DIGITAL Laser Printer LN15 Ethernet Interface User Manual
3-6
Services
3.3.3 Protocols
Each service has a protocol list associated with it; this list controls which protocols can access the service. Protocol parameters include the following:
3.3.3.1 DLC
Sets the service as the handler for Windows NT DLC print connections. DLC is
disabled by default.
3.3.3.2 LAN Manager
Enables or disables LAN Manager (NetBIOS/NetBEUI) access to the service.
LAN Manager is enabled by default.
3.3.3.3 LAT
Enables or disables LAT access to the service. LAT is disabled by default.
3.3.3.4 NetWare
Enables or disables NetWare (IPX) access to the service. NetWare is enabled by
default.
3.3.3.5 RTEL
Enables or disables RTEL access to the service. RTEL is enabled by default.
DIGITAL Laser Printer LN15 Ethernet Interface User Manual
3-7
Services
3.3.4 Service Command Format
To create a new service, use a unique service name with the Set/Define Service
command.
NOTE: All Set/Define Service commands require being the privileged
user on the server.
The format for Set/Define Service commands is shown in Figure 3-5.
Figure 3-5: Set/Define Command Format
SET
SERVICE ServiceName option [ option ]
DEFINE
Figure 3-6 displays an example of the Set/Define Service command format.
Figure 3-6: Creating a Service with LAT Enabled
DEFINE SERVICE backupprinter LATENABLED
The command in Figure 3-6 created a service named BACKUPPRINTER. This
service has LAT enabled.
The command below creates a service named LPS_PRT; this service has PostScript and PSConvert enabled.
Figure 3-7: Creating a Service with PostScript and PSConvert Enabled
DEFINE SERVICE LPS_PRT POSTSCRIPT ENABLED PSCONVERT ENABLED
DIGITAL Laser Printer LN15 Ethernet Interface User Manual
3-8
LAN Manager Configuration
4 - LAN Manager Configuration
4.1 Overview
The RP600 software configuration software is the easiest way to send print jobs
to the RP600.
If you are unable to use the RP600 software, the best way to configure the RP600
is to use the IP protocol and the Berkeley remote LPR software.
NOTE: Windows for PCs cannot reliably print jobs to the RP600 via
LAN Manager. It is recommended that Windows for Workgroups users spool their print jobs to a Windows NT host and
print from that machine.
The following sections covers DLC and NetBIOS configuration for LAN Manager hosts. These instructions are designed for Windows NT.
4.2 Windows NT Users
To send print jobs from a Windows NT host to the RP600, the RP600 must be
added as a Windows NT printer. Windows NT users can print using either the
DLC protocol or the NetBIOS protocol. DLC configuration is simpler than NetBIOS configuration; however, NetBIOS is more flexible. Both methods are discussed in the following sections.
NOTE: The RP600 does not support NetBIOS over TCP/IP.
4.2.1 DLC Configuration
The default text service (LPS_xxxxxx_TEXT) can be used without any further
configuration; DLC is automatically enabled on this service. To use the default
PostScript or binary services; however, Windows NT users must associate the
DLC characteristic with the desired service.
DIGITAL Laser Printer LN15 Ethernet User Manual
4-1
LAN Manager Configuration
NOTE: DLC can only be associated with one service at a time. If DLC
was previously enabled on another service, it will become disabled on that service.
To do this, use the Set/Define Service DLC command. For example, if you’d like
to use the binary (PCL) service, the DLC characteristic can be associated with
this service by entering the following commands:
Figure 4-1: Associating DLC With PCL Service
DEFINE SERVICE DEFAULT DLC PCL
In Figure 4-1, DLC PCL associated the DLC characteristic with the
LPS_xxxxxx_PCL service.
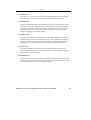
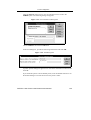
Open the NT Print Manager; its icon is located in the Main window. Choose Create Printer from the Printer menu.
Figure 4-2: Create Printer Dialog Box
LPS_PRT
NOTE: If the printer driver isn’t already installed, you’ll need the
Windows NT installation disks.
In the Printer Name box, enter the name of the queue on the NT host. Click the
Driver menu arrow; select the required printer driver from the pull-down menu.
Enter a description string in the Description box.
DIGITAL Laser Printer LN15 Ethernet User Manual
4-2
LAN Manager Configuration
If applicable, choose the Share this printer on the network option. (This is not
recommended until the print queue is confirmed to be running properly.)
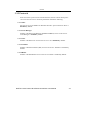
Click the Print To menu arrow to view its pull-down menu. Scroll to the Other
option. The following dialog box will appear:
Figure 6-1: Print Destinations Dialog Box
Choose the desired Network Port and click the OK button. The following dialog
box will appear:
Figure 4-3: Network Port Dialog Box
Add Network Peripheral Port
All known DLC nodes will be listed in the Card Address box. Select the RP600
hardware address. Enter a name to be associated with this address at the prompt.
DIGITAL Laser Printer LN15 Ethernet User Manual
4-3
LAN Manager Configuration
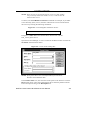
Click the Timers button. The following dialog box will appear:
Figure 4-4: Timers Dialog Box
Peripheral Port Timers
Click the Job Based radio button. Click the OK button in the remaining print
dialog boxes.
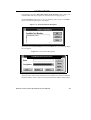
If you’d like this printer to be the default printer, click the Default menu arrow on
the title bar of the Print Manager window and scroll to the printer’s name.
Figure 4-5: Print Manager Window
LPS_PRT
DIGITAL Laser Printer LN15 Ethernet User Manual
4-4
LAN Manager Configuration
4.2.2 NetBIOS Configuration
All default services can be used for NetBIOS printing. If you’re using a custom
service, ensure that the LAN Manager characteristic is enabled.
To print from NetBIOS, you will need to redirect a port. Redirecting allows the
user to use a service on the RP600 as if it were on the host machine. Choose one
of the lpt ports to redirect (typically the ports to choose from will be lpt1, lpt2,
lpt3, or lpt4). Before you select a port to redirect, ensure that it doesn’t currently
have a printer connected to it.
Double-click the DOS Command Prompt icon to open a DOS session. At the
DOS prompt, use the NET USE command to indicate that the lpt port will be
redirected to the RP600 service.
Figure 4-6: Net Use Command
C:> NET USE LPTn:
\\LPS_xxxxxx\LPS_xxxxxx_TEXT
The Windows NT node will attempt to connect to the RP600. (If it cannot connect to the RP600, it will inform you of the problem.) At this point, all references
to lptn (the port specified with the NET USE command in Figure 4-4) will go to
the service that you created. For testing purposes, you can try to use a copy command, if the RP600 is ready to accept data.
To make the lpt redirect permanent, use the following command [Figure 4-7].
When the host is rebooted, the lpt redirect will be remembered; the host will
automatically attempt to connect to the RP600.
Figure 4-7: Making Redirect Permanent
C:> NET USE /PERSISTENT:YES
Exit the MS/DOS shell. Open the NT Print Manager; its icon is located in the
Main window on the desktop. Choose Create Printer from the Printer menu
[Figure 4-2, page 4-2].
NOTE: If the printer driver isn’t already installed, you’ll need the
Windows NT installation disks.
DIGITAL Laser Printer LN15 Ethernet User Manual
4-5
LAN Manager Configuration
In the Printer Name box, enter the name of the queue on the NT host. Click the
Driver menu arrow; select the required printer driver from the pull-down menu.
Enter a description string in the Description box.
Click the Print To menu arrow to view its pull-down menu, and select the lpt
port you wish to redirect. Click the OK button in each print dialog displayed.
If you’d like this printer to be the default printer, click the Default menu arrow on
the Print Manager’s title bar and scroll to the printer’s name [Figure 4-5, page 44].
4.2.3 Potential Windows NT Problems
If you’ve followed the setup instructions listed in this section, Windows NT
printing should run smoothly. However, two potential problems are listed below:
•
When Windows NT determines that insufficient progress is
being made on a print job, it will automatically time out
(force you to abort or retry) print jobs. By default, the timeout period is set to 45 seconds. If you have a slow printer,
this timeout period may not be long enough; Windows NT
may time out your print job when it’s queued to the RP600.
To change the timeout period, see the Settings dialog box in
Windows NT. (On some versions of Windows NT editing
the timeout period does not actually change the 45 second
timeout period.)
NOTE: When a timeout occurs, Windows NT will try to restart the
entire job. If you are unable to change your timeout period,
using LPR is suggested.
DIGITAL Laser Printer LN15 Ethernet User Manual
4-6
Introduction
LAT Configuration
5 - LAT Configuration
5.1 Overview
The RP600 software configuration software is the easiest way to configure LAT
print queues on the RP600. NetWare, and TCP/IP versions of the RP600 software
are shipped with the RP600 on the DIGITAL Laser Printer LN15 CD-ROM. All
instructions for using the RP600 software are listed in each README file.
Creating a LAT print queue can be done by printing directly to the RP600, or
printing to a service. Printing directly to a port is the simplest method of creating
a LAT print queue because it requires no configuration of the RP600. Printing
using a service requires some RP600 configuration, however, it allows you to
have multiple printers service the same VMS queue. The LAT characteristic must
be enabled on the service being used. To print PostScript jobs from VMS, a service must be used.
5.2 Printing Directly to a Port
This is a two-step process. First, a LAT application port that references the
RP600 parallel port must be created on the LAT host. The LAT application port is
a device that allows programs to treat a LAT connection as a physical port for
input and output. For example, a printer might be configured to use port
LTA3419, which might be connected (“mapped”) to port 1 of the RP600. The
LAT port can be mapped to either a service or an exact port on the ETS.
Second, a print queue that uses the LAT application port must be created.
DIGITAL Laser Printer LN15 Ethernet User Manual
5-1
LAT Configuration
Use the following commands to create a LAT application port and then set it to
the appropriate node and port:
Figure 5-1: Creating LAT Application Port
$ RUN SYS$SYSTEM:LATCP
LATCP> CREATE PORT LTAnnn/APPLICATION
LATCP> SET PORT LTAnnn/NODE=LPS_xxxxxx/PORT=Port_1
LATCP> EXIT
The nnnn is any unused LAT port number (use the Show Ports command to see
which port numbers are in use). VMS users can then use port LTAnnnn as a port
to the RP600.
LATCP ports are not permanently configured on a host. Add the commands necessary to create required LAT devices to the
SYS$MANAGER:LAT$STARTUP.COM file so that they will be recreated after
each host reboot.
NOTE: See the VMS documentation for more information about
terminal characteristics.
Note that LAT terminal device characteristics may have to be changed to correctly print some files. For example, by default the VMS terminal driver will
change form feeds into an equivalent number of line feeds. To disable this behavior, enter the following command:
Figure 5-2: Disabling Line Feeds
$ SET TERMINAL/PERM/FORM
LTAnnn:
To create and start a LAT queue on the host that uses this LAT application port,
enter the following:
Figure 5-3: Creating and Starting the Queue
$ INITIALIZE/QUEUE/START/ON=LTAnnn:/PROCESSOR=LATSYM
/RETAIN=ERROR queue_name
DIGITAL Laser Printer LN15 Ethernet User Manual
5-2
LAT Configuration
A print request would then look like the following:
Figure 5-4: Creating a Print Request
$ PRINT/QUEUE=queue_name filename.txt
5.3 Printing Using LAT Services
Printing using a LAT service requires the creation of three items:
•
A LAT service on the RP600
•
The LAT application port that references the RP600 print
resource
•
A print queue that uses the LAT application port
NOTE: LAT is disabled on all of the RP600 default services
because many network managers object to the frequent
LAT service announcements. If LAT connections to a
service are desired, a service must be created; the
default PostScript, Binary, and Text services cannot be
used.
LAT services can be created and connected to using the Set/Define
Service command. An example is displayed below:
Figure 5-5: Creating LAT Service
Local>> DEFINE SERVICE LPS_PRT LAT ENABLED
A LAT device can then be created using the following commands:
Figure 5-6: Creating LAT Device
$ RUN SYS$ SYSTEM:LATCP
LATCP> CREATE PORT LTAnnn/APPLICATION
LATCP> SET PORT LTAnnn/NODE=LPS_xxxxxx/service=LPS_PRT
LATCP> EXIT
DIGITAL Laser Printer LN15 Ethernet User Manual
5-3
LAT Configuration
The rest of the procedure for creating the print queue is the same as discussed in
Figure 5-2 through Figure 5-4.
5.4 PostScript Printing
To print PostScript jobs from a VMS host, an RP600 service must be used. The
service used must have the PostScript characteristic enabled:
Figure 5-7: Enabling PostScript Attribute
Local>> DEFINE SERVICE LPS_PRT POSTSCRIPT ENABLED
Using PostScript printers with LAT queues adds two extra steps to the host queue
setup. An application LAT port still needs to be created via LATCP. In addition, a
PostScript form and a reset module need to be created on the host. The reset module will contain the Ctrl-D that the printer needs to see to finish and eject the job.
To create the form, use the following commands:
Figure 5-8: Creating a PostScript Form
$ DEF/FORM POSTFORM formnum /STOCK/=DEFAULT/WIDTH=4096/WRAP
formnum is any unused form number (use Show Queue/Form/All to see the
form numbers that are currently in use). The longer width prevents the spooler
from truncating long (and legal) PostScript command lines.
To create the reset module, use an editor to create a file named EOJ.TXT. Place a
Ctrl-D (ASCII 0x4) in this file and insert it into the system device control library.
Figure 5-9: Creating Reset Module
$ LIBRARY/REPLACE SYS$LIBRARY:SYSDEVCTL.TLB
EOJ.TXT
DIGITAL Laser Printer LN15 Ethernet User Manual
5-4
LAT Configuration
If the library does not exist, it must be created using the following command:
Figure 5-10: Creating a Control Library
LIBRARY/CREATE/TEXT SYS$LIBRARY:SYSDEVCTL.TLB
Finally, use the INIT/QUEUE command to create the queue. Note the addition of
the form specification and the reset module.
Figure 5-11: Creating a Queue
$INIT/QUEUE/START/DEFAULT=(NOFEED,NOFLAG,FORM=POSTFORM)/ ON=LTAnnn:
/PROCESSOR=LATSYM/RETAIN=ERROR/SEPARATE=(RESET=EOJ) LPS_POST
A print request will look like the following:
Figure 5-12: Print Request
$ PRINT/QUEUE=LPS_POST filename.ps
DIGITAL Laser Printer LN15 Ethernet User Manual
5-5
NetWare Configuration
6 - NetWare Configuration
6.1 Overview
The following sections cover print configuration for NetWare hosts. The easiest
way to configure print queues is to use the RP600 software point-and-click interface.
The examples in this chapter show how to configure the RP600 using commands
entered at the command line interface (Local> prompt). Instructions for configuring NDS print queues on the RP600 are outlined in the Creating NDS Print
Queues section. To create NDS print queues, you must be running NetWare version 4.0 or greater. If you are running versions 2.x, 3.x, or version 4.0 with bindery emulation, see the section titled Creating Bindery Print Queues. Bindery
print queues may be configured using either the RP600 software, PCONSOLE,
or QINST.
DIGITAL Laser Printer LN15 Ethernet User Manual
6-1
NetWare Configuration
6.2 NetWare Access List
By default, the RP600 only scans local file servers (file servers one hop away) for
print queues to service. File servers on non-local Ethernets (for example, with a
IPX router between them and the RP600) can be enabled using the following
commands:
Figure 6-1: Enabling Non-Local File Servers
Local>> DEFINE PROTOCOL NETWARE ACCESS fileserver
Local>> INIT DELAY 0
The Set/Define Protocol NetWare Access command configures a list of file
servers that the RP600 contacts for print jobs. The Init Delay 0 command reboots
the box.
To enable scanning for jobs on all file servers in the extended network, replace
the file server name with the keyword All. However, on an extended (wide or
local-area) network with many file servers, specifying All can severely impact
the time between jobs and the overall printing and network performance.
NetWare traffic can be minimized by removing unused file servers from the
access list. To remove a file server from the list, use the Clear and Purge commands. Clear removes an entry from the list immediately, but does not remove it
permanently. Purge removes an entry from the list permanently, however, the
entry is not removed until the server is rebooted. Examples of the Clear and
Purge commands are given below:
NOTE: A single asterisk (*) can be used to represent a string of characters in the Clear and Purge commands.
Figure 6-2: Removing File Server From Access List
Local>> CLEAR PROTOCOL NETWARE ACCESS fileserver
Local>> PURGE PROTOCOL NETWARE ACCESS fileserver
DIGITAL Laser Printer LN15 Ethernet User Manual
6-2
NetWare Configuration
6.3 Creating NDS Print Queues
If you are using NDS, the Quick Set-Up option is the easiest way to create print
queues with PCONSOLE with NetWare v4.x or greater.
The following steps must be done on each file server that will need access to the
RP600 queues.
1.
NDS Registration
A. To register to use NDS, you must read and complete an
NDS registration form through the software.
NOTE: This registration is free of charge but must be completed for
every print server to be used.
B. Once you have completed the form, click Submit on the
web page.
C. To allow NDS on the RP600, enter the Define Protocol
NetWare DSLicense command using the string that you
have received following the registration.
Figure 6-3: Enabling NDS on the RP600
Local>> DEFINE PROTOCOL NETWARE DSLICENSE
string
2.
PCONSOLE Print Queue Set-Up
A. Log in as Admin on the file server you will be changing
and type PCONSOLE at the F: prompt to start the utility.
B. From the main menu choose Quick Set-Up.
C. The Quick Set-Up window will appear. Enter the fol-
DIGITAL Laser Printer LN15 Ethernet User Manual
6-3
NetWare Configuration
lowing information and the window will look like this:
Figure 6-4: The Quick Set-Up Window
Print Server: server name
New Printer: service name
New Print Queue: queue name
Print Queue Volume: file server
Banner Type:
Printer Type:
Location:
Interrupt:
Port:
The print server name (LPS_xxxxxx) is the name of your
RP600. The new printer name (LPS_xxxxxx_TEXT) is
the service name. The new print queue can be any name.
The print queue volume is the name of the file server
from which the printer receives print request. The
remaining fields can be left in their default settings.
D. Once you have entered all of the fields in the Quick SetUp Window, press F10 to save the print queue information.
3.
Print Server Configuration
A. Use the Define Protocol NetWare DSTree command to
define which directory service tree that the print server
is located on.
Figure 6-5: Defining the Directory Services Tree
Local>> DEFINE PROTOCOL NETWARE DSTREE food
B. Use the Define Protocol NetWare DSContext command to define the directory services context where the
DIGITAL Laser Printer LN15 Ethernet User Manual
6-4
NetWare Configuration
print server is located.
Figure 6-6: Defining the Directory Services Context
Local>> DEFINE PROTOCOL NETWARE DSCONTEXT ou=kiwi.ou=exotic.o=fruit
NOTE: For an explanation of how the NetWare Directory Service tree
is structured, see your host documentation.
C. Enter the Show Protocol NetWare Access command to
ensure that at least one of the file servers in the directory
services tree is in the access list.
By default the access list is set to Local which includes
all file servers which are not across a router. To add to
this list, enter the Define Protocol NetWare Access
command.
Figure 6-7: Adding to the Access List
Local>> DEFINE PROTOCOL NETWARE ACCESS fileserver
D. Reboot the RP600 using the Init Delay 0 command.
Figure 6-8: Rebooting the Server
Local>> INIT DELAY 0
4.
It may take up to two minutes for the print server to attach to
the queue.
5.
Enter the NETSTAT command. This will display information about file servers, printers, and queues that the print
server has found. If a queue is in JobPoll then the print server
has successfully attached to the queue.
DIGITAL Laser Printer LN15 Ethernet User Manual
6-5
NetWare Configuration
6.4 Creating Bindery Print Queues
6.4.1 Using QINST
The QINST utility requires being logged into the Supervisor (NetWare 2.2/3.11)
or Admin (NetWare 4.0) account on the target file server. To use the utility, copy
the QINST.EXE file from the DIGITAL Laser Printer LN15 CD-ROM into the
Public directory on the file server, ensure that it is in the executable path, and
type QINST.
When using NetWare version 4.0 and greater, the QINST program requires
access to UNICODE tables to provide character translation. To ensure the utility
runs properly, copy it into the NetWare Public directory or ensure that the PATH
variable includes the required UNICODE tables.
NOTE: If you wish to enable Bindery emulation, refer to your NetWare
documentation.
NOTE: If you experience problems using QINST, use the PCONSOLE
instructions on page 6-8 to install the print queue.
DIGITAL Laser Printer LN15 Ethernet User Manual
6-6
NetWare Configuration
The following example shows creating a Novell print queue named LPS_PRT.
Figure 6-9: Creating Novell Print Queue
F:\> \Public\QINST
Q-Install
Ver. n.m.
Logged in as ADMIN
Installing on GONZO, NetWare V3.xx
Volume number:0 <CR>
Enter the name of the print server.
: LPS_xxxxxx <CR>
Enter the name of the queue to create.
: LPS_PRT <CR>
Adding print queue LPS_PRT on volume GONZO_SYS
Enter the service name on LPS_xxxxxx which will service this
queue.
: LPS_xxxxxx_TEXT
Adding print server LPS_xxxxxx. Please wait...
Attaching LPS_xxxxxx to LPS_PRT
Adding print server LPS_xxxxxx_TEXT. Please wait...
Attaching LPS_xxxxxx_TEXT to LPS_PRT
Print queue installed successfully. Resetting LPS_xxxxxx.
Resetting print server.
Install another queue [y/n]? n
F:\>
Use the NPRINT command to print a job to the RP600.
Figure 6-10: NPRINT Command
F:\> NPRINT C:\AUTOEXEC.BAT /
QUEUE=LPS_PRT
DIGITAL Laser Printer LN15 Ethernet User Manual
6-7
NetWare Configuration
6.4.2 Using PCONSOLE
The QINST utility is the preferred method for creating Bindery print queues.
However, the PCONSOLE utility may also be used. To create a print queue using
PCONSOLE, three major steps must be completed:
•
The RP600 must be installed as a print server on the NetWare file server
•
Print queues must be created on the file server and must be attached to the
RP600
•
The RP600 must be told to re-poll the file servers for the updated queue
information
These steps must be performed on each file server that will need access to the
RP600 queues.
NOTE: The following steps refer to NetWare v3.11, but are similar for
v4.x and v2.x.
To create a print queue, complete the following steps.
1.
Log in as the privileged user on the file server you will be
changing and type PCONSOLE at the F: prompt to start the
utility.
2.
Create an entry for the Print Server on the Novell file server.
A. Select Print Server Information from the Available
Options menu (use the cursor keys to move to it and
press Enter). A list of current print servers will be
shown.
B. Press Insert to create a new entry, add the RP600 and
press Enter. This is the name that the RP600 will log in
as when querying the file server’s print queues. Note
that if the RP600 name is changed, the file server(s) will
need to be updated.
DIGITAL Laser Printer LN15 Ethernet User Manual
6-8
NetWare Configuration
NOTE: If the login password on the RP600 is changed, a new password will have to be entered for the server. Highlight the
RP600 name and press Enter to show the Print Server Information menu. Select the Change Password option and enter the
RP600 new login password.
C. Use the Insert key to add the name of the service which
will service the queue, (either LPS_xxxxxx_TEXT,
LPS_xxxxxx_PCL, or LPS_xxxxxx_PS) and press
Enter.
D. Return to the main Available Options menu by pressing
Escape.
3.
Create a print queue on the file server and associate it with
the RP600 service.
A. Select the Print Queue Information menu option
under Available Options and press Enter.
This shows a list of any existing print queues on the file
server. Press Insert to create a new queue on the file
server, type the new queue name and press Enter. The
name does not have to be related to the name of the
RP600 resources, but should be short and convenient for
users to remember.
B. Highlight the name of the queue just entered and press
Enter to configure the queue itself. Select Queue Servers (NetWare 4.0 users, select Print Servers in the Print
Queue Info box) and press Enter to specify which network print servers can print jobs from this print queue.
The list will be empty, as none have been selected yet.
Press Insert. The LPS_xxxxxx, LPS_xxxxxx_TEXT,
LPS_xxxxxx_PCL, or LPS_xxxxxx_PS resource
entered above should appear in a selection list.
Add the RP600 name (LPS_xxxxxx). (The RP600 name
is used to log in.) Highlight the LPS_xxxxxx name and
press Enter.
C. Press Insert again. Select either the text
(LPS_xxxxxx_TEXT), binary (LPS_xxxxxx_PCL), or
PostScript (LPS_xxxxxx_PS) service name and press
Enter again.
DIGITAL Laser Printer LN15 Ethernet User Manual
6-9
NetWare Configuration
D. Press Escape to return to the list of print queues.
E. Press Escape to return to the Available Options menu.
4.
Press Escape repeatedly to exit the PCONSOLE utility.
5.
At the Local> prompt, become the superuser on the RP600
and reset your print server using the Set Server NetWare
Reset command.
6.5 NetWare Queue Password
The default login password (access) on the RP600 is also used to log the RP600
into NetWare file servers. If the login password on the RP600 is changed, NetWare print queue setups must also be changed to reflect the new password.
DIGITAL Laser Printer LN15 Ethernet User Manual
6-10
TCP/IP Configuration
7 - TCP/IP Configuration
7.1 Overview
The following sections cover print configuration for TCP/IP hosts.
The RP600 provides two major TCP/IP printing methods: Berkeley remote LPR
and RTEL host software. Both methods provide queuing of jobs if the RP600 is
busy with another job. Instructions for host configuration for LPR and RTEL are
described in the following sections.
The remote LPR software allows the RP600 to look like a host that can print files.
The Digital-supplied RTEL software, which requires installation and configuration on the host, provides more functionality than remote LPR. It allows the
host’s lp or lpr printing system to transparently use the RP600 print devices, and
allows the creation of named pipe devices on the host that map to the RP600 parallel port. See the documentation included with the distribution CD-ROM for a
full discussion of RTEL functionality and configuration.
Raw TCP/IP socket connections can be used with custom queuing software to
create queues on the RP600.
DIGITAL Laser Printer LN15 Ethernet User Manual
7-1
TCP/IP Configuration
7.2 LPR on Generic UNIX Hosts
The Berkeley remote printing system is supported on many machines, and is simple to configure for the RP600.
Add the host print queue name into /etc/printcap, and then specify the remote
node name (the host name of the RP600) and the service name on the RP600.
NOTE: There are slight variations in LPR configuration for AIX, HP,
SCO, Solaris, ULTRIX, UNIX, and Windows NT hosts; after
reading this section, refer to the following sections for configuration information.
NOTE: Windows 95 does not support LPR directly, however, there are
third party solutions available.
To add a print queue for an RP600 interface, add the RP600 name and IP address
to the /etc/hosts file:
Figure 7-1: Adding Name and IP Address
xxx.xxx.xxx.xxx
LPS_xxxxxx
Edit the /etc/printcap file and add an entry of the following form:
Figure 7-2: Editing /etc/printcap File
lps|Printer on LAB LPS:\
:rm=LPS_xxxxxx:\
:rp=LPS_xxxxxx_TEXT:\
:sd=/usr/spool/lpd/lps_prt:
Note that the punctuation shown is required, and that no extra spaces should be
added. This creates a host queue named lps_prt. The rm parameter is the name
of the RP600 in the host's address file, the rp parameter is the name of the service
as it exists on the RP600, and the sd parameter specifies the name of a directory
used to hold temporary spooling files.
DIGITAL Laser Printer LN15 Ethernet User Manual
7-2
TCP/IP Configuration
The spooling directory must be created using the mkdir command and should be
world writable.
Figure 7-3: Creating Spooling Directory
# mkdir /usr/spool/lpd/lps_prt
# chmod 777 /usr/spool/lpd/lps_prt
In addition, the mx option allows unlimited size files to be printed and the sh
option prevents header pages from being generated. See the host’s documentation
or man pages for more information on the format of the printcap file and how to
create the spool directory.
After adding the queue entry to the printcap file, use the lpc status command to
display the queue:
Figure 7-4: lpc Status Command
% lpc status
lps_prt:
queuing is enabled
printing is enabled
no entries
no daemon present
Print to the queue using normal lpr commands:
Figure 7-5: Printing to Queue
% lpr -Plps_prt /etc/hosts
DIGITAL Laser Printer LN15 Ethernet User Manual
7-3
TCP/IP Configuration
7.3 Notes About LPR
There are five important things to note about the LPR printing method:
•
Because of the way the LPR protocol is typically implemented on the host, the processing options and the banner
page are sent after the job data itself. Because of this, the
RP600 prints banner pages at the end of a job, and cannot support most of the LPR options. If it is necessary to
have the banner page at the beginning of the printout, install
and use the RTEL software.
•
The RP600 cannot print multiple copies of the print job
when the “-#x” lpr option is used.
•
If banners are not needed, they can be disabled on custom
services using the following RP600 commands:
Figure 7-6: Disabling Banners
Local>> DEFINE SERVICE service_name BANNER DISABLED
NOTE: Banners cannot be disabled on default services (for example,
the default text service, LPS_xxxxxx_TEXT.)
•
Many LPR spoolers are not intelligent about using multiple
queues on one host. If two queues on the print host refer to
two services on the same RP600, they must use separate
spooling directories. If only the default directory is used,
data from the 2 queues can be intermixed or sent to the
wrong RP600 service.
•
No special purpose input or output filters can be used when
printing via LPR. If this functionality is necessary, use the
named pipe interface program in the RTEL software.
DIGITAL Laser Printer LN15 Ethernet User Manual
7-4
TCP/IP Configuration
7.3.1 LPR on AIX Hosts
LPR is available on machines running IBM’s AIX operating system versions 3.2
and higher. Print queues on AIX hosts can be configured using either UNIX commands or the SMIT application.
7.3.1.1 Using UNIX Commands
Using LPR on AIX hosts involves a slightly different configuration procedure.
The queue configuration file is /etc/qconfig and the format of the entry is different. Note the lack of colons (:) and the required white space.
Figure 7-7: Adding to Printcap Entry
lps_prt:
device = lps_prtd
up = TRUE
host = LPS_xxxxxx
s_statfilter = /usr/lpd/aixshort
l_statfilter = /usr/lpd/aixlong
rq = LPS_xxxxxx_TEXT
lps_prtd:
backend = /usr/lpd/rembak
Note that the device name is simply the queue name with a “d” appended.
7.3.1.2 Using SMIT
The System Management Interface Tool (SMIT) allows you to enable LPD printing and create print queues.
1.
At the host prompt type smit.
2.
From the main window in the application choose Print
Spooling.
3.
Then choose Manage Print Server and Start the Print
Server Subsystem (lpd daemon).
4.
In the Start the Print Server Subsystem dialog box, type both
in the first field. Click OK.
‘The lpd subsystem has been started’ will appear in the
Output section of the next window. Click Done.
DIGITAL Laser Printer LN15 Ethernet User Manual
7-5
TCP/IP Configuration
To add a print queue use the following instructions.
1.
From the main window choose Print Spooling.
2.
Then choose Manage Print Server and Manage Print
Queues.
3.
Next, choose Add a print queue.
4.
From the dialog box that appears choose remote.
5.
From the next dialog box choose the type of remote printing.
6.
Add the following information to the Add a Standard
Remote Print queue dialog box:
Figure 7-8: Adding a Print Queue
Name of QUEUE to add: queue_name
HOSTNAME of remote server: LPS_xxxxxx
Name of QUEUE on remote server: LPS_xxxxxx_PCL
TYPE of print spooler on remote server: BSD
DESCRIPTION of printer on remote server:
A dialog box will appear with the message “Added print
queue.”
To print, the normal lp syntax is used:
Figure 7-9: Printing to Queue
% lp -dlps_prt filename
DIGITAL Laser Printer LN15 Ethernet User Manual
7-6
TCP/IP Configuration
7.3.2 LPR on HP Hosts
LPR is supported in HP/UX Version 9.0 and greater. Print queues on HP hosts
can be configured using either UNIX commands or the SAM application.
7.3.2.1 Using UNIX Commands
To configure a print queue using LPR, become the superuser on your host and
issue the following commands:
Figure 7-10: Configuring a Print Queue Using UNIX Commands
# /usr/lib/lpshut
# /usr/lib/lpadmin -plps_prt -v/dev/null -mrmodel \
-ocmrcmodel -osmrsmodel -ormLPS_xxxxxx -orpLPS_xxxxxx_PCL
# /usr/lib/accept lps_prt
# /usr/bin/enable lps_prt
# /usr/lib/lpsched
NOTE: Note that the remote printer name can only be 14 characters so
the default text service name will not work.
Note that issuing the lpshut command stops the HP spooling system, so this
command should not be performed when print jobs are active. The lpadmin
command adds the print queue. The accept command tells the queueing system
that the queue is accepting requests and the enable command enables the print
queue so it can start printing. Finally, the lpsched command restarts the queuing
system. To print to this queue, normal lp syntax is used:
Figure 7-11: Printing to Queue
# lp -dlps_prt filename
DIGITAL Laser Printer LN15 Ethernet User Manual
7-7
TCP/IP Configuration
7.3.2.2 Using SAM
The System Administration Manager (SAM) allows you to create print queues.
1.
At the HP prompt type sam.
2.
From the main application window choose Printers and
Plotters. Click Open.
3.
Choose Printers/Plotters from the Printers and Plotters
window.
4.
In the Actions pull-down menu select Add Remote Printer/
Plotter.
5.
Enter the following information:
Figure 7-12: Configuring a Print Queue
Printer name: queue_name
Remote system name: LPS_xxxxxx
Remote printer name: LPS_xxxxxx_PCL
Remote cancel model: rcmodel
Remote status model: rsmodel
7.3.3 LPR on SCO UNIX Hosts
LPR is supported in SCO V3.2 release 4 with TCP/IP Version 1.2 and greater. To
configure a print queue using LPR, issue the following command:
Figure 7-13: Installing Print Files
# mkdev rlp
This installs the Berkeley remote printing files and executable programs.
NOTE: The mkdev rlp command should only be done once. If the command is used repeatedly, serious problems will result with the
machine. If this occurs, contact SCO technical support.
DIGITAL Laser Printer LN15 Ethernet User Manual
7-8
TCP/IP Configuration
To create a remote printer, use the following command:
Figure 7-14: Creating Remote Printer
# rlpconf
This command asks the following questions and creates a printcap entry for the
specified queue:
Figure 7-15: Configuring the Remote Printer
Remote Printing Configuration
Enter information for remote printers or local printers accepting remote printing requests
Please enter the printer name (q to quit): lps_xxxxxx_text
Is printer lps_xxxxxx_text a remote printer or a local printer? (r/l) r
Please enter the name of the remote host that lps_xxxxxx_text
is attached to: lps_xxxxxx
The lps_xxxxxx_text is connected to host lps_xxxxxx
Is this correct? (y/n)
Would you like this to be the sys.default printer? (y/n) n
Make sure your hostname appears in lps_xxxxxx’s
/etc/hosts.equivor or /etc/hosts:lpd file.
Make sure lps_xxxxxx_text appears in /etc/printcap (in BSD
format).
Make sure lps_xxxxxx_text has a spool directory on
lps_xxxxxx.
Putting lps_xxxxxx_text in printer description file and creating spool directory... done
Updating LP information... done
Keep in mind that the printer name must be the same as the service name on the
RP600. If you’d like to change the printer name at a later point, it can be changed
by manually editing the printcap file.
To print to this queue, normal lp syntax is used:
DIGITAL Laser Printer LN15 Ethernet User Manual
7-9
TCP/IP Configuration
Figure 7-16: Printing to Queue
# lp -dlps_xxxxxx_text filename
7.3.4 LPR on Solaris Hosts
The following commands configure a BSD print queue on a Solaris 2.3 system.
These commands require that you are the superuser and in the bourne shell.
Figure 7-17: Creating a BSD Print Queue
# /usr/lib/lpsystem -t bsd lps_xxxxxx
# /usr/lib/lpadmin -p lps_prt -s
lps_xxxxxx|lps_xxxxxx_text /usr/lib/accept
lps_prt
# enable lps_prt
NOTE: LPR is not reliable on Solaris machines. Users with Solaris
hosts should use the Digital-supplied RTEL software instead.
7.3.5 LPR on ULTRIX Hosts
ULTRIX hosts need the following additional information added to the printcap
entry:
Figure 7-18: Adding to Printcap Entry
lps_prt|Printer on LAB LPS:\
:lp=:ct=remote:\
:rm=LPS_xxxxxx:\
:rp=LPS_xxxxxx_TEXT:\
:sd=/usr/spool/lpd/lps_prt:
These additional options show that there is no physical device for this queue and
tell the host that this is a remote connection.
DIGITAL Laser Printer LN15 Ethernet User Manual
7-10
TCP/IP Configuration
To print to this queue, normal lp syntax is used:
Figure 7-19: Printing to Queue
# lp -dlps_prt filename
7.3.6 LPR on Windows NT
The following procedure configures an lpr print queue.
NOTE: This installation assumes that the TCP/IP protocol, Simple
TCP/IP services, and Microsoft TCP/IP printing have been
installed in Windows NT.
Open the NT PrintManager; its icon is located in the Main window on the desktop. Choose Create Printer from the Printer menu.
Figure 7-20: Create Printer Dialog Box
NOTE: If the printer driver isn’t already installed, you’ll need the Windows NT installation disks.
LPS_PRT
In the Printer Name box, enter the name of the queue on the NT host. Click the
Driver menu arrow; select the required printer driver from the pull-down menu.
Enter a description string in the Description box. If applicable, choose the Share
this printer on the network option. (This is not recommended until the print
queue is confirmed to be running properly.)
DIGITAL Laser Printer LN15 Ethernet User Manual
7-11
TCP/IP Configuration
Click the Print To menu arrow to view its pull-down menu. Scroll to the
OTHER option. The following dialog box appears:
Figure 7-21: Print Destinations Dialog Box
Choose LPR Port and click the OK button.
In the next dialog box, provide the following information and click OK:
Figure 7-22: LPR Dialog Box
lps_xxxxxx_text
A printer specific dialog box appears next. Fill out the information in the box and
click OK.
If you’d like this printer to be the default printer, click the Default menu arrow on
the Printer Manager’s title bar and scroll to the printer’s name.
DIGITAL Laser Printer LN15 Ethernet User Manual
7-12
TCP/IP Configuration
7.4 RTEL Functionality
If the LPR method of printing is not adequate for an application, (banners needed
before jobs, more flexibility needed in printing, etc.). RTEL software can be configured on the host. After installing the software and configuring connections to
the RP600, normal UNIX print commands can be used and normal queue utilities
(lpc, lpstat, etc.) will be usable.
NOTE: RTEL Binaries are provided for many systems as well as
source code for use on non-supported systems.
To print to the RP600 using special formatting or using third-party software
packages it may be necessary to create “print pipes” on the host. The RTEL software provides this functionality by providing a UNIX named-pipe interface.
To recreate the RTEL source files, copy the file RTEL_SRC.TAR from the distribution media to the UNIX host. Ensure that a binary copy is performed. Untar the
archive using the following command:
Figure 7-23: Untarring the Archive
# tar xvf
rtel_src.tar
There will be README files in the created directories that describe the contents
of the RTEL distribution and various man pages that describe the actual software
functionality.
7.5 TCP Socket Connections
If custom queuing software has been designed on a host, raw TCP/IP (or Telnet)
connections can be made directly to the RP600 parallel port. Opening a TCP session to port 3001 will form a direct connection to the parallel port on the RP600.
If Telnet IAC interpretation is needed, form a connection to port 2001. If the port
is in use, the connection will be refused.
DIGITAL Laser Printer LN15 Ethernet User Manual
7-13
Additional Configuration
8 - Additional Configuration
8.1 Overview
This chapter discusses some additional configurable attributes on the RP600.
These aspects include system passwords, server name, service names, and port
characteristics.
8.2 System Passwords
There are two important passwords on the RP600: the privileged password and
the login password.
NOTE: If you choose to change either password, the new password must be no more than 6 alphanumeric characters.
For security purposes, you should use a mix of letters
and numbers in each password.
8.2.1 Privileged Password
Changing any server, site, or port setting requires privileged user status. The
RP600 softwre will prompt you for the privileged password when it is needed. If
you are not using the RP600 software, you will need to enter the Set Privileged
command at the Local> prompt to become the privileged user. The default privileged password on RP600 is system.
Figure 8-1: Set Privileged Command
Local> SET PRIVILEGED
Password> system (not echoed)
Local>>
The prompt will change to reflect privileged user status. Only one user can be the
privileged user at a time. If another user is currently logged into the RP600 as the
privileged user, use the Set Privileged Override command to forcibly become the
privileged user.
DIGITAL Laser Printer LN15 Ethernet User Manual
8-1
Additional Configuration
To change the privileged password, use the Set/Define Server Privileged Password command. The following figure displays an example of this command.
Figure 8-2: Changing Privileged Password
Local> SET PRIVILEGED
Password> system (not echoed)
Local>> DEFINE SERVER PRIVILEGED PASSWORD “walrus”
8.2.2 Login Password
The login password is required for remote console logins. The default login password is access. To change the login password, use the Set/Define Server Login
Password command. The following is an example.
Figure 8-3: Changing Login Password
Local> SET PRIVILEGED
Password> system (not echoed)
Local>> DEFINE SERVER LOGIN PASSWORD “badger”
The login password is also used to log the RP600 into NetWare file servers. If the
login password is changed, NetWare print queue setups must also be changed to
reflect the new password.
DIGITAL Laser Printer LN15 Ethernet User Manual
8-2
Additional Configuration
8.3 Server and Service Names
The default server name (LPS_xxxxxx) can be changed using the following commands:
Figure 8-4: Changing Server Name
Local>> SET SERVER NAME biolab
Local>> DEFINE SERVER NAME biolab
Changing the server name automatically changes the names of the default services. In the example above, the server name is changed to BIOLAB and the
default service names will automatically be changed to BIOLAB_TEXT,
BIOLAB_PCL, and BIOLAB_PS. Because the default service names are based
on the server name, the server name can not be move than 12 characters.
Note that host queues may have to be reconfigured if the server and service
names are changed.
8.4 Autosensing Printers
The DIGITAL Laser Printer LN15 (and many other printers) support autoselection of job types. When autoselection is supported, print jobs can be queued to
the LPS_xxxxxx_PS and LPS_xxxxxx_TEXT services in any order; the printer
will automatically change its mode to fit the service being used.
NOTE: Refer to your printer’s documentation to determine if
your printer supports autoselection of job types.
DIGITAL Laser Printer LN15 Ethernet User Manual
8-3
Troubleshooting
A - Troubleshooting
A.1 Overview
This appendix discusses how to overcome a number of problems. If after reading
this section you can’t solve your problem, contact Digital.
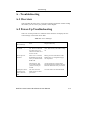
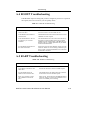
A.2 Power-Up Troubleshooting
There are several possible error situations if the unit does not display the welcome message or the LEDs do not flash:
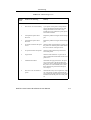
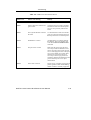
Table A-1: Error Messages
Power/
Error Message
Error
Diagnosis/Remedy
Power-up diagnostic failure
Usually a hardware failure. The ACT LED will
be solid red for 3 seconds, then another color
for one second.
Note which LED is blinking and its
color, then contact your dealer or Digital.
Power-up error
detected
If the error is non-fatal,
the RP600 will boot but
not try to load the Flash
ROM code.
Briefly press the Test button on the
RP600 panel. A configuration page
will be printed.
Network Error. The
ACT LED will blink
yellow 2-3 times per
second.
A boot failure has occurred. Once
booted and running normally, the ACT
LED will blink once every 2 seconds.
The ACT LED will
blink yellow 2-3 times
per second.
You will need to reload Flash ROM.
Attempts to download new code
from a network
host.
DIGITAL Laser Printer LN15 Ethernet User Manual
A-1
Troubleshooting
A.3 Printing Problems
The procedures discussed in this section begin at the most basic troubleshooting
level.
Table A-2: Printing Problems
Area to Check
Explanation
Verify that the IP address is unique
to the unit
There is a duplicate IP address on the network if:
Telnet/Rlogin connections fail soon after connecting,
or ARP requests do not resolve a host known to be
working.
The server either loses its IP address when booting or
will not allow a new IP address to be configured.
Monitor RP600 Queue Status and
Port Counters
Use the Show/Monitor Queue command to see if a
queue entry appears in the job list. If a queue entry
does not appear on the RP600, refer to the appropriate host section in this Appendix.
If an active queue entry appears, use the Monitor
Port 1 Counters command. If the output byte
counter is not incrementing, verify the connection
between the RP600 and the printer.
A.3.1 LPD Host Troubleshooting
Table A-3: LPD Host TroubleshootingVMS Host Troubleshooting
Area to Check
Explanation
Verify that the RP600 IP address and
name were entered properly in the
host file.
Telnet to the RP600 using the name in the host file
and verify that theRP600 name is resolvable and
that the RP600 is reachable via the network.
DIGITAL Laser Printer LN15 Ethernet User Manual
A-2
Troubleshooting
Area to Check
Explanation
Verify that jobs which appear in the
host queue reach the RP600.
From within the LPC administrative utility, enter
the following commands:
Become superuser on the host, and clear and reset
the host queue using the following commands:
abort queue_name, clean queue_name, enable
queue_name, and start queue_name.
These commands will kill the currently executing
daemon, remove all old entries in the queue,
enable the queue to accept new entries, and restart
job processing.
DIGITAL Laser Printer LN15 Ethernet User Manual
A-3
Troubleshooting
By default, the LAT error message codes on the host are not translated into text
error messages. If a LAT job fails and appears in the queue with an eight-digit
hex result code, the code can be translated by issuing the following commands:
Figure A-1: Translating LAT Error Codes
$ SHOW QUEUE/FULL/ALL queue_name
(note the error code nnnnnnnn)
$ SET MESSAGE SYS$MESSAGE:NETWRKMSG.EXE
$ EXIT %Xnnnnnnnn
When configuring a LAT device on a VMS host using a port name:
Area to check
Explanation
Verify that the specified node name
matches the server’s node name.
Use the Show Server command on the RP600.
When configuring a LAT device on a VMS host using a service:
Area to check
Explanation
Verify that the specified node name
matches the server’s node name.
Use the Show Server command on the RP600.
Verify that the service name used
matches the service name.
Use the Show Service Local Characteristics
command on the RP600.
Verify that the desired service is available.
Use the Show Service Local Characteristics
command from a network login. If the service rating is zero, the parallel port is in use.
Verify that the LAT characteristic has
been enabled on the service.
Use the Show Service Local Characteristics
command from a network login.
Verify that the LAT symbiont is specified as the queue process on the VMS
host.
Use the VMS command Show Queue/Full
queue_name to see the queue characteristics.
If a connection attempt has been unsuccessful when initially configuring a LTA
device, the LAT host software may become confused. Deleting and re-creating
the LTA port is often required to successfully connect to the RP600.
DIGITAL Laser Printer LN15 Ethernet User Manual
A-4
Troubleshooting
A.3.2 NetWare Host Troubleshooting
If the queue was created manually using PCONSOLE, delete the queue and recreate it using QINST or verify the steps used to create the queue; these are listed
in Using PCONSOLE.
Table A-4: NetWare Host Troubleshooting
Area to Check
Explanation
Verify that the server and queue
names appear and match the server
and service name.
Use PCONSOLE.
Verify that the NetWare access table
will allow access to the specified file
server.
By default, only local (non-routed) file servers are
scanned for queues.
Verify that the login password on the
RP600 and the queue password on
the file server match.
If the passwords do not match, the RP600 will not
be able to log into the file servers to scan for jobs.
Scanning too many file servers can
cause a delay between jobs.
Configure the access list to only scan for jobs on the
file servers of interest.
DIGITAL Laser Printer LN15 Ethernet User Manual
A-5
Troubleshooting
The following section assumes that the Novell queue was created using PCONSOLE’s Quick Set-Up option. If you experience NDS printing problems, try the
following steps:
Area to Check
Explanation
Verify that the print server has successfully attached to the queue.
Type NETSTAT at the Local> prompt. This will
display information about fileservers, printers, and
queues that the print server has found. If a queue is
in JobPoll then the print server has successfully
attached to the queue.
Verify that the DSTree, DSContext,
and DSLicensed are correct.
Type Show Protocol NetWare NDS. This command shows the tree and the context that you have
configured, a failure code, and an NDS error code
for each NDS server.
DSTree is the directory service tree on which the
print server is located. DSContext is the context
where the print server is located. DSLicensed
should be yes.
Table A-5 and Table A-6 show the failure codes and
the NDS error codes that may appear.
Verify that the printer and queue
changes that you have made propagate through the NDS tree.
It may take a few minutes for the changes to propagate through the NDS tree. If you type Set Protocol
NetWare Reset at the Local> prompt and all the
queues don’t show up, wait a few minutes and try it
again.
DIGITAL Laser Printer LN15 Ethernet User Manual
A-6
Troubleshooting
Table A-5: NDS Printing Errors
Failure
Code
Failure Code Meaning
Remedy
0
Success
1
Print server ran out of memory. Cycle power on the printer. If the problem
persists, disable the unused protocols and
change the NetWare access list to only
include file servers which have print queues
associated with them.
2
Unexpected response from
fileserver.
Report the problem to Digital Technical Support.
3
Unexpected response from
fileserver.
Report the problem to Digital Technical Support.
4
No printers found for the print
server.
Check to make sure that there are printers for
the print server and the printer names match
the service names on the print server.
5
No queue found for the printer.
Check to make sure that the printers have
associated queues.
6
Login failed.
Check to make sure there is a print server
object configured with the same name as the
print server.
7
Authentication failed.
Check that the login password on the print
server is the same as the password for the
print server object. If the login password on
the print server is the default (access) then
there should be no password for the print
server object.
8
Print server can not attach to
queue.
Check the directory services partitions, replicas, and volumes to make sure that the file
server where the queue actually lives has the
information about the print server and printers.
DIGITAL Laser Printer LN15 Ethernet User Manual
A-7
Troubleshooting
Table A-6: NDS Errors from the File Server
Failure code
Failure code meaning
Remedy
0
Success
fffffda7
Object could not be found in the
given context.
Check the print server name, dscontext,
and dstree to make sure that the printer
server is set up correctly with PCONSOLE.
fffffda5
The requested attribute could not
be found.
Use PCONSOLE to make sure that the
print server has associated printers and
that the printers have associated queues.
fffffd69
DS Database is locked.
An administrator is probably updating
the database. Wait a few minutes and
issue the Set Protocol NetWare Reset
command.
fffffd63
The password is invalid.
Make sure the password for the print
server object under PCONSOLE is the
same as the login password for the print
server. If the login password on the print
server is the default (access) then there
should be no password for the print
server object. If the login password is
something other than the default, then the
password for the print server object
should match.
fffffd54
Secure NCP violation.
The file server is probably requiring NCP
packet signature or IPX checksumming,
neither of which is currently supported.
DIGITAL Laser Printer LN15 Ethernet User Manual
A-8
Troubleshooting
A.4 BOOTP Troubleshooting
If the BOOTP request is failing and you have configured your host to respond to
the request, there are a few areas you can quickly check:
Table A-7: BOOTP Troubleshooting
Area to Check
Explanation
Is BOOTP in your system’s /
etc/services file?
BOOTP must be an uncommented line in the
/etc/services file as a real TCP/IP service.
Is the RP600 in the loadhost’s
/etc/hosts file?
The RP600 must be in this file for the host to answer
a BOOTP or TFTP request.
Is the download file in the correct directory? Is it worldreadable?
The download file has to be in the correct directory
and must be world-readable.Specify the complete
pathname for the download file in the BOOTP configuration file or, a default pathname may be added
to the download filename.
Are the RP600 and the host in
the same IP network?
Some hosts will not allow BOOTP replies across IP
networks. Either use a host running a different operating system, or change the RP600 to be in the same
IP network as the host.
A.5 RARP Troubleshooting
Table A-8: RARP Troubleshooting
Area to Check
Explanation
Are theRP600 name and hardware address in the host’s /etc/
ethers file?
The RP600 and it’s hardware address must be in
this file for the host to answer a RARP request.
Are the RP600 and its IP
address in the /etc/hosts file?
The RP600 and it’s IP address must be in this file
for the host to answer a RARP request.
Does your operating system
start a RARP server at boot
time?
Many do not. Check the host’s RARPD documentation for details, or use the ps command to see if
there is a RARPD process running.
DIGITAL Laser Printer LN15 Ethernet User Manual
A-9
Troubleshooting
A.6 PostScript Problems
PostScript printers can create problems, as they will silently abort jobs if they
detect an error.
The following procedures start at the most basic troubleshooting level and progressively work up to printing from the host system.
Table A-9: PostScript Troubleshooting
Area to Check
Explanation
Verify that the RP600 is communicating with the printer.
To test a PostScript printer use the Test Port 1 PostScript Count 2. This command will process 2
pages of PostScript data. Watch the indicators on
the printer to verify that the RP600 is communicating with the printer.
Because the printer is capable of bidirectional communication, use the command Test Service
RP600_xxxxxx_PS PostScript Count 5. This will
transfer data both to and from the printer. Autoselection must be disabled and the printer must be
configured as a PostScript printer for this test to
succeed.
Verifying Service Characteristics
To display service characteristics, use the Show
Service Characteristics command. If the service
rating is zero, the internal port is in use. Verify that
the PostScript characteristic has been enabled on the
service being used. Also, verify that the appropriate
protocols for the service are enabled.
DIGITAL Laser Printer LN15 Ethernet User Manual
A-10
Troubleshooting
Area to Check
Explanation
Monitor Port Counters
If PostScript jobs appear to print but nothing comes
out of the printer, verify the amount of data sent
from the host.
Then use the Zero Counter All command to zero
the counters.
Issue the appropriate print command from the host
system. After the job has completed, issue the Show
Port 1 Counters command.
The bytes output value should be approximately 171
bytes greater than the size of the file on the host system. These numbers are only approximate, but will
show that data is flowing to the printer.
DIGITAL Laser Printer LN15 Ethernet User Manual
A-11
Specifications
B - Specifications
B.1 Temperature Limitations
NOTE: Rapid temperature changes may affect operation. Therefore, do not operate the RP600 near heating or cooling
devices, large windows, or doors that open to the outside.
Operating range:
5° to 50°C (41° to 122°F)
Storage range:
-40° to 66°C (-40° to 151°F)
Maximum temperature
change per hour:
20°C (36°F)
B.2 Altitude Limitations
Operating:
2.4 km (8000 ft)
Storage:
9.1 km (30,000 ft)
If you are operating the RP600 above 2.4 km (8000 ft), decrease the operating
temperature rating by 1.8°C for each 1000 m (1°F for each 1000 ft).
B.3 Relative Humidity Limitations
Operating:
10% to 90% (noncondensing)
(40% to 60% recommended)
Storage:
10% to 90% (noncondensing)
DIGITAL Laser Printer LN15 Ethernet User Manual
B-1
Updating Software
C - Updating Software
C.1 Overview
The latest version of the RP600 software and its associated release notes can be
downloaded directly from the Digital development systems in one of two ways,
via dial-in modem or using anonymous ftp through the Internet.
DIGITAL Laser Printer LN15 Ethernet User Manual
C-1
Updating Software
C.2 Reloading RP600 Software
The RP600 stores its software in Flash ROM. This software controls the initialization process, the operation of the RP600, and the processing of commands.
The contents of Flash ROM can be updated by downloading a new version of the
operational software.
The RP600 can be reloaded from network hosts using NetWare, TCP/IP, or MOP.
Reloading instructions are given beginning on the following page. Regardless of
which protocol is used to update Flash ROM, the following points are important:
•
The Flash ROM software is contained in a file called
LPS.SYS (a copy of this file is provided with the RP600 on
the DIGITAL Laser Printer LN15 CD-ROM). This file must
be accessible when updating Flash ROM.
•
The LPS.SYS download file should be world-readable on the
host, regardless of which download method is being used. In
addition, there is an fifteen character length limit for the
pathname and a eleven character limit for the filename.
NOTE: It is very important to check the RP600 settings before using
the Initialize Reload command; ensure that you are reloading
the correct software file.
•
Define commands are used because configuration done with
Set commands are cleared when the RP600 boots. Use the
List Server Boot command to check the RP600 settings
before using the Initialize Reload command.
DIGITAL Laser Printer LN15 Ethernet User Manual
C-2
Updating Software
The reloading sequence is as follows:
1.
If BOOTP or RARP is enabled on the RP600 it will request
assistance from a BOOTP or RARP server before starting
the download attempts. The RP600 will then try TFTP, NetWare, and MOP booting, in that order, provided that it has
enough information to try each download method.
2.
Downloading and rewriting the Flash-ROM will take
approximately two minutes from the time the Initialize command is issued. If more than two minutes has elapsed and the
server has not successfully booted, press the button on the
front panel of the RP600. A brief page will be queued to the
parallel port and printed, describing the problem.
3.
If the download file could not be found or accessed, the
RP600 can still be booted with the code in Flash ROM. As
noted in Chapter 2, the OK/Activity LED will blink quickly
while the RP600 is booting (and reloading code) and then
slowly when it returns to normal operation.
NOTE: If you experience problems reloading Flash ROM, refer to
Troubleshooting Flash ROM Updates on page 5.
C.2.1 NetWare
The LPS.SYS file should be placed in the login directory on the NetWare file
server. The RP600 cannot actually log into the file server (since it knows no username/password); it can only access files in the login directory itself. On the
RP600, specify the file server name, filename and path:
Figure B-1: Reloading Flash ROM From NetWare
Local>> DEFINE SERVER NETWARE LOADHOST fileserver
Local>> DEFINE SERVER SOFTWARE “sys:\login\lps.sys”
Local>> LIST SERVER BOOT
Local>> INITIALIZE RELOAD
DIGITAL Laser Printer LN15 Ethernet User Manual
C-3
Updating Software
C.2.2 TCP/IP
Downloading uses the TFTP (Trivial File Transfer Protocol) and optionally
BOOTP. The RP600 will do a BOOTP query each time it boots. If a host provides
BOOTP support, it can be used to set the RP600's IP address and loadhost information. Add the RP600's name, IP address, hardware address, and download path
and filename to the BOOTP file (usually
/etc/bootptab).
Some BOOTP and TFTP implementations require a specific directory for the
LPS.SYS file; in this case the path should not be specified in the bootptab file and
the file must be placed in that directory. See your host’s documentation for
instructions on how to configure the LPS.SYS file in the directory.
If BOOTP cannot be used to configure the RP600's IP parameters, configure
them by hand using the following commands listed below.
NOTE: For instructions on how to log into the RP600 and enter these
commands, refer to Chapter 7, TCP/IP Configuration.
Figure B-2: Reloading Flash ROM From TCP/IP
Local>> DEFINE SERVER IPADDRESS xxx.xxx.xxx.xxx
Local>> DEFINE SERVER SOFTWARE “/tftpboot/LPS.SYS”
Local>> DEFINE SERVER LOADHOST xxx.xxx.xxx.xxx
Local>> LIST SERVER BOOT
Local>> INITIALIZE RELOAD
The path and filename are case-sensitive and must be enclosed by quotation
marks (“ “). If attempting to boot across an IP router, the router must be configured to perform proxy ARPing for the RP600.
DIGITAL Laser Printer LN15 Ethernet User Manual
C-4
Updating Software
C.2.3 MOP
Copy the LPS.SYS file to the MOM$LOAD directory. The LPS.SYS filename is
the only parameter that the RP600 needs to reload via MOP. Make sure the service characteristic is enabled on the host's Ethernet circuit, and then reload the
server using the following commands:
Figure B-3: Reloading Flash ROM From VMS
Local>> INITIALIZE RELOAD
NOTE: If the error message “xxx byte record too large,” is displayed
on the VAX console the LPS.SYS file was not transferred in
binary mode.
C.3 Troubleshooting Flash ROM Updates
Many of the problems that occur when updating Flash ROM can be solved by
completing the following steps:
NetWare
Make sure the file is in the login directory. Since the RP600
cannot actually log into the file server, it has very limited
access to the server directories.
TFTP
Check the file and directory permissions. Make sure the
loadhost name and address are specified correctly and that
their case matches the case of the filenames on the host system. Ensure that the host has TFTP enabled; several major
UNIX vendors ship their systems with TFTP disabled by
default.
MOP
The Ethernet circuit must have the service characteristic
enabled. Verify that the MOM$LOAD search path includes
the directory containing the LPS.SYS file.
DIGITAL Laser Printer LN15 Ethernet User Manual
C-5