1
Océ User manual
Océ Windows Printer Driver
User manual
Océ-Technologies B.V.
Copyright
©
2007, Océ
All rights reserved. No part of this work may be reproduced, copied, adapted, or
transmitted in any form or by any means without written permission from Océ.
Océ makes no representation or warranties with respect to the contents hereof and
specifically disclaims any implied warranties of merchantability or fitness for any
particular purpose.
Further, Océ reserves the right to revise this publication and to make changes from
time to time in the content hereof without obligation to notify any person of such
revision or changes.
Edition 2.8.1
US
Trademarks
Trademarks
Océ, Océ Windows Printer Driver are registered trademarks of Océ-Technologies
B.V.
Microsoft®, Windows® , Windows NT®, Windows 98®, Windows 2000®, Windows
XP®, Windows Server 2003®, Windows® Vista™ are either registered trademarks or
trademarks of Microsoft® Corporation in the United States and/or other countries.
Adobe®, Acrobat®, Reader® and Distiller® are registered trademarks of Adobe®
Systems Incorporated.
Novell™ is a registered trademark of Novell, Inc., in the United States and other
countries.
Citrix® MetaFrame™ is a registred trademark of Citrix Systems, Inc.
Products in this publication are referred to by their general trade names. In most, if
not all cases, these designations are claimed as trademarks or registered trademarks
of their respective companies.
3
Trademarks
4
Table of Contents
Table of Contents
Chapter 1
Introduction . . . . . . . . . . . . . . . . . . . . . . . . . . . . . . . . . . . . . . . . . . . . . . . . . . . . . . . 9
Principle . . . . . . . . . . . . . . . . . . . . . . . . . . . . . . . . . . . . . . . . . . . . . . . . . . 10
What is an Océ Windows Driver? . . . . . . . . . . . . . . . . . . . . . . . . . . . . 10
Workflow to print using an Océ Windows Driver . . . . . . . . . . . . . . . . . 11
Compatibility . . . . . . . . . . . . . . . . . . . . . . . . . . . . . . . . . . . . . . . . . . . . . . 12
Océ Windows Printer Driver 1.15 compatibility topics. . . . . . . . . . . . . 12
Check your Océ TDS printer version . . . . . . . . . . . . . . . . . . . . . . . . . 14
Check your Océ 9x00 printer version . . . . . . . . . . . . . . . . . . . . . . . . . 16
Configuration requirements . . . . . . . . . . . . . . . . . . . . . . . . . . . . . . . . . . . 18
Configuration requirements for Océ Windows drivers. . . . . . . . . . . . . 18
Presentation of the Océ Windows Printer Driver . . . . . . . . . . . . . . . . . . . 19
Access the Océ Windows driver . . . . . . . . . . . . . . . . . . . . . . . . . . . . . 19
Structure of the Océ Windows Printer Driver . . . . . . . . . . . . . . . . . . . 20
Printing Preferences/Document Defaults in Océ WPD . . . . . . . . . . . . 22
Device configuration . . . . . . . . . . . . . . . . . . . . . . . . . . . . . . . . . . . . . . 24
Chapter 2
Installation and upgrade . . . . . . . . . . . . . . . . . . . . . . . . . . . . . . . . . . . . . . . . . . . .
Installation-Introduction . . . . . . . . . . . . . . . . . . . . . . . . . . . . . . . . . . . . . .
Install Océ WPD - Before you begin . . . . . . . . . . . . . . . . . . . . . . . . . . . .
Define the correct installation method . . . . . . . . . . . . . . . . . . . . . . . . . . .
Install Océ Windows Printer Driver using the setup method . . . . . . . . . .
Install Océ WPD after a web download. . . . . . . . . . . . . . . . . . . . . . . .
Install Océ WPD from the Océ Drivers Pack CD . . . . . . . . . . . . . . . .
Install Océ Windows Printer Driver using Add a printer method . . . . . . .
Install Océ WPD using the 'Add (a) printer' method . . . . . . . . . . . . . .
Configure printer information (administrator only) . . . . . . . . . . . . . . . . . .
Connect to the printer . . . . . . . . . . . . . . . . . . . . . . . . . . . . . . . . . . . . .
Define the device settings . . . . . . . . . . . . . . . . . . . . . . . . . . . . . . . . .
'Back-channel configuration' . . . . . . . . . . . . . . . . . . . . . . . . . . . . . . . .
'Advanced accounting' checkbox . . . . . . . . . . . . . . . . . . . . . . . . . . . .
'Feed definition' / 'Number of feeds' . . . . . . . . . . . . . . . . . . . . . . . . . .
Configure the 'External finishers'. . . . . . . . . . . . . . . . . . . . . . . . . . . . .
'Folder' options . . . . . . . . . . . . . . . . . . . . . . . . . . . . . . . . . . . . . . . . . .
Uninstall . . . . . . . . . . . . . . . . . . . . . . . . . . . . . . . . . . . . . . . . . . . . . . . . . .
Uninstall the Océ Windows driver . . . . . . . . . . . . . . . . . . . . . . . . . . . .
Upgrade . . . . . . . . . . . . . . . . . . . . . . . . . . . . . . . . . . . . . . . . . . . . . . . . . .
Upgrade the driver . . . . . . . . . . . . . . . . . . . . . . . . . . . . . . . . . . . . . . .
25
26
27
28
29
29
31
32
32
33
33
35
36
38
39
40
41
42
42
43
43
5
Table of Contents
Chapter 3
Océ Windows Printer Driver Settings . . . . . . . . . . . . . . . . . . . . . . . . . . . . . . . . .
Principles and preferences. . . . . . . . . . . . . . . . . . . . . . . . . . . . . . . . . . . .
Océ Ticket / 'Printer default' . . . . . . . . . . . . . . . . . . . . . . . . . . . . . . . .
Set the 'User Preferences'. . . . . . . . . . . . . . . . . . . . . . . . . . . . . . . . . .
'Templates' . . . . . . . . . . . . . . . . . . . . . . . . . . . . . . . . . . . . . . . . . . . . .
'Advanced accounting'. . . . . . . . . . . . . . . . . . . . . . . . . . . . . . . . . . . . .
Retrieved information . . . . . . . . . . . . . . . . . . . . . . . . . . . . . . . . . . . . . . . .
Retrieve the 'Printer information' . . . . . . . . . . . . . . . . . . . . . . . . . . . . .
Select the page and media features . . . . . . . . . . . . . . . . . . . . . . . . . . . .
Page orientation . . . . . . . . . . . . . . . . . . . . . . . . . . . . . . . . . . . . . . . . .
Page size. . . . . . . . . . . . . . . . . . . . . . . . . . . . . . . . . . . . . . . . . . . . . . .
'Page size list filter' . . . . . . . . . . . . . . . . . . . . . . . . . . . . . . . . . . . . . . .
Saving custom sizes . . . . . . . . . . . . . . . . . . . . . . . . . . . . . . . . . . . . . .
'Media source' and 'Media type' . . . . . . . . . . . . . . . . . . . . . . . . . . . . .
Get the correct image rendering . . . . . . . . . . . . . . . . . . . . . . . . . . . . . . .
Define the colors . . . . . . . . . . . . . . . . . . . . . . . . . . . . . . . . . . . . . . . . .
'Color feel' (Océ TCS500 and Océ TCS300 systems) . . . . . . . . . . . .
Set optimal printer configuration for Océ 9x00 printers . . . . . . . . . . . .
Adjust quality according to print content . . . . . . . . . . . . . . . . . . . . . . .
Dithering Matrix (only on the print controller) . . . . . . . . . . . . . . . . . . .
Define the layout / transformation settings . . . . . . . . . . . . . . . . . . . . . . . .
'Scale' . . . . . . . . . . . . . . . . . . . . . . . . . . . . . . . . . . . . . . . . . . . . . . . . .
'Image size correction'. . . . . . . . . . . . . . . . . . . . . . . . . . . . . . . . . . . . .
'Printable area'. . . . . . . . . . . . . . . . . . . . . . . . . . . . . . . . . . . . . . . . . . .
'Rotation' . . . . . . . . . . . . . . . . . . . . . . . . . . . . . . . . . . . . . . . . . . . . . . .
'Mirror' . . . . . . . . . . . . . . . . . . . . . . . . . . . . . . . . . . . . . . . . . . . . . . . . .
'Alignment' . . . . . . . . . . . . . . . . . . . . . . . . . . . . . . . . . . . . . . . . . . . . . .
'Shift' . . . . . . . . . . . . . . . . . . . . . . . . . . . . . . . . . . . . . . . . . . . . . . . . . .
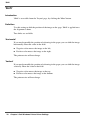
Cut the output. . . . . . . . . . . . . . . . . . . . . . . . . . . . . . . . . . . . . . . . . . . . . .
Select the cut size method . . . . . . . . . . . . . . . . . . . . . . . . . . . . . . . . .
'Strips' . . . . . . . . . . . . . . . . . . . . . . . . . . . . . . . . . . . . . . . . . . . . . . . . .
Set the final options . . . . . . . . . . . . . . . . . . . . . . . . . . . . . . . . . . . . . . . . .
Collate (for Océ TDS printers only) . . . . . . . . . . . . . . . . . . . . . . . . . . .
'To inbox' / 'To waiting jobs' . . . . . . . . . . . . . . . . . . . . . . . . . . . . . . . . .
'Stamping' (for Océ TDS / Océ TCS printers) . . . . . . . . . . . . . . . . . . .
Stamping (for Océ 9700 and Océ 9800 printers) . . . . . . . . . . . . . . . .
Select the output destination . . . . . . . . . . . . . . . . . . . . . . . . . . . . . . . .
Define the folding settings . . . . . . . . . . . . . . . . . . . . . . . . . . . . . . . . . .
Advanced folding options . . . . . . . . . . . . . . . . . . . . . . . . . . . . . . . . . .
45
46
46
47
49
51
53
53
54
55
57
59
60
61
62
62
64
65
66
68
69
69
70
71
72
74
75
76
77
77
78
79
79
80
81
83
84
86
88
Chapter 4
How to. . . . . . . . . . . . . . . . . . . . . . . . . . . . . . . . . . . . . . . . . . . . . . . . . . . . . . . . . . . 89
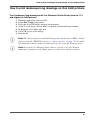
How to optimize the print performance for landscape drawings . . . . . . . 90
How to print landscape long drawings on Océ 9x00 printers . . . . . . . . . . 91
6
Table of Contents
Print using an Océ Windows Driver within MicroStation . . . . . . . . . . . . . 92
Print using an Océ Windows System Driver within AutoCAD . . . . . . . . . 93
Print using an Océ Windows Driver within Xsteel . . . . . . . . . . . . . . . . . . 95
Chapter 5
Troubleshooting . . . . . . . . . . . . . . . . . . . . . . . . . . . . . . . . . . . . . . . . . . . . . . . . . . 97
Solve installation problems . . . . . . . . . . . . . . . . . . . . . . . . . . . . . . . . . . . 98
Installation problems-Introduction . . . . . . . . . . . . . . . . . . . . . . . . . . . . 98
Back-channel restriction due to a firewall presence . . . . . . . . . . . . . . 99
Installation under AutoCAD 2004 . . . . . . . . . . . . . . . . . . . . . . . . . . . 100
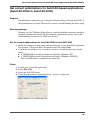
Get correct optimizations for AutoCAD-based applications (AutoCAD
2000i to AutoCAD 2005) . . . . . . . . . . . . . . . . . . . . . . . . . . . . . . . . . . 101
Get correct driver upgrade for AutoCAD-based applications (ACAD 2000i
and higher) . . . . . . . . . . . . . . . . . . . . . . . . . . . . . . . . . . . . . . . . . . . . 102
Advanced accounting problems . . . . . . . . . . . . . . . . . . . . . . . . . . . . 103
Improve output quality . . . . . . . . . . . . . . . . . . . . . . . . . . . . . . . . . . . . . . 104
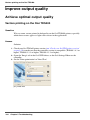
Achieve optimal output quality . . . . . . . . . . . . . . . . . . . . . . . . . . . . . 104
Vectors printing on the Océ TDS400 . . . . . . . . . . . . . . . . . . . . . . 104
Image quality according to a printer version. . . . . . . . . . . . . . . . . 105
Get a correct layout or rotation of the drawing on an Océ TDS/TCS
printer . . . . . . . . . . . . . . . . . . . . . . . . . . . . . . . . . . . . . . . . . . . . . . 106
Large-format printing . . . . . . . . . . . . . . . . . . . . . . . . . . . . . . . . . . 107
Cut synchro . . . . . . . . . . . . . . . . . . . . . . . . . . . . . . . . . . . . . . . . . 108
Océ Windows Drivers and SolidWorks application . . . . . . . . . . . 109
Manage the number of copies. . . . . . . . . . . . . . . . . . . . . . . . . . . . . . 110
Manage the number of copies under Windows NT/2000/XP . . . . 110
Manage the number of copies with AutoCAD under Windows 9x and
Me . . . . . . . . . . . . . . . . . . . . . . . . . . . . . . . . . . . . . . . . . . . . . . . . 111
Manage clipping . . . . . . . . . . . . . . . . . . . . . . . . . . . . . . . . . . . . . . . . 112
Define the settings to manage clipping . . . . . . . . . . . . . . . . . . . . 112
Manage clipping on the Océ TDS400 . . . . . . . . . . . . . . . . . . . . . 113
Manage clipping with Océ WPD for Windows 9x and Me . . . . . . 114
Achieve optimal output quality with Océ Windows Printer Driver specific
for Windows 9x and Me printing on an Océ TCS400 printer. . . . . . . 115
Set the 'Processing on the computer' (raster only) mode . . . . . . 116
Océ Windows Drivers and AutoCAD 2000. . . . . . . . . . . . . . . . . . 117
WPD and the MicroStation application. . . . . . . . . . . . . . . . . . . . . 118
Overcome limitations in applications . . . . . . . . . . . . . . . . . . . . . . . . . . . 119
Printing problems with VectorWorks . . . . . . . . . . . . . . . . . . . . . . . . . 119
Printing problems with Acrobat . . . . . . . . . . . . . . . . . . . . . . . . . . . . . 120
7
Table of Contents
8
Chapter 1
Introduction
9
What is an Océ Windows Driver?
Principle
What is an Océ Windows Driver?
Definition
The Océ Windows drivers can be used from any Windows application to print to your
Océ printer. They translate the data into graphics languages and enable your printer
to generate monochrome and color outputs.
Océ Windows Printer Driver
The Océ Windows Printer Driver (WPD) translates the data into HP-GL/2 (graphics
language designed by Hewlett-Packard). It includes the Océ Ticket (specific Océ Job
Ticket or RCF (Remote Control Format) header), a set of information sent to the
printer on how, when and where to print the job.
Océ Windows Raster Driver
The Océ Windows Raster Driver (WRD) converts your document into HP-RTL data,
the raster transfer language designed by Hewlett-Packard. It includes the Océ Ticket
or an RCF (Remote Control Format) header added to the HP-RTL file in order to
activate printer specific features.
10
Chapter 1 Introduction
Workflow to print using an Océ Windows Driver
Workflow to print using an Océ Windows Driver
Purpose
This procedure describes the recommended steps to follow to print using an Océ
Windows Driver.
Before you begin
Make sure that you previously installed the driver and defined the default 'Device
settings'.
Note: Check that the printer units are the same in the application and in the driver
(see ‘Units’ on page 47).
How to print a drawing
1. Create the document in your application.
2. Select File - Page Setup or File - Print Setup to:
■
■
Select your printer.
Define the document format for the selected printer by defining the 'Page size'. In
the 'Page size' list you can select a standard 'Page size', or select a 'Custom size'
previously registered (see ‘Page size’ on page 57).
3. Display the application preview if the function is available.
Note: The preview only takes into account the settings available in the application.
It does not display the driver transformation settings ('Mirror', 'Rotation',
'Alignment', 'Shift'...).
4. Select File - Print to:
■
■
send directly the document for printing.
open 'Properties' to access the printer settings.
Then you can modify the driver settings, attach a user identification to the output
using the accounting option, define the number of copies, set the layout and
image quality before printing.
11
Océ Windows Printer Driver 1.15 compatibility topics
Compatibility
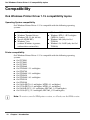
Océ Windows Printer Driver 1.15 compatibility topics
Operating System compatibility
Océ Windows Printer Driver 1.15 is compatible with the following operating
systems:
[1]
■
■
■
■
■
Windows XP (32-bit, 64-bit)
Windows Terminal Server
Windows XP (32-bit, 64-bit)
Novell (NDPS-IPP)
Windows Vista
(without Windows signature,
without driver uninstaller)
■
■
■
■
Windows 2000
Windows NT4.0 - SP5 or higher
(WPD1.8.2 only)
Windows Me (only for Océ
TCS400)
Windows 98, 98 SE (only for Océ
TCS400)
Printer compatibility
Océ Windows Printer Driver 1.15 is compatible with the following operating
systems:
■ Océ TCS500
■ Océ TCS400
■ Océ TCS300
■ Océ TDS860
■ Océ TDS800 1.3.3 and higher
■ Océ TDS700
■ Océ TDS600 3.2.3 and higher
■ Océ TDS450
■ Océ TDS400 1.4.3 and higher
■ Océ TDS320
■ Océ TDS300
■ Océ 9800 (EPC1.6.1 and higher, MTX1.6.1 and higher)
■ Océ 9700 (EPC1.6.1 and higher, MTX1.6.1 and higher)
■ Océ 9400-II (LVI_1.2.3 and higher, EPC-M2_1.03 and higher)
■ Océ 9300 (LVI_1.2.3 and higher, EPC-M2_1.03 and higher)
Note: To retrieve your Océ TDS printer version, see Check your Océ TDS version.
12
Chapter 1 Introduction
Océ Windows Printer Driver 1.15 compatibility topics
Application compatibility
Océ Windows drivers are designed to be compatible with all the Windows
applications.
Note: Specific optimizations for AutoCAD-based applications are available in the
Océ WPD driver, starting with version 1.7 (see ‘Get correct optimizations for
AutoCAD-based applications (AutoCAD 2000i to AutoCAD 2005)’ on page 101).
'Advanced accounting'
This option is only compatible with:
■
■
■
■
■
■
■
■
■
Océ TCS500 1.0 and higher
Océ TCS400 2.2 and higher
Océ TCS300 1.0 and higher
Océ TDS860 1.x and higher
Océ TDS800 2.1 and higher
Océ TDS700 1.x and higher
Océ TDS600 4.1 and higher
Océ TDS450 1.x and higher
Océ TDS400 2.1 and higher
'Printable area'
This option is only compatible with:
■
■
■
■
■
■
■
■
■
■
■
Océ TCS500 1.0 and higher
Océ TCS400 2.2 and higher
Océ TCS300 1.0 and higher
Océ TDS860 1.x and higher
Océ TDS800 2.1 and higher
Océ TDS700 1.x and higher
Océ TDS600 4.1 and higher
Océ TDS450 1.x and higher
Océ TDS400 2.1 and higher
Océ TDS320 1.x and higher
Océ TDS300 1.1 and higher
13
Check your Océ TDS printer version
Check your Océ TDS printer version
Introduction
To make sure that you are installing the Windows driver compliant with your Océ
TDS400, Océ TDS600 or Océ TDS800 printer version, you can check your printer
controller version number. Then, see the Compatibility table to know which driver
is optimized with your printer and your workstation operating system.
Note: Use Océ WPD with all versions of Océ TDS860, Océ TDS450 and Océ
TDS3x0 systems.
When to do
Check your printer version before the installation or the update of your Windows
driver.
Check your Océ TDS version
1. From your Océ TDS Controller, access the Océ System Control Panel.
2. From the System menu, select 'Print settings'. It launches the Dump-config print.
3. On the printout, on the 'Control-parameters (22-1)' section, check the 'Release
number controller'.
14
Chapter 1 Introduction
Check your Océ TDS printer version
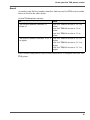
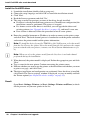
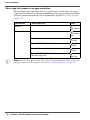
Result
According to the 'Release number controller', find out your Océ TDS version and the
driver to install in the tables below:
[2]
[2] Océ TDSx00 printers versions
If
Then
The 'Release number controller' is
below 6.1
your Océ TDS400 version is 1.4.1 or
below.
your Océ TDS600 version is 3.2 or
below.
your Océ TDS800 version is 1.3 or
below.
The 'Release number controller' is 6.1.x your Océ TDS400 version is 1.4.3 or
or higher
higher.
your Océ TDS600 version is 3.2.3 or
higher.
your Océ TDS800 version is 1.3.3 or
higher.
Then, General compatibility table to know which driver is compliant with your Océ
TDS printer.
15
Check your Océ 9x00 printer version
Check your Océ 9x00 printer version
Introduction
To make sure that you are installing the Windows driver compliant with your Océ
9x00 printer version, you can check your printer controller version number. Then,
see the General compatibility table to know which driver is optimized with your
printer and your workstation operating system.
When to do
Check your printer version before the installation or the update of your Windows
driver.
Check your Océ 9700 / 9800 controller firmware version
1. From your Oce 9700/9800 printer control panel, press ‘Machine’,
2. Select ‘Print Settings’ and validate,
3. Three pages with controller settings are printed. Check the Controller firmware
version number, indicated in the first line of the first page.
Result
If the controller firmware version number is higher than 1.6.1, install and use the Océ
WPD driver.
If the controller firmware version number is prior to 1.6, you MUST install and use
the Océ WRD3 driver.
Check your Océ 9300 controller firmware version
From your Oce 9300 printer control panel, press ‘Program’ to enter the main menu,
Select 'Configuration',
Select ‘Utilities’,
Select ‘Dump config’,
Three pages with controller settings are printed. Check the Controller firmware
version number indicated in the first line of the first page,
6. Press ‘Program’ to leave the main menu.
1.
2.
3.
4.
5.
Note: The dump configuration cannot be performed while a file is being processed.
16
Chapter 1 Introduction
Check your Océ 9x00 printer version
Result
If the controller firmware number is higher than LVI_1.2.3 or EPC-M2_1.0.3, install
and use the Océ WPD driver.
If the controller firmware number is prior to LVI_1.2.2 or EPC-M2_1.0.2, you
MUST install and use the Océ WRD3 driver.
17
Configuration requirements for Océ Windows drivers
Configuration requirements
Configuration requirements for Océ Windows drivers
Processor
■
Pentium II, 233 MHz
Disk space
■
300 MB required for the spooler while printing
RAM
For the Windows operating systems, see the Microsoft minimum requirements.
Advanced accounting (only for Océ WPD driver)
■
Internet Explorer 6.0
Note: You may have to check the 'Bypass proxy server for local addresses' in the
Internet Options (LAN settings).
18
Chapter 1 Introduction
Access the Océ Windows driver
Presentation of the Océ Windows
Printer Driver
Access the Océ Windows driver
Introduction
You can access the Océ Windows driver:
■
■
from your application.
from your desktop.
Access from the application
1.
2.
3.
4.
5.
Open your application.
Open a document.
Select File - Print or File - Page Setup .
Choose the printer.
Click 'Properties'.
Access from your desktop
1. Select Start - Settings - Printers or Start - Settings - Printers and Faxes
2. Right-click on the printer.
3. Select:
■
■
■
'Document Defaults...' (Windows NT).
'Printing Preferences...' (Windows 2000/XP/Server 2003, Terminal Server,
Citrix).
'Properties' (Windows 98).
19
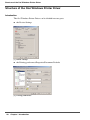
Structure of the Océ Windows Printer Driver
Structure of the Océ Windows Printer Driver
Introduction
The Océ Windows Printer Driver can be divided into two parts:
■
the Device Settings
[1]
[1] Device settings
■
the Printing preferences/Properties/Document Defaults
[2]
[2] Printing preferences
20
Chapter 1 Introduction
Structure of the Océ Windows Printer Driver
Device settings
■
■
■
to be defined to complete the installation with the printer configuration.
only accessible in Power User/Administrator mode.
can be accessed from Start - Settings - Printers or Start - Settings - Printers
and Faxes, by right-clicking on the printer and selecting 'Properties'.
Printing preferences/Documents defaults
■
■
to be defined per document.
accessible either to all users (from the application) or in Power user mode (from
the desktop).
For more details, refer to the Access section (see ‘Access the Océ Windows
driver’ on page 19).
21
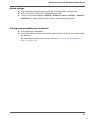
Printing Preferences/Document Defaults in Océ WPD
Printing Preferences/Document Defaults in Océ WPD
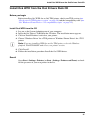
Introduction
There are 5 to 7 tabs available, according to the printer model selected.
Illustration
[3]
[3] Printing preferences
'Basic'
tab
This page allows you to define general settings such as:
■
■
■
■
■
■
■
'Layout'
'Page size (as in application)'
'Media source' and 'Media type'
Number of copies
'Cut size'
'Custom size'
'Printer information'
'Preferences'
tab
This page allows you to select layout settings such as:
■
■
■
■
■
22
Scaling
Mirroring
'Rotation'
'Alignment'
'Shift'
Chapter 1 Introduction
Printing Preferences/Document Defaults in Océ WPD
'Image'
tab
This page allows you to define image settings such as:
■
■
■
■
■
■
■
'Color'
'Color settings'
'Color feel' (for Océ TCS500)
'Print-file resolution'
'Print contains'/'Print optimization'
'Quality'
'Data Processing'
'Finishing'
tab
This page allows you to define the finishing options (only for printers including
finishing options).
'Stamping'
tab
This page allows you to define the 'Stamping' settings (according to your rights) such
as:
■
■
■
■
'Stamp selection'
'Stamp definition'
'Stamp position'
'Stamp text'
'User Preferences'
tab
This page allows you to define settings such as:
■
■
■
■
■
'About'
'Units'
'Language'
'Back-channel configuration'
'Templates'
'Accounting'
tab
This page gives information about the driver version. This can be useful information
to give to your Océ service technician in case of troubleshooting.
23
Device configuration
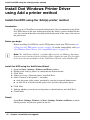
Device configuration
Illustration
[4]
[4] device settings
Device settings
This page allows to see and modify your printer configuration:
■
■
■
■
24
'Printer name' (host-name of the printer)
'Advanced accounting' activation
'Number of feeds'
'External finishers'
Chapter 1 Introduction
Chapter 2
Installation and upgrade
25
Installation-Introduction
Installation-Introduction
Introduction
The installation of the WPD driver requires installation files that you can get either
from the Océ Drivers Pack CD or from the 'Support and Downloads' section of the
Océ international web site http://www.oce.com.
Definition
The method used to install the driver depends on:
■
■
Your network architecture.
Where you got the installation files.
Attributes
This chapter guides you through the installation of the Océ WPD software on a
workstation. Once you have successfully installed the driver, see the configuration
chapter for a full explanation of how to use the options and dialog boxes.
Note: To get the installation process on a Print server, on Terminal Server or on
Citrix Metaframe server, consult the Océ TDS/TCS Connectivity Manual delivered
on a CD with your printer.
26
Chapter 2 Installation and upgrade
Install Océ WPD - Before you begin
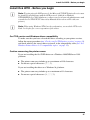
Install Océ WPD - Before you begin
Note: To print using the LPR protocol, the Microsoft TCP/IP Printing Service must
be installed (all platforms) and the LPR protocol enabled on Windows
NT/2000/XP/Server 2003 platforms (contact your local network administrator and
consult the Océ TDS-TCS Connectivity Manual delivered on a CD with your
printer).
Note: When using Windows NT4.0 on the workstation, you need the NT Service
Pack 5 or higher for correct operation of the driver.
Océ TDS version and Windows driver compatibility
To make sure that you have selected the driver according to your printer version,
follow the correct procedure (see ‘Check your Océ TDS printer version’ on page 14)
and check which is the correct driver to install, in the compatibility table (see ‘Océ
Windows Printer Driver 1.15 compatibility topics’ on page 12).
Caution concerning the printer names
If you are installing the Océ WPD driver on a Windows 2000/XP/Server 2003
platform:
■
■
The printer name may include up to a maximum of 220 characters.
Do not use special characters ('!', ',', '/').
If you are installing the driver on a Windows 9x platform:
■
■
The printer name may include up to a maximum of 31 characters.
Do not use special characters ('=', ',', ';', '/').
27
Define the correct installation method
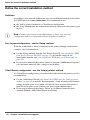
Define the correct installation method
Definition
According to your network architecture, you can use different methods to install the
Océ WPD driver on a user workstation. Océ recommends to use:
■
■
the 'Add (a) printer' method in a Client/Server configuration
the 'Setup' method when the workstation is directly connected to the printer (peer
to peer).
Note: Contact your local network administrator to know your network
configuration and to get information about the printer to address.
Peer to peer configuration : use the 'Setup' method
When the workstation is directly connected to the printer (through a network for
example), Océ recommends to:
■
■
Use the 'Setup' method, from the Océ Drivers Pack CD, (see ‘Install Océ WPD
from the Océ Drivers Pack CD’ on page 31), or from the setup.exe file
downloaded from the web, (see ‘Install Océ WPD after a web download’ on
page 29).
If you need to uninstall the printer, remove it using the 'Add/Remove Programs'
(see Automatic uninstall after a setup.exe installation).
Client /Server configuration : use the 'Add (a) printer' method
In a Client/Server configuration, you connect the workstation to the print server. Océ
recommends to:
■
■
28
Use the 'Add Printer Wizard '(see ‘Install Océ WPD using the 'Add (a) printer'
method’ on page 32) to install a 'Network printer'. As the wizard installs elements
coming from the print server, make sure that the latest version of the driver is
installed on the print server (contact your local system administrator).
If you need to uninstall the printer, 'Delete' it (see Manual uninstall after a
standard Windows Add Printer Wizard installation).
Chapter 2 Installation and upgrade
Install Océ WPD after a web download
Install Océ Windows Printer Driver
using the setup method
Install Océ WPD after a web download
Before you begin
Before installing Océ WPD for an Océ TDS printer, check your TDS version (see
‘Check your Océ TDS printer version’ on page 14) and the compatibility table (see
‘Océ Windows Printer Driver 1.15 compatibility topics’ on page 12).
Note: You need the System Administrator rights on your computer to install the
driver under a Windows NT/2000/XP or Server 2003 platform.
Get the installation files
Go to the Océ International web site (http://www.oce.com), select your country.
From the 'Support and Downloads' section, go to 'Downloads'.
Select 'Printer drivers'.
Select the driver to install and click 'Go'.
Follow the download and retrieval instructions.
Once the zipped.exe file is downloaded on your local directory, double-click on it
and unzip the content (by default in: \WPD).
7. Log on as the system administrator of your computer, and go to the directory where
you extracted the installation files.
1.
2.
3.
4.
5.
6.
29
Install Océ WPD after a web download
Install the Océ WPD driver
1.
2.
3.
4.
5.
Launch the installation (double-click on setup.exe).
Choose the setup language and click 'OK' to launch the installation wizard.
Click 'Next'.
Read the license agreement and click 'Yes'.
The setup searches for previous versions of the driver already installed:
■ If a driver is already installed from a print server (Client/Server configuration) the
installation cannot be performed. The process is stopped.
■ If a former version of the driver is installed, you can upgrade the driver and
existing printers (see ‘Upgrade the driver’ on page 43), and install a new one.
■ If no version is detected, follow the procedure to install a new printer.
6. Enter the controller hostname or IP address in order to connect to the print system
and click 'Next'. The back-channel process is launched to reach the printer controller
and retrieve the printer model and the printer information.
Note: To install the driver for an Océ TDS300 or Océ 9x00 system, select the model
from the list. Choose the option 'Select the model from the list' and enter the output
port associated with your printer (contact your Local System Administrator to get
it).
Note: When you select the printer model from the list, there is no back-channel
performed during the installation.
7. When detected, the printer model is displayed. Define the appropriate port and click
'Next'.
8. Type a name for the new printer Caution concerning the printer names.
9. Indicate whether you want to use the printer as the default one and whether you want
to print a test page, and click 'Next'.
10. The driver installation and configuration are performed. Once the driver is installed,
click 'Finish'.The 'Device settings' window is displayed, so you can modify and lock
the 'Printer options'(see ‘Define the device settings’ on page 35).
Result
Open Start - Settings - Printers (or Start - Settings - Printers and Faxes) to check
for the presence of your new printer in the list.
30
Chapter 2 Installation and upgrade
Install Océ WPD from the Océ Drivers Pack CD
Install Océ WPD from the Océ Drivers Pack CD
Before you begin
Before installing Océ WPD for an Océ TDS printer, check your TDS version (see
‘Check your Océ TDS printer version’ on page 14) and the compatibility table (see
‘Océ Windows Printer Driver 1.15 compatibility topics’ on page 12).
Install Océ WPD from the CD
1.
2.
3.
4.
Log on as the System Administrator of your computer.
Insert the Océ Driver CD-ROM in the CD drive. The installation menu appears.
Click on 'Install Products' and select your printer.
Choose 'Windows Driver' for a TDS printer or 'Windows Printer Driver' for a TCS
printer.
Note: If you are installing WPD for an Océ TDS printer, select the Windows
platform 'WinNT/2000/XP' and select your printer version.
5. Click 'Install'.
6. Follow the installation procedure Install the Océ WPD driver.
Result
Open Start - Settings - Printers (or Start - Settings - Printers and Faxes) to check
for the presence of your new printer in the list.
31
Install Océ WPD using the 'Add (a) printer' method
Install Océ Windows Printer Driver
using Add a printer method
Install Océ WPD using the 'Add (a) printer' method
Introduction
If you are in a Client/Server network configuration, Océ recommends to install the
Océ WPD driver on the user workstation using the 'Add (a) printer' method. In this
case, the version of the driver installed on the workstation is the same as the one on
the print server.
Before you begin
Before installing Océ WPD for an Océ TDS printer, check your TDS version (see
‘Check your Océ TDS printer version’ on page 14) and the compatibility table (see
‘Océ Windows Printer Driver 1.15 compatibility topics’ on page 12).
Note: The 'Add Printer Wizard ' is slightly different from one Windows Operating
System version to another, but the global procedure remains the same. The procedure
below describes an installation via the 'Add Printer Wizard ' under Windows XP.
Install Océ WPD using the 'Add Printer Wizard '
1.
2.
3.
4.
5.
Open the Start - Settings - Printers and Faxes window.
Double-click 'Add (a) printer' to launch the installation wizard.
Click 'Next'.
Choose to set up a 'Network printer' and click 'Next'.
Select 'Connect to this printer...' and either:
■ enter the name of the printer, provided by your local network administrator.
■ or click 'Next' to browse for the print server and select the printer queue.
6. Click 'Next'.
7. Indicate whether you want to use the printer as the default one and click 'Next'.
8. Click Finish.
Result
Open Start - Settings - Printers (or Start - Settings - Printers and Faxes) to check
for the presence of your new printer in the list.
32
Chapter 2 Installation and upgrade
Connect to the printer
Configure printer information
(administrator only)
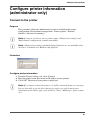
Connect to the printer
Purpose
This procedure allows the administrator to retrieve and define the printer
configuration ('Back-channel configuration', 'Printer options', 'External
finishers','Advanced accounting').
Note: As long as you do not enter a printer name, 'Advanced accounting' and
'Back-channel configuration' remains unavailable.
Note: 'Advanced accounting' and back-channel functions are not available when
the driver is installed on a Windows x64 platform.
Illustration
[5]
Configure printer information
1. From the 'Device settings' tab, select 'Connect'
2. Enter the printer name (host-name or IP address of your printer).
3. Click 'OK'. The name of your printer is displayed.
Note: If you cannot connect the printer, you will be warned with an error message.
You are then able to use the driver but not to retrieve nor refresh any printer
information in the 'Basic' page (such as 'Rolls', 'Trays', 'Media type', printer status,
etc.).
33
Connect to the printer
Result
If allowed in the 'Back-channel configuration', the connection is performed every
time the driver is opened.
Upon successful connection, the printer and media statuses will be refreshed and
displayed in the driver interface ('Basic' page).
34
Chapter 2 Installation and upgrade
Define the device settings
Define the device settings
Introduction
The 'Device settings' are available when you right-click on the printer and select
'Properties'.
Definition
As an administrator, these settings allow you to retrieve and define information about
a given printer.
'Printer name'
This feature allows you to connect to a given printer (see ‘Connect to the printer’ on
page 33) and retrieve information about it ('Rolls', 'Media type', 'Page size').
'Number of feeds', 'External finishers' and 'Advanced accounting' are also retrieved
but can be modified manually.
Note: Once a correct 'Printer name' is entered, the automatic update of the 'Printer
information' in the 'Basic' page is performed, by default, every time a user opens the
'Printing Preferences...'.
'Printer Description'
The 'Printer Description' window displays the settings defined for a printer:
■
■
■
■
'Printer model' (defined during the installation)
'Advanced accounting'(see ‘'Advanced accounting' checkbox’ on page 38)
'Feed definition'(see ‘'Feed definition' / 'Number of feeds'’ on page 39)
'External finishers'(see ‘Configure the 'External finishers'’ on page 40)
Click 'Modify' to change these 'Printer options' or to define the 'Back-channel
configuration' (see ‘'Back-channel configuration'’ on page 36).
Illustration
[6]
[6] Number of feeds
35
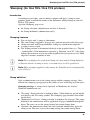
'Back-channel configuration'
'Back-channel configuration'
Introduction
The back-channel function allows the driver to gather information from the print
controller in order to display it in the driver.
An automatic back-channel is performed when the 'Windows Printer Driver' is
connected to a printer.
Once connected, the print system information ('Advanced accounting','Feed
definition', 'External finishers') is automatically collected from the controller and
displayed in the 'Device settings' window ('Printer Description').
If the default 'Back-channel configuration' is kept (automatic update allowed), the
same retrieved information is displayed in the driver when opened by a user (in the
'Basic'/'Printer information' and 'Finishing' sections).
Note: The 'Printer name' must be defined in the 'Device settings' tab (administrators
only) and the back-channel function must be enabled in order to make the 'Printer
information' available.
Printer compatibility
The back-channel function is available for all the:
■
■
Océ TCS systems
Océ TDS systems (except Océ TDS3X00 models).
Note: Back-channel is not available when the driver is installed on a Windows x64
platform.
'Back-channel configuration' in the 'Device settings' (administrator only)
By default the back-channel is allowed in both administrator and user sides.
If needed, the administrator can disable the back-channel for the users, from the
'Device settings' window. Nothing is then displayed in the 'Printer information'
('Basic' tab), and the settings defined in the 'Printer options' are locked and
propagated to the users.
The administrator can modify and lock the 'Printer options', whereas he allows (or
not) the back-channel for users.
36
Chapter 2 Installation and upgrade
'Back-channel configuration'
Modify the 'Printer options'
An icon representing a printer is displayed in front of the option when the
information is retrieved from the controller (via back-channel).
The administrator can uncheck a retrieved option or select another one.
Then, if he locks the modified'Printer options', these ones are propagated to the users
and replace the retrieved information.
'Refresh' the 'Printer information' ('Basic' tab)
The user can click the 'Refresh' button to reload and display the printer status and the
printer media status and availability.
The 'Refresh' function is available:
■ for all printers supporting back-channel.
■ when the back-channel connection has been performed and achieved.
■ when the automatic back-channel is enabled (not disabled in the 'Device settings'
or in the 'User Preferences').
■ when the driver is installed on a 32-bit (x86) platform.
'Back-channel configuration' in the 'User Preferences'
If allowed by the administrator, a user can disable the back-channel function in the
'User Preferences'.
Then, the 'Printer information' ('Basic' tab) is not available.
37
'Advanced accounting' checkbox
'Advanced accounting' checkbox
Definition
The 'Advanced accounting' option is available from the 'Device settings' page when
Océ Account Logic is active on the print controller. The accounting information is
retrieved from the controller, via the back-channel.
Note: The 'Advanced accounting' option is not available when the driver is installed
on a Windows x64 platform.
Note: This setting is not available for the Océ TDS3x0 and Océ 9x00 printers.
Status
If 'Advanced accounting' is checked, it indicates that Océ Account Logic is active on
the print controller. The user must fill in the advanced accounting fields to be able to
print.
If the 'Advanced accounting' checkbox is grayed and unavailable, that means either:
■
■
Océ Account Logic is not installed on the print controller, or
the controller version does not enable the activation of the 'Advanced accounting'
option.
The administrator can enable or disable the 'Advanced accounting' option from the
'Printer options' window, by clicking 'Modify'.
If the administrator disables the 'Advanced accounting' (and locks the 'Printer
options') whereas it is required by the printer controller, all the print files sent by the
users are sent 'To inbox' ((see ‘'To inbox' / 'To waiting jobs'’ on page 80)).
38
Chapter 2 Installation and upgrade
'Feed definition' / 'Number of feeds'
'Feed definition' / 'Number of feeds'
Definition
This setting is available from the 'Device settings' page.
'Feed definition'
This setting is used to indicate the number of rolls/trays available on the printer. This
information is automatically retrieved (via the back-channel) and displayed when
you click on 'Connect' (from the 'Printer name' section).
To change the accessible number of feeds, click on 'Modify', select the 'Number of
feeds' you want to set for the printer, and click OK.
39
Configure the 'External finishers'
Configure the 'External finishers'
Definition
In the 'Printer options' section of the 'Device settings' page, you can activate and
configure the 'External finishers' installed for your printer.
To activate a finisher (available for the printer), click 'Modify' and select the finisher:
■
■
■
■
■
'Integrated Receiving Tray' (for Océ TDS600 and Océ TDS700) (see ‘'Integrated
Receiving Tray' (for Océ TDS600 and Océ TDS700)’ on page 84)
'Copy Delivery Tray'(see ‘'Copy Delivery Tray'’ on page 84)
'Two-tray stacker'(see ‘'Two-tray stacker'’ on page 85)
'Lower Output Tray' (for Océ 9700 and Océ 9800 only) (see ‘'Lower Output Tray'
(for Océ 9700 and 9800)’ on page 85)
'Folder' ( 'Reinforcement unit', number of 'Belts'...) (see ‘'Folder'’ on page 85)
Click 'OK'.The declared finisher can then be selected in the 'Finishing' tab of the
driver.
40
Chapter 2 Installation and upgrade
'Folder' options
'Folder' options
Definition
When the administrator selects a folder in the 'Printer options' window, he may
activate the associated folder options:
'Reinforcement unit'
Check this option if the reinforcement unit is available on your printer.
'Belts'
You can select the number of belts available on your printer (1 or 2 for Océ TDS8x0,
Océ 9700 and Océ 9800, 1 for Océ TDS600 and Océ TDS700).
'Punching unit'
Check this option if the punching unit is available on your printer.
41
Uninstall the Océ Windows driver
Uninstall
Uninstall the Océ Windows driver
Introduction
Note: Make sure the printer is not in use.
Do not mix Installation/Uninstallation procedure with the different methods, use one
of the following options:
Automatic uninstall after a setup.exe installation
1. Log on as the System Administrator of your computer (for Windows
2.
3.
4.
5.
6.
7.
8.
9.
10.
NT/2000/XP/Server 2003).
Select Start - Settings - Control Panel.
Choose 'Add/Remove Programs'.
Select your printer model.
Click 'Add/Remove' or 'Change/Remove'.
Click 'Next'.
Select the printer to uninstall.
Click 'Next'.
Click 'Finish'.
Restart Windows if requested.
Manual uninstall after a standard Windows 'Add Printer Wizard ' installation
1. Select Start - Settings - Printers.
2. Right-click on the printer and choose 'Delete'.
Manual uninstall after an installation from the network printer (Windows
2000/XP/Server 2003)
1.
2.
3.
4.
5.
6.
42
Select Start - Settings - Printers and Faxes.
Right-click on the printer and choose 'Delete'.
From Start - Settings - Printers and Faxes, select File - Server Properties.
Go to the Drivers tab.
Select the Océ Windows Driver you want to delete.
Click 'Remove'.
Chapter 2 Installation and upgrade
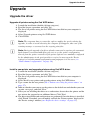
Upgrade the driver
Upgrade
Upgrade the driver
Upgrade all printers using the Océ WPD driver
1. Launch the installation (double-click on setup.exe).
2. Read the license agreement and click 'Yes'.
3. The list of all printers using the Océ WPD driver installed on your computer is
displayed.
4. Select Upgrade printers using Océ WPD driver.
5. Click 'Finish'.
Note: The setup may have to restart the explorer and/or the spooler during the
upgrade, in order to avoid rebooting the computer. If it happens, take care of the
warning message or you may lose the ongoing print jobs.
Note: During the upgrade of a driver already connected to a printer, the automatic
back-channel is activated and allows the user to get the printer configuration
directly from the printer controller. If the printer options were manually configured
by the administrator in the previous driver version, he must open the 'Device
settings' to lock this manual configuration and propagate it to the users (see
‘'Back-channel configuration'’ on page 36).
Install a new printer and upgrade printers using Océ WPD driver
1. Launch the installation (double-click on setup.exe).
2. Read the license agreement and click 'Yes'.
3. The list of all printers using the Océ WPD driver installed on your computer is
displayed.
4. Select Install a new printer and upgrade printers using Océ WPD driver.
5. Type a name for the new printer (see ‘Caution concerning the printer names’ on
page 27).
6. Indicate whether you want to use the printer as the default one and whether you want
to print a test page, and click 'Next'.
7. Since you are installing the driver on a workstation, do not share the printer and do
not activate the support for an additional driver. Click 'Next'.
8. The driver installation and configuration are performed. Once the driver is installed,
click 'Finish'. If needed, you can modify and lock the 'Printer options' displayed in
the 'Device settings' window (see ‘Define the device settings’ on page 35).
43
Upgrade the driver
Result
The new printer is installed and all printers are upgraded.
44
Chapter 2 Installation and upgrade
Chapter 3
Océ Windows Printer Driver
Settings
45
Océ Ticket / 'Printer default'
Principles and preferences
Océ Ticket / 'Printer default'
Definition
The Océ Ticket and 'Printer default' concepts are deeply involved in the way files are
sent to the printer and printed out.
Illustration
[7]
[7] Océ Ticket
Océ Ticket
The Océ Ticket is a set of information sent to the printer on how, when and where to
print the job, it gives access to the advanced printers features.
Printer settings
Some options described in this manual may be not available on every Océ printing
system series.
For instance, the 'Accounting', 'Media type', 'Collate', 'Shift' options are not available
on the Océ 9300 printers.
'Printer default'
When you select 'Printer default' for a print option ('Media type', 'Rotation',
'Alignment', 'Finishing'... for example), no information about this option is sent to
the printer. The value currently set for this option on the print system controller is
applied.
46
Chapter 3 Océ Windows Printer Driver Settings
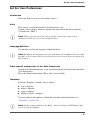
Set the 'User Preferences'
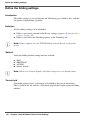
Set the 'User Preferences'
Introduction
This page allows you to set user settings such as:
Units
This setting is available from the 'User Preferences' page.
It allows you to change, whenever needed, the units used in the driver interface
('Custom size', 'Shift'...).
Note: When you switch from one unit to another, all settings expressed in
'millimeter'/'inch' are reset to their default values.
Language definition
Use this box to select the language used in the driver.
Note: By default, the language is the one used during the installation. In case of an
upgrade, it is the same as the one used in the previous version. You can change it at
any moment.
'Back-channel configuration' in the 'User Preferences'
If allowed by the administrator, a user can disable the back-channel function in the
'User Preferences'.
Then, the 'Printer information' ('Basic' tab) is not available.
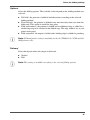
Templates
From the 'Templates' window, you are able to:
■
■
■
■
save a template
delete a template
apply a template
import or export a template.
To create and use the templates, follow the procedures described below (see
‘'Templates'’ on page 49).
Note: All the settings defined in the 'Basic', 'Layout', 'Image' and 'Finishing' tabs
can be stored in templates.
47
Set the 'User Preferences'
'Accounting'
Use this section to enter accounting information that will be sent with every print.
The default user name is your login and cannot be modified.
■
■
'User ID':
Enter the 'User ID', in the range 0-999999999 (nine digits). Non numeric values
are rejected.
The 'User ID' is automatically filled in from the previous job. You can change it
if required.
'Account ID':
Enter the 'Account ID', in the range 0-999999999 (nine digits). Non numeric
values are rejected.
The 'Account ID' is automatically filled in from the previous job. You can change
it if required.
If Océ Account Center is activated on the print controller and if the 'Advanced
accounting' option is checked in the 'Device settings' page, you can use the
'Advanced accounting' settings (see ‘'Advanced accounting'’ on page 51).
48
Chapter 3 Océ Windows Printer Driver Settings
'Templates'
'Templates'
Introduction
The templates are available when clicking the 'Templates' button in the 'User
Preferences' page.
Purpose
This feature allows you to save and store the driver settings in different templates in
order to be reused or shared.
All the parameters available in the driver are stored in the templates, except:
- the 'Custom size' (in the 'Page size' list).
■ - the accounting information.
■
Illustration
[8]
[8] 'Templates'
Create a template
1.
2.
3.
4.
Define the settings.
Click the 'Templates' button in the 'User Preferences' page.
Click the 'New' button.
Name the template and click 'OK'.
Apply templates
1. Click the 'Templates' button in the 'User Preferences' page.
2. Select the template from the list.
3. Click 'Apply'. The settings predefined for the selected template are enabled.
49
'Templates'
Note: You can also import or export 'Templates' from this window to enable
configuration sharing between users or when you install a new version of the driver
after uninstalling the previous one.
Import / Export templates
1.
2.
3.
4.
Click the 'Templates' button in the 'User Preferences' page.
Click the 'Import' or 'Export' button.
Browse to locate the file to import/export.
Click 'Open' to import or 'Save' to export.
Note: When you import a template not compatible with the current printer (i.e.: a
template created in an Océ TDS600 with finishing capability exported to an Océ
TCS400 without finishing), a warning is displayed to confirm the import. If you
confirm, the driver will do its best to solve the possible conflicts.
Note: Custom sizes are not saved in the templates.
Delete a template
1. Click the 'Templates' button in the 'User Preferences' page.
2. Select the template.
3. Click 'Delete'.
50
Chapter 3 Océ Windows Printer Driver Settings
'Advanced accounting'
'Advanced accounting'
Introduction
This window is available by clicking the 'Accounting' button on the 'User
Preferences' page.
Note: 'Advanced accounting' is not available for the Océ TDS3x0 and Océ 9x00
printers.
Note: The 'Advanced accounting' option is not available when the driver is installed
on a Windows x64 platform.
It is only displayed if Océ Account Logic is activated on the print controller and if
the 'Advanced accounting' option is checked in the 'Device settings' page.
Note: This replaces the basic accounting window.
Accounting fields
Displays in a tree classification the accounting fields. You can expand/collapse the
list. There are three categories:
■
■
mandatory fields: a red icon is displayed next to the field.
optional fields: a green icon is displayed next to the field.
Note: When a field value is not defined, the icon is a question mark. As soon as the
value is defined, the icon is a check.
Values
Displays the values for the selected accounting field.
Depending on the accounting field, you can select a value among a given list or you
can type directly the value.
Click Apply to validate the entered values.
51
'Advanced accounting'
'Accounting status'
Displays the status of the accounting information.
■
■
Green light: all mandatory fields are defined.
Red light: some of the mandatory fields are not defined. You can recognize them
easily by the red question mark icon next to the field.
Note: You can close the advanced accounting window even with red light but you
will not be able to print.
When you print, if the light is red, the advanced accounting window reopens
automatically to let you fill in the missing mandatory fields.
'Accounting storage'
Optional.
Displays the path where you store the accounting information. Optimizes
performances for the use of advanced accounting.
Click 'Browse' to modify the path.
'Refresh'
Click this button to retrieve updated accounting information from the print
controller.
'Apply'
Click this button to save the entered values, one by one.
52
Chapter 3 Océ Windows Printer Driver Settings
Retrieve the 'Printer information'
Retrieved information
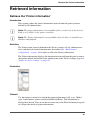
Retrieve the 'Printer information'
Introduction
This section gathers the printer information retrieved from the print system or
defined by the administrator..
Note: The printer information is not available if the security level of the Security
Pack is set to 'High' on the printer controller.
Note: The 'Printer information' is not available when the driver is installed on a
Windows x64 platform.
Definition
The 'Printer name' must be defined in the 'Device settings' tab (by administrators
only) and the back-channel function must be enabled (see ‘'Back-channel
configuration'’ on page 36) in order to collect the 'Printer information'.
The 'Printer information' displays the information retrieved from the print system or
the options defined and locked by the administrator in the 'Device settings' page (see
‘Define the device settings’ on page 35).
Illustration
[9]
'Refresh'
Use this button to retrieve or refresh the printer information ('roll', trays, 'Media
type', loaded media, printer status Ready/Off-line/Error). This information is
displayed on the left. You can use the two icons next to the 'Refresh' button to expand
or collapse the details of printer information.
53
Retrieve the 'Printer information'
Select the page and media features
Note: In the Océ WPD driver, it is important to notice the difference between 'Page'
and 'Media'.
'Page' is the page as you see it in your application whereas 'Media' is the support on
which the page is printed.
54
Chapter 3 Océ Windows Printer Driver Settings
Page orientation
Page orientation
Definition
This feature is used to select the page orientation. It defines the orientation of the
data generation within the page.
Page orientation
■
■
'Portrait' (default)
'Landscape'
Define the page orientation
To avoid clipping, the page orientation in the driver must be the same as the one
defined in application. If orientation in the driver is changed, only the page
orientation will change. No graphic objects will be rotated.
Note: To avoid clipping, some applications (e.g. Microsoft Word) ignore the
orientation defined in the printer driver and always force application-defined
orientation. The document in this application can contain pages with different
orientations. All pages will be printed with correct orientation due to the specific
behavior of the application.
55
Page orientation
'Short edge first' impact on the page orientation
The icon displayed on the 'Page size (as in application)' section reflects the exact
graphical data orientation in the page (combination of the page orientation and 'Short
edge first' option when manually set or automatically applied (see ‘'Short edge first'’
on page 72).
[3]
Orientation
'Short edge first'
Portrait
-
Landscape
No
Icon
[10]
[10] Portrait
[11]
[11] Landsc
ape
Yes
[12]
[12] 270°
Yes + 'ERICSSON' folding
[13]
[13] 90°
Yes + 'Add extra 180° to the short edge first'
[14]
[14] 90°
[15]
Yes + 'ERICSSON' folding + 'Add extra 180° to
the short edge first'
[15] 270°
Note: Find the description of the 'Short edge first' and 'Add extra 180° to the short
edge first' options in the 'Rotation' section (see ‘'Short edge first'’ on page 72).
56
Chapter 3 Océ Windows Printer Driver Settings
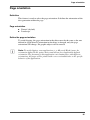
Page size
Page size
Introduction
You can select a standard page format for your print file, or define a custom one.
Illustration
[16]
[16] Page size
[17]
[17] Custom size
57
Page size
Page size
This feature is used to select the format of your page (as in application) among the
list of predefined sizes (in the 'Page size' list).
■
'Other sizes...'
When you select this option, the 'Preferences' window is displayed where you can
select the types of page sizes to display in 'Page size (as in application)'.
Custom size
According to your profile, you can create, save and modify a custom size in order to
share it or to use it locally only. Once saved, custom sizes are stored in the 'Page size'
list so they may be reused.
Follow the procedures below (see ‘Saving custom sizes’ on page 60) to define and
share custom sizes.
Note: After you create and save a new custom size in the WPD driver optimized for
AutoCAD, the custom page size is displayed in the AutoCAD 'Paper size' list, both in
'Portrait' ('Portrait') and 'Landscape' ('Landscape') orientations (except if the width
exceeds the printer threshold: in this case, only the 'Portrait' orientation is
available).
58
Chapter 3 Océ Windows Printer Driver Settings
'Page size list filter'
'Page size list filter'
Introduction
This feature is available by clicking the 'Preferences' button in the 'Basic' page.
Definition
From this list, you can select the types of page sizes you want to be displayed in the
'Page size (as in application)' list of the 'Basic' tab.
Illustration
[18]
[18] Page size list filter
■
■
■
■
ISO
ANSI
ARCH
JIS
Note: JIS is available for Océ TCS/TDS systems only.
59
Saving custom sizes
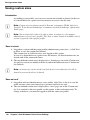
Saving custom sizes
Introduction
According to your profile, you can save a custom size in order to share it (in the case
of a shared driver on a print server for instance) or to use it locally only.
Note: Custom sizes are always saved in 'Portrait' orientation ('Width' inferior to
'Length'). To use them in 'Landscape' orientation, check the 'Landscape' option in the
'Basic' page.
Note: You need specific rights to be able to share a custom size (for instance,
administrator or power-user profile). The 'Save to share' button is available only if
you are logged on with a proper profile.
'Save to share'
1. Logged on a station with the proper profile (administrator, power-user...), click 'Save
to share' to save the custom size defined.
This custom size is visible for every user logged on this station.
In case of a shared driver on a print server for instance, all shared custom sizes are
shared with all the connected clients.
2. The new defined custom size is displayed as a shared page size in the 'Custom size'
list (only its creator can modify or delete it) and in the connected users 'Custom size'
list (locked).
Note: A custom size can be saved even if the driver is not shared yet. It will be
shared as soon as the driver is shared.
'Save as local'
1. Logged on with an administrator or a user profile, click 'Save as local' to save the
name and size values you entered, for a personal and local use only.
2. The new defined custom size is displayed as a local page size in the 'Custom size'
list. It is attached to this user profile, to this printer, to this workstation only. To
change or delete it, you must be logged on with the same user profile.
60
Chapter 3 Océ Windows Printer Driver Settings
'Media source' and 'Media type'
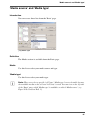
'Media source' and 'Media type'
Introduction
You can access these lists from the 'Basic' page.
[19]
[19] Media type
Definition
The Media section is available from the Basic page.
Media
Use this list to select your media source and type.
'Media type'
Use this list to select your media type.
Note: When you select a specific 'roll'/'tray', 'Media type' is not selectable because
the available media on the selected 'roll'/'tray' is used. You can view on the left side
of the 'Basic' page which 'Media type' is available on which 'Media source' (e.g:
Paper 20 lb. bond on 'Roll 1').
61
Define the colors
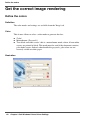
Get the correct image rendering
Define the colors
Definition
The color modes and settings are available from the 'Image' tab.
Color
This feature allows to select a color mode to generate the data:
■
■
■
'Color'
Monochrome ('Grayscale')
'True black and white vector': this is a monochrome mode, where all non-white
vectors are printed in black. This mode must be used if the document contains
pale-shade vectors. Indeed, when handled in grayscale, pale colors are not
correctly visible on white paper.
Illustration
[20]
[20] Color
62
Chapter 3 Océ Windows Printer Driver Settings
Define the colors
Color settings
This feature allows to define brightness and contrast for the image. For color
printers, the color mode also enables to set saturation, red, green and blue values.
[4]
Color
Grayscale
Vector true B&W
Brightness
selectable
selectable
not applicable
Contrast
selectable
selectable
not applicable
Saturation
selectable
not applicable
not applicable
Red, Green, Blue
selectable
not applicable
not applicable
Illustration
[21]
[21] Color settings
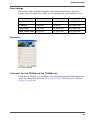
'Color feel' (for Océ TCS500 and Océ TCS300 only)
Using the Océ TCS500 v1.2 and higher, you can improve the color rendering of your
output by setting the 'Color feel'(see ‘'Color feel' (Océ TCS500 and Océ TCS300
systems)’ on page 64).
63
'Color feel' (Océ TCS500 and Océ TCS300 systems)
'Color feel' (Océ TCS500 and Océ TCS300 systems)
Introduction
The 'Color feel' settings are available for the Océ TCS500 v1.2 and higher and the
Océ TCS300 v1.0 and higher.
It allows you to improve the color rendering of the output, according to the content
of your printing file.
These color management settings can be defined on the Océ Power Logic®
Controller in order to be applied to every print files ('Printer default'). If you set them
in the printer driver, they overrule the settings defined on the controller.
Note: The 'Color feel' settings are available only when the Color mode is set to
'Color'.
Note: Find a detailed description of the Océ color management in the Océ TCS
Settings Editor documentation provided with the Océ Power Logic® Controller.
'Color feel' / 'Océ enhanced colors' settings
The 'Color feel' settings allow you to improve the color rendering of the output,
according to the content of your printing file.
You can select:
■
■
64
the 'Color feel' basic settings, to select predefined combinations of settings
the color advanced settings ('Océ enhanced colors'), to define one by one all the
color settings.
Chapter 3 Océ Windows Printer Driver Settings
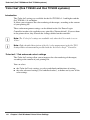
Set optimal printer configuration for Océ 9x00 printers
Set optimal printer configuration for Océ 9x00 printers
Introduction
When using Océ Windows Printer Driver with an Océ 9x00 printer, the rasterization
is performed by the controller. In order to get an optimal rendering, it is
recommended to set the rendering method to 'Cloud' on the printer control panel.
Note: Refer to your printer documentation to get the detailed procedure to set the
rendering setting.
Océ 9300 printer: set the 'Cloud' rendering mode
1. From your Océ 9300 printer control panel, press ‘Program’ to enter the main menu,
2. Open the 'Quality' menu.
3. In Rendering, select 'Cloud'.
Océ 9700 and Océ 9800 printers: check the rendering mode
1. From your Océ 9700/9800 printer control panel, press ‘Machine’,
2. Select 'Print settings' and validate,
3. Three pages with controller settings are printed. Check the rendering mode at the
bottom of the third page.
4. If the rendering mode is not set to 'Cloud', contact your Océ Service representative.
Note: If thin lines of a drawing are printed out too thick, print it in raster mode only
by setting the 'Data Processing' function to 'Processing on the computer'(see ‘'Data
Processing'’ on page 67).
65
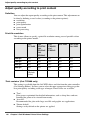
Adjust quality according to print content
Adjust quality according to print content
Definition
You can adjust the ouptut quality according to the print content. This adjustment can
be done by defining several values (according to the printer options):
■ resolution
■ print quality
■ print optimization
■ poster mode
■ data processing
Print-file resolution
This feature allows to specify a print-file resolution among several possible values
according to the printer model:
[5]
Océ
TCSx00
Océ
TDS700/
Océ
TDS3x0/
Océ
TDS4x0
Océ
TDS600/
Océ
TDS8x0
Océ 9300
Océ 9700/
Océ 9800
200 dpi
No
No
No
No
Yes
300 dpi
Yes
Yes
Yes
Yes
No
400 dpi
No
No
Yes
No
Yes
600 dpi
Yes
Yes
No
No
No
Automatic
Yes
(Default
value)
No
No
No
No
'Print contains' (Océ TCS400 only)
This setting is available from the Océ WPD driver and also from the print controller
(Océ Settings Editor). It allows you to select the most appropriate setting to get the
best print quality according to the type of output. Three values are available:
■
■
■
66
'Text':
Print process optimized for detailed information, such as sharp lines and text.
Intended for prints to be viewed from nearby.
'Area fill':
Recommended for plots with large area fills and graphic arts applications.
'Printer default':
Settings set by default on the printer are applied.
Chapter 3 Océ Windows Printer Driver Settings
Adjust quality according to print content
'Print optimization' (Océ TDS)
This setting is available from the Océ WPD driver and also from the print controller
(Océ Settings Editor). It allows you to select the most appropriate setting to get the
best print quality according to the type of output. Four values are available:
■
■
■
■
'Standard':
No special optimization.
'Poster':
Recommended for large plots and graphic arts applications.
'Lines/Text':
Print process optimized for detailed information, such as sharp lines and text.
'Printer default':
Settings set by default on the printer are applied.
'Print quality'
Quality is only available for color printers. You can select among four quality modes:
■
■
■
■
'Check': this mode is optimized for fast prints. This is the lowest quality level
used to check the overall look and feel of the output.
'Release': this mode is optimized for both text and gray areas.
'Presentation': This mode is optimized for high-resolution printing.
'Printer default': this mode uses the default value set on the printer (controller).
'Poster mode' (Océ 9300)
Set the 'Poster mode' to 'On' to improve the darkness of large areas of black
(recommended for large outputs and graphic arts applications).
If you select the 'Off' value, the printer applies no special optimization.
'Data Processing'
Click on 'More' to define the 'Data Processing' settings. This feature allows you to
select the type of data generated. Two choices are available:
■
■
'Best Performance (recommended)' (HP-GL/2 data): Recommended. All
rasterization process is done in the printer (output file size rather small). This is
the most optimal process.
'Processing on the computer' (pure HP RTL data): Rasterization process is done
on the PC (bigger output file size). This process is recommended if you
experience difficulties in getting the correct output.
67
Dithering Matrix (only on the print controller)
Dithering Matrix (only on the print controller)
Impact of 'Dithering Matrix' on the image quality
For the Océ TDS400 (before v1.4), Océ TDS600 (before v3.2) and Océ TDS800
(before v1.3) only, 'Dithering Matrix' is taken into account along with Print mode
settings in order to optimize the print quality of the output. It has a strong visual
impact on vectors with light colors. Two values can be selected, either 'Cloud' or
'Clustered'.
On the new versions of the Océ TDS controller, the 'Dithering Matrix' is no longer
available as a separate setting but is now embedded in the 'Print optimization' values.
This explains why you can get different visual results when you print the same job
with the same driver settings, but using the former or the new version of the
controller.
68
Chapter 3 Océ Windows Printer Driver Settings
'Scale'
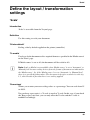
Define the layout / transformation
settings
'Scale'
Introduction
'Scale' is accessible from the 'Layout' page.
Definition
Use this setting to scale your document.
'Printer default'
Scaling value by default applied on the printer (controller).
'To media'
Used to scale the document to fit a required format as specified in the 'Media source'
on the 'Basic' page.
If 'Media source' is set to A0, the document will be scaled to A0.
Note: Scale to Media is not available when 'Media source' is set to 'Automatic' or
'Manual feed' because scaling derives from the format of document as indicated in
the 'Media source'. So, if the 'Media source' is set to 'Automatic' or 'Manual feed',
there is no specified format values. The document is therefore scaled to its own size,
1:1, which means in fact that there is no scaling applied.
'Percentage'
Allows you to enter your own scaling values as a percentage. You can scale from 25
to 400%.
You can keep aspect ratio, i.e. X scale is equal to Y scale. In this case, if you check
the 'Keep aspect ratio' box, you can only enter the X value and the Y value is
modified accordingly.
69
'Image size correction'
'Image size correction'
Definition
Checking this option means that the page size includes margins.
Illustration
[22]
[22] Image size correction
Attributes
As a printer sets physical device margins, a standard size image (A0, A1...) cannot
be entirely printed on an equivalent media size. In order to prevent clipping, the
'Image size correction' option indicates the physical margins size to the application,
so the application can decide to scale down or crop the image.
Note: If you disable this option, the image is printed in the required size (without
scaling), but be aware that it may be clipped or printed on a larger media size.
70
Chapter 3 Océ Windows Printer Driver Settings
'Printable area'
'Printable area'
Introduction
From this section, you can select the printable area.
Note: When a stamp is applied to a document, the 'Printable area' is automatically
set to 'Full size'.
Illustration
[23]
'Inked area'
Check this option if you want to print only the area where you defined graphical
objects.
This option allows you to save paper since blank spaces around the document are not
printed.
'Full size'
Check this option if you want to print the complete document as shown in the
application.
This option allows you to keep the formatting of the document when printing, as in
the application. Blank spaces around the document are respected.
71
'Rotation'
'Rotation'
Introduction
'Rotation' is accessible from the 'Layout' page, by clicking the 'More' button.
Definition
Use this list to select the rotation value to apply to your document.
'Printer default'
Rotation value applied on the printer (controller).
0°/'90°'/'180°'/'270°'
Rotates the document counter clockwise in the selected value.
'Media saving'
Data orientation can be automatically modified according to the drawing surface for
a minimum use of paper.
'Productive' (for Black & White printers only)
Optimizes the productivity. Data orientation can be automatically modified to ensure
the fastest printout delivery.
'Short edge first'
Rotates the graphical objects in order to obtain the short edge of the page printed
first. Use this setting to rotate 270° counterclockwise all landscape pages
(Exception: if an 'ERICSSON' fold is requested, the data is rotated 90°
counterclockwise). When this setting is selected, all landscape pages are rotated.
If you need to reverse the orientation of the graphical data on the printout (e.g. when
folding on Océ TCS printers), check the 'Add extra 180° to the short edge first' option
on the 'Data Generation' window (available from the 'Image' tab / 'More' button).
Note: The icon displayed on the 'Basic' page integrates the effects of the 'Short edge
first' (automatic or not) on the data orientation (see ‘Page orientation’ on page 55)
72
Chapter 3 Océ Windows Printer Driver Settings
'Rotation'
Automatic 'Short edge first' (Océ TDS/TCS printers only)
In order to avoid clipping and optimize performance, the driver can perform an
automatic 'Short edge first' rotation, in the following context:
■
■
the landscape drawing is wider than 36 inches, and
the rotation is set to 'Printer default' or 'Media saving' or 'Productive'.
When performed, the graphical data is rotated: 270° angle, except when folding is
set to 'ERICSSON' (90°) or when 'Add extra 180° to the short edge first' is selected.
This automatic behavior is disabled when a rotation is set ('0°'/'90°'/'180°'/'270°').
In case of a multipage document, each page is analyzed by the driver. The rotation is
performed only when needed.
Note: Since it is impossible to set a landscape format wider than the printer width
threshold in WPD optimized for AutoCAD, the automatic 'Short edge first' function
is not applicable when using WPD with AutoCAD (WPD from v1.15, with
optimization for AutoCAD-based applications).
73
'Mirror'
'Mirror'
Introduction
'Mirror' is accessible from the 'Layout' page, by clicking the 'More' button.
Definition
Use this setting to mirror the output, using one of the three available values.
Illustration
[24]
[24] Transformation window
'No'
The output is not mirrored and remains in its original state.
'Horizontal'
Allows the output to be mirrored with respect to the paper feed axis.
'Printer default'
Applies the value set on the printer (controller).
74
Chapter 3 Océ Windows Printer Driver Settings
'Alignment'
'Alignment'
Introduction
'Alignment' is accessible from the 'Layout' page, by clicking the 'More' button.
Definition
Use this list to select the position of the printed document on your media.
Attributes
This setting depends on the 'Cut size' method you selected.
75
'Shift'
'Shift'
Introduction
'Shift' is accessible from the 'Layout' page, by clicking the 'More' button.
Definition
Use this setting to shift the position of the image on the page. 'Shift' is applied once
the alignment is done.
Two shifts are available:
'Horizontal'
If you need to modify the position of a drawing in the paper, you can shift the image
horizontally. Enter the value in the field:
■
■
Negative value moves the image to the left,
Positive value moves the image to the right.
The printout size will not change.
'Vertical'
If you need to modify the position of a drawing in the paper, you can shift the image
vertically. Enter the value in the field:
■
■
Negative value moves the image to the top,
Positive value moves the image to the bottom.
The printout size will not change.
76
Chapter 3 Océ Windows Printer Driver Settings
Select the cut size method
Cut the output
Select the cut size method
Introduction
This feature is available when clicking the 'Cut size' button in the 'Basic' page.
Definition
Indicates how the device will cut the paper after printing. This setting is available
only if the print is made on a 'roll'. Therefore, it is not accessible when media source
is 'Tray' or 'Manual feed'.
Illustration
[25]
[25] Cut size
Methods
■
■
■
■
'Standard': Print is cut according to the media source selected in the 'Basic' page.
'Synchro': Print is cut according to the size of the image. There is a minimum cut
length which varies according to the printer model.
'Custom': Allows you to define your own cut size by entering the 'Length' value
required.
'Printer default': Print is cut according to the default cut setting applied on the
printer (controller).
77
'Strips'
'Strips'
Definition
Use this setting to make corrections on the length of the print. The adjustment of the
'Leading strip' and 'Trailing strip' changes the output format.
'Leading strip'
You can adjust the length of the output by adding a strip at the top of the printout
(from 0 mm to 400 mm).
The 'Leading strip' is declared in the units selected in the 'Preferences' window (see
Units).
Note: This is done after the scale or zoom transformation.
'Trailing strip'
You can adjust the length of the output by adding a strip at the bottom of the printout
(from 0 mm to 400 mm).
The 'Trailing strip' is declared in the units selected in the 'Preferences' window (see
Units).
Note: This is done after the scale or zoom transformation.
78
Chapter 3 Océ Windows Printer Driver Settings
Collate (for Océ TDS printers only)
Set the final options
Collate (for Océ TDS printers only)
Definition
Use this option to collate the multiple copies of your job. This setting is selectable
only if the number of copies is greater than 1.
Illustration
[26]
[26] Collate - checked
Checked
Copies are sorted by set: 1234, 1234, 1234, 1234.
Illustration
[27]
[27] Collate - unchecked
Unchecked
Copies are sorted by page: 1111, 2222, 3333, 4444.
79
'To inbox' / 'To waiting jobs'
'To inbox' / 'To waiting jobs'
Definition
The 'To inbox' option is available from the 'Basic' page. Check it to send the print file
to an inbox instead of directly to a printer.
Unchecked by default, the option availability and behavior depend on the setting
defined on the print controller (see the Jobs management / Print jobs setting in the
System menu of the 'Océ Settings Editor').
Note: This option is not available for the Océ TDS3x0, Océ TCS300 and Océ 9x00
printers.
Note: 'To inbox' and 'To waiting jobs' are the same option. Naming depends on the
printer.
Checked
When you enable this option, the job is not printed automatically but sent to the
printer's inbox. You can print the job later on, by selecting it directly from the
printer's inbox.
80
Chapter 3 Océ Windows Printer Driver Settings
'Stamping' (for Océ TDS / Océ TCS printers)
'Stamping' (for Océ TDS / Océ TCS printers)
Introduction
According to your rights, you can define, compose and apply a stamp to your
printout, inside or outside the border of the document, when printing to your Océ
TDS or TCS printer.
Open the 'Stamping' page to set:
■
■
the 'Stamp selection' (administrator and user if allowed).
the 'Stamp definition' (administrator only).
'Stamping' features
■
■
■
■
■
You can apply only 1 stamp to a document.
The same stamp is applied to all pages of a printout (not only to the first page).
'Stamp selection' and 'Stamp definition' settings are stored in the templates.
A stamp is never scaled.
The 'Stamp position' is determined relatively to the graphical data (e.g. 'Top left
- inside border'). If the document is rotated (e.g. 'Rotation' set to '90°'), the stamp
follows the rotation to stay on top of the graphical data (except in case of a 'Short
edge first' rotation, automatic or not).
Note: The icon displays the result of the 'Stamp selection' and the 'Stamp definition',
to illustrate whether a stamp is active or not and where it will be positioned.
Note: When a stamp is applied to a document, the 'Printable area' is automatically
set to 'Full size'.
'Stamp definition'
Only an administrator can set the stamp settings and the stamping strategy. Once
defined, the stamping is propagated to the clients (in case of sharing) or to the users.
Stamping strategy: A stamp can be 'Optional' or 'Mandatory for all users'.
When the administrator sets:
■
■
■
'No stamp': 'Stamp selection' is locked to 'None'. All the fields are grayed and the
icon displays the 'No stamp' symbol. The 'Stamping' page becomes unavailable
for the users.
'Mandatory for all users': 'Stamp selection' is locked to 'On all pages'. The stamp
defined by the administrator will be applied on all pages submitted through the
driver. The users can see the stamp settings but cannot change them.
'Optional': the administator allows the users to decide whether they apply the
stamp or not. The users can see the stamp settings but cannot change them.
81
'Stamping' (for Océ TDS / Océ TCS printers)
'Stamp position': The administrator selects the stamp position, on top or at the
bottom of the page, inside or outside the image border ('outside the border' option
puts the stamp in the margin).
The stamp position is illustrated by the icon.
Note: When you position a stamp 'outside the border', the page size is enlarged to
include an additional margin. This added margin may change the orientation of the
page and may influence the media selection.
'Stamp text': The stamps consists of a free combination of free text (limited to 256
characters) and predefined variables. The resulting stamp text is a single line.
Font: The administrator selects the font name ('Arial', 'MS Gothic', 'Simsun', 'Gulim')
and the font size (from 10 to 18 pts).
Note: 'Arial' is used for Latin characters, 'MS Gothic' for Japanese ones, 'Simsun' for
Chinese characters and 'Gulim' for Korean ones (when supported by the controller).
Note: The stamp color is black (RGB(0,0,0)).
Rotation impact on the stamp position
[6]
Orientation
Rotation
Portrait
'90°'
'180°'
'270°'
Landscape
'Short edge first' (automatic or not)
'Short edge first' + 'ERICSSON' folding
'Short edge first' + 'Add extra 180° to the short
edge first'
'Short edge first'+ 'ERICSSON' folding + 'Add
extra 180° to the short edge first'
82
Chapter 3 Océ Windows Printer Driver Settings
Stamp
position
[28]
[29]
[30]
[31]
[32]
[33]
[34]
[35]
[36]
Stamping (for Océ 9700 and Océ 9800 printers)
Stamping (for Océ 9700 and Océ 9800 printers)
Introduction
When you print with the Océ 9700 or Océ 9800 printer, you can define if a printer
specific stamp must be added to your drawing (name, date...). The 'Stamping' box
must be checked to apply and manage the stamping.
The 'Stamping' button is available from the 'Image' tab.
Stamping settings
[7]
[7] Stamping settings
Setting
Description
'Stamp number'
Enter the index number of the stamp registered on the
controller of the printer. The range of the value is 1 to 50.
'Stamp position'
Defines the position of the stamp within the physical page. It
can be bottom, middle, top or printer default.
'Font size'
Defines the stamp font size. The associated options are small,
large or printer default.
'Grayscale'
Adjusts grayscale of the stamp itself. The applied grayscale
can be black, gray, dark gray, light gray or printer default.
83
Select the output destination
Select the output destination
Introduction
You can select the output destination from the 'Finishing' page, only accessible for
printers with folding option.
[37]
[37] Finishing page
Definition
From the 'Finishing options', you can select between several output destinations:
■
■
■
■
■
'Integrated Receiving Tray'
'Copy Delivery Tray'
'Two-tray stacker'
'Lower Output Tray'
'Folder'
'Integrated Receiving Tray' (for Océ TDS600 and Océ TDS700)
The standard integrated tray receives up to 100 sheets.
This setting is the only output destination available when 'Copy Delivery Tray' and
'Folder' are not selected in the 'Device settings' page.
'Copy Delivery Tray'
This wheeled delivery tray with blower unit receives up to 150 sheets.
'Copy Delivery Tray' can be selected only if activated in the 'Device settings' page
(see ‘Define the device settings’ on page 35).
'Copy Delivery Tray' and 'Folder' can be associated.
84
Chapter 3 Océ Windows Printer Driver Settings
Select the output destination
'Two-tray stacker'
This high capacity stacking system coming with two trays receives up to 1500
sheets.
'Two-tray stacker' can be selected only if activated in the 'Device settings' page (see
‘Define the device settings’ on page 35).
'Lower Output Tray' (for Océ 9700 and 9800)
The 'Lower Output Tray' can be used to deliver (long) printed files.
'Lower Output Tray' can be selected only if activated in the 'Device settings' page
(see ‘Define the device settings’ on page 35).
'Lower Output Tray' can be associated with 'Copy Delivery Tray'. It cannot be
associated with 'Folder'.
'Folder'
'Folder' can be selected only if activated in the 'Device settings' page (see ‘Define the
device settings’ on page 35).
When you check this option, all folder settings are enabled.
85
Define the folding settings
Define the folding settings
Introduction
The folder settings are accessible from the 'Finishing' page, which is only available
for printers with finishing capability.
Definition
All the folding settings can be defined if:
■
■
Folder is previously selected in the 'Device settings' page(see ‘Define the device
settings’ on page 35).
Folder is selected in the 'Finishing options' of the 'Finishing' tab.
Note: Please configure the Océ TCS500 folding settings directly on the folder
device.
'Method'
Select the folding method among the four available:
■
■
■
■
'DIN'
'ERICSSON'
'AFNOR'
'Printer default'
Note: When set to 'Printer default', all folder settings are set to default values.
'Portrait fold'
Check this option to force your output to be folded in the portrait orientation.
This is useful if the file contains a title block (legend) that requires portrait folding
method.
86
Chapter 3 Océ Windows Printer Driver Settings
Define the folding settings
'Options'
Select the folding options. The available values depend on the folding method you
selected.
■
■
■
■
'Full fold': the printout is folded in both directions according to the selected
folding method.
'First fold only': the printout is folded in one direction only, then exits from the
folder unit. This option is useful for long plots.
'Fold and reinforce': the printout is folded and an additional edge is added for a
reinforcing strip to be attached to the folded copy. The edge width is set at your
printer front panel.
'Fold and punch': the output is folded and a binding edge is added for punching.
Note: 'Fold and punch' setting is available for the Océ TDS8x0, Océ 9700 and Océ
9800 printers only.
'Delivery'
Select the deposit where the output is delivered:
■
■
'Stacker'
'Belt'
Note: This setting is available according to the selected folding options.
87
Advanced folding options
Advanced folding options
Introduction
These options are available from the 'Finishing' page, clicking the 'Advanced' button.
[38]
[38] Advanced folding options
Definition
The 'Binding strip' is an additional strip set to punch holes or to create tabs on a
folded printout.
You can select:
■
■
■
'Printer default' to apply the value set on the printer controller.
'No binding strip' to remove the strip (and bypass the value set on the controller).
A value included in a given range.
'Folded packet size' definition
You can define the dimensions of the folded drawing:
■
■
'Width': from 186 mm (7.3') to 230 mm (9').
'Length': from 276 mm (10.9') to 310 mm (12.3').
Note: If an out-of-range value is entered, the software keeps the limit value.
88
Chapter 3 Océ Windows Printer Driver Settings
Chapter 4
How to
89
How to optimize the print performance for landscape drawings
How to optimize the print performance for landscape
drawings
Introduction
In order to optimize the global performance of the system, a drawing can be rotated
before being printed. The rotation can be automatically performed (on TDS/TCS
printer only) or manually set in the 'Advanced layout' window.
Optimize the printing of a long landscape drawing
To optimize the printing of a landscape drawing, perform the rotation in the
application and set the 'Page size' orientation to 'Portrait' in Océ Windows Printer
Driver.
If the rotation cannot be set in the application, in case of a drawing wider than 36
inches printed on the Océ TDS/TCS systems, the Océ Windows Printer Driver (v
1.13 and higher) performs an automatic 'Short edge first' rotation.
To enable this automatic behavior, make sure that the 'Rotation' option is set to
'Printer default' (default value), 'Media saving' or 'Productive'(see ‘'Rotation'’ on
page 72).
Note: You can also optimize print performance on Océ 9x00 printers (see ‘How to
print landscape long drawings on Océ 9x00 printers’ on page 91).
90
Chapter 4 How to
How to print landscape long drawings on Océ 9x00 printers
How to print landscape long drawings on Océ 9x00 printers
Print landscape long drawings with Océ Windows Printer Driver (version 1.13
and higher) on 9x00 printers.
1.
2.
3.
4.
5.
6.
7.
From the application, open your file.
Select File - Print or the printer.
Select the Océ WPD driver and open the properties.
On the 'Layout' page, click on 'More' to open the 'Advanced layout' window.
In 'Rotation' select 'Short edge first'.
Click 'OK' to save your settings.
Print the file.
Note: The 'Short edge first' is automatically performed by the driver (WPD 1.13 and
higher) for the Océ TDS/TCS systems (see ‘'Short edge first'’ on page 72). To enable
this automatic behavior, make sure that you do not set a specific 'Rotation' angle.
Note: In previous Océ Windows Printer Driver versions, select the 'Rotated
landscape' orientation (in the 'Basic' page) to set the short edge first rotation.
91
Print using an Océ Windows Driver within MicroStation
Print using an Océ Windows Driver within MicroStation
Before you begin
To print in the MicroStation application using an Océ Windows Driver, you need to
previously install the printer driver as described in chapter 2, Installation.
Required tools
A version of the MicroStation application.
An Océ Windows Driver (WPD or WRD).
Check
1.
2.
3.
4.
5.
6.
92
Launch your MicroStation application.
Open the File - Print window.
From this window, choose File - Windows Printer.
Select your Océ printer.
Adjust the settings of your Océ Windows Printer Driver.
Click 'Print'.
Chapter 4 How to
Print using an Océ Windows System Driver within AutoCAD
Print using an Océ Windows System Driver within AutoCAD
Before you begin
To print in the AutoCAD application using an Océ Windows system driver, you need
to previously install the printer driver as described in chapter 2: Installation.
Note: Specific optimizations for AutoCAD-based applications (AutoCAD 2000i and
higher) are available in the Océ WPD driver, starting with version 1.7.
Required tools
A version of the AutoCAD application.
An Océ Windows System Driver.
Define the Océ Windows system driver as an AutoCAD plotter driver
Open the AutoCAD application.
From File - Plotter Manager, double click on 'Add-A-Plotter Wizard'.
Click 'Next' on the 'Introduction' window.
Select 'System Printer' and click 'Next'.
Choose the Océ printer associated with the Windows system driver, and click 'Next'
twice.
6. Enter the plotter name and click 'Next'.
Then you can adjust the plotter settings.
1.
2.
3.
4.
5.
Adjust the plotter settings
1. Click on 'Edit Plotter Configuration...' to access the driver properties.
2. On the 'Device and document settings' tab, click on the 'Custom properties' button to
display the Windows system driver custom settings.
Note: The 'Configuration parameters' window may display, adjust the settings
according to your actual printer configuration, and validate.
3. Define the custom settings and click 'OK' twice.
4. Click on 'Finish'.
Note: Your Océ plotter is now installed, as you can see in the 'Plotters' window of
the Autodesk Manager (note that the plotter name has a .pc3 extension).
Note: You can also modify the settings before printing from your AutoCAD
application in the File - Plot menu. Select your Océ plotter (.pc3) and click
'Properties'.
93
Print using an Océ Windows System Driver within AutoCAD
Attention: The plotter (.pc3 file) you created using the Autodesk Plotter
Manager is specific to one version of the Océ Windows Driver. Some functions
may appear or change from one version to another. After an upgrade of the driver,
check that the complete plotter configuration is restored from the .pc3 file.Adjust
the settings if necessary.
Print in AutoCAD
Note: When printing on a system driver, always print using the plotter configuration
file (.pc3) in which the AutoCAD plotter settings are stored
1. Open the File - Plot window.
2. On the 'Plot device' tab, select your Océ plotter (.pc3) in the list.
3. Adjust the settings if needed.
Note: You can easily set the orientation of the printout by choosing the size with the
right 'Portrait' ('Portrait') or 'Landscape' ('Landscape') orientation directly in the
'Paper size' list ('Landscape' orientation is available only when the 'Page size' width
fits within the printer width threshold).
4. Click on 'Plot'.
Note: You may get an error message (see ‘Get correct optimizations for
AutoCAD-based applications (AutoCAD 2000i to AutoCAD 2005)’ on page 101).
94
Chapter 4 How to
Print using an Océ Windows Driver within Xsteel
Print using an Océ Windows Driver within Xsteel
Before you begin
To print in the Xsteel application using a Windows driver, you need to previously
install the printer driver as described in chapter 2: Installation.
Required tools
A version of the Xsteel application.
An Océ Windows Driver (WPD or WRD).
Configure the Océ printer in Xsteel
1. In the Xsteel application, open the File - Catalog - Plotters - Modify window.
2. In the 'Plotter catalog' window, enter your printer name (bottom left) to create a new
printer alias.
3. Click 'Browse' to select the printer you have installed.
4. Define the settings of your printer alias (paper size, plot area, color...).
5. Click 'Add'.
Print in Xsteel
1.
2.
3.
4.
From the 'Drawing' menu, open the drawing 'List...'.
Select your drawing and click 'Open'.
Select File/Plot current File - Plot current.
Select your printer alias and click 'Print'.
95
Print using an Océ Windows Driver within Xsteel
96
Chapter 4 How to
Chapter 5
Troubleshooting
97
Installation problems-Introduction
Solve installation problems
Installation problems-Introduction
Definition
We recommend to define the correct installation method, according to your network
architecture (see ‘Define the correct installation method’ on page 28).
Attributes
We recommend to use:
the 'Add (a) printer' method in a Client/Server configuration on a user
workstation
■ the 'Setup' method when the workstation is directly connected to the printer (peer
to peer)
■
98
Chapter 5 Troubleshooting
Back-channel restriction due to a firewall presence
Back-channel restriction due to a firewall presence
Question
How to get back-channel information after an installation on a network protected
with a firewall?
Answer
Open the TCP/IP port number 65200 on the firewall to allow the back-channel
process.
99
Installation under AutoCAD 2004
Installation under AutoCAD 2004
Question
I have installed my printer but why can't I find it in the Autodesk Plotter Manager?
Answer
Reason: you have several AutoCAD applications (2000i, 2002, 2004) and Autodesk
Plotter Manager directs you on the latest application you used.
Solution:
1. Open your AutoCAD 2004 application.
2. Select File - Plotter Manager.
3. Proceed with the configuration of your printer (see ‘Print using an Océ Windows
System Driver within AutoCAD’ on page 93).
100
Chapter 5 Troubleshooting
Get correct optimizations for AutoCAD-based applications (AutoCAD 2000i to
Get correct optimizations for AutoCAD-based applications
(AutoCAD 2000i to AutoCAD 2005)
Purpose
The following warning message is displayed when plotting a file from AutoCAD, if
the optimizations for AutoCAD were not correctly installed during the driver setup.
Warning message
Warning: the Océ 'Windows Printer Driver' could not find the extensions needed to
optimize printing from AutoCAD. To enable the optimization, please refer to the
troubleshooting section in Océ WPD user manual.
Get the correct optimizations for AutoCAD 2000i to AutoCAD 2005
1. Make sure you have writing rights in the drv directory of your AutoCAD application.
For instance: C:\Program Files \Autodesk\AutoCAD product\DRV
2. Launch the ocegdicp.exe file, located in your driver installation directory usually
under:
■ C:\WINDOWS\system32\spool\drivers\w32x86\2 (Windows NT)
■ C:\WINDOWS\system32\spool\drivers\w32x86\3 (Windows 2000/XP)
The Océ WPD driver is optimized for AutoCAD.
Check
1.
2.
3.
4.
Launch your AutoCAD application.
Select File - Plot.
Select the Océ WPD driver.
Check that the mention 'Optimized driver - by Océ' is displayed.
[39]
[39] AutoCAD optimizations
101
Get correct driver upgrade for AutoCAD-based applications (ACAD 2000i and higher)
Get correct driver upgrade for AutoCAD-based applications
(ACAD 2000i and higher)
Purpose
The following warning message is displayed when plotting a file from AutoCAD, if
the optimizations for AutoCAD were not correctly installed during the driver
upgrade.
Warning message
Warning: the extensions needed to optimize printing from AutoCAD with the Océ
'Windows Printer Driver' are not up-to-date.To take full advantage of the
optimization, please refer to the troubleshooting section on how to upgrade in the
Océ 'Windows Printer Driver' user manual.
Get the correct upgrade for AutoCAD 2000i and higher
1. Make sure you have writing rights in the drv directory of your AutoCAD application.
For instance: C:\Program Files \Autodesk\AutoCAD product\DRV
2. Launch the ocegdicp.exe file, located in your driver installation directory usually
under:
■ C:\WINDOWS\system32\spool\drivers\w32x86\2 (Windows NT)
■ C:\WINDOWS\system32\spool\drivers\w32x86\3 (Windows 2000/XP)
Check
1.
2.
3.
4.
Launch your AutoCAD application.
Select File - Plot.
Select the Océ WPD driver.
Check that the mention 'Optimized driver - by Océ' is displayed.
[40]
[40] AutoCAD optimizations
102
Chapter 5 Troubleshooting
Advanced accounting problems
Advanced accounting problems
Question
Why can't I connect to the printer and get the advanced accounting information?
Answer
1.
2.
3.
4.
Make sure you are using the compatible version of Internet Explorer: IE 6.0.
If yes, open the Internet Explorer and go to the Internet Options in the Tools menu.
Select Connections/LAN settings.
Check the 'Bypass proxy server for local addresses' option.
103
Vectors printing on the Océ TDS400
Improve output quality
Achieve optimal output quality
Vectors printing on the Océ TDS400
Question
Why are some vectors printed in bad quality on the Océ TDS400 printer, especially
when those vectors appear as light color vectors in the application?
Answer
Solution:
1. Check your Océ TDSx00 printer version (see ‘Check your Océ TDS printer version’
on page 14) to make sure that the controller version is compatible (TDS400 1.4.3 or
higher, TDS600 3.2.3 or higher, TDS800 1.3.3 or higher).
2. Open the 'Image' tab in the Océ WPD driver, or the Océ Settings Editor on the
controller.
3. Set the 'Print optimization' to 'Lines/Text'.
[41]
[41] Lines/Text
104
Chapter 5 Troubleshooting
Image quality according to a printer version
Image quality according to a printer version
Question
Why is the image quality different between an Océ TDS400 (before 1.4.3) and an
Océ TDS400 (1.4.3 and higher) or between an Océ TDS600 (before 3.2.3) and an
Océ TDS600 (3.2.3 and higher) or between an Océ TDS800 (before 1.3.3) and an
Océ TDS800 (1.3.3 and higher)?
Answer
Dithering matrix algorithm has changed from one controller version to another in
order to improve the overall image quality.
The dithering parameters 'Clustered' and 'Cloud' were accessible on the controller
only through the Océ Settings Editor. In the new controller versions, the dithering
matrix is no longer accessible but is directly embedded in the 'Print optimization'
parameters.
■
■
Tips to get the closer image quality as on your previous Océ TDS version:
[8]
If
Then
You selected the 'Clustered' setting in
the previous controller version
Set the 'Print optimization' to 'Standard'
or 'Poster' in the new version.
You selected the 'Cloud' setting in the
previous controller version
Set the 'Print optimization' to
'Lines/Text' in the new version.
105
Get a correct layout or rotation of the drawing on an Océ TDS/TCS printer
Get a correct layout or rotation of the drawing on an Océ
TDS/TCS printer
Question
I have applied a drawing rotation but why was the rotation not applied / the drawing
not printed on my Océ TDS/TCS printer?
Why is the layout of my drawing not correct (position of the drawing on the page,
margins)?
Answer
On the printer controller, within the 'Océ Settings Editor', set the 'PS no clip' setting
to 'Off'.
1. Open the 'Océ Settings Editor'.
[42]
[42] Océ Settings Editor
2. From the 'View' menu, set 'SA Settings'.
3. In the 'PDLs' tab, open the HPGL-2 tree.
4. Select 'PS no clip' and check 'Off' on the right part of the window.
Note: You can also set the 'Rotation' to 'Short edge first', and if needed, activate
'Add extra 180° to the short edge first'(see ‘'Short edge first'’ on page 72).
106
Chapter 5 Troubleshooting
Large-format printing
Large-format printing
Question
Why does large-format printing of PDF files from Acrobat Reader result in
unexpected problems using the HP-GL/2 Driver?
Note: This issue may occur in other software applications such as Adobe Illustrator
and PhotoShop when using the HP-GL/2 driver (WPD driver 'Data Processing' set
to 'Best Performance (recommended)').
Answer
As the problem happens because the page size in pixels is too big for the application
print engine, the solution consists in reducing the page number of pixels. As the
physical page size cannot be reduced, change the document resolution:
1. Select a lower 'Print-file resolution' in the 'Image' tab,
2. or use the Océ PostScript driver.
107
Cut synchro
Cut synchro
Question
When I selected 'Synchro' in the 'Cut size' method in WPD, why is a white area
printed anyway at the end of the print?
Answer
There are 2 possible reasons:
The drawing size is smaller than the minimal cut length. You cannot change it
because there is a minimum cut length which varies according to the printer model.
'PS no clip' is set to 'Off' in the controller and the printer cuts according to the page
size (as in application) you selected in the driver. You can select between the 2
solutions below:
1. Set 'PS no clip' to 'On' in the Océ Settings Editor or,
2. Redefine your 'Page size (as in application)' in the Océ WPD 'Basic' page.
108
Chapter 5 Troubleshooting
Océ Windows Drivers and SolidWorks application
Océ Windows Drivers and SolidWorks application
Question
Why do I have quality problems on 3D drawings using the Océ Windows Driver with
SolidWorks 2003?
Answer
This is a known application issue.
1. Contact your System administrator.
2. Upgrade your SolidWorks application to SolidWorks 2004.
109
Manage the number of copies under Windows NT/2000/XP
Manage the number of copies
Manage the number of copies under Windows NT/2000/XP
Question
In Microsoft PowerPoint and Corel applications under Windows NT/2000/XP, why
is the number of copies set in the driver not taken into account?
Answer
Set the number of copies from the application:
1. Open the File - Print window.
2. Enter the number of copies in the appropriate field.
110
Chapter 5 Troubleshooting
Manage the number of copies with AutoCAD under Windows 9x and Me
Manage the number of copies with AutoCAD under Windows
9x and Me
Question
With Océ WPD for Windows 9x and Me, why is the number of copies set in the
driver not taken into account in the AutoCAD 2000, AutoCAD 2002, and Microsoft
PowerPoint applications.
Answer
Set the number of copies from the application.
1. Open the File - Plot window.
2. In the 'Plot device' tab, set the number of copies.
111
Define the settings to manage clipping
Manage clipping
Define the settings to manage clipping
Question
The drawing is lightly clipped on the borders. How to check the proper settings?
Answer
In case of clipping, check that you are using the default driver configuration, and add
edges if needed.
1. In case of left or right clipping, set the following settings:
■
■
From the 'Layout' tab click 'More' to open the 'Advanced layout' and set the
'Alignment' to 'Centre'.
Check that the 'Shift' function is not activated.
2. In case of top or bottom clipping, add a 'Leading strip' and a 'Trailing strip' from the
'Basic' / 'Cut size' window.
Note: If needed, you can also check the 'Printable area' settings from the 'Basic' /
'Preferences' window (see ‘'Printable area'’ on page 71) and (see ‘'Image size
correction'’ on page 70).
112
Chapter 5 Troubleshooting
Manage clipping on the Océ TDS400
Manage clipping on the Océ TDS400
Question
On the Océ TDS400, when the print is exactly aligned with the border of a standard
paper format, why is the corresponding edge of the drawing clipped?
Answer
Use the 'Shift' or 'Image size correction' possibilities in the Océ Windows Printer
Driver.
Note: A larger paper size may be chosen by the Océ TDS400 for printing in case the
drawing exactly fits a standard paper size.
113
Manage clipping with Océ WPD for Windows 9x and Me
Manage clipping with Océ WPD for Windows 9x and Me
Question
Why is my long plot clipped before the end?
Answer
In the Océ WPD driver, check on the 'Image' tab that the resolution is set to 300 dpi.
Note: The clipping may occur if you have restored the 'Default' settings on the
driver 'Image' tab before printing. In that case, it means that the resolution has been
restored to 600 dpi.
114
Chapter 5 Troubleshooting
Manage clipping with Océ WPD for Windows 9x and Me
Achieve optimal output quality with Océ
Windows Printer Driver specific for Windows 9x
and Me printing on an Océ TCS400 printer
Note: In case of missing or corrupted output, set the 'Processing on the computer'
mode in 'Data Processing'.
115
Set the 'Processing on the computer' (raster only) mode
Set the 'Processing on the computer' (raster only) mode
Question
Lines are missing on the output when using mixed mode and when autorotation is
set on the controller.
Answer
Print the file in 'Processing on the computer' (Raster only) mode:
1.
2.
3.
4.
5.
6.
Open the Start - Settings - Printers window.
Right click on the printer you use to open the 'Properties'.
Click on 'Preferences'.
Select 'Image' tab.
Click the 'More' button.
Check the 'Processing on the computer' radio button.
[43]
[43] 'Processing on the computer' mode
Note: 'Processing on the computer' mode resolution is limited to 300 dpi.
Note: You can also set the 'Rotation' to 'Short edge first' in the driver (for Océ
Windows Printer Driver version 1.13 and higher), or 'Page size' to 'Rotated
landscape' (previous Océ Windows Printer Driver versions).
116
Chapter 5 Troubleshooting
Océ Windows Drivers and AutoCAD 2000
Océ Windows Drivers and AutoCAD 2000
Question
Why do errors occur when printing in AutoCAD 2000?
Answer
Check your AutoCAD version has been updated with the AutoCAD Plotting Update
Patch.
1. Check the AutoCAD version (see procedure below).
2. If the version has not been updated, get the AutoCAD Plotting Update Patch from
the Autodesk Product Support website http://support.autodesk.com.
3. Install the patch.
Checking whether your AutoCAD 2000 version has been updated
1. In AutoCAD, enter the line command '_vernum' in the command window.
2. Validate. If the result is 'VERNUM = "T.1.08"' or higher, the patch has been
installed.
[44]
[44] AutoCAD 2000
117
WPD and the MicroStation application
WPD and the MicroStation application
Question
Why is some paper information not well transmitted between the application, the
driver and the printer?
Answer
Follow these 2 points:
1. Use MicroStation version 8.00.04 and higher (instead of the 8.00.01 version).
2. If the paper orientation is not well transmitted from the driver to the application,
change it from the File - Print print menu of the MicroStation application.
118
Chapter 5 Troubleshooting
Printing problems with VectorWorks
Overcome limitations in applications
Printing problems with VectorWorks
Question
Why do I get no print or line missing when printing a document >A0 in VectorWorks
using the Océ WPD driver?
Answer
This is due to a resolution limitation in the application.
Set the resolution to 300 dpi in the Océ WPD driver (see ‘Print-file resolution’ on
page 66).
119
Printing problems with Acrobat
Printing problems with Acrobat
Question
When I print big files from Acrobat using the Océ WPD driver, two errors may
occur:
■
■
I get an error message 'Cannot print file'
Some data are missing on the print
How can I solve this?
Answer
This is due to a resolution limitation in the application.
Set the resolution to 300 dpi in the Océ WPD driver (see ‘Print-file resolution’ on
page 66).
Note: This limitation no longer exists when using Adobe Reader 7.
120
Chapter 5 Troubleshooting
Index
Index
A
Accounting . . . . . . . . . . . . . . . . . . . . . . . . . . . . .
Account ID . . . . . . . . . . . . . . . . . . . . . . . . . .
Accounting status . . . . . . . . . . . . . . . . . . . . .
Accounting storage . . . . . . . . . . . . . . . . . . .
Advanced accounting . . . . . . . . . . . . . . . 35,
User ID . . . . . . . . . . . . . . . . . . . . . . . . . . . . .
Advanced accounting . . . . . . . . . . . . . . . 35, 38,
Accounting status . . . . . . . . . . . . . . . . . . . . .
Accounting storage . . . . . . . . . . . . . . . . . . .
Refresh . . . . . . . . . . . . . . . . . . . . . . . . . . . . .
Advanced folding . . . . . . . . . . . . . . . . . . . . . . . .
Advanced layout
Alignment . . . . . . . . . . . . . . . . . . . . . . . . . .
Mirror . . . . . . . . . . . . . . . . . . . . . . . . . . . . . .
Rotation . . . . . . . . . . . . . . . . . . . . . . . . . . . .
Shift . . . . . . . . . . . . . . . . . . . . . . . . . . . . . . .
Alignment . . . . . . . . . . . . . . . . . . . . . . . . . . . . . .
AutoCAD
PC3 . . . . . . . . . . . . . . . . . . . . . . . . . . . . . . . .
51
47
51
51
51
47
51
51
51
51
88
93
Back-channel . . . . . . . . . . . . . . . . . . . . . . . . 36, 47
Belts . . . . . . . . . . . . . . . . . . . . . . . . . . . . . . . . . . 41
Binding strip . . . . . . . . . . . . . . . . . . . . . . . . . . . . 88
C
D
Data Generation
66
66
66
35
38
36
33
68
E
External finishers . . . . . . . . . . . . . . . . . . . . . 35, 40
75
74
72
76
75
B
collate . . . . . . . . . . . . . . . . . . . . . . . . . . . . . . . . .
Color . . . . . . . . . . . . . . . . . . . . . . . . . . . . . . . . . .
Color feel . . . . . . . . . . . . . . . . . . . . . . . . . . .
Color settings . . . . . . . . . . . . . . . . . . . . . . . .
Color feel . . . . . . . . . . . . . . . . . . . . . . . . . . . . . .
Copy Delivery Tray . . . . . . . . . . . . . . . . . . . . . .
Custom size . . . . . . . . . . . . . . . . . . . . . . . . . 57,
Cut size . . . . . . . . . . . . . . . . . . . . . . . . . . . . . . . .
Custom . . . . . . . . . . . . . . . . . . . . . . . . . . . . .
Standard . . . . . . . . . . . . . . . . . . . . . . . . . . . .
Synchro . . . . . . . . . . . . . . . . . . . . . . . . . . . .
Data Processing . . . . . . . . . . . . . . . . . . . . . .
Data Processing
Best Performance . . . . . . . . . . . . . . . . . . . . .
Processing on the computer . . . . . . . . . . . . .
Device settings . . . . . . . . . . . . . . . . . . . . . . . . . .
Advanced accounting . . . . . . . . . . . . . . . . . .
Back-channel . . . . . . . . . . . . . . . . . . . . . . . .
Connect . . . . . . . . . . . . . . . . . . . . . . . . . . . .
dithering matrix . . . . . . . . . . . . . . . . . . . . . . . . .
79
62
62
62
64
40
60
77
77
77
77
F
Feed definition . . . . . . . . . . . . . . . . . . . . . . . . . .
Finishing . . . . . . . . . . . . . . . . . . . . . . . . . . . . . . .
Copy Delivery Tray . . . . . . . . . . . . . . . . . . .
Folder . . . . . . . . . . . . . . . . . . . . . . . . . . . . . .
Integrated Receiving Tray . . . . . . . . . . . . . .
Lower Output Tray . . . . . . . . . . . . . . . . . . . .
Two-tray stacker . . . . . . . . . . . . . . . . . . . . . .
Folded packet size . . . . . . . . . . . . . . . . . . . . . . .
Folder . . . . . . . . . . . . . . . . . . . . . . . 40, 41, 84,
First fold only . . . . . . . . . . . . . . . . . . . . . . . .
Fold and punch . . . . . . . . . . . . . . . . . . . . . . .
Fold and reinforce . . . . . . . . . . . . . . . . . . . .
Full fold . . . . . . . . . . . . . . . . . . . . . . . . . . . .
Portrait fold . . . . . . . . . . . . . . . . . . . . . . . . .
39
40
84
84
84
84
84
88
86
86
86
86
86
86
I
Image size correction . . . . . . . . . . . . . . . . . . . . . 70
Inbox . . . . . . . . . . . . . . . . . . . . . . . . . . . . . . . . . . 80
L
Landscape . . . . . . . . . . . . . . . . . . . . . . . . . . . 55,
Language . . . . . . . . . . . . . . . . . . . . . . . . . . . . . .
Layout
Scale . . . . . . . . . . . . . . . . . . . . . . . . . . . . . . .
Leading strip . . . . . . . . . . . . . . . . . . . . . . . . . . . .
Lower output tray . . . . . . . . . . . . . . . . . . . . . . . .
60
47
69
78
40
121
Index
M
S
Media saving . . . . . . . . . . . . . . . . . . . . . . . . . . . . 72
Media source . . . . . . . . . . . . . . . . . . . . . . . . . . . . 61
Media type . . . . . . . . . . . . . . . . . . . . . . . . . . . . . 61
Mirror . . . . . . . . . . . . . . . . . . . . . . . . . . . . . . . . . 74
Save as local . . . . . . . . . . . . . . . . . . . . . . . . . . . . 60
Save to share . . . . . . . . . . . . . . . . . . . . . . . . . . . . 60
Scale . . . . . . . . . . . . . . . . . . . . . . . . . . . . . . . . . . 69
Percentage . . . . . . . . . . . . . . . . . . . . . . . . . . . 69
Scale to media . . . . . . . . . . . . . . . . . . . . . . . . 69
Shift . . . . . . . . . . . . . . . . . . . . . . . . . . . . . . . . . . . 76
Short edge first . . . . . . . . . . . . . . . . . . . . . . .55, 72
Add extra 180° to the short edge first . . . . . . 72
Stamping . . . . . . . . . . . . . . . . . . . . . . . . . . . .81, 83
Strips . . . . . . . . . . . . . . . . . . . . . . . . . . . . . . . . . . 78
N
Number of feeds . . . . . . . . . . . . . . . . . . . . . . . . . 39
O
Océ enhanced colors . . . . . . . . . . . . . . . . . . . . . . 64
Océ Ticket . . . . . . . . . . . . . . . . . . . . . . . . . . . . . . 46
P
Page orientation . . . . . . . . . . . . . . . . . . . . . . . . . . 55
Page size . . . . . . . . . . . . . . . . . . . . . . . . . . . . . . . 57
Page size list filter . . . . . . . . . . . . . . . . . . . . . . . . 59
Portrait . . . . . . . . . . . . . . . . . . . . . . . . . . . . . . . . . 55
Poster mode . . . . . . . . . . . . . . . . . . . . . . . . . . . . . 66
Preferences
Image size correction . . . . . . . . . . . . . . . . . . 70
Page size list filter . . . . . . . . . . . . . . . . . . . . . 59
Printable area . . . . . . . . . . . . . . . . . . . . . . . . 71
Print contains . . . . . . . . . . . . . . . . . . . . . . . . . . . 66
Print optimization . . . . . . . . . . . . . . . . . . . . . . . . 66
Printable area . . . . . . . . . . . . . . . . . . . . . . . . . . . 71
Full size . . . . . . . . . . . . . . . . . . . . . . . . . . . . . 71
Inked area . . . . . . . . . . . . . . . . . . . . . . . . . . . 71
Printer default . . . . . . . . . . . . . . . . . . . . . . . . . . . 46
Printer description . . . . . . . . . . . . . . . . . . . . . . . . 35
Printer information . . . . . . . . . . . . . . . . . . . .35, 53
Refresh . . . . . . . . . . . . . . . . . . . . . . . . . . . . . 53
Printer options . . . . . . . . . . . . . . . . . . . . . . . . . . . 35
Productive . . . . . . . . . . . . . . . . . . . . . . . . . . . . . . 72
Punching unit . . . . . . . . . . . . . . . . . . . . . . . . . . . 41
Q
Quality . . . . . . . . . . . . . . . . . . . . . . . . . . . . . . . . . 66
R
Reinforcement unit . . . . . . . . . . . . . . . . . . . . . . . 41
Resolution . . . . . . . . . . . . . . . . . . . . . . . . . . . . . . 66
Rotation . . . . . . . . . . . . . . . . . . . . . . . . . . . . . . . . 72
122
T
Templates . . . . . . . . . . . . . . . . . . . . . . . . . . .47, 49
To inbox . . . . . . . . . . . . . . . . . . . . . . . . . . . . . . . . 80
Trailing strip . . . . . . . . . . . . . . . . . . . . . . . . . . . . 78
Two-tray stacker . . . . . . . . . . . . . . . . . . . . . . . . . 40
U
Uninstall . . . . . . . . . . . . . . . . . . . . . . . . . . . . . . . 42
Units . . . . . . . . . . . . . . . . . . . . . . . . . . . . . . . . . . 47
Upgrade . . . . . . . . . . . . . . . . . . . . . . . . . . . . . . . . 43
User Preferences . . . . . . . . . . . . . . . . . . . . . . . . . 47
User preferences
Back-channel . . . . . . . . . . . . . . . . . . . . . . . . 36