1
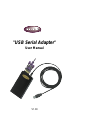
"USB Serial Adapter"
User Manual
V1.00
Table of Contents
1.
Introduction . . . . . . . . . . . . . . . . . . . . . . . . . . . . . . . .2
2.
Device Specifications . . . . . . . . . . . . . . . . . . . . . . . .2
2.1.
2.2.
2.3.
2.4.
2.5.
2.6.
2.7.
Environmental Conditions
Data Rate . . . . . . . . . . . .
Operating Systems . . . . .
Power Consumption . . . .
Dimensions . . . . . . . . . . .
LEDs . . . . . . . . . . . . . . . .
Compliance . . . . . . . . . . .
3.
Installation . . . . . . . . . . . . . . . . . . . . . . . . . . . . . . . . .3
3.1.
3.2.
3.3
Installing Windows® 98 Drivers . . . . . . . . . . . . . . . . . .3
Adding DOS Box Support (Optional) . . . . . . . . . . . . . .5
Uninstalling the USB Serial Adapter Drivers . . . . . . . . .6
4.
Using the USB Serial Adapter . . . . . . . . . . . . . . . . . .7
4.1.
4.2.
4.3.
4.4.
Serial Plug-and-Play Device Detection . . . . . . . . . . . .
Adding Non-Plug-and-Play (Legacy) Devices . . . . . . .
LED Indicator Lights . . . . . . . . . . . . . . . . . . . . . . . . .
Using the USB Serial Adapter With DOS Applications
5.
Troubleshooting . . . . . . . . . . . . . . . . . . . . . . . . . . . .9
5.1.
5.2.
5.3.
Port Unavailable . . . . . . . . . . . . . . . . . . . . . . . . . . . . .9
Communications Garbled . . . . . . . . . . . . . . . . . . . . .10
Modem Not Detected/Illegal Operation In MODEM.CPL 10
.
.
.
.
.
.
.
1
.
.
.
.
.
.
.
.
.
.
.
.
.
.
.
.
.
.
.
.
.
.
.
.
.
.
.
.
.
.
.
.
.
.
.
.
.
.
.
.
.
.
.
.
.
.
.
.
.
.
.
.
.
.
.
.
.
.
.
.
.
.
.
.
.
.
.
.
.
.
.
.
.
.
.
.
.
.
.
.
.
.
.
.
.
.
.
.
.
.
.
.
.
.
.
.
.
.
.
.
.
.
.
.
.
.
.
.
.
.
.
.
.
.
.
.
.
.
.
.
.
.
.
.
.
.
.
.
.
.
.
.
.
.
.
.
.
.
.
.
.2
.2
.2
.2
.2
.2
.2
.7
.7
.8
.8
1. Introduction
The USB Serial Adapter provides a standard serial interface to a PC
equipped with USB without requiring an add-in card. It supports many
existing applications and devices, providing true Plug-and-Play
capability. By default, the USB Serial Adapter installs without taking up
any resources. In this mode, most standard Windows® applications can
communicate with the device without using IRQ or memory location
resources. The device can also be easily set up to support DOS
applications that require specific resources.
2. Device Specifications
2.1. Environmental Conditions
0 to 70˚C (32 to 158˚F)
Humidity 10 to 90%, non-condensing
2.2. Data Rate
Runs at a maximum baud rate of 115K
2.3. Operating Systems
Windows® 98
2.4. Power Consumption
Powered from USB Bus
Normal Operation: ~70µA
Suspend: ~300mA
2.5. Dimensions
0.87" H x 2.6" W x 4.25" L
2.6. LEDs
Red: Power
Green: Transmit and Receive
2.7. Compliance
FCC Class B, USB specification v 1.0
2
3. Installation
3.1. Installing Windows® 98 Drivers
1. Insert the disk labeled "USB Serial Adapter Installation
Disk" into your floppy drive (typically drive A:).
2. Insert the flat (type A) connector into an available USB
port on your PC or USB hub attached to your PC.
3. Insert the square connector (type B) into the USB Serial
Adapter device. You will see an Add New Hardware Wizard.
4. Click "Next".
5. When asked "What do you want Windows® to do?"
choose Search for the best driver for your device
(Recommended). Click "Next".
6. To search for new drivers, choose Floppy disk drives.
Click "Next".
7. Make sure the location of the driver is your floppy drive.
Click "Next".
8. The final dialog says "Windows® has finished installing
the software that your new hardware device requires."
Click "Finish".
3
A new COM port will automatically be installed for both the
OSR2.1 and Windows® 98 versions. Follow the instructions below
to determine the name of the new COM port.
1. Follow the instructions below to open the Device Manager:
1. Right-click the "My Computer" icon on your desktop.
2. Click Properties from the menu that appears.
3. Click on the Device Manager tab on the System
Properties page.
2. Click on the "+" next to Ports (COM & LPT).
You will see a list of ports. One of the ports will be labeled USB
Comm Port (COM name) where COM name is the name of the
new COM port. This name will be used in applications.
4
3.2. Adding DOS Box Support (Optional)
DOS Box support for the USB Serial Adapter is useful if you
intend to use DOS applications, but not necessary for Windows®
applications. If you are using only Windows® applications, it is
recommended that you do not install this feature as it uses
resources. For more information about using DOS Box
applications, see section 4.4. Enabling DOS Box support
requires one IRQ and a range of eight memory locations in
order to function. In addition, some DOS applications require
certain IRQ and memory configurations to be associated with
specific COM ports. To enable DOS Box support for a
USB Serial Adapter device, follow the instructions below.
3. Follow the instructions below to open the "Device Manager":
1.Right-click on the "My Computer" icon on your desktop.
2.Click "Properties" from the menu that appears.
3.Click the "Device Manager" tab on the System
Properties page.
4. Click the "+" next to Ports (COM & LPT).
5. Click "USB Comm Port" (ComX) where X is the port
number of the device to which you’d like to add
DOS Box support.
6. Click the "Properties" button.
7. Click the "DOS Box" tab.
8. Click the box next to Enable DOS Box 16550
Emulator. A check mark will appear in the box.
9. Choose a DOS name for the port from the list box next
to Logical Device Name (DOS Box). Many DOS
applications will only work with COM1-COM4. If you don’t
want any of these, choose COMX. Click "OK".
5
10. You will be asked for the USB to Serial installation disk.
Insert the disk into your floppy drive and click "OK". If a
dialog pops up stating that a file could not be found,
make sure that the Copy files from: edit box contains
the name of your floppy drive and click "OK".
Once DOS Box support is enabled for a specific USB Serial
Adapter device, and additional Port entry in the Device
Manager will be created, labeled 16550 COM Port Emulator.
You will also be able to disable and enable this feature.
To disable or re-enable DOS Box support, follow steps 1-6
above. If you are disabling DOS Box support, the check
mark will disappear.
3.3. Uninstalling the USB Serial Adapter Drivers
1. Unplug all USB Serial Adapter devices from the
USB ports.
2. Open the "Control Panel" and double-click on
Add/Remove Programs.
3. On the Install/Uninstall page, click on "USB Serial Adapter"
software from the list box and click "Add/Remove".
4. You can choose to uninstall the USB Serial Adapter driver
and installation files, the mouse driver and installation
files, or both. Choose whatever you would like to remove
(a check mark will appear in the box next to each item to
be uninstalled) and click "OK".
5. A list of activities will appear in the Results: box. Click
"Done" to exit the uninstaller.
6
4. Using the USB Serial Adapter
4.1. Serial Plug-and-Play Device Detection
A Plug-and-Play device, such as a modem, can be
detected in one of two ways:
1. Attach the serial device to the USB Serial Adapter.
Unplug cable and plug the USB B connector to the
USB Serial Adapter.
2. Attach the serial device to the USB Serial Adapter.
Follow the instructions below to open the
"Device Manager":
1. Right-click the "My Computer" icon on
your desktop.
2. Click "Properties" from the menu
that appears.
3. Click the "Device Manager" tab on the
System Properties page.
4. Click "Refresh".
Your Plug-and-Play device should be detected and you may
be asked for a driver if it has not been previously installed.
Follow the instructions that came with your device to complete
the installation.
4.2. Adding Non-Plug-and-Play (Legacy) Devices
Non-Plug-and-Play devices must be added through the Add New
Hardware wizard in the Control Panel. Using this wizard, follow
the installation instructions that came with your device.
7
4.3. LED Indicator Lights
There are three LEDs on the USB Serial Adapter. When the
device is installed, the center, green LED will remain blinking
until the installation is complete. If the installation is successful,
the red LED will remain on, indicating power. When the device
is plugged in after installation, the lights will blink one at a time
in sequence from the red LED to the green LED, then back.
When the device has fully initialized and is ready to work, the
red power LED will remain on. During normal usage, the two
green LEDs indicate data being transmitted and received.
4.4. Using the USB Serial Adapter With DOS Applications
To enable the USB Serial Adapter to work with DOS applications,
follow the instructions in section 3.2 Adding DOS Box Support.
You can choose a different name for DOS than what is used for
Windows®. You may need to do this if the USB Serial Adapter has
been installed as COM5 or higher, since many DOS applications
will only use COM1-COM4. For instance, if you are adding
DOS Box support to COM7, you can choose to have DOS
applications use the device as COM2 instead, if COM2 is not
already in use. COM7 would still be available for use with
Windows® applications, but both COM2 and COM7 refer to
the same physical device.
Therefore, while a DOS application is using COM2, COM7
will be unavailable to Windows® applications and vice-versa.
8
5. Troubleshooting
5.1. Port unavailable
If the installation of the USB Serial Adapter has been completed
but the port is unavailable to applications, follow the instructions
below to diagnose the problem:
1. Check the LEDs on the USB Serial Adapter.
• If the red light is on steady, skip to the next section.
• If there are no lights on, check to make sure the device
has been properly plugged in.
• If the center, green LED is blinking steadily, the device
has not been configured properly. This can happen if
the wrong drivers have been installed for your operating
system. If the wrong drivers have been installed or if you
are not sure, follow the instructions in section 3.3,
Uninstalling the USB Serial Adapter Drivers and reinstall
the software.
2. Check to make sure no other applications are using the
COM port.
3. If you have enabled DOS Box support, make sure that no
other applications are using the Windows® name for the
COM port or the DOS name for the COM port (see section
4.4 Using the USB Serial Adapter with DOS Applications).
9
5.2. Communications Garbled
If you are using the USB Serial Adapter to communicate
between two computers over a serial cable, make sure that
the communications settings are the same on each computer.
For instance, if one computer is set up for 9600-baud, 8 data
bits, no parity, one stop bit and hardware handshaking, errors
can occur if the settings on the other device do not match.
5.3. Modem not detected/illegal operation in MODEM.CPL
It is possible that a modem attached to the USB Serial Adapter
will not be detected or a problem will occur in MODEM.CPL if
more than one USB hub is between the USB Serial Adapter
and the root hub. This is a known problem in MODEM.CPL,
a component of Windows® 98. The easiest solution to this
problem is to attach the USB Serial Adapter to either the
root hub (a USB port on the back of your PC) or to a hub
that is connected to the root hub.
Belkin Components has made their best effort to ensure
that all the information contained in this document is accurate
and reliable. However, the information is subject to change
without notice. No responsibility is assumed by Belkin
Components for the use of this information, or for infringements
of patents or other rights of third parties.
Belkin Components
Corporate Headquarters
501 West Walnut • Compton • CA • 90220-5221
310.898.1100 • 800.223.5546 • Fax 310.898.1111
www.belkin.com
Belkin Components, LTD.
Clarke Road • Mount Farm • Bletchley • Milton Keynes • MK1 1LG
+44 (0) 1908367178 • Fax +44 (0) 1908366564
© 1998 Belkin Components. All Rights Reserved. All Trade Names Are Registered Trademarks Of Respective Manufacturers Listed. P72533