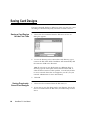
1
MONITOR ISM / AFx Director
Card Badging Option:
Badge Designer User's Guide
™
21-0356 v1.0
Jan 2001
™
User Guide
GuardDraw 5.1 for Windows
ii
GuardDraw 5.1 User Manual
Table of Contents
Introduction-------------------------------------------------------- 7
Setting Up the GuardDraw Workspace -------------------- 8
Specifying Undo Levels ----------------------------------------- 9
Setting the Error Logging Option --------------------------10
Connecting GuardDraw to a Database --------------------11
Setting Up Printers ----------------------------------------------12
The GuardDraw Workspace ---------------------------------14
Selecting Page Sizes ---------------------------------------------18
Creating New Card Designs ----------------------------------20
Opening Existing Card Design Files -----------------------21
Saving Card Designs --------------------------------------------22
Importing or Removing the Card Background ---------23
Drawing Shapes --------------------------------------------------26
Adding Static and Dynamic Text ---------------------------30
Adding Images----------------------------------------------------33
Adding Bar Codes -----------------------------------------------37
Moving and Rotating Objects --------------------------------45
Table of Contents
iii
Resizing Objects ------------------------------------------------- 46
Changing Object Attributes ---------------------------------- 47
Editing Object Properties ------------------------------------- 49
Selecting Colors -------------------------------------------------- 59
Creating Your Own Colors ----------------------------------- 60
Placing Objects on the K and O Planes ------------------- 62
Defining Expressions ------------------------------------------- 65
Setting Up Magnetic Stripe Information ----------------- 67
Setting Up Smart Chip Information ----------------------- 70
Setting Up Symbol PDF417 Bar Codes -------------------- 72
Tips and Tricks -------------------------------------------------- 77
Glossary ------------------------------------------------------------ 82
Index ---------------------------------------------------------------- 88
iv
GuardDraw 5.1 User Manual
Table of Contents
v
vi
GuardDraw 5.1 User Manual
Introduction
Welcome
Welcome to GuardDraw 5.1, the professional-quality design software
that makes creating superb, full-color photo badge templates quick
and easy. Import eye-catching graphics as card backgrounds and personalize your designs with your organization’s logo. Link your templates to cardholder information and images stored in the EPISUITE
database. Add bar codes, or encode magnetic stripes and smart chips—
all within the same application. Even if you’re not a design professional, you’ll get picture-perfect results in minutes with GuardDraw.
What’s New in
GuardDraw 5.1
If you are already familiar with GuardDraw 4.0 or earlier, here’s what
is new in version 5.1:
• 32-bit allows you to take full advantage of your Windows 95, 98,
or NT 4.0 (or higher) operating system
• configurable to connect to either ODBC or Jet data sources
(see “Connecting to an External Data Source”)
• highly customizable print and page setup options
(see “Setting Up Printers” and “Selecting Page Sizes”)
• programmable image types (see “Adding Images”)
• no database connection required for textual data
(see “Adding Static and Dynamic Text”)
• supports five new bar code types (see “Adding Bar Codes”)
A Note for First-Time
Computer Users
The first step on the road to designing identification cards is to learn
how to configure and use the software. This user manual will guide
you through the entire process of configuring your GuardDraw
workspace, linking to the EPISUITE database, and designing cards.
The procedures outlined in this guide are straightforward, step-bystep instructions that even first-time computer users will be able to
follow.
If you are uninitiated in the use of computers in general, do not be
intimidated by some of the terminology used in manual. This jargon
is common throughout the computer industry, and you are bound to
encounter it eventually. We have included an extensive glossary at
the back of this guide to introduce you to the terms that are associated
with using GuardDraw and digital imaging. This same glossary, and
most of these instructions—as well as extensive reference material—
are also available online, through the application’s Help menu. Please
make ample use of these tools.
Introduction
7
Setting Up the GuardDraw Workspace
You can tailor the GuardDraw workspace to better suit your needs.
For example, you can hide certain parts of the workspace, such as the
status bar or any of the tool bars. The workspace setup you choose
becomes the default setup used each time you start GuardDraw.
1.
Choose the Options command from the View menu. The
General Options dialog box appears.
2.
In the Show section of the General Options dialog box, check
the following options if you want them to be displayed each
time you use GuardDraw:
Text Style Bar
Tool Bar
Attribute Bar
Status Bar
Barcode Bar
3.
Click OK, or proceed to the next section for more configurations.
You can override these options at any time, while still maintaining the
default setup, simply by choosing the Text Style Bar, Tool Bar, Attribute
Bar, Status Bar and Barcode Bar commands from the View menu.
8
GuardDraw 5.1 User Manual
Specifying Undo Levels
Undo levels are the number of times that actions or commands can be
reversed with the Undo command in the Edit menu. For instance, if
you draw a circle on your card design, and then set the circle's line
color from black to red, those actions represent two levels that can be
undone. Therefore, if you invoke the Undo command twice, the first
usage would revert the circle's line color from red to black, and the
second Undo would delete the circle.
If you undo too many levels of actions or commands, you can also
reverse the Undo with the Redo command in the Edit menu.
1.
Choose the Options command from the View menu. The
General Options dialog box displays.
2.
In the field entitled “Undo remembers the last XXX commands,”
enter the number of undo levels. The maximum number you can
enter here is 100. The minimum is 1. The higher the setting, the
more memory GuardDraw requires to operate.
3.
Click OK, or proceed to the next section for more configurations.
Specifying Undo Levels
9
Setting the Error Logging Option
GuardDraw allows you to maintain a log for application errors. When
the appropriate option is enabled, the system automatically logs all
application errors and their corresponding messages in a flat ASCII
file. It is recommended that you enable this feature, since it is useful
for locating the source of any problems related to your software or
hardware systems.
1.
Choose the Options command from the View menu. The
General Options dialog box displays.
2.
Select the Log Error Messages in a File option.
The default path for the error log file is C:\WINDOWS\EPIerr.log.
Use the Browse button if you are unsure of the drive/directory
where the log file should be stored. When pressed, the Save As
dialog box will appear, allowing you to browse through the
various drives and directories that are available locally and on
your network (if the workstation is on a network).
3.
10
GuardDraw 5.1 User Manual
Click OK, or proceed to the next section for more configurations.
Connecting GuardDraw to a Database
Follow these instructions to connect GuardDraw to the required Jetor ODBC-compliant database.
Adding a Jet Data
Source
Adding an ODBC
Data Source
1.
Choose the Options command from the View menu. The
General Options dialog box displays.
2.
Follow the instructions according to your database type:
Microsoft Jet database: To connect to a Jet-compliant database, click
the Access 97 radio button, then type in the full path or click the Browse
button to navigate to the file. GuardDraw will automatically
reconfigure itself to use the information stored in that particular
database.You can add additional parameters to this connect string, if
required.
ODBC-compliant database: To connect to an ODBC-compliant database, click the ODBC radio button, then select the data source from
the pick list. You can add additional parameters to this connect string,
if required. Click the Data Source button to add, modify or delete
ODBC data sources.
Note: The EPISUITE application uses a unique database schema. If
you intend to use another database, make sure that it mirrors this
schema exactly. If there are any discrepancies, GuardDraw will return
an error message and the fields from your data source will not be accessible from GuardDraw.
3.
Click OK to confirm your configuration settings.
Connecting GuardDraw to Other Databases
11
Setting Up Printers
You must set up a printer in GuardDraw before you begin to create
and design cards. All of the necessary printer and page information is
stored in your card design file, which in turn is used by the EPISUITE
application as a card format - a packet of information that includes the
GuardDraw card design file, the card code generation method, and
the printer and page setup.
Set up printers by following these instructions:
Installing a
Printer Driver
Setting Up a
Card Printer
12
GuardDraw 5.1 User Manual
Follow the instructions provided by your printer manufacturer. The
printer will appear automatically in GuardDraw’s Print dialog box,
the next time you sign into the system.
1.
Choose the Print command from the File menu. The Print dialog
box displays.
2.
Select the printer you want to use. The default printer (as
specified in the Windows Printers control panel) will appear in
the list box. To select a different printer, scroll down the list and
choose from the printers displayed.
3.
To determine which side(s) of the card to print, choose from the
Front, Back, or Front and Back radio buttons. If the card design
currently open has only a front or back face, GuardDraw will
make that option the default.
If you want to print the design in the Front editing window on
the front of the card, make sure the Front Only radio button has
been selected. If you want to print the design in the Back editing
window on the back of the card, make sure the Back Only radio
button has been selected. If you want to print the design in both
editing windows on the front and the back of the card respectively, make sure the Front and Back radio button has been
selected.
Note: With the exception of the Front Only radio button, these
selections should only be made if you have a specialized printer
that prints on both the front and the back of cards, or if you want
to manually flip the cards over to print on their backs. If you want
to manually flip cards over to print on their backs—
especially if you are batch-printing both sides of the cards—you
should know that this method will require a moderate amount of
trial and error before you achieve satisfactory results.
4.
Set the number of copies to be printed in the Copies field. The
default is one copy.
5.
Click the OK button.
Setting Up Printers
13
The GuardDraw Workspace
The Tool Bar
The tool bar is displayed across the top of the application window,
below the menu bar. The tool bar provides quick mouse access to many
of GuardDraw’s File, Edit, Draw, and Help menu commands.
The following tools are available in the GuardDraw tool bar:
A
C
B
E
D
G
H
I
F
K
J
L
A
New button
E
Copy button
I
Print button
B
Open button
F
Paste button
J
Print Preview button
C
Save button
G
Object Properties button
K
About GuardDraw button
D
Cut button
H
Drawing Object buttons
L
Context Help button
The Drawing Object
Buttons
The Drawing Object buttons provide quick mouse access to all of the
commands in the Draw menu. They allow you to draw lines;
rectangles; round rectangles (rectangles with rounded corners);
ellipses; polygons; static text objects (text that remains the same from
card to card); dynamic text objects (text that has been linked to
EPISUITE database fields or expressions); bitmaps; image keylines
(blank boxes that are linked to the EPISUITE application image display fields); and bar codes.
The line, rectangle, round rectangle, ellipse and bitmap objects can be
constrained to perfectly horizontal or vertical lines, or to perfect squares
and circles, by holding down the SHIFT key while you draw.
14
GuardDraw 5.1 User Manual
The Text Style Bar
The Text Style bar is displayed across the top of the application
window, below the tool bar. The text style bar provides quick mouse
access to GuardDraw's Style menu commands.
The following tools are available in the GuardDraw Text Style bar:
A
C
B
A
Font pick list
C
Font Style buttons
B
Point Size pick list
D
Horizontal Justification
buttons
The Attribute Bar
D
E
E
Vertical Justification buttons
The Attribute bar is displayed across the top of the application
window, below the text style bar. It provides quick mouse access to
color settings for lines, object fills, and text.
The following pick lists are available in the GuardDraw Attribute bar:
A
B
C
D
F
E
A
Line Attribute pick lists
C
Text Color pick list
E
O (Overlay) Plane button
B
Fill Color pick list
D
K (Resin Black) Plane button
F
Static Text/Data Field pick list
The GuardDraw Workspace
15
The Line Attribute pick lists determine the color and weight
(thickness) of line objects and borders around drawing, text and
image objects.
The Fill Color and Text Color pick lists allow you to select colors for
drawing objects (ellipses, etc.) and text objects.
The K and O buttons allow you to shift designated objects—such as
bar codes—onto the K (resin black) plane, or to apply protective
overlays across specific objects in your card design. For further
information on K and O plane printing, refer to “Placing Objects on
the K and O Planes” later in this user guide.
The Static Text/Data Field pick list allows you to link dynamic text objects and image keylines to EPISUITE database fields and
expressions. For instance, you could link a dynamic text object to the
First_Name field in the database. “First_Name” will appear on your
card design, in whatever font and point size you select; but it will be
replaced by the cardholder’s first name (in your specified font and
size) when you print the ID card.
The BarCode Bar
The BarCode bar is displayed across the top of the application window, below the attribute bar. It provides quick mouse access to bar
code property settings.
The following pick lists are available in the GuardDraw BarCode bar:
Barcode Property pick list. Allows you to select bar code properties. By setting these properties, you have complete control over how the
bar code is displayed and printed.
16
GuardDraw 5.1 User Manual
Barcode Value pick list. Allows you to select
values, or enter text, for barcode properties.
Valid entries for this field may be found in
the individual property descriptions.
The GuardDraw
Design Windows
These areas of the GuardDraw workspace are where you design your
card templates. Whenever a new file is created, GuardDraw opens a
design window for both the front and the back of the card. You do not
need to keep the Back window open if you intend to design on the
front of the card. You may, however, open the Back window at any
time, simply by choosing the Back of Card command from the View
menu.
You may have multiple Front and Back design windows open at the
same time.
The following items define the GuardDraw design windows:
A
A
B
C
B
C
Units of Measure button. Units can be either imperial or metric
Rulers. Available both horizontally and vertically for object alignment
Editing grid. Used for object alignment. Can be hidden from the screen
The GuardDraw Workspace
17
Selecting Page Sizes
Different types of ID cards come in different sizes and these are dependent on the types of cards a printer will output. It is, therefore,
very important that you select the card page size before you begin to
design your card, since resizing the page can have a serious impact on
the overall design. This information is stored in the card design file
and is used by the EPISUITE application during the printing process.
18
GuardDraw 5.1 User Manual
1.
Make sure you set up the appropriate default printer. See the
section “Setting Up Printers” for details.
2.
Choose the Page Setup command from the File menu. The Page
Setup dialog box displays.
3.
Select the required card size from the options listed in the Card
Size pick list . Select any of the defaults, or select “Custom Size”
to specify your own dimensions.
4.
Select the card’s orientation on the printed page as either
Portrait or Landscape. This affects only the orientation of the
cards themselves, and is not connected to the orientation of the
page.
Landscape cards on a landscape page
Landscape cards on a portrait page
5.
Adjust the card’s width and height, if desired. By modifying these
settings, you are automatically resetting the card size to a custom
configuration.
6.
Adjust the left, right, top and bottom page margins, if desired.
7.
In the Cards Across field, indicate the number of cards that are to
be printed across the page (for batch printing purposes). In
general, a landscape page will allow you to print more cards
across than a portrait page, though you will not be able to print as
many cards down.
8.
In the Cards Down field, indicate the number of cards that are to
be printed down the page (for batch printing purposes). In
general, a portrait page will allow you to print more cards down
than a landscape page, though you will not be able to print as
many cards across.
9.
Adjust the horizontal and/or vertical spacing between the cards
printed on the page, if desired.
10. Check the Print Color and K Planes Separately option if your card
printer outputs four process colors (cyan, magneta, yellow and
black) when they are specified on separate document “pages.”
The first page should be in CMY, and the second should be
monochrome. This option merges the two pages into one, to
output four-color process.
11. Click OK to confirm the card setup configuration.
Selecting Page Sizes
19
Creating New Card Designs
Whenever a new file is created, GuardDraw opens two design windows: one for the front of the card, and another for the back. You do
not need to keep the Back design window open if you only intend to
print on the front of the ID card. You can, however, open the Back
design window at any time simply by choosing the Back of Card command from the View menu. The same also applies to the Front design
window.
You can have multiple front and back card designs open at the same
time.
20
GuardDraw 5.1 User Manual
1.
Make sure you have already set up a default printer and specified the card size and orientation.
2.
Choose the New command from the File menu or click the New
button on the tool bar. GuardDraw will open two new design
windows: one for the front of the card, and another for the back.
3.
Activate (by clicking on) the design window of your choice.
4.
If necessary, import a card background via the Import
Background command in the Edit menu.
5.
Design your card.
Opening Existing Card Design Files
Opening an Existing
Card Design File
1.
Choose the Open command from the File menu. The File Open
dialog box displays.
2.
In the File Name field, type the name of the card design you
want to open or select it from the list.
Note: If the card design you want is in another drive or directory, select it from the Look In pick list. You will only be able to
access network drives that are mapped to your PC (see your
network administrator for more information).
Opening a Recently
Saved Card Design
3.
Click the Open button.
1.
Open the File menu. The last four card designs that were saved
to disk will be listed at the bottom of the menu, directly above
the Exit command.
2.
Choose the name or number of the card design that you want to
open.
Opening Existing Card Design Files
21
Saving Card Designs
The Save command displays a dialog box where you can give a new
card design a filename and specify a location in which to store it.
Saving a Card Design
for the First Time
1.
Choose the Save command from the File menu. A Save As
dialog box appears.
2.
To save the drawing in the current drive and directory, type a
name in the File Name field. GuardDraw will automatically add
the extension .GDR to the file name.
Note: If you want to save the drawing in a different drive or
directory, type the entire path name in the File Name field, or
select the drive from the Look In pick list. You will only be able
to access network drives that are mapped to your PC (see your
network administrator for more information).
Saving PreviouslySaved Card Designs
22
GuardDraw 5.1 User Manual
3.
Click OK.
1.
Choose the Save command from the File menu; or
2.
If you want to save the design with a new filename, choose the
Save As command from the File menu, and follow Steps 2 and 3
above.
Importing or Removing the Card Background
Card backgrounds are graphics, such as bitmap images, which are created in other draw or paint programs. The background is the graphical “landscape” against which the various card design objects (e.g.,
images, text objects, etc.) are placed.
Importing the Card
Background
1.
Make sure that you have selected the appropriate card design
window (either the front or the back).
2.
Choose the Import Background command from the Edit menu.
The Open dialog box displays.
3.
In the File Name field, type the name—including the path and
extension—of the background file you want to insert into your
card design, or use the buttons to browse to your file.
4.
Click OK.
5.
The Crop dialog box will appear with your card background
image displayed inside it. Use the different buttons on the
dialog box to increase or decrease the magnification of the image.
Use your mouse pointer to resize or move the highlighting box
until you are satisfied with the appearance of your picture.
Importing or Removing the Card Background
23
6.
Cropping the Card
Background
Click OK. The card background will be placed on either the
front or the back of your card design.
When you add a background image to the card design, it is placed in a
dialog box that allows you to crop it to your taste. Once in the Crop
dialog box, you will notice that a highlighting box with eight sizing
handles is placed directly over the center of the image. The size of this
highlighting box will change depending on your selected page size
(see “Selecting Page Sizes”). At this point, you can either capture the
portion of the image “as is,” or resize the highlighting box to capture
some or all of the image.
To Capture the Whole Image
1. Place your mouse pointer within the highlighting box's cropping area. The pointer will change from a single arrow to a fourheaded arrow. This allows you to move the cropping area across
the newly acquired image.
24
GuardDraw 5.1 User Manual
2.
Press and hold down your left mouse button, and drag (move)
the cropping area to the desired location on the background
image. Release the left mouse button when you are satisfied
with the new location of the highlighting box.
3.
Click OK. The card background will be placed on either the
front or the back of your card design.
To Capture a Portion of the Image
1. Place your mouse pointer directly over one of the highlighting
box handles. The pointer will change from a single arrow to a
two-headed arrow. This allows you to resize the cropping area.
Removing the Card
Background
Exporting the Card
Background
2.
Press and hold down your left mouse button, and drag (move)
the handle towards the center of the cropping area.
3.
When the cropping area is sized to your satisfaction, move the
highlighting box so that it covers the portion of the image that
you want to capture.
4.
Click OK. The card background will be placed on either the
front or the back of your card design.
1.
Make sure that you have selected the appropriate card design
editing window (either the front or the back).
2.
Choose the Remove Background command from the Edit menu.
3.
The system will ask: “Are you sure you want to remove the
background image from the front/back of the card?” Choose Yes
to remove the card background image. Choose No to cancel.
1.
Choose the Export Background command from the Edit menu. The
Save As dialog box will be displayed so you can name your image,
define the file type, and specify the directory to which it will be saved.
Importing or Removing the Card Background
25
Drawing Shapes
GuardDraw comes complete with an extensive selection of tools that
allows you to design cards with ease. Use lines, squares, circles,
rectangles, ellipses and polygons to spice up your illustration, or to
create security clearance symbols for easy identification of unauthorized persons.
Lines
The Line button
To Draw a Line
1. Click on the Line button in the Tool Bar, or choose the Line
command from the Draw menu.
2.
Move the mouse pointer onto the editing screen.
3.
Press and hold down the left mouse button to anchor one end of
the line, and then drag the pointer. A flexible line stretches from
the anchor point to the new pointer position.
4.
When you are satisfied with the line, release the left mouse
button.
To Edit a Line
1. Select the line. Handles will appear at either end of the line.
Rectangles
The Rectangle button
26
GuardDraw 5.1 User Manual
2.
Position the mouse pointer over one of the handles, then press
and hold down the left mouse button.
3.
Drag the pointer to a new position on the editing screen.
4.
When you are satisfied with the line, release the left mouse
button.
To Draw a Rectangle
1. Click on the Rectangle button in the Tool Bar, or choose the
Rectangle command from the Draw menu.
2.
Move the mouse pointer onto the editing screen.
3.
Press the left mouse button to anchor one corner of a flexible
rectangle, and then drag the pointer. The flexible rectangle
stretches from the anchor point to the new pointer position.
4.
When you are satisfied with the rectangle’s size and shape,
release the left mouse button.
To Edit a Rectangle
1. Select the rectangle. Handles will appear on each side and
corner of the object.
2.
Position the mouse pointer over one of the handles, then press
and hold down the left mouse button.
3.
Drag the pointer to a new position on the editing screen.
4.
When you are satisfied with the rectangle’s new size and shape,
release the left mouse button.
To Draw a Perfect Square
Hold down the SHIFT key while you draw the rectangle.
Round Rectangles
The Round Rectangle button
To Draw a Round Rectangle
1. Click on the Round Rectangle button, or choose the Round
Rectangle command from the Draw menu.
2.
Move the mouse pointer onto the editing screen.
3.
Press the left mouse button to anchor one corner of a flexible
rectangle, and then drag the pointer. The flexible rectangle
stretches from the anchor point to the new pointer position.
4.
When you are satisfied with the rectangle’s size and shape,
release the left mouse button.
To Edit a Round Rectangle
1. Select the round rectangle. Handles will appear on each side
and corner of the object.
2.
Position the mouse pointer over one of the handles, then press
and hold down the left mouse button.
Drawing Shapes
27
3.
Drag the pointer to a new position on the editing screen.
4.
When you are satisfied with the rectangle’s new size and shape,
release the left mouse button.
To Edit Rounded Corner Curvatures
1. Select the round rectangle.
2.
A special handle appears inside the upper right-hand corner of
the rounded rectangle. Position your mouse pointer over that
handle, and the pointer will change from a single-headed arrow
to a four-headed arrow.
3.
Hold down the left mouse button, and drag the handle toward
the center of the object, to increase the curvature of the rounded
corners, or away from the center of the object, to decrease the
curvature.
4.
When you are satisfied with the rectangle’s new shape, release
the left mouse button.
To Draw a Perfect Square
Hold down the SHIFT key while you draw the round rectangle.
Ellipses
The Ellipse button
To Draw an Ellipse
1. Click on the Ellipse button in the Tool Bar, or choose the Ellipse
command from the Draw mneu.
2.
Move the mouse pointer onto the editing screen.
3.
Press the left mouse button to anchor one corner of a flexible
rectangle, and then drag the pointer. The flexible ellipse stretches
from the anchor point to the new pointer position.
4.
When you are satisfied with the ellipse’s size and shape, release
the left mouse button.
To Edit an Ellipse
1. Select the ellipse. Handles will appear on each side of the object.
2.
28
GuardDraw 5.1 User Manual
Position the mouse pointer over one of the handles, then press
and hold down the left mouse button.
3.
Drag the pointer to a new position on the editing screen.
4.
When you are satisfied with the ellipse’s new size and shape,
release the left mouse button.
To Draw a Perfect Circle
Hold down the SHIFT key while you draw the ellipse.
Polygons
The Polygon button
To Draw a Polygon
1. Click on the Polygon button in the Tool Bar, or choose the
Polygon command from the Draw menu.
2.
Move the mouse pointer onto the editing screen.
3.
Press the left mouse button to anchor one corner of a flexible
polygon, and then move the pointer. A flexible line stretches
from the anchor point to the new pointer position.
Note: Do not hold down the left mouse button during this
procedure, since the Polygon tool will continue to create anchor
points as you move the pointer.
4.
When you reach the point where you want the line to end,
press the left mouse button to create another anchor point.
5.
Continue adding sides in this fashion.
6.
To add the last side, double-click where you want the point to
end.
To Edit a Polygon
1. Select the ellipse. Handles will appear at each anchor point you
created.
2.
Position the mouse pointer over one of the handles, then press
and hold down the left mouse button.
3.
Drag the pointer to a new position on the editing screen, and
then release the left mouse button.
4.
Continue editing sides in this fashion.
Drawing Shapes
29
Adding Static and Dynamic Text
The Text button
The Text command performs two functions in GuardDraw. It can
create static text objects, which are used as non-changeable design elements such as headlines or field labels (for example, “First Name”). It
can also create dynamic text/data objects—objects that are connected
to a data field or expression, and which change from card to card (for
example, the first name of the cardholder).
The dynamic text/data field options available through the Text pick
list are directly dependent on the type of database connection you
have. For example, if GuardDraw is configured to access the textual
data in your database, it will retrieve the available field names through
the GA_TABLENAMES table. This points to the tables in your database, which contain all of the data you will be printing on your cards.
The field names displayed in the Text pick list will have the table name
as a prefix. If there is no prefix, then the field name is an alias located
in the GA_ALIAS table. Aliases behave in much the same way as the
Label does in an Expression, allowing you to create more meaningful
or shorter names for the fields you need to access.
When GuardDraw has access to your database, you will have full use
of the Define Expressions feature. You do not require special programming experience to create dynamic text objects. You do, however, require a knowledge of your database’s particular SQL expressions, if
you intend to use expressions in your card design (see “Defining Expressions”).
If GuardDraw does not have access to textual data, it will display the
field names found in the GA_LAYOUTFIELDS table. This table contains tags that are used to retrieve the available data fields directly
from your application. Therefore, the text/data field options must be
pre-configured in this table to reflect the input fields in your application in order to be available from the Text pick list. Please note that the
Define Expressions feature is not available in this mode.
The links between the database (or table) and your card design are
created automatically. Thus, your only task is to select the font, style,
point size, color and location of both the data fields/expressions and
text objects.
30
GuardDraw 5.1 User Manual
Creating Static Text
Objects
1.
Click on the Text button in the Tool Bar, or choose the Text
command from the Draw menu.
2.
Click on the arrow to the right of the Text/Data Field pick list in
the Attribute Bar. The list will expand to reveal your available
text/data field options.
3.
Select <STATIC TEXT> from the pick list.
4.
Move your mouse pointer onto the editing screen. The pointer
will change from an arrow to a cross.
5.
Press and hold down the left mouse button to anchor one end of
the text box, and then drag the pointer. A flexible box stretches
from the anchor point to the new pointer position.
6.
When you are satisfied with the size and location of the text box,
release the left mouse button.
7.
Click on the Select button in the Tool Bar, or choose the Select
command from the Draw menu.
8.
Double-click on the text box, or select the text object and choose
Object Properties from the Edit menu. A Static Text Properties
dialog box will appear.
9.
Make whatever option selections are necessary, then choose OK.
10. Select the font, style and point size by using the pick lists in the
Text Style Bar, or by choosing the Font command in the Style
menu.
11. Select the text color by using the Text Color pick list in the
Attribute Bar, or by choosing the Text Color command in the
Object menu.
12. Adjust the text justification by using the Justify buttons in the
Text Style Bar.
Adding Static and Dynamic Text
31
13. Select the text box line and fill colors by using the pick lists in
the Attribute Bar, or by using the Line Color and Fill Color
commands in the Object menu.
14. Adjust the text box line weight by using the Line Weight pick list
in the Attribute Bar.
15. Click on the horizontal and vertical justification buttons, to
determine the text object’s placement within the text box.
Creating a Dynamic
Text Object
Converting a Static
Text Object to a
Dynamic Text Object
32
GuardDraw 5.1 User Manual
1.
Click on the Text button in the Tool Bar, or choose the Text
command from the Draw menu.
2.
Click on the arrow to the right of the Text/Data Field pick list in
the Attribute Bar. The list will expand to reveal your available
text/data field options.
3.
Select any database field or expression available.
4.
Repeat Steps 4 to 7 above.
5.
Double-click on the text box, or choose the Object Properties
command from the Edit menu. The Dynamic Text Properties
dialog box will appear.
6.
Make whatever option selections are necessary, then choose OK.
Refer to Editing Object Properties for more details.
7.
Repeat Steps 10 to 15 above.
1.
Select the text object.
2.
Click on the arrow to the right of the Text/Data Field pick list in
the Attribute Bar. The list will expand to reveal your available
text/data field options.
3.
Select any of the data fields available from the pick list.
Adding Images
Digital images such as photographs, fingerprints, signatures and clip
art can be added to the card design using a drawing tool. The DB Image tool is used to create a keyline for any dynamic image type as
defined in the GA_IMAGEINFO table. The Image tool allows you to
import static image files from any external source.
Image keylines are automatically linked to the EPISUITE database.
When you print cards with the EPISUITE application, the keylines are
replaced by the cardholder’s images. Hard-to-counterfeit “ghosts” and
cameo effects can also be defined for the image keylines, thus providing an extra level of security to the cards you issue.
Adding Database
Images
1.
Click on the DB Image button in the Tool Bar, or choose the DB
Image command from the Draw menu. You will notice that the
default option in the Static Text/Data Field pick list has changed
to Photograph.
2.
Click on the arrow to the right of the Static Text/Data Field pick
list. The list will expand to reveal your available data field
options (e.g., Fingerprint, Photograph or Signature).
3.
Select Photograph to draw a photograph keyline on the card, or
select Signature to draw a signature keyline, etc.
4.
Move your mouse pointer onto the editing screen. The pointer
will change from an arrow to a cross.
5.
Press and hold down the left mouse button to anchor one end of
the image box, and then drag the pointer. A flexible box stretches
from the anchor point to the new pointer position.
The DB Image button
Note: Do not worry about sizing the keyline to its proper
dimensions when you draw it on your card design. All keylines
are automatically constrained to the aspect ratios of their
respective images, as defined in the EPISUITE application;
therefore, they will always print perfectly, no matter what size
you specify for them.
Adding Images
33
6.
Creating an
Image Ghost
When you are satisfied with the size and location of the image
keyline, release the left mouse button.
An image ghost is generally used in addition to a regular image, and
can be placed anywhere on the card design—even behind text or other
objects. This considered to be an additional ID security feature, since
ghosted images are extremely difficult to reproduce.
For complete details on creating image ghosts, refer to “Editing Object
Properties” later in this user guide.
Creating a
Cameo Effect
Adding Images
The Image button
34
GuardDraw 5.1 User Manual
For complete details on removing the image background (that is, creating a cameo effect or chromakey), refer to “Editing Object Properties” later in this user guide.
Image objects are similar to card backgrounds, except that they can be placed
on your card design in much the same way as objects such as images,
barcodes, and static or dynamic text.
1.
Click on the Image button in the Tool Bar, or choose the Image
command from the Draw menu.
2.
Move the mouse pointer onto the editing screen.
3.
Press the left mouse button to anchor one corner of a flexible rectangle, and then drag the pointer. The flexible highlighting box
stretches from the anchor point to the new pointer position.
4.
When you are satisfied with the highlighting box's size and shape,
release the left mouse button. The Image Properties dialog box
appears.
Resizing an
Image Object
5.
Choose the Load Image button. An Open file dialog box appears.
6.
Select the image file you want to load into your card design, and
click OK. You will be returned to the Image Properties dialog box,
and the image will be loaded onto the card design. If you wish,
reposition the Image Properties dialog box so that you can view
the image object beneath it. This will allow you to reset the
object's properties, and see immediately how they will affect the
appearance of the image.
7.
Select whatever image property options are necessary. Refer to
“Editing Object Properties”.
8.
Click OK.
Image ghosts and cameo effects can be applied to Image objects. For
complete details, refer to “Editing Object Properties”.
1.
Select the image. Handles will appear on each side and corner of
the object.
2.
Position the mouse pointer over one of the handles, then press
and hold down the left mouse button.
Adding Images
35
Drawing a
Perfect Square
36
GuardDraw 5.1 User Manual
3.
Drag the pointer to a new position on the editing screen.
4.
When you are satisfied with the image’s new size and shape,
release the left mouse button.
Hold down the SHIFT key while you draw the highlighting box. The
image will be sized to fit within the square.
Adding Bar Codes
Drawing bar codes on a card design can be a moderately complex process. It is, therefore, extremely important that you familiarize yourself
with the many types of bar codes available, and that you set their corresponding properties, values and database field specifications with
care. The overview on Bar Code Properties and Values (below) contains descriptions of the various types of bar codes that can be added
to your card design. More importantly, you should first refer to your
hardware documentation for information on the types of bar codes
supported by the card reader you have purchased.
Bar Code Properties
and Values
The following bar code properties are available in the BarCode Property pick list:
BarCodeType
Sets the type of bar code to be used. By setting this property, you select the type of bar code that is displayed or printed. The following is
a list of the possible types of bar codes:
Code 3 of 9
Alphanumeric bar code which allows uppercase letters and numbers.
Each character consists of nine elements. Three of the elements are
wide; hence the name, “3 of 9”. An embedded CRC character is present.
Set the Checksum value to Standard, to add a checksum to the bar
code.
Extended Code 3 of 9
Similar to Code 3 of 9, except that it allows the full 128 ASCII character
set to be encoded by printing two bar code characters for each text
character. Set the Checksum value to Standard, to add a checksum to
the bar code.
Interleaved 2 of 5
A numeric bar code. Each encoded character is composed of five elements—two wide and three narrow. The number of characters to be
printed must be even. If the number of characters is odd, then a zero
will be appended to the beginning of the code. Set the Checksum value
to Standard, to add a checksum to the bar code.
Adding Bar Codes
37
Code 93
Alphanumeric bar code allowing uppercase letters and numbers. Set
the Checksum value to Standard, to add a checksum to the bar code.
Extended Code 93
Similar to Code 93, except that it allows the full 128 ASCII character set
to be encoded. Set the Checksum value to Standard, to add a checksum
to the bar code.
UPCA
Universal Product Code, version A. Used to encode an 11-digit number. The first digit is the system number, and the rest are data characters. Both two and five digit supplementals are also supported.
Checksum not used.
UPCE 10 digit
A zero-compressed version of the UPCA bar code. This version allows
10 digits to be encoded. The first digit must be zero. Both two and five
digit supplementals are also supported. Checksum not used.
UPCE0 6 digit
A zero-compressed version of the UPCA bar code. This version allows
6 digits to be encoded. The first digit must be zero. Both two and five
digit supplementals are also supported. Checksum not used.
UPCE1 6 digit
A zero-compressed version of the UPCA bar code. This version allows
6 digits to be encoded. The first digit must be zero. Both two and five
digit supplementals are also supported. Checksum not used.
EAN 13
Used when the country origin must be known. EAN 13 is composed
of 13 digits. The first two characters are used to define the country of
origin; the next 10 are data; the last is a checksum. Both two and five
digit supplementals are also supported. Checksum not used.
EAN 8
Used when the country origin must be known. EAN 8 is composed of
eight digits. The first two characters are used to define the country of
origin; the next five are data; the last is a checksum. Both two and five
digit supplementals are also supported. Checksum not used.
38
GuardDraw 5.1 User Manual
Code 128 Auto
A variable-length bar code that is capable of encoding the full 128 ASCII
character set. Code 128 allows three subsets: A, B and C. This version
automatically selects the subset that will produce the smallest bar code.
Set the Checksum value to Standard, to add a checksum to the bar
code.
Code 128 A
A variable-length bar code that is capable of encoding the full 128 ASCII
character set. Code 128 allows three subsets: A, B and C. This version
allows all standard uppercase alphanumeric keyboard characters, plus
control characters. Set the Checksum value to Standard, to add a
checksum to the bar code.
Code 128 B
A variable-length bar code that is capable of encoding the full 128 ASCII
character set. Code 128 allows three subsets: A, B and C. This version
allows all standard uppercase alphanumeric keyboard characters, plus
all lowercase alpha characters. Set the Checksum value to Standard,
to add a checksum to the bar code.
Code 128 C
A variable-length bar code that is capable of encoding the full 128 ASCII
character set. Code 128 allows three subsets: A, B and C. This version
allows includes a set of 100 digit pairs, from 00 to 99
inclusively. This allows double-density numeric digits: two digits per
bar-coded character. Set the Checksum value to Standard, to add a
checksum to the bar code.
Codabar
A variable-length bar code that is capable of encoding 16 characters,
including 0 to 9, plus the symbols “-”, “$”, “;”, “.” and “+”. Used primarily for numeric data. Any one of “a,” “b,” “c” or “d” must be used as
the start and stop characters. Set the Checksum value to Standard, to
add a checksum to the bar code.
MSI Plessey
A variable-length bar code that is capable of encoding up to 15 numeric digits. Set the Checksum value to one of the following, to add a
checksum to the bar code:
•
•
•
One modulus 10 checksum
Two modulus 10 checksums
One modulus 11 checksum/one modulus 10 checksum
Adding Bar Codes
39
UCC-128
A specially-defined subset of Code 128 that is used primarily on shipping containers. It is numeric, and has a fixed length of 19 digits. Set
the Checksum value to Standard, to add a checksum to the bar code.
POSTNET (Zip + 4 PostalCode)
Used on envelopes and postcards that are shipped through the US
Postal Service. This bar code is placed on the lower right-hand corner
of the envelope. Checksum not used.
Symbol PDF417
A two-dimensional symbology that allows you to encode a Portable
Data File with ASCII, binary, or numeric data. The Symbol PDF417 is
particularly useful if you need to encode large amounts of data onto a
limited space (e.g., an ID card that requires customer or employee profiles, biometric data, and personal descriptions).
Refer to “Setting Up Symbol PDF417 Barcodes” later in this user’s guide
for complete details on the proper use of this new technology.
Code 49
A multiple-row bar code that can encode the full ASCII character set
below ASCII 128. Up to 49 alphanumeric characters or 81 numeric characters can be encoded. These characters are encoded into two to eight
rows, each divided by a separator bar. The top and bottom of the symbol also have separator bars that extend to the ends of the minimum
quiet zones.
Code 16K Auto
A multiple-row bar code that can encode the full ASCII character set
below ASCII 128 using existing UPC and Code 128 character set patterns. Up to 77 full ASCII characters or 154 numeric characters can be
encoded into 2 to 16 rows, and each row is divided by a separator bar.
The top and bottom of the symbol also have separator bars that extend to the ends of the minimum quiet zones. Code 16K is similar to
Code 128 in that you can choose between three subsets directly (A, B,
or C) or you can choose Code 16K Auto for auto switching mode.
Code 16K A
A multiple-row bar code that can encode the full ASCII character set
below ASCII 128 using existing UPC and Code 128 character set patterns. In Code 16K A, you can encode punctuation, digits, uppercase
letters, and control codes below the space character.
40
GuardDraw 5.1 User Manual
Code 16K B
A multiple-row bar code that can encode the full ASCII character set
below ASCII 128 using existing UPC and Code 128 character set patterns. In Code 16K B, you can also encode lowercase letters, but not
control codes below the space character.
Code 16K C
A multiple-row bar code that can encode the full ASCII character set
below ASCII 128 using existing UPC and Code 128 character set patterns. In Code 16K C, only digits can be encoded. This mode prints
digits in double-density compressed mode.
Text
Sets the text to be used in creating the bar code. The Text property
allows you to set the text that will be used to generate the bar code
itself. When this property is selected, the Value pick list changes to a
data entry box and allows you to input the bar code text. The bar code
changes on the editing screen as you type.
Checksum
Controls how the checksum is created. Checksums can be optionally
added to some bar codes. See the BarCodeType descriptions for more
information.
Direction
This property controls the horizontal and vertical position of the bar
code within the highlighting box.
Value
Left to Right
Top to Bottom
Right to Left
Bottom to Top
Description
Justifies the bar code horizontally from the left to right
margins.
Justifies the bar code vertically from the top to
bottom margins.
Justifies the bar code horizontally from the right to
left margins.
Justifies the bar code vertically from the bottom to top
margins.
Ratio
Sets the ratio of the bar code. The ratio of the wide bars to narrow bars
can be controlled using this property. The default value is a ratio of
3:1. Valid selections for this property are listed below. This property
Adding Bar Codes
41
only affects the following: Code 3 of 9, Extended Code 3 of 9, and Interleaved 2 of 5.
Value
3:1
2.5:1
2:1
Narrow Bar Width
This property sets the width of the thinnest bar in the bar code. The
width of the wider bars is then based upon this setting. The unit of
measure for this setting is based on twips (twentieths of a point). There
are 72 points to an inch; therefore, the smallest measurement you can
enter for this property’s value is 1/20 of a point, or 1/1440 of an inch.
The default value for this property is 30/20 of a twip.
Drawing a Bar Code
1.
Click on the Barcode button in the Tool Bar, or choose the
Barcode command from the Draw menu.
2.
Move the mouse pointer onto the editing screen.
3.
Press the left mouse button to anchor one corner of a flexible bar
code rectangle, and then drag the pointer. The flexible rectangle
stretches from the anchor point to the new pointer position.
4.
When you are satisfied with the bar code’s size and shape,
release the left mouse button.
The Barcode button
Linking the Bar Code
to a Database Field
or Expression
42
GuardDraw 5.1 User Manual
In order for the bar code to convert and use the proper data from the
EPISUITE database, it is extremely important that you link it to an
EPISUITE database field.
1.
Select the bar code you have created.
2.
Click the arrow to the right of the Static Text/Data Field pick list,
and select the field to which the bar code should be linked.
Setting the Bar Code
Properties and Values
Printing Bar Codes
on the K Plane
1.
Click on the bar code using the Select tool.
2.
Click the arrow to the right of the BarCode Property pick list,
located on the BarCode Bar. The list will expand to reveal the
various types of properties associated with the bar code.
3.
Select one of the bar code properties (e.g., “BarcodeType”).
4.
Click the arrow to the right of the Property Value pick list, located
on the BarCode Bar. The list will expand to reveal the various
options available for the selected bar code property.
5.
Select the appropriate bar code property value.
6.
Continue in this manner to select properties and their corresponding values, until you have properly configured your bar
code.
Bar codes should always be printed in black. There are, however, two
types of black available: process black and pure black (i.e., the black that
is exclusively printed on the K plane). While both colors are an acceptable selection, it is important to note that infrared bar code readers cannot recognize bar codes printed in process black. Unless you are sure
that your bar code reader can read process black, it is recommended
that you set your bar code to print in pure black.
1.
Click on the bar code using the Select tool.
2.
Click on the K Plane button (located on the Attribute Bar), if you
want the bar code to print in pure black, rather than in process
black.
Note: This option is only valid if your card printer supports K
plane (pure black) printing.
To Set the Bar Code While the default bar code background color is white, and should genBackground Color erally remain white, GuardDraw allows you to specify any other color
(including no color, or transparent) to prevent the illicit duplication of
ID cards by photocopying. It is important to note, however, that only a
small number of readers can actually recognize the black code against a
non-white field; thus, if you intend to specify a bar code background
Adding Bar Codes
43
fill as any color other than white, first make sure that your reader is
capable of distinguishing the code from the color field.
A good rule to remember, when printing bar codes against a non-white
field, is to print the bar code on the K plane (see above for details).
44
GuardDraw 5.1 User Manual
1.
Click on the bar code using the Select tool.
2.
Change the bar code background fill color by selecting from the
sixteen quick-access colors in the Fill Color Pick List, or choose
the Fill Color command from the Object menu for a more
extensive selection of colors.
Moving and Rotating Objects
Dragging objects with the mouse lets you position them interactively.
Moving an Object
1.
Select the object you want to move.
2.
Press and hold the left mouse button.
3.
Drag the object to its new location.
4.
Release the left mouse button to complete the move.
Alternatively, you may select the object and press any of the keyboard
arrow keys to move it. This is called “nudging.”
Leaving the Original
Object Behind
Rotating an Object
1.
Select the object you want to move.
2.
Press and hold down the CTRL key, and then press and hold
down the left mouse button. This will create a copy of the object
behind the original.
3.
Drag the copy of the object to its new location.
4.
Release the left mouse button to complete the move.
1.
Select the object you want to rotate.
2.
Choose the Rotate by 90 Degrees command from the Style
menu. The object will rotate, clockwise, by 90 degrees.
3.
Repeat until the object’s appearance is to your satisfaction.
Note: Rotating can be used to design duplex cards with different front
and back page orientations.
Moving and Rotating Objects
45
Resizing Objects
Resizing Objects
1.
Select the object. Handles will appear on each of its sides and at
its corners.
2.
Position the mouse pointer over one of the handles, then press
and hold down the left mouse button.
3.
Drag the pointer to a new position on the editing screen.
4.
When you are satisfied with the object’s new size and shape,
release the left mouse button.
Note: You cannot resize static text objects, in the sense that the point
size of the font will be increased or decreased as you stretch the text
box. Rather, when you resize the text box, you expand or contract the
amount of available space in which the text will fit. This is
particularly important if you increase the font’s point size, or if you
type too much text to fit within the text box. To reveal text that has
been hidden due to constraints in the size of the text box, follow the
instructions above.
46
GuardDraw 5.1 User Manual
Changing Object Attributes
Object attributes, such as line weight or fill color, can be changed at
any time while you are creating or editing the card design.
Changing Line
Attributes
Changing Object
Attributes
1.
Click on the line using the Select tool.
2.
Change the line color by selecting from the sixteen quick-access
colors in the Line Color pick list, or choose the Line Color
command from the Object menu for a more extensive selection
of colors.
3.
Change the line weight by selecting from the Line Weight pick
list in the Attribute Bar.
1.
Click on the object (e.g., a rectangle, image or text object) using
the Select tool.
2.
Change the line color by selecting from the sixteen quick-access
colors in the Line Color pick list, or choose the Line Color
command from the Object menu for a more extensive selection
of colors.
3.
Change the fill color by selecting from the sixteen quick-access
colors in the Fill Color pick list, or choose the Fill Color command
from the Object menu for a more extensive selection of colors.
4.
If the object is static or dynamic text, change the text color by
selecting from the sixteen quick-access colors in the Text Color
pick list, or choose the Text Color command from the Object
menu for a more extensive selection of colors.
5.
Change the line weight by selecting from the Line Weight pick
list in the Attribute Bar.
Changing Object Attributes
47
Changing Signature
Fill and Text Attributes
Setting Default
Attributes
48
GuardDraw 5.1 User Manual
You can modify signatures so that they are printed in different colors,
with or without image frame fills.
1.
Click on the signature using the Select tool.
2.
Change the fill color by selecting from the sixteen quick-access
colors in the Fill Color pick list, or choose the Fill Color command from the Object menu for a more extensive selection of
colors. Choose “x” for no fill, so that the signature is printed
against the card background.
3.
Change the color of the signature itself by selecting from the
sixteen quick-access colors in the Text Color pick list, or choose
the Text Color command from the Object menu for a more
extensive selection of colors.
If you plan to create several objects with the same attribute settings
(i.e., line weight, fill color, etc.), and you do not want to reset the attributes for each individual object, you can specify them as defaults
by performing the following tasks:
1.
Draw your initial object, and then define its attributes.
2.
Select the Set Default Attributes command from the Object
menu. This will set the default attributes to those of the object
you have just created.
3.
Draw your remaining objects.
Editing Object Properties
Static Text
Properties
1.
Double-click on the text box using the Select tool, or select the
text object and choose Object Properties from the Edit menu.
The Static Text Properties dialog box appears.
The following options will be available to you:
Text Editing Box
Displays the selected static text using the Microsoft Windows
screen font. To edit the text, simply click anywhere within this
editing box and make whatever modifications are necessary.
Conditional Display Options
Conditional display options are available. For complete information on these settings and what they do, see “Conditional Display
Options” below.
Dynamic Text
Properties
2.
Make whatever option selections are necessary, then click OK.
1.
Double-click on the text box using the Select tool, or choose
Object Properties from the Edit menu. A Dynamic Text Properties dialog box appears.
Editing Object Properties
49
The following options will be available to you:
Database Field/Expression
Lists the currently-selected dynamic text object for your visual verification.
Label
Enter a new label for the dynamic text object, if desired. This does
not affect output at print time, but rather is used to provide a more
significant identifier to the object. For instance, if the database field
used to output the date a card was issued is called ISSUANCE_DATE,
you might want to rename the label “Issue Date” to better identify it on your card design.
This feature is particularly handy if you have written a lengthy
database expression, and want to edit the label for brevity.
Keep Text on a Single Line
Check this box if you want to keep the dynamic output text on a
single line. If you do not check this box, text will wrap around
within the dynamic text object frame.
Please note that this option, when selected, could truncate the output text if it is too long to fit on a single line within the object
frame. If this occurs, make sure the following option box has been
selected.
50
GuardDraw 5.1 User Manual
Automatically Reduce Text Size to Fit in Box
Check this box if you want to automatically reduce the font point
size so that longer, single-line text will fit within the object frame.
This is usually used in conjunction with the preceding option, so
that output text is not truncated.
Conditional Display Options
Conditional display options are available. For complete information on these settings and what they do, see “Conditional Display
Options” below.
DB Image Properties
2.
Make whatever option selections are necessary, then choose OK.
1.
Double-click on the database image using the Select tool. The DB
Image Properties dialog box appears.
The following options will be available to you:
Ghost Image
Check this option if you want to create a ghost image.
Note: An image ghost is generally used in addition to a regular
image, and can placed anywhere on the card design—even under
text or other objects. It is considered an additional ID security
feature, since ghosted images are extremely difficult to reproduce.
Close-Cropping Options
The following options allow you to “close-crop” (i.e., remove the
background pixels) an image. The option you select depends on
the image quality of the background you want to remove. For tips
Editing Object Properties
51
on how to use these settings, refer to “Using the Close-Cropping
Options” in the Tips & Tricks section.
None
Choose this option if you do not want to close-crop the image.
Cameo Effect
Check this option if you want to create a cameo effect. This will
remove all background pixels around the subject of the image (i.e., the
card holder's head).
Note: The entire image background will not be removed if it is very
dark or if there are distinct variations in shading. To work around this
problem, click on the Custom Settings check box (described below),
and enter your custom Hue Variation and Intensity Threshold percentages. If the background pixels are too dark, no amount of manipulation will produce a satisfactory result.
Hue/Intensity Color Match
Check this option if you want to remove all pixels within a specified
hue/intensity range. This option is particularly useful if you are
having trouble removing background pixels with the Exact Color
Match option. Click on the Custom Settings check box (described
below), and enter your custom Hue Variation and Intensity Threshold
percentages.
Exact Color Match
Choose this option if you want to remove all background pixels that
are exactly the same color. This option is particularly useful for solidcolor backgrounds, which are commonly found in hand-made bitmap
files (e.g., logos, etc.).
Custom Settings
This check box and its corresponding settings are enabled when you
choose the Cameo Effect and Hue/Intensity Color Match options
above. Use it to enter custom percentages for the following settings:
Hue Variation
This is the percentage of the hue that GuardDraw will use to scan
for variations of the background pixels along the color spectrum.
GuardDraw removes pixels by sampling the first one located in the
upper left-hand corner of the image. It then uses this setting to scan
for pixels of a similar hue along the
52
GuardDraw 5.1 User Manual
specified percentage of the color spectrum. A higher value
means that GuardDraw will scan and remove pixels across a
wider percentage of the color spectrum. A lower setting means
that GuardDraw will confine the removal to pixels that more
closely match the first one that was sampled.
For example: If you enter a setting of "30" here, and if the
image's first pixel is a shade of green, then GuardDraw will
scan and remove all shades of green across 30 percent of the
spectrum (and possibly into portions of the yellow and blue
color ranges).
Intensity Threshold
This is the percentage that GuardDraw will use to scan for
variations in color intensity. GuardDraw removes pixels by
sampling the first one located in the upper left-hand corner
of the image. It then uses this setting as a threshold by which
all pixels of a certain intensity (and higher) will be scanned. A
higher value means that GuardDraw will confine its removal
to the brighter pixels that fall within the specified Hue Variation range. A lower setting means that GuardDraw will widen
its scan and remove a broader range of bright and dark pixels
within the specified Hue Variation.
For example: If you enter a setting of “60” here and a setting
of “30” in the Hue Variation box, and if the image’s first pixel
is a shade of green, then GuardDraw will scan and remove all
of the brighter shades of green across 30 percent of the color
spectrum. In other words, fewer green pixels will be removed
from the image. If, on the other hand, you lowered this setting to “20,” the removal will include a broader range of both
light and dark green pixels.
Conditional Display Options
Conditional display options are available. For complete information on these settings and what they do, see “Conditional Display
Options” below.
2.
Make whatever option selections are necessary, then click OK.
Editing Object Properties
53
Image Properties
1.
Double-click on the image object using the Select tool, or choose
Object Properties from the Edit menu. The Image Properties
dialog box appears.
The following options will be available to you:
Compress Image
Check this option if you want to maintain the original image
file's compression ratio.
Ghost Image
Check this option if you want to create a ghost image.
Note: An image ghost is generally used in addition to a regular
image, and can be placed anywhere on the card design—even
under text or other objects. It is considered an additional ID
security feature, since ghosted images are extremely difficult to
reproduce.
Close-Cropping Options
The following options allow you to “close-crop” (i.e., remove the
background pixels of) an image. The option you select depends
on the image quality of the background you want to remove. For
tips on how to use these settings, refer to “Using the CloseCropping Options” in the Tips & Tricks section.
None
Choose this option if you do not want to close-crop the image.
54
GuardDraw 5.1 User Manual
Cameo Effect
Check this option if you want to create a cameo effect. This will
remove all background pixels around the subject of the image
(i.e., the card holder's head).
Note: The entire image background will not be removed if it is
very dark or if there are distinct variations in shading. To work
around this problem, click on the Custom Settings check box
(described below), and enter your custom Hue Variation and
Intensity Threshold percentages. If the background pixels are too
dark, no amount of manipulation will produce a satisfactory
result.
Hue/Intensity Color Match
Check this option if you want to remove all pixels within a
specified hue/intensity range. This option is particularly useful if
you are having trouble removing background pixels with the
Exact Color Match option. Click on the Custom Settings check
box (described below), and enter your custom Hue Variation and
Intensity Threshold percentages.
Exact Color Match
Choose this option if you want to remove all background pixels
that are exactly the same color. This option is particularly useful
for solid-color backgrounds, which are commonly found in
hand-made bitmap files (e.g., logos, etc.).
Custom Settings
This check box and its corresponding settings are enabled when
you choose the Cameo Effect and Hue/Intensity Color Match
options above. Use it to enter custom percentages for the following settings:
Hue Variation
This is the percentage of the hue that GuardDraw will use to
scan for variations of the background pixels along the color
spectrum. GuardDraw removes pixels by sampling the first
one located in the upper left-hand corner of the image. It then
uses this setting to scan for pixels of a similar hue along the
specified percentage of the color spectrum. A higher value
means that GuardDraw will scan and remove pixels across a
wider percentage of the color spectrum. A lower setting means
that GuardDraw will confine the removal to pixels that more
closely match the first one that was sampled.
Editing Object Properties
55
For example: If you enter a setting of "30" here, and if the image's
first pixel is a shade of green, then GuardDraw will scan and
remove all shades of green across 30 percent of the spectrum
(and possibly into portions of the yellow and blue color ranges).
Intensity Threshold
This is the percentage that GuardDraw will use to scan for variations in color intensity. GuardDraw removes pixels by sampling
the first one located in the upper left-hand corner of the image.
It then uses this setting as a threshold by which all pixels of a
certain intensity (and higher) will be scanned. A higher value
means that GuardDraw will confine its removal to the brighter
pixels that fall within the specified Hue Variation range. A lower
setting means that GuardDraw will widen its scan and remove
a broader range of bright and dark pixels within the specified
Hue Variation.
For example: If you enter a setting of “60” here and a setting of
“30” in the Hue Variation box, and if the image’s first pixel is a
shade of green, then GuardDraw will scan and remove all of
the brighter shades of green across 30 percent of the color spectrum. In other words, fewer green pixels will be removed from
the image. If, on the other hand, you lowered this setting to
“20,” the removal will include a broader range of both light and
dark green pixels.
Stretch to Fit Within Box
Check this option if you want to resize (or stretch) the image so
that it fits inside the drawing box. You should be aware that this
option will override the image's aspect ratio, thus distorting the
image.
Constrain Aspect Ratio
Check this option if you want to constrain the image's aspect
ratio, thus protecting the image from distortion.
Conditional Display Options
Conditional display options are available only. For complete information on these settings and what they do, see “Conditional Display Options” below.
2.
56
GuardDraw 5.1 User Manual
Make whatever option selections are necessary, then click OK.
Object Properties
1.
Double-click on the object using the Select tool, or choose Object
Properties from the Edit menu. The Object Properties dialog box
appears.
The following options will be available to you:
Conditional Display Options
Conditional display options are available only. For complete information on these settings and what they do, see “Conditional
Display Options” below.
2.
Conditional Display
Options
Make whatever option selections are necessary, then choose OK.
Conditional display options allow you to print objects on the card design only if certain conditions are met. This allows you to adapt the
same card format to meet the identification needs of various departments within your organization.
Always Show Object
Click on this radio button if you want to print the object on all ID
cards.
Show Object Only When Field/Expression
Click on this radio button if you want to print the object on
specific ID cards. The field beneath this radio button will be
enabled. To define the instances in which this object should be printed
on the card, click on the arrow to the right of the field. A drop-down
list will appear. You may scroll through and select any of the available
data fields.
You must use this option in conjunction with one of the two
remaining options described below.
Editing Object Properties
57
Is Equal To
Click on this button to set the condition under which the object will be
printed on the ID card. In this instance, the object will print on the ID
card only when the field/expression entered above is equal to the contents of the data entry field at the bottom of this dialog box.
For instance, if you want to print the object only when the
Department field contains the word “Accounting,” you would click on
this radio button and enter the word “Accounting” below. Thus, the
selected object will only be printed on IDs that are to be issued to members of the Accounting department.
Is Not Equal To
Click on this button to set the condition under which the object will be
printed on the ID card. In this instance, the object will print on the ID
card only when the field/expression entered above is not equal to the
contents of the data entry field at the bottom of this dialog box.
For instance, if you want to print the object only when the Department field contains anything except the word “Accounting,” you would
click on this radio button and enter the word “Accounting” below. Thus,
the selected object will be printed on all IDs except those which are
issued to members of the Accounting department.
Expressions
Click on this button to define database expressions for object printing
conditions.
58
GuardDraw 5.1 User Manual
Selecting Colors
Selecting Colors
Using the Attribute
Bar Lists
1.
Select the object.
2a. If you want to change the line color, select any of the sixteen
quick-access colors from the Line Color pick list in the Attribute
Bar.
2b. If you want to change the fill color, select any of the sixteen
quick-access colors from the Fill Color pick list in the Attribute
Bar.
2c. If you want to change the text color, select any of the sixteen
quick-access colors from the Text Color pick list in the Attribute
Bar.
Selecting Colors
Using the Color
Dialog Box
The Color dialog box offers a wide range of colors for immediate
selection. The number available to you depends on your display
setting in the Windows Display control panel.
1.
Select the object.
2a. If you want to change the line color, choose the Line Color
command from the Object menu.
2b. If you want to change the fill color, choose the Fill Color
command from the Object menu.
2c. If you want to change the text color, choose the Text Color
command from the Object menu.
3.
In the Color dialog box, select the color you want from the
palette by clicking it with the left mouse button.
4.
Click OK.
Selecting Colors
59
Creating Your Own Colors
You can create your own colors and apply them to screen elements.
Creating Your Own
Colors
60
GuardDraw 5.1 User Manual
1.
In the Object menu, choose either the Line Color, Fill Color or
Text Color commands. The Color dialog box will be displayed.
2.
Choose the Define Custom Colors button.
3.
Drag the cursor in the color refiner box, and the arrow beside
the luminosity bar, to define your color. You can also create a
color by typing numbers in the Red, Green and Blue boxes, or in
the Hue, Sat (saturation) and Lum (luminosity) boxes. Click the
up and down arrows to change the numbers by using a mouse.
Note: The color you create is shown in the left side of the Color/
Solid box. You can double-click the right side of the box, or press
ALT+O, to use the solid color that most closely resembles the
one you have created.
4.
In the Custom Colors palette, select an empty box for the new
color, or select a color that you want to change.
5.
Choose the Add to Custom Colors button.
6.
Create any other colors you want, and add them to the palette.
7.
Click OK.
Creating Your Own Colors
61
Placing Objects on the K and O Planes
GuardDraw for Windows supports 24-bit color, with output process
colors in the following models: CMY (cyan, magenta and yellow),
CMYO (CMY plus a protective overlay); CMYK (CMY plus pure black),
and CMYKO (CMYK plus a protective overlay). Each color is considered a “plane”.
CMYK
For CMYK, ribbon-based ID card printers will use individual ribbons
or ribbon segments for each process color. Some color document printers, like the HP DeskJet 560C, will have a CMY ink cartridge and a
pure black (K) ink cartridge. As the card is passed through the printer,
each plane is applied to the card in such a way that it is combined with
the other planes to achieve a desired color. For example, if you were to
print process black on a card, the printer would combine 100% of the
cyan, magenta and yellow planes to achieve black. By contrast, pure
or resin black (which is much richer) is achieved by printing 100% of
the K plane.
The Protective
Overlay
While the protective overlay (also referred to as the overcoat) is not
technically a color, it is treated as such by printers that offer protective
overlay printing as an option. Literally, it is a transparent film on a
separate ribbon (the O plane) which is applied after the other colors
have been printed onto the card. It is used to protect the card from
wear and tear.
Placing Objects on
the K Plane
1.
Click on the object that you want to place on the K plane using
the Select tool.
2.
Click the K Plane button.
Note: This option is only valid if your card printer supports K
plane printing.
62
GuardDraw 5.1 User Manual
Placing Objects on
the O Plane
1.
Click on the Select button, or choose the Select command from
the Draw menu.
2.
Click on the object that you want to place on the O plane.
3.
Click on the Overlay button.
Note: This option will only work with certain printers. Please
consult your printer documentation for further details.
In general, applying protective overlays is a simple task when printing ordinary ID cards. It becomes more complicated, however, when
you apply them to cards that have embedded smart chips.
By default, a protective overlay will be applied across the entire surface of every card, unless you place a single card design object on the
O plane. In this case, the default is overridden and the protective overlay is applied only to the specified object. As you might imagine, the
whole-surface overlay default has significant implications when printing ID cards with smart chips, since applying an overlay to a smart
chip will render the chip inoperable.
To apply a protective overlay to the surface of an ID card, while excluding the portion of the card that is occupied by the smart chip, you
will have to draw four rectangles, place each of them on the O plane,
and then arrange them on the card as shown below.
Rectangle 1
Rectangle 2
Chip
Rectangle 4
Rectangle 3
Placing Objects on the K and O Planes
63
It is important to note that the rectangles do not require a fill/line color
or a line weight (i.e., they remain invisible on the editing screen), since
GuardDraw automatically assumes that O-plane objects have a 100%
solidity. Nevertheless, you should apply the O-plane rectangles as your
last step in the design process, since adding them will interfere with
the layout of your card.
64
GuardDraw 5.1 User Manual
Defining Expressions
While GuardDraw allows you to define any manner of valid SQL expression, it is important to note that you will most likely want to use
the Define Expressions feature to combine available database fields
(First_Name and Last_Name, for instance) or to produce a desired
output value (such as a specific date format). Please note that you
cannot use expressions if your configuration does not access textual
data in your database (see “Adding Static and Dynamic Text”).
It is impractical to discuss the various SQL expressions that can be
defined in GuardDraw, since these differ from database to database.
Rather, you should refer to the documentation that accompanies the
ODBC-compliant database you are using.
Defining Expressions
1.
Choose the Define Expression command from the Edit menu. A
Define Expression dialog box is displayed.
2.
Define your valid SQL database expression in the Database
Expression data entry area. You may add available fields or
expressions to your editing area from the Available Fields/
Expressions pick list by selecting (highlighting) the ones you
want and clicking the Transfer Field/Expression button (i.e., the
button with three stacked arrows).
Note: In the case of a Full Database or Textual Hybrid Database
connection, GuardDraw automatically adds square brackets
around each field name in the Database Expression data entry
when you click the Transfer button, or double-click an available
field to create an new expression. If you have a No Database
Defining Expressions
65
connection, an Image Hybrid Database connection, or if you type
in field names manually, you will need to add these brackets
yourself, if required. Refer to your EPISUITE SDK Installation
Guide or ask your system administrator for further information.
Using Expressions
as Dynamic Text
Objects
3.
Once your expression has been properly defined, press the Add
button, to add it to the list of available database fields and expressions.
4.
Repeat for each expression that you want to define. Choose Close
when you are finished.
You may select any expression when creating a dynamic text object,
just as you would any regular database field. Since an expression can
be rather lengthy, you can edit the label so that it more closely resembles
the expression’s intended purpose (e.g., “Full Name”).
Refer to “Adding Static and Dynamic Text” earlier in this user’s guide
for details.
66
GuardDraw 5.1 User Manual
Setting Up Magnetic Stripe Information
Using Magnetic
Stripes to Retrieve
Cardholder Records
GuardDraw allows you to encode virtually any database information
you like on the magnetic stripe, which is particularly helpful if you are
creating items such as credit cards, ATM cards, long distance telephone
cards or public transportation access cards.
To retrieve database records via magnetic stripes from within the
EPISUITE application, you should only encode the card code on Track
1 of the magnetic stripe, since this is the exclusive method used to
successfully retrieve records in this manner.
Allowable Track
Information
The following table illustrates the kind of information that may be
encoded to each track of the magnetic stripe:
Track
Bits Per Inch
No. of Alphanumerics
No. of Numerics
1
210
76
2
75
37
3
210
104
As indicated, Track 1 allows alphanumeric (i.e., both alphabetic and
numeric) characters, while Tracks 2 and 3 will only permit numeric
characters. Also, certain character sets will be accepted for encoding
on each track. For further information on allowable character sets, refer to the documentation that accompanies your magnetic stripe encoding module.
The printer will automatically verify whether or not a card has been
successfully encoded. If a card is not encoded properly, the printer
will simply eject the blank card and the on-line LED will flash. If this
occurs, you should reexamine the information you have selected for
encoding in GuardDraw, and make modifications to your track layout
as necessary.
Note: You do not need to add special data characters to signify Start
Sentinels, End Sentinels and Field Separators (as defined by ISO 78112 standards), since the EPISUITE application adds these characters automatically during the encoding process.
Setting Up Magnetic Stripe Information
67
Laying Out Magnetic
Stripe Tracks
1.
Choose the Card Encoding command from the Edit menu. The
Magnetic Stripe Encoding dialog box is displayed.
2.
From the Tracks pick list, select the track (or tracks) which can be
read by your card reader. Refer to your hardware documentation
to find out which tracks are supported by your particular device.
3.
In the Database Field/Expression pick list, scroll through and
select any available database field or expression that you want to
encode on this track of the magnetic stripe. If you want to create
a new expression, choose Expressions.
4.
Once you have selected a database field or an expression,
choose Add Field. Your selection will appear in the Track Layout
list box.
5.
Repeat steps 3 and 4 for each database field or expression that
you want to encode on this particular track. Repeat steps 1 to 4
to encode additional tracks.
6.
When you are finished, choose OK.
The track layout information will be saved to your card design when
you choose Save or Save As from the File menu. The physical
encoding of the magnetic stripe occurs when you print or externally
encode the card with the EPISUITE application.
68
GuardDraw 5.1 User Manual
Removing Individual
Fields/Expressions
from the Track
Layout
Removing All Fields
and Expressions
from the Track
Layout
1.
From the Tracks pick list, scroll through and select the track from
which the database field or expression is to be removed.
2.
Select the database field or expression from the Track Layout list
box.
3.
Choose Remove Field.
1.
From the Tracks pick list, scroll through and select the track from
which all of the database fields and expressions are to be
removed.
2.
Choose Clear Fields.
Setting Up Magnetic Stripe Information
69
Setting Up Smart Chip Information
This information is valid only if your ID card printer has an optional
smart chip encoding module installed.
Encoding Smart
Chips
1.
Choose the Card Encoding command from the Edit menu. The
Magnetic Stripe/Smart Chip Encoding dialog box is displayed.
2.
From the Tracks pick list, select Smart Chip.
3.
In the Database Field/Expression pick list, scroll through and
select any available database field or expression that you want to
encode to the smart chip. If you want to create a new expression,
choose Expressions.
4.
Once you have selected a database field or an expression,
choose Add Field. Your selection will appear in the Track Layout
list box.
5.
Repeat steps 3 and 4 for each database field or expression that
you want to encode on the smart chip.
6.
When you are finished, choose OK.
The smart chip information will be saved to your card design when
you choose Save or Save As from the File menu. The physical encoding of the smart chip occurs when you print the card from the EPISUITE
application.
Removing Individual
Fields/Expressions
from the Smart Chip
70
GuardDraw 5.1 User Manual
1.
From the Tracks pick list, select Smart Chip.
2.
Select the database field or expression from the Track Layout list
box.
3.
Choose Remove Field.
Removing All Fields/
Expressions from
the Smart Chip
1.
From the Tracks pick list, select Smart Chip.
2.
Choose Clear Fields.
Setting Up Smart Chip Information
71
Setting Up Symbol PDF417 Bar Codes
What is PDF417?
PDF417 is two-dimensional, stacked bar code symbology from Symbol Technologies. It provides sufficient information density and capacity for both Portable Data File and small item marking applications.
The Symbol PDF417 is unlike linear bar codes in that it works independently from a database. In other words, linear bar codes act as a
“key” to locate and retrieve a record that resides in a database. The
PDF417, however, can contain data from an entire record, and can
therefore be read in the absence of an external database system or
where the external system is not accessible.
Uses for the Symbol
PDF417
How PDF417 Works
with EPISUITE
What follows are just a few of the personal identification uses for
PDF417:
1.
Medical information can be encoded in a PDF417 symbol that is
placed on an identity card. This information would then be
readily available to physicians anywhere in the world, without
their having to contact the card holder’s local hospital.
2.
Security clearance and other departmental data can be encoded
on corporate identity cards, which are worn by a company’s
employees. This would allow security personnel to perform
roaming spot checks, without the need of expensive wireless
computers.
3.
PDF417 can be used to encode a shopper profile card with such
marketing information as the customer’s birthday or anniversary; buying preferences (favorite brands, colors, etc.); clothing
sizes; charge card information; significant purchase history; etc.
Customer service is enhanced because the sales associate has all
of the relevant information about the shopper without needing
to ask.
In order for the bar code to retrieve the proper record from your database, it is extremely important that you link it to the Card Code field.
However, since it is also possible to store in the PDF417 bar code as
much information as you require, you might want to write a specific
72
GuardDraw 5.1 User Manual
SQL expression that will concatenate data from a number of different
fields, and then link the bar code to that expression. To do this, refer to
your database management software documentation for details on
allowable SQL expressions; or refer to the document named
SQLFUNCT.WRI in the installation directory. Also read “Defining Expressions” earlier in this user guide, for details on creating your own
SQL expressions in GuardDraw.
What follows is an example of just such an SQL expression, which is
designed to concatenate information from the First_Name, Last_Name,
Card_Code, and Employee_Number fields. Each of these fields will
be delimited by a comma (“,”), so that the EPISUITE application is able
to determine where the Card_Code field is located in the data stream.
RTRIM(First_Name) + ‘,’ + RTRIM(Last_Name) + ‘,’ + RTRIM(Card_Code) +
‘,’ + RTRIM(Employee_Number)
In this example, the RTRIM SQL functions are used to strip away any
blank spaces that might exist in the respective fields. For instance, the
First_Name field allows you to enter a maximum of 256 characters. If
you have a card holder whose first name is John, then “John” represents four characters which are then followed by 252 blank spaces.
The + ‘,’ + sequences in the SQL expression indicate that you want a
comma placed between each field. This comma will then be used as a
field delimeter, which informs your card reader where one field starts
and another ends. This also allows you to specify, when setting up
your card reader in the EPISUITE application, where the Card Code
field can be located in the data stream (i.e., it is the third incoming
field).
Since the EPISUITE application uses only the Card Code field to retrieve card holder records, you would then have to set up a special
delimited-character card reader to filter out the First_Name,
Last_Name and Employee_Number fields when the PDF417 bar code
is scanned.
Drawing a Symbol
PDF417 Bar Code
1.
Click on the Bar Code button in the Tool Bar, or choose the Bar
Code command from the Draw menu.
2.
Move the mouse pointer onto the editing screen.
3.
Press the left mouse button to anchor one corner of a flexible bar
Setting Up Symbol PDF417 Bar Codes
73
code rectangle, and then drag the pointer. The flexible rectangle
stretches from the anchor point to the new pointer position.
Linking the Bar Code
to a Database Field/
Expression
4.
When you are satisfied with the bar code’s size and shape,
release the left mouse button. You will notice that the Bar Code
Property and Value pick lists have been activated in the Bar
Code Bar. The Bar Code Property will be set by default to
“Barcode Type.” The Bar Code Value will be set by default to
“Code 3 of 9.”
5.
Click the arrow to the right of the Value pick list in the Bar Code
Bar, then scroll down and select “Symbol PDF417” as your bar
code type.
6.
Link the bar code to a database field or expression, according to
the following instructions:
1.
Click on the Select button in the Tool Bar, or choose the Select
command from the Draw menu.
2.
Select by clicking on the bar code you have just created.
3.
Click the arrow to the right of the Static Text/Data Field pick list,
and select the field or the expression to which the bar code
should be linked.
4.
Set the PDF417 bar code’s properties and values, according to
the instructions on the following page.
For complete information on how to set the PDF417 properties and
values according to your own specific requirements, you should refer
to the documentation that accompanies your PDF417 symbol scanner.
Setting the Bar Code
Properties and Values
74
GuardDraw 5.1 User Manual
1.
Click on the Select button in the Tool Bar, or choose the Select
command from the Draw menu.
2.
Click on the PDF417 bar code you have just created (if it has not
yet been selected).
3.
Click the arrow to the right of the BarCode Property pick list,
located on the BarCode Bar. The list will expand to reveal the
various properties available for the Symbol PDF417.
4.
Select the appropriate bar code property, and set its corresponding value from the Value pick list. The following table describes
PDF417 properties and their allowable value settings.
Property: Text
Value: 123456
Description: Enter sample text here. This will not have an effect
on the creation of the bar code. Rather, it is intended to serve as an
example of how your bar code will appear when it is encoded
with a similar amount of data.
Property: Rows
Value: Auto, 3 - 90
Description: The number of data rows to use. This number must
be between 3 and 90. If the number of rows and columns is not
specified (i.e., both Rows and Columns are set to “Auto”), then the
bar code will be printed twice as wide as high (Aspect Ratio of
1:2). If only the number of rows is specified (i.e., Columns=Auto),
then the number of columns will be calculated so that the minimum number of columns required will be used. Default setting is
“Auto.”
Property: Columns
Value: Auto, 1- 30
Description: Number of data columns to use. Data columns do
not include the start or stop character, or the left and right row
indicators. This number must be between 1 and 30. If the number
of rows and columns is not specified (i.e., both Rows and Columns
are set to “Auto”), then the bar code will be printed twice as wide
as high (Aspect Ratio of 1:2). If only the number of columns is
specified (i.e., Rows=Auto), then the number of rows will be
calculated so that the minimum number of rows required will be
used. Default setting is “Auto.”
Property: Aspect
Value: 1:2
Description: Cannot be changed. Specifies the bar code’s aspect
ratio (ratio of width to height), which is used during the encoding
process for row and column calculations. 1:2 means the bar code is
twice as wide as it is high.
Setting Up Symbol PDF417 Bar Codes
75
Property: ECC Level
Value: 0 - 8
Description: Allows you to set the error correction level to be
used when encoding the PDF symbol. “0” indicates that no error
correction will be encoded. “8” indicates that the maximum level
of error correction will be used. Default setting is “3.”
Property: X Dimension
Value: 3.33 to 66.66
Description: Sets the X dimension of the narrowest element, in
mils. Default setting is 13.33 mils.
5.
76
GuardDraw 5.1 User Manual
Continue in this manner to select properties and their corresponding values, until you have properly configured your bar
code.
Tips and Tricks
Creating Your Own
Card Backgrounds
There are plenty of software packages available that offer high
resolution bitmap images that you can use as card backgrounds. If,
however, you would like to take the time to develop your own
company-specific backgrounds, there are a few points you should
remember.
1.
Use a sophisticated paint program to design your card
backgrounds, and then save them to a bitmap file format that is
recognized by GuardDraw. While Microsoft Paint is an
adequate tool for some kinds of graphic design, it does not offer
the creative effects (gradient fills, artistic text, etc.) that can give
your artwork a professional quality.
2.
Always set the size of your card background graphic to the
page-size of the medium onto which you will be printing (e.g.,
80mm long by 54mm high). Also, set the output resolution to at
least 300 dots per inch, with a 24-bit (16 million) color setting.
3.
If you prefer to use a draw program, rather than a paint
program, be sure to export your card background graphic with a
one-to-one pixel setting. Set the output resolution to at least 300
dots per inch, with a 24-bit color setting. If the draw program
offers antialiasing with the export utility, use it. This will smooth
out the “jaggies” in your artwork.
4.
You can save or export your background graphic to 256
dithered colors, if you like, to conserve disk space. But be aware
that the end result will be noticeably inferior to 24-bit color
output. Sixteen million colors will give your card background a
near-photographic quality. If disk space is an issue, save the file
as a JPEG image. This file format offers exceptional compression,
but maintains the high quality of the image.
5.
Test-print your background design on the printer you will be
using to produce your ID cards. ID card printers do not always
output the colors you see on your screen. Test-printing will
allow you to adjust the color output to your satisfaction before
you go into full ID card production.
Tips and Tricks
77
Large Card
Background Files
Large card background files can greatly impede your ability to draw
or resize objects in your card design. If you find that your card
background is slowing down your design time, deactivate the Show
Background command in the View menu (i.e., make sure there is no
check mark next to the menu item). This will hide your background
from view, and allow you to draw or resize objects with ease.
Using the CloseCropping Options
To View the Effects of Close-Cropping
GuardDraw only allows you to add image keylines (i.e., boxes that
represent the size and shape of images stored in the EPISUITE
database), and not the actual database images themselves. Therefore,
setting the image property close-cropping options can be very
time-consuming—especially when you do not know what effect your
settings will have until the card has been printed from within the
EPISUITE application.
To bypass this problem, import one of your images—a photograph,
for instance—as a bitmap object. When the bitmap is loaded, reposition the Bitmap Properties dialog box so that you can view the image
beneath it. Next, click on any of the Close-Cropping options. You will
be able to immediately view its affect on the image. If you customize
the Cameo Effect and Hue/Intensity Color Match options, take note of
the new Hue Variation and Intensity Threshold settings that work best
on the image you have loaded.
When you have removed the bitmap object's background pixels to your
satisfaction, add an image to the card design and use these new settings in the Close-Cropping Options area of the Image Properties dialog box.
Hue Variation and Intensity Threshold Settings
There is no easy way to use these two settings, since their effects
depend entirely on the tonal quality of image that is being closecropped. Images with darker background pixels, or backdrops that
have distinct variations in shading, will pose more of a problem than
images with brighter, solid-colored backgrounds.
For best results on close-cropping photographs, you should follow
these image capturing tips:
1) Make sure your subject is well lit.
78
GuardDraw 5.1 User Manual
2) Photograph your subjects against a solid-colored backdrop.
3) If you are using the ambient lighting in an office, rather than
specialized photographic lighting, try placing your subjects
against a colorful backdrop (sky blue, red or green work particularly well). This will enhance your subject's flesh tones, and
make it easier for GuardDraw to differentiate the background
pixels from those that compose the image of the card holder.
Nudging Objects
You can “nudge” GuardDraw objects one pixel at a time, to place them
on your card design with precision. To do this, select the object and
then use your arrow keys to move it in the direction of your choice.
Constraining Objects
To draw perfect squares and circles, or perfectly horizontal or vertical
lines, hold down the SHIFT key to constrain the object while you draw
or resize it.
It is important to note that images (photographs, fingerprints and
signatures) are automatically constrained to their proper aspect
ratios when you draw or resize them on your card design.
Quick-copying Objects
You can quick-copy an object by holding down the CTRL key, then
selecting and moving the original object with your mouse pointer. This
allows you to bypass the Copy/Paste commands and tool bar
buttons.
Shadow Effects
You can create a shadow effect for an object by copying the object,
specifying a darker fill color for the copy, and then staggering the
lighter-colored original on top of the copy.
Selecting/Deselecting
Multiple Objects
You can select multiple objects by holding down the SHIFT key and
clicking on the objects of your choice. Deselecting objects from a
previously selected group can be performed in the same manner.
Another way to select multiple objects is to click and hold down your
left mouse button, and then draw a marquee box around the group of
objects that you want to select. Be careful to not click and hold down
your left mouse button while the pointer is located over an object,
since this will serve only to select and move the object.
Tips and Tricks
79
Dynamic Text Objects
When you create a dynamic text object (a field or database
expression), you can modify the label for brevity or concision. For
instance, if you create a database expression like “RTRIM([First_Name])
+ ‘ ‘ + RTRIM([Last_Name]),” which concatenates the First_Name and
Last_Name fields with a single space between them, the full
expression will appear when you link it to the text object. To change
the expression label to something more concise (e.g., “Full Name”),
double-click on the text object and type a new label into the Edit Text
dialog box that is displayed.
Field and expression labels are used for design purposes only. They
do not effect the dynamic information that is output to the card
during the printing process.
80
Placing Bar Codes
When adding a bar code to your card design, it is a good idea to place
it so that the bottom of the code is at least 1/4-inch from the bottom
margin of the card. Most card readers are incapable of reading bar
codes that are printed below this placement location. To be sure your
bar code is in the right spot, test-print a single ID card and try it on
your card reader.
Sizing Bar Codes
When sizing a bar code to fit onto your card design, you should
remember a few handy points:
GuardDraw 5.1 User Manual
1.
To see how long the bar code will be (using the default 3:1
narrow bar width ratio), select the bar code and choose the Text
option from the Bar Code property pick list. Next, in the adjacent
Value field, enter a sample text string with the same number of
alphanumeric characters as you plan to use in the bar code. For
instance, if your planned barcoding sequence is 9 alphanumeric
characters in length, enter nine sample alphanumeric characters
in the Value field. The barcode on your card design will automatically resize itself to accommodate the new character length.
2.
If the bar code is too long to fit onto your card design, select the
bar code and choose the Ratio option from the Bar Code
Property pick list. Next, select “2.5:1” or “2:1” from the Value pick
list. This resizes the widest bars in the bar code by a ratio of 2.5 to
1 or 2 to 1, respectively, relative to the narrowest bars. The bar
code on your card design will automatically reduce in the length.
3.
Protecting Your Bar
Codes Against
Counterfeiting
If, after resetting your narrow bar width ratio, you still cannot fit
your bar code onto your card design, you should try adjusting
the narrow bar width itself. To do this, choose the Narrow Bar
Width option from the Bar Code Property pick list, and then
reduce the value that appears in the Value field.
K-plane bar codes can be printed against a process black background
and still be used by infrared card readers. Since infrared readers do
not identify process black, this combination of pure and process blacks
makes bar codes impossible to photocopy or scan.
For other types of bar code readers, consult your supplier for possible
anti-counterfeiting options. Intermec readers, for instance, do not identify Pantone 202; therefore, a k-plane bar code printed against this color
will still be recognizable by the reader, but remain difficult to reproduce.
Typography
If you are new to the concepts of proper font usage, you should
remember these simple rules to great ID card typography:
1.
Never use more than one or two fonts at a time in your ID card
design. If you must use two fonts, be sure that they complement
each other. In general, you can’t go wrong by combining one
serif typeface and one sans serif typeface.
2.
If your ID card printer prints at unusually low resolutions (i.e.,
200 dots per inch or under), always use a single, bold sans serif
typeface (printers with low resolutions cannot print the thin line
weights in a serif font). Set the point size to at least 10.
3.
If you are using a card background bitmap, be sure that your
typeface fill color makes your text object stand out against the
background. Generally, yellow and white characters can be
easily read against dark background colors. Try to avoid harsh
contrasts (e.g., red typography against a dark green background).
4.
To test if you have selected the proper typographical point size,
print out a sample card and try to read it at arm's length. If you
cannot see what is written on the card, then no one else will be
able to read it, either.
Tips and Tricks
81
Glossary
A
Aspect Ratio
The ratio of the width of an image to its height.
Attributes
Characteristics assigned to objects, with respect to the line and fill.
Line attributes include weight (thickness) and color. An object’s fill
attribute is a color. Text objects also have attributes, such as the font
(typeface), style and color.
B
Bitmap
An image composed of a series of dots (pixels). Scanners and paint
programs, such as Paint, generate this type of image. By
contrast, GuardDraw creates images using vector objects—shapes
stored internally as mathematical equations.
C
Cameo Effect
An artistic effect that is accomplished by removing the bitmapped
image’s background pixels. In the case of photographs, the image backdrop will be removed, and a close-cropped image of the card holder
will be placed against the card background.
Card
The printed card that has been issued to the cardholder. A card can
exist as a record in the database, even if the card itself has never been
printed.
Card Background
A card background is a high resolution bitmapped image that is
imported into the card design. It serves as a scenic backdrop to the
graphic objects and static or dynamic data that is printed on the card.
82
GuardDraw 5.1 User Manual
Card Code
The card code is a unique number that is assigned to a new card record
when it is created in the EPISUITE database. The card code should
ideally be printed on the badge as a bar code, or encoded on the badge’s
magnetic stripe or smart chip. When a card read is processed, the
card code is used to retrieve the cardholder’s record from the database.
Card codes can be manually entered via the keyboard, automatically
generated using your own numbering scheme, automatically
generated using the ISO/IEC 7812 numbering system, or produced
from an auto-combined Person table field and increment. If you
intend to use proximity cards, or cards with magnetic stripes or smart
chips, they might already have pre-encoded identifiers. In this case
the number can be added to the Card Code field through the use of a
card reader.
Card Format
A card format is a template from which ID cards are produced. It is
composed of a GuardDraw card design (including the card
background image, design objects, smart chip or magnetic stripe track
layout, and the printer setup information) and the card code
generation method.
A card format can only be deleted if there are no cards using the
format or if the cards using the format have their statuses set to
“Unprinted.”
Card Reader
A card reader is an access control hardware device used to read bar
codes, magnetic stripes, smart chips, or microwave emissions from the
different types of advanced security cards.
Cardholder
The person for whom a cardholder record is maintained, and to whom
the printed card is issued.
Constrain
Holding down the SHIFT key while drawing or resizing an object, to
force the object into a specific shape. For example, holding the SHIFT
key down while you draw or resize a rectangle forces that object to
become a perfect square. Images (photographs, fingerprints and
Glossary
83
signatures), when drawn, are automatically constrained to their proper
aspect ratios (as determined in the EPISUITE application).
Crop
Reducing or increasing the visible area of an image by using the Crop
button in the Crop Image dialog box. The area of the image that
resides within the rectangle will be cropped and saved to the
database. The area of the image that resides outside the rectangle will
be discarded.
D
Directory
A directory is a structure used to organize files on a disk like a drawer
in a filing cabinet. Directories have names, and can be divided into
subdirectories. For example, you can have a directory named CARDS
to store your card designs.
Double-Click
To press and release the left mouse button twice in quick succession.
Drag
To move the mouse while holding down the left mouse button.
Drive
A device in a computer that spins disks used to store information. Personal computers normally have a fixed, or hard, disk (labeled C), one
floppy disk drive (labeled A), and one CD-ROM drive (labeled D).
Dropdown List
A dropdown list allows you to choose commonly-used entries for a
specific category of information (such as Blue, Green, Brown or Gray,
if you create a pick list for the card holder’s eye color).
Dynamic Text Object
A text object in a GuardDraw card design that has been linked to an
EPISUITE database field (e.g., the cardholder’s first name, last name,
etc.). Unlike static text, a dynamic text object outputs the variable
information that was entered into its associated field.
84
GuardDraw 5.1 User Manual
E
Expression
In GuardDraw, a combination of operators, constants and names of
fields that produce a single value. You can use expressions to
combine database fields for magnetic stripe or smart chip encoding,
or for database field links to dynamic text objects (e.g., the First_Name
and Last_Name fields can be combined into one dynamic text object
that prints the cardholder’s full name on a single line).
Extension
Characters following the period in a filename that identify the type of
information in the file. For example, the .GDR extension indicates that
the file contains a GuardDraw drawing.
F
Field Label
The name which identifies the field. In GuardDraw, a dynamic text
object’s label can be modified using the Object Properties command
in the Edit menu.
G
Ghost Image
An image or bitmap that is almost transparent, so that the card background can be seen through it.
Grid Markers
A series of evenly spaced, intersecting horizontal and vertical dots used
to align objects.
H
Handles
Small squares that appear on the corners and sides of the cropping
rectangle. You can use these handles to resize or move the rectangle
over the captured image. The area of the image that resides within the
rectangle will be cropped and saved to the database. The area of the
image that resides outside the rectangle will be discarded.
Glossary
85
Hue
The position of a color along the color spectrum. For example, green is
located in the spectrum between yellow and blue.
J
Justification
The alignment of text in relation to the left, right, top and bottom margins of the text frame.
L
Landscape (Page Orientation)
A page oriented so that it prints from left to right across its longest
dimension.
Luminosity
The brightness of a color on a scale from black to white.
O
Orientation
Refers to the direction in which print is oriented on the page. Printing
across the width of the page is known as portrait orientation (derived
from portraits of people, which are usually vertical in format).
Printing across the length of the page is known as landscape
orientation (derived from landscape paintings or photographs, which
are usually horizontal in format).
P
Pixel
Short for “picture element.” Pixels are dots on a computer screen or
television that combine to form an image.
Point Size
A unit of measurement used primarily in typesetting for designating
type sizes. There are approximately 72 points to an inch.
86
GuardDraw 5.1 User Manual
Portrait (Page Orientation)
A page oriented so that it prints from left to right across its shortest
dimension.
Q
Query
To search for and retrieve records from the EPISUITE database, using
customizable searching and sorting parameters. New queries can be
saved for later use. Unused queries can be deleted.
S
Saturation
The purity of a color’s hue, moving from gray to the pure color.
Static Text Object
A text object in a GuardDraw card design that has not been linked to
an EPISUITE database field. Unlike dynamic text, a static text object,
such as a headline or a field label, remains constant from card to card
during the print process.
Symbol PDF417
A two-dimensional symbology that allows you to encode a Portable
Data File with ASCII, binary, or numeric data. The Symbol PDF417 is
particularly useful if you need to encode large amounts of data onto a
limited space (e.g., an ID card that requires customer or employee profiles, biometric data, and personal descriptions).
T
Text Box
A simple text field, which allows you to manually enter alphanumeric
or numeric data.
Glossary
87
Index
A
Attribute Bar 31, 32. See also
Workspace: Attribute Bar
command 8
B
Bar codes
Adding 42
Linking to database fields or
expressions 42
Printing on the K plane 43
Properties and values, overview 37
Properties and values, setting 43
Setting the background color 43
BarCode
button 42
command 42
BarCode Bar. See Workspace: BarCode
Bar
command 8
BarCode button 73
BarCode command 73
BarCode properties
BarCodeType 37
Codabar 39
Code 128 A 39
Code 128 Auto 39
Code 128 B 39
Code 128 C 39
Code 16K Auto 40
Code 16K B 41
Code 16K C 41
Code 3 of 9 37
Code 49 40
Code 93 38
EAN 13 38
EAN 8 38
Extended Code 3 of 9 37
Extended Code 93 38
Interleaved 2 of 5 37
MSI Plessey 39
POSTNET (Zip + 4 PostalCode)
40
Symbol PDF417 40
UCC-128 40
UPCA 38
UPCE 10 digit 38
88
GuardDraw 5.1 User Manual
UPCE0 6 digit 38
UPCE1 6 digit 38
Checksum 41
Direction 41
Narrow Bar Width 42
Ratio 41
Text 41
BarCode Property pick list 43, 74
BarCode Value pick list 74
C
Cameo effect 34, 52, 55
Card backgrounds
Cropping 24, 77
Exporting 25, 78
Importing 23, 76
Removing 24, 25, 77, 78
Card designs
Creating 20
Opening 21
Saving 22
Card Encoding command 68, 70
Close-cropping options 51, 54
Colors
CMYK 62
Creating your own 60
Placing objects on the K plane 62
Placing objects on the O plane 63
Selecting
Attribute Bar pick lists 59
Color dialog box 59
Conditional display options 57
D
Databases
Connecting GuardDraw 11
Jet database 11
ODBC-compliant database 11
DB Image
Adding 35
Button 33
Command 33
Properties 51
Define Expression command 65
Design windows. See Workspace:
Design windows
Drawing Object tools. See Workspace:
Drawing object tools
E
Ellipse
command. See Workspace: Drawing
object tools
tool. See Workspace: Drawing object
tools
Error logging 10
Export Background command 25, 78
Expressions
Defining 65
Using as dynamic text objects 66
F
Fill Color command 44, 32, 60, 47, 59
Fill Color pick list 44, 47, 48, 59
Font command 31
G
Ghost 34, 51, 54
I
Image
command 34
tool 34
Image object
Adding 34
Image objects
Changing signature fill and text
attributes 48
Creating cameo effects 34
Creating ghosts 34
Resizing 35
Import Background command
20, 23, 76
J
Justify buttons 31
K
K Plane button 43, 62
L
Line
command 26
tool 26
Line Color command 32, 60, 47, 59
Line Color pick list 47, 59
Line Weight pick list 32, 47
M
Magnetic stripes
Allowable track information 67
Laying out tracks 68
Removing track information 69
Menu
Draw 33, 34, 42, 31, 32, 26, 14
Edit 31, 32, 20, 65, 23, 9, 68, 70
File 20, 68, 21, 18, 12, 22, 70
Object 44, 31, 32, 60, 47, 48, 59
Style 31, 15, 45
View 11, 20, 10, 17, 9, 78, 8
Overcoat button. See Overlay button:
protective overlay
Overlay button
protective overlay. See herein Overcoat
button
P
Page Setup command 18
Page size setup 18
Polygon
command 29
tool 29
Print Setup command 12
R
New
command or button 20
Rectangle
command 26
tool 27. See also Workspace: Drawing
object tools
Remove Background command 25, 78
Rotate by 90 Degrees command 45
Round Rectangle
command. See Workspace: Drawing
object tools
tool 27
O
S
Object Properties
command 31, 32, 49, 54, 57
dialog box 57
Editing 49
Objects
Attributes
Changing lines 47
Changing objects 47
Setting defaults 48
Copying
Leaving the original behind 45
Drawing
Ellipses 28
Lines 26
Polygons 29
Rectangles 26
Round rectangles 27
Moving 45
Nudging 45
Resizing 46
Rotating 45
ODBC database 11
Open command 21
Options command 11, 10, 9, 8
Save As command 22
Save command 22
Set Default Attributes command 48
Smart chips
Laying out 70
Removing chip information 70
Static text objects 46
converting to dynamic text objects 32
creating 31
Static text properties 49
Static Text/Data Field pick list
33, 42, 31, 32, 74
Status Bar command 8
Symbol PDF417
Drawing on the card design 73
Linking to a database field or expression
74
Setting the properties and values 74
Uses for 72
N
tool 31, 32
Text Color
command 31, 60, 47, 48, 59
pick list 31, 47, 48, 59
Text Style Bar 31. See also Workspace:
Text Style Bar
Text Style Bar command 8
Text tool
Dynamic text 32
Tips and tricks 77
Tool Bar. See Workspace: Tool Bar
command 8
U
Undo levels 9
W
Workspace
Attribute Bar 15
BarCode Bar 16
Design windows 17
Drawing object tools 14
Setup 8
Text Style Bar 15
Tool Bar 14
T
Text
command 31
Index
89