1
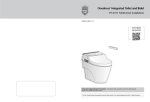
TM
Onedrous Integrated Toilet and Bidet
TH-0111 Toilet bowl installation
Contents in Box 1 of 2
[ ]
To view installation
video scan QR code
with mobile device
“Important safeguards/general cautions”- information that can protect user from safety hazards.
Please read carefully for proper usage.
- This user manual contains the products warranty. Please submit to our warranty department within 15 days of purchase.
Toilet bowl installation guide
Contents can be found in box 1 of 2
Before installing the Onedrous (chinabowl) , be sure to read the safety instructions.
INCLUDED PARTS
Attention before installation
(In the box labeled 1 of 2)
Check to make sure you have all these parts from the package
WARNING - If the chinabowl is cracked please wear safety gear (goggles, gloves) when handling it.
CAUTION 1. Please install the product as described in the manuals.
2. Install the Onedrous to a level floor (If floor is not level the Onedrous may not flush properly).
FLANGE
PART
3. Do not apply excessive force to the Onedrous when installing it. Such force could break the chinabowl.
2 X NUT
2 X WASHER
2 X T-BOLT
1 X PACKING
1 X FLANGE
2 X CAPS
2 X SCREWS
2 X BUSHINGS
2 X WASHERS
2 X LAGBOLTS
4. Onedrous is designed for installation in a house and to a water source that cannot freeze.
If the water freezes it may crack the chinabowl.
5. Onedrous may clog if diapers, sanitary napkins and/or wipes are flushed.
MOUNTING
BLOCK
PART
Check water supply valve in bathroom
■General inlet valve
(angle valve)
■Screw inlet valve
(angle valve)
1 x WATER SUPPLY
VALVE
■For special plumbing,
you may need a licensed plumber.
OTHERS
PAPER INSTALLATION
TEMPLATE
INSTALLATION
MANUAL
Minus slot
Handle
Screw inlet valve
Before Installation
COMMON TOOLS NEEDED
2 X MOUNTING
BLOCKS
Installation
This product should be installed using the included t-valve
2 X LAGBOLT
ANCHORS
Flange Size
* 12" Pipe Wrench
* Screwdriver
* 10" Adjustable wrench
* Putty knife
* Carpenter's level
* Drill * Pliers
* Tape Measure
* Goggles * Wax ring(option)
* Silicone for caulking
5.9”
2”
2.5”
4”
Installation method
Toilet space requirements:
1) Distance between finished wall and the center of the floor drain must be 12" (305mm)
2) Water supply should be approximately 10"(250mm) to the left (facing the bowl) from the center line of the flange and
approximately 2-1/2"(60mm) above the finished floor.
1 Fixed angle valve
2 Remove the old wax
Must use fixed angle valve, and not elbow shaped handle
as per the below diagram.
3) Using the provided template, confirm the installation dimensions of the Rough-in and the mounting blocks.
Water Pressure
Typically the standard range of working pressure is 20 to 80 psi static.
The Onedrous requires a minimum working water pressure of 15 psi flowing.
If replacing an existing toilet with the Onedrous you may
be able to use the existing flange and simply replace the
old wax ring with a new wax ring. If using existing
flange, skip to step 9.
Remove the old wax.
angle valve
Install the new wax ring
on the flange.
drain hole
NOTE
2
If the existing flange does not fit the Onedrous,
use enclosed flange and follow the directions.
When using the wax ring, follow the instructions above.
Toilet bowl installation guide
3
Toilet bowl installation guide
3 Flange components
4 Flange packing + flange
11 Install the concrete anchor
- Check the position for concrete anchor and drill
a hole with electric drill.
- Insert flange packing to flange
12 Install concrete anchor
- Put the concrete anchor into hole with hammer.
flange packing
Drill
nut, washer, T-bolt
flange packing, flange
flange
Hole
Hole
Block
5 Flange + bolt
6 Flange + Toilet bowl
- Turn toilet bowl upside down
- Insert bolt to flange
(note the direction of the bolt)
- Insert flange to toilet bowl
T bolt
13 Put hanger on the hole and fix it with bolts
14 Fix the toilet bowl
Installation
- Place the toilet bowl
Driver
Hole
7 Flange + Toilet bowl nut
Hanger
8 Insert drain hole to ensure proper fit
- Assemble flange to toilet bowl by using nut and
washer
- Turn toilet bowl right side up onto its base
- Please handle carefully, as this may require more than
one person
Boltguide
washer
nut
Cap
15 Caulk with silicone
Bolt Washer
16 Fix the toilet bowl like below picture.
drain hole
9 Remove toilet bowl and place aside.
- Tape installation template to floor and begin to
affix hanger as shown in picture below.
10 check the place for installation
- Please check the position and distance for
installation with ruler
Ruler
Caulk with
silicone
water inlet hose
T-valve
water supply valve
4
Toilet bowl installation guide
5
Trouble shooting
Specifications
※ Please be sure to check the following aspects before asking for help.
Specification
TH-0111
Power rating
Trouble shooting
The water does not spray
Factors to check
Direct inlet Flow Type, Low Tank
Water inlet pressure
1.0 ~7.0 kgf/cm²(14.2psi ~ 99.6 psi)
Back
Max. 700cc ± 150cc / min
Front
Max. 700cc ± 150cc / min
Water pressure adjustments
1 ~ 5 levels
Warm water temperature
control
Room Temp. ~ 93.2℉, 98.6 ℉, 104 ℉
Water
inlet type
- Check if the water tank is filled.
- See if the water valve is open
- Check if the water filter (strainer) is clogged.
120V / 60Hz / 1400W
Type
Wash device
The unit is not operating
- Check if the power cord is connected.
- See if the power is turned off from the main unit.
- Make sure that the Skin sensor on the seat touches your skin when
you sit on the seat.
Heated
Water is leaking
Water pressure is weak
Seat, water and
dryer is not warm
When the nozzle doesn’t
come out
- Ensure plumbing is properly connected. If water is leaking from the main unit
disconnect and contact service personnel.
- Check if the water pressure is set to “low”
- See if seat temperature is set to “low”.
- See if the water temperature is set to “low”.
- See if the dryer temperature is set to “low”.
Seat
Heater
1340W
Safety device
Bi-metal, Thermal fuse, Flow sensorHeated
Temperature control
Room Temp. ~ 93.2℉, 98.6 ℉, 104 ℉
Heater
55W
Safety device
Thermal fuse, temperature sensor in seat, Prevent low-temp burning
Warm air control
Room temp ~ 113 ℉ , 5 levels
Warm Air
Dryer Device
Heater
250W
Safety device
Thermal fuse
Turbo wash function
○
ELB
×
Economy mode
○
Deodorizer
○
Inlet water temperature
41℉~ 93.2℉ (recommended 54℉~ 93.2℉)
Ambient temperature
41℉~ 104℉ (recommended 54℉~ 93.2℉)
Dimensions
W: 415mm(16.34inch) L: 695mm(27.36inch) H: 145mm (5.71inch)
Weight
43.74kg (96.43 lbs) ( China bowl:38kg(83.78lbs) Bidet:5.74kg(12.66lbs)
- Make sure skin is touching Skin sensor
* Recommended water pressure is 1.0 ~7.0 kgf/cm²
When water is cold or warm
- Adjust the temperature
Information to the user
Body unit shakes
Dryer does not work
- Tighten the bolts (do not over-tighten)
- Make sure skin is in contact with skin sensor
This equipment has been tested and found to comply with the limits for a Class B digital device, pursuant to part 15 of the FCC Rules.
These limits are designed to provide reasonable protection against harmful interference in a residential installation. This equipment
generates, uses and can radiate radio frequency energy and, if not installed and used in accordance with the instructions, may cause
harmful interference to radio communications. However, there is no guarantee that interference will not occur in a particular
installation. If this equipment does cause harmful interference to radio or television reception, which can be determined by turning
the equipment off and on, the user is encouraged to try to correct the interference by one more of the following measures:
- Reorient or relocate the receiving antenna.
- Increase the distance between the equipment and receiver.
- Connect the equipment into an outlet on a circuit different from that to which the receiver is connected.
- Consult the dealer or an experienced radio/TV technician for help.
WARNING
6
Any changes or modifications not expressly approved by the manufacturer could void the
user’s authority to operate the equipment and limited warranty.
Toilet bowl installation guide
7