1
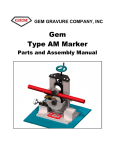
GEM GRAVURE COMPANY, INC
Gem
Type U2 High Speed
Marker
Parts and Assembly Manual
1
Copyright 2007, GEM Gravure Company, Inc All rights reserved.
This document is the property of GEM Gravure Company, Inc and contains confidential information
owned by GEM Gravure Company, Inc. Any unauthorized copying, use or disclosure of it without the prior
written permission of GEM Gravure Company, Inc is strictly prohibited.
GEM Gravure Company, Inc.
112 School Street
West Hanover, MA 02339
Tel: (781) 878-0456
Fax: (781) 878-9360
E-Mail: [email protected]
2
Gem Type U2 High Speed Marker
Table of Contents
Table of Contents……………………………………….…………………...……………....................................……………….………3
Safety Information….……….…...……………………...………………………………………....................................………………...4
Introduction…………………...…………...…...………………….……….…………………....................................…………………...5
Specification..……………………………………………...…………………………………....................................…….…………...…6
Initial Setup Instructions………………………………………..….………………………………....................................……………...7
Setup and Operating Procedure………………….…………………….....………………………....................................……………….7
Operation Procedures for GEM U2 Printers……………………………...………………………....................................………………8
Clean Up procedures…..…………………………………………...…...………………………....................................…………………9
U2 Exploded View..........….………………………….……..……….....…………...................................……………….......................10
Parts List.........………………..................................................……...……………………………...................................……………...11
Air Assembly Exploded View……………………………………………………..………...............................................…….………..12
Air Assembly Parts List……………………………............………….…………………..……....................................….……...……..13
U2 Stand Assembly………………………….………………………………………..…………....................................……………….14
U2 Stand Parts List…………...………….....................................................…...………...………....................................……………..15 U2 Ink Flow…………...………….……….........................................................................................................................……………..16
Ink Pot Assembly…………………………....……………..........................................................................................................….........17
Flat Wiper Holder………...…....…………............................................................................................................................….……..…18
Wiper Tension Assembly……………………...…….….…………...………..…..............................……....................................……...19
Wheel Saft Assembly & Solvent-or Ink Dripper Assembly……………...…………………………………....................................…...20
Wire Guide Assembly & Slide Plate Assembly……………………………..……………….……….…....................................……….21
Flat Print Wheel……...........……...…........................................................................................................................................…….......22
Concave Guide Wheel ……........……………….…………….....……..………..…..…….…...………....................................………..23
Inks & Thinners………………………………………………………….................….………….......................................…………….24
GEM Type U-2 Ultra Hi-Speed Marker Printing Set-Up..........................................................................................................................25
3
Safety Information
It is the responsibility of the user of this equipment to provide his employees with a
safe place to work, including proper tools, devices, and safety equipment.
It is essential that all personnel operating this equipment be instructed by their
supervisors in safety precautions as outline on the following pages as well as proper
operating procedures.
4
Introduction
The high speed one side printer for long production runs on extruder lines has filled a particular need in the
industry which is the capability of printing at top extruder speeds.
Its benefit lies in the ability to print at these speeds for full shift runs with little operator attention. For top
marking speeds, oversized 15” circumference flat print wheels are specified to provide a high rate of Linear
marking at moderate rotational speeds.
However, the machine can be modified to accommodate 10.6”, 12” and 15” circumference flat wheels. It
should be noted that potential top printing speeds are decreased with smaller sized print wheels.
The unit incorporates such features as a forced ink feed system with pressure gauge check on viscosity, a one
gallon ink supply, pneumatic action top guide wheel raising and lowering movement with fine pressure adjustment, shielded ink well to prevent ink splash and many other desirable features.
Please specify line direction and furnish complete print wheel legend and wire diameter when ordering the
Gem Type U Ultra High Speed Marker.
The recommended marking ink for this printer is the Gem Ultra High Speed ink prepared in the proper viscosity
for high speed extrusion marking and is ready for use as received. After many hours of use, check the ink pressure gauge shows signs of the ink viscosity becoming heavier, adding a small amount of thinner to the 1 gallon
ink reservoir will restore the ink to its original furnished viscosity.
5
6
Initial Setup Instructions
Top air cylinder requires minimum 40 psi. Gem marking ink is furnished in a “Use as Received” viscosity.
After unpacking, roughly center the machine in your wire line so the wire passes directly over print wheel position.
Setup and Operating Procedure
Select a can of ink and place in paint shaker. Upon clamping the ink can into the shaker turn on paint shaker
and set it for a minimum of 10 minutes duration.
Raise the top concave guide wheel up by actuating the air cylinder valve. The air cylinder valve is located at
the upper right hand side on top of the printer. Air pressure gauge should be set at 40 PSI.
Select the proper concave guide wheel based on the F.O.D. of the cable being run. A range of cable sizes is
printed on the concave guide wheel.
Place the concave guide wheel onto the top shaft and secure into place with wheel nut. Select a print wheel
based on wire gauge and F.O.D. of cable being run.
Place the print wheel onto the bottom shaft and secure into place with wheel nut.
Proper alignment of the two wheels is necessary. First align the print wheel on the bottom shaft by loosening
the thumb screw at the back of the printer that locks the bottom shaft assembly. Slide the bottom shaft assembly until it is in the line with the ink spray nozzle and then lock into place with thumb screw.
7
Operating Procedures for GEM U2 Printers
Align Concave guide wheel on top shaft by centering it in line with the print wheels. Lock shaft assembly into
place with thumb screw at back of printer at top shaft.
Insert a fresh flat poly wipe (1.5 x .5 x .125) into the slot of the brass wiper holder. Mount wiper holder on the
holder pin and position slide plate so that wiper fingers fit around the print wheel, and the bottom sharp edge
of the poly wipe contacts the wheel face on an angle. To achieve this proper angle slide the wiper assembly up
as high of an angle on the wheel as it will go, then slide it back just slightly and lock into place. Angle should be
10 to 15 degrees.
NOTE: The wiper assembly must be mounted on the wire entrance side of printer.
Engage the coil tension spring onto the split ring fastened to the bottom of the wiper holder. Crank and adjust
the wiper tension assembly to provide a small amount of drag on the print wheel face when it is rotated by
hand. With a cable stretched thru the printer adjust the entrance side adjust the small guide sheave so the
sheave is on the underside of the cable and align sheave to center of cable.
Place a gallon of ink into position and turn on ink pump. Adjust ink pressure to 5-6 PSI. Rotate the print wheel
by hand and check wipe. With the exception of the lettering the face of the print wheel should be wiped
clean.
Replace ink well top cover. Rotate the print wheel by turning the wheel shaft at the rear of the machine and
check if the print wheel rotates freely and does not scrape on slot side of the ink well cover. If it rubs against
the slot side, make a small adjustment of the wheel position by moving the wheel shaft in or out. Start up the cable line, after the knots have gone thru the printer, check to see that the cable is properly traveling thru the sheave and printer.
Lower the concave guide wheel down into position on top of the cable by actuating the air cylinder valve. Adjust the concave guide wheel with the top air lever forcing the cable to slightly contact the print wheel.
Check print quality. Re-adjust guide wheel pressure as required.
As the ink begins to thicken use the same series extended to thin the ink.
8
Clean Up Procedures
With diaphragm air pump off, lower the ink can so that the can catches the ink as the pump drains the ink well. Quickly
remove the ink can and replace it with a can of flushing solvent #4555. Place the can of flushing solvent up into position
and allow it to pump thru the system.
Pour some cleaner into a bucket and place the print wheel, wiper holder, concave guide wheel, shaft spacers, and wheel
nuts into bucket.
Using a rag, dip it into the flushing solvent as it comes out of the ink nozzle and cleanup ink splatters and excessive ink
with it. All areas to be cleaned include the frame, shafts, wiper tension assemblies, etc. It is best to wipe with a flushing
solvent soaked rag followed by wiping it clean with a dry clean rag.
Lower the can of flushing solvent allowing the can to catch the solvent as the pump drains the ink well then turn off
pump. Replace the can of flushing solvent with an empty can.
Use a rag to wipe the inside of the ink well clean.
Remove each item soaking in the cleaner and wipe them clean with a rag one at a time.
Take the dirty cleaner in bucket and dispose of by placing it into a drum properly labeled with a yellow hazardous waste
label.
9
U2 Exploded View (Top)
51
27
26
24
25
28
2
42
39
38
46
39
38
40 12
3
44
33
31
43
12
44
45
43
21
32
42
41
45
47
30
4
41
37
34
35
27
26
28
29
47
40
46
38
3
39
4
49
37
21
38
6
50
5
22
7
8
48
9
10
36
11
20
19
1
23
14
10
13
18 16 15
17
Overall Mechanical Parts list for High speed Marker
REF. # GEM #
PART # NAME
1
40-1543
61-146
High casting base
2
40-1002
61-7
Adjusting wheel carrier
3
40-1010
61-10
Brass Plug For lock Screw
4
40-1011
61-9
Bearing Housing Locking Screw With Brass Plug
5
40-1012
61-19
Slide Plate
6
40-1268
61-34
Adjusting Knob
7
40-1014
61-20
Wiper Support Arm
8
Flat Wiper Holder
See Pages 18 For Various Sizes Of Flat Wipers
9
1/4-20 Jam Nut
10
40-1015
61-28
Wheel Wiper Stud
11
40-1016
61-27
Wiper Spring ( Tension )
12
40-1285
61-46
Support Arm ( Short )
13
40-1017
61-110
Tension Adjusting Bracket
14
96-073
10-32 x 3/8” Flat Hd. Soc. Cap Screw
15
40-1018
61-68
Knob For Wiper Blade Tension Screw
16
40-1019
61-69
Wiper Blade Tension Screw
17
96-0028
1/4-20 x 1/4” Cup Point. Soc.Set Screw
18
98-0237
E - Clip
19
40-1020
61-26
Tension Follow Nut
20
40-1021
# 10 Internal Lock Washer
21
40-1022
61-22
Ink Reservoir Pins
22
96-0014
1/4-20 X 1/2” Hex Hd. Cap Screw
23
See Page 12 For Ink Pot Parts
24
40-1024
61-38
Rear Rol Nut
25
96-0027
1/4 - 20 X 5/16” Cup Pt. Soc. Set Screw
26
40-1025
5000-112
TruArc Retaining Ring
27
40-1273
R-8
Wavy Spring Washer
28
40-1266
Bearing
29
40-1028
61-12
Bearing Spacer
30
40-1029
60-13
Bearing Housing
31
40-1030
61-16R
Top Wheel Shaft
32
40-1031
61-16L
Bottom Wheel Shaft
33
40-1032
61-17R
Top Roll Nut ( Front )
34
40-1033
61-17L
Bottom Roll Nut ( Front )
35
40-1034
61-42
Wheel Spacer
36
96-0702
10-32 x 3/8” Button Hd. Soc. Cap Screw
37
61-245
Screw For Guide Wheel
38
40-4311
33KDD5
Bearing
39
5000-50 Internal Tru-Arc Retaining Ring
40
40-1269
61-48
Post ( For Wire Guide Assembly )
41
40-1286
61-47
Support Arm For Wire Guide Assembly (Long )
42
40-2146
61-132 Adjusting Nut ( Spec. )
43
8-32 Thumb Screw
44
40-1295
61-49
Spacer ( For Wire Guide Asm. )
45
61-50
Stud ( For Wire Guide Asm. )
46
40-4309
61-155
Bearing Spacer
47
40-1116
61-153
Wire Guide Wheel
48
1400-0083-00482 Key Ring
49
1/4” Washer
50
96-0216
3/8-24 x 1-1/4” Hex Hd.Cap Screw
51
40-1534
61-21A
High Speed A.M. Air Asm. See Page 16 & 17 For Parts
*Right Hand Shaft For Wire Direction R. to L, Left Hand Shaft For
Wire Direction L. to R.
11
Air Assembly Exploded View For U2 High Speed Marker - 61-21A
12
Air Assembly Exploded Parts View For U2 High Speed Marker -61-21A
REF. # GEM #
PART #
1
40-1009
61-4
2
40-1268
61-34
3
40-1018
61-68
4
40-1105
61-141
5
40-1289
61-142
6
40-1115
61-143
7
40-1114
61-144
8
40-1120
61-145
9
40-1516
61-152
10
4P
11
40-1518
4MV8
12
40-1519
BF094-D
13
504-2
14
508-2
15
364-2
16
274Z-60
17
97-0010
113-B
18
97-0005
19
97-0029
116-B
20
268-P
21
269-P
22
270-P
23
96-0802
24
96-0705
25
96-0014
26
96-0013
27
96-0040
28
29
NAME
Top Roll Adjusting Screw Collar
Adjusting Knob
Knob
Carrier Plate
Top Plate
Air Valve Support Plate
Air Gage Support
Stop Adjustinbg Screw
Choke
Ensaco Green tubing
Bimba 4 way Valve
Bimba Air Cylinder
Watts Filter
Watts Lubricater
Watts Regulator 0-60
Watts Gage
1/4”x1-1/2” Nipple
!/8”x3” nipple
1/8 Pt. Street Elbow
1/8x1/4 Tube Male Connector
1/8x1/4 Tube Male Elbow
1/8x1/4 Tube Female Elbow
8-32x1/4” Soc. Hd. Cap Screw
10-32x1/2” Soc. Hd. Cap Screw
1/4-20x1/2” Hex Hd. Cap Screw
1/4-20x3/4” Hex Hd. Cap Screw
1/4-20 Hex Nut
5/16-24 Hex Nut
1/4” U-Bolts
13
U2 Stand Assembly
3
12
23
24
23
5
25
22
2
26
13
1
7
11
15
8
6
28
29
15
16
22
27
28
21
15
4
9
10
17
20
14
18
19
28
14
U-2 Stand Assembly & Parts
REF # GEM #
PART #
1
99-0224
61-54A
2
40-1293
61-233
3
40-1104
61-168
4
40-1068
61-171
5
61-409
6
61-410
7
40-1022
61-22
8
40-1011
61-9
9
40-5297
80-32
10
40-2106
80-31
11
40-3519
60-217
12
98-0022
13
40-2021
80-25A
14
40-1520
15
40-2166
16
40-2004
17
80-27
18
98-0011
19
20
21
22
23
24
25
26
27
28
29
40-2161
NAME
STAND ASSEMBLY
CONTROL BRACKET FOR INK FEED
FLANGE FOR INK DRAIN TUBE
TUBE HOLDER
DRAIN TUBE(STATIONARY)
DRAIN TUBE (ADJUSTABLE)
INK RESERVOIR PIN
BEARING HOUSING LOCKING SCREW
SUPPORT POST FOR INK CAN
SUPPORT FOR INK CAN
PLATE FOR INK PUMP
PUMP
REGULATOR ASSEMBLY FOR PUMP
REGULATOR AND FILTER
GAGE 60 P.S.I.
BRACKET FOR REGULATOR
INK INTAKE PIPE
INK FILTER
3/8-FLAT WASHER
1/4-20 X 1” HEX BOLT
1/4-20 X 1/4” SOCKET HD. CAP SCREW
1/4” FLAT WASHER
10-32 X 5/8” BUTTON HD. SOC. CAP SCREW
10-32 X 3/4” BUTTON HD. SOC. CAP SCREW
1/4-20 X 1” HEX BOLT
3/8-16 X 1-1/4” HEX HD. BOLT
3/8” SPLIT LOCK WASHER
3/8-16 HEX NUT
HOKE VALVE
15
16
U2 INK FLOW
Parts Information
Cover and Parts for High-Speed Ink Pot Assembly
Gem #
Generic #
40-1505
61-115
40-1541
61-134-.300
40-1545
61-134-.437
40-1505
61-135
40-1113
61-136
40-1542
61-137-.300
40-1546
61-137-.437
40-1508
61-138
40-1106
61-139
40-1510
61-170
Name
Ink Pot Plug
Ink Pot Cover (10.6” Cir. Wheels)
Ink Pot Cover (10.6” Cir. Wheels)
Ink Pot ink feed Nozzle (10.6” Cir. Wheels)
Ink Pot Cover Skirt (10.6” Cir. Wheels)
Ink Pot Cover (12” Cir. Wheels)
Ink Pot Cover (12” Cir. Wheels)
Ink Pot Ink Feed Nozzle (12” Cir. Wheels)
Ink Pot Cover Skirt (12” Cir. Wheels)
Ink Pot ( With Front Drain)
10-32 x 3/8” Button Head Screw
10-32 Hex Nut
17
Gem Type AM Marker
Parts Ordering Information
Flat Wiper Holder
GEM
Part No.
Flat Wiper Holder
Generic Part
Wheel
No.
Width
Wheel
Type
40-1037
40-1038
61-10A.300
61-10A.437
Flat-HS
Flat-HS
.300”
.437”
Poly Or Nylon Wiper Materials
Corresponding Wiper Material
Wiper Materials
1½” x ½” x 1/8” Poly or Nylon
1½” x ½” x 1/8” Poly or Nylon
*Note: Poly or Nylon Flat Wipes purchased in packs of 100.
Note: Ink Skirt Optional
18
Poly Wipe- 40-9033
Gem Type AM Marker
Wiper Tension Assembly
Gem # Generic #
40-1072 - #61 – 14A Wiper Tension Assembly, complete
Complete Assembly includes:
Qty
1
1
1
1
1
1
1
1
1
2
GEM Part
Number
40-1018
40-1017
40-1019
40-1020
40-1016
96-9706
40-1021
96-0028
98-0237
96-0703
Generic Part
Number
#61-68
#61-110
#61-69
#61-26
#61-27
98407A120
-
Description
Knob
Tension Adjusting Bracket
Tension Screw
Tension Follow Nut
Tension Spring
#10-32 x 3/8” Button Head Cap Screw
#10 Internal Lock Washer
¼ - 20 x ¼” Cup Pt. Soc. Set Screw
E-Clip
#10-32 x 3/8” Flat Head Screws
19
Gem Type AM Marker
Wheel Shaft Assembly
Qty
Gem Part No.
1
1
40-1073
40-1074
Generic
Part No.
#61-6A
#61-4A
Description
Shaft Assembly, complete (R.H.)*
Shaft Assembly, complete (L.H.)*
*Left to right machine operation
Note: When machine is operating right to left, top shaft will be L. H. and
bottom R. H.
Complete Assembly includes:
Qty Gem Part No.
Generic
Part No.
1
40-1031
#61-16L
1
40-1030
#61-16R
1
40-1033
#61-17L
1
40-1032
#61-17R
2
98-0298
2
40-1025
5000-112
1
40-1028
#61-12
1
40-1273
R-8
1
40-1024
#61-38
1
40-1029
#61-13
Description
Wheel Shaft (L. H.)
Wheel Shaft (R.H.)
Roll Nut (L. H.)
Roll Nut (R. H.)
Bearings
1-1/8” Snap Rings
Bearing Spacer
Wavy Spring Washer
Rear Roll Nut
Bearing Housing
Solvent- or Ink-Dripper Assembly
Qty
Gem Part No.
Generic
Description
Part No.
1
40-1075
#61-39A
Dripper Assembly, complete
Complete Assembly includes bracket 40-1288
20
Gem Type AM Marker
Gem Type AM Marker
Inkwells
Qty
PartWire
No. Guide
Generic
PN# Gem
40-1081
Assembly Description
Part No.
Qty Gem Part No.
Generic
Description
1
40-1077
#61-21T
Teflon Coated
Part
No.
1 1 40-1023
#61-21
Standard
40-1081
#61-5A
In-Out
Adjusting Wire
1
40-1066
#61-21S Guide
Hi-Speed
(L.H. &(Slotted)
R.H)
40-1082
#61-27
V-Groove Roll
1 1 40-1078
#61-21L Small
Large
1
40-1079
#61-21WC Water-cooled Reservoir
(with standard hose fitting)
Slide Plate Assembly
“V” Groove Guide Wheels
#61-26A Slide Plate Assembly, complete – 40-1080
Qty
Generic
Description
Complete
Assembly includes:
Part No.
PN# 40-1080 Slide Plate
Assemble Generic PN# 61-26A
1
Qty
1
1
11
11
1
1
40-1083
#61-57
¼” to ½”
O.D.
Gem
Part No. #61-53
Generic ½” to 1” Description
40-1084
O.D.
Part
No.
40-1085
#61-54
1” to 1 ½”
O.D.
40-1012
#61-19
Slide
40-1086
#61-55
1 ½”
to 2”PlateO.D.
40-1118
#61-56
2” Adjusting
to 2 ½” O.D.
40-1268
#61-34
Knob
96-0216
3/8 – 24 x 1 ¼” Hex Cap
Screw
40-1014
#61-20
Wiper Support Arm
21
Gem Type AM Marker
Flat Print Wheels
For printing on
wire covering with
Min.-Max. O.D.
Range of:
.040 – 0.080”
Wheel ModelWidth
Type
Size
Wiper Required
G - .300”
1/32”
.300” Flat Hi-Speed
.080 – 0.100”
.100 – 0.125”
.125 – 0.200”
.200 – 0.300”
.300 – 0.400”
.400 – 0.500”
G - .300”
G - .300”
G - .300”
GL - .437”
GL - .437”
GL - .437”
1/32”
3/64”
1/16”
5/64”
3/32”
7/64”
(same)
(same)
(same)
.437” Flat Hi Speed
(same)
(same)
Wiper
Material
Poly or
Nylon
½” x ½” x
1/8”
(same)
(same)
(same)
(same)
(same)
(same)
NOTE: Models GM, GP and GR have same profile as Model GL,
differing only in dimensions
22
Concave Guide Wheels
For printing on
wire covering
with Min-Max
O.D. Range of:
Wheel
Radius
.045-.070”
.070-.095”
.095-.115”
.115-.135”
.135-.190”
.190-.235”
.235-.280”
.280-.330”
.330-.400”
.400-.430”
.430-.500”
3/64”
1/16”
5/64”
3/32”
1/8”
5/32”
3/16”
7/32”
1/4”
9/32”
13/32”
23
Gem Type AM Marker
x
BLACK
Wire Marking Inks and Thinner
x
WHITE
Different covering materials require differently compounded inks, as indicated
in the accompanying chart:
x
For printing on:
Specify ink:
YELLOW – 2na
Polyvinyl chloride………………………..………………………… Type G
x
RED – 7na
Rubber, natural or synthetic……………………………………….. Type CV
Nylon………………………………………………………………. Type NA
x
x
x
GREEN – 23pc
BLUE – 14na
Polyethylene or cross-link poly……………………………………. Type HCP
x
For hot or cold applications
x
Passes all standard abrasion and solvent-resistant tests
x
Dated for shelf life and inventory control
ORANGE – 5na
Available in Quarts
x
BROWN – 4pi
Gallons
5-Gallon Pails
x
VIOLET – 12ia
30-Gallon Drums
55-Gallon Drums
x
GREY – F
x
PINK -6 ½”ea
x
SLATE – 13ih
x
AQUA – 19ga
x
SILVER
x
GOLD
Order shipped on day it is received
24
25
To attain maximum printing speeds, the wire should first pass
through approximately 4 feet of water held back by a sponge dam
in the first trough. It should then pass through the remaining dry
air area within the trough and into a series of air wipes prior to
printing.
For most effective removal of water from the wire it should emerge
from the short water bath with a surface temperature of 150 to
170 degree Fahrenheit indicated by a beading effect of the water
remaining on the wire. The clean, dry wire can be then printed
at high speed and re-entered in the remaining water trough. Gem
engraved marking wheels and Gem type NA Ultra High Speed
Marking Ink for nylon are recommended for best printing results.
If when occasionally checking ink pressure readings on the Gem
Ultra High Speed Markers, the pressure increases, you can correct
this by adding a small amount of type NA High Speed Thinner to
the ink to reduce the pressure to that indication the original recommended viscosity.
U2
Marker
Recommended GEM Type U-2 Ultra Hi-Speed Marker Printing
Set-Up for Tandem THHN-THWN Insulated Wire Line.