Download HXSP-1001 - Hexin Technology
Transcript
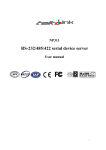
HXSP-1001
RS-232/485/422 serial device server
user manual
【Summarize】
HXSP-1001 is a serial device server which can connect with network fast. it provides one RS232/485/422 (RS-232: DB9M; RS-484/422: 4 bits terminal block) and 1 10Base-T Ethernet port, it
can manage the disperse serial device or host computer by network, easily and convenience. setting or
software upgrade by serial program group in apply, support TCP, UDP, ARP, ICM and DHCP
protocol, support Windows Native COM and auto-connect function once the network intermit.
In addition, HXSP-1001 provide the management collocate tools that based Windows flat roof. it can
lead the user manage and configure facility step by step, all of the setting can be done by network or
serial. Support pass gateway and router, easily for user to set IP address, Server and Client mode, size
of data and so on, Can realize the serial device connect with network by simply setting.
Its outside design support DIN-Rail and Wall mounting. apply to project easily .
【Feature】
Support RS-232/RS-485/RS-422
Support Socket application.
Support Sever and Client mode.
Support Windows/Linux COM serial driver mode.
Support TCP, UDP, ARP, ICMP and DHCP protocol
Support all of Windows Native COM and
the network blackout .
Support pass gateway and router.
Easy–to–use windows utilty for mass installation
All of the setting can be done by network and serial
Proper Serial auto-connection (On-the-fly)
【Capability index】
Ethernet
Standard: 10Base-T
Protocol; support TCP、UDP、APR、ICMP and DHCP protocol
Signal: Rx+, Rx-, Tx+, TxSpeed: 10Mbps
Working: full or half of duplex
Work mode: support Server and Client mode
auto-contact
function
once
Port memory: 512 byte
Transmit distance: 100m
Interface protection: 1.5KV ESD
Interface type: RJ-45
Serial
NO.of ports: RS-232,RS-422/485 4 bits terminal block
RS-232 signal: TxD, RXD, RTS, CTS, DTR, DSR, DCD, GND
RS-422 signal: Tx+, Tx-, Rx+, Rx-,GND
RS-485 signal: Data+, Data-,GND
Parity: None, Even, Odd, Space, Mark
Data bit: 7bit,8bit
Stop bit: 1, 1.5, 2
Transmission speed: 1200bps ~ 115200bps
Flow control: support RTS/CTS flow control or not flow control.
RS485 data direction: ADDC (Auto data direction Control).
Loading: RS-485/422 side support 32 nodes (optional 128 nodes)
Transfer distance: RS-485/422 side: 1200m, RS-232 side: less than 15m
Port protect: 1500W surge protect,15KV ESD Protect
Port type: RS-232 DB-9 male,RS-485/422 4bit terminal
Power supply
Power supply input: 9VDC
Consumption: 300mA
Environmental
Operating temperature: -20℃~60℃, 5~95% RH
Storage temperature: -25℃~85℃, 5~95% RH
Appearance
Color: blue and white
L×W×H: 100mm×69mm×22mm
Material: Iron
Weight: 230g
【Interface and LED】
10Base-T Ethernet port
Device connected to Ethernet: Red LED flash
Ethernet port has data transfer: Green LED flash
The 10/100BaseT(X) ports located on HXSP-1001 front panel. The pin of RJ45 port
display as below. Connect by UTP or STP. The connect distance is no more than 100m. 100Mbps
is used
100Ωof UTP , 10Mbps is used 100Ωof UTP 3,4,5
RJ 45 port support automatic MDI/MDI-X operation. can connect the PC , Server, Converter
and HUB by straight–though cable wiring . Pin 1, 2, 3, 6 Corresponding connection in MDI. 1→3,
2→6, 3→1, 6→2 are used as cross wiring in the MDI-X port of Converter and HUB. 10Base-T
are used in MDI/MDI-X, the define of Pin in the table as below.
pin
1
MDI
MDI-X
signal
signal
1
TX+
RX+
2
TX-
RX-
3
RX+
TX+
6
RX-
TX-
8
4, 5, 7, 8 —
—
Note:“TX±” transmit data±,“RX±” receive data±,“—”not use。
MDI(Straight-through cable):
RJ45
8
1
TX+
3
3
RX+
TX-
6
6
RX-
RX+
1
1
TX+
RX-
2
2
TX-
MDI-X (Cross-over cable)
RJ45
8
1
(RX+) TX+
3
1
(RX-) TX-
6
2
RX- (TX-)
TX+ (RX+)
(TX+)
RX+
1
3
(TX-)
RX-
2
6
RX+ (TX+)
TX- (RX-)
RS-232/485/422 port
RS-485/422 ( 4 bit terminal block)
1 T+/Data+ 2 T-/Data3 R+
4 RRS-232 , DB9M (male, pin)
1 DCD
2 RxD
3 TxD
5 GND 6 DSR
7 RTS
4 DTR
8 CTS
Obverse:
LED indicator show:
Electrify input: Status1and Status2 blinking 3times
Main mode undiscover target facility: Status2 blinking, 1 /sec
Data transmit: Status2 off
No data transmit: Status2 on
Setting error: Status1 blinking, 1/sec
data buffer full: Status1 on
【Simply use setting】
Introduction the equipment simple use as following(visit the facility by create a dummy serial
port ).
Running the serial connection wizard, interface display as below. Setting step by step.
Note: Create a Virtual serial port to visit the facility, need to close the firewall before install
link guide process. Especially the Windows XP
system.
Suggestion: Hold the default parameter of system during the installation . The user may also
according to the environment need choice device appropriate working pattern and other options。
Step 1: Click on “Next”
Step 2: Select the first item (create a link between a virtual
serial port and a device server). And then click on “Next”
Step 3: Default Item , select the create a new VSP (COM) .
Then click “Next”
Step 4: Default Item, and then click “Select from the list”
Step 5: Select your target corresponding IP from list, click
“Select”
Step 6: After select the target, back to
interface. Click
“Next”
Step 7: Select the working mode. and then click
client server mode(2)serve mode(3)free choice mode
Step 8: click on “Next”.
Step 9: Select the TCP/IP transport protocol suppose the
listening port on the device serve is a default port (1001),
click “Next”.
Step 10: Select the “Yes, enable on-the fly commands, use
out–of –band access” . Click “Next”.
Step 11: Click “Next”
Step 12: Click “Finish”
Continue click the “finish” in the next step.
Note: Advance setting steps and methods refer to the user manual document in CD.
【Device Installation】
Pay attention to the questions as below :
(1) Make sure the power adapter is 9V;
(2) Use the cross-over cable if the devices connect to the PC.
(3) Use the straight-through cable if the devices connect to the HUB.
Note: Cable (blue) with the product is a straight-through cable.
【Application】
Project
1. Based COM corresponding application and device communicate on PC
In this project, create a dummy serial and facility communicate by dummy serial software 。
dummy serial locate on client server.
Note: Communications bottom API OF dummy serial is based TCP/IP and UDP。
2. Based on Socket corresponding application and device communicate on PC.
In this project, application should based WinSocket. If PC application of PC locate on client
server. then NP312 must locate on server.
Note: Communications bottom API OF dummy serial is based TCP/IP and UDP。
【AFQ】
DS Manager program can not find facility during the using. The problems and the ways how
to solve as below:
1. No power supply, no network or error network
Answer: Using the adapter (9VDC). Can use straight-through cable connect to
HUB and switch .use the cross-cover cable connect to PC .
2. Firewall on PC
Answer: Close the Firewall.
3. IP address conflict
Answer: redistribute IP address.
4. Double network cards on PC
Answer: Remain LAN, uninstall another. LAN forbid. Restart.
5. contact with PC by cross-over wiring ,IP address display (DHCP)
Answer: set the IP address of PC to static address.
6. Search equipment's PC machine and equipment not in identical webpage
Answer: Need to designate search facility at DS Manager process. operate methods refer to
CD
7. MAC address binding
Answer: Forbidding network card of PC, restart, PC can find the facility. PC also can find
the facility after waiting 20 minutes.
MAC address bind:When PC carries on the correspondence with some equipment, If discovered
that this equipment's IP the address was been already obsolete by other equipment
use, PC
machine will think that this equipment IP address existence conflict is unable with this equipment
to carry on the normal correspondence。
【operate in application】
In the search, establishes in equipment's process, involves operates as follows :
1.
How to forbid network card
The first method: Click the icon
on the right of taskbar by right key on the mouse.
select the “forbid”
The second method: click on “network neighborhood” on the desktop of PC by right key on the
mouse, select “attribute” item, enter the “network connections”
Click on the LAN network card icon
2. How to start network card
“Network
neighborhood”,
network
“select
, select the “Forbid” from menu
attribute”
connections interface click on LAN network card icon
item
in
menu,
enter
the
, select the “using”item.
3. How to judge PC have double network card ?
Click the “start” menu, input the “ipconfig” in “Run dialog”, click “Confirm” If the
PC
have double IP address and MAC address. Need to remain the LAN, The others uninstall


