1
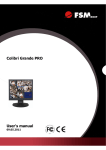
Table of Contents BESNet
Training Manual
Pre-Implementation Account Management and
Self-Determined Notifications for Registered
Entities
June 18, 2014
Version 1-1
3353 Peachtree Road NE
Suite 600, North Tower
Atlanta, GA 30326
404-446-2560 | www.nerc.com NERC | BESNet User Manual for Registered Entities V1‐1 | June 18, 2014 1 of 40 Table of Contents
Introduction ................................................................................................................................................................3
BESNet Program Cautions ..........................................................................................................................................4
Version History ...........................................................................................................................................................5
User Account Management........................................................................................................................................6
Introduction ............................................................................................................................................................6
Creating a New Account .........................................................................................................................................6
Creating Account Step 1: User Name and Password ..........................................................................................6
Creating Account Step 2: Verify Account ............................................................................................................8
Logging Into the BESNet Application ................................................................................................................... 10
Selecting the User’s Entity to Use .................................................................................................................... 11
Setting up Your BESNet Application Account ...................................................................................................... 12
Account Setup Step 1: Select Account Type .................................................................................................... 12
Account Setup Step 2: Association of Account with Entities ........................................................................... 13
Editing Your User Profile ...................................................................................................................................... 16
Password Management ....................................................................................................................................... 17
Changing User Password .................................................................................................................................. 17
Forgot/Resetting the User Password ............................................................................................................... 18
Managing Your User Account Properties ............................................................................................................ 21
Logging Out .......................................................................................................................................................... 22
Administrator User Account Management ............................................................................................................. 23
Administrative User Management....................................................................................................................... 23
Vetting New Users............................................................................................................................................ 23
User Role Management ................................................................................................................................... 24
BESNet Dashboard Overview .................................................................................................................................. 25
Notifications of Self-Determination ........................................................................................................................ 27
Creating a Notification of Self-Determination ..................................................................................................... 27
Create Notification of Self-Determination Screen Section 1: General Information ........................................ 27
Create Notification of Self-Determination Screen Section 2: Detailed Information........................................ 30
Adding an Element to a Notification of Self-Determination ............................................................................ 31
Add Supporting Documentation for the Element ............................................................................................ 39
Certifying the Notification of Self-Determination ............................................................................................... 40
Submitting the Notification of Self-Determination ............................................................................................. 40
NERC | BESNet User Manual for Registered Entities V1-1 | June 18, 2014
2 of 40
Introduction
NOTE: This pre-implementation manual ONLY addresses Account Management for Registered Entities and Submittal of Self-Determined Notifications. As we near the July 1,
2014, implementation date, additional sections will be made available regarding other
parts of the process and application.
Entity Administrator accounts should be the first accounts set up within the BESnet Application. Once the Primary Compliance Contact has established his or her Entity Administrator account, they can then work with the other individuals within their companies to set up additional User and Administrator accounts.
This user manual provides a guided walkthrough to illustrate the BES Notifications and Exceptions Tool (BESNet).
The system provides a workflow-based process that emulates the BES Exceptions Procedure, as outlined in NERC
RoP Appendix 5, to route, evaluate and take actions on Exception Requests and Self-Determined Notifications.
Users have the ability to login to a secure portal and create both Exception Requests and Self-Determination Notifications. Depending upon the selection, the user is provided with the appropriate Exception or Self-Determination form to which they are able to provide details regarding the Request / Notification. Each form captures the
relevant details for the Submitting and Owning Entities, Inclusion and Exclusion rules, Element Descriptions and
one or more elements.
Upon completion of the form, the Entity is able to submit the Request / Notification. The system will automatically
notify all appropriate parties of the submission. This includes Submitting and Owning Entities, Scope of Responsibility Entities, Regional Entities and NERC. BESNet provides facilities for Regional Entities to acknowledge Notificaton elements and process Exception Requests, request and receive supplemental information, alert and notify
participants, issue recommendations, and monitor periodic re-certification of requests. In addition, NERC can create proposed and final decisions, as well as manage appeals to those decisions.
Queries have been created for accessing information about Exception Requests and Notifications enabling the
BESNet to produce a list of facilities and Elements for which: 1) exceptions to the definition have been granted
and 2) self-determination Notifications have been submitted. NERC will publicly post reports on its website that
will provide interested persons, including applicable governmental authorities, information regarding submitted
Exception Requests that may be of interest to them.
NERC | BESNet User Manual for Registered Entities V1-1 | June 18, 2014
3 of 40
BESNet Program Cautions
The following cautions should be followed when using the BESNet program.
A. DO NOT use the back button in your browser.
B. Be sure to scroll right and left within your browser (depending on your screen resolution) to ensure that
all required information can be entered in the browser.
NERC | BESNet User Manual for Registered Entities V1-1 | June 18, 2014
4 of 40
Version History
The following is the history of changes to this document.
Version
Date
1-0
May 9, 2014
1-1
June 19, 2014
Change(s) Made
Initial Release – User Account Management
Section only
Incremental Release – Addition of Submittal of Self-Determined Notifications
NERC | BESNet User Manual for Registered Entities V1-1 | June 18, 2014
5 of 40
Change Tracking
User Account Management
Introduction
The BESNet application operates within the framework of the ERO Enterprise Platform, which includes several
applications, such as the NERC Standards Balloting System.
Note – If you already have an ERO Platform Account (for the new Standards Balloting System), please proceed
to Setting up New Account in the BESNet Application section of this User Guide.
When creating accounts, it is essential to make sure your Entity Administrator account is set up before any other
accounts. Your Entity Administrator should be the person who is registered with NERC as your Primary Compliance Contact (PCC). Requesting accounts before the Entity Administrator account is set up will result in having
to re-register those accounts later.
Creating a New Account
If you do not have an existing ERO Platform user ID, you will need to create a new account for the BESNet application. The new user must supply user profile information and identify the organization the user represents.
Once an account is created, an administrator will vet the user as a person for role-based, individual access to the
system. Once vetted, a user will be notified through email that they can login to the system.
Creating Account Step 1: User Name and Password
Navigate to the following URL:
https://BESNET.EROENTERPRISE.COM
A
Figure 1: ERO Platform Login Screen
NERC | BESNet User Manual for Registered Entities V1-1 | June 18, 2014
6 of 40
User Account Management
A. Click on Create New Account (A). The following screen will appear.
* Required Field
A
*
B
*
*
*
C
*
E
*
*
G
*
I
D
F
H
J
*
K
L
Figure 2: Create Account Screen
To create a new account,
A. Enter a User Name (MUST be a business email address - this can be the same email in step H).
B. Enter a Password. As the on-screen instructions indicate, this password:
a. Must be at least eight (8) characters in length.
b. Must contain at least one uppercase letter.
c. Must contain at least one numeric character.
C. Re-enter the Password.
D. Enter the user’s First Name.
E. Enter the user’s Last Name.
F. Enter the user’s Title.
G. Enter a valid business Phone Number where the user may be reached.
H. Enter an Email Address. This MUST be a valid email address, as it will be used to send ALL notifications of
actions and status updates within the system. Both User Name and Email Address may be the same.
NERC | BESNet User Manual for Registered Entities V1-1 | June 18, 2014
7 of 40
User Account Management
NOTE: Changing this field does not change a user’s username.
I. For security purposes, select a Password Question from the list of questions.
J. Enter the Password Answer to the security question (I).
K. Select the Verify icon (K). Several images display. Select the correct image of each description as instructed
until all three pictures have been verified.
L. Click the Create button (L).
Creating Account Step 2: Verify Account
A
Figure 3: Verify Account Screen
Upon successful verification of the account information provided on the Create Account form, a verification email
will be sent to the email account used to create your user account.
A. If you have not received the activation email, SELECT the Resend Validation Email (A) to have the activation email resent to the email address provided.
A
B
Figure 4: Sample Activation E-Mail
NERC | BESNet User Manual for Registered Entities V1-1 | June 18, 2014
8 of 40
User Account Management
A. Click on the link (A) provided in the verification email above. The following screen will appear:
A
B
C
Figure 5: PIN Verification Screen
A. Enter your User Name (A).
B. Enter the PIN (B) contained in the verification email.
C. Click Submit (C).
PIN Ex piration Procedure
If the PIN has expired, the following screen will appear:
NOTE: PINs expire 60 minutes after issuance.
A
Figure 6: PIN Expiration Screen
A. Click on Reset and Reset PIN (A). A new verification email will be sent with a new PIN.
NERC | BESNet User Manual for Registered Entities V1-1 | June 18, 2014
9 of 40
User Account Management
Once you have successfully created a user ID and it has been verified, the ERO Platform Screen will appear.
A
B
C
Figure 7: ERO Platform Screen
A. To enter the BESNet application, click on BES Exceptions (A).
B. At this screen, you also have the opportunity to modify your User Profile (B).If you have updated your
profile, click Save (C) to save the changes.
Note: You will have to logout of the application and log back in for the profile changes to take effect.
Logging Into the BESNet Application
For users who already have an account with BESNet, navigate to the following URL:
https://BESNET.EROENTERPRISE.COM
A. Enter the User Name (A).
B. Enter the Password (B) entered during the user registration process defined in Section Creating a New
Account.
C. If desired, check the Remember me? (C) Checkbox, which gives permission for the system to remember
the credentials entered.
D. Once completed with these fields, complete the login process by pressing the Sign In (D) button.
NERC | BESNet User Manual for Registered Entities V1-1 | June 18, 2014
10 of 40
User Account Management
A
B
C
D
E
F
Figure 8: ERO Platform Log-In Screen
For users who do not have an account:
E. Click the Create New Account (E) link. See Section Creating a New Account for more details.
To reset your password.
F. Click the Reset Password (F) link. See Section Resetting the User Password for more details.
Selecting the User’s Entity to Use
If the user has been vetted as a representative for more than one Entity, the user will first be prompted
to select the Entity they wish to represent for the current session. Users who are only vetted for a single
Entity will skip this step.
A
B
Figure 9: User Entity Selection Screen
To identify the Entity the user will represent during this session:
A. Select the Entity Name (A) from the Entity list. Only those for which this user has been vetted
will appear.
B. Click the Select (B) button.
NERC | BESNet User Manual for Registered Entities V1-1 | June 18, 2014
11 of 40
User Account Management
Setting up Your BESNet Application Account
Once your BESNet User ID has been established, you will need to finish setting up the functions of the new account.
Navigate to the BESNet application: https://BESNET.EROENTERPRISE.COM. You will be shown your user profile.
Select the BES Exceptions tab on the left (A) of the ERO Enterprise Platform Entry Page.
A
Figure 10: ERO Enterprise Platform Entry Page
Account Setup Step 1: Select Account Type
You must select an Account Type. Registered Entities may only select the Registered Entity account type.
A. Select Registered Entity as your Account Type (A).
A
B
C
Joe
Smith
[email protected]
Figure 11: Account Type Selection Screen
NERC | BESNet User Manual for Registered Entities V1-1 | June 18, 2014
12 of 40
User Account Management
Account Type
Description
Accounts for members of the entities registered with NERC and/or the national Regions. Includes members of submitting, owning, and scope of responsibility entities.
Registered Entity
NOTE: Each user account may only be created for a single account type. Account type selection is only available
one time following new account creation. The account type cannot be changed once it has been selected.
B. Click the Save button (B). This will take you to the My Profile screen.
NOTE: The user’s profile information entered during the first step of account creation appears in the User Profile
area (C).
Account Setup Step 2: Association of Account with Entities
The next step in the registration process is to associate the user’s account with one or more Entities on the My
Profile Screen.
A
B
C
D
Figure 12: My Profile Screen
The next step in the registration process is to associate the account with one or more Entities.
A. View the User Profile information in the User Profile section (A).
B. If desired, edit the User Profile information by clicking the Edit button (B). See the Editing Your User
Profile section for further details.
C. View the listing of the Business Entities (C) with which the account is currently associated in the Business
Entities list. When initially registering, this list will be empty.
D. To associate the account with an Entity, click the Add Entity button (D). This displays the Entity Listing
Screen allowing you to select the Entities to be applicable to this user.
NERC | BESNet User Manual for Registered Entities V1-1 | June 18, 2014
13 of 40
User Account Management
A
B
C
D
Figure 13: Entity Selection Screen
A. From this list, select the Entity to associate with the account by clicking the checkbox to the left of the
Entity record, in the Add column (A).
a. The Entity listing can be filtered by typing in the Entity Name filter textbox in the header (directly
beneath the Entity Name label).
B. Select the Region (B) that will be responsible for vetting the user account if an administrator for this Registered Entity does not yet exist in the system. (If there is an Entity Administrator role already associated
to the Registered Entity, a vetting request will be sent to that Entity Administrator).
NOTE: Choosing the Regional Entity in this screen does not associate a Registered Entity to a Region within
the system; this is only used for vetting requests for account access.
NOTE: If you do not see your Entity listed in the list, contact your Regional Entity.
C. Select the Role (C) the account will perform for that Entity. Roles are:
a. Entity User: A general user of the system.
b. Entity Administrator: A user who has the ability to vet user accounts for that Registered Entity, as
well as perform all functions of the Entity User role.
NOTE: The system does not allow a user to change his or her role for an Entity. Instead, the Entity Administrator must remove the user’s association with the Entity, after which the user must submit a new request
to be associated to the Entity with the new role.
D. Repeat steps A through C for each Entity to be associated with the account. When complete, click the
Save button (D). This will bring up the Vetting Request Confirmation Screen. This confirms your request
NERC | BESNet User Manual for Registered Entities V1-1 | June 18, 2014
14 of 40
User Account Management
to be vetted by the Entity Administrator(s) associated for each selected Entity (See the Vetting Users section for further detail) and the following screen will be displayed.
Figure 14: Vetting Request Confirmation Screen
The Entity User will be notified by e-mail when each association request has been vetted (approved or rejected).
If a request for association with an Entity has been rejected, there will be an e-mail notification that you have
been rejected.
If the user has not received a vetting response within five business days, contact your Regional Entity or your
Entity Administrator.
Once the account user has received notification that the request has been vetted and approved, the user will see
the Entities associated with his account in the My Profile Screen (A).
A
Figure 15: My Profile Screen with Entity Association
The user can then access the information for that Entity in the BESNet application.
NERC | BESNet User Manual for Registered Entities V1-1 | June 18, 2014
15 of 40
User Account Management
Editing Your User Profile
To update your User Profile, enter the desired update(s) in the appropriate field on the User Profile Screen and
press Save (A).
A
Figure 16: User Profile Screen
If your profile changes have been successful, the Profile Update Confirmation Screen will be displayed.
Figure 17: Profile Update Confirmation Screen
Log out and back into the BESNet application.
NOTE: Profile changes will NOT take effect until you log out and log back into the BESNet application.
NERC | BESNet User Manual for Registered Entities V1-1 | June 18, 2014
16 of 40
User Account Management
Password Management
Changing User Password
A. If a User wishes to change his password, he should hover over the User tab in the header of the BESNet
Dashboard and then click on the My Profile tab in the dropdown. This will bring you to the My Profile
Screen.
A
Figure 18: BESNet Home Page
B. Click on the Edit button (A) on the My Profile Screen. This will bring you to the User Profile Screen.
A
Figure 19: My Profile Screen
C. Click on the Reset Password link (A) under Password on the User Profile Screen.
A
NERC | BESNet User Manual for Registered Entities V1-1 | June 18, 2014
17 of 40
User Account Management
Figure 20: User Profile Screen
D. Continue from Step B of the Forgot/Resetting the User Password instructions below.
Forgot/Resetting the User Password
If a user has forgotten his password, the password must be reset.
A. To reset a user’s password, the user should select Reset Password (A) from the ERO Platform Log-In
Screen. The system then displays the Password Reset Screen.
A
Figure 21: ERO Platform Log-In Screen
B. From the Password Reset Screen, the user can
• Enter the User Name (A).
• Enter the Email Address (B) associated to the Account
• Select the Verify icon (C). Several images display. Select the correct image of each description as instructed until all three pictures have been verified.
• Click the Submit (D) button.
A
B
C
D
Figure 22: Password Reset Screen
C. The BESNet application will send a Password Reset Request E-mail to the user and display the Password
Reset Validation Screen. If necessary, the user can request that the Password Reset Request E-mail be
resent pressing the Resend Validation Email (A).
NERC | BESNet User Manual for Registered Entities V1-1 | June 18, 2014
18 of 40
User Account Management
A
Figure 23: Password Reset Validation Screen
D. The user should then copy the Confirmation Pin (A) and click on the URL (B) for to change the password
B
A
Figure 24: Password Reset Request E-mail
E. The user should then enter his User Name (A) and paste the PIN (B) on the Verify Pin Screen and press
Submit (C).
A
B
C
Figure 25: Verify Pin Screen
F. Once the PIN has been entered, the user must enter the Password Answer (A) selected during the registration process and click the Submit Question (B) button on the Password Recovery Screen.
A
B
NERC | BESNet User Manual for Registered Entities V1-1 | June 18, 2014
19 of 40
User Account Management
Figure 26: Password Recovery Screen
G. The user should then enter the desired New Password (A), Confirm Password (B), and click the Save Password (C) button on the Enter Net Password Screen.
A
B
C
Figure 27: Enter New Password Screen
H. The BESNet application will send a Password Change Confirmation E-mail to the user and display the User
Profile Screen.
Figure 28: Password Change Confirmation E-mail
Figure 29: User Profile Screen
NERC | BESNet User Manual for Registered Entities V1-1 | June 18, 2014
20 of 40
User Account Management
Managing Your User Account Properties
A user of the BESNet application can manage their account properties whenever they are logged on to the system.
This allows them to edit their user profile or associate themselves with a new Entity. User can access their user
account properties in one of two ways:
A. Clicking on the User Name in the upper right corner of the BESNet application screen.
A
Figure 30: BES Application Screen Header
A. Selecting User > My Profile from the dashboard menu.
A
Figure 31: Dashboard Menu Detail
These will display the User Profile Management screen.
A
Smith
Joe
[email protected]
B
C
D
Figure 32: User Profile Management Screen
From here the user can:
A. View the User Profile (A) information.
B. Edit the User Profile information by clicking the Edit button (B).
C. View the listing of Business Entities (C) for which the user has access or has requested access.
D. Add an additional Business Entity request, by clicking the Add Entity (D) button.
NERC | BESNet User Manual for Registered Entities V1-1 | June 18, 2014
21 of 40
User Account Management
Logging Out
To log out of the system, click the Log Out link (A) at the upper right of the BESNET system screen.
A
Figure 33: BESNet System Screen Header
NERC | BESNet User Manual for Registered Entities V1-1 | June 18, 2014
22 of 40
Administrator User Account Management
Administrative User Management
The Administrator of a Registered Entity has the ability to vet new user account requests and manage users’ roles
within the Entity.
The Administrator will be notified by email of new user account requests.
To perform this function, on the BESNet Dashboard the Administrator should click User > User Administration
pull-down menu (A).
A
Figure 34: BESNet Dashboard Header
Vetting New Users
On the User Management Screen, the Administrator will see a Vet Requests list, containing a listing of all users
who have requested accounts associated with the Registered Entity for which the user has Administrative privileges.
Joe
Smith
[email protected]
A
Joe
Smith
[email protected]
B
Figure 35: User Management Screen
A. Check the checkbox (A) next to each record to select it as one to approve or reject.
B. To approve the selected request(s), click the Vet button (A).
C. To reject the selected request(s), click the Reject button (B).
The decision to approve or reject the request will be e-mailed to the user.
NERC | BESNet User Manual for Registered Entities V1-1 | June 18, 2014
23 of 40
Administrator User Account Management
User Role Management
The Administrator is responsible for management of the roles of all of the users within his purview.
A. To perform this function, on the BESNet Dashboard the Administrator should click User > User Administration pull-down menu (A). This will bring you to the User Management Screen
A
Figure 36: BESNet Dashboard Header
The User Management on the lower part of the User Management Screen displays a list of all users for which the
user has Administrator privileges.
A
Joe
Smith
[email protected]
Jim
Smith
[email protected]
Tim
Smith
[email protected]
Tom
Smith
[email protected]
B
C
D
Figure 37: User Management Screen
A. The Technical Review Panel (TRP) membership can only be set by a Regional Administrator, and therefore cannot be set here.
B. The NERC Review Panel (NRP) membership can only be set by a NERC Administrator, and therefore cannot be set here.
C. To disassociate a user account from the Entity, uncheck the Member checkbox (C) for that account/Entity
relationship. By default, all vetted members appear checked in the Member checkbox (C).
D. Once all the role changes have been made, click the Save button (D).
NERC | BESNet User Manual for Registered Entities V1-1 | June 18, 2014
24 of 40
BESNet Dashboard Overview
The BESNet Dashboard is the home screen for the BESNet application. The Dashboard is displayed when a user
first logs in and at any point when the Home link is pressed.
A
B
C
Figure 38: BESNet Dashboard
A. The Dashboard navigation bar (A) contains the following options:
a. Home: Returns the user to the Dashboard
b. User: Provides options for user management and account management.
c. Create Exception Request: Starts the process for creating a new Exception Request.
d. Create Self-Determination: Starts the process for creating a new Notification of Self-Determination.
e. Reports: Contains options for reporting.
NOTE: Some options may not appear, based on a user’s role in the system.
B. The Show in Dashboard Filter (B). By default, Exception Requests that are archived or withdrawn, or
that have been split and are therefore no longer active, do not appear in the Exception Requests listing.
This filter allows the user to include any or all of these Exception Requests in the listing by checking the
box next to the Exception Request state that should be included. These operate as follows:
a. Archived: When checked, the dashboard will include Exception Requests that have been archived, cancelled, or terminated.
b. Withdrawn: When checked, the dashboard will include Exception Requests that have been withdrawn; that is, those submitted to Initial Review, but then rescinded by the Submitting Entity.
c. Split: When checked, the dashboard will include Exception Requests that have been split into
one or more newer Exception Requests, and exist as a historical record.
NOTE: For more information about Split Exception Requests, see sections on Splitting an Exception Request or Recertifying an Exception Request.
d. Self-Determination in NERC Review: When checked, the dashboard will include any Notifications
of Self-Determination that are awaiting NERC’s review.
NERC | BESNet User Manual for Registered Entities V1-1 | June 18, 2014
25 of 40
BESNet Dashboard Overview
C. The Dashboard List (C) contains a list of all Exception Requests and Notifications of Self-Determination.
Here, the user can:
a. Change the number of records that appear in the list, by changing the Show in Entries value.
b. Change the display order of the entries in the list, by clicking on the header of each column.
c. Filter the contents of the list, by entering text into the text boxes underneath each column
header.
d. Open a record, by clicking on the Status link.
e. Navigate through the pages in the list, by clicking the navigation links to the bottom right of the
listing.
NERC | BESNet User Manual for Registered Entities V1-1 | June 18, 2014
26 of 40
Notifications of Self-Determination
Creating a Notification of Self-Determination
The BESNet application is the vehicle for officially notifying a Regional Entity of a self-determination of a change
of status for an Element when applying the BES Definition. 1
To start, click the Create Self-Determination pull-down (A) on the Dashboard Menu, and choose whether the
Notification of Self-Determination is For Inclusion or For Exclusion. This will bring the user to the Create Notification of Self-Determination Screen.
A
Figure 39: BESNet Dashboard
The Create Notification of Self-Determination Screen is broken into three sections for these instructions.
Create Notification of Self-Determination Screen Section 1: General Information
Section 1 contains General Information (A) about the Submitting Entity, pre-populated from the user information.
D
A
B
C
Figure 40: Create Notification of Self-Determination Screen Section 1
Basic information about the Submitting Entity (i.e., the Entity with which the user is operating) can be edited
here, including the Address, City, Country, State, and Postal Code.
Section 1 also has two sub-sections about the Notification for:
A. The Element Description (B) and the Basis for Self Determination (C)
Refer to the BES Definition Reference Document and the BES Notification Review Guidelines at:
http://www.nerc.com/pa/RAPA/Pages/BES.aspx
1
NERC | BESNet User Manual for Registered Entities V1-1 | June 18, 2014
27 of 40
Notifications of Self-Determination
B. Save Draft and Delete buttons (D) that can be used at any time.
NOTE: The BESNet application automatically saves a draft of the Notification if the browser is closed or the session
is interrupted.
Selecting Elem ent Description
NOTE: A Notification can contain more than one Element, but all Elements in the Notification should be of the same
type and should be Included or Excluded for the same reasons.
A
B
Figure 41: Element Description and Basis for Self-Determination
The user must select the Element Description. To do so, click on the blue Plus Sign at the Element Descriptions
(A). This will bring the user to the Add Element Description Screen.
A
B
Figure 42: Add Element Description Screen
The user should select the appropriate Element Description for which the Notification of Self-Determination is
being submitted (A), and click on Add (B) to complete the action. This will return the user to the Create Notification of Self-Determination Screen.
NERC | BESNet User Manual for Registered Entities V1-1 | June 18, 2014
28 of 40
Notifications of Self-Determination
Selecting Basis for Self-Determ ination
NOTE: A Notification can contain more than one Element, but all Elements in the Notification should be of the same
type and should be Included or Excluded for the same reasons.
The user must select the BES Definition reason for the Element’s inclusion or exclusion. To do so, click on the blue
Plus Sign at the Basis for Self-Determination (B). This will bring the user to the Add BES Definition Screen.
A
B
Figure 43: Add BES Definition Screen
The user should select the appropriate BES Definition reason that the Element is being included or excluded and
for which the Notification of Self-Determination is being submitted (A), and click on Add (B) to complete the action. This will return the user to the Create Notification of Self-Determination Screen.
R em oving an Elem ent Description or Basis for Self-Determ ination
Once the Basis for Self-Determination is selected, the Create Notification of Self-Determination Screen will show
Red X’s (A) near the Element Description and Basis for Self-Determination areas on the screen.
NERC | BESNet User Manual for Registered Entities V1-1 | June 18, 2014
29 of 40
Notifications of Self-Determination
A
A
Figure 44: Create Notification of Self-Determination Screen
If either the Element Description or Basis for Self-Determination is incorrect or should be removed, click on the
Red X. This will bring the user to the appropriate removal screen (Figure 45, Remove Element Description Screen,
used as an example).
The user should check the box of the Description (A) to be removed and then click on the Remove button (B) to
complete the action. This will return the user to the Create Notification of Self-Determination Screen.
A
B
Figure 45: Remove Element Description Screen
Create Notification of Self-Determination Screen Section 2: Detailed Information
The Detailed Information Section 2 contains information for the Submitting Entity Contact Information (A), and
the Entity’s authorized representative that is certifying the Notification of Self-Determination.
The user must enter:
A. The Submitting Entity Contact Information (A)
B. The Authorized Representative’s Name and Title (B).
NERC | BESNet User Manual for Registered Entities V1-1 | June 18, 2014
30 of 40
Notifications of Self-Determination
A
[email protected]
B
Figure 46: Create Notification of Self-Determination Screen Section 2
Adding an Element to a Notification of Self-Determination
Once the general information is entered in Sections 1 and 2 for the Notification on the Create Notification of SelfDetermination Screen, the user should click on the Add button, which will take you to the Add Element Screen.
A
Figure 47: Create Notification of Self-Determination Screen – Add Element Screen
NERC | BESNet User Manual for Registered Entities V1-1 | June 18, 2014
31 of 40
Notifications of Self-Determination
Several functions are performed through the Add Element Screen:
A. The Element Type (A) has a pull-down menu (B) allowing selection of the type of Element.
A
B
F
C
D
E
Figure 48: Add Element Screen
B. The user should select the Element Type from the pull-down menu (B), which will display data entry
screens specific to that Element Type. Additional information on the types is in the Element Type section
of this document.
C. The Region(s) where the Element resides is selected in the Select the Region area (C)—multiple Regions
can be selected.
NERC | BESNet User Manual for Registered Entities V1-1 | June 18, 2014
32 of 40
Notifications of Self-Determination
D. Attach necessary documentation2 by clicking on the Add button (D). Additional guidance on adding documents is included in the Adding Documents section of this guide.
NOTE: At least one (1) supporting document is required for each Element in a Notification of Self-Determination.
E. Click on the Add Element button (E) when finished entering data for the Element to complete its addition
to the Notification. That action will return the user to the Create Notification of Self-Determination
Screen, where all Elements that are part of the Notification are displayed.
F. Informational points are denoted by an “i” (F) throughout the Add Element Screens. Hovering over them
will reveal additional information about the item.
Elem ent Types
When adding an Element to a Notification of Self-Determination, the fields to be completed vary by Element.
Screenshots of each Element’s properties are provided below for reference.
Table 1 shows the types of Elements listed in the Element Type pull-down menu (A) on the Add Element Screen.
Table 1: Element Types
Within
FERC
Jurisdiction
Generation
Facility
Circuit
2
Yes or No,
Required
Yes or No,
Required
Name(s)
Voltage (kV)
ID
Specific Type
MVA Rating
Comments
Generation
Station Name,
Required;
Unit Name,
Required
From Point
Name,
Required;
To Point Name,
Required;
Common
Element Name,
Required
Connected
AC Transmission
Voltage,
Required,
from a list of values
Unit ID,
Required
Required,
from a list of
Generator
Unit Types
Gross
Nameplate
Rating,
Required
Optional
From Point kV,
Required,
from a list of values;
To Point kV,
Required,
from a list of values
Circuit ID,
Optional
Required,
from a list of
Circuit Types
Normal
Rating,
Optional
Optional
N/A
N/A
Normal
Rating,
Optional
Optional
N/A
Device Type
Normal
Rating (MVA
or MVAR),
Optional
Optional
N/A
N/A
N/A
Optional
Substation,
DC
Converter
Yes or No,
Required
Converter
Name,
Required
Substation,
Shunt
Device
Yes or No,
Required
Network Name,
Required;
Device Name,
Required
Network
Yes or No,
Required
Network Name,
Required
Connected
AC Transmission
Voltage,
Required,
from a list of values
Station kV,
Required,
from a list of
values
Connected
AC Transmission
Voltage,
Required,
from a list of values
Refer to the BES Notification Review Guidelines for additional information on necessary documentation.
NERC | BESNet User Manual for Registered Entities V1-1 | June 18, 2014
33 of 40
Notifications of Self-Determination
Add a Generation Facility
If the user clicks on the Generation Facility in the Element Type section of the Add Element Screen, the following
Generation Facility Screen appears:
I
A
B
C
D
E
F
G
H
Figure 49: Add Generation Facility Screen
A. Select whether the Generation Facility is within the U.S. Borders (A).
B. Provide the Generation Station Name (B).
C. Provide the Generator Unit Name (C).
D. Select the Connected Transmission Voltage (D) from the pull-down list.
E. Provide the Generator Unit ID (E).
F. Select the Generator Unit Type from the pull-down list.
G. Provide the Gross Nameplate Rating in MVA (G). One decimal point is allowed.
H. Provide Comments (H) if desired.
I.
Click on the Add Element button (I) to save the information. This will bring the user to the Create Notification of Self-Determination Screen.
Add a Circuit
If the user clicks on the Generation Facility in the Element Type section of the Add Element Screen, the following
Circuit Screen appears:
NERC | BESNet User Manual for Registered Entities V1-1 | June 18, 2014
34 of 40
Notifications of Self-Determination
K
A
B
C
D
E
F
G
H
I
J
Figure 50: Add Circuit Screen
A. Select whether the Circuit is within the U.S. Borders (A).
B. Provide the From Point Name (B).
C. Provide the To Point Name (C).
D. Provide the Common Element Name (D) for the Circuit.
E. Select the From Point kV (E) from the pull-down list.
F. Select the To Point kV (F) from the pull-down list.
G. Select the Circuit Type (G) from the pull-down list.
H. Provide the Gross Nameplate Rating in MVA of the Circuit (H). One decimal point is allowed.
I.
Provide the Circuit ID (I).
J.
Provide Comments (J) if desired.
K. Click on the Add Element button (I) to save the information. This will bring the user to the Create Notification of Self-Determination Screen.
Add a DC Converter
If the user clicks on Substation – DC Converter in the Element Type section of the Add Element Screen, the following Circuit Screen appears:
NERC | BESNet User Manual for Registered Entities V1-1 | June 18, 2014
35 of 40
Notifications of Self-Determination
F
A
B
C
D
E
Figure 51: Add DC Converter Screen
A. Select whether the DC Converter is within the U.S. Borders (A).
B. Provide the Converter Name (B).
C. Select HVDC as the Connected AC Transmission Voltage (C) from the pull-down list.
D. Provide the Normal Rating in MVA for the DC Converter (D). One decimal point is allowed.
E. Provide Comments (E) if desired.
F. Click on the Add Element button (F) to save the information. This will bring the user to the Create Notification of Self-Determination Screen.
Add a Substation Shunt Device
If the user clicks on the Substation – Shunt Device in the Element Type section of the Add Element Screen, the
following Shunt Device Screen appears:
NERC | BESNet User Manual for Registered Entities V1-1 | June 18, 2014
36 of 40
Notifications of Self-Determination
H
A
B
C
D
E
F
G
Figure 52: Add Shunt Device Screen
A. Select whether the Shunt Device is within the U.S. Borders (A).
B. Provide the Station Name (B) where the device is located.
C. Provide the Device Name (C).
D. Select the Station kV (D) from the pull-down list.
E. Select the Device Type (E) from the pull-down list.
F. Provide the Normal Rating in MVA for the Device (F). One decimal point is allowed.
G. Provide Comments (G) if desired.
H. Click on the Add Element button (H) to save the information. This will bring the user to the Create Notification of Self-Determination Screen.
NERC | BESNet User Manual for Registered Entities V1-1 | June 18, 2014
37 of 40
Notifications of Self-Determination
Add a Netw ork
If the user clicks on the Network in the Element Type section of the Add Element Screen, the following Network
Screen appears:
E
A
B
C
D
Figure 53: Add Network Screen
A. Select whether the Network is within the U.S. Borders (A).
B. Provide the Network Name (B).
C. Select the Connected AC Transmission Voltage (C) from the pull-down list.
D. Provide Comments (D) if desired.
E. Click on the Add Element button (E) to save the information. This will bring the user to the Create Notification of Self Determination Screen.
Selecting a R egion for the Elem ent
The user must select the Region(s) in which the Element of the Self-Determined Notification is located. Multiple
Regions can be selected for Circuits.
A
Figure 54: Select Region(s) Section of Add Element Screen
NERC | BESNet User Manual for Registered Entities V1-1 | June 18, 2014
38 of 40
Notifications of Self-Determination
Add Supporting Documentation for the Element
At least one supporting document 3 must be supplied for each Element in the Notification. To add a document,
click the Add button in the Document section of the Add Element Screen (A). This will take you to the Add Element
Document Screen.
A
Figure 55: Document Section of Add Element Screen
A
B
C
D
E
Figure 56: Add Element Document Screen
A. Provide a Document Name (A) for the document being attached.
B. Select a document using the Choose Document browsing area (B). NOTE: There is a 50 MB file size limit.
C. Select a Confidential Type (C) from the pull-down list.
D. Provide a Description (D) for the document.
E. When the Add Element Document form is completed, click on the Create button to attach the document
to the Element. This will take the user back to the Add Element Screen
A
B
C
Figure 57: Add Element Screen Showing Attached Document
3
Refer to the BES Notification Review Guidelines for additional information on necessary documentation.
NERC | BESNet User Manual for Registered Entities V1-1 | June 18, 2014
39 of 40
Notifications of Self-Determination
When the supporting documentation has been attached to the Notification, the Add Element Screen will show
that the Document (A) is attached to the Element. If additional files need to be attached as supporting documentation, the user should click on the Add button (B) and the Add Document Screen will appear again.
Certifying the Notification of Self-Determination
Before submitting the Notification of Self-Determination, the Notification must be certified by an authorized representative of the Entity. To do this, the representative’s name and title must be entered on the Create Notification of Self-Determination Screen at (A).
The user must then select the Certification checkbox (B) before submitting the Notification.
A
B
C
Figure 58: Create Notification of Self Determination Screen
Submitting the Notification of Self-Determination
To Submit the Notification of Self-Determination, the user should click on the Submit button (C) on the Create
Notification of Self-Determination Screen. The user also has the option to Save Draft to allow the user to return
to complete the draft Notification at a later time, as well as Delete to allow the user to completely delete the draft
Notification.
The user will be returned to the BESNet Dashboard (Figure 59), showing that the submitted Notification is in
Regional Review (A below). The ID for the Notification will also be complete with year, Region, NCR, and the SD
number—SD indicating that the item is a Self-Determined Notification.
A
B
C
Figure 59: BESNet Dashboard with Self-Determined Notification in Regional Review
NERC | BESNet User Manual for Registered Entities V1-1 | June 18, 2014
40 of 40