1
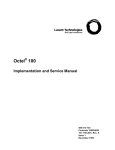
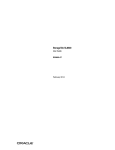
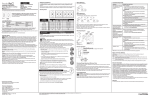
by
ROMBO
CONTENTS
eaGE
SUBJECT
INTRODUCTION..................................................................1
Getting Started .......................
.
........................................... 2
GUIDED TOUR .................................................................
3
Grabbing Frames ..........................................................3
HELD Frames and the Paletto Editor ...................................
4
Saving and Loading ....................
.
.......
.
..........................
4
Cut Put and Clipboards ........................................................
5
Window Grabbing ...................... .
.
................................6
.
REFERENCE SECTION
PROJECT MENU.............................................................
6
........................................
New....................................
.
.
.
.
6
Load ..................................................................................
6
Save .................................................................................... 6
Save as .........................................................................
6
Status ..............................................................................
7
Delcte ..............................................................................
7
Oult ........................
:................................................................
7
OPTIONS MENU.........................................................................
7
Grab ......................................................................................
7
Re read..................................................................................
7
Fast grab ................................................................................
8
Animnto ................................................................................
8
Carousel ..............................................................................
8
V~ew ........................................................................... 8
Frame set .....................
.
.....................................................8
Cut ..............................................
.
.
.
.
.................................8
Put ................................................................................. 9
Ouantize ..................
.....
.................................................. 9
Clear ................................................................................. 9
Clear FREE ............................................................................
9
Initialize...................................................................................
9
SETTINGS MENU ............................................................... 9
..............................................9
Clipboard ..........................
.
.
Use clipbd.............................................................................
10
Set grid ............................................................................. 10
Grid on ............................................................................... 10
10
Coordinates.....................................................................
10
Set interr.............................................................................
10
Interr. on ...............................................................................
Autoadvance ..................................................................... 10
11
One Frame .....................................................................
Set Window ........................................................................ 11
Move Window ....................... .....................................11
11
Palette ..................................................................................
.
.
THE PANEL ........................................................................
12
Grab delay ...................
........
........................................12
Bri .......................................................................................12
12
Window type ....................................................................
Animate delay .............................................................. 12
Carousel delay ....................................................................13
Frame number ....................................................................
13
Frame status ................................................................... 13
13
Frame palette .................................................................
APPENDICES
A: Installing VlDl on a Hard Disk ......................................14
B: Technical Specification....... .................................. i s
C: User Hardware Adjustments ....................................... 15
D: Technical Support.........................................................1 5
E: Glossary .........................................................................
16
F: VidiGrab Quick Reference ................................................17
.
.
VIDI-AMIGA Video Grabber for AMlGA computers
Version 1 (c) 1989 ROMBO Productions
6 Fairbairn Rd. Livingston EH54 6TS
Tel : 0506 414631
Credits :
Hardware: Colin Faulkner
Software:
Keith Wilson
-
VIDI-AMIGA USER-MANUAL Auaust 1989
by Keith Wilson, ROMBO
VIDI-AMIGA is a video frame grabber capable of digitising video frames into your
Amiga computer. This means that a variety of video sources can be used such as a
camera, video recorder, another computer or even live TV, a still picture is not needed.
The Amiga screen is updated in approximately a quarter of a second allowing the video
source to be viewed without the need for a separate monitor. This also allows you to
grab moving sequences and create stunning multi-window animations by digitising
incoming pictures over existing animations with great ease.
All available memory in the Amiga is reserved for mult~pleframestores which are used
to store sequences of pictures or single frames which may be HELD to avoid being
ovorwritton On a 1Mb Am~ga15 framostores arc poss~bleand a further 25 frames per
megabyte after this - that's over 90 pictures on a 4Mb machine!
Ed~t~ng
between frames is achieved by use of the Cut and Put commands with the
optlon ol having an intermediate Clipboard lrame which is used to store multiple
cl~pplngslor later use
Full pali:tlc control IS glvcn over each frame and a palette cd~torallows palettes to be
deflned, loaded and saved The V~d~Grab
software handles standard IFF flles to ensure
cornp,~tib~l~ty
w~tha11 Am~gaart and graphlcs packages
Flrst read the Getttng Started sectlon on how to connect up your VI~I-Am~ga
and load
tlw software The software has been des~gnedto be as lntultlve as poss~bleso feel free
to play about w~th~t and explore the varlous optlons To take full advantage of
V I ~Am~ga
I
however, ~t 1s probably a good Idea to lollow the Gu~dedTour at some stage
~norder to famll~ar~se
yourself w~ththe entlre package
A Refcrcnce section dcscr~bingevery leature of V~diGrabin detail can be found towards
the back of the manual, this is the place to check up if you are having a problem or are
not too sure how a particular feature operates. There is also a Glossary and a Quick
Reference chart show~ngeach option available from the menu, panel and keyboard.
If you are unfamiliar with the operation of the Amiga then a look at your User
Manual will do no harm, terms such as double-click, drag, requester and gadget are
used throughout this manual so it may help to know what they actually mean. Calling
up a menu is done in the normal Amiga way by holding down the right mouse button,
moving up to the required menu item and releasing the button.
We hope that Vidi-Amiga will open up experimentation in the field of computer graphics
and art to a much wider audience. It is also ideally suited to the product~onot
professional video and presentation applications. If you have developed programs or
v i d e ~ swith Vidi, or have any comments, suggestions or special requirements from the
package, we would be most interested to hear from you - user feedback is always of
value. Amiga development is continuing and from time to time software upgrades will
be available and we hope to incorporate your ideas.
GElTING STARTED
Your Vidi-Amiga system consists of:
Vidi-Amiga interface (the black box)
Phono-phono video cable
Vidi-Amiga software on a 3.5" disk
Registration card
This manual
To use Vidi-Amiga you will also need the following:
An Amiga computer with at least 512K ol memory
A video source - may be a VCR, video camera etc.
Suitable cable to Vidi hardware i f not phono-phono
If using Amiga-1000, a standard F/F RS-232 gender change1
Connect Vidi-Amiga to the parallel port at the back of your Amiga, the 2 3 p i n D-plug is
used to power the interface and must be plugged into the second d r i v e port. If care is
taken, Vidi may be connected or disconnected while the computer is on but this must
be done at your own risk - the worst that can happen is a machine reset.
Now connect a suitable video source to the phono connector on the intertace. All video
recorders have some form of Video Out via a Phono. BNC, or SCART connector and
an appropriate cable or adaptor may be bought from an electrical supplier. Rombo IS
able to supply a variety of adaptors.
To load the VidiGrab software, reset your Amiga and insert the supplied disk in drive
zero, the software will load automatically. NOTE: This process does not load
Workbench and upon quitting VidiGrab you will be presented wlth a CLI, type
LOADWB [RETURN] ENDCLI [RETURN] to enter the normal Workbench environment,
or you may type VlDlGRAB [RETURN] to re-load the program. Vid~Grabcan be loaded
from Workbench by double-clicking on its icon which can be found in the Vidi drawer
but this only works il you booted up with tho Vidi disk.
To avoid any problems with disk corruption, the first time you load the Vidi software
please do the following; select Quit from the VidiGrab Project menu and answer Yes to
the prompt. Now type DISKCOPY DFO: TO DFO: [RETURN] from the CL1 (you may use
TO DF1: if you have more than one drive). Follow the prompts until the disk is
backed-up. Now reboot the software from your backup and keep the original safe NEVER use the original disk unless you are backing it up and DON'T save any files on
it. If you have any problems with the disk supplied, eg. it does not load the VidiGrab
program, please contact Rombo direct on (0506) 414631.
The latest information on Vidi-Amiga can be found in a ReadMe file in the Vidi drawer,
type MORE README [RETURN] from the CL1 or double-click over the ReadMe icon
from Workbench.
GUIDED TOUR
By th~stime you should have connected up your system, made a backup, re-booted
VidiGrab, and are probably wondering what it can actually do. The aim of this section is
to gut& you through most bits ol VidiGrab without going into too much detail - you can
always check the Reference section for more information.
Grabbina frames
We'll start by grabb~nga sequence of frames - move the mouse pointer over the word
Grab at the left-hand side of the Panel bar. Click~ngthe left mouse button once should
start the grab, if not, check that your video source is running and properly connected to
the interface Use left / right cursor keys to adjust the brightness and up I down to sh~ft
the frame To halt the grab. press any other key or click the mouse.
A succession of frames will have been grabbed into memory, clicking on Fram shows a
selection of frames In m~niature,click on one to select it. The number beneath Fram on
the panel is the current frame being displayed which may be changed by clicking over
tlio arrows at c ~ t l ~ eside
r
To replay thcso frames, you should selcct Anim to cycle
through the frames until stopped by pressing a key or clicking the mouse. You'll notice
that frames are replayed much faster than they are grabbed so you can slow them
down by chang~ngthe value under Anim on the panel with the nudge arrows.
The VidiGrab software has several ways of selecting various options, clicking on the
Panel or changing a value with the nudge arrows are two ways. VidiGrab also has
menus which are obtained by holding down the right mouse button, moving to the top of
the screen then down to the desired option. When the mouse button is released, the
option under the pointer is chosen or switched ON or OFF for some items on the
Settings menu. Most options have a key shortcut which is displayed in the menu. You
may use any method of selection as many features are available from the panel, menu
and keyboard.
If you're only interested in grabbing one frame, try changing the Autoadvance and One
frame settings from the menu bar. Autoadvance OFF grabs into the current frame
rather than successive frames, One frame only grabs a single frame. When
Autoadvance is OFF, you may also select Fast grab to catch the r~ghtmoment (reduce
the Grab &lay beneath Grab on the panel to ensure maximum speed). Re-read will
merely show the last frame grabbed
Once you are happy with a frame, it is a good idea to make it HELD by clicking
underneath Stat or pressing H, this ensures that it cannot be ovenvrltten unless
specifically requested. HELD frames may be shown using the Carousel whlch has 11s
own delay and operates in a similar manner to Animate.
Frames are always grabbed in 16 shades and by default these are shown as grey, but
by changing the frame palette number (undcrnoath Pal on thc panel) you can display
the frame in various colours. Clicking on Pal itself gives you access to the Palette
editor.
Choose a palette that you don't like much and select ink 8 by clicking on its coloured
box. Change the ink's Red, Green and Blue content to give the desired colour. To fill In
the other colours in the palette, click on ink 8 and while holding down the mouse button,
drag the pointer over to ink 0 and release. All the colours in between will have been
smoothed automatically - do the same from 8 to 15 and you have a new palette.
Simple. It is worth experimenting with colour smoothing to get a feel for it, eg. you may
create palettes which go from black through red and yellow to white. Click on EXIT or
press any key to return to the main panel.
Savina and Loading
You will at some stage want to save frames to disk and this IS achieved with the Save
as menu option, Insert a disk with at least 40K free space, select Save as and press the
right mouse button then click on the correct drive name - only save to RAM dlsk if you
are sure there's plenty of room. Directories are entered by clicking on their name, and
the File gadget should be used to type in a filename. Click OK or CANCEL to exit
The Load and Delete options work in a similar way. Try various combinations of these
on a blank disk wlth some unimportant pictures to familiarise yourself with these
optlons Note that frame titles are remembered and can be seen in the Frame select
dlsplay, you can use Save to save a frame under its existing name.
Cut. Put and Clipboards
Frame editing is performed with Cut and Put; use Cut to click and drag out an
appropriately sized window, and Put to copy this window to another part of the frame or
another frame. Note that if you overwrite the Cut area any subsequent Put will use the
ncw window, even if the entire frame has changed. For more advanced editing a
Clipboard may be allocated for storing several clippings, this is done via the Clipboard
option in the Settings menu.
If a Clipboard is allocated and in use a Cut from another frame will flip to the Clipboard
and allow you to place the clipping, and Put allows selection of a clipping to paste into
the frame Although you may only have one Clipboard at a time, it can contain up to 40
non-overlapping clippings If Cut or Put is selected from the Clipboard frame itself (ie.
the lrame has the status of CLIP) they allow you to delete or copy a clipping
respectively
If want to retain all c l ~ pinformation but do normal Cut and Puts for a while, switch the
Use clipbd setting OFF Cut and Put will behave as if there were no clipboard until this
of the clipboard entirely use the Clipboard option again,
is switched back ON To get r ~ d
dolng this will lose all clip information but the screen remains intact. Clipboards may
also be Loaded and Saved with the clip information being saved in a separate .dip file.
Window arabbing
To achiovo more complcx animntions, you may Grab into a window. The Grab window
IS deflned in a similar way to Cutting from a frame, but selecting Set window or Win.
There are two types of w~ndows,INSide and OUTslde as well as the default OFF, these
are d~splayedunder Win on the panel. When a window is selected, Grab only updates
parts of a frame, leavlng the remainder as it is. Try grabbing different window
animations w~thAutoadvance ON - some interesting effects can be created...
Well, that about wraps it up - it will probably tako you a while to understand each optlon
fully but don't be afraid to experiment. If you accidentally ask the program to do
something radical it will check to see if you are sure before going ahead - eg. saving
over an existlng file or clearing all the frames. Good luck.
Every frame is cleared, given the default palette and made FREE. If a clipboard is
assigned, it will be cleared but retains its CLIP status. You may prefer to use Clear or
Clear FREE from the Options menu.
Upon selecting Load, a File Requester appears in the Workbench screen, alter
selecting a valid filename and VidiGrab will attempt to load an IFF picture with
accompanying palette into the next FREE frame. The frame is made HELD upon
loading successfully and its palette is matched with an ex~stingone where possible
Also see Save, Save as and Delete.
Operation of the File Requester is straightforward; the scroll bar or arrows at the right
move through the current directory. Clicking on a f~lenamew~llcopy it Into the F ~ l e
gadget, double-clicking selects a file and exits the Requester. You may change
directory by clicking on the Parent gadget or a directory name. Clicking over the Drawer
or File string gadget allows you to type a name directly from the keyboard. RETURN
redisplays the directory or exits the Requester with the given filename.
Clicking the right mouse button or the Drives gadget displays a list of logical device
names which may be selected. To cancel the operation, click on CANCEL or the close
window gadget, OK will exit the Requester with the selected filename
The current frame along with its palette is saved to disk under its existing name, if the
frame has no name then an error is reported (use Save as instead). After saving a
frame, VidiGrab will move to the next frame with the same status, this is to make saving
sequences slightly easier. Files saved are standard IFF. See also Save as, Load and
Delete.
Save as (S)
This option is similar to Save except that you are prompted with the File Requester
before saving (see Load for more details). Note that even i f you decide not to save the
frame its title will be updated - you may want to use this as a way of namlng frames.
See also Save. Load and Delete.
A copyright message is displayed along with the amount of free memory, number of
frames and how many have FREE status. Clicking Stat on the Panel also gives this
d~splay.See Panel 1 Frame status.
Delete (Del)
Allows you to delete files on disk with the File Requester (see Load for details), will
keep prompting for lllenames until CANCEL is selected. NOTE: files which are deleted
cannot be recovered.
After prompting to ensure that you really mean it, Quit will exit VidiGrab, returning all
allocated memory to the system. NOTE: unless first saved to disk, all frames are lost
forever.
OPTIONS
MENU
.- -
. ..---
Starts grabbing vidco framcs, also ava~lablefrom the Panel If Autoadvance IS ON.
grabbing commences from the next FREE frame, and 11One frame has been selected
only a s~ngleframe IS grabbed You may set the delay between each grab and
Interrupts may occur Br~ghtnessis adjusted w~ththe left and r~ghtcursor keys, Vertical
frame offset with up and down, Interrupts may be sw~tchedON or OFF w~!h I, pressing
any other key or clicking the mouse w~llhalt the Grab
If a grab window is selected, only a portion of the frame will bt? updated. When grabbing
a window with Autoadvancc you will see the original frames animating at the same time
which may be used to create some excellent multi-window animations.
Also see Re-read, Fast grab, Animate, Settings: Set interr, Interr, on, Autoadvance,
One frame and Set window, Panel: Grab delay. Bri, Window type, Frame status ... in
fact most of the rest of this manual.
Re- readl_R)
The frame currently stored in the interface is copied into a FREE frame. the following
FREE frame if Autoadvance is ON. Also see Grab, Fast grab, Settings: Autoadvance
and One frame
Fast arab [Z)
This option is only available when Autoadvance and Grab window are OFF. Is similar to
Grab but frames are displayed in only 4 shades until the grab is halted, the interface w~ll
then be Re-read in the full 16 shades. Also see Grab. Re-read, and Settings:
Autoadvance.
Animate [A)
FREE frames are shown in a continuous loop and lnterrupts will occur if turned ON by
pressing I. You may set the delay behveen each frame from the panel. See also Grab,
Carousel, Settings: Set interr, Interr. on and Panel: Animate delay, Frame status.
Similar to Animate except HELD frames are shown and Interrupts do not have any
effect - is also available on the Panel. See Animate. Panel: Carousel delay and Frame
sta!us.
View (space)
This option lets you see the entire frame without menu or Panel bars. Clicking on the
picture area has the same effect.
Frame sel. (F)
Up to sixteen frames are shown in miniature, if more are available arrows in the corner
of the screen may be clicked to move the display. When choosing a frame, a box is
drawn around the frame and its palette is displayed - you may select it by clicking once.
See Panel: Frame number.
Allows you to define an area of a frame for use with Put - note that thls area remains
defined until another is selected, even if the frame changes (see Settings: Set window
for details on definlng a window).
If a Clipboard is currently in use, VidiGrab will automatically jump to the CLIP frame
allowing you to position the clipping. As with Put, its location and size are then stored
internally. It is not normally useful to overlap clippings. If the current frame is the
clipboard then Cut allows you to select a clipping to be deleted. Also see Put, Clea:,
Settings: Clipboard, and Use clipbd.
Used in conjunction with Cut, areas may be copied between frames, if a dipboard is in
use, you must first select a dipping to copy. When not using the dipboard, take care
not to overwrite the Cut area since there is no intermediate buffer. Placing the clipping
is similar to the operation of Settings: Move window. Selecting Put on the CLlP frame
will duplicate the selected dipping. Also see Cut, Settings: Clipboard, and Use clipbd.
Copies a frame into the following FREE frame and if requested, reduces it to the
number of shades requested - 2, 4 or 8.
Clears the current frame, gives it the &fault palette and FREES it. NOTE: Cleared
frames cannot be recovered... so be careful. Also see Clear FREE and Project: New.
Clears all FREE frames. NOTE: these frames will be lost completely (there are no key
shortcuts to any of the clear operations to prevent them being selected by accident).
Also see Clear and Project: New.
Resets the Vidi hardware and informs you of the video signal type connected. You
MUST select this option when you swap video signals or the interface is removed and
re-connected, (to allow use of the parallel port for example), otherwise frames may not
be Grabbed correctly or the display may jitter. An Initialize is performed automatically
when you load VidiGrab. See also: Grab, Re-read and Fast grab.
If there is no clipboard, the current frame is Cleared and given CLlP status, otherwise
the existing dipboard will be switched off. In this case, although the frame data is
retained, all dip information is lost and unrecoverable. Also see Use clipbd, Options:
Cut, Put, and Clear.
Use c~ipbd.(B)
This option defines what happens if there is a CLIP frame and Cut or Put operations
are taking place. When Use clipbd. is ON, Cut will switch to the clipboard frame and Put
will allow selection of a clipping. When OFF, the clipboard information is not lost but Cut
and Put will behave as if there were no clipboard, ie. copy directly. See also Clipboard,
Options: Cut and Put.
Allows you to select an imaginary grid size which all windows corners are snapped to.
The lines may be on character (8x8 pixels), quarter screen or sixteenth screen
boundaries. The grid is used by Set window, Move window and Options: Cut, or Put
operations.
Grid on !#)
Switch the use of the grid temporarily OFF or ON, you may use the key shortcut even
while actually performing a window operation. See above for more details.
Coordinates (Y)
When ON, window operations will display the window start coordinates or dimensions in
the bottom-left corner of the screen. The key shortcut may be used dur~ngthe
positioning or sizing of a window.
Set interr,
The next HELD frame will be used to interrupt any Grab or Animate operations at
regular intervals. You may define the interval between each interrupt and the duration
for which the frame should be displayed. A value of zero for either of these sett) gs is
taken to mean the current Grab or Animate delay Also see lnterr on, Clptions:$rab
and Animate.
lnterr. on (I)
This switches the Interrupts feature ON or OFF, see Set interr.
Autoadvance iV)
Takes effect when Grabbing a series of frames. If Autoadvance is ON the frame
number will become that of the following FREE frame before each Grab - this allows
you to later Animate a series of frames. When Autoadvance is OFF, the current frame
is used for any Grab operation. Note that Fast grab is only available
with Autoadvance OFF. See also One frame, Options: Grab, Re-read and Fast grab
When ON, Grab operations will grab only a single frame and return to the Panel display
- the default is continuously grab frames until halted. If used in conjunction with
Autoadvance, this feature allows stop-frame animation by allowing preparation of the
picture between frames. Also see Autoadvance, Options: Grab, Re-read and Fast grab.
Allows an area of the screen to be used for grabbing into. You may then Grab either
inside or outside this window area. To set a window, click on the top-left corner and
drag the pointer down to the right until the desired size is set then release the mouse
button. You may abandon a window by pressing the ESC key in which case the window
will remain unchanged. Coordinates and the Grid may be switched ON or OFF wh~le
defining the window by pressing Y or # respectively.
~ f t e h e f i n i n gthe Grab window. h e Window type on the Panel is automatically set to
INSide unless you have already selected OUTside. Also see Coordinates. Set grid, Grid
on, Move window, Options: Grab and Panel: Window type.
Move window (M)
This allows repositioning of the Grab window without changing its size. Again, you may
abandon using ESC, toggle the Grid with #, or Coordinates with Y. The window outline
will be shown on screen and you can position it with the mouse, clicking once will store
the new position. As with Set window, the Window type is altered.
Allows editing of the shades used to display frames. A new Panel appears along with
boxes showing the sixteen colours in the current palette. Note: palettes 1 thru 9 are
global (ie. identical for each frame, changing these will alter all frames with that palette)
with palette 1 being the default palette. Palette 0, however, is specific to each frame
and editing will not affect other frames.
The current ink may be changed by selecting a coloured box or a point on the picture,
the colour of the pixel under the pointer will be used. To actually change an ink's colour
you must adjust the Red. Green or Blue content of that ink in a similar way to adjusting
values on the main Panel. A smooth transition between
colours can be achieved by setting the colour of the first and last inks, clicking upon the
first and dragging to the last. All inks inbetween will be smoothed.
Palottes can be Loaded or Saved by clicking on tho relevant box. Note that i f you Load
a picture file from the palette editor only its palette will be used, the picture itself is
ignored. Select EXIT or press any key to return to the main Panel.
The panel displays various settings associated with menu items as well as duplicates of
some commands. In general the command is above and the setting underneath. The
commands Grab, Win. Cut, Put, Anim, Caro, Frame, Stat and Pal are identical to their
menu counterparts (Win is equivalent to Set window). There follows a description of the
various settings and their names progressing from left to right;
Grab delay
This represents the delay between each frame grabbed and may be between 2 and
99150th~of a second but due to limitations of the Amiga parallel port, frames cannot be
read back much faster than 15150th~seconds. Selecting a lower setting than this will
glve no further speed increase. See Options: Grab and Fast grab.
Bri (
4-
4
1
This is the software brightness control which varies from 0 thru 7, may also be changed
while grabbing frames. The brightness setting only takes effect when a frame is
Grabbed, it will not alter the picture after it is in memory. Clicking over Bri restores the
default of 4. See Options: Grab and Fast grab.
This may be OFF (grab whole screen), INS (grab inside window), or OUT .(grab outside
window) and only takes effect when using one of the Grab options. See Obtions: Grab,
Re-read, Fast grab, Settings: Set window and Move window.
Animate delay
The delay between each frame in Animate, note that it takes at least 2150th~of a
second to display each frame. Also see Grab delay and Options: Animate.
As Animate delay except sets the delay for the Carousel. Whilst Animate is usually
used for a rapid sequence of frames, the Carousel is more often a utilised tor slower
picture gallery effect. See Options: Carousel.
Allows you to change the current frame number, keys 1-9, 0 for 10, and F l - l 0 for
frames 11-20 may also be used. Also see Options: Frame sel.
You may set each frame's status to be FREE, HELD or CLIP. FREE frames are used
for Grab with Autoadvance and Animate whilst HELD frames are used in the Carousel
and are not overwritten unless specifically requested. See Options: Grab, Animate,
Carousel and Settings: Clipboard.
The palette number of the current frame is shown here. See Settings: Palette for more
details.
APPENDIX A: INSTAI LING VlDl ON A HARD DISK
You will need to copy the VidiGrab and VidiGrab.info files into an appropriate drawer
which may be done from Workbench by dragging the icon to its new home. VidiGrab
also needs certain libraries which may be found in the LlBS directory; arphbrary,
vidi.library, mathieeedoubbas.libraryand mathieeedoubtrans.library.To copy a file from
the CLI, type COPY Vidi-Amiga:libsl*name' TO DH0:libs [RETURN], 'name* being the
name of the file, DHO: is the name of the hard drive. You may find that the last two
library files are already on your hard disk in which case you needn't copy them (check
by using DIR DH0:libs).
Once all these files are copied successfully, you should be able to run VidiGrab by
clicking on its icon held in the hard disk.
APPENDIX B; TECHNICAL SPECIFICATION
Hardware
Vidi-Amiga requires a l v composite video signal and samples to 4-bit resolution at
approx. 6MHz using a flash AID converter. A complete frame is grabbed to a
high-speed internal frame store in 20 milliseconds ie. a single video frame. Hardware
brightness and contrast controls set the floor and width of the digitised data.
The standard unit is fitted with 32K of RAM giving over 200 lines of 320 pixels per line
in 16 shades (or grey level). This is factory upgradable to 40K giving 256 lines.
.sQlbYcm
Grabs moving pictures into multiple framestores
Animation at up to 25 frames per second
Provision for stop-frame animation
Grab to windows with multi-window animation
Saves and loads IFF picture and palette files
Software brightness control
Cut and paste editing between frames
Optional clipboard facility
Interrupt feature for displays and demonstrations
Palette editor with colour smoothing
Works with interlaced or free-running sync
APPENDIX CILSER HARRYYAREARdlbSTMENTS
A good quality video signal contains a vast amount of information, it comprises
signals of over 5Mhz, with hundreds of different intensity levels. Vidi-Amiga has to
reduce this to a screen of 64000 pixels each having o ~ l l yone of 16 intensity levels don't expect perfect resultsl
-
All video signals are equal, but some are more equal than others to help
overcome these variations, Vidi-Amiga has the following adjustments available.
SCAN WIDTH - This alters the
digitising frequency, compressing or expanding the
video signal horizontally. This
is factory set to give the correct
asqct ratio, when viewed on a
'standard' television screen.
User adjustable Controls
BRIGHTNESS - This sets the
mean level for the keyboard
brightness controls, and hence
the-upper or white level for the
Scan Width
digitiser. With a BR1 value of 4,
adjust this to give a good
lightldark balance on an 'average' picture.
l
Vldeo l/P Brightness contrast
I
l
-
CONTRAST This sets the lower black reference level. With this set fully clockwise,
this is clamped to the incoming black level and all the vldeo slgnal is digitised.
To achleve best results on difflcult pictures, careful adjustment of the BRIGHTNESS
and CONTRAST controls may be requlred.
-
Contact us If you have any problems, suggestlons or speclal requirements Arnlga
technical support is free from Rombo;
Rombo Productions (Amiga Technical Enquiries)
6 Fairbairn Road
Kirkton North
Livingston EH54 6TS
Tel: (0506) 414631
Fax: (0506) 414634
APPENDIX E: GLOSSARY
Clipboard
A VidiGrab frame that has been assigned CLIP status and is used to
store portions of pictures.
Clipping
An item held in the Clipboard
Device
A Logical Device.
Directory
Files on disk are grouped within directories.
Frame
Each picture in VidiGrab is called a Frame, you may have many
Frames in memory simultaneously but usually only one is visible on
the Screen.
Grab
The action of taking a Video Frame and digitizing it in hardware into
a form readable by the Amiga. Frames are always grabbed 320
pixels wide in 16 shades.
IFF
Interchange File Format is a file type used by many Amiga
packages, it may store picture and palette data.
Interrupts
VidiGrab allows you to define an interrupt frame with which to
periodically interrupt Grab or Animate operations.
Logical Device
May be a peripheral such as a disk drive like DFO:,printer PRN:, or
a pathname such as DEVS:. You may write to each logical device in
a similar manner.
Menu
The pull-down-menus at the top of the screen which are accessed
by holding the right mouse button down and releasing over the
desired item.
Palette
A collection of colours used to display a Screen, in VidiGrab each
Frame may have its own palette and all palettes may be edited.
Panel
The bar at the bottom of the VidiGrab Screen, may be clicked on to
select options or change settings.
Parallel Port
The connector at the back of the Amiga into which the Vidi interface
or a Centronics printer is plugged.
Screen
VidiGrab opens its own screen which is used for all operations
except the File Requester which is displayed on the Workbench
screen
Window
In VidiGrab, this is a rectangular area of the screen which may be
Grabbed into or copied to another Frame.
APPENDIX F: VlDlGRAB Q U l C K E N C E
Menultem
Function
Animate delay
Animate FREE frames
Autoadvance ON OFF
Carousel delay
Carousel HELD frames
Clear all frames
Clear current frame
Clear FREE frames
Clipboard ON OFF
Cl~pboardusage
Cwrdlnates ON OFF
Cut window
Delete d~skfiles
number
Frarr 'palette
Frame select
Frame status
Grab brightness
Grab delay
Grab frames
Grab one frame
Grab quickly
Grab window size
Grab window position
Grab window iype
Grid ON OFF
Grid size
Initialize Vidi
Interrupts ON OFF
Interrupt settings
Load frame
Load palette
Put window Idipping
Re-readinterface
Quantize frame
Quit V~diGrab
Palette editor
Save frame
Save palette
Status 8 credits
Vertical frame offset
V~ewentlre frame
Fra9
U
f3ml
Anim'
Anim
Options: Animate
Settings: Autoadvance
Options: Carousel
Project: New
Options: Clear
Options: Clear FREE
Settings: Clipboard
Settings: Use dipbd.
Settings: Cwrdlnates
Optlons: Cut
Project: Delete
Caro'
Caro
X
Del
Cut
-10 Fram'
Pal'
Fram
Stat'
Brl'
Grab'
Grab
Options: Frame sel.
Options: Grab
Settings: One frame
Options: Fast grab
Settings: Set window
Settings: Move window
Win
Win'
Settings: Grid on
Settings: Set grid
Options: Initialize
Settings: Interr, on
Settings: Set interr.
Project: Load
Settings: Palette
Options: Put
Options: Re-read
Options: Quantize
Project: Quit
Settings: Palette
Project: Save (as)
Settings: Palette
Project: Status
Options: Grab
Options: View
(Load)
Put
Pal
118,
space
' signifies value displayed underneath speafied option
( ) choose th~soption after selecting menu Item
(Save)
Stat
This was brought to you
from the archives of
http://retro-commodore.eu