1
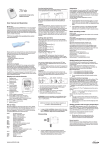
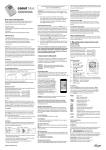
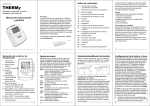
2 - Setting room zone, room zone
temperature, heating & saving times
(time programme)
The new programmable
radio-controlled energy saving
control for radiators
www.eurotronic.org
Please read the user
manual before you place
the thermostat. Keep the
documents for later questions and provide them if
you pass the thermostat
on to other persons.
Shipment
2 radiator thermostats
1 user manual
(control)
2 user manuals
Application as directed
By purchasing the Sparmatic premium radiator
thermostat you own a programmable radio controlled radiator thermostat which can be used for
temperature regulation in enclosed rooms. It fits
to all common thermostat valves (possibly with an
adaptor) and can contribute to a reduction of heating energy.
Please use the device only for this purpose.
1- Initial setting of the control
Set house code, room zone, date and time.
After inserting the battery, the Sparmatic premium
control automatically requests entry of house code,
number of room zones to be administrated as well
as date and time.
Set the house code HC:00 with
the control wheel.
Confirm with the PROG button.
Set the number of room zones
1-10 with the control wheel.
Confirm with the PROG button.
Set the year with the control
wheel.
Confirm with the PROG button.
Set the month with the control wheel.
Confirm with the PROG button.
Set the day with the control wheel.
Confirm with the PROG button.
Set the hour with the control wheel.
Confirm with the PROG button.
Set the minute with the control
wheel.
Confirm with the PROG button.
Press button PROG once.
Setting the room zone:
R0 appears + set flashing
room number 01:10.
Press button PROG again. Heating symbol flashes.
Set the heating temperature with the control wheel.
Press button PROG again.
Saving symbol
flashes.
Set the saving temperature
with the control wheel.
Confirm with the PROG button.
Now you are requested to set your own time programme.
In the time programme you
can set 2 heating and 2 saving
periods for each weekday.
2.1 - Setting the time programme
The weekdays are numbered by 1 – 7 (1= Monday to
7= Sunday). An arrow in the display marks the current day.
Press the PROG button. Select day or day block with
the control wheel. Confirm with the PROG button. Set
the beginning of the 1st heating period with the control
wheel. Confirm with the PROG
button. Set the beginning of the
1st saving period with the control
wheel. Confirm with the PROG
button. Set the beginning of the
2nd heating period1 with the control wheel. Confirm
with the PROG button. Set the
beginning of the 2nd saving
period1 with the control wheel.
Confirm with the PROG button.
Conclude the process with the
AUTO
MANU button or select the next week day or day block.
Days not programmed by the user=factory setting is active.
1
If you do not want to programme these days, confirm with “-- --”.
2.2 - Temperature display of the control
After having finished all setting, the LCD display shows
the room temperature (thermometer function) as well as
date and time.
3 - Further Settings
Master- economy (saving) function
With the button all radiator thermostats are set to
the respective economy temperature. This function stays active until the next switch point.
and MANU are shown in the
display.
Master heating function
With the button
all radiator
thermostats are set to the preset heating temperature.
This function stays active until
the next switch point. and MANU are shown in the
display.
Changing the temperature of individual rooms /
manual override
This function allows to change the room temperature without changing the programmed saving and heating
periods.
Select the room zone by turning the control wheel.
and
are flashing in the
display. Press the button
or
for the desired selection. The selected symbol stops flashing. After 10
seconds the control accepts it.
With the start of the next programmed automatic
saving or heating period Sparmatic premium returns
to automatic mode.
Child lock
This functions locks all buttons of the thermostat controls! Adjustment is only possible by the radio control unit. Enable/disable the function with the
button.
Bloc appears in the displays of the individual thermostats and the control.
3.1 - Holiday function
The
button allows you to set a lowered temperature during the holidays. Press the
button. The
date flashes in the display. Select the end of your
holiday function with the control
wheel. (= automatic heating periods start). Press the
button again and the corresponding
time flashes (= start of the automatic heating time). After pressing the
button you
are requested to set the desired temperature for the
holiday period.
Press the
button again and the function is active. The symbol
appears in
the display. Disable the holiday function
by pressing the
button.
The holidays temperature is shown at
the thermostat controls. You can change
the temperature manually at the thermostat control if the child lock
is not active.
Cancel programming ESC
To break during the programming and/ or to return to
the initial state press the ESC button.
4 - Change administrative settings
Press the SETUP button to change these settings.
Now you start again with setting time and date (s.
„Initial setting of the control“).
Replacing the batteries
If the battery symbol appears in
the display the batteries need
to be replaced by new ones. Always replace both batteries at
once. Ensure that the polarity
is correct!
Dispose old batteries according to WEEE 002/96/
EG. Never put them into the household waste!
Note:
If you change the place of the devices ensure that
the radio transmission works properly. If the thermostat controls receive no radio signal for more than 60
minutes
is shown in the display.
5 - Setting the thermostat control
Inserting the batteries
Open the battery compartment and and insert 2 mignon alkaline batteries (LR6, AA, AM3). Do not use
rechargeable batteries! Ensure that the polarity
is correct! Incorrect inserted or leaking batteries
can destroy the Sparmatic premium. It is necessary
to replace the batteries if the symbol bAtt is shown in
the display. After a battery replacement or a break in
the power supply Sparmatic premium starts an automatic adaption.
5.1 - Setting the thermostat control
Now you are requested to enter the house code and
the room zone number in the thermostat control.
00:00 appears in the display. The first two numbers
are set to the respective house code (00:07). You
set the room zone with the last two numbers (00:10).
Confirm with the PROG button.
An adaption is running now. After the adaption the
display stays empty. The setting are selected with
the control wheel and confirmed with the PROG button.
With the control wheel you can “overwrite” the programmed temperature until the next switch point.
The buttons
are inactive.
Sparmatic premium works like a standard control
without any radio function if you enter 00:00 as
combination for house code and room zone and
confirm with the PROG button. Then you are requested for date and time. All values are set according to
the enclosed manual for the Sparmatic basic. This
device runs as a stand-alone-solution. All operation
AUTO
elements are active. Press the MANU
button
for
more than 5 seconds to involve the device into your
radio system. 00:00 appears in the display to reenter house code and room zone.
5.2 Adjusting temperature to local conditions /
temperature- setup
Often the perceived temperature significantly deviates from the set thermostat temperature, for example due to spatial distance to the thermostat. For
this reason you should execute a temperature set
up that is specifically adapted to your room situation. To do so press the PROG button for 5 seconds.
The house code appears in the display. Press the
PROG button again for 5 seconds. 0.0° appears.
Now set the desired temperature increase at the
Sparmatic premium control. Confirm with the PROG
button. The temperature shown in the LCD display
does not change!
6 - Mounting
Sparmatic premium can be easily mounted on all
common valve bodies. It can be installed without
grime and water spots, because the heating circuit
water is not interrupted. Loosen the fastening of the
old thermostat head, pull the thermostat head off of
the valve.
Select an adapter if necessary:
Adapters are required for some valve types. Prior to
mounting, select the appropriate adapter as shown
in the adapter table. If you require an adapter: Push
the adapter onto the valve and turn it until it noticeably clicks into place. If the adapter is fitted with a
screw, tighten the adapter with the screw.
The instruction Inst is shown in the display. Sparmatic premium can be quickly and easily mounted with
a single hand movement. Hand-tighten the union nut
until the device is firmly fixed on the valve body.
7 - Adapting
Press any button and Sparmatic premium will start
to adapt. The device will adapt itself to the stroke
of your valve body. To do this the valve will now be
opened and closed several times to learn the end
points. In some cases this process can take a few
minutes. During this adaptation process ADAP will be
shown in the display.
8 - Cleaning and used devices
Cleaning
To clean the thermostat use only a dry or lightly wet
cloth. Avoid chemical solvent - it can probably damage the device.
Used devices
Do not throw old devices and packaging into the
household waste. They can be recycled. You receive
further information at you local administration.
Data transmission
For the data transmission between the radio control
and the thermostat control a particularly reliable radio transmission system is used (868 MHz). Owning
the statutory regulations requiring the data transmission to be limited to max. 36 seconds per hour (1%
duty-cycle) the likelihood and risk of interference
with other radio services is minimized.
The data transmission to the individual thermostat
control is carried out in regular time pattern. Thus it
can take up to 15 minutes for the data signal to get
transmitted to the individual thermostat control.
Wir
We
EUROtronic Technology GmbH,
Südweg 1, 36396 Steinau
erklären, dass das Produkt
declare that the product
elektronischer Heizkörperthermostat Sparmatic
electronic radiatorcontroller Sparmatic
auf das sich diese Erklärung bezieht, mit folgenden Normen übereinstimmt
to which this declaration relates is in confirmity with the following standard
International
International EN 55022: 2006
EN 55024: 1998 + A1: 2001 + A 2: 2003
EN 55014-1: 2006
EN 61000-4-2/ 2001
EN 61000-4-3/ 2002+A1
EN 60950-1: 2006
EN 60730-1-1: 2000+ A1: 2004
EN 61000-4-2/ 2001
EN 61000-4-3/ 2001+A1
R + TTE Richtlinie 99/5 EG
They bear the CE mark.
Help
Steinau, 30.10.07
Problem
Cause
Solution
Batt
Batteries do not
have enough power.
Replace batteries.
Heating
element
does not
cool down.
Valve does not
close completely.
It may be that the
closing point of
your valve seat has
shifted.
Adapt again (see “Adapting”)
Move the valve stem
several times by hand, it
may be that adaptation is
impossible because your
valve is calcified or the
seat no longer performs
its function.
Heating
element
does not
warm up.
Is the boiler water temperature OK??
Valve does not
Remove the Sparmatic
premium, move the valve
open, is it calcified
stem back and forth per
after the summer
pause / heating
hand or with a tool.
pause?
E1
No adaptation
possible.
Is the installation OK?
E2
Valve stroke is too
short.
Open and close the valve
several times manually or
replace the batteries.
E3
Motor movement is
not possible.
Does the valve stem
move freely??
FUFE
No radio transmission between the
thermostat control
and the radio control for more than
60 minutes.
Check the conditions on
site. The position of the
radio control may need to
be changed.
This declaration certifies agreement with the directives cited, however
it does not contain any assurance of characteristics.
Guarantee
The guarantee period is 24 months and it starts on
the date on which the product was purchased by the
end user. Please keep the purchase receipt for the
duration of the guarantee period; it must be submitted for a guarantee claim. This product has been
manufactured using state-of-the-art production processes and in addition it has been subjected to rigorous quality controls. Nevertheless if defects should
occur during the guarantee period, please contact
us at the address listed below. After the guarantee
period all upcoming repairs are with costs. Your legal
rights are not restrained by this guarantee.
Please note that shipments of goods, return shipments, and other shipments can only be accepted if
postage/shipping charges are prepaid in full.
Adapter table
Heimeier, Junkers
Landys+Gyr, MNG,
Honeywell, Braukmann
no adapter
required
thread dimension of M 30x1,5
Danfoss RAV
enclosed pin must be
plugged on the valve tapped
+ accompanying
pin, only for RAV!
Danfoss RA
Danfoss RAVL
After successful adaptation Sparmatic premium returns to normal mode. Now it is ready to receive its
programme from the control.
Konformitätserklärung
Declaration of Confirmity
Additional adapter types are listed at www.eurotronic.org
EUROtronic Technology GmbH
Südweg 1
D-36396 Steinau - Ulmbach
Phone: +49 (0) 6667/ 9190 50
Email:
[email protected]
Internet: www.eurotronic.org
Packg.-No. 900 000 091 | version 07.2008