1
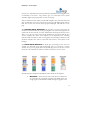
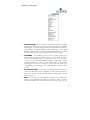
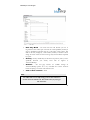
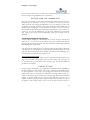
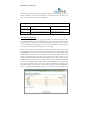
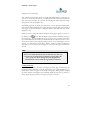
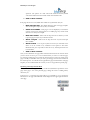
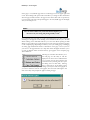
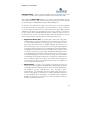
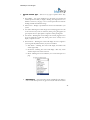
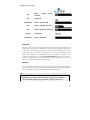
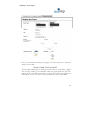
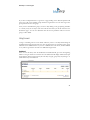
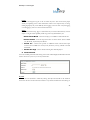
Connect™ User Manual
Blue Step Platform
BlueStep Technologies
BlueStep™ Technologies
ConnectTM
C
onnectTM is an Internet-based, information-management solution that
solves communication challenges within organizations and communities.
Linking multiple Connect™ sites creates an intelligent network of web pages,
adaptable to the size, structure and information needs of your group. With
powerful security tools and hierarchical management structure, Connect ™ arranges
information in a manner that enhances communication along the natural, already
established lines within your organization. In addition to aiding communication within a
group, Connect™ also allows an organization to extend beyond its boundaries to reach
those outside, making accessible information that pertains specifically to them. Connect
™ brings people together and brings content and data to people.
The administrator for your site has access to the Site Admin screen, which is a good
place to start the design process. It includes six (6) tools to manage your site. You can
access these tools either from the Admin drop-down list on the home page of the site,
from the Unit Management screen (in the unit which contains the site) or from the
Organization Administration screen itself. The tools are: Site Information and
Permission, Site Structure, Styles, Site Sign-up, Site Administrators, Invite Users and
Media Library. The following are tables with the data field information for these utilities
within the Site Administration.
Field Descriptions - Site Information and Permissions
Field Name
Description
Character Type
Name*
Name of the site; required field
Alpha/numeric field; default blank
Title
Title is shown along with name of the site
Alpha/numeric or HTML; default blank
Domain Name
This is the web address of the site on the
hosted server
Optional service; contact MA for setup
URL syntax
Include any key words you would like
internet search engine to look for
Alpha/numeric field; default blank
Vanity Name
Key Words
N/A
3
BlueStep™ Technologies
Field Descriptions - Site Structure
Field Name
Description
Character Type
None
There are no fields associated with the Site
Structure tool other than adding pages
None
Field Descriptions - Styles
Field Name
Description
Character Type
Inherited/Custom
Radio button
Primary
Select from inherited style, predetermined
color combinations or colors of your
The main color display for the pages
Secondary
The secondary color for the pages
Accent 1
The first accent color for the page
Accent 2
The second accent color for the page
Background
The color for the background of the page
Body Font
The font style for the body text of the page
Header Font
Logo
The font style for the header text of the
page
Selection list for retaining inherited style or
choosing from 3 options
Graphic to be included on the site header
Background
Image
Graphic to be included on the body of the
site
Navigation Style
Hexadecimal code for the color or one
of the 16 primary hex colors
Hexadecimal code for the color or one
of the 16 primary hex colors
Hexadecimal code for the color or one
of the 16 primary hex colors
Hexadecimal code for the color or one
of the 16 primary hex colors
Hexadecimal code for the color or one
of the 16 primary hex colors
Hexadecimal code for the color or one
of the 16 primary hex colors
Hexadecimal code for the color or one
of the 16 primary hex colors
Drop-down list
Any graphic file selected from those
stored in the Media Library
Any graphic file selected from those
stored in the Media Library
Field Descriptions for Site Sign-up
Field Name
Description
Character Type
No Sign-up
Allowed
Radio button disallowing any user from
signing up for the site; useful during the
design stage.
Select from the listed pre-defined policies,
which policy will be used for this site.
Radio button
NA
Radio button
Alpha/numeric text field
Message
Enter text of the ‘Thank You’ message to
4
BlueStep™ Technologies
Implementing Connect
The first step in implementing ConnectTM is to create the organization’s main site. The
purchase price of BlueStep™ products includes a set up fee for the Organization site.
Included in this set up is the initial organization structure, determination of the layout on
the initial page (site template) and deciding on your site colors. The setup fee doesn’t
include any custom graphics, icons or programs. Once you have determined the layout of
the initial page, you can then manage content and create additional units, sites, pages or
pagelets for your site(s).
Note:
Remember that as part of the creation of your Organization,
Connect™ also created your first web page. You may or may not
use this as the landing space for visitors to your site.
Organization Chart
The organization chart will allow you to build the “tree” structure for your organization.
When you purchased ConnectTM, Answers4/BlueStep created the first container for you.
This is your Organization. It gives you access to the tools allowing you to manage your
organization. You can then determine what the structure of your implementation will
look like. The organization chart will be the tool that allows Organization Administratos
(Admins) to build this structure.
Tip:
When you begin to think about creating sites, it will be useful to
remember that any initial sites created will be put in your root
organization container. Should you wish to not do this,
remember to create a unit for your actual sites.
Site Information
Whether you create your site or it is done as part of the initial implementation, you will
need to understand some basics about the site information and those data fields critical
to the existence of the site. Some of the fields associated with your site can be changed.
Some will have an impact on your overall structure and others are just field tags with little
impact if you change the information. When determining the basic structure of your
5
BlueStep™ Technologies
organization, the units within the organization and where your different sites will reside,
you will need to think about how the “tree” will look before adding additional containers.
While you can always change information after the fact, doing so may have impacts to
the organization’s structure and the relationships that are built between containers. You
may need to provide Answers4/BlueStep with the information to populate the data fields
associated with your Organization. Creating this organization will create your first site.
Keep in mind that this site WILL NOT be an outwardly facing web site for users. It will
be a landing page for your organizational administrative users.
You may chose not to use this first root site as the container that holds your home
landing page but rather as the container used only by and for Organization Admins.
Remember, it is easier to have a fully developed tree structure from the beginning rather
than trying to patch units or sub-units inside of a functional web presence.
Note:
You can select the layout, colors, logos, etc. once you have created
the site by editing the site page from either the organization
admin chart or the site structure tool.
You will also find these fields available for editing as part of the site creation wizard
available in the sites listing or from the Admin drop-down menu and then selecting Site
Information.
Site Structure & Design
Determining the overall structure and design of your site is very important. You will first
need to decide if the site will be a stand alone page with sub-pages servicing the needs of
your organization or if it represents the master site with many other sub-sites that will be
used as other related main pages. Many organizations will benefit from implementing this
master/subordinate site structure. Even though you can implement this strategy at any
time, it will be more useful if you decide what your structure will be before you begin
implementation.
As a default when your first site was created as part of setup, the page is of the composite
type, a very flexible template. It allows Admins the most flexibility in designing or
structuring the home site. The template will default to Amazonian Layout. It has also
been populated with useful information about how you might change or build pages. It
is not the intent that this information should continue to be what you let your site visitors
see. You will want to change or enhance the home site. You can experiment with
6
BlueStep™ Technologies
changing the layout template by clicking on the Edit Page button in the upper right hand
corner of the home site.
Tip:
Changing the template layout does not destroy the existing
information on the page. It only seems to do so. It merely
redisplays different layouts with a different number and
arrangement of pagelets. Any data that was in a pagelet is there
until you decide to delete the information.
Your home page also contains a default number of sub-pages attached to this initial site.
The pages will be shown as tabs on the site navigation bar displayed below the page title.
As a site admin you can create new pages, edit or delete existing pages and reorder those
pages to fit your needs. You are not limited in the number of pages or sub-pages that can
be created. You may create as many pages as you feel is necessary within any given site.
One thing to remember is that, you cannot change the type of a page. In other words,
you cannot change a composite page to a news page. If you wish to change the page type
you will need to create the new type of page and delete the old page that did not meet
your needs.
It is important to stress that there are two areas of usage when you create a web site. The
first is the actual page or pages, usually containing smaller sections called pagelets. These
sections can contain information or data. The second area is actually creating other pages
off the home page. These will be shown as tabbed site pages in the site navigation bar.
The unique design of Connect™ will actually allow you to use a page from any unit or
site within the organization as a page or pagelet. This literally lets you create a webpublishing platform capable of propagating consistent content across very broad
organizations. The power of being able to create a common page and have it updated
across the organization by a single user cannot be described. Imagine having centralized
data that can be pushed to allied or departmental groups. They have the ability to
maintain their own look and feel but can also receive consistent, organization-wide
content on sections or pages, as desired. The following figure show a very simple site
called Flintstone with the default home page and the five (5) default sub-pages. Any one
of these pages or any you chose to add could be other pages you have created or ones
that were developed by an organization’s central web management. Each of these pages
can be edited, deleted, reordered or hidden.
7
BlueStep™ Technologies
Layout – Composite Page Templates
Answerss4/BlueStep has developed page templates that should meet the needs of most
organizations for their home page web site. Associated with each template is a given
number of pagelets that can be utilized to develop the look and feel desired by the
organization for its implementation.
Note:
These templates are associated with the page type know as
composite. All other page types have their own pre-set style.
There are nine (9) templates provided with the ConnectTM license. You can base any of
your pages upon these formats if the page is a composite page. Each has been designed
to fill a certain need and probable layout. When you select the template a given number
of pagelets or content areas will be included with the initial design. Any one of these
pagelets can be populated with a variety of different content types. You might also chose
to not use the pagelet and leave it as white space. Keep in mind that your initial page will
be created as your “home” for that site. You can move any other pages up in the order to
represent your home or main landing page, if you so chose.
The template facsimile presented in the next few pages have pagelets that can/will
expand based upon the content they contain. Each template has a heading and there may
also be one or two additional full width pagelets that could be used as sub-headings.
8
BlueStep™ Technologies
In many cases, experimentation is the best method to determine how each pagelet works
in relationship to the others. Usage will also give you a better feel of how content
determines pagelet sizing in proportion to others on the page.
There are blocked sections visible on the facsimile templates. The vertical and horizontal
edges are indicative of two issues. The first is how the page will display column and row
lines. The second is how sections will be proportioned height- and width-wise on the
page.
The horizontal block dimensions will proportion your page based upon the
information contained within any of the given pagelets in the section. The pagelets in the
column with the most amount of content will determine the breakpoint for that section.
That is to say, the size of the section will be determined by the column with the most
amount of display data. (Some of the templates are not impacted by this sectioning
method and will size purely on what is in the pagelets.) If the heading is divided as in the
Newsletter template, there will be a horizontal section break to force balance in the
headings.
The vertical block dimensions are based upon a percentage, in most cases. For
example, the Amazonian layout will proportionally space on a 30/50/20 % column
structure. If you put in a graphic that is exceptionally large, then you may have a screen
that needs to be scrolled across with the scroll bar at the bottom of a users screen.
The following short descriptions will detail the section breaks for the templates.
Newsletter – There are three sections that will size vertically. The
top section has only a single pair of pagelets. The middle section has
a single pagelet in the left hand column with eight (8) pagelets in the
9
BlueStep™ Technologies
right column. You might think of these as the heading, body, and
footer. There are no vertical % column lines available.
Amazonian – Only the top section will size vertically and is the
heading. The remaining three columns will size vertically and
independently of each other. The left column will have four (4)
pagelets, the middle section will have seven (7) pagelets, and the right
column will have four (4) pagelets. There are two vertical column
lines available that sizes the page in a 30/50/20% proportion.
2 Column Amazonian – Only the top section will size vertically
and is the heading. The remaining two columns will size
independently of each other. The left column will have four (4)
pagelets and the right column will have seven (7) pagelets. There is a
single vertical column line available that sizes the page in a 30/70%
proportion.
Applied – No sections. Each pagelet will size according to the
amount and size of information contained within the pagelets. There
are no vertical column lines or sizing available and the pagelets will
wrap based upon the data contained in the pagelet.
Product Page - There are three sections that will size vertically.
The top section has only two full-width pagelets. The middle section
has two pagelets in the left hand column with three (3) pagelets in the
right column. You might think of these as the heading, body, and
footer. There are no vertical % column lines available.
Shopping Mall – No sections. Each pagelet will size according to
the amount and size of information contained within the pagelets.
There are no vertical column lines or sizing available and the pagelets
will wrap based upon the data contained in the pagelet.
Newsprint – No section or vertical lines available. Each of the
pagelets will expand to meet the size of data they contain. There are
three (3) full width pagelets that might be headings, two evenly split
left/right column pagelets, and one footer pagelet.
Single Block – No section or vertical lines available. Each of the
pagelets will expand to meet the size of data they contain. There is
one (1) full width pagelet that might be headings, two full width
pagelets, and one footer pagelet.
10
BlueStep™ Technologies
Section - There are three sections that will size vertically. The top
section has only a full-width pagelet. The middle section has six (6)
evenly split pagelets. The footer is also evenly split. There are no
vertical % column lines available.
Desktop - Web page style layout with four section blocks and a
header.
A brief application discussion of select layouts:
NEWSLETTER
The template is designed for organizations wishing their sites to look like newsletter
layout. It is in a 40/60% format. There are large blocks at the top for a heading or
graphic that would be for beyond the small heading provided. These larger sections
could be for a logo or a branding strategy. A body section where information would be
included with the left hand section good for a single article and the right section for
several smaller articles. The footer section can be used for disclaimers, policies or links to
partners. The focus is in top to bottom formatting rather than side-to-side. It is designed
for highlighting a large number of news articles and content pieces.
AMAZONIAN
Three columns in a 30/50/20% format allow organizations to provide a wide variety of
information to visitors. The template may be used as a “portal” page where the intent is
to provide a large amount of data in the limited area of a home page. The left column
might be used for navigational elements such as links to other organizations or partners.
The center column could be for content vignettes, and the right column for additional
related information The proportion will be maintained with a heading style and body.
There is no allowance for a footer. The formatting focus is side to side. The template is
the default site built when you build a new site.
2 COLUMN AMAZONIAN
This style is accented by a 30/70% layout. The basic 1/3 2/3 layout. There is a header
designed with this template but not a footer. Two large sections in what might be the
heading for a branding strategy. This template might also be used as the primary landing
site for many web sites. It provides the maximum flexibility for the Admin. It would be
great as a sub-site landing page but could also stand alone if that is the intent.
APPLIED
Designed to be used as a home page with one large ‘splash’ image and three feature
articles. Intended for large amounts of white space between page elements to encourage
11
BlueStep™ Technologies
a clean elegant style. The header would be used in the small gray area at the top or on the
‘splash’ pagelet. The last pagelet can act as the footer. There are no balance restrictions
relating to the proportions.
NEWSPRINT
This is a standard newspaper layout. There are two columns with room for multiple
headers and footers. This template is ideal for news pages or informational areas for
members. The page could provide a point-counter point display that would elicit input
from members or visitors to the site with one of the other pagelets for surveys about the
featured items.
SINGLE BLOCK
There are headers and footers designed into this template but its strength is its open and
very usable format. Use this for large or single concept pages with the Content Editor.
The remaining layouts, shopping mall, product page, section and desktop, each have a
wide range of applications and benefits to fill an almost unlimited number of needs and
data requirements.
Content
There are fifteen (15) different content pages that could be made a home page or could
be included in any given site as sub-pages. They can be introduced as pagelets, as well.
Each of these is a container and as such can hold other objects. Any of these pages could
be your home site. By default, the first site is created as a composite page and gives you
the maximum flexibility for the home site. As you add any of these pages within your
home site, they will each be displayed as part of the site navigation bar. They can be
renamed or moved to fit your needs. They cannot be changed as to their type. If you
wish to change the type you would need to delete the unwanted page and recreate the
page you wish. The content pages are:
12
BlueStep™ Technologies
Composite Page – Used for large and varied blocks of information, blank
pagelet are contained in the composite page that can be useful for the ultimate
custom design. You first home page on a site will be designated as a composite
page allowing you maximum flexibility. Composite pages give you the added
flexibility of selecting what the composite page template would be to provide a
basic layout structure. The composite page is useful as a home site page.
Text/HTML – Text/HTML pages can be used by those who have more
advanced skills but still remain simple enough for staff members to manage
content. The text/HTML page is an open screen with no set format or
sections. If you have some skill at HTML coding this format will give you the
maximum flexibility. You can also use the Content Editor to create highly
custom pages. You can even cut and paste content from other pages to the
text/HTML type of content page. The text/HTML page is useful as a home
site page.
Structured Content – These pages are specifically designed to allow the
creation of online manuals, books, pamphlets, etc. These may be printable or
online only and offer and easy, flexible method of adding pages and full
outlines to the text.
News – News pages give your organization the ability to post information
specific to your organization. This might be an “About Us” section or perhaps
a “Meet the Board” section. Once you have created the news page, any new
13
BlueStep™ Technologies
news articles can be added easily with the Content Editor. The news page
would not likely be useful as a home site page.
Discussions – This tool will allow users of the site to participate in
“threaded” discussions that had been posted by an Administrator. Discussions
can be useful to receive feedback from visitors, constituents or members. The
threaded design gives users the ability to comment on not just the main
discussions but any of the replies or replies to replies. You might think of this
page as your “list server” without the constant aggravation of email
notification. The discussions page is not useful as a home site page.
Calendar – Use calendar as a centralized area to post upcoming events that
may interest users of the site. Given the hide function and security, you can
create special calendars visible to only certain people. The calendar page is not
useful as a home site page.
Surveys – Want to know how users of your site feel about your organization,
site usage or their thoughts on issues? Surveys will allow you to get their
feedback in a question/answer format. The survey page is not useful as a home
site page.
Links – Many organizations have affiliation with other groups. Links will give
you a quick “bookmark” to partners, sponsors or other sites within your
organization. They will be displayed as a listing of multiple links as you chose.
The links page is not useful as a home site page.
Shared Files – Shared files can be a good spot to post by-laws, financial
statements, white papers or any information considered important to your
users. Creating folders or sub-folders gives users the ability to organize files.
The shared files page is not useful as a home site page.
Chat – Live on-line interaction between users of the chat room. Having
scheduled interactive exchanges of ideas, positions, plans or organization
direction is useful to the organization and it’s functioning. The chat page is not
useful as a home site page.
Link – You can place a tabbed link on your site navigation tool bar with this
page. You may wish to use this as a link to other sites or a national site. The
link page is not useful as a home site page.
Sub-Menu – You can display a selectable listing of all sub-pages attached to
any given page. This is particularly valuable, as it is self-updating whenever a
sub-page is added to the site structure.
14
BlueStep™ Technologies
RelateTM Area – This will give you a doorway into the various features of
the RelateTM database if you have purchased this option.
When you create these pages, keep in mind that they can be anywhere within sites
in the Organization’s hierarchical structure. It is up to you how much depth you
decide to build into your organization, unit(s) or site(s).
Tip:
Good web design suggests that users never be more than 2 or3
clicks from any other page. This means you should limit the depth
of your visible site structure.
Standard Colors
The following colors are standard hexadecimal coded colors that meet the specification
for HTML 3.2 and 4.x. They are proven to work with the major browsers on the market
today. If you wish to customize colors, you can use the hexadecimal code associated with
your color schemes. When using the color codes, you can either enter the name of the
color in the data entry field (if you are using the standard sixteen (16) colors) or the
hexadecimal number. If you use the number, remember to include the # sign before the
numeric code.
The list of colors is:
AQUA - #00FFFF
BLACK - #000000
BLUE- #0000FF
FUCHSIA - #FF00FF
GRAY - #848284
GREEN - #008200
LIME - #00FF00
MAROON - #840000
NAVY - #000084
OLIVE - #848200
PURPLE - #840084
RED - #FF0000
SILVER - #C6C3C6
TEAL - #008284
WHITE - #FFFFFF
YELLOW - #FFFF00
15
BlueStep™ Technologies
Tip:
set
Site colors and layouts can be based upon a standard
offered. You can also customize your site
colors with
the hexadecimal number for your specific colors.
Subsequent
pages can be based upon this template or can be
customized for each site.
Connect™ Security
As part of implementation, you will want to consider your security model. When you
create sites there are a default set of permissions put on any page.
The default is to grant two default groups permissions to the created site. The groups are
Everyone and Registered Users. Both of these groups are granted “No Access” as the
default set of permissions. This allows the Admin or designer the ability to configure and
manage the page or pages before anyone has access to the page. Once the final design is
completed, users can be granted the appropriate access.
Sign-up Policies
When you create a site you will need to determine how users will access the site. By
default any new site that is created will have ‘No Sign-up Allowed’ set for the site. This
will allow you to design and develop the site without users accessing a site under
construction. Once the site is ready for usage you will then determine the different types
of sign-up policies, you may want to use and implement them.
Configuring & Managing Connect™
Configuring a Site
Your first site was configured as part of your setup. Possibly you provided
Answers4/BlueStep with information, graphics, layout template choice and other
information to establish your first site. It is now your job to continue to add other sites,
sub-sites, pages and pagelets. As part of the setup, the site created is by default your
home site. You may wish to change this or even hide this site and create another site for
16
BlueStep™ Technologies
your landing page. The key to the whole structure is to know what you want to do before
you begin. Take a few minutes to sketch out what the structure will look like, whether the
initial page built will be your landing site or if you want to create a new one, what subpages will be useful and what they will be called, how many sub-pages to create and will
they be hidden and what your general template scheme will be. These are only a few of
the things you should consider, but certainly will get you started.
Creating a New Site
Creating sites is easy. You can create as many sites within as many units as you would
like. The only limit is your imagination. Remember that good design is about ease of
navigation. The less hunting users need to do, the more usable the site will feel. A good
rule of thumb is, “Don’t get too granular in your structure depth.” In other words, do
not create too many containers within containers. To begin, you will want to stay within
at least 3 or 4 levels in your tree. The easier it is to navigate your site, the more often users
will visit. Creating a pleasing and simple access to information and data that is pertinent
to your users should be your objective. Making your structure easy to navigate is an
attainable goal with the flexibility Connect™ offers.
The following data entry activities will get your basic site up and running. It consists
mainly of entering data into fields that allows the system to identify your site. How you
actually make the site look and navigate after it is built will be the more involved task.
ENTERING DATA
Creating a site has two sections associated with it. The sections are General Information
and Site Design, which you will access from the Styles section under the Admin tab. To
fully create a site will entail eight (8) simple steps.
1.
Enter the Site Name – This is the name of the site and is a required field.
The name can be changed and is only for informational purposes.
2.
Enter the Domain Name – This will be the appended name to the
bluestep.net site. It will also be the URL users will type to land on this
particular site. As you design your organizational structure, keep in mind that all
URLs within a site must be unique.
3.
Enter Vanity Domain - This will be the name specified by you and applied
for through the bluestep.net site. It will be another URL users will type to land
on your particular site. As you designed your organizational structure, keep in
mind that all URLs within a site must be unique.
4.
Enter the Description – The description is for internal clarification. You
may wish to more fully detail what the purpose of the site may be.
17
BlueStep™ Technologies
5.
Enter Key Words – Put words here that will describe your site or
Organization. These will be part of the web site search capabilities, should you
chose to implement registration with any of the major search engines. This
field can be easily changed by a staff member, should you decide to add or
change the search criteria for these meta-tags. Keywords should be separated
by a space.
6.
Security – Security should always be left in the No position, unless you have
specifically discussed
Answers4/BlueStep.
your
security
7.
Statistics
8.
Click on Save or Cancel to finish.
issues
with
an
engineer
at
– Site and page statistics are available through an
Answers4/BlueStep partner for a very reasonable fee. Contact Answers4
before attempting to use either of the statistics boxes.
Note:
You will be able to more fully manage your site after it has been
created via the Site Admin tools. This entails colors, layout, logos
and other items.
18
BlueStep™ Technologies
Once you have created your site you will want to determine its look/feel and final layout
before you begin to assign Administrators or permissions.
EDITING YOUR SITE INFORMATION
Once the site is created you can edit the information associated with that given site.
Remember that the information for a site is not available to the users and is used by
Admin personnel only. Changing the information is as easy as clicking on a route to the
Site Admin and selecting which site to edit. (There will be other tools available that you
will find useful in managing your site(s) within the Site Admin, as well.) You can access
Site Admin from either the button in Organization Administration for the unit the site
resides in or, if you are the Administrator, you will have an Admin tab on the site home
page. Once you have gotten to the Site Information screen, you can change any of the
data fields.
Configuring & Managing the Site Structure
The site structure will give you a hierarchical look at your site, the pages and sub-pages
within the site. You can enter the site structure from either the Site Admin page by
clicking on Site Structure listing or the drop-down Admin button in the upper right hand
Site Administration navigation bar.
You will be able to reorder the page(s) or sub-pages within the site. Editing and deleting
is allowed, as well. Editing will let you change the basic information about any of the
page types. The information that can be changed varies between the available pages. You
can create fifteen (15) different pages within your site.
Types and Usages of New Pages
When you decide to create pages within your site you will find each of these types of new
pages to be useful and work for specific goals you wish to achieve with your page(s). In
the next few sections we will detail each of the page types, date fields available and
possible use case examples.
COMPOSITE PAGE
Composite pages are designed to give Organizations a maximum amount of flexibility in
creating their pages, the look and feel of those pages and the layout. Essentially they are
an open opportunity to truly create your own page, but retain basic layout structure.
Within this structure you can manage any smaller part of the page, called a pagelet. As a
default, the first page created is an Amazonian composite page. There will be a minimum
number of pagelets included in the composite page, dependant upon the type of
template you chose when the composite page was created. You can change the type of
the pagelets on the composite page to meet your needs. There are three sections to a
19
BlueStep™ Technologies
composite page you will have to configure. They are: general information, section widths
and separators. Choosing between the various composite templates allows you to
determine how the composite page will look to visitors.
Use Case: Composite Pages
Composite pages work very well if you want to maintain a consistent layout for any given
site or sub-page. Since they are based upon any of the ten (10) templates you can base
many or all of the pages upon this template type. You could then make the design and
posting of certain graphics or icons consistent across your site(s). Composite pages give
you a great deal of flexibility while maintaining a certain degree of form and format.
Many users find it helpful to apply a consistent look. It also give you the ability to include
a defined number of pagelets, with content in each pagelet. Since each of the pagelets will
allow users to easily populate content, this is the ultimate page tool.
Field Descriptions - Composite Page
Field Name
Description
Character Type
Page Title*
The title of the page, Required field
Alpha/numeric field, default blank
Hidden
Checking the box will allow you to hide
this page
The name of the container you want to put
the new page in
Radio button selection from the existing
template layouts
Determine the width of your page in either
percentages or pixel width
Determine how wide the white space is
between columns and rows
Determine if you will use vertical or
horizontal lines on the page between
Enter the hexadecimal code for the color,
preceded by the #
Determine how the vertical and horizontal
lines will intersect
Check Box
Location
Layout
Page Widths
Gutter Width
Lines
Line Color
Intersections
Alpha/numeric or HTML, default Site
Radio Button
Page width in 100th of percent, Pixels in
0-999 pixels
Pixels in 0-999
Check box for each, opt to use or not
Precede color code with the # sign and
then the 6 digit code for the color, color
Radio button of three selections
TEXT/HTML
Another open and fully flexible page type is Text/HTML. It will allow you to completely
determine the layout of the page. Where composite pages defined a certain layout and
number of pagelets, Text/HTML pages are completely open.
Use Case: Text/HTML
20
BlueStep™ Technologies
Text/HTML pages are an open format. There are no layouts or pagelets available. The
main tool is the Content Editor. From within the Content Editor you can custom design
the layout and/or content for this page. It will allow you to cut and paste from any
source, be it another web tool or simply a site. If you have a moderate understanding of
code development or HTML you will also find this useful to copy the code and modify
it to achieve the look or results that you wish.
Field Descriptions - Text/HTML Page
Field Name
Description
Character Type
Page Title*
The title of the page, Required field
Alpha/numeric field, default blank
Hidden
Checking the box will allow you to hide
this page
The name of the container you want to
put the new page in
Usage of the Content Editor
Check Box
Location
Content
Alpha/numeric or HTML, default Site
NA
Tip:
When using the content editor you will find that cutting and copying
with Internet Explorer will be required. Since the editor
is a product of tools from Microsoft, it is designed to
work to full advantage with their products. Cutting and
pasting from other browsers will not achieve the desired
result.
NEWS
News is designed to allow you to post information pertinent to the organization.
Creating a news page will allow you or your designated users to then post new items.
You will also be able to put additional information via the content editor and post a
graphic that might be associated with your organization. News will additionally let you
attach a discussion to the news article. This is an alternative method to just doing a
discussion alone. Post a news article and then find our how your users feel about this
given news item.
21
BlueStep™ Technologies
Use Case: News
You can use news to post information about your organization. It may also be useful to
cut and paste other news-worthy events. News could also be designed to be a content
distribution page from another group within your organization. For example, your
national group may wish to publish organization-wide information and have it distributed
to the various regional or local sites. The pages within an organization could be designed
for distribution to the local level with no action required from the local groups. As the
“master” site content was changed, the changes would be propagated to the page or
pagelet on the local site.
DISCUSSIONS
Discussions will give you the ability to get feedback from the visitors or members of your
site. Posting a discussion will let those who wish to make threaded replies to the
discussion or to the replies to the discussion.
Use Case: Discussions
Gaining consensus is at the heart of any group’s ability to function, make decisions or
move forward. Using discussions can eliminate those delays between sending e-mail or
leaving voice-mail and not getting a response. Once users are familiar with discussions
and know that can be actively used for gaining a consensus, it will save users, members or
employees a great deal of time by getting feedback. For example, you might want to find
out how your members feel about a current legislative bill being sponsored. Being able to
gain this information and possibly present it to the legislator who is sponsoring the bill
would be helpful to your organization.
Field Descriptions – Discussions
Field Name
Description
Character Type
Page Title*
The title of the page, Required field
Alpha/numeric field, default blank
Hidden
Checking the box will allow you to hide this
page
The name of the container you want to put
the new page in
Usage of the Content Editor
Check Box
Location
Content
Alpha/numeric or HTML, default Site
NA
22
BlueStep™ Technologies
CALENDAR
Posting a calendar for events is a useful method to let visitors or users know what’s
coming up. A separate page for the calendar gives users access to the upcoming events of
the organization. Calendar pages can also be hidden. Hiding a calendar page gives you
the ability to allow access based upon a security model.
Use Case: Calendar
All organizations have events. Having a central area for checking these activities can be a
time saver. Instead of users calling or e-mailing your organization, they can check the
organizational calendar to determine the specifics of an upcoming event. You might also
decide to have multiple calendars for different groups of users or a private calendar for
your Board of Directors.
Field Descriptions – Calendar
Field Name
Description
Character Type
Page Title*
The title of the page, Required field
Alpha/numeric field, default blank
Hidden
Checking the box will allow you to hide this
page
The name of the container you want to put
the new page in
Check Box
Location
Alpha/numeric or HTML, default Site
SURVEYS
Often there are times when you want to know how people feel or what their thoughts
are about a given subject. Creating a single question, multiple answer survey can help you
determine this.
Use Case: Surveys
Surveys can be used as a consensus-builder much like discussions. However, they are not
designed to have any interaction beyond just answering the question. It does not allow
users to give written feedback. Surveys can offer multiple answers to the question and the
posting of the answer can be anonymous or enumerated. Enumeration will attach the
users e-mail address to the survey question. For example, you may wish to hold an
annual event and want those involved to vote for location. Creating a survey question
such as, “Where should we hold our annual company party?” and offering answers on
the locations would be a standard type of survey.
23
BlueStep™ Technologies
Field Descriptions – Surveys
Field Name
Description
Character Type
Page Title*
The title of the page, Required field
Alpha/numeric field, default blank
Hidden
Checking the box will allow you to hide this
page
The name of the container you want to put
the new page in
Check Box
Location
Alpha/numeric or HTML, default Site
LINKS
All organizations have affiliated organizations, sponsors, partners or just web sites to
which you may want to create a quick link or bookmark. Links will give you the ability to
do this.
Use Case: Links
Say your organization is made up of a national group with ten regional offices. Each of
these has its own web site and you want to create a quick link to the national site and six
of the regions you have the closest communication with. Links is the perfect way to
accomplish this.
Field Descriptions – Links
Field Name
Description
Character Type
Page Title*
The title of the page, Required field
Alpha/numeric field, default blank
Hidden
Checking the box will allow you to hide this
page
The name of the container you want to put
the new page in
Check Box
Location
Alpha/numeric or HTML, default Site
SHARED FILES
Whether its white papers, by-laws or just information about the organization, being able
to post these documents in a central location is extremely valuable. Shared files can be a
standard folder or sub-folder hierarchical structure or a simple landing zone for file
storage.
24
BlueStep™ Technologies
Use Case: Shared Files
Building a structure to your shared files area will give you the ability to allow or deny
access to certain information. For example, you might want to have any users be able to
look at or download product sheets, white papers or general information about your
organization, but you may not want just anyone except a specific registered group of
users to be able to see the latest financial information. Creating a subfolder with this
sensitive information contained within it and using permissions on this folder would limit
who would have access to the data.
CHAT
Chat is a real-time interaction between participants in the chat room. It is strongly
suggested you limit chat rooms to certain predetermined times and have them managed
by a monitor. In addition to the data fields associated with the above table, you will need
to specify the chat room.
Use Case: Chat
Chat rooms give you the ability to conduct real time interaction between any user who
wished to participate in the chat. For example, you might want to have your constituents
join in a chat with the Board in a question and answer session.
Field Descriptions - Chat Page
Field Name
Description
All as per above
See table above
Chat Room
Name of Chat Room
Character Type
Alpha/numeric field, default blank
LINK
You may wish to create a specific link to a single site that appears as a tab on the site
navigation bar. You can do so with link. In addition to the normal data fields, you will
need to specify the URL.
Use Case: Link
You have an unusually close relationship with your national organization. Creating a
specific link that appears on your site navigation bar will let users jump quickly to that
allied site. For example, your organization is a state level non-profit group. You affiliate
25
BlueStep™ Technologies
with the larger national organization. Putting their URL in this tool and giving your site
visitors the ability to move to the national site in one click can increase the exposure of
both your site and that of the national organization.
Field Descriptions – Link Page
Field Name
Description
All as per above
See table above
URL
You can specify the URL to the site you are
creating the link for
Character Type
Standard HTML syntax for site
navigation
Initial Layout and Orderings
When your site was created, it was given very basic data associated with the site and a
layout format defaulted by Answers4/BlueStep. You may have also provided initial data
to populate the site. It will be your job to manage updates and changes to the site. For
you to understand how to manage the site it will be important to understand the
structure that was created and those elements you can change.
When a site is created the wizard builds a default structure. The site structure tool will
give you a visual of this layout. At the top of the site will be the site listing. It will display
the BlueStepTM icon to the left of the listing and underline the site name. Clicking on the
underlined name will take you to the home page for the created site. Below the site name
will be the additional pages that either were created or have been created by your
Organization for this site. The line listings will display the page name, the page type, if it
is hidden, display the reorder icon to the right, an edit icon and a delete icon. The home
icon is not accessible from this listing. Clicking on the underlining of the site name will
take you to the site home page. If you chose to edit the site information, clicking on the
edit pencil will allow you to do this. (This can also be done from the Site Information
screen or Organiztion Administration screen for the specific site.) The figure below
26
BlueStep™ Technologies
displays the site structure page.
This would also be the location where you would create additional pages or sub-pages for
your site. As you develop the structure, you will find the reorder to be a useful tool. It will
allow you to move the pages up or down in the ordering. This will consequently change
their position on the site navigation bar.
The default pages built are: home, news, discussions, surveys, calendar and shared files.
Each of these will be displayed in the site navigation bar at the top of the screen. Each of
these pages can also be edited for a number of different data fields and what will be
displayed to users.
Should you wish to change the order in which the existing pages appear, you can do so
button. This will display a pop-up window containing a listing of
by clicking on the
the existing pages. You can highlight the page you want to move and click on the Move
Up or Move Down function. Once you are satisfied with the order, click on Save to save
the reorder or Cancel to leave without posting the moves. As you add depth to your site
structure, any object that has other objects within it will have a reorder icon displayed.
This allows you to re-order not just the pages on your site, but also pages within the tree
structure.
Note:
There is not a delete function for the site from this view. Since you
are in the site you cannot delete it. Should you wish to delete the
site you can do so from manage sites in the Organization
Administration screen at either the organization or unit level.
Creating a New Page
Whether you are creating a new page or managing an existing page, the basic steps and
information will be identical. If you are the Organization, Unit or Site Administrator, you
will be able to create new pages as well as edit existing pages. Editing implies changing
any of the elements of the page but you CANNOT change the page type. To do this you
need to delete the page and create a new page of the type you require.
27
BlueStep™ Technologies
Tip:
You may want to create your new page, transfer any information
from the page you intend to delete to the new page, and then
delete the page that did not meet your needs.
CREATING PAGES
To create a new page, select the New Page icon in the upper right corner of the site
structure listing page in either the Admin drop-down or Site Administration screen.
A drop down menu will appear giving you the option of creating one of fifteen (15)
different types of pages. Each of these pages are containers and in some cases can
hold data from other pages. Your choice of page type will determine what the layout
will be and what kind of information can be put in the page. If for example you
choose to create a news page, you will be restricted to posting news articles to the
page created. If you select composite or text/HTML you will have a great deal more
flexibility to what the page layout looks like and how you can style the page.
Tip:
When you create a new page you are creating a container
capable of holding information. When you go to that page it will
be blank
with the exception of the tool that will give you the capability
of adding content to the page. The tool available will vary
depending of the type of page you have created.
ENTERING DATA
Depending on the type of page you choose to create there will be a varied number of
data fields to configure. If it is one of the canned or predefined pages there are five (5)
steps to creating the page. They are:
1.
Enter the Page Title – The default will be the name of the page template.
You can change it to represent any title you would like. You could use the
name of what the page would be holding.
28
BlueStep™ Technologies
2.
Check off it is Hidden – If the page is not to be displayed on the
navigation bar, you can hide the contents of the page by checking this box. A
hidden page may contain stored discussions or surveys, for example.
3.
Enter the Location – Select from the drop down list a container you wish
to put this page. It may be any container in this site.
4.
Add Content – The content editor will allow you to put anything you would
like on the page. This could include text, graphics or HTML code.
5.
Click on Save or Cancel
If the page selection is composite then there will be additional data fields to determine.
There are ten (10) data fields. They are:
1.
Enter the Page Title – The default will be the name of the page template.
You can change it to represent any title you would like.
2.
Check off it is Hidden – If the page is not to be displayed you can hide
the contents of the page by checking this box. A hidden page may contain
stored discussions or surveys for example.
3.
Enter the Location – Select from the drop down list a container you wish
to put this page. It may be any container in this site.
4.
Select a Layout – Select a layout based upon those available. You do this
by selecting the radio button next to the layout you wish to use.
5.
Select Section Widths – You will be able to select either a percentage or
pixel width. A percentage will set how wide the page will be. Pixels will set the
width and be interpreted by the users monitor definition. Generally there are
72 pixels to an inch, but that can vary depending on the setup of the user’s
monitor.
6.
Select a Gutter Width – You can set how wide your page edges or the
space between columns and row will be. This will allow you to decide how you
actually display information.
7.
Select Separators – Show either column or row separators. Checking the
box will display them. To clear the separator lines on the page, unclick the
check mark.
8.
Select your Line Color – Based upon any standard hexadecimal number.
This will most likely be in coordination with your site color definitions.
9.
Determine your Line Intersections – Check on the radio buttons
which of the intersections you wish to display if you checked or used line
29
BlueStep™ Technologies
separators. The options are: solid vertical with dashed horizontal, dashed
vertical with solid horizontal and solid vertical with solid horizontal.
10. Click on Save or Cancel
If the page selection is a Text/HTML there will be five (5) data fields. They are:
1.
Enter the Page Title – The default will be the name of the page template.
You can change it to represent any title you would like.
2.
Check of it is Hidden – If the page is not to be displayed you can hide the
contents of the page by checking this box. A hidden page may contain stored
discussions or surveys for example.
3.
Enter the Location – Select from the drop down list a container you wish
to put this page. It may be any container in this site.
4.
Select a Layout – Select from the drop down list a layout based upon
those available.
5.
Select Content – You can put any kind of content you wish inside of the
editor. It can be created in any standard tool and pasted to this editor.
Remember that Java script will be taken off of any material pasted into the
Content Editor.
6.
Click on Save or Cancel
Once you have finished a new page will be created and inserted into the structure where
you have chosen to have it put. You can then decide if you want to re-order the page.
To create pages within pages uses exactly the same progression of steps as creating a new
page. You will just determine where you want to put the page as the location selection in
the creation process. You will also need to populate the page with information. The page
template you chose will determine the content you can use to populate the specific page.
Populating a New Page with Edit Mode
Once you have created a page as Admin, you will have administrative permissions to the
page. If the page is one of the pre-built pages, editing will consist of adding articles,
discussions, etc.
If, however, it is a composite page there will be a tool available to you to manage the
information on the page. The Edit Mode will be displayed in the upper right hand corner
of the page.
30
BlueStep™ Technologies
If the page is a text/HTML page there is an Edit Page icon in the upper right hand
corner. The Edit Page will open an editor that will let you change the basic information
about the page and add content to the page via the content editor. This is a perfect way
to cut and paste code from other pre-built pages to the text/HTML page. It will display
what you cut and past over.
Caution:
Since the Content Editor only works with Internet Explorer, you
will want to do your cutting and pasting with IE, as well.
For a composite page, this utility is a toggle tool meaning that if you click on the tool it
will change to the opposite mode. Clicking on the View Mode will take you to the Edit
Mode. Clicking on the Edit Mode will take you to the View Mode. Opening the Edit
Mode on a page will expose an edit pencil icon for each of the page elements (pagelets)
on that composite page. Depending on whether you are just creating a page or managing
an existing page will determine if there is information on the page or not. If you move
your cursor to the page element icon, a drop down menu will appear that allows you to
use four (4) different utilities associated with any given pagelet on the composite page.
These utilities are:
Selecting any of the first three will take you to
that edit page for that utility. It will also
display the two other tools in a tabbed format
on your screen. You can move between each
of the first three by selecting that tab to open
the editing screen for that utility. Selecting
Save or Cancel in any of the editing screens
will perform that activity and post any changes you may have made to the pagelet. If
you want to delete the contents of the pagelet, select the “Clear This Pagelet” and
click on the Okay when prompted to approve clearing the page.
31
BlueStep™ Technologies
If the page is a text/HTML the editing mode will consist of opening the
information page about the text/HTML page and allows you to change the title as
well as use the Content Editor.
Note:
You cannot remove a pagelet from a page. You can only clear its
content.
USING CONTENT SOURCE EDITOR
The content source editor is designed for you to determine location and the type of
element the pagelet or full text/HTML page will be. Once you have entered the editing
mode by clicking on the Edit button in the upper right hand corner of your composite
page you will be toggled into Edit Mode. Icons displaying the pagelets will be shown on
the page. If you move your cursor over the pagelet edit icon there will be four activities
listed. Clicking on the content source will take you into that editing screen.
32
BlueStep™ Technologies
Custom Content – You may select text/HTML or leave it unchecked. If you select
text/HTML, you will be able to specific the content in the Customize Content tab.
The second field, Source Site, will allow you to select a location from which you may
want to pull content. This will be done from a drop down listing. The feature is designed
for those wishing to use ConnectTM as a dynamic data-publishing tool.
In most cases, you would use the default or the current site. You can select a different
site to draw content from for this pagelet, if you wish. Whether you choose another site
or use the existing site, there are five (5) other radio buttons with multiple selections
available for each content type via drop-down menus. You can select any one of the five
(5) types and any of those available within the selection to define the content source. For
any content source you select you will also be able to define this element for Customize
Content and the Borders and Colors. The five radio button selections are:
Page From Source Site – You will be able to select from a drop-down
menu displaying any page that had been previously created for the content site
you have selected. Selecting an existing page gives you the ability to create
pages with content that can now act as linked sub-pages. If you select one of
the “canned” pages, such as news, discussion or survey, topics will be displayed
in the pagelet in a listing format. You can determine how those listed formats
are displayed under Customize Content. An example of this would be to create
an “About Us” pagelet on your home page and then make that pagelet a link to
a text/HTML page with information about the organization. You can then use
one of the existing pages to create your “About Us” page. Anyone who clicked
on the heading for the pagelet would be taken to this page. You might also use
this as a method to allow users to quickly get to third or lower level pages in
your site since they will not be accessible to them from the site navigation bar
or its second level drop-down menu.
Media Library – Use this to post a picture to the pagelet. You can post
either static or motion graphics to the Media Library. Static graphic files posted
to the pagelet from here will be posted as the size it exists in the Media Library.
For example, if you post a GIF file that is 144 x 144 pixels, it will be
approximately 2” x 2”, dependant on the user’s graphics settings. If you wish to
resize the static graphic, you will need to do so with a graphic editor and repost
it to the Media Library. If the graphic is an animated file like QuickTime,
RealTime or a Flash file, you can set the size of the video display of that item
from the Customize Content screen.
33
BlueStep™ Technologies
Special Content Type – There are six (6) types of special content. They
are:
Page Header – Use of this will likely be in the upper most pagelet and
would represent the ability to display a heading. You might also use it to
delineate a section on your page or to set a section apart with more than the
headings available in the Border settings.
Select Person – Displays a pre-defined record from an individual in your
system.
User Tasks- Defining this content will give the currently logged in user a list
of the tasks from any teams to which they belong. Using this pagelet can
give frequent visitors a quick update or snapshot of their pending tasks.
User Teams – Defining this content will give the currently logged in user a
list of the Teams™ to which they belong. This can be a handy tool to
display a snapshot for users.
Personal Issues – Defining this content will display the issues assigned to
you through the My Office function, if you have it enabled.
Web Search – Defining this content will display the HotBot web
search engine utility.
Site Search – Defining this content will display a data entry search
window and provide a search of the site.
Blank – Defining this content will allow you to create white space on a
page.
Detail Report – Among the many features of Relate™ is the ability to
create custom detail reports on any given record. This radio button allows
34
BlueStep™ Technologies
you to select one of the reports previously created and display the data in
the specified pagelet.
Note:
It is important to remember that for each content type you will be
able to define to a large extent the actual content and
borders/colors.
USING CUSTOMIZE CONTENT
The Customize Content tabbed screen is designed to allow you to further define titles
and additional text that will be displayed as headings and content.
Title and Introduction
You will be allowed to change the title. This is a simple text box and will display the new
name of the content you are defining. For example, the content element might be “Web
Search” and you want to change it to “Surfing the Internet”. Adding this new text in the
title data entry box will make this change for you and display “Surfing the Internet”as the
pagelet title. The title will appear as the header and is based upon what you choose to
display from the Borders and Colors definitions. Depending on the title style, it may
appear to be “outside” the pagelet. Using the Content Editor, you can include literally
any additional text, graphic, color or font you wish.
35
BlueStep™ Technologies
USING BORDERS & COLORS
The third utility available for customizing your content is to determine the borders and
colors of the pagelet element. There are five (5) sections in Borders and Colors. In each
of the sections there will be radio buttons next to the options available. You will be able
to only select a single radio button per section. The sections are:
Title Style
Title style will let you determine how the title of the pagelet will be displayed. Each of the
styles has its own unique layout and will give you the flexibility you need. The table below
will show the eight (8) different styles available and a brief description. See the figure
below for the page shot of the Title Styles.
Name
Description
No Header
Not visible
Icon
36
BlueStep™ Technologies
Title
Square Reversed
Title
Underlined
Heading Only
Quarter
round
Square – Quarter round
Title
Square – Half High – Reversed
Title
Square – Half Round – Reversed
Title Only
Heading Only
–
No attributes
Square – Half Round
Title Icon
The next section offers you the option of displaying an icon in the title or heading of the
pagelet. Many of the content sources will have an icon associated with them. If you chose
to rename the element and there is an icon associated with the element, the icon may not
be appropriate for your new title. You can turn the icon off. The system default is for the
icon to not be displayed. For example; if the content source were a news page the icon
would be the newspaper icon used in Answers4/BlueStep’s products. If you chose to
rename it “Health Watch”, the newspaper icon may not be appropriate. You can then
leave the icon turned off and not have this problem.
Borders
You can determine the borders of the pagelet element. The top border is determined by
the Title you chose for the pagelet. You can now select the left, right and bottom borders.
The color will match the page color layout inherited from the site color.
Tip:
Depending on what you may have chosen for a page layout, its column
and row dividers and the pixel gutter width, you may not wish to use
37
BlueStep™ Technologies
borders
on your pagelets.
Title and Border Color
Your title and border colors can be selected to emphasize either your primary or secondary
color. This is a simple either/or selection with the radio buttons. The primary and secondary
color schemes will filter down from the color selection for the Site. You cannot change a color
scheme for a pagelet or content section.
Body Color
The color of the fill in the pagelet can be clear, a half tone of the primary color or a half tone of
the secondary color.
Tip:
Be careful with using a body-shading fill. You could the information
in the pagelet unreadable.
38
BlueStep™ Technologies
Once you have finished customizing your pagelet, you need to either Save or Cancel the
changes you have made.
USING CLEAR THIS PAGELET
The last pagelet editing feature is clearing the content. Since you cannot delete a pagelet
from the page, cleaning up the information within the pagelet might take some time.
Clicking on the “Clear This Pagelet” will let you empty the contents of the pagelet. The
editor will ask you if you are sure you want to perform this act. Click on OK to finish.
39
BlueStep™ Technologies
Setting/Changing Site Colors
There are fourteen (14) color templates available for the site. Each color template consists of
primary, secondary, accent 1 and accent 2 colors. You can also define your own color scheme
based upon the hexadecimal code for the color. The color schemes will roll down to
subsequent pages within the site.
Fonts are also selected within the site color management screen. They consist of selecting the
font for the body of the site and the header. Currently, Answers4/BlueStep offers nine (9)
font styles. They are:
ARIAL
MS SANS SERIF
TIMES NEW ROMAN
COURIER NEW
MS SERIF
TREBUCHET
HELVETICA
TAHOMA
VERDANA
Sign-Up Options
You can determine different sign up options for each of the sites you create. Once you have
created your sign-up policies, they can be assigned to the site. Click on the Site Admin drop
down menu and click on Site Sign-Up. All of the policies that have been created for the
organization will be available to be assigned to your site. This will also include a “No Sign-Up”
policy. You can select the radio button next to the site policy, assign a customized welcome
message and click on Save.
40
BlueStep™ Technologies
Tip:
By default, sites are set to No Sign-Up. This allows Admins to configure
the site before taking it live. Don’t forget to assign a policy to your site and
allow users to sign up.
Site Administrators
You can assign any registered user the ability to administer your site. This is essentially
giving this person management permission. The difference is that administrators cannot
and will not be blocked by changing permission in subsequent containers. The only method
to block an explicitly assigned site Admin is to remove that person from the admin list. Site
Admins have broad authority to configure and manage your sites. You should not assign
this permission lightly or quickly.
Caution:
Since you cannot block an administration assignment,
Administrators are very powerful entities. The only way to restrict
Admins is to remove the user from administering the site. There is
no way to explicitly remove administration rights.
User Permissions
You can grant permissions to users for access or usage of the site or pages within the site.
To do so, go to the Site Admin home page or the home page of the site and click on the
Site Admin tab and drop-down menu. This will allow you to select Site Structure. From
there you can edit any of the pages for the site or the site itself. Entering the edit mode will
display the general information about the site or page, as well as the Permissions tab.
To determine specific permissions for the site or any of its pages click on the Permissions
tab. You will be taken to the Permissions editing screen. Permissions can be very useful to
either allow or deny access to any given site or page. To add a group or user, click on the
Add Group or Add User icon in the upper right hand corner of the Permissions page.
ADDING GROUP PERMISSIONS TO SITES/PAGES
41
BlueStep™ Technologies
If you select to add permissions to a given site or page, clicking on the Add Group button will
open a list of all of the available groups within the Organization. You can then assign some
given permission level to that group.
Once you have determined the group you want to add, clicking on the group listing will add it
as a security entity for the object. The screen will be closed and you will be returned to the
Permissions page. You can now determine what the level of permission will be set for the
group you have added.
Using Connect
“Using” is something visitors or users will do when they come to a site. Beyond knowledge of
the dashboard and site navigation bars, the users should not have any new skills to learn. Users
will either be non-affiliated visitors to your site or affiliated users. All visitors, whether affiliated
or not, will see a given basic view with a set dashboard navigation bar.
Dashboard
Users of a site will always have the dashboard. The dashboard will give users the beginning
utilities to navigate and move around the site. The dashboard will display utilities based upon
the permissions that have been granted, the roles they may play, groups they may belong to or
Teams™ that they are members of.
42
BlueStep™ Technologies
Greeting
User will be greeted when they visit the site, if they have affiliated with the site in the past. The
greeting will display the time of day and the first name associated with their username. For
example, “Good morning, John”. There is no user intervention allowed with this tab.
My Profile
There is also a navigation tab that will take them to their user profile area, where they can
update or change information about their own account.
PERSONAL INFORMATION
The personal information will be determined by the level and usage of RelateTM. If the
organization has purchased RelateTM, you can determine the number of fields you allow the
users of the site to modify. If you have not purchased RelateTM, then the personal information
section will not be available.
ONLINE ACCOUNT
Users of the site can change basic information about their account. This includes
username, password, re-type password, question we’ll ask and answer. Users can also
determine the e-mail format for announcements from the system. Occasionally, users
will not have a mail system that will accept formatted e-mails. In this case, they should
select the not formatted option to alleviate any formatting issues when they receive
notifications from the system.
43
BlueStep™ Technologies
Logout
Users are encouraged to logout of the site when they leave. This ensures both proper
security and updating of the cookie information written to the computer they are using.
Exiting improperly may create difficulty when logging in the next time. Beyond logging
out and logging in, there is no user intervention allowed.
Search
Users can search the site(s), pages or Teams™ for key words associated with any of these
objects. Using the search capability entails usage of four (4) data fields they are:
1. Enter Search Words – Enter the word(s) you would like to find within the site.
2. Search Criteria – From the drop down select one of the criteria. Those available
are, All Words, Any Words, Exact Phrase.
3.
Search For – Check boxes provide an additional search criteria based upon
location. Those available are: content, news, discussion, surveys, calendar event and
shared files.
4.
Results Per Page – Set the number of listing that will be displayed.
5.
Click on Search
Your search will be performed and a listing of the results will be displayed. Remember that this
search is for the site you are in, not for any external sites.
My Team
Users can view the Teams™ to which they belong. The My Team tab will not be visible for
those users who have not been invited to and have not joined a Team™. If the user belongs to
44
BlueStep™ Technologies
multiple Teams™ , its name will be displayed. Should the user belong to more Teams™ than
can be displayed the My Team list will allow them to go to a screen displaying all of the
Teams™.
Tools
Tools is an administrative tab and can only be accessible to users who have been granted the
organization administrator permissions.
Sites
User who have access to only a single site will not see the sites tab. If the user has access to
more than one site, the sites tab will be visible and will display a listing of the sites to which the
user has been granted access. Should the user have access to more sites than can be listed in
the drop down menu, a site list is shown, allowing them to choose which site to visit.
Creating a Login Account
As part of designing and managing your site, an Administrator created login criteria that is
associated with the sign-up policy tool for your Organization. Users of the site(s) within your
organization will be granted access through the sign-up policy assigned to the site.
Of the four (4) steps to creating a sign-up policy, visitors or users to your site will be impacted
in two different ways. The first is how they actually gain access to the site. They can do so as
new visitors or from an existing list.
45
BlueStep™ Technologies
Visitor Login - Anyone
When you selected or were assigned the sign-up policy for your site, one of the possible
methods would be for anyone to be able to sign-up and use the site. This means that all
your organization is really requiring is for the person to register and will automatically be
allowed access to the page or pages you have created.
If users need to sign-up the first thing they should do is be given your URL for the site.
Connect™ will inform them that they are not currently able to access the site and one of
the options would be I’m a new user and then Sign Me Up.
46
BlueStep™ Technologies
If the user clicks on the Sign Me Up option, they will be taken to the sign-up data entry
screen where they will be required to enter some basic information about themselves.
Member Login
You could also let users sign-up from a pre-established list. With the sign-up policy you could
determine how an individual would find their information and be allowed access.
A final factor to consider is if those signing-up should be automatically granted access or if the
Administrator will need to approve the sign-up.
47