Download User Manual - Kodak PixPro
Transcript
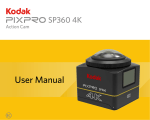
User Manual
PIXPRO SP360
(Smart Device Version)
For
KODAK PIXPRO SP360 Action Cam
Ver. 5.1
Before You Start
Declaration of Conformity
Responsible Party:
JK Imaging Ltd.
Address:
JK Imaging Ltd., 17239 So. Main Street, Gardena, CA 90248 USA
JK Imaging Europe, 71 Clarendon Road, Watford, WD17 1DS, UK
Company Website: http://kodakpixpro.com
About this Manual
JK Imaging Ltd. reserves all rights of this document. No part of this published manual may be reproduced, transmitted, transcribed,
stored in a retrieval system or translated into any language or computer language, in any form, by any means, without the prior written
permission of JK Imaging Ltd..
All trademarks mentioned in this manual are used for identification purposes only and are properties of their respective owners.
This manual will instruct you on how to operate the PIXPRO SP360. JK Imaging Ltd. has tried its utmost to ensure the correctness of the
user manual contents, but reserves the right to modify as necessary.
Throughout this manual, the following symbols are used to help you locate information quickly and easily:
Indicates useful information.
Indicates long pressing a certain point.
Indicates tap a certain point.
1
Matters needing attention
Your smart device operating system version needs to be iOS 7 or higher, or Android 4.2 or higher. iPad mini1 / iPad 2 / iPhone 4s and
earlier models (any system versions) do not support this App.
Please do not use in places having high intensity magnetic field, electrostatic and electric wave interference (for example near a
microwave oven), which may cause failure in receiving signals.
Please do not use Wi-Fi or NFC connection functionality on a plane.
When using the Wi-Fi or NFC connection, the camera and the smart device can only be connected one to one, please keep the camera
within 10 meters (32.8 feet) without signal shielding interference.
When the smart device judges the system to be out of memory, the App will not be able to run normally. Please clean up the memory of
the smart device.
We will update the App from time to time. Some new features require you to synchronously update the firmware version of the camera,
in order to ensure the stability of the system. Please note for the prompt on the App.
2
Contents
Before You Start........................................................................................................................................... 1
Contents........................................................................................................................................................ 3
Connecting the Camera with the Smart Device................................................................................... 5
Download and Install App..................................................................................................................................................................................................5
Establish a Connection........................................................................................................................................................................................................6
Wi-Fi Connections (iOS System and Android System)......................................................................................................................................6
NFC Connections (Android System)......................................................................................................................................................................6
Operation Methods.................................................................................................................................... 8
Position Service Function....................................................................................................................................................................................................8
Remote Viewfinder...............................................................................................................................................................................................................8
Remote Viewfinder Interface...................................................................................................................................................................................8
Parameter Settings...................................................................................................................................................................................................10
Shooting Mode...............................................................................................................................................................................................10
Unfold Mode...................................................................................................................................................................................................11
View Mode......................................................................................................................................................................................................12
Level Sensor....................................................................................................................................................................................................13
EV settings......................................................................................................................................................................................................13
3
White Balance................................................................................................................................................................................................14
Menu................................................................................................................................................................................................................15
Shooting Method......................................................................................................................................................................................................22
Shooting...........................................................................................................................................................................................................22
Video Recording.............................................................................................................................................................................................23
Playback................................................................................................................................................................................................................................24
Switching of the Remote Viewfinder Mode and the Playback Mode............................................................................................................24
Switching Camera and Smart Device Index Playback......................................................................................................................................25
Introduction of the Icons in the Playback Mode................................................................................................................................................26
Single Playback...............................................................................................................................................................................................26
Index Playback................................................................................................................................................................................................27
Description of the Functions in the Playback Mode.........................................................................................................................................28
Gestures in the Playback Mode..................................................................................................................................................................28
(Smart device single playback mode)..................................................................................................................................28
Rotate
Select One or More File(s) (Camera and Smart device index playback mode)...............................................................................29
(Camera Single playback and index playback mode)................................................................................................31
Download
Share
.........................................................................................................................................................................................................33
Delete
.......................................................................................................................................................................................................34
Play the Video
Menu
(Camera and Smart device single playback mode)............................................................................................36
(Camera and Smart device index playback mode)............................................................................................................37
4
Connecting the Camera with the Smart Device
Download and Install App
Please download App installation package
(App name: PIXPRO SP360) to your smart device from the path below and install it.
Android system
For Android devices, search and download the App “PIXPRO SP360”
the interface.
in Google play, and install it following the instructions on
https://play.google.com/store/Apps/details?id=com.jkimaging.pixproremoteviewer
iOS system
For Apple devices, search and download the App “PIXPRO SP360”
interface.
in App store, and install it following the instructions on the
https://itunes.Apple.com/us/App/pixpro-remote-viewer/id833154167?mt=8
After successful installation, this icon
will appear on the smart device screen.
5
Establish a Connection
1 Wi-Fi Connections (iOS System and Android System)
1. Camera:
Check SSID (PIXPRO-SP360_XXXX) and password (initial password: 12345678) indicated on the label in the battery
compartment of the camera. In the main interface, press the
button to switch to Wi-Fi mode.
2. Smart Device: Enable Wi-Fi mode, it will automatically search the nearby Wi-Fi hotspots. Select the camera’s SSID
(PIXPRO-SP360_XXXX) and input the password.
To optimize Wi-Fi performance, please close other unnecessary programs running on the smart device.
For an Android system smart device, you can directly tap the App icon
to enter the "Select connecting device" screen.
Select the SSID name of the camera to be connected, enter an eight-digit password, and tap "Connect".
2 NFC Connections (Android System)
1. Enable NFC mode on your smart device.
2.Use your smart device to slightly touch the NFC mark on the camera; if the smart device has a prompt tone or vibration, it means
the connection is successful.
3.The App will open automatically on your smart device.
The NFC feature will only be available when your smart device's screen is unlocked.
After having a successful connection of your smart device with an camera, if you use a different camera to touch the same
smart device, the previous connection will be replaced.
6
If connection fails, tap
to try to reconnect.
Connection Failed!
XXXXXXXXXXXXXXXXXXXX
•XXXXXXXXXXXXXXXXX
•XXXXXXXXXXXXXXXXXXXXXXXXXXXXXXX
XXXXXXXXXXXX
•XXXXXXXXXXXX
•XXXXXXXXXXX
•XXXXXXXXXXXXXXXXX
When it is unnecessary to connect to the camera or unable to connect the camera, tap the icon
device to perform related operations under the playback mode of the smart device.
on the screen of the smart
7
Operation Methods
Position Service Function
When connected successfully, you can tap the App icon (
) to start it. Enable the GPS function on the smart device by following the
prompts on the interface, PIXPRO SP360 can record GPS location on picture files. This function is not available for video files.
Remote Viewfinder
1 Remote Viewfinder Interface
On the Remote Viewfinder interface, tap
1234567
, EV value and White balance icons to hide, and tap
1234567
to restore display.
1234567
8
Shooting interface
Movie interface
1415 1617
67 8
5
4
3
1234567
1234567
9
10
18
(
)
2
1
13 12
20 19
11
1
Shooting mode
6
Battery state
11
Quick Review
16
Pixel ratio
2
Unfold mode
7
Image size
12
Shutter
17
Frame rate
3
EV value
8
Number of photos that
can be taken
13
View mode
18
Level Sensor
4
White balance
9
EIS
14
Movie size
19
Playback
5
Menu
10
No memory card in the
camera
15
Recordable video time
20
Start video recording
/
Stop video recording
9
2 Parameter Settings
Shooting Mode
Tap the Shooting Mode icon to enter the Mode Selection screen. Tap any of the options to confirm selection.
1234567
Loop Recording
Loop recording allows for the recording of independent segments of movies according to selected time length from the beginning
of recording. The product will continually record movies of the length selected until the record button is pressed to end recording.
When the memory card is full, the product will overwrite the recorded files starting from the first movie circularly.
To use this feature, a memory card needs to be inserted into the camera.
Movie mode
Enables video recording.
Auto Mode
Enables photo shooting.
10
Unfold Mode
Select from several different viewing effects.
1234567
Type
Square
Spherical
Icon
Mode
Operating methods (moving via sliding the finger around)
Front
-
Panorama
Move to the left/right
Seg
Move up/down (Enlarge image) , move to the left/right
Ring
Flip up/down, move to the left/right
Magic flat
Move up/down, move to the left/right
Dome
Flip up/down, move to the left/right
11
View Mode
Select the icon according to the direction that the camera lens is facing, so the image will be displayed in the upright direction.
1234567
Icon
Mode
Up
Down
1234567
Description
Means the image will be displayed upright when the lens is facing upward.
Means the image will be displayed upright when the lens is facing downward.
In the Front mode, this function is not displayed.
12
Level Sensor
Detect the horizontality of the camera.
Horizontal and vertical bar represent two directions parallel to sea level. Set the center of the horizontal bar and the center of
vertical bar as base points. There are 15 sections on both up and down side from the base point for the vertical bar and 15 sections
on both left and right side from the base point for the horizontal bar. Each section represents inclination of 1°. When the tilt angle is
more than 50°, the axial directions corresponding to the horizontal bar and vertical bar will change.
+Z
-Y
-X
+Z
-X
-Z
+Y
-X
+Y
0°
+Z
-Y
-Z
-Y
+X
+X
-Z
5°
5°
+Y
+X
5°
0°
5°
EV settings
Adjust the brightness of framing interface. It is applied to the circumstance where the contrast of shot subject and background
brightness is relatively large.
EV value can be adjusted through sliding a finger up and down.
1234567
+0.7
+0.3
0.0
13
White Balance
The WB function allows the user to adjust color temperatures under different light sources, so as to confirm that the color can be
presented properly.
1234567
There are 5 options:
•
AWB
•
Daylight
•
Cloudy
•
Fluorescent
•
Underwater
14
Menu
Tap
to show a settable menu. Tap the Menu Items to be set to enter the Item Options screen. Tap Options to return to the Menu
screen. Tap
to return to the Remote Viewfinder screen.
Menu
1234567
Image Size
2M 16:9
Moive Size
FHD 16:9 30p
Loop Recording
10 min.
EIS
On
Level Sensor
On
Power Off
Off
Wi-Fi Saving
Off
Touch Capture
Image Size
Set photo resolution.
There are 3 options:
•
10M 1:1
3264 X 3264
•
5M
2592 X 1944
•
2M 16:9
1920 X 1080
15
Movie size
Set video resolution.
There are 9 options:
•
FHD 16:9 30p (1920 X 1080)
•
1440x1440 1:1 30p
•
1280x960 4:3 50p
•
1280x960 4:3 30p
•
1280x720 16:9 60p
•
1280x720 16:9 30p
•
1072x1072 1:1 30p
•
848x480 16:9 60p
•
848x480 16:9 120p
When recording in higher pixel resolutions for extended periods of time, the camera may get warm. This is not a camera
malfunction. Please shut down until the body temperature is lowered, and then start to use.
Select 120fps as the frame rate of movie size to carry out high-speed video recording. The product shoots ultra high speed
movies, and plays back with normal 30fps speed, in order to capture visually indistinguishable moments easily.
① The sound cannot be recorded.
② It does not support electronic image stabilization (EIS).
③ The maximum recordable time is 60 seconds, when the time reaches 60 seconds, the product will automatically stop
recording.
16
Loop Recording
Set the time period for Loop Recording.
There are 2 options:
•
5 min. (
)
•
10 min. (
)
EIS (Electronic Image Stabilization)
Set the electronic image stabilizer switch.
There are 2 options:
•
Off
•
On (
)
EIS (Electronic Image Stabilizer) is only optional under 1072x1072 1:1 30p size.
Level Sensor
Set the level sensor.
There are 2 options:
•
On
•
Off
This feature is only actived in the front unfold mode (
).
17
Power off
When this function is enabled, if there are no actions taken within a set time frame (except while recording), the product will
automatically shut down.
There are 3 options:
•
Off
•
5 min.
•
10 min.
Wi-Fi Saving
The Wi-Fi will automatically disconnect if you do not touch the smart device screen within three minutes after starting to record.
However, the Camera will continue recording.
There are 2 options:
•
On
•
Off
Touch Capture
Tap the Touch Focus icon or enter the menu for setting.
There are 2 options:
•
On
•
Off
18
Format SD (DSC)
Clear all data stored in the camera or the memory card.
There are 2 options:
•
FORMAT
•
CANCEL
Reset
Reset settings ( except for Date and time, Wireless AP point SSID and password, UID and password in the "remote monitoring") can
recover all product settings to the factory defaults.
There are 2 options:
•
RESET
•
CANCEL
After resetting, the camera will power off automatically.
19
Change Password
Change the Wi-Fi connection password.
Enter the old password according to the screen tips, and then enter the new password twice, and finally Tap “Update”.
If you forget the Wi-Fi connection password, you can use the reset function on the camera to reset it (initial password:
12345678).
Please enter the new password on smart device after changing Wi-Fi password. Some models of smart device will remember
the Wi-Fi password previously entered, so please clear the old password on smart device manually before connection (For
different models, this operation may be varied, please subject to your user manual).
Android system
iOS system
1
2
1
3
2
About
• View the current version of the App.
• View the firmware version of the camera in the App connection status.
• Tap the official website on the interface and you can go to the website for more information.
20
Menu that can be adjusted under each mode: ( O: Optional X: Not optional ).
Mode
Menu Items
/
/
/
/
/
/
/
/
/
/
/
/
EV value
X
X
O
O
O
O
White balance
O
O
O
O
O
O
Unfold mode
O
O
O
O
O
O
View mode
X
O
X
O
X
O
Size
O
O
O
O
O
O
Loop Recording
O
O
X
X
X
X
EIS
X
O (1072x1072 1:1 30p)
X
O (1072x1072 1:1 30p)
X
O (1072x1072 1:1 30p)
Level Sensor
O
X
O
X
O
X
Power Off
O
O
O
O
O
O
Wi-Fi Saving
O
O
O
O
O
O
Touch Capture
X
X
X
X
O
O
21
3 Shooting Method
All files are saved on the memory card of the camera.
Select
/
/
/
/
, and the stored video or photo files are global; select
, and the stored video or photo
files are square.
Shooting
1. Align the camera lens with the shooting subject, and confirm viewing through the screen of the smart device.
2. Tap the icons on the interface to set the corresponding parameters.
3.Tap
to take a shoot.
1234567
22
Video Recording
Tap the Shooting Mode icon on the Shooting screen to enter the Mode Selection screen, and tap
screen.
to enter the Video Recording
1. Tap the icons on the interface to set the corresponding parameters.
2.Tap
to start recording and then tap
to stop.
1234567
In the video recording process, tap
00:00:10
to shoot without affecting the video recording.
23
Playback
There are two playback modes: •. Single playback (movie / photo);
•. Index playback (camera/smart device).
1 Switching of the Remote Viewfinder Mode and the Playback Mode
1. Tap the review, and enter the camera Single playback interface.
2.Tap
to enter the index playback interface.
3.Tap any small figure to enter the single playback interface.
4.Tap
to enter the remote viewfinder interface.
Remote Viewfinder
interface
Single playback
interface
Index playback
interface
2
1234567
4 JUL 2014
3
1 JUL 2014
21 JUN 2014
1
24
2 Switching Camera and Smart Device Index Playback
1. On the camera index playback interface, tap
2.On the smart device index playback interface, tap
to enter into the smart device index playback interface.
to enter into the camera index playback interface.
Camera
index playback interface
Smart device
index playback interface
4 JUL 2014
4 JUL 2014
1 JUL 2014
1 JUL 2014
21 JUN 2014
21 JUN 2014
On the smart device index playback interface, tap a small figure to enter into the smart device Single playback interface.
On the camera index playback interface, tap a small figure to enter into the camera Single playback interface.
25
3 Introduction of the Icons in the Playback Mode
Single Playback
Smart device
Camera
Photo playback
interface
Video playback
interface
Photo playback
interface
Video playback
interface
00:02:00
Enter index playback screen
Share the current photo or video to social networks
Photo or
video
Delete the current photo or video
00:02:00
Enter photo or movie mode
Download the current photo or video to the smart
device
Rotate the photo
Play the video
Spherical
photo or
video
Switching to the previous photo or video
Switch to the next photo or video
The image is displayed in an erected direction
The image is displayed in an inverted direction
Panorama
Seg
Ring
Magic flat
Dome
26
Index Playback
Smart device
Camera
1
1
4 JUL 2014
4 JUL 2014
4 JUL 2014
4 JUL 2014
1 JUL 2014
1 JUL 2014
1 JUL 2014
1 JUL 2014
21 JUN 2014
21 JUN 2014
21 JUN 2014
21 JUN 2014
Menu
Return to the previous interface
Enter photo or movie mode
To select all files
Select multiple files to share
Enter the download mode to move the files in the
camera into the smart devices
Select multiple files to delete
Video file
27
4 Description of the Functions in the Playback Mode
Gestures in the Playback Mode
1. Hide/display the icons: Single finger tap the photo or video once.
2. Zoom in the photo or video (except for front video): Quickly tap the photo or video twice or use two fingers apart to expand the
photo or video (Sliding a finger to move around the photo or video).
Zoom out the photo or video (except for front video):Quickly tap the photo or video twice again, and it will restore the original
size or use two fingers folded to reduce the photo or video.
3.Browse fore-and-aft files: Tap
Rotate
/
with one finger.
(Smart device single playback mode)
Rotate the photo by 90° (Only for front photo).
Tap
, the photo will rotate 90 counter-clockwise each time this icon is pressed.
28
Select One or More File(s) (Camera and Smart device index playback mode)
1. Long press a file thumbnail to enter the Multiple-selection screen.
1
4 JUL 2014
4 JUL 2014
1 JUL 2014
1 JUL 2014
21 JUN 2014
21 JUN 2014
2.View fore-and-aft files by sliding a finger up and down on the screen.
1
4 JUL 2014
1 JUL 2014
21 JUN 2014
29
3.Select one or more file(s).
3.1. Tap
after date folder (
) to select all files under the date folder;
1
4
4 JUL 2014
4 JUL 2014
1 JUL 2014
1 JUL 2014
21 JUN 2014
21 JUN 2014
3.2. Tap a file thumbnail to select a single file (tap again to cancel the selection);
4
5
4
4 JUL 2014
4 JUL 2014
4 JUL 2014
1 JUL 2014
1 JUL 2014
1 JUL 2014
21 JUN 2014
21 JUN 2014
21 JUN 2014
30
3.3. Tap
to select all files; tap
to cancel the selections and return to the Index Playback interface.
34
4
Download
4 JUL 2014
4 JUL 2014
4 JUL 2014
1 JUL 2014
1 JUL 2014
1 JUL 2014
21 JUN 2014
21 JUN 2014
21 JUN 2014
(Camera Single playback and index playback mode)
Download the photos or movie in the camera to your smart device.
Camera Single playback mode:
1. Select the file you want to download, and tap
2.Tap
to start downloading.
in the downloading process, and select “YES” in the pop-up interface to cancel downloading.
3.After downloading is complete, tap
to return to the playback interface.
31
1
1/1
Download Finished!!
Download Successful : 1
Download Failed : 0
2
3
Camera index playback mode:
1. Select one or more file(s) you want to download, and tap
2.Tap
to start downloading.
in the downloading process, and select “YES” in the pop-up interface to cancel downloading.
3.After downloading is complete, tap
to return to the playback interface.
32
Share
Share the photos or videos to the social network site.
Camera single playback and index playback mode:
1. Select one or more file(s) you want to share, and tap
2.Tap
to start downloading.
in the downloading process, and select “YES” in the pop-up interface to cancel downloading.
3.After the download is completed, the photos or videos on the smart device can be shared.
• When the mobile data network is open: Select the social network site to share.
• Mobile data network not open:
iOS system
Please share according to the interface prompt.
Android system
1
XXXXXXXXXXXXXXXXXXXXXXXXXXXXXX
XXXXXXXXXXXXXXXXXXXXXXXXXXXXXX
XXXXXXXXXXXX
N/N
SETTING NETWORK
2
CANCEL
3
「SETTING NETWORK」: Open mobile data network or Wi-Fi for internet access.
「CANCEL」: Cancel sharing.
33
After the “SETTING NETWORK” is selected and the network is switched, the interface has 3 options:
“SETTING NETWORK”: Change the network settings.
“SHARE”: Select the social network site to share.
“CANCEL”: Cancel sharing.
When the network is changed, the App will close automatically.
Smart device single playback and index playback mode:
Please share according to the operating methods for sharing in single playback and index playback mode of the camera.
Delete
Delete the selected photos or videos.
Index playback mode:
1. Select one or more file(s) you want to download, and tap
.
2.Select “DELETE” to confirm the deletion in the pop-up prompt screen.
34
Single playback mode:
1. Select the file you want to delete, and tap
.
2.Select “DELETE” to confirm the deletion in the pop-up prompt screen.
Android system
iOS system
Would you like to Delete?
CANCEL
DELETE
DELETE
CANCEL
35
Play the Video
(Camera and Smart device single playback mode)
Slow wireless transmission may impact viewing. We suggest downloading the file to your device before viewing.
1.Tap
to play the video.
2.Tap
to pause the video.
3.Tap
to continue the video.
4.Tap
to return to the previous interface.
00:02:00
00:01:12
00:02:00
00:01:12
00:02:00
If the smart device does not support the video resolution of 1440 x 1440(30fps), the screen will be black while playing the
video. Please use SP360 model (PC version) then.
36
Menu
(Camera and Smart device index playback mode)
1.Tap
or slide from the left to the right of the screen to
display the menu.
Menu
4 JUL 2014
Download Size
Original
2.Tap your desired setup item.
YouTube
Login
3.Tap the option to return to the Menu.
4.Tap
About
to return to playback interface.
1 JUL 2014
Download Size
Set the download size.
21 JUN 2014
There are 2 options :
• Original
• 2M / VGA (Image Size is 2M / Movie Size is VGA)
YouTube
This option is only under the iOS system.
About
See Page 20 for explanations.
37
The Kodak trademark and trade dress are used under license from Kodak.
© 2015 JK Imaging Ltd. All Rights Reserved.
JK Imaging Ltd., 17239 So. Main Street, Gardena, CA 90248 USA
JK Imaging Europe, 71 Clarendon Road, Watford, WD17 1DS, UK
http://kodakpixpro.com


