1
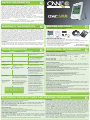
STEP ONE
INSTALL
INSTALLARE
BATTERIES
LE BATTERIE
STEP TWO
SYNCHRONISE
SINCRONIZZARE
UNITS
LE UNITA’
Using
head or flatabladed
removeil
Usarea cross
un cacciavite
croce screwdriver,
per rimuovere
the
Sender Unit
compartment
cover and insert
coperchio
del battery
vano batterie
del Trasmettitore
ed 3
AA
batteries.
Press and
the RESET
button
located
inserire
3 batterie
AA.hold
Tenere
premuto
RESET
sul
on the rear of the Transmitter.
Press
and
hold theCHECK
CHECK
keyparte
on the
front of the
until thefino
redaLED
Tenere
premuto
nella
anteriore
del Sender
Trasmettitore
che flashes.
il LED non si illumina
Slide the rear battery compartment off the Display Unit.
Togliere il coperchio del vano batterie del Monitor
Insert 3 AA batteries in the Display Unit. You will hear a
ed inserire
short
beep. 3 batterie AA. Verrà emesso un beep.
Le two
due units
unitàwillverranno
connesse.
processo
potrebbe
durare 2Once
minuti.
Una volta
The
now connect.
PleaseQuesto
note, this
may take
up to 2 minutes.
connected
the
connesse
del top
segnale
si illuminerà
verrà
un in0
radio
wave l’icona
icon in the
left ofwireless
the screen
will be fully completamente
illuminated and ae“0”
will mostrato
be displayed
the
main
display.
(zero)
nella
pagina principale del Monitor.
retro del Trasmettitore.
Premere
SEARCH key,
nellalocated
parte on
posteriore
Verrà
beep.beep.
L’icona
Press
the SEARCH
the rear ofdel
theMonitor.
Display Unit.
Youemesso
will hearuna short
Thedel
segnale
wireless,
sinistraofdella
schermata
iniziale,
lampeggerà.
radio
wave
icon, innell’angolo
the top left alto
handa corner
the main
screen,
will flash.
You
can position
Display
Unit up to
30ad
metres
away from
the Sender
Il Monitor
potràthe
essere
posizionato
fino
una distanza
massima
di 30 metri dal Trasmettitore
(subject
to building
construction).
(la costruzione
della
casa potrebbe influire su questo dato)
Se la
sincronizzazione
If the
fallisce gira il
synchronisation
fogliofails
per turn
process
sapere
over tocosa
findfare
out
what to do
Il pulsante CHECK
STEP THREE
PROGRAMMING
IMPOSTARE
L’indicatore del segnale wireless
Il pulsante SEARCH
Partendo dall'alto a sinistra, seguire queste istruzioni per
Starting at the top, left hand side, follow these
impostare
completamente
e programmare
Monitor
instructions
to fully set-up
and programme
your Wireless
monitor.
INDICATORE SEGNALE INDICATORE MODALITA’
Il Monitor Wireless ha tre schermate.
SCHERMATA TEMPO REALE
The
main screen
displays mostra
real time
data.
lower
left La
hand
screen
the time,mostra
date and
La schermata
principale
i dati
in The
tempo
reale.
sezione
in displays
basso a sinistra
la
room temperature. The lower right hand screen displays accumulated and average data to date.
data, l'ora e la temperatura ambiente. La sezione in basso a destra mostra il consumo
You will hear a short beep every time you press one of the keys, MODE, ADJUST, SET. We
complessivoyou
finouse
ad the
oggi.sound
Vienetoemesso
un program
breve beep
volta
che si preme
uno
dei tasti,
recommend
help you
the ogni
settings
accurately.
If you
would
prefer
MODE,
ADJUST,
SET.
Se
si
preferisce
non
sentire
il
segnale
acustico,
è
possibile
disattivare
not to hear the beep, you can turn the sound off by pressing the MODE and ADJUST keys at the
l'audio
tenendo
perWhen
2 secondi
il tasto
MODE
e is
ADJUST
contemporaneamente.
same
time.
Hold forpremuto
2 seconds.
the sound
indicator
icon
no longer
visible, the sound has
Quando
l'icona
indicatore
del
suono
non
è
più
visibile,
il
suono
è
stato
spento.
Perpress
riattivare
il
been turned off. This icon is only visible when the sound is on. To resume
sound,
the two
keys
again
and
hold
for
2
seconds.
You
will
hear
a
short
beep
and
the
sound
indicator
icon
will
segnale acustico, ripetere la procedura. Verrà emesso un segnale acustico e l’indicatore
reappear
riapparirà.
A. ORA/OROLOGIO:
Press
and
hold theilSET
younon
hearviene
a beep.
SET un
iconbeep.
will appear
bottom
left hand
corner.
Tenere
premuto
tastokey
SETuntil
finché
emesso
L’iconainSET
apparirà
in basso
a
CLOCk will be displayed.
sinistra. Verrà visualizzato CLOCK. Premere nuovamente SET. Premere ADJUST o MODE per
Press SET again. Press ADJUST or MODE key to display the time in either 12 hour clock or 24
visualizzare nella modalità 12 o 24 ore. Premere SET per confermare.
hour clock mode. Press SET to confirm.
Verrà will
visualizzato
HOUR.
Premere
il tastoorADJUST
MODE
l'ora
corretta.
HOUR
be displayed.
Press
the ADJUST
MODE okey
to setper
the impostare
correct hour.
Press
SET to
Premere
SET
per
confermare.
confirm.
Verrà will
visualizzato
MINU.
Premere
il tastoorADJUST
MODE
i minuti corretti.
MINU
be displayed.
Press
the ADJUST
MODE okey
to setper
theimpostare
correct minutes.
Press
SETSET
to confirm.
Premere
per confermare.
SCHERMATA
CONSUMO
COMPLESSIVO
SCHERMATA
ORA, DATA E
TEMPERATURA
AMBIENTE
ICONA SET
B. DATA:
Press
SETSET
to set
date. DDMM
(Day/Month/Year)
will be
displayed.
Press ADJUST orPremere
MODE if
Premere
perthe
impostare
la data.
Verrà visualizzato
DDMM
(giorno/mese/anno).
wish toochange
datesidisplay
to MMDD
(Month/Day/Year).
Press SET
to confirm.
will be
you
ADJUST
MODEthese
desidera
cambiare
la visualizzazione
della
data YEAR
di MMDD
Default setting
10confermare.
(2010). PressVerrà
SET visualizzato
to confirm orYEAR.
ADJUST
or MODE todichange
displayed.
(mese/giorno/anno).
SETisper
L'impostazione
defaultthe
è
year. Press SET to confirm.
10 (2010). Premere SET per confermare o ADJUST o MODE per modificare l'anno. Verrà
MNTH will be displayed. Press ADJUST or MODE to set the month. Press SET to confirm. DAY will be
visualizzato MNTH. Premere ADJUST o MODE per impostare il mese. SET per confermare.
displayed. Press ADJUST or MODE to set the day. Press SET to confirm.
Verrà
visualizzato
Premere ADJUST o MODE per impostare il giorno. SET per confermare.
TAR 1(tariff)
will be DAY.
displayed.
C. TARIFFA:
Your OWL
be programmed
with
up ad
to 6un
different
tariffdisettings,
allow for different
tariff ratesil
L’OWL
puòcan
essere
programmato
fino
massimo
6 tariffeto differenti,
per consentire
according
to
time
and/or
days
of
the
week.
TAR
1
is
your
main
setting.
You
can
choose
to switch
monitoraggio ottimale a seconda dell’ora e/o giorni. TAR 1 è l'impostazione principale.
Si può
TAR
2-6
settings
on
or
off,
depending
which
apply
to
you.
scegliere di attivare/disattivare TAR 2-6, in caso di necessità. Premere il tasto SET ed £
Press the SET key again and £ will flash in the left hand side of the screen or the Pence will flash
lampeggerà sul lato sinistro dello schermo o CENTS sul lato destro dello schermo. Premere il
on the right hand side of the screen.
tasto
o ADJUST
per scegliere
inserire
costo
in rate
£ all'ora
centesimi
all'ora.per
SET
per
PressMODE
the ADJUST
or MODE
key anddichoose
to ilenter
your
as £ o
per
hour or pence
hour.
confermare.
Controlla
la
tua
tariffa
ed
inserisci
il
costo,
ad
esempio
10,50
centesimi,
utilizzando
il
Press SET to confirm.
tasto
ADJUST
o the
MODE.
Premere
SET per
confermare
ed inserire
la e.g.
cifra10.50
successiva.
Continua
The first
digit of
rate will
flash. Check
your
tariff and enter
your rate.
pence using
the
ADJUST
or MODE
key.
questa
sequenza
fino
a quando tutte e quattro le cifre sono state impostate. SET per confermare.
Press
SET
to visualizzato
confirm andnella
enterschermata
the next digit.
Continue
sequence
until all fourlampeggeranno
digits of your
W.
DAY
sarà
principale
ed this
i giorni
della settimana
been set.
Press aSET
to confirm.
rate have
nella
schermata
in basso
sinistra.
Premere ADJUST o MODE per scegliere la tariffa. Scegli tra i
W.DAY will be displayed in the main screen and the days of the week will flash in the lower left hand
cinque
giorni della settimana MON-FRI, solo il fine settimana SAT-SUN, o per tutta la settimana
screen. Press ADJUST or MODE to choose your tariff rate period. Choose between the five week
MON-SUN.
SET per confermare. Verrà visualizzato HOUR e la prima cifra dell'orologio, nello
days, MON-FRI, or weekend only, SAT-SUN or all week, MON-SUN. Press SET to confirm.
schermo
in
basso
a sinistra,
ADJUST
impostare
di inizio
per questa
HOUR will be displayed
andlampeggerà.
the first digit Premere
of the clock
in theper
lower
left handl'ora
screen
will flash.
Press
tariffa.
SET
per
confermare.
Verrà
visualizzato
MINS.
Premere
ADJUST
o
MODE
per
impostare
i
ADJUST to set the start time hour for this tariff rate. Press SET to confirm.
minuti.
L’ora
d’inizio
per
questa
tariffa
è
stata
impostata.
SET
per
confermare.
Verrà
visualizzato
MINS will be displayed. Press ADJUST or MODE to set the minutes. You have now set the specific
start2time
for this
tariff.
Press
to confirm.
TAR 2 andSET
OFF
will be displayed.
TAR
ed OFF.
Entra
negli
altriSET
menù
tariffe premendo
o MODE
per saltare. Continua questa
Enter
other
tariff
menus
by
pressing
the
SET
key
or
MODE
to
skip.
sequenza per tutte le variazioni di tariffa, premendo il tasto SET per confermare.
Continue
this sequence
all variations
in tariff rate and time, pressing SET to confirm.
Verrà
visualizzato
ALARMforimpostato
su OFF.
ALARM will be displayed and OFF.
D. ALARME:
Press theilSET
keySET.
again.
will flash innella
the window.
this setting
you would likeseansi
Premere
tasto
OFFOFF
lampeggerà
finestra. Change
Modificare
questa ifimpostazione
to
sound
when
the
usage
peaks
above
a
specified
rate.
alarm
desidera che si attivi un allarme al superamento di una soglia pre-impostata. Premere ADJUST o
Press ADJUST
or MODE
change
to ON.
Press SET L'impostazione
to confirm. The default
setting
is 10.00
kW.È
MODE
per impostare
su toON.
SET per
confermare.
di default
è 10,00
kW.
You can choose to change this from 0 up to 999.9 kW. Press the ADJUST or MODE key to set the
possibile scegliere di cambiare questa soglia da 0 fino a 999,9 kW. Premere il tasto MODE o
maximum rate to trigger the alarm.
ADJUST
perdigit
impostare
sogliaSET
massima
per far
attivare
l'allarme.
Dopo ogni modifica, premere
After each
change,lapress
to confirm.
Press
the SET
key again.
SET
per
confermare.
Verranno
visualizzati
CURR
ed
il
simbolo
£.
CURR will be displayed and a £ sign.
E. VALUTA:
Your default setting
is £pounds
sterling.Verrà
This visualizzato
will display the
costdel
of your
energy
consumption
in
L'impostazione
di default
è £ sterline.
il costo
vostro
consumo
nella
your chosen
valuta
scelta.currency.
Premere il tasto SET se si desidera scegliere una valuta differente. Le opzioni
Press the SET
key€,again
you
a different
are la€, valuta
$, ¥, F, P, R,
disponibili
sono
$, ¥,if F,
P,wish
R e to
Kr.choose
Premere
ADJUSTcurrency.
o MODEYour
peroptions
scegliere
& kr. Press ADJUST or MODE to choose the correct currency. Press SET to confirm.
corretta. SET per confermare. VOLT e 230 verranno visualizzati.
VOLT and 230 will be displayed.
F. VOLTAGGIO:
Your default setting
is 230 èVolts.
L'impostazione
di default
di 230 Volt. Premere il tasto SET se si desidera scegliere una
Press the diversa.
SET key Le
if you
wish tosono
choose
different
voltage.
options
are between
100per
and 400
tensione
opzioni
tra a100
e 400
volt. Your
Premere
ADJUST
o MODE
volts.
Press
ADJUST
or
MODE
to
set
the
correct
voltage
for
your
country.
Press
SET
to
confirm.
impostare la corretta tensione. SET per confermare. °C e TEMP verranno visualizzati.
°C and TEMP will be displayed.
STEP FOUR
Identify live iloutgoing
supply cable toin electricity
Identificare
cavo di alimentazione
uscita dal
meter (usually
grey, (di
redsolito
or brown
androsso
located
contatore
elettrico
grigio,
o on
you look
at the
meter).
the right as
marrone
e situato
sulla
destra
di chi guarda il
Unclip the Sensor and fit around live cable. Snap
contatore).
Sganciare il sensore e montarlo
the clip shut to fasten securely in place (see the
attorno al cavo (non è necessario “sbucciare” il
images to the right).
cavo). Far scattare la clip per fissare saldamente
in posizione (vedere l’immagini a destra).
Please Note: It is normal for the sensor
to be loose fit or be able to slide along the
Nota:
cable.è normale che il sensore sia lento o in
grado di scorrere lungo il cavo.
?
Installazione
tri-fase? Gira il
If you have a
foglio
per
3-phase
scoprire turn
come
over
installation
connettere
to find
out how to
connectOWL
OWL
LOCATE
IDENTIFICARE
OUTGOING
IL CAVO
CABLE
INDICATORE
SUONO
(mostrata
quando in
modalità SET)
PORTA
CONNESSIONE
MINI-USB
INDICATORE
TARIFFA
?
Per scoprire il
costo della
To find out what a
tariffa,
girare
tariff rate is, simply
ilturn
foglio
overper
the
maggiori
sheet
for more
informazioni
information
INDICATORE BATTERIA
TASTI DI NAVIGAZIONE
(mostrata quando le batterie nel
monitor/trasmettitore sono
scariche)
Se avete una
tariffa a fasce,
girare il foglio
per scoprire
come settare
OWL
ICONA USB
(mostrata quando
collegato al pc)
? ? ?
Cos’è la
funzione
What is the
ALARM?
ALARM
function?
Turn
over ilthis
sheet
Girare
foglio
to
find
out.
per scoprirlo
Vuoi
visualizzare lo
Want to view your
storicodata?
dei We
historical
dati?
Gira
show you howil on
foglioside
perof
the other
sapere
come
this sheet.
Volete
collegarlo al
Want to connect
PC?PC?
LeFull
to your
istruzioni
instructions
nel on
CDthe
aresono
included
allegato
CD.
enclosed
G. TEMPERATURA:
L'impostazione di default è gradi centigradi (°C). È possibile scegliere di visualizzare la
temperatura in Fahrenheit (°F). Premere ADJUST o MODE per cambiare. SET per confermare.
Verranno visualizzati GHG e 0.46kg/kwh.
H. GREEN HOUSE GAS:
L’OWL
puòcan
calcolare
la quantità
di emissioni
CO2 per per
unità
di of
energia
elettrica
Your
OWL
calculate
the amount
of CO2 di
emissions
unit
electricity
used.utilizzata.
You haveSono
four
displaying
this data.
each option you
realdati.
timeCon
dataogni
and opzione
accumulated
data.
options for quattro
disponibili
opzioni
per With
la visualizzazione
di have
questi
verranno
Real
time data
is in
shown
in reale
the main
screen.
Accumulated
is displayed
in the lower
right nella
hand
visualizzati
i dati
tempo
e quelli
accumulati.
I datidata
in tempo
reale vengono
mostrati
screen.
You
can
choose
to
display
this
data
in
either
metric
or
imperial
values.
schermata principale. Quelli accumulati vengono visualizzati nella schermata in basso a destra. È
Press the SET key. The measures will flash in both the main screen and lower right hand screen.
possibile scegliere di visualizzare tali dati in entrambi i valori metrici o imperiali. Premere il tasto
Press ADJUST or MODE to choose between these options:
SET.
Le misure lampeggeranno sia nella schermata principale che inferiore dello schermo.
i)
Real time in kilogrammes (KG) & accumulated in kilogrammes (KG)
Premere
o MODE(LB)
per&scegliere
tra queste
opzioni:
ii) Real ADJUST
time in pounds
accumulated
in pounds
(LB)
1)
Dati
in
tempo
reale
ed
accumulati
in
chilogrammi
iii) Real time in kilogrammes (KG) & accumulated in (kg)
metric tonnes (TONNE)
2) Dati
in time
tempo
reale ed(LB)
accumulati
in libbrein(lb)
iv)
Real
in pounds
& accumulated
imperial tons (TON)
When
have chosen
SET to confirm.
The digits in
main screen
will start
to flash. Press
3) Datiyou
in tempo
reale inpress
chilogrammi
(kg) e accumulati
in the
tonnellate
metriche
(TONNE)
ADJUST
MODE
to select
the(lb)
conversion
valueinbetween
0.00kg
to 1.90kg
for metric, or 0.00LB
4) Dati in or
tempo
reale
in libbre
e accumulati
tonnellate
imperiale
(TON)
to
4.00LB.
Press SET
to confirm.
Una
volta scelto
premere
SET per confermare. Le cifre nella schermata principale inizieranno a
END will be displayed.
lampeggiare. Premi ADJUST o MODE per selezionare il valore di conversione tra 0.00kg a 1.90kg
per le metriche o 0.00LB a 4.00LB per le imperiali. SET per confermare. END sarà visualizzato.
TO REVIEW YOUR SETTINGS
VERIFICARE
Press
the SET
LE button
IMPOSTAZIONI
and then the MODE button to scroll through your settings. You can exit the
setup at any
time SET
by pressing
holding the
SETper
key,scorrere
and all changes
made to this
point
will be
Premere
il tasto
e quindiand
il pulsante
MODE
le impostazioni.
Si può
uscire
in
saved.
qualsiasi momento tenendo premuto il tasto SET, tutte le modifiche verranno salvate.
STEP FIVE
INSTALLARE
IL
FIT
THE
TRASMETTITORE
TRANSMITTER
Fix the mounting bracket (optional) to the wall or the baseFissare la staffa di montaggio (opzionale) alla parete,
board used to mount your meter, next to the fuse box or
accanto al contatore o nelle vicinanze.
nearby.
Inserire il trasmettitore nel suo supporto e collegare il
Slot the Sender into its bracket and connect the Sensor cable
del sensore
in una
qualsiasi
delle
tre prese
chebase
si
tocavo
any one
of the three
Sender
sockets,
located
on the
oftrovano
the unit.alla base dell'unità.
La photograph
foto a destra
mostra
una tipica
installazione
con the
il
The
on the
right shows
a typical
installation, with
trasmettitore
su staffatoathe
destra
il
Sender
mountedmontato
on it’s bracket
rightdel
of contatore
the meter eand
sensore
sul cavo
elettrico
(di solito
the
Sensormontato
fitted around
the live
electricity
cablegrigio,
(usuallyrosso
grey,
or brown).
red
o marrone).
CONGRATULAZIONI
CONGRATULATIONS
Avete appena installato con successo il vostro OWL.
successfully.
Per la risoluzione dei problemi e informazioni aggiuntive si
For Troubleshooting and additional information please turn
prega di girare il foglio o visitare www.theowl.com
over this sheet or visit www.theowl.com
You have now set up and installed your
SAFETY INFORMATION
Keep the
equipmentlontano
out of the
reach
of children,
especially infants.
Tenere
il materiale
dalla
portata
dei bambini.
Installation of this
productprodotto
must be deve
carriedessere
out byeffettuata
adults onlysolo
andda
if persone
there is any
doubt,
a qualified
L'installazione
di questo
adulte
o se
ci sono
electrician.
dubbi
da un elettricista qualificato. Non installare il dispositivo in ambienti umidi (bagno,
Do not installcucina
your equipment
humid room di
(bathroom,
laundry, okitchen
or in closeNon
proximity
to a
lavanderia,
ecc) o in
in a prossimità
un rubinetto
acquaetc)sorgente.
esporre
tap or water source. Do not expose the equipment to moisture, splashes or spray.
l'apparecchio a umidità, spruzzi o spray. Le apparecchiature e tutti i componenti sono per uso
The equipment and all associated components are for indoor use and in normal temperature conditions only.
interno
e in condizioni
di Store
temperatura
normali.
le temperature
estreme. Conservare
Avoid extreme
temperatures.
away from
sources Evitare
of heat, ignition
or fire.
lontano
da
fonti
di
calore
o
fuoco.
Non
tentare
di
aprire,
smontare
o
riparare
le attrezzature,
se
Do not attempt to open, disassemble or repair the equipment, other than to change the
batteries.
non
per
cambiare
le
batterie.
L'apparecchio
contiene
un
trasmettitore
radio,
che
può
The equipment contains a radio transmitter, which may affect the operation of medical or emergency
compromettere
il funzionamento
di apparecchiature
mediche oalways
di emergenza.
Prima di
equipment. Before
using this equipment
in a medical environment,
seek the advice
of utilizzare
a qualified
expert.
medical apparecchiatura
questa
in un ambiente medico, chiedere sempre il parere di un esperto
The LCD screen
is made LCD
of glass
may
dropped.in caso di caduta.
qualificato.
Lo schermo
è diand
vetro
e sibreak
può ifrompere
Please
take
special
care
when
handling
a
damaged
Display
as the uno
liquidschermo
crystals may
be harmful toi
Si prega di prestare particolare attenzione quando siscreen,
maneggia
danneggiato,
your
health.
cristalli liquidi possono essere dannosi per la salute. Non coprire i fori di ventilazione sugli
Do not cover the
ventilation di
holes
on the equipment.
apparecchi.
Assicurarsi
leggere
questa “Guida all’installazione” prima di utilizzare
Please
ensure
you
read
this
Installation
and Programming Guide carefully before using the equipment.
l'apparecchiatura.
22 Save
SaveEnergy
EnergyLimited
Limited
The
Annexe,
Lane, Sherbourne
SherbourneStStJohn,
John,Basingstoke,
Basingstoke,Hants
Hants
RG24
9LR
The
Annexe,Field
FieldHouse
HouseBarn,
Barn, Chineham
Chineham Lane,
RG24
9LR
Tel:+44
+441256
1256383
383 431
431 [email protected]
[email protected]
Tel:
WARRANTY INFORMATION
+USB
Installation and Programming Guide
BEFORE YOU START
CONTENUTO DELLA CONFEZIONE
2 SaveStrumenti
Energy Limited
guarantees
that +USB
the OWL
+USB per
will un
work
for a minimum
period
of 12
months
Carlesi
garantisce
che l’OWL
funziona
periodo
minimo di
12 mesi
dalla
data
date ofed
purchase
and
that itnei
willmateriali,
be free from
defects in materials,
workmanship or
If during
difrom
acquisto
è privo di
difetti
di fabbricazione
o di progettazione.
Sedesign.
nel corso
this limited 1 year period of guarantee, from date of purchase, you find that the equipment is not working
diproperly,
questoyou
anno
di garanzia, dalla data di acquisto, si rileva che l'apparecchiatura non funziona
may return it to us and we will replace, or, (at our discretion) repair it, free of charge.
correttamente, è possibile restituirlo e verrà sostituito, o (a nostra discrezione) riparato
2 Save Energy Limited will not accept any liability for defects arising from fair wear and tear, accidental
gratuitamente.
non
si assume
responsabilità
or wilful damage,Carlesi
misuseStrumenti
or failure to
follow
productalcuna
or safety
instructions. per difetti derivanti dall’uso,
danno
accidentale
o
doloso,
uso
improprio
o
mancata
osservanza
istruzioni
del prodotto
di
If you return any equipment as faulty, 2 Save Energy Limiteddelle
reserves
the right
to test othe
sicurezza.
Se
si
restituisce
qualsiasi
attrezzatura,
Carlesi
Strumenti
si
riserva
il
diritto
di
provare
equipment and if found to be in perfect working order, to return it to you. In this event, 2 Save Energyil
Limited reserves
the di
right
to charge
for any testing
or postage
costs incurred.
This Strumenti
does not affect
your
materiale
e nel caso
perfetta
efficienza,
di re-inviarlo.
In questo
caso, Carlesi
si riserva
rights
to equipment,
illegal
diritto
di relating
addebitare
eventualiwhich
costi isdifaulty.
collaudo o spese postali sostenute. Questo non influisce
Warranty
conditions
onlyalapply
where Proof
PurchaseLa
is garanzia
provided. è valida solo in caso di scontrino o
sui
diritti legali
relative
materiale,
che èofdifettoso.
To return
your OWL +USB
contact Per
[email protected]
to [email protected]
the issue and reason for
fattura
comprovante
l’acquisto.
restituire l’OWL +USB contattare
returning
your product.
2 Save
Limited
issue you a Vi
form
andrilasciato
reference number.
OnceUna
we have
per
segnalare
il problema
e laEnergy
ragione
per lawill
restituzione.
verrà
un modulo.
volta
received ilthe
completed
form and
of d’acquisto
purchase we
will inizio
commence
the returns
process.
ricevuto
modulo
compilato
e laproof
prova
avrà
il processo
di reso.
COMPLIANCE
CONFORMITA’
CE marking
certifiesche
thatil this
productsoddisfa
meets the
main requirements
of the
European Parliament
IlThe
marchio
CE certifica
prodotto
i requisiti
principali del
Parlamento
europeo eand
del
Council
Directive
1999/5/EC.
A
copy
of
the
signed
and
dated
Declaration
of
Conformity
available onè
Consiglio Direttiva 1999/5/CE. Una copia firmata e datata della Dichiarazione di isConformità
request.
disponibile su richiesta. L’OWL +USB è stato fabbricato secondo lo Standard di Qualità ISO-9001
If something
missing,siplease
contact
us: [email protected]
Se
mancasse is
qualcosa
prega di
contattarci:
[email protected]
BATTERIE AA x 6
CAVO USB
MONITOR WIRELESS
TRASMETTITORE
CD e MANUALE
SENSORE
Grazieyou
per aver
scelto l’OWL
Thank
for choosing
the+USB
OWL+usB.
Seguire questi semplici passi per impostare l’OWL
+USB e si sarà in grado di:
Follow these simple steps to set up your OWL+usB and you will be able to:
Calcolare
la
quantità
di
energia
utilizzata,
il
costo
di
tale
potenza,
la quantità
di green
gas
Calculate the amount of power being used, the cost of
that
power, the
amount di
ofemissioni
associated
GHG
e
scaricare
i
dati
registrati,
sul
PC.
house gas emissions and download recorded data to your PC.
+usB,
Primasetting
di installare
l’OWL
+USB,
assicurarsi
di leggere
attentamente
le Safety
norme Precautions.
di sicurezza.
Before
up your
OWL
please ensure
you carefully
read the
Your OWL +USB is manufactured to ISO-9001 Quality Assurance Standards.
Prima di
cominciare
l’installazione
assicurarsi
avere:
Before
you
start installation
please
ensurediyou
have:
Girare
fogliofor
perfull
le
Turnilover
1.
Una
bolletta
con
i
dettagli
della
propria
tariffa
1. An electricity bill with details of your tariff and rates
istruzioni diinstructions
installazione
installation
piccolo
a stella
o ascrewdriver
taglio
2.2.AUn
small
crosscacciavite
head or flat
bladed
TROUBLESHOOTING
ADDITIONAL INFORMATION
PROBLEMA
Il Monotor è vuoto
POSSIBILE CAUSA
Batterie
PROVA COSI’
Controllare che siano correttamente
installate o cambiarle
Viene mostrato uno
“0”
Non rileva la corrente
1. Controllare che il sensore sia
correttamente collegato al filo e
ben chiuso (VEDI STEP FIVE)
2. Controllare che il sensore sia
connesso al Trasmettitore
Vengono mostrati
“•” “----”
Batterie o sincronizzazione persa
Controllare che le batterie siano
correttamente installate o sostituirle
o fare un reset completo.
Readings
high
Letture appear
consumi
troppo alte
Tariff
or voltage
settings may be
La tariffa
o il voltaggio
incorrect
potrebbero non essere
corretti
Check your tariff and voltage
Controlla la tariffa ed i settaggi
(see (vedi
overleaf)
and reset if
settings
di
tensione
retro)
necessary
Readings
low
Letture appear
consumi
troppo basse
Sensor
not closed
Il sensore
non èproperly
chiuso in
modo corretto
Although
thelasensor
clipsensore
maybe
Anche se
clip del
closed,
if it is a tight
then the
core
fosse chiusa,
se èfittroppo
stretta
may
not close
properly.
the
il
centro
potrebbe
nonCheck
chiudersi
diameter
of your cable
(up to il10mm
correttamente.
Verificare
sensors
cable for standard
diametro
del cavo
(fino aand
10mm
di
cavo
sensori
standard e
17mm
forper
latge
sensor).
17
millimetri
large).
Reposition
thei clip
on a straight
Riposizionare
peice of cable. la clip sul cavo.
1.
the RESET
button
on the
1. Press
Premere
il pulsante
RESET
ofdel
Sender
Unit (The end
sulback
retro
Trasmettitore
of a paperclip is ok for this)
2. Press
Tenere
pulsante
2.
andpremuto
hold the il
green
CHECK sul Trasmettitore, il led
CHECk button on the Sender
comincerà a lampeggiare
until the RED light starts to flash
3. Press
Tenere
SET&eRESET
Synchronisation
fails
InNella
the unlikely
eventcircostanza
that
3.
andpremuto
hold the SET
Sincronizzazione
sfortunata
Wireless
inallo
STEP
2
synchronising
fails you will need
che, la sincronizzazione
fallisca RESET
STEP
2è
buttonssul
of Monitor
the Monitor
at the
tosarà
resetnecessario
your OWL back
to factory
fallita
resettare
time il(Use
end of verrà
paperclip).
4. same
Lasciare
RESET,
l’OWL and
alle clear
impostazioni
di by
your memory
settings
4.
Releaseun
thesegnale
RESET button
ande
emesso
acustico
fabbricathese
e cancellare
la
following
instructions:
a tone should
be sul
heard.
mostrate
le linee
display
memora come segue:
All the segments should appear
5. Al secondo segnale acustico
on the Display.
il pulsante SET può essere
5. On hearing a second tone the
lasciato. L’indicatore del
Tip:
Doporesetting
avere resettato
Monitor,
Tip: After
the Displayil Unit,
it
SET button can be released.
segnale Wireless lampeggerà,
can takepotrebbe
up to 2 minutes
to establish
questo
impiegare
2 minuti aper
The
signal indicator
will flashsta
ciò
significa
che il Monitor
link with theuna
Transmitter.
Press andTenere
hold
stabilire
connessione.
meaning
that
the
display
cercando il Trasmettitoreise si
the CHECk button on the Transmitter
searchingcompletamente
for the Sender, and
premuto
CHECK sul Trasmettitore fino a
illuminerà
una
until the red LED flashes.
be fully illuminated when it
will sincronizzato
che il led non lampeggia. Questo farà
volta
This will then transmit every 2 seconds.
has synchronised to the Monitor.
trasmettere ogni 2 secondi.
6. A
Uno
(zero)
mostrato
6.
“0” “0”
should
nowverrà
be displayed
in
nelthe
display.
middle of the screen.
“----”
in display
Viene
mostrato
“----”
Monitor
United
& Sender
have lost
Il Monitor
il Trasmettitore
linkperso
and repeating
STEP 2
radio
hanno
la connessione
synchronise
units haslofailed
radio e ripetendo
STEP 2 la
sincronizzazione non è riuscita
INSTALLARE
IMPIANTOSUPPLY
TRI-FASE
INSTALLINGOWL
OWLSU
INUN
A 3-PHASE
Se
si hahave
un impianto
ulteriori
sensori
e forse
di misura
più grande a
If you
a 3-phase3-fase
supplysaranno
you will necessari
need two due
additional
Sensors
and
possibly
larger sensors
depending
on the
size of your
the sensors
is the èsame
process
above but you
seconda
delle
dimensioni
dei cables.
cavi. Il Fitting
montaggio
dei sensori
lo stesso
delas
mono-fase
ma will
sarà
need to identify
the correct
using
the information
below: qui di seguito:
necessario
individuare
i cavicables
corretti
utilizzando
le informazioni
3-PHASE
WIRING CODES
CODICI
DI CABLAGGIO
INSTALLAZIONE TRI-FASE
L1
L1L2
Ukfino
untilad
April
2006
UK
Aprile
2006: Red
Europa
Aprile
Europeda
(inc
Uk) 2006:
from April 2006
L3
L2
Yellow Giallo
Blue
Rosso
Marrone
Brown
Black
Nero
Grey
Neutral Neutro
Earth
L3
Black
Blu
Grigio
Blue
Se non sei sicuro sull’installazione si prega di consultare un elettricista qualificato
Terra
Green/yellow
striped
Nero
Verde
e Giallo
(green on old installations)
Blu
Verde e Giallo
Green/yellow striped
If you are unsure about installation please consult a qualified electrician or visit www.theowl.com for more information
COS’È
LA FUNZIONE ALLARME?
La
funzione
di ALARM
allarme FUNCTION?
è stata progettata per avvisare quando viene superata una soglia preWHAT
IS THE
evitare
interruzioni
di corrente
dovute
ai superamenti
impostata
consumo.
Questo ètoutile
The alarm di
function
is designed
warnper
you
when le
your
pre-determined
electricity
usage
peaks
del
limite
massimorate.
e perThis
evitare
sprechi.
a specified
is useful
if your household is running on a budget and you need to
above
monitor
costs closely.
COME
LEGGERE
LA BOLLETTA
UNDERSTANDING
TARIFFS
ANDenergia
TIEREDa TARIFFS
I fornitori di elettricità
vendono
diverse tariffe. I prezzi possono variare anche tra il
Electricity suppliers sell electricity at different rates to different people across the country. Rates
giorno e la notte. Il tasso da pagare per la corrente si chiama "tariffa"ed è chiaramente indicata
may also vary at different times of the night or day. The rate you pay for your electrity is called a
sulla
bolletta.
Alcuniidentified
utenti potrebbero
avere bill.
tariffe primarie/secondarie in base all'utilizzo. Per
“tariff”
and is clearly
on your electrity
usare
questi
dati
sarà
necessario
calcolare
una
media
in base
al on
consumo
nella
TAR data
1.
Some electricity users will have primary/secondary rates
based
usage. eToinserirla
make use
of this
POSSO
UN an
APPARECCHIO?
need to calculate
average based on usage and enter this figure into tariff 1.
you willMONITORARE
I MONITOR
APPLIANCE
LEVEL?
IlCAN
sensore
non riesce
a monitorare
la corrente se agganciato ad un cavo con la terra, il neutro e la
The Sensor
is unablesolo
to detect
current
flow when
clipped
appliance
lead4.with earth, neutral and
fase.
Può funzionare
quando
agganciato
ad una
fase an
come
nello STEP
live
cables.
The
sensor
will
only
work
when
clipped
over
a
live
phase
cable
as per STEP 4.
QUANTI DATI POSSONO ESSERE MEMORIZZATI NEL MIO OWL +USB?
HOW MUCH DATA CAN BE STORED ON MY OWL+USB?
IData
dati is
vengono
memorizzati per gli ultimi 720 giorni con un valore giornaliero di consumo, costi di
stored for the last 720 days as a daily value of electricity used, cost of electricity used
energia
elettrica
utilizzata
in base
alladay,
tariffa
quel of
giorno
la quantità
di emissioni
di CO2 sulla
based on Tariff rates
entered
for that
andper
amount
CO2 eemissions
based
on conversion
base
del
fattore
di
conversione
per
quel
giorno.
Questi
dati
sono
accessibili
tramite
la below).
funzione
factor for that day. This data is accessible through the History function of the Monitor (see
alsoMonitor
stored every
the last
30 days
and this is anche
accessed
the per
automatic
Data is del
History
(vediminute
sotto).for
I dati
vengono
memorizzati
ogniusing
minuto
gli ultimi 30
function
of the utilizzando
software application
supplied
with the
Monitor. del software fornito con il
download
giorni,
a questi
si accede
la funzione
automatica
di download
INSTALLING THE SOFTWARE APPLICATION TO DOWNLOAD THE DATA TO PC?
monitor.
Please read the User Manual on the Software Application CD supplied with OWL+USB Electricity
INSTALLARE
IL SOFTWARE PER SCARICARE I DATI SUL PC
Monitor. Install the software following the installation guide in the user manual.
contoOWL
+USB.
il software
SiFollow
pregathe
di leggere
manuale
d'usoofnel
allegato
Getting ilStarted
section
theCD
User
Manual,
get the
NewInstallare
Hardware
installed, seguendo
and to
laadd
guida
all’installazione.
Seguire
sezione
“Getting
Started” per installare il nuovo hardware, e
the USB
as a “Connected
To”ladevice
in the
software.
per
aggiungere
l'USB comeTHE
dispositivo
"Connected
HOW
DO I DOWNLOAD
DATA TO
MY PC? To ".
SimplySCARICO
connect Ithe
mini-USB
port
of the monitor to the PC, and the last 30 days data (or numCOME
DATI
SUL MIO
PC?
ber days
data stored
if less
than 30
will automatically
download
the OWL30USB
Connect2
Basta
collegare
la porta
mini-USB
deldays)
monitor
al PC e gli ultimi
dati (altomassimo
giorni)
verranno
database.
scaricati automaticamente nel database dell’OWL USB Connect2.
HOW OFTEN DO I NEED TO DOWNLOAD THE DATA TO MY PC?
QUANTO SPESSO DEVO SCARICARE I DATI SUL PC?
Data should be downloaded every 30days since last data download or sooner.
IIfdati
dovrebbero
essere
scaricati
ogni 30 giorni
o prima.
Se the
questo
superato,
30 days
is exceeded
since
last download,
then the
data for
daystermine
betweenviene
the last
30 daysi dati
dei
tra gli ultimi
30 giorni
l'ultimo download
verranno
sovrascritti
quindifornon
andgiorni
last download
of data
will beeoverwritten
in the monitor,
hence
there willnel
be Monitor,
no data saved
cithose
saranno
salvati
per quei giorni nel database.
daysdati
in the
database.
Please
Note:
If youconfusi
are concerned
or confused
by the installation
process
please call
customer
N.B.:
Se siete
sul processo
di installazione
si prega
di contattare
il nostro
services onServizio
01256 383
431
or
email
[email protected]
Clienti: [email protected]
REVIEWING YOUR SETTINGS AND READING YOUR DATA
If you wish to review any of the programmed settings at any time, press and hold the SET key until the SET icon
Se
si desidera
tutte
and you rivedere
hear a short
beep.le impostazioni programmate, tenere premuto il tasto SET fino a
appears
quando
CLOCk appare
will appear
l'icona
in theSET
lower
e siright
sente
hand
unscreen.
breve segnale acustico.
Press MODE
key nella
to scroll
between the
CLOCK
apparirà
schermata
in different
basso aprogram
destra.settings, DATE, TAR 1, TAR 2, TAR 3, TAR 4, TAR 5, TAR
6, ALARM, CURR, VOLT, TEMP, GHG, END until you reach the one you wish to change.
Premere
tasto
MODE per scorrere tra le diverse impostazioni: DATE, TAR 1, TAR 2, TAR 3, TAR 4,
Press SETil key
to confirm.
TAR
6, ALARM,Your
CURR,
VOLT,
GHG,
fino a quello
che sitodesidera
modificare.
Refer5,toTAR
Programming
OWL
againTEMP,
and follow
theEND
instructions
in this guide
change the
settings.
Premere il tasto SET per confermare.
HOW TO READ YOUR DATA:
Fare
al “Impostare
e seguire
Your riferimento
Display unit will
show COST inOWL”
the main
screen. le istruzioni nella guida per modificare i settaggi.
To view ENERGY consumption, press MODE key once.
COME
LEGGERE I DATI:
To view GREEN HOUSE GAS Emissions, press MODE key again.
IlTodisplay
mostrerà
nella
return to
the mainCOST
screen,
pressschermata
MODE keyprincipale.
again.
Per visualizzare il consumo energetico, premere il tasto MODE una volta.
HOW TO READ YOUR AVERAGE DATA:
Per
visualizzare le emissioni di gas (GHG), premere nuovamente il tasto MODE. Per tornare alla
Press and hold the ADJUST key and AVERAGE data will appear in the bottom right-hand corner. AVERAGE
schermata
nuovamente
tastoadjust
MODE.
DAY (basedprincipale,
on 30 dayspremere
rolling) will
appear first. ilPress
again and AVERAGE WEEk (based on 30 days
rolling) will appear, press ADJUST key again and AVERAGE MONTH (based on 30 days rolling) will appear.
COME LEGGERE LA MEDIA DEI DATI:
Tenere
tasto
e la media
(basata
su for
30 2giorni)
in basso a
To returnpremuto
to the realiltime
dataADJUST
display press
MODE key
and hold
secondsapparirà
until you nell'angolo
hear a short beep.
destra. La MEDIA GIORNALIERA apparirà per prima. Premere di nuovo ADJUST e la MEDIA
SETTIMANALE apparirà, premere nuovamente il tasto ADJUST e la MEDIA MENSILE verrà
visualizzata.
Per ritornare ai dati in tempo reale tenere premuto MODE per fino al breve segnale acustico.
HISTORICAL DATA:
STORICO DATI:
The data displayed in the lower right hand screen of your Display Unit will always show the cumulative
I dati visualizzaticonsumption
in basso aand
destra
del cost
Monitor
mostrano
sempre
l'energiaOWL
complessiva/consumo
energy/emissions
the total
to date,
or since your
last reset.The
can store and show
historical
for totale.
up to 2 years.
accumulated
delle emissioni
ed ildata
costo
L’OWL è in grado di memorizzare e visualizzare i dati accumulati
At any time, you can choose to view historical data for comparative purposes. You can choose to view this data from a
fino a 2 anni. È possibile visualizzare questi dati per un giorno specifico, settimana, mese o 3 mesi.
specific day, week, month or 3 month period.
Perset
impostare
datafor
di inizio
tenere premuto
MODE.
HISTkey
è visualizzato
nella
schermata
principale
To
the startladate
your historical
data, press
MODE
and hold for
2 seconds.
HIST
will be
displayed
in theschermo
main screen
and aYEAR
in the
lower
screen.lampeggia.
The year inPremere
the lowerMODE
left hand
e YEAR nello
in basso
destra.
L'anno
in right
bassohand
a sinistra
per
screen will flash. Press MODE key to reduce the Year or ADJUST key to increase the year that you wish the data to be
diminuire
o
ADJUST
per
aumentare
l'anno
che
si
desidera
sottoporre
a
revisione.
Premere
SET
per
reviewed from. Press SET key to confirm.
confermare.
nella
destra
e the
il mese
lampeggia
sullo
MONTH
will beMONTH
displayedèinvisualizzato
the lower right
handschermata
screen and in
thebasso
month awill
flash in
lower left
hand screen.
MODE
to reduce
the month
or ADJUST
key to increase
theselezionare
month. PressilSET
key to
confirm. SET per
Press
schermo
in key
basso
a sinistra.
Premere
MODE/ADJUST
per
mese.
Premere
DAY will be displayed in the lower right hand screen and the date will flash in the lower left hand screen. Press
confermare. DAY è visualizzato nello schermo in basso a destra e la data lampeggia sullo schermo in
MODE key to reduce the day or ADJUST key to increase the day. Press SET key to confirm. You now have your
basso
a sinistra.
Premere MODE/ADJUST per scegliere il giorno. Premere SET per confermare. Avete
start
date
set.
You
can nowlachoose
review
period.
between
this day, ilone
week,periodo
one month
or three months
impostato
vostrayour
data
di inizio.
È Choose
ora possibile
scegliere
vostro
di revisione.
Sceglifrom
tra
this date. Press ADJUST to scroll between these options. The data in the lower right hand screen will change acquesto
giorno,
una
settimana,
un
mese
o
tre
mesi
da
tale
data.
Premere
ADJUST
per
scorrere
tra
cording to your selection.
queste opzioni. I dati nello schermo in basso a destra cambieranno in base a questa selezione.
HOW
READ YOUR
HISTORICAL
COMETOLEGGERE
LO STORICO
DEI DATA:
DATI:
Your Display unit will show HIST in the main screen and COST in the top right hand corner of the main screen.
Il Monitor mostrerà HIST nella schermata principale e COST in alto a destra. Secondo la data di
According to the start date and time period you have set you can now view historical cost data.
inizio
il periodo
tempo stabilito
è ora
possibile
visualizzare
To
viewed
historical
energydi
consumption
during this
period,
press MODE
key once.lo storico. Per visualizzare il
To
view historical
green house
gas emissions
during
this period,
press
MODE
keyPer
again.
consumo
energetico
in questo
periodo,
premere
MODE
una
volta.
le emissioni di gas serra
To
return tonuovamente
the main historical
costPer
screen,
pressand
hold the MODE
key again.
premere
MODE.
tornare
alla schermata
principale
tenere premuto MODE.