1
Hervé PHILIPPE
Lab. de Biologie Cellulaire 4
Bat. 444, Université de Paris-Sud
91405 Orsay - FRANCE
☎ 33.(1).69.41.64.81
Fax 33.(1).69.41.21.30
E.mail [email protected]
MUST user's manual - Version 1.0 (Apr/03)
TABLE OF CONTENTS
I GENERAL INTRODUCTION
1
I-1 Functions of MUST ............................................................................1
I-1.1 Database management ........................................................1
I-1.2 Aligned sequence management ...........................................2
I-1.2.1 Sequence alignment ...............................................2
I-1.2.2 Choosing representative species............................2
I-1.2.3 Choosing which regions to use...............................2
I-1.2.4 Visualisation of dendrograms and comparison of
matrices .............................................................................3
I-1.2.5 Concatenation of files of aligned sequences ..........3
I-2 Writing conventions used in this manual ............................................4
I-3 Installing the software on hard disk....................................................5
I-4 Work directories .................................................................................6
I-4.1 Working with several users ..................................................6
II-4.2 Creation of a new working directory ....................................7
I-5 General keyboard coding ...................................................................8
I-6 Color code..........................................................................................8
I-7 Printing results ...................................................................................9
I-7.1 Matrix printers ......................................................................9
I-7.2 Postscript printers ................................................................9
I-8 Summary of files used by MUST........................................................11
I-8.1 [MUSTEXE]\MUSTEXE........................................................11
I-8.2 [MUST]\MUST......................................................................11
I-8.3 [MUST]\MUST\ALI................................................................11
I-8.4 [MUST]\MUST\DATA ...........................................................12
I-8.5 [MUST]\MUST\TYPEi...........................................................12
I-8.6 [MUST]\SEQ ........................................................................12
I-8.7 Current working directory .....................................................13
I-8.8 *.BAK files ............................................................................15
I-9 Indications on the architecture of the database..................................15
I-9.1 General information..............................................................15
I-9.2 File descriptions ...................................................................15
I-10 The MUST program .........................................................................16
II SEQUENCE DATABASE
17
II-1 General presentation ........................................................................17
II-2 The USEB Program ..........................................................................17
II-3 The ENTRYSEQ Program ................................................................19
II-3.1 Sequence acquisition ..........................................................19
II-3.2 Correction of acquired sequences.......................................19
i
MUST user's manual - Version 1.0 (Apr/03)
II-3.3 End of the program .............................................................19
II-4 The SAVESEQ Program ...................................................................20
II-4.1 General information.............................................................20
II-4.2 Molecule and Domain..........................................................21
II-4.3 Identifier ..............................................................................21
II-4.4 Other rubrics .......................................................................22
II-4.5 Integration into the files of aligned sequences ....................22
II_5 The SAVECUT program...................................................................23
II-5.1 Cut file format......................................................................23
II-5.2 Using SAVECUT .................................................................24
II-5 The EMBL program...........................................................................25
II-5.1 Format EMBL ......................................................................25
II-5.2 Acquisition of characteristic sequence fields .......................26
II-5.3 Choice of sequence portions ...............................................26
II-6 Other extraction programs ................................................................27
II-6.1 The SPLITEMB and SPLITGEN programs..........................27
II-6.2 The EMBLCUT program......................................................28
II-6.3 The GENBANK program .....................................................28
II-6.4 The GENCUT program........................................................29
II-6.5 The SWISS program ...........................................................29
II-6.6 Programme NBRF...............................................................30
II-7 The MODIFSEQ program .................................................................31
II-7.1 Sequence recognition..........................................................31
II-7.2 Change of molecule type.....................................................31
II-7.3 Rubric modification..............................................................31
II-7.4 Modification of sequence.....................................................31
II-7.5 Modifications in the files of aligned sequences ...................33
II-8 The VERIFSEQ program ..................................................................33
II-9 The INTEGSEQ program ..................................................................34
II-10 The INTEGALL program .................................................................34
II-11 Management of the database .........................................................35
II-11.1 The INFOBANK program ..................................................35
II-11.2 The DELBANK program ....................................................35
II-11.3 The SAVEBANK program .................................................36
II-11.4 The LOADBANK program .................................................36
II-12 The FILM program ..........................................................................37
II-13 The TRANSLAT program................................................................38
III MANAGMENT OF ALIGNED SEQUENCES
40
III-1 General introduction.........................................................................40
III-2 Program FAST .................................................................................40
III-3 Program MAKETREE ......................................................................42
III-3.1 Modification of a tree ..........................................................42
III-3.1.1 Moving in a tree ....................................................42
III-3.1.2 Adding a sister group............................................43
III-3.2 Creation of a tree ...............................................................45
III-3.3 Management of the sub-trees ............................................45
III-3.4 Management of the files of systematic frame .....................46
III-4 Program ED .....................................................................................47
III-4.1 General introduction ...........................................................47
ii
MUST user's manual - Version 1.0 (Apr/03)
III-4.2 Choosing the file of aligned sequences..............................48
III-4.3 Choosing the species .........................................................48
III-4.3.1 Choosing the species one by one.........................48
III-4.3.2 Choosing a group of species ................................49
III-4.3.3 'Cupboard' group ..................................................49
III-4.3.4 Correction of the list of selected species ..............49
III-4.3.5 Archiving lists of species.......................................50
III-4.3.6 Other functions .....................................................50
III-4.4 Sequence alignment...........................................................51
III-4.4.1 Display and movement .........................................51
III-4.4.2 Color palette .........................................................51
III-4.4.3 Modification of the alignment ................................52
III-4.4.4 Consensus sequences .........................................52
III-4.4.5 Saving the modifications.......................................53
III-4.4.5 Printing the sequences .........................................53
III-4.5 Writing the sequences in a file ...........................................54
III-5 Programs AFAS, CAFAS and DAFAS .............................................54
III-5.1 Advantages and drawbacks of this set of programs ...........54
III-5.2 Preparing the files: AFAS ...................................................54
III-5.3 Extracting sequences : CAFAS ..........................................55
III-5.4 Management of the prepared files: DAFAS........................56
III-6 Program NET ...................................................................................56
III-6.1 Description of the main window..........................................56
III-6.2 Choosing boundaries .........................................................57
III-6.2.1 Display and movements .......................................57
III-6.2.2 Elimination of regions, by stretch, or character by
character............................................................................58
III-6.2.3 Eliminating sites as a function of the rate of nonsequenced species, of missequenced characters, or of gaps
...........................................................................................58
III-6.2.4 Elimination of regions by entering the boundary values
...........................................................................................59
III-6.2.5 Saving chosen boundaries ...................................59
III-6.2.6 Display options .....................................................59
III-6.3 Use of the criteria ...............................................................60
III-6.4 Formatting of sequences....................................................61
III-6.4.1 General comments ...............................................61
III-6.4.2 File NBS ...............................................................61
III-6.4.3 Parsimony.............................................................62
III-6.4.4 Jackknife...............................................................63
III-6.4.5 Printing of the aligned sequences.........................64
III-6.4.6 Other formats........................................................64
III-6.5 Matrices of distance ...........................................................65
III-6.6 Positions.............................................................................66
III-6.7 Other options......................................................................67
III-6.7.1 Changing the order of species..............................67
III-6.7.2 Choice of the presentation of the identifier ...........67
III-6.7.3 Choice of the version of PHYLIP ..........................68
III-6.7.4 Level of GC...........................................................68
III-6.7.5 Frequency of characters.......................................68
iii
MUST user's manual - Version 1.0 (Apr/03)
III-6.7.6 Printing .................................................................68
III-7 The NJ program ...............................................................................69
III-8 The NJBOOT program.....................................................................69
III-8.1 Format of entry file .............................................................69
III-8.2 Format of output files..........................................................69
III-8.2.1 Major regroupings.................................................69
III-8.2.2 Parenthesised tree ...............................................70
III-8.2.3 Regroupings present in more than 1% of samplings70
III-8.3 Utilisation of NJBOOT ........................................................70
III-9 Recuperation of outputs from programs of phylogenetic construction 71
III-9.1 Transformation to TREEPLOT format ................................71
III-9.2 AFT_HEN...........................................................................71
III-9.3 AFT_PAUP.........................................................................74
III-9.4 AFT_PHYL .........................................................................76
III-9.5 Mode of employment of the utilities ....................................76
III-10 The TREEPLOT program...............................................................77
III-10.1 Parenthesised tree file......................................................77
III-10.2 Modifications of the tree ...................................................77
III-10.2.1 Choice of the root ...............................................78
III-10.2.2 Rotation around a node ......................................78
III-10.2.3 Weight of the lower branch .................................78
III-10.3 Matrix of distances ...........................................................78
III-10.4 Output to printer ...............................................................79
III-10.4.1 Matrix printers.....................................................79
III-10.4.1 Postscript printers...............................................79
III-10.5 Other functions .................................................................80
III-11 The COMP_MAT program .............................................................80
III-11.1 Method of comparison used .............................................80
III-11.2 Visualisation of the species couples.................................81
III-11.3 Choice of species .............................................................81
III-11.4 Indices..............................................................................81
III-11.5 Printing .............................................................................82
III-12 Diverse programs...........................................................................83
III-12.1 The JACKMONO program ...............................................83
III-12.4.1 General information ............................................83
III-4.2 Utilisation .................................................................83
III-12.2 The AFT_EXT program ....................................................84
III-12.3 The JACKBOOT program ................................................84
III-12.3.1 General information ............................................84
III-12.3.2 Utilisation of JACKBOOT....................................85
III-12.4 The COMP_BOO program ...............................................86
III-12.4.1 Description of the display....................................86
III.12.4.2 Main menu ..........................................................86
III-12.4.3 Other options ......................................................87
III-12.5 The MONO_HIS program.................................................88
III-12.5.1 General information ............................................88
III-12.5.2 Utilisation of MONO_HIS ....................................88
III-12.6 The COMP_POS program ...............................................89
III-12.6.1 Method of comparison used ...............................90
III-12.6.2 Options available ................................................90
iv
MUST user's manual - Version 1.0 (Apr/03)
III-12.7 The RESTRIC program ....................................................91
III-12.7.1 Utilisation ............................................................91
III-12.7.2 The ENZYME.RES file........................................91
III-12.7.3 The RESTRIC.OUT file.......................................92
III-12.8 The SHAREGAP program................................................93
III-12.8.1 Choice of the file of aligned sequences ..............93
III-12.8.2 Suppression of common deletions......................93
III-12.8.3 Search for possible common deletions ...............93
III-12.9 The AFT_CLUS program .................................................94
v
MUST user's manual - Version 1.0 (Apr/03)
I GENERAL INTRODUCTION
I-1 Functions of MUST
This ensemble of programs has two basic functions:
- Database management, which permits you to acquire and save non-aligned
sequences (or raw sequences) and to maintain their integrity in the files of non-aligned
sequences.
- Management of aligned sequences begins with the files of aligned sequences, and
allows you to apply different treatments to the sequences, leading to the construction of
phylogenetic trees. The user has the possibility to vary many parameters (choice of
species, choice of sites, etc.). In addition, several modules aid in making critical analyses
of data and inferences.
This group of programs has been conceived with user-friendliness in mind. They are
written in C (Microsoft 5.1) for any PC compatible computer with an EGA screen and a
hard disk. They are furnished in executable form.
To get an overall view of the software, it is advisable to first read the article which
describes it (Nucleic Acids Research, in press) and read the documentation afterwards.
I-1.1 Database management
Database management is particularly useful for laboratories which produce
sequences to use in constructing phylogenies. A good many errors usually occur, first in
reading the autoradiogram, then in entering the sequence on the computer. The Program
ENTRYSEQ minimises these errors, by requiring that the new sequence be entered TWO
times, independently. We advise that two different people read the film, then enter the
sequence. Also, the comparison of a new sequence with those of other species often
points out specific nucleotides as questionable, when they differ 'much too much' from the
consensus sequence or from that of the closest species. In this case it is often necessary
to recount runs of the same nucleotide, since four G's can easily be interpreted as being
three or five. It also happens that a sequence must be redone, to be sure the information is
valid or to confirm a sequence which is difficult to interpret on gel. Whatever the case, the
program MODIFSEQ allows modification of a sequence already archived.
In addition, since many interesting sequences are furnished by international
databanks, several programs (EMBL, GENBANK, etc.) allow you to easily incorporate
sequences or parts of sequences, contained in a file in the format of the international
databanks, into the database of MUST. These programs archive, at the same time, the
mnemonic, the access number, and the references of articles in which the sequence has
been published. This information is thus easy to consult in writing an article.
Files containing aligned sequences undergo frequent manipulations, in the course of
which errors are easily introduced. The program VERIFSEQ controls the correspondence
between the raw sequences saved in the database and those present in the files of aligned
sequences.
1
MUST user's manual - Version 1.0 (Apr/03)
I-1.2 Aligned sequence management
Management of aligned sequences is a point of primary importance for all
researchers who wish to use different algorithms and vary different parameters during the
construction of phylogenies.
I-1.2.1 Sequence alignment
The first and probably most important parameter is the alignment of the sequences.
Clearly, an objective alignment (that is, reproducible) is that obtained using a precise
algorithm, with given weights for various events (substitutions, insertions, or deletions). For
example, using the algorithm of dynamic programming, one can optimally align two
sequences. Unfortunately, the weights are difficult to estimate. More importantly we know,
because of the three-dimensional structure of proteins, that the weights cannot be the
same throughout the sequence (for example, it is virtually impossible to have a gap in a
transmembrane segment). Nonetheless, all the algorithms assume constant weights. In
addition, there is no rapid algorithm which results in the optimal alignment of n sequences,
especially when n is large.
Consequently, alignment programs offer suboptimal results with subjectively chosen
parameters. Thus it is not very difficult to improve an automatic alignment of sequences
(Olsen and Woese, 1993). The program ED lets you edit aligned sequences and
ameliorate an alignment 'by eye' , using diverse visualisation options (in particular, dashes
for identical nucleotides, and calculation and display of consensus sequences of subgroups
of sequences).
I-1.2.2 Choosing representative species
The second parameter is the choice of species considered as representative of a
group. Of course, the user has already made a preliminary choice in making the
sequences. However, to build a phylogeny, he or she generally draws samples from
among the ensemble of available species. The program CAFAS facilitates such sampling
by visualising the current phylogenetic information in cladogram form. Then the user
chooses his samples explicitly in function of the point to be tested. Also, this systematic
frame allows you to verify the quality of the samples chosen, by displaying, for each group,
the number of available sequences and the number of sequences selected.
I-1.2.3 Choosing which regions to use
The third parameter is the choice of regions of sequences to be used. Not only is it
necessary to exclude the regions where alignment is dubious, it is also possible to retire
regions which do not evolve at a rate adequate with respect to the problem posed, in
particular those which evolve too rapidly. The program NET lets you eliminate these
regions, either directly on the aligned sequences or by using indices of variability (for
example one may keep only ditypic (this is a completely unknown word; I have no idea
2
MUST user's manual - Version 1.0 (Apr/03)
what the English spelling is, but it looks wrong to me) sites, as suggested by Nanney). You
can also format the sequences or matrices of distances so as to be usable by different
programs of phylogeny construction (DNAPARS, DNABOOT, FITCH, etc. of the PHYLIP
PACKAGE of Felsenstein, PAUP from D. Swofford, HENNIG86 of J. Farris, CLUKIM,
CLUSTAL and CLUNJ of D. Higgins, PCFOLD from M. Zuker).
I-1.2.4 Visualisation of dendrograms and comparison of matrices
The program TREEPLOT lets you visualise and print out the phylogenies obtained,
under dendrogram form, in placing the root at any point and in pivoting the species around
the nodes as you wish.
The program COMP_MAT visualises, in a plane, two matrices of distances. The two
matrices may be calculated from two different molecules or two different methods (only
transitions, only transversions, Jukes and Cantor, etc.), or also from a tree. This program
lets you verify quickly whether the information contained in the two matrices is comparable,
and to visualise and evaluate the impact of a pair of species, a single species, or a group of
species on that comparison. You can also visualise the saturation curve of substitutions, in
comparing the number of observed differences with the number of substitutions inferred by
parsimony or with a difference matrix (paleontological dates, less quickly evolving
molecules, transversions versus transitions; see, for example, Philippe et al. 1993, or
Leclerc et al. (in prep.).
I-1.2.5 Concatenation of files of aligned sequences
For the large biological molecules (rRNAs in particular) the manipulation of entire
sequences is difficult, since the text editors generally available on a computer are illadapted for the task of managing, in user-friendly fashion, long chains of characters (up to
5000 in these cases). Moreover, biological molecules are very often composed of domains
evolving at different rates; when one is interested in a wide spectrum of species, there are
domains where one can align all the representatives and others where only certain groups
can be aligned.
It is preferable to subdivide the sequences into such domains; one can then regroup
species in blocks for which the regions are alignable. In this way, sequences of
homogeneous variability are no longer punctuated by 'fictive' deletions, generally arising
from insertions in distant species. Thus you work on the alignment with files of aligned
sequences containing a maximum of homologous sites, and can reconstruct all or part of
the molecule studied to build phylogenies. The program AFAS lets you concatenate files of
aligned sequences. It can also be used to reunite the domains cited above, or different
molecules (18S, 28S, 5.8S).
I-1.2.6 Critical analysis of bootstrap values
Lecointre et al. a et b
I-1.2.7 Critical analysis of homoplasy
3
MUST user's manual - Version 1.0 (Apr/03)
Philippe et al.
I-2 Writing conventions used in this manual
C:\MUST
Repertory name or filename
SET MUST=C:\MARIE
DOS command line
2
Mus musculus
Xenopus laevis
File description
INFOBANK
Program name
Shift
Keystroke name (a plus sign between two key names
corresponds to a combination of keys which must be used at
the same time)
Domain
Keyword used in MUST
REMARK
Important remarks are also framed
The figure shows the correspondence between the key names used in this manual
and the names encountered on keyboards presently in use .
4
MUST user's manual - Version 1.0 (Apr/03)
Names used
Other names or symbols
in this manual
I-3 Installing the software on hard disk
The installation of the MUST package requires at least 5Mo on a DOS unit. To begin
the installation, simply insert the diskette MUST1 in the drive and type
<drivename>:SETMUST
So, if the diskette drive is A, the command for installation is
A:SETMUST
The program details all changes of diskette.
It asks the disk drive where to find the diskettes for installation
Then it asks in which unit MUST should be installed. This unit will be referred to as
<MUSTEXE>. For example, MUST can be installed on the root directory of a disk or on a
subdirectory: the unit <MUSTEXE> will then be called, respectively, C: or C:\TOTO
depending on whether it is installed on the root directory of disk C or on the directory TOTO.
Finally, the program will ask for the first work unit of MUST, that is, the unit
containing the files of the first user (cf. chapter I-4). This unit will take the name <MUST>.
5
MUST user's manual - Version 1.0 (Apr/03)
The work directory can be the same as the installation directory, but we do not recommend
this.
Once the files are installed, the user must initialise three global variables of the DOS
environment in AUTOEXEC.BAT. This file is automatically modified. The old file is saved
under the name AUTOEXEXC.BAK. The new AUTOEXEC.BAT must contain the following
three lines:
PATH=%PATH%;<MUSTEXE>\MUSTEXE
SET MUST=<MUST>
SET MUSTEXE=<MUSTEXE>
For example, if <MUSTEXE> is equal to C: and <MUST> to C:\PIERRE, AUTOEXEC.BAT
will contain the following lines:
PATH=%PATH%;C:\MUSTEXE
SET MUSTEXE=C:
SET MUST=C:\PIERRE
where %PATH% is the path described in the former AUTOEXEC.BAT.
For MUST to function, it is necessary to execute the batch AUTOEXEC.BAT or
restart your computer using the key combination Ctrl+Alt+Del.
REMARK : You may check that the DOS global variables (MUST, MUSTEXE
and PATH) have correctly been assigned by using the DOS command
SET. You should obtain an output close to this following, especially for
the bold lines :
COMSPEC=C:\COMMAND.COM
PROMPT=$p$g
PATH=C:\MUSTEXE;C:\C5\BIN;C:\BIN;C:\DOS;C:\EXCEL;C:\WINDOWS;C:\NORTON;C:\C5\BINB
TEMP=C:\WINDOWS\TEMP
MUSTEXE=C:
MUST=C:
WINDIR=C:\WINDOWS
I-4 Work directories
I-4.1 Working with several users
Let's go back to the global variables MUSTEXE and MUST. The variable MUSTEXE
indicates which unit contains the software MUST. This variable must ABSOLUTELY remain
the same as that you used with SETMUST. In contrast, the variable MUST can be
changed. It indicates the unit containing the files used. Take the case of two users, Pierre
and Marie, who wish to work totally independent of one another. For this, it is necessary
that each user has his own work units; thus, in the case of Pierre and Marie, one must
have the following arborescence:
6
MUST user's manual - Version 1.0 (Apr/03)
The directory PIERRE\MUST\ALI will contain the files of aligned sequences
prepared by the program AFAS (see below). The directory \PIERRE\MUST\DATA must
contain the files with the names of species and groups, the files of films, the files of
boundaries, and the files of species list (see below). The directory \PIERRE\SEQ must
contain the files of aligned sequences (see below).
Suppose that the directories PIERRE and MARIE are created directly in the root of
disk C: when Pierre wants to work, he initialises MUST by typing, in DOS:
SET MUST=C:\PIERRE
and the software MUST will work with the data in the directory C:\PIERRE.
It's the same process for Marie, who initialises the variable MUST by :
SET MUST=C:\MARIE
II-4.2 Creation of a new working directory
During the installation, an initial work directory is automatically created. Afterwards,
if Jean creates his work environment without using the installation program SETMUST, he
has to create his own network, for example JEAN, in the directory D:\USER, by following
these steps:
1) Put himself in the directory from which one creates the new network, in our
example the directory D:\USER
2) create the work directory by the command DOS makedir :
md JEAN
3) create the ensemble of the arborescence using the following commands:
cd
md
md
cd
md
md
JEAN
SEQ
MUST
MUST
ALI
DATA
7
MUST user's manual - Version 1.0 (Apr/03)
4) if they already exist, copy his own files into the directories
D:\USER\JEAN\MUST\ALI, D:\USER\JEAN\MUST\DATA and
D:\USER\JEAN\SEQ
The sub-directories TYPE0 ... TYPEy are created by the software.
For a description of the files to copy, consult chapters I.8.3, I.8.4 et I.8.6
I-5 General keyboard coding
We will first present the keys you will use the most often, in giving their general
function:
Return :
validates a choice in a menu or signals the finish of a chain of
characters;
Escape :
return to preceding menu or exit from the program (normally or
prematurely);
F1 :
access to HELP screen (when there is one!);
F2 :
access to lists of aid in acquiring data or the list of programs;
F5 :
validates the entry or the choices made on the current screen;
Pgup, Pgdn, Home and End : all these keys permit you to move around in the
menus (Ctrl+→ and Ctrl+← let you move quickly).
REMARK : It occurs, although rarely, that the keys do not have the capabilities we mention
above.
I-6 Color code
As a general rule, the color of a window is characteristic of its type:
• red :
window warning of a dangerous action demanding confirmation
(destruction, exit from program, etc.),
• fuchsia : help window,
• green : menu, (a menu line ending with an arrow calls a submenu),
• blue :
question needing a response (at least a confirmation),
• white : list (files, species, etc.),
The text of certain windows may use other colors (check each program for specifics)
but you will find the following colors in all programs:
• bright yellow : active datum,
• light blue :
keys to use to continue through the program,
• white :
label characterising a datum,
8
MUST user's manual - Version 1.0 (Apr/03)
• light green :
• red :
datum properly so called,
window title.
I-7 Printing results
I-7.1 Matrix printers
Many programs have printout options. In most cases, the printout is in text mode,
workable on the majority of matrix printers. Certain non matrix printers can also do the job.
However, in the present version, printouts in graphic mode require the use of a printer with
8, 9, or 24 pins.
REMARK : Because of the diversity of printing codes used by the
manufacturers, even with a pin printer, we can't guarantee that you will
be able to print out graphics.
MUST has no special error management to indicate lack of a printer. When the
computer is not connected to a printer a DOS error message, comparable to the following,
will appear surimposed on the screen (check your DOS manual to resolve the problem):
Erreur d'écriture : écriture sur unité PRN
Abort, Retry, Ignore, Fail
The programs can "redirect" this printout toward a file called <program
name>.OUT; thus, the program VERISEQ would route to VERISEQ.OUT This possibility
offers three major advantages:
• especially, to economise paper, since quite often one reads a printout only once
and throws it out.
• to modify the exit point of the program when it's not optimal, for example, to
correct printing codes on exit printers in text mode.
• you can work on a computer not connected to a printer and transfer, on diskette,
what you wish to print onto a computer connected to a printer.
The default configuration is not necessarily an exit onto a printer (check each
program description for more details).
I-7.2 Postscript printers
For the programs TREEPLOT, MONO_HIS, COMP_MAT and COMP_BOO, it is
possible to obtain a print file in Postscript format. This file contains commands in Postscript
language which can be modified to adjust the final printout. To print the file, simply use the
print command for the system of your machine, applied to the Postscript file. Some
examples:
print TOTO.PS
in DOS
lpr TOTO.PS
in UNIX
with TOTO.PS the file to be printed.
9
MUST user's manual - Version 1.0 (Apr/03)
The impression is configured for a sheet-to-sheet printer using pages 21 cm by 29.7 cm.
The printout options differ, depending on the program: check each program description.
10
MUST user's manual - Version 1.0 (Apr/03)
I-8 Summary of files used by MUST
I-8.1 [MUSTEXE]\MUSTEXE
Files
*.AID
Descriptions
Help files of the call menus
Software
MUST, USEB and FAST
*.EXE
Executable programs
All
*.HLP
Help files
All
*.MAT
Matrices of similarities for amino acids
NET and NJBOOT
SYS*.*
Systematic frames created by
MAKETREE
MAKETREE, ED, AFAS,
CAFAS, SHAREGAP,
JACKMONO
These files must not be destroyed.
However, the SYS*.* files created by MAKETREE can be destroyed by this same
program.
I-8.2 [MUST]\MUST
Files
Descriptions
TYPEMOL.LST Contains the list of databases
Software
All the programs called by
USEB
This file is destroyed through the program DELBANK.
I-8.3 [MUST]\MUST\ALI
Files
*.ALI
*.INF
Descriptions
Files of aligned sequences prepared by
AFAS
Software
AFAS, CAFAS and DAFAS
Information associated with the
corresponding *.ALI file
AFAS, CAFAS and DAFAS
These files can be deleted through the program DAFAS.
The *.ALI and *.INF files function in pairs. If you wish to copy a file of sequences
prepared on another machine (or another directory) you must also copy the corresponding
information file.
11
MUST user's manual - Version 1.0 (Apr/03)
I-8.4 [MUST]\MUST\DATA
Files
AFAS.REF
Descriptions
Contains the name of the active
systematic frame for AFAS et ED, and
that of the active file
specifying the correspondence between
'species name' and 'group name'
Software
AFAS, ED, JACKMONO and
SHAREGAP
FILM.
Contains the information on archived
films
FILM
*.BOR
Files of boundaries generated by NET
NET
*.LIS
Lists of species generated by CAFAS
and ED
CAFAS and ED
*.NOM
Contains the correspondences between
'species names' and 'Group names'
SAVESEQ, EMBL, FILM, ED,
MODIFSEQ, SHAREGAP and
AFAS
*.SYS
Contains the configuration for
COMP_BOO, COMP_MAT, ED,
MONO_HIS, NET and TREEPLOT
COMP_BOO, COMP_MAT,
ED, MONO_HIS, NET and
TREEPLOT
The *.BOR and *.LIS files are deletable using NET, CAFAS and ED.
I-8.5 [MUST]\MUST\TYPEi
Files
ESPECE.LST
Descriptions
List of species of the ith database
Software
All programs called by USEB
SEQj
Information for the jth species of the ith
database
All programs called by USEB
Each TYPEi directory corresponding to a database of sequences. All these directories
have the structure described below.
The files in these directories can be deleted by DELBANK.
I-8.6 [MUST]\SEQ
Files
*.ALI
Descriptions
Files of aligned sequences
12
Software
ED, AFAS, VERIFSEQ,
EMBL,
SAVESEQ, MODIFSEQ and
INTEGSEQ
MUST user's manual - Version 1.0 (Apr/03)
I-8.7 Current working directory
Several programs create files in the active directory (the list of files likely to be found
in that directory is given in the following table). In order to conserve the readability of the
MUST arborescence, we advise that you create one (or several) work directories outside
the arborescence.
REMARK: These active directories can be anywhere on the disk, or on a
diskette.
Files
*.ALI
Descriptions
Files of aligned sequences in ED format
Software
NET, AFAS and ED
*.ARB
Trees usable for TREEPLOT
NJ, AFT_PAUP, AFT_HEN,
AFT_PHYL, TREEPLOT and
NJBOOT
*.CLU
Files of aligned sequences created by
NET in CLUSTAL format
NET, CLUSTAL
*.DBO
Files of aligned sequences created by
NET in DNABOOT format
NET, DNABOOT
*.DCO
Files of aligned sequences created by
NET in DNACOMP format
NET, DNACOMP
*.EMB
Files in EMBL format
EMBL
*.GRP
Description of the regroupings found by
NJBOOT and JACKBOOT
NJBOOT and JACKBOOT
*.HEN
Files of sequences in HENNIG86 format
HENNIG86
*.INV
Files of aligned sequences created by
NET in DNAINVAR format
NET, DNAINVAR
*.MAC
Files of sequences in MACCLADE or
PAUP 3.0 formats
MACCLADE and PAUP 3.0
*.MAT
Files of matrices of distances created by NET, TREEPLOT, NJ and
NET or TREEPLOT
COMP_MAT
Files of aligned sequences created by
NET, DNAML
NET in DNAML format
*.ML
*.MLK
Files of aligned sequences created by
NET in DNAMLK format
13
NET, DNAMLK
MUST user's manual - Version 1.0 (Apr/03)
Files
*.NBM
Descriptions
Information concerning the treatments
done to create the files of matrices of
distances
Software
NET, TREEPLOT, NJ and
COMP_MAT
*.NBR
Files in NBRF format
NBRF
*.NBS
Information concerning the treatments
done
to create the files of sequences
NET, AFT_PAUP, AFR_HEN,
AFT_PHYL
*.NET
Files of sequences usable by NET,
created by ED, CAFAS and NET
CAFAS, ED and NET
*.OUT
Redirection of an exit for printout
All the MUST programs
which have a printout exit
*.OUT
Exit for programs PAUP, HENNIG86
and PHYLIP
AFT_PAUP, AFT_HEN
and AFT_PHYL
*.PAU
Files of sequences in PAUP 2.4 format
PAUP 2.4
*.PEN
Files of aligned sequences created by
NET in DNAPENNY format
NET, DNAPENNY
*.POS
List of positions and associated values
(ex : number of nucleotides at this
position)
NET, AFT_HEN, AFT_PHYL
and COMP_POS
*.PRS
Files of aligned sequences created by
NET in DNAPARS or PROTPARS
formats
NET, DNAPARS and
PROTPARS
*.TRE
Tree created by the PHYLIP programs
AFT_PHYL
*.*
Files in GENBANK and SWISS formats
GENBANK and SWISS
*.
Files of raw sequences created by NET
in PCFOLD format
NET, PCFOLD
The *.MAT and *.NBM files form a pair; they must be copied and moved together.
In the same way, the *.PAU, *.HEN, *.MAC, *.CLU, *.ALI, *.NET, *.PRS,
*.DBO, *.PEN, *.ML, *.MLK, *.DCO, *.INV and *.CLU files are associated with
an *.NBS file.
14
MUST user's manual - Version 1.0 (Apr/03)
I-8.8 *.BAK files
These files can be in all directories belonging to the software, except the current
directory. They contain a save of the previous version of the data files. They can thus be
destroyed by the user. We strongly advise that this be done from time to time, because
they can take up a lot of room on the disk.
I-9 Indications on the architecture of the database
I-9.1 General information
This section concerns you only if you have had an electrical failure at the moment a
program was writing on the disk, or if you have received a message of the FATAL ERROR
type. In these cases you may have to manually correct the contents of certain files. to help
you in this task, a succinct description of the principle files is given below.
In case of problems, begin by recuperating the lost files by executing the DOS
command:
CHKDSK /F
From this point on, the architecture must be reconstructed:
either in renaming the files with the BAK extension, for example by the DOS command:
rename ESPECE.BAK ESPECE.LST
or in writing the files yourself to recuperate the proper format; for this you must use an
editor which permits a save in ASCII format.
ATTENTION: It is important to note that the files <MUST>\MUST\TYPEi\SEQj
contain all the information necessary to define the sequence present in
the file.
All these files are write protected. In addition, each time a MUST program modifies a
file, it renames the former file by giving it the extension BAK (for example, TYPEMOL.BAK,
ESPECE.BAK or SEQ12.BAK); then it writes the new file.
I-9.2 File descriptions
In the directory <MUST>\MUST the file TYPEMOL.LST contains, on the first line, the
number of types of molecules, then a line following with <Molecule 0>, then a line with
<Domain 0>, etc. For example:
2
28S
C1
28S
|
|
|
|
number of types
Molecule 0
Domain 0
Molecule 1
15
MUST user's manual - Version 1.0 (Apr/03)
D1
| Domain 1
The order in which the types of molecules are listed is fundamental, since it
determines in which directory the corresponding sequences are located: this is the
directory <MUST>\MUST\TYPEi, i being the molecule order number. For example, the
sequences for 28S-C1 are in the directory <MUST>\MUST\TYPE0.
The file ESPECE.LST, in the directory <MUST>\MUST\TYPEi, contains on its first
line the number of species archived for a given type of molecule; then, on the following
lines, the species names. As above, the order is fundamental since the information
concerning the species is located in the file <MUST>\MUST\TYPEi\SEQj, j being the order
number. This file contains all the information in text mode, preceded by a #, then the
sequence, on a line not beginning with a #.
For example, for the 28S - C1, the file <MUST>\MUST\TYPE0\ESPECE.LST looks
like this:
2
Mus musculus
Xenopus borealis
And the file <MUST>\MUST\TYPE0\SEQ1 contains all the information on Xenopus
borealis as follows:
#Molecule: 28S
#Domain: C1
#Identifier: Xenopus borealis
#Characteristic of the organism: XEB28SRRNA
#Author(s) of the sequence: ?
#Number of films: X59733
#Quality of the sequence (A-F): B
#Reader(s) of sequence: ?
#Archived: Wednesday 4 August 1993 at 10 hours 6
#Free commentaries:
#Ajuh,P.M., Heeney,P.A., Maden,B.E. and Edward,H.
#Xenopus borealis and Xenopus laevis 28S ribosomal DNA and its
#complete 40S ribosomal precursor RNA coding units of both species
#Proc. R. Soc. Lond., B, Biol. Sci. 245, 65-71 (1991)
UCAGACCUCAGAUCAGACGUGGCGACCCGCUGAAUUUAAGCAUAUUACUAAGCGGAGGAAAAGAAAC
UAACCAGGAUUCCCCCAGUAACGGCGAGUGAAGAGGGAAGAGCCCAGCGCCGAAUC
I-10 The MUST program
This is a call program for the principal software in the MUST package. It is in the
form of a selection menu which displays the program function followed by its name. To
activate a program you must use Return to validate the active line, in yellow.
Using F1, you can get a terse description of the current program.
16
MUST user's manual - Version 1.0 (Apr/03)
II SEQUENCE DATABASE
II-1 General presentation
Two variables are used to define the type of sequence entered: Molecule and
Domain. The first is used whatever the sequence, while the second is of interest only for
large molecules. However, both variables must always be named (a simple dash can be
used for Domain, but one can also indicate the type of molecule by putting DNA or
Protein). It is advisable to cut a large molecule into domains of homogeneous variability in
order to facilitate the alignment. To define the sequence, you simply assign it an identifier
which must contain one, and only one, blank. We advise the use of the following syntax:
<genus name> <species name>[_<various characteristics>]
where the use of "various characteristics" is facultative.
EXAMPLE :
Mus musculus
Salmo salar_Bretagne
Xenopus laevis_17
REMARK: One unique sequence will be recognised by these three key-words.
There are other types of information which permit a better characterisation of the
sequence, but these are not used for the programs to recognise the sequence. Thus, in the
files of aligned sequences (which must have an ALI extension and be in the <MUST>\SEQ
directory, the first two lines have to be :
#<Molecule>
#<Domain>
The remainder of the file is a repetition of the motif:
><genus name> <species name>[_<various characteristics>]
<Corresponding sequence>
It is sufficient to put an # at the beginning of a line for it to be considered as a
commentary (except for the first two lines). These constraints must be respected in
constructing files in order to have good correspondence with the database (see the file
C1.ALI on the diskette).
Figure 1 indicates the existing programs and the information transfers they handle.
Now we will go into detail on the usage of each program.
II-2 The USEB Program
This program lets you call the ensemble of database management programs, using
a rolling menu; you don't need to know the names of the programs. These different
programs are presented below. An aid, describing each program, is available by using F1.
17
MUST user's manual - Version 1.0 (Apr/03)
Figure 1 : Schematic flowchart of the management of raw sequences (USEB).
18
MUST user's manual - Version 1.0 (Apr/03)
II-3 The ENTRYSEQ Program
REMARK: If you have computer tools for the reading and interpretation of films, this
program is of no interest. In that case, save your sequence in an ASCII file and use
the program SAVESEQ directly (see below).
II-3.1 Sequence acquisition
This program is used to acquire nucleic acid or protein sequences. By default, it is
configured in the "acquisition of nucleic acids" mode. Use F2 to pass from one mode to the
other. The code is indicated by the letter used. The program asks you to enter the
sequence two separate times.
REMARK: We recommend that two people work together on this, one reading the films and
the other entering the sequence, then reversing roles for the second entry.
Each acquisition is done simply by using the alphabetic keys of the keyboard. The
acquisition is validated by using the Return key, with the program asking for confirmation.
II-3.2 Correction of acquired sequences
After the second entry is validated, the program compares the two entries, and
indicates differences between them. The second sequence is displayed below the first, with
identical characters indicated by dashes.
The current element is displayed in yellow. The only possible writing mode is
'insertion'. To replace a character, remove it using Backspace or Delete, then insert the
new character. The insertion of a new element occurs to the left of the current one. Use the
vertical displacement arrows to pass from one sequence to the other. The horizontal
displacement arrows let you travel along the sequence (depressing Ctrl at the same time
lets you move quickly, in jumps of 30 characters.
The sequence cannot be definitively validated (using Return) until the two
sequences are identical.
II-3.3 End of the program
After validation, the program displays a menu with several functions.
For many people, it is easier to read films in the direction 3'->5', but conventionally
they are used in the 5'->3' direction. So the program offers you the possibility to invert the
acquired sequence.
It is also possible to generate the complementary sequence of DNA or RNA, as
such or inverted.
Example:
If the sequence entered is ACGTT, depending on the option chosen, the sequence
archived will be:
19
MUST user's manual - Version 1.0 (Apr/03)
ACGTT if option "Leave the sequence as it is" ;
TTGCA if option "Invert the sequence" ;
AACGT if option "Take the fragment of complementary ADN as it is" ;
TGCAA if option "Take the fragment of complementary ADN and invert
it".
REMARK: The program SAVESEQ is then automatically activated (if there is some
problem, the sequence will be saved in the file <MUST>\MUST\SEQUENCE.BRU)
II-4 The SAVESEQ Program
II-4.1 General information
You can also call SAVESEQ directly to archive a sequence contained in a file:
simply type at the DOS prompt:
SAVESEQ <name of file containing sequence>
The file should consist only of sequence and spacing characters. The blanks and
line shifts placed in the sequence are automatically eliminated by the program. For
example, a file might look like this:
GAAGGCGTAA
GCGGTTGGTG
AACATTTTGT
GAGTCCTCCT
CTCAGGACGC
ATCCTGGTTG
TTGTTCTCTG
TGTTGGATTC
TTGCGCTCAT
GACCGGTGGA
TGAACTTTTA
TCTCTTGAAT
CGCAGAACAG GGGTGGTGCC
GATGCGCGCG CACGAAGGGG
GATGTGTTAA AGGCGGCGAA
TTCGCCCTTT
If SAVESEQ finds E, F, I, L, P or Q in the sequence, it assumes a protein; if not, it
assumes an nucleic acid. It then verifies that the characters figure in one of the two
following codes:
For nucleic acids
For proteins
A
=
A
A
=
Ala
C
=
C
C
=
Cys
G
=
G
D
=
Asp
T, U =
T, U
E
=
Glu
R
=
A, G (Purine)
F
=
Phe
Y
=
C, T (Pyrimidine)
G
=
Gly
M
=
A, C
H
=
His
W
=
A, T
I
=
Ilu
S
=
C, G
K
=
Lys
K
=
G, T
L
=
Leu
V
=
A, C, G
M
=
Met
H
=
A, C, T
N
=
Asn
D
=
A, G, T
P
=
Pro
B
=
C, G, T
Q
=
Gln
N
=
A, C, G, T
R
=
Arg
S
=
Ser
T
=
Thr
V
=
Val
W
=
Trp
Y
=
Tyr
20
MUST user's manual - Version 1.0 (Apr/03)
X
=
undetermined
If the program encounters unknown characters, it proposes that they be transformed
into X's. This transformation is required for the remainder of the integration of the
sequence. If the user refuses, the program aborts without saving the sequence.
We strongly recommend that you archive only sequences which have been
precisely determined. It is possible to modify stored sequences (with the
program MODIFSEQ), but not simple.
II-4.2 Molecule and Domain
The program asks you to fill in a certain number of fields. The fields Molecule,
Domain, and Identifier are obligatory to save a sequence. Apart from the rubric Free
Commentaries, the other fields will assume a default value, if you do not assign one ('?' or
'E' for Quality of the sequence)..
For the fields Molecule and Domain, F2 will give you the list of existing databases.
You choose the active base, in yellow, using Return. If you wish to create a new type of
molecule, simply fill in the fields Molecule and Domain; a window will appear proposing the
following three options:
This database does not exist in the unit <MUST>
• to choose from the list of existing database
• to correct the name you just have entered
• to create this new database
You should go to the third option and validate with Return.
II-4.3 Identifier
To fill the field Identifier, you can again use the F2 key which will display the list of
species contained in one of the files (with the extension NAME) in the
<MUST>\MUST\DATA directory. This file is obligatory. It contains the list of names of
species which you use, as well as their group names (cf. below). This file can have a large
number of lines (1600 maximum) according to the following format:
<genus name> <species name>[_<various characteristics>] , <group name>
EXAMPLE :
Mus musculus , Rodentia
Xenopus laevis_17 , Lissamphibia
Species names must be in alphabetical order in the file (if necessary, use the DOS
command SORT to alphabetise). All new species archived must have its name in this file.
When there are several users, you may create several files of this type. For example, the
software is furnished with the file GENERAL.NOM in the <MUST>\MUST\DATA directory.
21
MUST user's manual - Version 1.0 (Apr/03)
The list of species, classified alphabetically, is displayed when you type F2. Typing
the first letter of the species name sought displays a shortened list of all species whose
names begin with that letter; F2 returns you to the complete list.
If you wish to rename or discard a file of this type, you must use DOS commands.
Also, if you want to remove a species from the file, correct spelling errors, or change group
names, it is necessary to use a text editor.
However, you can add new species to the files. Simply put the desired name in the
Identifier field and validate. The menu which follows will display:
This species is not in the file <MUST>\MUST\DATA\GENERAL.NOM
• to choose from the list of species in file <MUST\DATA\GENERAL.NOM
• to change the file containing the species names
• to integrate this species in the file <MUST>\MUST\DATA\GENERAL.NOM
You validate the third option; then enter the group name of the new species. The
program searches the <MUST>\MUST\DATA\AFAS.REF file for the name of the active
systematic frame (see below) and constructs a list of all the group names in that systematic
frame. Then you choose the name you want from that list.
Using this menu, you can also create a file with the option "to change the file
containing the species names". Simply supply a new name to create the
corresponding file.
II-4.4 Other rubrics
You must then fill in the different rubrics, being all the more careful if several people
are working in collaboration. This is the only way in which your co-workers (and yourself as
well, several months later!) can know precisely which individual of the species has been
used and what level of confidence one can have in the sequence. The film numbers will
permit you to easily locate them again to check the estimated quality and the number and
identity of readers. This in turn will lead you to reread the film, rerun the sequence, or
accept the data supplied.
Once all the rubrics are completed, F5 archives the sequence and its related
comments in the database.
II-4.5 Integration into the files of aligned sequences
SAVESEQ then displays the list of aligned sequence files corresponding to the type
of molecule you have entered. Remember that these files must be in the <MUST>\SEQ
directory, and have an ALI extension. You can then add the sequence to the end of the file
activated by using Return, or in a new file by using F3. If no file corresponds to the new
molecule, the program goes directly to create mode.
WARNING: the program will simply add the new sequence to the end of the
*.ALI file.
22
MUST user's manual - Version 1.0 (Apr/03)
II_5 The SAVECUT program
The purpose of this program is to help the user divide a large gene into several
domains. For example, the ribosomal RNA 23-28S (LSU) has been split into 20 domains
(10 conserved and 10 variable) in order to facilitate management and alignment (see
above). To be able to use this program, it is necessary to determine the conserved
domains, and to have the beginning and end sequences of highly conserved domains (with
very few gaps, and around 20 characters). These highly conserved sequences will then be
used to search for the domain limits in new sequences to be archived. The consensus
sequences of domain limits for ribosomal RNA 28S are furnished in the
<MUST>\MUST\DATA\*.CUT files. To optimise limit searches, a consensus sequence has
been determined for each of the three super-kingdoms (Eubacteria, Archaebacteria and
Eukaryota). The sequences differ slightly between the three groups; in practice it is
possible, but rather difficult, to divide a eukaryotic gene with the sequences from
Eubacteria.
SAVECUT lets you archive sequences which are in an ASCII file, cutting the gene
into several domains. These sequences may have been acquired using ENTRYSEQ: in
that case, they will be in the <MUST>\MUST\SEQUENCE.BRU file. You will need to know
the name of the raw sequence file; this is necessary to start the command:
SAVECUT <filename>
You will also need a cut file corresponding to the molecule type. The format of this
file, *.CUT, is described below.
II-5.1 Cut file format
For each conserved domain in the molecule, the file contains two sequence
fragments, corresponding to the domain limits. These fragments serve as references to
determine the beginning and end of the domain in the new gene. However, if the gene
begins with a conserved domain, the sequence corresponding to the start of the domain is
not given; the program begins the domain at the level of the first character. In the same
manner, if a gene ends with a conserved domain, the end sequence of that domain is not
described, and the program pursues the final domain to the last character of the gene.
The cut files for the 28S RNA are furnished with the software. These three files
(28S_ARCH.CUT for Archebacteria, 28S_EUBA.CUT for Eubacteria and 28S_EUKA.CUT
for Eukaryota), are in the directory <MUST>\MUST\DATA.
The file should have the following format:
Name of molecule: 28S
Name of domain: C1
Begin
23
MUST user's manual - Version 1.0 (Apr/03)
End
GAACGCGGUACAGCCCAAACCGAAUC
Name of domain: C2
.
.
Name of domain: C12
Begin
AGUACGAGAGGAAC
End
GCAUCUAAGCUCGAAACC
II-5.2 Using SAVECUT
The first phase of utilisation of SAVECUT is identical to that of SAVESEQ. The only
difference is at the level of sequence determination; the keywords Molecule and Domain
are not requested, only the Identifier must be specified. After the sequence is extracted, the
list of cut files, *.CUT, is presented in menu form, with the choice of current file (in yellow)
by using Return. A confirmation of the choice, with file description, is requested.
The program then searches for all similarities between the genes and the different
reference sequences of conserved domains. For each reference sequence, a list of the 20
best matches is displayed, in decreasing order of similarity.
<position in the gene> : <number of similarities>.
The name and length of the reference sequence is displayed above each list. In order to
avoid possible domain straddling, the program proposes only similarities which start after
the end of the preceding domain. This is applicable once the terminal position of the
preceding domain has already been validated.
One can establish the upper limit beyond which no similarity should be taken into
account by using F2. This is an useful trick, if one knows the exact position of the next limit
or the approximate length of the domain.
A display of similarities is proposed, for fine determination of the position to be taken
into account in cutting the gene. The current similarity is shown in yellow when Return is
depressed. Under the reference sequence, the portion of the gene concerned is displayed,
with identical characters shown as dashes. It is then possible to choose the exact position
where the gene should be cut, using the horizontal arrows to move the cursor along the
sequence. The current position is in yellow. The program cuts to the left of that position. To
confirm the cut, simply validate using Return; the position is recorded and the cursor
moves automatically to the level of the next reference sequence. Escape will return you to
the same list of similarities without recording the cut.
To advance to the next cut, you must validate a position. It is not possible to jump
from cut to cut. However, there is another possible method: you can jump a cut by using
Escape. This trick lets you eliminate domains which are not present in the gene you wish
to cut.
24
MUST user's manual - Version 1.0 (Apr/03)
REMARK: Because of the automatic displacement after validation of a position and the
impossibility of moving along the cuts, no corrections are possible. For this reason,
be very prudent in your choices: each validation of a cut is definitive.
When all the cuts have been traversed, SAVECUT saves each domain in the
corresponding aligned sequence file. The program assumes that, between two conserved
domains, there is a divergent domain. It names this divergent domain using the letter D
followed by the number of the preceding conserved domain. If the gene begins with a
divergent domain, this one will be called D0.
II-5 The EMBL program
II-5.1 Format EMBL
It is also possible to archive sequences which come from the EMBL bank. You need
to have the sequence of interest in a file with the extension EMB, in the format described
below. For the EMBL program to operate, this file can only contain one sequence.
WARNING: Many sequence extraction programs concatenate all the
sequences extracted into the same file. It is then necessary to split this
file into as many separate files as there are sequences. The SPLITEMB
program will do this for sequences pulled out of the EMBL bank (see II6.1).
ID
XX
AC
XX
DT
DT
XX
DE
XX
KW
XX
OS
OC
OC
XX
RN
RA
RT
RT
RL
XX
CC
XX
FH
FH
FT
FT
XX
SQ
GGHBBM
standard ; RNA ; VRT ; 601 BP.
J00860 ;
02-DEC-1985 (sequence correction)
18-JUL-1985 (incorporated)
Chicken hemoglobin beta chain mrna
beta-globin ; globin.
Gallus gallus (chicken)
Eukaryota ; Metazoa ; Chordata ; Vertebrata ; Tetrapoda ; Aves ;
Galliformes.
[1] (bases 1-601)
Richards R.I., Shine J., Ullrich A., Wells J.R.E., Goodman H.M. ;
"Molecular cloning and sequence analysis of adult chicken beta
globin cdna" ;
Nucleic Acids Res. 7:1137-1146(1979).
Formerly chkhbb. compared with nbrf data.
Key
Location/Qualifiers
CDS
52..495
/note="Beta-globin message"
Sequence 601 BP ; 135 A ; 202 C ; 148 G ; 116 T ; 0 other ;
gctcagacct cctccgtacc gacagccaca cgctaccctc caaccgccgc catggtgcac
tggactgctg aggagaagca gctcatcacc ggcctctggg gcaaggtcaa tgtggccgaa
25
MUST user's manual - Version 1.0 (Apr/03)
tgtggggccg
gcgtcctttg
cacggcaaga
aacaccttct
ttcaggctcc
actcctgaat
cgcaagtacc
cctgcagaaa
a
aagccctggc
ggaacctctc
aagtgctcac
cccaactgtc
tgggtgacat
gccaggctgc
actaagcacc
tgctccggag
caggctgctg
cagccccact
ctcctttggg
cgaactgcat
cctcatcatt
ctggcagaag
agcaccaaag
ctgacagctt
atcgtctacc
gccatccttg
gatgctgtga
tgtgacaagc
gtcctggccg
ctggtccgcg
atcacggagc
gtgacaaata
cctggaccca
gcaaccccat
agaacctgga
tgcatgtgga
cccacttcag
tggtggccca
acctacaacc
aagttcattc
gaggttcttt
ggtccgcgcc
caacatcaag
ccccgagaac
caaggacttc
tgccctggct
attgcatgca
agtgacactc
//
II-5.2 Acquisition of characteristic sequence fields
When you commence the EMBL program, you can initially choose the file of interest
among all the files in the current directory which have an EMB extension .
After file selection, a screen comparable to that of SAVESEQ is displayed, but with
fewer rubrics and a supplementary window at the base of the screen. In this window are
displayed the text of the EMB file lines which begin with:
KW if the cursor is on the fields Molecule and Domain
•
•
OS and OC if the cursor is on the field Identifier
•
DE, RN, RA, RT, RL and CC if the cursor is on the Free commentaries field
These concern information pulled from the EMB file which can provide aid in the
acquisition of the diverse fields. The rubric Identifier is completed automatically by the
contents of the line beginning with OS.
The fields Molecule, Domain, and Identifier are obligatory to pursue the acquisition.
The F2 key offers the same functions as in SAVESEQ when the cursor is on these fields.
In addition, when the cursor is on the Free commentaries field, F2 gives you access
to a new window, displaying in particular the article references in which the sequence has
been published. You can move within the window using the vertical displacement arrows
and select any line by tapping Return. An ordering number appears at the left of each line
selected. The selection is validated using F5. All the selected lines are then added to the
Free commentaries field. The F4 key lets you annul all selected lines at the same time. To
suppress the selection of a single line, hit Return when that line is active. Note that when
the cursor is positioned on a line already written into Free commentaries, the selected line
in the aid furnished will replace the line marked by the cursor.
The fields Number of films and Characteristic of the organism are not displayed on
screen but are completed automatically by the access number and the sequence
mnemonic, respectively. These fields are displayed by the INFOBANK and MODIFSEQ
programs, and serve as a reference for the bibliographies of your articles.
II-5.3 Choice of sequence portions
After F5 validation of acquired fields, the screen displays a selection of the portions
of sequence to be extracted. The sequences in an EMBL file are composed of the
ensemble of nucleotides sequenced (for example, all of a chloroplast genome). But
generally, one works on a given fragment (coding sequence, intron, pseudogene...) The
26
MUST user's manual - Version 1.0 (Apr/03)
program allows the selection of this fragment, even if it is not continuous in the genome,
since it offers the possibility of concatenating several fragments.
To perform this extraction:
• Choose the sequence portions in the list furnished by the EMBL bank, with
Return. An ordering number for concatenation appears to the left of each line
selected,
• Create a new portion by tapping F3; the limits of this selection are then
demanded (the portion is automatically selected),
• If necessary, correct your choice by tapping Return on a previously selected
line. The selection is removed and the order of concatenation corrected,
• Validate your choice using F5.
Using the following menu, you can then transform the DNA sequence:
Leave the DNA sequence intact
Replace T's with U's
Take the complementary DNA
Take the complementary RNA
Translate the complementary into protein
Translate into protein
For example, in the above file, if you wish to select only the sequence coding for
beta-globulin, simply select the line containing the keyword CDS; the number 1 appears to
the left of that line, and the choice is validated using F5.
Once the material is saved the program displays, as in SAVESEQ, the
corresponding list of aligned sequence files. After you have added the new sequence to the
files you choose, you can either extract another sequence from the same file using F4 or
return to the list of files with an EMB extension using F5. Within that list, you can discard
unwanted files with the Del key.
WARNING: no confirmation is requested before deletion of these files
II-6 Other extraction programs
These programs function in the same manner as EMBL. However, the programs
SWISS and NBRF permit neither the extraction of sequence portions nor sequence
transformations.
II-6.1 The SPLITEMB and SPLITGEN programs
These programs are anterior to all programs which allow the transformation of
sequences extracted from a sequence bank into a sequence usable by MUST. Many
programs for extraction concatenate, into a single file, all sequences extracted from a
sequence bank. But the transformation software furnished in MUST can only work with files
27
MUST user's manual - Version 1.0 (Apr/03)
containing a single sequence. Therefore it is necessary to split the primary extraction file
into as many files as there are sequences. The SPLITEMB and SPLITGEN programs do
this job.
SPLITEMB splits extraction files in the format of the EMBL bank. It searches for the
keyword ID at the beginning of the line. This keyword indicates to the program that a new
sequence has begun. To determine the end of the sequence, the program seeks the
keyword //. SPLITEMB creates a file with the ensemble of characters between these two
keywords. To name the new file, the program takes the sequence identifier (the word which
follows the keyword ID) as filename, then gives the file an EMB extension. If the identifier
has more than 8 characters, a period is inserted after the eighth character with the
remainder of the identifier serving as the file extension. If the identifier has more than 11
characters, the extension is truncated to three characters.
REMARK: since the EMBL program does not recognise files without an EMB extension,
those files with an identifier of fewer than 8 characters must be renamed so as to
have this extension.
SPLITGEN works in the same way as SPLITEMB, with the first keyword recognising
a sequence being LOCUS.
REMARK: since the formats of files from the EMBL and SWISSPROT banks are
compatible, the SPLITEMB program can also treat primary files extracted from
SWISS-PROT.
II-6.2 The EMBLCUT program
This archives sequences from the EMBL bank, cutting the gene into several
domains. The sequence of interest must be in a file formatted for EMBL, *.EMB for which
the format is described in chapter II-5, as well as a cut file corresponding to the molecule
type. The format of this latter, *.CUT, is described in chapter II-5.1.
The usage of EMBLCUT is two-step:
• the extraction of the sequence, in a manner comparable to the extraction in
EMBL,
• the determination of limits of conserved domains in a manner comparable to that
in SAVECUT (cf. II-5.2).
II-6.3 The GENBANK program
This will archive sequences which come from the GENBANK. It is sufficient to have
the sequence of interest in a file with the format described below. There must not be more
than one sequence in the file.
REMARK: Many programs for sequence extraction from sequence banks
concatenate all the sequences extracted into the same file. Thus it is
necessary to split the primary extraction file into as many files as there
28
MUST user's manual - Version 1.0 (Apr/03)
are sequences. The SPLITGEN program will do this job for sequences
pulled from GENBANK (see II-6.1).
LOCUS
DEFINITION
ACCESSION
KEYWORDS
SOURCE
ORGANISM
CHKAGLBD
426 bp ds-DNA
VRT
15-DEC-1988
Chicken alpha-globin-D gene, complete cds.
M15378
alpha-globin ; globin.
Chicken nonanemic reticulocte DNA, clone lambda-C-alpha-G2[7].
Gallus domesticus
Eukaryota ; Animalia ; Metazoa ; Chordata ; Vertebrata ; Aves ;
Neornithes ; Neognathae ; Galliformes ; Phasianidae ; Gallus
domesticus.
REFERENCE 1 (bases 1 to 426)
AUTHORS Dodgson,J.B., McCune,K.C., Rusling,D.J., Krust,A. and Engel,J.D.
TITLE
Adult chicken alpha-globin genes, alpha-A and alpha-D: No anemic
shock alpha-globin exists in domestic chickens
JOURNAL Proc. Natl. Acad. Sci. U.S.A. 78, 5998-6002 (1981)
STANDARD simple staff_entry
FEATURES
Location/Qualifiers
CDS
1..426
/note="alpha-globin-D"
BASE COUNT
91 a
120 c
121 g
91 t
3 others
ORIGIN
Unreported.
1 atgctgactg ccgaggacaa gaagctcatc cagcaggcct gggagaaggc cgcttcccac
61 caggaggagt ttggagctga ggctctgact aggatgttga ccacctaccc tcagaccaag
121 acctacttcc cccacttcga cctttcgcct ggctctgacc aggtccgtgg ccatggcaag
181 aaggtgttgg gtgccttggg caacgcggtg aagnnngtgg ataacctgag ccaggccatg
241 gctgagctga gcaacctgca tgcctacaac ctgcgtgttg accccgtcaa tttcaagctg
301 ttgtcgcagt gcatccagtg cgtgcggcta gtacacatgg gcaaagatta cacccctgaa
361 gtgcatgctg ccttcgacaa gttcctgtct gccgtgtctg ctgtgctggc tgagaagtac
421 agataa
//
II-6.4 The GENCUT program
This archives sequences from the GENBANK, cutting the gene into several
domains. The sequence of interest must be in a file formatted for GENBANK, and in a cut
file corresponding to molecule type. The cut file format, *.CUT, is described in paragraph
II-5.1.
The usage of GENCUT is two-step:
• sequence extraction, comparable to that in GENBANK,
• determination of the limits of conserved domains, as for SAVECUT (cf. II-5.2).
II-6.5 The SWISS program
This archives SWISS-PROT sequences. The sequence of interest must be in a file
formatted as described below. There must not be more than one sequence in this file.
REMARK: Many programs for sequence extraction from sequence banks
concatenate all the sequences extracted into the same file. Thus it is
necessary to split the primary extraction file into as many files as there
are sequences. The SPLITEMB program will do this job for sequences
pulled from SWISS-PROT see II-6.1).
29
MUST user's manual - Version 1.0 (Apr/03)
ID
AC
DT
DT
DT
DE
OS
OC
OC
RN
RA
RL
DR
KW
SQ
//
MYG$INIGE
STANDARD ;
PRT ;
153 AA.
P02181 ;
21-JUL-1986 (REL. 01, CREATED)
21-JUL-1986 (REL. 01, LAST SEQUENCE UPDATE)
01-JAN-1990 (REL. 13, LAST ANNOTATION UPDATE)
MYOGLOBIN.
AMAZON DOLPHIN (INIA GEOFFRENSIS).
EUKARYOTA ; METAZOA ; CHORDATA ; VERTEBRATA ; TETRAPODA ; MAMMALIA ;
EUTHERIA ; CETACEA.
[1] (SKELETAL MUSCLE, SEQUENCE)
DWULET F.E., BOGARDT R.A., JONES B.N., LEHMAN L.D., GURD F.R.N. ;
BIOCHEMISTRY 14:5336-5343(1975).
PIR ; A02503 ; MYDDAR.
HEME ; OXYGEN TRANSPORT ; RESPIRATORY PROTEIN ; MUSCLE.
SEQUENCE
153 AA ; 17071 MW ; 108881 CN ;
GLSDGEWQLV LNIWGKVEAD LAGHGQDVLI RLFKGHPETL EKFDKFKHLK TEAEMKASED
LKKHGNTVLT ALGGILKKKG HHEAELKPLA QSHATKHKIP IKYLEFISEA IIHVLHSRHP
GDFGADAQAA MNKALELFRK DIAAKYKELG FHG
II-6.6 Programme NBRF
This will archive sequences which come from the NBRF. It is sufficient to have the
sequence of interest in a file in a file with the extension NBR, and with the format described
below. There must not be more than one sequence in the file.
ENTRY
TITLE
DATE
PLACEMENT
SOURCE
ACCESSION
REFERENCE
#Authors
#Journal
COMMENT
SUPERFAMILY
KEYWORDS
SUMMARY
SEQUENCE
1 G L
31 R L
61 L K
91 Q S
121 G D
151 F H
///
S
F
K
H
F
G
MYDDAR
#Type Protein
Myoglobin - Amazon dolphin
27-Nov-1985 #Sequence 27-Nov-1985 #Text 28-May-1986
428.0
12.0
1.0
20.0
5.0
Inia geoffrensis #Common-name Amazon dolphin
A02503
(Sequence with experimental details)
Dwulet F.E., Bogardt R.A., Jones B.N., Lehman L.D.,
Gurd F.R.N.
Biochemistry (1975) 14:5336-5343
This myoglobin was isolated from skeletal muscle.
#Name globin
heme\ oxygen transport\ respiratory protein\ muscle
#Molecular-weight 17071 #Length 153 #Checksum 1472
5
10
15
20
25
30
D G E W Q L V L N I W G K V E A D L A G H G Q D V L I
K G H P E T L E K F D K F K H L K T E A E M K A S E D
H G N T V L T A L G G I L K K K G H H E A E L K P L A
A T K H K I P I K Y L E F I S E A I I H V L H S R H P
G A D A Q A A M N K A L E L F R K D I A A K Y K E L G
II-7 The MODIFSEQ program
II-7.1 Sequence recognition
This program permits you to modify a sequence already archived, but which
contains errors or is incomplete (either the sequence or the diverse associated comments).
30
MUST user's manual - Version 1.0 (Apr/03)
It is necessary to give the three keywords (Molecule, Domain, and Identifier) in order to
determine, within the base, which sequence you wish to modify. The F2 key can be used to
give either the list of existing databases or the list of species archived, for the type of
molecule chosen (to facilitate the search for an identifier in the list, type in its initial; see II4.3). The acquisition of a name or code identifying the person doing the modification is
obligatory.
II-7.2 Change of molecule type
This option corrects an error in the rubric "type of molecule" (Molecule or Domain).
Once the sequence choice is made, a window displays the ensemble of information
available for that sequence. You then choose the change of molecule type using F3 in lieu
of validating by Return.
You can then choose the new molecule type from the list furnished. However, if the
species already exists in the new type, the program will refuse the change. In this case you
must either change the species name using MODIFSEQ, or destroy the corresponding
sequence with DELBANK.
REMARK: This operation does not modify the aligned sequence files. You have to use
INTEGSEQ to incorporate the sequence whose molecule type you have altered, and
an editor to delete the sequence from its former file.
II-7.3 Rubric modification
Then, without the operation affecting the aligned sequence files, you can change
Characteristic of the organism, Author(s) of the sequence, Number of films, Quality of the
sequence and Reader(s) of sequence. If you change Identifier, the program will
automatically change this name in all aligned sequence files, unless they are not in the
proper format. You must then put them in the needed format and correct the former
Identifier yourself; otherwise there will no longer be any correspondence between the
sequence contained in the base and that in the aligned sequence files.
II-7.4 Modification of sequence
Visualisation of the sequence
In the center of the screen, the sequence is displayed twice. The first display, in
white, is the reference sequence; that is, the sequence presently archived, which makes
the modifications evident. The second, in yellow, is the zone of acquisition: it is in this
sequence that modifications can be made. The cursor is positioned on this second
sequence, and you have no access to the first one.
Movement along the sequence
If you want to modify the sequence, you can move within it in order to find the
zone(s) to be modified, either by using the displacement arrows or by searching for a
subsequence with F2. In this case, you must then give the subsequence and the program
will seek it to the right of the current position and, if it is found, place you at its beginning.
31
MUST user's manual - Version 1.0 (Apr/03)
F3 lets you repeat the search for the same motif to the right of the current position, and F4
to the left.
Replacement, insertion or deletion of characters
The modifications are done in insertion mode, to the left of the current cursor
position. To replace a character, you must therefore delete the former character then insert
the new one, or vice versa. All replacements are visualised in the reference sequence by
displaying the former character on a red background. In the case of an insertion of
character, an empty red space is inserted in the reference sequence.
The suppression of the current character is done using the key Suppr; that of the
preceding character with Backspace. In the case of deletions, the suppressed characters
also appear on a red background.
It is possible to insert a fragment of sequence using the Ins key, following the same
procedure as in ENTRYSEQ; that is, two independent acquisitions of the segment to be
added and the possibility of inversion at the end of the acquisition.
Modifications to the ensemble of the sequence
You can also acquire the sequence anew, independently, using F6; the program will
make the same comparison as in ENTRYSEQ.
Finally, it is possible:
• to invert the sequence using Shift+F1;
• to obtain the complementary DNA sequence with Shift+F2;
• to transform the T's into U's with Shift+F3;
• to transform the U's into T's with Shift+F4;
The final three options being, obviously, available for sequences of nucleic acids,
not of proteins.
For all the preceding cases, the modifications are included in the reference
sequence, and the characters changed do not appear against red.
Validation or cancellation of modifications
Once all modifications have been made, validate your work with F5, since the
program will request this confirmation of modifications before passing to the next phase.
You can then enter a comment on the operations performed. Even if no comment is
entered, a second F5 validation is necessary.
32
MUST user's manual - Version 1.0 (Apr/03)
If you have the slightest doubt as to the validity of the operations you have
performed, there are two possible solutions:
• use Esc to exit from the program without modifying the sequence stocked in the
bank;
• use F7 to annul all the modifications made in the sequence and return yourself
to the initial state.
II-7.5 Modifications in the files of aligned sequences
Once the modifications are completed, the program proposes the addition of Free
commentaries justifying the modification (change of species name, change from GGGGAG
to GGGGGAG...). It modifies the database, and searches in all aligned sequences files
containing the keywords Molecule and Domain for the corresponding Identifier. When it is
found, the program transforms the former sequence to a commentary (adding a # in front
of the sequence) and places the new sequence just below the old one, unless the file is
not in the proper format (in that case, correct the format and use VERIFSEQ which will
give the same result; see below). It is then sufficient to copy the old alignment on the new
sequence.
II-8 The VERIFSEQ program
The purpose of this program is to verify the concordance between the archived
sequences and those in the files of aligned sequences. Of course, it does not take spaces
or gaps (*, - or $) into account. Its default exit is the file VERIFSEQ.OUT, but you can
"redirect" it towards the printer by using the option F3. To start the verification, simply
select a file using Return.
The program reads the first two lines of the file in order to know Molecule and
Domain. When these do not exist in the database, the user is alerted. There is nothing to
prevent one from having an aligned sequence file for a molecule type without entering it in
the archives; it is however necessary to keep two lines beginning with # at the start of the
file for the group of programs in the MUST package.
When the two variables are present in the database, VERIFSEQ will read all
sequences contained in the file. Two cases can then be found:
• the species does not exist in the database indicated at the beginning of the file;
the program communicates this fact, but nothing prevents one from having
unentered species in a file where there are entered species.
• the species is in the base; the program will compare the reference sequence to
that in the file. If at least one difference is found, the aligned sequence
(containing an error) is placed in Commentaries (by adding a # before the
sequence) and the reference sequence placed just below it in the *.ALI file; the
program displays the two sequences on the screen as follows:
REFERENCE GAAGGCGTAA CTCAGGACGC TTGCGCTCAT CGCAGAACAG
33
MUST user's manual - Version 1.0 (Apr/03)
WRONG
---------- ----C----- ---------- ---------Finally the program displays, as information, all species in the corresponding
database which are not present in this file.
If there are modifications necessary in the file, the program renames the old version
from <NAME>.ALI to <NAME>.BAK and titles the corrected file <NAME>.ALI.
If a file is not in the right format, the program indicates this as clearly as possible.
Since the modifications are initially done in a temporary file, if errors are detected,
VERIFSEQ does not recopy the temporary file, and corrections previously found are not
saved.
II-9 The INTEGSEQ program
This program lets you search for a single sequence which has already been
archived.
You must initially give the two keywords Molecule and Domain (manually or by using
F2, which furnishes the list of molecule types). The Identifier field is then accessible, and
F2 will then give the list of possible identifiers.
After validation by Return, the program displays all the rubrics acquired during
archiving. Confirm your choice with Return. You can then choose from the list of available
ALI files or create a new file with F3. The sequence is then integrated into the ALI file of
your choice. If the chosen sequence already exists in the ALI file, the program does not
indicate this.
Using F4, you can choose another species to integrate without having to recall the
fields Molecule and Domain.
II-10 The INTEGALL program
This program lets you update a file of aligned sequences by adding to it all the
saved species not yet in the file.
You choose the database using the two keywords Molecule and Domain (manually
or by using F2, which furnishes the list of molecule types). After validation by Return, the
program displays the ensemble of aligned sequence files corresponding to the selected
base. You choose the target file (validation of the active file, in yellow, using Return) or
create a new file with F3.
The program updates the file and indicates:
• the number and names of added species,
• the number and names of species present in the file which are not in the base,
34
MUST user's manual - Version 1.0 (Apr/03)
• the name of species present several times in the file.
With F4, you can choose a new database; F2 lets you change programs.
II-11 Management of the database
The following programs let you:
• to obtain information on the database of sequences,
• to save entire or partial databases,
• to keep the base intact in case of user error,
• to make updates on several machines.
II-11.1 The INFOBANK program
This program gives you all available information on the database. It furnishes:
• the list of types of molecules already present,
• the list of species archived for a given molecule type,
• all the information corresponding to a species, for a type of molecule,
• all the domains where a species can be found,
• all the domains where at least one species of a group can be found.
Depending on the type of information desired, one or several of the following may be
asked for: Molecule, Domain, Species or Group. The choice is made by selection from the
lists (validate using Return on the current element, in yellow). For the last two options, the
program searches in <MUST>\MUST\DATA\AFAS.REF for the name of the active file in
<MUST>\MUST\DATA\*.NOM, or that of the active systematic frame. For the last option it
determines the ensemble of species belonging to the group you have chosen among those
contained in the <MUST>\MUST\DATA\*.NOM file which is active.
It displays these data on the screen and then gives you the possibility to print them.
The default file is INFOBANK.OUT but you can "redirect" it to the printer by using F3.
II-11.2 The DELBANK program
This is useful only if you have made a grave error (creating two bases with the same
name, the only difference being a upper or lower-case letter; indeed, the keywords take
account of the difference in capitalisation). It lets you destroy an entire database, as well as
a given species for a molecule type.
You choose the item to be deleted from those in the lists; validate the choice of the
current element, in yellow, by using Return. The program displays information on the data
selected (Molecule, Domain, Identifier, number of species, date of creation, etc.) and
requests confirmation before performing the deletion.
35
MUST user's manual - Version 1.0 (Apr/03)
II-11.3 The SAVEBANK program
This program will save all or part of the data base onto a diskette, another directory,
or another disk. It is possible to save:
• the entire base,
• one or several types of molecule,
• all the base starting from a specific date.
The program will ask the identity of the unit to which you wish to save the material. It
transfers the data saved in the \SAVEBANK file on that unit, for example the file
A:\SAVEBANK.
If the file already exists, that is, if the data base has already been saved on that unit,
SAVEBANK proposes:
• to add the new sequences saved to the end of those already present,
• to destroy the old material by writing over it with the new sequences.
If the SAVEBANK file is larger than the available space on the unit, there are only two
possibilities:
• save only part of the material on the space available,
• use the DOS command
BACKUP /s <MUST>\MUST A:.
REMARK: We strongly advise that the entire base be saved regularly, at least once each
six months, and that the data added after the last complete save be saved much
more frequently, such as on a weekly schedule.
WARNING: The correct functioning of the computer's internal clock must be
verified regularly in order to properly use this program. The SAVEBANK
and LOADBANK programs use the machine's clock to determine if a
sequence being saved is anterior to the sequence contained in the base.
It is also necessary for the clocks of all computers used to be
approximately synchronous.
II-11.4 The LOADBANK program
This program will recuperate a SAVEBANK file (constructed by the program
SAVEBANK) and install it on the hard disk of a computer (that to which the file was saved,
or another). Simply indicate the unit on which the SAVEBANK file is located. The program
will integrate the sequences saved into the data base on the hard disk. There are four
cases possible:
• the sequence to be loaded (i.e. that in the SAVEBANK file) does not exist in the
base and the program will then add it to the base;
• the sequence to be loaded exists in the base, but the version in the base is older
than that to be loaded; the program will replace it with the newer version;
36
MUST user's manual - Version 1.0 (Apr/03)
• the sequence to be loaded exists in the base, but the two versions are the same
age; the program will do nothing;
• the sequence to be loaded already exists in the base and the existing version is
the more recent of the two; the program does not change the existing version
and informs you why.
While loading the data, LOADBANK indicates the number of sequences treated and
details the number of sequences corresponding to each possible case. Once loading is
finished, you can visualise the list of treatments performed. The information is automatically
stocked in the LOADBANK.OUT file, but cannot be "redirected" to a printer.
II-12 The FILM program
This program is used to archive the films, for two purposes: first, to search for the
films corresponding to a species when one wishes to verify the sequence, and secondly, to
aid in the search for sources of experimental problems. For example, to determine the
possible causes of a problem, one can easily determine which probe was used between
two given dates or which method of extracting DNA or RNA was used for a given
sequence.
The name or number of each film must be indicated (for example, GL34) and the
date given on which the sequence was produced. We advise that when a gel is reexposed
in autoradiography the same code be given to the film with an R or RR added: for example,
GL34R and GL34RR. Then you can archive up to 16 groups of four lanes each by filling in
the following fields:
Species name
Myxine glutinosa
Ext
3
Technique
Qu g32P
Prim
C2
Mi
C
Q
B
with the following remarks:
• Species name, which should be in a file containing the names of species (in the
directory <MUST>\MUST\DATA, see above);
• Ext: field containing the extraction number for the species (one can extract DNA or
RNA more than once for a single species, and the products may not all be of the
same quality);
• Prim: field indicating the name of the primer (i.e. probe or primer) with which one has
sequenced;
• Mi: field indicating the length of migration for this sample (S -> Short, L -> Long, TL > Very Long, TT -> Very very long, etc.) ;
• Q: quality of the ensemble of four lanes determining the readability of the sequence;
give a letter from A to E. One can use the following type of codage: A -> no reading
problems, B -> few reading problems, C -> numerous reading problems but clearly
readable sections, D -> nearly no readable sections and E -> nothing.
37
MUST user's manual - Version 1.0 (Apr/03)
To move within the menu for archiving films, use the up and down arrows; Return
and Tab to go to the following field, and Shift+Tab to go to the preceding field. You can
also destroy a line by using Shift+F2.
It is possible to modify a film or to recopy it, particularly in the case of a reexposure
where only the qualities change. However, it is not possible to destroy a film except by
going directly into the file where it is stocked (see below).
You can make various searches on the ensemble of films archived:
Archiving a new film
Searching for a species
Searching for a species and a primer
Searching for a species and an extract
Searching for a species, an extract and a primer
Searching for a primer between 2 dates
Systematic searching between 2 dates
Searching for all species in the archives
Searching for all films in the archives
Coping a film which is in the archives
Modification of a film which is in the archives
For a search between two dates, if you wish to make a search without giving
beginning and end dates, tap Escape when the dates are requested.
Finally,
you
should
know
that
the
archiving
is
done
in
the
<MUST>\MUST\DATA\FILM file, which is write-protected (by the DOS command, ATTRIB
+R <MUST>\MUST\DATA\FILM). Within this file, each film is archived on a single line,
each field being separated by a tabulation.
Example :
GL34 1/8/1989
Myxine glutinosa
3
Qu g32P
C2
C
B
This file must be edited directly if you wish to destroy a film. Similarly, in case of
serious problems, you can consult this file. Each time a film is modified, the former version
is kept in the file <MUST>\MUST\DATA\FILM.BAK. Finally, to save, simply copy the file
onto a diskette. Note that it is not easy to work on several different computers, since this
file must be transported each time.
II-13 The TRANSLAT program
This program lets you translate DNA or RNA sequences into proteins. It offers the
possibility to choose the genetic code utilised, with the F4 key.
It works from raw sequence files (*.ADN located in the current directory) or aligned
sequence files(*.ALI in the directory <MUST>\SEQ). You pass from one type of file to the
other by using F3.
38
MUST user's manual - Version 1.0 (Apr/03)
Choose a file to be translated from the list proposed (validation of the current
element, in yellow, using Return). For files of aligned sequences, the exit file is located in
the directory <MUST>\SEQ and its name must be different from that of all other files in this
directory. For raw sequence files, the exit file is in the current directory and its name will
have a PRO extension but may otherwise be the same as that of the file to be translated.
TRANSLAT displays the problems encountered during a translation, for example a
stop codon in the middle of the sequence. You must press any key in order to acknowledge
the error message before the translation will continue. It is not possible to abort a
translation in course.
39
MUST user's manual - Version 1.0 (Apr/03)
III MANAGMENT OF ALIGNED SEQUENCES
III-1 General introduction
This set of programs processes a group of aligned sequences in order to build
phylogenies. It was devised taking the following hypotheses into account:
1) The alignment obtained from a high number of species remains unchanged
whatever the sampling of the species; so, one can have an unique file of aligned
sequences containing all the available species.
2) Biological molecules are generally composed by different regions which have
quite various rates of evolution. For instance, the active site of a protein performs evolution
at a much slower rate than the other parts of the protein. For a given group of species,
alignment will be possible in some domains and not in others. For example, all the
Eukaryotes can be aligned in the domain C2 of 28S rRNA, but not in the domain D2 which
has a too high rate of divergence; in this domain, only groups like Mammals or
Euteleosteans can be aligned. It is thus better to cut in different domains the large
molecules in order to build files of aligned sequences in which all the existing/available
species can actually be aligned.
3) The sampling of the species is of prime importance since its quality governs the
test to be done on the pre-established phylogeny. To do so, the sampling has to be done in
presence of this phylogeny. The choice of the species is easily done browsing in a preestablished systematic frame.
The program ED edits the sequences to be aligned in order to work this alignment
according various techniques. It can also select sub-groups of species.
If large genes are cut into several domains, it will be necessary to use the program
AFAS which can concatenate sequences from different files. Then the program CAFAS
can select the species you want to use. Finally the program NET can withdraw/remove
sites according various criteria, compute matrices of distances according various methods,
and create sequence or matrix files usable by several softwares of phylogeny construction.
The available programs and the transfers of informations performed are shown in
figure 2. The usage of each program will now be explained in detail.
III-2 Program FAST
This program displays a pop up menu from which you can call the main programs of
Management of Aligned Sequences, without knowing the names of the different
programs described below.
F1
Press
to
access
a
help
screen
describing
each
program.
40
MUST user's manual - Version 1.0 (Apr/03)
Figure 2 : Schematic flowchart of the management of aligned sequences (FAST)
41
MUST user's manual - Version 1.0 (Apr/03)
III-3 Program MAKETREE
Practising phylogenetic construction sets the researcher a problem of sampling. This
sampling obligatory takes into account a pre-existing set of systematic data. It is thus
useful to present the palette of sequenced species in connection with the phylogenetic
frame to be tested: so the user easily can evaluate permanently the bias in sampling.
The phylogenetic frame is displayed as a cladogram for the three following reasons:
• a cladogram presents a phylogenetic classification (the only classification for
which a comparison with a molecular phylogeny makes sense);
• most of the recent results are obtained using the cladistic method;
• on the same diagram are displayed both certain and uncertain branch line
points.
The program MAKETREE creates a personalised systematic frame that you can
modify. Its use is quite cumbersome but infrequent. The general principle of the systematic
frame is a purely dichotomic tree in which all the nodes (internal or external) have a name.
This name must not contain the ( : , ) characters. If the cladogram contains a polytomy, this
one can be represented by putting the internal nodes very close to each other.
The basic operation to build the tree consists in adding a sister group at the current
node (internal or terminal). This operation is described in the following chapter
(Modification of a tree)
III-3.1 Modification of a tree
The list of the existing systematic frames is displayed; the current tree (yellow) is
selected by pressing the Return key.
The date of the last modification is displayed along with a choice of actions:
• Return to confirm the choice,
• Escape to come back to the screen of systematic frames,
• Del to destroy the systematic frame,
• Ins to copy the systematic frame.
III-3.1.1 Moving in a tree
Moving can be done using the arrow keys with the following meanings:
Down Arrow key
• If the cursor is on an internal node, it will go to the downstream daughter-node,
i.e. one down-right move without interval (or on the leaf if the cursor was on a
terminal node).
• If the cursor is on a leaf, it will go to the following leaf (or to the first leaf of the
tree if the cursor was on the last leaf).
42
MUST user's manual - Version 1.0 (Apr/03)
Up Arrow key
• If the cursor is on an internal node, it will go to the upstream daughter-node, i.e.
one up-right move without interval (or on the leaf if the cursor was on a terminal
node).
• If the cursor is on a leaf, it will go to the preceding leaf (or to the last leaf of the
tree if the cursor was on the first leaf).
Left Arrow key
• If the cursor is on an internal node, it will go to the preceding internal node,
located immediately to the left.
• If the cursor is on the root of the sub-tree, pressing the Left Arrow key will
display the preceding tree.
Right Arrow key
• This key is only used to display a sub-tree, when the cursor is on a leaf for which
the name is followed by a right arrow.
PgUp key
• This key moves the cursor quicker (by step of 4) making in one press the same
move as if the Up Arrow key had been used 4 times.
PgDw key
• This key moves the cursor quicker (by step of 4) making in one press the same
move as if the Down Arrow key had been used 4 times.
NOTE: when the cursor is on an internal node, the name of this node is displayed up left of
the tree. This name refers to the taxon which contains all the downstream nodes and
leaves.
III-3.1.2 Adding a sister group
The F2 key creates a new internal node between the node the cursor is on and its
mother-node or upstream node. The new node is created with the minimal distance apart
the two branches.
For example, if the current node is the leaf Aves, the display changes from:
to:
by F2 and
43
MUST user's manual - Version 1.0 (Apr/03)
Name of new node: Archosauria
Name of new group: Crocodilia
and if the current name is the internal node Archosauria, the display changes from:
to:
by F2 and
Name
of
new
node:
Diapsida
Name of new group: Lepidosauria
To create a new node, a minimal distance between nodes is required. Only the
horizontal distance is significant, vertical distance is just used for an easier reading of the
tree.
To move an internal node along the horizontal axis, you must use the F3.key The
node is then moved with the Left or Right Arrow keys (quick move by combination of these
keys with the Ctrl key).
To rotate daughter-nodes around an internal node, use F6 key.
To correct or modify the name of a node, use F5.key
Using F4 will either destroy a leaf; or transform an internal node in a leaf in which
case the entire downstream sub-tree will be destroyed.
Once the construction of the systematic frame is finished, Shift+F5 will save it and
return you to the main menu.
Shift+F1 returns you to the main menu without saving the construction.
Escape exits the program without taking into account the modifications.
44
MUST user's manual - Version 1.0 (Apr/03)
III-3.2 Creation of a tree
After you choose the option "Creation of a new systematic frame" with
Return :
• The program asks for the "Name of the systematic frame". You validate
your entry with Return.
• You must then enter the names of the two first Groups of your tree, and validate
each entry with Return.
• You can correct your entry using the direction arrows.
"Name of the systematic frame" corresponds to the name you gave to the
root of your tree. That is this name which appears in the list of the systematic frames during
the modification phase. The root cannot have any sister group. To enlarge your tree, you
must locate the cursor on one of the 2 Groups, the 2 first leaves of your tree.
The following of the creation is done the same way as in the previous chapter.
III-3.3 Management of the sub-trees
One complication occurs because the screen can only contains 25 lines. Thus it is
not possible to have more than 23 leaves on one screen However the user often needs
to have more than 23 leaves in a cladogram It is necessary to have sub-trees. For
example, the cladogram of the Metazoa includes a sub-tree in which the phylogeny of
Deuterostomata is detailed. Here, a sub-tree is a leaf taxon for which a daughter sub-tree
is available on another screen.
There are different methods to manage sub-trees. If the cursor is on an internal
node, F7 transforms this node into a leaf of the current tree, and put the daughter sub-tree
into a new sub-tree ; if the cursor is on a leaf, F7 creates a new sub-tree and asks you for
the names of the two first leaves of this tree. The reverse operation, i.e. the integration of a
sub-tree inside the tree, is done using Shift+F7 provided that the total number of leaves of
the resulting tree do not exceed 23.
In a tree which contains sub-trees, if the cursor is on a node leading to a sub-tree
(node name followed by an arrow), the F8, F9 et F10 keys manage node transfers between
the tree and the sub-trees. Along all these operations of transfer, the tree as well as the
sub-tree must keep at least 2 leaves.
F8 is used to insert the sister-group of a sub-tree into the latter; F9 to transfer the
uppermost daughter of a sub-tree root into the tree, while F10 transfers the lower daughter.
45
MUST user's manual - Version 1.0 (Apr/03)
Starting from the above configuration, with Mammalia as the current node, F9 will transfer
the leaf Monotremata (the uppermost daughter of the sub-tree) into the tree, leading to the
following configuration:
Let's displace the current node from Mammalia to Theria:
F10 will then transfer the leaf Marsupiala (the lower daughter of the sub-tree) into the tree,
giving the following configuration:
With F8, it is possible to reverse the process. To transfer the sister-group into the
sub-tree, the current node has to be displaced to the leaf which leads to the sub-tree.
III-3.4 Management of the files of systematic frame
It is possible to destroy or to copy a systematic frame. To do so, , you just select in
the first MAKETREE screen the box "Modification of existing systematic
frame", then choose and activate a systematic frame. The Del key will destroy it while
the Ins key will copy it.
To work on different computers, you must know that the systematic frames are
archived in the directory <MUSTEXE>\MUSTEXE. The file SYSTEME.LST contains the list of
46
MUST user's manual - Version 1.0 (Apr/03)
the names of the systematic frames, and the files SYS0, SYS1, etc., contain the systematic
frames themselves. One needs only to copy these files on the different computers.
III-4 Program ED
III-4.1 General introduction
This program is specifically designed to edit aligned sequences by modifying the
alignment, but not the sequences by themselves. ED displays the aligned sequences this
way: the characters of the first sequence are explicitly displayed; in the following
sequences, they are represented by an hyphen (-) if they are identical to those of the first
sequence, and are explicit if they are different. In this program, two peculiar characters are
used: a star (*) for a gap, and a space (or blank) for a non-sequenced part; these two
characters are always explicitly displayed even if they are identical to those of the first
sequence.
Since it is easier to align sequences which are not too different, ED is able to
construct a sub-group of species from the group of the available sequences, and to edit it
without taking into account the gaps common to all species of this sub-group. In this way,
you have a much better view of the alignment.
However, if you add a star in a species sequence, the previously shared gaps will no
longer be in common, and will be displayed even though there were no displayed gaps on
the previous screen.
The position of the current character is expressed as an absolute value for the
whole group of species contained in the file. Current position values are displayed at the
bottom left of the screen, and do not increase linearly since the common gaps are not
displayed. The absence of value indicates a common gap which is not displayed.
To align more divergent sequences, ED offers the use of consensus sequences.
This way you can first align species inside two groups then align these two groups using for
each only one sequence. The consensus sequences are displayed using a color code
which reflects the strength of the consensus: you just need to align the "high" consensus
regions in the two groups since if a group does not contain any consensus it does not
make sense to try to align with a more distant group.
Two major advantages for using consensus sequences:
• in case a group contains a very large number of species you can modify the
alignment of the whole group with just one operation;
• the internal alignment of a group remains unchanged.
However, the use of groups during the alignment process is not bias proof. Since
the user creates groups according a pre-established knowledge, the alignment is not
objective: the user introduces into the alignment an imprint of the result he expects to
rediscover. This risk is a real one, and to my knowledge the only way to solve this conflict
consists in using NET to exclude rigorously the regions of ticklish alignment.
47
MUST user's manual - Version 1.0 (Apr/03)
III-4.2 Choosing the file of aligned sequences
The first window of the program ED displays the list of the files of aligned sequences
which are present in the directory <MUST\SEQ>. Pressing Return will select the current file
(yellow color). The program will display the specs of this file and ask your choice to be
confirmed before going on the step of choosing the species.
In the upper part of the window are displayed the name of the current systematic
frame and the name of the file which contains the species names and their group name.
The names on display are those which were chosen during the last session of ED, AFAS,
or SHAREGAP; they are stored in the file <MUST>\MUST\DATA\AFAS.REF. If this file
does not contain any name of current systematic frame (or if it does not exist), the default
systematic frame is the first in the list of systematic frames. If so, you will have to enter the
name of the species file. It should be noted that this type of file must be in the directory
<MUST>\MUST\DATA and have the extension NOM.
Since the program MAKETREE can build several systematic frames, you need to be
able to change of frame. To choose a frame, F3 will access to the list of the existing
systematic frames.
Species will place themselves in the frame as a function of their associated group
name in the file containing the species names. With F4 you can change this file by
choosing the current file (yellow color), or by creating a new file with "Create ➧". You
must give the name of the file without its path and its extension; thus, if the full name of the
file is D:\MUST\DATA\INSECTS.NOM, you must write only INSECTS.
III-4.3 Choosing the species
Once you chose the file of aligned sequences, the systematic frame is displayed. To
the right of the screen are displayed values by the side of each leaf name or internal node:
• 0 means that there is no species either in this node or in the daughter sub-tree;
• (x / y): x is the number of selected species; y indicates the number of species
which belong to the ensemble node + its daughter sub-tree.
III-4.3.1 Choosing the species one by one
Obtaining the list of species
To select one species, i.e. Mus musculus, you just need to move on the leaf which
contains it, here Rodentia, and to press on Return. All species of this group are then
displayed, i.e. Mus musculus, Rattus norvegicus and Mesocricetus auratus.
If you press on Return while the current node is an internal node, the displayed list
of species consists of species which belong to this node as well as to all the nodes of the
daughter sub-tree. For example, if you are on the node Archosauria, the species which
have Archosauria, Crocodilia et Aves as a group name will be displayed. To select Mus
musculus, you can activate the node Mammalia, but it will not be very convenient if you
48
MUST user's manual - Version 1.0 (Apr/03)
have very large numbers of Mammalian species. In that case, it would be better to activate
the leaf Rodentia.
Display of the species
The list of the species is displayed in alphabetical order. The value to the right of
each species name represent the length of this sequence, expressed as percent of the
largest sequence length (added blanks at the beginning and the end of the sequence, in
order to compensate the non sequenced portions, are excluded). You can thus know the
sequence length which is available.
Selecting species
Press on Return will select the current species (yellow color). Preceding its name a
number will be displayed, which represents the ordering number in the list of the selected
species; for example, if Mus musculus is the 12th selected species, the number 12 will
precede this species.
To cancel the selection of a species, press once more on Return while the species
is the current one, and the ordering number disappears.
It is also possible to search for a species by typing the beginning of its name
followed by the F9 key; this feature is useful when the group contains more than 23
species (limit of a full screen). ED lists all species which start with these characters. For
instance, if you type Mu, the program will display Mucor racemosus et Mus musculus. The
selection of the species is done and undone the same way as above.
III-4.3.2 Choosing a group of species
Press F2 will select all the species of the current group, whatever it is a leaf or a
node. That can speed up establishing a list of species so long as you know which species
are contained in a file. When displayed, you can also select the whole list of species of a
group by pressing F2.
III-4.3.3 'Cupboard' group
If a species does not have its name in the file containing the species names, or if its
group name does not exist in the chosen frame, this species is not associated to a group of
the frame. In this case, it will be put in a particular group, the 'Cupboard' group. F6 will
access all the species of this group and the selection is done as in any other group.
III-4.3.4 Correction of the list of selected species
F5 displays the list of species already selected and you can modify the ordering
number of the species in this list. This is a practical fast way to visualise the selection result
and to verify it. Numbers between square brackets indicate the current ordering numbers.
49
MUST user's manual - Version 1.0 (Apr/03)
To change the order: enter the new position to the left of the species you want to
move (cancel by Backspace). At that level, you can also unselect some species by typing
0 before their name.
F2 activates the option to change the order. F3 arranges in ascending order and
come back to the tree.
To rearrange the species, the program begins to position the numbered species,
then it fills up the empty locations with the remaining species, respecting the initial
ascending order.
For example:
6 [1] A a
[2] B b
2 [3] C c
[4] D d
4 [5] E e
[6] F f
8 [7] G g
[8] H h
gives
then
[2] C c
[4] E e
[6] A a
[8] G g
[1]
[2]
[3]
[4]
[5]
[6]
[7]
[8]
B
C
D
E
F
A
H
G
b
c
d
e
f
a
h
g
REMARK: Note that if you come back to the tree with Escape or F4, the program does not
take into account the values which are on the display. However, if you already used
F2 to rearrange the initial list, Escape or F4 will not retrieve this initial list; the last
order saved by F2 is kept.
III-4.3.5 Archiving lists of species
In practice, the user will often use the same list of species or a very similar one. It is
thus interesting to archive a list of species in order to avoid to rebuild the same list or so at
each use.
F7 starts this operation and asks you for your name and for a list name.
With F8 you can load a list of species which was previously archived by F7. F8
displays a list of the lists of species which are already archived, and if you validate one of
these lists by pressing Return, the screen will display the name and the title which were
given during a previous archiving, as well as the number of species, and the date and hour
of this archiving.
At this step it is possible to validate/unvalidate your choice, but you can also rename
the list with F2 or delete it with Del. It is wise to delete quite often old unused lists in order
to avoid confusion. If some species are present in the list and not in the file of aligned
sequences, ED will issue a warning. If you work on several computers, you can transfer the
files containing the lists of species. These files are in the directory <MUST>\MUST\DATA
and have a LIS extension.
III-4.3.6 Other functions
The two last functions are the deselection of the whole current list of chosen species
with F10 and the possibility to go directly on a sub-tree with F4.
50
MUST user's manual - Version 1.0 (Apr/03)
REMARK: Once you are in the stage of choosing the species, if you want to
change the frame or the file *.NOM, you must come back with Shift+F1 to
the selection window for the file of aligned sequences (changing of
sequence file). Thus you will loose the species previously selected.
III-4.4 Sequence alignment
III-4.4.1 Display and movement
Once you chose the species, you access with F3 to the aligned sequences. ED
displays the 14 first characters of the species name, then the 60 first characters of the
corresponding sequence, by blocks of 10.
To move within the sequences, you can use the directional arrows to move step by
step, and Pgup, Pgdn, Ctrl+right arrow, Ctrl+left arrow, Home and End to move rapidly.
When the cursor is on the first (or last) line, if you press on the Up (or Down) arrow,
the first species will be replaced by the second (last) species. This is necessary to be able
to see all the sequences when the number of selected species is larger than 23, the
maximum number of species which can be displayed on the screen. This is also useful to
get a visual impression of the alignment, since, depending on the first species, the dashes
will differ in number and distribution.
The gaps due to the non selected species are not displayed on the screen. This
explains why the position counter (yellow color, at the bottom left of the screen) can be
incremented or decremented by more than one when the cursor is moved horizontally by
only one step. For the same reason, the first nucleotide (or amino acid) displayed may be
at a position value superior to 1.
In the same way, if you modify the alignment, stars can appear where there was
none, at the right of the current position. You just need to adjust the alignment and the
stars will disappear.
III-4.4.2 Color palette
Sequences are displayed according a color code. This code can be personalised as
a function of research thema, or according your personal taste. The color code can be set
to a monochrome mode. The modification is done by choosing the last option with F8 :
➧".
"Choice of palette of colors
An 8 color choice is available ; the word 'EXAMPLE' is displayed with the 8 possible
colors ; that allows you to assess the utility of each color. Each character has a default
color. This color code is represented by the list of characters to the right of the list of
possible colors.
To modify the color of a character, you have to move the yellow arrow at the level of
the desired color. To do so, use the Up and Down arrows. Then, you just need to type the
character which will be added to the current color list and deleted from the previous color
list. Modifications are validated by pressing F5, sequences are then displayed according
51
MUST user's manual - Version 1.0 (Apr/03)
the new set of colors. If you do not want to modify the color palette and keep the previous
code, you can exit this window by pressing Escape.
The blank character (non sequenced site) is not easy to represent; it is displayed as
an question mark '?' on the background color.
III-4.4.3 Modification of the alignment
You can modify the alignment in several ways by :
- inserting a star or a space, to the left of the current position, into the sequence of
the current species;
- inserting with the Ins key one or several stars, to the right of the current position,
into all the sequences of the file except into the current sequence. This
function is interesting since it does not modify the existing alignment;
- deleting a star or a blank, either to the right of the current position with the Del
key or to the left with the Backspace key;
- deleting with the Shift+F2 keys all the blanks and stars to the right of the current
position, up to the next nucleotide or amino acid.
III-4.4.4 Consensus sequences
As described above, it can be interesting to modify the alignment on a consensus
sequence for one or several groups. With ED, you can build 'ensembles' which can contain
any number of species between 1 and 200.
For each of these ensembles, you will have the choice to display either all the
sequences of the group or only the consensus sequence. The latter is determined by
searching at each position for the character which is the most represented. The usage
frequency of this character is displayed according the following color code :
bright white
light magenta
light cyan
light green
yellow
light red
red
: 100%
: more than 90%
: between 80% and 90%
: between 70% and 80%
: between 60% and 70%
: between 50% and 60%
: less than 50%
The first time you choose your species, the ensemble 1 is automatically built. Then,
to create new ensembles, you have to use F3 when the current window is displaying the
consensus sequence.
The management of the ensembles is done with the F2 key by which you can
modify the composition of an existing ensemble, with the F6 key by which you can delete a
ensemble, and with the F4 key which switches the display between the consensus
sequence and all the sequences of the ensemble.
52
MUST user's manual - Version 1.0 (Apr/03)
REMARK: The program will not issue any warning if you use the same species into
different ensembles. This will affect the pertinence of the color comparisons between
groups. Care should be taken in the choice of the species which constitute the
ensembles.
When the consensus sequence alignment is modified, all the sequences in the
ensemble are affected in the same way. Thus, when a star is added to the consensus
sequence, all the sequences will have an added star at that position. Note that you cannot
delete a star in a consensus sequence unless all the species have a star or a space at that
position. Therefore, you can delete a white star from a consensus sequence, since this
color indicates a 100% consensus. However, you can delete a non white star from a
consensus sequence if the position contains only blanks and stars.
III-4.4.5 Saving the modifications
F5 will save all the modifications made to the alignment since the beginning of the
session, even on sequences which are not displayed anymore.
During the saving, the old file of aligned sequences is renamed with an extension
BAK ; for example <MUST>\SEQ\TOTO.ALI will be renamed <MUST>\SEQ\TOTO.BAK
and the new alignment will be in <MUST>\SEQ\TOTO.ALI.
III-4.4.5 Printing the sequences
F8 will print the aligned sequences with all the modifications which were done.
Species will be printed in the order they were selected (1st species of the 1st ensemble, 2nd
species of the 1st ensemble... 1st species of the 2nd ensemble, etc...) and not in the way
they are displayed on the screen.
When you press the F7 key, 2 frames are displayed: the upper frame displays the
printing parameters; the lower frame gives the choice to print the file using the parameters
displayed in the upper frame, or to modify individually each of these parameters.
The following menu:
Printing of sequences
Change of number of blocs
➧
Change of length of identifiers
➧
Choice of printing of the positions
➧
Choice of replacement of characters by a dash ➧
Change of printer type
➧
allows you to modify:
• the number of nucleotides per block;
• the length of identifiers, which are always printed in italic;
• the printing of the positions (displayed vertically above the sequences).
• the replacement of nucleotides by dashes;
• the printer type.
53
MUST user's manual - Version 1.0 (Apr/03)
REMARKS: As on the screen, the displayed positions are the real positions inside the file,
and not the positions in the alignment of a sub-ensemble of species in which the
deletions due to others species have disappeared.
F7 does not print the consensus sequences.
III-4.5 Writing the sequences in a file
The key combination Shift+F3 allows to write in a file all the selected sequences of
all the ensembles. This file is written in the current directory, with the extension NET since
it is written with the format of the program NET (see the description of this program in the
Chapter III-6). The program NET is automatically launched after you validate the name of
the file.
III-5 Programs AFAS, CAFAS and DAFAS
III-5.1 Advantages and drawbacks of this set of programs
The program AFAS prepares the files of aligned sequences to be used by the
program CAFAS. In particular, it can concatenate sequences which are contained in
different files. The sequences which are contained in the prepared files cannot be modified
anymore. However, these files are linked to a frame and the associations 'species namegroup' will be frozen.
It is useful to be able to concatenate easily and quickly different files of aligned
sequences. Indeed, the files of aligned sequences can be small sized (a gene cut in
several subunits) ; they can also have a biological sense (one gene).
The program CAFAS then allows you to choose the species and to write the
sequences in a file formatted for the program NET.
Finally, the program DAFAS provides a management of the previously prepared
files.
REMARK: It can be better to use this set of programs rather than to get aligned sequence
files formatted for NET via the program ED, since the selection of species and their
writing in a file are much quicker: AFAS reads only once the whole file and CAFAS
reads only the required sequences. So, if your alignment is 'good' for a file, it is
better to use AFAS and CAFAS rather than ED to choose the species.
III-5.2 Preparing the files: AFAS
AFAS is mainly used to concatenate sequences from different files. Since these files
can contain different species, AFAS offers two concatenation modes:
• F4 = intersection, only the species which are present in all the selected files are
kept;
54
MUST user's manual - Version 1.0 (Apr/03)
• F5 = union, keeps any species present in one of the selected files ; blank
sequences are set in the case a species is not present in one or several files.
However, AFAS can also prepare an only one file formatted for CAFAS, by pressing
the F3 key (if several files are selected, the program will transform them one after another).
The files of aligned sequences are selected by pressing the Return key. The order
of the files in the selection, displayed to the left of the files, is kept as the order of the
concatenated sequences.
You can change:
• the systematic frame with F6,
• the file containing the names of the groups, with F7.
You finally choose the transformation mode for the selected files (F3, F4, F5). The
name of the prepared file (maximum of 8 characters), the user's name, and the title are
then prompted for. The program archives also the date and the hour of the operation.
Within each leaf-group of the frame, species are automatically sorted in alphabetical
order. If you do not want to sort the species, use F8 to set the unsorted mode. In this case
you cannot concatenate files; you just can access to the transformation via F3.
The prepared files are in the directory <MUST>\MUST\ALI. For each preparation,
two files are created, one with the extension INF, and the other with the extension ALI. The
file INF is write protected (DOS command, ATTRIB +R TOTO.ALI) and contains all the
informations. The file ALI contains only the aligned sequences.
REMARK: The file ALI is not created in the ED format, but in a more complex oneonly
readable by CAFAS.
III-5.3 Extracting sequences : CAFAS
To extract sequences by choosing of species, you need to use the program CAFAS.
It displays the list of the prepared files. You choose the current prepared file (yellow color)
with Return. The program displays the informations which were entered during the
preparation stage, and prompts to confirm your choice.
Then, the program acts like ED for the choice of the species (functions described in
paragraph III-4.3).
List of the functions:
• F2 : selects all the species;
• F4 : changes the frame;
• F5 : displays the list of the selected species;
• F6 : lists the species contained in the 'cupboard' group;
• F7 : archives the current selection;
• F8 : loads an archived selection;
• F9 : searches for species using the beginning of their name.
Once the sequence selection completed, two functions are available:
55
MUST user's manual - Version 1.0 (Apr/03)
• F3 will continue with the program NET ; CAFAS will automatically format the file
for NET (with the extension NET);
• Shift+F3 allows you to write the file NET without continuing with the program
NET.
III-5.4 Management of the prepared files: DAFAS
To delete or rename a file which was prepared by AFAS, you have to use the
program DAFAS. This program displays the list of the files which have the CAFAS format.
Pressing Return will choose the current file and the program prompts you for deletion (Del
key) or renaming (F2 key).
III-6 Program NET
This program works on the files contained in the current directory, and which have
the extension NET (created by the programs ED or CAFAS). You can choose a file among
them (Return will select the current file, displayed in yellow color). Once you confirmed
your choice, the main window is displayed.
Numerous functions are available from this window, you can:
• choose the portions of sequences you want to use;
• remove the sites according various criteria;
• compute the distances on the selected positions;
• format the data for use with several software.
III-6.1 Description of the main window
Once you chose a file, the window presented above is displayed on the screen:
• on the first line, the name of the file and the number of existing species;
• to the left, the number of sites which are removed according different options,
the number of informative sites, and the number of variable sites;
• to the right, one histogram representing one of the 4 criteria (PRESENT1 is
displayed as default histogram);
• on the last line, the available functions.
"Informative sites" are defined on the basis of parsimony, which means that an
informative site has at least two different characters which are at least represented twice.
The variable sites are non-constant sites (e.g., with several different characters).
At the left of the main screen, are displayed the number of removed sites for each
criteria, and the number of sites remaining into play. This last value is of some importance
since only the sites which are yet into play are taken into account for the writing of the
output files and for the computing of the matrix of distance .
56
MUST user's manual - Version 1.0 (Apr/03)
FILE : 18S.NET
TOTAL
number of species : 15
HISTOGRAM OF PRESENT2
2112
-BOUNDARIES
=
1311
801
PRESENT1
PRESENT2
[2.00,5.00]
KHI2
510
CODON
CONSERVED
211
VARIABLE SITES
398
INFORMATIVE SITES
221
F1:Help
2:Boundaries
2.00
F3:Criteria
5.00
F4:Sequence
F5:Matrix
F6:Option
Seven functions are available through function keys:
• F1, the help;
• F2, the suppression of sequence portions by choosing boundaries (cf III-6.2) ;
• F3, the suppression of sites using the criteria (cf III-6.3) ;
• F4, the writing of output files, with various format for use with other programs (cf
III-6.4) ;
• F5, the writing of the matrix of distance (cf III-6.5) ;
• F6, the choice of different options ;
• F7, the usage of the positions.
It is possible to change the starting file with Shift+F1.
III-6.2 Choosing boundaries
Use the F2 key to choose the sequence portions you want to delete; the aligned
sequences will then be displayed, with 23 species and 60 characters at the most.
III-6.2.1 Display and movements
If you want to see the species which are not displayed, you can scroll the list of
species by using the Up or Down arrows as well as the PgUp and PgDw keys. As for ED,
it is useful to get a visual impression of the alignment.
57
MUST user's manual - Version 1.0 (Apr/03)
With the Right and Left arrows you move within the sequences, and you can thus
choose the sequence portion you want to visualise. By combination with the Ctrl key, you
can move by steps of 30 characters. With the Home and End keys you can move to the
beginning and to the end of the sequences, respectively.
III-6.2.2 Elimination of regions, by stretch, or character by character
If you want to eliminate a region, open a parenthesis, (, while the cursor is at the
beginning or the end of this region. The current position will be set in red, which means it is
eliminated for the subsequent treatments. Starting from this initial position, as long as you
do not close the parenthesis, ), any movement of the cursor will eliminate a portion of
sequence up to the most extreme position reached by the cursor. Retracing the cursor
steps will not allow you to put back already eliminated sites into action (see below how to
recover these positions). Closing the parenthesis, ), will exit this elimination mode, and you
will be able to move again within the sequences without eliminating any region.
If you eliminated a region you want now to put back into analysis, you just need to
put the cursor onto any position of this region, and press on the Ins key.
You can also eliminate or put back the positions one by one: the - key eliminates the
current position from the analysis, and the + key puts back into analysis a previously
eliminated position.
With F6, you can cancel the chosen boundaries, and put back all the positions into
analysis. However, F6 will not exit the elimination mode. To exit this mode, you always
need to close the parenthesis, ).
III-6.2.3 Eliminating sites as a function of the rate of non-sequenced species,
of missequenced characters, or of gaps
It happens quite often that the available sequences for a pool of species have not
the same length, or are not determined with the same accuracy. These regions can be
ticklish for phylogenetic analysis, in particular for the methods of distances. The accepted
symbols to indicate a non-existing sequence are the blanks (or spaces), the question
marks (?), and the X. A whole list of characters symbolises the poorly determined sites
(RYMWSKVHDBN?X).
Gaps are often present in regions which are difficult to align. They also pose
problems of weighing and coding for the parsimony method. Gaps are represented by stars
(*) or by dollar signs ($).
When you are choosing the boundaries, it can be useful to quickly remove such
regions. With the F5 key, you can selectively eliminate sites as a function of one of three
possibilities described above ; the following menu offers you to choose the type of
elimination:
Elimination of non-sequenced sites for all the species ( ?X)
Elimination of sites containing gaps (*$)
Elimination of sites containing undetermined characters (RYMWSKVHDBN?X)
58
➧
➧
➧
MUST user's manual - Version 1.0 (Apr/03)
The program computes for each position the species frequency which corresponds
to the chosen type of elimination, and then indicates the number of positions for which this
frequency is equal or superior to several threshold values of frequency (0, 1 ,2 ,3, 4, 5, 10,
25, 50, 75 and 99%). If you choose the value 0%, you will keep the sites only where no
species fulfils the chosen option. If you choose a non-null value, all positions with a value
strictly superior to the threshold value will be eliminated from the analysis and signalled in
red, as if they have been eliminated by the parentheses.
III-6.2.4 Elimination of regions by entering the boundary values
Using F7, you can acquire the boundaries by giving the beginning and end values of
the intervals to be eliminated. The subsequent display shows cases with the values
superior and inferior of the positions of each eliminated interval. To create a new case, use
the Ins key which will had a case to the left of the current case (number in yellow). When
you are at the final case, use the Right arrow to create another case at the end of the list.
You can delete a case using the Del key.
When moving from left to right, the values must be strictly incremental. It is not
possible to exit this menu if this condition is not respected, unless there is only one case
and the two values are equal to zero (it is then considered that the user does not wish to
eliminate this region). F7 returns you to the display of sequences.
III-6.2.5 Saving chosen boundaries
Usually, once you have chosen the boundaries for analysis, the same boundaries
will be used for many other analyses. It is often useful to save the chosen boundaries on
hard disk, so you do not have to redefine them every time. With F3, you can save these
boundaries in a file, and with F2 you can choose a file of boundaries and load it. If you
want to work on another computer with these files, you have to know that they have an
extension BOR, and are located in the directory <MUST>\MUST\DATA.
III-6.2.6 Display options
F8 switches the display of the histograms of site variability criteria (see III-6.3). With
F9, you can display either the four criteria or only one of them. At the left of the histograms,
two numbers indicate the lowest and highest values for each indice. If one criteria was
selected on the main window, two arrows indicate the limit values of the chosen
boundaries. A line of upper case 'i', I, specifies the sites eliminated by the selection of one
or several criteria: this display does not differentiate the criteria. This line is located above
the histograms of the criteria, or at the bottom of the screen in case these histograms are
not displayed.
To the left of this line, the current character position is displayed in yellow color. This
position is expressed as an absolute value for the whole species ensemble of the file.
Since the shared gaps are not displayed, the values of the current position do not follow a
linear increase (some values are absent).
59
MUST user's manual - Version 1.0 (Apr/03)
F10 allows you to choose the type of display of the identifier (see III-6.7.2).
Finally, with F4, you can change the order of species, for instance in order to put
side by side two species you are interested in (cf III-6.6.1).
III-6.3 Use of the criteria
Four different criteria can be used to eliminate sites. The F3 key displays the list of
the available criteria:
• PRESENT1 : number of characters present on 1 site (if PRESENT1 = 1, then
the site is constant);
• PRESENT2 : number of characters present at least twice on 1 site (if
PRESENT2 = 1, then the site is non-informative for the parsimony);
• KHI2 : index of variability;
• CODON : localisation of the site within its codon (codons are determined with
respect to the first position of the sequence).
Choice of the criteria boundaries
Once you have chosen the criteria, a window for the acquisition of the boundaries is
displayed. On the first line are displayed the values of the boundaries: the maximal and
minimal values (non-modifiable) are displayed in dark blue. You can change the limit
values within the range of the extremal values, erasing the displayed value with
Backspace and typing in the new value. You can go from one boundary to the other with
the horizontal arrows.
Once you have chosen the boundaries, you can move with the vertical arrows to
select an action (you validate the current action, in yellow color, with Return) :
• remove all the sites which are not included in the interval;
• put back the sites which were previously removed using this criteria.
Overall elimination of sites
With the Shift+F2 key combination, you can remove from the sequences all the noninformative sites for parsimony, e.g. all the sites for which PRESENT2 equals 1.
With the Shift+F3 key combination, you can remove from the sequences all the
constant sites, e.g. all the sites for which PRESENT1 equals 1.
Saving the value of the criteria
With the F7 key, you can save the values of the different criteria for each selected
position, in a file with the extension POS. The option 'Minimal nb of steps'
corresponds to the value 'PRESENT1 - 1'. The files which are obtained can be compared
with the files which result from the programs AFT_PHYL et AFT_HEN, which give the
number of steps of a site in a tree (see Chapters III-9.2 and III-9.4).
A more detailed description is given Chapter III-6.6.
60
MUST user's manual - Version 1.0 (Apr/03)
III-6.4 Formatting of sequences
III-6.4.1 General comments
Several programs, outside the MUST package, are able to treat sequences. These
programs require quite often a particular format of the sequences. To use of these
programs with sequences acquired through MUST, NET gives the possibility to create
sequence files with the appropriate format. This option can also be used to get printing
formats.
To choose the write format of your sequences, use the F4 key which displays the
following list of formats:
Writing in PHYLIP format
Writing in HENNIG86 format
Writing in PAUP 2.4 format
Writing in PAUP 3.0 format
Writing in REDUCSEQ format
Writing in CLUKIM format
Writing in ED format
Writing in NET format
Writing in NJBOOT format
Writing without the deletions
Jackknife for bootstrap
Print
➧
➧
➧
➧
When a line ends with an arrow, the choice of a sub-format is required.
To each format is associated a file having a proper extension (see the possible
extensions in the list of the files of MUST : paragraph I-8.6). This extension is automatically
added to the name of the file.
A name is proposed for each output file. This name is composed as follows:
• the sequence filename to which is added an ordering number,
• the ordering number corresponds to the order of creation of the files, it will be
preceded by an underline character (_) for the files numbered from 0 to 9.
• if the sequence filename is longer than 6 characters, it will be cut at that length.
It is possible however to enter a name of your choice (by deleting with Backspace
the proposed name, then typing yours).
REMARK : others formats will be furnished upon request.
III-6.4.2 File NBS
A file which contains informations pertinent to the ensemble of species is associated
to the output files. This file, with the extension NBS, is required for the programs creating
parenthesed trees (AFT_PAUP, AFT_HEN, AFT_PHYL). It contains the breakdown of all
61
MUST user's manual - Version 1.0 (Apr/03)
operations which were made starting from the aligned sequence file ; it allows you to know
what really is contained in the final file.
Example of file NBS :
#┌ Sequences extracted from file VAN3 created by van
#│ on Tuesday, April 9, 1991 at 13:26
#└ file title: catzef
#File EX.NET created on Sunday, December 8, 1991 at 21:22
#File MM.NBS created on Saturday, May 30, 1992 at 15:25
#
#Type of parsimony : All the events
#BOUNDARIES : 136-147 182-189 209-209 432-435 458-520 575-625 669-678 774-1015
# 19 eliminated sites, car CODON _ [ 2.00, 3.00] (_ [ 1.00, 3.00]
#It remains 41 positions from the 60 selected positions (total = 238)
#List of the 21 species in use:
Protopterus_dulli
Ambystoma_californiense
Ambystoma_tigrinum
Pleurodeles_waltl
Rana_esculenta
Typhlonectes_compressicauda
Xenopus_laevis
Homo_sapiens
Macaca_mulatta
Pan_troglodytes
Cricetus_sp.
Mus_musculus
Rattus_rattus
Bos_primigenius_taurus
Sus_scrofa
Equus_caballus
Lacerta_lepida
Natrix_viperina
Anas_platyrhynchos
Columba_palombus
Gallus_gallus
-------------------------------------------------------------------------------19 eliminated sites, car CODON
_ [
2.00,
3.00] (_ [
1.00,
3.00] :
12
50
105
161
176
207
226
247
286
295
305
372
394
444
453
535
556
654
737
-------------------------------------------------------------------------------List of the 41 retained positions:
20
48
72
86
126
150
155
162
174
179
198
206
208
237
240
257
267
292
293
299
303
319
369
377
393
395
440
449
451
456
457
521
536
538
558
567
648
653
661
751
762
III-6.4.3 Parsimony
Several parsimony programs exist, but they often require files having a particular
format. NET writes on disk the file with the appropriate format for each of the following
programs.
Among all the programs PHYLIP (Felsenstein), several are parsimony programs:
• DNAPARS ;
• DNAPENNY : exhaustive research for all the trees;
• DNABOOT : bootstrap by parsimony;
• PROTPARS : parsimony for the protein sequences.
Others programs use also parsimony:
• PAUP (Swofford, Version 2.4 or 3.0)
• The format MACCLADE is identical to the format PAUP 3.0
• REDUCSEQ (Swofford, Version 2.4.1)
• HENNIG86 (Farris)
62
MUST user's manual - Version 1.0 (Apr/03)
For all the programs listed above, you have to precise what types of events you
want to keep:
• all the events (transitions, transversions and deletions)
• all the substitutions (ignoring deletions)
• in the case of DNA sequences, only the transversions (and not the gaps).
The type of events is chosen in the following menu:
All the events
All the substitutions
All the transversions
III-6.4.4 Jackknife
Depending on the species representative of the taxons, the robustness of a node, or
even its existence (different topology), can vary heavily (Lecointre, Philippe, Le and Le
Guyader, submitted). Since the result which will be obtained with a given species is not
predictable, the option JACKKNIFE allows to make an evaluation by random sampling of
species or sites. So far the program DNABOOT is the only one able to take advantage of
this option; the obtained files have thus this format. Since DNABOOT is a parsimony
program, you will have to indicate what types of events have to be taken into account.
There are three ways to use this option. These variantes are available in the
following sub-menu:
Jackknifing of species
Systematic addition or removal of species
Jackknifing of sites
Jackknifing of species
It is an easy way to study the phenomenon by several random samplings for a given
number of species. You are asked to enter the number n of species, among the m existing
species, and the number N of samplings. For each sampling, the program creates a file
with the format DNABOOT, which thus contains a random choice of the n species
requested.
Jackknifing by systematic addition or removal of species
You can study exhaustively the impact of all species on a tree.
First you must choose some species from the list furnished (e.g. n species chosen
among the m presented).
You can then choose between:
• using F2, the program will create a file which contains all of the chosen species
plus a species taken from the (m-n) remaining species;
• using F3, the program will create a file containing all the species chosen minus
one.
In either case, a file in DNABOOT format is created for all possible combinations.
Jackknifing of sites
63
MUST user's manual - Version 1.0 (Apr/03)
Bootstrap values do not increase linearly in function of the number of sites; the value
may even raise when sites are removed.
Choose two parameters:
• the number of randomly chosen sites (n);
• the number of samplings (N).
For each sampling the program will create a DNABOOT file containing a random
choice of n sites. The ensemble of species is conserved in each file.
III-6.4.5 Printing of the aligned sequences
Several printing options are available:
• Printing of aligned sequences with the options specified in the upper window;
• A block constitutes10 sites, and it is possible to change the number of blocks
printed per line;
• The length of the identifiers (in italic) can be modified;
• The absolutes positions can be printed if the user desires;
• In order to obtain a printout comparable to the display of sequences during the
choice of boundaries, identical characters can be replaced by a dash;
• The choice of printout of removed regions depending on the choice of
boundaries; if the choice is validated, the symbol '_' is added above the regions
removed.
• The printout can be directed towards the printer or towards the NET.OUT file:
you can aslo redirect the printout using the F6 key (cf III-6.7.5) . The default
printout file will contain control characters specific to most matrix printers, so
that it is also possible to obtain an ASCII printout compatible with non matrix
printers.
These options are available in the following menu:
Printing of sequences
Change of number of blocs
➧
➧
Change of length of identifiers
Choice of printing of the positions
➧
➧
Choice of replacement of characters by dash
Change of printer type
➧
Choice of printing the regions removed due to the boundaries ➧
Redirect the output printer
➧
III-6.4.6 Other formats
PHYLIP format (Felsenstein)
Besides the strict parsimony options, the ensemble of PHYLIP programs includes
other programs with their own formats:
• DNAML and DNAMLK : maximum of likelihood;
• DNACOMP : method of compatibility;
• DNAINVAR : Lake's evolving parsimony.
64
MUST user's manual - Version 1.0 (Apr/03)
CLUKIM format for the calculation of matrices of distances.
Recording without deletions
• PCFOLD (Zucker) for the determination of secondary structures of RNA;
• CLUSTAL1 (Higgins) for automatic alignment of sequences (there is also a
program which transforms a CLUSTAL exit file into ED format, see AFT_CLUS
in chapter III-12.9);
• NEC P7 prints only the sequences without the deletions.
Recording in ED format
Recording in NET format
Recording in NJBOOT format
|
| See the corresponding paragraphs
|
III-6.5 Matrices of distance
Use the F5 key to calculate the matrices of distance which correspond to your
sequences.
Nucleic acids
The program starts first to calculate all the differences for each pair of species.
You must choose among the different types of measuring distances (Return will
validate the current element in yellow color). You have the choice between the various
combinations of events (transition, transversion and deletion), and between KIMURA's
formula and the one of JUKES and CANTOR.
Proteins
You choose directly among the different types of measuring distances (Return will
validate the current element in yellow color). You have the choice between 5 types:
• Boolean (any difference = 1);
• Miyata (hydrophoby and encumbrance);
• Hydropathy index (Kyte & Doolittle);
• Similarity of structures II (Risler);
• Log-odds matrix (Dayhoff);
The program displays a warning if calculation results in null distances.
Output format
After the program has calculated the matrix of distance, it automatically goes on with
the choice of the output type:
• Recording a file in NEIGHBOR JOINING format (see chapter III-7);
• Recording a file in FITCH format (program of the PHYLIP ensemble);
• Creating files by a random JACKKNIFING of species (see chapter III-6.4.5); files
have a NEIGHBOR JOINING format;
• Displaying on the screen: use the directional arrows and the keys PgUp,
PgDw, Home and End to move along the matrix;
• Exit to a printer or record in the file of redirection (see chapter III-6.5);
65
MUST user's manual - Version 1.0 (Apr/03)
REMARK: if the matrix has more than 22 lines, the direct output on the printer will be limited
to the 22 first species; to obtain the full printing of the matrix, you must redirect the
output towards the file NET.OUT, then print this file from the DOS environment.
The program proposes a filename for each output file. This name is made as
follows:
• name of the sequence file, with the extension NET, to which is added an
ordering number;
• the ordering number corresponds to the order of the file creation; it is preceded
by a dash (-) for the files numbered from 0 to 9;
• if the name of the sequence file is longer than 6 characters, it will be cut at that
length.
It is possible however to enter a name of your choice (by deleting with Backspace
the proposed name, then typing yours).
All files have automatically the extension MAT.
REMARK: The calculation of matrices requires a lot of memory, so the number of selected
species is quite limited.
III-6.6 Positions
One of the important functions of the MUST software lies in a simple management
of positions in the aligned sequences. Indeed, as far as an alignment is not substantially
modified (adding a star in ED with Ins, or destruction of a common deletion with
SHAREGAP), the positions given by the software correspond to the absolute positions in
the initial file of aligned sequences. The deletions common to a subset of species are
suppressed, but they are taken into account for the values of the positions.
This feature allows you:
1) to use the same boundaries for two different selections of species, so to build
phylogenies using the same characters;
2) to get, after a parsimony program (PAUP or PHYLIP), the number of steps for a
position, and to know the absolute value of the position even if regions were
eliminated with NET.
With the F7 function key, you can save (in a file with POS extension) the values of
the different criteria/indices for each selected position (the criteria/indices are described in
chapter III-6.3). The obtained files can be compared with the files resulting from the
AFT_PHYL et AFT_HEN programs which calculate the number of steps of a site in a tree
(see chapters III-9.2 and III-9.4).
III-6.7 Other options
With the F6 key, you can access to these options which are described in the
following menu:
66
MUST user's manual - Version 1.0 (Apr/03)
Change of species order
Choice of display of the identifier
Choice of the PHYLIP version
Calculation of relative level of GC
Calculation of the frequencies of characters
Change of printer type
Redirect the output "printer"
➧
➧
➧
➧
➧
III-6.7.1 Changing the order of species
The numbers between squared brackets indicate the current ordering number.
To change this order: enter the new position to the left of the species you want to
displace (cancel with Backspace).
To suppress a species, type 0 as new position. CAUTION, the program put back the
removed sites as a function of the rate of X and of the criteria. Moreover, after validation,
the species is lost; the only way to put it back is to reload the initial sequence file.
F2 activates the option to change the order (see below the method). F3 rearranges
and comes back to the main window of NET. To exit the window without rearranging, you
must use the Escape key; the program will not take into account the ordering numbers
which were entered. However, this last possibility cannot cancel a change of order already
validated by F2.
To rearrange species, the program starts to place the numbered species, then it fills
up the empty places with the remaining species, respecting the initial increasing order.
For example :
6 [1] A a
gives
then
[1] B b
[2] B b
[2] C c
[2] C c
2 [3] C c
[3] D d
[4] D d
[4] E e
[4] E e
4 [5] E e
[5] F f
[6] F f
[6] A a
[6] A a
8 [7] G g
[7] H h
[8] H h
[8] G g
[8] G g
III-6.7.2 Choice of the presentation of the identifier
A sub-menu permits you to choose the type of display for the identifier among the
three following possibilities:
• "Genius species" : complete generic and species name;
• "G. species" : initial of the genus name and entire species name;
• "Genius" : generic name only.
III-6.7.3 Choice of the version of PHYLIP
In order to obtain a file usable for TREEPLOT starting from output files generated by
the PHYLIP ensemble, the program AFT_PHYL (see III-9.4) requires a file with the
extension TRE. The version 3.3 of PHYLIP requires the presence of the option Y to create
67
MUST user's manual - Version 1.0 (Apr/03)
this file automatically. NET adds the option Y in the output files formatted for the programs
of the PHYLIP package, version 3.3.
III-6.7.4 Level of GC
This option concerns only nucleic acids.
For each sequence, the program calculates the percentage in bases G+C. For this
calculation, only non-retired positions are retained. The program outputs the result, in table
form, to a printer or to NET.OUT (see III-6.7.6), ordering the sequences according to the
option chosen among the following possibilities:
• sort by increasing order of GC;
• sort by decreasing order of GC;
• no sort (order of sequences at the moment of calculation).
III-6.7.5 Frequency of characters
For each sequence, the program determines the frequency of each character (or of
non-determined characters). The result is also given as a table, printed out or written into
NET.OUT (see III-6.7.6). There is no sorting possibility for this option.
III-6.7.6 Printing
Type of printer
The outputs from NET are intended for matrix printers. It is possible to get an output
for another type of printer. But in this case, no formatting is guaranteed (condensed
characters, italic...). All printing is done in ASCII with a page jump at the end of printing.
Redirection towards a file
The standard output is done on a printer. But the output can be redirected towards a
file named NET.OUT. This option lets you work on a computer not connected to a printer or
modify the output of the program when it's not exactly what you wanted.
NET offers several possibilities for printing (sequences, matrices...). When the
output is redirected towards the file NET.OUT, the successive impressions are
concatenated in the file. However, the file is reset to zero at each new session. Likewise,
each time the output is redirected from the printer towards the file, or vice versa, the file is
reinitialised.
The output file contains the following characters for the control of printing:
• beginning and end of writing in condensed mode (aligned sequences, tables of
frequences of characters,...)
• beginning and end of writing in italic (identifiers)
III-7 THE NJ PROGRAM
The principal window displays a list of files of matrices (MAT extension) accessible
in the current directory. You choose a file by validating (Return) the active file, in yellow. If
68
MUST user's manual - Version 1.0 (Apr/03)
the format is not good for the program (in particular the FITCH format), a message will alert
you. A window then displays information on the file of sequences and on the matrix; you
must confirm the choice with Return.
The principal advantage of the NEIGHBOR JOINING method is its extreme rapidity.
The program generates a file containing a parenthesised tree. This file has the same name
as that containing the matrix, but with the extension ARB. To visualise the tree, you must
pass through the TREEPLOT program(see chapter III-9). To do so, use F2, which gives
access to a list of programs, and choose the option TREEPLOT.
III-8 The NJBOOT program
This program calculates a consensus tree of the major (?) regroupings according to
the bootstrap algorithm, with the tree being constructed by the NEIGHBOR JOINING
method. The main advantage of NJBOOT is its speed.
III-8.1 Format of entry file
This file, with an NJB extension, is created by NET or JACKMONO. It consists of:
• a commentary retracing the different steps leading to creation of the file;
• a line of numbers (number of species, length of the sequence, type of sequence,
number of random samplings, type of distance);
• the list of the species and the sequences.
Example :
#Sequences extracted from 18SAA.ALI of the 20 July 1992 at 15 hours 4
#File TOTO.NET created on Tuesday 1 December 1992 at 18 hours 56
#Jackmono of 4 species in a total of 5
4 11 0 1000 0
Mus_musculus___________________________ CGCCCCGCGCG
Oryctolagus_cuniculus__________________ *C***GGGAUA
Homo_sapiens___________________________ CCCCCCCGGCA
Xenopus_laevis_________________________ *G***GCCAUG
III-8.2 Format of output files
III-8.2.1 Major regroupings
This file is named :
<name of source file>.OUT
Among the ensemble of regroupings determined, NJBOOT selects the mutually
exclusive ones. For each ensemble of overlapping regroupings, the one with the highest
number of appearances is retained.
The regroupings are symbolised by a succession of points and stars, the latter
representing all the species belonging to the node under consideration. The species are
ordered as in the source file. To the right of each regrouping, the number of appearances,
the total number of characters and the name of the source file are displayed.
69
MUST user's manual - Version 1.0 (Apr/03)
Example
>TOTO_0.OUT
.*.*
822 : 11 (TOTO_0.NJB) Mus_musculus___________________________
Oryctolagus_cuniculus__________________ Homo_sapiens___________________________
Xenopus_laevis_________________________
III-8.2.2 Parenthesised tree
This file is named:
<name of source file>.ARB
This is a tree whose format respects the norms adopted on June 24, 1986 by the
Society for the study of evolution (see chapter III-10.1 for a description of the format). This
tree can be visualised with TREEPLOT. It is constructed using the major regroupings.
III-8.2.3 Regroupings present in more than 1% of samplings
This file is named:
<name of source file>.GRP
It is the ensemble of regroupings which appeared in more than 1% of the replicates,
classed in descending order. The description of each line is the same as for the file of
major regroupings.
Example
.*.*
.**.
..**
800 : 11 (TOTO_0.NJB)
185 : 11 (TOTO_0.NJB)
15 : 11 (TOTO_0.NJB)
III-8.3 Utilisation of NJBOOT
The NJBOOT program is very simple to use. You choose the current file, in yellow,
with Return. NJBOOT displays a description of the chosen file and requests a validation
with Return. During its run, NJBOOT displays a count of the number of random samplings
done with respect to the total number of samplings expected (generally 1000).
NJBOOT generates a file in TREEPLOT format, to which you have direct access by
F2.
It is useful to be able to automatically run a series of NJBOOT, especially after an
ensemble of formatting with JACKMONO. To do so, simply use the following DOS
command:
for %f in (*.NJB) do NJBOOT %f
NJBOOT then treats all files with the extension NJB in the current directory. The
only constraint is that the file of the parenthesised tree not exist, or be older than the
corresponding source file, *.NJB. If this is not the case, NJBOOT will not treat this file.
70
MUST user's manual - Version 1.0 (Apr/03)
III-9 Recuperation of outputs from programs of phylogenetic
construction
III-9.1 Transformation to TREEPLOT format
Many programs are used to construct phylogenies. They require entry files of a
particular format. These files, generated by NET (cf. III-6.4.3), are treated by their
respective programs (PHYLIP, PAUP, HENNIG86). Each construction program must
furnish a file <input file name>.OUT in its own format. Utilities are included in MUST
to make these output files uniform, and so obtain one or several parenthesised trees
usable by TREEPLOT. These are described below.
The names of files of parenthesised trees created by these utilities are constructed
in the following way:
• output file name (*.OUT) to which an ordering number is added if several files of
trees are created;
• the ordering number corresponds to the order in which the files were created,
and is preceded by the underline symbol (_) for files numbered from 0 to 9;
• if the name of the output file has more than 6 characters, it will be truncated to 6;
• the file has an ARB extension.
The three utilities also require the information files *.NBS and *.NBM associated
with files used by PHYLIP, PAUP and HENNIG86. In addition, AFT-PHYL needs the file
*.TRE; to generate this last file automatically, NET adds the option Y in the output file to
the format of programs in the ensemble PHYLIP version 3.3.
III-9.2 AFT_HEN
This transforms an output file from the program HENNIG86 into a parenthesised
tree file for TREEPLOT. By default, HENNIG86 gives only one display on the screen. To
generate the file *.OUT, the NET program adds the following commands to the end of the
file in HENNIG86 format (with the extension HEN).
log <nom de fichier>.OUT ;
display * ;
HENNIG86 displays trees with the species names replaced by numbers, AFT_HEN
does the inverse. In addition, HENNIG86 does not give the branch lengths, AFT_HEN
gives an arbitrary branch length of 1. AFT_HEN also creates one or several files of
numbers of steps per position (with the extension POS). These files are created using the
output obtained with the command xsteps c; of HENNIG86. The result of this command
must thus be placed in an *.OUT file. AFT_HEN retrieves the exact value of the position
and attributes to it the calculated number of steps (see above).
Example of *.HEN file:
71
MUST user's manual - Version 1.0 (Apr/03)
mhennig length 38 ci 71 ri 64 trees
3
mhennig 0.7 seconds
bb file 0 from mhennig 3 trees
bb length 38 ci 71 ri 64 trees 3
bb 0.3 seconds
tlist file 0 from bb 3 trees
tree 0
(0 1 (2 (6 8 (3 4 5 7 ))))
tree 1
(0 1 (2 (8 (3 4 5 6 7 ))))
tree 2
(0 1 (2 (8 (6 (3 4 5 7 )))))
tlist 0.1 seconds
xsteps file 0 from bb 3 trees
tree 0 length 38 ci 71 ri 64
character/steps/ci/ri
0
1
2
3
4
5
6
7
1
2
2
2
3
1
2
1
100 50 50 50 66 100 50 100
100
0
0
0
0 100
0 100
19 20 21 22
2
2
1
1
50 100 100 100
0 100 100 100
13 14
2
1
50 100
0 100
15 16 17 18
2
1
1
1
50 100 100 100
0 100 100 100
8
9 10 11
2
1
1
1
50 100 100 100
50 100 100 100
12
3
66
50
13 14
2
1
50 100
0 100
15 16 17 18
2
1
1
1
50 100 100 100
0 100 100 100
8
9 10 11
2
1
1
1
50 100 100 100
50 100 100 100
12
3
66
50
13 14
2
1
50 100
0 100
15 16 17 18
2
1
1
1
50 100 100 100
0 100 100 100
8
9 10 11
2
1
1
1
50 100 100 100
50 100 100 100
12
3
66
50
13 14
2
1
50 100
0 100
15 16 17 18
2
1
1
1
50 100 100 100
0 100 100 100
23
2
50
0
best fits
character/steps/ci/ri
0
1
2
3
4
5
1
2
2
2
3
1
100 50 50 50 66 100
100
0
0
0
0 100
19 20 21 22
2
2
1
1
50 100 100 100
12
3
66
50
23
2
50
0
tree 2 length 38 ci 71 ri 64
character/steps/ci/ri
0
1
2
3
4
5
6
7
1
2
2
2
3
1
2
1
100 50 50 50 66 100 50 100
100
0
0
0
0 100
0 100
19 20 21 22
2
2
1
1
50 100 100 100
0 100 100 100
8
9 10 11
2
1
1
1
50 100 100 100
50 100 100 100
23
2
50
0
tree 1 length 38 ci 71 ri 64
character/steps/ci/ri
0
1
2
3
4
5
6
7
1
2
2
2
3
1
2
1
100 50 50 50 66 100 50 100
100
0
0
0
0 100
0 100
19 20 21 22
2
2
1
1
50 100 100 100
0 100 100 100
| AFT_HEN lit séquentiellement le
| fichier : il mémorise la dernière ligne
| contenant 'lentgh' présente avant le
| premier arbre rencontré, et associe
| cette ligne à l'arbre. De même avec
| les arbres suivants
6
7
2
1
50 100
0 100
23
2
50
72
MUST user's manual - Version 1.0 (Apr/03)
0 100 100 100
0
worst fits
character/steps/ci/ri
0
1
2
3
4
5
1
2
2
2
3
1
100 50 50 50 66 100
100
0
0
0
0 100
19 20 21 22
2
2
1
1
50 100 100 100
0 100 100 100
6
7
2
1
50 100
0 100
8
9 10 11
2
1
1
1
50 100 100 100
50 100 100 100
12
3
66
50
13 14
2
1
50 100
0 100
15 16 17 18
2
1
1
1
50 100 100 100
0 100 100 100
23
2
50
0
xsteps 1.8 seconds
Example of a parenthesised tree file created by AFT_HEN :
#Arbre calculé avec le programme HENNIG86
#bb length 38 ci 71 ri 64 trees 3
#┌ Séquences extraites du fichier BP1_F4 créé par bp
#│ le Dimanche 9 Février 1992 à 12 heures 48
#└ dont le titre est : tmp
#Fichier TOTO.NET créé le Dimanche 9 Février 1992 à 13 heures 4
#Fichier TOTO_2.NBS créé le Lundi 8 Juin 1992 à 18 heures 58
#
#Type de parcimonie : Tous les événements
# 203 sites éliminés, car PRESENT2 _ [
2.00,
2.00] (_ [
1.00,
2.00]
#Il reste 24 positions sur les 227 sélectionnées (total = 227)
(Physarum_polycephalum:1,Dictyostelium_discoideum:1,(Prorocentrum_micans:1,(Lyco
persicon_esculentum:1,Oryza_sativa:1,(Arabidopsis_thaliana:1,Citrus_limon:1,Frag
aria_ananassa:1,Sinapis_alba:1):1):1):1) ;
The HENNIG86 program does not always create a dichotomous tree. AFT_HEN can
transform the tree into a parenthesised one, but TREEPLOT is still unable to use it.
III-9.3 AFT_PAUP
This transforms an output file from the program PAUP into a file usable by
TREEPLOT. The PAUP program requests the name of the entry file and that of the output
file. For AFT_PAUP, these two names must be identical.
The PAUP program truncates species names to 8 characters, AFT_PAUP replaces
these by the complete name.
Example of *.PAU file:
***************************
*
*
*
P A U P
*
*
*
*
Version 2.4.1
*
*
*
*
Illinois Natural
*
*
History Survey
*
*
*
73
MUST user's manual - Version 1.0 (Apr/03)
*
06/08/92
18:59:13
*
*
*
***************************
Version du Lundi 8 Juin 1992 à 18 heures 58
*******************
* Analysis No. 1 *
*******************
Option settings:
NOTU ....................
9
NCHAR ...................
24
User-tree(s) ............
NO
HYPANC ..................
1
ADDSEQ .................. CLOSEST
HOLD ....................
1
SWAP ....................
GLOBAL
MULPARS .................
NO
OPT .....................
N/A
ROOT .................... ANCESTOR
Weights applied .........
NO
OUTWIDTH ................
80
Missing data code .......
?
MAXTREE .................
N/A
All characters are unordered.
Branch lengths and linkages for unrooted tree no.
Connected
to node
Node
Dictyost
Prorocen
Arabidop
Citrus_l
Fragaria
Lycopers
Sinapis_
Oryza_sa
10
11
12
13
14
15
16
(
(
(
(
(
(
(
(
2)
3)
4)
5)
6)
7)
8)
9)
16
15
13
10
11
12
10
14
11
12
13
14
15
16
Physarum (
Statistics for tree no.
Branch
length
1)
4.000
5.000
0.000
0.000
1.000
1.000
0.000
4.000
0.000
0.000
0.000
1.000
6.000
8.000
8.000
1
Length =
38.000
Consistency index = 0.711
Tree no.
1 rooted using designated ancestor
* Physarum
1
74
1
MUST user's manual - Version 1.0 (Apr/03)
*
*
*********** Dictyost
2
*
*
*
*
************** Prorocen
3
*******************16
*
*
*
* Arabidop
4
*
*
*
******************15
* Citrus_l
5
*
**13
*
* 11 Sinapis_
8
*
* *
**************14 12** Fragaria
6
* *
* *** Lycopers
7
*
*********** Oryza_sa
9
Example of the parenthesised tree obtained:
#Arbre calculé avec le programme PAUP Version 2.4.1
#
#
Length =
38.000
Consistency index = 0.711
| Characteristics of the tree
|
#┌ Séquences extraites du fichier BP1_F4 créé par bp
#│ le Dimanche 9 Février 1992 à 12 heures 48
#└ dont le titre est : tmp
#Fichier TOTO.NET créé le Dimanche 9 Février 1992 à 13 heures 4
#Fichier TOTO_1.NBS créé le Lundi 8 Juin 1992 à 18 heures 57
#
#Type de parcimonie : Tous les événements
# 203 sites éliminés, car PRESENT2 _ [
2.00,
2.00] (_ [
1.00,
2.00]
#Il reste 24 positions sur les 227 sélectionnées (total = 227)
((((((((Sinapis_alba:0.000000,Citrus_limon:0.000000):0.000000,Fragaria_ananassa:
1.000000):0.000000,Lycopersicon_esculentum:1.000000):0.000000,Arabidopsis_thalia
na:0.000000):1.000000,Oryza_sativa:4.000000):6.000000,Prorocentrum_micans:5.0000
00):8.000000,Dictyostelium_discoideum:4.000000):4.000000,Physarum_polycephalum:4
.000000) ;
III-9.4 AFT_PHYL
This transforms an output file from the programs of the PHYLIP package into a
parenthesised tree file usable by TREEPLOT. The option Y, added by NET to the output
file in PHYLIP format, is needed for PHYLIP to write the tree into a file (with the extension
TRE). Besides the files *.NBS and *.NBM, AFT_PHYL thus requires the file *.TRE.
The PHYLIP program truncates species names to 10 characters, AFT_PHYL
replaces these by the complete name. AFT_HEN also creates a file of positions (with the
extension POS) using the *.OUT file generated by the programs DNAPARS and
DNAPENNY.
Example of a *.TRE file:
((((Oryza_sati,(Citrus_lim,(Fragaria_a,(Lycopersic,(Sinapis_al,Arabidopsi))))),P
rorocentr),Dictyostel),Physarum_p) ;
((((Oryza_sati,(Citrus_lim,(Fragaria_a,((Sinapis_al,Lycopersic),Arabidopsi)))),P
rorocentr),Dictyostel),Physarum_p) ;
75
MUST user's manual - Version 1.0 (Apr/03)
((((Oryza_sati,(Citrus_lim,(Fragaria_a,(Sinapis_al,(Lycopersic,Arabidopsi))))),P
rorocentr),Dictyostel),Physarum_p) ;
Example of the parenthesised tree obtained:
#┌ Séquences extraites du fichier BP1_F4 créé par bp
#│ le Dimanche 9 Février 1992 à 12 heures 48
#└ dont le titre est : tmp
#Fichier TOTO.NET créé le Dimanche 9 Février 1992 à 13 heures 4
#Fichier TOTO_0.NBS créé le Lundi 8 Juin 1992 à 18 heures 57
#
#Type de parcimonie : Tous les événements
# 203 sites éliminés, car PRESENT2 _ [ 2.00, 2.00] (_ [ 1.00, 2.00]
#Il reste 24 positions sur les 227 sélectionnées (total = 227)
#DNA parsimony algorithm, version 3.31
# 38 trees in all found
#requires a total of
38.000
((((Oryza_sativa:1.0,(Citrus_limon:1.0,(Fragaria_ananassa:1.0,(Lycopersicon_escu
lentum:1.0,(Sinapis_alba:1.0,Arabidopsis_thaliana:1.0):1.0):1.0):1.0):1.0):1.0,P
rorocentrum_micans:1.0):1.0,Dictyostelium_discoideum:1.0):1.0,Physarum_polycepha
lum:1.0) ;
III-9.5 Mode of employment of the utilities
All the programs described in chapter III-9 are used in the same manner. The utility
displays the list of *.OUT files. You choose your file (validation of the active file, in yellow,
with Return). The program creates the file(s) of parenthesised tree(s). You can transform
other output files or continue with another program, notably TREEPLOT, using F2.
III-10 The TREEPLOT program
III-10.1 Parenthesised tree file
The program TREEPLOT traces a phylogenetic tree starting from a tree in
parenthesised form obtained, for example, using the programs NJ, AFT_PAUP or
AFT_PHYL. The entry file must thus be of the form:
#┌ Séquences extraites du fichier CONSE28S créé par HP
#│ le Mardi 12 Mars 1991 à 13 heures 57
#└ dont le titre est : Domaines conservés du 28S
#Fichier EX.NET créé le Mardi 19 Mars 1991 à 16 heures 40
#Fichier EX_0.MAT créé le Mardi 19 Mars 1991 à 16 heures 40
#Matrice calculée avec Toutes les différences
#BORNES : 1-27
#1209 sites éliminés, car PRESENT2 _ [2.00,4.00] (_ [1.00,4.00]
#Il reste 587 positions sur les 1796 sélectionnées (total = 1822).
#Arbre calculé avec la méthode Neighbor Joining
((((Mus_musculus:1.991875,Xenopus_laevis:1.994125):13.212914,(Drosophila_melanog
aster:20.867724,Caenorhabditis_elegans:17.426275):1.356087):2.219244,(Physarum_p
olycephalum:27.000974,(Euglena_gracilis:27.842391,(Trypanosoma_brucei:3.687273,C
rithidia_fasciculata:2.819727):30.665610):9.815276):6.007036):2.907344,(Saccharo
myces_cerevisiae:15.670047,(Prorocentrum_micans:12.954813,Tetrahymena_thermophil
76
MUST user's manual - Version 1.0 (Apr/03)
a:14.863188):2.544453):0.561859,(Oryza_sativa:3.350750,Citrus_limon:2.275250):13
.369766) ;
The lines beginning with an # correspond to commentaries. They must be placed at
the beginning of the file
All of the following lines are interpreted as the parenthesised description of the tree.
The tree must be presented in parenthesised form respecting the norms adopted June 24
1986 by the Society for the study of evolution. It can be written over several lines. Actually,
the carriage returns and spaces are eliminated during the reading of the tree. The tree may
be rooted or unrooted, but must be strictly dichotomous. If the tree is unrooted, the
program will choose the first species encountered as outgroup.
To obtain the complete identifier of a species, you must separate the genus name
from the species name by the underline symbol "_" because all underlines will be replaced
by blanks during display and printing. However, the identifier must not contain more than
40 characters, or it will be truncated.
III-10.2 Modifications of the tree
The first window of TREEPLOT displays the list of files of parenthesised trees
(*.ARB). You choose you file (validation of the active file in yellow, using Return). The
program indicates the possible existence of negative distances, then displays the
commentaries associated with the file, requesting confirmation of the choice.
REMARK: The vertical lines have a null length; they are present only to make
the tree readable. Only the horizontal lines represent distances between
species.
III-10.2.1 Choice of the root
It is possible to choose an outgroup species (the root will then be situated between
that species and the nearest node) or to choose to position the root at the left of a node.
Place the cursor on the species or node desired, and create the root using F3. The tree is
redrawn with the new root.
In addition, one may choose the percentage of the length of the internode which is
consecrated to the upper branch. The program permits the acquisition of that value using
F4 (cf III-10.2.3).
III-10.2.2 Rotation around a node
You place the cursor on the node around which you wish to make the rotation. The
F2 key gives a permutation of the upper and lower branches which emanate from the
current node. Obviously, this function is not active when the cursor is on a leaf.
77
MUST user's manual - Version 1.0 (Apr/03)
III-10.2.3 Weight of the lower branch
It is possible to modify the respective lengths of direct daughter branches of the root.
Whatever the position of the cursor, the F4 key permits this modification to be made. By
default, each branch has a weight of 50.
After an explanation of this function, you specify the weight (in percentage from 0100) which will be assigned to the lower daughter branch. Thus, a weight of 10
corresponds to a long upper branch (90% of the sum of the two branch lengths and a short
lower branch (10% of the same sum). The inverse is true if you acquire a value of 90.
III-10.3 Matrix of distances
It is also possible to calculate the matrix of distances which corresponds to the tree
(e.g. patristic distances or estimated distances). This has the format described for the
program NJ. By default, the name of the file containing the matrix is <name of source
file>'.MAT. Thus, starting from the file TOTO_0.ARB, one obtains the matrix file
TOTO_0'.MAT. However this name can be modified by the user (efface using Backspace
and type the new name in). The order of species in the matrix corresponds to that of the
tree, in beginning from the top of the screen. This function is available using F6.
78
MUST user's manual - Version 1.0 (Apr/03)
III-10.4 Output to printer
III-10.4.1 Matrix printers
Using F5, one obtains a printout of the tree directly. You need a printer with 8, 9, or
24 pins connected to your computer. If no printer is connected, you exit directly from
TREEPLOT with a DOS error message. You gain access to the choice of printer in the
following menu of options:
Printing of diagram
Change of paper size
Change of type of printer
Change of scale
Choice of line thickness
➧
➧
➧
➧
It is thus possible to choose the type of paper used (80 or 132 columns), the line
thickness and the horizontal scale. The default scale is that which permits the use of the
entire width of the sheet of paper. To give a larger scale will diminish the size of the tree.
III-10.4.1 Postscript printers
Using the key combination Shift+F5, It is possible to obtain a print file in Postscript
format. This file contains the tree. Many options are available in the following menu:
Printing of diagram
Choice of the name of file
Choice of the margin
Choice of character size
Choice of line spacing
Choice of line thickness
Change of type of drawing
Change of print of BE
Change of style
Change of scale
➧
➧
➧
➧
➧
➧
➧
➧
➧
The name of the output file is, by default, the name of the initial file chosen in
TREEPLOT with the extension PS. It is always possible to modify this name, especially if
the Postscript print file already exists, since in this case, TREEPLOT crashes the first file.
The margins, calculated in centimetres with respect to the adges of the sheet of
paper, cannot be less than 0.7 cm. This limitation is imposed by many laser printers.
The size of characters and the thickness of lines is expressed in points.
The interline corresponds to the space between two lines, and is null by default. It is
expressed in millimetres.
Three tree types are proposed:
- "Horizontal": The branches of the tree are composed of horizontal and vertical
lines, but only the horizontal lines represent distances separating two nodes,
79
MUST user's manual - Version 1.0 (Apr/03)
- "Oblique": The branches of the tree are composed of oblique lines running
directly from a node to its daughter node,
- "Cladogram": The tree is represented in cladogram form.
The option "Change of print of BE" allows you to display (or not) the bootstrap
value to the left of each node.
The names of leaves are printed in Times Roman typeface; you can choose the
following styles: "Italic", "Normal" or "Bold".
As for the matrix printers, the default horizontal scale is that which occupies the
width of the sheet of paper
By playing with the parameters 'character size', 'interline', and 'scale', it is possible to
modify the vertical space occupied by the tree. The program will not verify that the tree will
fit on a single sheet; you must check that the value for space available is not negative.
III-10.5 Other functions
Here is a summary of these functions :
F7 : Moves the tree up;
F8 : moves the tree down;
F9 : affichage des commentaires associ‚s au fichier ;
Shift+F1 : loads a few data file;
Shift+F2 : lengthens all branches leading to species such that all species are
shown at the same level. The branch lengths return to normal if you reroot the
tree, because the program modifies only the X coordinates of the leaves.
WARNING, the calculation of matrices of patristic distance does take this
modification into account;
Shift+F3 : Writes the tree into a file formatted for PHYLIP.
REMARK: There is a version for EGA screens and a version for VGA screens (with more
species displayed on the screen). Please contact the author to obtain an EGA
version program.
III-11 The COMP_MAT program
The user may need to know quickly whether two molecules give the same
phylogenetic information, without going through tree construction which is long, difficult,
and requires many operations.
This can be done by direct comparison of the values contained in the matrices of
distances. The module represents the values graphically for comparison.
III-11.1 Method of comparison used
Choose two files of matrices, using two successive Return validations on the active
file. These files, with a MAT extension, are created by the NET and TREEPLOT programs.
The program takes the intersections of the species and produces all the possible
80
MUST user's manual - Version 1.0 (Apr/03)
combinations of couples of species. To trace the graph, one uses a plan in which each axis
represents the distances for a matrix. Each species couple is positioned within the plan by
placing, respectively, the values of the two distances on the two axes.
The comparison of the matrices is done by visual evaluation of a cloud of points.
The regression line is displayed in yellow. You can refine the comparison by playing with
the following options, displayed in menu form below the graph.
Choice of species of first group
Choice of species of second group
Display of the pairs of species
You can display the information associated with each matrix using the F2 and F3
keys.
III-11.2 Visualisation of the species couples
When "Display of the pairs of species" is activated, the list of species
couples is displayed, with the percentages. Each percentage represents the distance which
separates the point considered, perpendicularly, from the regression line, calculated as a
percentage of the longest distance. You can move within the list using the vertical arrows
and PgUp, PgDw, Home and End.
It is thus possible to identify each point because of the green spot which appears
when a species couple is activated. Escape returns you to the preceding menu. This
option is very useful in spotting which species couples correspond to "abnormal" points.
III-11.3 Choice of species
It is also possible to visualise the distribution of one or several species in the cloud
of points using the option "Choice of species of first group" which displays the
list of species.
Select the species which you wish to visualise (movement using vertical arrows,
validation by Return). Validate the list chosen with Escape. All the points involving the
chosen species will be in magenta on the graph. The species thus selected will be
integrated into the first group.
By choosing other species with the option "Choice of species of second
group", you can limit the points displayed in color to species couples consisting of one
species from each group. For example, you could visualise all species couples of type
(Aves, Mammalia).
The selection of species is done as for the first group.
III-11.4 Indices
4 indices are displayed above the graph:
•
R = correlation coefficient;
81
MUST user's manual - Version 1.0 (Apr/03)
•
Standard deviation (Fitch and Margoliash, 1967);
DS = 100 ×
•
2
Υ
ς||
Ω
Tateno's Indice (Tateno et al., 1982) ;
TATENO =
•
Ρ
|Σ∑ ∑ βd1- d2 γ/ d1
|Τ n × βn - 1γ− 2
Ρ
|Σ 2 × ∑ βd1- d2 γ |Υ
ς
|Τnβn - 1γ
|Ω
2
Farris' Indice (Farris, 1972) ;
FARRIS =
2
n × n -1
β γ × ∑ d1- d2
III-11.5 Printing
Many options are available in menu form for the two printout modes proposed (print
into a file in Postscript language with F4, printout on a pin printer with F5). The choice of
options is done in a similar manner in either case: an upper frame displays the current
printout choices and a lower frame lets you modify these choices by selection within a
menu and submenu. The first line of the menu activates printout using the options
displayed in the upper frame.
Printing in Postscript
Printing of diagram
Choice of the name of file
Choice of the number of diagrams per page
Choice of X title
Choice of Y title
Choice of printing of the diagonal
Change in the shape of the point
➧
➧
➧
➧
➧
➧
In choosing the number of diagrams per page, one also defines the unit size of the
diagrams. The program calculates the dimensions for a diagram in function of this option,
in order to optimise the use of the page.
The legends of the axes will be centered in the length of the corresponding axis.
You activate the printing into the file by the command "Printing of diagram". If
the chosen file already contains print commands for diagrams, the new diagram will be
organised like the preceding ones.
Printing on a pin printer
82
MUST user's manual - Version 1.0 (Apr/03)
Printing of diagram
Printing of the criteria only
Choice of the X and Y values printing
Change in the size of squares
Choice of the frame printing
Change in the type of printer
Redirection of the output "printer"
➧
➧
➧
➧
➧
The printing of the diagram also includes printing of the commentaries associated
with each file, as well as the diverse criteria used to make the comparison.
III-12 Diverse programs
III-12.1 The JACKMONO program
III-12.4.1 General information
The DNABOOT program, in the Felsenstein package, constructs phylogenetic trees
by parsimony. Beginning from files in NET format, JACKMONO creates files in DNABOOT
or NJBOOT formats. Starting from a pool of species belonging to different groups which
are thought to be monophyletic, JACKMONO generates an ensemble of all the species
combinations possible in taking at random a single species per group. One can thus study
the impact of a species on a node.
Each combination is stored in a different , for which a name is chosen as follows:
- The name of the sequence file, shortened to six characters;
- An ordering number incremented with each file created;
- A DBO extension for DNABOOT, or NJB for NJBOOT.
Each *.DBO is associated with an *.NBS file (see paragraph III-6.4.2).
Since DNABOOT is a parsimony program, you must detail the type of events that
JACKMONO will take into account (all events, transversions only, substitutions only). In
addition, JACKMONO automatically eliminates all sites non informative for parsimony.
For NJBOOT also, the type of events must be detailed.
III-4.2 Utilisation
The window of the JACKMONO program displays the list of sequence files in the
active directories. Choose the active file (in yellow) with Return. The program then displays
the characteristics of this file and asks you to confirm your choice with Return before
launching the creation of all the combinations possible. The program displays temporarily
the number of combinations made.
The name of the current systematic frame and the name of the file containing the
species names and their group name are displayed in the upper part of the window. The
displayed names correspond to those chosen during the last session of ED, AFAS or
SHAREGAP (see paragraph III-4.2 for complementary explanations).
83
MUST user's manual - Version 1.0 (Apr/03)
F3 gives access to the list of existing systematic frames in order to choose another.
F4 allows you to change the file associating species names and group names; do
not give either the path or the extension of the filename.
III-12.2 The AFT_EXT program
III-12.3 The JACKBOOT program
III-12.3.1 General information
This program prepares files usable by the COMP_BOO and MONO_HIS programs
from flies obtained with the DNABOOT or NJBOOT programs. These prepared files contain
the bootstrap values for the ensemble of species, deduced from the values obtained for a
sub-ensemble of species. Before using JACKBOOT, it is necessary to add the list of
species, followed by a blank line, to the beginning of the *.GRP file created by DNABOOT
or NJBOOT. This addition must be made manually, using a text editor.
Example of a file in JACKBOOT format:
Mus_musculus____________
Oryctolagus_cuniculus___
Homo_sapiens____________
Xenopus_laevis__________
.*.*
.**.
..**
.*.*
.**.
..**
609
367
24
609
367
24
:
:
:
:
:
:
11
11
11
11
11
11
(TOTO_0.NJB)
(TOTO_0.NJB)
(TOTO_0.NJB)
(TOTO_0.NJB)
(TOTO_0.NJB)
(TOTO_0.NJB)
It is necessary to add the '_' symbol to the end of species names such that all
names have the same number of characters. This number must also be equal to the
number of characters in the species names in the associated *.OUT file.
In addition, in the case of NJBOOT, the ensemble of *.OUT files, which are studied
together, must be concatenated in a single joint file (without extension). In this file each
*.OUT file must be separated from the precedent by a blank line.
JACKBOOT generates *.BOO files consisting of a series of lines; each line must
contain at least the following information:
- the observed bootstrap value (Mean);
- the deduced bootstrap value (Sites);
- the ordering number for regrouping (Nx);
- The elementary name of the file, with a period separating the name from the
extension.
The number of sites and the filename must be separated by two periods.
Commentaries can be added to the file; in this case the line must be preceded by the
symbol #. A species list can be placed at the end of each line, this would be the list of
species associated with each bootstrap value.
84
MUST user's manual - Version 1.0 (Apr/03)
Example of a *.BOO file:
#Raja
Mean=
Mean=
Mean=
Mean=
.
.
montagui
, Raja radiata
60.15 Sites= 40 : N1-t40_3.out
96.94 Sites= 20 : N2-t20_4.out
226.39 Sites= 20 : N3-t20_1.out
424.71 Sites= 40 : N4-t40_2.out
Other values can be added to the files without problems; they will not be interpreted
by the program. Thus, the file illustrated above could look like this:
#Raja montagui
, Raja radiata
Mean= 60.15 Sites= 40 Species= 2 : N1-t40_3.out
Mean= 96.94 Sites= 20 Species= 2 : N2-t20_4.out
Mean= 226.39 Sites= 20 Species= 2 : N3-t20_1.out
Mean= 424.71 Sites= 40 Species= 2 : N4-t40_2.out
.
.
III-12.3.2 Utilisation of JACKBOOT
1) Choose the *.GRP file, with the list of species using Return on the active file (in
yellow).
2) Confirm the choice of file.
3) Choose the desired option from the following menu :
Comparaison of observed and
Comparaison of observed and
Comparaison of observed and
Histogram of differences of
Histogram of differences of
Histogram of differences of
inferred
inferred
inferred
observed
observed
observed
BE for all nodes
mean of BE
corrected mean of BE
and inferred means
and inferred corrected means
and inferred BE of all nodes
4) Acquire the name of the *.OUT file corresponding to the first file chosen (or to the file
concatenated for NJBOOT).
5) Acquire the name of the output file which will take a BOO extension.
85
MUST user's manual - Version 1.0 (Apr/03)
III-12.4 The COMP_BOO program
III-12.4.1 Description of the display
This program permits you to study the evolution of bootstrap values (method
measuring the solidity of a node) in function of the number of sites. These values are
stored in a file with a BOO extension. The file is generated by the AFT_EXT (see III-12.2) or
JACKBOOT (see III-12.3) programs from the *.OUT and *.GRP files created by
DNABOOT or NJBOOT(see III-8). The ensemble of bootstrap values is displayed in the
first window; you choose the file to be visualised (by Return, on the active file in yellow).
COMP_BOO Then displays the values in graphic form, with the number of sites on
the X (horizontal) axis and the bootstrap values on the Y (vertical) axis. Each point
represents an elementary file which stores a bootstrap value for a given number of sites.
The regression line is shown in yellow.
In the upper part of the screen, from left to right, the following information is
displayed:
- the correlation coefficient R;
- the total number of points ;
- the name of the bootstrap file
III.12.4.2 Main menu
The principal options are displayed in menu form below the graph:
Display of each point
Display of mean value
Printing out the diagram
Visualisation of points
This furnishes the list of elementary files with the following data:
- the name of the elementary file;
- a percentage representing the distance which separates (perpendicularly) the
examined point to the right of the line of regression, calculated as a percentage
of the longest observed distance;
- between parentheses, the value of the XY coordinates.
The point corresponding to the current file is visualised as a green point
Display of mean values
For each value of site number, this option displays the mean Value of the
bootstraps. This mean is seen as a yellow point.
Printout on a matrix printer
The graph can be printed according to several options. The launching of a printout
displays, in the upper frame, the present configuration stored in the file
\MUST\DATA\COMP_BOO.SYS. Using the central menu, you can modify one or several
options:
86
MUST user's manual - Version 1.0 (Apr/03)
• "Choice of the X and Y values printing": The program will take the
•
•
•
•
•
minimal and maximal values to limit the axes; in addition, it divides the X axis in
3 equal parts and the Y axis in 4 equal parts. This often results in decimal
values. During printing, it can thus be useful to have different values than those
displayed on the screen;
"Choice of the mean values printing" ;
"Change in the size of the squares" 15 is a good standard value;
"Choice of the frame printing" in addition to equal partitioning of X and
Y axes, an upper horizontal line and a vertical line can be printed so that the
graph is enclosed in a frame;
"Change in the type of printer" : the choice offered only permits you to
dictate the number of pins of the printer;
"Redirection of the output "printer"": the printout can be directed
towards a matrix printer or the file COMP_BOO.OUT;
III-12.4.3 Other options
Postscript file
Using the F5 key, a file in Postscript language allows you to print the graph on a
Postscript type printer. Several options, available on a menu, let you configure the
impression:
Printing of diagram
Choice of the name of file
Choice of the number of diagrams per page
Choice of X title
Choice of Y title
Choice of printing of the diagonal
Change in the shape of the point
➧
➧
➧
➧
➧
➧
The choice of the number of diagrams per page has a direct influence on the unit
size of each diagram.
The legends of the axes are centred on the axes.
Other Function keys
F2 : Displays the commentaries in the bootstrap file
F3 : Modifies the scale on the X axis
F4 : Modifies the scale on the Y axis
SHIFT+F1 : Loads a new file of bootstraps
SHIFT+F2 : Modifies the scale of the X axis so that the values are between 0 and
the maximal value, and modifies the scale of the Y axis so that the values lie
between 0 and 1000.
87
MUST user's manual - Version 1.0 (Apr/03)
III-12.5 The MONO_HIS program
III-12.5.1 General information
This program lets you display in histogram form the bootstrap values (BE) obtained
by the DNABOOT or NJBOOT programs (see III-8). Starting from *.OUT and *.GRP files
generated by these two programs, AFT_EXT (III-12.2) or JACKBOOT (see III-12.3) create
*.BOO files usable by MONO_HIS .
III-12.5.2 Utilisation of MONO_HIS
Choose the current file (in yellow) by Return. The program displays the commentary
lines present in the file and asks for confirmation of the choice. MONO_HIS displays a
histogram of the ensemble of values in white. If a list of species is associated with
corresponding bootstrap values, the sub-histogram is displayed species by species (in
green). The display on the screen represents 78 classes.
The following values are displayed above the histogram (the second line represents
the values of the ensembles of BE, and the third line the values specific to the current
species):
• on the first line, the filename and the number of species;
• N = total number of BE;
• MIN = minimal BE value;
• MAX = Maximum BE value;
• γ = mean value of BEs;
• σ = spread for type;
• δ = spread between the two mean values.
The name of the current species is displayed in yellow, above and to the right of the
histogram. This name appears only when a species list is associated with each BE value.
Diverse options are accessible using the keyboard.
Display of commentaries
The lines of commentary at the beginning of a file (preceded by the symbol #) are
displayed with the F2 key.
Vertical scale of the histogram
By default, the program arranges the histogram so as to occupy the height available
on the screen. In order to compare several histograms, it is useful to have a common
vertical scale. This operation is called using F3; the program asks for the number of units
likely to use the maximum height. In raising this number, you will diminish the size of the
peaks.
Boundaries of bootstrap values
By default, MONO_HIS displays the histogram using the bootstrap values between
0 and 1000. these limit values can be modified with F4.
88
MUST user's manual - Version 1.0 (Apr/03)
Postscript files
A file in Postscript is generated using the F5 key. This file can be printed on any
printer using Postscript. Several printing options are available in a scrolling menu:
Printing of diagram
Choice of the name of file
Choice of title
Choice of the number of diagrams per page
Choice of the number of intervals
Choice of the printing of 1 or 2 histograms
Change of maximal number of values per class
➧
➧
➧
➧
➧
➧
The size of a diagram varies in function of the maximum number of diagrams per
page. The unit size of a diagram is calculated for optimal use of the page. To print several
diagrams on the same page, simply give the same file name; as long as there is space on
the page the program will place diagrams successively from left to right (in the case of six
diagrams per page) and from top to bottom.
The number of intervals is the total number of divisions along the BE axis. It can be
interesting to modify this number to refine the disposition of the BEs, or during reduction of
the width of a histogram, so that each peak is not a simple vertical line.
When printing a single histogram, you choose to print uniquely the general
histogram. However, when you choose two histograms, the printout is a superimposition of
the general histogram on the histogram of the current species. This option is available only
when a list of species is associated to each bootstrap value.
When you change the maximum number of values per class, you change also the
vertical scale of the diagram (see above).
Printing on a matrix printer
The exit file is sent directly to the printer using F6. When a list of species is
associated with each bootstrap value, MONO_HIS offers to print either the global
histogram and the current histogram, or the global histogram alone.
Display of sub-histograms
You can review the ensemble of sub-histograms, species by species, using the
horizontal arrows. The characteristic values associated to the current species are displayed
above the histograms.
This function is available only when a list of species is associated with each
bootstrap value.
III-12.6 The COMP_POS program
The NET, AFT_PHYL and AFT_HEN programs generate files of positions ( with a
POS extension), in which, for each position retained, you give either an index value or the
number of steps. The COMP_POS program does a direct comparison of the values
contained in the files of positions. This comparison can be made between positions within a
tree or those in different trees. The module permits comparison by representing the values
on a graph, as in COMP_MAT.
89
MUST user's manual - Version 1.0 (Apr/03)
III-12.6.1 Method of comparison used
You choose two files of positions (two successive validations using Return on the
active file). For the comparison, the program takes the two values of a position and makes
all possible combinations of pairs of values.
To draw the graph, use the plan in which each axis represents the values of a file of
positions. Each pair of positions is displayed within the plan by placing the two values of
the position on the two axes. The regression line is shown in yellow. The correlation
coefficient is displayed above and to the left.
You can display the information associated with each file of position on the X and Y
axes, respectively, with the F2 and F3 keys.
III-12.6.2 Options available
Printing the graph
It is possible to direct the graph towards a matrix printer using F5.
The F4 key lets you direct the exit file for COMP_POS.OUT towards the printer and
the contrary.
Beneath the graph, a menu offers three options (validation by Return, on the active
option in yellow).
Display of each position
Write the differences into a file *.POS
Write one kind of positions into a file *.BOR
Visualisation of positions
This option displays the list of positions. The percentage displayed corresponds
represented by the distance at the right of that position with respect to the greatest
distance.
You move within the list by using the vertical arrows, PgUp, PgDw, Home and
End. You can identify each point because of the green indicator which appears when a pair
of species is activated. Escape returns you to the preceding menu.
Writing the differences into a file
The program will request the name of the file in which the differences will be stored
(commentary is facultative). The file will have a POS extension.
The study of these differences permits you, among other things, to measure the
homoplasy, that is, the difference between the number of steps and the minimal number of
steps.
Writing the values of comparison into a file
Since the values of position are discrete values, many pairs will be displayed at the
same place on the graph. Thus, it is interesting to know how the number of points for each
90
MUST user's manual - Version 1.0 (Apr/03)
index value or number of steps. The print option lets you output this result in table form
according to one or both of the axes.
III-12.7 The RESTRIC program
III-12.7.1 Utilisation
This program lets you determine which restriction sites are present along sequences
contained in a file of aligned sequences (ALI extension).
There are two ways to use this program:
• To search for all the restriction sites, in all the sequences of the file of aligned
sequences, for a given group of restriction enzymes. The group of restriction
enzymes is defined in the file ENZYME.RES;
• To determine the position of a particular stretch of nucleotides in the sequences
of the file.
In the first case, simply enter the following order after the DOS prompt:
RESTRIC TOTO.ALI
where TOTO.ALI is the file of aligned sequences.
The program will search, display the results on the screen (go to the next page
using Return) and store these results in the file RESTRIC.OUT.
In the second case, you must specify the motif to be recognised by entering the
following command after the DOS prompt:
RESTRIC TGCAGT TOTO.ALI
where TOTO.ALI is the file of aligned sequences, and TGCAGT the motif sought.
III-12.7.2 The ENZYME.RES file
The ENZYME.RES contains the following:
name of the enzyme
bases recognised by the enzyme
You must place this information in two lines.
Example :
Eco RI
GAATTC
Eco RV
GATATC
Sma I, Xma I, Ava I
CCCGGG
Not I
GCGGCCGC
Hind III
AAGCTT
91
MUST user's manual - Version 1.0 (Apr/03)
III-12.7.3 The RESTRIC.OUT file
This is the exit file for the program RESTRIC. It is generated automatically.
For each enzyme, it gives the list of species containing the restriction site and,
between parentheses, the position within the sequence. It also furnishes the motif
recognised; RESTRIC accepts the indetermineds of sequencage whatever the letter of
indertermination (see code in chapter II-4.1).
At the end of the file, a table summarises the number of sites per enzyme.
ATTENTION: The file crashes each time RESTRIC is launched.
Example :
----------------- Eco RI ------------------> Prorocentrum micans (position = 101) : GAAUUC
-> Sinapis alba (position = 121) : GAAUUC
----------------- Eco RV ------------------> Tetrahymena pyriformis (position = 86) : GAUAUC
-> Tetrahymena thermophila (position = 190) : GAUAUC
-> Drosophila melanogaster (position = 155) : GAUAUC
----------------- Sma I, Xma I, Ava I ------------------>
->
->
->
->
->
->
Arabidopsis thaliana (position = 238) : CCCGGG
Herdmania momus (position = 157) : CCCGGG
Xenopus laevis (position = 197) : CCCGGG
Xenopus borealis (position = 200) : CCCGGG
Homo sapiens (position = 163) : CCCGGG
Pan troglodytes (position = 163) : CCCGGG
Rattus norvegicus (position = 163) : CCCGGG
----------------- Not I ---------------------------------- Hind III ------------------> Caenorhabditis elegans (position = 34) : AAGCUU
RESUME :
->
->
->
->
->
Eco RI
: 2
Eco RV
: 3
Sma I, Xma I, Ava I
Not I
: 0
Hind III
: 1
: 7
92
MUST user's manual - Version 1.0 (Apr/03)
III-12.8 The SHAREGAP program
This program is complementary to ED, in facilitating the determination of deletions
common to several species. It serves the following purposes:
• The suppression of deletions common to the ensemble of species (presence of
a gap or a blank at a given site);
• The search for possible common deletions (positions where the presence of a
gap or a blank is found more than 50%of the time).
SHAREGAP does not permit the modification of the alignment of sequences; ED
must be used to take advantage of the information supplied by SHAREGAP.
III-12.8.1 Choice of the file of aligned sequences
The first window of the SHAREGAP program displays the list of files of aligned
sequences present in the <MUST\SEQ> directories. You choose the active file (in yellow)
with Return. The program displays the characteristics of the file and requests confirmation
of the choice by Return before beginning the search for common deletions.
The name of the current systematic frame, and the name of the file containing the
names of species and their group name, are displayed in the upper part of the window. The
names displayed correspond to those chosen during the last session of ED, AFAS, or
SHAREGAP (see complementary explanations in paragraph III-4.2).
F3 gives access to the list of existing systematic frames to choose another.
The species will be arranged in the systematic frame in function of the group name
associated with them in the file containing the species names.
F4 lets you change the file associating group names and species names; do not give
the path or the extension of the file name.
After calculation, the program displays:
• The number of common deletions found;
• The number of sites with more than 50% of deletions.
It is then possible to choose between the two following options, using Return:
• Suppress the deletions in common;
• Display the sites of possible common deletions.
III-12.8.2 Suppression of common deletions
This is a simple elimination of positions where a common deletion exists. The file of
aligned sequences is rewritten in removing these positions. A save is done to a file with a
BAK extension.
III-12.8.3 Search for possible common deletions
The display of sites where the presence of a gap or blank is found in more than 50%
of the sequences lets you visualise some surprising placements of deletions. Notably, one
can find the following case:
93
MUST user's manual - Version 1.0 (Apr/03)
A*
A*
A*
*A
*A
where the suppression of deletions is evident.
Description of the display window
The choice of this option opens a window which displays:
• A consensus sequence representing the ensemble of species with a nucleotide
at the level of the site visualised;
• A second consensus sequence grouping the species with a gap or a blank at
that site;
• To the right of each sequence, the number of species and of groups constituting
each consensus sequence;
• In the upper part of the window, the list of species not having a gap at that
position; this list is in the order of the file of aligned sequences and not in
taxonomic order.
A color code is used to highlight the consensus value for each site; this code is
displayed, in percentage, above the sequences. The nucleotides identical between the two
consensus sequences are represented by a dash..
The site is highlighted by writing the two nucleotides on a blue background. The
value of the position is displayed below the sequences. It is not possible to move along the
sequences; you can only go from one site to the next, by using Return.
Printing
For each site, it is possible to obtain a hard copy of the output, or to direct it to a file
(redirect the exit using F5 on the preceding window). The output has the following format:
• name of file of aligned sequences, date and time of printing;
• list of species without a gap at the given position, with mention of group name;
• the consensus sequence of the preceding species;
• the consensus sequence of species with a deletion.
Since a color code was not usable to specify the consensus value, this value is
represented by a number. The number corresponds to the lower limit of each consensus
value. Thus a value of '9' corresponds to a consensus between 90% and 99%. The
absence of a number signifies a consensus value of 100%.
III-12.9 The AFT_CLUS program
CLUSTAL1 is a program of alignment of sequences. NET furnishes a file with the
entry format of CLUSTAL1 (*.CLU). CLUSTAL1 generates three files named OUT1, OUT2
and OUT4. This last file contains the aligned sequences.
AFT_CLUS transforms the file of aligned sequences OUT4 into a file usable by ED. It
makes the following modifications:
• the program CLUSTAL1 shortens the species names to 15 characters,
AFT_CLUS replaces them by the complete names;
• CLUSTAL1 symbolises gaps by dashes, AFT_CLUS replaces them with stars;
94
MUST user's manual - Version 1.0 (Apr/03)
• it concatenates the sequences.
The file of aligned sequences in ED format is generated in the directory
<MUST>\SEQ. It has an ALI extension. Its name is that of the entry file for CLUSTAL1.
Example of OUT4 file:
Gap fixed =
10 Gap vary. =
10
Anacystis nidul
Bacillus subtil
Leptospira inte
Pirellula marin
CTGTACCCTAAACCGACACAGGTGGGACGGTAGAGTATACCAAGGGGCGCGAGGTAACTC
CCGTACCGCAAACCGTCACAGGTAGGCGAGGAGAGAATCCTAAGGTGATCGAGAGAACTC
CCGTACCGCAAACCGACACAGGTAGGCAAGTAGAGAATACTAAGGTGTTCGAGATAACTC
CCGTACTA-AAACTGACACAGGTAGGTAGGTCGAGTAGACCAAGGCGCTCGGGAGAACAG
* ****
**** * ******* **
* *** * * **** * ** * ***
Anacystis nidul
Bacillus subtil
Leptospira inte
Pirellula marin
TCTCTAAGGAACTCGGCA
TCGTTAAGGAACTCGGCA
TCGTTAAGGAACTCGGCA
TGGTTAAGGAACTCTGCA
*
********** ***
Below the sequences, stars symbolise the characters identical for all the species.
Utilisation of AFT_CLUS
Simply enter the following command after the DOS prompt:
AFT_CLUS <file>.CLU
where file is the name of the entry file for CLUSTAL1.
AFT_CLUS also proposes the transformation of T's to U's.
95
LITERATURE CITED
Olsen, G.J., and C.R. Woese (1993). Ribosomal RNA: a key to phylogeny. FASEB J.,
7:113-123.


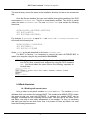


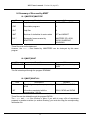
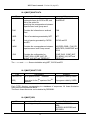
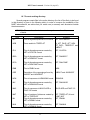
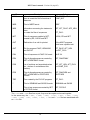


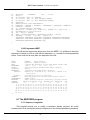


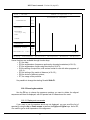


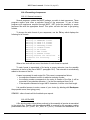
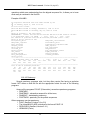


![Model DO402G Dissolved Oxygen Converter [Style: S3]](http://vs1.manualzilla.com/store/data/005725233_1-bd7e4c5bf258da59a958f30153ff00ea-150x150.png)