1
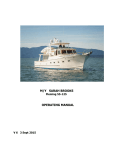
NOTES FROM THE OWNERS
OF
“SLIPSTREAM”
Latest Revision: 7/25/15
Welcome aboard SLIPSTREAM!
She’s an Owners version of the Hunter 41 Aft Cockpit. She is the second Hunter we have owned.
We bought her in San Diego a few years ago where she was lightly used and like new. We
outfitted her with a new chart plotter and full enclosure as well as radar and a set of davits to
keep the dingy secure. We found her to be a very capable and comfortable boat during our
family’s summer trip up the coast. We are excited to move her into the San Juan Islands and
know she will meet your expectations.
SLIPSTREAM is very well balanced and sails and powers easily. She keeps you safe, comfortable
and warm regardless of the conditions.
Our 3 favorite things about SLIPSTREAM:
1. She has a roomy deep cockpit with a full enclosure that is easy to see out of. The stern seats
are a great place to maintain watch while the autopilot which works wonderfully steers while
you are taking a break.
2. Her two staterooms and heads allow everyone their privacy and a quiet place to sleep
uninterrupted. (The dinette converts to a comfortable sleeping area if needed.)
3. The sail handling and the equipment we chose make her very easy to operate!
SLIPSTREAM’s primary nuances (which will be discussed in greater detail in our notes):
1. The main sail needs to be across the port side of the boat without a lot of tension so that
wrapping it up is easier.
2. She will maintain her momentum more than you think. We like to bring her into a port-side
dock with the wind coming over the starboard bow. Ease in, drop her into reverse and she
will walk right over to the dock.
3. She’s an easy sailing boat but trying to sail very close to the wind is not for her. Open the
angle and let the sails have some shape and you will have a more enjoyable sail. She is a big
boat and needs that airflow and sail shape to generate boat speed.
We’re very happy with this well-built and beautiful vessel and are eager to share her with you,
our guests. We know you’ll love SLIPSTREAM as much as we do and we thank you for taking
special care of her.
Enjoy your voyage!
Julianna and Rich Clark, Owners
1
INDEX:
Introduction: Favorites & Nuances
1. Anchors
2. Anchor Windlass
3. Barbecue
4. Batteries & Charging
5. Berths
6. Bilge Pumps
7. Dinghy
8. Dodger & Bimini
9. Electrical Panel
10. Electronics
11. Emergency/Safety
12. Engine & Handling
13. Fuel Tank
14. Head & Holding Tank
15. Headroom
16. Heater
17. Keel Depth
18. Inverter
19. Outboard
20. Refrigerator
21. Sails
22. Shower, Hot Water & Shower Sump Pump
23. Spares
24. Stove/Oven/Microwave
25. Water Pressure & Tanks
“SLIPSTREAM” Specs:
Year: 2004
LOA: 40’4”
LWL: 35’ 6”
Beam: 13’ 3” Draft: 6’6”
Displacement: 19,400 lbs (dry)
Mast height above WL: 63’ (with antenna)
Fuel: 36 gal.
Water: 100 gal.
Water Heater 11 gal.
Holding: 35 gal.
Battery Capacity 2 4D 400 amp.
2
1. Anchors
SLIPSTREAM is equipped with two anchors, one forward and one in the port cockpit
locker. The primary bow anchor is a 40 # Lewmar Claw (Bruce) with 150’ of 5/16” chain
and 200’ of nylon rope. The chain is marked with yellow paint every 50'.
The secondary stern anchor is a Danforth with 25 feet of chain and 150 feet of nylon
rope. It is stored in the port transom lazarette.
The stern tie line is a 600 foot reel of line for stern ties in the aft cockpit locker. (Please
do not cut the line; it is all needed for certain places in Desolation Sound.)
The scope to use in the islands is 4-to-1 for the highest water depth you’ll
encounter in the spot where you choose to drop anchor. Check your tide data…to
know how much water you may lose and how much water you will gain as the tide
floods in and ebbs out during your stay. Since most coves are 15’-30’ deep, expect
to pay out about 60’-120’ of rode. After you have paid out the suitable amount of
rode, 2 minutes of reverse (in idle speed reverse) sets the anchor and tests its
holding power. (Note other boats and points of reference on land. Are you
moving? If not after 2 minutes, you’ve set you anchor successfully.) If you wish to
sleep even better, throttle up to about 1500 RPMs in reverse for another 30
seconds to prove to yourself that the anchor is set well!
For storm conditions (sustained winds of 25+ knots), extend your scope to 7 or
10-to-1, provided you have room to leeward. Otherwise, set two bow anchors
(using the secondary anchor, chain and rode) in a v-type pattern for extra holding
power.
2. Anchor Windlass
Power is received from the engine start battery. Always operate the windlass while the
engine is running! Otherwise, the windlass will drain the start battery. The breaker (i.e.,
the “on” and “off” switch) for the windlass circuit is located on the electrical panel. It is
labeled “Windlass”. There is also a big circuit breaker below the helm seat. There are
two foot switches near the anchor well on deck.
Deploying the Anchor.
With an electric windlass, it is important to deploy the anchor into the water by
hand. Pay out enough slack in the chain so that you can hand-deploy the anchor
into the water about one foot below the water surface. (By having the anchor
3
slightly in the water, the water will buffer that troublesome “pendulum” action
that causes a partially-deployed anchor to swing and ding the bow before you get
it all the way into the water with a windlass controller that you’re not familiar
with.) Once the anchor is in the water, use the electric windlass to lower the
anchor to the bottom of the bay and deploy the desired amount of scope. The
chart plotter has an anchor alarm function which we use when anchored.
Retrieving the Anchor.
When retrieving the anchor, never use a windlass to pull the boat forward to
where the anchor is set. (The windlass is not designed for it, would be a large
draw on the batteries, and might cause serious damage to the attachment base.)
Instead, head the boat under power toward the anchor while using the windlass to
take up the slack in the chain.
Also, when retrieving the anchor, only retrieve it up to where you can see the
anchor about one foot below the water (again to buffer any possible “pendulum”
action if the anchor were just out of the water). Then, by hand, retrieve the anchor
from just below the water onto the bow roller. This prevents possible pendulum
action, plus, if the anchor gets hung up on the bow roller and you continue to
press the “up” button on the electric windlass, you will probably damage the
attachment base. DO NOT use the windlass power to take up the last few inches
of slack. Just take the extra chain and snug it up and hand-set the chain back onto
the gypsy.
Take your time, the anchor chain dropping off of the gypsy sometimes bunches up
under the windlass and you might need to push it down several times (with your
foot or a mop handle) to the bottom of the chain locker to prevent the chain from
jamming in the windlass.
Securing the Anchor.
Once the anchor is on the bow roller, be sure to secure the anchor with
the“keeper” line. Snap the line through a link in the chain nearest the anchor,
then lead the line straight back and around the drum angling the line to the port
bow cleat. Secure tightly with a standard cleat knot. (The chain on the gypsy on
the windlass should not be the only thing keeping the anchor from unexpectedly
returning to the sea bottom!) After securing the anchor with a line, immediately
switch the windlass breaker “off” to prevent draining the engine start battery
should the windlass system decide to short out.
4
3. Barbecue
The propane BBQ is plumbed to the propane tank. Make sure the faucet-like valve on the
tank is turned on. Then switch the red cut-off valve to the in-line position to open flow of
propane to the BBQ. After that, the BBQ’s little dial is the control for lighting. Turn the
control to the “on” or “light” position, and with the LID OFF, light the burner through the
round hole at the base of the BBQ. (With the lid on, the BBQ tends to be hot and cook
quickly, so tend your meat often.) As a courtesy to the next guest, please use the wire
brush attached to the BBQ to clean it after use.
4. Batteries & Charging
For normal operations, leave the battery switches “on” (with the arrow pointing down) all
the time and the DC main switch on. A battery combiner isolates the start battery,
assuring all batteries are charged, while protecting the engine start battery from drawdown by house usage. The House bank has two deep-cycle batteries for house services
mounted under the navigator’s seat. The engine start battery is a single high-amperageoutput battery specifically designed for starting diesel engines. The arrow on the battery
switches is clearly marked and easy to understand. The circuit breakers on this panel
are for the charging circuit as well as the electric winch and windlass and should be
checked if any of these components are not functioning properly.
5
Battery voltage can be checked on the electrical panel. The starting battery is labeled
“start” and the house battery is “house”, a toggle switch changes the display to reflect
what you are monitoring. You should try not to discharge below 11.5 volts before recharging the batteries by (1) running the diesel or (2) plugging into shore power. The
charger is below the seat in the living room next to the kitchen.
CAUTION: Never turn a battery switch to “off” while the engine is running! This
will blow the diodes on the alternator, and your batteries will no longer charge.
5. Berths
SLIPSTREAM is ideal for 4 people, but she’ll sleep a maximum of 6 - two in the forward
cabin, two in the aft cabin, two people on the dinette table (converts to a queen berth).
The forward bed is 6’6’’ long, 4’2” wide (at the head) and 2’8” wide (at the foot). The aft
bed is 6’6” long, 5’ wide. The converted dinette is 7’3” long and 5’ wide (with side
cushions removed). The starboard settee is 4’9” long and 21” wide. It is a couch, not a
bed.
Converting the Dinette into a Double Bed. Remove the center leaf and store it in
its protective cover at the foot of the aft bed. Loosen the knobs and lower the
table all the way down to match the level of the cushions. The table edge will sit
on top of the base of the couch. Fit the folding cushions onto the table and you are
ready for sheets.
To return the table to normal. Remove the folding cushions and store
at the foot of the aft bed. Raise the table up and tighten the knobs to set
the height all the way up.
Reinstall the table leaf if you wish.
6. Bilge pumps
Please check the bilge each day, morning and evening. It is accessed by lifting the
floorboard next to the salon table.
There are three bilge pumps: See page 59 in Hunter Owner’s Manual for additional info.
(1) The primary bilge pump is automatic on a float switch. This can also
be triggered as needed by toggling the switch marked bilge pump on
the electrical panel. This switch will return to its normal position
“OFF” when released. The LED light on this switch is an indicator
that the bilge pump is on. This bilge pump typically does not run
often so if you hear the pump and or see the LED on please
investigate. This is hard-wired to the batteries and will operate with
the switch on or off.
6
(2) The second high capacity bilge pump is also hard-wired to the
batteries with a float switch and an audible alarm high in the bilge. If
it goes off, you have a big problem and should investigate why. It
will shut off automatically when there is no more high water in the
bilge. There is also an alarm in the cockpit when this pump is
running.
(3) The manual emergency bilge pump is the third bilge pump. The
emergency bilge pump insert outlet is located in the cockpit across
from the shower (with the pickup tube in the lowest point in the
bilge). The handle is stored in clips in the large cockpit locker. This
pump is tested but not typically used for normal operations.
7. Dinghy.
SLIPSTREAM has an inflatable Mercury hard bottom dinghy, one bench seat for rowing,
oars and an outboard engine. (See “Outboard” section.)
We have equipped SLIPSTREAM with a set of KATO Davits to make handling the
dingy easy and secure. To launch the dingy. Verify that the drain plug is in place.
Release any tie downs or lines that secure the dingy and store out of the way.
Release the lines from the cleats that hold the front and rear of the dingy. Slowly
let the lines out until the dingy is in the water. Climb in and unclip the lines from
the lifting points and clip them to the davit. Start the 3.5HP Nissan engine and let
it warm up. Release the painter from the boat bringing it inside and securing the
line so that it does not foul the prop.
7
To store the dingy:
Using the 6 to 1 lifting tackle 1 person can easily raise the dingy. There are cleats
that the line ties off to when the dingy is in its proper location. The dinghy is
secured from swinging with three ratchet straps. Please refer to the photos below
to show how the straps are configured and locations of the clip points.
8
Please take special care when beaching the dinghy (refer to the dinghy beaching
procedure in your charter guest book). Most of the beaches you will land at are
strewn with barnacle-covered, bottom-slicing rocks. When approaching the shore,
weight the dinghy aft by leaning or moving the crew toward the back of the
dinghy. Then offload everyone over the bow. Lift the dinghy above barnacle
height using the hand lines on either side, and set it down gently on the beach.
Also remember to secure the painter under a rock or to a large driftwood log – we
have very large tidal fluctuations (so your dinghy won’t float away).
8. Dodger & Enclosure
Our dodger not only protects the crew from the weather when in the cockpit, but it has
several stainless steal grab handles for safety.
The center plexiglass panel can be opened on hot days to get a refreshing breeze by
flipping it up onto the dodger. Please don’t take off the dodger. (It can be difficult to put
back on.)
The dodger’s plastic “glass” is vulnerable to scratching from salt crystals,
especially after sailing into a challenging breeze. When salt spray on the glass
dries in the wind, tiny salt deposits are left behind and tend to obscure your
vision. Please avoid directly touching the glass with a damp rag or sponge. Salt
does dissolve in water, but not as fast as you might think. The salt crystals remain
un-dissolved for several seconds. It’s like rubbing the glass with sand paper! To
clean, please use generous amounts of fresh water from a pan from the galley and
9
“flood” the glass to dissolve the salt crystals away. (Better yet, wait until you’re
at a dock where you can hose off the salt crystals. If the dodger glass is really
clear, you can thank previous guests for their diligence. And we thank you too!
CAUTION: We have found that most spray sunscreens react chemically with the
plexiglass. So please inform your crew to spray sunscreen downwind of the
dodger glass. And please don’t lean against the dodger with sunscreen on your
back and shoulders. Once that chemical reaction takes place, the glass is ruined
and must be replaced (at a cost of around $400).
The individual enclosure panels can be rolled up and put out the way with straps. Rather
than rolling up the side "door" panels we often prefer to partially unzip them and tuck
them aft under the traveler lines (to prevent kinking) and then clip them to a black strap
to hold them in place. This allows air flow and ease of movement in and out of the
cockpit while not having to remove the enclosure panels completely. It also allows you
to easily re-zip the panel if you would like the protection.
9. Electrical Panels
Most switches at the panel board are self-explanatory, but some circuits are unique.
A/C (120V) Power. The A/C outlets will only function while connected to shore power
OR, when not connected to shore power and the inverter button is pressed “on”
(converting 12 volt house battery to A/C). A/C outlets will only work when the A/C
Outlets breaker is in the “on” position. The panel is divided into line 1 and 2. The line 1
side is the only side that is used.
Battery Charger The Battery Charger breaker switches must not be tripped or turned
“off” for shore power to charge the batteries. These switches are always on and are
located on the panel below the navigator’s seat. The XANTREX unit controls all
charging and combining of batteries, nothing needs to be done except leave both batteries
on.
Inverter The inverter button is located on the XANTREX panel. To run AC outlets just
push the inverter button, you will see a green light and hear the unit. Press again to turn
off. The A/C Outlets breaker switch must be “on” for the plugs to be live but it is not
necessary to have the AC main switch on. (DO NOT use the inverter while connected to
shore power.) The inverter is used to power lighter loads such as outlets and the
microwave. The hot water heater can not be operated off the inverter.
10
Chart Plotter The circuit breaker for “GPS” is located on the electrical panel. This
switch powers the C120W chart plotter at the helm.
Autopilot The autopilot and all of the other instruments, with the exception of the chart
plotter and VHF, are powered by an on/off switch on the electrical panel labeled
“Instruments”. Normal operation will have the GPS, Instruments and VHF switches on.
The instruments powered by the GPS and Instruments switches are dependent on each
other so both switches need to be on during use.
Cabin Lights Once you have turned on the circuit at the electrical panel labeled “cabin
lights”, there are on/off switches in each room and some of the lights have separate
switches themselves. The salon overhead lights have an additional master switch located
on the starboard end of the galley countertop next to the propane control.
Water Pressure This pump pressurizes the water system and it shuts down when the
water system is at “working pressure”. If you don’t hear the pump start up when you turn
it on at the panel board it means that the system is at working pressure – you should hear
the pump start again after you use some fresh water. When no one is below decks,
especially while motoring or even when sailing, turn off the water pressure switch.
Should you run a tank dry, the pump would continue to run until it burns out…and you’d
never hear it running while everyone is in the cockpit. Water tank selection valves are
located under the kitchen sink and are on when the valve is pointed the same way as the
line. Normal operation is to have 1 tank on at a time (valve parallel line) with the other
tank closed off (valve perpendicular to line). Switch to the second tank after the 1st tank
runs dry. SLIPSTREAM uses fresh water for the toilets so this switch will need to be on
along with the "head" switch. There is also a manifold valve for each run so if the cockpit
shower does not come on check the valves under the sink. Normal operation is to have all
manifold valves on all the time.
11
Sump Pump This switch powers the sump pumps that remove shower drain water from
each head. There is also a switch located in each head which needs to be turned on to
pump out the shower drains.
Shore Power A/C Circuit Breaker. There is a main AC breaker reset switch in the aft
stateroom.
Running & Steaming Lights Please be advised that night passage making is not
permitted under terms of your charter agreement with San Juan Sailing. Only use in cases
of reduced visibility (like fog or on the rare days in the Pacific Northwest when there’s
heavy overcast).
Anchor Light. Should be on all night in an anchorage. (It won’t deplete batteries.)
10. Electronics
The radar/chart plotter/GPS, depth sounder, wind instrument, and autopilot are all
Raymarine products. There are full manuals below for each set of instruments.
Cellular Telephones SLIPSTREAM is equipped with 12-volt cigarette lighter type
outlets that may be used for recharging your cellular telephone. The outlets are on the
electrical panel face and are hot unless the main DC switch is off.
Depth Sounder Power on by turning on the switch labeled instruments on the electrical
panel. The depth alarm should be set at 10 feet. There is a ST290 quick reference guide in
12
the chart table to assist with minor changes. There are many alarms and functions and
modifying these are not recommended.
The digital depthsounder will not give accurate readings beyond 400’. In deeper
water, the sensitivity on the unit increases as the transducer tries to get some
reading back. Consequently, you will receive many false readings caused by
currents, changes in water temperature, fish, and seaweed. Use the depthsounder
only as an aid to navigation in shallow water.
IMPORTANT: The key to avoiding rocks is NOT the depthsounder – but
knowing where you are at all times. (Rocks are the greatest navigational and
safety hazard in the islands – but they are all clearly marked on the charts.)
Radar & Chart Plotter SLIPSTREAM is equipped with a Raymarine C120W chart
plotter at the helm with integrated radar. (The chart plotter may be used without the radar
to minimize battery drain.) GPS input for the chart plotter is integrated with the unit. To
start the Radar/Chart plotter, turn on the electrical panel switch labeled “GPS”. Press and
hold the red power button at the lower left corner of the unit until it beeps and turns on
the display. Press the large control button on the right to accept the license agreement. To
use the radar press "page" for radar and then follow the instructions. You then use the
power switch to toggle between Standby and Transmit for the radar (if you need it). If
you plan to save electricity and use the chart plotter only, toggle to Standby.
The radar/chart plotter unit will start up in its last pre-shutdown mode (Radar only, Chart
only, or Radar Overlay screen. To shut down the unit, press and hold the power key (red
button, lower left) for 3 seconds. This unit has on screen data such as tide and current
data which is very handy. The page that splits the screen with chart and overhead data is
nice for a picture view of where you are heading. Move the cursor to where you’re
heading and zoom in and take a look! There is an alarm for anchor drag which we use
when we drop the hook. The full user manual is located below as there is there are too
many functions to describe here.
We recommend that in addition to using your PRIMARY navigation aids –
namely, the Maptech waterproof chart book or the roll charts (with the most
active “killer rocks” marked in red) – up in the cockpit while underway, you also
utilize the chartplotter for added safety. It helps you to see if you are where you
think you are on the chart book or paper charts. If someone asks, “Where are
we?” Within 3 seconds, you need to be able to point to the chart and show them
the vessel’s precise position. If you can’t, you’re in danger of hitting a rock.
The only time when the chartplotter becomes your primary navigation tool is
when you’re in a “tight spot” like going through a narrow pass or approaching
13
the entrance to a secluded cove. (With the chartplotter, you can “zoom in” to
make something that’s the size of a dime on a paper chart into the size of a
paperback novel or larger on the screen. You can see more detail and,
importantly, any hazards in the area. Your boat’s position on the chartplotter is
accurate to within 3 meters – about 10 feet. )
You should have little need of the radar except for the highly unlikely event that
you are suddenly enveloped by fog, which is rare in this area. The fog that we’ve
encountered in the islands usually forms in the wee hours of the morning and
burns off by mid-day. So if it’s a little soupy after breakfast, we put on an extra
pot of coffee until it lifts. Never depart from a safe location into the fog!
To do so, even with radar, would be contrary to prudent seamanship. FYI – Fog
becomes “reduced visibility” when you can see ¼ mile (about 4 football fields) in
all directions. It is safe to proceed CAREFULLY in reduced visibility using your
radar to “see” beyond the haze, but be sure to look up from the screen about
every 10 seconds and use your eyes to scan the horizon forward, behind, and side
to side. A motoryacht, tanker or freighter traveling at 20 knots takes only 39
seconds to travel ¼ mile! You need to see these fast-moving vessels soonerrather-than-later so you can prepare, if indicated, to quickly take evasive action
to avoid an impending collision.
Knotmeter We use the chart plotter to determine our speed over the ground. The
databar at the top of the display includes this information. This tends to be more accurate
and there is no fussing with a mechanical unit.
VHF Radio The remote access microphone (RAM), when plugged into the outlet on the
pedestal, controls all radio functions of the unit mounted above the nav station from the
steering station. There is a “PWR” switch on the RAM to turn on the system at the helm.
If you unplug the RAM at any point just make sure to plug it back in before you turn on
the power to the VHF at the nav station so that VHF recognizes the RAM. We find the
RAM to be very convenient while entering and leaving moorings and monitoring
Channel 16 while underway.
To listen to the weather reports (should be done in the morning before you head
out and ½ hour before your final destination), push the “CH/WX” button on the
radio. Scan the weather channels for the one with the best reception before
sailing in the morning and prior to anchoring for the evening. This is generally a
light wind region but weather changes can be sudden. Listen for the “inland
waters of western Washington”
14
Both cover the San Juan Islands and the Canadian Gulf Islands. You will also
hear “Strait of Juan de Fuca” (south of the San Juans), “Georgia Strait” (north),
and “Rosario Strait” (runs through the eastern part of the San Juans).
You should monitor channel 16 (the hailing and distress channel) during your
cruise. You may save a vessel or a life. You may hail vessels on channel 16, but
after establishing contact on channel 16, ask the skipper of the other boat to
switch to working channels 78, 79 or 80. San Juan Sailing monitors channel 80
during office hours (closed Sundays). If you need a review of VHF radio protocol,
you’ll find information located in the onboard Charter Guest Reference
Notebook. (By phone you can reach the San Juan Sailing office at -800-677-7245
or SJS’s owner, Roger Van Dyken, at 360-224-4300 on cell or 360-354-5770 at
home.)
In case of a distress where you can no longer stand by the radio to pass your
mayday, use the red distress button on the radio. First flip up the cover, then
press the button for 5 seconds. GPS input is automatically coded into your signal.
Please see page 12 in the ICOM instruction for more information.
11. Emergency / Safety Equipment
First Aid Kit: A complete first aid kit is located in the drawer under the couch. BandAids and antibiotic ointment are located in the first aid kit. Please note any usage of these
items so they may be replaced for the next Guest. Pull the strap on the drawer under the
couch to open it (be careful not to let the strap slip into the drawer).
Flares/Air Horn Visual day/night distress signals and an air horn are located in a netted
bag in the drawer under the couch.
Fire Extinguishers There are three fire extinguishers all mounted on bulkheads. One is
located in the galley. There is also one in each of the staterooms. There is also a SEAFIRE fire suppression system mounted in the engine room. Normal operation of this
system is indicated by a green light on the instrument panel.
Emergency Tiller It sort of looks like a metal pipe, with an “elbow” bend in it. It’s
located in the port cockpit locker. The rudder post attachment point is under the
helmsman seat. Unscrew the cover to gain access to the rudder post.
15
12. Engine & Handling
Reverse SLIPSTREAM “walks to port” very slightly. It’s easily overcome with the wheel
and rudder when you have a little sternway. (Be sure to hang on tightly to the wheel in
reverse. If not, water pressure on the aft edge of the rudder will slam the rudder over to
one side or the other. And that’s very hard on the steering mechanism.)
Forward SLIPSTREAM has a large and deep rudder. So she’s very quick on her feet and
turns in a narrow radius. Very small rudder adjustments will easily change course.
Docking SLIPSTREAM carries momentum well, so your final approach and turn in toward
your slip can usually be done with the shifter in neutral…you’ll certainly need no more
than “idle speed forward” (unless there are high winds).
Never turn off the engine until the vessel is securely tied at the dock. Remember, you’ll
need to use your engine – in reverse – to stop the boat. It’s very difficult and often
impossible for people holding lines to stop the forward momentum of a vessel as heavy
as a cruising sailboat.
When coming into our docks in high winds or if you’d just like a little assistance
upon arrival, simply hail “San Juan Sailing” on VHF channel 80. We’ll be glad
to offer some “coaching” and/or catch your lines. In fact, most marinas in the
islands will help you if you hail them and ask for assistance. Asking for docking
assistance, especially in windy conditions or with an inexperienced crew, is a sign
of prudent seamanship.
16
Starting
Hunter owner’s manual page 17
1. Check the oil level. The dipstick is accessed by opening the engine access panel in the
aft stateroom. Also, if the dipstick indicates no oil the first time you check it, reinsert
and try again - the correct level will show when the air lock bubble is broken. Expect
the oil to be blacker than that of a gasoline powered automobile engine…this is
normal for a diesel after only a few hours of operation. The transmission is under the
vanity and uses the same oil as the engine if you would like to verify its level also.
2. Do not overfill. Use the onboard spare oil to add no more than a cup at a time waiting
for a moment before checking again.
3. Check the coolant level…anywhere between the two lines (high and low) on the
overflow reservoir is “good”.
4. While you have access to the front of the engine, check for belt tightness and leaking
fluids.
5. Check the fuel level by using the tank monitor or visually inspect the tank under the
aft cabin mattress if there is any question of adequate fuel. To check a tank level
using the monitor panel turn the monitor panel on and "toggle" between tanks using
the arrow buttons. This will reset all tank levels to give the current level. If you don't
switch between tanks the readings will not be accurate.
6. Verify that the engine raw water seacock is on allowing cooling water to enter the
engine.
7. Look over the stern for kelp, logs or branches that could foul the propeller.
8. Make sure the gearshift is in neutral. There is a mark on the pedestal showing this
location. If you want to run the engine faster after starting press in on the button at the
base of the handle while moving the handle forward. This will disengage the shifting
mechanism.
9. Insert the key and turn it clockwise, to the first click.
10. Turn the key further clockwise to start the engine just like a car. Expect the engine to
start in 5 seconds or less. If the engine doesn’t start after 10 seconds of cranking, turn
key counter clockwise to the off position. Wait 15 seconds and try again. The alarm
buzzer is indicating a low oil pressure or high engine temperature or a lack of
charging. Normal operation will have no alarms sounding or red lights on after the
engine has started.
11. After the engine starts, release the key, check for water gurgling out the exhaust, then
gradually ease the throttle back to idle near 700 RPM.
12. Verify that all the engine warning lamps have gone off. During normal warmed up
operation the temperature gauge will be straight up and the oil pressure will be a little
to the left of straight up.
13. Please allow a few minutes of warm up before placing a load on the engine. It is very
hard on a diesel to be placed under load when cold.
14. The key can easily come out so tuck the key float behind the clear panel to prevent
the key from falling out!
17
Proceeding in Forward / Reverse
Release the wheel by loosening the knob a full turn counterclockwise. Bring the throttle
back to the neutral position (10 o'clock position with neutral position marked. Now you
may engage forward gear by pushing ahead on the throttle slightly or reverse gear by
pulling back on the throttle. To keep the transmission “healthy”, please remember to
pause 2 seconds (say “one and two and”) in the 10 o'clock neutral position when shifting
from forward to reverse and visa versa. Once the lever has engaged either forward or
reverse gear the speed can be adjusted by further moving the lever.
Operation
54 HP Yanmar JH series engines are very reliable. Cruising speed is 7 knots at 2700
RPM. Fuel consumption is approximately 3/4 gallon/hour at 2700 RPM.
Please do not exceed 3000 RPM because it’s hard on the diesel and fuel consumption
goes WAY UP (at very little increase in actual speed). We find the engine will have least
vibration at 2700 RPM…and at some points below 2700 RPM. (5-6 knots at 2000-2500
RPM – economy cruise speed at less than ¾ gallons per hour.)
To avoid the possibility of sucking air or sludge when the fuel level approaches
1/4 of a tank, refuel when the fuel drops below ½ full and before it reaches ¼ full.
Engine Overheat If the buzzer sounds while the engine is running, about 999
times out of a thousand it’s no more serious than eelgrass plugging up your raw
water strainer. The best upfront solution to this problem is prevention—keep an
eye peeled for eelgrass mats, especially along those “soapy” looking tide and
eddy lines in the water. And don’t run over it. When eelgrass gets sucked into the
engine cooling water intake, it jams at the raw water strainer.
To clear the eelgrass from the raw water strainer. Close the raw water intake
valve at the base of the steps. Place a pan to catch the excess seawater and
unscrew the clear container. Extract the eelgrass and toss it in the galley
garbage. The strainer screen can also be removed after the container is removed.
Replace the strainer and then the container by turning it clockwise until the lid is
seated firmly on the rubber gasket. THIS RUBBER GASKET COULD BE
THROWN OUT SO BE CAREFULL! The valve can be turned on briefly to verify
that nothing is blocking the intake to the strainer (be careful and ready to torn off
quickly as this is below the water line). Turn the valve back on and restart the
engine.
18
If upon restarting the engine overheats
again, check the seal between the strainer,
the rubber gasket, and the container. If the
strainer is drawing air, it won’t draw water.
If needed, open and then retighten the lid on
the strainer…and check to make sure the
rubber gasket is in place in the lid (and not
lying in the bilge.)
If the above fails to solve the problem, call
San Juan Sailing for assistance.
There may be other reasons you hear the
buzzer. If you lost oil pressure, the oil icon
warning light will light up, so check which
light is showing red. If it’s the oil light, shut
down the engine, check the oil level, and
contact San Juan Sailing. The alarm buzzer
is more likely to indicate engine overheating,
and the temperature icon light will light up. Before you shut down the engine,
check for water gurgling out the exhaust. If you have a “wet exhaust”, check the
coolant level in the overflow reservoir bottle and if none is seen, add enough to
reach the top level line on the bottle. (ONLY AFTER THE ENGINE COOLS
DOWN, you might remove the cap on the engine block and add coolant.) And
check the bilge for a light green liquid. If found in the bilge, call San Juan
Sailing. If the coolant reservoir bottle is full, check to see if the engine threw a
belt.
Engine Shutdown Remember--do not turn off the ignition key while the engine is
running! (This can damage the diodes on the alternator, and the batteries will no longer
charge. If you accidentally do this, turn the key back to the “on” position as soon as
possible.) Instead, first bring the engine to idle and the gearshift to neutral. Allow the
engine 5 minutes to cool down. Then push the red fuel cutoff button located next to the
key. After the engine stops, turn the key to the “off” position (turn it counter-clockwise)
and remove key.
13. Fuel Tank
SLIPSTREAM has a 36-gallon fuel tank. The engine consumes approx. 3/4 to 1 gallon of
diesel per hour. The tank is located in the aft cabin under the mattress. Check the fuel
level by using the tank monitor at the nav station or visually inspect the tank under the aft
cabin mattress if there is any question of adequate fuel. To check a tank level using the
monitor panel turn the monitor panel on and "toggle" between tanks using the arrow
buttons. This will reset all tank levels to give the current level. If you don't switch
between tanks the readings will not be accurate.
19
Please be very careful when fueling. Never allow maximum flow from the filler
hose. If you do, the fill tube will surge and diesel will spill from the vents onto the
side and onto the deck. It takes only a few drops of diesel fuel in the water to
create a sheen and subject you to a Coast Guard fine. Fill slowly and carefully.
Check the side vent and, with dish washing soap, wipe up any excess fuel to avoid
yellowing the hull and stern and polluting the water. Also be very careful of drips
when removing the hose. Diesel and shoe bottoms are a very slippery and
dangerous combination. After wiping, please use soapy water to scrub down any
drips so it does not stain the fiberglass.
Put your ear down to the fill hole and listen to the diesel flow. When the pitch
changes and gets higher and higher, the tank is likely full and you’re now filling
the hose between the tank and the fill hole. Avoid a fuel spill – STOP! Check the
fuel gauge. If the gauge is not on “F”, continue filling. When you think you’re
finished fueling, check the fuel gauge one last time to make sure it’s reading “F”.
That way, San Juan Sailing will not charge you a $50 fueling charge (plus the
cost of fuel).
Note: Unlike automobile fuel gauges, fuel gauges on boats are notoriously
inaccurate, especially on the low end. Therefore, whenever the fuel level drops
below ½ full, you should refuel at your next opportunity.
NEVER let the fuel level fall below ¼ full or you’re in danger of running out of
fuel. (Towing and the cost of a mechanic to bleed the air from the fuel lines is an
expensive proposition for a charter guest.)We monitor the engine hour meter and
refill at 20 to 25 hours of operation.
14. Head & Holding Tank
SLIPSTREAM has no “Y” valves in the waste distribution
system. Instead the toilets always flush to the holding tank. The flushing water
draws from the fresh water tanks so monitor your usage and tank level indicators.
If the toilet pump starts to resist your flushing effort, don’t force it! Exploding
or leaking sewage is most unpleasant! Search out the problem and correct it.
Offshore sailors have a rule: “Never put anything down a marine toilet that
hasn’t been eaten first.” And that, of course, includes feminine items. In fact,
offshore sailors do not even put soiled toilet tissue down a marine head.
They simply deposit soiled toilet tissue (and feminine items) in a receptacle such
as a waste basket with a liner bag or a Ziploc baggie, but not down the toilet. We
20
and San Juan Sailing highly recommend you follow this rule. And since we’ve
been recommending this, we’ve had almost no incidents of plugged heads!
There is one 35 gallon holding tank, and it will need to be emptied once every day
to avoid a leaking sewage or, worse yet, an exploded holding tank…a real
“vacation ruining” event! (San Juan Sailing staff will discuss holding tanks,
overboard discharge and pumpouts upon your arrival.) Check the tank level by
using the tank monitor in the nav station located under the VHF. To check the
tank level using the monitor panel turn the monitor panel on and "toggle" between
tanks using the arrow buttons. This will reset all tank levels to give the current
level. If you don't switch between tanks the readings will not be accurate.To
operate the head make sure that the switches for water pump and head are on at
the electrical panel. There is a toggle switch near the head that when rocked to the
fill side will put fresh water in the bowl. To flush the contents into the holding
tank just rock the switch to the drain side.
The holding tank can be emptied in two ways: 1) At a shore pumpout station or 2)
when in suitable waters, use the macerator pump to discharge overboard.
If you pump out the holding tank at a shore facility, after emptying, please fill it
with about 5 gallons of fresh water through the deck fitting to rinse, and then
pump it out again. Thank you!
To operate the macerator pump, open the seacock located in the sole of the
forward stateroom (refer to the Through-hull Diagram at the front of the Owner
Notes), turn on the breaker switch at the DC electrical panel and toggle the
macerator switch on the right side of the panel. The pump will run until the tank
is empty and the sound of the pump will noticeably change. Close the valve and
turn off the breaker switch.
21
15. Headroom
The headroom on SLIPSTREAM (taken centerline in the main salon) is 6’3”.
16. Heaters
has 2 built-in heaters and a portable space heater located under the sole near
the aft head that can be used at the dock when on shore power. The 1st heater is driven
off the engine just like a car. The control is located on the left side of the instrument
panel marked HEATERCRAFT. This is great to use when the engine is running and
warm. We usually run the engine for 10 to 15 minutes as we drop the sails and are
approaching the anchorage or the dock to warm up the cabin, charge the batteries and
create a full tank of hot water. The 2nd source of heat is the diesel-fired Webasto cabin
heater will make the interior “toasty” within 10-15 minutes. The heater control is located
near the sink. Slide the switch to heat then set the temp up or down. The heat is turned off
by sliding the switch to the off position. Note: It takes about 5 minutes for the heater to
“cycle up” and get hot. You will find that the heat outlets in the aft end of the boat
provide warm air before the forward outlets. This is due to the location of the heater at
the stern. The fan will continue to run for about 5 minutes while the unit is cooling down
and cycling off. The heat is dry, comfortable, and on those rainy days or cool evenings,
makes a huge difference in cruising comfort!
SLIPSTREAM
When it’s cool, we recommend warming the boat before turning in for the night,
with the last person to go to bed instructed to turn the diesel heater off before
retiring. (Otherwise, the boat will get too hot and the electric fan in the diesel
heater will drain the house batteries. The down comforters will keep you warm in
bed.) Then, the first one up in the morning can simply turn the cabin heater back
on.
17. Inverter
When not on shore power, A/C power may be enabled by pushing the invert button on
the XANTREX control panel. A green light comes on. Then, flip the “Outlets” switch on
the A/C electrical panel “on”. Press the button again to turn off the inverter.
22
18. Keel Depth
SLIPSTREAM has a deep fin keel and draws 6’6’’…so figure on 8 feet to be on the safe
side. The depth sounder has the low water alarm set at 10 feet to remind you.
San Juan sailing strongly recommends that you always maintain a minimum of
10’-12’ under the keel at all times, both underway and at low tide on anchor.
19. Outboard.
SLIPSTREAM is equipped with a 4 stroke Nissan 3.5 horsepower outboard. This brand and
size has proven to be a practical and VERY reliable dinghy outboard.
DO NOT add any oil to the gasoline mixture – it uses just straight gasoline. The fill cap is
located at the top of the engine.
As a courtesy we have an additional red spare gasoline container tied into your dinghy.
WARNING – Gasoline fumes are explosive and a very dangerous fire hazard if stored on
a boat. Keep the spare gasoline container in the dinghy and tied to the transom so it stays
upright. NEVER store the spare gasoline container in a locker, lazarette, or any other
storage area on your vessel.
The outboard is light so it’s easy to transfer from the stern rail outboard mount to the
dinghy transom (and vice versa). PLEASE do not cruise with the outboard on the dinghy.
It will no longer work after saltwater gets into or even near the intake of the carburetor.
If this happens, you will have to condition your rowing muscles until you get back to
Bellingham). We also recommend taking the outboard off the dinghy at night. We have
actually had dinghies deflate in the cool of the night and had wind waves or powerboat
wakes flip the dinghy over. It’s a disturbing sight first thing in the morning to see your
outboard propeller sticking straight up, with the motor under the water. At that point it’s
nothing more than a very ineffective $900 anchor. And we do not want to have to sell you
a non-working outboard after it has been submerged!
To Start
1. Rotate the fuel valve lever (starboard aft corner of the outboard) aft to open the fuel
valve.
2. Pull out the choke switch (starboard forward corner of the outboard).
3. Open the air vent on the top of the fuel cap (top of outboard) by turning counterclockwise about 3 full turns.
23
4. Make sure the black U-shaped kill clip (with the red lanyard) is clipped into the red
shut-off knob (port forward corner of the outboard).
5. Turn the handle throttle to the start or the restart position.
6. Pull the rip cord until it starts. (You shouldn’t have to pull it more than 5 times.)
While Running
1. Push the choke back in shortly after the engine starts (after about 10 seconds).
2. There is no reverse transmission--just neutral and forward. Flip the gearshift on the
starboard side toward you after the engine is warmed up and idling to engage the
transmission. If you want to go in reverse--just swivel the outboard around 180 degrees.
To Shut Off
1. Shut the outboard off by pushing in the red shut-off knob (where the kill clip is clipped
in). Or just pull the red lanyard until the clip pops off.
2. To avoid prop damage, shut the outboard off and raise it out of the water before you
reach the shore. Pull the outboard forward and out of the water until the pin can be
pressed in that holds the engine up and out of the water. To put the outboard shaft back in
the water, pull the engine toward you and release the pin allowing the propeller back into
the water.
When Not in Use
1. Store the outboard on the raised dingy in its lowered position.
2. Turn the valve off and close the vent on the tank.
3. Put the outboard back on the outboard mount on the stern rail and tighten both braces.
4. Push the fuel valve lever forward to close (starboard aft corner of the outboard).
5. Close the air vent on top of the fuel cap (top of outboard) by turning it clockwise.
6. Secure the outboard further by tying the safety lanyard to the stern rail.
Troubleshooting
If the engine won’t start, review steps 1-6 above to make sure you’ve done all 6 steps.
There is a spare spark plug and spark plug wrench in the tool box in case the engine
won’t start or is running rough. (A new spark plug solves myriad outboard problems.
If you use the spare spark plug, notify your check-in skipper upon your return so a new
one can be placed aboard for future guests.) If the outboard is running and you’re heading
toward shore, and the engine suddenly quits, it’s usually that someone has forgotten to
vent the fuel cap. If the engine is running fine but the propeller isn’t moving, the shear
pin is probably broken – just take the cotter pin out to remove the propeller and replace
the broken shear pin (a spare pin is located forward of the shaft under the handle grip)
and put the propeller and new pin back into place.
24
20. Refrigerator/Freezer
The well-insulated refrigerator (17” wide, 25’’ tall, and 15” deep) must be turned “on” at
the electrical panel. The temperature thermostat control dial (with 1 through 7, 7 being
coldest and will probably freeze your lettuce) is located inside the refrigerator, along on
the aft edge. We usually keep it set at about "5". There is a small freezer compartment in
the refrigerator (a dozen hot dogs max capacity). The freezer (12” wide, 18’’ tall, and
15” deep) is operated by a switch on the electrical panel.
We recommend running the refrigerator and freezer at all times to avoid it
becoming smelly. They are quiet and don’t consume too much power if left closed.
There are no drains or any maintenance required.
21. Sails
Headsail. The 110% jib has roller furling for your convenience. Whether fully or
partially deployed, you’ll have good sail shape. Slight hand-over-hand tension on
opposing lines – furling line and sheets – prevents problems such as a rat’s nest on the
drum (should the wind catch the sail and unwrap it violently) or a baggy furled sail.
Reefing the Headsail – Simply ease the jib sheets (keeping control of them) while pulling
in the jib reefing line until only the amount of sail you desire is deployed. You should
not have to use the winch to furl the jib. If you cannot furl by hand, forcing it with the
winch will only exacerbate the problem. Instead, investigate to see why it will not furl in
naturally.
Mainsail. The main has an in-mast furling system.
With an in-mast rig, in normal conditions, it’s recommended that the head sail be
deployed first (while underway). The mast bows slightly aft at the top. By deploying the
head sail first, the pressure of the wind in that sail tends to straighten up the mast.
This makes it easier for the main to deploy from within a plumb mast. So provided that
the wind is less than 20 knots, steer to a course of approx. 60 degrees to the wind (close
reach). Deploy the head sail first. Now you may throttle down and place the engine in
neutral, sailing on the head sail alone. Shut down the engine. Now you’re ready to deploy
the main. The throttle/shift lever can be moved to reverse to stop any rotation of the
propeller while sailing.
If you’re in high wind (20+ knots) conditions, you may prefer to deploy the
mainsail head-to-wind instead. That’s okay, but in this situation, deploy the main
first. (Since you’re in high winds, only partially deploy the main so it’s in effect
25
“reefed”.) Once deployed, fall off and begin sailing…just like you would on a
vessel with a conventional main. Then partially deploy the head sail. Be
conservative with the amount of sail you deploy in high winds. If you’ve been too
conservative, you can easily deploy more sail area while sailing. The main will
deploy and roll up easily if the wind is coming over the starboard bow.
To deploy the main:
1. Use the traveler to position the boom across the port side of the vessel. This
will help the sail to roll cleanly out of the slot as well as keeping the pressure
off the sail. Move the knob at the mast to the free position to allow the furler
to rotate.
2. The continuous furling loop line can be user to unroll the main initially while
the outhaul is used to keep tension on the sail. The clutches are labeled in and
out to indicate what side to pull.
3. Once the sail is out and has begun to unroll easily the outhaul can be used
alone. If you want to not deploy the whole sail keep pressure on the furling
line and stop the sail at the desired amount. It is easier to roll back in a few
feet of sail rather than try to stop the sail before it is completely out.
4. Be careful not to force the outhaul or you will do damage to the rigging and
the sail. If it does not respond to moderate force check for the hang-up. (Most
rope clutches provide one-way stops, so you don’t need to open it when
winching in.) The knob can be moved to the ratchet position for reefing the
sail or putting the sail away.
Reefing the mainsail:
You have infinite reef points with an in-mast furling main. You can deploy as little
or as much sail area as you determine is appropriate for wind conditions you
encounter. And you can reef an in-mast main while sailing and from the safety of
the cockpit!
1. The position of the boat relative to the wind and the position of the boom over
the port side will allow the sail to wrap easily and not rub against the mast. If
the main halyard has relaxed causing the bottom of the sail to wrinkle then
tension the main halyard prior to reefing. The sail must be completely
deployed before any adjustments can be made with the main halyard.
2. Verify that the knob has been moved to the ratchet position at the mast.
While maintaining pressure on the furling loop line release the rope clutches.
Furl the sail while easing the outhaul. This job is easiest with one person
furling and one person playing out the outhaul line as slight tension is left on
the sail. Close the rope clutches. Success!
26
3. After you’ve furled the main, you are ready to shorten the head sail. (If you
shorten the head sail first, you’ll increase “weather helm” and likely round
up. So always reef the main first.)
Furling in the main:
When you’re ready to bring in the sails, start by furling in the main. When the
main is tightly wrapped inside the mast, you’re ready to furl in the head sail.
This is the same as reefing except you will continue to furl until the sail cover has
begun to enter the mast. Once completely furled return the clutches to their
normal closed position and tension all lines. Verify that the knob is in the ratchet
position to lock the sail inside the mast.
IMPORTANT: Be sure to keep light tension on the outhaul in order to get a nice
tight wrap of the mainsail inside the mast. The wind will help you get a nice tight
wrap. Remember, if you furl the main without any wind pressure on it (if you’re
head-to-wind in high winds or if you simply becalmed), tension on the outhaul
line is the ONLY force that will get you a nice tight wrap inside the mast. And a
loosely furled main inside the mast could mean a tough next deployment or, in the
worse case, a jammed main.
Now that you’re just sailing on a close reach on the head sail only, it’s time to
start the engine and shift into forward in order to maintain your course of 60
degree off the wind. While holding course, furl in the head sail. And motor in to
your anchorage or marina!
SLIPSTREAM is easy to sail. Her sail plan is designed for single or short-handed
sailing while her tall mast is designed for performance. Once she has way she is
easily steered with small rudder changes. Her perfect breeze is 10-20 knots with
heel at 5-20 degrees. Full sail can be carried in winds up to 17 knots. If you reach
the edge of your comfort envelope sooner, don’t hesitate to shorten your sails.
Remember, “Reef often and reef early.” You can always shake them out if you
decide you’ve been too conservative.
22. Shower, Hot Water & Shower Sump Pump
Hot water is stored in the insulated tank. It takes about 30 minutes of running the engine
under load to get the water hot. When on shore power, you can heat your water
27
electrically by turning the “water heater” switch on the A/C panel to the “on” position. It
takes about an hour to heat the water electrically.
CAUTION: The engine heats water to scalding temperatures! So please BE CAREFUL!
Turn the “sump pump” breaker to “on” at the electrical panel. The pump for each
shower is activated by separate tan colored rocker switches located (partially hidden)
below the lip of the countertop on the right side in each head.
Experienced cruisers know the sailor’s shower: get wet, turn off the water, soap
up, rinse off. (If the shower basin overflows, you’re using too much water.)
On warm, sunny days, an alternative to the below decks shower is the swim
platform shower (with hot and cold water) located next to the swim ladder. This is
also a good way to rinse off salt after swimming or dirt after going ashore.
23. Spares
SLIPSTREAM is equipped with engine and general spares. They are located in plastic
containers under the cabin sole in front of the main cabin head.
A TOOL KIT IS LOCATED IN THE CABINET AT THE TOP OF THE STEPS.
24. Stove/Oven/Microwave
The gimbaled propane stove has two burners and an oven. Propane is a hazardous gas,
and requires caution. For your safety, please follow these procedures:
1. Open the faucet-like hand valve at the propane tank all the way open.
2. Make sure all stove control knobs on the stove are in the “off” position.
3. Turn the electric solenoid switch located at the end of the counter to “on”. A
red light will appear.
4. Light a match or butane lighter, push in the stove control knob in and turn to
the left to high. The burner should light immediately. Hold the knob in for 2-3
seconds (warming a thermal couple) and release. You may then operate the
knob like a normal stove. The oven is the same with the burner in the back of
the oven so you will want a long lighter to reach the gas.
5. When finished with the stove, shut off the burner(s), then shut off the solenoid
switch. (What little propane remains in the line from the tank to the galley is
insignificant, and even if this tiny amount of propane were to leak into the
28
cabin, it would not cause a problem.) No need to shut off the propane tank
during the day.
6. At night, it’s recommended that you turn off the propane tank with its faucetlike hand valve. That way, should the solenoid value fail, there’s no chance
that propane will leak into the vessel. (Since propane is a deadly gas, you’ll
sleep much better!) Then, the first one up in the morning can go out to the
tank and turn it back on to start the water boiling for the coffee!
To operate the microwave
1. Turn the switch on at the AC electrical panel labeled Microwave.
2. Press the invert button to power the AC panel if not connected to shore power.
3. Press power and set the power level from 1 to 10 with 10 being maximum
power.
4. Press time and enter the time in minutes from 1 to 99.
5. Press start.
6. When complete turn off the AC switch and the inverter.
To operate the oven:
Please note that the propane tank and both propane valves (the hand valve and
the solenoid valve) are located in the propane locker in the starboard aft cockpit
locker, which is vented and isolated from the rest of the boat. Any leaks there will
move down, out, and away from the boat.
While the propane tank normally lasts for 4 weeks or more, San Juan Sailing’s
staff tops them off every 2 weeks…so you’ll have plenty for you cruise!
If cooking underway, gimbal the stove by loosening the knobs at either side and
sliding the knob in to disengage the locking pin, if the boat heels, hot liquids and
foods will not readily slide off of the stove. Also, for added security, use the
fiddles that hold the pots/pans on the burners. If you have something in the oven,
please lock the oven door by pressing down on the handle so the contents cannot
slide out onto the galley sole (or someone’s feet).
WARNING: Never cook in high wave conditions or in strong, gusty winds. Food
will definitely go flying!
When cooking at a dock or in a quiet anchorage, lock the stove in position by
sliding the pins into the holes in the cabinets and tightening he knobs
That way, if someone leans on the stove or grabs the oven handle, it won’t tip and
spill pot/pans on the cook top.
If you have any difficulty lighting the oven, light the burners on the cook top for a
minute or two and then try re-lighting the oven.
29
25. Water Pressure & Tanks
Water pressure: The fresh “water pump” switch is located on the electrical panel. Turn
the breaker “on” to activate the pump. The pump is located under the kitchen sink and
will run when water is used. The pump will run continuously if the tank is dry. Normal
operation is to have one tank open at a time with the other tank closed. When a tank runs
dry, turn off the empty tank and turn on the full tank by turning the valves under the
kitchen sink.
It’s okay to leave on while someone is below decks. But please turn “off” when
motoring or sailing. You could burn out the domestic water pump should one of
the tanks run dry as it tries in vain to pump water to build pressure (and you
would not hear the pump running continuously over the sound of motoring or
sailing).
Water tanks SLIPSTREAM has two 50 gallon water tanks located under the cabin sole.
Selection valves are under the kitchen sink (to the lower right of the water distribution
manifold) labeled starboard and port. The water tank level indicators are on the tank
system monitor panel located below the VHF radio.
To check a tank level turn the monitor panel on and "toggle" between tanks using the
arrow buttons. This will reset all tank levels to give the current level. If you don't switch
between tanks the readings will not be accurate. Each tank is filled independently at the
deck level fitting labeled WATER. (One tank per side)
State parks have no pressurized water to refill tanks, but all points of civilization
do. With fresh water heads and normal water use we keep an eye on the levels
and fill when it’s convenient. If your crew does not let the water run continuously
while they brush their teeth, shave or shower, you shouldn’t need to refill too
often.
Enjoy your vacation aboard SLIPSTREAM! *
30
*
*