1
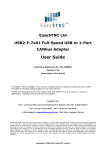
EasySync Ltd
ES-DLA-8/16
Document Reference No.: ES_000102
Rev 1.0
Issue Date: 2013-04-30
EasySYNC Ltd
Unit 1, 2 Seaward Place, Centurion Business Park, Glasgow, G41 1HH, United Kingdom
Tel.: +44 (0) 141 418 0181
Fax: + 44 (0) 141 418 0110
E-Mail (Support): [email protected]
Web: http://www.easysync.co.uk
Neither the whole nor any part of the information contained in, or the product described in this manual, may be adapted or reproduced
in any material or electronic form without the prior written consent of the copyright holder. This product and its documentat ion are
supplied on an as-is basis and no warranty as to their suitability for any particular purpose is either made or implied. EasySYNC Ltd will
not accept any claim for damages howsoever arising as a result of use or failure of this product. Your statutory rights are n ot affected.
This product or any variant of it is not intended for use in any medical appliance, device or system in which the failure of the product
might reasonably be expected to result in personal injury. This document provides preliminary information that may be subject to
change without notice. No freedom to use patents or other intellectual property rights is implied by the publication of this document.
EasySYNC Ltd, Unit 1, 2 Seaward Place, Centurion Business Park, Glasgow, G41 1HH, United Kingdom. Scotland Registered Number:
SC224924
Copyright © 2013 EasySYNC Limited
Document Reference No.: ES_000102
ES-DLA-8/16
Rev 1.0
Clearance No.: ES #050
1
2
Introduction ................................................................................... 4
1.1
Package Contents.......................................................................................... 4
1.2
Logic Analyzer Hardware .............................................................................. 5
1.3
Hardware Specifications ............................................................................... 7
1.4
Software Specifications ................................................................................. 7
1.5
System Requirements ................................................................................... 8
1.5.1
Operating System Requirements ................................................................. 8
1.5.2
Hardware System Requirements.................................................................. 8
Setting up the Instrument .............................................................. 9
2.1
2.1.1
Windows .................................................................................................. 9
2.1.2
Mac OS X: ...............................................................................................12
2.2
3
4
Software Installation .................................................................................... 9
Device Driver Installation ........................................................................... 16
2.2.1
Mac OS X ................................................................................................16
2.2.2
Windows .................................................................................................17
2.3
Hardware Setup .......................................................................................... 21
2.4
Installation Complete .................................................................................. 22
Using the ES-DLA-8/16 ................................................................ 23
3.1
Connect to the ES-DLA-8/16 Device ............................................................ 23
3.2
Log Data...................................................................................................... 23
3.3
Set Trigger Conditions................................................................................. 24
3.4
Finding Data or Signal Patterns ................................................................... 26
3.5
Analyze and Decode Result ......................................................................... 26
User Interface .............................................................................. 27
4.1
Main Area .................................................................................................... 28
4.1.1
Set Trigger Conditions...............................................................................28
4.1.2
Configure Channel Name and Data Display Color ..........................................29
4.1.3
Use Mouse Scroll Wheel to Resize ...............................................................29
4.2
Tree View .................................................................................................... 30
4.2.1
Combine Channels to Form a Bus ...............................................................30
4.2.2
Delete a Bus or All Buses ...........................................................................31
4.3
Scale Area ................................................................................................... 32
4.4
Snapshot Area ............................................................................................. 33
4.5
Protocol Analyzer ........................................................................................ 34
4.5.1
I2C Decoder ............................................................................................35
4.5.2
One Wire Decoder ....................................................................................36
©2012-2013 EasySYNC Ltd.
2
Document Reference No.: ES_000102
ES-DLA-8/16
Rev 1.0
Clearance No.: ES #050
4.5.3
SPI Decoder ............................................................................................36
4.5.4
UART Decoder ..........................................................................................38
4.6
5
Menu and Quick Access Buttons .................................................................. 38
4.6.1
File Menu and Related Quick Buttons ..........................................................39
4.6.2
View Menu and Related Buttons .................................................................40
4.6.3
Device Menu and Related Buttons ...............................................................41
4.6.4
Search Menu and Related Buttons ..............................................................47
4.6.5
Protocol Analyzer and Related Buttons ........................................................50
4.6.6
Help Menu and Related Buttons ..................................................................50
Contact Information ..................................................................... 51
Appendix A - List of Figures ............................................................... 52
Appendix B - Revision History ............................................................ 55
©2012-2013 EasySYNC Ltd.
3
Document Reference No.: ES_000102
ES-DLA-8/16
Rev 1.0
Clearance No.: ES #050
1
Introduction
The EasySYNC ES-DLA-8/16 is an 8/16-channel logic analyzer which connects to the computer using USB.
When combined with the free, downloadable EasyLogic software, if offers a cost-effective yet simple-touse solution for electronics design & verification.
1.1 Package Contents
The following components are included in the package. Ensure all items are included in the package
before discarding the packing materials.
-
USB logic analyzer unit
Test clip harness
Quick-start guide
Carrying bag
USB cable
Note: For the 8-channel version, the package will contain a single harness with 10 clips. For the 16channel version, the package will contain two harnesses, giving 20 clips in total.
The logic analyzer and test clips are shown below:
Figure 1-1: Logic Analyzer package contents
©2012-2013 EasySYNC Ltd.
4
Document Reference No.: ES_000102
ES-DLA-8/16
Rev 1.0
Clearance No.: ES #050
1.2 Logic Analyzer Hardware
The logic analyzer hardware is shown below. The main external components are the Logic Probe
connector, the status LED and the USB connector.
The status LED indicates that the analyzer is successfully enumerated on the computer (connected to the
USB port and the driver installed).
Note that there is no separate power connector as the analyzer is powered through the USB connection.
Status LED
Figure 1-2: Logic Probe connections (ES-DLA-16 shown) and Status LED
Figure 1-3: Rear panel showing the USB connector
©2012-2013 EasySYNC Ltd.
5
Document Reference No.: ES_000102
ES-DLA-8/16
Rev 1.0
Clearance No.: ES #050
Figure 1-4: Front panel showing the ES-DLA-8 and ES-DLA-16 Logic Probe connectors
The pin out of the logic probe connector is summarised below in Figure 1-5 and Table 1-1.
Note: Figure 1-5 and Table 1-1 show the pin functions for the 16-channel analyzer. For the 8-channel
analyzer, only the pins shown on the upper row are used.
E
X
T
G
N
D
C
H
0
C
H
1
C
H
2
C
H
3
C
H
4
C
H
5
C
H
6
C
H
7
C
L
K
G
N
D
C
H
8
C
H
9
C
H
10
C
H
11
C
H
12
C
H
13
C
H
14
C
H
15
G
N
D
Figure 1-5: Pin names (looking into the connector as in Figure 1-4)
Models
GND
Upper
CH0-7
EXT CLK
Lower
ES-DLA-8
Y
Y
Y
ES-DLA-16
Y
Y
Y
GND
Y
CH8-15
Y
GND
Y
Table 1-1 Functional Pins in ES-DLA-8/16
©2012-2013 EasySYNC Ltd.
6
Document Reference No.: ES_000102
ES-DLA-8/16
Rev 1.0
Clearance No.: ES #050
1.3 Hardware Specifications
Number of Channels: 8 (ES-DLA-8 model) or 16 (ES-DLA-16 model)
Capture clock: external clock and internal clock
Internal capture uses internal clock programmable for rates up to 60MHz (RLE or 4bit raw)
Data capture modes: Raw data or RLE (Run Length Encoding)
Maximum input voltage: -0.5 … +5.25V DC
Input Overvoltage protection: +/-20V (see note below)
CMOS standard voltage thresholds
o
Logic Low
-0.5 … +0.8V
o
Logic High
+2.0 … +5.25V
Hardware upgradeable over USB
Bus Powered USB Interface (60mA)
Instrument carrying bag included
Attractive enclosure with compact dimensions
Dimensions - W: 40mm x H: 10mm x D: 53mm
Note: the analyzer is protected against overvoltage up to +/- 20V but is not designed for continuous
operation outside of -0.5 to +5.25V
1.4 Software Specifications
Trigger modes:
o
Rising Edge
o
Falling Edge
o
High Level
o
Low Level
Maximum number of samples: 1 Billion
Pre-Trigger Mode: 0%, 25%, 50%, 75% and 100%
Protocol Analyzer: I2C, SPI, OneWire and UART decoders.
Windows and Mac OSX versions
©2012-2013 EasySYNC Ltd.
7
Document Reference No.: ES_000102
ES-DLA-8/16
Rev 1.0
Clearance No.: ES #050
1.5 System Requirements
This section details the basic operating system and hardware requirements for the Logic Analyzer. Note
that the software and hardware capabilities of the analyzer may vary depending on PC configuration. This
manual assumes proper installation of a supported operating system as listed below.
1.5.1 Operating System Requirements
Support
Operating System
Windows XP, Windows Vista, Windows 7, Windows 8
32-bit or 64-bit operating system; Mac OS X 10.7~10.8
Table 1-2 Operating Systems Requirements
1.5.2 Hardware System Requirements
Hardware Name
Lowest Minimum
Configuration
Recommended
Configuration
CPU
1 GHz
2 GHz
Memory
1.5GB
2GB
VGA Display Capability with
1024x768 resolution or
higher.
VGA Display Capability with
1024x768 resolution or higher.
Hard Drive
At least 100MB available space
At least 100MB available space
USB
USB 1.1 supported
USB2.0 recommended
Display Devices
Table 1-3 Hardware Requirements
©2012-2013 EasySYNC Ltd.
8
Document Reference No.: ES_000102
ES-DLA-8/16
Rev 1.0
Clearance No.: ES #050
2
Setting up the Instrument
This section describes the installation of the logic analyzer. The main steps are:
Install the device software
Connect the hardware
Connect the Logic Probes to the Device Under Test
Each of these steps is covered in detail below. There are separate sections for the PC and Mac.
2.1 Software Installation
The analyzer should not be connected to the USB port yet. Before connecting the analyzer to the
computer, the EasyLogic program should be installed.
2.1.1 Windows
Start the installation by double-clicking the installation package, the following screen will appear.
Figure 2-1 Application installer welcome screen
Click on the “Next” button to proceed to the License Agreement screen.
©2012-2013 EasySYNC Ltd.
9
Document Reference No.: ES_000102
ES-DLA-8/16
Rev 1.0
Clearance No.: ES #050
Figure 2-2 License agreement
If you agree with the terms and conditions of the License Agreement, click on “I Agree” button, otherwise
click on the “Cancel” button. Agreeing to the terms and conditions will bring up the following screen.
Figure 2-3 Install location
Select the directory in which to install the EasyLogic software. A default directory is already selected but
can be changed in this window. Click the “Install” button to continue the installation process.
©2012-2013 EasySYNC Ltd.
10
Document Reference No.: ES_000102
ES-DLA-8/16
Rev 1.0
Clearance No.: ES #050
Figure 2-4 Copy files
As shown above, a progress screen will appear as the files are installed. Installation may take a few
seconds. Upon successful installation, the following screen will appear.
Figure 2-5 Installation completed
The installation of the application is now complete. Proceed to Section 2.2 to complete the driver
installation.
©2012-2013 EasySYNC Ltd.
11
Document Reference No.: ES_000102
ES-DLA-8/16
Rev 1.0
Clearance No.: ES #050
2.1.2 Mac OS X:
To install EasyLogic on Mac OS, the following steps should be followed. The example below is for Mac OS
X Mountain Lion but the procedure should be very similar for other Mac OS versions.
Note: The USB driver for Mac OS is embedded within the software. As a result, no separate installation
for the driver is needed.
By default, MAC OS may not allow unsigned third-party applications to be installed. In order to overcome
this restriction, the security settings need to be changed.
Click on the Apple icon in the top left corner of the screen and choose System Preferences.
Figure 2-6 System Preferences
Next, click on the Security & Privacy icon.
Figure 2-7 Click Security & Privacy
To edit the security settings, click the padlock icon in the bottom left of the window.
©2012-2013 EasySYNC Ltd.
12
Document Reference No.: ES_000102
ES-DLA-8/16
Rev 1.0
Clearance No.: ES #050
Figure 2-8 Security & Privacy
The Mac credentials will need to be confirmed before the settings can be changed. Enter the password
and then hit Unlock.
Figure 2-9 Input Name and Password
©2012-2013 EasySYNC Ltd.
13
Document Reference No.: ES_000102
ES-DLA-8/16
Rev 1.0
Clearance No.: ES #050
On the following screen, under the options for "Allow applications downloaded from", click on the
Anywhere" radio button. Upon clicking, a confirmation window will be displayed, click on "Allow From
Anywhere".
Figure 2-10 Allow 3rd party application
Now that the security settings have been changed, EasyLogic can be installed on the Mac by downloading
the royalty-free installer EasyLogic.dmg from the EasySYNC website:
http://www.easysync-ltd.com/page/13/software.html
Figure 2-11 EasyLogic.dmg
©2012-2013 EasySYNC Ltd.
14
Document Reference No.: ES_000102
ES-DLA-8/16
Rev 1.0
Clearance No.: ES #050
After the download is completed, double click on the file to unpack it.
Figure 2-12 Double click EasyLogic
The EasyLogic will then be mounted and the application folder will open.
Figure 2-13 Drag the EasyLogic to the Application of Finder
Copy the EasyLogic.app to the Applications folder to complete the installation.
The application installation is now complete. Proceed to Section 2.2 which shows connection of the
hardware to the Mac.
©2012-2013 EasySYNC Ltd.
15
Document Reference No.: ES_000102
ES-DLA-8/16
Rev 1.0
Clearance No.: ES #050
2.2 Device Driver Installation
Before using the analyzer, the USB driver needs to be installed. The Mac and Windows sections below
give details for each operating system.
2.2.1 Mac OS X
The installation of the application in the previous section includes the driver for OS X. Therefore, the only
step for installation on the Mac is to connect the USB cable from the analyzer to a spare USB port on the
Mac.
The analyzer should be plugged into a USB host port on the Mac itself. If a hub is required, a selfpowered USB hub (one that has its own power supply) should be used.
Figure 2-14: Connect the USB cable to the Logic Analyzer
Figure 2-15: Connect the USB cable to the computer
©2012-2013 EasySYNC Ltd.
16
Document Reference No.: ES_000102
ES-DLA-8/16
Rev 1.0
Clearance No.: ES #050
2.2.2 Windows
To install the driver, connect the analyzer to a spare USB port on the PC. The instrument should be
plugged into a USB host port on the PC itself. If a hub is required, a self-powered USB hub (one that has
its own power supply) should be used.
Figure 2-16: Connect the USB cable to the Logic Analyzer
Figure 2-17: Connect the USB cable to the computer
If this is the first time that the instrument has been plugged in, Windows will request the USB drivers for
the product and will display a Found New Hardware Wizard dialog box.
The automatic or manual installation method can be used as detailed below.
-
Some versions of Windows (normally Vista and onwards) are configured to check automatically
for drivers on-line and will complete an automatic installation.
Older versions of Windows may not do this and the manual method can be used.
©2012-2013 EasySYNC Ltd.
17
Document Reference No.: ES_000102
ES-DLA-8/16
Rev 1.0
Clearance No.: ES #050
2.2.2.1 Windows - Automatic Installation
The example below is for Windows 7, and it will install the driver automatically provided the PC is
connected to the internet.
1. Connect the analyzer to a spare USB port on the PC or self-powered hub. The following screen will
appear as Windows searches and installs the driver automatically.
Figure 2-18 Found new device
2. When the driver is successfully installed, the following pop-up will appear.
Figure 2-19 Driver installed
©2012-2013 EasySYNC Ltd.
18
Document Reference No.: ES_000102
ES-DLA-8/16
Rev 1.0
Clearance No.: ES #050
2.2.2.2 Windows - Manual Installation
For Windows XP (or later versions of Windows where they are configured not to search online for drivers
automatically), the driver installation can be completed using the files provided on the EasySYNC
website.
First of all, download the driver from the link below:
http://www.easysync-ltd.com/page/8/certified-drivers.html
Then un-zip the driver to a folder on your PC.
Connect the analyzer to the PC.
When the hardware wizard appears, select "Install from a list or specific location (Advanced)"
Figure 2-20 Install driver
2. Browse to the folder where the un-zipped driver has been saved.
©2012-2013 EasySYNC Ltd.
19
Document Reference No.: ES_000102
ES-DLA-8/16
Rev 1.0
Clearance No.: ES #050
Figure 2-21 Find driver location
3. The device is now ready to use.
Figure 2-22 Driver installed
©2012-2013 EasySYNC Ltd.
20
Document Reference No.: ES_000102
ES-DLA-8/16
Rev 1.0
Clearance No.: ES #050
2.3 Hardware Setup
After the application and driver installation, the next step is to connect the analyzer’s logic probes.
Note: If the analyzer is not currently connected to the computer, it should be connected now.
First, connect the supplied wire harness to the device. For the 8-channel analyzer, there will be one wire
harness with 10 clips. For the 16-channel analyzer, there will be two harnesses, each with 10 clips, giving
20 clips in total.
Note that there is no need to connect both harnesses in the 16-channel device if only 8 channels are
currently required.
Figure 2-23: Plugging the wire harness into the analyzer
Note: The black wire (ground) must be aligned to the triangle symbol marked on the analyzer body, as
shown above.
After the wire harness is connected, the test clips can be connected to the device under test (DUT).
GND
GND
Figure 2-24: Connecting test clips to DUT
©2012-2013 EasySYNC Ltd.
21
Document Reference No.: ES_000102
ES-DLA-8/16
Rev 1.0
Clearance No.: ES #050
2.4 Installation Complete
The set-up is now complete and the analyzer is ready for use. The remainder of this manual explains the
features of the EasyLogic software.
Figure 2-25: An Assembly of Laptop, Logic Analyzer, and DUT
©2012-2013 EasySYNC Ltd.
22
Document Reference No.: ES_000102
ES-DLA-8/16
Rev 1.0
Clearance No.: ES #050
3
Using the ES-DLA-8/16
This section provides a brief introduction to using the ES-DLA-8/16 logic analyzer. A full description of
each option in the user interface is given in Section 4 (User Interface).
3.1 Connect to the ES-DLA-8/16 Device
This section assumes that the analyzer has been installed as shown in section 2 of this guide.
The first step is to open the EasyLogic software. Note that if the application is opened before the ES-DLA8/16 is connected to the USB port of the computer; the Scan function may need to be run to allow the
application to detect the analyzer (see Figure 3-1 below).
Detected Device
Figure 3-1 Scan Device
When the device is successfully detected by the application, it is shown in the Detected Device drop-down
box. It is now ready for use.
3.2 Log Data
This initial example assumes that the capture is being started manually and that no triggering is used.
The sample rate and number of samples can also be configured at this point to suit the waveform being
monitored. For example, set the sample rate to 250K and the number of samples to 1M.
Logging can then be started in one of two ways (see Figure 3-1 above):
-
Clicking the ‘Device’ menu and selecting Get Samples, or
Clicking the red dot button on the menu bar
Once the capture is started, the device will begin to record data.
The dialog below is displayed during recording, and disappears after recording is complete. If the settings
mentioned earlier in this section were used, the capture will take place over a period of 4 seconds (1M
samples at 250K samples/sec). The cancel button can also be used to stop the capture manually.
©2012-2013 EasySYNC Ltd.
23
Document Reference No.: ES_000102
ES-DLA-8/16
Rev 1.0
Clearance No.: ES #050
Figure 3-2 Capture in progress
Once the capture cycle has competed, the waveform will be displayed. One example of captured data is
shown below.
Figure 3-3 Collect Logic Data
Note: There are additional options available from the Device menu and menu bar shown in Figure 3-1.
Further details of these options and device setup can be found in Section 4.6.3 (Device Menu and Related
Buttons).
3.3 Set Trigger Conditions
The data of interest may not always be present immediately after the capture is started. Therefore,
trigger conditions can be set so that the analyzer can begin capturing data once a specific condition
occurs.
The trigger conditions are defined by left-clicking the “H”, “L”, “R”, and “F” buttons to select the
interested signal pattern.
©2012-2013 EasySYNC Ltd.
24
Document Reference No.: ES_000102
ES-DLA-8/16
Rev 1.0
Clearance No.: ES #050
The trigger position can also be set from the Quick Access bar (as described in Section 3.1 above). This
allows the position of the trigger within the captured data to be specified.
-
In some cases, the trigger condition marks the end of the desired data, i.e. the analyzer stops
when the trigger condition is detected, and then displays the selected number of samples before
the trigger occurs. In this case, 100% would be selected.
In other cases, the data after the trigger occurs may be of interest. In this case, the trigger
position would be set to 0% and the analyzer will collect the selected number of samples after
the trigger occurs.
Other trigger positions (25%, 50%, and 75%) allow some data to be collected before and some
collected after the trigger occurs.
Once the trigger condition has been selected, the “Get samples” menu option or the red button on the
Quick Access toolbar should be clicked to arm the analyzer. The analyzer will now begin capturing data
according to the sample rate and number of samples settings specified in the Quick Access toolbar (as
described in Section 3.1 above)
Figure 3-4 Capture in progress
The capture will stop automatically once the trigger has occurred (and once any data occurring after the
trigger has been collected if the trigger position dictates this).
Note: These buttons provide the following options
H
L
R
F
Trigger
Trigger
Trigger
Trigger
on
on
on
on
High
Low
Rising Edge
Falling Edge
Only one of the four buttons may be enabled at a time. To disable all four buttons, click again on the
selected one.
Channel and Trigger Setting
Data View
Figure 3-5 Set Trigger Condition
©2012-2013 EasySYNC Ltd.
25
Document Reference No.: ES_000102
ES-DLA-8/16
Rev 1.0
Clearance No.: ES #050
3.4 Finding Data or Signal Patterns
After capturing data, the search function can be used to easily locate a data pattern of interest. There are
several search features available through the Search menu, and full details can be found in section 4.6.4
(Search Menu and Related Buttons).
Figure 3-6 Search Data or Signal Pattern
3.5 Analyze and Decode Result
The software also includes decoders for common serial protocols (I2C, One Wire, UART and SPI). These
can be enabled after a data capture run has completed, in order to analyze and decode the captured data.
This feature can be accessed through the Logic Analyzer tab on the menu bar.
Full details of the options available are given in section 4.5 (Protocol Analyzer).
Protocol Selection
Search Function
Setting Area
Chip
Selection
Data Area
Command Table
Figure 3-7 Protocol Analyzer
©2012-2013 EasySYNC Ltd.
26
Document Reference No.: ES_000102
ES-DLA-8/16
Rev 1.0
Clearance No.: ES #050
4
User Interface
This section describes the user interface of the EasyLogic software.
The application window has seven main areas, which are highlighted below. This chapter illustrates how
to use the various options and settings within the user interface.
Menu Bar
Protocol Analyzer
Quick Access Area
Scale Area
Tree
View
Main Area
Snapshot Area
Figure 4-1 Screenshot of Main UI
©2012-2013 EasySYNC Ltd.
27
Document Reference No.: ES_000102
ES-DLA-8/16
Rev 1.0
Clearance No.: ES #050
4.1 Main Area
This area is used to display the waveform data, with a separate trace for each channel. This view
supports 4, 8 or 16 channel waveforms. Once the captured data is displayed, it is possible to scroll
along the collected waveforms and re-size the view.
There is a channel setting area to the left-hand side of the waveform displays. This area contains the
controls for setting the channel name, data display colour, or triggering conditions.
Channel Setting
Data View
Figure 4-2 Main Area
4.1.1 Set Trigger Conditions
These buttons allow the trigger condition to be set.
Figure 4-3 Channel name and Trigger Buttons
The buttons correspond to the following modes:
: Trigger on High Level
: Trigger on Low Level
: Trigger on Rising Edge
: Trigger on Falling Edge
Note: Only one button will be selected at a time. The button selected will show as pressed in (darker
grey). If a button is currently selected, it can also be de-selected by clicking on it again.
©2012-2013 EasySYNC Ltd.
28
Document Reference No.: ES_000102
ES-DLA-8/16
Rev 1.0
Clearance No.: ES #050
4.1.2 Configure Channel Name and Data Display Color
To configure the channel name and waveform colour, right-click on the name of channel (e.g. the
“Channel 0” part of Figure 4.3) and a pop-up menu will appear:
Figure 4-4 Channel Pop-up Menu
By selecting “Change name” from this menu, a change name dialogue will appear and a new name can
be entered.
Figure 4-5 Change Channel Name Dialog
By selecting “Change Colour”, the color chooser dialog will appear to allow the colour for that channel to
be selected.
Figure 4-6 Channel Color Chooser
4.1.3 Use Mouse Scroll Wheel to Resize
If the mouse has a scroll wheel, this can be used to zoom in and out of the waveforms shown in the
display. This allows for zooming in and out of the waveform quickly, for example zooming out to help find
the area of interest and then zooming in to examine the waveform in more detail.
©2012-2013 EasySYNC Ltd.
29
Document Reference No.: ES_000102
ES-DLA-8/16
Rev 1.0
Clearance No.: ES #050
4.2 Tree View
The tree view allows more than one channel to be combined into a single bus. Initially, each channel is
shown separately with its own name adjacent to each trace. However, where the signals being recorded
are part of a bus, it is helpful to combine them within the analyzer software to display them as a bus.
Figure 4-7 Tree view
4.2.1 Combine Channels to Form a Bus
To combine several signals into a single bus, the following steps can be used:
1.
Select the required channels by left-clicking on each channel name in turn in the tree view
area.
Figure 4-8 Select Channels to Form a Bus
2.
Right-click on one of the selected channels to display a pop-up menu for bus management,
as Figure 4-9 shows. Then left-click on the “Combine to bus” menu item to create a bus.
Figure 4-9 Combine Channels to Form a Bus
©2012-2013 EasySYNC Ltd.
30
Document Reference No.: ES_000102
ES-DLA-8/16
Rev 1.0
Clearance No.: ES #050
As shown in Figure 4-10, Channel 0 and 1 are now combined into a new bus called “Bus 1”.
The ‘-’ button next to the bus name can be used to collapse the bus into a single row.
Likewise, the ‘+’ button can be used to expand the bus again to show the individual channels
within.
Figure 4-10 Expanded Tree View
Figure 4-11 Collapsed Bus View
4.2.2 Delete a Bus or All Buses
To remove the grouping of the signals on the tree view, the following steps can be used.
1.
Right-click on the bus to be removed to display the pop-up menu, as shown in Figure 4-12.
Figure 4-12 Bus Pop-up Menu
2.
Click “Delete this bus” to un-group only this bus, or alternatively, click “Delete All bus” to
un-group all of the buses which have been created.
Note that when one or more buses exist, it is also possible to un-group all of the existing buses by rightclicking on a single channel (which is not part of a bus) and selecting “Delete All bus” from the pop-up
menu.
©2012-2013 EasySYNC Ltd.
31
Document Reference No.: ES_000102
ES-DLA-8/16
Rev 1.0
Clearance No.: ES #050
Figure 4-13 Channel Pop-up Menu
4.3 Scale Area
This area sits in-between the Quick Access and Main areas. It is used to display time-based information
about the collected data, the cursor (time marker) positions, and the timing interval between cursors.
In Figure 4-14 for example, the information shown in the Scale area includes the timescale for the
collected electronic signal, the marker position for cursor A, B, T, and S, and timing interval between A, B,
and T.
Note: The cursor S marks the data which a user has searched for. The cursor T shows the trigger point,
where the data had matched the trigger conditions specified. Cursors A and B are user-defined markers
which can be used for reference (e.g. to measure the time between two user defined points).
Scale Area
Figure 4-14 Scale Area and Waveform
To enable cursor A and cursor B, right-click on the waveform to display the pop-up menu, and then leftclick “Move A to here” or “Move B to here” to define the A/B marker position.
Figure 4-15 Waveform Pop-up Menu
©2012-2013 EasySYNC Ltd.
32
Document Reference No.: ES_000102
ES-DLA-8/16
Rev 1.0
Clearance No.: ES #050
4.4 Snapshot Area
The Snapshot area is used to show the relative position of the current waveform displayed on Main area
to the entire set of collected data.
Figure 4-16 Snapshot area
There are two main ways to scroll along the captured data:
-
Click the left mouse button on the desired position within the snapshot area. The main display
will then scroll immediately to this point to show the waveforms at this position. For example,
clicking half-way along the snapshot bar at the point circled in red above will cause the main
display to show the point half-way through the entire set of captured data. This method is useful
to move the position close to the main area of interest within the waveform.
-
Position the mouse pointer within the area of the snapshot area and use the mouse scroll wheel
to scroll the position forward or backward. The vertical line on the on the snapshot area shows
the current position which is being displayed in the main waveform window. This method is useful
to fine-tune the position of the main waveform window to find the exact part of the captured data
which is required.
©2012-2013 EasySYNC Ltd.
33
Document Reference No.: ES_000102
ES-DLA-8/16
Rev 1.0
Clearance No.: ES #050
4.5 Protocol Analyzer
The EasyLogic software can decode and analyse UART, I2C, SPI and One-Wire protocols through the
Protocol Analyzer tab.
Switching between the Main and Protocol Analyzer displays can be achieved by clicking on the
appropriate tab. These tables can be found underneath the Quick Access area.
Protocol Selection
Search Function
Setting Area
Chip
Selection
Data Area
Command Table
Figure 4-17 Protocol Analyzer
The user interface of the analyzer contains six main panels:
Protocol Selection
This is used to select the protocol which the software will decode within the data stream. It
should be set to match the actual protocol used in the data which has been captured. The
software can decode the "UART", "I2C", "ONEWIRE" and "SPI" protocols.
Chip Selection
Pre-defined decoders are available for some chip types. In these cases, the commands for that
device will be displayed in the command table. For example, if an SPI communication to an
AT93C46 EEPROM has been recorded, then setting the protocol to SPI and selecting AT93C46
from the chip selection panel will show the commands for that particular chip.
If the chip type is not listed, the ‘Generic’ option should be selected in this panel.
©2012-2013 EasySYNC Ltd.
34
Document Reference No.: ES_000102
ES-DLA-8/16
Rev 1.0
Clearance No.: ES #050
Setting Area
These settings can be used to configure the protocol decoder. Note that the controls available
depend on which protocol is selected. Drop-down boxes are used to specify which of the logic
analyzer channels corresponds to each of the signals (e.g. which channel is SCL in an I2C
waveform).
It includes other settings depending on the protocol, such as the Clock Polarity, CS Polarity, Bit
Order and Clock Phase for SPI.
Note: The following sections give details of the options for each protocol.
The Decode button is then pressed to start decoding of the data.
Command Table
For a pre-defined chip, this table shows the commands associated with particular values, for
example, the Page Program command on an EEPROM chip.
Search Function
This allows searching of the transactions shown in the Data Area below. The desired value can be
entered and the Search Value button pressed. The search can be carried out in either direction
from the current position by using the Up and Down radio buttons.
Data Area
This area shows the decoded data in list form.
4.5.1 I2C Decoder
For the I2C decoder, the only settings required are to specify which logic analyzer channel is associated
with each I2C signal and then click Decode to start the decoding.
Figure 4-18 The Setting of I2C Decoder
©2012-2013 EasySYNC Ltd.
35
Document Reference No.: ES_000102
ES-DLA-8/16
Rev 1.0
Clearance No.: ES #050
4.5.2
One Wire Decoder
The 1-wire protocol decoder only requires the logic analyzer channel used for the IO line to be specified
and then click Decode to start the decoding.
Figure 4-19 The Setting for 1-Wire Decoder
4.5.3
SPI Decoder
The SPI decoder requires the logic analyzer channels used for the CS, SCK, MOSI and MISO to be
specified. It also requires the polarity of the chip select, the bit order, the clock polarity and the clock
phase to be selected.
Figure 4-20 The Setting of SPI Decoder
To configure the SPI decoder,
1. Select the CS channel.
2. Select the SCK channel.
©2012-2013 EasySYNC Ltd.
36
Document Reference No.: ES_000102
ES-DLA-8/16
Rev 1.0
Clearance No.: ES #050
3. Select the MOSI channel.
4. Select the MISO channel.
5. Select CS Polarity.
6. Select Clock Polarity.
7. Select Bit order.
8. Select Clock Phase.
9. Click "Decode" button to analyze data; the analyzed data will be shown in the data area.
©2012-2013 EasySYNC Ltd.
37
Document Reference No.: ES_000102
ES-DLA-8/16
Rev 1.0
Clearance No.: ES #050
4.5.4 UART Decoder
In addition to selecting the logic analyzer channels used for the UART, Tx and Rx signals, the baud-rate,
data bits, parity, and MSB/LSB setting must also be specified, then click the Decode button to decode the
UART data.
Figure 4-21 The Setting of UART Decoder
4.6 Menu and Quick Access Buttons
The analyzer software has various menus which allow the settings to be changed and to start the capture
etc; for convenience, most of these tasks can also be accomplished using the buttons on the Quick
Access menu. This section covers the menu options and also the equivalent buttons on the Quick Access
menu.
To use the Quick Access menu, click on the required button (for example File) and the toolbar below will
now show the buttons used to carry out tasks related to the File menu, such as Save and Export.
Hovering over a button will bring up a small tool tip to show its purpose.
Figure 4-22 Menu and Quick Access Buttons
©2012-2013 EasySYNC Ltd.
38
Document Reference No.: ES_000102
ES-DLA-8/16
Rev 1.0
Clearance No.: ES #050
4.6.1 File Menu and Related Quick Buttons
This menu provides functions related to the files containing captured data.
Figure 4-23 File Menu and Buttons
1. New
Clears the current set of captured data.
2. Open
Opens an existing raw data file.
3. Save
Updates the currently opened file.
4. Save as
Saves currently used data into another file.
5. Export
Exports the data into a .txt or .csv file.
6. Print
Prints out the current waveform (screenshot) to a printer.
7. Print Preview
Shows a preview of the waveform to be printed in a preview window with “Print” and “Cancel”
buttons. Click “Print” to print this screenshot and click “Cancel” to close this window.
8. Screen Shot
Saves a screenshot of the waveform to an image file.
9. Exit
Exits the program.
©2012-2013 EasySYNC Ltd.
39
Document Reference No.: ES_000102
ES-DLA-8/16
Rev 1.0
Clearance No.: ES #050
4.6.2
View Menu and Related Buttons
This menu and related buttons provide functions to adjust the channel tree, image zoom, and waveform
views.
Figure 4-24 View Menu and Buttons
1. Show Channel Tree
Shows or hides the channel tree view. See chapter 4.2 for further details.
2. Frequency/Time
Switches between Time-based and Frequency–based scales. See chapter 4.3 for further details.
3. Zoom-in
Zooms in on the waveforms displayed in main area. See chapter 4.1 for further details.
4. Zoom-out
Zooms out on the waveforms displayed in main area. See chapter 4.1 for further details.
5. Show all waveforms
Zooms out fully to view the entire waveform.
©2012-2013 EasySYNC Ltd.
40
Document Reference No.: ES_000102
ES-DLA-8/16
Rev 1.0
Clearance No.: ES #050
4.6.3
Device Menu and Related Buttons
The device menu is used to start the capture process and to configure logic analyzer settings.
Figure 4-25 Device Menu and Buttons
1. Scan
This scans for the logic analyzer hardware. If the hardware is connected after the EasyLogic
software was started, the ES-DLA-8/16 may not be detected by the software. This button can be
used to detect the hardware.
2. Get samples
Starts the capture of logic signals. If no trigger is specified, the capture starts immediately. If a
trigger is specified, this button arms the analyzer to wait for the trigger condition.
3. Signal
This item includes the following sub-menu:
Figure 4-26 Signal Sub-Menu
3.1 Channel
This menu item opens a channel name and color editor. In here, the name and colour can be
configured for all channels. As mentioned in section 4.1.2 (Configure Channel Name and Data
Display Color), each channel can be edited individually, but this option allows all of the channels
to be configured at the same time.
©2012-2013 EasySYNC Ltd.
41
Document Reference No.: ES_000102
ES-DLA-8/16
Rev 1.0
Clearance No.: ES #050
Figure 4-27 Channel Name and Color Setting Editor
3.2 Cursor color
This menu item opens a cursor (marker) editor, where the colours of the A, B, and T cursors can
be selected.
Figure 4-28 Cursor Color Editor
©2012-2013 EasySYNC Ltd.
42
Document Reference No.: ES_000102
ES-DLA-8/16
Rev 1.0
Clearance No.: ES #050
3.3 Merge Channel
This menu item opens the bus management editor for the waveform display. This provides
similar functionality to the tree view in section 4.2, where channels can be merged into buses or
buses can be un-merged, but allows all of the channels to be edited from a single menu.
Figure 4-29 Bus Management Editor
4. Device Parameter
This menu item contains several options to configure the ES-DLA-8/16.
Figure 4-30 Device Configuration Sub-menu
©2012-2013 EasySYNC Ltd.
43
Document Reference No.: ES_000102
ES-DLA-8/16
Rev 1.0
Clearance No.: ES #050
4.1 Channel number
This selects how many channels are actually used. Selections of 4, 8 and 16 channels are
possible. This setting affects the maximum useable sample rate available. Higher sample rates
are available with smaller numbers of channels.
4.2 Sample rate
This allows the sample rate to be configured. Rates between 25K and 30MHz are possible, but the
actual range available also depends on the number of channels used.
4.3 Number of samples
This defines how many data samples are collected. Sizes between 1MBytes and 1GBytes are
possible.
If no trigger has been set, the capture will begin immediately and will run until the specified
number of samples has been collected. If a trigger condition has been set such that data is to be
captured after the trigger point, the capture will continue until all of the required data has been
captured.
4.4 Pre-Trig
This defines how much data is collected before a trigger condition is met, and therefore whether
the trigger point lies at the beginning or the end of the captured data. It can also be set to 25%,
50% or 75% to capture some data before and some data after the trigger.
Settings of 0%, 25%, 50%, 75% and 100% are available.
4.5 Clock
This selects which clock source should be used for the sample rate calculation and data
acquisition. Internal or External can be selected.
Note: If using an external clock, an external clock source should be connected to the ES-DLA8/16 and the edge setting below is used to define whether the active edge is the positive or
negative edge.
4.6 Edge
This configuration option applies when an external clock is selected as the sampling clock. It
selects which edge of the incoming clock is used for the sampling of the data (positive or
negative)
4.7 Data format
The ES-DLA-8/16 supports two data format modes: Raw and RLE. The user can select which
mode to use.
RAW mode sends each sample individually to the software. The Run Length Encoding mode
compresses consecutive samples which have the same data value. It can be more efficient where
the data has a lot of repetitive values.
©2012-2013 EasySYNC Ltd.
44
Document Reference No.: ES_000102
ES-DLA-8/16
Rev 1.0
Clearance No.: ES #050
5.
Trigger Signal
This item opens the trigger condition editor. This provides the same function as the individual
channel trigger buttons described in section 4.1.1, but provides controls for all channels at the
same time.
Figure 4-31 Trigger Condition Editor
: Trigger when signal is at logically high level
: Trigger when signal is at logically low level
: Trigger when signal has a rising edge
: Trigger when signal has a falling edge
6. Reset
This menu allows the application defaults to be quickly restored.
Figure 4-32 Reset Menu
©2012-2013 EasySYNC Ltd.
45
Document Reference No.: ES_000102
ES-DLA-8/16
Rev 1.0
Clearance No.: ES #050
6.1 Signal
This option restores application default settings for all channel names and colors.
6.2 Device Parameter
This item restores application default settings for the device parameters.
6.3 Trig-signal
This item restores application default settings for trigger conditions, i.e., no trigger condition set.
6.4 Quick Access Menu
For quick access to the device parameters shown in this section, the buttons on the “Device
Parameter Quick Access Bar” can be used.
Figure 4-33 shows the bar when used with internal clocking.
Figure 4-33 Device Parameter Quick Access Bar (1)
1.
2.
3.
4.
5.
6.
7.
Select
Select
Select
Select
Select
Select
Select
which connected ES-DLA-8/16 is used (in this case a 16-channel ES-DLA-16).
how many channels are used in the current capture (8 in this case).
the sample rate (15M samples / sec in this case).
how much data should be collected (1M samples in this case).
pre-trigger (in this case, 100% data is collected before the trigger).
the data format (RAW is selected)
the clock source (Internal clock is used here)
Figure 4-34 shows the bar when the external clock is enabled. An additional Negative/Positive
option appears to allow the selection of the active edge.
Figure 4-34 Device Parameter Quick Access Bar (2)
8. In this case, the ES-DLA-16 will do sampling at the negative edge of the external clock signal.
©2012-2013 EasySYNC Ltd.
46
Document Reference No.: ES_000102
ES-DLA-8/16
Rev 1.0
Clearance No.: ES #050
4.6.4 Search Menu and Related Buttons
These functions are used to search for certain signal patterns.
Figure 4-35 Search Menu and Buttons
1. Data
When working with bus-type data (parallel, 4-, 8-, or 16-bit type), this function can be used to
search for a particular value on the bus.
Figure 4-36 Search Data Dialog
First, select how many channels are used for the search. The setup must match the “Device”
menu->”Device Parameter”->”Channel Number” setting.
Figure 4-37 Configure Used Channel for Search
The data to be found can then be entered in the “Search Data” input box. The base type of the
data value entered should also be specified (Bin, Dec, or Hex).
Figure 4-38 Search Data Input Box
©2012-2013 EasySYNC Ltd.
47
Document Reference No.: ES_000102
ES-DLA-8/16
Rev 1.0
Clearance No.: ES #050
The “Search Prev.” or “Search Next” buttons can then be used to do a forward or backward
search.
When the search is complete, the Close button allows the dialog to be closed.
Note: Sometimes, only certain bits of the data are relevant in the data to be searched for.
Channels can be ignored in the search by ticking the Ignore Bit box and then selecting the
channels to be ignored.
Figure 4-39 Ignore some bits in Search
2. Trigger
This function can perform search based on the signal pattern. This operates in a similar way to
the setting of a trigger condition when collecting data. The Trigger Search Window will appear
when this is selected from the menu.
Figure 4-40 Search Signal Pattern
First, set the Condition 1 state by left-clicking the button for each channel. Each button will cycle
through “N”, “H”, “L”, “R”, “F” on each click,
Then, click the OR/AND button to cycle through the OR/AND options. This defines how the two
conditions are combined,
Then, set the Condition 2 state as required.
©2012-2013 EasySYNC Ltd.
48
Document Reference No.: ES_000102
ES-DLA-8/16
Rev 1.0
Clearance No.: ES #050
The states for the channel condition buttons are defined below:
: Not-used channel in this search
: Search high-level state for this channel
: Search low-level state for this channel
: Search rising edge for this channel
: Search falling edge for this channel
Once the Condition 1, Condition 2, and OR/AND settings have been made, use the “Search Prev.”
or “Search Next” to do forward or backward searches.
Once the searching is completed, click the “Close” button to close this dialog.
When the selected trigger pattern or data is found, a search cursor will show up in the main area,
to mark the data position visually.
Figure 4-41 Search Cursor Marks the Expected Pattern or Data
3. Bar
This menu helps to quickly find the cursors.
Figure 4-42 Bar Sub-menu for Cursors/Marks
©2012-2013 EasySYNC Ltd.
49
Document Reference No.: ES_000102
ES-DLA-8/16
Rev 1.0
Clearance No.: ES #050
3.1 A-Bar
This will move cursor A into sight.
3.2 B-Bar
This will move cursor B into sight.
3.3 Trig-Bar
If there is a trigger condition for the collected data and the trigger-point exists, this will move
cursor T into sight.
3.4 Search-Bar
If a search has been performed, and the data or pattern is found, this will move cursor S into
sight.
4.6.5 Protocol Analyzer and Related Buttons
This menu and related buttons allow access to the respective protocol decoders. More information can be
found in section 4.5 (Protocol Analyzer).
Figure 4-43 Protocol Analyzer Menu and Buttons
4.6.6 Help Menu and Related Buttons
This function provides access to the help and about information.
Figure 4-44 Help Menu and Buttons
©2012-2013 EasySYNC Ltd.
50
Document Reference No.: ES_000102
ES-DLA-8/16
Rev 1.0
Clearance No.: ES #050
5
Contact Information
Head Office – Glasgow, UK
EasySYNC Limited
Unit 1, 2 Seaward Place,
Centurion Business Park
Glasgow, G41 1HH
United Kingdom
Tel: +44 (0) 141 418 0181
Fax: +44 (0) 141 418 0110
E-mail (Sales):
[email protected]
E-mail (Support):
[email protected]
E-mail (General Inquiries):
[email protected]
Web Site URL:
http://www.easysync-ltd.com
Web Shop URL:
http://www.easysync-ltd.com
Branch Office – Tigard, Oregon, USA
EasySYNC Limited (USA)
7130 SW Fir Loop
Tigard, OR 97223
USA
Tel: +1 (503) 547 0909
Fax: +1 (503) 547 0990
E-Mail (Sales):
[email protected]
E-Mail (Support):
[email protected]
E-Mail (General Inquiries):
[email protected]
Web Site URL:
http://www.easysync-ltd.com
Web Shop URL
http://www.easysync-ltd.com
©2012-2013 EasySYNC Ltd.
51
Document Reference No.: ES_000102
ES-DLA-8/16
Rev 1.0
Clearance No.: ES #050
Appendix A - List of Figures
Figure 1-1: Logic Analyzer package contents ............................................................. 4
Figure 1-2: Logic Probe connections (ES-DLA-16 shown) and Status LED .................. 5
Figure 1-3: Rear panel showing the USB connector .................................................... 5
Figure 1-4: Front panel showing the ES-DLA-8 and ES-DLA-16 Logic Probe connectors
................................................................................................................................... 6
Figure 1-5: Pin names (looking into the connector as in Figure 1-4) .......................... 6
Figure 2-1 Application installer welcome screen ........................................................ 9
Figure 2-2 License agreement .................................................................................. 10
Figure 2-3 Install location ........................................................................................ 10
Figure 2-4 Copy files ................................................................................................ 11
Figure 2-5 Installation completed ............................................................................ 11
Figure 2-6 System Preferences ................................................................................. 12
Figure 2-7 Click Security & Privacy ........................................................................... 12
Figure 2-8 Security & Privacy ................................................................................... 13
Figure 2-9 Input Name and Password ...................................................................... 13
Figure 2-10 Allow 3rd party application..................................................................... 14
Figure 2-11 EasyLogic.dmg ...................................................................................... 14
Figure 2-12 Double click EasyLogic .......................................................................... 15
Figure 2-13 Drag the EasyLogic to the Application of Finder .................................... 15
Figure 2-14: Connect the USB cable to the Logic Analyzer........................................ 16
Figure 2-15: Connect the USB cable to the computer ............................................... 16
Figure 2-16: Connect the USB cable to the Logic Analyzer........................................ 17
Figure 2-17: Connect the USB cable to the computer ............................................... 17
Figure 2-18 Found new device .................................................................................. 18
Figure 2-19 Driver installed ...................................................................................... 18
Figure 2-20 Install driver ......................................................................................... 19
Figure 2-21 Find driver location ............................................................................... 20
Figure 2-22 Driver installed ...................................................................................... 20
Figure 2-23: Plugging the wire harness into the analyzer ........................................ 21
Figure 2-24: Connecting test clips to DUT ................................................................ 21
Figure 2-25: An Assembly of Laptop, Logic Analyzer, and DUT ................................. 22
Figure 3-1 Scan Device ............................................................................................. 23
Figure 3-2 Capture in progress ................................................................................. 24
Figure 3-3 Collect Logic Data .................................................................................... 24
Figure 3-4 Capture in progress ................................................................................. 25
©2012-2013 EasySYNC Ltd.
52
Document Reference No.: ES_000102
ES-DLA-8/16
Rev 1.0
Clearance No.: ES #050
Figure 3-5 Set Trigger Condition .............................................................................. 25
Figure 3-6 Search Data or Signal Pattern ................................................................. 26
Figure 3-7 Protocol Analyzer .................................................................................... 26
Figure 4-1 Screenshot of Main UI ............................................................................. 27
Figure 4-2 Main Area ................................................................................................ 28
Figure 4-3 Channel name and Trigger Buttons ......................................................... 28
Figure 4-4 Channel Pop-up Menu.............................................................................. 29
Figure 4-5 Change Channel Name Dialog .................................................................. 29
Figure 4-6 Channel Color Chooser ............................................................................ 29
Figure 4-7 Tree view ................................................................................................ 30
Figure 4-8 Select Channels to Form a Bus ................................................................ 30
Figure 4-9 Combine Channels to Form a Bus ............................................................ 30
Figure 4-10 Expanded Tree View .............................................................................. 31
Figure 4-11 Collapsed Bus View ............................................................................... 31
Figure 4-12 Bus Pop-up Menu .................................................................................. 31
Figure 4-13 Channel Pop-up Menu ............................................................................ 32
Figure 4-14 Scale Area and Waveform ..................................................................... 32
Figure 4-15 Waveform Pop-up Menu ........................................................................ 32
Figure 4-16 Snapshot area ....................................................................................... 33
Figure 4-17 Protocol Analyzer .................................................................................. 34
Figure 4-18 The Setting of I2C Decoder ................................................................... 35
Figure 4-19 The Setting for 1-Wire Decoder ............................................................. 36
Figure 4-20 The Setting of SPI Decoder ................................................................... 36
Figure 4-21 The Setting of UART Decoder ................................................................ 38
Figure 4-22 Menu and Quick Access Buttons ............................................................ 38
Figure 4-23 File Menu and Buttons ........................................................................... 39
Figure 4-24 View Menu and Buttons ......................................................................... 40
Figure 4-25 Device Menu and Buttons ...................................................................... 41
Figure 4-26 Signal Sub-Menu ................................................................................... 41
Figure 4-27 Channel Name and Color Setting Editor ................................................. 42
Figure 4-28 Cursor Color Editor ................................................................................ 42
Figure 4-29 Bus Management Editor ......................................................................... 43
Figure 4-30 Device Configuration Sub-menu ............................................................ 43
Figure 4-31 Trigger Condition Editor ........................................................................ 45
Figure 4-32 Reset Menu ........................................................................................... 45
Figure 4-33 Device Parameter Quick Access Bar (1) ................................................ 46
Figure 4-34 Device Parameter Quick Access Bar (2) ................................................ 46
©2012-2013 EasySYNC Ltd.
53
Document Reference No.: ES_000102
ES-DLA-8/16
Rev 1.0
Clearance No.: ES #050
Figure 4-35 Search Menu and Buttons ...................................................................... 47
Figure 4-36 Search Data Dialog ................................................................................ 47
Figure 4-37 Configure Used Channel for Search ....................................................... 47
Figure 4-38 Search Data Input Box .......................................................................... 47
Figure 4-39 Ignore some bits in Search .................................................................... 48
Figure 4-40 Search Signal Pattern ............................................................................ 48
Figure 4-41 Search Cursor Marks the Expected Pattern or Data ............................... 49
Figure 4-42 Bar Sub-menu for Cursors/Marks .......................................................... 49
Figure 4-43 Protocol Analyzer Menu and Buttons ..................................................... 50
Figure 4-44 Help Menu and Buttons ......................................................................... 50
©2012-2013 EasySYNC Ltd.
54
Document Reference No.: ES_000102
ES-DLA-8/16
Rev 1.0
Clearance No.: ES #050
Appendix B - Revision History
Version 1.0
30th April 2013
Initial release
©2012-2013 EasySYNC Ltd.
55
Mouser Electronics
Authorized Distributor
Click to View Pricing, Inventory, Delivery & Lifecycle Information:
EasySync:
ES-DLA-8