1
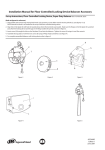
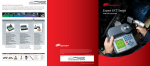
Passport Training Tools Welcome to Passport – the global website that will revolutionize your ability to ID parts and look-up service information 24/7! Don't waste time, start learning now how Passport will make your job easier! Your login information will provide you access to www.irpassport.com: 1. Passport Essentials 1. Site Navigation - Passport has two (2) main frames in which you will navigate: a Navigation Frame and the Main Navigation Frame. Navigation Frame Main Navigation Frame 2. Site Features - Listed below several key features of Passport. Please read over the description of each feature and become familiar with its associated application icon. Feature How To Use Click the Main Page button to display the navigation links on the Main Page. This button is available at all screens except the Main Page. Click the Bulletins button to open the Bulletins window. From this window you can view and search for bulletins. Click the Search button to open the Search window. From this window you can search for parts and service information. Click the Orders button to open the Transaction List. From this list you can view and open Picklists and quotes. Click Part Info to display a Part Number text box. Then type a number and click to display parts information. Click the Help icon to view information that explains what to do at a particular screen. This icon is available throughout the application. 2. Parts ID Training 1. Finding a Part To learn how to locate a specific part and its number and an operators manual in Passport please read the following case study to describe this process. Case Study: 2705P1 Impact Tool Tune Up Kit One of our customers, John Connors has called you and requests a 2705P1 Impact Tool Tune Up Kit and the price for that kit. To help John, you’ll use Passport to find the right tune up kit and its price. To find the 2705P1 Series Impact Tool tune up kit and its price for John, you would complete the following steps: 1. 2. 3. 4. 5. 6. 7. In the Navigation Frame, select Productivity Products Select Impact Tools Select 2705P1 Series Select Part Manuals Select 2705P1 [P7540us] Select Standard Duty Impactool. Scroll down to the last part number (#2705-TK3) in the part list. Please take a moment to practice the above steps in Passport Case Study: 2705P1 Impact Tune Up Kit After locating the Tune-Up Kit for John, now you can find and share with him its list price. There are 2 methods for identifying the list price of a part. Æ Method 1: From within the Part Manual. 1. In the parts list on the right hand side, select a Part Number. For example, 2705-TK3. The price will be displayed in a pop-up window. This is called the Part Info window. Æ Method 2: Using the Part Info Link 1. In the product category navigation of Passport click the Part Info hyperlink. (it is in the upper right of the gray area)… 2. A pop-up window will appear with a textbox in it. Type 2705-TK3 and hit the GO button. 3. The price will appear on the center right hand side labeled MSRP. Having found the Tune-Up Kit and its list price, you can now share it with John. Passport Application Practice – Using one of the above methods, find the price for a trigger for a 2705P1 Part No. 705-93. Which answer below is correct? A. $1.30 B. $2.00 C. $2.42 D. $3.10 2. Zoom In & Out on Parts Diagram To change the size of the part diagram you may either zoom in or out by clicking the Zoom + or the Zoom - icons. 3. Return to Original Screen Size To return to a Parts Diagram’s original size, select the Original Size icon. 4. Obtain Part Number Detail To quickly jump to the part number detail from the part diagram, select any part illustration number on the diagram. See in image below. 5. Print Parts Page To print the current view and part detail, select this Printer icon. 6. Print Parts Image To print the diagram only, select this Printer icon. 7. Superseded Parts Now, let’s discover if a part has been superseded. Parts are superseded because of Ingersoll Rand’s ongoing commitment to quality, enhancements in product performance or changes in product attributes (e.g. physical dimensions or material composition). Anytime you see the Supersede icon in Passport either that part number has been superseded or it has superseded another part number. This icon will be displayed in part manuals, the part info window, and quotes. Example: 1. 2. 3. 4. 5. 6. Select Air Starters from the Part Navigation Select TS Series Select Part Manuals Select TS1401 [P7166] Select Series TS1401 Turbine Starter (This is a specific page of the manual). Scroll down to Item #8 (ST900-40) in the part list. Notice the Supersession icon next to it. Click the icon , a window will pop-up displaying the Supersede details. You can see that part number ST900-40 has been superseded by 04559191. Helpful Hint: An additional method for finding this Supersede is to use the Part Info link. By entering ST900-40 or 04559191, the Supersede icon will appear. 8. Locating Operators Manuals Continuing on, a huge advantage of Passport is its ability to store hundreds of our Operator Manuals. To find an Operator’s Manual, you would complete the following steps: 1. 2. 3. 4. 5. 6. In the Navigation Frame, select Paving Breakers Select 93 - 95 Series Select Operators Manuals Then select 93/95 [P6199us] Click on the Specifications link. What is the Impacts/min for a 93A4? Which answer below is correct: A. 1,250 B. 2,350 C. 2,400 D. 2,655 Please Note: Adobe Acrobat Reader is needed to view our online Operator Manuals. Passport Application Practice Your turn. To practice what you just learned, go to Passport and complete the following steps: 1. 2. 3. 4. 5. In the Navigation Frame, find and select Controllers. Then select TMA Series Select Operators Manuals Then select TMAD DC Electric Torque Management System [7114] What page is the installation information on? a. Page 1 b. Page 3 c. Page 7 d. Page 11 Now, that you have learned how to locate an Operators Manual, let’s continue on to our next lesson, Locating Service Bulletins. 3. Bulletin Training Service Bulletins contain critical information such as part number changes, material changes, assembly / disassembly instructions and other service related information. To locate Service Bulletins, click the following icon in the navigation frame. Main Navigation Frame When first entering the Bulletin section, all new posted Bulletins will automatically be displayed. To view a Bulletin, click the number next to it. Navigation Frame You enter the following search criteria to locate service bulletins for specific models. 1. Enter one or more of the following search criteria: Search For: Enter a criteria to search for a specific value or leave it blank. (e.g., Model Numbers, Keywords) Type: Here you can narrow your search to a specific type of Bulletin. Criticality Level: Determine if you want to see only mandatory or non-mandatory Bulletins in the results. Models: Select a specific model that has Bulletins associated with it. Released: Search for a Bulletin from a specific time frame. 2. Once you have entered or selected your criteria, select the Go button to begin your bulletin search. Tip: You may leave all the fields blank and click the Go button. Notice that several Bulletins already exist. View a Bulletin by selecting the Number. 4. Quote Training 1. Creating a Parts Picklist In this lesson, you will learn how to create a Picklist. A Picklist is similar to a shopping cart for an online store. You can add, delete, or modify items in a Picklist. Picklist names default to your initials and a timestamp. There are three (3) methods to adding items to a Picklist. In all three (3) methods, a Picklist is automatically created. To View your current Picklist select the binocular icon. ÆMethod 1: The GO button 1. In a part’s list, click the GO button next to an item. specific item with a quantity of one to your Picklist. This will automatically add that ÆMethod 2: Checkboxes and the Green Arrow button 1. In a part’s list, select the checkbox next to each item you want to add to your Picklist. You can select more than one item. 2. Next, click the Green Add button at the top. This will automatically add the checked items to your current or newly created Picklist. ÆMethod 3: The Part Info Window 1. In a part’s list, click the Part Number for any item. In the pop-up Part Details window, you will see the text Add to Picklist: and a textbox. Add the quantity you want in your Picklist in the textbox. 2. Then click the GO button. 3. This same method can be done from selecting the “Part Info” link from the Homepage. Passport Application Practice Use one or more of the Picklist Item methods just discussed to create a Picklist for a 3101G Series Grinder. 1. In the Navigation Frame, select Grinders, Die Grinders and then 3101G Series. 2. Then in the Main Navigation Frame, select Parts Manuals, 3101G [P7642] and then Model 3101G 1/4" Collet Standard Duty Die Grinder 3. Select the GO button next to 3101G-747. This will automatically add this item with a quantity of one to your Picklist. Please Note: Your Picklist name defaulted to your initials and a timestamp. 2. Creating Repair Quotes Once you have created a Parts Picklist, you can now convert it to a Repair Quote. There are seven (7) steps to create a repair quote from a picklist. Step 1. Identify the Picklist to Convert Use the transaction list which contains all your Picklists and Quotes. 1. First select the “Transaction List” icon in the upper left corner of Passport. This will take you to a list of all your Picklists and Quotes. 2. In the Main Navigation Frame you will see a list of your Picklists. Here you can delete Picklists and Quotes, or sort by the column headers. For example: You could sort by “Total” to find your highest-dollar Quotes. 3. In the Navigation Frame there is a search tool. This tool can be used to search through your Picklists and Quotes. This is also known as your “Transactions List”. For example: You could search for all Picklists and Quotes that contain part number 3101G-747. Once you have identified a Picklist you can convert it to a Quote. Step 2: Convert a Picklist to a Quote 1. First select the Orders icon in the upper left corner of Passport to access your Transactions List. This will take you to a list of all your Picklists and Quotes. 2. Drill down on the newest Picklist by clicking the column heading Order No. 3. Then in the Navigation Frame, under Order Process click the dropdown menu that has “Picklist” as the value, select “Quote”. The page will refresh and you will see all the quote information in the Main Navigation Frame. Step 3: Complete Quote Header Information Now that you have converted a Picklist to a Quote, let’s add in specific quote information. Icons • Print Preview • Save Quote • Delete Quote • Transaction List The Quote Header information is in the Navigation Frame starting with Quote Number and ending with the Private Note field. Only the Quote Number is required. • • • • • • • • Quote Number – Can be modified to be customer specific Customer Ref. No. – Can be modified to be customer specific Description – Provide additional quote detail Contact Person – Defaults to current user Serial No. – Can be used to enter the tool’s Serial No. Unit Info. – Provide additional quote detail Customer – Customer Name Private Note – Add in additional information that can only be viewed by the current user. Step 4. Add in Customer Information • If you have previously created a quote for a customer, their name will appear in the drop down box. • Otherwise, select the Address Book hyperlink to open your Customer Address Book. The right hand side will contain all of your customers. This window contains a search tool. (Click [All ] to display all of your customers.) • Click the Red Star • to add a new customer. Step 5. Modify Item Prices • The Adjusted List Price column will be changed based on Currency Exchange Rate Adjustments. • The Sell Price allows you to change individual item prices. It can be used in conjunction with the Adjusted List Price. • The Landed Cost field is a multiplier. It can be used to mark up or mark down all of the line items. – For example, using 1.1 would increase the Adjusted List Price by 10%. A Landed Cost of .90 would decrease the Adjusted List Price by 10%. • You can convert a quote to a different currency using the Exchange Rate and To Currency fields. • You may also add in any Discount and Miscellaneous Charges as well. Step 6. Select User Defined Quote Defaults The selected information is automatically included with every quote. 1. Logo - You can select the default Ingersoll Rand icon or select a different logo. Note: You can have additional logos loaded to Passport. 2. Contact Information – Your location’s contact information. 3. User Defined Fields – Here you can turn on (check) or turn off (uncheck) comments that will appear at the bottom of the Quote. Helpful Hint: You may want to enter your Terms and Conditions here. Step 7. Save & Print Quote Select the disk Icon quote. to save your quote and then select the printer icon to print your Additional Resources As an additional resource, you may download a full version of our Passport User Manual. This document may take couple of minutes to download, please go to the following link: http://irtools.com/passport/training_manual/Passport Reference Guide.pdf