1
Audition 4
Advanced Digital Sound Editing
User's Manual
SunRize Industries
Credits
Audition 4 was written by Mathias Fischer, a recent West German University graduate
Mathias, in conjunction with Avantgarde Software in Hamburg, developed Audition 4
to be the fastest and most extensive 8 bit editor available for the Amiga.
A vantgarde Software
Mathias Fischer
Martin Dencker
-Author
-Agent
SunRize Industries
Anthony Wood
Todd Modjeski
Susan Bruner
Chris Walton
Dr. Anna Bruner
- Project Leader
- Testing, Manual
-Manual
-Manual
-Manual
I!
First Edition
Third Printing
Copyright 1991 SunRize Industries. All rights reserved.
Reproduction or publication of the content in any manner. without the express written
consent of the publisher. is prohibited. No liability is assumed with respect to the use
of the information herein.
Audition 4 and Perfect Sound are trademarks of SunRize Industries.
The Audition 4 software is copyrighted 1991 SunRize Industries. Audition 4 may be
copied for archival purposes only. Any copy made of Audition 4 not for the purpose of
archival is considered piracy.
Your Audition 4 diskettes are warranted to the original purchaser for a period of three
months from the original purchase date--under normal use and service--against
defective materials or workmanship. ANY IMPLIED WARRANTIES ARE ALSO
LIMITED TO THE THREE MONTHS FROM THE ORIGINAL PURCHASE DATE.
This warranty is void if the diskettes have been damaged by accident or unreasonable
use, neglect, improper service or other causes not arising out of defects in material or
workmanship.
SUNRIZE Il'.'DUSTRIES SHALL NOT BE LIABLE FOR LOSS OF USE OF
AUDITION 4 OR OTHER INCIDENTAL OR CONSEQUENTIAL COSTS, EXPENSE
OR DAMAGES INCURRED BY THE PURCHASER.
During the above three months, defective diskettes will be replaced without charge to
the purchaser when the damaged diskettes are returned, prepaid and insured, with proofof-purchase date, to SunRize Industries customer service listed below. After the first
three months, defective diskettes may be replaced at a five dollar charge each.
DISKETTES RETURNED WITHOUT PROOF-OF-PURCHASE DATE OR
REPLACEMENT FEE WILL NOT BE REPLACED.
Before returning Audition 4 diskettes, please review the technical support instructions
in this manual
SunRize Industries
2959 S. Winchester Blvd., Suite 204
Campbell, CA 95008 USA
iii
Table of Contents
Introduction-~················*······················· . ··············································· ix
About this manual ....................................................................... ix
Chapter 1 - Digital Audio ........................................................................ 1
Digital vs. Analog ........................................................................ 1
Converting Analog to Digital ....................................................... 2
Chapter 2 . . Installation ........................................................................... 5
Making a Backup ......................................................................... 5
Hard Drive Installation ................................................................. 6
Running Audition 4 ...................................................................... 6
Setting your Sampler Type ........................................................... 7
Chapter 3 . Getting Started................................................................... 9
Loading a Sample ......................................................................... 9
TitleBar ..................................................................................... 10
12 Basic Buttons ........................................................................ 10
Zoom Button .............................................................................. 12
Selecting a Range ....................................................................... 13
Recording a Sample ................................................................... 13
Saving a Sample ......................................................................... 15
Chapter 4 . . EDIT I, Basic Editing .............................................................. 17
Delete ......................................................................................... 17
Keep ........................................................................................... 18
Copy .......................................................................................... 18
Zero ........................................................................................... 18
Overwrite ................................................................................... 19
Cut ............................................................................................. 19
Insert .......................................................................................... 19
Add Workspace .......................................................................... 20
Stereo Editing ............................................................................ 20
v
Chapter 5 -EDIT 2, Advanced Editing .............................................. 21
Mix ............................................................................................ 22
Voice Over Tutorial ................................................................. 25
Echo ........................................................................................... 26
Fade ........................................................................................... 29
Panning Tutorial ..................................................................... 31
Flange ........................................................................................ 32
Filter .......................................................................................... 34
Tune Waveform ......................................................................... 38
IFF Instrument Tutorial .......................................................... 41
Invert ......................................................................................... 43
Backward ................................................................................... 44
Swap Channels ........................................................................... 44
Swap Buffer & Main .................................................................. 44
Chapter 6 - Realtime Effects ...............................................................
Editing Effects ...........................................................................
Mix while Sampling ...................................................................
Meters ........................................................................................
45
45
46
46
Chapter 7 . . Special Editing ..................................................................... 49
Smooth ....................................................................................... 49
Maximize ................................................................................... 4 9
Centralize ................................................................................... 49
Lift Treble .................................................................................. 51
Lift Bass ..................................................................................... 51
Chapter 8 - Sequencing a Sound .......................................................... f. 53
Tutorial ................................................................................... 56
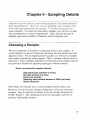
Chapter 9 - Sampling Details .............................................................. 57
Choosing a Smnpler ................................................................... 57
Sampling .................................................................................... 58
Monitor ...................................................................................... 5S
Start Volume .............................................................................. 61
v;
Stereo I Mono .............................................................................
Srunpling Rate ............................................................................
Is 56,000-Hz better than a CD? ..................................................
Creating a Play Disk ...................................................................
Notes on Memorv Management... ...............................................
62
62
63
64
65
Chapter 10 ·Saving Sounds and Instruments .................................... 67
Waveform, Buffer, and Range .................................................... 67
Compressed ..... * ......... ~.~·····~······················································~··· 67
Raw Data ................................................................................... 68
Executable .................................................................................. 68
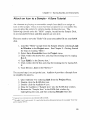
Executable Icon Tutorial ......................................................... 69
Configuration ............................................................................. 70
IFF Instruments .......................................................................... 71
Sonix Instruments ...................................................................... 71
Chapter 11 · Project Options ................................................................. 73
About. ....................................................................................... 73
Loading Sounds ......................................................................... 73
Operation of a File Requester ................................................. 74
Load RAM Scan ......................................................................... 75
Play Files ................................................................................... 77
Deleting files .............................................................................. 77
Printing ...................................................................................... 77
Quit. ........................................................................................... 78
Chapter 12 . . Configuration ................................................................... 79
Stereo Mode ............................................................................... 79
Ok Requester .............................................................................. 80
Lowpass Filter ............................................................................ 81
Position Line .............................................................................. 81
Oscilloscope ............................................................................... 81
Level Display ............................................................................. 82
Cursor ........................................................................................ 82
VII
Sampler Types ...........................................................................
Colors ........................................................................................
Close Workbench Screen ............................................................
HiFi Playback ............................................................................
82
83
85
85
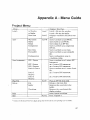
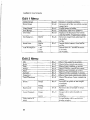
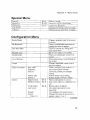
Appendix A: Menu Guide ...................................................................... 87
Appendix B: Technical Support ............................................................ 91
1llclex ......................................................................................................
VIII
~~
Introduction
Audition 4 is the next generation digital sound editor that allows you to
record and edit any sound in ways previously impossible. Written in
100% Assembly language, Audition 4 was designed from the ground up
be easy to use, fast, flexible and powerful. You can preview different
echoes, flanges, filters, mixes, and fades without altering your original
sample. While previewing an effect, you can alter its parameter in real
time for instant feedback.
to
A sequencer is also included for editing multiple loop points. And
creating autobooting Play Disks is possible with Audition 4's unique
record to floppy disk feature. Audition 4 is the most advanced 8-bit
sample editor available for the Amiga.
About this Manual
This manual provides information for installing and using Audition 4.
The manual is divided into 12 Chapters. An Appendix and Index is also
included.
Chapter 1 ........... ........ Digital Audio explains the difference between
analog and digital sound and describes the digital
sampling process.
Chapter 2 .................. .Installation instructs the reader on how to run the
program from a floppy, or how to load Audition 4
on to a hard drive.
Chapter 3 ................... Getting Started includes a brief introduction to
loading, sampling, and saving, and an overview of
the 12 basic buttons.
IX
Chapter 4 ................... Edit 1 • Basic Editing provides a detailed look at
the Edit 1 menu. This includes cut, copy, and
insert.
Chapter 5 ................... Edit 2 - Advanced Editing describes the advanced
edit features, including echo, flange, mix and fade.
Tutorials are provided in this chapter.
Chapter 6 ................... Realtime Effects outlines the digital effects that
can be produced direct from a parallel port sampler
in realtime.
Chapter 7 ................... Special Editing describes a few additional editing
features. Lifting the treble and bass of a sample is
included.
Chapter 8 ................... Sequencing a Sound describes how to create a
sound file that includes multiple loop points. A
tutorial is included.
Chapter 9 ................... Sampling Details explains how to record your own
samples using a parallel port sampler. A discussion
on memory usage is included.
Chapter 10 ................. Saving Sounds and Instruments provides
information on the different types of sound files anc
instructions on how to save.
Chapter 11 ................. Project Options includes a description of all the
options included in the project menu. A tutorial on
file requesters is included.
Chapter 12 ................. Configuration will enable you to customize
Audition 4's options to your preference.
X
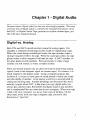
Chapter 1 - Digital Audio
In recent years, digital audio has become increasingly popular. The most
common use of digital audio is currently the Compact Disc player. Soon
the DAT, or Digital Audio Tape, promises to replace cassette tapes, just
like CDs have replaced albums.
Digital vs. Analog
Both COs and DA Ts record numbers instead of analog signals. For
example, a standard cassette tape records sound by magnetizing a tape.
When the sound being recorded gets louder, the tape recorder writes a
stronger magnetic field to the tape. When the sound gets softer, the tape
player writes a softer magnetic field onto the tape. A DAT recorder, on
the other hand, records numbers. For loud sounds, it writes a large
number; for soft sounds, it writes a smaller number.
1bere are several reasons why numbers are better to record than analog
signals (such as the magnetic signal on cassette tapes). For starters, it is
much simpler to edit digital sound. Using a computer program like
Audition 4, it is easy to move parts of sound around or insert one sound
into the middle of another. In the analog world this is accomplished by
cutting and splicing tape. Another advantage, and the reason the music
industry is upset about DAT, is that when you copy digital audio you
always get a perfect copy. Remember that digital sound is just numbers
and is manipulated like any other data in your computer. When you copy
a disk with your computer, you get an exact copy of the data. On the
other hand, every time you copy a magnetic tape, you add a little
distortion or "tape hiss".
1
Audition 4 User's Guide
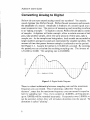
Converting Analog to Digital
So how do you turn natural analog sound into numbers? You need a
sound digitizer like Perlect Sound. Perlect Sound measures and records
the amplitude of a sound. Amplitude is loudness of a sound signal at an
exact moment in time. The process of measuring and recording is referre•
to as "taking a sample." To digitize a sound, Perlect Sound takes a series
of samples. A digitizer will take a sample, allow a certain amount of time
pass, take another sample, allow the same amount of time pass, take a
sample, etc. As the samples are being taken, loud sounds are recorded as
larger numbers and quiet sounds are represented by smaller numbers. The
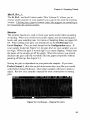
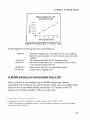
amount of time that passes between samples is referred to as the period.
See Figure 1-1. Assume the period is l/10,000 of a second. By inverting
the period you can calculate the resulting sampling rate. The inverse of
l/10,000 is 10,000. The sampling rate is lO,OOOHz.
I
I
I
i
I
I
i
1
I
I
I
I
-,-,--1'--'-~..J___C'---L--'-_;_'---'---'---'---'--1..-.J.--'--'-~'-\T-
lJ_
··r· I
~~~
I
SAMPLING PEPIOD
:
I
I
I
i
Figure 1-1. Digital Audio Diagram
There is a direct relationship between sampling rate and the maximum
frequency you can record. This relationship, called the "Nyquist
theorem", states that the maximum frequency you can record is equal to
half the sampling rate. Thus, if you sample at 1O,OOOHz, all frequencies
up to 5,000Hz will be recorded accurately. Frequencies over 5.000Hz wil
not be recorded, in fact, they wili introduce distmtion into the sound. Thi.
distortion is called "aliasing".
2
Chapter 1 - Digital Audio
The maximum sampling rate your Arniga can play back is 28,000Hz
(under normal conditions). Compact Discs always play back at 44,100Hz.
This gives CDs a maximum frequency range of 22,000Hz which is outside
or on the limits of most people's hearing ability.
The second parameter that determines digital sound quality is the
maximum sample value. If we let silence be recorded as zero, what value
does the loudest possible sound have? This value is the maximum sample
value. Sound will oscillate above and below zero by this amount. On the
Amiga, the maximum sample value is 127. Thus all sounds are recorded
as numbers between 127 and -127, with zero being silence. For
comparison, CD players have a sample range from -32,767 to 32,767.
Obviously this gives CDs better sound quality than an Arniga.
The final thing to notice about digital sound is that it uses quite a bit of
memory. Since each sample on an Amiga takes one byte, a sampling rate
of 10,240 samples per second means that every second of sound is going
to take exactly lOK of memory. Recall that 1024 bytes equals one "K",
and 1024K equals one megabyte.
3
Chapter 2 - Installation
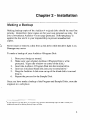
Making a Backup
Making backup copies of the Audition 4 original disks should be your first
priority. Remember, these copies are for your own personal use only. For
your convenience Audition 4 is not copy protected. Software piracy is
against the law and it is your responsibility to prevent unauthorized
copies.
Never insert or remove a disk from a disk drive while the drive light is on.
Damage may occur.
To make a backup of your Audition 4 Program Disk:
1.
2.
3.
4.
5.
6.
Boot your Amiga as normal.
Make sure your original Audition 4 Program Disk is write
protected. (Open the window on corner of the disk.)
Insert the Audition 4 Program Disk into the internal drive.
Insert an initialized blank disk into your external drive. •
Drag the Audition 4 disk icon on top of the blank disk's icon and
drop it.
Repeat the process for the Sample Disk.
Once you have made a backup of the Program and Sample Disks, store the
originals in a safe place.
• If you only have one disk drive, or if you have any questions about backup copies of disks. consult your
workbench manual for Making Backup Copies of Disks.
5
Audition 4 User's Guide
Hard Drive Installation
To load Audition 4 on your hard drive, just double click the Install HD
icon and follow the online instructions. Within the Install program you
can select to install the program, sample disk, library files, and public
domain programs by selecting their names and then clicking Begin
Install.
To install Audition 4 on your hard drive:
1.
2.
3.
4.
5.
6.
7.
8.
9.
Boot your computer as normal.
Make sure your Audition 4 Program Disk is write protected.
Insert the Audition 4 disk into a disk drive.
Double click the Audition 4 Disk icon.
Double click the Install HD icon, and follow the online
instructions.
Select which files within Audition 4 you want to copy to your
hard drive.
Select the destination directory on your hard drive.
Click Begin Install.
Insert the Sample Disk when prompted.
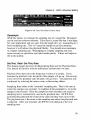
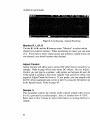
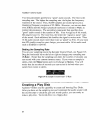
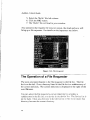
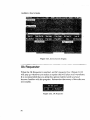
Running Audition 4
To start the Audition 4 program, simply double click the Audition 4
Program icon. After the program is finished loading, the screen will scrol
up from the bottom of your screen. Click the OK button to begin. Figure
2-L
6
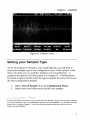
Chapter 2 - Installation
Figure 2-1. Audition 4 Screen
Setting your Sampler Type
To set the program to recognize your sound digitizer, you will need to
select your sampler type in the configuration menu. Other options in the
menu will allow you to customize Audition 4 to your preference. A
complete description of all the options is in Chapter 11 - Configurations.
First time installers should select the type of sampler they have and accept
the other configuration defaults.
1.
2.
Select Type of Sampler from the Configuration Menu.*
Select one of the following to classify your sampler:
• Hold down the right mouse button to view the menu items in the menu bar. The item you want can be selected
by moving your poin!er to the word Configuration, then down to Type of Sampler. You should then move !he
pointer over to your type of sampler. To make your selection, release the right mouse button when your
sampler becomes highlighted.
7
Audition 4 User's Guide
Generic*
Any parallel port sampler not listed below.
Perfect 1&2 Perlect Sound Sampler, version 1 or 2.
Perfect 3
Perlect Sound Sampler, version 3.
Perfect
Sound
If you are not sure which version of Perlect Sound you have, keep in mind
that versions 1 & 2 do llQt have mic jacks.
* Generic applies to parallel port samplers only.
or the serial port.
B
Audition 4 will !Ill! access samplers tha~ connect to the JOystick,
Chapter 3 - Getting Started
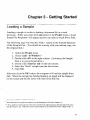
Loading a Sample
Loading a sample is similar to loading a document file in a word
processor. When you select the Load option in the Project menu, a Load
Sound File Requester• will appear and you can select a sound file to load.
The following steps will load the "Hello" sample in the Tutorial directory
of the Sample Disk. (You should be working with your backup copy, not
the original disk.)
1. Select the Project menu.
2. Select Load - to Window. ••
3. Double click dfl: in the right column. (Assuming the Sample
Disk is in your external drive.)
4. Double click Tutorial (dir) in the left column.
4. Select the "Hello" sample from the left column.
5. Click Ok!.
After you click the Ok! button, the computer will load the sample from
disk. When the sample has finished loading, its graph will be displayed
on the screen and the file name will listed in the title bar.
• For instructions on using tl1e file requester, see the File Requester Tutorial in Chapter II .
• • If you prefer to use the keyboard "short cuts", hold down the righl Amiga key, (firnt key right of the space
bar), then tap the L key. Within this manual, keyboard shortcuts are indicated by "RA-L ", rught Amiga- L.
9
Audition 4 User' Guide
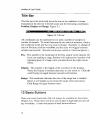
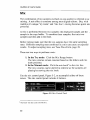
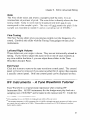
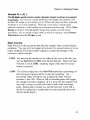
Title Bar
The title bar is the horizontal bar at the top on the Audition 4 screen.
Contained in the title bar is the file name and the following coordinates:
Position, Display and Range. Figure 3-1.
Figure 3-1. Title Bar
All coordinates can be expressed in two units: number of samples or
number of seconds. To switch between the two units of measure, click on
the coordinate in the title bar you want to change. Example: to change the
units of Position, click the word Pos. and the units will toggle between
samples and seconds. (Seconds are always carried to 3 decimal places.)
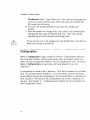
Pos.: This number is the coordinate of the first sample in the display. Or,
if you are marking a range, Position will indicate the location of the
beginning point of a range while you hold down the right mouse
button.
Display: This number is the length of the waveform in the display.
Notice the Display coordinate decreases as you zoom in. Click the
word Display to toggle between seconds and samples.
Range: This coordinate indicates the size of the range that is marked.
Notice it will update as you resize the range with your mouse.
Oick Range to toggle between units.
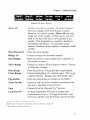
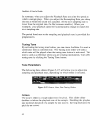
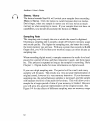
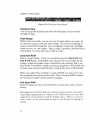
12 Basic Buttons
There are twelve basic tools that will always be available on the screen.
(Figure 3-2.) These tools will allow you to play or highlight any area of
any waveform. A short description of each button follows:
10
Chapter 3 - Getting Started
Figure 3-2. Basic Buttons
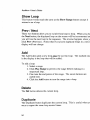
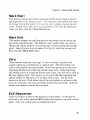
Show All
- Zooms om as far as possible. On larger samples.
the entire sample will fill the display window.
However, on smaller samples, Show All may only
graph part of the sample. In these cases, you will
need to use the scroll bar to move around in the
sample. This irregularity is caused by Audition's
fast display subroutines. To maximize screen
updates, Audition always displays a multiple of 640
samples.
Play Waveform - Plays the entire sample.
Range All
Play Display
- Creates a range over the entire sample
Show Range
-Enlarges a range to fill the display window. (Zooms
in to display a range)
Play Range
Clear Range
- Plays the portion of the graph that is highlighted.
- Cancels highlighting of a marked range. This is not
a delete function. Sample data remains the same.
Play Buffer
Zoom In/Out
- Plays the sample that is currently in the buffer. •
- Plays the pmtion of the sample that is currently in
the display window.
- Zooms in and out of the waveform providing close
up views. (detailed in next section)
Stop
- Cancels all of the Play and Try** buttons.
Loop On/Off
- A toggle button that will make a sample play
continuously if it is on. To toggle between Loop
On and Loop Off, click the button until the desired
* Buffer refer~ to Audition 4'~ copy huffr.:r, for more information sec page 18.
** Try buttons an: detailed in Chapter 5
11
Audition 4 User' Guide
option is showing.
Edit Normally/Freehand- If normally is selected, edits are created by
using the menus, (cut and copy etc.). If freehand is
selected, the display zooms all the way in on a
waveform and allows you to draw on the graph wit!
the mouse. Like the Loop button, you can toggle
the Edit button by clicking it until the preferred
option is displayed.
Zoom Button
Because Audition 4 is written in Assembly Language, it is capable of a
realtime zoom. This means that you can adjust the zoom parameters and
you will see the waveform react instantaneously to your commands.
1.
Click Zoom ln.
The zoom button is divided into two parts: the right and left
side. Clicking on the right side of the button (on the word In),
will cause you to zoom in on your sample. Hold down the
mouse button to zoom in realtime.
2.
Click Zoom Out.
Clicking the left side of the zoom button (on the word Out), will
zoom you back out of the sample. Continuously holding the
Zoom Out button will expand the view to show the entire
waveform. The Show All button will also accomplish this.
By combining the zoom button and the scroll bar, you can navigate
anywhere in the sample and at any level of detail. The horizontal Scroll
Bar is located at the bottom of the waveform window. Click the arrow on
the far right to move the displayed area toward the end of the sample.
Hold the arrow down to scroll in real time. You can also drag the slider
knob to move to another part of the sample. This is most evident when
you have zoomed in on the sample.
12
Chapter 3 - Getting Started
An interesting effect can be created by moving the scroll bar while a
sample is playing. First, zoom in on a sample (all the way) and select
Loop On. Then, click Play Display. While the sample is looping, move
the scroll knob slowly toward the end of the sample.
Selecting a Range
Selecting a Range is accomplished by clicking the left mouse button at the
beginning of the desired area and dragging to the desired end. • The
selected range will be highlighted as you move the mouse. Click the Play
Range button to hear the range. If you need to adjust the edges of your
range, you can position the cursor on either edge of your selected range,
press down the left mouse button and drag the edge of the range to a new
position.
To range an entire wavefonn, click Range All.
Recording a Sample
Never attach or remove samplers or other devices from your computer
while the power is on. Doing so may damage your computer or the
device.
To record a sample, make sure your sampler is set up properly. It should
be attached to your Amiga and to a sound source. Refer to your sampler
manual for installation insu·uctions. A microphone or any other audio
output, such as a CD player, can serve as your sound source. Once the
sampler is in place and your audio connections are secure, you are ready
to record a sample.
*Dragging Is accomplished by clicking t:1e left mouse button. holding it down as you move the cur:>or, and then
releasing the mouse bu!ton.
13
Audition 4 User' Guide
To record a sample:
1. Select Delete - Waveform from the Project menu. This gives
you a clean slate to start with.
2. Select Edit 2 • Sampler (RA-6). This puts the Sampler Control
Panel at the bottom of the screen.
3. Check the Configuration menu Type of Sampler, to make sure
your sampler type is selected.
4. Plug an audio source into the sampler's left input channel.
5. Click on the L button under the word Monitor:. If the sound level
is too low, adjust the gain. Perfect Sound 3 Owners: adjust the gair
by using the arrow keys. Most other samplers can be adjusted by
turning the gain knob on the sampler.
6. Once the gain has been set, click the right mouse button to stop
monitoring.
Perfect
Sound
7. Click on the L button under the word Sample:. A message will
appear, Press left mouse button to start, right to stop.
8. Click the left mouse button to begin sampling. Once you begin the
screen will go black. Do not panic, Audition 4 is recording your
sample to RAM. The screen will reappear when you stop sampling
9. To stop the sampler, click the right mouse button. Otherwise, the
sample will be recorded to the largest contiguous block of memory
available. (This is not necessarily all of your memory.) Sampling
will automatically stop when the block is full.
10. Play your sample by clicking Play Waveform.
For an in depth look at sampling see Chapter 8 - Sampling Details.
14
Chapter 3 - Getting Started
Saving a Sample
To save your sample as an IFF sound file on a floppy disk:
1.
2.
3.
4.
5.
6.
Initialize a blank floppy disk:
Insert initialized disk into dfl :.
Select Save - Waveform from the Project menu.
Type dfl: next to the word Drawer.
Type in a name for the sample next to the word File.
Click the OK! button to save it, or click Forget it to exit the
requester without saving.
Save- Waveform will save your sample in IFF format. For more details
on saving and different file formats see Chapter - 9 Saving Sounds and
Instruments.
• To initialize a blank disk, switch to Workbench by clicking the depth gadget, (upper right comer). Put a blank
disk into a Jisk drive and select initialize from the disk rnenu. Your disk icon must be setected (highlighted)
b-~fore
you can select initialize.
15
Chapter 4 - Edit 1, Basic Editing
All the following features are found in the Edit 1 menu, Figure 4-1. They
are your basic editing tools of Audition 4. They are equivalent to cut,
copy, and paste for a word processor and are generally as straightforward.
Figure 4-1. Edit 1 Menu Options
Delete Range
Delete Range removes a range from your sample. Delete a range by
highlighting a range on the graph and then select delete range from the
Edit 1 menu. Warning: This process is irreversible. If you are editing
a stereo sample and you delete a range from only one channel, be aware
that the channels will not be in sync following the delete. If you need to
delete from only one of the channels and keeping them in sync try the zero
range option. For more on stereo eruting see the related section at the end
of this chapter. The keyboard shortcut for Delete Range is RA-n.•
• Keyboard short cuts are provided for most Edit Functions. To select an edit function from the keyboard, hold
down the right Amiga key (first key right of the space bar) and type the "short cut" letter or number.
17
Audition 4 User's Guide
Keep Range
The Keep Range function works opposite to delete. In Keep Range you
highlight what you want to keep. Anything not ranged will be deleted.
Warning: This process is irreversible. If you choose Keep Range with :
stereo sample and select the Right or Left channel, the kept range will be
moved to the beginning of the waveform and be followed by zeros until
the end of the sample (equivalent to silence). Channels will remain the .
same length, but they will be out of sync. Keyboard shortcut: RA-K.
Copy Range
Copy Range will copy the highlighted range to the buffer. • The original
waveform will not be affected; however, the range will replace anything
that was in the buffer. The copied range will be stored in the buffer until
it is replaced by another file or range. To view or edit the buffer, you can
swap the main display with the buffer using the Swap Buffer & Main
option in the Edit2 menu. The keyboard shortcut for Copy is RA-C.
Zero Range
The Zero Range function will replace the value of the ranged part of a
sample with zeroes. A zero translates to silence. This can be used with a
stereo waveform to clear a range of one of the channels, while keeping
both in sync. Warning: This process is irreversible. Shortcut: RA-Z.
* The buffer is equivalent to a clipboard in word processors.
18
ll acls as a temporary slorage area.
Chapter 4 - Basic Editing
Overwrite
The Overwrite function is used to replace a displayed area with the
wavefonn in the buffer. Click a cursor point on the graph to indicate
where you want the buffer to begin replacing. If you indicate a range.
overwrite will begin at the start mark. The overwrite will continue until
the end of the buffer or waveform is reached. Keyboard shoncut: RA-0.
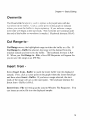
Cut Range to Cut Range moves the highlighted range to either the buffer or a file. If
Cut Range to -Buffer is selected, the range will be deleted from the
original sample and moved to the buffer. The keyboard shortcut is RAX. When you Cut Range to - File, a Save IFF Requester will appear for
you to save the range as an IFF File.
Insert from Select Insert from - Buffer to insert the entire buffer into the displayed
sample. First, click a cursor point on the graph where the insert should go
and then select Insert- Buffer. If you have a range selected, the start
mark of the range will act as the insert point The keyboard shortcut for
Insert from- Buffer is RA-1.
Insert from · File will bring up the Load to Window File Requester. You
can insert an entire file into the displayed sample.
19
Audition 4 User's Guide
Add Workspace
n
Add Workspace allows you to insert a period of silence at a cursor point
Or, if a range is marked, a Workspace will be added at the start mark of
the range. You can choose between 1, 5, or 10 second Workspaces. The:
are often useful when creating manual effects.
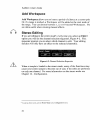
Stereo Editing
If you are editing in the stereo mode*, every time you select an Edit 1
option you will see the channel selection requester, Figure 4-2. This
requester prompts you to select which channel to edit. Your editing
function will only have an effect on the selected channel(s).
Figure 4-2. Channel Selection Requester
When a sample is loaded in the stereo mode, many of the functions may
cause your stereo sample to become out of sync if the edits are performed
on only one channel. For more information on the stereo mode see
Chapter 12- Configuration.
*To edit in stereo mode, activate Stereo Mode in the Configuration menu.
20
Chapter 5- Edit 2, Advanced Editing
When the first 8 options in the Edit 2 menu (Figure 5-l) are selected,
custom "control panels" appear below the 12 basic buttons. These control
panels will increase your editing capabilities beyond simple menu edits.
The control panels are generally made up of slider gadgets and buttons.
The combination of which will enable you to achieve a variety of effects.
Figure 5-1. Edit 2 Menu Options
Many of the Edit 2 options offer a Try Button. This one button makes
fine tuning incredibly easy. By clicking on the Try Button, you will
preview the selected effect. You can try out a new effect without altering
your original sample. While you are listening to the temporary effects,
adjust the parameters in the sliders and hear the results instantaneously.
While using the try option you may find it convenient to turn Loop On
and adjust the variable sliders while the sample plays continuously.
21
Audition 4 User's Guide
Mix
The combination of two samples overlaid on one another is referred to as
mixing. A mix effect is common among most digital editors. But, with
Audition 4's unique "try mode" and "mix box", mixing becomes quick and
powerful.
A mix is performed between two samples: the displayed sample and the
sample in the copy buffer. To combine three samples, first mix two
samples and then add in the third.
Before mixing make sure that the two samples have the same sampling
rates. Different sampling rates combined in a mix can cause unexpected
results. To adjust sampling rates, see Tune Waveform, page 38.
There are two ways to perform a mix:
1. In the Try mode: Click the Mix Range button.
The mix volumes remain constant based on the sliders and mix
knob positions.
2. In the Manual mode: Click the mix knob* in the mix box.
The mix volumes can be altered in realtime as the samples are
playing by moving the mix knob.
Use the mix control panel, Figure 5-2, to accomplish either of these
mixes. The mix control panel includes 4 buttons.
Figure 5-2. Mix Control Panel
• Mix Knob· the litlle circle in tl1e Mix Box.
22
Chapter 5 - Edit 2, Advanced Editing
Try Mix
This button is different from most Try buttons because it toggles between
two modes: Manual and Try. When Try is selected you can hear the mix
which is selected by the slider gadgets or by clicking on the mix knob. It
is called try because you are not altering your original samples. While
listening to the temporary mix, you can adjust the parameters in the mix
box or the sliders and hear the results instantaneously. If the Loop
On/Off button is set to Loop On the sample will play repeatedly while
you adjust the mix volumes.
Manual Mix
When the Manual Mix is selected, you actually perform a mix on your
sample every time you click the mix knob. It is different from Mix Range
because the mix volumes can be altered as the samples are playing. But
keep in mind that the samples are altered as soon as you click the mix
knob. This is not a try function.
Mix Range
After you have fine tuned the desired mix with Try Mix, Mix Range will
execute the mix that is represented in the slider gadgets and the mix box.
You may want to back up your original samples before you Mix the
Range. After you Mix Range, your samples are permanently combined.
To mix a stereo sample, click Mix Range twice: once while the channel
button is on left, and again while it is on the right. Keep all the
parameters the same for an identical mix on both channels.
Right I Left Channel
Mix is executed one channel at a time. The left I right button is provided
to switch you between channels. Click the button to toggle between the
two channels.
23
Audition 4 User's Guide
n
NOTE: Although you may have a stereo sample loaded, when you click
the mix knob, you will only hear the channel that is selected on the left I
right button. The audio will be playing from both outputs, but remember
you are hearing the mix from only one channel.
Exit Mix
Click this button to remove the mix control panel. The control panel win
also be removed if you select another Edit 2 option that requires a specific
control panel. Only one control panel can be displayed at once.
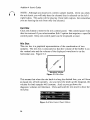
Mix Box
The mix box is a graphical representation of the combination of two
samples. The mix box is structured so that the volume of the buffer is on
the vertical axis and the volume of the displayed waveform is on the
horizontal axis. Figure 5-3 .
.,
E
~+.·
:I
0
>
.,
~
=
r:o
:I
~~ ~
•
.e~-
0
Wavefonn Volume
Figure 5-3. Mix Box
This means that when the mix knob is along the dashed line, you will hear
an equal mix of both samples. As you move the knob up the diagonal, the
volume for both samples will increase. And, as you go down the
diagonal, volumes will decrease. Click and hold the mix knob to hear the
mix play.
Figure 5-4. Mix Control Panel Sliders
24
Chapter 5 - Edit 2, Advanced Editing
Wave and Buffer Volume
There are two slider gadgets in the Mix Control Panel - wave volume and
buffer volume. (Figure 5-4) These sliders will increase or decrease the
volume of your samples before mixing. The number chosen is a
percentage of the original volume of the sample. You can boost volume
by setting the slider controls to a number greater than l 00%. In the
Manual Mix mode, as you move the mix knob in the mix box, the sliders
will update to the current setting. The sliders and the mix box set the
same parameters, only the graphical representation is different.
Voice Over- A Mix Tutorial
Mix is often used to add a voice sample over a music sample. A short
tutorial on a music and voice mix follows.
1. Load the "MusicMix" sample to the buffer, and "VoiceOver" to
the window. Both samples are in the Tutorial directory on the
Sample Disk.
2. Select Edit 2 • Mix.
3. Select the Try Mix button. (Try/Manual Mix is a toggle button,
click the button until it reads Try Mix.)
4. A mix will occur between an entire buffer and a range of the
sample displayed in the window. To range the entire voice
sample, click Range All after loading. •
5. Click and hold the mix knob. Listen to the mix that is described
in the volume sliders.
6. Move the mix knob so that the Wave form Volume is about 100%,
and the Buffer Volume is about 25%. This will result in the voice
sample playing at full volume while the music sample plays
softly in the background.
• ;1.1ixing will occur until Ctlhcr the buffer or the displayed wavefom1 ends.
25
Audition 4 User's Guide
Echo
When you select the Edit 2 • Echo function, the echo control panel will
appear below your 12 basic buttons. The six echo buttons on the right are
as follows: See Figure 5-5.
Figure 5-5. Echo Control Panel Buttons
Echo I Delay
Click this toggle button to switch between echo and delay. In echo you
will hear many repeats after the original sound is played. With a delay,
there is only one repeat
Try Echo
This is the button that revolutionizes echoes. Click on this button and you
will hear the echo that has been selected in the slider gadgets. It is called
Try, because you are not altering your original sample. You are just
trying an echo out. While you listen to the temporary echo, you can
adjust the parameters in the sliders and hear the results instantaneously.
By selecting Loop On, your sample will repeat as you alter the delay and
the volumes.
Echo Range
After you have fine tuned the desired echo with Try Echo, Echo Range
will execute the final echo. You may want to back up your original
sample before you Echo the Range. After you Echo Range, your sample
will have a permanent echo. To create identical echoes on a stereo
sample, click Echo Range twice: once while the channel button is on left.
25
Chapter 5 - Edit 2, Advanced Editing
and again while it is on the right. Keep all the parameters the same for
identical echoes.
Right I Left Channel
Echo is executed on one channel at a time. The left I ri!!ht button is
provided to switch you between channels. Click the button to toggle
between the two channels.
~
NOTE: Although you may have a stereo sample loaded, when you click
the try button, you will only hear the channel that is selected. The channel
will be playing from both outputs so remember that you are hearing the
echo off only one channel.
Realtime Echo
For this option to run, you must have your sampler plugged into the
parallel p01t. For more information on real time effects see Chapter 6 Realtime Effects.
Exit Echo
Click this button to remove the echo control panel. The echo control
panel will also be removed if you select another Edit 2 option that requires
a specific control panel. Only one control panel can be displayed at once.
Echo Parameters
An echo has three parameters: Echo Delay, Echo Volume and Main
Volume. They are all represented in the control panel by slider gadgets.
Figure 5-6.
I
'I
l
I
27
Audition 4 User's Guide
Figure 5·6. Echo Control Panel Sliders
Echo Delay
Echo delay refers to the amount of time that passes between repeats of the
sound. Keep in mind that short samples will require small delays. A
sample that is 1 second long will probably require an echo less than .250
seconds. You will notice that small echoes, less than .1 second will
introduce a metallic sound, like speaking into a tin can. Larger delays like
.5 to 1.0 seconds can produce effects like an echo canyon. The maximum
delay that Audition will allow is 2 seconds.
Echo Volume
This will set the volume of the successive echoes. If set at 50%, each
successive repeat will have 50% of the volume of the previous portion.
lf the Echo Volume is less than 100%, each successive repeat will be a
fraction of the previous portion. The following diagram, Figure 5-7, is an
example of an echo that has a echo volume of 50%. The original wave
(highlighted) is at full volume. The second wave is reduced 50%, the
third wave is reduced 25% etc.
Figure 5-7. Echo Volume: 50%
Chapter 5 - Edit 2, Advanced Editing
Main Volume
Main Volume will increase or decrease the volume of the original sample
before executing the echo. The number chosen is a percentage of the
volume of the original sample. You can boost the volume of the original
sample by setting the main volume greater than 100%.
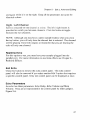
Fade
The ability to have a sample fade in from silence or fade out is available
in the Edit 2 - Fade option. When the fade option is selected the fade
control panel will appear below your basic buttons. The six buttons on the
right are as follows: See Figure 5-8.
· Ead!lllallt
r "
,
•G
G
("~"'"'
~
,,. ~·
. ~a.i;Butter
Trg Pa~
left Ch~l
Exit r~
Figure S-8. Fade Control Panel Buttons
Fade Wave, Range and Buffer
All three buttons function the same except they create fades on different
parts of a sample. After you have fine tuned the desired fade with Try
Fade, Fade Wave will execute the fade described by the slider gadgets.
You may want to back up your original sample before you fade the wave.
After you Fade Wave, your sample will have a permanent fade. To create
identical fades on a stereo sample, click Fade Wave twice: once while the
channel button is on left, and again while it is on the right. Keep both
slider parameters the same for identical fades.
29
Audrtion 4 User's Guide
Try Fade
Click this button to hear the fade that is selected by the slider gadgets. It
is called Try, because it will not alter your original sample. You can just
try it out. While you are listening to the temporary fade, you can adjust
the parameters in the sliders and hear the results instantaneously. Click the
Loop On button to have the sample play continuously while you are
adjusting parameters.
Right I Left Channel
Fade is executed on one channel at a time. The left I right button is
provided to switch you between the channels. Click the button to toggle
between the two channels.
NOTE: Although you may have a stereo sample loaded, when you click
the try button, you only hear the channel that is selected. The channel will
play from both outputs, so remember you are hearing the fade on only one
channeL
Exit Fade
Click this button to remove the Fade control paneL It will also be
removed if you select another Edit 2 option that requires a specific conn·ol
paneL Only one control panel can be displayed at once.
Fade Parameters
A fade has two parameters: Start Volume and End Volume. They are
both represented in the control panel by slider gadgets. Figure 5-9.
Figure 5·9. Fade Control Panel Sliders
30
Chapter 5 - Edit 2, Advanced Editing
Start and End Volume
These volumes are a percentage of the original samples volume. They
vary between 0 and 128%. If the Start Volume is less than the End
Volume. the sample will fade in. If the Start Volume is greater than the
End Volume. the sample will fade out. Setting the Volumes to the same
number will cause the sample to be scaled. If both volumes are set tO
125% the sample will be boosted by twenty-five percent. A sample can
be scaled down by setting the volumes to a number less than 100%.
Stereo Pan - A Fade Tutorial
A popular use for fading is to create a panning effect with a sample. A
pan is the effect heard when a sound is first heard from one channel and
then switches to another channeL This is accomplished by creating a
decreasing fade on one channel and an increasing fade on the other.
In the following tutorial you create the effect of a car starting on the left
side of you and driving right past you and down the road. Even though
the original sample is mono, you can create stereo effects by using the
stereo mode.
1.
2.
3.
4.
5.
6.
7.
8.
9.
10.
11.
Load "CarStart". It is in the Tutorial directory on the Sample
Disk.
Activate the Stereo Mode in the Configuration menu.
Select Edit 2 - Fade.
Select the Left Channel button.
Put the start volume on 125%.
Put the end volume on 25%.
Click Fade Wave.
Select the Right Channel button.
Put the start volume on 50%.
Put the end volume on 120%.
Click the Fade Wave
31
Audition 4 User's Guide
12.
13.
Click Play waveform to hear the car start and drive by. For best
results use stereo headphones.
To reverse the path of the car, have it drive from right to left:
click Range All, and then select Swap Channels from the Edit 2
Menu.
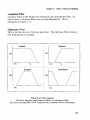
Flange
A flange is similar to a delay. The difference between a delay and a
flange is that a flange varies the delay time while the sound is playing.
Delay time is always getting shorter or longer. The result of a varying
delay time, is pitch shifting. Pitch shifting is useful for doubling effects.*
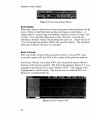
When you open the flanger control panel you will notice six buttons and
two sliders. See Figure 5-10.
Figure S-10. Flange Control Panel
Flange Wave I Flange Range
After you have achieved the desired flange effect with Try Flange, the
Flange Wave button will execute the flange described in the sliders. You
may want to backup your original sample because this function
permanently alters the sample in memory. To create identical flanging on
a stereo sample, click Flange Wave twice: once while the channel button
is on left and again while it is on right. Keep the parameters the same for
identical flanging. If you click the Flange Wave button, the flange effect
.
.
Doubling - The effect achieved when a sampk fs. played twice in rapid success ton.
32
Chapter 5 - Edit 2, Advanced Editing
will be added to the entire sample. but if you click the Flange Range
button the flange effect will only occur on the marked portion of the
wave.
Try Flange
Click on this button to hear what the flange will sound like before altering
the original sample. It does not alter the original sample. You are just
previewing it. To alter the flange, make adjustments to the sliders and
click the Try Flange button to hear the new flange.
Realtime Flange
This button allows you to peiform flange effects in realtime. For this
option you must have a sampler plugged into the parallel port. For more
information on realtime effects consult Chapter 6 - Realtime Effects.
Left Channel/ Right Channel
Because the Flanger is executed on one channel at a time, the left/ right
button is provided to switch between channels. Click the button to toggle
between the two channels.
Exit Flange
Click this burton to remove the flange control paneL The flange control
panel will also be removed if you select another Edit 2 option that requires
a control panel. Only one control panel can be displayed at once.
Flange Length
This button controls the period of a flange effect. Period refers to the
amount of time it takes to complete one cycle of the effect. Using a small
value for this parameter produces a short wavering effect, while larger
values produce a slow cycling effect. Dedicated t1anger devices
sometimes refer to this parameter as 'Speed'.
33
Audition 4 User's Guide
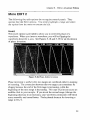
Flange Depth
This parameter controls the time difference between the shortest and the
longest delay times. A small value will cause the difference to be small,
making a chorusing or phasing sound. A large value will cause this
difference to be large, producing an effect with extensive pitch shifting.
Dedicated flanger devices refer to this parameter as 'Depth'.
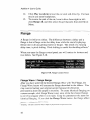
While experimenting with flanges, you may want to try the following
flange values (Figure 5-11) on the "Moderator" sample, located on the
Sample Disk.
Description Modulation
Pilch Shift
Phasing
(Flange)
Wacky
(Chorus)
Doubling
Flange Length
0.212
0.044
1.000
1.000
0.283
Flange Depth
10134
10134
126
1034
2703
Figure 5-11. Suggested Flange Settings for "Moderator"
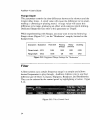
Filter
A filter screens out a certain frequency range in a sample and allows
desired frequencies to play through. Audition 4 allows you to use four
different type of filters: Lowpass, Highpass, Bandpass, and Bandbarrier.
They can be selected in the control panel by highlighting a button. Figure
5-12.
Figure S-12. Filter Control Panel
34
Chapter 5 - Edit 2, Advanced Editing
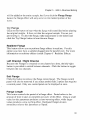
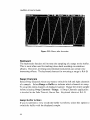
Lowpass Filter
Lowpass refers to the frequencies allowed to pass through the filter. In
other words, a Lowpass filter removes high frequencies. This is
illustrated in figure 5-13.
Highpass Filter
This is just the reverse of the low pass filter. The high pass filter removes
low frequencies in a sample.
Lowpass
Highpass
dBs
dBs
KHz
KHz
Bandpass
dBs
Band Barrier
dBs
KHz
KHz
Figure 5-13. Filter Diagrams
The above diagrams graph Frequency (KHz) vs. Attenuation (dBs).
Fo refers to the adjustable cutoff frequency that is selected with the slider gadget.
35
Audition 4 User's Guide
Band Pass Filter
Band Pass refers to a filter that removes the frequencies above and below
the designated frequency range. In other words, it allows a band of
frequencies to pass through the filter.
Band Barrier Filter
Band Barrier is the inverse of Band Pass. With Band Barrier, you can
select a frequency range to be removed from a sample. That is,
Bandbarrier will allow frequencies above and below a band to be passed.
Filter Frequency
The frequency gadget is the adjustable parameter in the filter control
panel. (Figure 5-14.) It controls the cutoff frequency. Click the knob anc
slide it to the desired frequency. Notice that the maximum cutoff
frequency changes from sample to sample. The maximum filter
frequency is always equal to half of the sampling frequency. So if you
sampled at IO,OOOHz, your maximum cutoff is 5,000Hz. Audition 4
automatically calculates the maximum filter frequency for each sample.
Figure 5-14. Filter Frequency
The remaining control panel buttons (figure 5-15) work similarly to their
echo and fade counterparts.
Figure 5-15. Filter Control Buttons
36
Chapter 5 - Edit 2, Advanced Editing
Try Filter
Click on this button to hear the filter with the selected parameters. Your
original sample is not being altered. While you are listening to the
temporary filter, you can adjust the filter frequency on the slider and hear
the results instantaneously. The new filter ta.\ces effect when you release
the frequency knob. Click the Loop On button to have the sample play
continuously while you adjust the tilter frequency.
Filter Wave and Range
After you have fine tuned the desired filter frequency with the Try button,
Filter Wave performs the filter on your sample. You may want to back up
your original sample before you Filter the Wave or Range. After filtering,
your sample will be permanently altered. To execute identical filters on a
stereo sample, click Filter Wave twice: once while the channel button is
on left, and again while it is on the right. Keep all the parameters the
same for identical frequency cutoffs.
Right I Left Channel
Filter is executed on one channel at a time. The left I right button is
provided to switch you between channels. Click the button to toggle
between the two channels.
Although you may have a stereo sample loaded, when you click the try
button, you will only hear the channel that is selected. The sample will be
playing from both outputs so remember you are hearing the output from
only one channel.
Realtime Filter
For this option to run you must have your sampler plugged into the
parallel port. For more information on real time effects see Chapter 6 Realtime Effects.
37
Audition 4 User's Guide
Exit Filter
Click this button to remove the filter control paneL The filter control
panel will also be removed if you select another Edit 2 option that requires
a specific control panel. Only one control panel can be displayed at once.
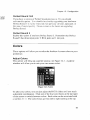
Sampler
Due to the complexity of this feature, an entire chapter has been dedicated
to sampling. Please see Chapter 9 - Sampling Details
Sequencer
Due to the complexity of this feature, an entire chapter has been dedicated
to sequencing. Please see Chapter 8 -Sequencing
Tune Waveform
With Tune Waveform you can adjust the playback speed and the
"recorded'' sampling rate of a sample. By adjusting the playback speed
you can slow a sample down or speed it up (The Chip & Dale Effect).
Altering the "recorded" sampling rate after your sample has been recorded
is also possible. However, it is best to use the conect rate when recording
the sound, if possible. Sampling Rate adjustments are generally required
when creating IFF Instruments.
When you select Edit 2- Tune Waveform, the tune control pane~ (Figure
5-16) will appear below your 12 basic buttons. These gadgets allow you
to alter the pitch or the sampling rate of a sample.
38
Chapter 5 - Edit 2, Advanced Editing
Figure 5-16. Tune Waveform Control Panel
Resample
With this button, you change the sampling rate of a sound file. Resample
can be used to conserve memory. If you have a sound file that is too large
for your application and you can't trim the length of it, try resampling at a
lower sampling rate. This will cause the sample to use less memory,
however it will reduce the playback fidelity. You should never resample
to a higher sampling rate. Resampling to a higher sampling rate uses
more memory to reproduce equivalent audio quality. It does not improve
the sound quality.
Set Res. Rate/ Set Play Rate
This button toggles between Set Resampling Rate and Set Playback Rate.
You should be familiar with the differences between the two rates.
Playback Rate detennines the frequency or pitch of a sample. If you
increase the playback rate, the pitch of the sample will go up. Conversely,
if you lower the playback rate, the pitch will go down. The playback rate
is adjusted by selecting the octave, note, or fine tuning sliders.
Sampling Rate refers to the "recorded" sampling rate. That is the rate at
which the sample was recorded. In Audition 4 this parameter is set in the
sampler control panel. Once the sample has been recorded, the original
sampling rate is automatically used as the playback rate. All IFF files
automatically playback the sound at the same rate they were saved with.
The playback rate is the same as the sampling rate unless the playback rate
is adjusted. After you resample, the IFF file will playback at the new
sampling rate.
39
Audition 4 User's Guide
In summary, when you adjust the Playback Rate you alter the speed at
which a sample plays. When you adjust the Resampling Rate you changt
the rate at which the sound was sampled. (If the new sampling rate is
lower than the original rate, the file becomes smaller.) When you
resample, your playback speed will automatically change to match the
new sampling rate.
The period listed next to the sampling and playback rate is provided for·
programmers.
Tuning Tone
By activating the tuning tone button, you can cause Audition 4 to emit a
continuous tone at a desired note. The Tuning tone slider will select
which note will be played when the tuning tone button is activated. This
tone is used as a reference when you are creating instruments. Tum off th
tuning tone by clicking the Tuning Tone button.
Tune Parameters
The following three sliders (Figure 5-17) will allow you to adjust the
sampling and playback rates, depending on which mode is selected.
Figure S-17. Octave. Note, Fine Tuning Sliders
Octave
The octave slider is a rough adjustment for pitch. This slider either
doubles or halves the playback rate of the sample. Doubling the playbacl
rate increases the pitch of a sample by one octave; halving decreases the
pitch by an octave.
40
Chapter 5- Edit 2, Advanced Editing
Note
The Note slider raises and lowers a sample's pitch by notes. It is an
intermediate adjustment of pitch. The note slider is directly above the fine
tuning slider. Keep in mind that the displayed note does not always
coiTespond to the sample's pitch. The note 'A•ill onlv match the pitch if the
sample was recorded ar middle C and at a sampling rate of 8363Hz.*
Fine Tuning
The Fine Tuning slider gives you precise control over the frequency of a
sound. Combine this slider with the Tuning Tone gadgets to tune your
instruments.
left and Right Volume
These sliders set your output volume. They are not intrinsically related to
tuning. If you want to adjust the audio level on one of your channels at
any time within Audition 4, you can adjust these sliders in the Tune
Waveform Control Panel.
Exit Tuner
Click this button to remove the tune waveform control panel. The control
panel will also be removed if you select another Edit 2 option that requires
a specific control panel. Only one control panel can be displayed at once.
IFF Instruments -A Tune Waveform Tutorial
Tune Waveform is of paramount importance when creating IFF
Instrument files. All IFF instruments for the Arniga must play back at a
sampling rate of 8363Hz** and be tuned to the musical note 'C'. Under the
*If the sampling rate was 16,726Hz, the displayed note will be off by one octave.
•• The standard frequency for IFF instruments files is 8,363Hz, although some music programs will allow you to
usc samples that are sampled at J6.726Hz. When possible, you should use 16,726 Hz because it produces
higher quality samples.
41
.
'
I
Audition 4 User's Guide
most ideal circumstances, you should tune your instmment to middle C
and sample the sound at 8363Hz. Because this is not always possible,
you can adjust a prerecorded sample to 8363Hz and middle C by using thf
tune waveform control panel.
The following tutorial will take you through a step by step conversion of;;
sound to be converted to an IFF Instrument.
1.
2.
3.
4.
5.
6.
7.
8.
9.
-10.
i 1.
42
Load "TuneMe". Located in the Tutorial directory of the Sam ph
Disk.
Select Edit 2 • Tune Waveform.
Click the Set Res. Rate button until "Playback Rate" appears
above the Note slider.
Highlight the Tuning Tone button by clicking it.
Set Tuning Tone Note to middle 'C'. The slider knob should be
in the middle of the slider for middle C.
Activate Loop On and click Play Waveform to play the sample
continuously.
You are now hearing your sample and a continuous middle C
tone. Adjust the Octave, Note, and Fine Tuning sliders to
change the pitch of the sample so it is in tune with the Tuning
Tone. You must do this by ear. If your ear boarders on the side
of tone deafness, here's a hint -- try about 12,17 5Hz.
Select the Set Play Rate button until it says "Resample Rate"
above the Note slider.
Adjust the Octave, Note, and Fine Tuning sliders so the
resampling rate is set to 8,363Hz.
Select the Resample gadget to change the sampling rate and
tuning of the instrument sample.
Select Save Instrument - IFF 1 Octave from the Project
menu to store the instmment as an IFF Instrument file.
Chapter 5 - Edit 2, Advanced Editing
More EDIT 2
The following four edit options do not require control panels. They
operate like the Editl options. You simply highlight a range and select
the option from the menu to execute t..'le edit.
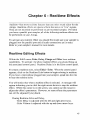
Invert
The invert option is provided to allow you to invert the phase of a
waveform. When you invert a waveform, you will be flipping the
waveform about the x-axis. See Figures 5-18 and 5-19 for an illustration
of phase inversion.
funnnvsin~
:
-
P'os:
UBI Display:
8.316 ·Range:
9.888
Figure 5-18. Phase, before Inversion
Phase inversion is useful when two ranges are combined either in looping
or inserting. The connection between the two ranges can sometimes be
choppy because the end of the first range is increasing, while the
beginning of the next range is decreasing. This type of joint can cause an
audible click in your sample. If you invert the second range (change the
beginning decrease to an increase), your waveform connection will blend
more smoothly and sound better. The keyboard shortcut for inverting a
range in RA-V.
43
Audition 4 User's Guide
Figure 5·19. Phase, after Inversion
Backward
The backwards function will reverse the sampling of a range or the buffer.
This is most often used for tracking down back masking on notorious
albums. However, reversing conventional instruments can create very
interesting effects. The keyboard shortcut for reversing a range is RA-B.
Swap Channels
Select Swap Channels when you want to switch the left and right channels
of a sample. Select Range or Buffer to indicate which channels to swap.
To swap the entire channels of displayed sample. Range the entire sample
before selecting Swap Channels - Range. A Swap Channels application
is detailed in the Fade Tutorial, Stereo Pan. Keyboard shortcut: RA-N.
Swap Buffer & Main
If you would like to view or edit the buffer waveform, select this option to
switch the buffer with the displayed sample.
44
Chapter 6 - Realtime Effects
Audition 4 has more realtime features than any other sound editor for the
Amiga. Realtime effects are special effects that occur on "live" signals.
They are not recorded or performed on pre-recorded samples. Provided
you have a parallel port sampler, all of the following realtime effects can
be performed on your Amiga.
To activate any realtime effect you should first make sure your sampler is
plugged into the parallel port and all audio connections are in order.
Refer to your sampler's manual for more details.
Realtime Editing Effects
Within the Edit2 menu; Echo, Delay, Flange and Filter have realtime
capabilities. To activate the above realtime effects you should bring up
the associated control panel. Realtime Delay is in the Echo control panel.
To create a realtime echo, select Edit2 - Echo. When the control panel
appears, click on the Realtime Echo button to begin echoing in realtime.
If you have a microphone plugged into your sampler, speak into the mic
to hear the realtime echo.
You will notice that when a realtime effect is selected. A message will
appear informing you to click the right mouse button to stop the realtime
effect. While this notice is on the screen, you cannot use the mouse to
adjust the effect's parameters. However, on some effects the parameters
can still be adjusted by keyboard.
During Realtime Echo and Delay,
· Echo Delay is adjusted with the left and right arrow keys.
·Echo Volume is adjusted with the up and down arrow keys.
45
Aud~ion
4 User's Guide
During Realtime Filter
· Frequency is adjusted with the left and right arrow keys.
· Filter Type is selected by typing the corresponding number
on the key pad.
1- Lowpass
2- Highpass
3- Bandpass
4 - Bandbarrier
To cancel any realtime effect click the right mouse button.
Realtime Mix
Within the sampler control panel, you can record directly into a
prerecorded sample. After you adjust the volumes of both samples, you
can begin mixing into the original sample in realtime. For more
information see Chapter 9 - Sampling Details.
Realtime Meters
The Oscilloscope and VU Meters can be viewed by enabling them in the
configuration menu.
To activate the Oscilloscope:
1. Check to see if the Oscilloscope is already activated. (Is there a
check mark to the left of the word oscilloscope in the
Configuration menu?)
2. If not, activate the scope by selecting the Oscilloscope option.
3. As audio is input into the sampler, your oscilloscope will
measure the amplitude of the sound in realtime, as well as
measure prerecorded samples as they play back.
46
Chapter 6 - Realtime Effects
The VU Meter operates in the same fashion; however, it displays the
average amplitude of the sound. For more on Meters see Chapter 12 Configuration.
47
Chapter 7 - Special Editing
Smooth
The smoothing function is a type of low pass filter with the cutoff
frequency automatically set to a function of the sampling rate. Smoothing
is a quick process that will remove unwanted high frequencies. For more
precise filtering, bring up the filter control panel by selecting the Edit2 ·
Filter option.
Maximize
Maximize scans the selected range, determines the highest amplitude,
then scales the range to the maximum volume allowed for on the Amiga.
This is useful for boosting the playback level of a sample if your gain was
not set properly when it was sampled. If it is possible, you should sample
the sound again with a higher gain setting.
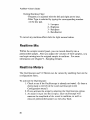
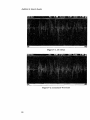
Centralize
Centralize scans the selected range, determines the DC offset, and then
corrects for it. Ideally your waveform should be centered at 0 on the yaxis. If you find your sample centered above or below that line, you
should select the centralize option to center the waveform, removing the
DC offset. It is especially important to remove the DC offset when you
intend to mix many samples. See Figures 7-1 and 7-2 for an illustration
of a sample before and after centralizing.
49
Audition 4 User's Guide
Figure 7-l. DC Offset
Figure 7-2. Centralized Waveform
50
Chapter 7 - Special Editing
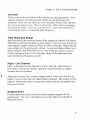
Lift Treble
Lift treble, perfonns a high-pass filter operation on your ranged data, then
adds the result to your range. The effect on ;:our sample will be similar to
the effect created by- increasing the treble on vour stereo.
~
.
Lift Bass
This function operates similar to the Lift Treble function; however, the
Lift Bass operation adds the result of a low-pass filter, rather than a highpass filter.
51
Chapter 8- Sequenced Sounds
The sequencer ponion of Audition 4 allows you to create multiple loop
points within a sample. This gives you the ability to create entire songs
even when lack of memory would normally prevent it This is
accomplished by looping through repeated sections. For example, if you
wanted to digitize a song that consisted of two verses and a single chorus
repeated three times, you could save the chorus once and play it back after
every verse. You would not waste memory by digitizing the same chorus
three times.
j
I
When you select the Edit 2 · Sequence menu option, the sequencer
control panel will appear below the 12 basic buttons. Figure 8-L
.
'-'
I
I
I
l
"
Figure 8-1. Sequencer Control Panel
I
I
i
Play Sequence
This button plays the entire sequence from the beginning. It will include
all loops that have been added to the original sample. The sequence can
be automatically repeated by clicking the Loop On button.
Play Loop
This button plays the cmTent loop that is selected in the Sequence# slider.
If you want to hear the loop played repeatedly, then activate the Loop On
button. Within the sequencer control panel loops are like ranges ~ they
both define a region of a sample, You will use ranges to define new
loops.
53
I
l
i
Audition 4 User's Guide
Show Loop
This button works much the same as the Show Range button except it
zooms in on a loop.
Prev I Next
These two buttons allow you to switch from loop to loop. When you clic
the Next button, the displayed loop on the screen will be incremented anc
you will see the next loop in the sequence. The reverse happens when yo
click Prev (Previous). Notice that if you have duplicate loops in a row th
display will not change.
Add
The Add button adds a new loop~ the current loop. The marked rang
in the display is the loop that will be added.
To add a loop:
L Select a range.
2. Click Play Range to preview the range before making it a
sequenced loop.
3. Fine tune the end points of the range. The zoom buttons are
useful here.
4. Click the Add button to tum the range into a loop.
Delete
The Del button deletes the current loop.
Duplicate
The Duplicate button duplicates the current loop. This is useful when y(
want to repeat the same loop several times.
54
Chapter 8 - Sequenced Sounds
Mark Start
This button changes the starting loop point of the current loop to match
the beginning of the marked range. This button is useful when you want
to change the starting point of an existing loop. without altering the end
point. Simply select the new beginning point for the loop by selecting a
range and then click the !\lark Start button.
Mark End
This button changes the end loop point of the current loop to match the
end of the selected range. This button is most useful when you want to
change the ending point of an existing loop, without altering the starting
point. Select the new ending point of the loop by selecting a range and
then click the Mark End button.
Zero
These buttons seek zero crossings. A zero crossing is a point in the
sample where the waveform has a value of zero. The Zero buttons are
used to help find the best loop points. Good loop points occur when the
beginning and the end of the loop are the same value. If the beginning
and ending points of a loop are not the same value, you will hear a click as
the loop repeats itself. The easiest way to assure that the beginning and
ending values are the same is to set them both to zero. Use the Zero
buttons to do this. Click either side of the zero buttons to advance to the
next zero crossing. The top zero button controls the start mark, while the
bottom zero button controls the end mark.
Exit Sequencer
Click this button to remove the Sequence control paneL It will also be
removed it you select another Edit 2 option that requires a specific control
paneL Only one control panel is displayed at once.
55
Audition 4 User's Guide
Sequence#
This slider allows you to quickly choose which loop you want displayed.
Used in combination with the Prev/Next buttons, you can switch betwee
different loops easily.
Sequencing Tutorial
The following tutorial illustrates a technique to create a sample that
consists of sequenced loops. The following routine will create a stutterir
effect if applied to a voice sample.
1.
2.
3.
4.
5.
6.
7.
8.
9.
10.
11.
12.
13.
1"+.
"
Load "VoiceOver", located in the Tutorial directory on the
Sample Disk.
Select the Edit 2-Sequencer menu option.
Select a small range at the beginning of the sample. (Less than
1/4 of the entire sample.)
Click the Add button.
Click the Duplicate button three times.
Select another range. (From the beginning of the sample to the
middle.)
Click the Mark End button.
Click the Duplicate button.
Select a small range in the middle of the sample. (Less than 1/4
of the entire sample.)
Click the Mark Start button.
Click the Duplicate button.
Click the Range All button.
Click the Mark End button.
Click the Play Sequence button.
For a demonstration of a music sequence, load "DemoSequence" from tl
Sample Disk and click Play Sequence.
56
Chapter 9 - Sampling Details
Audition 4 can be used as a stand alone program to edit sounds obtained
from sound librmies. Hov.:ever, you will probably want to sample your
own voice and create your own samples. To do that you must have a
sound sampler. To create the best quality samples, you will have to take
into consideration a variety of parameters. These include the type of
sampler, gain level, number of channels, and the sampling rate.
Choosing a Sampler
The most important component in digitizing sound is the sampler. A
sound sampler is a piece of hardware that plugs into the parallel port and
digitizes sound. For the highest possible quality you will want a sampler
that creates consistently clean samples. That is, samples without noise or
distortion. Noisy samplers should be avoided along with samplers that do
not provide a method for adjusting input gain (volume control).
Some recommended sampler features:
·Adjustable gain (software or knob)
·Mic jack (preamp is a plus)
·Noise-free samples
·Sampling rates variable between 5-28KHz (at least)
·Stereo Channels
Most likely you already have a sound sampler and are ready to go.
However, if you find your sampler inadequate or if you do not have a
sampler, keep in mind that Audition 4 was specifically designed for
Perfect Sound 3. The combination of the two packages is proven to
produce high quality samples.
57
Audition 4 User's Guide
Sampling
When you select Sampler from the Edit 2 menu, the following Sampler
Control Panel will appear at the bottom of your screen. See Figure 9-1.
ixVnl: 18811
f.L+RR
tlonitDr Sanple; 199!!. Sta~tVol :IJlB l::Rate: 11897 = 164 Sec
i.i+RR 'lltRR ~~
Rdjus.t: · 8~ ·
llooo
, :Record Disk £xit Sai!Pier
Figure 9-1. Sampler Control Panel
Mix Volume%
The Mix Option, to the left in the Control Panel (Figure9-2) is provided
give you more control when sampling directly into another sample. For
example, you may want to record voice directly over a sample of music
that has already been sampled. An alternate to using the Mix Volume%
feature is to record two separate samples and combine them in the Edit 2
Mix option. The Edit 2 - Mix option has added functions such as the T;
Mix button.
To do a realtime mix with a previously recorded sample:
1.
2.
3.
4.
5.
6.
7.
8.
9.
10.
58
Load the original sample to the window.
Save the original sample as backup before mixing in the live
sample.
Select a range from the original sample to be sampled over. To
range the entire sample, click Range AIL
Drag the Mix Volume slider to a number between 0-128%.
Drag the Sample Volume slider to a number between 0-128%.
With both volumes at 100% the new sample mixes evenly with
the original range. You will be able to hear both of them equall:
Test your gain in the monitor mode, see page 59.
Click Lor R under Mix Volume% to start the recording proces:
Click the left mouse button to start recording.
Click the right mouse button to stop.
Click Play Waveform to hear the two samples.
Chapter 9- Sampling Details
Mix R, R+L, L
The R, R+L, and the L button under "Mix Volume%" allows you to
choose which channel of your digitizer you want to mix with the existing
sample. Clicking the a channel button under Mix triggers the sampling to
!;>e mixed into the current sampie.
Monitor
The monitor function is used to check your audio levels before sampling
or mixing. When you monitor your audio signal, you are checking gain
levels and your sampling rate. For more on Sampling Rates see pages 6264. When setting your gain you should tum on the Oscilloscope and
Level Displays. They are both located in the Configuration menu. If
your sample looks like Figure 9-2, the gain level on your sampler was set
too high. When the gain is set too high it can cause clipping. Notice that
the peaks of the sample go off the graph. When this occurs, you should
decrease the gain until the waveform fills the graph completely without
peaking off the top. See Figure 9-3.
Setting the gain is dependent on your particular sampler. If you have
Perfect Sound 3, click the up and down arrow keys just like you would
with Perfect Sound Software. Most other samplers will have a knob to
adjust. Review your sampler's manual for more instructions on setting
gam.
Figure 9-2. Oscilloscope- Clipping Wavefonn
59
Audition 4 User's Guide
Figure 9-3. Oscilloscope- Optimal Waveform
Monitor R, L+R, R
Use the R, L+R, and the R buttons under "Monitor" to select which
channel you want to monitor. When monitoring in mono you can select
or L. If you have a stereo sound source and intend to sample from only
one channel, you should monitor that channel.
Adjust Control
Adjust Control will allow you to correct DC offset that is caused by yot
sampler. Refer to page 49 for more about DC offsets. Next to Adjust
Control you can type in a number, valid entries are between 64 and -64.
If the signal is coming in from your sampler with a positive offset, ente
negative Adjust Control to lower it. If you prefer, you can sample with
the DC offset unadjusted and correct it later by using the Centralize opt
in the Special menu. Refer to page 49.
Sample%
This parameter controls the volume of the original sample when mixin.[
live to a previously recorded sample. Select a number from 0-128%.
Refer back to Mix Volume for more information on mixing directly to
sample.
60
Chapter 9- Sampling Details
Sample A, LtR, L
The B. RtL. and L buttons under "Sample" tri~~r Audition 4 to sample
to memorv. If you have a range marked on the graph, the digitizer will
replace the range by recording over it. When the range has been replaced,
Audition 4 will stop sampling. Warning: if you have a small range
marked, Audition 4 will sample for a moment and then stop. Click Clear
Range to remove the highlighted range and sample over the entire
waveform. Or, to create a clean slate on which to digitize, select DeleteWaveform from the Project menu.
Start Volume
Start Volume is the parameter that tells the sampler when it should begin
sampling. You can set it to trigger at the touch of a mouse button or it can
begin sampling when the sampler registers a certain percentage of the
maximum signal strength.
LMB - By moving the marker on the slider all the way to the left, you
can set StartVol to LMB, (Left Mouse Button). When the Start
Volume is set to LMB, sampling begins when the left mouse
button is pressed.
1-100- The number adjacent to the StartVol represents a percentage of
the maximum signal possible to start the recording. The
horizontal slider will allow you to adjust the Start Volume
between 1 and 100. When at 100, an absolute peak will trigger
the sampler to begin sampling. If it is set at 50, the sampler will
wait until it hears an audio level that is half of the maximum
peak. Setting Start volume to a number between 1 and 100 is
useful for capturing a sample that has a quiet period before the
desired audio begins.
61
Audition 4 User's Guide
n
Stereo I Mono
The button beneath StartVol will switch your sampler from recording i1
Mono to Stereo. Click the button to switch between the two modes.
Don't forget, when you sample in stereo you will use twice as much
memory as when sampling in mono. If your sampler does not have ste1
capabilities, you should always keep the button on Mono.
Sampling Rate
The sampling rate is simply the rate at which the sound is digitized.
Choosing a sampling rate is usually a trade off between memory usage
and sound quality. The higher the sampling rate, the better the sound, t
the more memory you will use. With any system that records to RAM 1
floppy disk, you will find that your memory usage can often dictate yot
sampling rate.
When recording digital sound, a sampler measures the audio level and
pauses for a period of time, and then measures it again, and then pauses
etc. This process is repeated as long as the sampler is recording. Refer
Chapter 1 - Digital Audio for more information on digital sound.
If you use a high sampling rate. The period will be small, and many
samples will be taken. This results in a very accurate representation of
original sound, however it is very memory intensive. If you decrease tl
sampling rate, the period between samples is increased, and the sample
will measure the level of the audio fewer times. This will allow you to
sample for a longer period of time if your memory is limited. Howeve
you will get a less accurate representation of the original sound. See
Figure 9-4 for the effects of different sampling rates on memory usage.
62
Chapter 9- Sampling Details
Memory Required for 60
Seconds of Audio
:~~~I
~~~~~~~
/
~
T
2
/
, oco
5000
0
10
20
I
I
I
30
40
50
Sampling Rate (KHz)
Figure 9·4. Sampling Rate vs. Memory Usage
Some standard sampling rates for your reference.
2,000-Hz
8.363-Hz
28,867-Hz
28,867-Hz+
44,100-Hz
Minimum sampling rate. Provided more for special effects
than for accurate samples. It could work for sounds less then
l,OOOHz.
The standard rate for 8SVX IFF Instrument Files.
Maximum Amiga DMA rate. Anything above this will not
work with most Amiga software.
Requires play back in a non-multitasking mode.*
Compact Disc sampling rate.**
Is 56.000 samples per second better than a CD?
Since Audition 4 can sample at up to 56,000 samples per second
(assuming your hardware can record that fast, most can't) you might think
that you can record better quality sound than a CD player (since CD
players use 44,100 samp/sec.) This is not the case.
* Programmees note
4
This corresponds to an Amiga hardware register 11 AudPer" of 124.
•• CDs use 16 bit audio, not 8 bit like the Amiga. To get CD quality on the Amiga you must install an audio
card like the SunRize AD-1016.
63
Audition 4 User's Guide
Two key parameters specify how "good" audio sounds. The first is the
sampling rate. The higher the sampling rate, the higher the frequency
response of the sound. Thus, 56,000 samples per second gives you a
theoretical frequency response of 255KHz. However, no one can hear
over 20KHz and the Amiga's playback hardware is limited to 4KHz in
normal circumstances. The second key parameter that specifies how
"good" audio sounds is the number of bits. Your Amiga has 8 bit sound;
CD players have 16. The more bits, the better the "signal to noise" rat}o
of the sound. Each additional bit doubles the signal-to-noise ratio. Thus
16 bit audio sounds much more than twice as "good" as 8 bit. If you want
true CD quality sound on your Amiga, you must add a 16 bit audio card
such as SunRize's AD1016.
Setting the Sampling Rate
You set your sampling rate in the Sampler Control Panel, see Figure 9-5.
Drag the horizontal bar to the left or right to change your sampling rate
(S-Rate). Notice that the sampling rate alters the number of seconds you
can record with your current memory status. If you want to sample in
stereo, click the Mono button and it will change to Stereo. You will
notice that the number of seconds you can record is halved when you
switch from mono to stereo.
Figure 9-5. Sampler Control Panel • S-Rate
Creating a Play Disk
Audition 4 offers you the capability to create self booting Play Disks.
After you have set the sampling rate and monitored the audio source with
the oscilloscope to check the gain and sound quality, you are ready to
make a play disk. To record direct to a floppy disk:
Chapter 9- Sampling Details
1. Initialize a blank disk:
3. Click Record Disk.
2. When it is requested. put the initialized biank disk in your internal
drive:•
5. Double check that a blank disk is in the internal drive. All data
on the disk in the dfO: drive will be lost.
6. Select OK!
7. Audition 4 is now recording direct to your floppy disk.
8. Recording will automatically stop when the Play Disk is full. To
stop the recording early, click and hold the right mouse button.
9. To hear the Play Disk, reboot your computer keeping the Play
Disk in the internal drive.
Audition 4 Play Disks are played by booting the computer with them.
Once the disk has played through it will repeat itself. Think of Play Disks
as 3 1/2' CDs in a plastic case.
If you do not completely fill the disk with audio, during playback you
may hear noise at the end of the sample. The noise is caused by
miscellaneous computer data that has remained on disk.
Audition 4 Play Disks are .!lQ.t standard system disks. To reuse a Play Disk
as a program disk, you will have to reinitialize it.
Notes on Memory Management
As you gain more experience sampling you will probably begin to wonder
why your maximum sample size is smaller than your available memory.
This is caused by the fact that Audition 4 requires a contiguous chunk of
memory to record to. Audition 4 will always select the largest available
"' To initialize a blank di!ik, switch to \Vorkbcnch by clicking the depth gadget, (upper right comer). Put a blank
disk into a disk drive and select initialize from !he disk menu. Your disk icon must be selected {highlighted)
before you can selecr initialize.
** You cannot record direct to a tloppy on an external drive.
65
Audition 4 User's Guide
chunk of RAM to record to. Example: If you have 2 Megabytes of free
memory. You probably have one largest chunk about lOOOK, another
chuck about 700K, and the several remaining chucks making up about
300K. Provided this is your set up, Audition 4 will sample to the lOOOK
chuck first, then the 700K chuck, and finally the smaller chunks.
There is an utility called MergeMem that scans the memory list and
attempts to combine chunks of memory that are next to each other.
By running MergeMem, you may increase the largest free memory chunk.
MergeMem is located in the System drawer in your Workbench.
66
Chapter 10 .. Saving Sounds and
Instruments
Sound files can be saved in a varietv- of formats. Before choosing~ a
format for a particular sample. you should consider the application that
you intend for the file. Most likely you will be saving in IFF format. IFF
8SVX is the standard digital sound file format for the Amiga. Note:
8SVX files will not load into the music programs that expect SMUS files.
SMUS refers to a collection of musical notes, not digitized sound.
Waveform, Buffer or Range
Selecting Save- Waveform,- Buffer, or- Range will automatically save
the specified area as an IFF sound file. As the standard Amiga sound
format, IFF is the format you will use most often. IFF files are exportable
to most other Amiga programs, e.g. Amiga Vision, Deluxe Video, and
Bars and Pipes.*
Compressed
The compressed option will save your file in IFF format using Fibonacci
Delta Compression. This particular compression technique will save each
sample as a four bit offset from the previous sample. This will cut your
file size by half, but it may reduce the sound quality considerably.
Compression is most effective on voice samples.
--·····
---------
• Amiga Vision is a trademark of Commodore Business Machines, Inc. Deluxe Video is a trademark of
Electronic A.ns. Bars and Pipes is a lrademark of Bloc Ribbon Sound Works.
67
I'
I
Audition 4 User's Guide
If you plan to import a compressed file into another program, first check
to see if the other software will load compressed files.
Raw Data
The Raw format is most often used by programmers. This format only
•
stores the waveform data. That is, the information that is required to
create the waveform. Information such as sampling rate, loop points, and
IFF formatting are discarded. Raw fonnat is exportable to very few
programs. SoundTracker is one of the few that will accept Raw Files.
Executable
Saving in the executable format will allow you to play a sample without
loading Audition 4 or another player program. To create and play an
executable sound file from shell:
1. Create a sample to be saved as an executable sound.
2. Select Save - Executable.
3. Next to drawer, type "dfl :" (This will save your sample to a
floppy disk in the external drive.)
4. Next to file type "play _me".
5. Click Ok!.
6. Quit Audition 4. (Select Quit. from the Project menu.)
6. Open shell by double clicking the shell icon.
7. Type cd dfl:
8. Type play_me, return.
9. Your sample will play.
68
Chapter 10 · Saving Sounds and Instruments
Attach an Icon to a Sample - A Save Tutorial
An alternate to playing an executable sample from shell is to assign an
icon to the sample. Once an icon has been assigned ro an executable file,
you can play the sample by simply double clicking the icon. The
following tutorial saves the "Hello" sample, located on the Sample Disk,
in an executable format and then attaches an icon to it.
First you need to save the "Hello" file as an executable file on your RAM
disk.
1. Load the "Hello" sample from the Sample Disk by selecting Load
to Window in the Project menu. See Chapter 2 -Getting Started
2.
3.
4.
5.
for help on loading "Hello".
Select Save-Executable from the Project menu.
Click within the drawer box and clear the existing text by typing
RA-X.
Type RAM: in the Drawer box. •
Click within the file box and clear the existing text by typing RA-
X.
6. Type Hello. exe in the File box.••
The second step is to assign the icon. Audition 4 provides a Sample Icon
to simplify the process.
1. Quit Audition 4 by selecting Quit from the Project Menu.
2.
3.
4.
5.
Double click the RAM disk icon.
Double click the Audition 4 icon.
Drag the Audition 4 "Sample Icon" into the RAM disk window.
Rename the "Sample Icon" in the RAM disk window by
highlighting the icon, and then selecting Rename from the
"'If you are low on memory you can substilute dfO: for RAM:.
**Tile suffix ".exe" is not required. It is. used in l.hi~ tutorial to differentiate between the executable ''Heno" me
and the original IFF file.
69
Audition 4 User's Guide
Workbench menu. Type "Hello.exe" when you are prompted for
a new icon name and hit return. The icon name must match the
file name from the above.
6. You can now double click the icon to hear the "Hello.exe"
sample.
7. Store the sample on a floppy disk. Put a disk in an external drive
and drag the icon onto the desired disk icon. The icon and the
attached sound will be stored on the floppy disk.
If you do not remove the sample from the RAM disk, it will be lost
when your Amiga is turned off.
Configuration
Save · Configuration is not a sound file format. Configuration refers to
the menu that includes: enable oscilloscope, type of sampler, colors, etc.
After you have customized Audition 4 to your preferences, you can select
Save- Configuration and your setup will load whenever you run
Audition 4.
Configuration is saved in the s: directory. This file is located on your boot
disk. If you booted from Audition 4 , you will need to remove the write
protect before saving the configuration. If you booted from a custom boot
disk, Audition 4 will transfer the configuration file to the s: directory on
the disk. See Chapter 11 - Configuration for details on all your options in
the Configuration menu.
70
Chapter 10 - Saving Sounds and instruments
Instrument
Audition ..:t provides a variety of ways tO save instrument files. If you
intend to u~e your sound files in music programs such as Deluxe Music
Construction Set (D\1CS) you will need to save your files as IFF
instruments files. Almost all Amig:~ music programs will accept IFF
Instrument files, with the notable exception of So nix, see page 7 L
IFF Instruments
IFF instruments are the most popular instrument format for the Amiga.
You may choose to save your one octave sound as either 1, 3, or 5
octaves. Be warned, saving sounds as 3 or 5 octaves will produce
significantly larger files on disk, so make sure you have enough memory
to accommodate them.
IFF instruments have the added ability to save a loop point. A loop point
is any marked range that is highlighted when the sample is saved. If a
range is not selected, then a loop won't be saved. You may preview the
loop by clicking the play range button while the loop is on. This will
continuously play the loop.
Note: If a loop is positioned in the middle of a sample, Audition 4 will not
save the portion of the sample to the right of the loop.
Sonix Instruments
Sonix* is a popular music composition program that requires a special file
format. With Audition 4 you can save samples in the Sonix format.
When you save a sample in Sonix format, Audition 4 creates two files: a
.inst file and a .ss file. Both of these files must be present to load the
sample in Sonix. If you want to edit a Sonix sample, load the .ss file into
Audition 4. You may save the sample as 1, 3, or 5 octaves. Three and 5
octave samples will produce significantly larger files.
* Sonix is a trademark of Aegis lnc.
71
Chapter 11 - Project Options
Chapter 11 - Project Options
About...
The About ... requester brings up the credits and the software version
number. There is also a Memory Display in the About. .. window. The
Memory Display cycles through readouts for Free, Chip and Fast Memory
when clicked. Free Memory is the total unallocated RAM in your system.
Click the Free Memory Display and it will change to a Chip Memory
Display. Chip Memory is the RAM that is addressable to the Amiga's
sound and graphics chips. Click the Display again and you will see your
available Fast Memory. All memory that is not Chip is called Fast
Memory. It is called fast because programs in it will run faster in some
cases.
Loading to Window or Buffer
When you select Load to Window or Load to Buffer a file requester
(Figure 11-1) will appear in the middle of the screen. File requesters are
generally straightforward, but if you are new to the Amiga, you may want
to go through the following tutorials.
A quick load to window
To load the "Hello" sample, located on the Sample Disk,
window:
1.
2.
3.
4.
to
the display
Put the Sample Disk in the external drive.
Select Load to - Window from the Project menu.
Click on dfl: in right column.
Click on Tutorial (dir) in the left column.
73
Audition 4 User's Guide
5. Select the "Hello" file left column.
6. Click the OK! button.
7. The "Hello" file will load to your window.
Any operation that requires file input or output, like load and save will
bring up a file requester. For details on the requesters see below.
'
t
I
Figure 11-l. File Requester
The Operation of a File Requester
The most prominent feature in the file requester is the file list. The file
list is on the left. Every directory listed in the file list is a subdirectory of
the current directory. The current directory is displayed to the right of the
word Drawer.
You can select the file requester's current directory by selecting a
subdirectory in the file list, or a device in the device list The device list is
on the righr. Click any directory in the device list or file list to make that
directory become the cun·ent directory.
74
Chapter 11 - Project Options
To go back upwards into the file system. you can use the Parent button.
If your currem directory is dfl :Sounds/Voice and you click the Parent
button, the cuaent directory will change to dfl:Sounds. Clicking the
button again will change :he current directory tO dfl :.
You may select a file at any time, even while the file list is being updated.
Select a file by doub!e clicking on its name or by typing the name in at the
word File. After you type in the name, hit return or click the OK button.
The two gadgets, Hide and Show are located at the bottom right. Both
gadgets hold criteria which is applied to every file in the file list. If the
criteria is met, then the file will be shown or hidden depending on the
which gadget holds the criteria. For example, if you had six files: carl,
car2, car3, voicel, voice2, voice3. You could hide the car files by typing
"car*" in the Hide gadget. The files which are hidden can be made visible
by updating the Show/Hide criteria.
Load RAM Scan
A RAM Scan is a comprehensive look at your computer's memory. All
the current data stored in RAM* will be displayed on the graph. This
includes, program data, graphic data, and the operating system. Not to
mention any samples that have been recorded to memory.
When you Load RAM Scan from the Project menu, a control panel will
appear at the bottom of the screen. Figure 11-2. The control panel will
allow you to switch the display between Chip RAM and Fast Ram, and to
grab a selected range from the display. You will not be able to edit in
RAM Scan. Editing RAM directly would risk crashing your entire
computer. Just consider the resu.lts of accidently deleting or zeroing the
RAM that contains your operating system .
•
Random Acces:;;
~1emory
75
Audition 4 User's Guide
I
Figure 11-2. RAM Scan Control Panel
Playback Rate
You can adjust the playback rate of the RAM display to fast forward
through the data.
Grab Range
While in the scan mode, you can use your 12 basic buttons as usuaL So
you are free to play, zoom, and select ranges. If you find something of
interest in the RAM waveform, you can highlight it and click the Grab
button to move it to the display. Once a range is grabbed, the RAM Scan
control panel will close and you can edit as usuaL
Chip/Fast RAM
This is a toggle button. Click it to switch between the Chip RAM and
Fast RAM display. Chip RAM is the memory that is accessible by the
Amiga's sound and graphic chips. Fast RAM is any memory that is not
Chip RAM. Fast RAM is called fast because programs in Fast RAM will,
in some cases, execute faster that they would if they were in Chip RAM.
When you toggle from and back to a type of RAM, you may notice that
the waveform does not remain the same. This is because RAM contents
are transitory in nature and are always changing.
Exit Scan RAM
Click this button to remove the RAM Scan control panel and to resume
editing.
One application for RAM Scan is to load a program that has interesting
sound effects embedded in it. When you do a RAM Scan, you may find
some of the sounds mixed in with r.he program data. When you locate a
useful sound. us~ the g:·ab gadget to copy it r.o the display for editing or
savmg.
70
Chapter 11 - Project Options
Save and Save Instruments
Due to the complexity of these options an entire Chapter has been
dedicated to the saving of sound files. Please refer to Chapter 10 Saving
Sounds and Instruments.
Play File
By selecting this option, you can play a sample without loading the
waveform. Choose the sound file by clicking the desired sample name
from the file requester that appears when the option is selected. Click
OK! to hear the sample play. This is useful to quickly find a desired file.
Play file requires noncompressed IFF files to play. Raw and compressed
files must be loaded before they can be played.
Delete
File
When you select Delete - File, you bring up a delete file requester. This
requester operates similarly to the load file requester, except that the
selected file will be deleted and removed from disk.
Buffer
This option empties the copy buffer.
Waveform
By selecting Delete- Waveform. you will clear all data from the
waveform display. This is useful when preparing to digitize a sample.
Print
To print a copy of your waveform:
77
Audition 4 User's Guide
1. Tum off the computer and remove your sampler.
2. Connect your printer as normal. Refer to the printer manual for
instructions.
3. Tum on the computer and the printer.
4. Disable the Oscilloscope option in the Configuration menu if it
is enabled. (Remove the checkmark.) You cannot print while
the oscilloscope is displayed.
5. Exit any control panel that may be open. An open control panel
will cause the 12 basic buttons to print below the waveform. ·
6. Select Print from the Project menu.
7. Click OK!.
Quit
Quit will allow you to terminate the Audition 4 program. Don't forget to
save the current sample in the display window and your buffer. If you
quit without saving, they will be lost.
78
Chapter 12 - Configuration
Chapter 12 - Configuration
Most of the configuration options have two positions: enabled and
disabled.* The check mark to the left of the option indicates that it is
enabled. For more information on saving your configuration setup, see
page 70.
n
Stereo Mode
By turning on the stereo mode you will see two waveforms in the display
window. Now you are ready to sample or edit in stereo.
While in the stereo mode, the top graph is the Left Channel, the bottom is
the Right Channel. The oscilloscope and level meters also measure the
amplitude of separate channels. See Figure 12-1.
To return to a mono channel, disable stereo mode. Turning off stereo
mode while a stereo waveform is in the display window will cause the
waveform to be converted to mono. A requester will appear prompting
you to select left, both, or right. If you select left or right, that channel
will be kept and the other lost. "Both" creates a mono sample by mixing
the left and right channels together.
*To enable an option. click the right mouse button and move the cursor to the configuratwn menu. \Vhile
holding down the button, move the cursor down to the option you want to enable. (If there is a check mark next
to the option, it is already enabled.) Release the mouse button when the option becomes highlighted. Now that
option is enabled. To disable an option, rep~at the same process. removing the check mark.
79
Audition 4 User's Guide
Figure 12-1. Stereo Screen Display
Ok Requester
When the Ok Requester is enabled, an Ok! requester box (Figure 12-2)
will pop up whenever you select an option that will alter your waveform
It is recommended that you keep this option enabled until you have
become familiar with the program. Remember that many of the edits are
irreversible.
Figure 12-2. Ok Requester
BO
Chapter 12 - Configuration
lowpass-Fi Iter
All digital sound systems require a lowpass filter on the audio output.
TI1is cuts out high frequencies
that would create an aliasing effect if
.
allowed to play. The Amiga's lowpass filter operates at 7KHz with the
filtering starting to effect signals at 4KHz. All Amigas, with the
exception of the Amiga 1000, can turn off this lowpass filter. This means
that you can increase your frequency range, but you risk introducing
aliasing in your playback. To tum off the Amiga's lowpass filter, disable
the enable lowpass filter option (remove the checkmark).
~
Position
~
line
TI1e position line is the vertical line that indicates the current position on
the displayed waveform as it is being played. You should keep this option
enabled. If you tend to confuse the position line with the cursor line, keep
in mind that the position line does not respond the movement of your
mouse.
Oscilloscope
The Oscilloscope option places a realtime oscilloscope near the bottom of
the display. The oscilloscope appears above the level displays, if they are
enabled. The oscilloscope will operate whenever you play or monitor a
sound. If you are in the stereo mode, notice that the left channel is
graphed on the left and the right channel is on the right. The channels are
separated by a space in the middle, Figure 12-1. The Oscilloscope is
especially helpful when setting gain levels before sampling.
81
Audition 4 User's Guide
Level Display
With the level display enabled, two peak meters will be activated on the
bottom of the Audition 4 screen. These meters are true signal peak
meters. They measure the amplitude of a signaL When enabled during
monitoring, if the meters show red you should check your input for
clipping. See page 59 for more on clipping. In the stereo mode, the right
display is measuring the right channel and the left display is measuring the
left charmel.
Cursor
As you move your cursor over the display window, your arrow will
become a vertical line if this option is enabled. If the cursor option is
disabled, the mouse pointer will serve as a cursor to mark ranges and loop
points. You can change the color of the cursor by selecting a new color in
Colors - Cursor: in the Configuration menu.
·-~-·------
Type of Sampler
Play while sampling
This feature should be enabled if you would like to hear your samples
play as you are sampling. Disabling will allow you to sample at higher
sampling rates.
Generic
This setting should be enabled if you have a sampler other than Perfect
Sound. Audition 4 requires samplers that plug into the parallel port. It
will not recognize serial and joystick port samplers.
82
Chapter 12- Configuration
>erfecl
;ound
Perfect Sound 1&2
If you have a version of Perfect Sound previous to 3.0. you should
activate this option. You should also consider upgrading your hardware.
Perfect Sound 3 is vastly improved over previous versions, especially in
the area of sound quality. Please contact us for details on upgrading
Perfect Sound.
Perfect Sound 3
Enable this option if you have Perfect Sound 3. Remember that Peri'ect
Sound 3 has three input jacks: 2 RCA jacks and 1 mic jack.
Colors
These options will allow you to tailor the Audition 4 screen colors to your
preference.
Adjust Colors
This option will bring up a palette window, see Figure 12-3. A palette
window will allow you to mix your own screen colors.
Figure 12-3. Palette
To alter your colors, you can just adjust the R G B sliders until you reach
a desirable combination. Click one of the four color boxes at the top right
of the screen to switch between colors. Each color can be associated with
a number, 0- 3. The color boxes go from left to right starting at the top.
83
Audition 4 User's Guide
Each color box controls the color for a several screen items. For
Example: Color #3 controls the waveform and the range.
Swap is useful to switch two colors. To swap colors 1 and 2, highlight
the box around color #1, click Swap, then highlight color #2. These
colors will now swap positions.
Copy will allow you to the same color to two different positions. Click
the color you want to copy, click copy, then click the color you want
replaced.
Spread is very helpful when you are trying to create a color scheme that
is based on two complementary colors. For example if you wanted to
create a gray level screen, make color #1 black, and color #4 white. First
highlight the black color box, click Spread, then highlight the white color
box. Colors 2 and 3 will become two different shades of gray.
Undo allows you to back up one change.
Ok! will accept the new color scheme. Cancel will exit the palette
without implementing any changes. To store a color scheme, make your
alterations and then select Save· Configuration from the Project menu,
see page 70. Your color scheme will now load every time you run
Audition 4.
Workbench Colors
This option changes the Audition 4 colors to match your Workbench
colors.
Cycle Colors
Cycle colors will use the same colors as chosen in the palette, but will
assign them to different numbers. That is, it will swap the colors all
around. You can go through twenty-four variations with the same four
colors.
Chapter 12 - Configuration
Last Saved
Tnis will call up the color scheme that was selected when you last saved
your configuration. To store a color scheme. make your alterations and
then select Save - Configuration from the Project menu. see page 70.
Default
This will return the screen to the original Audition 4 colors.
Cursor (Color 1 ,2,3)
Tnis will change the color of your cursor line. Colors I, 2 and 3 cannot be
adjusted in the palette - they are regulated by your Workbench colors.
Close Workbench Screen
When working in Audition 4, you can click the depth gadget to switch
from Audition 4 to Workbench. If you are trying to maximize your
memory for the largest sample possible, you may want to close the
Workbench screen. To close it, enable the Close Workbench Screen
option. Once Workbench is closed, you will have more memory
available. You should close all windows in the workbench that are open.
Some types of windows, if open, will prevent you from closing the
Workbench screen. To reopen the Workbench Screen, disable the option.
HiFi Playback
When the HiFi Playback option is enabled, Audition 4 will use a special
High Fidelity playback routine. HiFi refers to an intensive method of
playback. Normally the computer is occupied by playing the sample and
updating the wavefonn and screen. In the HiFi mode, the screen goes
blank, so the computer can dedicate more energy to playing the sample.
Because the computer has more time to dedicate to the playback, the time
85
Audition 4 User's Guide
between each sample is more exact. Therefore, your sample will sound
better.
SG
Appendix A - Menu Guide
Project Menu
About...
Load-
Save-
'
i
i
to Window
to Buffer
Ram Scan
RA-L"
RA-G
Waveform
Buffer
Range
Compressed
RA-W
Raw Data
Execmable
Configuration
Save Instrument -
IFF l Octave
IFF 3 Octave
IFF 5 Octaves
Sonix I Octave
Sonix 3
Octaves
Sonix 5
Octaves
Play File
Delete-
as a 5 octave IFF instrument.
RA-P
File
Buffer
Waveform
i
i
Print
Quit
Displuvs Title Page.
Loads a file into the window.
Loads a file into the buffer.
Displays waveform of RAM in window.
Saves waveform as an IFF file.
Saves buffer as an IFF file.
Saves range as an IFF file.
Saves waveform as a compressed
IFF file.
Saves waveform as raw data.
Saves waveform as an executable
file.
Saves configuration setup to
s:Audition.config.
Saves waveform as a 1 octave IFF
Instrument.
as a 3 octave IFF instrument.
as a 5 octave IFF instrument.
Saves waveform as a I octave Sonix
file.
as a 3 octave IFF instrument.
RA-Q
Plays an IFF file from disk.
Deletes a file from disk.
Removes the waveforrn in the
buffer.
Removes the waveform in the
(iisplay window.
Prints current waveform.
Exits Audition 4.
* Notation for Keyboard Short Cuts, Right Amign key followed by the corresponding INter or number.
87
!
j..<
I
I
Audition 4 User's Guide
Edit 1 Menu
1
'
I
I
II
'
Delete Rang_e
KeepRange
RA-D
RA-K
Copy Range
Zero Range
Overwrite
RA-C
RA-Z
RA-0
RA-X
Buffer
Cut Range to -
Removes ranged waveform.
Removes all of the waveform except
ranged area.
Copies range to buffer.
Fills range with zeros (silence).
Replaces the displayed waveform
with the buffer, beginning at cursor.
Removes ranged data, placing ii in
the buffer.
or file.
Inserts data at cursor, from buffer,
or file.
Inserts time of I second at cursor.
5 seconds.
10 seconds.
'
File
Buffer
File
I sec
Insert from '
Add Workspace-
RA-I
I
/5 sec
!0 sec
Edit 2 Menu
Mix
'Echo
Fade
Flange
Filter
Samoler
Sequencer
Tune Waveform
I
RA-1
I RA-2
RA-3
RA-4
RA-5
RA-6
RA-7
I RA-8
I
I
I
I
1
Invert-
Range
Backwards-
Buffer
Range
1
RA-V
I
J
i
RA-B
'
:
RA-N
1
i
I Swap Channels -
Range
I
I
i
Buffer
I Swap Buffer &
: Main
88
I
i
I
Places Mix controls on screen.
Places Echo controls on screen.
Places Fader controls on screen.
I
Places Flmu~er controls on screen.
Places Filter controls on screen.
Places Sampler controls on screen.
Places Sequencer controls on screen.
Places Waveform Tuner controls on
screen.
Reverses the phase of the ranged
waveform.
or buffer.
.
Reverses data of sample in range.
I
buffer.
Swaps left & right channels in
'i
range.
or buffer.
I
Swaps buffer with waveform in
I
disQlav window.
I
I
i
I
Appendix A - Menu Guide
Special Menu
1--"S"'m"'o"'o::.th"------------t-=R:.::Ac.:...::-S:._+I Reduces siQnal.
I
1
1
I-"-M"'a"'x""i'-'m"'iz"'c:;___ _ _ _ _ _ _ _ _+-'R""A;..:_;:-1v'""1-+i ~I'-'nc"''r..-ce=3se~s i gnu I to maximum.
~---"C"'e"'n""tr"'a"'li.:;,ze::;__ _ _ _ _ _ _ _ __,_i_,R-"'."-''-'-'--:-l mj Adjusts fm DC offset
.
LiftTre~b~le::;__ _ _ _ _ _ _ _ _r---~!_P.:;,e~r:.::fo~r:.::lTI.:;,s~a.:;,h~J~g~h~-p~a~ss~fi~Jt~er~o~n~m~n~g~e~.
Lift Bass
I Performs a low-nass filter on range.
1.
Configuration Menu
Changes program mode from mono
to stereo.
! Ok Requester
Causes confirmation requesters on
editmg fu11ctions to appear.
Turns on and off the Amiga lowLow Pass-filler
pass output filter .
.
Shows pl£1v point in wavef()rm.
Position-Line
Places an oscilloscope window on
Oscilloscope
screen.
i
Places peak meters at the bottom of
Level Display
the screen.
Cursor
Changes waveform cursor from a
. line to a pointer.
I
Type of Sampler - Play while
Allows Amiga to play audio as it
Sampling
passes through the sampler.
I
Generic
Universal parallel port sampler
setting.
Perfect 1&2
Perfect Sound 1 & 2 setting.
Perfect Sound 3 sampler settinc.
Perfect 3
RA-$
ColorsAdjust Colors
Places color palette on screen.
WBench Colors RA-%
Sets screen colors to workbench colors.
Cycle Colors
RA-&
Rotates colors in palette.
Last Saved
Uses colors last saved in configuration.
Uses Audition 4's default colors.
Default
CursorChanges the color of the cursor to;
Color 1-3
pointer
colors I, 2 or 3.
I
Stereo Mode
i
!
L
I
I
(contmued)
89
Audition 4 User's Guide
Confiauration Menu {cont.)
Close Workbench
Screen
HiFi Playback
!
I
90
Closes Workbench Screen to
maximize available memorv .
. Uses HiFi playback when appliI cable.
I
I
Appendix B- Techincal Support
Appendix B - Technical Support
If you suspect any problems with vour Auditil'n -t software. please note
the following instructions.
1. Open the read_ me file on disk. This file contains any updated
information that is not included in this manual.
2. If you are unable to boot the program and suspect a bad disk,
a. Return the package to your dealer for replacement.
b. Within 3 months of the purchase date - Mail in the defective disks
and a copy of your receipt to SunRize Industries. An RA number is
not necessary. Upon receipt, the damaged disks will be replaced.
c. After 3 months from the purchase date - Mail in the defective disks
and $5.00 for every replacement disk. An RA number is not
necessary.
3. If you suspect a malfunctioning sampler, contact the manufacturer of
the sampler. Perfect Sound owners, call SunRize for information on
repairs and upgrades.
4. Before calling SunRize be sure to have the software version number
handy. The version number is found in the About... window.
SunRize Industries Technical Support can be reached at (408) 374-4962.
Technical Support is available Monday through Friday from 8:00 a.m. to
5:00p.m. (Pacific Time).
SunRize Industries
2959 S. Winchester Blvd., Suite 204
Campbell, CA 95008 USA
Tel: (408)-374-4962
Fax: (408)-374-4963
91
Audition 4 User's Guide
92
Index
·A·
About..
Add \Vorkspace ..
Advanced Editing............... ..... "" .. ,. ... ,. .... 21~-!4
/HL
Range ............................................................. : I
Show..........................
.. ................ 10-ll
Amiga's. Lowpas.s Filter .................................. 81
Analog to Digital Conversion .......................... 2
,82
Curser.
... ss
c.'JC'r'"
.19
OJ!."····
·D·
DAT ............................................................... !
DC Offset
................................. 49-50, 60
Delay ........................................................... 26, 32
Realtin1e .......................................................... 4 5
Delete,
·B·
............................. 5
Backup Disks ......... .
Backwaro ......................................................... 44
Band barrier Filter ..... ""'"' ................................ 36
Reallin1 e ................... , .......... ,... ,. ............. ., .. , ... 45
Bandpass Filter ............................................... 36
Reahime ........................................................... -+5
Basic Buttons, 12 ............................................. 10
Bass, Lift ............................................... ., .......... 5 t
Bits, 8 and 16 .................................................... 64
Buffer,
Copy ................................................................ 18
Cut to...............
.. .................................... 19
Delete..................................
.. ................. 77
Edit.....................
...44
Insertfron1 ..................................................... 19
Load to....
.....................
.. ...... 23
Play........................................
. ....... tl
Save ................................ .
....... 67
.. ................... .44
Swap with ;\fain ....... .
·C·
CD Players................
.. ............... !. 3, 63
Cenlralize ........................................................ 49
Channels, Swap.... ........................................ 44
Chip Memory ............................................ 73, 76
Clear R<tnge .........
.. ................. 1 l
Clo'c Workbench Screen..
.. ..... 85
Colors.............................
.. .................... 83-85
CompactDi~cPiayers ........................ 1,3,63
Compression .................................. " ..... ""' 67~68
Configuration. Save ...................... ., ................. 70
Configuration Menu ................................. 79-86
Control Panels .................................................. 21
Coordinates ..................... '"""'" ........................ 10
Copy.....................................
......... 18
Buffer ............................................................ 77
File...................................
.. ..... 77
Range .............................................................. 17
Waveform........
.. ...... 77
Digltar Audio Jnlroducrion ............................ 1-3
Digitai ,!J..udio Tape .................................. ,,. .. .,, J
Digital vs. Analog ........................... " ................. I
Dispby.
Coordinate ..................................................... I 0
Play ............................................................... !!
Doubling... .................
.. ......................... 32
-EEcho, ................. .
................... 26-29
.. .................................26. 32
Delay..............
Realtime ......................................................... 45
Stereo......
............................................. q.27
Edit 1 :.01enu ............................................... l7·20
Edit 2 Menu ............................................... 21·44
Edit,
..... 21-44
Advanced ........... .
............................... !7-20
Basic ...... .
.. .................. 11
Freehand .............. ..
Nonnally ...........
.. ............................... 11
Special.....................
.. ......................... 49-52
Stereo .......................................................20. 79
Eight Bit Audio..
.. .................................... 64
Executable.....
.. ......................... 68
................................ 69-70
Icon Tutorwf ...
............................ 68
S;we ...
·F·
Fade ............................... .
Stereo .......... ..
Turorial ....... .
Fast Memory
.......... 29~32
.. ................. 30
......... .31
....73, 76
93
,.
·L·
File,
Cut to ............................................................... l9
!
'
II
:
f
f
Delete .............................................................. 77
Insert from ... ,. ............................. " ...... , .......... 19
Play .................................................................. 71
Requester .................................................. 73-74
Tutoria/ ........................................................... 74
Filters, ......................................................... 34-38
Amiga's Lowpass .......................................... &!
Band Barrier ................................................... 36
Band Pass ........................................................ 36
Frequency ...................................................... .36
Higllpass ......................................................... 35
Lift Bass .......................................................... 51
Lift Treble ....................................................... 51
Lowpass .......................................................... 35
Realtime .......................................................... 45
Smooth ............................................................ 49
Aange, ......................................................... 32-34
Realtime .......................................................... 45
Stereo .............................................................. 33
Aip ................................................................... .43
Free Memory ................................................... 73
Freehand, Edit .................................................. !!
-GGain .................................................................. 59
Generic Samplers .......... ,, .............................8, 82
Getting Started ............................................ 9-15
-HHard Drive Installation ..................................... 6
HiFi Playback ................................................... 85
Highpass Filter, ................................................ 35
Lift Treble ....................................................... 51
Realtime .................................... ,,,, ...... ,.......... 45
-I·JKIcon, E'ecutable ......................................... 68-70
IFF lnslruments,
Re:tamp!lng for ............... " ........................ 38-42
Save .......................................................... 15. 71
Tutorial ................................................... ,.41 -42
Insert ................................................................. 19
Installation .................................. " ........ _. ........ 5~S
f-lard DriYe .................. ,. ................................... 6
San1pier .................................................. 7~S. 13
Instruments (sec IFF ar Soni.'l.:)
Invert.....
....... ,..................... ,. ........... 43
Keep..........
.. ..................................... 18
94
Level Display, .................................................. 82
Realtime .................................................... 46-4 7
Stereo .............................................................. 79
Lift Bass ............................................................ 51
Lift Trcble ......................................................... 5l
Load,
Introduction ......... '" .......................................... 9
RAM Scan ...................................................... 75
Sounds ............................................................ 73
Tutoria/ ......... , .• , .............. ., ................ ,, ........ 74
Loop On/Off ............................................... ll, 21
Lowpass Filter, ................................................ 35
Amiga's ........................................................... 81
Lift Bass .......................................................... 51
Realtime .......................................................... 45
Smooth ............................................................ 49
·MMaximize .......................................................... 49
~emory.
Chip ........................................................... 73. 76
Fast ............................................................73, 76
Free ................................................................. 73
Introduction ................................................ 3, 39
Memory Managen1ent.. .................................. 6S
Sampling Rate vs .......................................... 63
Menu,
Configuration ........................................... 79-86
Edit! ......................................................... 17-20
Edit 2 ......................................................... 21 -44
Project ....................................................... 73-78
Special.. ..................................................... 49-52
MergeMem ....................................................... 66
Meters.
Oscilloscope ................................................... 81
Realtime .................................................... 46-47
Stereo .............................................................. 79
vu .................................................................. 82
Mix ........................................................ ,, ... 22~25
Box ............. ,,., ..................... , ................... 22. 24
Knob ............................................................... 24
Stereo .............................................................. 23
Tulorial ...... , ................................................... 25
\Vhiie Sampling ................................ ,, ........... 58
.. ...... 59
\1onilor ........................................ ,..
.. .... , ..................
~iultiloop Points: ...
,~
)
.!\.
~onnally. Edit .............................................. , l;
:\yquist Theorem .............................................. 2
-0-
Rcalltme Effects ............... ,........................ 45-4 7
Ok Requ~ster ....... "····
Open {sec Loadi
Re-cording 1sec Samplin~r: J
K:.:~:tmp!e
Oscilloscope .. .
Re3ltlr:w ........... ..
. ........ '""" ...... -"$I
..........
R!C""\.TfS>.: .••
. ............. ._, ...................... "39
.....................
. ...16-4 7
. ... 44
·············· ............ 6
Stereo ............. .
. ,,_,.,,. ... ,. .......... 41
Output V0lumc.
Overwrite ............. ""'
Sampler .
. p.
............................ 57
''""" .............. ., l
Generi<:
........................... 8, 82
ln:s.ta!ling ............................................... 7-&, 13
Monitoring ................................................ ., .....'i9
Perfect Sound .................................. 2, 8, 57, 83
Setting TyP' of.. ..................................... 7-8, 82
Sampling, ........................................................ 5?
Direct to Disk ........................................... 64-65
Into a Sample .................................................. 58
IntrOOuction to ...................................... 2, 13~14
Monitoring ............... " ..................................... 59
Play !lack Disks. to ............................•....• 64-65
Play Wnile ................................................... 82
Stan Volume.................
..... 61
Stereo ........................
.. .. 62
Samplin!! Rate.
Introduction............ .. ......................... 2~3, 62
~Hz better than a CQ7 .. "' ........... 63-64
For Mix Samples .......................................... 22
Memory ;\1anagement Notes on ............. 65-66
Memory Usugc ................................... 39, 62~63
Resrunpling., ..................... " ............................ 39
Seiling ................................... '" ...................... 6~
Standard Raks......
.. .................. ., ... 63
Saving ................. ,_
.................... 67-72
Buffer ............................................................. 67
Compressed ............................................. 67-68
Configuration ................................................. 70
Executable ........................... ,.......................... 68
E.xecwabfe leon Turorial ......................... 69-70
IFF tnstrumenl1' ., ........................... ,., ............ 71
Instronlents ..................................................... 71
[ntroduclion lo .............................................. 15
Range ................. ., .......................................... 67
Choo~ing
Palette ... , ...................... ,, ... " ............................ 83
Pan ....... ,. .................... , ....................... " ............ 31
Tutorial .......... " ..... "'.............
..31
Panels, Control ................................................. 2l
Perfect Sound, ................................... 2, 8, 57. 83
Adjusting Gain ................. ., ..................... 14, .59
Pitch ............................................................ 39-41
Pitch Shifting ............................................. 32. 34
Play,
Buffer ............................................................. 11
Display..........................
........................ 11
File ................................................................... 77
Range ............................................................. 11
Waveform ..................................................... 11
While Sampling.
..... .............
.... 82
Play Disk................
. ....................... 64-65
Playback Rate.........
.... 38-39, 4 I
Position Coordinate...........
.... , .............. 10
Po5.ition Line.............
.. ............... 81
Print Wavefom1 ............... --......................... 77~ 78
Project Menu ............................................. 73-78
·QQuit. .................................................................. 78
·RRAM Scaa........................................ ........... 75
Range,
All ................................................................... !!
Clear .............................................................. !!
Coordinate"'"'".
.. ................................. 10
Copy ............................................................... 18
Delete .............................................................. !?
Keep ............................................................... 18
Play................................................ ............ II
Save ..........
,.6 7
Selecling a............................. .. .............. ,. ... 13
Show ........
11
Swap Stereo Channels ................................... 4~
OT . . . . , . . . . . . . . . . . . . . . . . . . . . . . . . . . . . . . . . . . . . . . . _ , • •
c .....................................................
Zero..........
-S-
0
..... _., ................. 18
Raw Data, Save ................................................ 68
Defi:1i~io11
"'f ;1....
Rav.• Data.............
................................. 68
Sonix Instruments.....
.. ............................. 71
Sounds ..................................................... 14, 67
To a Blank Disk ............................................ !4
\Vavefonn ...................................................... 67
Scroll Bar....................................
.... !2-!3
Sequence ................................................... 53-56
95
Sequence (cont.)
Play ....................................•............................. 53
Tutorial ............................................ ,..............56
Shift, Pitch ................................................. 32, 34
Show~
i'
\
l
AIL........................................................... I0-11
Range .............................................................. !!
Silence ........................................................ 18, 20
Sixteen Bit Audio ............................................. 64
Smooth .............................................................. 49
SMUS ................................................................ 67
Sonix Instru:n1ents ............................................ 71
Special Menu ........_................................... 49·52
Speed, Playback ............................................... 38
Stereo
Editing .............................................................20
Meters ............................................................. 79
!\1ode ...............................................................79
Output Volume ............................................... 41
Pan ................................................................... 31
Sampling .........................................................62
Stop ................................................................... !!
Swap Buffer & Main ........................................ 44
Swap Channels ................................................. 44
·T·
Technical Suppon ............................................ 91
Title Bar ........................................................ 9-10
Treble, Lifl ........................................................51
Try Buuon ......................................................... 21
Tune Tutorial ...................................................41
Tune V·/aveform ......................................... 38~42
Tuning Tone ................................................... 40
Tutorials,
Executable !con ............................................. 69
Fade (Pan) ....................................................... 31
Operation of a FUe Requester........................ 74
Sequence ......................................................... 56
Tune InstrumenL .......... ,....~........................... 41
Voice Over......................................................22
-l'·V·
Voice Over Tutorial ............................... ,, ........ 25
Volume. Left and Right .................................. .41
Vl!
~1eters .......................................................
82
Realtime .................................................... 46-4 7
Slereo """'"""'"'"'"'···· .................................. 79
-W\Vaveform.
Delete ...... ,. .................................................. 77
96
Wavefonn (cont.)
Play ................................................................. !!
Print ........................................................... 77-78
Save ................................................................. 67
'n1indow 1 Load to ............. ,.• ,.,. ......................... , 73
Wori<bench Screen. Close ............................... 85
Wori<space, Add ............................................... 20
-X·Y·Z·
Zero ................................................................... 18
Zoom, .......................................................... ll-12